
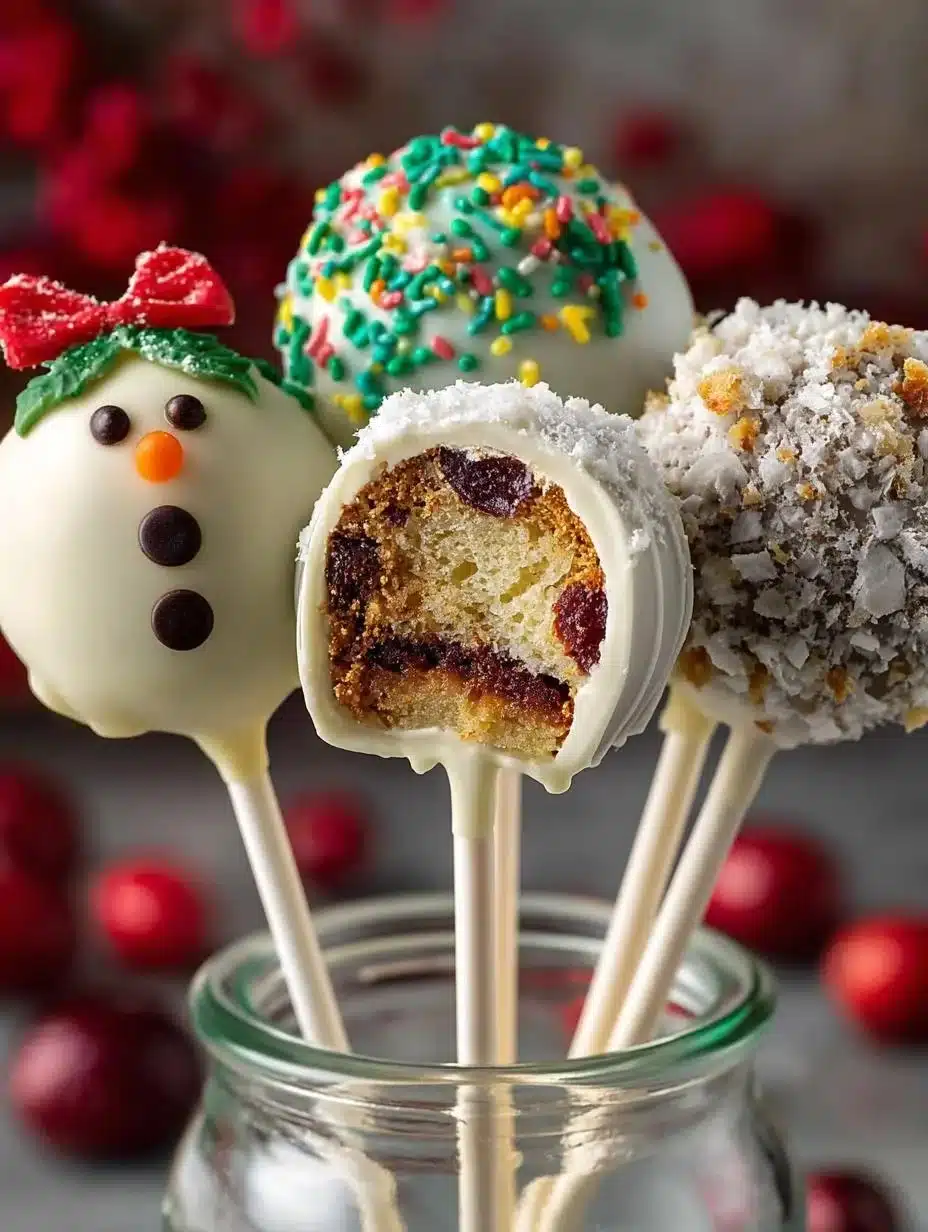
Traditional Christmas Cake Pops guide
A cake on a stick feels a little like holiday magic — familiar, portable, and instantly joyful. In this Traditional Christmas Cake Pops guide you’ll learn how to make classic cake pops from scratch, understand their history, and develop the skills to adapt flavors, shapes, and finishes to match your celebration.
This guide gives you step-by-step instructions, practical troubleshooting, foundational theory, and advanced techniques so you can move from beginner to confident creator. Expect recipes, timing, tools, storage tips, and variations you’ll actually use.
For a quick festive project idea while you read, consider pairing cake pops with other small holiday desserts like mini macarons to create a dessert board that looks thoughtful but comes together quickly.
Background & Context
Cake pops are a modern twist on classic cake-and-frosting dynamics: essentially cake crumbled and rebonded with a binder, then coated and decorated. They’ve become a holiday staple because they are portable, customizable, and lend themselves to playful seasonal designs.
The notion of cake served in bite-sized formats has long cultural roots — think petits fours and cake balls — but the contemporary cake pop concept crystallized in the 2000s. If you’re curious about the broader tradition of compact holiday sweets, a hearty fruitcake traybake provides complementary ideas for textured, dense fillings that inspire some cake-pop flavor profiles (festive fruitcake traybake).
Culturally, cake pops tap into the same holiday impulses as cookie decorating and gingerbread: they are craftable and sharable. That makes them excellent for gifting, sales tables, or family activities.
Classic Christmas Cake Pops history
When exploring the Classic Christmas Cake Pops history, you’ll see a blend of home-baking practicality and social-media aesthetics. Early iterations were simple cake balls; designers then popularized coating them on sticks and elevating decorations.
The “authentic” origin is hybrid — there isn’t one region or guardian bakehouse that invented cake pops. Instead, the format emerged through experimentation and a desire to re-purpose leftover cake into something polished and portable. If you want to riff on seasonal flavors, try pairing a peppermint-mocha profile as a glaze or swirl inspiration (peppermint mocha ideas).
Why This Approach Works
This guide focuses on reasons and methods — not just recipes — so you understand why steps matter.
- Adaptability: The cake-crumb + binder method lets you use any cake base. That flexibility keeps waste low and creativity high.
- Repeatability: A clear formula (cake:binder ratio, chilling, coating technique) makes results predictable and scalable.
- Accessibility: Basic tools and pantry staples are sufficient, which makes the craft approachable for beginners.
Common doubt: “Are cake pops just fancy cake balls?” Yes and no. The stick and coating change handling, display, and mouthfeel. The coating gives a clean surface for decorations and a crisp outer shell that contrasts with the soft interior.
If you worry about time, this process is efficient. Many steps are hands-off (chilling, setting), so you can batch multiple elements without constant active work.
Core Concepts Explained
Breaking the technique into core concepts helps you troubleshoot and customize.
- Binder concept: The binder (usually frosting, ganache, or cream cheese) rehydrates cake crumbs and provides cohesion. Use just enough to hold shape without becoming gummy.
- Texture balance: The interior should be moist but firm. Too dry — it crumbles. Too wet — it will not stay on the stick or hold shape.
- Coating and temper: The shell (chocolate, candy melts) must be fluid enough to coat evenly but not so thin that it runs off. Proper temperature control leads to a glossy finish and snap.
- Support system: The stick, chilling, and the setting surface are part of a system. Each step supports the next: properly chilled pops are less likely to crack when dipped.
Alternatives and substitutions:
- Binding agents: Instead of buttercream, try cream cheese (for tang), ganache (richer), or marshmallow fluff (sweeter and sticky).
- Coatings: Use tempered chocolate for shine and snap, candy melts for ease and color options, or yogurt coatings for tangy variations.
- Flours and cakes: Use sponge, butter cake, or even dense pound cake. Gluten-free options work if the crumb binds well.
For ideas that reuse single-serve concepts with different textures, consider the simplicity and speed of a mug cake as inspiration for flavor concentration in your cake base.
Tools, Resources, or Foundations
Essentials:
- Cake: home-baked or store-bought; avoid iced whole cakes unless you plan to remove frosting first.
- Binder: buttercream, cream cheese frosting, or ganache.
- Coating: chocolate (couverture or baking chocolate) or candy melts.
- Sticks: lollipop sticks, paper or plastic.
- Styrofoam block or a drying stand for standing pops.
- Baking sheets, parchment, and a microwave-safe bowl or double boiler.
Optional enhancements:
- Candy melts in assorted colors for theme-specific finishes.
- Food coloring (oil-based for chocolate, water-based for frosting).
- Edible glitter, sanding sugars, or nonpareils for texture.
- Molds for shaped pops (hearts, trees, bells).
Budget-friendly alternatives:
- Use store-bought frosting as binder and melted chocolate chips for coating.
- Substitute a cardboard block covered in foil for a foam stand in a pinch.
Commentary on usefulness:
Basic tools yield excellent results for first attempts. Invest in quality chocolate and good sticks as you progress; they noticeably improve finish and handling.
Step-by-Step Process
Below is a logical progression from baking to decorated pops. Time estimates assume small batches (24 pops) with active and passive time noted.
- Bake and cool cake (or use a cooled store cake) — Active: 30–60 minutes; Passive: 1 hour cooling.
- Crumble cake and mix with binder — Active: 15–20 minutes.
- Portion and shape balls — Active: 20 minutes; Passive: 30–60 minutes chilling.
- Insert sticks and dip — Active: 30–45 minutes; Passive: 10–20 minutes setting per batch.
- Decorate and finish — Active: 30–60 minutes; Passive: final set 20–30 minutes.
Total hands-on time: ~2–3 hours spread across a 4–6 hour project flow.
H3: Step 1 — Choosing and preparing your cake base
Use a cake that is fully cooled and not overly moist. Sponge cakes may need a stronger binder. Dense cakes (pound, butter) usually require less binder. Remove any thick fondant; you want crumb that mixes easily.
Tip: Slightly stale cake is easier to crumble and binds well. If your cake is too fresh, leave it uncovered for a couple hours to dry a touch.
H3: Step 2 — Binder ratios and mixing
Start with a 3:1 crumb-to-binder ratio by volume as a guideline (3 cups crumbled cake to about 1 cup binder), then adjust. The goal is a dough that holds when rolled into a ball but is not sticky.
Method:
- Crumble cake into a large bowl.
- Add half the binder and mix. Add more gradually.
- Test by rolling: it should hold a round form and not stick excessively to your hands.
Common mistake: Using too much frosting leads to greasy pops that slide or slump. Solution: Add crumb to absorb extra binder, or refrigerate.
H3: Step 3 — Shaping and chilling
Scoop uniform portions using a cookie scoop (about 1–1.5 inches for bite-size, 1.75–2 inches for standard). Roll gently; too much handling warms the mixture and increases stickiness.
Chill on a baking sheet for 30–60 minutes. For best stick adhesion, dip the end of the stick in melted coating, insert halfway, then return to chill for 10 minutes before a full dip.
Common error: Not chilling enough leads to crumbling during dipping. Avoid by giving adequate time in the fridge or freezer (short bursts in freezer, but watch for freezing solidness).
H3: Step 4 — Melting and dipping
If using chocolate, tempering gives the best shiny finish, but for most home projects careful melting and cooling works.
Melting tips:
- Use a double boiler or microwave in 20-second bursts, stirring between.
- For candy melts, add a tiny bit of vegetable oil to thin if needed.
Dipping technique:
- Hold the stick near base; dip fully and lift, twirling to let excess drip.
- Tap the wrist gently to remove excess.
- Place back into foam to set or decorate immediately.
Pro tip: Work in small batches so the coating remains fluid for a smooth finish.
H3: Step 5 — Decorating and finishing
While the coating is still wet, add sprinkles or disk decorations. For piped details, wait until fully set then use melted chocolate or royal icing.
Advanced finishing:
- Use edible airbrush for gradients.
- Apply metallic dust for shimmer (use a dry brush).
- Create marbled effects by dragging a toothpick through two wet colors.
Common mistakes + solutions:
- Cracked shells: Coating was too cool or popped were too cold. Warm coating slightly or let cake pops sit at room temp briefly before dipping.
- Falling off sticks: Not enough binder or sticks inserted incorrectly. Rechill pops and set sticks with a dab of coating as glue.
Expert Techniques & Insights
Once you’ve mastered basics, these techniques raise consistency and finish.
- Proper tempering: Tempering chocolate gives superior gloss and snap. It stabilizes cocoa butter crystals for better setting in varied temperatures.
- Emulsion control: When using water-based frostings, avoid adding water to chocolate or coating — it will seize. Use oil or cocoa butter-based thinners.
- Uniformity: Use a scale for consistent weights if selling or gifting. Consistency improves presentation and baking time predictability.
- Batch workflow: Organize your session into stations — crumbing, mixing, shaping, dipping, decorating — to improve speed and reduce errors.
Lessons from experience:
- Humidity is the enemy of crisp shells. On humid days, work in a cooler room or adjust expectations for sheen.
- Simple designs often look best. Small, deliberate details (a tiny bow, single stripe) can be more elegant than busy surfaces.
Variations & Adaptations
Different contexts call for different cake pop styles.
- Kid-friendly: Use colorful candy melts, soft textures, and themed toppers.
- Elegant events: Tempered dark chocolate with gold leaf or cocoa dusting.
- Vegan/gluten-free: Use plant-based buttercream and GF cake; ensure binder is stable (ganache with coconut cream can help).
- Seasonal flavors: Pumpkin spice, gingerbread, eggnog, or peppermint-laced binders suit the holidays.
Skill-level adaptations:
- Beginner: Use pre-made cake and store frosting, candy melts for coating.
- Intermediate: Bake your own cake, make buttercream, practice dipping.
- Advanced: Temper chocolate, sculpt shapes, use molds and advanced decorations.
If you need quick holiday dessert pairings or want to design a themed dessert spread, small cheesecakes can complement cake pops nicely; consider mini cheesecake bites for visual balance.
Analysis & Benefits Breakdown
This section compares popular choices and summarizes strengths, limitations, and best use-cases.
| Element | Strengths | Limitations | Best for |
|—|—:|—|—|
| Buttercake base | Tender, familiar flavor | May require more binder | Classic taste and color |
| Pound cake base | Dense, holds shape | Can be heavy | Decorative pops, long-lasting |
| Cream cheese binder | Tangy, stable | Adds moisture | Red velvet or carrot cake pops |
| Ganache binder | Rich, less sweet | Needs chilling | Adult flavors, chocolate-forward pops |
| Candy melts | Color variety, easy | Can be chalky | Themed colors, beginners |
| Tempered chocolate | Shine, snap | Requires skill | Elegant gifts or sales |
Strengths:
- Highly customizable in flavor and design.
- Compact and shareable — great for events and gifting.
- Efficient use of leftover cake.
Limitations:
- Coating finish can be temperamental in variable climates.
- Requires some practice to perfect dipping and decorating.
Considerations:
- Time: Allow for multiple chilling and setting stages.
- Temperature: Keep coatings at workable temps for consistent coverage.
- Storage: Pops stored in airtight containers keep best for 3–5 days, depending on binder and coating.
Preparation, Retention & Long-Term Use
Preparation tips:
- Do mise en place: prep coatings, decorations, and chilling space before forming balls.
- Label flavors to avoid mix-ups during decoration.
Retention & reuse:
- Freeze undecorated balls on a sheet, then store in airtight bags for up to 2 months. Thaw in fridge before dipping.
- Assembled pops freeze well if wrapped individually; thaw slowly in the fridge to avoid condensation.
Longevity of skill:
- Once you internalize binder ratios and dipping technique, you can adapt these skills to other confections: truffles, bonbons, and filled chocolates.
- Decorating skills transfer to cookies, cupcakes, and plated desserts.
Troubleshooting & Common Problems
Problem → Cause → Solution
- Crumbling interior → Too little binder → Add small amounts of frosting and chill until firm.
- Shell cracking after dipping → Pops were too cold or coating too thick → Let pops sit at room temperature 5–10 minutes before dipping; thin coating slightly.
- Coating seizing → Water contamination → Dry all utensils; if chocolate seizes, stir in warm cream to salvage.
- Pops sliding down stick → Not enough binder or stick inserted cold → Re-chill with stick reinforced by a dab of coating at insertion.
- Cloudy, dull coating → Chocolate not tempered or humidity → For shine, temper chocolate or work in lower-humidity environment.
Reassurance: Many “failures” are fixable or cosmetic. Keep experimenting and adjust one variable at a time.
FAQ
Q1: How long do cake pops stay fresh?
A1: Generally 3–5 days in an airtight container at room temperature if coated with chocolate and using buttercream binder. Refrigerate for cream-cheese binders and consume within 3 days.
Q2: Can I use store-bought cake for cake pops?
A2: Yes. Remove dense frosting and use the crumb as-is. Store-bought cakes are convenient and consistent for beginners.
Q3: Can I make cake pops ahead for a party?
A3: Yes. You can freeze undecorated balls for up to 2 months and decorate after thawing. Fully decorated pops can be refrigerated for a few days.
Q4: Why does my chocolate look streaky?
A4: Likely not tempered or temperature shock. Either temper chocolate or ensure it cools gradually and avoid cold surfaces.
Q5: My cake pops are too sweet. How can I balance sweetness?
A5: Use less-sweet binders (ganache instead of buttercream), choose darker coatings (70%+ chocolate), or add a pinch of salt to the binder.
Q6: How do I transport cake pops without damage?
A6: Use a snug box with foam insert or create layers with parchment and dividers. Individual wrapping in cellophane with ties provides protection and presentation.
Q7: Are cake pops suitable for large events (200+ pieces)?
A7: Yes. They scale well. Work in assembly-line fashion and recruit helpers for shaping, dipping, and decorating.
Q8: Can I use royal icing for decorating?
A8: Yes — royal icing dries hard and is great for fine details and adhering small toppers. Use it after the shell sets.
Related Topics & Next Steps
If you enjoyed mastering cake pops, explore:
- Cookie and confections pairing for dessert tables.
- Tempering chocolate and bonbon-making for advanced chocolate work.
- Cupcakes and mini layer cakes to expand portion-control dessert skills.
For design inspiration and companion desserts, consider trying themed treats like seasonal cakes or small cheesecakes; these skills enhance your dessert menu cohesion.
Quick Reference Summary
- Binder guideline: start 3:1 crumb-to-binder by volume and adjust.
- Chill between shaping and dipping to prevent crumbling.
- Dip in warm, fluid coating and let excess drip; set upright to finish.
- Use tempered chocolate for shine; candy melts for color ease.
- Store undecorated pops in freezer; decorated ones in airtight containers.
Bookmark these bullet points for quick troubleshooting and workflow memory.
Conclusion
You now have a full Traditional Christmas Cake Pops guide that covers history, core theory, practical steps, troubleshooting, and advanced techniques. Use this as a reference for holiday baking, gift-making, or developing small-batch treats for events.
If you want a simple holiday-focused recipe to practice your first batch, try this Easy Christmas Cake Pops Recipe (For The Holidays) – Basics With … which walks through a straightforward beginner method. For another clear, step-oriented recipe with variations, see this Easy Christmas Cake Pops Recipe to compare techniques and decoration ideas.
I can also convert this guide into a reusable system prompt, adapt it for technical tutorials, or build a content evaluation checklist from this framework if you’d like next steps. Which would help you most?
Traditional Christmas Cake Pops
- Total Time: 45 minutes
- Yield: 24 pops 1x
- Diet: Vegetarian
Description
Delightful and portable cake pops perfect for holiday celebrations, offering a fun and customizable dessert experience.
Ingredients
- 1 cake (home-baked or store-bought)
- 1 cup buttercream, cream cheese frosting, or ganache (binder)
- Chocolate or candy melts (for coating)
- Lollipop sticks
- Edible decorations (sprinkles, edible glitter, etc.)
Instructions
- Bake and cool the cake, or use a cooled store-bought cake. Allow to cool for 1 hour.
- Crumble the cake into a large bowl and mix in the binder until it holds together.
- Portion and shape the mixture into balls, then chill for 30-60 minutes.
- Insert lollipop sticks into the chilled cake balls and dip into the melted coating.
- Decorate while the coating is still wet and allow to set for 20-30 minutes.
Notes
Ensure to chill pops adequately before dipping to prevent crumbling. Use food coloring and various edible decorations for themed designs.
- Prep Time: 15 minutes
- Cook Time: 30 minutes
- Category: Dessert
- Method: Baking
- Cuisine: American
Nutrition
- Serving Size: 1 pop
- Calories: 150
- Sugar: 10g
- Sodium: 50mg
- Fat: 7g
- Saturated Fat: 4g
- Unsaturated Fat: 2g
- Trans Fat: 0g
- Carbohydrates: 18g
- Fiber: 0g
- Protein: 2g
- Cholesterol: 20mg