
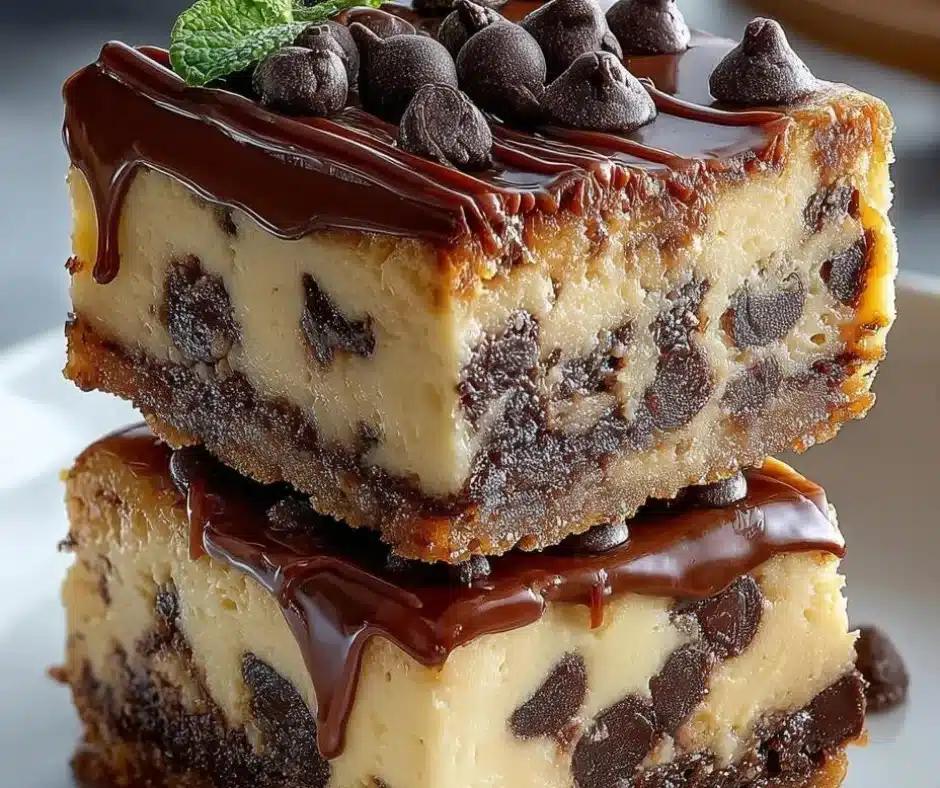
Traditional Chocolate Chip Cheesecake Bars guide
Few desserts combine comfort and decadence like a dense, creamy cheesecake studded with chocolate chips in a portable bar form. Right away: this guide gives you the know-how to make reliable, delicious Traditional Chocolate Chip Cheesecake Bars, whether you’ve never baked one or you want to refine a signature version.
You’ll gain a clear understanding of origins and technique, practical step-by-step instructions, troubleshooting for the problems you’ll actually encounter, and advanced options so the bars evolve with your skill. If you like exploring crossover desserts, check this blueberry cheesecake roll tutorial for ideas that borrow the same structural thinking.
Background & Context
Traditional Chocolate Chip Cheesecake Bars combine two popular American dessert traditions: dense New York–style cheesecake and chocolate-chip–studded bars. The modern cheesecake has roots in ancient Greece, but the dense, cream-heavy New York profile developed in the 20th century as cream cheese became widely available.
These bars are a pragmatic, social dessert—easier to portion and transport than a whole round cheesecake, which is why they appear at potlucks, bake sales, and family gatherings. They also sit at the intersection of technique and accessibility: the flavor profile is straightforward, but successful texture requires attention.
For perspective on how cheesecake techniques adapt to different formats and flavors, you can look at variations like the blueberry crumble cheesecake, which uses similar layering and baking principles.
Understanding the past informs the present: the “classic” in Classic Chocolate Chip Cheesecake Bars history refers less to a single recipe and more to a format that became standardized as home bakers embraced rectangular pans and sheet-bake approaches.
Why This Approach Works
This guide emphasizes control and repeatability over gimmicks. You’ll learn methods that minimize cracking, ensure even texture, and maximize flavor with manageable effort.
Benefits:
- Predictability: Clear steps reduce variability that comes from oven differences and ingredient temps.
- Scalability: The bar format can be scaled up or down for parties, and many techniques translate to whole cheesecakes.
- Flexibility: You can swap crusts, chips, or mix-ins without changing the structural method.
Common doubts: “Do I need a water bath?” Not always. This guide explains when a water bath helps and when it’s overkill. “Are the ingredients fussy?” Not if you follow substitutions and temperature advice provided here.
This approach balances traditional technique—like controlling heat and mixing—with modern conveniences, such as using a food processor for the crust or silicone pans for easy release.
Core Concepts Explained
Break the task into reliable building blocks: crust, filling composition, chocolate inclusion, baking strategy, cooling & cutting.
- Crust: The base binds the dessert and contributes texture contrast. Common options: graham cracker crumb, shortbread cookie, or even a blondie base. Use a processor for even crumbs, and press firmly into the pan.
- Filling composition: The core of texture: cream cheese fat content, eggs for structure, sugar for tenderness, and a bit of sour cream or heavy cream for smoothness. Ratios matter: too many eggs → custardy or rubbery; too little fat → crumbly.
- Chocolate inclusion: Chocolate chips add texture pockets and sweetness balance. Consider size and shape: mini chips distribute more evenly than large chunks; semisweet is classic, but bittersweet raises sophistication.
- Baking strategy: Low-and-slow baking produces an even set. There are two main strategies: dry-baked with gentle heat and careful cooling, or a water-bath (bain-marie) for extra insurance against cracking.
- Cooling & cutting: Rapid temperature changes cause cracking and sinking. A staged cool-down—oven-off resting with the door cracked, then room temp, then refrigeration—gives the cleanest cuts.
If you want to borrow techniques from close relatives, the layered logic used in cheesecake brownies helps when combining different textures and baking rates.
Alternatives and substitutions:
- Lower-fat cream cheese: use full-fat for best texture; if needed, stabilize with a tablespoon of cornstarch per 450 g (1 lb) cream cheese.
- Gluten-free crust: use almond flour + melted butter and press into pan.
- No-bake: use a stabilized cream-cheese whipped filling and chill in a springform or pan lined with foil.
Tools, Resources, or Foundations
Essentials:
- 8×8 or 9×13 inch baking pan (depending on yield desired)
- Mixing bowls, electric mixer or stand mixer
- Spatula, rubber scraper, and measuring tools
- Oven and cooling rack
Helpful but optional:
- Food processor (for fine crust crumbs)
- Springform or removable-base pan (for whole cheesecakes)
- Thermometer (to check internal doneness)
- Silicone liner or parchment for easier release
Budget-friendly alternatives:
- Use a fork and sturdy bag to crush crumbs if you don’t have a processor.
- A glass or metal pan will work if you line it well with parchment.
For garnish ideas that add texture and visual contrast, consider items like chocolate-dipped pretzels; see this chocolate-covered pretzels page for inspiration on combining sweet and salty elements.
Commentary: Equipment is less important than technique—accurate times, room-temperature ingredients, and patience during cooling make the biggest difference.
Step-by-Step Process
This section gives a tested, classical method for Traditional Chocolate Chip Cheesecake Bars with time estimates and pro tips.
Total active time: ~40–50 minutes. Total time including chilling: 6–12 hours.
Ingredients (for 8×8 pan):
- Crust: 1 1/2 cups graham cracker crumbs (or crushed cookies), 5 tbsp melted butter, 2 tbsp sugar.
- Filling: 24 oz (675 g) full-fat cream cheese (room temp), 2/3 cup sugar, 2 large eggs (room temp), 1 tsp vanilla extract, 1/3 cup sour cream or heavy cream, 3/4 cup mini chocolate chips.
Preparation (H3): Preheat & prep
- Preheat oven to 325°F (160°C).
- Line the pan with parchment, leaving an overhang for removal.
- Combine crumbs, sugar, and butter; press into bottom evenly. Bake 8–10 minutes to set; cool slightly.
Filling (H3): Mix carefully
- Beat softened cream cheese until smooth and free of lumps (about 2–3 minutes).
- Add sugar and beat until combined (don’t overbeat).
- Add eggs one at a time, mixing just until incorporated.
- Fold in vanilla and sour cream/heavy cream with a spatula.
- Fold in mini chocolate chips gently so they’re evenly distributed.
Assemble & bake (H3)
- Pour filling over crust and smooth.
- Bake at 325°F (160°C) for 28–34 minutes. Edges should be set and slightly puffed; the center should have a gentle jiggle.
- For a water bath: wrap the pan bottom in foil, place in a larger pan, and add hot water halfway up the sides; bake as above. This reduces cracking but requires caution when removing.
Cool & chill (H3)
- Turn oven off and crack the door; cool in oven for 30–45 minutes to equalize temperature.
- Remove to wire rack until room temperature, then refrigerate at least 4 hours or overnight for best slicing.
Cutting & serving
- Use a sharp knife warmed under hot water and wiped dry between cuts for clean slices.
- Serve chilled or at cool room temperature.
Common mistakes + how to avoid them:
- Overbeating cream cheese: this incorporates air that causes cracks—mix until just smooth.
- Baking too hot: causes edges to overcook and center to sink—follow low temperature and check early.
- Cutting too soon: not enough chill leads to smearing—wait at least 4 hours.
Pro tips:
- Use mini chips to avoid heavy pockets of chocolate that can cause uneven baking.
- If top is too brown, tent with foil after 15–20 minutes.
- Freeze the bars for 30 minutes before slicing to get ultra-clean edges quickly.
For creative inspiration that blends cookie and cheesecake thinking, check the cheesecake-stuffed red velvet cookies, which use similar balancing of textures.
Expert Techniques & Insights
Once you’re comfortable, try these advanced tactics to level up:
- Water bath mastery: Instead of standard foil, use a heavy-duty strip and check water level mid-bake. The bain-marie is ideal for precision baking in drafty or older ovens.
- Temperature management: Let cream cheese come fully to room temp and whisk the eggs separately to warm them slightly; cold elements shock the batter and can cause lumps.
- Chip tempering: For a silkier melt, briefly stir chips into warm filling so some melt but most retain structure. This must be tested—too much melting will bleed.
- Even distribution: Freeze the mixed chips for 5–10 minutes before folding—this keeps them suspended in batter during baking.
- Flavor layering: Add a thin ribbon of salted caramel or espresso-swirl to the filling for depth; use piping techniques to create even ribbons.
Lessons learned: Small procedural tweaks (chip size, cooling cadence) have outsized effects on texture and appearance. Keep a baking journal to record oven idiosyncrasies and ingredient brand differences.
Variations & Adaptations
These bars are a versatile canvas.
Flavor variations:
- Double-chocolate: swap crust for chocolate cookie crumbs and use dark chips.
- Salted caramel: swirl salted caramel before baking; finish with flaky salt.
- Fruit stud: fold in chopped strawberries or raspberries; reduce chips by half to balance moisture.
Dietary adaptations:
- Gluten-free: almond flour crust or gluten-free cookie crumbs.
- Lower sugar: reduce sugar by up to 25%, but taste as you go.
- Vegan: use cashew-based fillings or commercial vegan cream cheese; bake as a no-bake set if unsure.
Skill-level adaptations:
- Beginner: follow the base recipe exactly; use mini chips and a simple graham crust.
- Intermediate: add swirls or a crumb topping; use a water bath.
- Advanced: create layered bars (e.g., cookie base, cheesecake middle, brownie top) using techniques from the cheesecake brownies technique.
Cultural or practical flexibility: The filling can be flavored with citrus zest, liqueurs, or spices (cardamom, cinnamon) to give culturally familiar notes.
Analysis & Benefits Breakdown
Here’s a quick comparative table to help decide which approach to use depending on priorities.
| Goal | Best approach | Strengths | Limitations |
|—|—:|—|—|
| Fast & simple | No-bake bars | Quick, minimal baking skill | Texture differs from classic cheesecake |
| Classic flavor & texture | Low-and-slow bake, chilled overnight | Creamy, dense, stable | Requires refrigeration time |
| Perfect appearance | Water bath + cool staging | Minimized cracks, even texture | More setup and care required |
| Portability | Bar format (8×8 or 9×13) | Easy to portion and transport | Slightly less elegant than plated slices |
Considerations:
- If you need shelf-stable bars for a bake sale, choose a sturdier crust and keep refrigerated until service.
- For professional presentation, work on consistent slice sizes and finish edges with a hot knife.
Preparation, Retention & Long-Term Use
How to prepare effectively:
- Day-before approach: bake the night before and chill overnight for best texture.
- Mise en place: measure ingredients and bring dairy products to room temperature before starting.
Storage:
- Refrigerate in an airtight container for up to 4–5 days.
- Freeze well-wrapped bars for up to 3 months; thaw overnight in refrigerator.
Retention of skills:
- Practice one variable at a time (e.g., try a water bath on one batch and not on another) to learn effects.
- Keep notes on oven temps and times; homemade ovens vary by 10–25°F (5–15°C).
Longevity of knowledge:
- Mastering cream-cheese textures translates to tarts, cheesecakes, and fillings—skills are durable.
Troubleshooting & Common Problems
Problem → Cause → Solution
- Cracked top → Too much air in batter / oven temp too high → Mix gently, avoid overbeating; reduce oven temp and consider water bath.
- Sinking center → Undercooked center or rapid cooling → Bake until edges are set; use staged cooling and chill thoroughly.
- Lumpy batter → Cold cream cheese lumps → Ensure full room temperature and beat until smooth; press through a sieve if necessary.
- Soggy crust → Wet filling or underbaked crust → Pre-bake crust 8–10 minutes; press firmly and chill before filling.
- Chocolate chips sink → Batter too thin or chips too heavy → Use mini chips or chill chips briefly before folding.
- Grainy texture → Overbaking or low-fat cream cheese → Use full-fat cream cheese and avoid overbaking; remove when center still jiggles.
Each problem is solvable with procedural changes—baking is more about controlled steps than mystery.
FAQ
Q: Can I use low-fat cream cheese?
A: You can, but expect a flatter, less creamy texture. Stabilize with a tablespoon of cornstarch per pound of cream cheese.
Q: Do I need a water bath for bars?
A: Not strictly. A water bath reduces cracking and evens heat, but a low oven temp and careful cooling can be sufficient for bars.
Q: Why did my bars weep or release liquid?
A: Overbaking or too much sugar can cause separation. Bake to the correct doneness and chill fully; avoid high-sugar mix-ins without adjusting balance.
Q: How do I get clean slices for serving?
A: Chill thoroughly and slice with a hot, wiped knife between cuts.
Q: Can I make these ahead for an event?
A: Yes—bake the day before, chill overnight, and keep refrigerated until service.
Q: Are mini chips better than regular chips?
A: Mini chips distribute more evenly and are less likely to cause structural imbalance, so they’re often preferable.
Q: How long do they last at room temperature?
A: Because of the dairy, keep refrigerated. Out of refrigeration, limit to two hours maximum at room temp.
Q: Can I double the recipe?
A: Yes—use a larger pan and monitor baking time closely; check doneness starting 10–15 minutes earlier than expected.
Related Topics & Next Steps
If you want to build on this, explore:
- Layering techniques for hybrid bars (cheesecake + cookie + brownie).
- Flavor pairing exercises (coffee with dark chocolate chips).
- Presentation and finishing skills, like glazing and piping.
These next steps turn a reliable recipe into a signature offering.
Quick Reference Summary
- Use full-fat cream cheese, eggs at room temp.
- Prebake the crust for stability.
- Mix filling until smooth; avoid overbeating.
- Bake low (around 325°F / 160°C) and cool in stages.
- Chill at least 4 hours before slicing.
- Use mini chips for even distribution.
- For best appearance, consider a water bath and hot-knife slicing.
Keep a small notebook for oven-specific timing and ingredient notes.
Conclusion
You now have a comprehensive, practical Traditional Chocolate Chip Cheesecake Bars guide that covers fundamentals, step-by-step technique, and advanced options to refine your results. For a tested home-style spin that combines cookie and cheesecake elements, see Mom On Timeout’s chocolate chip cookie cheesecake bars recipe for inspiration and technique comparison. For a classic, straightforward formulation you can adapt, review Pillsbury’s Chocolate Chip Cheesecake Bars recipe to compare ingredient ratios and baking cadence.
If you want, I can now convert this into a reusable system prompt, adapt it for a hands-on tutorial, or create a content-checklist you can use when producing recipes. Which would you like next?
Traditional Chocolate Chip Cheesecake Bars
- Total Time: 255 minutes
- Yield: 16 servings 1x
- Diet: Vegetarian
Description
Delicious and decadent chocolate chip cheesecake bars, combining the richness of New York-style cheesecake with the convenience of bar form.
Ingredients
- 1 1/2 cups graham cracker crumbs
- 5 tbsp melted butter
- 2 tbsp sugar
- 24 oz (675 g) full-fat cream cheese (room temperature)
- 2/3 cup sugar
- 2 large eggs (room temperature)
- 1 tsp vanilla extract
- 1/3 cup sour cream or heavy cream
- 3/4 cup mini chocolate chips
Instructions
- Preheat oven to 325°F (160°C) and line an 8×8 inch baking pan with parchment, leaving an overhang for easy removal.
- In a mixing bowl, combine graham cracker crumbs, sugar, and melted butter; press this mixture firmly into the bottom of the pan. Bake for 8–10 minutes and let cool slightly.
- In another bowl, beat the softened cream cheese until smooth and free of lumps (about 2–3 minutes), then add sugar and mix until combined. Incorporate eggs one at a time, mixing just until fully incorporated.
- Fold in the vanilla, sour cream or heavy cream, and then carefully add in the mini chocolate chips, making sure they are evenly distributed.
- Pour the filling over the pre-baked crust and smooth the top. Bake at 325°F (160°C) for 28–34 minutes; the edges should be set and puffed, while the center should jiggle slightly.
- Turn off the oven and crack the door, allowing it to cool for 30–45 minutes. Remove from the oven and place on a wire rack to cool to room temperature, then refrigerate for at least 4 hours before slicing.
- Once chilled, use a sharp knife warmed under hot water to cut clean slices and serve chilled or at cool room temperature.
Notes
For creative variations, try adding salted caramel or fruit. Ensure to let the cheesecake cool completely to avoid cracking.
- Prep Time: 15 minutes
- Cook Time: 40 minutes
- Category: Dessert
- Method: Baking
- Cuisine: American
Nutrition
- Serving Size: 1 bar
- Calories: 280
- Sugar: 18g
- Sodium: 230mg
- Fat: 16g
- Saturated Fat: 10g
- Unsaturated Fat: 5g
- Trans Fat: 0g
- Carbohydrates: 32g
- Fiber: 1g
- Protein: 4g
- Cholesterol: 60mg