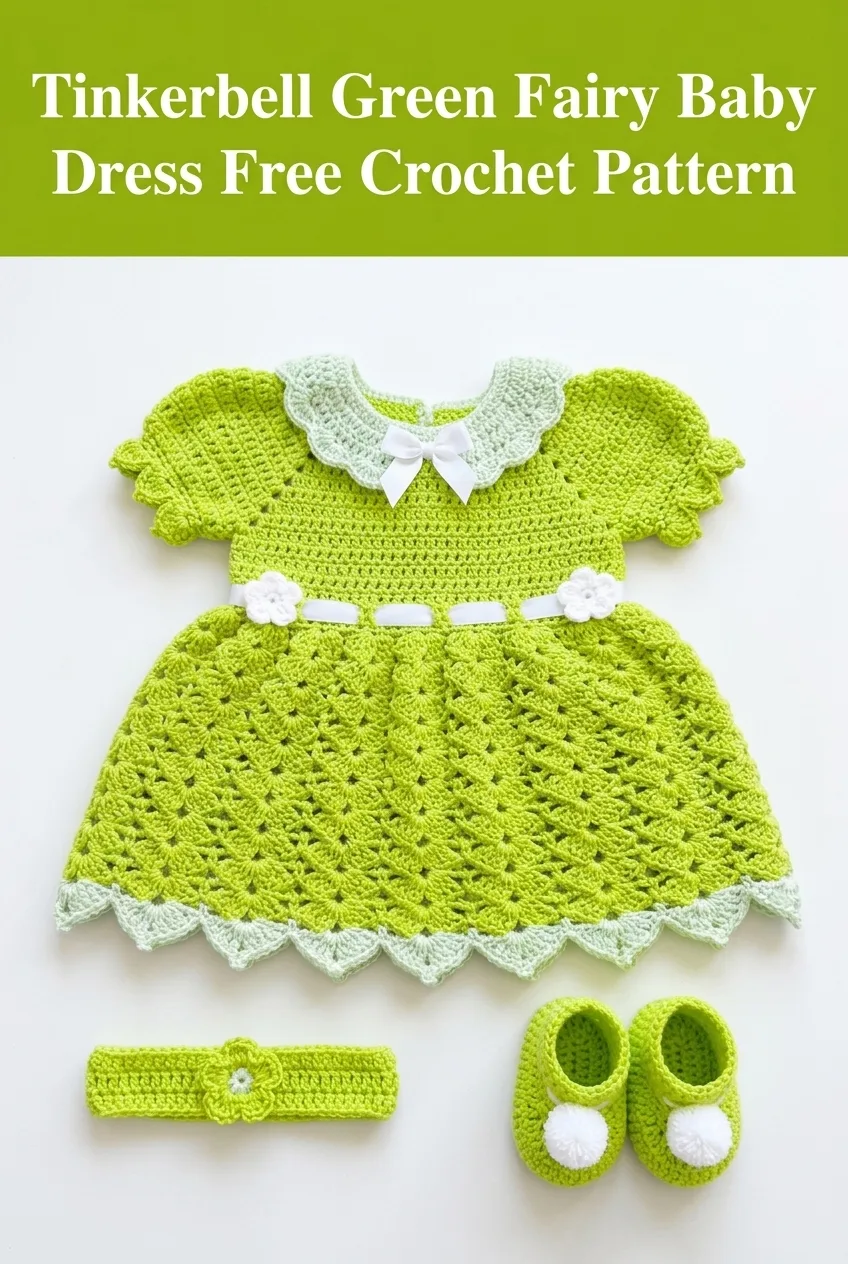
Tinkerbell Green Fairy Baby Dress Free Crochet Pattern
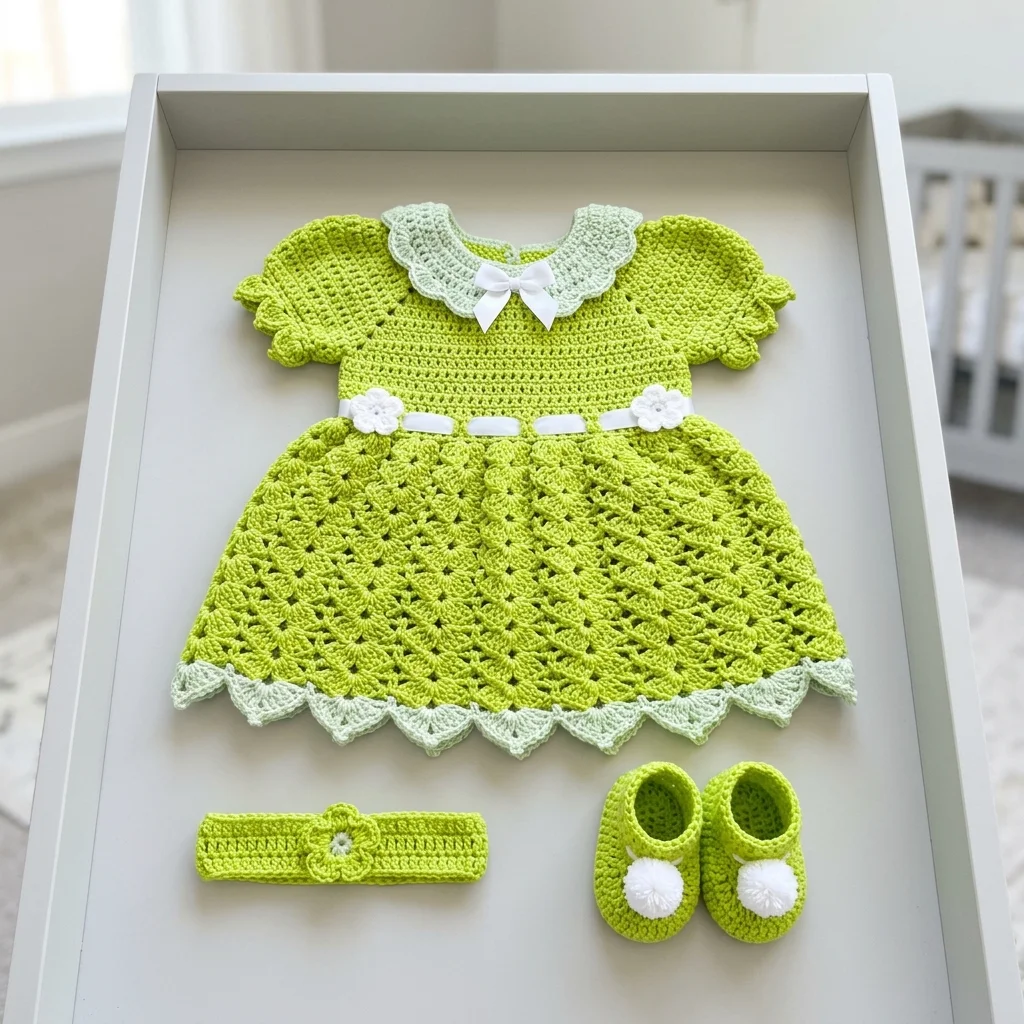
SUPER QUICK baby gift alert! This adorable Tinkerbell green fairy baby dress set is one of those projects that looks WAY more complicated than it actually is. You can finish the entire outfit in a weekend, and I promise the recipient will think you spent weeks on it. The matching headband and booties take this from sweet to absolutely swoon-worthy. If you need a baby shower gift that will steal the show, this is it!
Why You’ll Love This Crochet Baby Dress Pattern
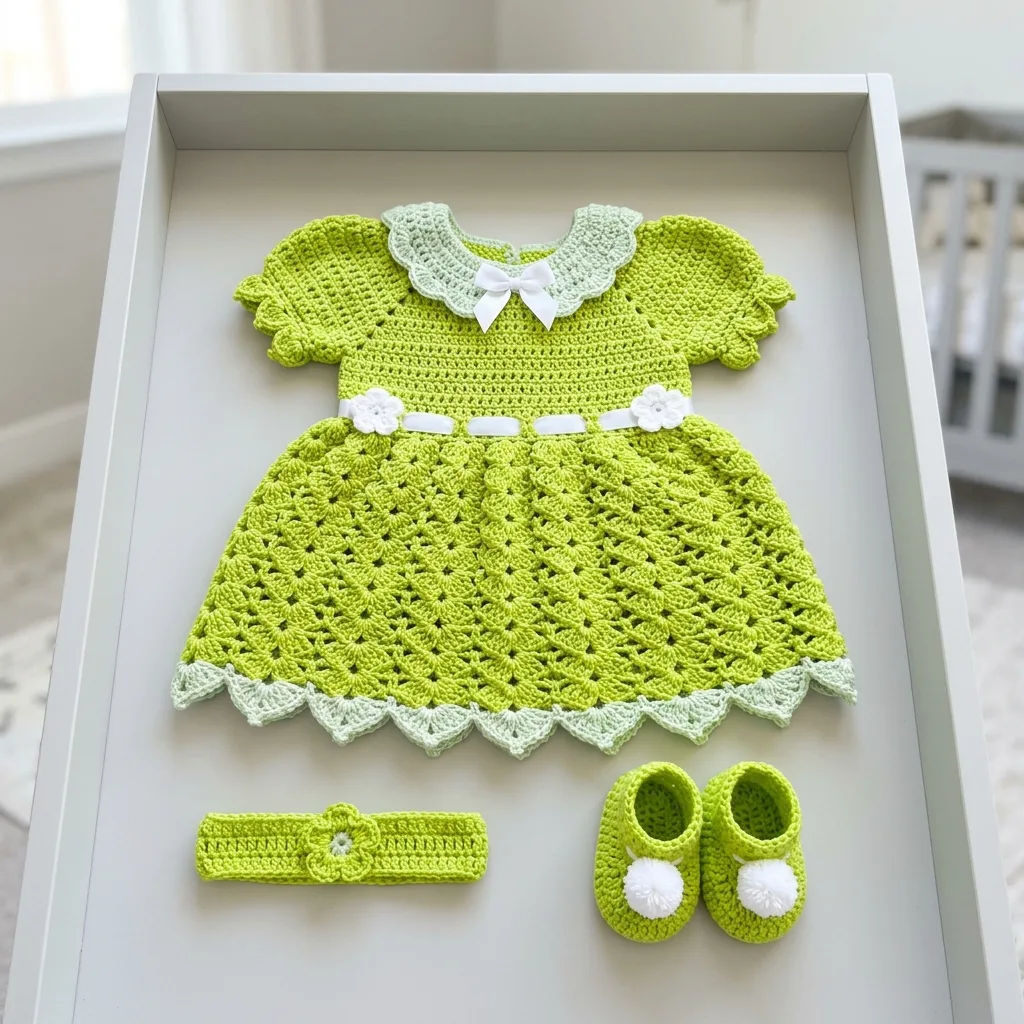
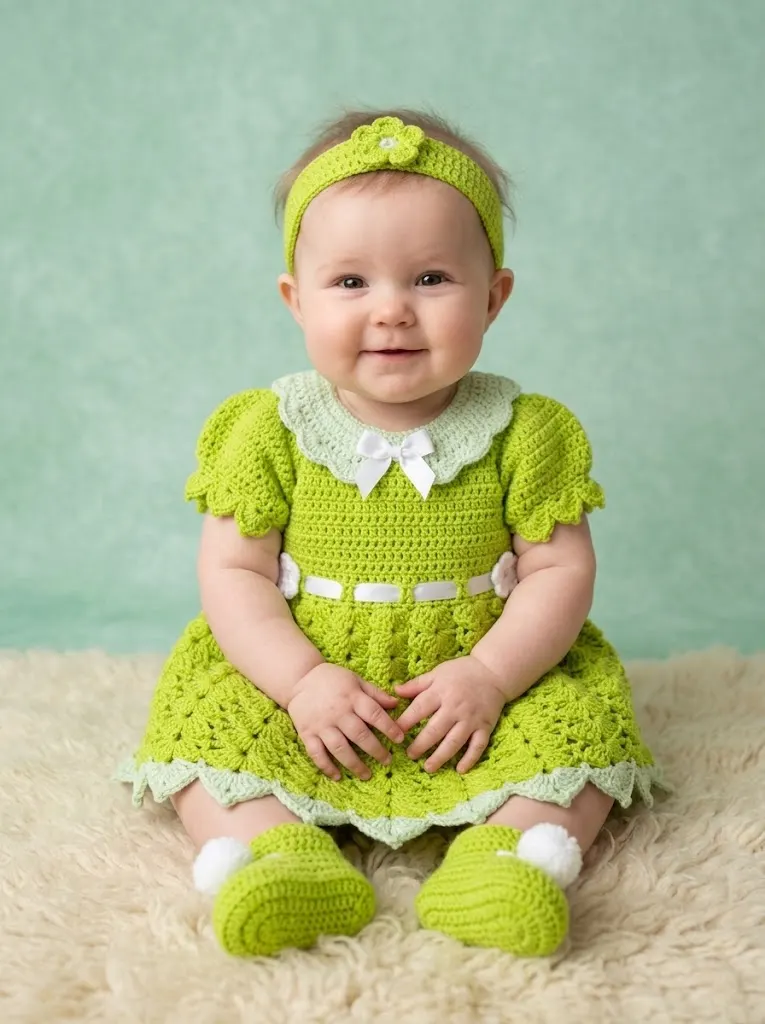
This complete layette set includes a dress with a gorgeous shell stitch skirt, a peter pan collar, matching headband, and the cutest little booties with pom pom details. The lime green color feels fresh and modern while the mint accents and white ribbon details give it that fairy tale charm.
The shell stitch pattern on the skirt creates beautiful texture without complicated techniques. If you can double crochet, you can absolutely make this dress. I designed the bodice with simple rows of half double crochet so the fit stays structured while the skirt flows and twirls.
Skill Level
Intermediate beginner to confident beginner. You should be comfortable with basic stitches and working in the round. The shell stitch looks fancy but follows a simple repeat once you get the rhythm.
Finished Measurements
This pattern fits 0 to 6 months as written.
Dress:
Headband:
Booties:
Materials Needed
Yarn:
I recommend a soft acrylic or cotton blend that can withstand washing. Baby items need to be practical! Look for yarn labeled DK weight or light worsted, which is number 3 on the yarn weight scale.
Hook:
Notions:
Stitch Abbreviations and Definitions
Let me walk you through every stitch you will need. Read through these before starting so nothing catches you off guard.
Ch = Chain. Wrap yarn over hook, pull through loop. This creates your foundation.
Sl st = Slip stitch. Insert hook, yarn over, pull through stitch AND loop on hook in one motion. Used for joining rounds.
Sc = Single crochet. Insert hook, yarn over, pull up a loop (2 loops on hook), yarn over, pull through both loops. The shortest basic stitch.
Hdc = Half double crochet. Yarn over, insert hook, yarn over, pull up a loop (3 loops on hook), yarn over, pull through all 3 loops. Slightly taller than single crochet.
Dc = Double crochet. Yarn over, insert hook, yarn over, pull up a loop (3 loops on hook), yarn over, pull through 2 loops, yarn over, pull through remaining 2 loops. Creates a taller, more open fabric.
Shell = Work 5 dc into the same stitch. This creates the fan shape that makes the skirt so pretty.
Inc = Increase. Work 2 stitches into the same stitch.
Sk = Skip. Miss the indicated stitch and work into the next one.
Gauge
With 4.0mm hook in half double crochet:
16 stitches and 12 rows = 4 inches
Take time to check your gauge! A dress that is too small or too big will not fit properly. Make a small swatch, measure it, and adjust your hook size if needed. Go up a hook size if your swatch is too small, down if it is too large.
Pattern Notes
Tinkerbell Green Fairy Baby Dress Pattern Instructions
Bodice Back
Using MC and 4.0mm hook:
Row 1: Ch 27. Hdc in 3rd ch from hook and in each ch across. Turn. (25 hdc)
Row 2: Ch 2 (does not count as a stitch here and throughout), hdc in each st across. Turn. (25 hdc)
Rows 3 through 10: Repeat Row 2. (25 hdc)
Fasten off. Set aside.
Bodice Front
Work exactly as Bodice Back through Row 10. Do not fasten off.
Joining Bodice and Creating Armholes
Row 11: Ch 2, hdc in first 6 sts (right front shoulder), ch 5 for underarm, skip to back piece, hdc across 25 sts of back, ch 5 for second underarm, hdc in last 6 sts of front (left front shoulder). Turn. (37 hdc, 10 ch)
Row 12: Ch 2, hdc in each st and ch across. Turn. (47 hdc)
Row 13: Ch 2, hdc in each st across. Turn. (47 hdc)
This creates your waist edge. Now we will add the shell stitch skirt.
Skirt
Change to working in joined rounds. Join with a sl st to form a tube.
Round 1: Ch 1, sc in each st around, sl st to first sc to join. (47 sc)
Round 2: Ch 3 (counts as first dc), dc in same st, sk 2 sts, *shell in next st, sk 2 sts*, repeat from * around, 3 dc in same st as beginning ch 3, sl st to top of ch 3 to join. (15 shells plus 2 half shells at join)
Round 3: Sl st to center dc of first shell, ch 3, 4 dc in same st (first shell made), *shell in center dc of next shell*, repeat from * around, sl st to top of ch 3 to join.
Rounds 4 through 12: Repeat Round 3.
Round 13 (Border Round): Change to CC. Sl st to center dc of first shell, ch 1, *sc in center dc of shell, ch 3, sc in same st*, repeat from * around, sl st to first sc to join.
Fasten off and weave in ends.
Sleeves (Make 2)
Join MC at underarm with a sl st.
Round 1: Ch 1, work 24 sc evenly around armhole opening, sl st to first sc to join. (24 sc)
Rounds 2 through 4: Ch 1, sc in each st around, sl st to first sc to join. (24 sc)
Round 5 (Shell Edge): Ch 3, 2 dc in same st, sk 2 sts, *shell in next st, sk 2 sts*, repeat from * around, 2 dc in same st as beginning, sl st to top of ch 3 to join. (8 shells)
Round 6: Change to CC. Sl st to center dc of first shell, ch 1, *sc in center dc of shell, ch 2*, repeat from * around, sl st to first sc to join.
Fasten off. Repeat for second sleeve.
Peter Pan Collar
Using CC and 4.0mm hook:
Row 1: Ch 50. Sc in 2nd ch from hook and in each ch across. Turn. (49 sc)
Row 2: Ch 1, sc in first st, *sk 1 st, shell in next st, sk 1 st, sc in next st*, repeat from * across. Turn. (12 shells)
Row 3: Ch 3, 2 dc in first sc, *sc in center dc of shell, shell in next sc*, repeat from * across, ending with 3 dc in last sc. Turn.
Row 4: Ch 1, sc in first dc, *shell in sc, sc in center dc of shell*, repeat from * across, sc in top of turning ch.
Fasten off. The collar will naturally curve due to the shell construction.
Collar Edging
Using white yarn and 3.5mm hook, join at one corner of collar.
Edging Round: Ch 1, sc evenly around entire collar edge, working 3 sc in each corner. Sl st to first sc. Fasten off.
Matching Headband Pattern
Using MC and 4.0mm hook:
Row 1: Ch 8. Sc in 2nd ch from hook and in each ch across. Turn. (7 sc)
Rows 2 through 45: Ch 1, sc in each st across. Turn. (7 sc)
The band should measure approximately 14 inches. Adjust length as needed.
Fasten off, leaving a long tail. Sew short ends together to form a loop.
Flower Embellishment
Using white yarn and 3.5mm hook:
Magic Ring: Ch 1, work 5 sc into ring, sl st to first sc. Pull ring tight.
Petal Round: *Ch 3, sl st in same st*, repeat from * in each sc around. (5 petals)
Fasten off. Sew flower to center of headband. Add a small bead or button to flower center if desired.
Matching Booties Pattern (Make 2)
Using MC and 4.0mm hook:
Sole
Round 1: Ch 10. Sc in 2nd ch from hook and in next 7 ch, 3 sc in last ch (this turns the corner). Working along opposite side of foundation ch, sc in next 7 sts, 2 sc in last st, sl st to first sc. (20 sc)
Round 2: Ch 1, 2 sc in first st, sc in next 7 sts, 2 sc in each of next 3 sts, sc in next 7 sts, 2 sc in each of next 2 sts, sl st to first sc. (26 sc)
Round 3: Ch 1, sc in first st, 2 sc in next st, sc in next 7 sts, *sc in next st, 2 sc in next st* 3 times, sc in next 7 sts, *sc in next st, 2 sc in next st* twice, sl st to first sc. (32 sc)
Sides
Rounds 4 through 6: Ch 1, working in back loops only for Round 4 then both loops for Rounds 5 and 6, sc in each st around, sl st to first sc. (32 sc)
Toe Shaping
Round 7: Ch 1, sc in first 10 sts, *sc2tog* 6 times, sc in remaining 10 sts, sl st to first sc. (26 sc)
Sc2tog = Single crochet decrease. Insert hook in first st, pull up a loop, insert hook in next st, pull up a loop, yarn over, pull through all 3 loops on hook.
Round 8: Ch 1, sc in first 10 sts, *sc2tog* 3 times, sc in remaining 10 sts, sl st to first sc. (23 sc)
Cuff
Rounds 9 through 11: Ch 1, sc in each st around, sl st to first sc. (23 sc)
Round 12 (Edging): Ch 1, *sc in next st, ch 1, sk 1 st*, repeat around, sl st to first sc.
Fasten off. Sew white pom pom to top center of each bootie.
Assembly and Finishing
Attaching the Collar:
Position the collar around the neckline with the scalloped edge facing outward. The collar should sit like a peter pan collar, meeting at center front. Use yarn needle and matching yarn to whipstitch in place along the neckline edge.
Adding the Ribbon Details:
Thread the longer white ribbon through the waist area between Rows 12 and 13 of the bodice, weaving in and out. Tie in a small bow at center front or side. Trim ends at an angle to prevent fraying.
Tie the shorter ribbon in a small bow and tack to center front of collar.
Optional Flower Accents:
Make 2 small white flowers using the flower embellishment instructions. Sew one on each side of the waist ribbon.
Weaving in Ends:
Use your yarn needle to weave all remaining yarn tails into the wrong side of the fabric. Weave through several stitches, then back through in the opposite direction for security. Trim close to fabric.
Care Instructions
Hand wash in cool water with mild detergent or machine wash on delicate cycle in a mesh laundry bag. Lay flat to dry and reshape while damp. Do not hang dry as this can stretch the garment. Store folded rather than hanging.
Tips for Success with This Crochet Baby Dress Pattern
Counting stitches: The shell stitch rounds can get tricky to count. Remember that each shell has 5 double crochets with the center one being your landmark for the next round. Place stitch markers if needed.
Tension consistency: Try to keep your tension even throughout the project. The bodice needs to be slightly firmer than the skirt for structure.
Sizing adjustments: To make this dress larger, add more chains to your starting chain (in multiples of 4 for the shell pattern to work) and add more rows to the bodice before joining.
Color variations: This pattern works beautifully in any color combination. Try soft pink with white, lavender with mint, or classic white with pale yellow accents.
I really hope you enjoy making this sweet little dress set! It makes such a thoughtful handmade gift, and I just know the lucky baby who receives it will look absolutely precious. If you make this pattern, I would absolutely love to see your finished project. Tag me on Instagram or share it in my Facebook group so I can cheer you on!
Be sure to save this Tinkerbell Green Fairy Baby Dress crochet pattern to your Pinterest boards so you can find it whenever you are ready to start stitching. And please drop a comment below if you make it. I read every single one and your photos make my whole day!
You Might Also Like
- Ocean Blue Mermaid Plush Doll Free Crochet Pattern
- Pink Strawberry Couple Amigurumi Free Crochet Pattern
- Lavender Purple Drawstring Bucket Bag Free Crochet Pattern
- Ocean Blue Ombre Drawstring Bucket Bag Free Crochet Pattern