Teal Ocean Wave Crochet Robe Free Pattern
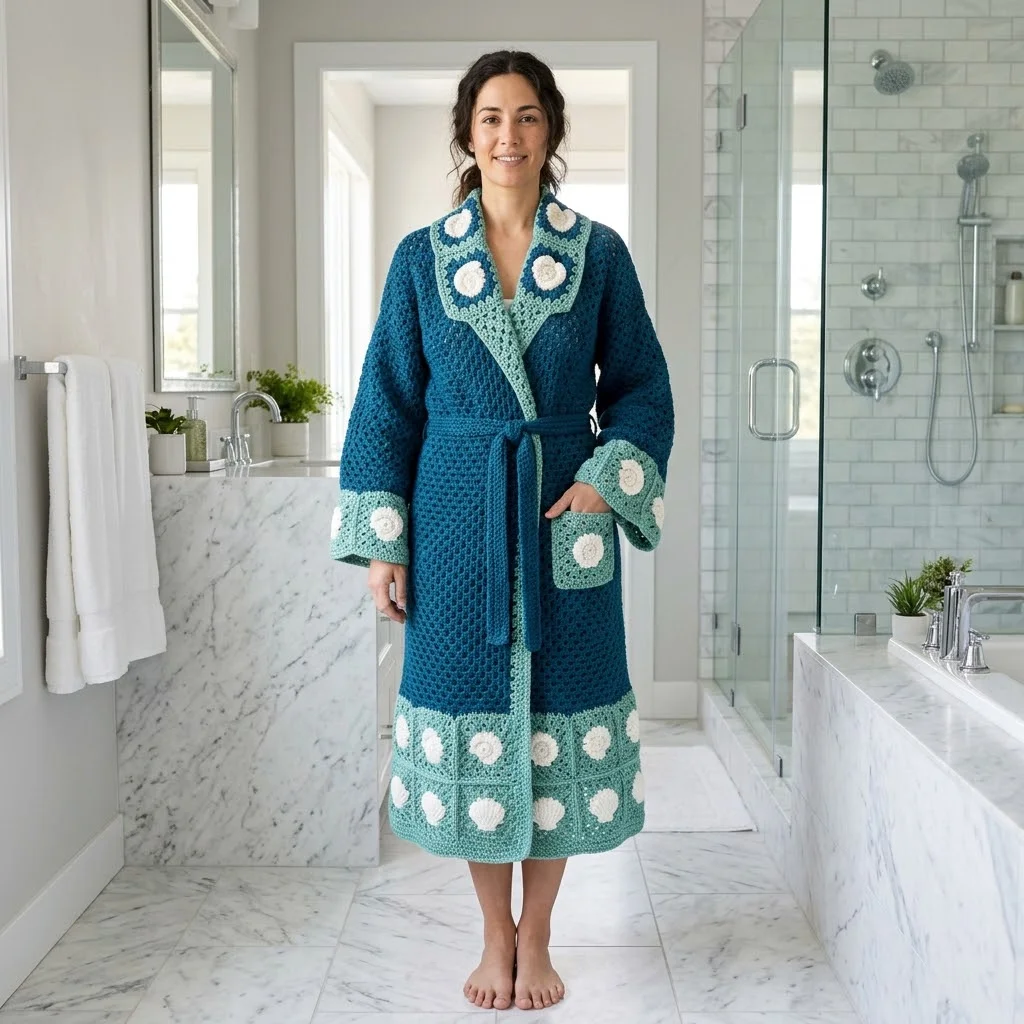
Looking for a cozy project that wraps you in handmade warmth from head to toe? This stunning crochet robe combines the classic granny stitch with beautiful floral motifs to create a garment that is as practical as it is gorgeous. The construction uses double crochet clusters and simple granny squares, making it perfect for intermediate crocheters ready to tackle a larger wearable project. This robe works up surprisingly quickly considering its size, and it makes an absolutely unforgettable gift for someone special, including yourself.
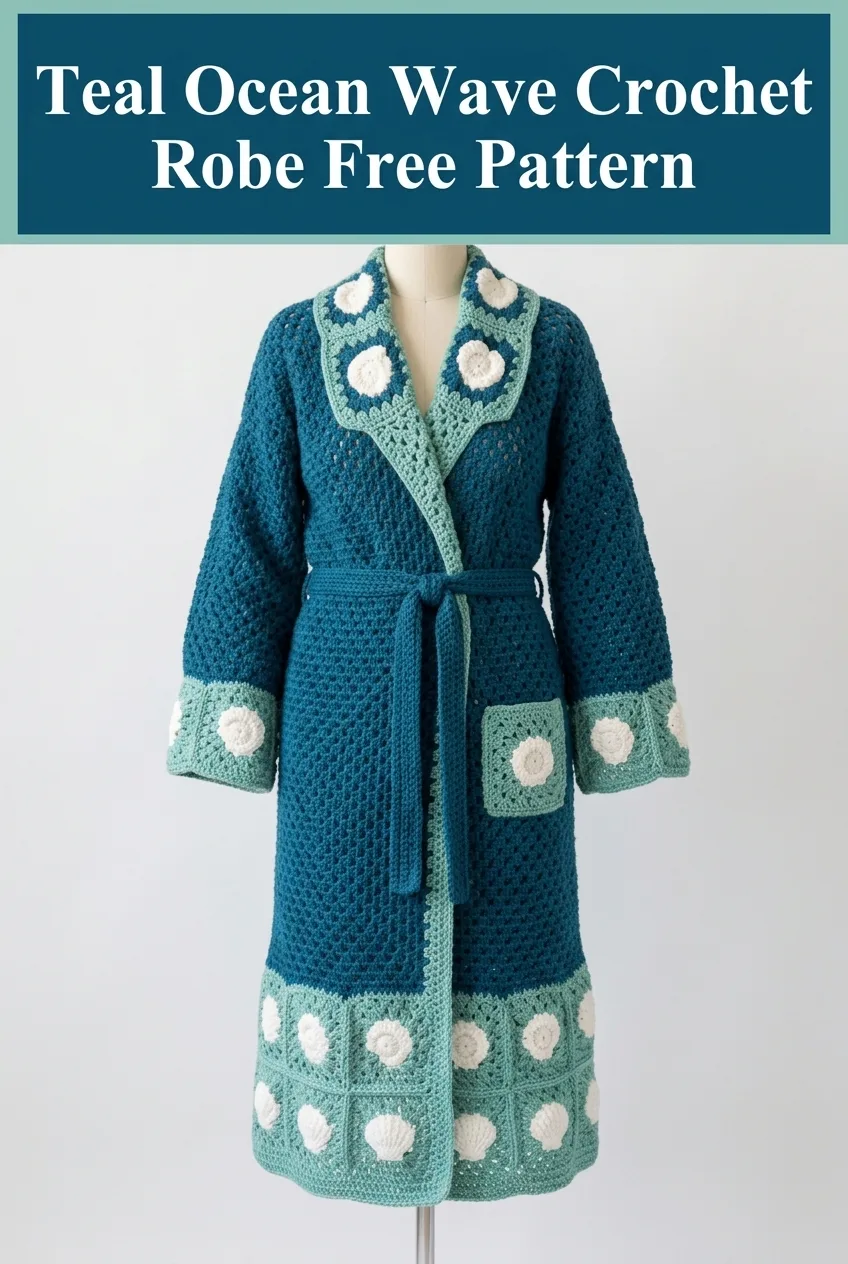
About This Crochet Robe Pattern
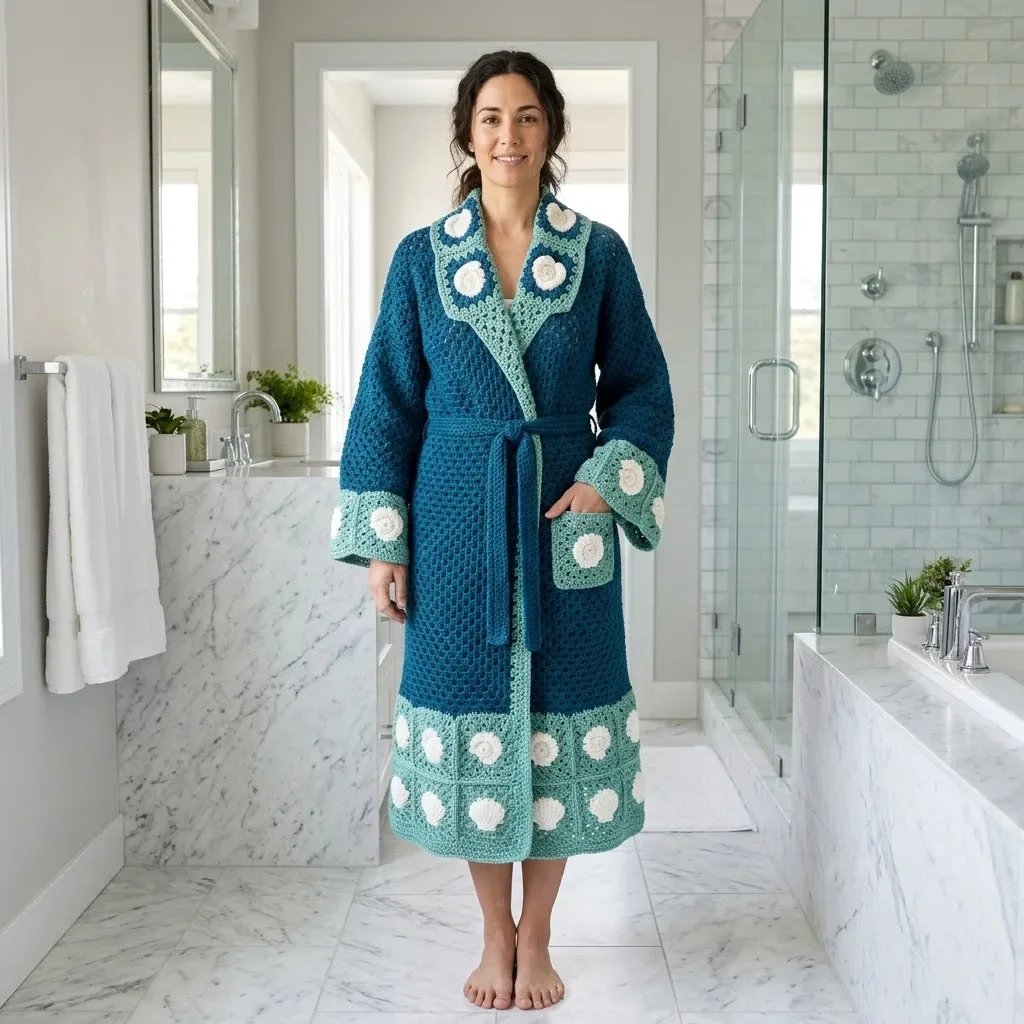
This beautiful teal crochet robe features a long, flowing silhouette that hits below the knee for maximum coziness. The body uses a classic granny cluster stitch pattern in deep teal, while the collar, cuffs, hem border, and pockets showcase a lighter seafoam shade adorned with cream-colored floral granny squares. A matching teal tie belt cinches the waist for a flattering fit.
The construction combines several techniques that intermediate crocheters will find satisfying to master. You will work the main body panels flat, create separate floral granny squares, then join everything together for a professional finish. The wide shawl collar gives this robe an elegant spa-like feel.
Skill Level: Intermediate
Finished Measurements:
Materials Needed for Your Crochet Robe
Gathering your supplies before you start will make this project flow smoothly. Here is everything you need:
Yarn:
I recommend a soft acrylic or cotton blend yarn for this robe. You want something that feels good against your skin and washes easily. Look for yarn with good drape so your finished robe flows nicely rather than standing stiff.
Hook:
Notions:
Gauge Information
Getting your gauge right matters for wearable projects like this crochet robe pattern. Take time to check it before diving in.
Gauge: 14 stitches and 8 rows = 4 inches in granny cluster stitch pattern
Granny Square Gauge: Each floral square measures 5 inches by 5 inches after blocking
To check your gauge, chain 20 and work 10 rows of the granny cluster pattern. Measure the center section. If your swatch is too big, try a smaller hook. If it is too small, go up a hook size.
Stitch Abbreviations and Definitions
Let me walk you through every stitch you will use in this pattern. Even if you know these already, a quick refresher never hurts.
ch = chain: Yarn over, pull through loop on hook. This creates your foundation and is used for spacing.
sl st = slip stitch: Insert hook, yarn over, pull through both loops at once. Used for joining and moving across stitches invisibly.
sc = single crochet: Insert hook, yarn over, pull up a loop (2 loops on hook), yarn over, pull through both loops. Creates a short, tight stitch.
dc = double crochet: Yarn over, insert hook, yarn over, pull up a loop (3 loops on hook), yarn over, pull through 2 loops, yarn over, pull through remaining 2 loops. Creates a taller stitch with nice drape.
3-dc cluster = three double crochet cluster: Work 3 dc into the same stitch or space. This creates the classic granny stitch grouping.
sk = skip: Pass over the indicated number of stitches without working into them.
sp = space: The gap or hole created between stitch clusters.
Floral Granny Square Pattern
You will need 24 floral granny squares total for this crochet robe. Make all of them before starting the body panels. This is a great take-along project, perfect for making squares while watching your favorite show.
You will need:
Round 1 (Flower Center)
With Color C (Cream), make a magic ring.
Ch 3 (counts as first dc), work 11 dc into the ring. Sl st to top of beginning ch-3 to join. Pull the magic ring closed. (12 dc)
If magic rings intimidate you, no worries. You can ch 4 and sl st to form a ring instead, then work your 12 dc into that ring.
Round 2 (Petals)
Ch 1, sc in same st. *Ch 3, sk 1 st, sc in next st.* Repeat from * around, ending with ch 3, sl st to first sc. (6 ch-3 petals)
Fasten off Color C. Weave in ends or leave a short tail to weave later.
Round 3 (First Border)
Join Color B (Seafoam) in any ch-3 space.
Ch 3 (counts as dc), 2 dc in same sp, ch 1. *3 dc in next ch-3 sp, ch 1.* Repeat around. Sl st to top of beginning ch-3. (6 clusters of 3 dc each)
Round 4 (Square Formation)
Ch 3, 2 dc in same st (first cluster made), ch 1, 3 dc in ch-1 sp, ch 1. *In next cluster, work (3 dc, ch 2, 3 dc) for corner, ch 1, 3 dc in next ch-1 sp, ch 1.* Repeat around, working corners in every other cluster. Sl st to join. (4 corners, 8 side clusters)
Round 5 (Final Border)
Ch 3, 2 dc in same st, ch 1. Work 3 dc in each ch-1 sp along sides. At each corner ch-2 sp, work (3 dc, ch 2, 3 dc). Continue around. Sl st to join.
Fasten off. Weave in ends. Block each square to 5 inches.
Back Panel Instructions
The back panel forms the foundation of your crochet robe. Work it flat in rows.
With Color A (Deep Teal), ch 74.
Row 1: Dc in 4th ch from hook (skipped chains count as first dc), dc in next ch. *Sk 2 ch, 3 dc in next ch.* Repeat from * across to last 3 ch. Sk 2 ch, dc in last ch. Turn. (24 clusters plus edge stitches)
Row 2: Ch 3 (counts as dc throughout), 2 dc in first st. *Sk 2 dc, 3 dc in sp before next cluster.* Repeat across. Dc in top of turning ch. Turn.
Repeat Row 2 until piece measures 36 inches from beginning, or desired length to underarm.
Back Armhole Shaping
Next Row: Ch 3, 2 dc in first st. Work in pattern across, stopping 3 clusters before the end. Dc in next sp. Turn, leaving remaining stitches unworked. (18 clusters)
Continue in pattern on center stitches for 9 more inches.
Fasten off.
Front Panel Instructions (Make 2)
Each front panel is worked separately, then joined to the back at the shoulders.
With Color A, ch 38.
Row 1: Dc in 4th ch from hook, dc in next ch. *Sk 2 ch, 3 dc in next ch.* Repeat across to last 3 ch. Sk 2 ch, dc in last ch. Turn. (12 clusters plus edge stitches)
Row 2: Ch 3, 2 dc in first st. Work in pattern across. Dc in turning ch. Turn.
Repeat Row 2 until piece measures 36 inches, matching the back panel.
Front Armhole and Neckline Shaping
Armhole Row: At armhole edge, sl st across first 3 clusters. Ch 3, work in pattern across. Turn. (9 clusters)
Continue for 3 inches even.
Begin Neck Shaping: Decrease 1 cluster at neck edge every other row 3 times while continuing armhole edge straight.
Continue until front measures same as back to shoulder. Fasten off.
Sleeve Instructions (Make 2)
Sleeves are worked from the top down for easy length adjustment.
With Color A, ch 56.
Row 1: Dc in 4th ch from hook, dc in next ch. *Sk 2 ch, 3 dc in next ch.* Repeat across. Turn. (18 clusters)
Work even in granny cluster pattern for 16 inches.
Switch to Color B for the cuff.
Work 2 inches in pattern with Color B.
Fasten off, leaving a long tail for seaming.
Adding Cuff Squares
Using the mattress stitch or whip stitch, attach 3 floral granny squares evenly spaced across the bottom edge of each sleeve cuff. The squares will overlap the Color B section slightly.
Assembly Instructions
Now comes the satisfying part where your crochet robe really takes shape.
Step 1: Block all pieces to measurements. This step makes seaming much easier and gives your finished robe a polished look.
Step 2: With yarn needle and matching yarn, seam the front panels to the back panel at the shoulders using the mattress stitch. Line up your rows carefully for invisible seams.
Step 3: Fold each sleeve in half lengthwise and seam the underarm. Attach the sleeves to the body, matching the center of the sleeve cap to the shoulder seam.
Step 4: Seam the side seams from the bottom of the armhole to the hem on each side.
Collar Construction
The shawl collar uses floral squares backed by the granny cluster stitch in Color B.
Step 1: Join 6 floral squares in a strip, 3 squares for each side of the collar. Use the join-as-you-go method or whip stitch.
Step 2: With Color B, pick up stitches along one long edge of the square strip. Work 3 inches of granny cluster pattern to create collar depth.
Step 3: Pin the collar to the neckline, starting at the center back and working around each front edge. The collar should extend down each front approximately 12 inches. Whip stitch in place.
Hem Border
The decorative hem border brings together the coordinating colors beautifully.
Step 1: Join 8 floral squares in a strip.
Step 2: With Color B, work 3 rows of granny cluster pattern along the top edge of the square strip.
Step 3: Attach the completed border to the bottom edge of the robe body, easing to fit. The border should wrap completely around the hem.
Pocket Instructions (Make 2)
These roomy pockets are both decorative and functional.
Step 1: Join 2 floral squares vertically for each pocket.
Step 2: With Color B, work a border of granny clusters around 3 sides of the joined squares (leaving the top open).
Step 3: Position pockets on the front panels at hip height. Whip stitch in place along the sides and bottom, leaving the top open for your hands.
Tie Belt
A simple belt completes your crochet robe.
With Color A, ch 200 (or desired length, typically 60 to 70 inches).
Row 1: Sc in 2nd ch from hook, sc in each ch across. Turn. (199 sc)
Row 2: Ch 1, sc in each st across. Turn.
Rows 3 through 5: Repeat Row 2.
Fasten off. Weave in ends.
If you want a more substantial belt, work additional rows until the belt is about 1.5 to 2 inches wide.
Finishing Touches
Take your time with these final steps. They make the difference between a homemade look and a handmade treasure.
Weave in all remaining ends. Use your yarn needle to weave each tail through several stitches on the wrong side, then double back. Trim close to the fabric.
Block your finished robe. Lay it flat on a blocking mat or clean towel. Spray lightly with water and pat to shape. Allow to dry completely.
Add belt loops (optional). Chain 10 with Color A, sl st to join in a loop. Attach one loop to each side seam at waist height.
Care Instructions
Your beautiful crochet robe deserves gentle care to keep it looking its best for years.
Machine wash on delicate cycle with cold water. Use a mesh laundry bag for extra protection. Lay flat to dry, reshaping while damp. Avoid hanging, as the weight of the wet yarn can stretch your robe out of shape.
If using 100% acrylic yarn, you can tumble dry on low heat, but I still recommend flat drying for best results.
Customization Ideas
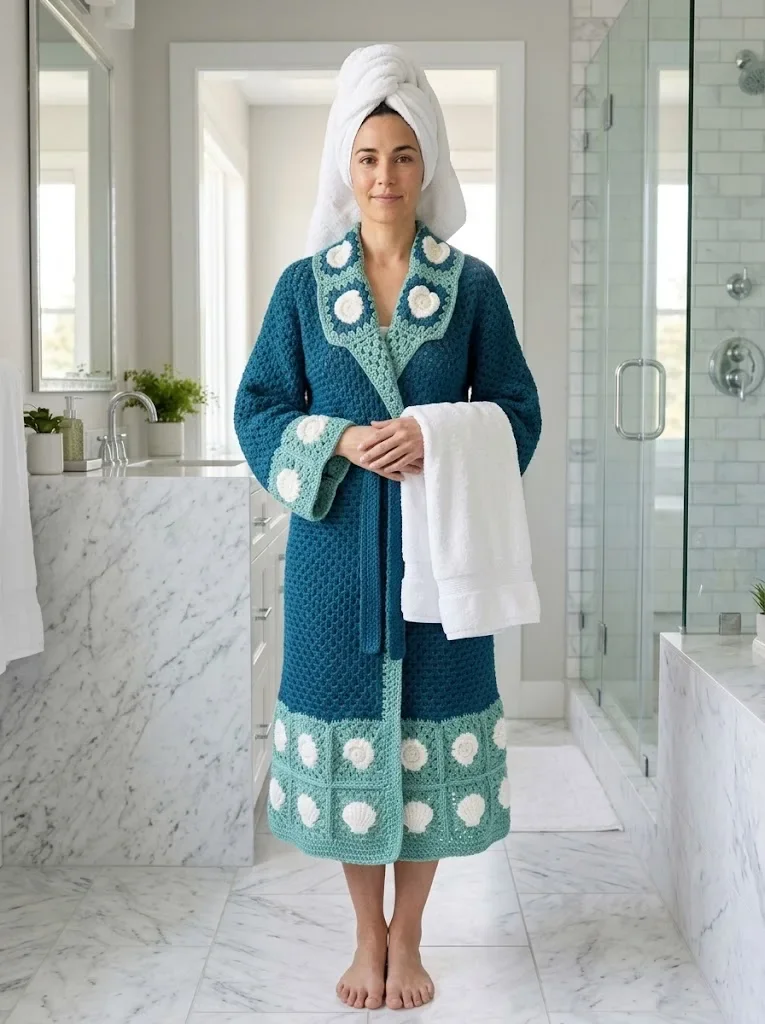
Make this crochet robe pattern your own with these simple modifications:
Adjust the length: Add or subtract rows from the body panels before the armhole shaping. Each inch requires approximately 2 additional rows.
Change the fit: Add or subtract clusters from your foundation chain. Each cluster adds roughly 2 inches to the width.
Switch up colors: Try a monochromatic look with different shades of the same color, or go bold with contrasting brights.
Add more flowers: Work additional floral squares and scatter them across the body panels for an all-over garden effect.
I hope this Teal Ocean Wave Crochet Robe brings you as much joy to make as it will to wear. This is the kind of project that feels like a real accomplishment when you slip it on for the first time. If you make one, I would absolutely love to see it. Tag me on Instagram or share a photo in our Facebook group. Your creativity inspires me and our whole community.
If you loved this crochet robe pattern, do yourself a favor and pin it to your favorite Pinterest board so you can find it again when you are ready to start. And please drop a comment below to let me know if you have any questions or just to say hi. I read every single one, and hearing from you truly makes my day. Happy crocheting, friend.
You Might Also Like
- Mint Garden Baby Crochet Dress Free Pattern
- Sage Green Textured Baby Outfit Set Free Crochet Pattern
- Blush Pink Shell Clutch with Pearl Accents Free Crochet Pattern
- Mint Green Popcorn Stitch Baby Jumpsuit Free Crochet Pattern