Sunshine Lemon Tiered Baby Dress Free Crochet Pattern
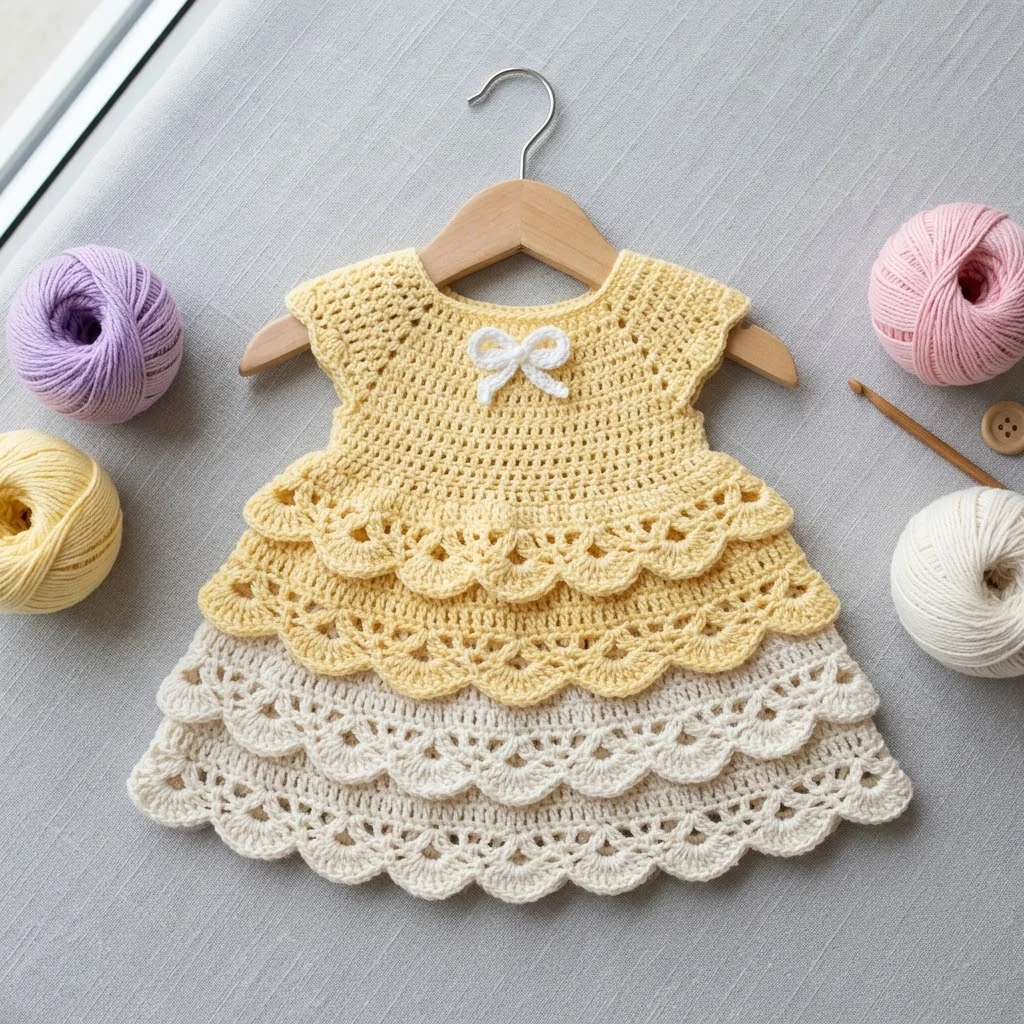
Oh, this little dress makes my heart sing! If you have been searching for the perfect crochet baby dress pattern that looks impressive but works up faster than you might expect, you just found it. This sunshine lemon tiered baby dress features a fitted bodice, sweet cap sleeves, and the most gorgeous layered skirt with shell stitch detailing. The soft yellow and cream color combination feels fresh, classic, and perfect for spring photos, baby showers, or just everyday sweetness.
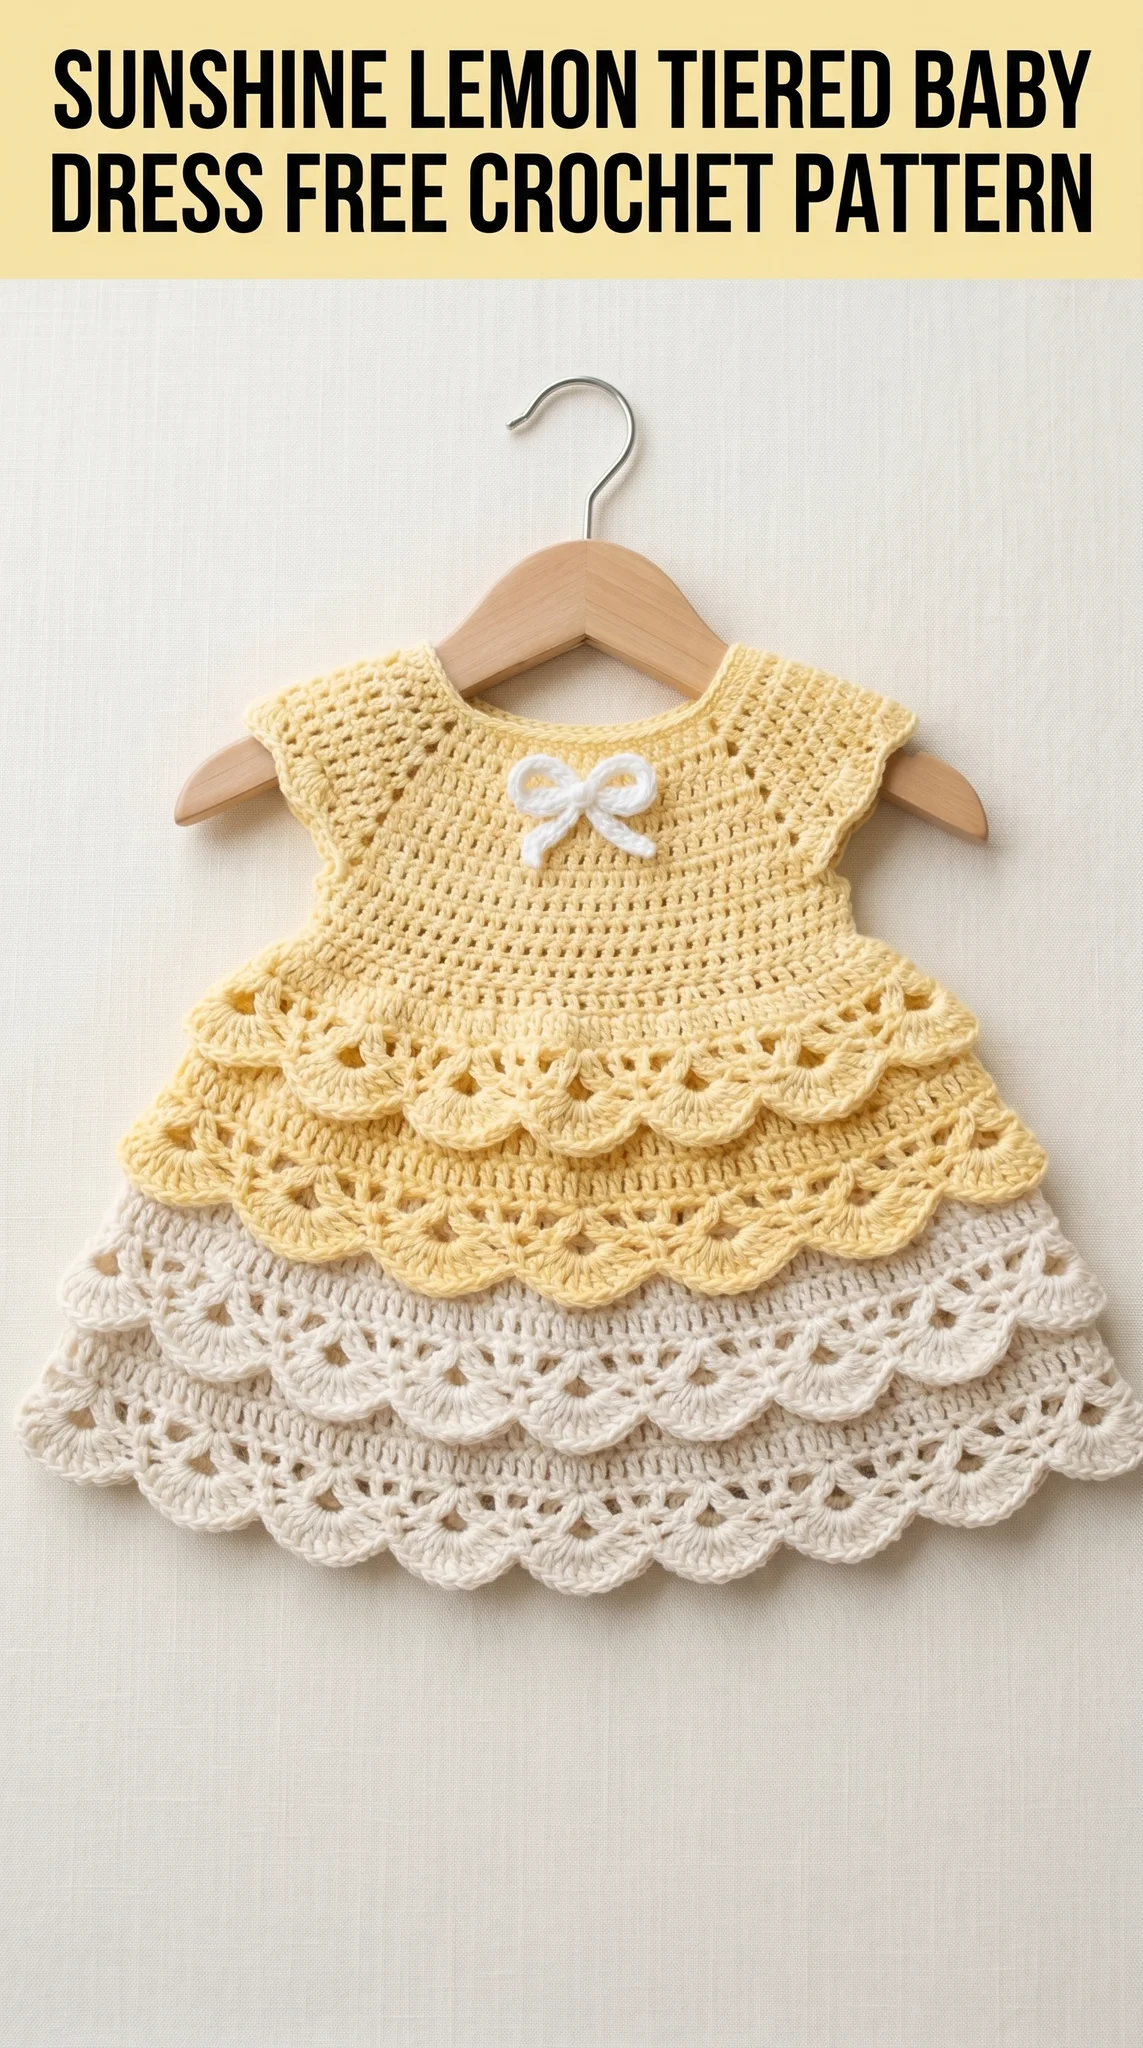
I promise this pattern is more approachable than it looks. If you can work basic stitches and follow along row by row, you can absolutely make this dress. I will walk you through every single step, explain any tricky bits, and give you all the details you need to create this heirloom piece from scratch.
Let me show you exactly how to crochet this beautiful tiered baby dress.
Why This Crochet Baby Dress Pattern Works So Well
Before we dive into the step by step instructions, let me tell you what makes this design special from a construction standpoint.
The bodice is worked in one piece from the neckline down using a simple yoke increase method. This means no seaming for the shoulders or sides of the upper body. The yoke shaping creates those lovely little cap sleeves naturally as part of the construction.
The tiered skirt is what gives this dress its showstopper quality. You will create two overlapping layers using shell stitches, with the top tier in yellow and the bottom tier in cream. Each tier is worked separately but attached during construction, creating that beautiful ruffled layered effect.
The small decorative bow at the bodice center adds the finishing touch. It takes about five minutes to make and elevates the entire piece.
Skill Level
I would call this an easy to intermediate crochet pattern. You need comfort with basic stitches and following a repeat pattern across rows. The shell stitch sections follow a predictable rhythm once you get going.
If you are a confident beginner who has completed at least one or two garment projects, you should be able to tackle this dress. Just take your time with the yoke shaping and count carefully on those first few rounds.
Finished Measurements
This pattern is written for size 6 to 12 months.
Approximate finished measurements:
Materials Needed
Yarn:
Use a light worsted weight yarn (category 3) or DK weight yarn in a soft, machine washable fiber. Cotton blends or acrylic blends work beautifully for baby garments because they hold up to frequent washing and feel gentle against sensitive skin.
Hook:
Notions:
Gauge
18 stitches and 10 rows = 4 inches (10 cm) in double crochet using 4.0 mm hook.
Please take the time to check your gauge before starting. If your gauge is too tight, go up a hook size. If too loose, go down a hook size. Proper gauge ensures your finished dress will fit correctly.
Abbreviations and Stitch Definitions
Let me define every stitch abbreviation you will see in this pattern. Even if you already know these, having them all in one place helps when you are working through the instructions.
ch = chain: Wrap yarn over hook, pull through loop on hook.
sl st = slip stitch: Insert hook, yarn over, pull through stitch and loop on hook in one motion.
sc = single crochet: Insert hook, yarn over, pull up a loop (2 loops on hook), yarn over, pull through both loops.
dc = double crochet: Yarn over, insert hook, yarn over, pull up a loop (3 loops on hook), yarn over, pull through 2 loops, yarn over, pull through remaining 2 loops.
hdc = half double crochet: Yarn over, insert hook, yarn over, pull up a loop (3 loops on hook), yarn over, pull through all 3 loops at once.
sk = skip: Pass over the indicated stitch without working into it.
sp = space: The gap created between stitches, often where you will place your next stitch.
shell = shell stitch: Work 5 dc into the same stitch or space. This creates a fan shaped cluster.
inc = increase: Work 2 stitches into the same stitch.
st(s) = stitch(es)
Special Techniques
Shell Stitch Pattern
The shell stitch creates those beautiful scalloped edges on the skirt tiers. To work a shell, you simply place 5 double crochet stitches into one single stitch or space. The stitches fan out naturally to create a curved, decorative shape.
Yoke Construction
The bodice uses a top down raglan style yoke. You will place stitch markers at four points to mark where your increases happen. These increase points shape the shoulders and create the armhole openings.
Step by Step Crochet Pattern
Part 1: The Bodice
Foundation and Neckline
Using MC (yellow) and 4.0 mm hook:
Row 1: Ch 61. Dc in 4th ch from hook and in each ch across. Turn. (58 dc)
Row 2: Ch 3 (counts as dc here and throughout). Dc in each st across. Turn. (58 dc)
Setting Up the Yoke
Now you will divide your stitches for the yoke shaping. Place stitch markers as follows: after stitch 10, after stitch 19, after stitch 39, and after stitch 48.
This divides your work into: back (10 sts), sleeve (9 sts), front (20 sts), sleeve (9 sts), back (10 sts).
Row 3 (Increase Row): Ch 3. *Dc in each st to marker, 2 dc in next st, move marker, 2 dc in next st.* Repeat from * to * 3 more times. Dc in remaining sts. Turn. (66 dc)
Row 4: Ch 3. Dc in each st across. Turn. (66 dc)
Row 5 (Increase Row): Repeat Row 3 increase pattern. Turn. (74 dc)
Row 6: Ch 3. Dc in each st across. Turn. (74 dc)
Row 7 (Increase Row): Repeat Row 3 increase pattern. Turn. (82 dc)
Row 8: Ch 3. Dc in each st across. Turn. (82 dc)
Separating for Bodice and Sleeves
Row 9: Ch 3. Dc in next 13 sts (back section). Ch 4, skip 17 sts (first sleeve). Dc in next 28 sts (front section). Ch 4, skip 17 sts (second sleeve). Dc in remaining 14 sts (back section). Turn. (55 dc + 8 ch)
Row 10: Ch 3. Dc in each st and ch across. Turn. (63 dc)
Rows 11 through 14: Ch 3. Dc in each st across. Turn. (63 dc)
This completes your bodice section. The work should measure approximately 5 inches from the neckline edge.
Part 2: First Skirt Tier (Yellow)
Continue working with MC (yellow).
Row 15 (Setup for Shells): Ch 1. Sc in first st. *Sk 2 sts, shell in next st, sk 2 sts, sc in next st.* Repeat from * across, adjusting final stitches as needed to end with sc. Turn. (approximately 10 shells)
Row 16: Ch 3. 2 dc in first st. *Sc in center dc of shell, shell in next sc.* Repeat from * across, ending with 3 dc in last st. Turn.
Row 17: Ch 1. Sc in first dc. *Shell in sc, sc in center dc of shell.* Repeat from * across. Turn.
Rows 18 through 21: Repeat Rows 16 and 17 two more times.
Row 22 (Scallop Edge): Ch 1. Sc in first st. *5 dc in next sc, sc in center dc of shell.* Repeat from * across. Fasten off.
Part 3: Second Skirt Tier (Cream)
Join CC (cream) at the bottom of Row 14 of the bodice, working into the back loops of that row to create a layered effect.
Row 1: Ch 1. Sc in first st. *Sk 2 sts, shell in next st, sk 2 sts, sc in next st.* Repeat from * across. Turn. (approximately 10 shells)
Rows 2 through 9: Repeat the shell pattern as established in Rows 16 and 17 of the first tier, alternating the pattern rows.
Rows 10 through 13: Continue shell pattern, allowing this tier to extend approximately 2 inches longer than the yellow tier above.
Row 14 (Scallop Edge): Ch 1. Sc in first st. *5 dc in next sc, sc in center dc of shell.* Repeat from * across. Fasten off.
Part 4: Neckline Edging
Join MC (yellow) at one back corner of the neckline.
Round 1: Ch 1. Sc evenly around entire neckline opening, working approximately 58 sc total. Join with sl st to first sc.
Round 2: Ch 1. *Sc in next 2 sts, sk 1 st, 3 dc in next st, sk 1 st.* Repeat from * around. Join with sl st. Fasten off.
This creates a delicate picot edge around the neckline.
Part 5: Armhole Edging (Optional)
If you would like finished edges around the armholes, join MC at the underarm of one sleeve opening.
Round 1: Ch 1. Sc evenly around armhole opening, approximately 32 sc. Join with sl st.
Round 2: Ch 1. Sc in each st around. Join with sl st. Fasten off.
Repeat for second armhole.
Part 6: Decorative Bow
Using AC (white):
Ch 30. Dc in 4th ch from hook and in each ch across. Fasten off. (27 dc)
Take this strip and fold both ends toward the center, overlapping slightly. Use a short length of white yarn to wrap tightly around the center several times, creating the bow shape. Secure with a knot and leave tails for sewing.
Bow Tails: Ch 15. Sl st in 2nd ch from hook and in each ch across. Fasten off. Make 2 tails.
Attach tails to the back of the bow center, then sew the completed bow to the center front bodice just below the neckline.
Finishing Your Crochet Baby Dress
Weave in all ends using your tapestry needle. I like to weave ends through several stitches in one direction, then reverse and weave back for extra security. Baby items get washed frequently, so secure your ends well.
Block your dress by soaking it in lukewarm water for about 15 minutes. Gently squeeze out excess water (do not wring), then lay flat on a blocking mat or clean towel. Shape the skirt tiers so they fan out nicely, and pin if needed. Allow to dry completely.
Back closure (optional): If you prefer a button closure at the back neckline, sew a small button to one back corner and use the natural space between stitches on the opposite corner as a buttonhole.
Helpful Tips for Success
Count your stitches at the end of each row, especially during the yoke shaping. Losing or gaining stitches early on will throw off your entire garment.
Use stitch markers generously. Mark the center front, the increase points, and the beginning of rounds. They save so much frustration.
The tiers should overlap. The yellow tier sits on top of the cream tier, creating depth and dimension. When you attach the cream tier into the back loops, this naturally positions it underneath.
Try on as you go if you have access to the baby (or a similar sized doll). Adjustments are much easier before you have finished the skirt.
Pattern Customization Ideas
Change the length: Add or remove shell pattern rows to make the skirt shorter for a newborn or longer for a toddler.
Switch up colors: This pattern would look stunning in pastel pink and white, lavender and cream, or even mint green and ivory. Consider seasonal colors like red and white for holiday photos.
Add ribbon: Thread a thin satin ribbon through the row just below the bodice for an extra decorative element.
Create a matching headband: Use the shell stitch pattern on a simple band to create a coordinating accessory.
Thank You for Making This With Me
I hope you love making this sunshine lemon tiered baby dress crochet pattern as much as I enjoyed designing it. There is something so satisfying about watching those tiered shells come together, and the finished dress makes such a thoughtful handmade gift.
If you make this dress, I would absolutely love to see it! Share your finished project on Instagram or Facebook and tag me so I can celebrate your work. Seeing these patterns come to life in your hands is truly the best part of what I do.
Happy crocheting, friend. You have got this.