Sunshine Daisy Bow Crochet Vest Free Crochet Pattern
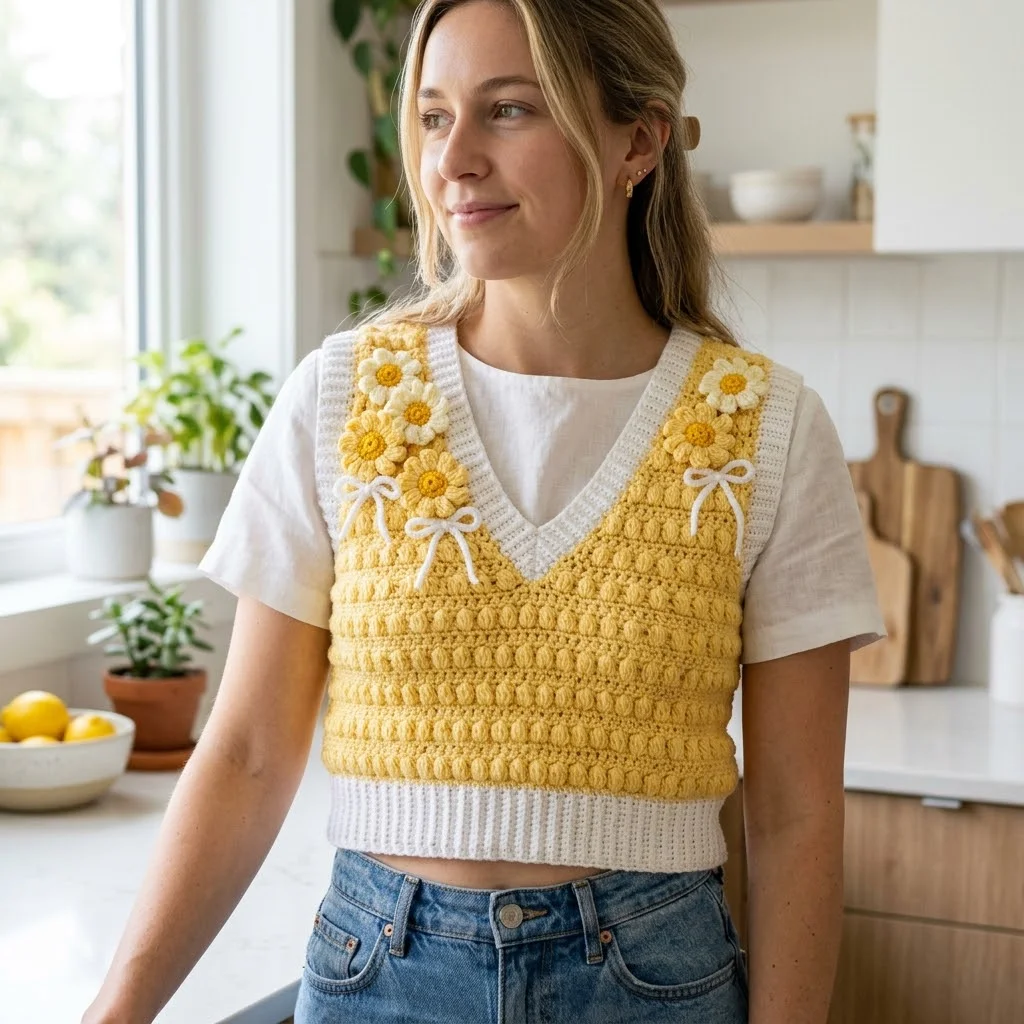
I’ve been looking for the perfect spring layering piece, and this cheerful daisy vest has become my absolute favourite project to date. After scrolling through endless vest patterns that felt too plain or too complicated, I finally created one that hits every mark. This is the kind of pattern I wish I had found years ago, and now I get to share it with you.
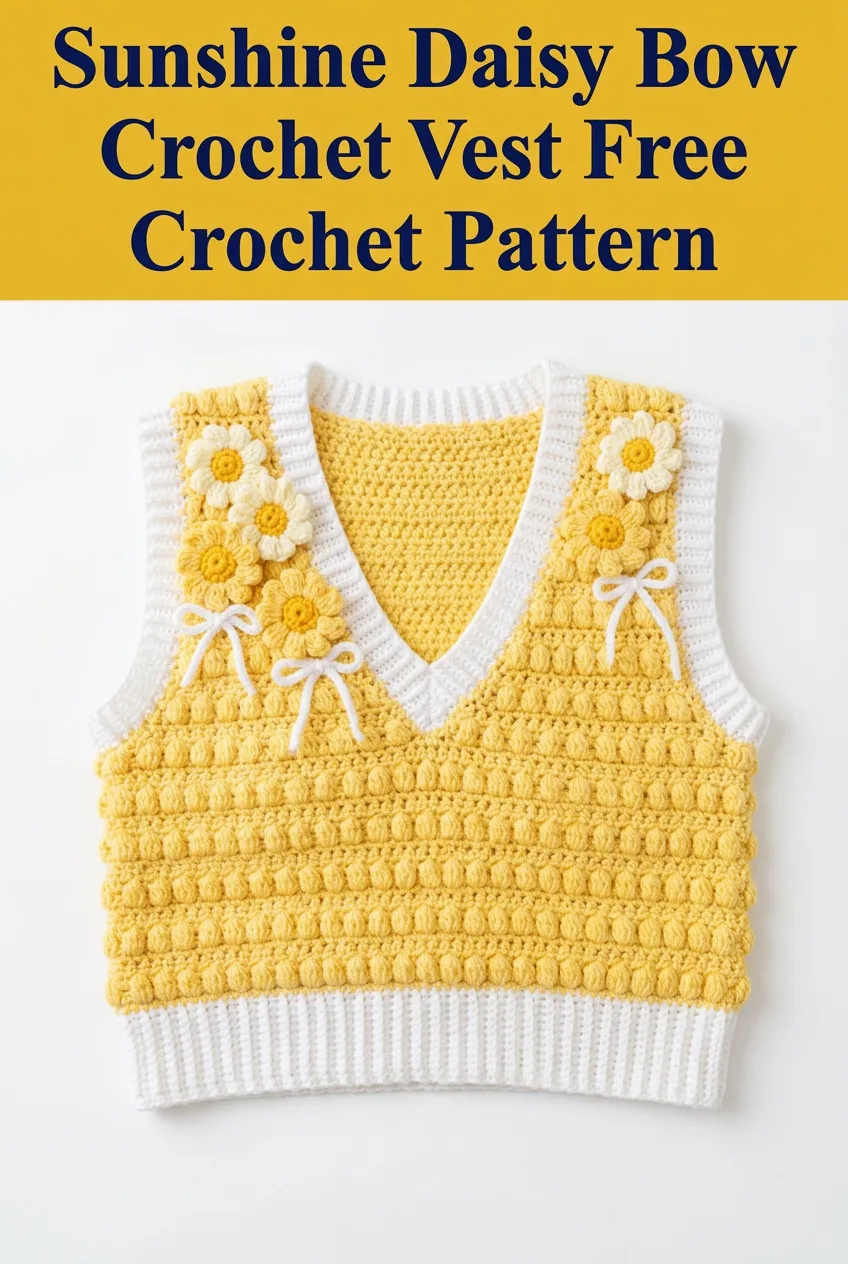
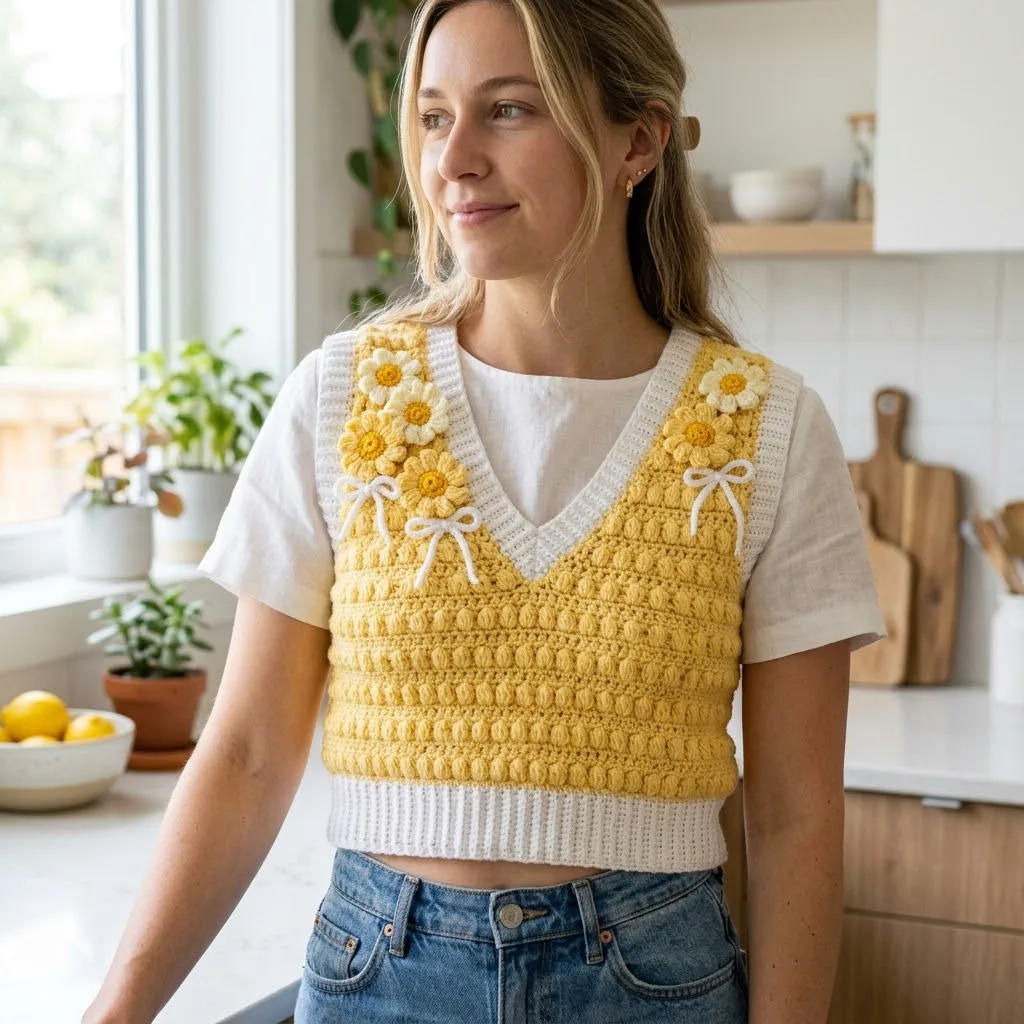
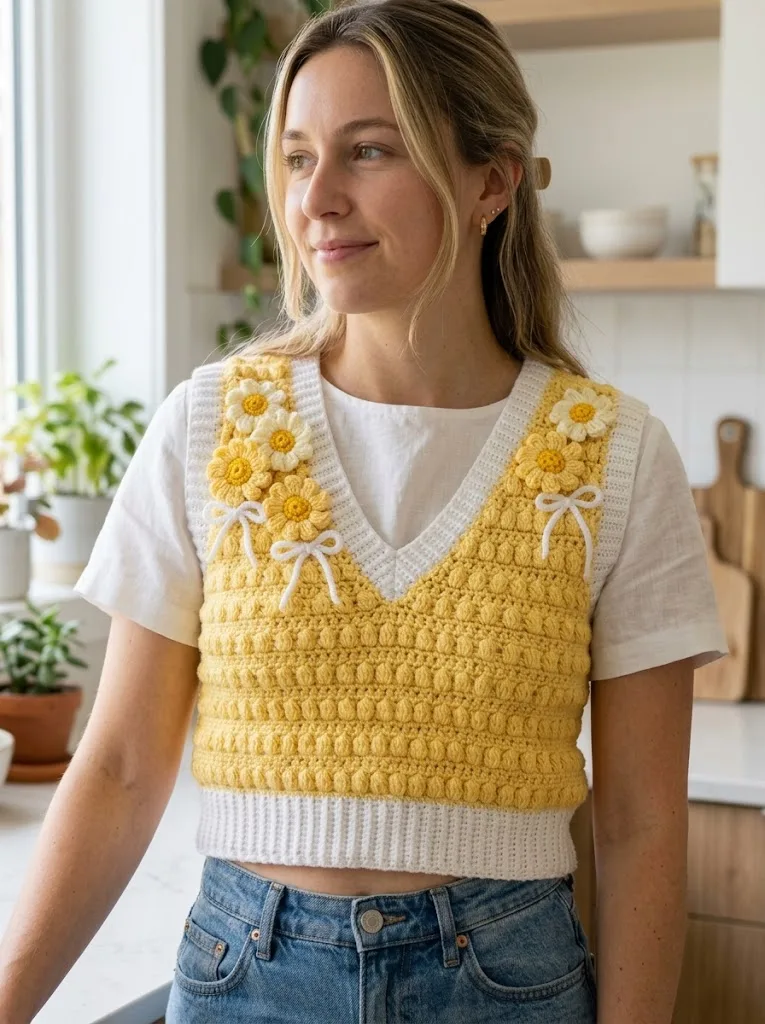
This crochet vest combines a textured bobble stitch body with sweet dimensional daisies and delicate bow accents along the V-neckline. The sunny yellow and cream colour palette practically begs to be worn over a simple white tee with your favourite jeans. Whether you’re looking for a statement piece for weekend brunch or a handmade gift that will genuinely impress, this pattern delivers.
Why You’ll Love This Crochet Vest Pattern
The Sunshine Daisy Bow Vest looks far more advanced than it actually is. Yes, there are bobbles. Yes, there are appliqué flowers. But I promise each element uses familiar stitches worked in slightly different ways. If you can single crochet and double crochet, you already have the foundation skills needed.
The construction is straightforward too. You’ll work the front and back panels separately in flat rows, then seam them at the shoulders and sides. The ribbed hem and neckline trim add polish without complicated shaping. The daisies and bows are made separately and sewn on at the end, so you can customize placement to your preference.
This crochet tutorial walks you through every step, from casting on your foundation chain to weaving in that final tail.
Skill Level
Intermediate. You should be comfortable with basic stitches and ready to try bobbles if you haven’t already. The daisy motifs require working in the round, but each flower is small and quick, perfect for building confidence.
Finished Measurements
This pattern is written for size Small with a finished bust measurement of approximately 34 inches (86 cm) and a length of 18 inches (46 cm) from shoulder to hem. The cropped fit sits at or just above the natural waist.
For larger or smaller sizes, adjust your starting chain in multiples of 4 stitches to maintain the bobble pattern repeat.
Materials Needed
Yarn:
A soft acrylic blend or cotton-acrylic works beautifully for this project. Look for yarn with good stitch definition so your bobbles really pop. I recommend something like Lion Brand Basic Stitch or Paintbox Yarns Simply Aran.
Hook:
Notions:
Gauge
16 stitches and 12 rows = 4 inches (10 cm) in bobble pattern with 5.0 mm hook.
Please, please check your gauge. I know it’s tempting to skip this step, but garments that don’t fit are heartbreaking after all that work. Make a small swatch, measure it, and adjust your hook size if needed. Too big? Go down a hook size. Too small? Go up.
Abbreviations and Stitch Definitions
Let me break down every stitch you’ll encounter:
Step by Step Crochet Pattern Instructions
Back Panel
The back panel is worked flat from the bottom hem up.
Ribbed Hem:
With CC (cream) and 4.0 mm hook:
Row 1: Ch 11, sc in 2nd ch from hook and in each ch across. (10 sts)
Rows 2-68: Ch 1, turn, sc in BLO of each st across. (10 sts)
This creates a stretchy ribbed band approximately 17 inches wide. Don’t fasten off.
Rotate your work 90 degrees to crochet along the long edge of the ribbing. You’ll pick up stitches along the row ends.
Transition Row: Switch to MC (yellow) and 5.0 mm hook. Ch 1, work 68 sc evenly across the long edge of the ribbing. (68 sts)
Body:
Row 1 (WS): Ch 1, turn, sc in each st across. (68 sts)
Row 2 (RS): Ch 1, turn, sc in first st, *sk 1, bob in next st, sc in next 2 sts* repeat from * to last 3 sts, sk 1, bob in next st, sc in last st. (68 sts including bobbles)
Row 3 (WS): Ch 1, turn, sc in each st across, working 1 sc into the top of each bobble. (68 sts)
Row 4 (RS): Ch 1, turn, sc in first 3 sts, *sk 1, bob in next st, sc in next 2 sts* repeat from * to last st, sc in last st. (68 sts)
Row 5 (WS): Ch 1, turn, sc in each st across. (68 sts)
Rows 6-33: Repeat Rows 2-5 seven more times. Your bobbles will create a lovely offset brick pattern.
Armhole Shaping:
Row 34: Sl st in first 6 sts, ch 1, sc in same st, continue in bobble pattern across to last 6 sts, leave remaining sts unworked. (56 sts)
Rows 35-44: Continue in established bobble pattern, maintaining sc rows between bobble rows. (56 sts)
Shoulder Shaping:
Row 45: Ch 1, turn, sc in first 18 sts. Leave remaining sts unworked for first shoulder. Fasten off. (18 sts)
Skip centre 20 sts for back neck. Rejoin yarn to work second shoulder.
Row 45 (second shoulder): Join MC in st after centre gap, ch 1, sc in same st and in remaining 17 sts. Fasten off. (18 sts)
Front Panel
Work the ribbed hem exactly as for the back panel.
Transition Row: With MC and 5.0 mm hook, work 68 sc evenly across the long edge of ribbing. (68 sts)
Body Rows 1-25: Work in bobble pattern exactly as for back panel.
V-Neck Shaping:
You’ll now work each side of the V-neck separately.
Left Front:
Row 26: Ch 1, turn, work in pattern across first 32 sts, sc2tog over next 2 sts. Leave remaining sts unworked. (33 sts)
Row 27: Ch 1, turn, sc2tog over first 2 sts, sc across in pattern. (32 sts)
Rows 28-33: Continue in pattern, decreasing 1 st at neck edge every row. (26 sts after Row 33)
Row 34 (Armhole): Sl st in first 6 sts, ch 1, continue in pattern to neck edge, decrease 1 st. (19 sts)
Rows 35-44: Continue in pattern, decreasing 1 st at neck edge every other row. (18 sts)
Row 45: Work even. Fasten off. (18 sts)
Right Front:
Join MC to centre of Row 26.
Row 26: Ch 1, sc2tog, work in pattern across remaining 32 sts. (33 sts)
Work as for left front, reversing all shaping.
V-Neck Trim
With CC and 4.0 mm hook, join yarn at bottom of V-neck.
Round 1: Ch 1, sc evenly up right side of V-neck, across back neck, and down left side of V-neck. Work 3 sc in the point of the V. Join with sl st.
Round 2: Ch 1, sc in each st around, working sc3tog at the point of the V to keep it sharp. Join, fasten off.
Daisy Motifs (Make 6)
These cheerful flowers are worked from the centre out.
Centre:
With yellow and 4.0 mm hook, make a magic ring.
Round 1: Ch 1, work 6 sc into ring. Pull ring closed. Join with sl st to first sc. (6 sts)
Round 2: Ch 1, 2 sc in each st around. Join. (12 sts)
Fasten off yellow. Join cream for petals.
Petals:
Round 3: *Ch 4, sl st in 2nd ch from hook, hdc in next ch, dc in next ch, sk 1 st on centre, sl st in next st* repeat 6 times total. (6 petals)
Fasten off, leaving a long tail for sewing.
Bow Accents (Make 2)
With CC and 4.0 mm hook:
Ch 20. Sl st in first ch to form a loop. Ch 20, sl st in same starting ch to form second loop.
Centre wrap: Ch 6, wrap around centre of bow, sl st to secure. Fasten off.
These sweet little bows add such a feminine touch. Don’t stress about making them perfect. Handmade charm is the goal.
Assembly
1. Block all pieces by wet blocking or steam blocking to measurements.
2. Seam shoulders: With yarn needle and CC, whip stitch or mattress stitch shoulder seams together, matching the 18 sts on each side.
3. Seam sides: Starting at the bottom of the armhole, seam down each side to the hem.
4. Attach daisies: Arrange 3 daisies along each side of the V-neckline, spacing them evenly. Sew in place through the centre of each flower.
5. Attach bows: Position one bow on each side of the V-neck, just below the lowest daisy. Sew securely.
6. Weave in all ends. Take your time with this step. Nobody wants tails poking out of their beautiful new vest.
Helpful Tips for Success
Bobble direction matters. Bobbles naturally push to the opposite side of where you’re working. Work them on wrong side rows so they pop out on the right side.
Count your stitches. Bobbles can be tricky to count at first. Remember that each bobble counts as one stitch. After every few rows, count to make sure you still have the correct total.
Don’t pull too tight on the ribbing. The BLO single crochet creates stretch, but only if you maintain a relaxed tension.
Try on as you go. Before starting the armhole shaping, hold the piece up to your body. Does it look like it will fit? Adjust now if needed.
Customization Ideas
This beginner friendly crochet pattern adapts beautifully:
Care Instructions
Hand wash in cool water with mild detergent. Lay flat to dry, reshaping gently. Store folded to prevent stretching at the shoulders.
I hope you absolutely love making this Sunshine Daisy Bow Crochet Vest as much as I loved designing it. The combination of cheerful bobbles, sweet daisies, and those darling little bows creates something truly special. This is the kind of project that makes people ask, “Wait, you MADE that?”
If this pattern made you smile, I’d love for you to save it to your Pinterest boards so you can find it whenever you’re ready to start. And please, please leave a comment below if you make one. Seeing your finished projects genuinely makes my whole week brighter.
You Might Also Like
- Cozy Gray Hexagon Sofa Throw Free Crochet Pattern
- Sunset Ombre Seashell Clutch Free Crochet Pattern
- Sunshine Lemon Tiered Baby Dress Free Crochet Pattern
- Tropical Octopus Baby Blanket Free Crochet Pattern