19 Mini Crochet Christmas Gifts to Make with Love

Looking for small christmas crochet gifts that feel thoughtful without taking up much space? These 19 patterns include tree decorations, useful everyday items and little ways to present a gift card or note.
Choose a project around the person receiving it: a cotton coaster for a tea drinker, a leaf bookmark for a reader, or a stocking ornament that can hold a folded message.
For more ideas that build on this collection, explore crochet Christmas gift tags.
Before You Start
Crochet stitch terms in this article use US terminology. Check the patternâs stated difficulty before choosing a project: the list runs from beginner to intermediate, and the stuffed shapes need more assembly than a flat bookmark or star.
Match the yarn to the job. Cotton is a sensible choice for coasters, face scrubbies and the mesh soap saver because those items may need washing. For a softly stuffed ornament, choose a yarn that gives a fabric firm enough to hold its filling.
Some small gifts still need careful sizing. Measure a straight-sided mug before making the buttoned cosy, and check that it will sit clear of the handle. For the mitts and lip balm holder, work from the intended recipientâs measurements or the actual tube. Weave in ends securely, and check that the scrunchie elastic still stretches freely.
Crochet terminology: This article uses US crochet terms. Check the abbreviations for each project.
Mini Stocking Ornament

A mini stocking makes a thoughtful little keepsake for the Christmas tree. Its familiar shape also looks lovely hanging from a wrapped present, where it can become part of the gift rather than just the packaging.
This version has a flat, softly shaped silhouette with a contrasting cuff. The top stays open, so you can tuck in a small folded note for the recipient without losing the look of a classic Christmas stocking.
Mini Stocking Ornament

Quick-reference card. Follow the complete written instructions below.
Materials
- Smooth DK yarn: Small amounts of red for the stocking and cream for the cuff; a little matching yarn for the hanging loop.
- Crochet hook: Use a size that gives a firm fabric; 4 mm is a starting point.
- Yarn needle and scissors: For attaching the cuff and loop and weaving in ends.
Size and Fit
Target size: approximately 8 cm wide across the foot and 8 cm tall to the top of the cuff, excluding the loop. The opening is approximately 5 cm wide when laid flat. Size will vary with yarn, hook and tension.
Gauge
Aim for approximately 20 single crochet stitches and 22 rows per 10 cm in flat fabric. Exact gauge is not essential for an ornament, but use firm stitches so the stocking holds its shape.
Abbreviations
US crochet terms.
- ch = chain
- sc = single crochet
- sc2tog = single crochet two stitches together
- sl st = slip stitch
- st(s) = stitch(es)
Pattern
- Stocking panels: make two With red yarn, ch 11. Row 1: Sc in the second ch from the hook and in each remaining ch; turn. (10 sc) Rows 2â8: Ch 1, sc in each st; turn. (10 sc per row)
- Extend the foot Row 9: Ch 1, sc in each of the 10 sts, then ch 7; turn. The 7-chain extension forms the top edge of the foot. Row 10: Sc in the second ch from the hook and in each of the next 5 chains, then sc in each of the 10 sts of Row 9; turn. (16 sc)
- Shape the foot Rows 11â13: Ch 1, sc in each st; turn. (16 sc per row) Row 14: Ch 1, sc2tog, sc in the next 12 sts, sc2tog; turn. (14 sc) Row 15: Ch 1, sc2tog, sc in the next 10 sts, sc2tog; turn. (12 sc) Row 16: Ch 1, sc in each st. (12 sc) Fasten off and weave in the ends. Make the second panel in the same way.
- Join the panels Place the panels together with their outlines aligned. Keep both Row 1 edges unjoined: these are the stocking opening. Join red yarn at one top corner and sc through both layers evenly around the side of the leg, bottom of the stocking, end and top of the foot, and remaining side of the leg. Work extra sc at an outer corner if needed to keep the edging flat. Stop at the other top corner without working across the opening. Fasten off and weave in the ends.
- Crochet the cuff With cream yarn, ch 21. Row 1: Sc in the second ch from the hook and in each remaining ch; turn. (20 sc) Rows 2â4: Ch 1, sc in each st; turn. (20 sc per row) Fasten off, leaving a long sewing tail. Bring the two short ends together, without overlapping them, and sew them edge to edge to make a ring.
- Attach the cuff Slip the cuff ring over the stocking opening, with its seam at one side. Position it so that roughly two cuff rows sit above the panels and two cuff rows overlap them. Sew the cuffâs lower edge to the front panel, then to the back panel, taking care to catch only the panel you are sewing to. Do not sew across the top or stitch the front and back panels together: the opening must remain clear for a note.
- Make and attach the hanging loop With cream yarn, ch 17. Sl st in the second ch from the hook and in each remaining ch. (16 sl sts) Fasten off, leaving tails at both ends. Bring the ends together to form a loop. Sew both ends firmly to the upper back of the stocking near one side, stitching through the cuff and back panel only. Make several small securing stitches, then weave in the tails without closing the opening.
Finishing
- Weave in any remaining ends.
- Gently shape the foot and straighten the cuff.
- If adding a note, fold it small enough to slip through the open top without stretching the cuff.
Helpful Tips
- Make both panels with the same hook and tension so their edges align.
- Mark the first and last stitch of Row 10 if the chain extension makes the new row hard to follow.
- When edging the joined panels, space stitches evenly along row ends rather than forcing a fixed stitch count.
Five-Point Star Ornament

This flat five-point star makes a cheerful tree decoration and a reusable topper for a Christmas parcel. Its simple outline looks lovely in gold, whether it hangs on its own or accompanies a gift tag.
A firm fabric matters here: close stitches give the narrow points enough structure to keep a crisp outline rather than curling or drooping. The star is a manageable small project for a confident beginner who is comfortable working in the round and turning rows.
Five-Point Star Ornament

Quick-reference card. Follow the complete written instructions below.
Materials
- Cotton DK yarn: A small amount in gold
- Crochet hook: 3 mm, or a size that gives a firm fabric
- Stitch marker: For marking the first stitch of the centre’s second round
- Yarn needle and scissors: For finishing
Size and Fit
One size. The centre has 20 edge stitches, with five points worked across four stitches each. Finished dimensions depend on yarn and tension.
Gauge
An exact gauge is not essential. Use a hook that makes close stitches without obvious gaps; the centre should lie reasonably flat.
Abbreviations
US crochet terms.
- ch = chain
- sc = single crochet
- sc2tog = single crochet two stitches together: insert hook in each of the next two stitches in turn and pull up a loop, then yarn over and pull through all three loops
- sl st = slip stitch
- st = stitch
Pattern
- Centre, round 1 Make a magic ring. Work 10 sc into the ring, pull it closed, then sl st to the first sc to join. (10 sc)
- Centre, round 2 Ch 1, then work 2 sc in each sc around. Mark the first sc of this round. Sl st to that first sc to join, then fasten off. Do not count the ch 1 or joining sl st as stitches. (20 sc)
- Point 1, row 1 Join yarn with a sl st in the marked sc. Ch 1 and sc in that same sc and in each of the next three sc around the centre. (4 sc)
- Point 1, row 2 Ch 1, turn. Sc2tog over the first two stitches, then sc in each of the remaining two stitches. (3 sc)
- Point 1, row 3 Ch 1, turn. Sc in the first stitch, then sc2tog over the last two stitches. (2 sc)
- Point 1, row 4 and hanging loop Ch 1, turn, and sc2tog. (1 sc) Ch 18 and sl st into the tip stitch just made to form a loop. Fasten off.
- Points 2â5 For each point, join yarn with a sl st in the next unused sc of centre round 2. Repeat point rows 1â4, but fasten off after row 4 without making another hanging loop. Each point begins in four different centre stitches; the five points use all 20.
Finishing
- Weave in all ends securely on the reverse, taking care not to pull the points out of shape.
- Smooth the points into shape by hand. The close, firm stitches help them hold their outline without relying on blocking to reach a particular measurement.
Helpful Tips
- Move the marker if needed so you can identify the first group of four centre stitches. The next points begin at centre stitches 5, 9, 13 and 17.
- Turning ch 1 stitches and slip-stitch joins never count towards the stitch totals.
Buttoned Mug Cosy

A buttoned mug cosy makes a thoughtful small Christmas gift for someone who always has a warm drink close by. Its ribbed texture adds a little colour to a plain mug, while the buttoned opening makes it easy to use with a favourite cup.
Choose the mug before you begin: this design suits a straight-sided mug with an uninterrupted area below the handle. Checking the fit against that mug as you work helps the cosy sit comfortably without covering the handle or its attachments.
The cosy is a decorative cover rather than protection from a hot mug. Pairing it with the intended mug makes the gift feel personal and takes the guesswork out of fit for the recipient.
Buttoned Mug Cosy

Quick-reference card. Follow the complete written instructions below.
Materials
- Wool-blend DK yarn: A small amount of green yarn
- Crochet hook: 4 mm, or a size that gives a flexible fabric
- Button: One button that fits securely through the chain loop
- Other supplies: Yarn needle, sewing thread or spare yarn suitable for attaching the button, and scissors
Size and Fit
Make one cosy for the intended mug. The eight-stitch sample band begins with ch 9; check its height after a few rows. It must fit entirely on a straight section below the handle attachments and above the base. For a different clear-strip height, change the starting chain and work one fewer sc than the number of chains on every row. Add or remove rows until the rectangle wraps around the mug with its short ends nearly meeting under gentle stretch, without riding onto the handle. Choose a different mug if there is no suitable clear strip.
Gauge
Exact gauge is not required. Check the band directly against the mug as you work; it should stretch gently around the circumference without becoming loose.
Abbreviations
US crochet terms.
- ch = chain
- sc = single crochet
- BLO = back loop only
- sl st = slip stitch
- st(s) = stitch(es)
Pattern
- Foundation Ch 9 for the sample band. Its stitches will run vertically on the mug; its rows will build the length around the mug.
- Row 1 Sc in the second ch from the hook and in each remaining ch. You have 8 sc.
- Row 2 Ch 1, turn. Sc BLO in each of the 8 sts.
- Remaining rows Repeat Row 2, keeping 8 sts in every row. After a few rows, check that the band’s height fits the clear strip below the mug handle. Wrap the work around that strip from time to time. Stop when the short ends nearly meet under gentle stretch. Fasten off and weave in the ends.
- Button Sew the button securely at the centre of the foundation-chain edge, halfway up the band. Position it on the outside of the cosy.
- Adjustable fastening loop Join yarn at the centre of the final-row edge, halfway up the band. Chain a few stitches, then hold the band on the mug and try the chain around the button. Add or undo chains until the loop reaches the button under gentle stretch without pulling the band out of place. Sl st back into the same centre point to close the loop. Fasten off and weave in the ends.
Finishing
- Button the cosy around the mug on the clear strip below the handle. Check that it sits flat, stays above the base and leaves the handle and its attachments unobstructed.
- Remove the cosy before washing or microwaving the mug. The cosy is decorative, not protection from a hot mug.
Helpful Tips
- If the band slips down, remove a row or two so it needs a little stretch to fasten. If it pulls tightly, add rows.
- Try the fastening before securing the loop: its length depends on the mug, the button and the final fit.
Granny Square Coaster
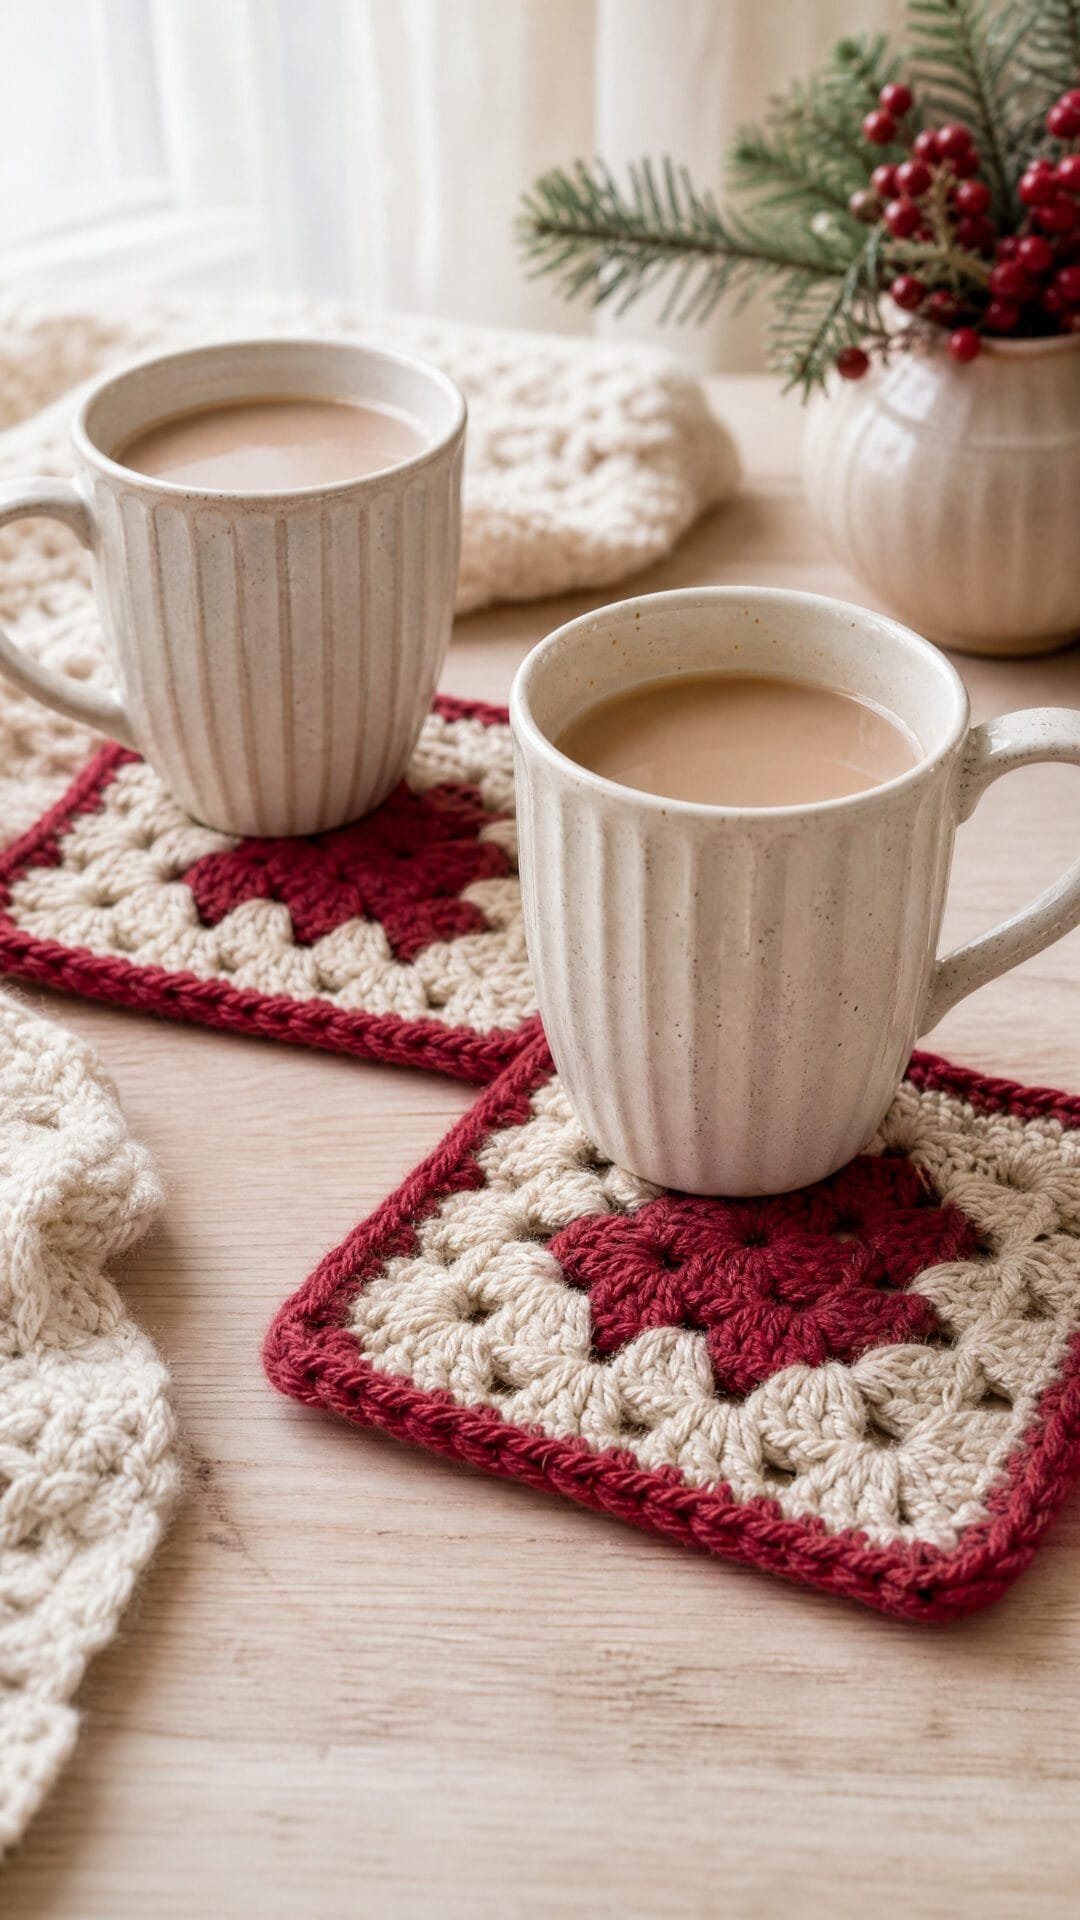
A set of granny-square coasters is a practical small Christmas gift, especially in cranberry and cream. The familiar square motif looks festive beneath a mug without relying on a novelty shape that might spend the rest of the year in a drawer.
Cotton is a good choice for coasters because it absorbs the occasional drip. These are best suited to everyday mugs rather than very hot cookware, and used coasters should be allowed to dry before they are stacked.
For a coaster that sits neatly on a table, aim for a relaxed square with a firm edge that does not pull the corners in. If the fabric cups or ripples, adjust your tension before making the rest of the set so the coasters sit alike.
Granny Square Coaster

Quick-reference card. Follow the complete written instructions below.
Materials
- Cotton DK yarn: Small amounts of cranberry and cream for each coaster. Use cotton rather than acrylic for a more absorbent coaster.
- Crochet hook: 4 mm (G/6), plus an optional 3.5 mm (E/4) hook for the edging.
- Notions: Yarn needle, scissors and rustproof pins for blocking.
Size and Fit
One four-round square with an edging, intended to finish at approximately 9â11 cm (3½â4¼ in) across, depending on yarn, tension and blocking. Make four alike for a small set.
Gauge
Exact gauge is not essential. Keep the granny rounds relaxed enough to lie flat; check the width before making the rest of a set.
Abbreviations
US crochet terms.
- ch = chain
- dc = double crochet
- sc = single crochet
- sl st = slip stitch
- sp = space
- st = stitch
Pattern
- Set-up With cranberry yarn and the 4 mm hook, ch 4 and join with a sl st in the first ch to form a ring. Work with the right side facing throughout. A beginning ch 3 counts as one dc.
- Round 1 Ch 3, work 2 dc into the ring, ch 2. (Work 3 dc into the ring, ch 2) three times. Join with a sl st in the top of the beginning ch 3. You have four 3-dc groups and four ch-2 corner spaces.
- Round 2 Sl st in each of the next 2 dc and into the next ch-2 corner sp. Ch 3, work 2 dc, ch 2, 3 dc in that corner sp. *Ch 1; work 3 dc, ch 2, 3 dc in the next corner sp. Repeat from * twice more. Ch 1 and join in the top of the beginning ch 3. There are four corner spaces and one ch-1 space along each side. Fasten off cranberry.
- Round 3 Join cream yarn with a sl st in any ch-2 corner sp. Ch 3, work 2 dc, ch 2, 3 dc in that corner sp. *Ch 1, work 3 dc in the next side ch-1 sp, ch 1; work 3 dc, ch 2, 3 dc in the next corner sp. Repeat from * twice more. Ch 1, work 3 dc in the remaining side ch-1 sp, ch 1; join in the top of the beginning ch 3. There are two ch-1 spaces along each side.
- Round 4 Sl st in each of the next 2 dc and into the next ch-2 corner sp. Ch 3, work 2 dc, ch 2, 3 dc in that corner sp. *Ch 1, work 3 dc in each of the next two side ch-1 spaces, placing ch 1 after each group; work 3 dc, ch 2, 3 dc in the next corner sp. Repeat from * twice more. Ch 1, work 3 dc in each of the remaining two side ch-1 spaces, placing ch 1 after each group; join in the top of the beginning ch 3. There are three ch-1 spaces along each side.
- Round 5: firm edging Use the 3.5 mm hook if it gives a flat, firm edge; otherwise keep the 4 mm hook. Sl st in each of the next 2 dc and into the next ch-2 corner sp. Ch 1 (does not count as a st), work 3 sc in that corner sp. *Work 1 sc in each dc and 1 sc in each ch-1 sp along the next side; work 3 sc in the next corner sp. Repeat from * twice more. Work 1 sc in each dc and 1 sc in each ch-1 sp along the last side. Join with a sl st in the first sc and fasten off. There are 72 sc: 15 along each side and 3 in each corner.
Finishing
- Weave every yarn end securely through the back of several stitches, changing direction before trimming. Keep ends clear of the coasterâs surface.
- Dampen the cotton square, gently shape it to an even square and pin it flat without stretching the corners. Leave it to dry completely.
- Make three more squares with the same yarn and hook for a matching set of four.
Helpful Tips
- If the edging pulls the corners in, switch back to the 4 mm hook or work more loosely. If the square ripples, check that each side space received only one 3-dc group.
- A ch-2 space marks each corner. The smaller ch-1 spaces sit along the sides.
- Cotton can still feel damp after catching a drip; allow used coasters to dry before stacking them.
Pocket Tissue Cover

A striped pocket tissue cover makes an everyday packet feel a little more gift-worthy. Its soft fabric is comfortable to carry in a handbag or coat pocket, while the overlapping opening lets you pull out a tissue without removing the cover.
Pocket tissue packets are not all alike, so keep the one you plan to cover nearby as you make this project. The design wraps around the packet with an opening at the front for dispensing and another at the back for inserting a fresh packet. There is no button or other stiff fastening to catch on the contents of a bag.
Pocket Tissue Cover

Quick-reference card. Follow the complete written instructions below.
Materials
- Yarn: Small amounts of washable acrylic-cotton DK yarn in two colours, A and B.
- Hook: 4 mm crochet hook, or a size that gives a comfortable fabric at your measured gauge.
- Notions: Tape measure, stitch markers or pins, yarn needle and scissors.
- Pocket tissue packet: Use the actual packet to measure and check the fit.
Size and Fit
Measure the packetâs front width W, length L and thickness D. Make two identical rectangles. Each should measure approximately W + D + 1.6 cm across its stitches and L + 0.7 cm along its rows. This gives each rectangle enough width to travel from the back centre, around one long side, to the front centre, with an overlap of roughly 0.8 cm at each free edge. For example, a packet measuring W 7.5 cm à L 11 cm à D 2 cm calls for rectangles about 11.1 à 11.7 cm. Check the fit on the packet before seaming; packet sizes and crochet fabric vary.
Gauge
Planning gauge: 16 hdc stitches and 12 rows = 10 cm in the fabric pattern. Measure your own fabric to choose the counts. At this gauge, 18 stitches à 14 rows gives a rectangle approximately 11.25 à 11.7 cm. For another packet, multiply the required rectangle width in centimetres by your stitches per centimetre and round to a whole stitch; do the same with the required length and your rows per centimetre. Make both rectangles the same size.
Abbreviations
US crochet terms.
- ch = chain
- hdc = half double crochet
- st(s) = stitch(es)
Pattern
- Make rectangle 1 With colour A, ch 20. Row 1: hdc in the third ch from the hook and in each remaining ch; 18 hdc. Row 2: ch 2, turn; hdc in each st; 18 hdc. The turning ch does not count as a stitch.
- Add stripes Work Rows 3â14 as Row 2, changing colour every two rows: B for Rows 3â4, A for 5â6, B for 7â8, A for 9â10, B for 11â12 and A for 13â14. Fasten off, leaving a tail to weave in. The rectangle has 18 stitches across and 14 rows along its length.
- Make rectangle 2 Repeat Rows 1â14 for a second identical rectangle. If you adjusted the stitch or row count for your packet, use that same count for both rectangles and keep each colour band two rows deep.
- Check the wrap Place one rectangle around each long side of the packet. The foundation and final-row edges sit at the packetâs two short ends; the long, unsewn edges of the rectangles meet and overlap at the centre of both the front and back. Centre the front overlap over the packetâs tissue opening. The packetâs short ends should be covered, and the fabric should wrap without stretching hard. Adjust both rectangles alike before seaming if needed.
- Seam the packet ends Mark the folds and overlaps, then remove the packet. At one short end, sew the front end edges to the corresponding back end edges, working from one long-side fold across to the other. Catch all the layers where the rectangles overlap at the centre. Keep the seam close to the edge, about 2 mm in, and do not sew along either central overlap. Repeat at the other short end. The two central overlaps remain open: one for dispensing at the front and one for inserting the packet at the back.
Finishing
- Weave in all ends without closing the central overlaps.
- Insert the tissue packet through the back overlap, then align its tissue opening beneath the front overlap. Draw a tissue gently through the front opening.
- Remove the packet before laundering the cover, and follow the yarnâs care instructions.
Helpful Tips
- For a different-sized packet, measure the packet rather than relying on the dimensions printed on its wrapper.
- If the front overlap is difficult to open, reduce the width of both rectangles slightly; if the packet shows through beside the opening, increase it slightly.
- Keep the end seams shallow so the cover retains enough length for the packet.
Mesh Soap Saver

A mesh soap saver is a practical little bathroom gift: it keeps a bar together as it gets smaller while giving water a way to drain away. Pair it with a favourite soap for a present that feels considered without needing much wrapping.
The closed oval base supports the bar, while the open sides allow air to circulate between uses. A firmer top edge helps the bag hold its shape when the drawcord is pulled closed. Check the fit against the soap you plan to give, as bars vary in shape.
Choose a washable yarn for a bag that will regularly get wet. The cord needs to tolerate rinsing too, and its ends should be firmly secured so they stay in place when the bag is opened or hung up. Leave the soap saver somewhere it can drain and dry between uses.
Mesh Soap Saver

Quick-reference card. Follow the complete written instructions below.
Materials
- Cotton DK yarn: Approximately 30 g, including the drawcord. Choose a washable yarn.
- Crochet hook: 4 mm, or a size that gives a firm base and flexible mesh.
- Notions: Stitch marker, yarn needle and scissors.
- Soap: One bar approximately 8 Ã 5 Ã 2.5 cm for the sample size.
Size and Fit
One sample size for the soap bar listed above. The 38-stitch opening has an approximate 19 cm circumference at the stated gauge. Before finishing the top, put the soap in the bag: work additional mesh rounds if needed until the mesh reaches about 1 cm above the bar. Remove the soap before threading the cord.
Gauge
Approximately 20 sc to 10 cm in the round. Exact row gauge is not essential; check the fit against your soap.
Abbreviations
US crochet terms.
- ch = chain
- sc = single crochet
- sl st = slip stitch
- sp = space
- inc = work 2 sc in the indicated stitch
Pattern
- Base, round 1 Ch 16. Sc in the second ch from the hook and in each of the next 13 ch, 3 sc in the last ch. Working along the other side of the foundation chain, sc in the next 13 ch and 2 sc in the first ch used. Join with a sl st to the first sc. Do not turn. (32 sc)
- Base, round 2 Inc in the first sc, sc in the next 13 sc, inc in each of the next 3 sc, sc in the next 13 sc, and inc in each of the last 2 sc. Join to the first sc. Do not turn. (38 sc)
- Mesh, round 1 Repeat [sc in the next sc, ch 1, skip the next sc] 19 times. Join to the first sc. (19 sc and 19 ch-1 spaces)
- Mesh, rounds 2â10 Sl st into the next ch-1 sp. Repeat [sc in the next ch-1 sp, ch 1, skip the next sc] 19 times. Join to the first sc. Do not turn. (19 sc and 19 ch-1 spaces per round) Check the fit after round 10 and repeat this round if the mesh does not yet reach about 1 cm above the inserted soap.
- Dense top edge, round 1 Sc in each sc and each ch-1 sp of the final mesh round. Join to the first sc. (38 sc)
- Drawcord openings, round 2 Repeat [sc in the next sc, ch 1, skip the next sc] 19 times. Join to the first sc. (19 sc and 19 ch-1 spaces)
- Dense top edge, round 3 Sc in each sc and each ch-1 sp. Join to the first sc and fasten off. (38 sc)
- Drawcord Leaving a 12 cm yarn tail, ch 101. Sl st in the second ch from the hook and in each remaining ch. Fasten off, leaving another 12 cm tail. The finished cord should be at least 35 cm long; if it is shorter, make a new one with more chains.
Finishing
- Weave in the bag ends securely. Thread the drawcord in and out through all 19 openings in top-edge round 2, bringing both ends out near one another.
- Tie a firm overhand stopper knot in each cord end, larger than an opening. Sew each yarn tail back through its cord end beyond the knot, then trim. Tug gently to check that the knots cannot pull through.
- Rinse the bag and cord as needed, and hang them where water can drain. The open mesh, washable cotton and firmly finished cord help the soap saver withstand regular rinsing.
Helpful Tips
- A marker in the first stitch of each round makes the oval increases and joins easier to track.
- Count each ch-1 space as one position when checking the mesh and top edge.
- If your soap is a different shape, check that it slips through the opening and sits below the planned top edge before fastening off.
Textured Face Scrubbies

A little stack of reusable face scrubbies makes a thoughtful Christmas gift for someone who enjoys a simple skincare routine. The raised texture gives the rounds a gentle, tactile feel, while their compact shape makes them easy to tuck into a gift bag.
For facial use, soft cotton is a more comfortable choice than scratchy novelty yarn. Give the scrubbies only when they have been thoroughly rinsed and are completely dry, so the set is ready to use or store.
Tie several together with a narrow yarn band for a neat presentation. A matching set feels considered without needing elaborate packaging.
Textured Face Scrubbies

Quick-reference card. Follow the complete written instructions below.
Materials
- Yarn: Soft DK cotton for the scrubbies and a narrow yarn band. Avoid scratchy novelty yarn for facial use.
- Hook: 4 mm crochet hook, or a size that makes a firm but supple fabric.
- Notions: Yarn needle and scissors.
Size and Fit
Make three six-round scrubbies for one set. Finished diameter depends on your cotton, hook and tension; no fixed diameter is required. Each round uses the same stitch counts, so the set is easy to repeat.
Gauge
A measured gauge is not required. Check that each disc lies reasonably flat without feeling stiff. Change hook size or tension if needed.
Abbreviations
US crochet terms.
- ch = chain
- sc = single crochet
- sl st = slip stitch
- st(s) = stitch(es)
- inc = work 2 sc in the next stitch
- puff = Yarn over, insert hook in the indicated stitch and pull up a loop; repeat twice more in the same stitch. Yarn over and pull through all 7 loops on the hook, then ch 1 to secure. The securing chain does not count as a stitch.
Pattern
- Before you begin Work in joined rounds. After each round, join with a sl st in the first sc, then ch 1 to begin the next round. Joining slip stitches and beginning chains do not count as stitches. Work into the tops of the stitches from the previous round, not into the puff securing chains.
- Round 1 Make a magic ring. Work 6 sc into the ring and pull it closed. Join. (6 sts)
- Round 2 Ch 1, inc in each stitch around. Join. (12 sts)
- Round 3 Ch 1, repeat [sc in the next st, inc in the next st] 6 times. Join. (18 sts)
- Round 4 Ch 1, repeat [sc in the next st, puff in the next st, inc in the next st] 6 times. Join. (24 sts)
- Round 5 Ch 1, repeat [sc in each of the next 3 sts, inc in the next st] 6 times. Join. (30 sts)
- Round 6 Ch 1, repeat [sc in each of the next 3 sts, puff in the next st, inc in the next st] 6 times. Join and fasten off. (36 sts)
- Repeat and bundle Make two more scrubbies the same way. For a narrow yarn band, chain until the length will go around the stack with enough left to tie a bow; fasten off. Wrap the chain around the three scrubbies and tie it.
Finishing
- Weave in every scrubbie end securely, keeping the fabric smooth against the skin.
- Rinse the finished scrubbies thoroughly and let them dry completely before bundling them for a gift.
Helpful Tips
- Use soft cotton rather than scratchy novelty yarn for facial use.
- Rinse each scrubbie thoroughly after use and allow it to dry fully.
- If a disc cups or ruffles, try a different hook size or adjust your tension before making the rest of the set.
If youâd like to keep building your crochet skills, take a look at crochet Christmas gift bags.
Crochet Hair Scrunchie

This crochet hair scrunchie makes a soft, small Christmas gift with just a little DK yarn. Choose an intact, fabric-covered hair elastic that stretches comfortably and springs back. Work the first round loosely around the elastic so the stitches can move as it stretches, then add a gently ruffled edge. Check the stretch after each round; if the crochet holds the elastic tight, undo the round and use a larger hook or a more suitable elastic. Avoid an exposed knot or rough join that could catch in hair.
Crochet Hair Scrunchie

Quick-reference card. Follow the complete written instructions below.
Materials
- Yarn: A small amount of smooth burgundy DK yarn
- Hook: 4 mm crochet hook, or a larger hook if needed to keep the stitches loose
- Hair elastic: One intact, fabric-covered elastic, approximately 5 cm in diameter when relaxed; choose one that stretches comfortably and returns to shape
- Other: Yarn needle and scissors
Size and Fit
One size, made around an approximately 5 cm relaxed-diameter hair elastic. The finished fit depends on the elastic. Check during both rounds that it stretches comfortably and springs back; the crochet should not hold it at a fixed diameter.
Gauge
Exact gauge is not critical. Work loosely enough that the stitches can shift around the elastic as it stretches.
Abbreviations
US crochet terms.
- ch = chain
- sc = single crochet
- hdc = half double crochet
- sl st = slip stitch
- st(s) = stitch(es)
Pattern
- Choose the elastic Use an intact, fabric-covered hair elastic without an exposed knot or rough join. Stretch it before starting to make sure it moves freely and returns to shape.
- Round 1: Cover the elastic Make a slip knot on the hook. Insert the hook through the centre of the elastic and work 48 sc around the elastic itself, spacing the stitches evenly without pulling them tight against its covering. Join with a sl st to the first sc. Do not count the joining sl st as a stitch. Check that the elastic still stretches freely; if the stitches grip it, undo the round and work more loosely or use a larger hook. (48 sc)
- Round 2: Ruffled edge Ch 1 (does not count as a stitch). Working into the stitches of Round 1, repeat [1 hdc in the next st, 2 hdc in the next st] 24 times. Join with a sl st to the first hdc. Check the stretch again before fastening off. (72 hdc)
Finishing
- Fasten off and weave the yarn ends into the crochet stitches, keeping them away from the part that sits against the hair.
- Spread the stitches around the elastic to even out the cover and ruffle. Stretch and release the scrunchie once more to check that no yarn strand restricts it.
Helpful Tips
- A fabric-covered elastic gives the stitches a surface to grip without placing bare rubber against the hair.
- Keep the stitches loose around the elastic rather than packing them tightly together. If the finished cover limits the stretch, undo it and use a larger hook or a more suitable elastic.
- Leave the elastic intact; tying cut elastic together can leave an uncomfortable knot.
Lip Balm Holder

A lip balm holder makes a small Christmas gift that is useful beyond the festive season. The striped, open-top design keeps a balm handy on a bag zip pull, while the firm cotton fabric helps it hold its shape.
Lip balm tubes vary in width and height, so choose the balm you plan to give and check it against the holder before adding the strap. It should slide in without being forced, with enough of the top showing to grip easily. The pattern explains how to adjust the height if needed.
Striped Lip Balm Holder
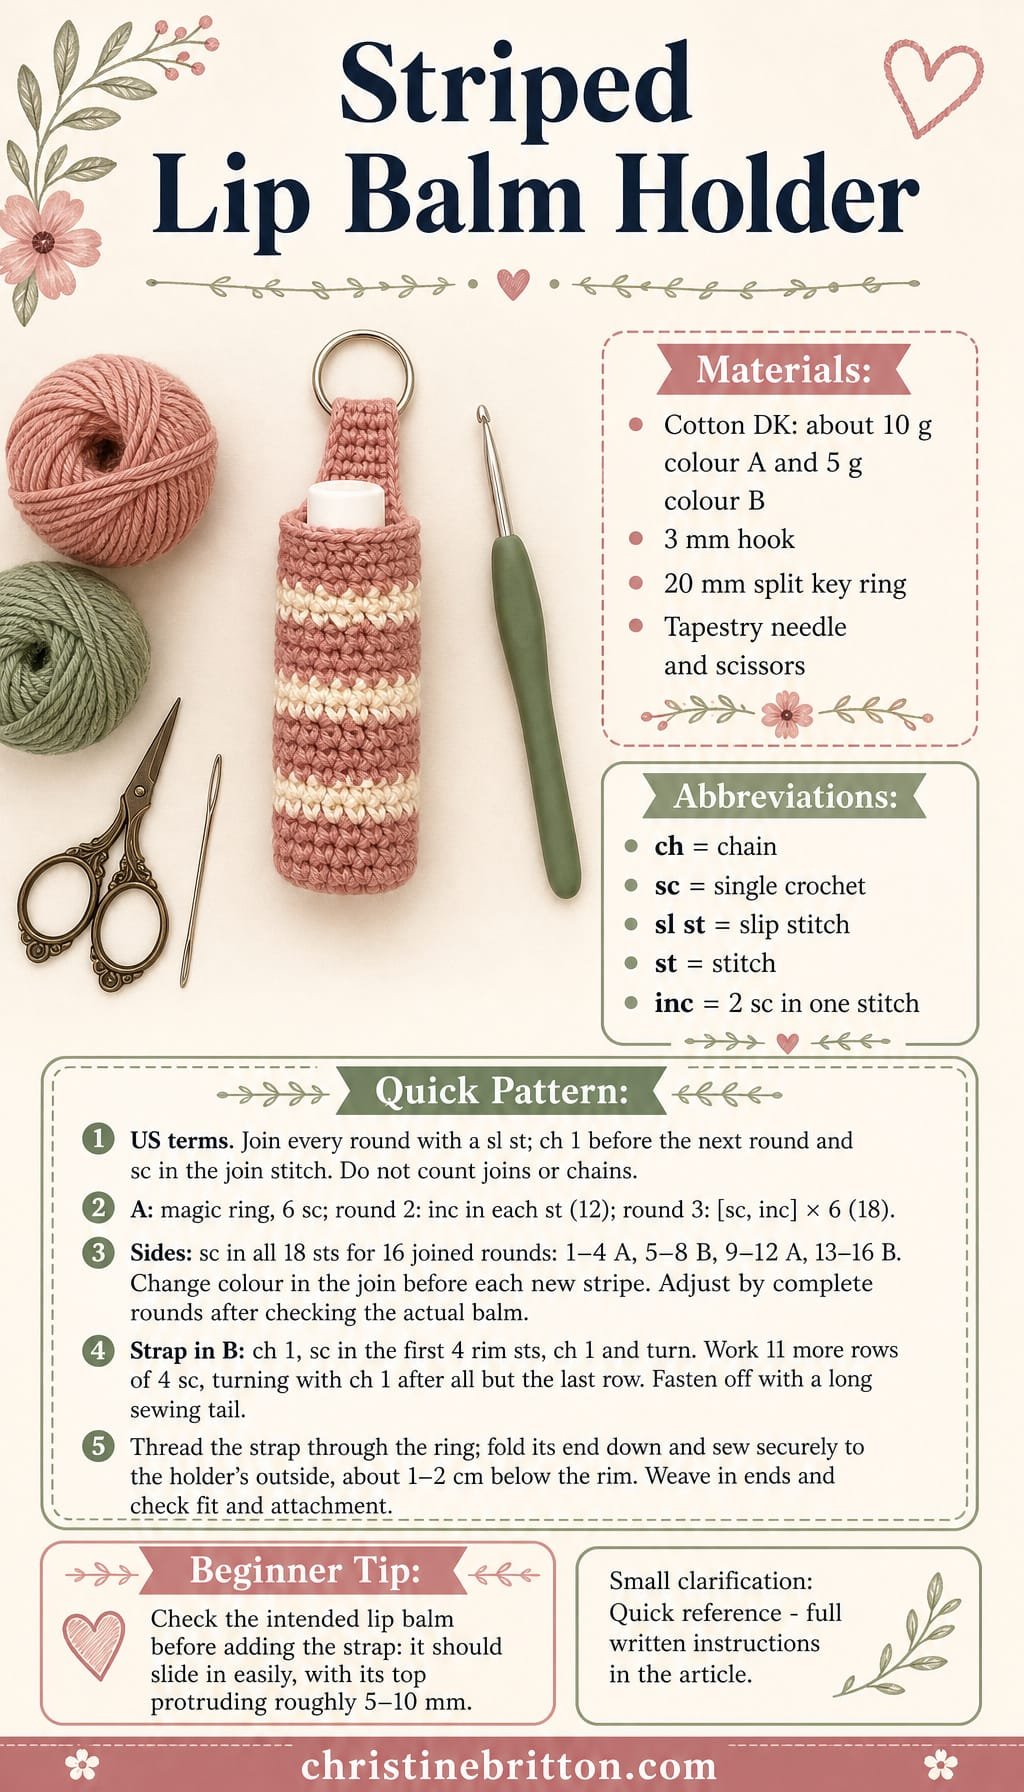
Quick-reference card. Follow the complete written instructions below.
Materials
- Cotton DK yarn: Approximately 10 g in colour A and 5 g in colour B
- 3 mm crochet hook: Or a size that makes a firm fabric without gaps
- Small split key ring: Approximately 20 mm across
- Tapestry needle and scissors: For securing the strap and weaving in ends
Size and Fit
Designed for a lip balm tube approximately 1.8â2.1 cm wide and up to 6.5 cm tall. At the suggested gauge, the 18-stitch tube has a circumference of about 7.2 cm and the 16 side rounds are about 6.4 cm tall. These are calculated dimensions, not measured results. Try the actual balm in the holder: it should slide in without forcing, and the rim should sit roughly 5â10 mm below its top so it can be gripped. Add or omit side rounds to adjust the height. If the width is unsuitable, change hook size or yarn and check the fit before making the strap.
Gauge
Aim for approximately 25 single crochet stitches and 25 rounds per 10 cm in firm fabric. Fit against the intended lip balm matters more than matching gauge exactly.
Abbreviations
US crochet terms.
- ch = chain
- sc = single crochet
- sl st = slip stitch
- st(s) = stitch(es)
- inc = work 2 sc in one stitch
Pattern
- Before you begin Use colour A for the base. Join each round with a sl st to its first sc. Ch 1 to begin the next round and work its first sc in the same stitch as the join. Joining sl sts and turning chains do not count as stitches.
- Base round 1 Make a magic ring, work 6 sc into it, pull closed and join. (6 sts)
- Base round 2 Ch 1, inc in each stitch around; join. (12 sts)
- Base round 3 Ch 1, [sc in next st, inc in next st] 6 times; join. (18 sts)
- Sides, rounds 1â4 Ch 1, sc in each of the 18 stitches through both loops; join. Repeat for 4 rounds in colour A. (18 sts each round)
- Sides, rounds 5â8 Change to colour B by drawing it through the joining sl st at the end of side round 4. Work 4 rounds as for side round 1. (18 sts each round)
- Sides, rounds 9â12 Change to colour A in the joining sl st at the end of side round 8. Work 4 rounds as for side round 1. (18 sts each round)
- Sides, rounds 13â16 Change to colour B in the joining sl st at the end of side round 12. Work 4 rounds as for side round 1. (18 sts each round) Check the height with the intended lip balm now. Add or omit complete side rounds as needed, ending with a joined round; keep colour B attached for the strap.
- Strap, row 1 Ch 1, sc in the first 4 stitches of the last side round, ch 1 and turn. The strap is 4 stitches wide; the holder still has an 18-stitch rim.
- Strap, rows 2â12 Sc in each of the 4 strap stitches. Ch 1 and turn after rows 2â11 only. After row 12, fasten off, leaving a long tail for sewing.
Finishing
- Weave in yarn ends, keeping the inside of the holder smooth.
- Pass the free end of the strap through the split key ring. Fold the strap back down the outside of the holder and use its long tail to sew the end securely to the side, about 1â2 cm below the rim. Sew across the end and along its edges, without stitching the opening closed.
- Weave in the sewing tail securely. Put the intended lip balm into the holder and check that it can be removed easily and that the strap and ring are firmly attached before clipping the ring to a bag zip pull.
Helpful Tips
- The base and sides should feel firm rather than lacy; a smaller hook can help close gaps.
- Try the lip balm in the tube before working the strap. Tube widths vary, even when their heights look alike.
- For a shorter balm, omit complete side rounds. For a taller one, add complete side rounds, keeping the rim low enough to grip the balm.
Crochet Leaf Bookmark

A crochet leaf bookmark is a thoughtful little gift for someone who always has a book on the go. It is easy to tuck inside a Christmas card or pair with a novel, without adding bulk to the present.
The leaf lies flat between the pages, while its fine, flexible stem can reach towards the bookâs edge. That makes it more comfortable to use than a bookmark with a raised decoration, which may press into the pages when the book is closed.
Crochet Leaf Bookmark

Quick-reference card. Follow the complete written instructions below.
Materials
- Yarn: A small amount of smooth 4-ply cotton yarn in green
- Hook: 3 mm crochet hook, or a size that gives a flat, flexible leaf
- Other: Yarn needle and scissors
Size and Fit
The sample uses a 13-chain leaf foundation and a 28-chain stem. Finished measurements vary with yarn and tension. Add chains to the stem before fastening off if you would like it longer.
Gauge
Gauge is not critical. Aim for stitches that hold the leafâs shape without making it stiff.
Abbreviations
US crochet terms.
- ch = chain
- sc = single crochet
- hdc = half double crochet
- dc = double crochet
- sl st = slip stitch
Pattern
- Leaf foundation Ch 13. Leave a tail long enough to weave in later.
- First side Starting in the second ch from the hook, work sc in each of the next 2 ch, hdc in each of the next 2 ch, dc in each of the next 3 ch, hdc in each of the next 2 ch, and sc in each of the next 2 ch. One foundation ch remains unworked.
- Tip and second side Work 3 sc in the last ch to turn around the tip. Working into the unused loops along the opposite side of the foundation chain, work sc in each of the next 2 ch, hdc in each of the next 2 ch, dc in each of the next 3 ch, hdc in each of the next 2 ch, and sc in each of the next 2 ch. You have made 25 stitches around the leaf.
- Stem Sl st into the first sc of the leaf to bring the working yarn to its base; do not count the sl st as a leaf stitch. Ch 28, then fasten off by drawing the cut yarn end through the final loop and pulling it snug.
Finishing
- Weave the starting tail into the leaf. Weave the stemâs end back through several chain links so it stays secure without a bulky knot.
- Lay the bookmark flat and gently smooth the leaf into shape. If needed, lightly dampen and leave it flat to dry; do not press a thick crease into it.
Helpful Tips
- Work into the unused loops of the foundation chain on the second side, rather than making stitches into the first sideâs stitches.
- Keep the stem chain relaxed so it remains flexible between book pages.
Small Desktop Basket

This small desktop basket makes a useful Christmas gift on its own or filled with wrapped sweets. After the festivities, it can hold paper clips, hair ties or other lightweight bits and pieces within easy reach.
Its low, wide shape helps it sit neatly on a desk. A firm yarn and close, even stitches give the fabric enough body to stand upright, but the sides remain flexible rather than rigid. If your crochet feels loose, aim for a denser fabric so the basket is less likely to slump.
Small Desktop Basket

Quick-reference card. Follow the complete written instructions below.
Materials
- Yarn: Approximately 40â50 g of firm aran-weight cotton or cotton-blend yarn in cream.
- Crochet hook: 4 mm, or a size that produces a dense fabric without making the stitches difficult to work.
- Other: Stitch marker, yarn needle and scissors.
Size and Fit
One size. The base has 48 stitches around its outer edge, with eight plain side rounds followed by two edging rounds. At the suggested gauge, expect a basket approximately 8â9 cm across and 4â5 cm high; these are estimates, not tested measurements.
Gauge
Approximately 18 sc and 20 rounds per 10 cm in dense single crochet. Exact gauge is not essential, but a loose fabric will make a softer basket.
Abbreviations
US crochet terms.
- BLO = Back loop only
- ch = Chain
- MR = Magic ring
- sc = Single crochet
- sl st = Slip stitch
- st = Stitch
Pattern
- Before you begin Work in joined rounds. At the start of each round, ch 1; this does not count as a stitch. Join each round with a sl st to its first sc. Keep the joining sl st out of the stitch count.
- Base, round 1 Make an MR and work 6 sc into it. Pull the ring closed and join. (6 sc)
- Base, round 2 Work 2 sc in each st around; join. (12 sc)
- Base, round 3 Repeat (sc in next st, 2 sc in next st) around; join. (18 sc)
- Base, round 4 Repeat (sc in each of next 2 sts, 2 sc in next st) around; join. (24 sc)
- Base, round 5 Repeat (sc in each of next 3 sts, 2 sc in next st) around; join. (30 sc)
- Base, round 6 Repeat (sc in each of next 4 sts, 2 sc in next st) around; join. (36 sc)
- Base, round 7 Repeat (sc in each of next 5 sts, 2 sc in next st) around; join. (42 sc)
- Base, round 8 Repeat (sc in each of next 6 sts, 2 sc in next st) around; join. (48 sc)
- Sides, round 1 Working in BLO, sc in each st around; join. The unused front loops mark the turn from base to sides. (48 sc)
- Sides, rounds 2â8 Working through both loops, sc in each st around; join each round. (48 sc per round)
- Top edging, round 1 Sc through both loops in each st around; join. (48 sc)
- Top edging, round 2 Do not ch 1. Work 1 sl st loosely in each of the 48 sc around. Join to the first edging sl st with a sl st, then fasten off. Do not pull the edging tight.
Finishing
- Weave in the ends securely on the inside.
- Gently flatten the base with your hands and shape the sides upright. Fill with wrapped sweets or lightweight desk supplies.
Helpful Tips
- A firm yarn and close, even stitches offer more support than a larger hook and loose stitches, but this basket will not have rigid sides.
- If the base cups before you begin the sides, check the stitch counts and relax your tension slightly; if it ripples, try firmer tension.
- Keep the final slip stitches loose so the rim does not draw in.
Crochet Gift-Card Envelope

A gift card may be the present, but a crochet envelope makes handing it over feel more personal. This reusable pocket gives the card a place to live after the wrapping has been cleared away.
The design has a folded pocket and a tapered flap with a button closure. Its firm fabric helps it hold its shape, while the flap keeps the card tucked away without sealing it in.
Use the card you plan to give as your guide to fit. It should slip in and out comfortably, without stretching the pocket or catching at the sides.
Crochet Gift-Card Envelope

Quick-reference card. Follow the complete written instructions below.
Materials
- Cotton DK yarn: A small amount in cranberry or your chosen colour
- Crochet hook: 3.5 mm, or a size that gives a firm fabric and the required fit
- Button: Approximately 10â12 mm across
- Other: Yarn needle, scissors, ruler and the gift card you intend to give
Size and Fit
Sample is intended for a card approximately 8.6 cm wide à 5.4 cm tall. Aim for a rectangle about 10 cm wide and a finished pocket at least 6.2 cm deep, leaving room for the side seams and easy removal. The flap is about 3 cm long. Check your own card before seaming: it should slide between the folded layers without stretching the fabric. For a different card, adjust the starting chain to give roughly 1.4 cm extra width before seaming, and work enough rows for each 16-row body half to exceed the cardâs height by about 0.8 cm. Keep both body halves the same number of rows.
Gauge
No fixed gauge is required; fit the work to the card. For the sample dimensions, aim for approximately 22 sc across 10 cm and 16 rows across 6.2 cm. Measure the fabric rather than relying on row or stitch counts alone.
Abbreviations
US crochet terms.
- ch = chain
- sc = single crochet
- sc2tog = single crochet two stitches together; counts as one stitch
- sl st = slip stitch
- st(s) = stitch(es)
Pattern
- Make the body Ch 23. Row 1: Sc in the second ch from the hook and in each ch across; turn. (22 sc) Rows 2â32: Ch 1, sc in each st across; turn. (22 sc per row) The turning ch does not count as a stitch. Rows 1â16 will become the front of the pocket; rows 17â32 will become its back. Before continuing, check that the width and each 16-row half suit your card as described under Size and Fit.
- Shape the flap Continue from the end of Row 32. Row 33: Ch 1, sc2tog, sc in the next 18 sts, sc2tog; turn. (20 sts) Row 34: Ch 1, sc across; turn. (20 sts) Row 35: Ch 1, sc2tog, sc in the next 16 sts, sc2tog; turn. (18 sts) Row 36: Ch 1, sc across; turn. (18 sts) Row 37: Ch 1, sc2tog, sc in the next 14 sts, sc2tog; turn. (16 sts) Row 38: Ch 1, sc across; turn. (16 sts) Row 39: Ch 1, sc2tog, sc in the next 12 sts, sc2tog; turn. (14 sts) Row 40: Ch 1, sc across. (14 sts) Fasten off. These progressively shorter rows form the flap.
- Fold and check Fold Rows 1â16 upwards over Rows 17â32, with the fold between Rows 16 and 17. The Row 1 edge forms the pocket opening just below the flap. Match the side edges, insert the card temporarily and confirm that it can be removed without tugging. If it is tight, remake the body slightly wider or use a larger hook; do not seam a tight pocket.
- Place the button Remove the card. Mark the centre of the outside front about 2 cm below the pocket opening, away from its side edges. Sew the button securely through the front pocket layer only, taking care not to catch the back layer. Keep the inside as flat as possible.
- Seam the pocket With the front still folded upwards, use matching yarn and a yarn needle to seam each side from the bottom fold to the pocket opening, matching the 16 row-ends of the front to those of the back. Keep seams narrow. Leave the opening and flap unsewn, then check the cardâs fit again.
- Add an adjustable loop Fold the flap down and identify the gap between its two centre stitches at the Row 40 tip. Join yarn in that gap, ch 7 and sl st back into the same gap to form a loop. Try it over the button. If it is too short or too loose, undo it and use fewer or more chains as needed; it should fasten without pulling the flap tight. Fasten off.
Finishing
- Weave in all ends, keeping the inside of the pocket smooth.
- Gently shape the envelope by hand; avoid stretching the opening.
- Insert the gift card and close the flap. Check that the card remains easy to remove.
Helpful Tips
- Cotton DK gives the pocket structure without adding much bulk around the card.
- If adapting the width, keep the flap centred: work one sc2tog at each end of every other flap row until its tip is narrow enough for a neat closure.
- A button is a small part; this envelope is not suitable as a toy for young children.
Simple Fingerless Mitts

Fingerless mitts make a useful winter gift when someone needs warm hands but still wants their fingertips free. This plain, ribbed pair has a flexible fit and an understated look that works with an everyday coat.
A little measuring makes these easier to give with confidence. Ask for the recipientâs palm circumference without the thumb and the distance from the intended wrist edge to just below the fingers. The rectangleâs wrap-around length needs to feel comfortable around the palm, while its other dimension determines the coverage; either can be adjusted independently.
The thumb opening is worth checking before the seam is secured. With the rectangle held around the hand, its position should follow where the thumb naturally rests, with enough room to move without pulling the fabric. If the recipient cannot try it on, ask them to check the marked position against their hand before you commit to it.
Simple Fingerless Mitts

Quick-reference card. Follow the complete written instructions below.
Materials
- Wool-blend DK yarn: Enough for two mitts; the amount depends on the recipientâs measurements and your gauge.
- Crochet hook: Choose a size that makes a flexible fabric with your yarn.
- Yarn needle and scissors: For seaming and weaving in ends.
- Tape measure and stitch markers: For measuring the hand and marking the thumb openings.
Size and Fit
Measure around the widest part of the recipientâs palm, excluding the thumb. Then measure from the intended wrist edge to just below the base of the fingers. These determine each rectangleâs length around the hand and height along the hand. Also note where the thumb sits so you can place its opening during the fit check. The sample calculation uses a 19 cm palm circumference and 16 cm wrist-to-finger coverage; it is an example, not a tested size range. Each example rectangle is about 18.3 cm long relaxed and 16 cm high at the illustrative gauge. Check that it stretches comfortably around the 19 cm palm before seaming.
Gauge
For the sample calculation only, assume 15 half double crochet stitches and 12 rows per 10 cm, measured with the fabric relaxed. This is not a tested gauge. Measure your own fabric and adjust the starting chain for height and the number of rows for circumference.
Abbreviations
US crochet terms.
- ch = chain
- hdc = half double crochet
- BLO = back loop only
Pattern
- Measure and plan For each mitt, the stitches across a row form its wrist-to-finger height; the rows build its length around the palm. The sample uses 24 hdc across for about 16 cm of height and 22 rows for about 18.3 cm of relaxed length. If your fabric differs, make a starting chain long enough to reach the desired height, then work rows until the rectangle wraps comfortably around the palm. A little stretch is useful, but it must not feel tight.
- First mitt, Row 1 Ch 26. Hdc in the third ch from the hook and in each remaining ch. You have 24 hdc.
- Rows 2â22 Ch 2, turn; the turning ch does not count as a stitch. Hdc BLO in each of the 24 stitches. At the end of Row 22, fasten off, leaving a long tail for seaming. For an adjusted size, keep the same stitch count on every row and stop when the rectangleâs length fits around the palm.
- Second mitt Make a second rectangle to the same measurements as the first, using the same stitch and row counts.
- Mark and fit the thumb openings On each rectangle, identify the finger edge and wrist edge. Fold the rectangle so the first and last row edges meet; these will form the side seam. For the 16 cm-high sample, mark a 4 cm unseamed section starting 3 cm down from the finger edge. This leaves approximately 3 cm to seam above the opening and 9 cm below it. Hold or pin the seam closed and try the mitt on the intended hand if possible. Move or enlarge the opening as needed so the thumb passes through comfortably, and check the palm fit before stitching.
- Seam each mitt With the yarn tail and a yarn needle, join the first and last row edges from the wrist edge up to the lower thumb marker. Leave the marked section open, then join from the upper thumb marker to the finger edge. Keep the seam flexible. Position the seam beside the thumb when putting on each mitt.
Finishing
- Weave in all ends without pulling the fabric out of shape.
- Try on both mitts. Check that the finger and wrist edges sit where intended, the palms are comfortable and neither thumb opening pulls. Adjust a seam if necessary.
Helpful Tips
- Count rows rather than relying on the starting-chain length to judge palm fit: the rows run around the hand.
- If a recipient cannot try on the mitts, ask for their palm circumference, wrist-to-finger measurement and thumb position; avoid stitching the thumb openings permanently until you have checked those measurements against the folded rectangles.
- Use a loose seaming tension so the seam can stretch with the ribbed fabric.
For another related project collection, browse crochet Christmas ornament patterns.
Cinched Bow Brooch

This little bow turns a plain winter coat or scarf into a more personal Christmas gift. Its compact shape makes it an understated accessory for an adult, while the dark red colour adds a festive touch.
The bowâs tidy outline comes from even pleats and a snug centre wrap: if the middle is loose, the ends can look uneven. The brooch bar also needs to be held at both attachment points so it cannot pivot when worn. Because it has a sharp pin, this is not a suitable gift for a young child.
Cinched Bow Brooch
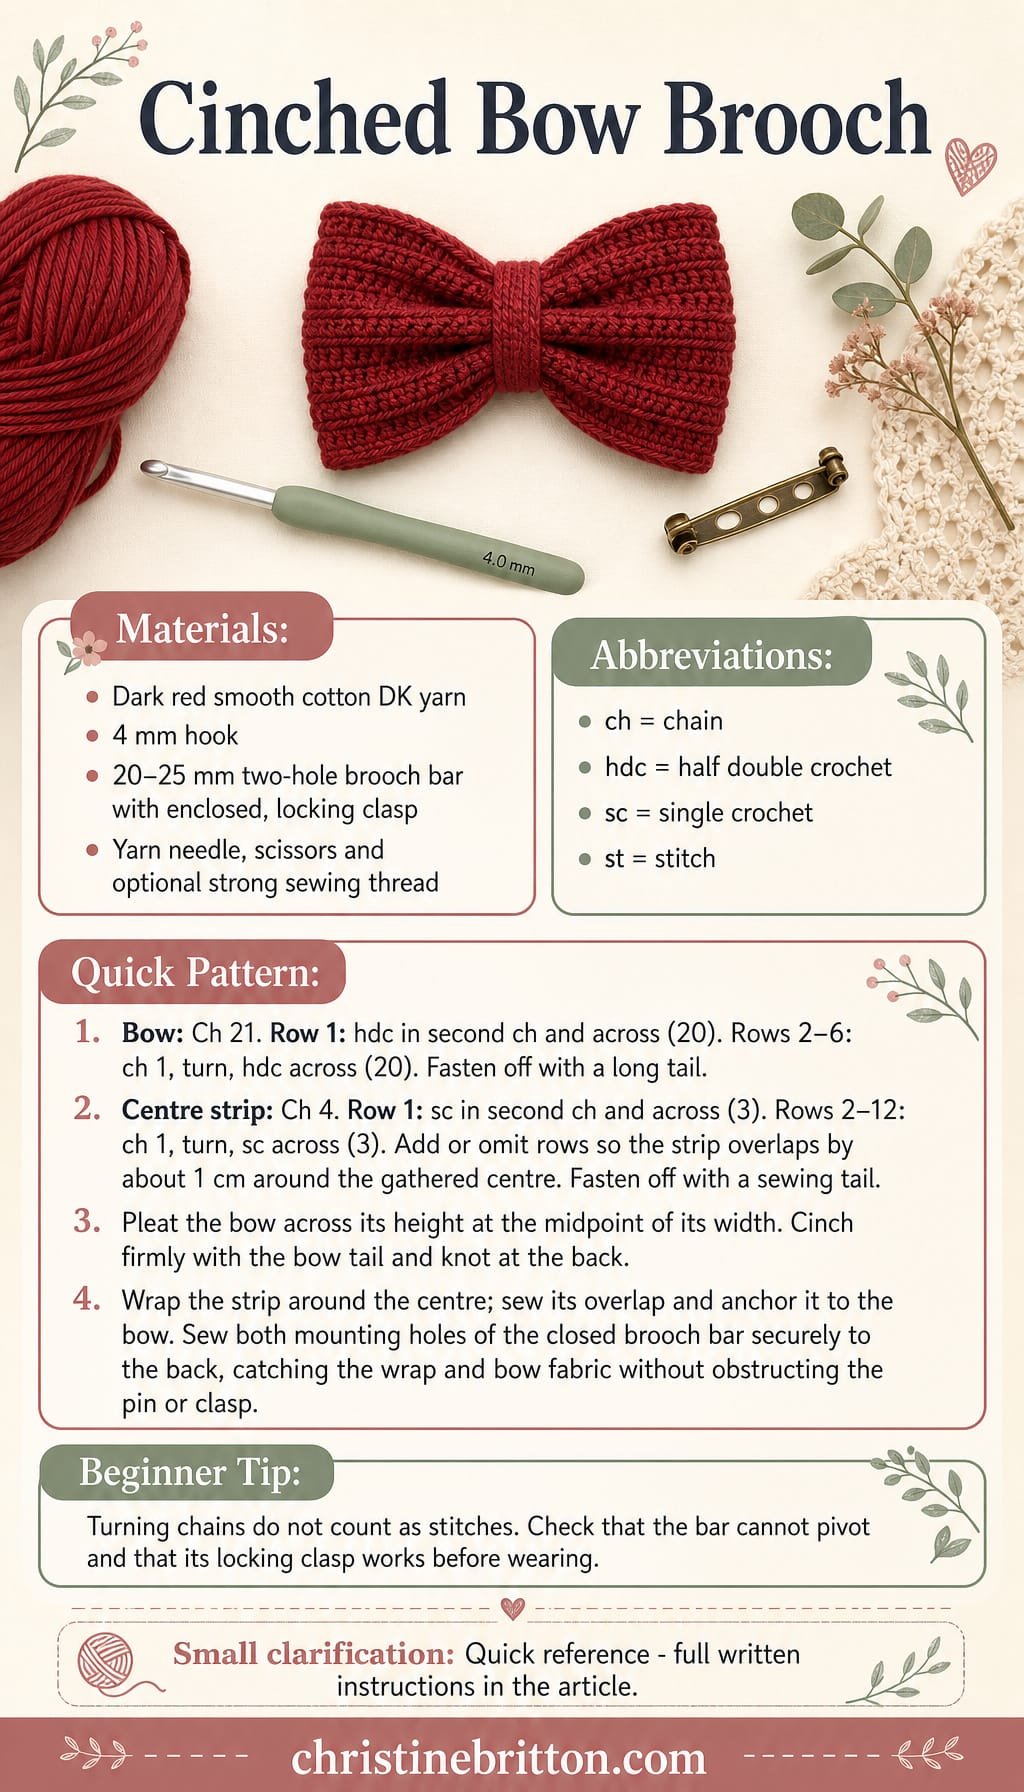
Quick-reference card. Follow the complete written instructions below.
Materials
- Smooth cotton DK yarn: A small amount in dark red, plus a matching length for sewing
- Crochet hook: 4 mm, or a size that produces a firm fabric
- Brooch finding: A 20â25 mm sew-on brooch bar with two mounting holes and an enclosed, locking clasp
- Notions: Yarn needle and scissors
Size and Fit
One size. The flat bow rectangle is approximately 12.5 cm wide and 5 cm high at the suggested gauge. Pleating makes the finished bow slightly smaller. Adjust the centre stripâs length to fit snugly around your gathered bow.
Gauge
Suggested gauge: 16 hdc stitches and 12 rows to 10 cm in flat fabric. Exact gauge is not essential; aim for fabric firm enough to support the finding.
Abbreviations
US crochet terms.
- ch = chain
- hdc = half double crochet
- sc = single crochet
- st(s) = stitch(es)
Pattern
- Bow rectangle, Row 1 Ch 21. Hdc in the second ch from the hook and in each remaining ch. (20 hdc)
- Bow rectangle, Rows 2â6 Ch 1, turn; hdc in each st across. The turning ch does not count as a stitch. (20 hdc per row) Fasten off, leaving a long tail for cinching.
- Centre strip, Row 1 Ch 4. Sc in the second ch from the hook and in each remaining ch. (3 sc)
- Centre strip, Rows 2â12 Ch 1, turn; sc in each st across. The turning ch does not count as a stitch. (3 sc per row) Check its length around the gathered centre: its ends should overlap by about 1 cm without pulling the bow out of shape. Add more rows if needed, or use fewer than 12 rows if it is too long. Fasten off, leaving a tail for sewing.
- Fold and cinch Lay the rectangle with its long edges at the top and bottom. At the midpoint of its width, fold the fabric into two shallow accordion pleats across its height. Pinch the pleats together, keeping both ends of the bow even. Wrap the rectangleâs yarn tail firmly around the pinched centre several times, then knot it securely on the back.
- Add the centre strip Wrap the narrow strip around the cinched centre with its ends overlapping on the back. Sew the overlap together and take a few stitches into the bow beneath it so the strip cannot slide. Keep the seam on the back.
- Attach the brooch bar Centre the closed brooch bar horizontally across the back. Using matching yarn or strong sewing thread, stitch repeatedly through each mounting hole and into the centre wrap and bow fabric. Secure both ends of the bar so it cannot pivot; do not stitch over the moving pin or clasp.
Finishing
- Weave in and trim all ends. Gently spread the bowâs ends and straighten the pleats.
- Check that the clasp closes, the bar does not wobble or twist, and no sewing stitches obstruct the pin.
Helpful Tips
- Smooth cotton and a firm tension help the pleats stay crisp.
- If the centre strip feels loose, resew it with a greater overlap before attaching the finding.
- A sharp brooch pin is unsuitable for a young childâs gift. This brooch is intended for an adult.
Gingerbread Person Ornament

This gingerbread person ornament is a soft, cheerful choice for a handmade Christmas gift. Its flat-panel construction gives it a familiar biscuit shape, while light stuffing adds just enough depth to make it feel like a keepsake.
The shape is worked in turned rows, with the arms and rounded head formed as part of each silhouette. Keeping the fabric firm helps the ornament hold its outline without letting the stuffing show through.
Yarn-stitched eyes, a smile and cream icing details give it character without detachable beads or buttons. It is intended as a decoration rather than a toy, and looks lovely on a tree or tied to a wrapped present.
Gingerbread Person Ornament

Quick-reference card. Follow the complete written instructions below.
Materials
- Smooth DK yarn: Small amounts of gingerbread brown, cream and dark brown or black.
- Crochet hook: 3.5 mm, or a size that makes a firm fabric with no gaps for stuffing.
- Other supplies: A little toy stuffing, yarn needle, stitch markers and scissors.
Size and Fit
One size. Approximately 9 cm wide across the arms and 12 cm tall before the hanging loop if worked near the suggested gauge. The finished dimensions will vary with your yarn and tension.
Gauge
Suggested gauge: approximately 20 sc and 24 rows per 10 cm in turned rows. Exact gauge is not essential; the fabric should be firm enough to contain stuffing.
Abbreviations
US crochet terms.
- ch = chain
- sc = single crochet
- sc2tog = single crochet two stitches together
- sl st = slip stitch
- st(s) = stitch(es)
Pattern
- Before you begin Make two identical brown panels. Turn after every row and ch 1 before working the next row; turning chains do not count as stitches. Work increases by placing 2 sc in one stitch. For each panel, make two separate legs, then join them at Row 5.
- First leg, Rows 1â4 Ch 5. Row 1: sc in the second ch from the hook and in each remaining ch (4 sc). Rows 2â4: sc in each st (4 sc). Fasten off.
- Second leg, Rows 1â4 Repeat Rows 1â4 of the first leg, but do not fasten off. Place this leg to the right of the first leg, with both pieces facing the same way and their Row 4 top edges level.
- Join the legs, Row 5 Turn and sc across all 4 sts of the second leg. Ch 2 across the gap, then sc across all 4 sts of the first leg, beginning at its edge nearest the gap. There are 10 positions across the row: 8 sc and 2 chains.
- Body, Rows 6â10 Row 6: sc in each of the 4 sc, 2 chains and 4 sc across (10 sc). Rows 7â10: sc in each st (10 sc).
- Sloping arms, Rows 11â20 Rows 11â14: 2 sc in the first st, sc across to the last st, 2 sc in the last st. Stitch counts after these rows: 12, 14, 16 and 18. Row 15: sc across (18 sc). Rows 16â19: sc2tog over the first 2 sts, sc across to the last 2 sts, sc2tog. Stitch counts after these rows: 16, 14, 12 and 10. Row 20: sc across (10 sc).
- Neck and head, Rows 21â29 Row 21: sl st in the first 2 sts, ch 1, sc in each of the next 6 sts; leave the last 2 sts unworked (6 sc). Row 22: turn, ch 1, sc across the 6 sc (6 sc). Rows 23â24: turn, ch 1, 2 sc in the first st, sc across to the last st, 2 sc in the last st (8 sc, then 10 sc). Rows 25â27: sc across (10 sc). Rows 28â29: sc2tog over the first 2 sts, sc across to the last 2 sts, sc2tog (8 sc, then 6 sc). Fasten off.
- Embroider the front Choose one panel as the front. With dark yarn, stitch two small eyes and a smiling mouth on the head. With cream yarn, stitch short icing lines across the torso and near the ends of the arms and legs. Keep all details at least one stitch in from the edges, and secure every yarn end on the back of the panel.
- Hanging loop With cream yarn, ch 22 and fasten off, leaving a tail at each end. Fold the chain into a loop and anchor both ends securely to the inside top edge of the back panel.
- Join and stuff Place the panels together with their outer faces showing and edges aligned. Using brown yarn, whipstitch around the outline, including the separate leg edges and the lower edge of the chain bridge between them. Leave a small opening along one side of the torso. Add a little stuffing to the head, arms, body and legs without stretching the fabric; close the opening securely.
Finishing
- Weave in the seam ends securely.
- Ease the stuffing into the corners of the arms and legs, then gently shape the ornament by hand.
Helpful Tips
- Mark the first and last stitch of each widening row to make the arm increases easier to spot.
- When joining the legs, check that neither leg is twisted before working across the first leg.
- Use stitched eyes rather than beads or buttons, particularly if the ornament might be handled by children. This ornament is decorative, not a toy.
Mini Christmas Tree Plush

This mini Christmas tree plush makes a cheerful shelf decoration or a small stocking gift. Its tapered shape gives it a familiar tree silhouette, while the soft finish keeps it cosy rather than formal.
A separate flat base helps the tree stand upright. Light stuffing is important here: too much at the bottom can make the base bulge and cause the tree to rock.
The colourful details are stitched in yarn rather than added as loose embellishments. This tree is intended as a decoration, not a toy for a young child.
Mini Christmas Tree Plush

Quick-reference card. Follow the complete written instructions below.
Materials
- Green DK yarn: Approximately 20 g for the cone and base.
- Contrasting yarn: Small scraps for stitched decorations.
- Crochet hook: 3.5 mm, or a size that makes a firm fabric with no gaps for stuffing to show through.
- Toy stuffing: A small amount of polyester stuffing.
- Stitch marker: To mark the first stitch of each continuous round.
- Tapestry needle and scissors: For decorating, sewing on the base and finishing.
Size and Fit
One size. At the suggested gauge, expect a tree roughly 9 cm tall and 6.5 cm across the base; the finished dimensions will vary with tension and stuffing.
Gauge
Aim for approximately 18 sc and 20 rounds per 10 cm. A firm fabric that contains the stuffing matters more than an exact gauge.
Abbreviations
US crochet terms.
- MR = magic ring
- sc = single crochet
- inc = work 2 sc in the same stitch
- st/sts = stitch/stitches
- rnd = round
Pattern
- Before you begin Work in continuous rounds without joining or turning. Move the marker to the first stitch of each new round. Numbers in parentheses give the stitch count at the end of the round.
- Cone, rnds 1â3 With green yarn, rnd 1: work 6 sc in an MR (6). Rnd 2: sc in each st (6). Rnd 3: inc in each st (12). Pull the MR closed securely.
- Cone, rnds 4â9 Rnds 4â5: sc in each st (12 each rnd). Rnd 6: (sc, inc) 6 times (18). Rnds 7â8: sc in each st (18 each rnd). Rnd 9: (2 sc, inc) 6 times (24).
- Cone, rnds 10â17 Rnds 10â11: sc in each st (24 each rnd). Rnd 12: (3 sc, inc) 6 times (30). Rnds 13â14: sc in each st (30 each rnd). Rnd 15: (4 sc, inc) 6 times (36). Rnds 16â17: sc in each st (36 each rnd). Fasten off, leaving a long tail to attach the base.
- Stitched decorations Before stuffing, use contrasting yarn to make about 6â8 small, spaced X-shaped stitches on the outside of the cone, mainly across rnds 6â15. Make each X with two short diagonal passes across the surface of one sc. Keep the stitches close to the fabric rather than leaving loops, and secure the yarn ends with several stitches on the inside. Leave rnds 16â17 clear for sewing.
- Flat base, rnds 1â3 With green yarn, rnd 1: work 6 sc in an MR (6). Rnd 2: inc in each st (12). Rnd 3: (sc, inc) 6 times (18). Pull the MR closed securely.
- Flat base, rnds 4â6 Rnd 4: (2 sc, inc) 6 times (24). Rnd 5: (3 sc, inc) 6 times (30). Rnd 6: (4 sc, inc) 6 times (36). Fasten off and weave in the base tail.
- Stuff and close Add a little stuffing to the cone, distributing it evenly without packing the bottom firmly. Place the base over the opening with its right side facing outwards. Match its 36 edge stitches to the coneâs 36 edge stitches. Using the long cone tail, sew the edges together with one small sewing stitch through each matched pair. Secure and hide the tail.
Finishing
- Set the tree upright and gently flatten the circular base with your hands. If the bottom bulges, reopen a short section of seam, remove a little stuffing and sew it closed again.
- Tuck away any visible yarn ends. Check that the stitched decorations and seam are secure.
Helpful Tips
- Use stitched yarn details rather than buttons, beads or other loose decorations.
- Keep most of the stuffing above the base seam so the flat circle can rest on a shelf.
- This is intended as a decoration, not as a toy for a young child.
Little Bell Ornament

This little bell ornament brings a classic Christmas shape to a tree or a wrapped gift. Its closed crown and straight sides lead into a wider, flared rim, which gives the decoration its recognisable bell outline.
The contrasting hanging loop adds a touch of colour, while the yarn clapper is decorative rather than functional: this bell will not ring. With no loose small parts, itâs a thoughtful choice when you want a small handmade decoration thatâs easy to tuck into a gift.
Little Bell Ornament
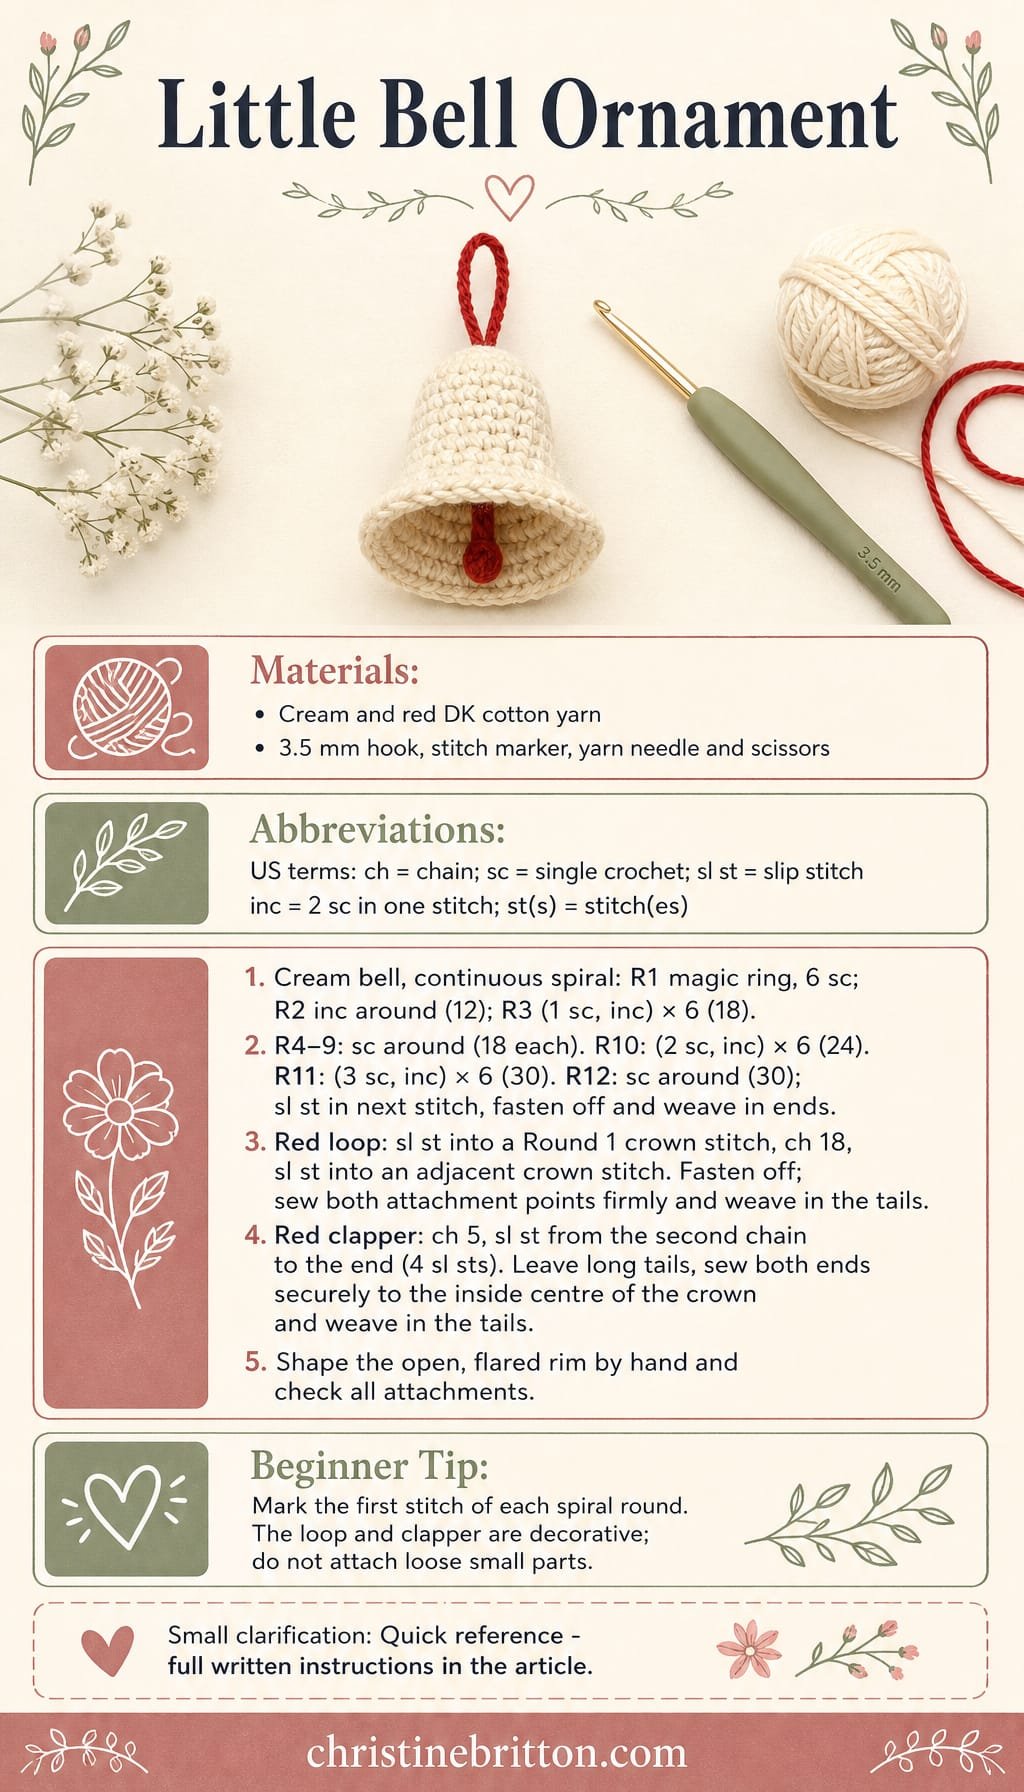
Quick-reference card. Follow the complete written instructions below.
Materials
- Cream DK cotton yarn: A small amount for the bell.
- Red DK cotton yarn: A small amount for the hanging loop and yarn clapper.
- 3.5 mm crochet hook: Or a hook that makes a firm fabric with your yarn.
- Stitch marker: To mark the first stitch of each round.
- Yarn needle and scissors: For sewing and finishing.
Size and Fit
One small ornament, approximately 5 cm across the flared rim and 5â6 cm tall, excluding the hanging loop. Size will vary with yarn and tension.
Gauge
Gauge is not critical. As a guide, aim for approximately 20 single crochet stitches and 22 rounds per 10 cm in firm fabric; use a smaller hook if the stitches have large gaps.
Abbreviations
US crochet terms.
- ch = chain
- sc = single crochet
- sl st = slip stitch
- inc = work 2 sc in the same stitch
- st(s) = stitch(es)
Pattern
- Bell, Round 1 With cream yarn, make a magic ring. Work 6 sc into the ring and pull it closed. Work in a continuous spiral; mark the first stitch of each round. (6 sts)
- Round 2 Inc in each stitch around. (12 sts)
- Round 3 (1 sc, inc) 6 times. (18 sts)
- Rounds 4â9 Sc in each stitch around for six rounds. (18 sts per round)
- Round 10 (2 sc, inc) 6 times. (24 sts)
- Round 11 (3 sc, inc) 6 times. (30 sts)
- Round 12 Sc in each stitch around. Sl st in the next stitch to smooth the edge, then fasten off and weave in the cream ends. The increases in Rounds 10 and 11 form the flared rim. (30 sts)
- Hanging loop At the centre of the closed crown, join red yarn with a sl st through a stitch of Round 1. Ch 18, then sl st through an adjacent Round 1 stitch to form a loop. Fasten off, leaving a long tail at each attachment point. Sew each attachment firmly through the crown with its tail, then weave both tails into the inside of the bell.
- Yarn clapper With red yarn, ch 5. Sl st in the second chain from the hook and in each of the remaining 3 chains to make a short cord. Fasten off, leaving long tails at both ends. Sew both tails securely through the inside centre of the crown so the cord hangs inside the bell, then weave the tails into the fabric. Do not add a bead or any other loose small part.
Finishing
- Gently shape the bell with your fingers, keeping the crown closed and the rim open.
- Check that the hanging loop and clapper are firmly attached and that every yarn end is woven in securely.
Helpful Tips
- Move the stitch marker up after each round; the bell is worked in a spiral until the final slip stitch.
- If the rim curls tightly inwards, ease it into shape by hand rather than adding unplanned increases.
- The yarn clapper is decorative and will not make the bell ring.
Buttoned Cable Tidy

A buttoned cable tidy is a small Christmas crochet gift with a job to do: it keeps a charging cable together in a bag or drawer. The narrow strap adds a touch of colour without taking up much room.
This design is fitted to the cable it will hold, so it works best as a gift when you can check it against the recipientâs cable. Aim for a comfortable fit around a loose coil rather than a tight wrap; the tidy should hold the strands together without pulling on the connector.
Its button-and-loop fastening makes the cable easy to put away and take out again. Pair it with a charging cable for a practical little present, or tuck it into a stocking on its own.
Buttoned Cable Tidy
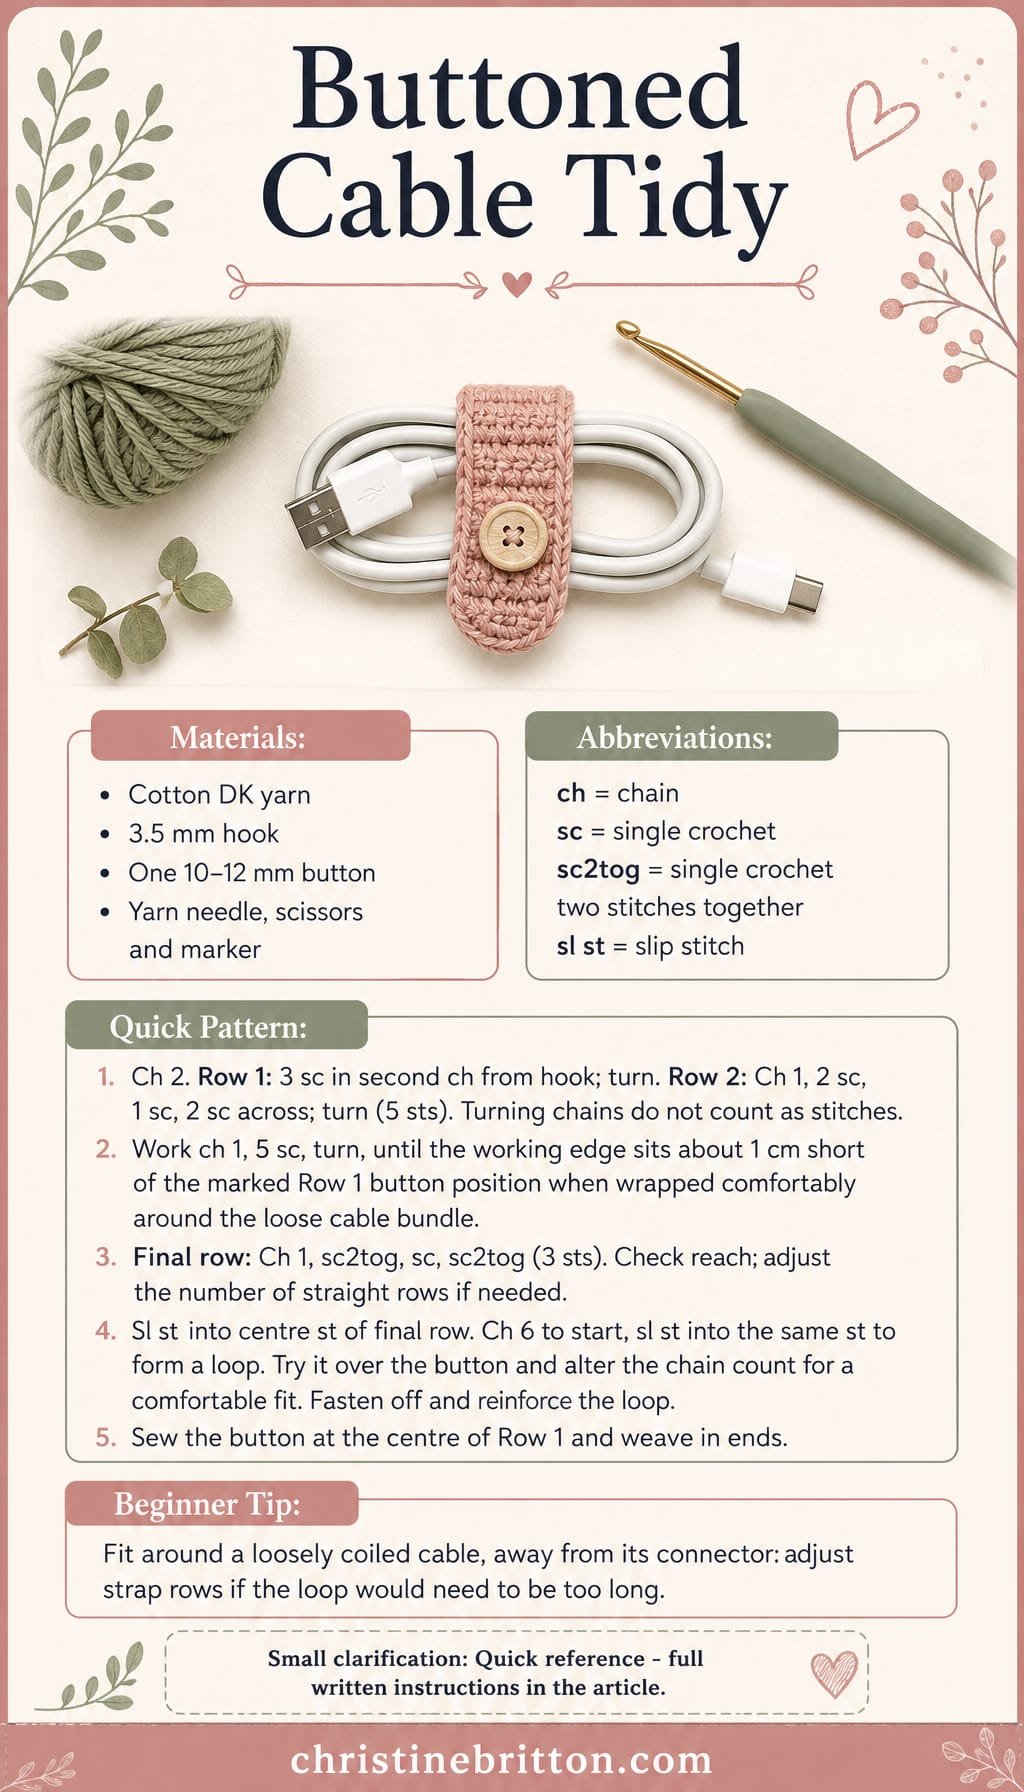
Quick-reference card. Follow the complete written instructions below.
Materials
- Cotton DK yarn: A small amount; green if you would like the Christmas look shown.
- Crochet hook: 3.5 mm, or a size that gives you a firm, dense fabric.
- Button: One small, smooth button, approximately 10â12 mm wide.
- Other supplies: Yarn needle, scissors and a removable stitch marker or pin.
Size and Fit
Made to fit your cable rather than to a fixed length. Loosely coil the cable, then use a flexible tape to measure around the bundled strands at the point where the tidy will sit. The strap should wrap around that bundle with a small overlap; it must not draw the coil tight or put pressure on a connector.
Gauge
An exact gauge is not needed because the length is fitted to the cable. Aim for firm stitches with no large gaps. Five single crochet stitches should make a narrow strap, approximately 2 cm wide; change hook size if your fabric is too loose.
Abbreviations
US crochet terms.
- ch = chain
- sc = single crochet
- sc2tog = single crochet two stitches together: draw up a loop in each of the next two stitches, yarn over and draw through all three loops
- sl st = slip stitch
- st(s) = stitch(es)
Pattern
- First rounded end Ch 2. Row 1: Work 3 sc into the second ch from the hook; turn. Row 2: Ch 1, work 2 sc in the first st, 1 sc in the next st and 2 sc in the last st; turn. You have 5 sts. The turning ch does not count as a stitch.
- Strap Row 3 and following rows: Ch 1, sc in each of the 5 sts; turn. Continue in 5-sc rows. Mark the centre of Row 1 as the button position. Wrap the strap around the loosely coiled cable with Row 1 underneath. Stop adding rows when the working edge falls about 1 cm short of the marked button position after one comfortable wrap. Do not stretch the strap to make it reach.
- Second rounded end Next row: Ch 1, sc2tog over the first 2 sts, sc in the next st, sc2tog over the last 2 sts. You have 3 sts. Do not turn. This narrower row completes the softly rounded end. If its centre will not reach or slightly overlap the button position when wrapped around the cable, undo this row and add or remove a 5-sc row before working it again.
- Adjustable button loop Sl st into the centre st of the final 3-st row. Ch 6 as a starting point, then sl st back into that same centre st to form a loop. Before fastening off, try the strap on the cable: the loop must slip over the button without tugging the coil tight. Undo and change the number of chains until it fits. If a comfortable loop would be excessively long, change the number of 5-sc rows instead; chain count alone does not determine the fastening reach. Fasten off, leaving a tail to secure the loop.
Finishing
- Sew the button firmly at the marked centre of Row 1, checking that its position works with the loop.
- Use the loop tail to reinforce its attachment at the centre stitch, then weave in all ends securely.
- Fasten the tidy around the cable bundle, away from the connector. Unbutton it before pulling the cable out.
Helpful Tips
- Keep the cable in a loose coil while fitting; a tidy should hold the strands together, not bend or strain a plug.
- A smooth, low-profile button is less likely to catch on other items in a bag.
- For a wider cable bundle, add 5-sc rows to the strap rather than relying on a long, loose chain loop.
Tiny Present Cube
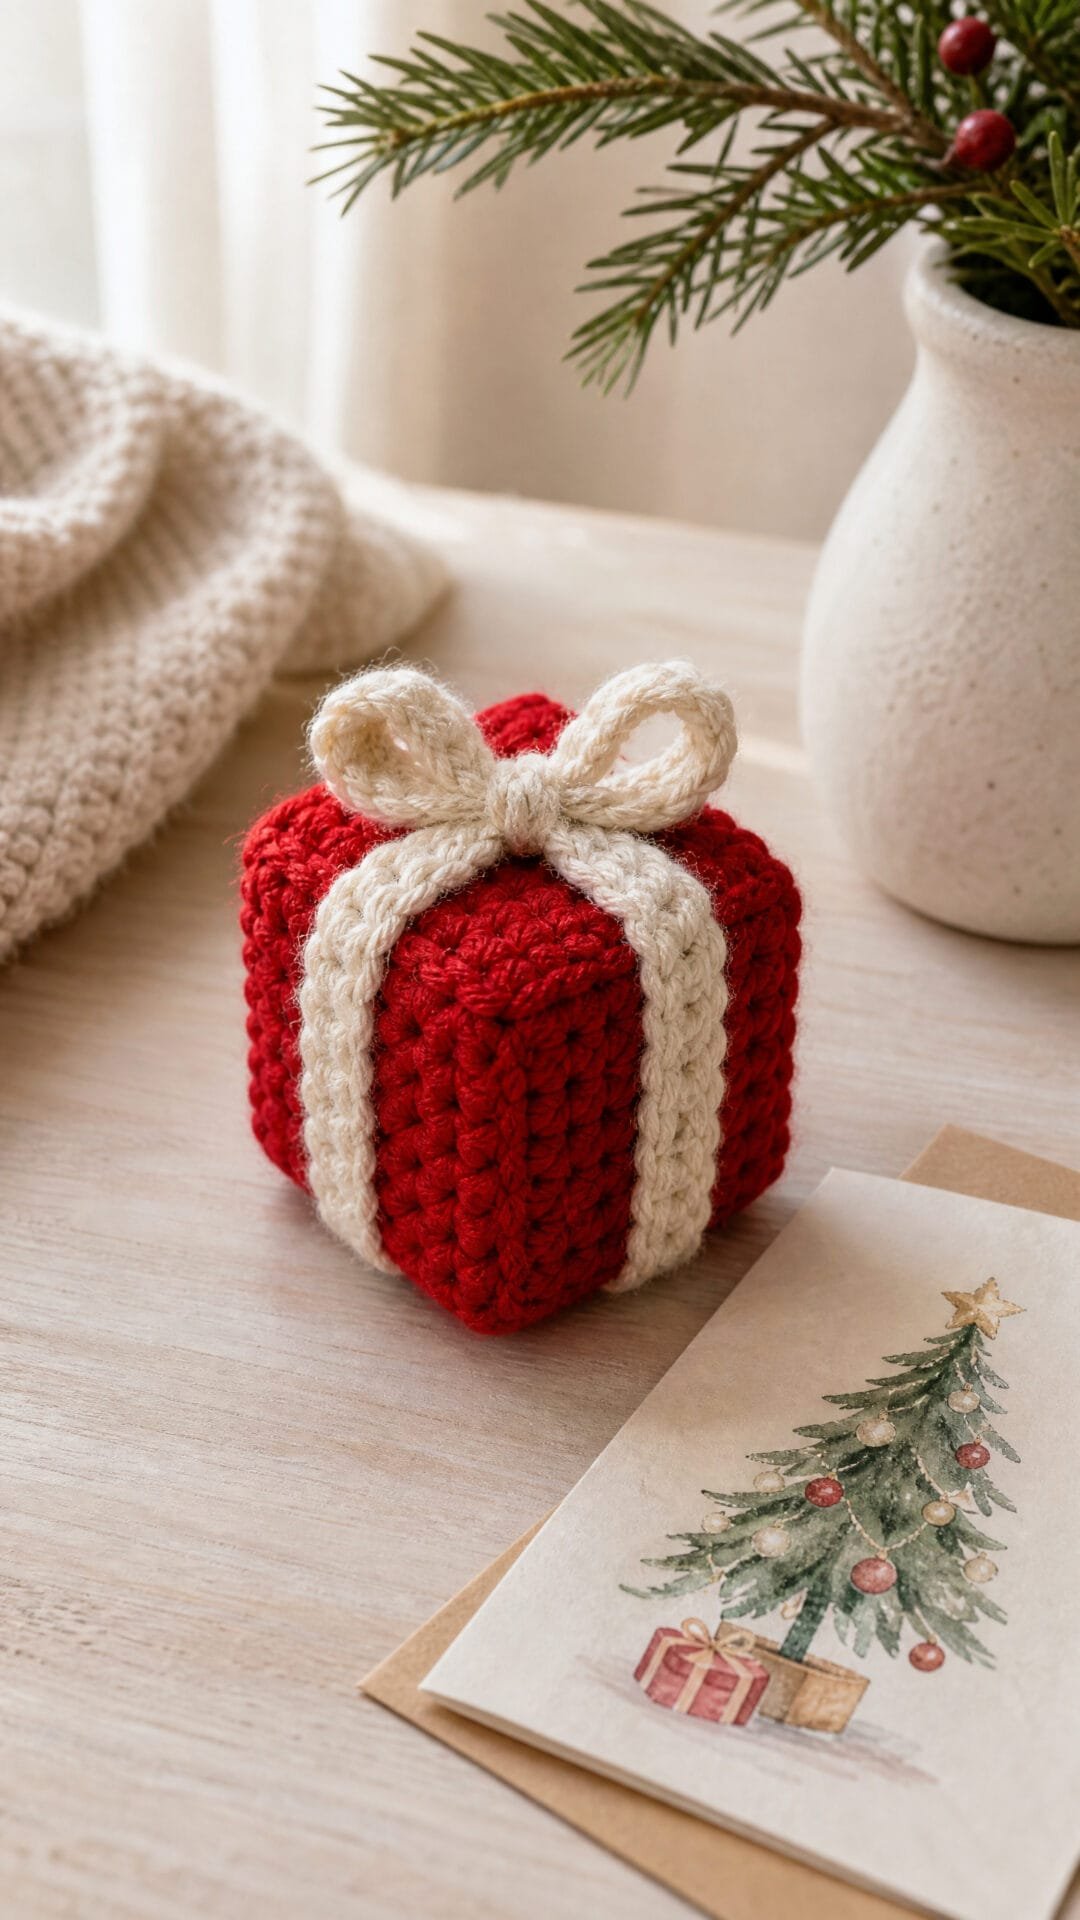
This tiny parcel is a cheerful desk or shelf decoration and a thoughtful choice when you want a handmade Christmas gift that does not need to fit its recipient. Its red faces and cream ribbon give it the look of a wrapped present without paper or glued-on decorations.
The shape comes from matching flat panels rather than shaping the fabric as you crochet. Careful seaming matters here: when the corners line up and the seams sit evenly, the faces read as a cube instead of a rounded cushion.
A lightly filled centre helps the parcel stay soft while keeping its edges distinct. The crocheted ribbon and bow add the finishing visual detail, making this a small Christmas crochet gift that can be brought out year after year.
Tiny Present Cube

Quick-reference card. Follow the complete written instructions below.
Materials
- DK yarn: Approximately 40 g red and 20 g cream; amounts are allowances, not measured usage.
- Crochet hook: 3.5 mm, or a size that produces a firm fabric with no visible gaps when lightly stretched.
- Other supplies: Small amount of polyester stuffing, yarn needle, scissors, tape measure and removable stitch markers.
Size and Fit
One sample size: approximately 5 cm on each side before adding the ribbon. Make all six squares the same size. The ribbon lengths are based on the finished cube, so measure them against your assembled parcel.
Gauge
Approximately 12 sc across and 14 rows measure 5 cm square, measured flat. A precise gauge is less important than making six matching, firm squares. If your squares differ in width and height, adjust your hook or the number of rows before making all six.
Abbreviations
US crochet terms.
- ch = chain
- sc = single crochet
- st(s) = stitch(es)
- RS = right side
Pattern
- Six red squares Make six alike. Ch 13. Row 1: Sc in the second ch from the hook and in each ch across; 12 sc. Ch 1, turn. Rows 2â14: Sc in each st across; 12 sc. Ch 1 and turn after Rows 2â13 only. Fasten off, leaving a long sewing tail on each square. Check that each panel measures approximately 5 cm in both directions and that all six match.
- Assemble the open cube Choose one square for the base and four for the sides; set the sixth aside for the lid. With RS together, sew one side square to each edge of the base. Sew the upright edges of neighbouring side squares together to form an open cube. Keep the corners aligned and distribute your sewing stitches evenly: a squareâs 12-st edge and 14-row edge may need different numbers of sewing stitches. Secure the seams, then turn the cube RS out.
- Stuff and close Add stuffing lightly, easing it into the corners without rounding the faces. Position the remaining square over the opening, matching its corners to the side seams. Sew it securely in place with neat, small stitches, adding a little more stuffing before closing the final edge if needed. Take care at each corner: aligned, even seams make the parcel look squarer.
- Cream ribbon strips Make two. Ch 4. Row 1: Sc in the second ch from the hook and in each remaining ch; 3 sc. Ch 1, turn. Continue working 3 sc across each row until the strip wraps around four faces of the assembled cube with approximately 2 cm of overlap underneath. At the stated gauge, about 62 rows give a 22 cm strip; measure your own work rather than relying on that row count. Fasten off with a long sewing tail.
- Attach the ribbon Centre one strip across the top, down two opposite sides and across the bottom. Overlap and sew its ends together underneath. Place the second strip at right angles to the first, crossing it at the centre of the top and bottom; join its ends underneath in the same way. Using cream yarn, make small securing stitches along the strips and at their crossings so they stay flat against the parcel.
- Crocheted bow With cream yarn, ch 5. Row 1: Sc in the second ch from the hook and in each remaining ch; 4 sc. Ch 1, turn. Rows 2â20: Sc in each st across; 4 sc. Ch 1 and turn after Rows 2â19 only. Fasten off with a long tail. Bring the two short ends to meet at the centre of the strip and stitch them in place. Pinch the centre, wrap the tail around it several times and secure it on the back. Sew the bow firmly over the ribbon crossing on top.
Finishing
- Weave in or securely bury every yarn end inside the cube.
- Straighten the ribbon and gently shape the corners by hand; do not pull the seams so tight that the faces pucker.
Helpful Tips
- Use a smaller hook if stuffing shows through the red fabric.
- Mark the four corners of each square before seaming to help keep the panels aligned.
- This is a decorative keepsake, not a toy for a young child.
Frequently Asked Questions
Which projects are good for using small amounts of yarn?
The hair scrunchie, leaf bookmark, star and little bell are all small projects. Check each patternâs yarn requirements before choosing leftovers.
What can I make for someone whose size I do not know?
Try a decoration, bookmark, coaster or gift-card envelope. Save fitted projects such as the mitts or mug cosy for when you can take measurements.
Are the stuffed ornaments suitable for a first crochet project?
They are marked intermediate beginner or intermediate. A flat star or granny square coaster is a more manageable place to start if you are still getting used to shaping and finishing.
How should I finish a small crochet gift?
Weave in loose ends, check seams and attachments, and follow the yarnâs care instructions. For a brooch or an ornament with small details, consider who will receive it before gifting.
Final Thoughts
A small crochet gift can be useful, decorative or part of the wrapping. Pick the pattern that suits its recipient, then give the fit and finishing as much attention as the stitches.
If you are making several presents, vary the projects rather than repeating one that needs individual measurements.