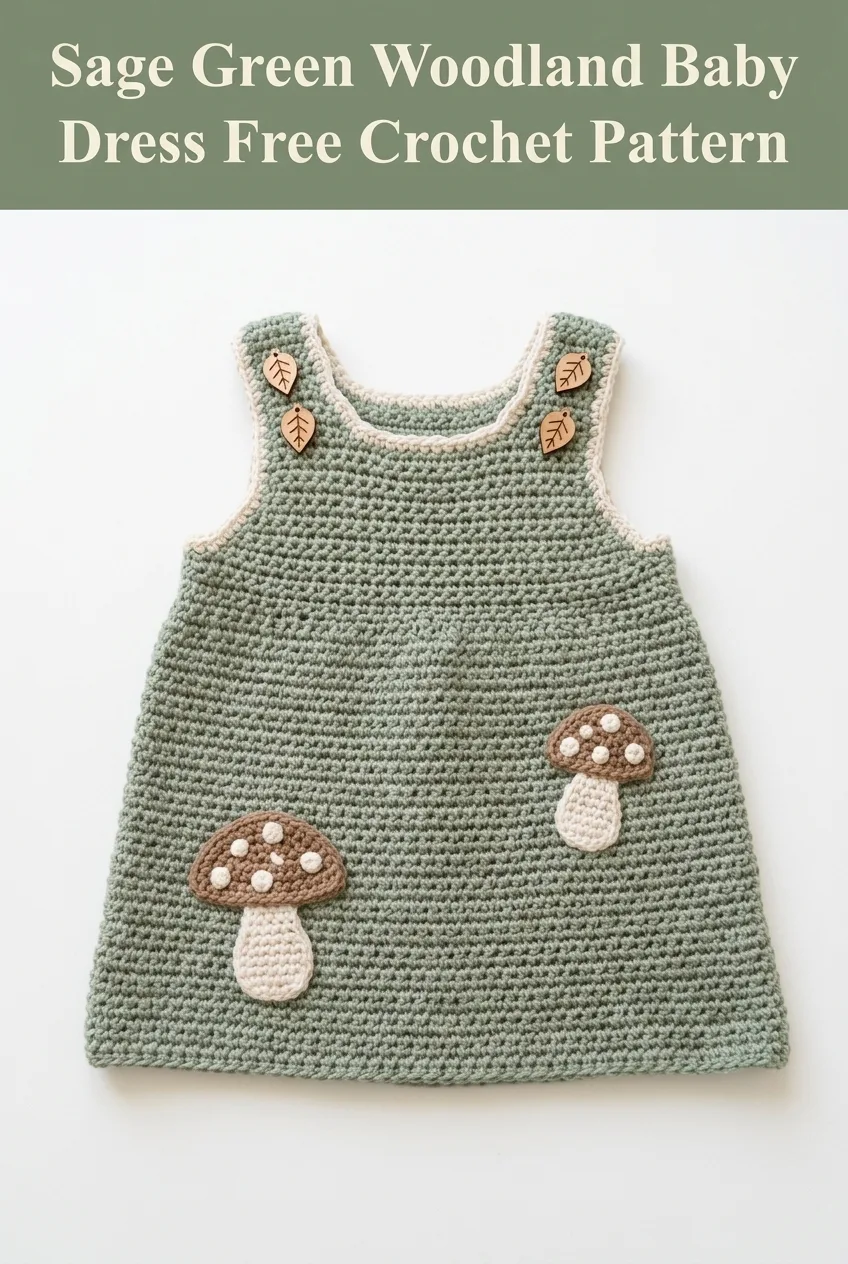
Sage Green Woodland Baby Dress Free Crochet Pattern
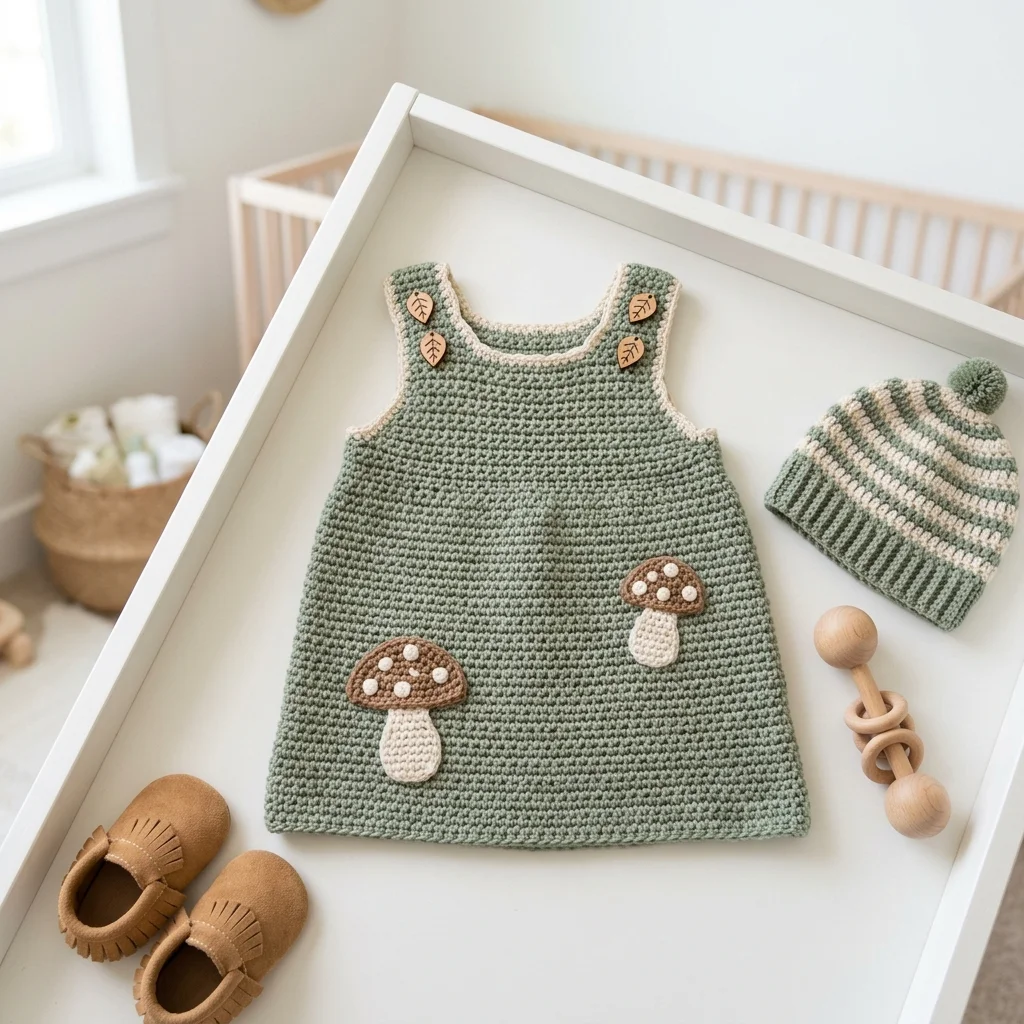
Baby garments look intimidating, right? All those tiny pieces, the shaping, the finishing. I hear this from crocheters all the time. But here’s the truth: this woodland baby dress is honestly one of the most straightforward garment patterns you’ll ever make. If you can crochet a rectangle and work basic increases, you can absolutely make this adorable dress. The body is worked flat in simple rows, the straps are just short strips, and those sweet mushroom appliqués are beginner-friendly circles and ovals. Whether you’ve never made a baby garment before or you’re a seasoned pro looking for a quick project, this pattern breaks everything down into manageable steps that won’t leave you frustrated.
Why You’ll Love This Crochet Baby Dress Pattern
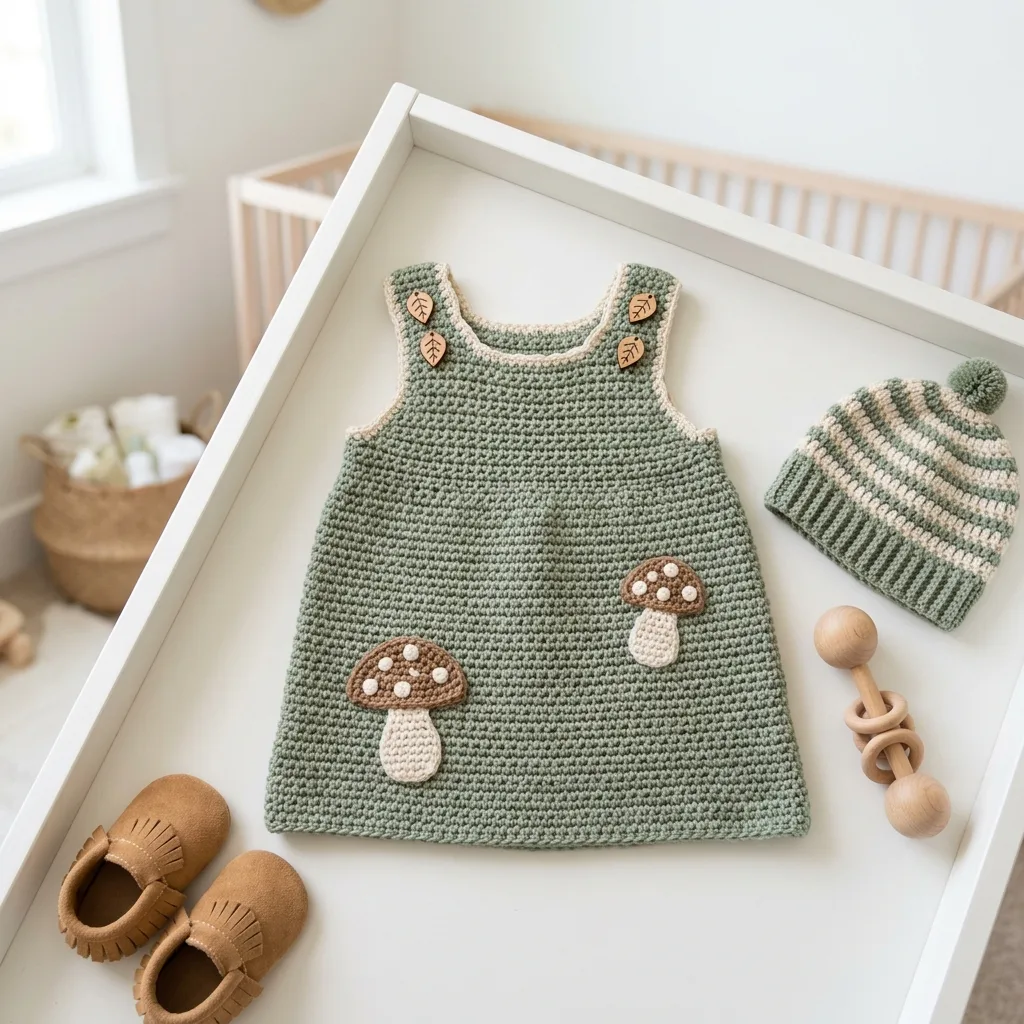
This sage green woodland baby dress combines a classic A-line silhouette with whimsical forest details that make it perfect for fall photo sessions, baby showers, or everyday wear. The neutral sage green pairs beautifully with the cream trim and warm brown mushroom caps, creating a cohesive woodland aesthetic without being too busy.
The construction is refreshingly simple. You’ll work the dress body as one flat piece, then seam the sides. No complicated armhole shaping or tricky neckline decreases. The straps attach with adorable wooden leaf buttons, which means you can adjust the fit as baby grows.
What makes this pattern beginner friendly:
Materials Needed for Your Woodland Baby Dress
Yarn:
I recommend a soft, machine washable acrylic or cotton blend for baby items. Look for yarn labeled “baby soft” or check that it’s suitable for sensitive skin.
Hook:
Notions:
Gauge
14 stitches and 16 rows = 4 inches in single crochet using 5.0mm hook
Please take time to check your gauge. A dress that’s too small won’t fit over baby’s head, and one that’s too large will slip off those tiny shoulders. Make a small swatch, measure it, and adjust your hook size if needed.
Size Information
This pattern is written for size 6 to 12 months.
Finished measurements:
Abbreviations and Stitch Definitions
Before we dive in, let me explain every stitch and term you’ll encounter:
Ch = Chain. Wrap yarn over hook, pull through loop on hook. This creates the foundation for your work.
Sc = Single crochet. Insert hook into stitch, yarn over, pull up a loop (2 loops on hook), yarn over, pull through both loops. This is your main stitch for the entire dress body.
Sl st = Slip stitch. Insert hook into stitch, yarn over, pull through both the stitch and the loop on hook in one motion. Used for joining and edging.
Inc = Increase. Work 2 single crochet stitches into the same stitch. This makes your fabric wider.
Dec = Decrease. Insert hook into first stitch, pull up loop, insert hook into next stitch, pull up loop (3 loops on hook), yarn over, pull through all 3 loops. This joins 2 stitches into 1.
Magic ring = An adjustable starting loop that closes completely. If this technique is new to you, you can substitute by chaining 4 and slip stitching into the first chain to form a ring.
FO = Fasten off. Cut yarn, pull tail through final loop, and pull tight.
Step by Step Crochet Pattern for Woodland Baby Dress
Dress Front Panel
We’ll start with the front of the dress, working from the bottom hem upward.
Foundation Row: With MC and 5.0mm hook, ch 37.
Row 1: Sc in 2nd ch from hook and in each ch across. (36 sts)
Row 2: Ch 1, turn. Sc in each st across. (36 sts)
Rows 3 through 10: Repeat Row 2. (36 sts)
Now we’ll begin the gradual shaping that creates the A-line silhouette. Don’t worry, it’s just simple decreases at the edges.
Row 11 (decrease row): Ch 1, turn. Dec over first 2 sts, sc in each st until 2 sts remain, dec over last 2 sts. (34 sts)
Rows 12 through 14: Ch 1, turn. Sc in each st across. (34 sts)
Row 15 (decrease row): Ch 1, turn. Dec over first 2 sts, sc in each st until 2 sts remain, dec over last 2 sts. (32 sts)
Rows 16 through 18: Ch 1, turn. Sc in each st across. (32 sts)
Row 19 (decrease row): Ch 1, turn. Dec over first 2 sts, sc in each st until 2 sts remain, dec over last 2 sts. (30 sts)
Rows 20 through 22: Ch 1, turn. Sc in each st across. (30 sts)
Row 23 (decrease row): Ch 1, turn. Dec over first 2 sts, sc in each st until 2 sts remain, dec over last 2 sts. (28 sts)
Rows 24 through 40: Ch 1, turn. Sc in each st across. (28 sts)
You’ve now completed the bodice portion of the front panel. FO and weave in ends.
Dress Back Panel
Work exactly the same as the front panel. Having two identical panels makes this pattern wonderfully simple.
Shoulder Straps (Make 2)
Foundation Row: With MC and 5.0mm hook, ch 7.
Row 1: Sc in 2nd ch from hook and in each ch across. (6 sts)
Rows 2 through 16: Ch 1, turn. Sc in each st across. (6 sts)
FO, leaving a long tail for sewing.
Assembly
Step 1: Lay front and back panels with right sides facing (wrong sides out). Using your yarn needle and MC, seam the side edges together from the bottom hem up to Row 25. This leaves the top portion open for armholes.
Step 2: Turn dress right side out. Position straps on the front bodice, approximately 2 inches in from each side edge. The straps should sit about half an inch down from the top edge. Sew securely in place.
Step 3: On the back bodice, mark where the straps will button. Sew your wooden leaf buttons at these positions.
Step 4: Create small buttonhole loops at the back edge of each strap. Using MC, join yarn at the corner of the strap, ch 5, sl st back into the strap about half an inch away. FO and secure. Test that your button fits through the loop before finishing.
Cream Edging
This edging gives the dress a polished look and hides any uneven edges. You’ll work around the entire neckline and armhole openings.
Neckline and armhole edging: With CC1 and 5.0mm hook, join yarn at any corner of the front neckline. Work sc evenly around the entire top edge of the dress, including around the armhole openings. Work 3 sc in each corner to keep it lying flat. Sl st to join, FO.
The edging doesn’t need to be an exact stitch count. Just keep your tension consistent and make sure the fabric doesn’t pucker or ruffle.
Mushroom Appliqués
These adorable mushrooms are the star of the show. You’ll make two in different sizes.
Large Mushroom
Stem (make 1):
With CC1 and 4.0mm hook, work a magic ring.
Round 1: 6 sc into ring, sl st to join. (6 sts)
Round 2: Ch 1, 2 sc in each st around, sl st to join. (12 sts)
Rounds 3 through 6: Ch 1, sc in each st around, sl st to join. (12 sts)
FO, leaving a long tail.
Cap (make 1):
With CC2 and 4.0mm hook, work a magic ring.
Round 1: 6 sc into ring, sl st to join. (6 sts)
Round 2: Ch 1, 2 sc in each st around, sl st to join. (12 sts)
Round 3: Ch 1, *sc in next st, 2 sc in next st* repeat around, sl st to join. (18 sts)
Round 4: Ch 1, *sc in next 2 sts, 2 sc in next st* repeat around, sl st to join. (24 sts)
FO, leaving a long tail.
Small Mushroom
Stem: Work same as large mushroom stem, but only complete Rounds 1 through 4. (12 sts)
Cap: Work same as large mushroom cap, but only complete Rounds 1 through 3. (18 sts)
Mushroom Spots
Using CC1, embroider 3 to 4 small French knots or satin stitch dots onto each mushroom cap. These add that classic toadstool look.
Attaching the Mushrooms
Position mushrooms on the lower front of the dress, slightly overlapping if desired. The larger mushroom looks great placed toward the left side, with the smaller one to the upper right. Pin in place, then sew securely using matching yarn and a yarn needle. Be sure to catch both the stem and cap edges.
Matching Striped Hat (Optional)
The coordinating hat shown alongside the dress uses the same sage green and cream yarns.
Brim: With MC and 5.0mm hook, ch 45. Work in back loop only single crochet for 8 rows to create the ribbed brim texture. Join short ends to form a tube.
Body: Working in rounds along the long edge of the brim, sc evenly around, alternating 2 rounds MC and 2 rounds CC1 for stripes. Continue for approximately 4 inches.
Crown shaping: Decrease evenly by working *sc 4, dec* around. Continue decreasing rounds until opening is small enough to close. FO and close top.
Pom pom: Attach a small pom pom in MC to the top.
Care Instructions
Machine wash on gentle cycle with cold water. Tumble dry low or lay flat to dry. The wooden buttons should be removed before washing if possible, or hand wash the dress to protect them.
Tips for Success with This Crochet Pattern
Blocking makes a difference. Even though this is a simple garment, light blocking helps the stitches settle and gives a more professional finish. Lay the dress flat on a towel, spritz with water, and pat into shape.
Count your stitches. After every few rows, count to make sure you haven’t accidentally added or dropped a stitch. This is especially important during the decrease rows.
Use stitch markers. Place markers at the beginning and end of your rows to keep track of edges. This helps ensure even sides.
Don’t stress about perfection. Baby clothes get spit up on, dragged through the mud, and outgrown in weeks. This dress is meant to be loved and worn, not preserved in a museum. Your stitches don’t need to be perfect.
Who Is This Woodland Baby Dress For?
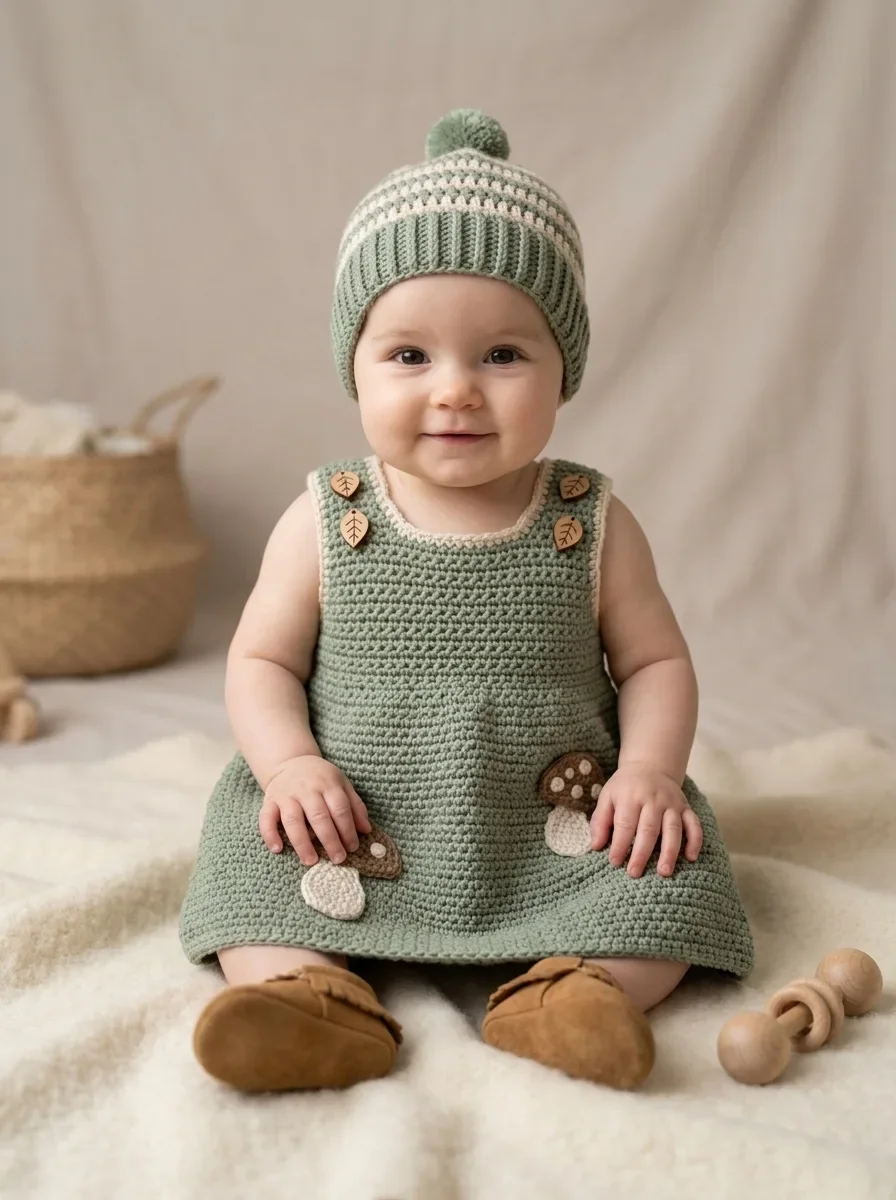
This crochet baby dress pattern makes a thoughtful handmade gift for baby showers, first birthdays, or fall family photos. The gender-neutral sage green works beautifully for any baby, and the woodland theme suits nature-loving families perfectly.
The dress also works wonderfully as a layering piece. Pair it over a long-sleeved onesie and tights for cooler weather, or wear it alone on warm days.
I really hope you enjoy making this sweet little woodland dress as much as I enjoyed designing it. There’s something so satisfying about creating a wearable garment, especially one this cute. If you make one, I’d absolutely love to see it! Tag me on Instagram or share a photo in my Facebook group.
If this pattern caught your eye, go ahead and save it to your Pinterest boards so you can find it when you’re ready to start. And please drop a comment below if you make this dress or have any questions along the way. I love hearing from you and seeing your finished projects!
You Might Also Like
- Sage Green Summer Tote with Cream Tassels Free Crochet Pattern
- Pink Valentine Highland Cow Amigurumi Free Crochet Pattern
- Coral Poppy Baby Dress Free Crochet Pattern
- Coral Sunset Gradient Chain Purse Free Crochet Pattern