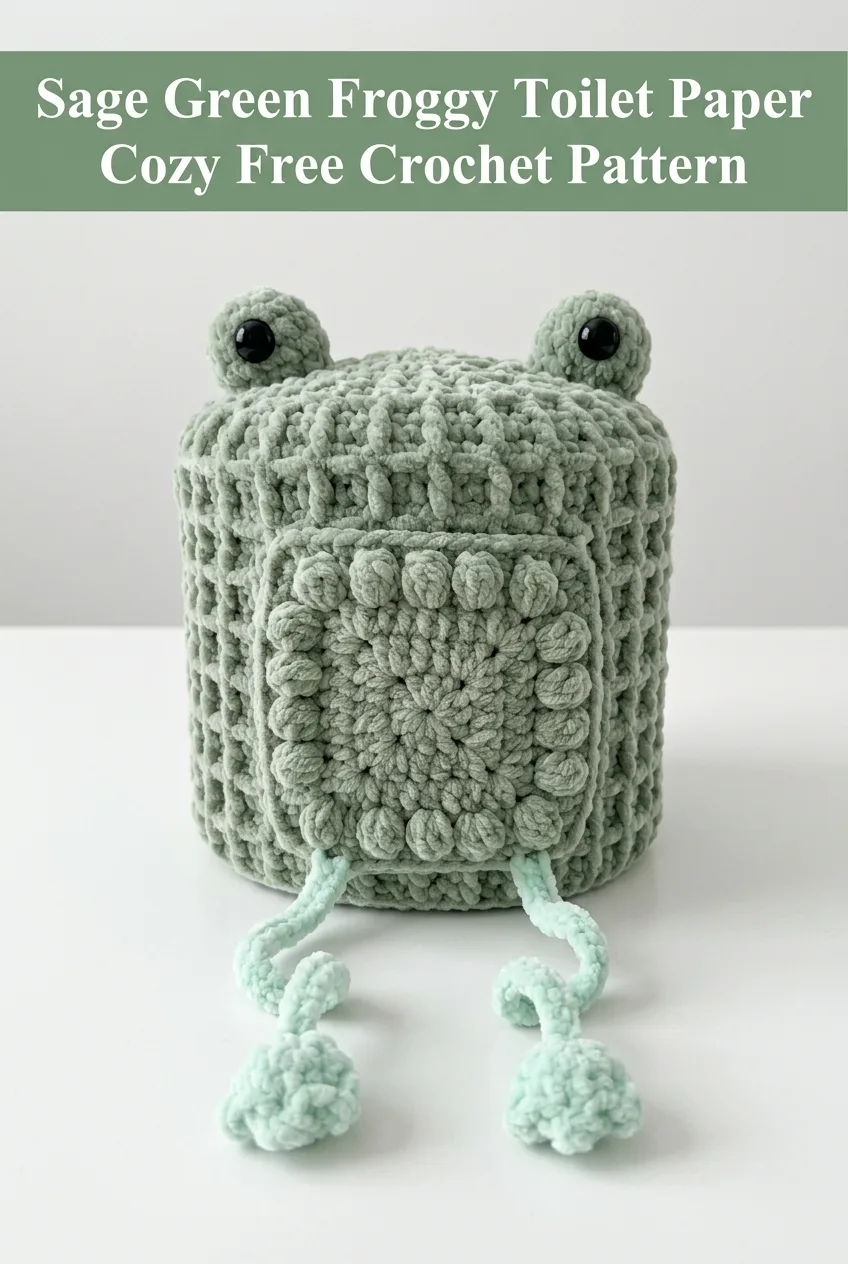
Sage Green Froggy Toilet Paper Cozy Free Crochet Pattern
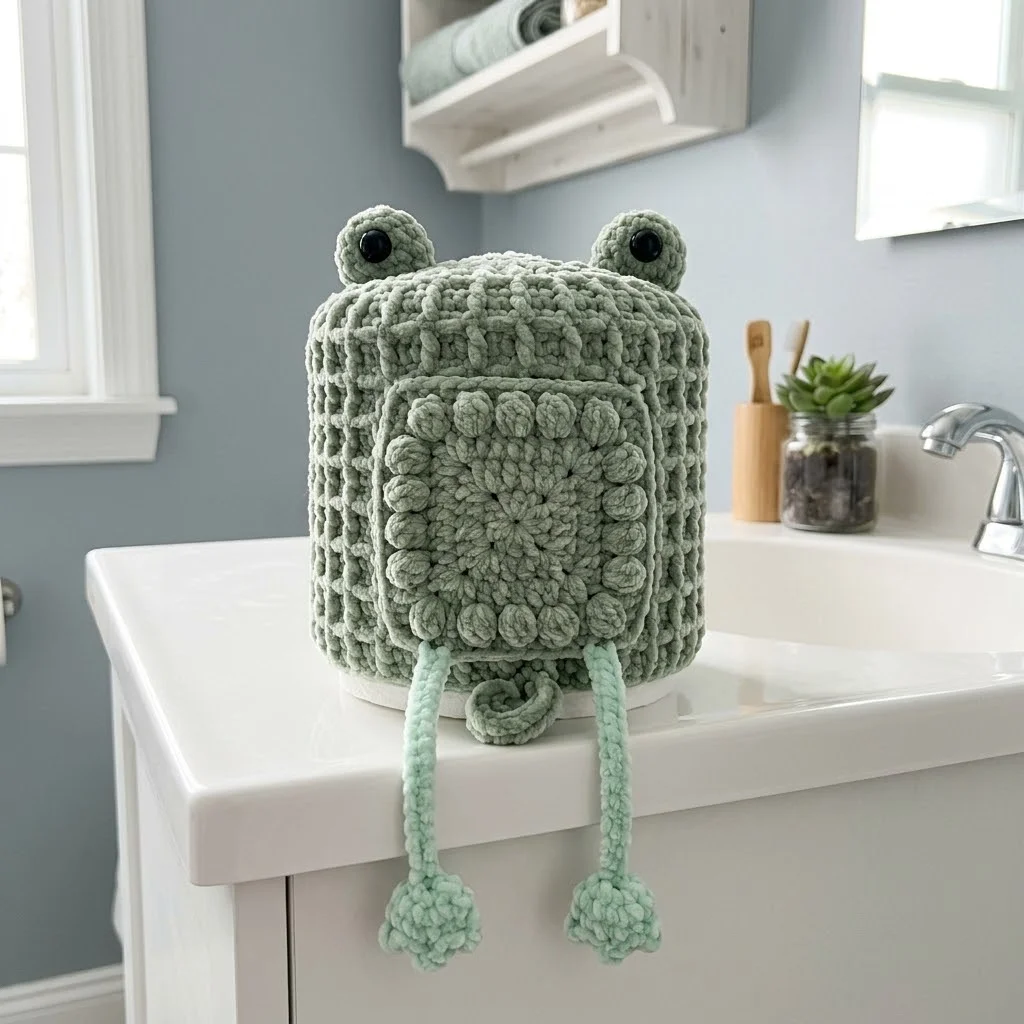
Looking for a quick bathroom refresh that doubles as a conversation starter? This adorable frog toilet paper cozy keeps your spare roll dust-free while adding a pop of whimsy to your space. The pattern uses simple single crochet and bobble stitches throughout, making it perfect for confident beginners ready to try texture work. It works up in just a few hours with chunky chenille yarn, and honestly, it makes the cutest housewarming gift. Your bathroom guests will absolutely smile when they spot those little froggy eyes peeking at them.
Why You’ll Love This Froggy Toilet Paper Cozy Pattern
This isn’t your grandmother’s toilet paper cover. The chunky chenille yarn creates a plush, squishy texture that looks modern and feels luxurious. Those dangling frog legs add playful character, and the bobble stitch belly panel gives beautiful dimension without complicated colorwork.
What makes this pattern beginner friendly:
The sage green color I chose feels fresh and spa-like, but this little guy would look adorable in bright lime, forest green, or even a fun variegated yarn. Make a whole pond of them in different shades!
Materials Needed for Your Crochet Frog Toilet Paper Cozy
Gathering your supplies before you start makes the whole process smoother. Here’s everything you’ll need to create your own froggy friend.
Yarn:
Hook:
Notions:
Gauge:
Working in single crochet with super bulky chenille yarn and 8.0mm hook: 10 stitches and 10 rows equals approximately 4 inches square. Gauge isn’t critical for this project since toilet paper rolls are fairly standard, but your cozy should fit snugly without being too tight.
Skill Level and Finished Dimensions
Skill Level: Easy to Intermediate
You should be comfortable with working in continuous rounds and basic stitch placement. The bobble stitches might be new to you, but I’ll walk you through them step by step.
Finished Size:
Abbreviations and Stitch Definitions
Let me break down every stitch you’ll encounter in this pattern. Even if you know these already, a quick refresher never hurts.
ch = chain: Wrap yarn over hook, pull through loop on hook. This creates the foundation for many projects.
sl st = slip stitch: Insert hook, yarn over, pull through stitch AND loop on hook in one motion. Used for joining and invisible movement.
sc = single crochet: Insert hook into stitch, yarn over, pull up a loop (2 loops on hook), yarn over, pull through both loops. The most basic and sturdy stitch.
inc = increase: Work 2 single crochet stitches into the same stitch. This adds one stitch to your count.
bob = bobble stitch: Yarn over, insert hook into stitch, yarn over, pull up a loop, yarn over, pull through 2 loops. Repeat this 4 more times in the same stitch (6 loops on hook), yarn over, pull through all 6 loops. Push the bobble to the right side of your work. Don’t worry if this feels awkward at first. It gets easier with practice!
MR = magic ring: Create an adjustable loop to begin working in the round. This allows you to pull the center hole closed completely.
How to Crochet the Froggy Toilet Paper Cozy Step by Step
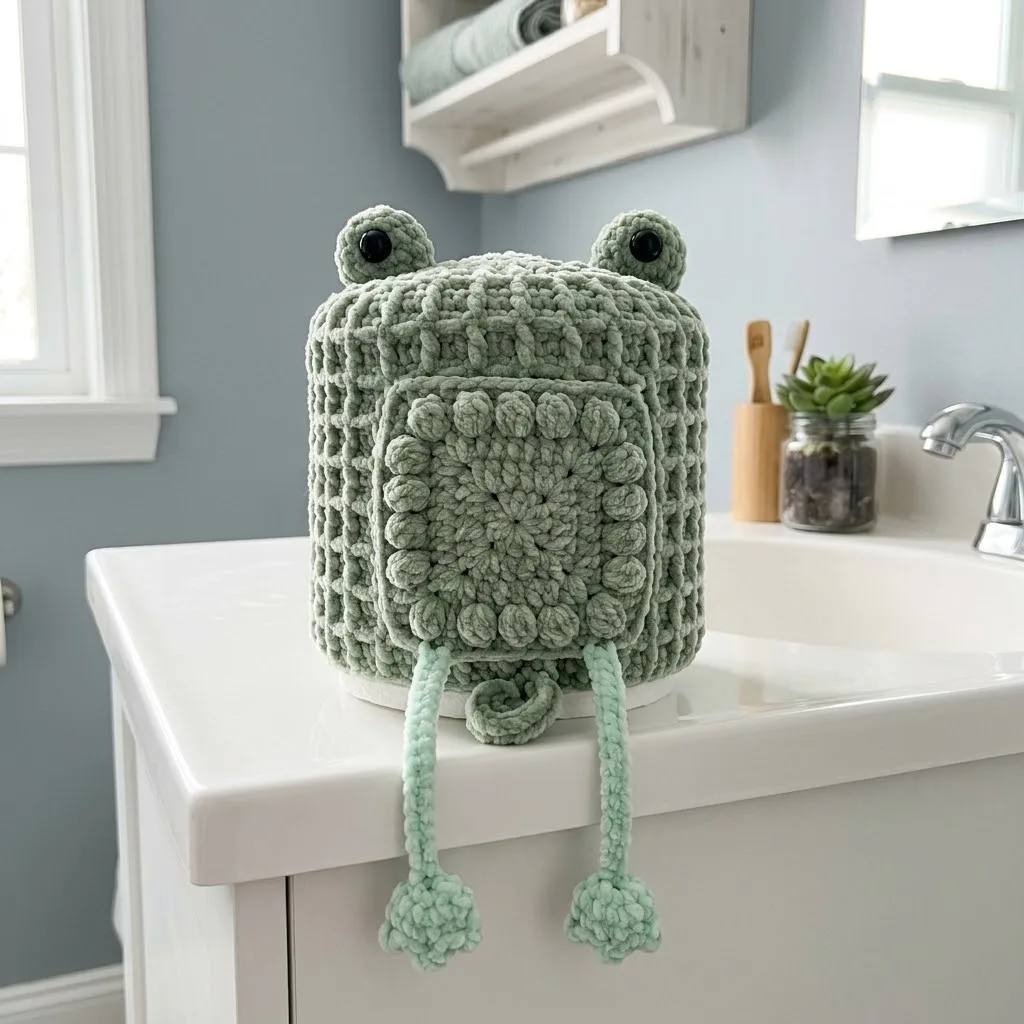
Main Body
The body is worked from the top down in continuous rounds. Place a stitch marker at the beginning of each round and move it up as you go. Do not join rounds unless instructed.
Round 1: Using MC, create a MR. Work 6 sc into the ring, pull tight. (6 sts)
Round 2: Inc in each st around. (12 sts)
Round 3: *Sc 1, inc* repeat around. (18 sts)
Round 4: *Sc 2, inc* repeat around. (24 sts)
Round 5: *Sc 3, inc* repeat around. (30 sts)
Round 6: *Sc 4, inc* repeat around. (36 sts)
Round 7: *Sc 5, inc* repeat around. (42 sts)
Round 8: *Sc 6, inc* repeat around. (48 sts)
You now have a flat circle that forms the top of your cozy. Time to start working the sides!
Rounds 9-11: Sc in each st around. (48 sts)
These rounds create the transition from top to sides. Work in the back loops only on Round 9 to create a subtle ridge that defines the top edge. Then resume working through both loops for Rounds 10 and 11.
Round 12: *Sc 5, bob* repeat around. (48 sts, with 8 bobbles)
Rounds 13-14: Sc in each st around. (48 sts)
Round 15: *Sc 2, bob, sc 3* repeat around. (48 sts, with 8 bobbles offset from previous bobble row)
Rounds 16-17: Sc in each st around. (48 sts)
Round 18: *Sc 5, bob* repeat around. (48 sts, with 8 bobbles)
Rounds 19-20: Sc in each st around. (48 sts)
Round 21: *Sc 2, bob, sc 3* repeat around. (48 sts, with 8 bobbles)
Rounds 22-24: Sc in each st around. (48 sts)
Sl st to next st. Fasten off, weave in ends.
Belly Panel with Flower Bobble Design
This decorative panel attaches to the front of your cozy. It features a beautiful bobble flower pattern that adds lovely texture.
Row 1: Using MC, ch 17. Sc in 2nd ch from hook and each ch across. Turn. (16 sts)
Row 2: Ch 1, sc in each st across. Turn. (16 sts)
Row 3: Ch 1, sc 7, bob, sc 8. Turn. (16 sts)
Row 4: Ch 1, sc in each st across. Turn. (16 sts)
Row 5: Ch 1, sc 5, bob, sc 2, bob, sc 6. Turn. (16 sts)
Row 6: Ch 1, sc in each st across. Turn. (16 sts)
Row 7: Ch 1, sc 3, bob, sc 2, bob, sc 2, bob, sc 4. Turn. (16 sts)
Row 8: Ch 1, sc in each st across. Turn. (16 sts)
Row 9: Ch 1, sc 5, bob, sc 2, bob, sc 6. Turn. (16 sts)
Row 10: Ch 1, sc in each st across. Turn. (16 sts)
Row 11: Ch 1, sc 7, bob, sc 8. Turn. (16 sts)
Rows 12-14: Ch 1, sc in each st across. Turn. (16 sts)
Fasten off, leaving a long tail for sewing.
Frog Eyes (Make 2)
The eyes are small stuffed spheres that give your frog its adorable character. Work these in continuous rounds.
Round 1: Using MC, create a MR. Work 6 sc into the ring. (6 sts)
Round 2: Inc in each st around. (12 sts)
Round 3: *Sc 1, inc* repeat around. (18 sts)
Rounds 4-6: Sc in each st around. (18 sts)
Insert safety eye through the center front of the eye, between Rounds 3 and 4. Secure the backing on the inside. Add a small amount of fiberfill stuffing.
Round 7: *Sc 1, sc2tog* repeat around. (12 sts)
Note: Sc2tog means single crochet two together. Insert hook in first stitch, pull up loop, insert hook in next stitch, pull up loop (3 loops on hook), yarn over, pull through all 3 loops. This decreases your stitch count.
Round 8: Sc2tog around. (6 sts)
Add more stuffing if needed. Fasten off, leaving a long tail. Thread tail through remaining stitches, pull tight to close.
Frog Legs (Make 2)
The dangling legs are one of my favorite details. They’re worked as simple tubes with bobble feet.
Foot:
Round 1: Using CC, create a MR. Work 6 sc into the ring. (6 sts)
Round 2: Inc in each st around. (12 sts)
Rounds 3-5: *Sc 1, bob* repeat around. (12 sts with 6 bobbles per round)
Round 6: *Sc2tog* repeat around. (6 sts)
Leg:
Continue working in CC.
Rounds 7-30: Sc in each st around. (6 sts)
This creates a long tube approximately 6 inches. Feel free to add or subtract rounds to adjust leg length to your preference.
Sl st to next st. Fasten off, leaving a long tail for attaching.
Assembly Instructions
Time to bring your froggy friend together! Take your time with this part.
Step 1: Position the belly panel on the front center of the main body, with the bottom edge of the panel sitting about half an inch above the bottom edge of the cozy. Pin in place.
Step 2: Using the long tail from the belly panel, whip stitch around all four edges to secure it to the body. The chunky yarn makes this quite easy, just work evenly and keep your tension consistent.
Step 3: Attach the eyes to the top of the cozy. Position them about 2 inches apart, centered on the top toward the front. Use the long tails to sew them securely in place, stitching through the base of each eye several times.
Step 4: Attach the legs to the bottom front of the cozy, positioned just below the belly panel. Space them about 3 inches apart. Stitch securely through the top of each leg tube.
Step 5: Weave in all remaining ends. For chenille yarn, I recommend weaving through at least 3 inches of stitches and doubling back for security.
Pattern Notes and Tips for Success
Working with chenille yarn: This fluffy yarn can be a bit slippery. Take your time and count your stitches frequently. The texture hides mistakes beautifully, so don’t stress about perfection.
Adjusting the size: Standard toilet paper rolls are about 4.5 inches tall and 5 inches in diameter. If your cozy feels too loose or tight, try going up or down a hook size rather than changing your stitch count.
Making the bobbles pop: Always push your bobbles to the right side (outside) of your work as you complete them. They have a tendency to flip to the wrong side if you’re not paying attention.
Safety eyes alternative: If this cozy is for a home with very young children who might pull at it, consider embroidering the eyes instead or using felt circles with fabric glue.
More Ways to Customize Your Frog Cozy
Once you’ve mastered the basic pattern, try these fun variations:
This pattern also works wonderfully as a cover for spare paper towel rolls or even as a whimsical planter cover for small pots.
Final Thoughts on Your Crochet Frog Toilet Paper Cozy
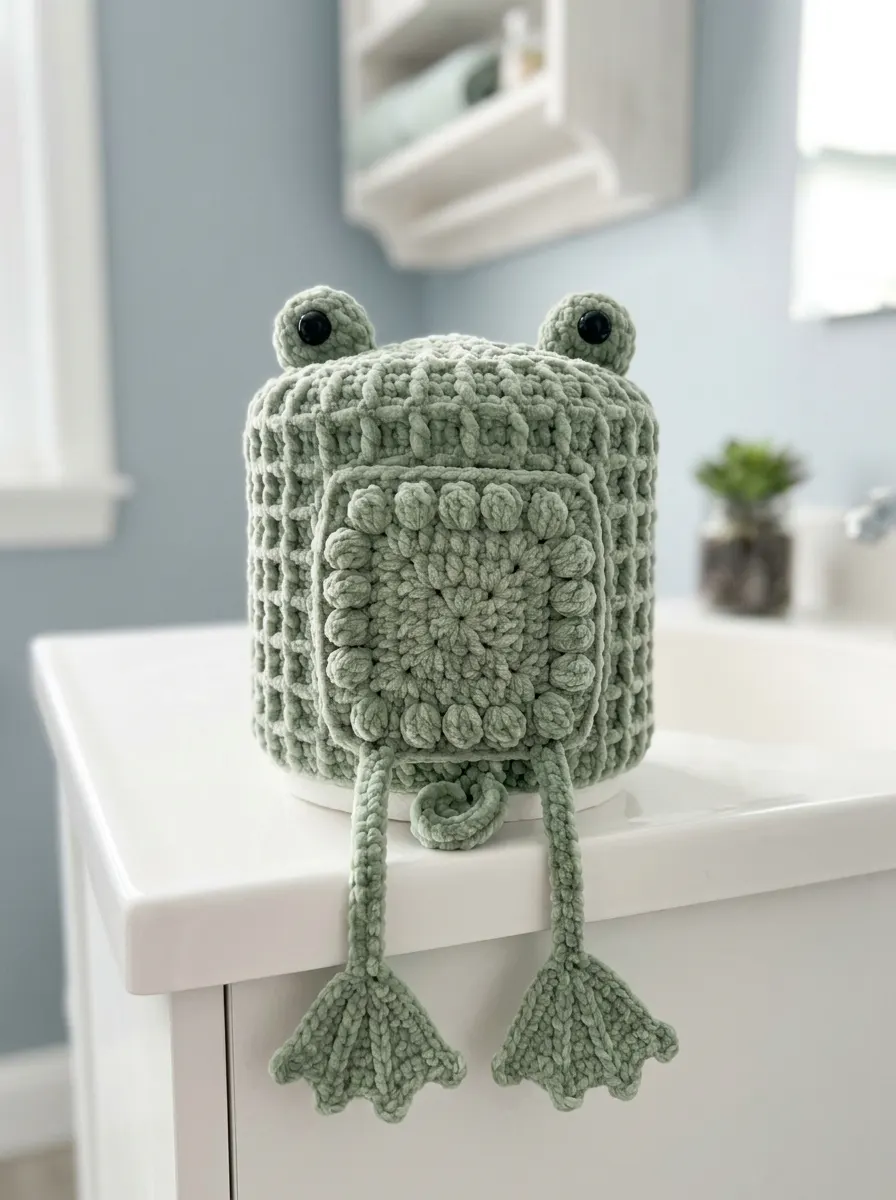
You did it! Your bathroom just got a whole lot cuter. This little froggy cozy combines practical function with personality, and I hope you had fun making it. The bobble texture, those sweet dangling legs, and those big eyes all come together to create something that makes everyday moments just a bit more joyful.
Whether you keep this one for yourself or gift it to a friend who needs a smile, I’d love to hear how your project turned out. Crochet brings so much warmth into our homes, and playful projects like this remind us not to take things too seriously.
I really hope you enjoyed making this sage green froggy toilet paper cozy! If you want to come back to this pattern later, go ahead and save it to your Pinterest boards so it’s easy to find. And please drop a comment below if you make one. I absolutely love seeing your finished projects and hearing which color combinations you chose!
You Might Also Like
- Mint Green Popcorn Stitch Baby Jumpsuit Free Crochet Pattern
- Ocean Blue Daisy Granny Square Blanket Free Crochet Pattern
- Dusty Rose Cable Cuff Slipper Boots Free Crochet Pattern
- Lavender Butterfly Baby Dress Free Crochet Pattern