Pink Rose Butterfly Baby Dress Free Crochet Pattern
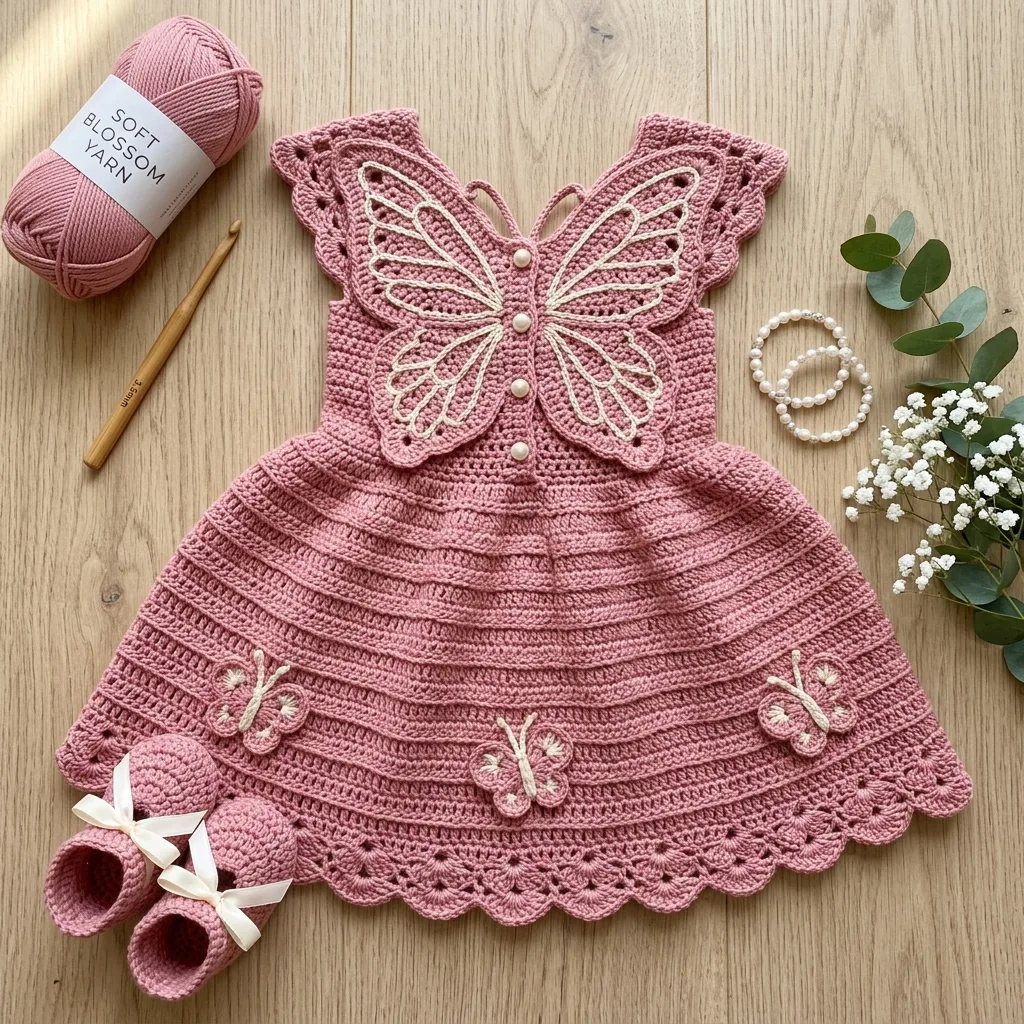
Let me guess. You saw this dress and thought, “There’s no way I can make that.” The intricate butterfly bodice, the perfectly tiered skirt, those delicate lace edges. It looks like something that belongs in a boutique window with a triple-digit price tag.
But here’s the truth. If you can single crochet and double crochet, you already have the core skills for this dress. The construction is straightforward top-down work in joined rounds. The butterfly? It’s a separate piece you make and sew on. No complicated colorwork. No carrying yarn. Just one section at a time.
I won’t pretend this is a weekend project. It takes time, patience, and attention to detail. But every single technique breaks down into manageable steps. Intermediate crocheters will feel challenged in the best way. Advanced beginners ready to level up will learn so much. Let’s walk through it together.
About This Crochet Pattern
This heirloom-quality baby dress features a fitted bodice worked in the round from the top down. The bodice transitions into a full flared skirt with beautiful horizontal texture created by working in the back loop only on alternating rounds. The showpiece is that stunning large decorative butterfly applique centered on the front bodice. You work it separately and sew it on after blocking.
Three smaller butterfly appliques accent the skirt hem for extra charm. The hem finishes with a delicate shell and picot lace border that creates those gorgeous scallops you see in the photo. The dress closes at the center back with a simple button loop.
Skill Level: Intermediate to Advanced
Time Estimate: 30 to 45 hours total for size 12 months, including all appliques and finishing. The large butterfly applique alone accounts for approximately 8 to 10 hours. Add approximately 5 hours per size increase.
Finished Measurements
The sample shown is size 12 to 18 months.
All instructions are written for size 12 to 18 months. Adjustments for other sizes appear in parentheses throughout as (0-3 months, 6-12 months, 12-18 months, 2T).
Materials Needed for This Crochet Baby Dress
Yarn:
Yarn Suggestions:
Cotton or cotton-blend yarn is strongly recommended. It provides the structure needed for the skirt to flare naturally and washes beautifully for baby items. Avoid 100% acrylic for this project.
Hook:
Notions:
Gauge
20 stitches and 22 rows = 4 in / 10 cm in single crochet worked in the round, blocked.
One shell repeat (5 dc) in the skirt = approximately 1.25 in / 3.2 cm wide.
Gauge matters here because this is a fitted garment. Swatch before you begin. If your swatch measures larger than gauge, go down one hook size. If smaller, go up one hook size.
Abbreviations and Stitch Definitions
Let me break down every stitch you’ll need. I’ll give you the full name, the abbreviation, and exactly what to do.
ch (chain): Yarn over, pull through loop on hook. The foundation of most crochet.
sl st (slip stitch): Insert hook, yarn over, pull through both the stitch and the loop on hook in one motion. Used for joining rounds.
sc (single crochet): Insert hook into stitch, yarn over, pull up a loop (2 loops on hook), yarn over, pull through both loops. The most basic stitch.
hdc (half double crochet): Yarn over, insert hook, pull up a loop (3 loops on hook), yarn over, pull through all 3 loops.
dc (double crochet): Yarn over, insert hook, pull up a loop (3 loops on hook), yarn over, pull through 2 loops (2 loops remain), yarn over, pull through remaining 2 loops.
tr (treble crochet): Yarn over twice, insert hook, pull up a loop (4 loops on hook), yarn over, pull through 2 loops three separate times.
BLO (back loop only): Work only into the back loop of the stitch. This creates the horizontal ridge texture on the skirt.
sc2tog (single crochet two together): Insert hook into next stitch, pull up a loop. Insert hook into following stitch, pull up a loop (3 loops on hook). Yarn over and draw through all 3 loops. This decreases by one stitch.
Shell Stitch: Work 5 dc into the same stitch or space. Creates the fan-shaped shell unit.
Picot: Chain 3, slip stitch into the first chain of the chain-3. Adds the decorative points to the hem.
FSC (Foundation Single Crochet): A method of simultaneously making the foundation chain and first row of single crochet. This creates a flexible, non-curling neck edge.
Pattern Notes Before You Begin
Read these carefully. They’ll save you confusion later.
1. The dress is worked top-down. Start at the neck, shape the yoke with raglan-style increases, separate for armholes, work the body in rounds, then flare the skirt.
2. All rounds are joined with a slip stitch. Begin each round with the appropriate starting chain.
3. Place a stitch marker at each of the 4 raglan increase points and move them up each round.
4. The large butterfly is worked separately in Color B and sewn to the front bodice after blocking.
5. Chain 3 at the beginning of dc rounds counts as first dc throughout.
6. Blocking is essential. Wet block the finished dress before sewing on appliques.
Step by Step Crochet Pattern Instructions
Yoke
The yoke is worked flat initially for the back opening, then joined.
Yoke Neck Foundation:
Using Color A and 3.5 mm hook, work 64 (56, 64, 72) FSC. Do not join.
Row 1 (WS): Chain 1, turn. Sc in each FSC across. (64 sc)
Now divide for yoke sections using stitch markers. The yoke is divided into: Left Back 8 (7, 8, 9) sts, Left Raglan 1 st marked, Left Front Sleeve 10 (8, 10, 12) sts, Left Raglan 1 st marked, Front 24 (21, 24, 27) sts, Right Raglan 1 st marked, Right Front Sleeve 10 (8, 10, 12) sts, Right Raglan 1 st marked, Right Back 8 (7, 8, 9) sts.
Yoke Row 2 (RS, increase row): Chain 1, turn. Sc in each st to 1 st before first marker, 2 sc in next st (inc), sc in marked st, 2 sc in next st (inc). Continue this increase pattern at each of the 4 markers. Sc to end. (80 sc)
Yoke Row 3 (WS): Chain 1, turn. Sc in each st across. (80 sc)
Continue alternating increase rows and plain sc rows:
Checkpoint: The piece should measure approximately 3.5 in / 9 cm from neck edge to bottom of yoke.
Join Yoke and Separate Sleeves
Setup Round (RS): Chain 1. Sc across Left Back section (20 sts), chain 4 for underarm bridge, skip all 26 Left Sleeve stitches, sc across Front section (44 sts), chain 4, skip all 26 Right Sleeve stitches, sc across Right Back section (20 sts). Join both back edges with slip stitch.
Bodice Round 1: Chain 1. Sc in each of the 20 left back sts, sc in each of the 4 underarm chain sts, sc in each of the 44 front sts, sc in each of the 4 underarm chain sts, sc in each of the 20 right back sts. Sl st to join. (92 sc)
Bodice Rounds 2 through 8: Chain 1. Sc in each st around. Sl st to join. (92 sc)
Waist Transition Round
Waist Round 1 (Increase Round): Chain 1. Sc in first st, 2 sc in next st. Repeat (sc in next st, 2 sc in next st) around. Sl st to join. (138 sc)
Skirt
This is where the magic happens. The BLO rounds create those beautiful tiered ridges.
Skirt Round 1: Chain 3 (counts as dc). Dc in each st around. Sl st to join. (138 dc)
Skirt Round 2 (BLO): Chain 1. Working in BLO only, sc in each st around. Sl st to join. (138 sc)
Skirt Round 3 (Increase Round): Chain 3. Dc in first st. (Dc in next 2 sts, 2 dc in next st) repeat around. Sl st to join. (184 dc)
Skirt Round 4 (BLO): Chain 1. Sc in BLO of each st around. Sl st to join. (184 sc)
Skirt Round 5: Chain 3. Dc in each st around. Sl st to join. (184 dc)
Skirt Round 6 (BLO): Chain 1. Sc in BLO of each st around. Sl st to join. (184 sc)
Skirt Round 7 (Increase Round): Chain 3. Dc in first st. (Dc in next 3 sts, 2 dc in next st) repeat around. Sl st to join. (230 dc)
Continue this pattern of BLO rounds, dc rounds, and increase rounds:
Hem Shell and Picot Lace Border
Border Round 1 (Shell Setup): Chain 1. Sc in first st. (Skip 2 sts, shell of 5 dc in next st, skip 2 sts, sc in next st) repeat around. Sl st to first sc. (53 shells)
Border Round 2: Chain 3. (Sc in center dc of next shell, ch 3, dc in next sc, ch 3) repeat around. Sl st to join.
Border Round 3: Sl st into first ch-3 sp. Chain 1. (Sc in ch-3 sp, shell of 5 dc in next sc, sc in next ch-3 sp, sc in next dc) repeat around. Sl st to first sc.
Border Round 4 (Picot Finishing): Sl st to center of first shell. Chain 1. (Sc in center dc of shell, picot, ch 2, skip to next shell center) repeat around. Sl st to first sc. Fasten off.
Cap Sleeves
With RS facing, join Color A at center underarm.
Sleeve Round 1: Chain 1. Sc across the 4 underarm chain sts, sc in each of the 26 held sleeve sts. Sl st to join. (30 sc)
Sleeve Round 2: Chain 1. Sc in each st around. Sl st to join. (30 sc)
Sleeve Round 3 (Decrease): Chain 1. (Sc in next 4 sts, sc2tog) repeat around. (24 sc)
Sleeve Round 4: Chain 1. Sc in each st around. Sl st to join. (24 sc)
Sleeve Round 5 (Scallop Edging): Chain 1. (Sc in next st, skip 1 st, 3 dc in next st, skip 1 st) repeat around. Sl st to join. Fasten off.
Repeat for second sleeve.
Neck Edge Finishing
With RS facing, join Color A at top right corner of back opening.
Neck Edge Round 1: Chain 1. Work sc evenly around the neck edge, approximately 1 sc per FSC across front and back. Sl st to join.
Neck Edge Round 2 (Button Loop): Chain 1. Sc in each st around. When you reach the top of the right back opening, chain 6, skip 2 sts, sl st back into the skipped st to form loop. Complete round. Fasten off.
Sew one pearl button to the left back opening edge aligned with the button loop.
Large Butterfly Applique
The butterfly has 4 wing sections worked in Color B. Two upper wings and two lower wings, mirrored for left and right sides.
Upper Wing (Make 2):
Foundation Chain: Chain 14.
Wing Row 1: Dc in 4th ch from hook, dc in each ch across. (12 dc)
Wing Row 2: Chain 4, turn. Tr in same first st, dc in next 2 sts, hdc in next 2 sts, sc in next 2 sts, hdc in next 2 sts, dc in next st, (dc, tr, ch 2, tr, dc) all in last st.
Wing Row 3: Chain 3, turn. Dc into ch-2 sp at tip. (Ch 2, skip 2 sts, dc in next st) repeat 5 times across. Ch 2, dc in top of ch-4.
Wing Row 4: Chain 3, turn. (3 dc in ch-2 sp) repeat across each ch-2 sp, dc in last dc. (20 dc)
Wing Row 5: Chain 1, turn. Sc in first dc. (Ch 3, skip 2 dc, sc in next dc) repeat across.
Wing Row 6: Chain 1, turn. (5 dc shell in ch-3 lp, sc between lps) repeat across.
Wing Row 7: Chain 1, do not turn. Work sc edging down the straight inner edge. Fasten off, leaving a 12-in tail.
Lower Wing (Make 2):
Foundation Chain: Chain 10.
Lower Wing Row 1: Dc in 4th ch from hook, dc in each ch across. (8 dc)
Lower Wing Row 2: Chain 3, turn. (Ch 2, skip 1 st, dc in next st) repeat 3 times. Ch 2, dc in turning ch.
Lower Wing Row 3: Chain 3, turn. (3 dc in ch-2 sp, dc in next dc) repeat across. (17 dc)
Lower Wing Row 4: Chain 1, turn. Sc in first st. (Ch 2, skip 2, sc in next) repeat across.
Lower Wing Row 5: Sl st into first ch-2 sp. Chain 1. (3 dc shell in ch-2 sp, sc in next sc) repeat across. Fasten off, leaving a 12-in tail.
Butterfly Assembly:
Arrange all 4 wings on a flat surface. Upper wings angle upward and outward. Lower wings angle downward and outward. Whipstitch the straight inner edges together at a central vertical axis.
For antennae, chain 8 with Color B, fold in half, and attach at the top center of joined wings.
Create a small oval body using Color A. Sew to the center of the joined wings. Add pearl buttons along the body center.
Small Butterfly Appliques (Make 3)
Work smaller versions following the lower wing instructions. Sew to the skirt hem at center front and approximately 5 in to each side.
Finishing Your Butterfly Baby Dress
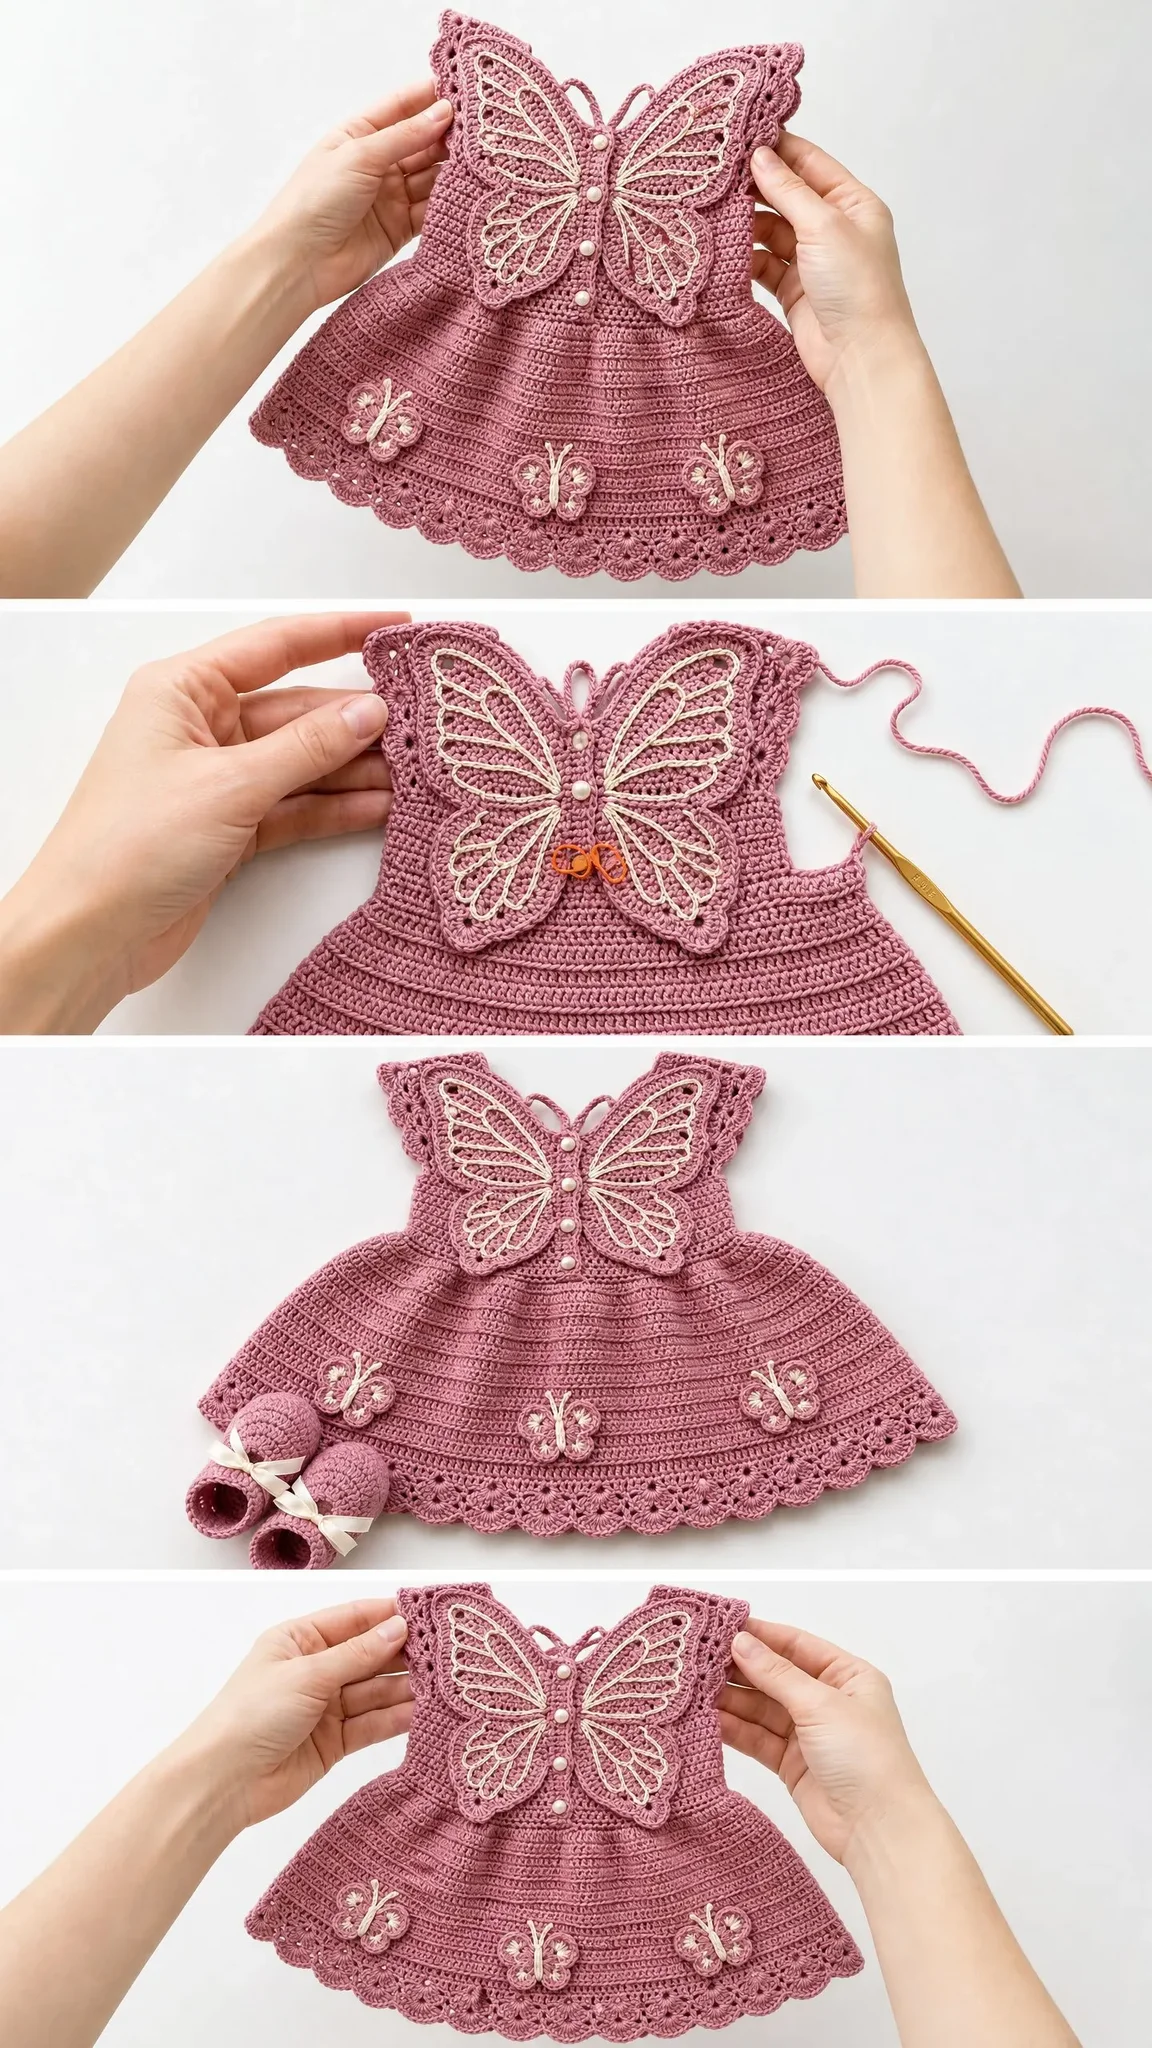
Weave in all ends securely. Wet block the entire dress before attaching any appliques. Lay flat on a blocking mat, pin the skirt into a full circle to encourage the flare, and allow to dry completely.
Pin the large butterfly to the center front bodice, positioning it so the wings frame the neckline and extend slightly onto the cap sleeves. Sew securely using matching thread.
Attach the three small butterflies to the marked positions on the skirt hem.
Give the dress a final steam or light press if needed.
I hope this crochet tutorial gives you everything you need to create something truly special. This dress takes time and attention, but every hour shows in the finished piece. It’s the kind of project that becomes a treasured keepsake, passed down and photographed for years to come.
If you make this butterfly baby dress, I would absolutely love to see it! Share your photos on Instagram or tag me on Facebook. Seeing your finished projects is honestly the best part of sharing patterns.
Save this pattern to your Pinterest boards so you can find it when you’re ready to start. And please drop a comment below if you make one. I’d love to hear how it turns out for you!
You Might Also Like
- Lavender Fields Flower Bracelet Free Crochet Pattern
- Blush Pink Tiered Lace Puff Sleeve Dress Free Crochet Pattern
- Sunset Orange Ruffle Crochet Dress Free Crochet Pattern
- Coral Bloom Baby Dress Free Crochet Pattern