Pink Dragon Baby Swaddle Blanket Free Crochet Pattern
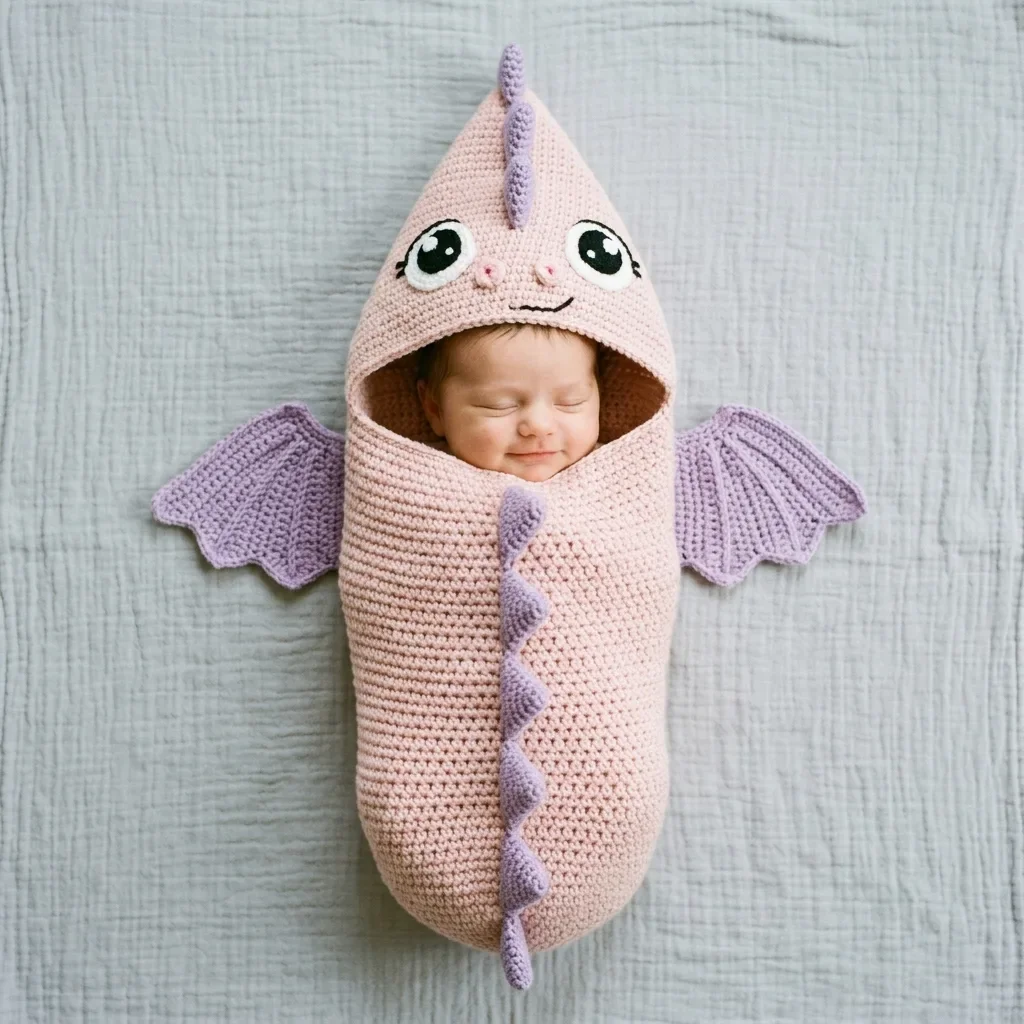
Let me guess. You saw this adorable dragon cocoon and thought, “There’s no way I can make that.” Maybe the wings look complicated. Maybe the hood seems fussy. Maybe you’ve never crocheted anything with so many pieces before.
Here’s the truth. This pattern is just single crochet. That’s it. The body is a tube worked in the round. The hood is a flat rectangle with some decreases. The wings and spikes are small, simple shapes sewn on at the end. If you can chain, single crochet, and increase, you have every skill you need.
I promise this is more approachable than it looks. Whether you’re an advanced beginner ready to stretch your skills or an experienced crocheter looking for a showstopping baby gift, this dragon swaddle cocoon will work up beautifully. Let me walk you through every single step.
Why This Dragon Swaddle Cocoon Makes the Perfect Baby Gift
This cozy cocoon transforms any newborn into an adorable baby dragon for photos, snuggles, or both. The design wraps baby securely from toes to shoulders while the hood frames their sweet face with dragon features. Those bat wings and dorsal spikes? Pure magic for newborn photography sessions.
The construction is smarter than it looks. You’ll work the body as one seamless tube from bottom to top. No seams along the sides means nothing to irritate baby’s skin. The hood attaches at the top opening, and all the dragon details get sewn on last. Think of it as building with simple blocks.
Finished measurements put this squarely in the newborn to three month range:
Expect this project to take 12 to 18 hours total. The body alone runs 6 to 8 hours, the hood another 2 to 3, and finishing details fill the remaining time.
Materials You’ll Need
Yarn:
Hook: US size G-6 / 4.00 mm crochet hook
Additional supplies:
Yarn suggestions that work beautifully: Lion Brand 24/7 Cotton in Rose and Lavender gives excellent stitch definition and washes well. Paintbox Yarns Cotton DK works if you go down to a 3.50 mm hook. Whatever you choose, make sure it’s machine washable and baby safe.
Gauge (Please Don’t Skip This)
With your G-6 hook and Yarn A in single crochet (sc) worked in continuous rounds:
To make a gauge swatch: Chain 22. Work single crochet in rows for 24 rows. Block lightly. Measure the center section.
Gauge matters here because the cocoon needs to fit a newborn properly. Too tight and baby won’t fit. Too loose and the swaddle effect disappears. Adjust your hook size up if your stitches are too tight, down if too loose.
Abbreviations and Stitch Definitions
ch: chain, the foundation stitch that creates your starting row
sl st: slip stitch, insert hook, yarn over, pull through both loops on hook
sc: single crochet, insert hook in stitch, yarn over and pull up a loop (2 loops on hook), yarn over and pull through both loops
sc2tog: single crochet two together (a decrease), insert hook in first stitch, pull up a loop, insert hook in next stitch, pull up a loop (3 loops on hook), yarn over and pull through all 3 loops
inc: increase, work 2 sc into the same stitch
MR: magic ring, an adjustable loop that closes tightly at the center of rounds
st(s): stitch(es)
rnd(s): round(s)
BLO: back loop only, work into only the back loop of the stitch
Part 1: The Body
The body starts at the bottom (where baby’s feet go) and works upward to the opening. You’ll work in continuous rounds, meaning you don’t join or turn at the end of each round. Use a stitch marker to track your first stitch.
Rnd 1: Using Yarn A and a magic ring, work 6 sc into the ring. Pull ring closed. (6 sc)
Rnd 2: Inc in each st around. (12 sc)
Rnd 3: (Sc in next st, inc in next st) around. (18 sc)
Rnd 4: (Sc in next 2 sts, inc in next st) around. (24 sc)
Rnd 5: (Sc in next 3 sts, inc in next st) around. (30 sc)
Rnd 6: (Sc in next 4 sts, inc in next st) around. (36 sc)
Rnd 7: (Sc in next 5 sts, inc in next st) around. (42 sc)
Rnd 8: (Sc in next 6 sts, inc in next st) around. (48 sc)
Rnd 9: (Sc in next 7 sts, inc in next st) around. (54 sc)
Rnd 10: (Sc in next 8 sts, inc in next st) around. (60 sc)
Rnd 11: (Sc in next 9 sts, inc in next st) around. (66 sc)
Rnd 12: (Sc in next 10 sts, inc in next st) around. (72 sc)
Rnd 13: (Sc in next 11 sts, inc in next st) around. (78 sc)
Rnd 14: (Sc in next 12 sts, inc in next st) around. (84 sc)
Checkpoint: Your flat disk should measure approximately 7.5 inches (19 cm) across.
Rnds 15 through 55: Work even, sc in each st around. (84 sc each round)
This creates approximately 8 inches of vertical tube. After Round 55, your piece should measure 9 to 9.5 inches from the bottom.
Now you’ll add gradual shaping to widen toward the shoulders.
Rnd 56: (Sc in next 13 sts, inc in next st) around. (90 sc)
Rnds 57 and 58: Work even. (90 sc)
Rnd 59: (Sc in next 14 sts, inc in next st) around. (96 sc)
Rnds 60 and 61: Work even. (96 sc)
Rnd 62: (Sc in next 15 sts, inc in next st) around. (102 sc)
Rnds 63 and 64: Work even. (102 sc)
Rnd 65: (Sc in next 16 sts, inc in next st) around. (108 sc)
Rnds 66 through 70: Work even. (108 sc)
Rnd 71: (Sc in next 17 sts, inc in next st) around. (114 sc)
Rnds 72 through 76: Work even. (114 sc)
Rnd 77: (Sc in next 18 sts, inc in next st) around. (120 sc)
Rnds 78 through 82: Work even. (120 sc)
Rnd 83: Working in BLO, sc in each st around. (120 sc)
Rnd 84: Working in both loops, sc in each st around. (120 sc)
Fasten off Yarn A. Weave in ends. Your body is complete.
Part 2: The Hood
The hood is worked flat in rows, shaped into a cone, then attached to the body opening.
Foundation chain: Using Yarn A, ch 61.
Row 1 (RS): Sc in 2nd ch from hook and in each ch across. Turn. (60 sc)
Rows 2 through 10: Ch 1, sc in each st across. Turn. (60 sc each row)
Now begin shaping decreases at both ends of every other row.
Row 11: Ch 1, sc2tog over first 2 sts, sc across to last 2 sts, sc2tog. Turn. (58 sc)
Row 12: Ch 1, sc in each st across. Turn. (58 sc)
Continue this pattern (decrease row, even row) through Row 65.
Row 13: Decrease row. (56 sc)
Row 14: Even row. (56 sc)
Row 15: Decrease row. (54 sc)
Continue decreasing every other row until:
Row 61: (8 sc)
Row 62: Ch 1, sc2tog, sc across to last 2 sts, sc2tog. Turn. (6 sc)
Row 63: Ch 1, sc2tog, sc in next 2 sts, sc2tog. Turn. (4 sc)
Row 64: Ch 1, sc2tog twice. Turn. (2 sc)
Row 65: Ch 1, sc2tog. (1 sc)
Fasten off, leaving a long tail.
Hood assembly: Fold the hood lengthwise so the slanted edges meet. Whipstitch approximately 4 to 5 inches down from the tip to create the pointed cone shape.
Attaching the hood: Position the hood opening against approximately 60 stitches of the body opening (the front half). Whipstitch securely. For the back 60 stitches, fold the edge inward and stitch down for a clean finish.
Part 3: Hood Tip Accent (The Horn)
Using Yarn B:
Rnd 1: MR, work 6 sc. (6 sc)
Rnd 2: Inc in each st. (12 sc)
Rnd 3: (Sc in next st, inc) around. (18 sc)
Rnds 4 and 5: Work even. (18 sc)
Rnd 6: (Sc in next st, sc2tog) around. (12 sc)
Stuff lightly with fiberfill.
Rnd 7: Sc2tog around. (6 sc)
Fasten off, close the opening, and sew to the hood tip.
Part 4: Dorsal Spikes (Make 12)
Small spikes (make 4 for the hood):
MR, 3 sc. (3 sc)
Rnd 2: (Sc in next st, inc) once, sc in next st. (4 sc)
Rnd 3: (Sc in next st, inc) twice. (6 sc)
Rnd 4: Work even. (6 sc)
Fasten off with a long tail.
Medium spikes (make 5 for upper body):
MR, 4 sc. (4 sc)
Rnd 2: Inc in each st. (8 sc)
Rnd 3: (Sc in next st, inc) around. (12 sc)
Rnds 4 and 5: Work even. (12 sc)
Fasten off with a long tail.
Large spikes (make 3 for lower body):
MR, 4 sc. (4 sc)
Rnd 2: Inc in each st. (8 sc)
Rnd 3: (Sc in next st, inc) around. (12 sc)
Rnd 4: (Sc in next 2 sts, inc) around. (16 sc)
Rnds 5 and 6: Work even. (16 sc)
Fasten off with a long tail.
Space spikes approximately 1.5 inches apart along the center back seam, from hood to body.
Part 5: Wings (Make 2)
Using Yarn B, ch 22.
Row 1: Sc in 2nd ch from hook and across. Turn. (21 sc)
Row 2: Ch 1, inc in first st, sc across to last st, inc. Turn. (23 sc)
Row 3: Ch 1, sc across. Turn. (23 sc)
Continue increasing at both ends every other row until you have 31 sc.
Rows 11 through 14: Work even. (31 sc each row)
Now shape three lobes by working short rows. Work the first 8 stitches, decrease down to a point. Rejoin for the middle 11 stitches, decrease to a point. Rejoin for the final 12 stitches, decrease to a point.
Work a single crochet edging around the entire wing perimeter, putting 3 sc at each lobe tip.
Attach wings at the sides of the body around Round 65, with the straight edge against the body.
Part 6: The Dragon Face
Position safety eyes approximately 2 inches up from the hood opening, about 1.5 inches apart horizontally. Push through the fabric and secure with locking backs.
Cut white felt ovals (approximately 1.5 inches by 1.25 inches) for eye surrounds. Cut small holes to fit around the safety eye posts before locking.
Add pink felt circles for blush cheeks. Use surface slip stitch in Yarn B or embroidery thread to create the nose and mouth details.
Pattern Notes and Safety Tips
Important for baby safety: Safety eyes should only be used on items for babies who will be supervised. For unsupervised use, embroider the eyes instead using yarn.
The stitch counts in parentheses at the end of each instruction show your total stitches after completing that round or row. Use these to check your work.
When the pattern says “work even,” simply work one sc into each stitch with no increases or decreases.
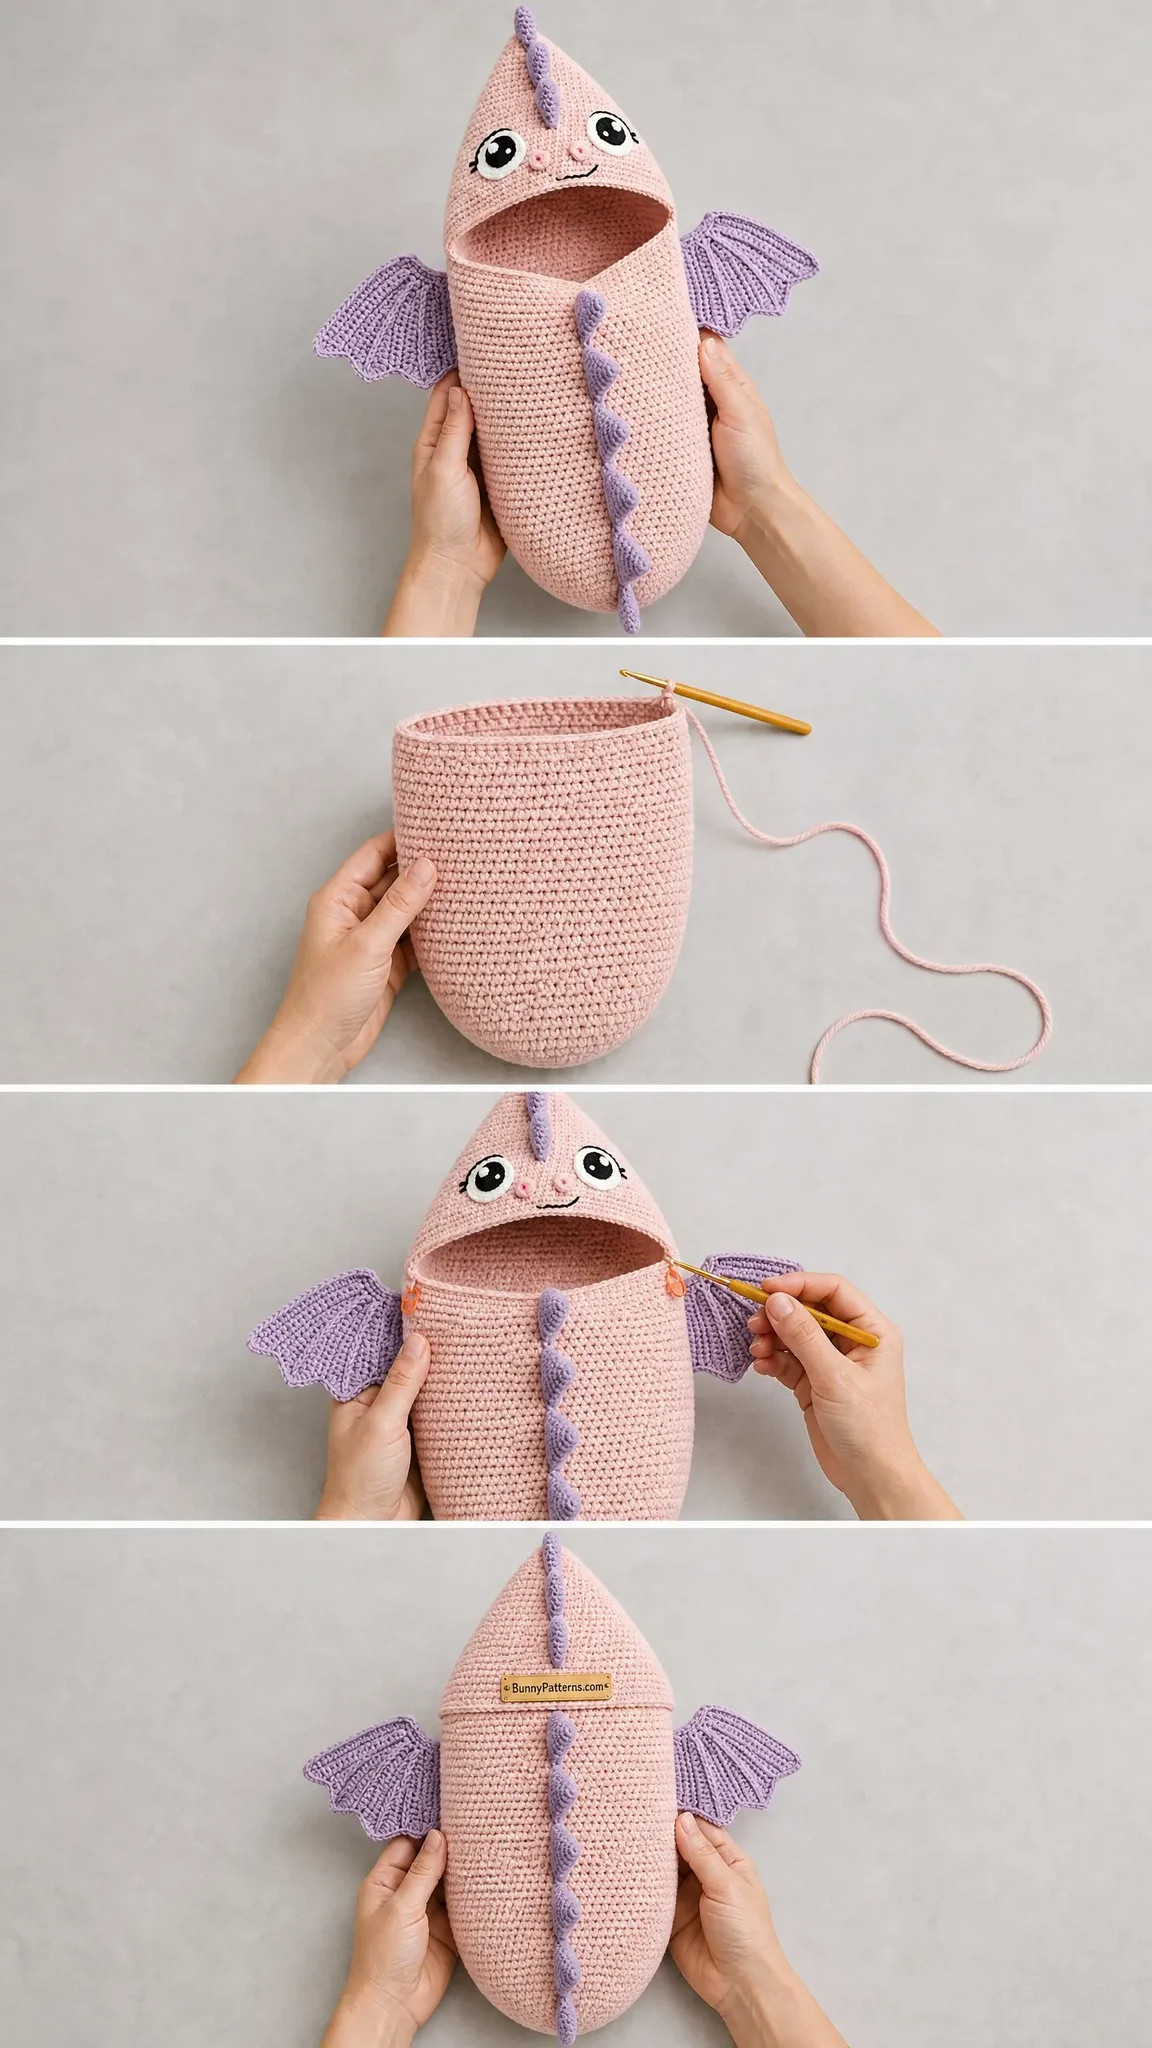
You Did It!
This dragon swaddle cocoon looks impressive, but you built it from simple shapes. A tube. A cone. Some triangles. Flat panels with scalloped edges. Each piece used basic stitches you already know.
The finished cocoon makes an unforgettable baby shower gift or newborn photo prop. Every time someone sees those little lavender wings, they’ll ask where you got it. And you’ll get to say you made it yourself.
I hope you love making this pattern as much as I loved designing it. If you want to save this dragon cocoon for your next project, go ahead and pin it to your Pinterest boards. And please, drop a comment below when you finish yours. I’d absolutely love to see your baby dragons come to life!
You Might Also Like
- Mint Green Shell Stitch Baby Dress Free Crochet Pattern
- Strawberry Shortcake Turtle Free Crochet Pattern
- Pastel Rainbow Shell Stitch Bodysuit Free Pattern
- Coral Sunset Ruffled Baby Romper Free Crochet Pattern