Pastel Pink Bunny Baby Romper Free Crochet Pattern
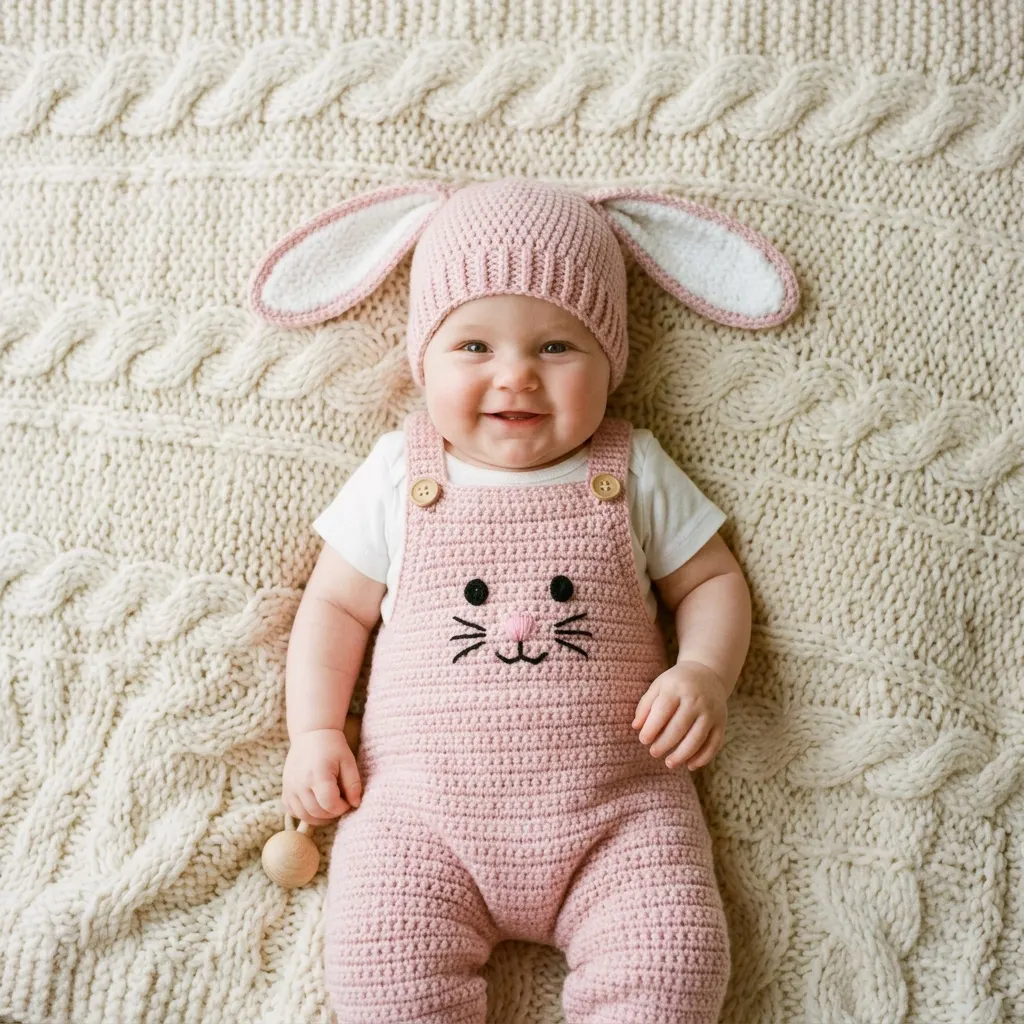
Looking for the perfect handmade baby shower gift or a sweet outfit for newborn photos? This adorable bunny romper keeps little ones cozy while looking absolutely precious. The entire piece uses single crochet throughout, making it accessible for confident beginners who want to try garment construction.
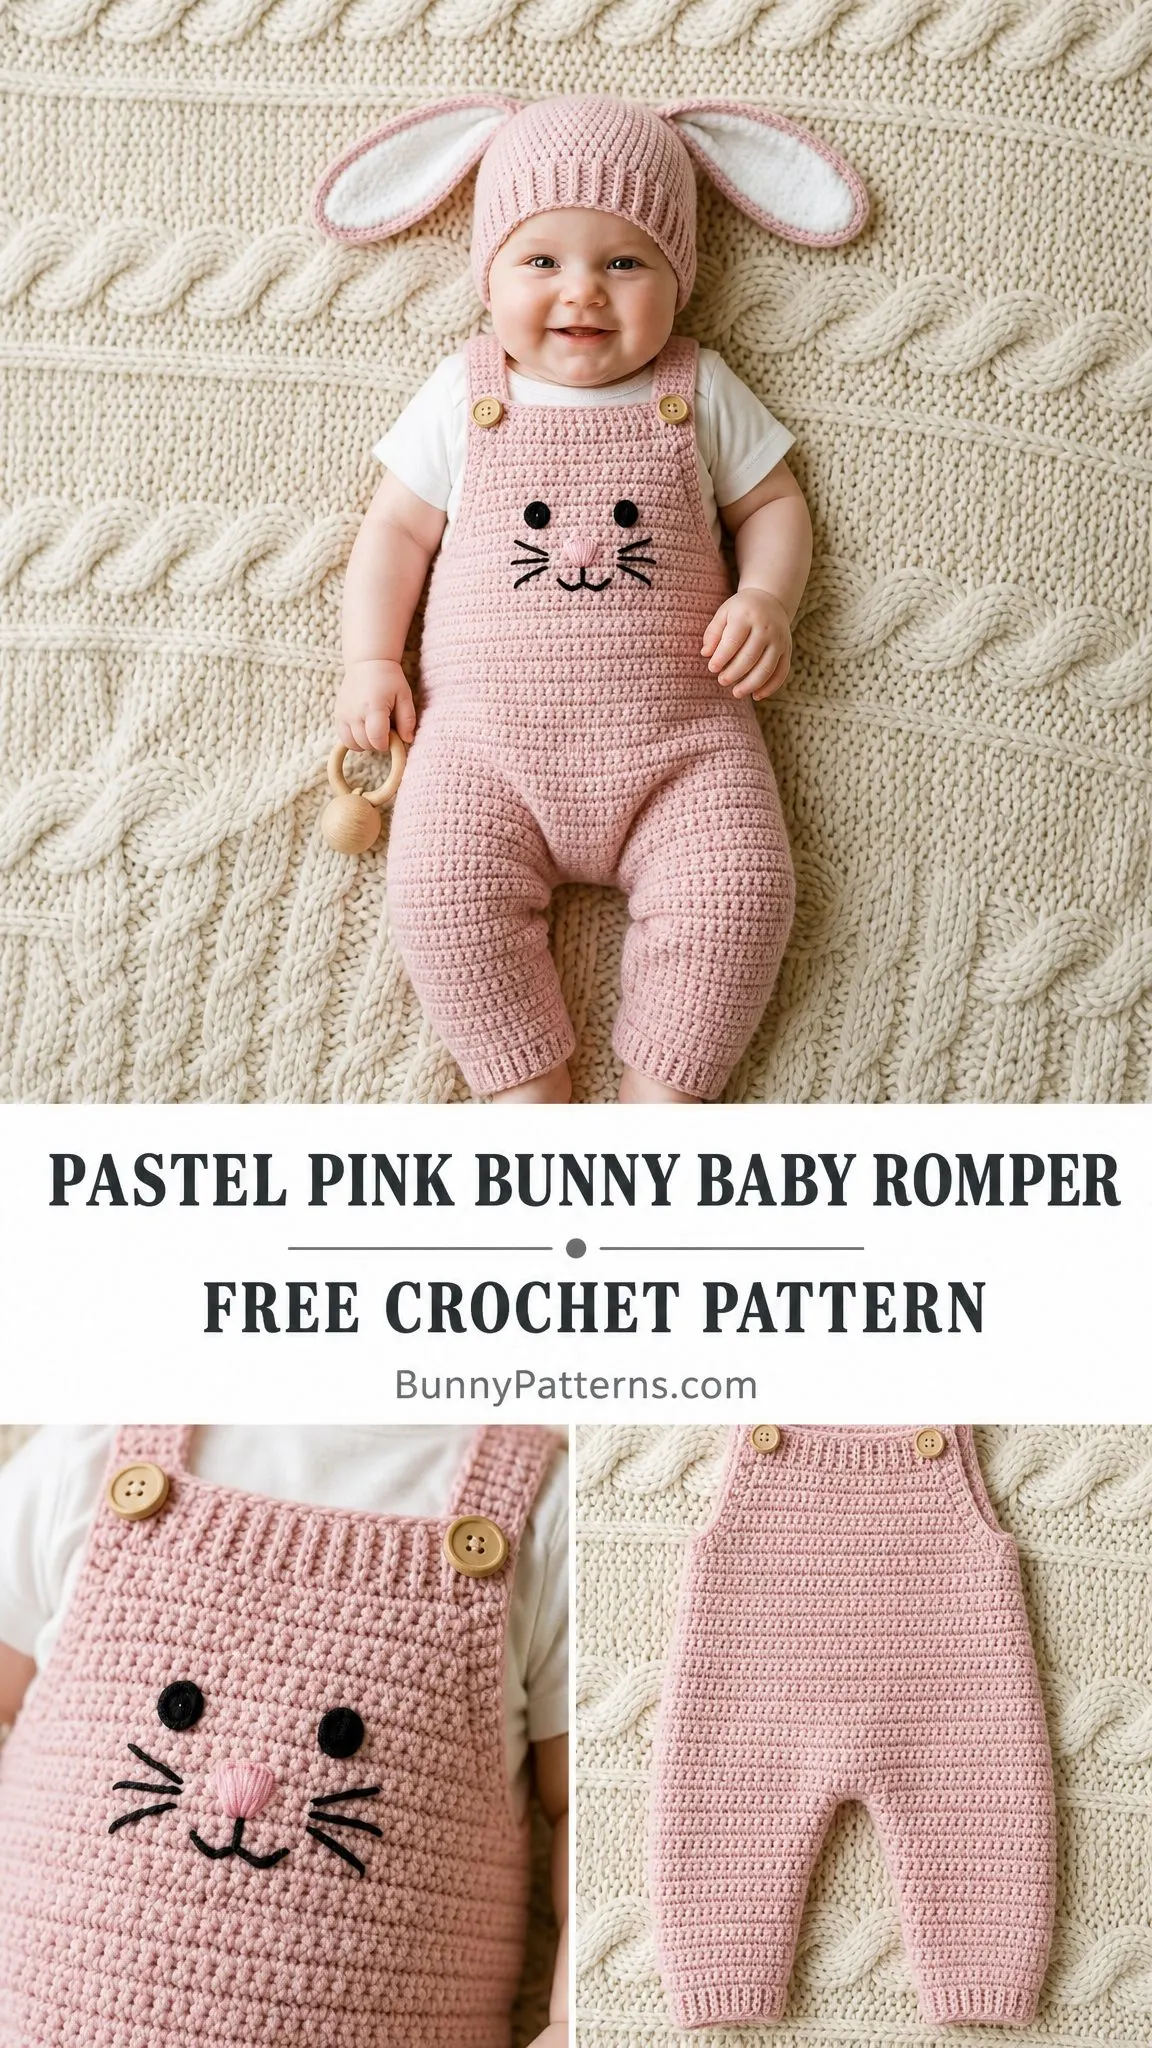
The romper features bib-style straps with wooden button closures, ribbed leg cuffs for gentle fit, and an embroidered bunny face that transforms a simple garment into something truly special. It works up in worsted weight yarn, so you will see progress quickly. Most crocheters finish this project in 8 to 12 hours.
Whether you are making this for your own baby, a grandchild, or a friend’s little one, this pattern creates a keepsake-quality piece. The dense single crochet fabric is sturdy enough for everyday wear yet soft against delicate skin. Let me walk you through every step.
About This Crochet Baby Romper Pattern
This bunny baby romper is sized for 3 to 6 month old babies, though I have included sizing notes at the end if you need to adjust. The construction method is straightforward. You will make two flat panels, one for the front and one for the back, then seam them together at the sides and crotch. The straps are worked separately and attached during assembly.
The finished romper measures approximately 17 inches around the chest and 16 inches from shoulder strap tip to crotch seam. The bib portion is about 6 inches wide and 4 inches tall, giving you plenty of space for that sweet embroidered bunny face.
Skill level: Intermediate. If you can work single crochet confidently, read a pattern, and are willing to try basic shaping and seaming, you can absolutely make this romper.
Materials You Will Need
Gather these supplies before you start:
Yarn:
Hook:
Notions:
Yarn Suggestions
Any smooth worsted weight yarn that meets gauge will work beautifully. Here are some specific options:
Lion Brand Pound of Love in Dusty Pink works wonderfully. It has a smooth twist that shows stitches clearly, and it is machine washable, which parents appreciate.
Paintbox Yarns Simply DK held double gives excellent stitch definition. The Blush Pink colorway matches the reference garment closely.
Cascade 220 Superwash in a dusty rose shade blocks beautifully and holds its shape well. The superwash treatment means it can go in the washing machine on gentle.
Avoid fuzzy, fluffy, or highly textured yarns. The embroidered bunny face will not show up clearly against them.
Gauge
18 stitches and 20 rows = 4 inches in single crochet, blocked
Gauge matters for fitted garments like this one. Please make a swatch before starting. If your swatch has more stitches per 4 inches than specified, switch to a larger hook. If you have fewer stitches, try a smaller hook. Keep adjusting until your gauge matches.
Abbreviations
Here are all the abbreviations used in this pattern, with definitions:
Special Techniques
Single Crochet Two Together (sc2tog)
This is your decrease stitch. Insert your hook into the next stitch, yarn over, and pull up a loop. You now have 2 loops on your hook. Insert your hook into the following stitch, yarn over, pull up a loop. Now you have 3 loops. Yarn over and draw through all 3 loops at once. You have turned 2 stitches into 1.
Back Loop Only Single Crochet (BLO sc)
When you look at the top of a stitch, you see two loops forming a V shape. The back loop is the one farther from you. For BLO sc, insert your hook under only that back loop instead of under both. This creates a horizontal ridge on the right side and gives a subtle ribbed texture. You will use this for the leg cuffs.
Pattern Notes Before You Begin
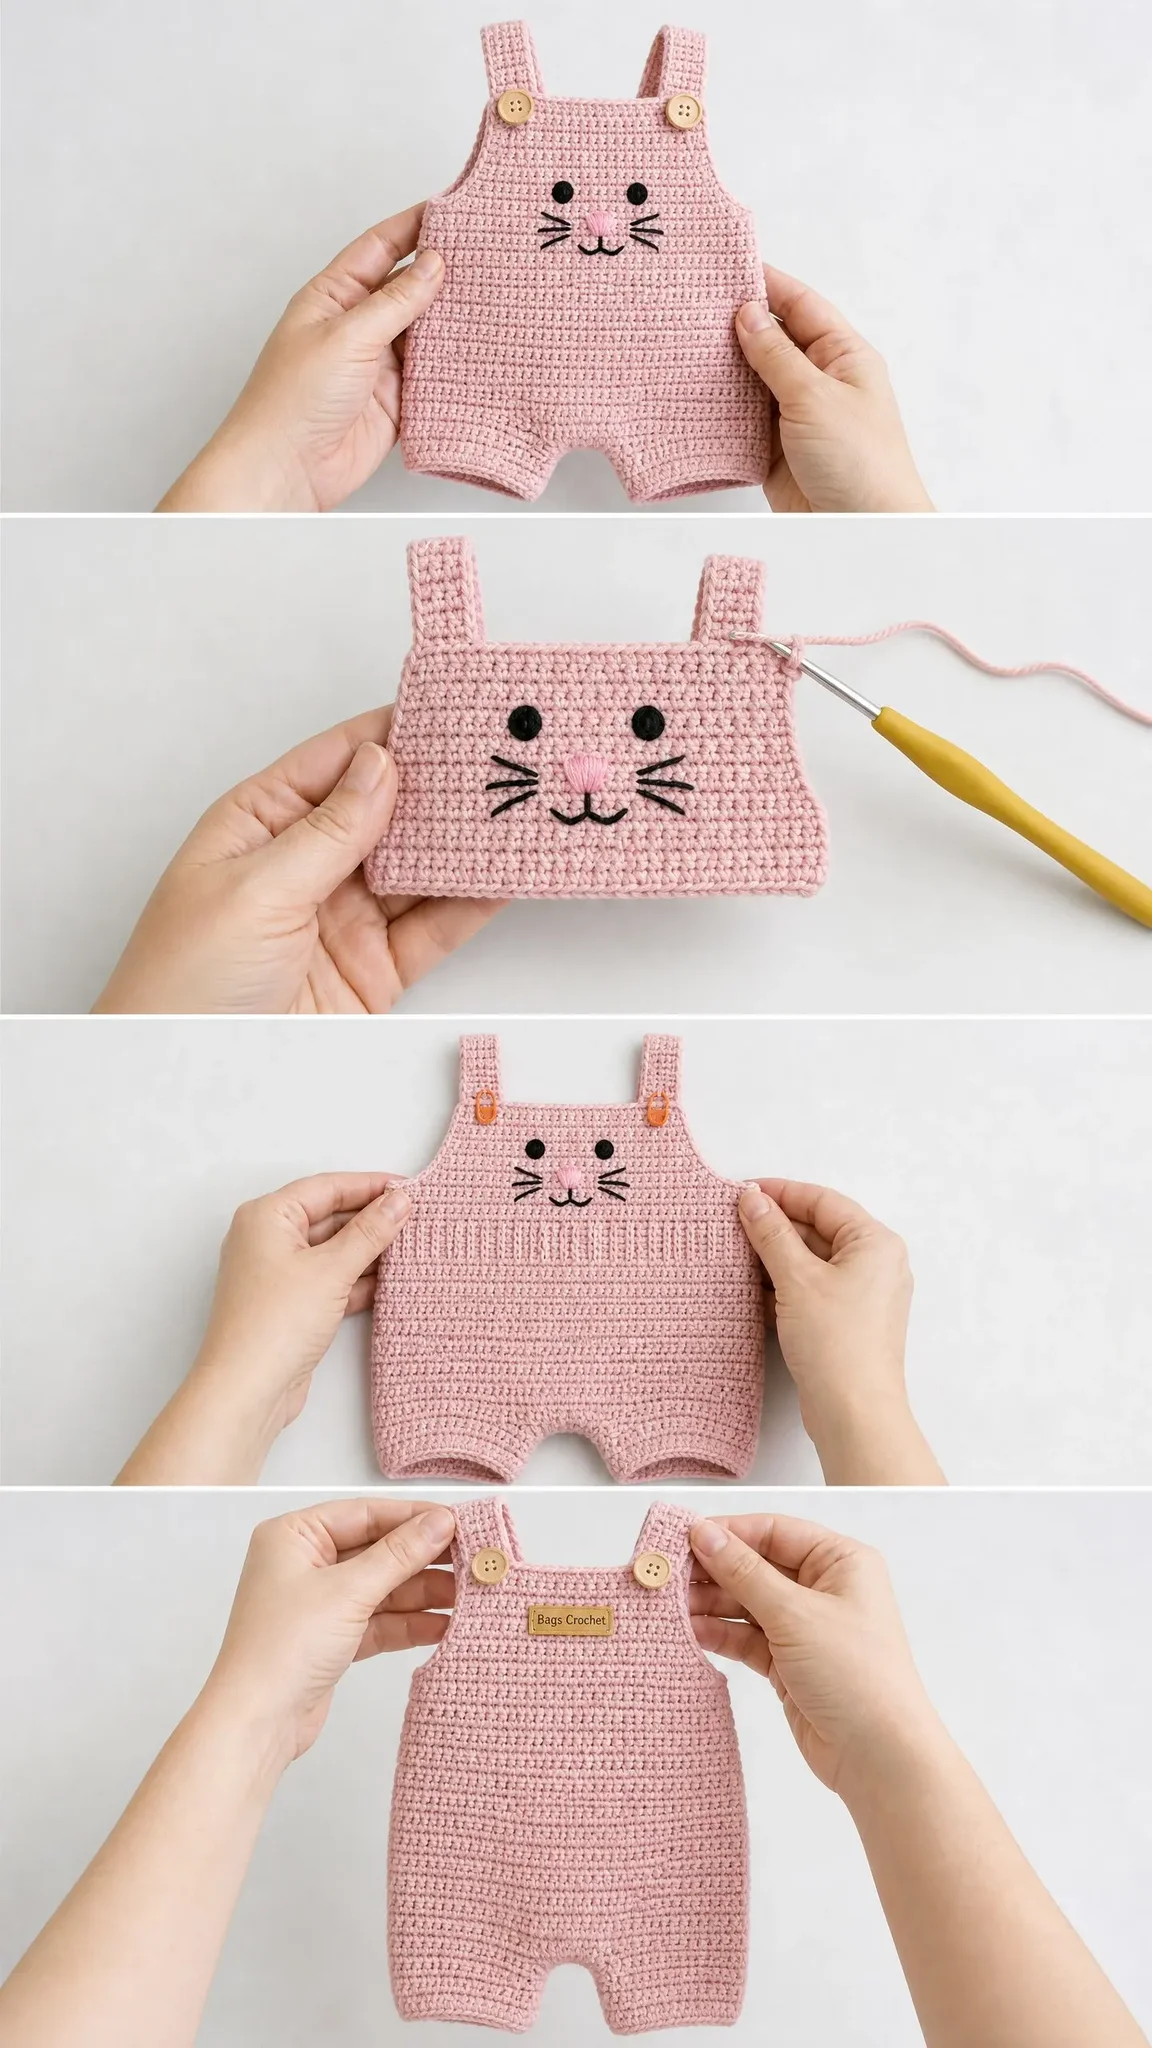
1. The romper is worked flat in two main panels, then seamed at the sides and crotch.
2. The front panel includes a bib section extending above the main body. The back panel is straight across the top with strap attachment points.
3. All turning chains count as 0 stitches in this pattern. Each row begins with chain 1 for turning purposes only. Do not count it or work into it on the following row.
4. The right side is the smooth side of the single crochet fabric, sometimes called the knit-look side.
5. Stitch counts in parentheses at the end of each row show your total working stitches.
Instructions
Front Panel
Foundation: Ch 40.
Row 1 (WS): Sc in 2nd ch from hook and in each ch across. Turn. (39 sc)
Row 2 (RS): Ch 1, sc in each st across. Turn. (39 sc)
Rows 3 through 18: Ch 1, sc in each st across. Turn. (39 sc)
After Row 18, your work should measure approximately 3.5 inches tall. Check this measurement before continuing to the armhole shaping.
Armhole Shaping (Front)
Row 19 (RS): Ch 1, sl st in first 3 sts (these stitches are left unworked to create the armhole), sc in next 33 sts. Turn. (33 sc)
Row 20: Ch 1, sc2tog over first 2 sts, sc in each st to last 2 sts, sc2tog. Turn. (31 sc)
Row 21: Ch 1, sc2tog over first 2 sts, sc in each st to last 2 sts, sc2tog. Turn. (29 sc)
Row 22: Ch 1, sc2tog over first 2 sts, sc in each st to last 2 sts, sc2tog. Turn. (27 sc)
Row 23: Ch 1, sc in each st across. Turn. (27 sc)
Rows 24 through 30: Ch 1, sc in each st across. Turn. (27 sc)
After Row 30, the armhole and shoulder section should measure approximately 2.5 inches from the start of armhole shaping.
Bib Shaping (Front)
The bib is worked on the center 17 stitches only. You will leave 5 stitches unworked on each side.
Row 31 (RS): Ch 1, sc in first 5 sts. Place a stitch marker here. Sc in next 17 sts. Place another marker. Turn, leaving last 5 sts unworked. (17 sc)
You are now working only on those center 17 stitches.
Row 32: Ch 1, sc in each of the 17 sts across. Turn. (17 sc)
Rows 33 through 50: Ch 1, sc in each of the 17 sts across. Turn. (17 sc)
After Row 50, the bib should measure approximately 4 inches tall from its base at Row 31.
Bib Strap Separation (Front)
Row 51 (RS): Ch 1, sc in first 5 sts. Turn. Leave remaining 12 sts unworked. (5 sc)
Left Strap (as worn):
Row 52: Ch 1, sc in each of 5 sts. Turn. (5 sc)
Rows 53 through 66: Ch 1, sc in each of 5 sts. Turn. (5 sc)
After Row 66, the left strap should measure approximately 3 inches from the strap separation row. Fasten off, leaving an 8-inch tail for weaving in.
Right Strap (as worn):
Return to Row 51 stitches. Skip center 7 sts (these form the neckline gap). Attach MC yarn to the next stitch.
Row 51-R (RS): Ch 1, sc in next 5 sts. Turn. (5 sc)
Row 52-R: Ch 1, sc in each of 5 sts. Turn. (5 sc)
Rows 53-R through 66-R: Ch 1, sc in each of 5 sts. Turn. (5 sc)
Fasten off, leaving an 8-inch tail.
Checkpoint: Your finished front panel from the bottom edge to the top of the straps should measure approximately 16 inches total length. The bib width should be approximately 6 inches.
Back Panel
Foundation: Ch 40.
Row 1 (WS): Sc in 2nd ch from hook and in each ch across. Turn. (39 sc)
Row 2 (RS): Ch 1, sc in each st across. Turn. (39 sc)
Rows 3 through 18: Ch 1, sc in each st across. Turn. (39 sc)
Armhole Shaping (Back)
Row 19 (RS): Ch 1, sl st in first 3 sts, sc in next 33 sts. Turn. (33 sc)
Row 20: Ch 1, sc2tog over first 2 sts, sc in each st to last 2 sts, sc2tog. Turn. (31 sc)
Row 21: Ch 1, sc2tog over first 2 sts, sc in each st to last 2 sts, sc2tog. Turn. (29 sc)
Row 22: Ch 1, sc2tog over first 2 sts, sc in each st to last 2 sts, sc2tog. Turn. (27 sc)
Row 23: Ch 1, sc in each st across. Turn. (27 sc)
Rows 24 through 50: Ch 1, sc in each st across. Turn. (27 sc)
Back Strap Attachment Row
Row 51 (RS): Ch 1, sc in first 5 sts, fasten off leaving a long tail. (5 sc worked, leaving 22 sts unworked temporarily)
Reattach yarn to the 23rd stitch of Row 50.
Row 51-B: Ch 1, sc in next 5 sts. Fasten off leaving a long tail. (5 sc)
The 17 stitches between the two strap anchor sections remain as the back neck opening.
Checkpoint: Both panels should now be identical in length. Lay them flat side by side to confirm before seaming.
Straps (Make 2)
These are the back straps that cross over the shoulders and button onto the front bib.
Foundation: Ch 7.
Row 1: Sc in 2nd ch from hook and in each ch across. Turn. (6 sc)
Rows 2 through 30: Ch 1, sc in each st across. Turn. (6 sc)
Each strap should measure approximately 6 inches long and 1.25 inches wide. Fasten off, leaving a 12-inch sewing tail.
Assembly
Step 1: Side Seams
Place front and back panels with right sides together. Using your yarn needle and a whipstitch or mattress stitch, seam the right side edge from Row 1 up through Row 18. Fasten off. Repeat for the left side edge. The portions above Row 18 remain open as armholes.
Step 2: Crotch Seam
Fold the assembled garment so the bottom edges of the front and back panels align at the center. Seam across the bottom center for approximately 2.5 inches using a whipstitch on the wrong side. This creates two leg openings.
Step 3: Attach Back Straps
Lay the garment flat with the back panel facing up. Position one strap at the left back strap anchor section, aligning the strap end with the top edge. Sew the strap end securely using the long tail. Sew through multiple rows for security. Repeat for the right strap.
Step 4: Attach Buttons
Sew 2 wooden buttons onto the right side of each front bib strap tip. That is 4 buttons total, 2 per strap. The back shoulder straps will button to these by slipping over the buttons through the natural stitch gaps.
Leg Cuffs (Make 2)
Join MC yarn at the center inside of one leg opening with a sl st.
Round 1: Ch 1, sc evenly around the leg opening, placing approximately 40 sc evenly distributed. Join with sl st to first sc. (40 sc)
Rounds 2 through 6: Ch 1, BLO sc in each st around. Join with sl st to first sc. (40 sc)
Fasten off and weave in end. Each leg cuff should measure approximately 1.25 inches deep.
Repeat for the second leg opening.
Bunny Face Embroidery
The bunny face is embroidered on the front bib, centered horizontally. Position it approximately 1 inch above the base of the bib section.
Eyes: Using black yarn, embroider two small filled circles approximately 1/2 inch wide, spaced about 1.5 inches apart. Use satin stitch (small parallel stitches layered close together) to fill each eye.
Nose: Using light pink yarn, embroider a small inverted triangle approximately 1/2 inch wide and 1/4 inch tall, centered between the eyes and about 3/4 inch below them. Fill with satin stitch.
Whiskers: Using black yarn, embroider three straight lines extending from each side of the nose. Each whisker should be 1 to 1.25 inches long. Angle them slightly upward, horizontally, and slightly downward for a natural look.
Mouth: Using black yarn, embroider a small curved smile descending from the bottom of the nose, approximately 1/2 inch long, curving up gently at each end.
Secure all embroidery ends on the wrong side with a double knot.
Size Adjustments
For newborn (0 to 3 months): Reduce foundation chain to 36 stitches, reduce the bib to 15 center stitches, work straps 2 rows shorter. You will need approximately 290 yards of yarn.
For 6 to 9 months: Increase foundation chain to 44 stitches, increase the bib to 19 center stitches, add 4 extra rows to the torso section (work Rows 3 through 22 instead of ending at 18), add 2 extra rows to strap length. You will need approximately 400 yards of yarn.
For length only: Add or remove rows between Row 3 and Row 18. Every 2 rows adds about 0.4 inches to torso length.
Finishing and Blocking
Weave in all yarn ends securely on the wrong side.
For wool yarn, wet block by soaking the garment in cool water, gently pressing out excess water between towels, then laying flat and pinning to measurements. Allow to dry completely.
For acrylic yarn, use steam blocking instead. Hold a steam iron 1 to 2 inches above the fabric surface without touching it. Allow to cool completely before removing pins.
Care Instructions
For acrylic: Machine wash cold on gentle. Lay flat to dry. Avoid high heat tumble drying.
For superwash wool: Machine wash cold on delicate. Lay flat to dry.
Store folded rather than hanging to prevent stretching.
You Did It!
This crochet baby romper pattern creates something truly special. The combination of the structured single crochet fabric, those sweet wooden buttons, and that charming embroidered bunny face makes a gift that will be treasured and photographed over and over again.
I hope this step by step crochet tutorial gave you everything you need to create this adorable piece. The instructions might look long, but remember, you are really just making rectangles and sewing them together. Take it one section at a time, and before you know it, you will have a finished romper ready for its first photo session.
If you loved this pattern, go ahead and save it to your Pinterest boards so you can find it easily when you are ready to start. And if you make this bunny romper, I would absolutely love to see it! Drop a comment below or tag me on social media with your finished project. Seeing your creations truly makes my day.
You Might Also Like
- Strawberry Shortcake Turtle Free Crochet Pattern
- Sage Green Boho Crochet Summer Dress Free Pattern
- Sage Green Floral Bucket Bag Free Crochet Pattern
- Mint Garden Party Baby Dress Free Crochet Pattern