Ocean Blue Floral Lace Top Free Crochet Pattern
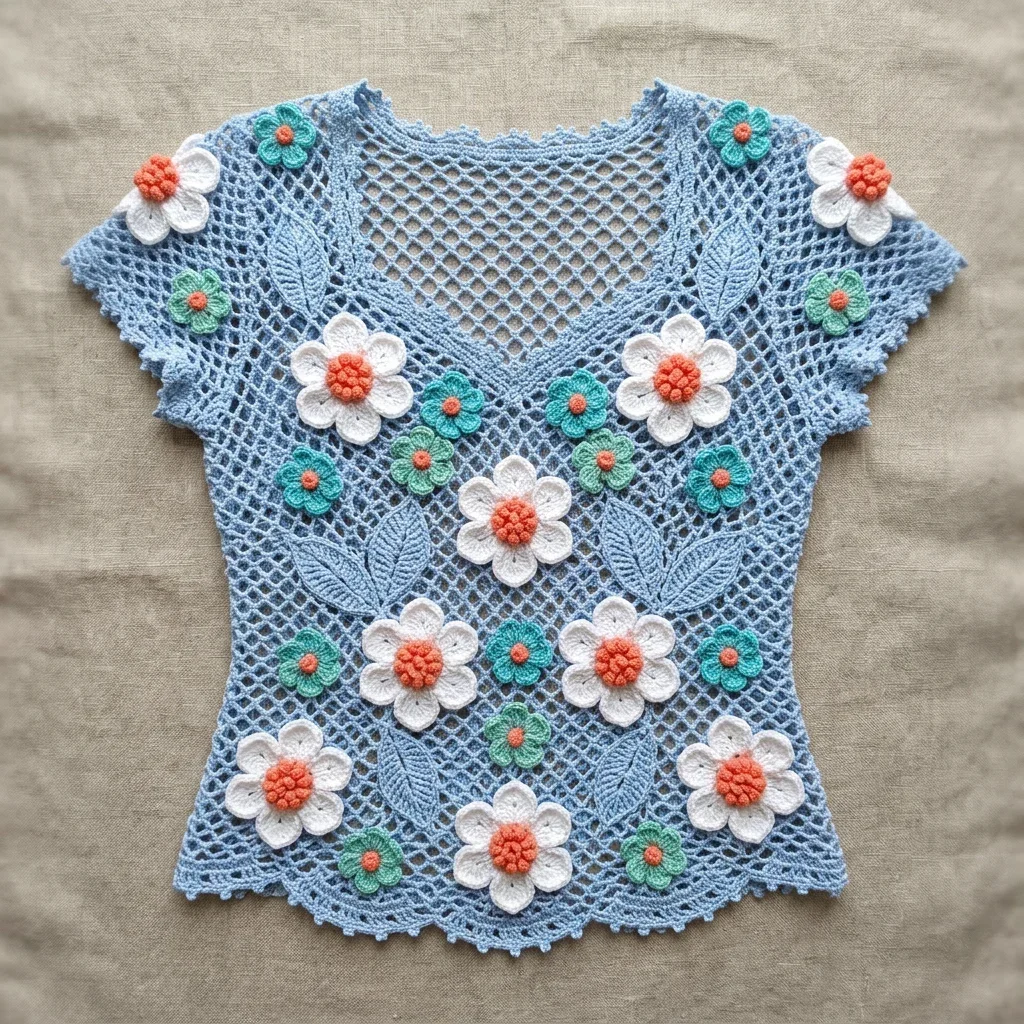
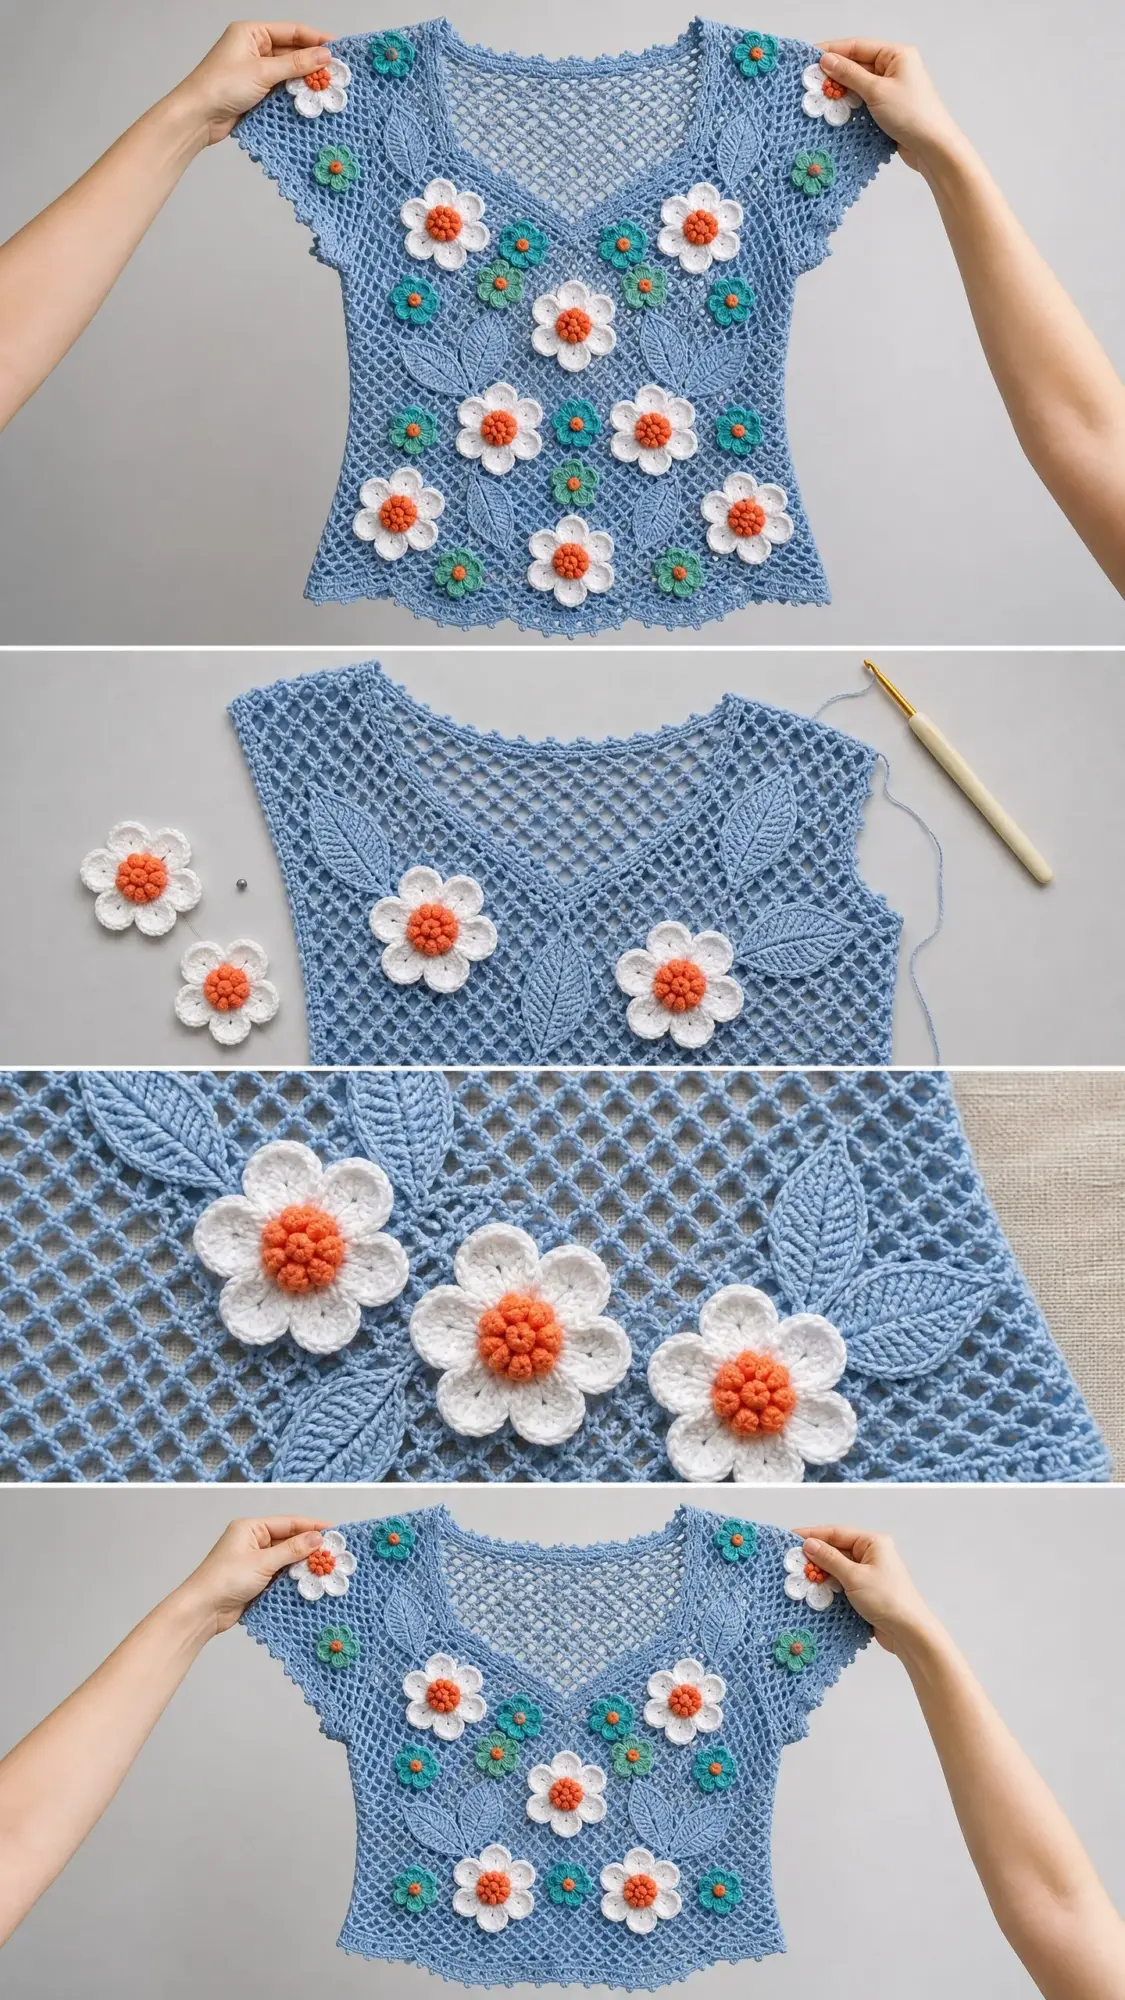
Looking for a stunning summer top that works up into a wearable piece of art? This ocean blue floral lace top combines an airy diamond mesh body with three-dimensional flower appliques in white, teal, and mint. The finished garment is perfect for layering over a camisole on warm days or wearing to a garden party when you want to turn heads.
The construction uses basic stitches like double crochet (dc) and chains (ch), though the mesh pattern and dimensional flowers place this in the intermediate to advanced skill range. If you can work consistently in double crochet and have made at least a few projects with joining rounds, you are ready for this challenge. The top makes a gorgeous gift for someone special, or treat yourself to 40 to 60 hours of meditative stitching that results in a garment you will treasure.
This pattern creates a fitted top with a finished bust of 38 inches and approximately 18 inches of total length. The V-neck front and shallow scoop back give it an elegant silhouette, while the cap sleeves add just enough coverage without bulk. Every stitch count has been verified, and I have included checkpoints throughout so you can confirm your measurements as you go.
Materials You Will Need for This Crochet Top
Gathering your supplies before you start makes the whole process smoother. Here is everything you need to complete this ocean blue floral lace top pattern.
Yarn Requirements:
Recommended Yarn Brands:
Paintbox Yarns Simply DK works beautifully for this project. You will need approximately 6 balls in the main blue shade and 1 ball each of white, teal, mint, and coral. Lion Brand 24/7 Cotton is another excellent choice if you prefer a slightly shinier finish. Drops Safran with its cotton-linen blend creates a relaxed, beachy look if that appeals to you.
Hooks:
The smaller hook keeps your flowers firm and three-dimensional. Do not skip this.
Notions:
Gauge Information
Getting your gauge right is critical for a garment that fits properly. With MC and the E-4 hook in the diamond mesh stitch pattern, you should achieve:
16 stitches and 10 rows = 4 inches / 10 cm in width and height, measured after blocking.
Each mesh repeat of 1 dc plus chain 2 equals approximately 0.5 inch in width. Each row of mesh equals approximately 0.4 inch in height.
Work a gauge swatch before starting the body panels. If your swatch is too small, go up a hook size. If it is too large, go down a hook size. Trust me, taking 20 minutes to check gauge now saves hours of frustration later.
Abbreviations Used in This Pattern
Let me define every abbreviation before we begin. Understanding these terms makes the instructions much easier to follow.
Special Stitches and Techniques
Diamond Mesh Stitch (worked flat)
This creates the beautiful open lacework that forms the body of your top.
Row 1 (RS): Ch 3 (counts as dc), sk 2 sts, dc in next st, ch 2, sk 2 sts, dc in next st, rep from across, turn.
Row 2 (WS): Ch 5 (counts as dc + ch 2), dc in next dc, ch 2, rep from to last dc, dc in top of tch, turn.
Repeat Row 2 for the pattern. Each mesh square equals 1 dc plus ch 2. When counting stitches, count each dc as 1 stitch and treat each ch-2 as the space between.
Bobble Stitch (for flower centers)
This creates the textured coral centers on all your flowers.
Yarn over, insert hook in stitch, yarn over, pull up a loop, yarn over, pull through 2 loops. You now have one partial double crochet on your hook. Work 4 more partial dc in the same stitch for 5 total. Yarn over, pull through all 6 loops on hook. Chain 1 to lock. That completes 1 bobble cluster.
Leaf Motif
These elegant leaves frame the flowers beautifully.
Ch 12. Sc in 2nd ch from hook, hdc in next ch, dc in next 2 ch, tr in next 2 ch, dc in next 2 ch, hdc in next ch, sc in next ch, ch 1, do not turn.
Working back along the opposite side of the foundation chain: sc in first ch, hdc in next ch, dc in next 2 ch, tr in next 2 ch, dc in next 2 ch, hdc in next ch, sc in last ch, sl st in base of first sc to close.
Fasten off, leaving a 12-inch tail for sewing. The finished leaf measures approximately 2 inches long and 0.75 inch wide.
Step-by-Step Instructions for the Front Panel
Hem Border Setup
With MC and E-4 hook, ch 170.
Foundation Row (WS): Sc in 2nd ch from hook and in each ch across. Turn. (169 sc)
Checkpoint: Your foundation row should measure approximately 21 inches in width. If it is wider or narrower, check your hook size and tension against gauge.
Leaf Border Row 1 (RS): Ch 1, sc in first sc, [ch 3, sk 2 sc, sc in next sc] rep from across. Turn. (56 ch-3 spaces)
Leaf Border Row 2 (WS): Ch 1, sc in first sc, [3 sc in next ch-3 sp, sc in next sc] rep from across. Turn. (169 sc)
Leaf Border Row 3 (RS): Ch 3 (counts as dc), sk 1 sc, dc in next sc, ch 2, sk 2 sc, dc in next sc, rep from across. Turn. (56 mesh units)
Leaf Border Row 4 (WS): Ch 5 (counts as dc + ch 2), dc in next dc, ch 2, rep from to last st, dc in top of tch. Turn. (56 mesh units)
Leaf Border Row 5 (RS): Rep Row 4. Turn. (56 mesh units)
Body Mesh Section
The body mesh is now established. Work even in the Diamond Mesh Stitch over these 56 mesh units.
Body Mesh Rows 6 through 30 (25 rows total):
Each row: Ch 5 (counts as dc + ch 2), dc in next dc, ch 2, rep from across, dc in top of tch. Turn. (56 mesh units per row)
Checkpoint: After completing Row 30, your front panel should measure approximately 12 inches from the cast-on edge.
Armhole Shaping
Row 31 (RS): Sl st across first 4 mesh units (sl st into each of the next 4 dc and their ch-2 sp), ch 5 (counts as dc + ch 2), cont in mesh pattern across until 4 mesh units remain, leave last 4 mesh units unworked. Turn. (48 mesh units)
Row 32: Ch 5, cont in mesh across. Turn. (48 mesh units)
Row 33: Sl st across 1 mesh unit, ch 5, cont in mesh across until 1 mesh unit remains, leave unworked. Turn. (46 mesh units)
Row 34: Ch 5, cont in mesh across. Turn. (46 mesh units)
Row 35: Rep Row 33 shaping. Turn. (44 mesh units)
Row 36: Ch 5, cont in mesh across. Turn. (44 mesh units)
Rows 37 through 42: Work even in mesh, no shaping. (44 mesh units per row)
Checkpoint: After Row 42, the armhole opening should measure approximately 2.5 inches from the first armhole row.
Front Neckline Shaping (V-Neck)
The V-neck begins at Row 43. You will work the left and right sides separately.
With 44 mesh units across, place a stitch marker at the center point between unit 22 and unit 23.
Right Front Neckline:
Row 43 (RS): Ch 5, work in mesh across first 20 mesh units only. Leave remaining sts unworked. Turn. (20 mesh units)
Row 44 (WS): Ch 5, work in mesh across, stop 1 mesh unit before end of row. Leave last unit unworked. Turn. (19 mesh units)
Row 45: Ch 5, work across all 19 units. Turn. (19 mesh units)
Row 46: Ch 5, work across, stop 1 unit before end. Turn. (18 mesh units)
Row 47: Ch 5, work across. Turn. (18 mesh units)
Row 48: Ch 5, work across, stop 1 unit before end. Turn. (17 mesh units)
Rows 49 through 51: Work even in mesh. Turn. (17 mesh units)
Fasten off MC.
Left Front Neckline:
With RS facing, rejoin MC in the dc at the start of the left side (unit 23 from the right edge on Row 43).
Row 43 (RS, left side): Ch 5, work in mesh across remaining 21 mesh units, dc in top of tch. Turn. (21 mesh units)
Row 44 (WS): Ch 5, work across, stop 1 unit before end of row. Turn. (20 mesh units)
Row 45: Ch 5, work across. Turn. (20 mesh units)
Row 46: Ch 5, work across, stop 1 unit before end. Turn. (19 mesh units)
Row 47: Ch 5, work across. Turn. (19 mesh units)
Row 48: Ch 5, work across, stop 1 unit before end. Turn. (18 mesh units)
Rows 49 through 51: Work even. Turn. (18 mesh units)
Fasten off MC.
Back Panel Instructions
Work the back panel exactly as the front panel from the Foundation Row through Row 42. All hem, body, and armhole shaping rows are identical. (44 mesh units after armhole shaping)
Back Neckline Shaping (Shallow Scoop)
Row 43 (RS): Ch 5, work across all 44 mesh units. Turn. (44 mesh units)
Row 44 (WS): Ch 5, work across all 44 mesh units. Turn. (44 mesh units)
Now divide for back neckline.
Right Back:
Row 45 (RS): Ch 5, work across first 17 mesh units, leave rest unworked. Turn. (17 mesh units)
Row 46: Ch 5, work across. Turn. (17 mesh units)
Rows 47 through 51: Work even. (17 mesh units) Fasten off MC.
Left Back:
With RS facing, skip the center 10 mesh units for the back neckline opening, rejoin MC in next dc.
Row 45 (RS): Ch 5, work across remaining 17 mesh units. Turn. (17 mesh units)
Row 46: Ch 5, work across. Turn. (17 mesh units)
Rows 47 through 51: Work even. (17 mesh units) Fasten off MC.
Flower Applique Instructions
Large Flower (makes 10 total)
These measure approximately 2.5 inches in diameter and use color A (white) with a color D (coral) center.
Layer 1 (back petals, color A):
Magic ring or ch 4, join with sl st to form ring.
Rnd 1: Ch 1, work 10 sc in ring, join with sl st to first sc. (10 sc)
Rnd 2: Ch 6, sl st in 2nd ch from hook, sc in next ch, hdc in next ch, dc in next ch, hdc in next ch, sl st in next sc of rnd 1, rep from 9 more times. (10 petals) Fasten off color A.
Layer 2 (front petals, color A):
Rejoin color A in any sl st between petals of rnd 1.
Rnd 3: Ch 8, sl st in 2nd ch from hook, sc in next 2 ch, hdc in next ch, dc in next ch, hdc in next ch, sc in next ch, sl st in next sl-st between petals, rep from 9 more times. (10 petals) Fasten off color A.
Center bobble (color D):
Join color D in center ring opening of rnd 1. Work 1 bobble in center. Fasten off color D.
Medium Flower (makes 14 total)
These measure approximately 1.5 inches in diameter and use color B (teal) with a color D center.
Magic ring.
Rnd 1: Ch 1, work 8 sc in ring, join. (8 sc)
Rnd 2: Ch 5, sl st in 2nd ch from hook, sc in next ch, hdc in next 2 ch, sl st in next sc, rep from 7 more times. (8 petals) Fasten off color B.
Center: Join color D in center ring, work 1 bobble. Fasten off color D.
Small Flower (makes 12 total)
These measure approximately 1 inch in diameter and use color C (mint) with a color D center.
Magic ring.
Rnd 1: Ch 1, work 6 sc in ring, join. (6 sc)
Rnd 2: Ch 4, sl st in 2nd ch from hook, sc in next ch, hdc in next ch, sl st in next sc, rep from 5 more times. (6 petals) Fasten off color C.
Center: Join color D in center ring, work 1 bobble. Fasten off color D.
Assembly and Finishing
Blocking (Do This First)
Block both panels before seaming. Soak finished panels in cool water for 20 minutes. Gently press out excess water without wringing. Lay flat on blocking mats and pin to dimensions: 21 inches wide, 18 inches long. Use rust-proof pins every 1 to 1.5 inches along the mesh edges. Allow to dry fully for 12 to 24 hours.
Shoulder Seams
Align front and back panels with wrong sides facing each other. Using MC and a yarn needle, whipstitch the 17-unit shoulder sections of front to back on each side. On the left shoulder, fold the extra unit of the front panel under by one dc and seam from there so the finished width is even.
Side Seams
With wrong sides facing each other, align front and back panels at the side edges. Whipstitch from the lower hem edge upward to the armhole. Leave the armhole open for the sleeve edging.
Neckline Edging
With RS facing, join MC with sl st at the center back neckline. Work sc evenly around the entire neckline opening: sc in each dc, 2 sc in each corner, and 1 sc in each ch-2 sp. When you reach the V center point, work sc3tog across the V point to create a clean angle. Work 1 rnd of sl st in the back loops of these sc for a tidy rolled edge. Join with sl st, fasten off.
Sleeve Edging
With RS facing, join MC with sl st at the underarm side seam on one armhole.
Rnd 1: Ch 1, sc evenly around armhole opening, placing sc in each dc and 1 sc per ch-2 sp. Aim for approximately 44 sc around each armhole. Join with sl st. (44 sc)
Rnd 2: Ch 3, sk 1 sc, sl st in next sc, rep from around. Join. (22 ch-3 picot loops)
Fasten off. Repeat for second armhole.
Attaching Flowers and Leaves
Make 28 leaf motifs total. Position leaves in pairs pointing upward at the hem and shoulder areas.
Arrange flowers in a diagonal grid pattern following the natural structure of the mesh:
Use locking stitch markers to pin all flowers before sewing. Sew each flower with its matching yarn color using small tack stitches through the base of each flower into the mesh fabric.
Size Customization Tips
To size up: Add mesh units in multiples of 3 to the foundation chain. Every 3 mesh units equals approximately 1.5 inches of additional width.
To size down: Remove mesh units in multiples of 3 from the foundation chain.
To change length: Add or remove rows in the body mesh section. Every 2.5 rows equals approximately 1 inch.
Care Instructions
Hand wash in cool water with gentle detergent. Do not wring or twist. Press gently in a clean towel to remove water. Lay flat to dry away from direct sunlight. Do not tumble dry or bleach. Store folded rather than hung to prevent the mesh from stretching.
Thank you so much for choosing this ocean blue floral lace top crochet pattern for your next project. I hope the detailed instructions and checkpoints help you create something truly beautiful. If you make this top, I would absolutely love to see your finished piece. Tag me on Instagram or share a photo in my Facebook group.
If this pattern caught your eye, go ahead and save it to your Pinterest boards so you can find it when you are ready to start. And please drop a comment below if you make one. I love hearing which color combinations you choose and seeing how each crafter makes the design their own.
You Might Also Like
- Dusty Rose Floral Crochet Summer Boots Free Pattern
- Mint and Lavender Bunny Baby Blanket Free Crochet Pattern
- Sage Green Mesh Cover Up Free Crochet Pattern
- Sage Green Boho Crochet Backpack Free Pattern