‘Monster Ate My Homework’ Tote Pattern
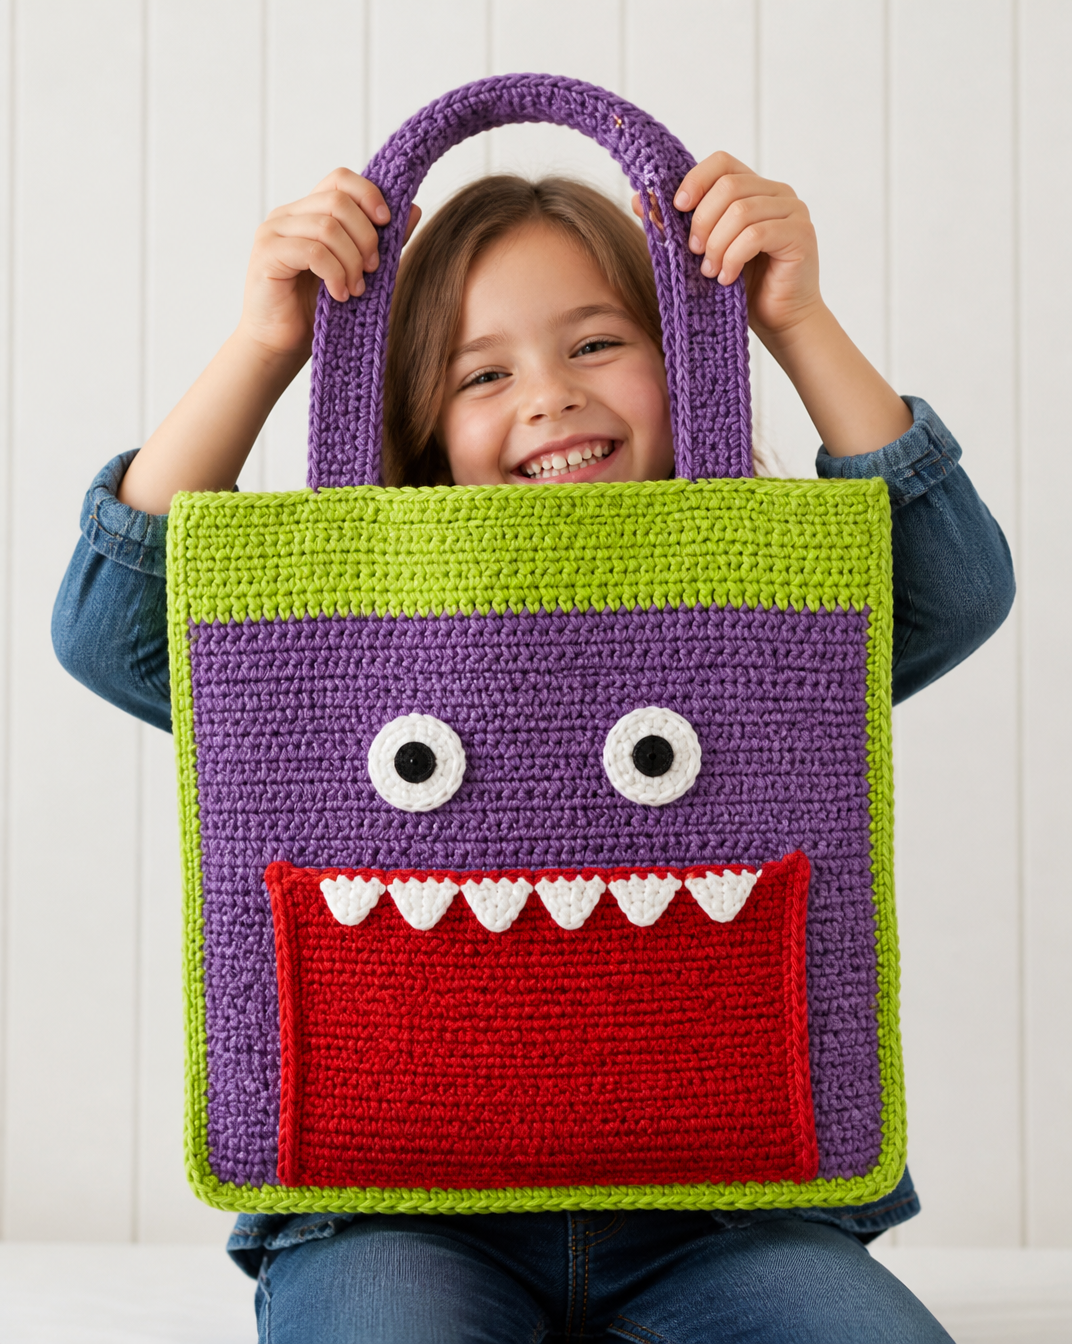
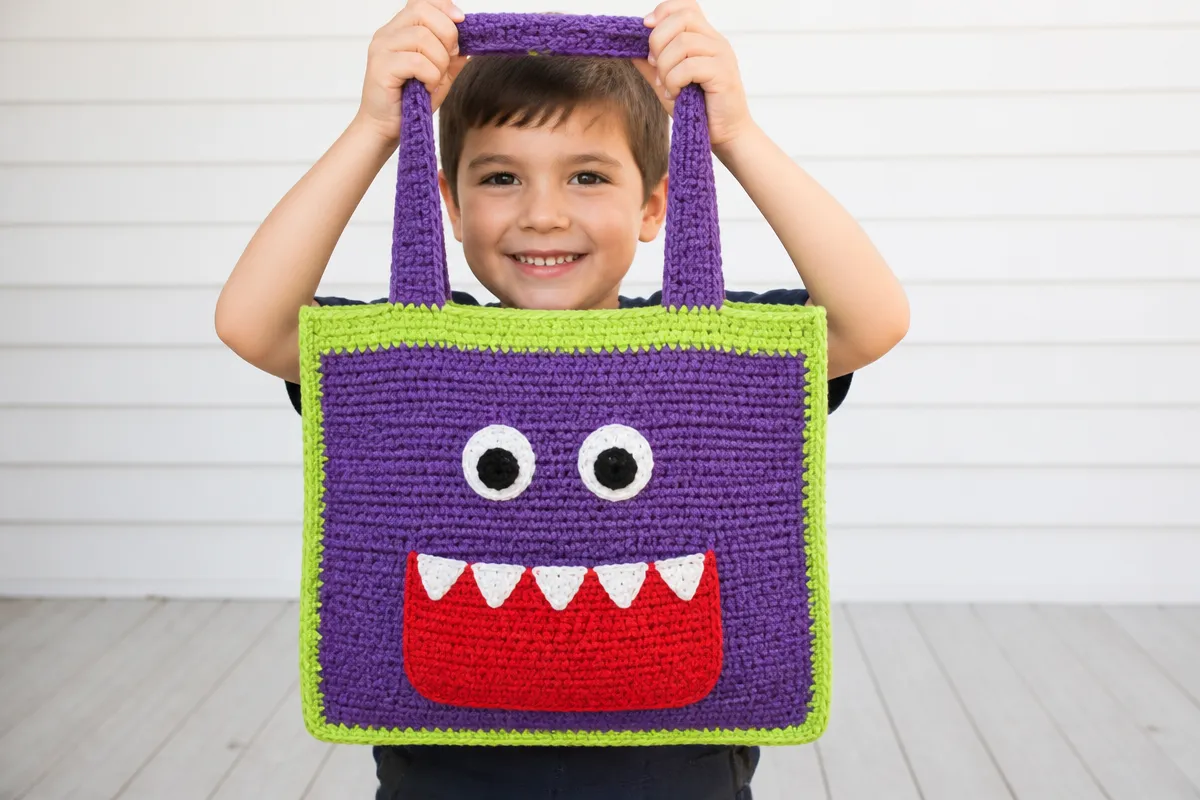
The Monster Ate My Homework Tote Pattern creates a playful crocheted bag with a colorful striped body, a toothy mouth pocket, pencil pockets, round eyes, and sturdy crocheted handles. The design uses Lily® Sugar’n Cream® cotton yarn in Hot Green, Grape, Red, and White, with a small amount of black felt for the pupils.
This article presents the supplied construction instructions in order, from making the two bag pieces through crocheting the mouth pocket, teeth, eyes, and handles. It also explains the pattern abbreviations, folding points, color changes, and finishing sequence so the written pattern is easier to follow.
Project Overview
The tote is constructed from two matching rectangular bag pieces. Each piece begins with Contrast A Hot Green, changes to Contrast B Grape, and returns to Contrast A for the upper section. The pieces are joined through both thicknesses with a round of single crochet worked around the side edges and bottom.
The front of the tote is decorated with a Red mouth pocket. The pocket includes folded sections that form side pencil pockets. White teeth are crocheted separately and sewn to the mouth pocket, while two small White crocheted circles become the eyes. Black felt circles are glued to the centers of the eyes before the eyes are sewn to the front of the bag.
The source specifies measurements for the bag sections, but it does not provide a completed finished size for the tote. It also does not state a skill level, gauge measurement, estimated completion time, care instructions, or finished handle placement measurements. Those details should not be assumed.
✓ Confirmed construction: Make 2 alike bag pieces, make and fold the mouth pocket, make 2 teeth pieces, make 2 eyes, make 2 handles, join the bag pieces, sew on the features, and attach the handles.
{image_template}
Materials
| Item | Source specification | Quantity or notes |
|---|---|---|
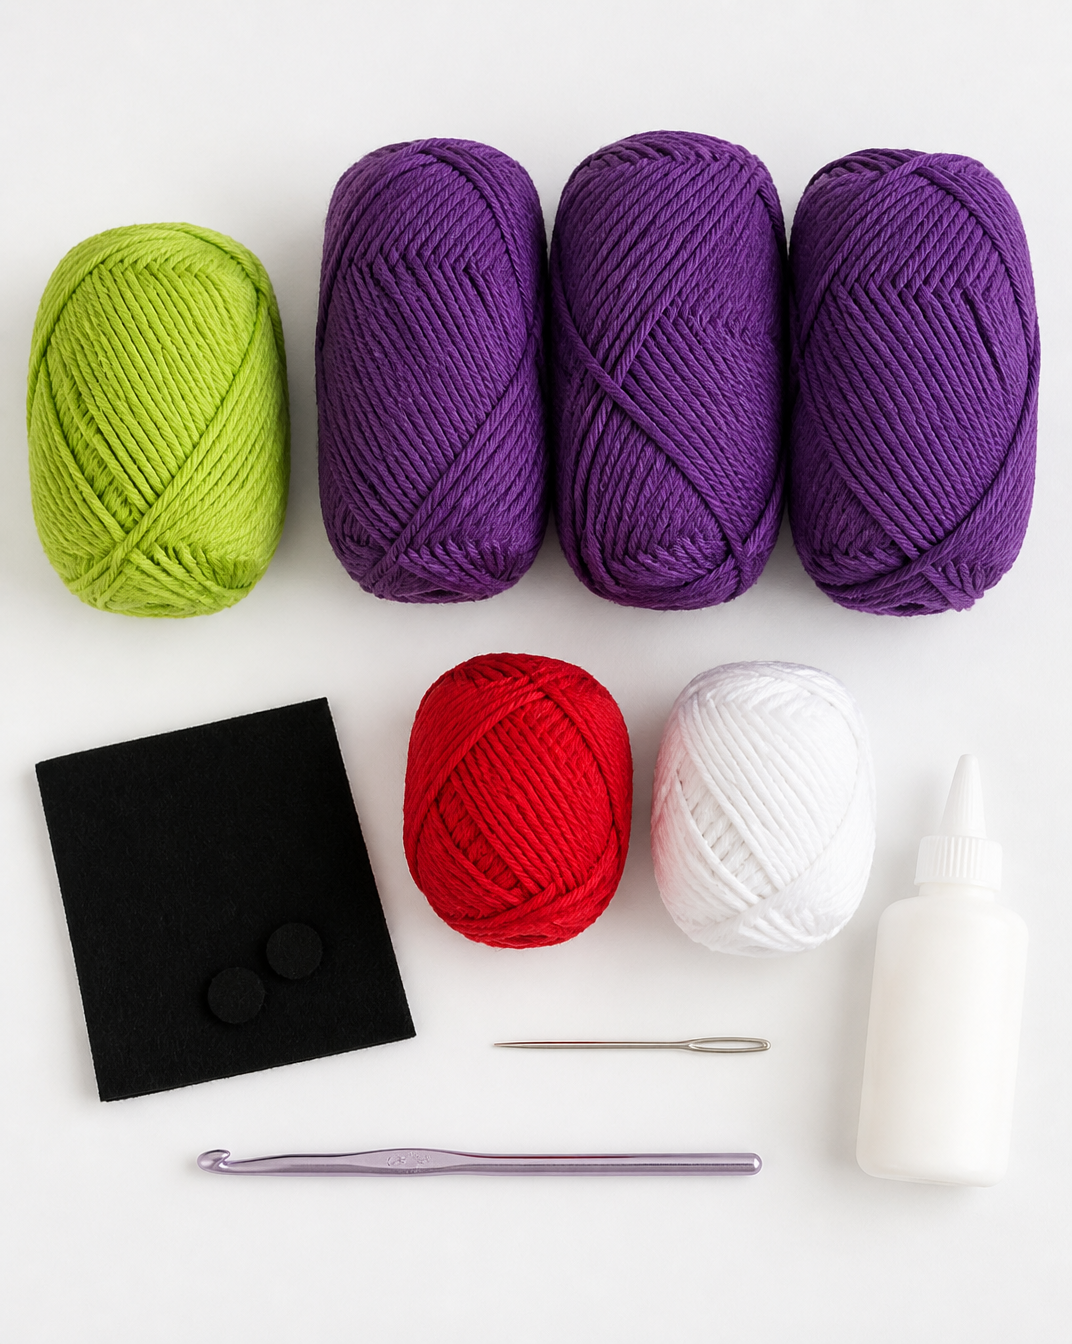
| Yarn | Lily® Sugar’n Cream® (70.9 g / 2.5 oz; 109 m / 120 yds) | Use the listed contrasts below |
| Contrast A | Hot Green (01712) | 105 m / 116 yds or 1 ball |
| Contrast B | Grape (00071) | 250 m / 276 yds or 3 balls |
| Contrast C | Red (00095) | 52 m / 57 yds or 1 ball |
| Contrast D | White (00001) | 38 m / 42 yds or 1 ball |
| Crochet hook | Size 4 mm (U.S. G or 6) crochet hook | Or size needed to obtain gauge |
| Black felt | Small piece of black felt for eyes | Cut circles approximately 1/2″ [1.5 cm] |
| Craft glue | Craft glue | For attaching black felt circles to the eyes |
Abbreviations and Pattern Notes
The following meanings are confirmed by the supplied instructions. The source uses both rows and rounds, depending on the section.
| Abbreviation | Meaning confirmed by the source |
|---|---|
| ch | Chain |
| hdc | Half double crochet |
| sc | Single crochet |
| Sc2tog | Single crochet two together, as used for decreases |
| sl st | Slip stitch |
| RS | Right side |
| WS | Wrong side |
| rnd | Round |
| rem | Remaining, as used in “rem sts” and “rem loop” |
Pattern reading notes: “Make 2 pieces alike” means the bag instructions are worked twice. “Join B” and “Join A” indicate the stated color changes. “Working through both thicknesses” means the hook passes through both folded or layered sections. “Working in back loops only” and “working in front loops only” are specifically stated and should be retained at those rows.
⚠ Source note: The supplied teeth section contains the instruction “Rep from to 3 times more,” but the source does not show the marked symbols or labels around that repeat. The wording is retained as supplied. The source also refers to placement “as shown in picture,” but no picture or placement measurements are included here.
Before You Begin
Review the entire construction order before starting. The bag pieces are made first, followed by the mouth pocket, teeth, eyes, and handles. The finishing section then joins the bag pieces and adds the decorative features and handles.
- Prepare Contrast A, B, C, and D according to the listed material requirements.
- Use a 4 mm (U.S. G or 6) crochet hook, or the size needed to obtain gauge. A gauge measurement is not supplied.
- Track the stated measurements as the bag pieces grow: 2″ [5 cm], 10″ [25.5 cm], and 12″ [30.5 cm].
- Mark the specified rows in the mouth pocket. These markers identify folding and sewing points later.
- Pay attention to RS and WS instructions, especially when the pocket changes from working through both loops to working in front loops only or back loops only.
- Keep the mouth pocket’s top edge open when sewing it onto the front of the bag.
Detailed Step-by-Step Monster Ate My Homework Tote Pattern
Bag: Make 2 Pieces Alike
Each bag piece begins in Hot Green, changes to Grape, and returns to Hot Green. The first row contains 45 half double crochet stitches.
- With A, ch 47.
- 1st row: 1 hdc in 3rd ch from hook. 1 hdc in each ch to end of chain. Turn. 45 hdc.
- 2nd row: Ch 2. 1 hdc in each hdc to end of row. Turn.
- Repeat the last row until work from beg measures 2″ [5 cm]. Join B.
- With B, repeat the 2nd row until work from beg measures 10″ [25.5 cm]. Join A.
- With A, repeat the 2nd row until work from beg measures 12″ [30.5 cm]. Fasten off.
| Section | Exact instruction | Stated count or measurement |
|---|---|---|
| Foundation | With A, ch 47. | Not applicable |
| 1st row | 1 hdc in 3rd ch from hook. 1 hdc in each ch to end of chain. Turn. | 45 hdc |
| 2nd row and repeat | Ch 2. 1 hdc in each hdc to end of row. Turn. Repeat until the stated measurement. | 2″ [5 cm], then 10″ [25.5 cm], then 12″ [30.5 cm] |
Mouth Pocket
The Red mouth pocket begins with 17 single crochet stitches. Its folding rows create the pocket structure, including the first pencil pocket and the later second pencil pocket.
- With C, ch 18.
- 1st row (RS): 1 sc in 2nd ch from hook. 1 sc in each ch to end of chain. Turn. 17 sc.
- 2nd to 4th rows: Ch 1. 1 sc in each sc to end of row. Turn.
- 5th row (Folding row): Ch 1. Working in back loops only, 1 sc in each sc to end of row. Turn. Place marker at end of last row.
- 6th to 8th rows: Ch 1. Working in both loops, 1 sc in each sc to end of row. Turn.
- 9th row: Ch 1. Fold work along 5th row. Working through both thicknesses, 1 sc in each sc and rem loop of foundation ch to end of row. Turn. This makes the first pencil pocket.
- 10th row: Ch 1. 1 sc in each sc to end of row. Turn.
- Repeat the last row until work from marked row measures 5½” [14 cm], ending on a WS row.
- Next row (RS): Ch 1. Working in front loops only, 1 sc in each sc to end of row. Turn. Place marker at end of row.
- Next 3 rows: Ch 1. Working through both loops, 1 sc in each sc to end of row. Turn.
- Next row (RS, Folding row): Ch 1. Working in back loops only, 1 sc in each sc to end of row. Turn.
- Next 3 rows: Ch 1. 1 sc in each sc to end of row. Turn. Fasten off at end of last row.
- Fold work along the last Folding row worked.
- Thread yarn through a needle and sew the edge to rem loops of the marked row. This makes the second pencil pocket.
The pocket instructions specifically identify a marked 5th row and a later marked row. Preserve those markers, because the final sewing step refers to the rem loops of the marked row.
Teeth: Make 2
Each White teeth piece begins as a strip of 25 single crochet stitches. The shaping instructions describe five teeth on each piece.
- With D, ch 26.
- 1st row: 1 sc in 2nd ch from hook. 1 sc in each ch to end of chain. Turn. 25 sc.
- First Tooth: Ch 1. Sc2tog. 1 sc in next sc. Sc2tog. Turn. Leave rem sts unworked.
- Second row: Ch 1. 1 sc in first st. Sc2tog. Turn.
- Third row: Ch 1. Sc2tog. Fasten off.
- Second Tooth: Join D with sl st to next unworked sc. Work the First Tooth instructions again.
- Third to Fifth Teeth: Rep from to 3 times more.
- Five teeth are made.
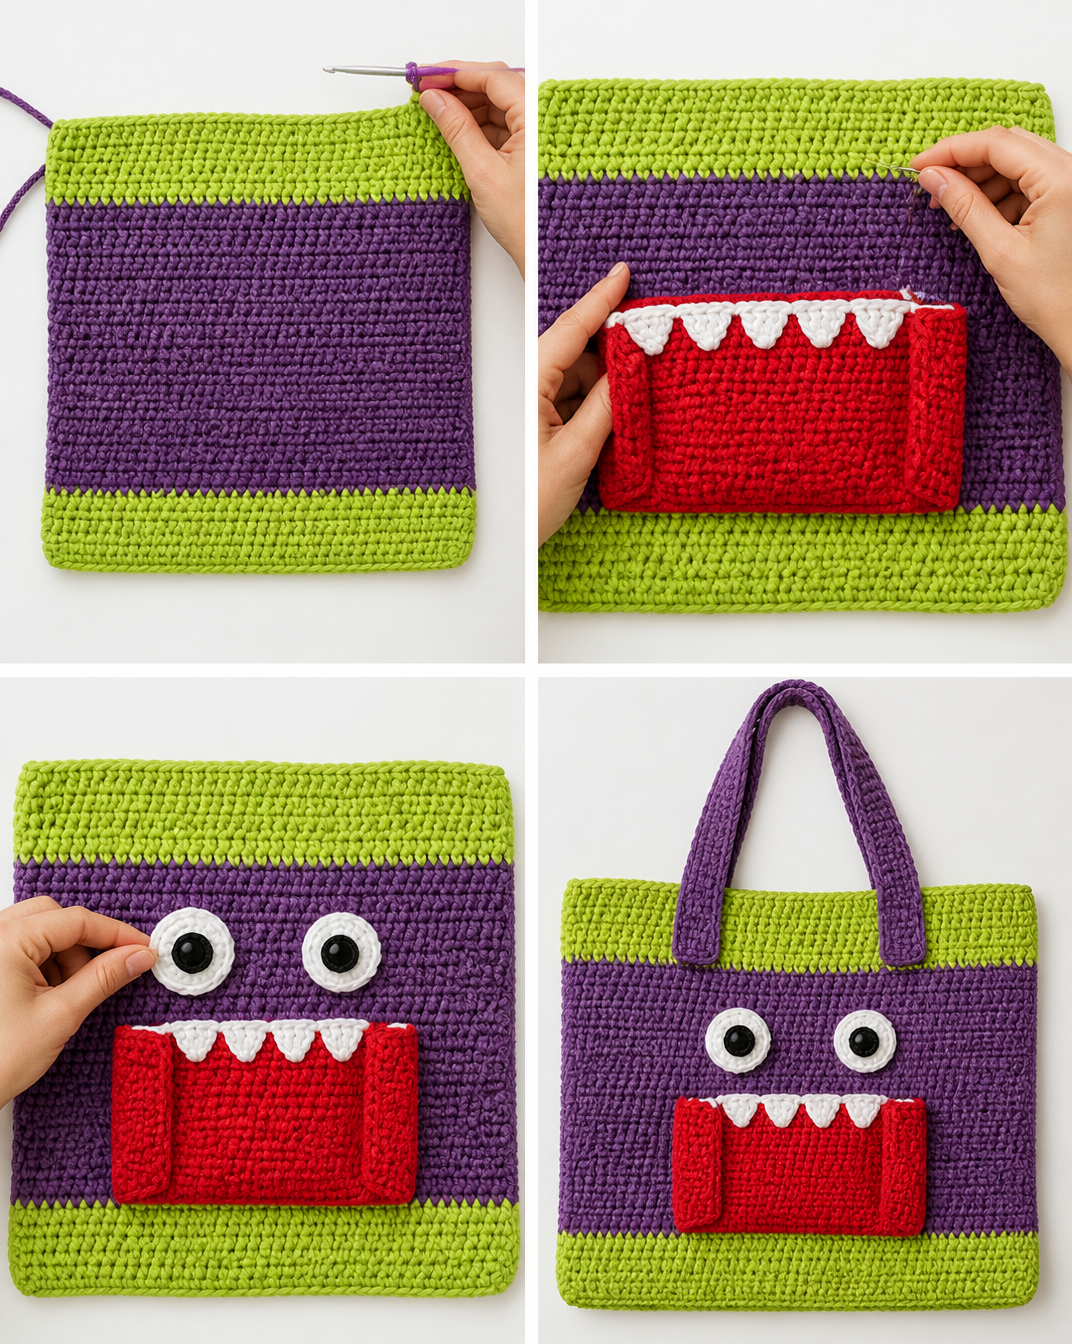
Sew the teeth to the Mouth Pocket as shown in the picture, taking care not to sew the side pencil pockets closed.
Eyes
Make two White crocheted eyes. The eyes are worked in rounds and are finished after the second round.
- With D, ch 2.
- 1st rnd: 6 sc in 2nd ch from hook. Join with sl st to first sc.
- 2nd rnd: Ch 1. 2 sc in each sc around. Join with sl st to first sc. 12 sc.
- Fasten off.
Handles: Make 2
The handles are made in Grape using half double crochet. Each handle begins with 67 hdc after the foundation chain and is folded lengthwise before the sides are joined.
- With B, ch 69.
- 1st row: 1 hdc in 3rd ch from hook. 1 hdc in each ch to end of chain. Turn. 67 hdc.
- 2nd row: Ch 2. 1 hdc in each hdc to end of row. Turn.
- Repeat the last row 4 times more.
- Fold work in half lengthwise.
- Working through both thicknesses, 1 sc in each hdc and rem loop of foundation ch to end of row.
- Fasten off.
Assembly and Finishing
The finishing instructions join the two bag pieces first. The pocket and teeth are treated as decorative and functional front details, while the eyes and handles are added afterward.
- With WS of Bag pieces tog, join A with sl st to top left corner.
- Ch 1. Working through both thicknesses, work 1 rnd of sc evenly around side edges and bottom, having 3 sc in each bottom corner.
- Fasten off.
- Sew Mouth Pocket onto Front of Bag, leaving top edge open.
- Cut black circles from felt for Eyes approximately 1/2″ [1.5 cm].
- Glue black felt circles to centers of Eyes.
- Sew the Eyes to the Front of Bag.
- Attach Handles as shown in the picture.
Finishing checklist:
- ✓ Join the bag pieces with their WS together.
- ✓ Work through both thicknesses around the side edges and bottom.
- ✓ Make 3 sc in each bottom corner.
- ✓ Leave the top edge of the Mouth Pocket open.
- ✓ Keep the side pencil pockets clear when sewing on the teeth.
- ✓ Glue the black felt circles to the centers of the crocheted Eyes.
- ✓ Sew the Eyes to the Front of Bag.
- ✓ Attach both Handles as shown in the picture.
Source-Based Checkpoints
Confirmed: The bag pieces measure 2″ [5 cm] before the first color change, 10″ [25.5 cm] before returning to A, and 12″ [30.5 cm] before fastening off. The first bag row has 45 hdc, the Mouth Pocket foundation row has 17 sc, the teeth foundation row has 25 sc, the eyes’ second round has 12 sc, and the handles’ first row has 67 hdc.
⚠ Verify against the source: The teeth section includes a missing-looking reference in “Rep from to 3 times more.” The exact marked range is not visible in the supplied text. Follow the supplied wording as printed and verify it against the original source if available.
The source also says to sew the teeth and attach the handles “as shown in picture.” No image, diagram, or placement measurements are included in the supplied material. Therefore, exact feature and handle placement is not specified here.
The source provides a hook size or a hook size needed to obtain gauge, but it does not provide a gauge measurement. A completed finished tote size, skill level, yarn substitution guidance, care instructions, and completion time are also not specified.
Frequently Asked Questions
How many bag pieces are required?
Make 2 bag pieces alike. Both pieces follow the same color sequence and row instructions.
Which color is used for the main bag?
The bag begins with Contrast A Hot Green, changes to Contrast B Grape at 2″ [5 cm], and changes back to Contrast A at 10″ [25.5 cm]. The piece is fastened off at 12″ [30.5 cm].
How many teeth are made?
Make 2 teeth pieces. Each piece is described as having five teeth. The teeth are worked in Contrast D White and sewn to the Mouth Pocket.
Does the Mouth Pocket have pencil pockets?
Yes. The pocket instructions describe a first pencil pocket made at the 9th row and a second pencil pocket made after the later folding row and sewing step. The source cautions that the teeth must not be sewn through the side pencil pockets.
How are the eyes made?
Each eye is worked in White from ch 2. The first round has 6 sc, and the second round increases to 12 sc. Black felt circles approximately 1/2″ [1.5 cm] are glued to the centers.
What hook size does the pattern use?
The specified hook is a size 4 mm (U.S. G or 6) crochet hook, or the size needed to obtain gauge. The source does not state the gauge measurement.
What is the finished size of the tote?
A completed finished size is not specified. The source does provide the working measurements for the bag pieces: 2″ [5 cm], 10″ [25.5 cm], and 12″ [30.5 cm] at the stated color-change and finishing points.
Conclusion
The Monster Ate My Homework Tote Pattern combines a striped crocheted bag with a Red mouth pocket, folded pencil pockets, White teeth, crocheted eyes, and black felt pupils. By following the supplied row order, preserving the marked pocket rows, and completing the finishing steps as written, you can assemble the full character-inspired tote while keeping the original technical details intact.