Monarch Butterfly Shawl Free Crochet Pattern
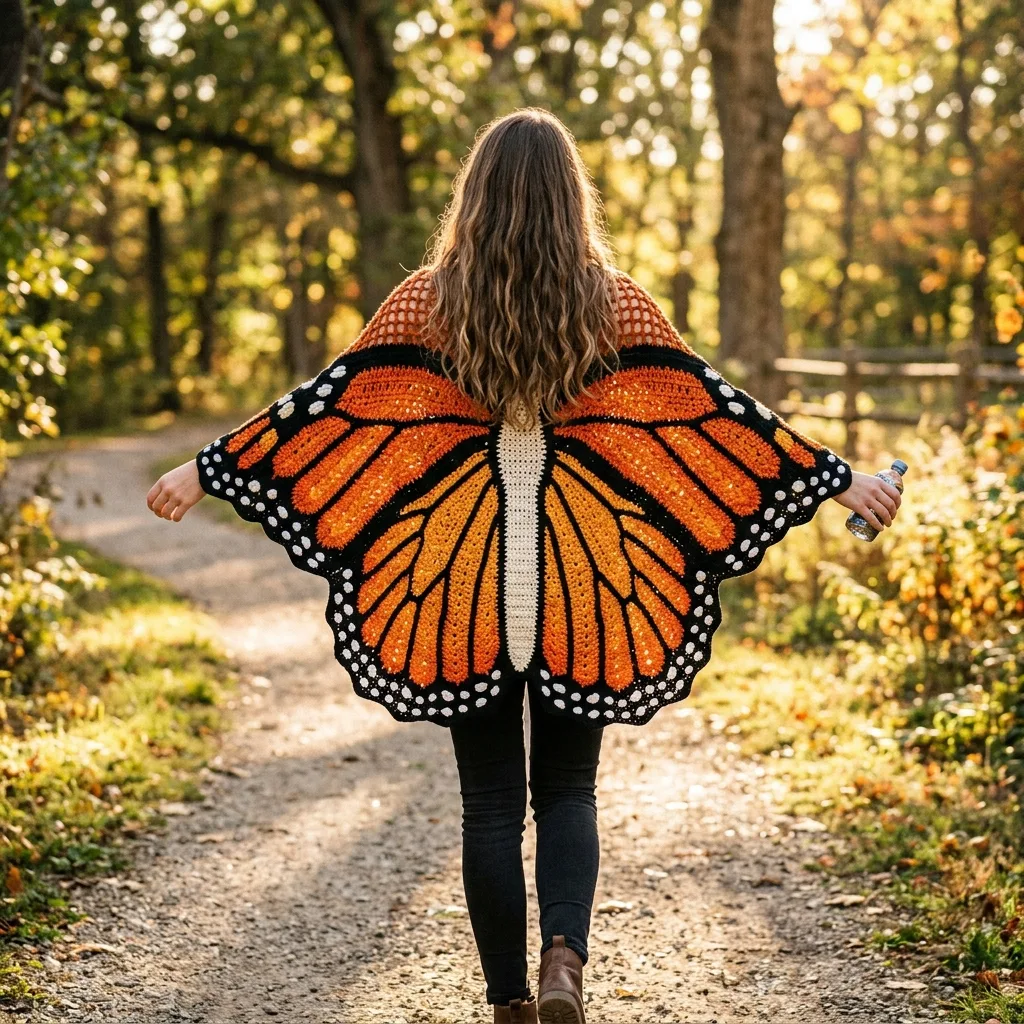
You know that gorgeous hand-dyed skein sitting in your stash? The one you’ve been saving for “something special”? This is the project.
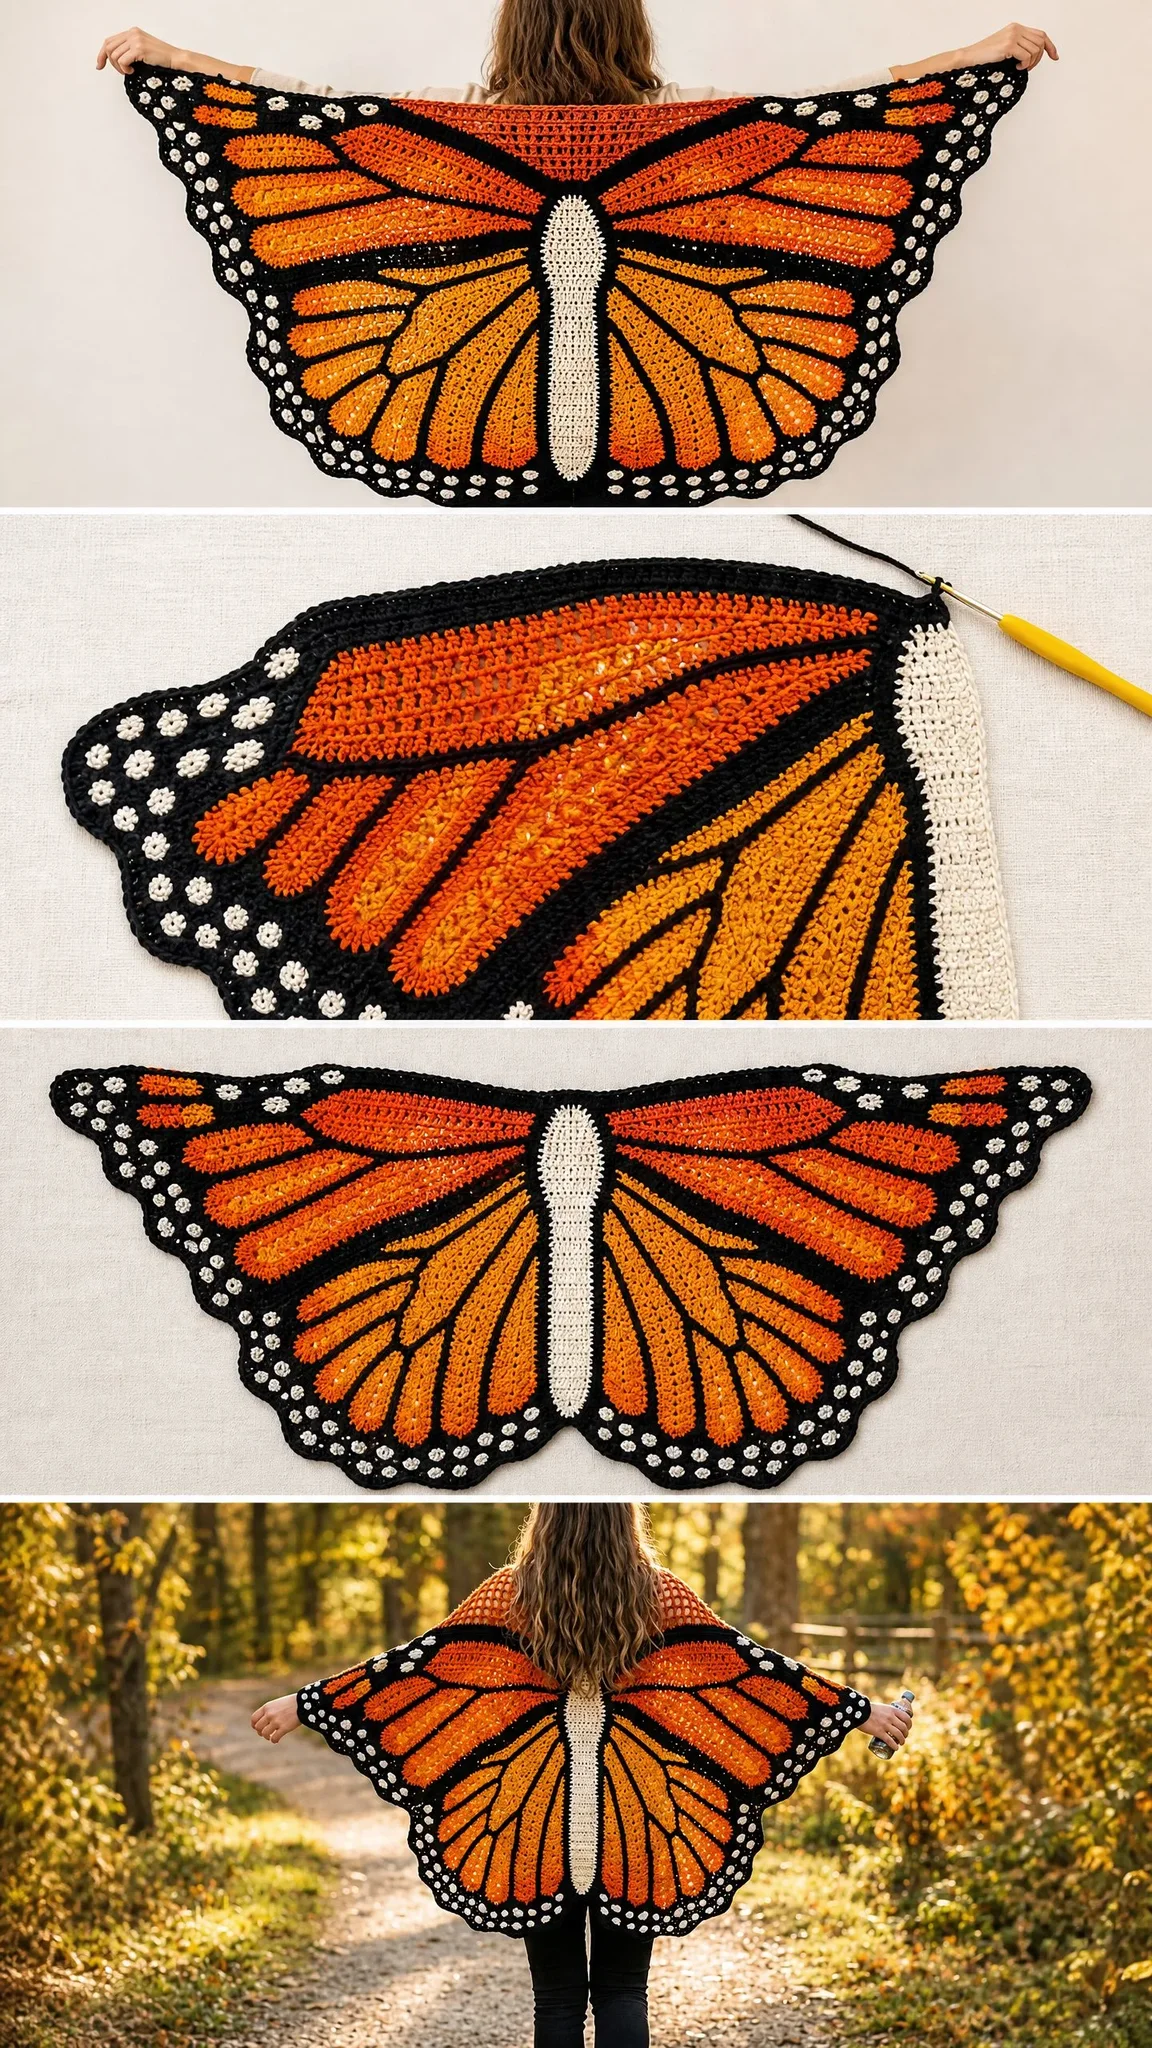
The Monarch Butterfly Shawl is a wearable art piece that transforms you into a walking work of nature. When you spread your arms, those iconic orange and black wings fan out behind you in all their glory. The construction combines tapestry crochet for the colorwork, an open mesh yoke for the body section, and a scalloped border with white dot embellishments to capture every detail of real monarch wings.
I won’t sugarcoat this one. It’s an advanced intermediate project that requires comfort with multiple yarn colors, following a colorwork chart, and patience. But if you’ve been wanting to level up your skills with something truly show-stopping, grab your worsted weight stash in burnt orange, amber, black, cream, and white. Let’s make some wings.
About This Butterfly Wing Shawl Pattern
This stunning crochet shawl mimics the wings of a monarch butterfly with remarkable accuracy. The finished piece drapes from your shoulders like a cardigan, with your arms passing through open wing sections. When you extend your arms outward, the full wingspan effect is absolutely breathtaking.
The shawl is constructed as two mirrored wing panels joined along a center back yoke. You’ll work from the neck downward and outward, building each wing section with careful shaping and colorwork. The mesh stitch at the yoke creates a semi-transparent effect representing the butterfly’s body region, while the tapestry single crochet (sc) technique handles the detailed wing coloring.
Finished measurements:
These measurements fit a standard adult size US S through L with slight adjustments possible.
Skill Level
Advanced Intermediate
This project requires comfortable management of multiple yarn colors using tapestry crochet and intarsia techniques. You’ll follow a colorwork chart, execute shaped lower wing edges with scallop border patterning, and work a mesh yoke with increases. If you’re confident changing colors mid-row and carrying yarn floats cleanly, you’re ready for this.
Time estimate: Approximately 60 to 90 hours depending on your experience with tapestry colorwork.
Materials Needed for Your Monarch Butterfly Crochet Shawl
Yarn
You’ll need worsted weight yarn (category 4) in five colors:
Recommended Yarn Brands
Lion Brand Vanna’s Choice works beautifully for this project. It’s 100% acrylic with 170 yards per 3.5 oz skein. You’ll want Terracotta or Rust for Color A, Honey for Color B, Black for Color C, Linen for Color D, and White for Color E. Plan on 3 skeins each of Colors A, B, and C, plus 1 skein each of Colors D and E.
Paintbox Yarns Simply Worsted is another excellent choice. Use Burnt Orange, Mandarin Orange, Jet Black, Cream, and Paper White.
Caron Simply Soft also achieves gauge nicely. Try Autumn Red, Harvest, Black, Bone, and White.
Substitution note: Avoid heavily textured, fuzzy, or bouclé yarns. The tapestry colorwork requires clean stitch definition for the wing veins and border details to read clearly. Natural fibers like cotton or cotton-acrylic blends produce a crisper fabric and block beautifully flat.
Hook
US size J-10 / 6.0 mm for main fabric
US size G-6 / 4.0 mm for surface crochet veins (optional but recommended)
Notions
Gauge
18 sc x 20 rows = 4 inches / 10 cm in tapestry single crochet with two strands carried.
Gauge matters here. The finished wingspan depends directly on hitting this gauge. Swatch using your planned colorwork method because carrying floats tightens the fabric significantly compared to plain single crochet (sc). Adjust your hook size as needed.
Abbreviations and Special Stitches
Let me walk you through every stitch and abbreviation you’ll encounter.
Standard Abbreviations
Special Stitches Explained
Tapestry Single Crochet (TSC): This technique lets you carry unused colors inside your stitches invisibly. Hold the inactive yarn strand along the top of the previous row horizontally. Insert your hook into the next stitch as normal, lay the inactive strand over the top of the hook, yarn over with the ACTIVE color only, pull up a loop (this traps the inactive strand inside), yarn over with the active color, and draw through both loops. The inactive color hides inside every stitch.
Color Change in TSC: Work the sc until the last step (2 loops on hook), drop the current color, pick up the new color, yarn over and draw through both loops. Always change colors one stitch BEFORE you want the new color to appear visually.
Mesh Stitch: Chain 2, skip 1 stitch, sc in next stitch. Repeat (ch 2, skip 2 stitches, sc in next stitch) across the row. This creates an open lattice effect perfect for the yoke.
Dot Stitch: With Color E (white), work 3 sc tightly into the same stitch to form a raised bobble-like dot. These are added individually during finishing.
Scallop Border Stitch: In Color C (black): Slip stitch into first stitch, ch 3, work 4 dc into same stitch, skip 2 stitches, slip stitch into next stitch, skip 2 stitches. Repeat (5 dc into next stitch, skip 2 stitches, slip stitch into next stitch, skip 2 stitches) across. Each scallop repeat uses 5 stitches.
Pattern Notes Before You Begin
Read through these notes first. They’ll save you confusion later.
1. The shawl is worked in two mirrored wing panels joined along the center back yoke. Wing panels are worked flat, back and forth in rows.
2. Color work uses tapestry single crochet throughout the main wing body. You’ll follow the color chart described row by row in the instructions.
3. The yoke (shoulder area) is worked first as a single top panel in mesh stitch with Color A and Color C, establishing shoulder width. The two wing sections then fan outward and downward from this yoke base.
4. Because the shawl is symmetrical, both wings are described together. Work each wing section simultaneously using separate yarn balls to keep row counts consistent, or complete one wing fully before starting the second.
5. The center front edges are finished with a slip stitch column in Color D to create the cream body stripe of the butterfly.
6. Surface slip stitch veins in Color C are added after the main fabric is complete.
7. Right side (RS) is the side facing you when you begin Row 1.
8. At the end of every row, ch 1 and turn for sc rows, or ch 3 and turn for dc rows.
9. All stitch counts in parentheses are WORKING stitches, not counting the turning chain.
Step-by-Step Instructions
Section 1: Yoke Panel
The yoke spans your shoulders. It’s worked flat in mesh stitch using Color C (black) as the primary structure.
With Color C, ch 111.
Foundation Row (RS): Sc in 2nd ch from hook, (ch 2, skip 2 ch, sc in next ch) rep across, ending sc in last ch, turn. (37 sc plus 36 ch-2 spaces)
Row 1 (WS): Ch 1, turn. Sc in first sc, (ch 2, skip ch-2 space, sc in next sc) rep across to last sc, sc in last sc. (37 sc)
Row 2 (RS): Ch 1, turn. Sc in first sc, (ch 2, skip ch-2 space, sc in next sc) rep across. (37 sc)
Rows 3 through 10: Rep Row 1 and Row 2 alternately four more times. (37 sc each row)
Checkpoint 1: Your yoke should measure approximately 4 inches / 10 cm tall and 24 inches / 61 cm wide. The mesh creates a loose open-knit look representing the butterfly thorax/body area.
Do not fasten off. Place a stitch marker at the center sc of the yoke (stitch 19 of 37). This marks the center back of your shawl.
Section 2: Right Wing Panel
The right wing is worked from the right side of the yoke outward and downward.
Attach Color A with a sl st to the bottom-right corner sc of the yoke.
Beginning Pickup Row (RS): Ch 1. Working along the bottom edge of the yoke, sc evenly across the right half from right edge to center marker. Pick up 1 sc per sc anchor point and 2 sc per ch-2 space. This gives you: 19 sc anchor points plus 18 ch-2 spaces (each yields 2 sc) = 19 + 36 = 55 sc. (55 sc)
Row 1 (WS): Ch 1, turn. Sc across all 55 sts in Color A. (55 sc)
Row 2 (RS): Ch 1, turn. Sc in each of first 54 sts, 2 sc in last st (wing outer edge increase). (56 sc)
Row 3 (WS): Ch 1, turn. 2 sc in first st, sc across to end. (57 sc)
Row 4 (RS): Ch 1, turn. Sc across to last st, 2 sc in last st. (58 sc)
Row 5 (WS): Ch 1, turn. 2 sc in first st, sc across to end. (59 sc)
Row 6 (RS): Ch 1, turn. Sc across to last st, 2 sc in last st. (60 sc)
Row 7 (WS): Ch 1, turn. 2 sc in first st, sc across to end. (61 sc)
Row 8 (RS): Ch 1, turn. Sc across to last st, 2 sc in last st. (62 sc)
Row 9 (WS): Ch 1, turn. 2 sc in first st, sc across to end. (63 sc)
Row 10 (RS): Ch 1, turn. Sc across to last st, 2 sc in last st. (64 sc)
Rows 11 through 20: Continue this same increase pattern. Increase 1 stitch on each end of every row (RS increase at outer edge, WS increase at inner edge). After Row 20: (74 sc)
Checkpoint 2: Your wing section should measure approximately 4 inches / 10 cm tall from the pickup row and 74 stitches wide.
Beginning Tapestry Colorwork (Rows 21-40)
Now the magic happens. You’ll use Colors A, B, and C in a pattern that replicates the monarch wing cell structure. Use tapestry single crochet throughout, carrying all unused colors inside your stitches.
Color Zone Guide:
Row 21 (WS): 2 sc in first st (inc), 14 sc Color A, 35 sc Color B, 8 sc Color C, sc2tog at outer edge (dec). (75 sc)
From Row 21 onward, the outer edge begins gentle shaping decreases while the lower wing expands via increases at the inner edge.
Row 22 (RS): Ch 1, turn. Sc2tog at outer edge, 6 sc Color C, 1 sc Color A, 30 sc Color B, 15 sc Color A, 2 sc in last st at inner edge. (75 sc)
Rows 23 through 40: Continue with the same structure. Increase 1 at inner edge, decrease 1 at outer edge, maintaining 75 sc total while shifting color zones.
Color distribution per row (inner edge to outer edge):
Checkpoint 3: Your wing panel should measure approximately 8 inches / 20 cm from the pickup row and remain 75 stitches wide.
Lower Wing Expansion (Rows 41-60)
Now the lower wing widens. Increase 1 at BOTH edges every RS row while maintaining the black outer border at 8 stitches.
Row 41 (RS): 2 sc in first st, 24 sc A, 41 sc B, 8 sc C, 2 sc in last st. (77 sc)
Row 42 (WS): Sc across maintaining color zones. (77 sc)
Row 43 (RS): 2 sc in first st, 24 sc A, 43 sc B, 8 sc C, 2 sc in last st. (79 sc)
Row 44 (WS): Sc across. (79 sc)
Row 45 (RS): 2 sc in first st, 25 sc A, 44 sc B, 8 sc C, 2 sc in last st. (81 sc)
Row 46 (WS): Sc across. (81 sc)
Row 47 (RS): 2 sc in first st, 25 sc A, 46 sc B, 8 sc C, 2 sc in last st. (83 sc)
Row 48 (WS): Sc across. (83 sc)
Row 49 (RS): 2 sc in first st, 26 sc A, 47 sc B, 8 sc C, 2 sc in last st. (85 sc)
Row 50 (WS): Sc across. (85 sc)
Row 51 (RS): 2 sc in first st, 26 sc A, 49 sc B, 8 sc C, 2 sc in last st. (87 sc)
Row 52 (WS): Sc across. (87 sc)
Row 53 (RS): 2 sc in first st, 27 sc A, 50 sc B, 8 sc C, 2 sc in last st. (89 sc)
Row 54 (WS): Sc across. (89 sc)
Row 55 (RS): 2 sc in first st, 27 sc A, 52 sc B, 8 sc C, 2 sc in last st. (91 sc)
Row 56 (WS): Sc across. (91 sc)
Row 57 (RS): 2 sc in first st, 28 sc A, 53 sc B, 8 sc C, 2 sc in last st. (93 sc)
Row 58 (WS): Sc across. (93 sc)
Row 59 (RS): 2 sc in first st, 28 sc A, 55 sc B, 8 sc C, 2 sc in last st. (95 sc)
Row 60 (WS): Sc across. (95 sc)
Checkpoint 4: Your right wing should measure approximately 16 inches / 40.6 cm from the pickup row and 95 stitches wide.
Even Rows (Rows 61-75)
Work even with no increases or decreases while continuing colorwork.
Rows 61-63: 28 sc A, 59 sc B, 8 sc C. (95 sc each row)
Rows 64-66: 29 sc A, 58 sc B, 8 sc C. (95 sc each row)
Rows 67-69: 30 sc A, 57 sc B, 8 sc C. (95 sc each row)
Rows 70-72: 31 sc A, 56 sc B, 8 sc C. (95 sc each row)
Rows 73-75: 32 sc A, 55 sc B, 8 sc C. (95 sc each row)
Checkpoint 5: Your right wing panel measures approximately 20 inches / 50.8 cm from the pickup row.
Lower Wing Tip Shaping (Rows 76-100)
Now decrease to create the pointed lower wing shape. Decrease 2 stitches at the outer (wrist) edge and 1 stitch at the inner (center) edge every RS row.
Row 76 (RS): Sc2tog, sc2tog, sc across to last 2 sts, sc2tog. (92 sc)
Row 77 (WS): Sc across. (92 sc)
Row 78 (RS): Sc2tog, sc2tog, sc across to last 2 sts, sc2tog. (89 sc)
Row 79 (WS): Sc across. (89 sc)
Continue this pattern through Row 91, decreasing by 3 stitches every RS row.
Row 92 (RS): Sc2tog three times at outer edge, sc across to last 2 sts, sc2tog. (67 sc)
Row 93 (WS): Sc across. (67 sc)
Row 94 (RS): Sc2tog three times at outer edge, sc across to last 2 sts, sc2tog. (63 sc)
Row 95 (WS): Sc across. (63 sc)
Row 96 (RS): Sc2tog three times at outer edge, sc across to last 2 sts, sc2tog. (59 sc)
Row 97 (WS): Sc across. (59 sc)
Row 98 (RS): Sc2tog three times at outer edge, sc across to last 2 sts, sc2tog. (55 sc)
Row 99 (WS): Sc across. (55 sc)
Row 100 (RS): Sc2tog twice at outer edge, sc across to last 2 sts, sc2tog. (52 sc)
Fasten off.
Checkpoint 6: Your completed right wing panel is approximately 30 inches / 76 cm long from neck to lower tip.
Section 3: Left Wing Panel
Return to the yoke. Attach Color A with sl st to the bottom-left corner sc.
Pickup Row (RS): Ch 1. Sc evenly across the left half of the yoke bottom edge from center marker to left edge. (55 sc)
Work Rows 1 through 100 exactly as written for the right wing, but MIRROR the shaping. All increases and decreases that occurred at the outer edge now occur at the LEFT outer edge.
For tapestry colorwork rows, read color zones in reverse order. The outer black border is now on the LEFT side, and the inner orange zone is on the RIGHT.
Fasten off after Row 100. (52 sc)
Section 4: Border and Edging
Step 1: Front Opening Body Stripe
With Color D (cream), join at the top right front corner of the right wing inner edge. Work sl st evenly down the entire inner front edge, spacing 1 sl st per row end. (approximately 100 sl sts)
Fasten off. Repeat on the left wing inner edge.
These cream columns represent the butterfly’s body stripe.
Step 2: Lower Wing Edge Main Border
With Color C (black), join with sl st at the inner lower right corner of the right wing.
Border Row 1: Sc evenly across the entire lower edge from inner corner to outer wing tip. (approximately 80 sc)
Border Row 2: Ch 1, turn. Sc in each st across. (80 sc)
Border Row 3 (Scallop Row): Do not turn. Work scallop border stitch across: (sl st in first st, ch 3, 4 dc in same st, skip 2 sts, sl st in next st, skip 2 sts) rep across. (16 scallop repeats)
Fasten off. Repeat border on left wing.
Step 3: Outer Wrist Edge Finish
With Color C, join at the top outer corner of the right wing. Sc evenly down the outer angled edge. Work sc border for 2 rows total, then work 1 row of scallop border.
Fasten off. Repeat on left wing.
Step 4: Neck Edge Finish
With Color C, join at the right front top corner. Sl st across the entire top neck edge of the yoke. (approximately 111 sl sts)
Fasten off.
Step 5: White Dot Embellishment
Using Color E (white) and a yarn needle, work Dot Stitches at regular intervals across the black scallop border. Space dots approximately every 4th stitch, placing them within the black border zone only. Aim for 20 to 24 dots across each lower wing border and 6 to 8 dots along each outer wrist edge.
Fasten off each dot individually and weave in ends on the wrong side.
Section 5: Surface Crochet Wing Veins
Wing veins are added after blocking. Using Color C and a smaller hook (US G-6 / 4.0 mm), hold yarn behind the fabric. Work surface slip stitches in curved lines radiating from the body center outward toward the wing edges, following the natural vein pattern of monarch wings.
Reference your photos for vein placement. The veins curve gently and branch toward the outer edges.
Finishing Your Monarch Butterfly Shawl
Weave in all remaining ends securely. Block your shawl by laying it flat on blocking mats, spraying with water, and pinning the scalloped edges into crisp points. Allow to dry completely before wearing.
The shawl is worn cardigan-style. Slip your arms through the open wing sections. When you spread your arms wide, those beautiful monarch wings unfurl behind you.
Tips for Success
Take your time with colorwork. The tapestry crochet technique takes practice. If this is your first tapestry project, work a small practice swatch until you’re comfortable carrying the inactive yarn inside your stitches.
Use bobbins. Managing multiple yarn colors is much easier with tapestry crochet bobbins. They prevent tangling and keep your workspace organized.
Block aggressively. This shawl really comes to life after wet blocking. The scalloped border and wing shape need proper blocking to achieve that dramatic silhouette.
Mark your checkpoints. Use the checkpoint measurements throughout the pattern to make sure you’re on track before continuing.
Thank you so much for choosing this butterfly shawl pattern. I hope you love making it as much as I loved designing it. If you create one, I’d be absolutely thrilled to see it. Tag me on Instagram or share it in my Facebook group.
If this pattern inspired you, go ahead and save it to your Pinterest boards so you can find it when you’re ready to start. And please drop a comment below if you make one. I read every single comment and love seeing your finished butterflies take flight!
You Might Also Like
- Pastel Rainbow Granny Square Bucket Bag Free Crochet Pattern
- Charcoal Gray Modern Lace Maxi Skirt Free Crochet Pattern
- Mint Chocolate Daisy Granny Square Blanket Free Crochet Pattern
- Dusty Rose Garden Bobble Sweater Free Crochet Pattern