Midnight Silver Lace Bucket Bag Free Crochet Pattern
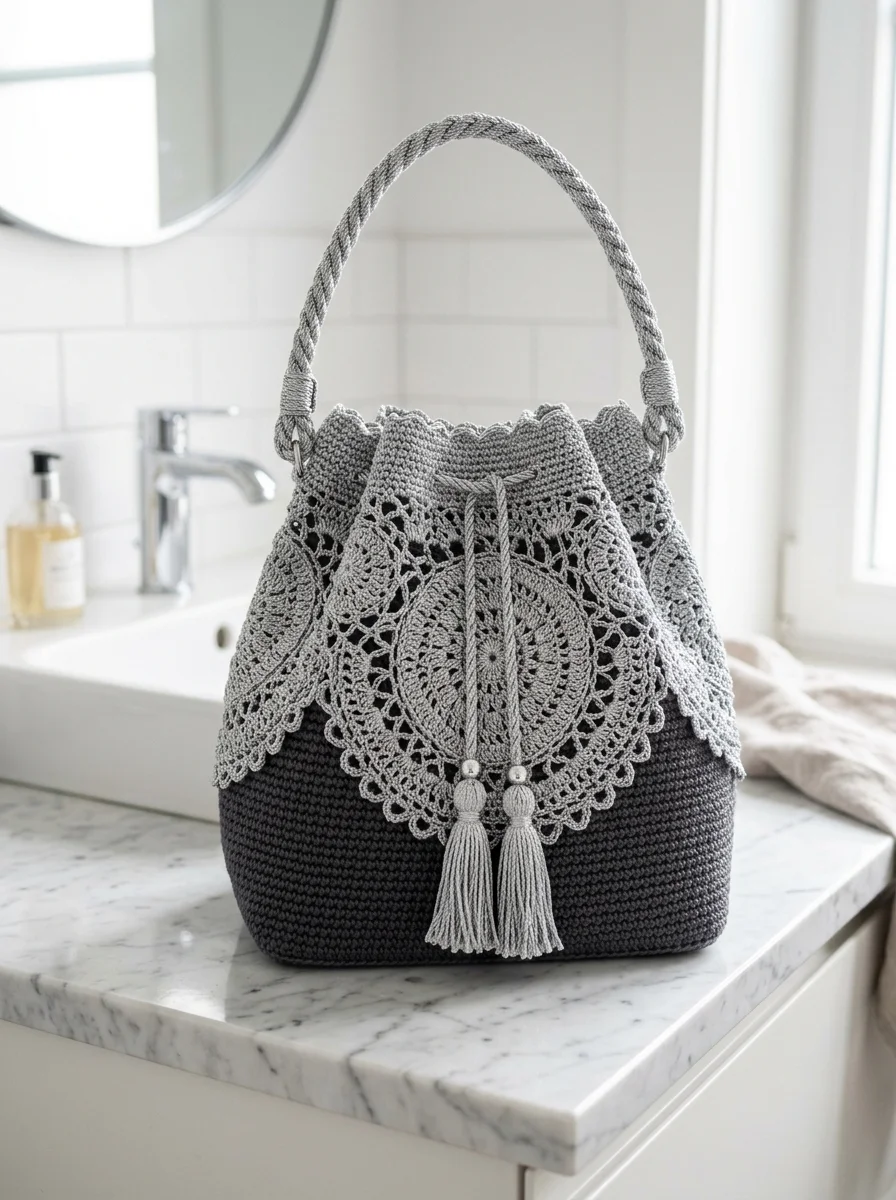
This gorgeous two-tone bucket bag is about to become your new favorite project. I designed the Midnight Silver Lace Bucket Bag to combine elegant lace medallion work with a sturdy, practical base you will actually use every day. The contrast between the dark charcoal bottom and the silvery grey lace overlay creates a sophisticated look that works for everything from farmers markets to date nights.

If you are comfortable with basic stitches and have made a few projects in the round, you can absolutely make this crochet pattern. I will walk you through every single step. The lace medallion looks intricate but breaks down into familiar stitches once you understand the rhythm. Take your time and trust the process.
Why This Bucket Bag Pattern Works So Well
The construction is smarter than it looks. You will create a solid base and body first, then work a separate lace overlay that attaches at the top. This means your belongings stay secure inside the dense charcoal section while the decorative lace adds that wow factor without sacrificing function.
The twisted rope handle adds professional polish. The drawstring closure with tassels keeps everything contained. And the whole thing uses just two colors of the same yarn weight, so your tension stays consistent throughout.
Materials Needed for This Crochet Bucket Bag
Yarn:
I recommend a mercerized cotton for this crochet tutorial. The sheen catches the light beautifully in that lace work, and cotton holds its shape under the weight of your essentials. Yarn like Scheepjes Catona, Drops Safran, or similar smooth cotton works perfectly.
Hook:
Notions:
Gauge:
20 stitches and 22 rows = 4 inches in single crochet with 3.5mm hook
Gauge matters here. Your bag needs structure. Swatch and adjust hook size if needed.
Finished Dimensions:
Skill Level and Techniques Used
This step by step crochet pattern is intermediate level. You should already know how to:
Stitches and Abbreviations:
The Crochet Pattern: Step by Step Instructions
Part 1: Bag Base (Color A, Charcoal)
The base is a simple flat circle worked in continuous spiral rounds. Place a stitch marker at the start of each round and move it up as you go.
Round 1: With Color A, make a magic ring. Work 6 sc into ring, pull tight. (6 sts)
Round 2: 2 sc in each st around. (12 sts)
Round 3: *Sc in next st, 2 sc in next st* repeat around. (18 sts)
Round 4: *Sc in next 2 sts, 2 sc in next st* repeat around. (24 sts)
Round 5: *Sc in next 3 sts, 2 sc in next st* repeat around. (30 sts)
Round 6: *Sc in next 4 sts, 2 sc in next st* repeat around. (36 sts)
Round 7: *Sc in next 5 sts, 2 sc in next st* repeat around. (42 sts)
Round 8: *Sc in next 6 sts, 2 sc in next st* repeat around. (48 sts)
Round 9: *Sc in next 7 sts, 2 sc in next st* repeat around. (54 sts)
Round 10: *Sc in next 8 sts, 2 sc in next st* repeat around. (60 sts)
Round 11: *Sc in next 9 sts, 2 sc in next st* repeat around. (66 sts)
Round 12: *Sc in next 10 sts, 2 sc in next st* repeat around. (72 sts)
Round 13: *Sc in next 11 sts, 2 sc in next st* repeat around. (78 sts)
Round 14: *Sc in next 12 sts, 2 sc in next st* repeat around. (84 sts)
Your base should measure approximately 7 inches across. If it is smaller, go up a hook size. If larger, go down.
Part 2: Bag Body (Color A, Charcoal)
Now we build the walls straight up without increasing. This creates that classic bucket shape.
Round 15: Working in back loops only (BLO) this round, sc in each st around. (84 sts)
This creates the sharp corner where the base meets the sides. Do not skip this step.
Rounds 16 through 45: Sc in each st around. (84 sts each round)
That is 30 rounds of straight sides. Your charcoal section should measure approximately 5.5 inches tall.
Fasten off Color A. Weave in ends securely.
Part 3: Upper Body and Eyelet Round (Color B, Silver Grey)
Join Color B with a standing sc in any stitch.
Rounds 46 through 52: Sc in each st around. (84 sts)
Round 53 (Eyelet Round): *Sc in next 5 sts, ch 2, skip 2 sts* repeat around. End with sc in remaining sts to complete round. (72 sc, 12 ch-2 spaces)
This round creates the holes for your drawstring.
Rounds 54 through 56: Sc in each st and ch around. (84 sts)
Part 4: Scallop Edge (Color B)
Round 57: *Skip 1 st, 5 dc in next st (shell made), skip 1 st, sl st in next st* repeat around. Join with sl st to first dc.
Fasten off. Weave in ends.
Part 5: Large Lace Medallion (Color B, Silver Grey)
This is the show stopper. The medallion attaches to the front of your bag. Make one.
Round 1: Magic ring, ch 3 (counts as dc), 11 dc into ring, sl st to top of ch-3 to join. (12 dc)
Round 2: Ch 3, dc in same st, 2 dc in each st around, sl st to join. (24 dc)
Round 3: Ch 4 (counts as dc plus ch-1), *dc in next st, ch 1* repeat around, sl st to 3rd ch of beginning ch-4. (24 dc, 24 ch-1 spaces)
Round 4: Sl st into ch-1 space, ch 3, 2 dc in same space, ch 1, *3 dc in next ch-1 space, ch 1* repeat around, sl st to join. (24 3-dc clusters)
Round 5: Sl st to center dc of cluster, ch 5 (counts as dc plus ch-2), *dc in center dc of next cluster, ch 2* repeat around, sl st to join. (24 dc, 24 ch-2 spaces)
Round 6: Sl st into ch-2 space, ch 3, 4 dc in same space, *5 dc in next ch-2 space* repeat around, sl st to join. (120 dc in 24 shells)
Round 7: Ch 1, sc in same st, sc in next 2 dc, ch 5, skip 2 dc, *sc in next 3 dc, ch 5, skip 2 dc* repeat around, sl st to join. (72 sc, 24 ch-5 loops)
Round 8: Sl st to center sc of 3-sc group, ch 6 (counts as dc plus ch-3), *dc in center sc of next group, ch 3* repeat around, sl st to join.
Round 9: *In ch-3 space work (sc, hdc, 3 dc, hdc, sc)* repeat in each ch-3 space around. Sl st to join. (24 scallops)
Round 10 (Outer Lace Border): Ch 1, sc in joining st, *ch 5, sc in center dc of next scallop, ch 5, sc between scallops* repeat around, adjusting final stitches to join smoothly. Sl st to first sc.
Round 11: In each ch-5 loop, work (sc, hdc, dc, tr, dc, hdc, sc). Sl st to join.
Round 12 (Picot Edge): *Sc in sc, picot, sc in next st, sc in next st* repeat around entire edge, creating a delicate picot trim.
Fasten off. Weave in ends. Block this medallion flat before attaching. Blocking opens up the lace beautifully.
Part 6: Attaching the Medallion
Center the medallion on the front of your bag, overlapping onto both the charcoal and silver sections. The scalloped edge of the medallion should drape naturally.
Using Color B and your tapestry needle, whipstitch the top edge of the medallion to the bag body. Work through the back of the picot edge so your stitches remain invisible from the front.
Tack down a few points along the sides if needed to prevent the medallion from flipping up.
Part 7: Twisted Rope Handle
This handle gives that professional boutique look.
Step 1: Cut six strands of Color B, each 90 inches long.
Step 2: Knot all six strands together at one end. Secure this knot to a fixed point (doorknob, heavy book, or have a friend hold it).
Step 3: Divide strands into two groups of three. Twist each group tightly to the right (clockwise) until the strands kink when you release tension slightly.
Step 4: While maintaining tension, twist both groups around each other to the left (counterclockwise). The opposing twists lock together.
Step 5: Knot the other end securely. Trim excess.
Your rope should measure approximately 18 to 20 inches. Adjust starting strand length for longer or shorter handles.
Attaching the Handle:
Sew each knotted end securely to the inside of the bag at the scallop round, positioned at opposite sides of the opening. Reinforce with multiple passes of yarn. These attachment points bear weight.
Part 8: Drawstring and Tassels
Drawstring:
Chain 150 with Color B. Fasten off. Weave this chain through the eyelet holes you created in Round 53, starting and ending at center front.
Tassels (make 2):
Wrap Color B around a 4 inch piece of cardboard 30 times. Slide off, tie tightly at one end. Cut loops at the opposite end. Wrap yarn around the tassel about half an inch below the tied end to create the head. Trim ends evenly.
Thread a silver bead onto each drawstring end before attaching tassels. Secure tassel to drawstring end by tying or sewing.
Finishing Your Midnight Silver Lace Bucket Bag
Give your finished bag a light steam block if needed. The cotton will relax and the lace will open up beautifully.
Check all your attachment points: handle, medallion, drawstring. Reinforce anything that feels loose.
Consider adding a fabric lining if you plan to carry small items. A simple drawstring fabric bag inside prevents lipsticks and keys from poking through.
Pattern Notes and Tips for Success
Tension matters. Keep your single crochet tight on the bag body. This creates structure. Loose stitches result in a floppy bag that will not hold its shape.
Block the medallion. I cannot stress this enough. Unblocked lace looks crumpled and sad. A quick soak and pin out transforms your work.
Use stitch markers liberally. Mark the beginning of each round. Mark increase points. Mark where your medallion will attach. Markers prevent headaches.
If your lace curls: You may be working too tightly. Try going up half a hook size on the medallion only.
Customize your colors. This design works beautifully in cream and white, navy and gold, or any two coordinating shades. The contrast between the solid base and lace overlay is the magic.
You Made It!
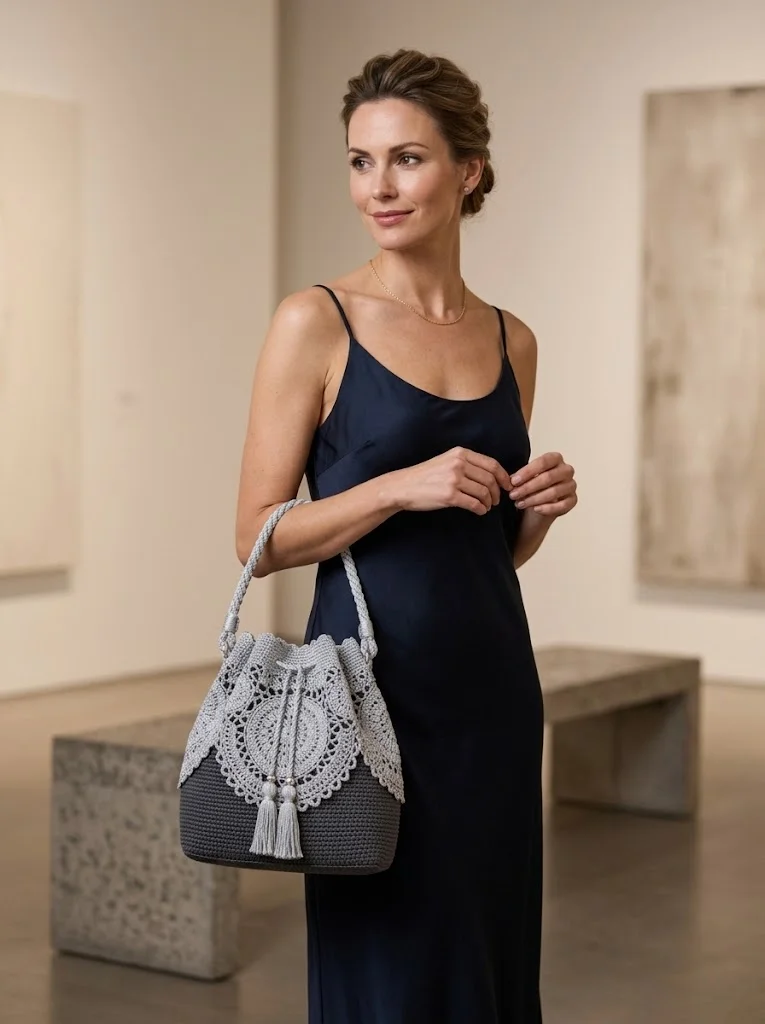
I hope you love making the Midnight Silver Lace Bucket Bag as much as I loved designing it. There is something deeply satisfying about watching that lace medallion come together, knowing you created something both beautiful and genuinely useful.
Thank you so much for choosing this crochet pattern. Your trust means everything to me.
I would absolutely love to see your finished bags. Tag me on Instagram or share in my Facebook group. Seeing your color choices and personal touches is the best part of this whole creative community.
Happy hooking, friend. You have got this.