Lavender Purple Dreamy Tassel Clutch Free Crochet Pattern
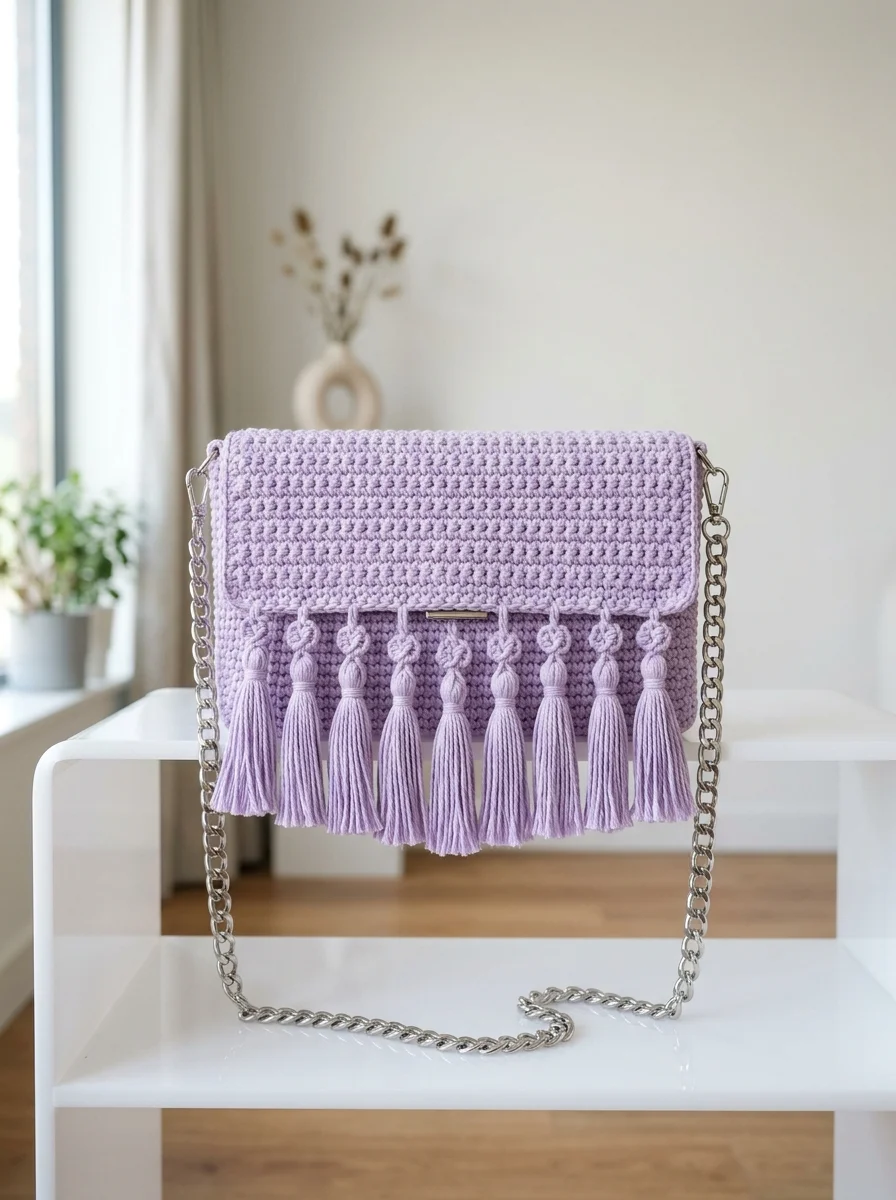
This gorgeous lavender clutch bag with tassels is one of those projects that looks way more complicated than it actually is. I am so excited to share this pattern with you today. The combination of textured stitches, decorative knotted details, and those dreamy tassels creates a bag that honestly looks store bought. But you made it yourself. With your own two hands and a hook.
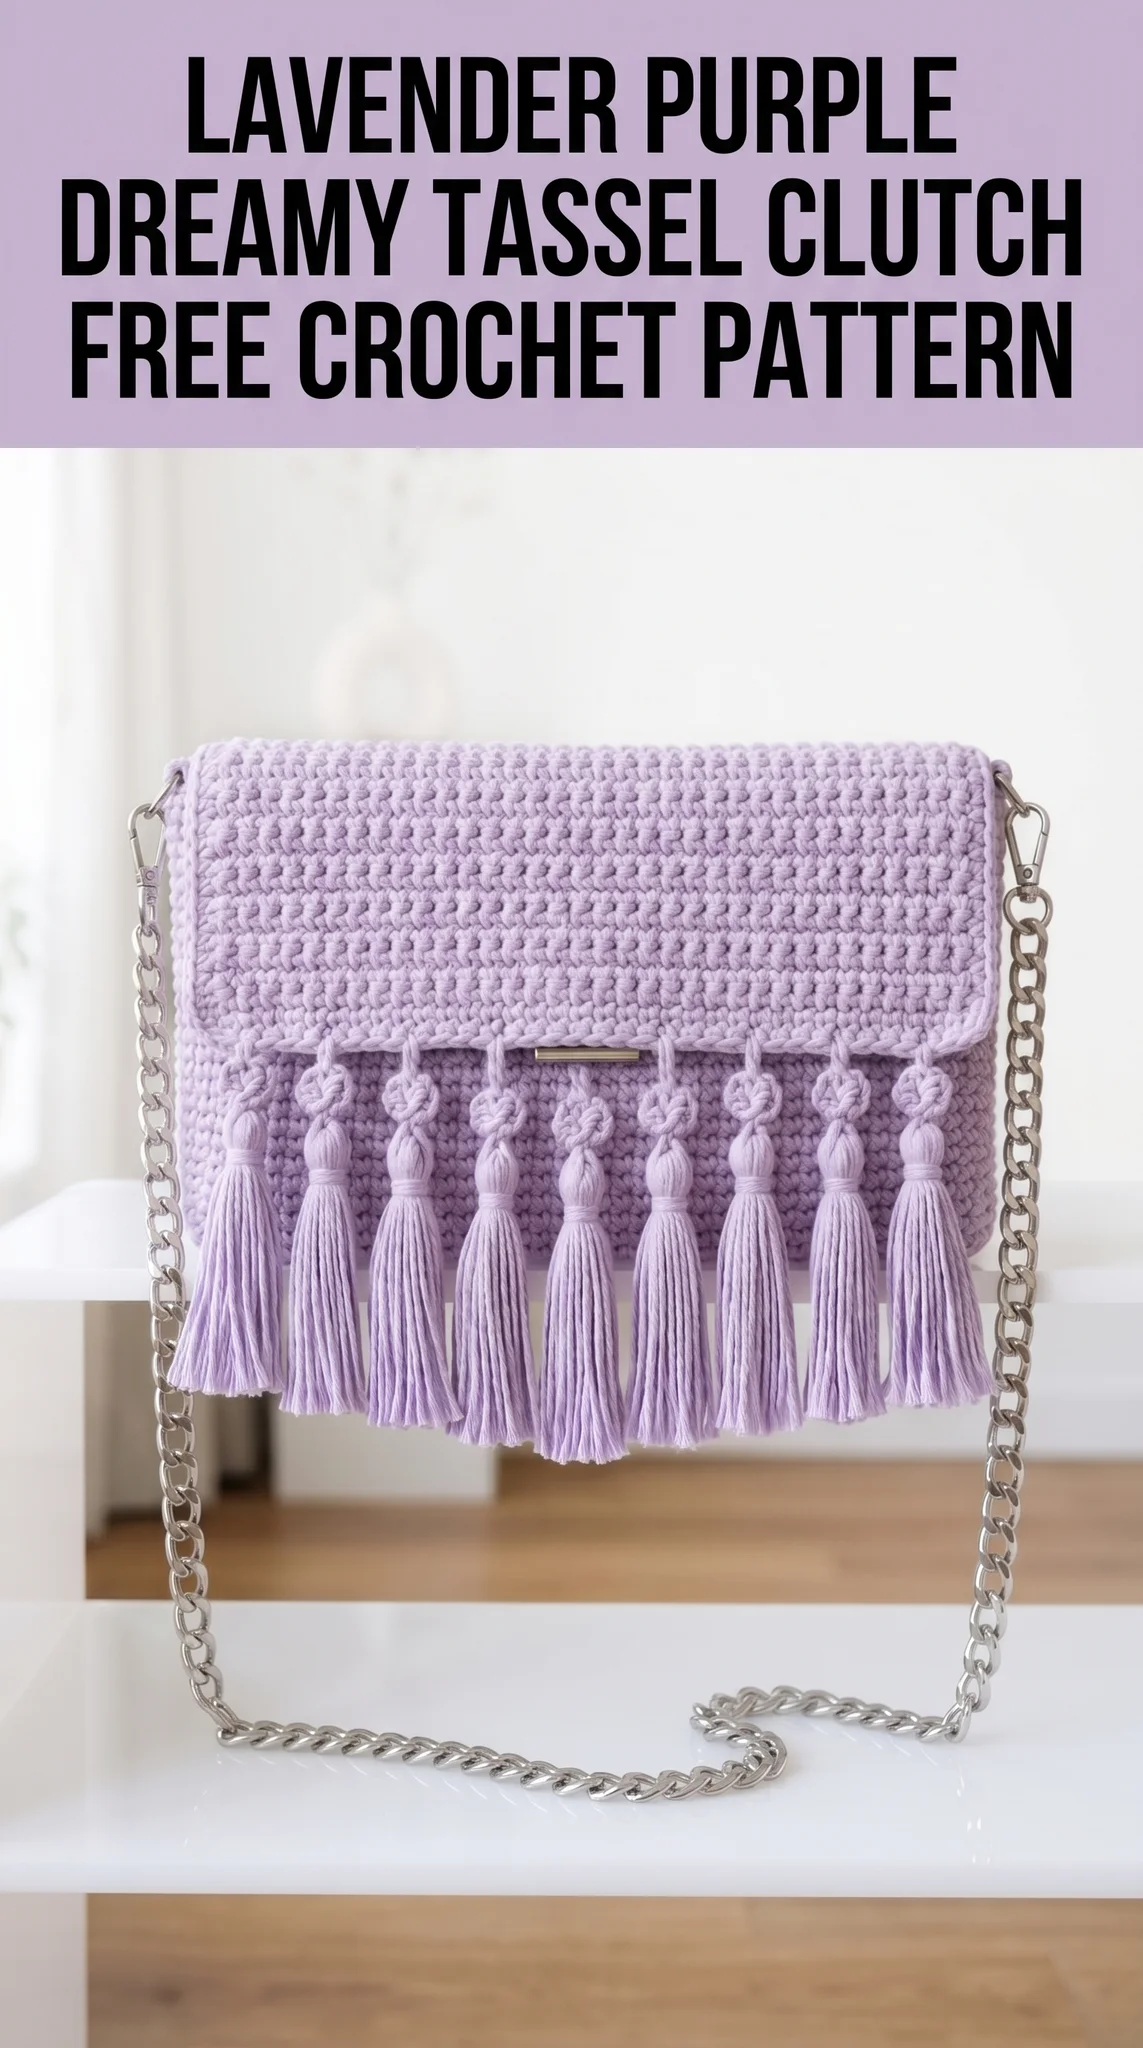
If you can work basic crochet stitches in rows and know how to make a simple tassel, you can absolutely create this stunning accessory. I would call this an intermediate level project, but a confident beginner who takes their time will do just fine.
Let me walk you through every single step of this crochet tutorial so you can make your own lavender tassel clutch from scratch.
Why You Will Love This Crochet Clutch Pattern
This is not your average crochet bag pattern. The rectangular clutch shape is classic and timeless. But those decorative elements take it to another level entirely.
The body uses a combination of single crochet (sc) and a textured stitch pattern that creates subtle horizontal ridges. The flap features beautiful texture work that adds visual interest without being fussy. And those tassels with their knotted tops? Absolute showstoppers.
The silver chain strap transforms this from a clutch you carry in your hand to a crossbody bag you can wear all day. So practical. So chic.
This step by step crochet pattern gives you everything you need to recreate this exact look.
Materials Needed
Before we dive into the pattern instructions, let me tell you exactly what you will need.
Yarn:
Hook:
Notions:
Gauge:
Finished Dimensions
Abbreviations Used
Let me define every stitch abbreviation before we begin. I will use the full name first, then the abbreviation, then explain what it actually means in plain English.
Pattern Notes Before You Begin
A few things that will make your life easier.
The bag body is worked flat in rows, then seamed along the sides and bottom. The flap is worked separately and attached. This construction method gives you clean edges and professional looking results.
The textured section on the flap alternates between regular single crochet rows and BLO single crochet rows. Working in the back loop only creates those pretty horizontal ridges you see in the photo.
Do not stress about perfection. Cotton yarn is less forgiving than acrylic, so take your time and keep your tension consistent. If your stitches look a little uneven, blocking will help tremendously.
Step by Step Crochet Pattern Instructions
Part 1: The Clutch Body (Front and Back Panels)
You will make two identical panels, then join them.
Foundation: Ch 41.
Row 1: Sc in 2nd ch from hook and in each ch across. Turn. (40 sts)
Row 2: Ch 1 (does not count as stitch here and throughout), sc in each st across. Turn. (40 sts)
Rows 3 through 32: Repeat Row 2. (40 sts each row)
You should have a rectangle measuring approximately 22cm wide and 14cm tall.
Fasten off and weave in your starting tail.
Make a second panel exactly the same way.
Part 2: Joining the Panels
Place both panels together with wrong sides facing each other. You will join along three sides, leaving the top open.
Using a tapestry needle and matching yarn, whip stitch along the bottom edge and both side edges. Keep your stitches small and even, about one stitch apart.
Alternatively, you can use single crochet to join if you prefer a slightly more visible seam. Insert hook through both layers, yarn over, pull through, complete the sc. Work one sc in each stitch across the bottom, then up each side.
Turn right side out. Your bag body is complete.
Part 3: The Flap
The flap is the star of the show. It features alternating textured rows that create those beautiful ridges.
Foundation: Ch 41.
Row 1: Sc in 2nd ch from hook and in each ch across. Turn. (40 sts)
Row 2: Ch 1, working in BLO, sc in each st across. Turn. (40 sts)
Row 3: Ch 1, sc in both loops of each st across. Turn. (40 sts)
Rows 4 through 5: Repeat Rows 2 and 3.
Rows 6 through 15: Repeat the alternating BLO and regular sc rows, ending with a BLO row. (40 sts each row)
Rows 16 through 20: Ch 1, sc in each st across working in both loops. Turn. (40 sts each row)
This creates a smooth border at the top of the flap for a polished finish.
Fasten off, leaving a long tail for attaching.
Part 4: Attaching the Flap
Position the flap along the back panel of your bag, aligning the top edges. The textured side should face outward when the flap is closed.
Using your long tail and tapestry needle, whip stitch the flap securely to the back panel. Work through both layers, keeping stitches tight and invisible from the front.
Part 5: Making the Decorative Knotted Tassels
This is where the magic happens. Each tassel has a decorative knotted top that adds so much character. You will make 9 tassels total.
For each tassel:
1. Cut a piece of cardboard about 8cm tall.
2. Wrap yarn around the cardboard approximately 25 times.
3. Cut a 20cm piece of yarn. Thread it under the wrapped yarn at the top of the cardboard. Tie a tight double knot.
4. Cut the yarn at the bottom of the cardboard. You now have a bundle of strands tied at the top.
5. Cut another 30cm piece of yarn. Hold it about 1cm below the top knot. Wrap it tightly around the bundle 6 to 8 times, creating the tassel neck.
6. Thread the wrapping yarn through the bundle using a tapestry needle. Trim the end inside the tassel.
7. Trim the bottom of the tassel evenly.
Creating the knotted detail:
This is the part that looks so impressive. Take the long ties at the top of your tassel and work a simple macrame style knot or decorative loop.
One easy method: fold the ties, twist them once around each other, then pull the tassel through the loop created. This forms a pretty knot above the tassel head.
Repeat for all 9 tassels.
Part 6: Attaching the Tassels
Space your 9 tassels evenly across the front panel of the clutch, just below where the flap closes.
Using a tapestry needle, thread the tassel ties through the crocheted fabric from front to back. Pull snug. Tie securely on the inside of the bag. Weave in and trim the ends.
The tassels should hang at even intervals, approximately 2cm apart.
Part 7: Adding Hardware
For the strap attachments:
Identify where you want your D rings or lobster clasps to sit. Typically this is at the top corners of the bag, just below the flap.
You can crochet small loops to hold the hardware:
Ch 10, sl st to form a loop. Thread through your D ring before joining. Attach the loop securely to the side of your bag using a few tight stitches.
Repeat on the other side.
Clip your chain strap to both D rings.
For the closure:
A magnetic snap works beautifully with this design. Hand sew one half to the inside of the flap and one half to the front panel, positioned so they align when closed.
You can also use a small metal clasp or decorative button and loop closure.
Finishing Your Lavender Tassel Clutch
Almost done. Let us make everything look perfect.
Weave in all remaining ends using your tapestry needle. Take your time here. Cotton yarn can work its way loose, so weave through at least 2 inches of fabric in different directions.
Block your clutch if desired. Wet blocking cotton works well. Dampen the bag, shape it with your hands, stuff with tissue paper to hold the shape, and let it dry completely.
Fluff your tassels by gently separating the strands and trimming any uneven pieces.
Tips for Success
Tension matters. Keep your stitches consistent throughout. If you crochet tightly, go up a hook size. If you crochet loosely, go down.
Cotton can be hard on your hands. Take breaks. Stretch your fingers. This is supposed to be relaxing.
The tassels make this bag. Do not rush them. Take time to make each one uniform and fluffy.
Hardware elevates everything. A chain strap looks so much more polished than a crocheted strap for this particular design. Treat yourself to nice hardware.
Make It Your Own
While I adore this lavender purple color, you could easily adapt this crochet clutch pattern to suit your style.
Try a classic black or cream for a more versatile accessory. Go bold with coral, teal, or mustard yellow. Skip the tassels for a cleaner minimalist look. Add more tassels for extra drama.
This pattern is your starting point. Make it yours.
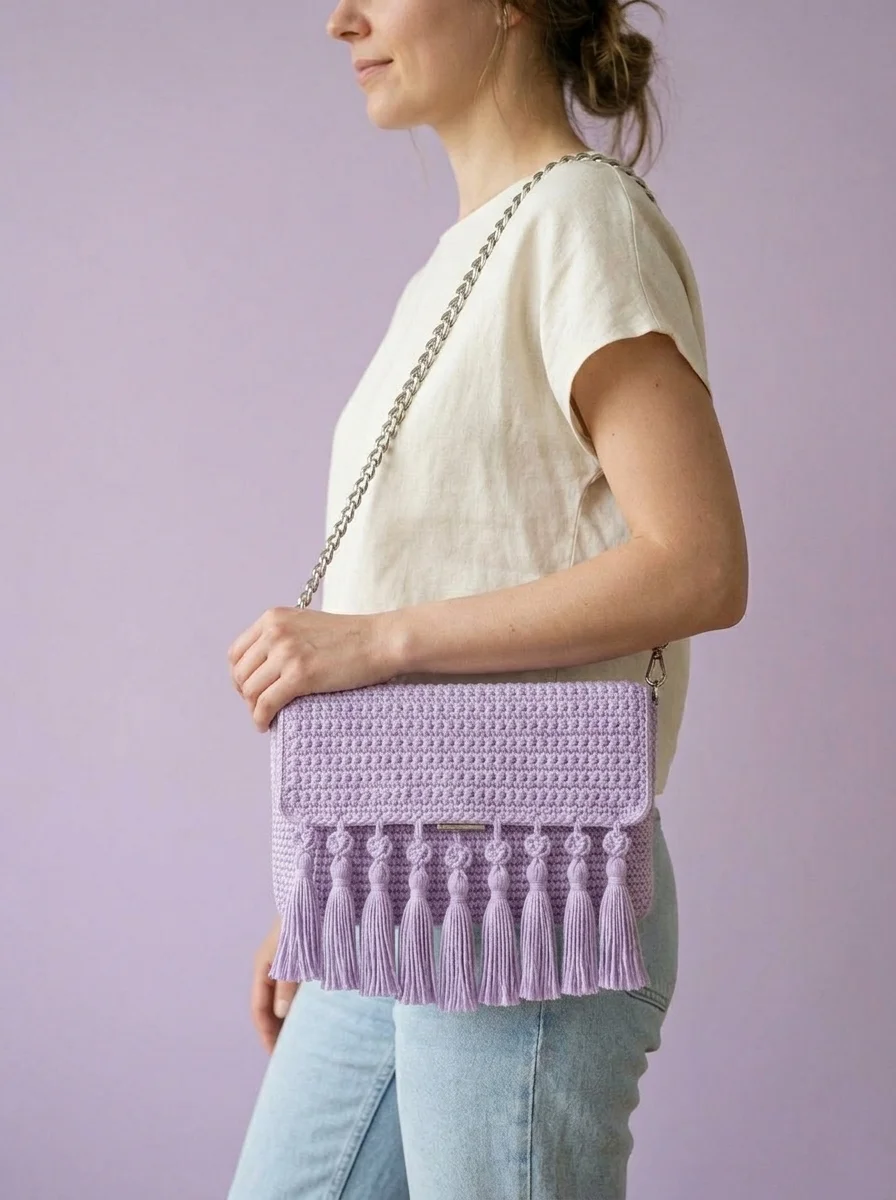
You Did It
I really hope you enjoy making this lavender dreamy tassel clutch as much as I enjoyed writing this crochet pattern for you. It is such a satisfying project to complete because the finished result looks absolutely gorgeous.
Thank you so much for choosing to make this bag. Your time and creativity mean so much to me.
I would absolutely love to see your finished clutch. Tag me on Instagram or share in my Facebook group so I can cheer you on. Seeing your makes truly makes my day.
Happy crocheting, friend. You have got this.