Lavender Granny Square Baby Poncho Free Crochet Pattern
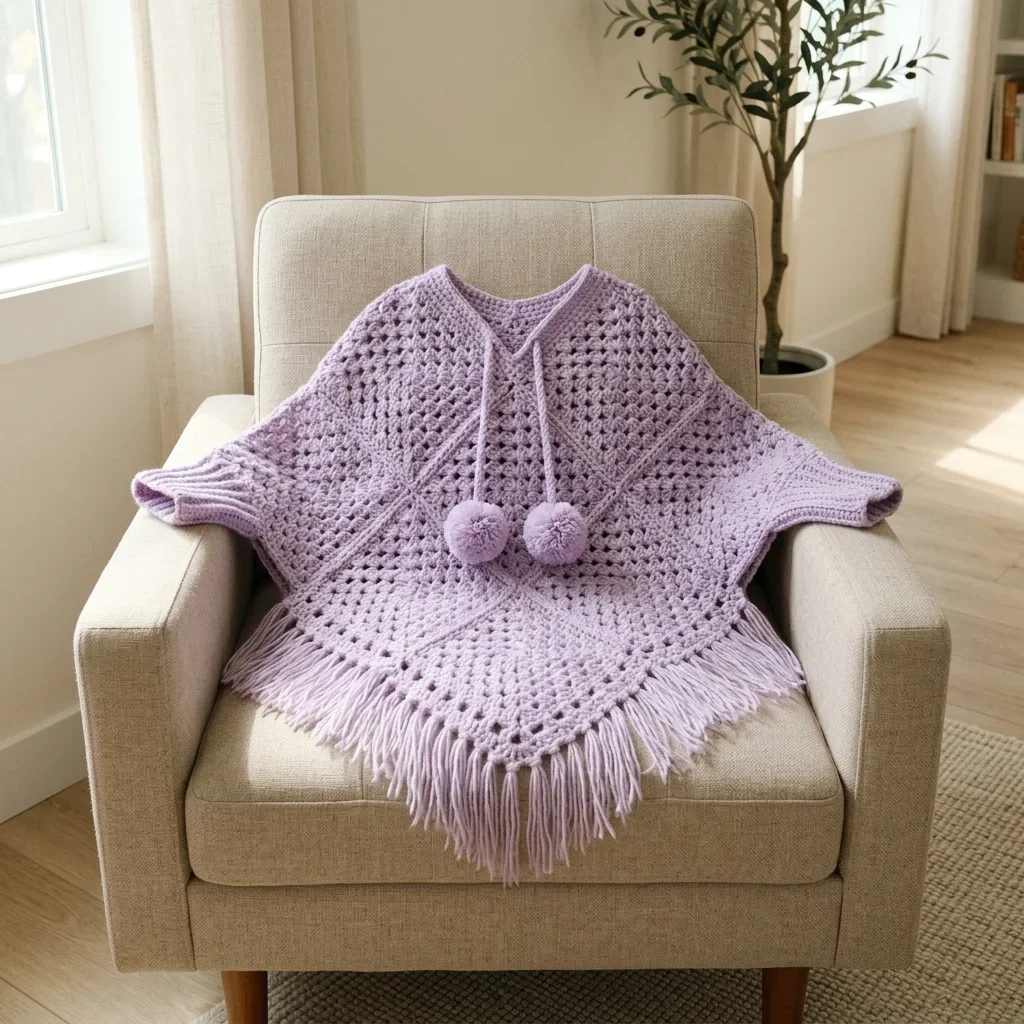
Go dig through your stash right now. That soft lavender skein you have been saving for something special? This is the project it has been waiting for.
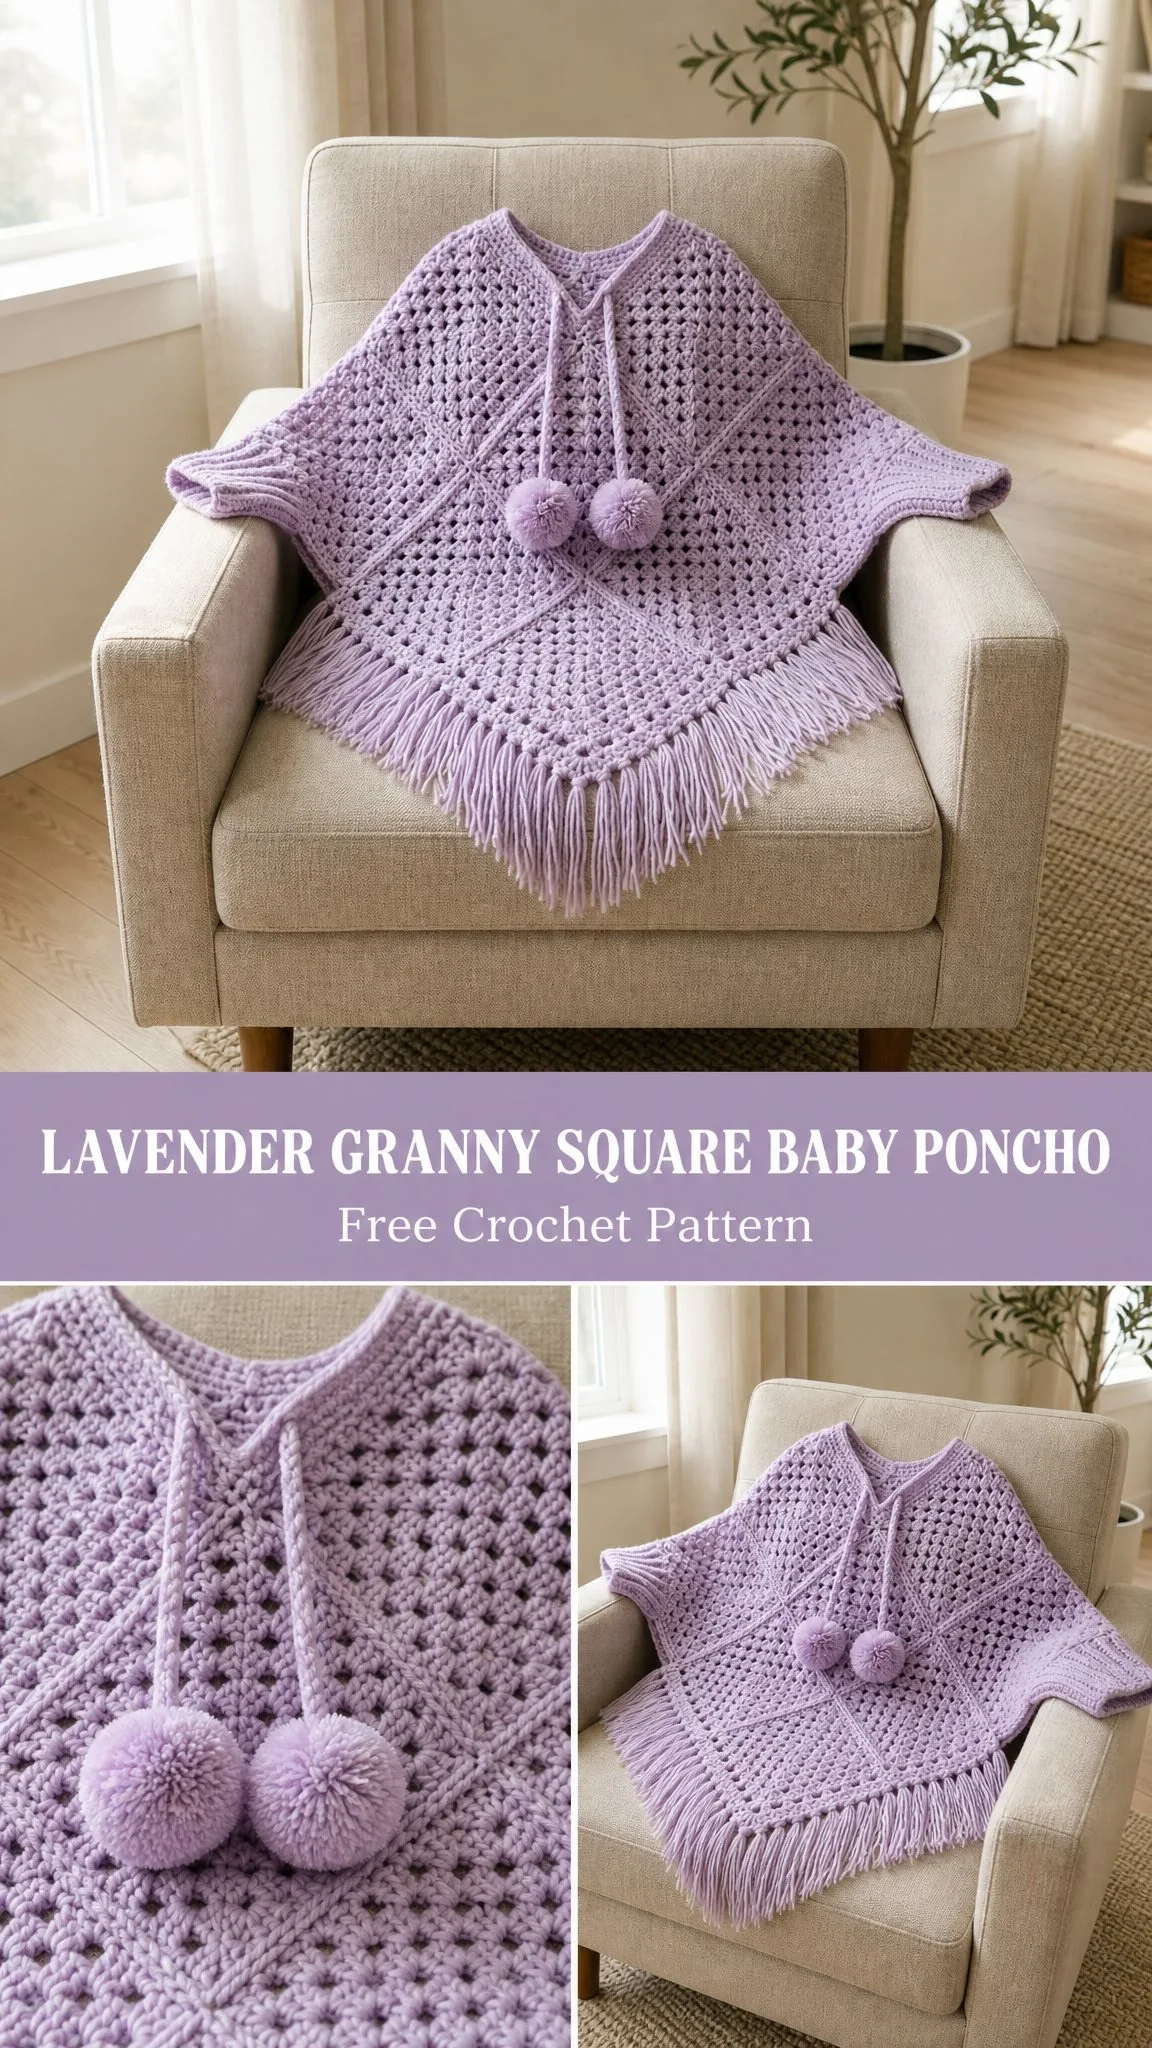
This baby poncho is built from two large granny squares joined at the shoulders with the corners rotated to create those gorgeous diamond points at the front and back hem. The construction is clever but not complicated. You will work the classic granny cluster pattern you probably already know, then seam the panels together in a way that naturally creates the arm openings without any fussy shaping.
If you are comfortable making a basic granny square and can handle a simple seam, you can absolutely make this poncho. The pattern calls for worsted weight yarn and a 6.0 mm hook, so it works up faster than you might expect. I would call this easy to intermediate level, mostly because you will be adding ribbed sleeve cuffs, fringe, and little pom pom ties at the end. None of those finishing touches are difficult, but they do require patience and attention.
Why This Granny Square Baby Poncho Works So Well
The genius of this design is in how the two panels come together. Each panel is a traditional granny square worked from the center out. When you orient each square as a diamond and seam them at the top shoulders only, you get a poncho that drapes beautifully with pointed hems in front and back. The side corners stay open to become arm holes. No complicated armhole shaping required.
The granny cluster stitch creates a lacy, breathable fabric that is perfect for a toddler layer. It is warm enough to add coziness but open enough that it will not overheat a busy little one. The fringe along the hem adds movement and visual interest, while the pom pom ties at the neckline are just plain adorable.
This poncho fits children approximately 12 to 24 months old, but I have included sizing notes if you need to go smaller or larger.
Materials You Will Need
Gather these supplies before you start:
Yarn: Worsted weight yarn, CYC 4 or Medium weight, approximately 350 to 400 yards total in lavender or your chosen color
Hook: US size J-10, which is 6.0 mm
Notions:
Yarn Suggestions That Work Beautifully
Lion Brand Pound of Love in Pastel Lavender is soft against baby skin, machine washable, and gives beautiful stitch definition with its slight sheen.
Paintbox Yarns Simply DK held double creates a worsted equivalent weight while keeping the fabric airy and lightweight.
Caron Simply Soft in Soft Plum or Orchid is budget friendly, easy care, and produces a lovely fluid drape.
When substituting yarn, choose something machine washable since this is a baby garment. Avoid fuzzy yarns like mohair blends because they will obscure the pretty granny cluster texture.
Gauge Information
Getting gauge right matters here because even small differences will significantly affect how the finished poncho fits a small child.
One complete granny square motif repeat measured over 4 rows of cluster pattern should equal 3.5 inches or 9 cm.
For a more practical reference: 16 double crochet stitches across should measure 4 inches or 10 cm, and 8 rows of double crochet should measure 4 inches or 10 cm.
Always swatch before starting. If your swatch is too big, try a smaller hook. If it is too small, go up a hook size.
Finished Measurements
This poncho fits a child approximately 12 to 24 months old.
The poncho drapes as a double pointed front and back panel that falls to mid torso on a toddler.
Abbreviations and Stitch Definitions
Here are all the abbreviations used in this pattern. I have included plain English definitions so you know exactly what each stitch involves.
beg = beginning
ch = chain. Wrap the yarn over your hook and pull it through the loop on your hook. That is one chain.
ch-sp = chain space. The gap or hole created by a chain stitch in the previous row or round.
dc = double crochet. Yarn over, insert hook into stitch, yarn over and pull up a loop (3 loops on hook), yarn over and pull through 2 loops (2 loops remain), yarn over and pull through remaining 2 loops. One double crochet complete.
rep = repeat
rnd = round
RS = right side. The front or public facing side of your work.
sc = single crochet. Insert hook into stitch, yarn over and pull up a loop (2 loops on hook), yarn over and pull through both loops.
sk = skip
sl st = slip stitch. Insert hook into stitch, yarn over and pull through both the stitch and the loop on your hook in one motion.
sp = space
st = stitch
sts = stitches
WS = wrong side. The back or private facing side of your work.
yo = yarn over. Wrap the yarn over your hook from back to front.
[ ] = work the instructions within brackets the number of times indicated
( ) = stitch count at the end of the row or round
\* = repeat the instructions following the asterisk as directed
Special Stitches Explained
Granny Cluster
This is also called a shell cluster in this pattern. It is simply 3 double crochet stitches worked into the same stitch or space.
Here is how to work it: Yarn over, insert hook into the designated stitch or space, yarn over and pull up a loop, yarn over and draw through two loops, yarn over, insert hook into the same stitch or space, yarn over and pull up a loop, yarn over and draw through two loops, yarn over, insert hook into the same stitch or space again, yarn over and pull up a loop, yarn over and draw through two loops, yarn over and draw through all four loops on hook.
That completes one 3 dc granny cluster. In this pattern, a granny cluster is always 3 dc worked into the same space unless otherwise noted.
Corner Increase Unit
Work [3 dc, ch 2, 3 dc] into the same corner chain 2 space. This unit adds width at each of the four corners on every round, which is what makes your square grow.
Side Fill Unit
Work [3 dc, ch 1, 3 dc] into each ch 1 side space along the edges between corners. As your square grows, more ch 1 spaces accumulate and each one receives a side fill unit.
Fringe
Cut yarn strands to the stated length. Hold the specified number of strands together and fold in half. Insert the folded loop through a stitch at the hem edge, pull the yarn tails through the loop, and tighten. That creates one fringe knot.
Pattern Notes Before You Begin
1. The poncho is made of two identical panels. Each panel begins from a center ring and grows outward in rounds, forming a large granny square approximately 18 inches from corner to corner measured diagonally.
2. Each panel is worked flat in joined rounds. After completing each round, join with a slip stitch to the top of the beginning ch 3, then turn your work. Turning on each round keeps both sides of the fabric looking consistent and prevents a visible spiral jog.
3. The panels are placed with one corner at the top for the neck, one at the bottom for the hem point, and two at the sides where the arms come through. The two panels are seamed at the top two shoulder segments only, leaving the side corner spaces open as arm openings.
4. The neck opening is the space between the two joined panels at the center top. A simple chain tie is worked around this opening.
5. The sleeve cuffs are worked in the round in ribbed single crochet around each arm opening after seaming.
6. Fringe is attached along the entire lower hem edge of both front and back panels after all other finishing is complete.
7. The starting magic ring can be substituted with ch 4 and join with sl st to form a ring.
8. All ch 3 at the beginning of a round counts as a dc throughout.
Granny Square Panel Instructions
Make 2 identical panels.
Foundation Ring
Make a magic ring. Or if you prefer, ch 4 and join with sl st to form a ring.
Round 1 (RS)
Ch 3 (counts as dc), work 2 dc into ring, ch 2, [3 dc into ring, ch 2] 3 times, join with sl st to top of beginning ch 3. Turn. (4 clusters, 4 ch 2 corner spaces, 12 dc total)
Round 2 (WS)
Sl st into first ch 2 corner sp, ch 3, work 2 dc into same corner sp, ch 2, 3 dc into same corner sp [this completes the first corner unit], ch 1, [work corner unit of (3 dc, ch 2, 3 dc) into next ch 2 corner sp, ch 1] 3 times, join with sl st to top of beg ch 3. Turn. (8 clusters, 4 ch 2 corner spaces, 4 ch 1 side spaces, 24 dc total)
Round 3 (RS)
Sl st into first ch 2 corner sp, ch 3, 2 dc into same corner sp, ch 2, 3 dc into same corner sp, ch 1, 3 dc into next ch 1 side sp, ch 1, [corner unit into next ch 2 sp, ch 1, 3 dc into next ch 1 side sp, ch 1] 3 times, join with sl st to top of beg ch 3. Turn. (12 clusters, 4 ch 2 corner spaces, 8 ch 1 side spaces, 36 dc total)
Round 4 (WS)
Sl st into first ch 2 corner sp, ch 3, 2 dc into same corner sp, ch 2, 3 dc into same corner sp, ch 1, [3 dc into next ch 1 side sp, ch 1] 2 times, [corner unit into next ch 2 corner sp, ch 1, [3 dc into next ch 1 side sp, ch 1] 2 times] 3 times, join with sl st to top of beg ch 3. Turn. (16 clusters, 4 ch 2 corner spaces, 12 ch 1 side spaces, 48 dc total)
Round 5 (RS)
Sl st into first ch 2 corner sp, ch 3, 2 dc into same corner sp, ch 2, 3 dc into same corner sp, ch 1, [3 dc into next ch 1 side sp, ch 1] 3 times, [corner unit into next ch 2 corner sp, ch 1, [3 dc into next ch 1 side sp, ch 1] 3 times] 3 times, join with sl st to top of beg ch 3. Turn. (20 clusters, 4 ch 2 corner spaces, 16 ch 1 side spaces, 60 dc total)
Round 6 (WS)
Sl st into first ch 2 corner sp, ch 3, 2 dc into same corner sp, ch 2, 3 dc into same corner sp, ch 1, [3 dc into next ch 1 side sp, ch 1] 4 times, [corner unit into next ch 2 corner sp, ch 1, [3 dc into next ch 1 side sp, ch 1] 4 times] 3 times, join with sl st to top of beg ch 3. Turn. (24 clusters, 4 ch 2 corner spaces, 20 ch 1 side spaces, 72 dc total)
Round 7 (RS)
Sl st into first ch 2 corner sp, ch 3, 2 dc into same corner sp, ch 2, 3 dc into same corner sp, ch 1, [3 dc into next ch 1 side sp, ch 1] 5 times, [corner unit into next ch 2 corner sp, ch 1, [3 dc into next ch 1 side sp, ch 1] 5 times] 3 times, join with sl st to top of beg ch 3. Turn. (28 clusters, 4 ch 2 corner spaces, 24 ch 1 side spaces, 84 dc total)
Round 8 (WS)
Sl st into first ch 2 corner sp, ch 3, 2 dc into same corner sp, ch 2, 3 dc into same corner sp, ch 1, [3 dc into next ch 1 side sp, ch 1] 6 times, [corner unit into next ch 2 corner sp, ch 1, [3 dc into next ch 1 side sp, ch 1] 6 times] 3 times, join with sl st to top of beg ch 3. Turn. (32 clusters, 4 ch 2 corner spaces, 28 ch 1 side spaces, 96 dc total)
Round 9 (RS)
Sl st into first ch 2 corner sp, ch 3, 2 dc into same corner sp, ch 2, 3 dc into same corner sp, ch 1, [3 dc into next ch 1 side sp, ch 1] 7 times, [corner unit into next ch 2 corner sp, ch 1, [3 dc into next ch 1 side sp, ch 1] 7 times] 3 times, join with sl st to top of beg ch 3. Turn. (36 clusters, 4 ch 2 corner spaces, 32 ch 1 side spaces, 108 dc total)
Round 10 (WS)
Sl st into first ch 2 corner sp, ch 3, 2 dc into same corner sp, ch 2, 3 dc into same corner sp, ch 1, [3 dc into next ch 1 side sp, ch 1] 8 times, [corner unit into next ch 2 corner sp, ch 1, [3 dc into next ch 1 side sp, ch 1] 8 times] 3 times, join with sl st to top of beg ch 3. Turn. (40 clusters, 4 ch 2 corner spaces, 36 ch 1 side spaces, 120 dc total)
Checkpoint: After Round 10, each panel should measure approximately 18 inches or 46 cm from corner to corner diagonally. Each side of the square measures approximately 12.5 inches or 32 cm. If your panel is larger or smaller, adjust by adding or removing rounds before proceeding.
Fasten off and weave in ends. Make a second identical panel.
Seaming the Panels Together
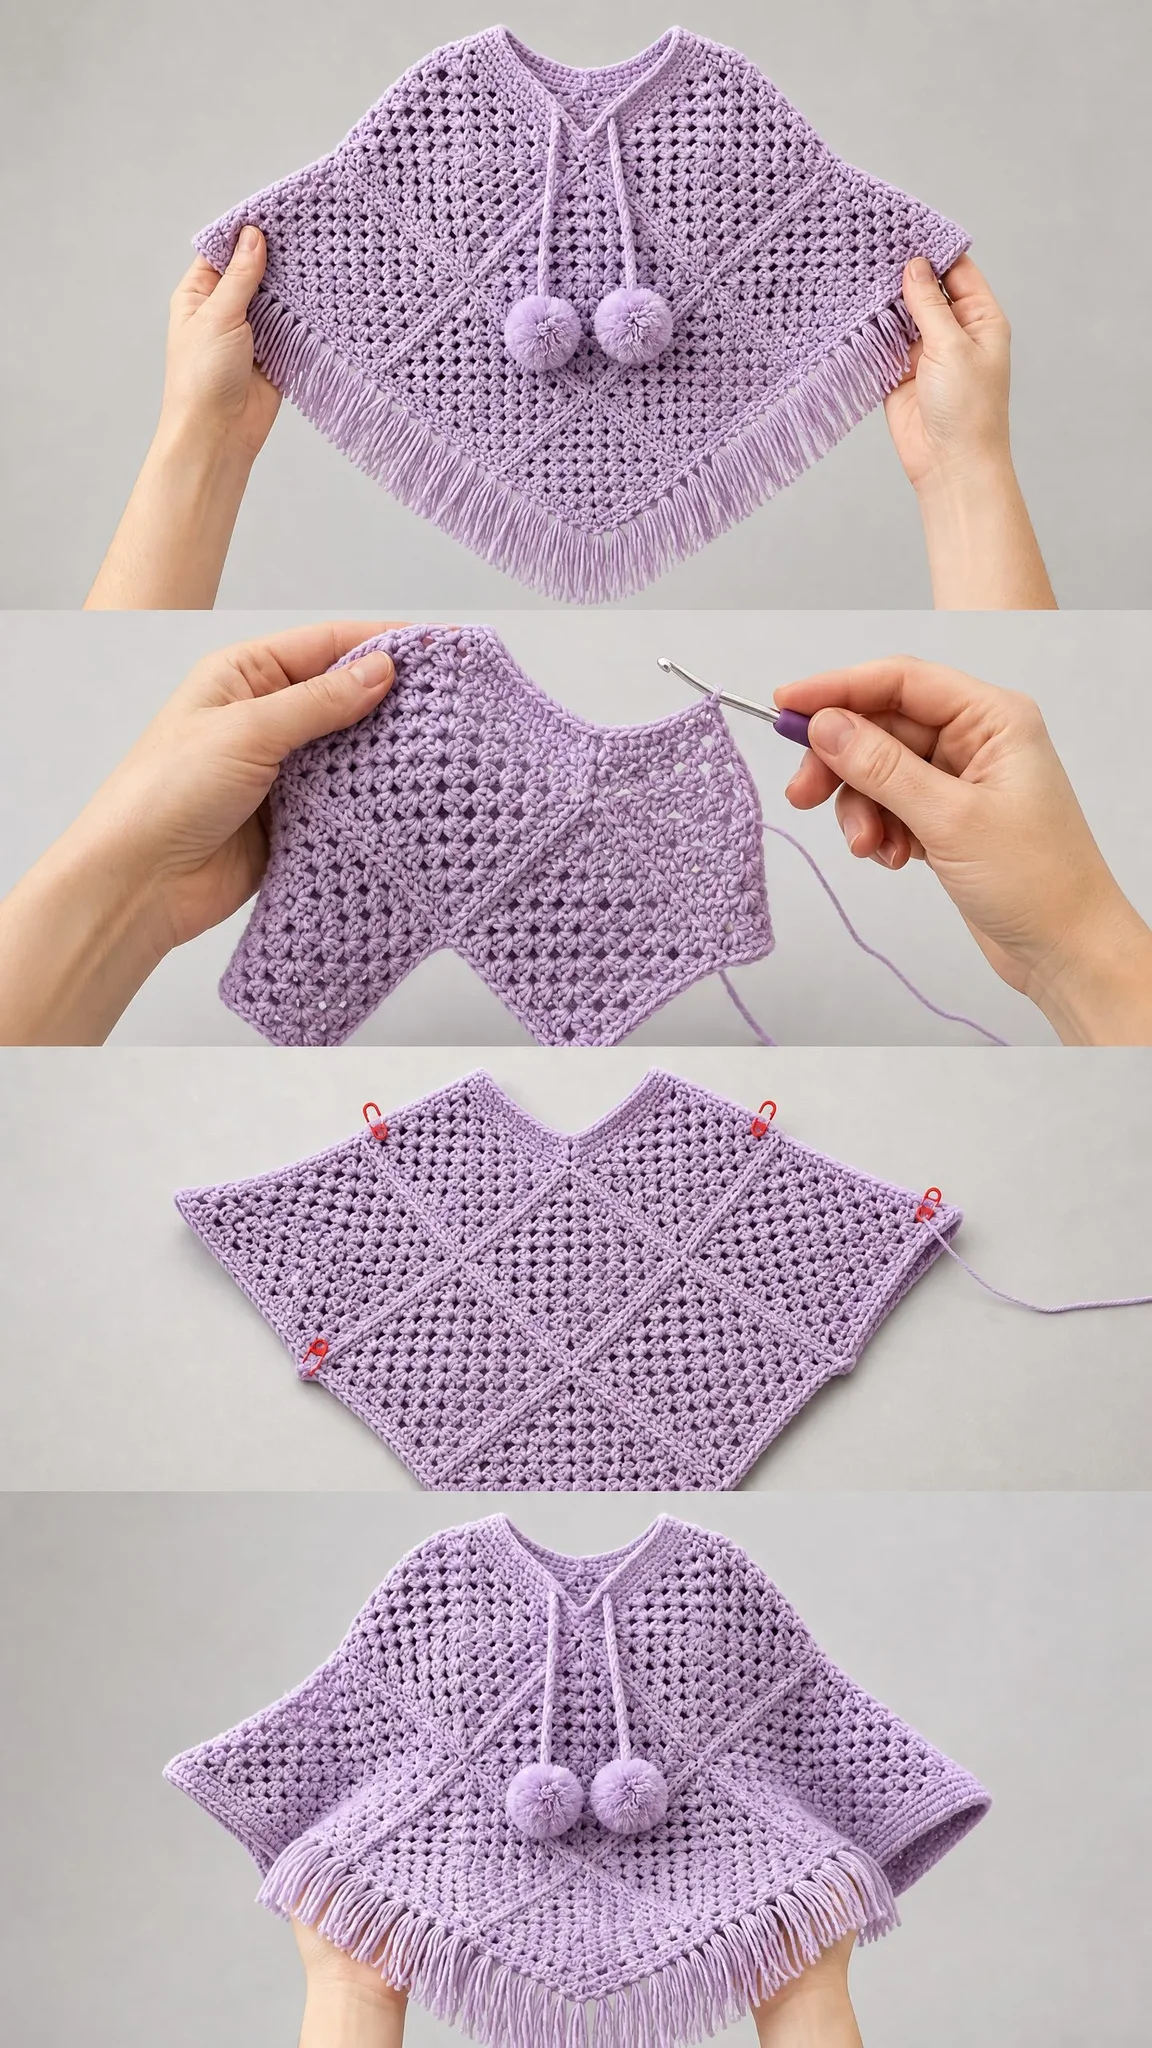
Lay both panels flat with the right side facing up. Orient each panel as a diamond with one corner pointing up, one pointing down, and two out to the sides. The top corner of each panel will form part of the neck edge, and the bottom corner will be the front and back hem point.
Place the two panels together with wrong sides facing each other so the right side faces out on both sides.
You will seam along the top two side edges only. Leave the bottom two side edges open because these become the arm openings. Also leave a center neck gap.
The seam on each shoulder covers approximately 3 side cluster groups, roughly 4 to 4.5 inches or 10 to 11.5 cm, measuring down from the top corner on each side edge.
Mark the seam start and stop points with stitch markers on both panels before joining.
Using a yarn needle and a length of yarn, use whip stitch through both panels cluster by cluster and chain space by chain space along each marked shoulder segment. Seam the left shoulder, then the right shoulder, leaving the center top open as the neck opening and both lower side corners open as arm openings.
You can also join the shoulders using a slip stitch seam worked through the right side with your hook and yarn for a decorative ridge on the outside.
Checkpoint: After seaming, try the poncho over a doll or form. The neck opening should be approximately 9 to 10 inches or 23 to 25.5 cm in circumference, large enough to slip over a toddler’s head. Each arm opening should measure approximately 8 to 9 inches or 20 to 23 cm around.
Neck Edging and Tie
With right side facing and beginning at one shoulder seam, attach yarn at neck edge with sl st.
Round 1
Ch 1, work 1 sc into each dc and 1 sc into each ch sp evenly around entire neck opening, join with sl st to first sc. Do not turn. Aim for approximately 44 to 48 sc evenly distributed. (approximately 46 sc)
Round 2
Ch 1, sc in each sc around, join with sl st to first sc. Fasten off. (approximately 46 sc)
Making the Tie
Using the same yarn, make a chain approximately 24 inches or 61 cm long. Fasten off.
Beginning at one side of the neck center front, weave the chain in and out through the sc stitches of the neck edging, going in and out through the stitches rather than through the fabric itself. Circle the entire neckline. The two ends of the chain will emerge at the same point at center front.
Knot a pom pom securely onto each end of the chain.
Making the Pom Poms
Wrap yarn around two fingers or a pom pom maker approximately 50 to 60 times. Tie tightly at the center with a long strand. Cut the loops on both sides. Trim into a round 1.5 to 2 inch or 4 to 5 cm pom pom. Use the long tying strand to attach each pom pom to one end of the chain tie.
Sleeve Cuffs
The cuffs are worked in the round around each arm opening to create the ribbed wrist edge.
With right side facing and beginning at the underarm point of one arm opening, attach yarn with sl st.
Round 1
Ch 1, work 1 sc into each st and ch sp evenly around arm opening, join with sl st to first sc. Aim for approximately 36 to 40 sc distributed evenly. (approximately 38 sc)
Rounds 2 through 5
Ch 1, sc in each sc around, join with sl st to first sc. (38 sc)
Tip for ribbed texture: For a more pronounced rib effect, work Rounds 2 through 5 in back loop only single crochet instead of both loops. This creates a subtle horizontal rib texture.
After Round 5, fasten off and weave in ends. Repeat for the second arm opening.
Checkpoint: Each cuff should measure approximately 1.25 to 1.5 inches or 3 to 4 cm in depth. If you want a slightly longer cuff, work 2 additional rounds before fastening off.
Adding the Fringe
The fringe is attached along the entire hem edge of both front and back panels. That means the bottom two edges of each diamond panel, from one arm opening corner across the bottom hem point to the other arm opening corner.
Cut yarn strands: Cut yarn into pieces 10 inches or 25.5 cm long. You will use 3 strands per fringe knot.
Spacing: Attach one fringe knot into every ch 1 side space and every ch 2 corner space along the hem edge. Skip the dc cluster tops and attach only into the chain spaces. This gives a neat, even fringe that aligns with the lace openings of the granny pattern.
For each knot: Hold 3 strands together and fold in half to create a loop. Insert a crochet hook into the ch sp from right side to wrong side, catch the folded loop, pull it through slightly, then pull the 6 loose ends through the loop and tighten firmly.
Trim all fringe ends to an even 4 inches or 10 cm below the hem edge using sharp scissors and a ruler.
Repeat along all four hem edges. That is two edges per panel and two panels total.
Size Customization Tips
To size up for ages 2 to 3 years: Work 12 rounds instead of 10 on each panel. This adds approximately 3 to 3.5 inches or 7.5 to 9 cm to the diagonal, producing a poncho approximately 21 inches or 53 cm point to point. Increase yarn quantity to approximately 500 yards or 457 meters.
To size up for ages 4 to 5 years: Work 14 rounds. This adds approximately 6 to 7 inches or 15 to 18 cm to the diagonal. Yarn needed increases to approximately 600 to 650 yards or 549 to 595 meters.
To size down for ages 6 to 12 months: Work 8 rounds. Check that the neck opening is still large enough for the infant’s head before seaming.
To adjust shoulder width: Seam more cluster groups for narrower arm openings or fewer for wider arm openings. Four cluster groups per shoulder creates a snug fit. Two cluster groups creates a very open drape.
Finishing and Blocking Your Poncho
Weave in all remaining ends securely using a yarn needle. Work each tail in two different directions through the back of the work to prevent unraveling.
Wet blocking is strongly recommended. Submerge the finished poncho in cool water and press out excess moisture in a towel. Do not wring. Lay flat on a blocking mat or clean towels and pin each corner point firmly, stretching gently to the stated measurements. Allow to dry completely before unpinning, typically 24 hours.
Blocking opens up the granny cluster lace texture significantly and gives the poncho a more polished, even appearance. The fringe will also straighten and soften during the blocking process.
Care Instructions
If using machine washable yarn, which is recommended for a baby garment, machine wash cold on a gentle cycle in a mesh laundry bag. Lay flat to dry. Do not tumble dry because heat may shrink the fibers or cause pilling. Do not iron directly on the crochet fabric.
If using wool or wool blend yarn, hand wash only in cool water with a gentle wool wash product. Press out water gently and lay flat to dry. Store folded, not hanging, to prevent the poncho from stretching out of shape at the shoulder seams.
You Made It!
Thank you so much for making this lavender granny square baby poncho with me. I really hope the little one who receives it loves it as much as you enjoyed creating it. There is something so satisfying about watching those granny clusters grow round after round, and then seeing the whole thing come together when you seam those panels.
If you make this poncho, I would absolutely love to see it! Share your finished project on Instagram or Facebook and tag me so I can cheer you on.
Save this crochet pattern to your Pinterest boards so you can find it easily when you are ready to start or want to make another one in a different color. And if you have any questions or just want to share how yours turned out, drop a comment below. I always love hearing from you!
You Might Also Like
- Sunset Orange Ruffle Crochet Dress Free Crochet Pattern
- Coral Sunset Ruffled Baby Romper Free Crochet Pattern
- Ocean Wave Granny Square Bag Free Crochet Pattern
- Dusty Rose Fringed Pocket Wrap Free Crochet Pattern