Lavender Dream Bow Crochet Vest Free Crochet Pattern
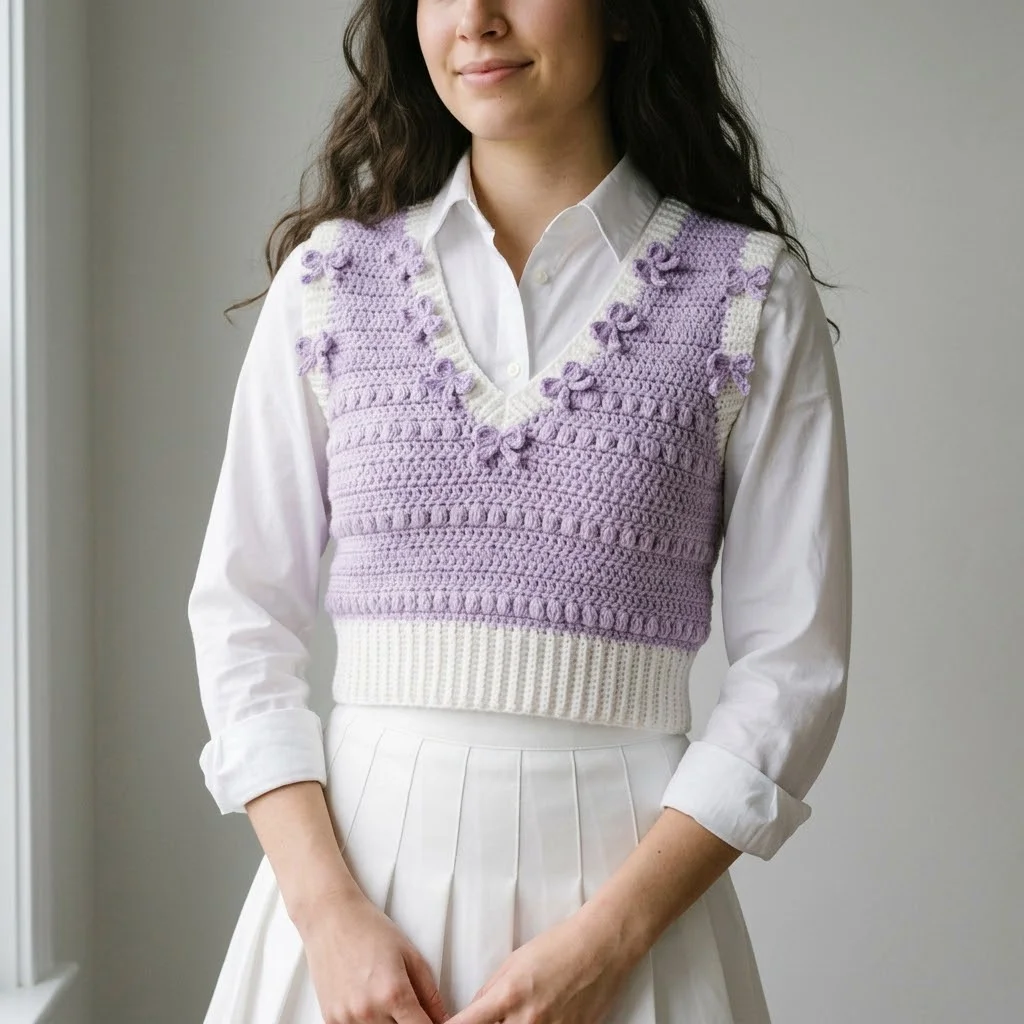
Looking for a cozy layering piece that works up beautifully and makes the perfect handmade gift? This crochet vest combines soft lavender and cream yarn with adorable three-dimensional bow details that add just the right amount of whimsy. The stitch pattern uses basic stitches you probably already know, including double crochet and puff stitches arranged in horizontal texture rows. It works up in about a weekend for most intermediate crocheters, and the cropped fit makes it ideal for layering over button-down shirts or casual tees. Whether you are making this for yourself or someone special, this vest pattern delivers that handmade charm without being overly complicated.
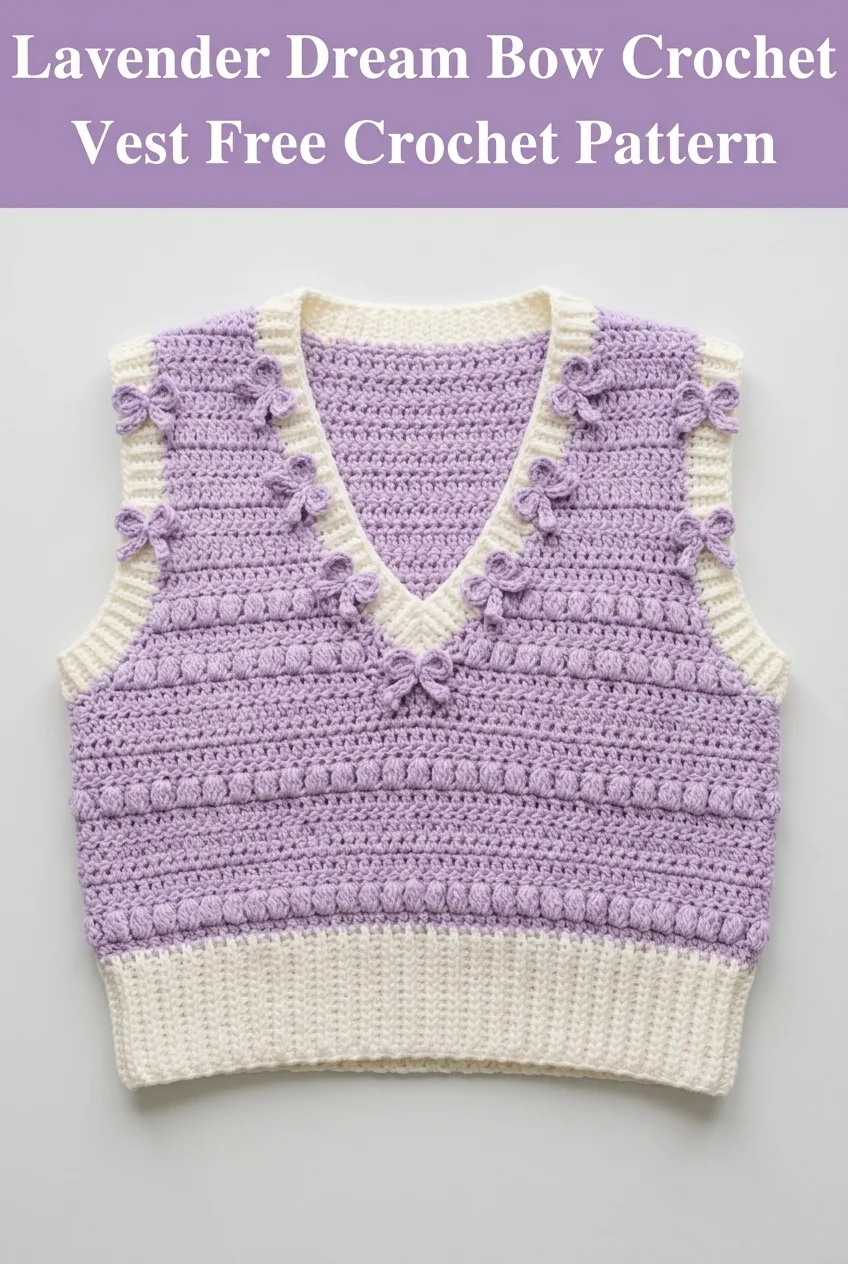
About This Lavender Dream Bow Crochet Vest Pattern
This cropped sweater vest features a classic V-neckline, wide ribbed hem, and the most darling little dimensional bows scattered across the yoke and upper body. The construction is straightforward once you understand the flow. You will work the front and back panels separately, then seam them at the shoulders and sides before adding the finishing touches.
What makes this vest special is the combination of textures. The body features alternating rows of regular double crochet and raised puff stitch rows that create those lovely horizontal ridges you can see in the design. The bows are worked separately and sewn on after assembly, which means you can place them exactly where you want them.
Skill level: Intermediate. You should be comfortable with basic stitches, increasing and decreasing for shaping, working in rows, and seaming pieces together.
Materials You Will Need
Gathering your supplies before you start makes the whole process smoother. Here is everything you need for this crochet vest pattern.
Yarn:
I recommend a soft acrylic blend or cotton-acrylic blend for this project. You want something with good stitch definition that will hold the puff stitches nicely. Avoid anything too fuzzy or textured, as it will hide those beautiful details.
Hook:
Notions:
Gauge
Gauge matters for garments. Please take time to check yours before starting.
In double crochet: 14 stitches and 8 rows = 4 inches (10cm)
If your gauge is off, adjust your hook size. Too many stitches per inch means you need a larger hook. Too few stitches means you need a smaller hook.
Finished Measurements
This pattern is written for size Small with a finished bust of approximately 34 inches and length of 16 inches from shoulder to hem. The cropped fit sits right at the natural waist.
Sizing notes: To adjust for larger sizes, add stitches to your foundation chain in multiples of 4 to maintain the stitch pattern. Add approximately 8 stitches (2 pattern repeats) for each size up.
Abbreviations and Stitch Definitions
Let me walk you through every stitch you will use in this pattern. Even if you know these already, a quick refresher never hurts.
ch = chain: Yarn over, pull through the loop on your hook. This creates the foundation for your work.
sl st = slip stitch: Insert hook, yarn over, pull through both the stitch and the loop on your hook in one motion. Used for joining and moving across stitches without adding height.
sc = single crochet: Insert hook, yarn over and pull up a loop (2 loops on hook), yarn over and pull through both loops. The shortest of the basic stitches.
hdc = half double crochet: Yarn over, insert hook, yarn over and pull up a loop (3 loops on hook), yarn over and pull through all 3 loops.
dc = double crochet: Yarn over, insert hook, yarn over and pull up a loop (3 loops on hook), yarn over and pull through 2 loops, yarn over and pull through remaining 2 loops.
puff st = puff stitch: (Yarn over, insert hook in stitch, yarn over and pull up a loop) 3 times in the same stitch (7 loops on hook), yarn over and pull through all 7 loops. This creates a puffy, raised cluster.
dc2tog = double crochet 2 together (decrease): Yarn over, insert hook in next stitch, yarn over and pull up loop, yarn over and pull through 2 loops. Repeat in next stitch. Yarn over and pull through all 3 remaining loops. This decreases by one stitch.
FLO = front loop only
BLO = back loop only
Special Techniques
Working the Puff Stitch Rows
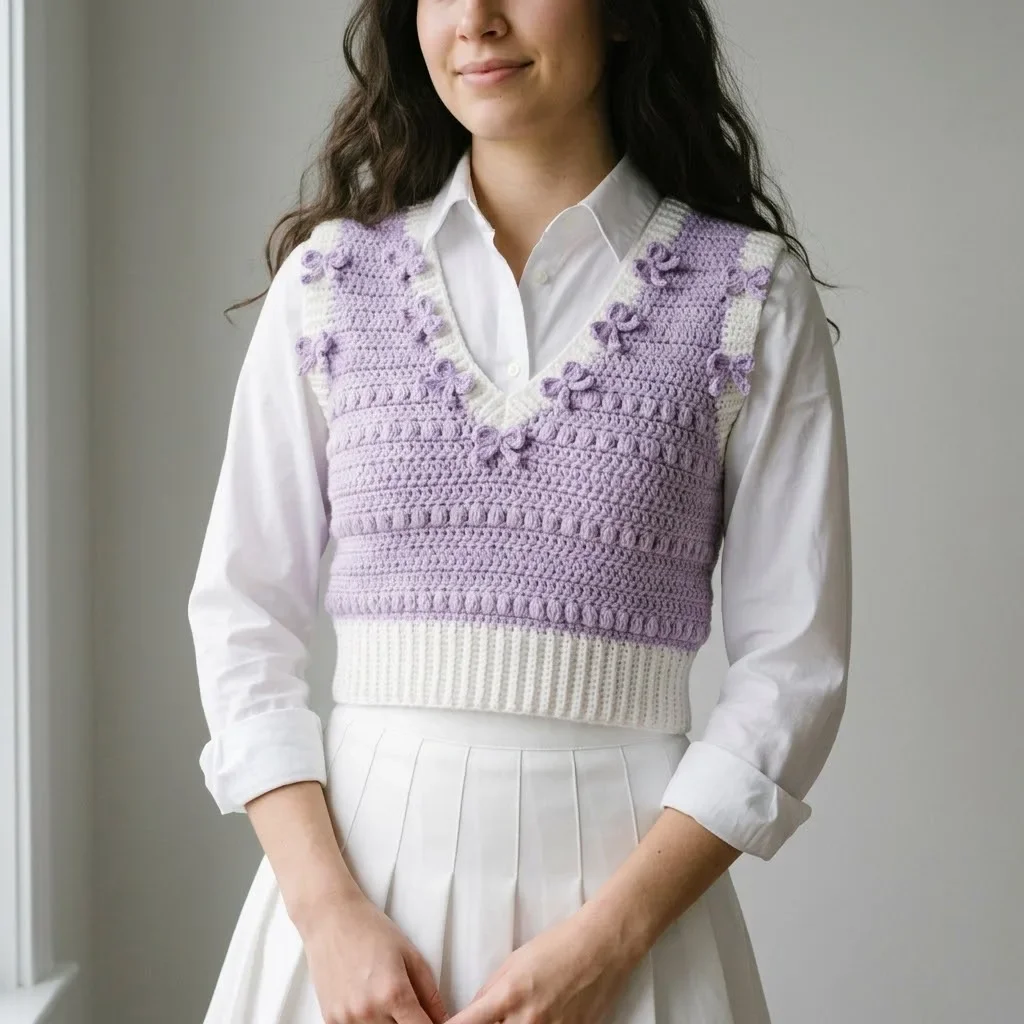
The texture on this vest comes from alternating regular double crochet rows with puff stitch rows. When working puff stitches, keep your tension loose so you can pull the yarn through all those loops without struggling. If your puffs feel tight and difficult, try relaxing your grip.
A tip that helps: after completing each puff stitch, chain 1 to lock it in place before moving to the next stitch. This keeps everything neat and prevents the puffs from getting lost in the fabric.
V-Neck Shaping
The V-neck is created by working each side of the front panel separately once you reach the neckline. You will decrease at the neck edge while maintaining the armhole edge. Take your time here and count carefully.
Crochet Vest Pattern Instructions
Back Panel
With Color B (Cream), ch 62.
Row 1: Dc in 4th ch from hook and in each ch across. Turn. (60 sts)
Rows 2-6: Ch 3 (counts as dc), dc in each st across. Turn. (60 sts)
This creates the ribbed-look bottom band. For a more pronounced ribbed texture, you can work these rows in BLO.
Change to Color A (Lavender).
Row 7: Ch 3, dc in each st across. Turn. (60 sts)
Row 8 (Puff Row): Ch 3, dc in next st, *puff st in next st, ch 1, skip next st, dc in next 2 sts*, repeat from * to * across. Turn. (60 sts including chains)
Row 9: Ch 3, dc in each st and ch-1 space across. Turn. (60 sts)
Row 10: Ch 3, dc in each st across. Turn. (60 sts)
Rows 11-14: Repeat Rows 8-10, then Row 8 once more.
Rows 15-26: Repeat the 4-row pattern (dc row, puff row, dc row, dc row) three more times.
Armhole Shaping:
Row 27: Sl st in first 5 sts, ch 3, dc in each st across until 4 sts remain, leave remaining sts unworked. Turn. (52 sts)
Row 28: Ch 3, dc2tog, dc in each st until 3 sts remain, dc2tog, dc in last st. Turn. (50 sts)
Rows 29-36: Continue in established pattern (alternating puff rows and dc rows), maintaining 50 sts.
Row 37: Ch 3, dc in each st across. Fasten off. (50 sts)
Front Panel
Work the same as the Back Panel through Row 26.
Armhole and V-Neck Shaping:
Row 27: Sl st in first 5 sts, ch 3, dc in next 21 sts. Turn. Leave remaining sts unworked for now. You will work the other side separately. (22 sts for left front)
Row 28: Ch 3, dc2tog (neck decrease), dc in each st until 3 sts remain, dc2tog, dc in last st (armhole decrease). Turn. (20 sts)
Row 29: Ch 3, dc in each st until 3 sts remain, dc2tog, dc in last st. Turn. (19 sts)
Rows 30-36: Continue decreasing 1 st at neck edge every row while maintaining armhole edge. Continue puff stitch pattern as established. (12 sts remain)
Row 37: Ch 3, dc in each st across. Fasten off. (12 sts)
Right Front:
With wrong side facing, skip center 6 sts for V-neck, join Color A in next st.
Row 27: Ch 3, dc in each st until 4 sts remain, leave remaining sts unworked. Turn. (22 sts)
Row 28: Ch 3, dc2tog (armhole decrease), dc in each st until 3 sts remain, dc2tog, dc in last st (neck decrease). Turn. (20 sts)
Rows 29-37: Work as mirror image of left front, decreasing at neck edge and maintaining armhole edge. (12 sts remain)
Fasten off.
Shoulder Straps with Stripes
With Color B (Cream), ch 10.
Row 1: Dc in 4th ch from hook and in each ch across. Turn. (8 sts)
Rows 2-4: Ch 3, dc in each st across. Change to Color A. Turn.
Rows 5-8: Ch 3, dc in each st across. Change to Color B. Turn.
Rows 9-12: Ch 3, dc in each st across. Fasten off.
Make 2 shoulder straps total.
Crocheted Bows (Make 12-15)
These adorable bows are what make this vest truly special. They work up quickly once you get the hang of them.
With Color C (Dark Purple), ch 20.
Row 1: Sc in 2nd ch from hook and in each ch across. Turn. (19 sts)
Row 2: Ch 1, sc in each st across. Fasten off, leaving a long tail.
Roll the piece into a bow shape by pinching the center. Wrap the tail around the center several times to create the bow shape, then secure with a few stitches. Leave the remaining tail for sewing onto the vest.
Assembly
Lay out your pieces on a flat surface before seaming. This helps you visualize the final garment and catch any mistakes.
1. Shoulder seams: Using a yarn needle and matching yarn, whip stitch or mattress stitch the shoulder straps to the front and back panels. Position them so the striped pattern shows from the front.
2. Side seams: Align the front and back panels at the side edges. Seam from the bottom hem up to the armhole, leaving the armhole open.
3. Armhole edging (optional): Join Color B at the underarm. Sc evenly around the armhole opening. Sl st to join. Fasten off.
4. Neckline edging: Join Color B at the center back neck. Sc evenly around the entire neckline, working 3 sc in each corner point of the V-neck to keep it flat. Sl st to join. Fasten off.
5. Attach bows: Position the bows as shown in the image, primarily around the V-neckline, upper chest area, and scattered across the yoke. Sew each bow securely in place using the tails.
Finishing Touches
Weave in all remaining ends carefully. For garments, I like to weave ends along the seam lines where they will be least visible and most secure.
Block your finished vest by wetting it gently, pressing out excess water with a towel, and laying it flat to dry in the correct shape. This evens out your stitches and gives the vest a polished, professional look.
Styling Your Lavender Dream Bow Crochet Vest
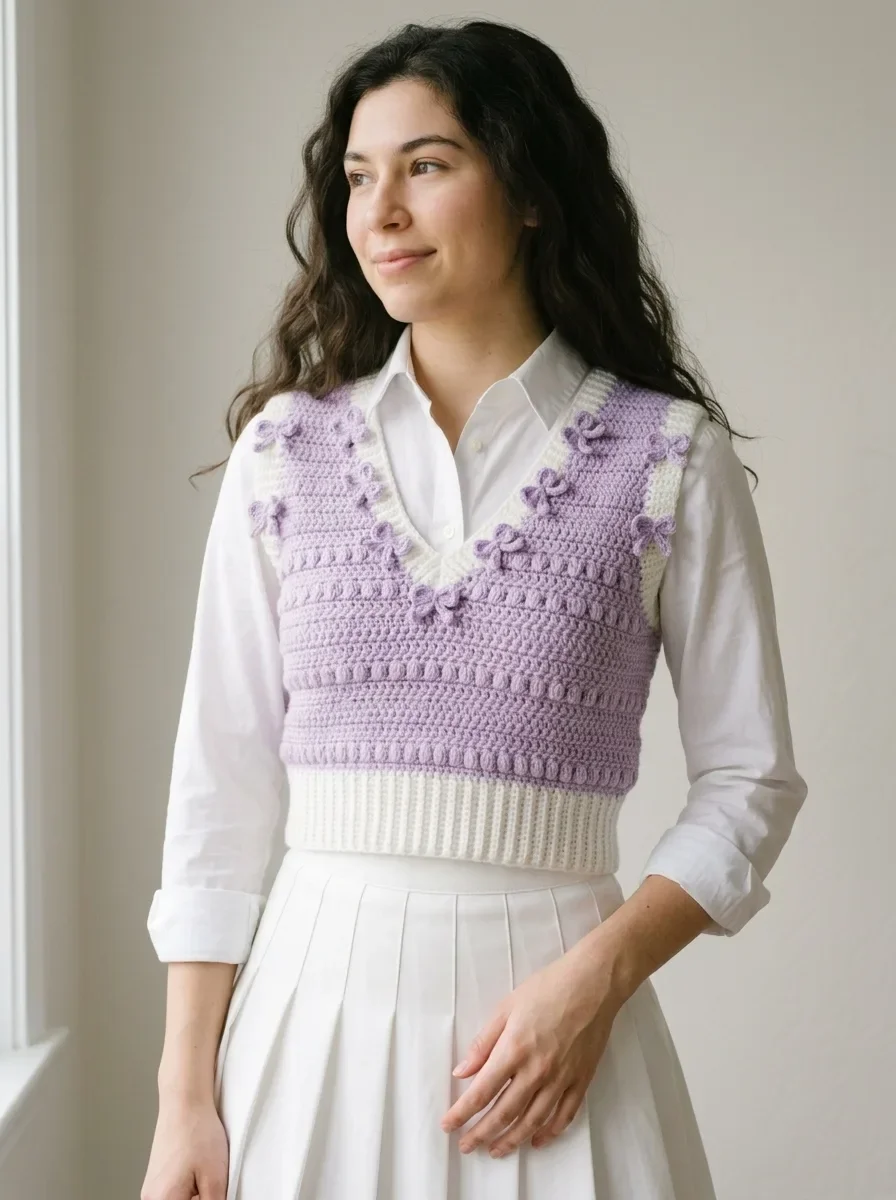
This crochet vest pattern creates a versatile piece that works for so many occasions. Layer it over a crisp white button-down for a preppy, polished look. Wear it with a simple tee for casual weekend outings. The cropped length pairs beautifully with high-waisted skirts and pants.
The lavender and cream color combination feels fresh and romantic, but you could absolutely make this in different colors. Imagine it in sage green and cream, or dusty pink with white. The bows could match the main color or provide a pop of contrast.
Helpful Tips for Success
If you are new to garment making: Take it slow with the shaping rows. Mark your right side and wrong side with stitch markers so you always know which side you are working on.
If your puff stitches look uneven: Practice a few on a swatch first. Consistency comes with repetition. Make sure you are pulling up loops to the same height each time.
If your V-neck looks wonky: Blocking works wonders. Pin it into shape while damp and let it dry completely before wearing.
If the vest feels too tight or loose: Check your gauge again. Garments are less forgiving than blankets when gauge is off.
Why You Will Love This Crochet Tutorial
This lavender dream bow crochet vest combines classic construction with playful details that make it uniquely yours. The step by step instructions guide you through each stage, from the foundation chain to attaching the final bow. It is the kind of project that feels impressive to make and even better to wear.
Whether you are an intermediate crocheter looking to try garment construction or an experienced maker who wants a satisfying weekend project, this pattern delivers. The texture, the shaping, the sweet little bows. Every element comes together into something truly special.
I hope you absolutely love making this crochet vest pattern. It has become one of my favorite pieces in my handmade wardrobe, and I think it will become one of yours too. If you make one, I would be so thrilled to see it. Tag me on Instagram or share a photo in my Facebook group. Seeing your finished projects honestly makes my whole day.
If this pattern caught your eye, go ahead and save it to your Pinterest boards so you can find it when you are ready to cast on. And please drop a comment below if you make this vest or have any questions along the way. I love hearing from you and seeing this design come to life in your hands.
You Might Also Like
- Ocean Blue Chameleon Amigurumi Free Crochet Pattern
- Sage Green Woodland Baby Dress Free Crochet Pattern
- Sunset Ombre Seashell Clutch Free Crochet Pattern
- Ocean Blue Highland Cow Amigurumi Free Crochet Pattern