Lavender Butterfly Bathroom Set Free Crochet Pattern
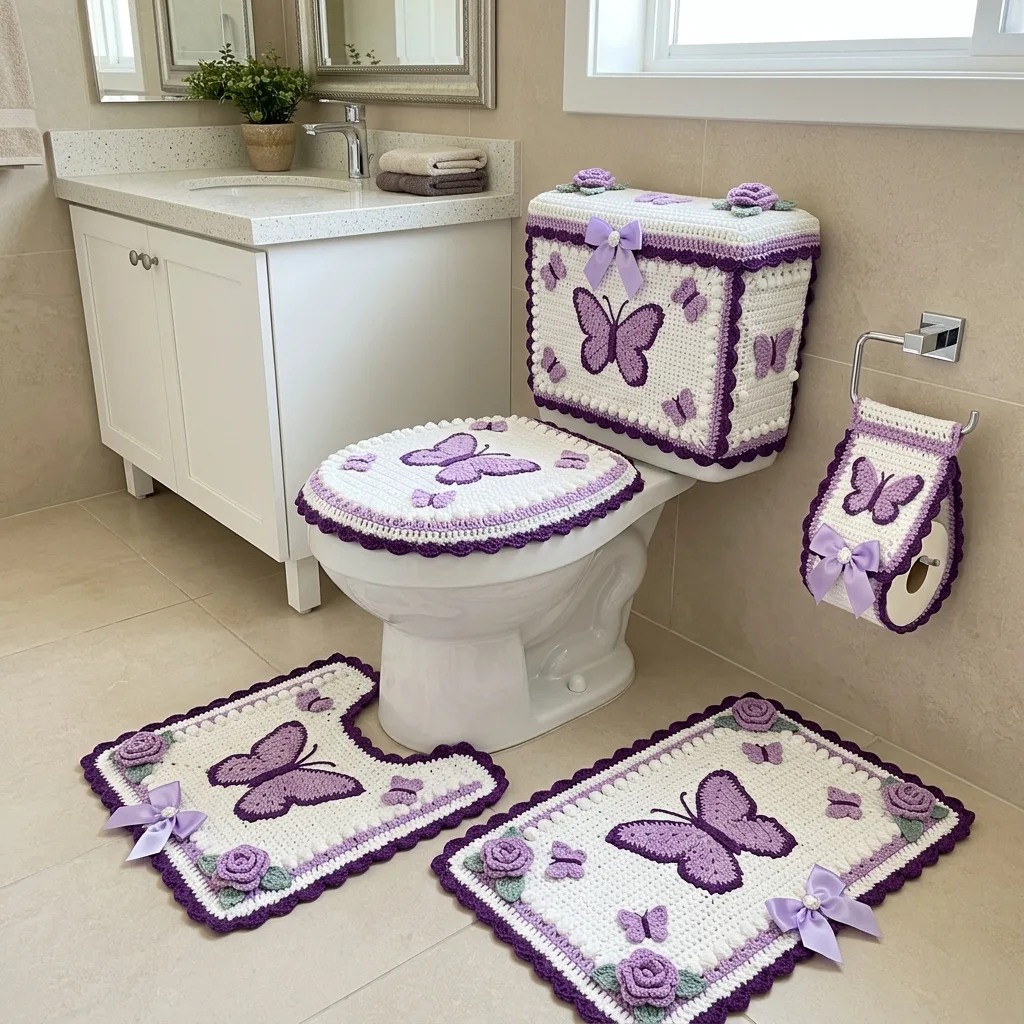
I call this one the “Grandma Rose Collection,” and it has been sitting in my design notebook for almost three years now. The original sketch came from a visit to my great-aunt’s house in Pennsylvania. She had this elaborate crocheted bathroom set from the 1970s, complete with matching everything, and I remember thinking it was the most beautifully coordinated space I had ever seen. She told me her mother made it as a wedding gift, and every piece was still in perfect condition after fifty years.
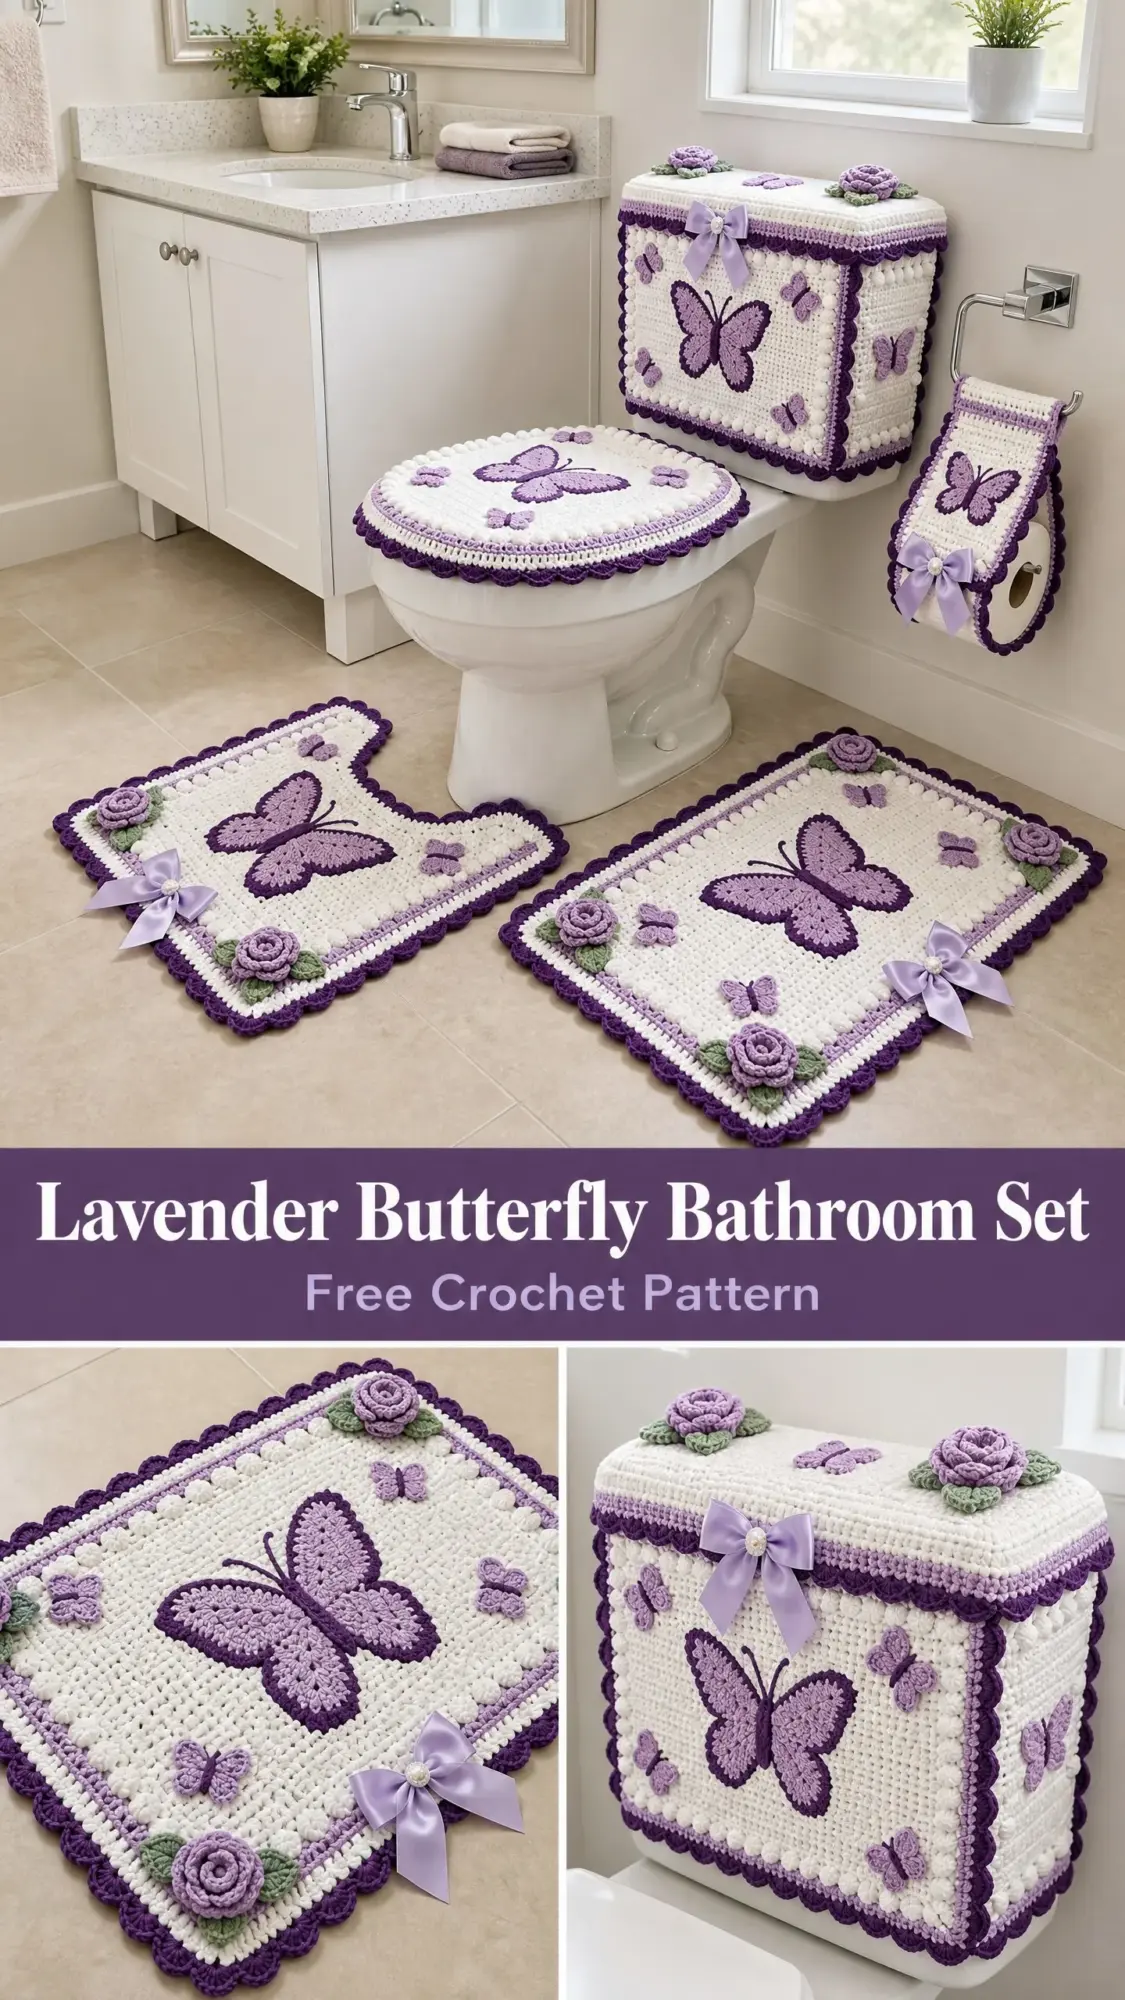
That visit stuck with me. I started sketching butterfly motifs on the train ride home, imagining a modern version with softer colors and cleaner lines. The lavender and cream combination came from a paint chip I picked up at the hardware store months later. It sat on my desk until one day it clicked. This was the palette.
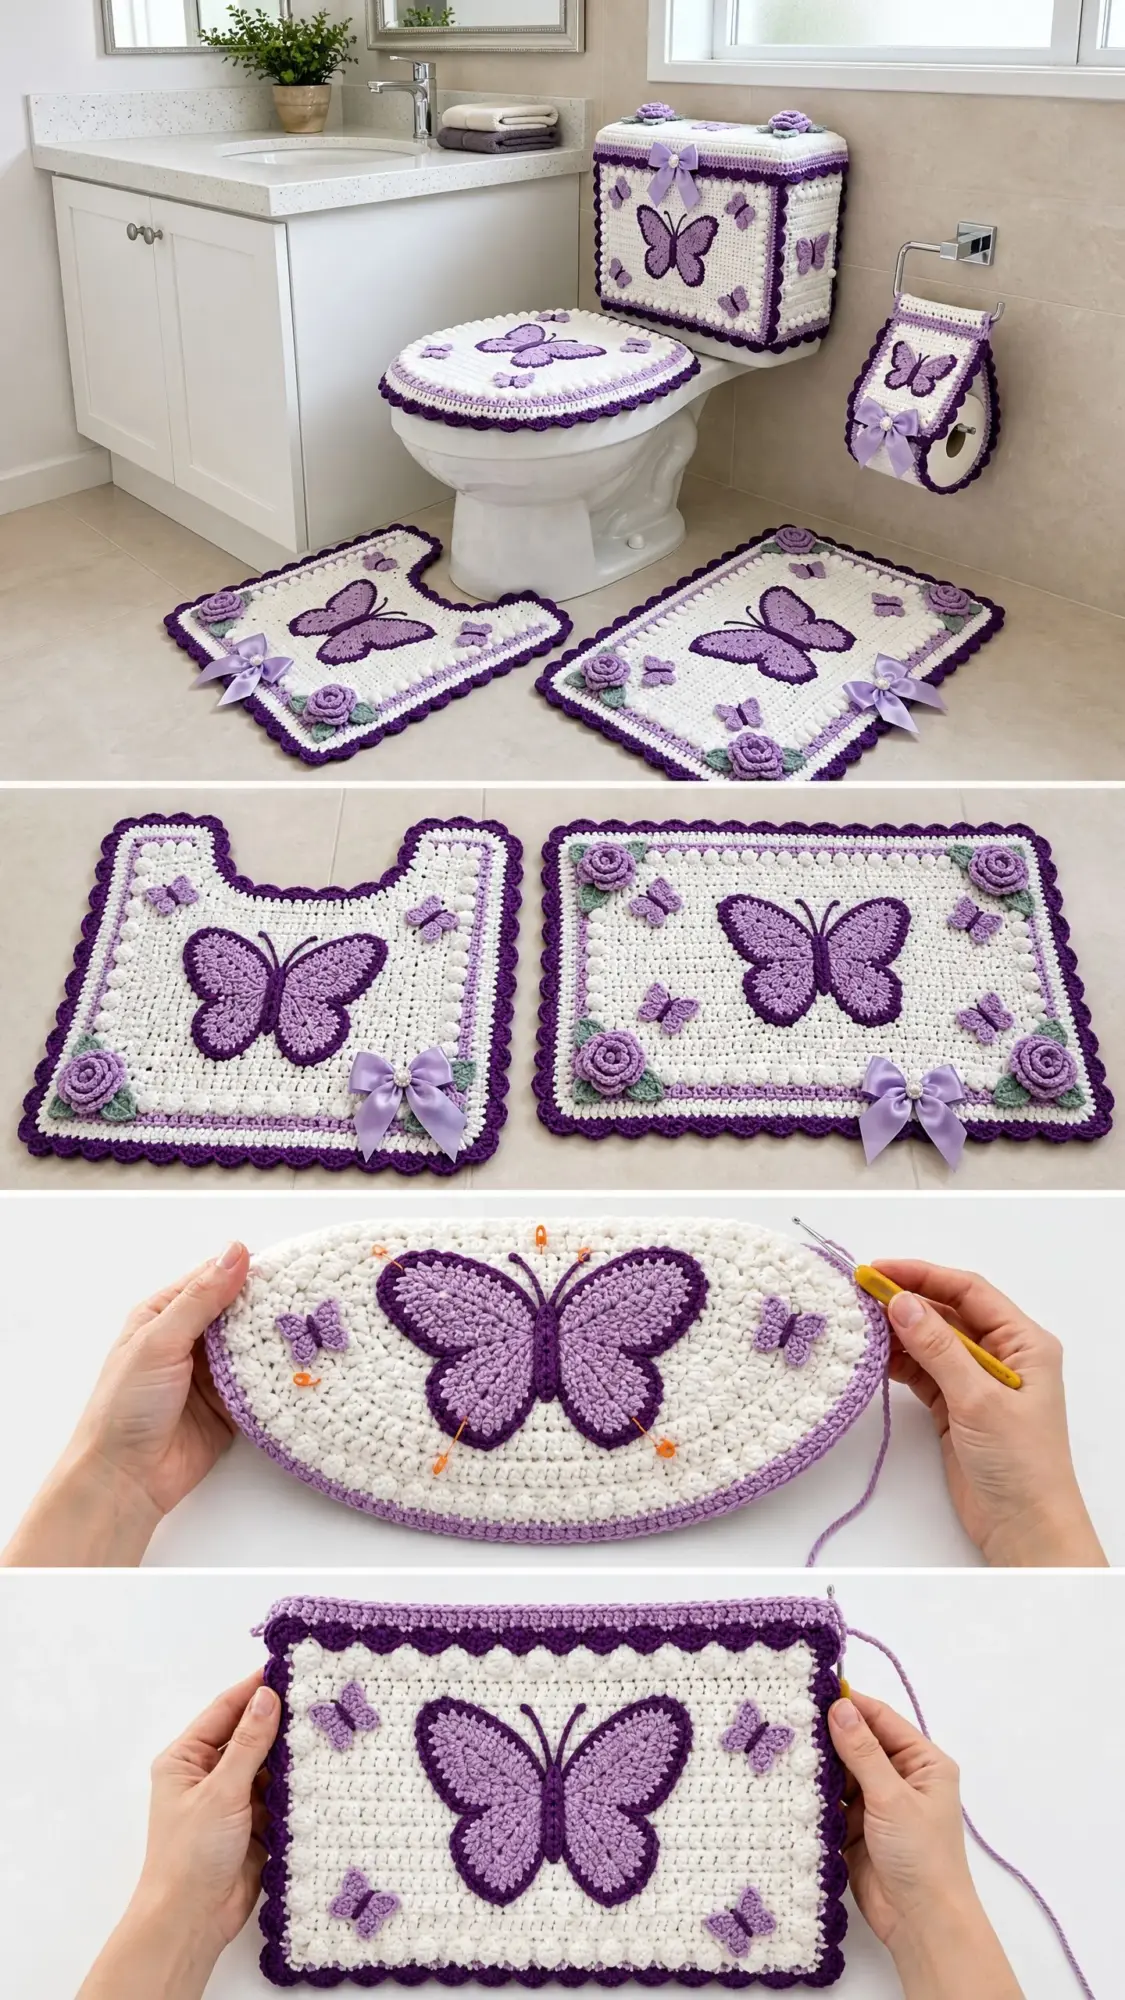
The full set includes five coordinating pieces: a toilet tank cover, a toilet lid cover, a contour rug, a rectangular bath mat, and a toilet paper roll cover. Each piece features the same butterfly motifs, bobble stitch borders, three-dimensional roses, and satin bow accents. Working through this collection felt like coming full circle with that memory from my great-aunt’s bathroom.
About This Bathroom Set Crochet Pattern
This coordinated bathroom set is a showstopper project for intermediate to advanced crocheters. You will work with intarsia-style colorwork, bobble stitch edging, three-dimensional applique elements, and multiple construction methods including flat rectangles, ovals, and box structures.
Skill Level: Intermediate to Advanced
Time Estimate: Approximately 30 to 40 hours for the complete set. The tank cover alone takes roughly 12 to 15 hours. Budget extra time for assembling and sewing on all the appliques.
The butterflies can be worked directly into the fabric using surface stitches, or you can make them as separate appliques and sew them on afterward. I recommend the applique method for most crocheters because it is more forgiving and gives you better control over placement.
Finished Measurements
Toilet Tank Cover: approximately 7.5 inches wide x 7 inches deep x 8 inches tall (19 cm x 18 cm x 20 cm). Fits most standard two-piece toilet tanks.
Toilet Lid Cover: approximately 14 inches wide x 17 inches long (35.5 cm x 43 cm). Fits most elongated toilet lids.
Contour Rug: approximately 20 inches wide x 24 inches long (51 cm x 61 cm)
Bath Mat: approximately 20 inches wide x 28 inches long (51 cm x 71 cm)
Toilet Paper Cover: approximately 5 inches wide x 5.5 inches tall (12.5 cm x 14 cm)
Materials Needed
Yarn
You will need worsted weight yarn in four colors:
Yarn Suggestions
Option 1: Lion Brand Pound of Love in Cream (Color A), Orchid (Color B), and Amethyst (Color C) with Fern (Color D). This yarn is machine washable, affordable in large quantities, and produces a dense, even fabric.
Option 2: Caron Simply Soft in Off White (Color A), Iris (Color B), and Plum Perfect (Color C). This yarn drapes nicely and gives the motifs a softer finish.
Option 3: Red Heart Super Saver in Aran (Color A), Lavender (Color B), and Purple (Color C) with Frosty Green (Color D). This is the most budget-friendly choice and fully machine washable.
Choose any worsted weight yarn that achieves gauge. Machine washable yarn is important since bathroom accessories need frequent laundering.
Hook
US Size J/10 (6.0 mm) crochet hook
Notions
Gauge
16 single crochet (sc) stitches x 18 rows = 4 inches x 4 inches (10 cm x 10 cm) worked in single crochet with Color A and a US J/10 (6.0 mm) hook, blocked flat.
Check your gauge before beginning. A tighter gauge produces a denser, firmer fabric which is preferable for the tank cover. A slightly looser gauge may work for the rugs.
Abbreviations
Special Stitches
Bobble Stitch (bo)
The bobble stitch creates a raised, textured bump that pops to the front of your work. Here is how to make one:
Step 1: Yarn over, insert hook into the indicated stitch.
Step 2: Yarn over and pull up a loop. You now have 3 loops on your hook.
Step 3: Yarn over and pull through 2 loops. You now have 2 loops on your hook.
Step 4: Repeat Steps 1 through 3 four more times in the same stitch. You are working a total of 5 double crochets together. After the fifth repeat, you will have 6 loops on your hook.
Step 5: Yarn over and pull through all 6 loops on your hook.
Step 6: Chain 1 to close the bobble.
The bobble pops to the right side of your work. Each bobble counts as 1 stitch throughout the pattern.
Surface Slip Stitch
This technique creates a raised outline on the surface of your finished fabric. With the right side facing, insert your hook under the top loop of a stitch. Place contrasting yarn on the wrong side of your work. Pull up a loop through the stitch to the right side. Insert your hook into the next stitch, pull yarn through the stitch and through the loop on your hook. Continue along your designated path.
Crochet Rose (3D Applique)
Step 1: With Color B, chain 31.
Step 2 (Row 1): Double crochet in the 4th chain from hook, double crochet in each chain across. (28 dc)
Step 3 (Row 2): Chain 3, turn, 2 double crochet in each double crochet across. (56 dc)
Step 4 (Row 3): Chain 3, turn, 2 double crochet in each double crochet across. (112 dc)
Step 5: Fasten off leaving a 12-inch (30.5 cm) tail.
Step 6: Roll the strip tightly from one end, with Row 3 (the fullest edge) on the outside. The first few wraps create the center bud. Loosen slightly as you wrap to create the open petal effect.
Step 7: Using the long tail, stitch through the base of the roll several times to secure. Add a few green (Color D) chain loops or double crochet stitches at the base as leaves before fastening off.
Make 6 roses total for the complete set.
Small Butterfly Applique
With Color B, make a magic ring. Chain 2, 4 double crochet in ring, chain 2, slip stitch in ring, chain 2, 4 double crochet in ring, chain 2, slip stitch in ring. Fasten off. Pinch the center and wrap Color C twice around the center pinch to form the body. Secure with a knot.
Make approximately 24 small butterflies for the complete set.
Large Butterfly Applique
With Color B, chain 2.
Row 1: 6 sc in 2nd chain from hook. (6 sc)
Row 2: Chain 1, turn, increase in each stitch. (12 sc)
Row 3: Chain 1, turn, (sc in 1 stitch, increase in next stitch) repeat across. (18 sc)
Row 4: Chain 1, turn, (sc in 2 stitches, increase in next stitch) repeat across. (24 sc)
Row 5: Chain 1, turn, sc in each stitch. (24 sc)
Row 6: Chain 1, turn, (sc2tog, sc in 2 stitches) repeat across. (18 sc)
Row 7: Chain 1, turn, (sc2tog, sc in 1 stitch) repeat across. (12 sc)
This forms one upper wing. Do not fasten off. Chain 1, rotate the piece, and work along the foundation edge to create the second symmetric upper wing by mirroring Rows 1 through 7.
For the lower wings (slightly smaller), attach Color B at the center base. Chain 2, work 5 sc in the 2nd chain from hook. (5 sc) Work 5 rows using the same increase-then-decrease sequence as the upper wings, but stop at the Row 4 equivalent for a smaller wing shape. Repeat for the second lower wing.
Using Color C, surface slip stitch around all four wings to create the dark outline. Work a chain of 8 stitches in Color C for the body, attach at the wing center, and add a chain-3 loop at each end for antennae.
Make 5 large butterflies (one per set piece).
Pattern Notes Before You Begin
1. All pieces are worked flat (back and forth in rows) unless otherwise specified. The tank cover panels are worked flat and then assembled with slip stitch seams.
2. The bobble border is worked as the final round or row on all pieces. Work bobbles on right side rows only.
3. When joining panels for the tank cover, hold pieces with wrong sides together and slip stitch through both layers with Color C for a visible, decorative seam.
4. Satin bows are sewn on after all crochet is complete.
5. Stitch counts appear in parentheses at the end of each row or round.
6. Block all pieces before assembly by dampening and pinning to finished dimensions. Allow to dry fully.
Piece 1: Toilet Tank Cover
The tank cover consists of five rectangular panels: Front, Back, Left Side, Right Side, and Top. Each panel is worked separately, then joined.
Front Panel
With Color A, chain 33.
Row 1 (WS): Sc in 2nd chain from hook, sc in each chain across. Chain 1, turn. (32 sc)
Rows 2-30: Sc in each stitch across. Chain 1, turn. (32 sc)
Row 30: Sc in each stitch across. Do not turn. Do not fasten off. (32 sc)
Checkpoint: The front panel should measure approximately 8 inches tall x 8 inches wide (20.3 cm x 20.3 cm).
Bobble Border on Front Panel
Without fastening off, change to Color C.
Border Row 1: Chain 1, turn to work across top edge (Row 30), sc in each stitch across. (32 sc)
Border Row 2: Chain 1, turn, (bobble in next stitch, sc in next stitch) repeat across. End with sc. (16 bobbles, 16 sc = 32 sts)
Border Row 3: Chain 1, turn, sc in each stitch across. (32 sc)
Fasten off Color C.
Attach Color C at the bottom right corner of the foundation chain edge and work Border Rows 1 through 3 along the bottom edge the same way. Fasten off.
Back Panel
Work exactly as the Front Panel including the bobble border rows at top and bottom.
Left Side Panel
With Color A, chain 29.
Row 1 (WS): Sc in 2nd chain from hook, sc in each chain across. Chain 1, turn. (28 sc)
Rows 2-30: Sc in each stitch across. Chain 1, turn. (28 sc each row)
Row 30: Sc in each stitch across. Do not turn. (28 sc)
Work bobble border at top and bottom edges same as the front panel. Fasten off.
Right Side Panel
Work exactly as the Left Side Panel. (28 sc x 30 rows)
Top Panel (Lid of Tank Cover)
With Color A, chain 29.
Row 1 (WS): Sc in 2nd chain from hook, sc in each chain across. Chain 1, turn. (28 sc)
Rows 2-32: Sc in each stitch across. Chain 1, turn. (28 sc each row)
Row 32: Sc in each stitch across. Do not turn. (28 sc)
Work bobble border on all four edges of the top panel. Attach Color C at each edge midpoint and work a single round of (bobble, sc) alternating around the entire perimeter, working 3 sc in each corner. Fasten off.
Tank Cover Assembly
Hold the Front Panel and Left Side Panel with wrong sides together, right edges aligned. Using Color C and a tapestry needle, slip stitch through both layers along the shared vertical edge.
Join the Right Side Panel to the Front Panel the same way along the opposite side edge.
Join the Back Panel to both Side Panels along their remaining vertical edges.
You now have a four-sided open box.
Attach the Top Panel by slip stitching through both the top edges of all four side panels and the perimeter of the top panel simultaneously. Use Color C throughout for a consistent purple seam detail.
Tank Cover Finishing
Sew one large butterfly applique to the center of the front panel, positioned approximately 3 inches (7.6 cm) from the bottom border and centered horizontally.
Sew 4 to 6 small butterfly appliques scattered around the large butterfly.
Repeat butterfly placement on the back panel and each side panel (one large, 3 to 4 small per panel).
Sew one crochet rose with Color D leaves to each of the two front top corners of the lid panel.
Sew one satin bow at the center top of the bobble border on the front panel. Attach a pearl button to the center of the bow knot.
Piece 2: Toilet Lid Cover
The lid cover is worked as a flat oval that mirrors the shape of a standard elongated toilet lid.
Foundation Oval
With Color A, chain 25.
Round 1 (RS): Sc in 2nd chain from hook, sc in next 22 chains, 3 sc in last chain (this turns the corner). Now working along the opposite side of the foundation chain: sc in next 22 chains, 2 sc in same stitch as first sc. Slip stitch to first sc to join. (50 sc)
Round 2: Chain 1, sc in same stitch, sc in next 22 stitches, increase in next 2 stitches, sc in next 22 stitches, increase in next 2 stitches. Slip stitch to join. (54 sc)
Round 3: Chain 1, sc in same stitch, sc in next 22 stitches, increase in next 4 stitches, sc in next 22 stitches, increase in next 4 stitches. Slip stitch to join. (62 sc)
Round 4: Chain 1, sc in same stitch, sc in next 23 stitches, (sc in 1 stitch, increase in next stitch) twice, sc in next 23 stitches, (sc in 1 stitch, increase in next stitch) twice. Slip stitch to join. (66 sc)
Round 5: Chain 1, sc in same stitch, sc in next 23 stitches, (sc in 2 stitches, increase in next stitch) twice, sc in next 23 stitches, (sc in 2 stitches, increase in next stitch) twice. Slip stitch to join. (70 sc)
Round 6: Chain 1, sc in each stitch around. Slip stitch to join. (70 sc)
Round 7: Chain 1, sc in same stitch, sc in next 24 stitches, (sc in 3 stitches, increase in next stitch) twice, sc in next 24 stitches, (sc in 3 stitches, increase in next stitch) twice. Slip stitch to join. (74 sc)
Round 8: Chain 1, sc in each stitch around. Slip stitch to join. (74 sc)
Round 9: Chain 1, sc in same stitch, sc in next 25 stitches, (sc in 3 stitches, increase in next stitch) twice, sc in next 25 stitches, (sc in 3 stitches, increase in next stitch) twice. Slip stitch to join. (78 sc)
Round 10: Chain 1, sc in each stitch around. Slip stitch to join. (78 sc)
Round 11: Chain 1, sc in same stitch, sc in next 25 stitches, (sc in 4 stitches, increase in next stitch) twice, sc in next 25 stitches, (sc in 4 stitches, increase in next stitch) twice. Slip stitch to join. (82 sc)
Round 12: Chain 1, sc in each stitch around. Slip stitch to join. (82 sc)
Round 13: Chain 1, sc in same stitch, sc in next 26 stitches, (sc in 4 stitches, increase in next stitch) twice, sc in next 26 stitches, (sc in 4 stitches, increase in next stitch) twice. Slip stitch to join. (86 sc)
Round 14: Chain 1, sc in each stitch around. Slip stitch to join. (86 sc)
Round 15: Chain 1, sc in same stitch, sc in next 27 stitches, (sc in 4 stitches, increase in next stitch) twice, sc in next 27 stitches, (sc in 4 stitches, increase in next stitch) twice. Slip stitch to join. (90 sc)
Rounds 16-17: Chain 1, sc in each stitch around. Slip stitch to join. (90 sc)
Checkpoint: After Round 17, the oval should measure approximately 14 inches wide x 17 inches long (35.5 cm x 43 cm).
Bobble Border on Lid Cover
Change to Color C.
Round 18: Chain 1, (bobble in next stitch, sc in next stitch) repeat around. Slip stitch to join. (45 bobbles, 45 sc = 90 sts)
Round 19: Chain 1, sc in each stitch around. Slip stitch to join. (90 sc)
Fasten off Color C. Weave in ends.
Lid Cover Finishing
Sew one large butterfly applique to the center of the lid cover, positioned toward the front (wider end of oval).
Scatter 4 small butterfly appliques around the large butterfly.
Sew one satin bow at the front lower edge of the bobble border. Attach a pearl button to the bow center.
Piece 3: Contour Rug
The contour rug is a U-shaped mat that wraps around the base of the toilet.
Main Rectangle
With Color A, chain 81.
Row 1 (WS): Sc in 2nd chain from hook, sc in each chain across. Chain 1, turn. (80 sc)
Rows 2-45: Sc in each stitch across. Chain 1, turn. (80 sc each row)
Row 45: Sc in each stitch across. Do not turn. (80 sc)
Checkpoint: After Row 45, the rectangle should measure approximately 20 inches wide x 10 inches tall (51 cm x 25.4 cm).
Notch Shaping
The U-shaped cutout is created by working the left and right sides separately.
Row 46: Sc in first 24 stitches, leave remaining stitches unworked. Chain 1, turn. (24 sc)
Rows 47-90: Sc in each stitch across. Chain 1, turn. (24 sc each row)
Row 90: Sc in each stitch across. Fasten off. (24 sc)
Rejoin Color A at stitch 57 of Row 45 (leaving stitches 25 through 56 free for the notch opening).
Row 46B: Sc in next 24 stitches across to end of row. Chain 1, turn. (24 sc)
Rows 47B-90B: Sc in each stitch across. Chain 1, turn. (24 sc each row)
Row 90B: Sc in each stitch across. Fasten off. (24 sc)
Checkpoint: Each arm of the contour rug should measure approximately 6 inches (15.2 cm) wide. The total rug measures approximately 20 inches wide x 24 inches long (51 cm x 61 cm). The U opening is approximately 8 inches wide x 11 inches deep (20.3 cm x 28 cm).
Contour Rug Edging
Attach Color C at any outer corner. Chain 1.
Round 1: Sc evenly around the entire outer perimeter of the rug including around the inside of the U cutout, working 3 sc in each outer corner and sc2tog at each inner corner of the U opening. Slip stitch to join. (approximately 296 sc)
Round 2: (Bobble in next stitch, sc in next stitch) repeat around, working 3 sc in each outer corner and sc2tog at each inner corner. Slip stitch to join.
Round 3: Sc in each stitch around. Slip stitch to join. Fasten off.
Contour Rug Finishing
Sew one large butterfly applique to the lower center of the back section, positioned 2 inches (5 cm) from the bottom edge and centered between the two arms.
Scatter 4 small butterfly appliques around the main motif.
Sew one crochet rose to the lower left and lower right corners, approximately 1 inch (2.5 cm) from the corner bobble border.
Sew one satin bow at the center bottom edge between the two front arms. Attach a pearl button to the bow center.
Sew non-slip rug backing to the wrong side if desired.
Piece 4: Bath Mat
Main Rectangle
With Color A, chain 81.
Row 1 (WS): Sc in 2nd chain from hook, sc in each chain across. Chain 1, turn. (80 sc)
Rows 2-63: Sc in each stitch across. Chain 1, turn. (80 sc each row)
Row 63: Sc in each stitch across. Do not turn. (80 sc)
Checkpoint: After Row 63, the bath mat should measure approximately 20 inches wide x 14 inches tall (51 cm x 35.6 cm).
Bath Mat Edging
Attach Color C at any corner.
Round 1: Chain 1, sc evenly around all four sides working 3 sc in each corner. For top and bottom edges, sc in each of the 80 stitches. For side edges, work approximately 1 sc per row end (63 sc per long side). Slip stitch to join. (approximately 290 sc)
Round 2: (Bobble in next stitch, sc in next stitch) repeat around, working 3 sc in each corner. Slip stitch to join.
Round 3: Sc in each stitch around. Slip stitch to join. Fasten off.
Checkpoint: After edging, the bath mat should measure approximately 20 inches wide x 28 inches long (51 cm x 71 cm).
Bath Mat Finishing
Sew one large butterfly applique to the center of the mat, positioned 4 inches (10 cm) from the bottom edge and centered horizontally.
Scatter 4 to 6 small butterfly appliques around the main butterfly.
Sew one crochet rose to each bottom corner.
Sew one satin bow at the bottom center of the bobble border. Attach a pearl button to the bow center.
Sew non-slip rug backing to the wrong side if desired.
Piece 5: Toilet Paper Roll Cover
The toilet paper cover is a cylindrical tube worked in the round.
Foundation
With Color A, make a magic ring.
Round 1: Chain 1, 6 sc in ring. Slip stitch to join. (6 sc)
Round 2: Chain 1, increase in each stitch around. Slip stitch to join. (12 sc)
Round 3: Chain 1, (sc in 1 stitch, increase in next stitch) repeat around. Slip stitch to join. (18 sc)
Round 4: Chain 1, (sc in 2 stitches, increase in next stitch) repeat around. Slip stitch to join. (24 sc)
Round 5: Chain 1, (sc in 5 stitches, increase in next stitch) 4 times. Slip stitch to join. (28 sc)
Round 6: Chain 1, sc in each stitch around. Slip stitch to join. (28 sc)
Checkpoint: The base should measure approximately 4.5 inches (11.4 cm) in diameter.
Cylinder Body
Round 7: Chain 1, working in BLO (back loop only), sc in each stitch around. Slip stitch to join. (28 sc)
Rounds 8-18: Chain 1, sc in each stitch around. Slip stitch to join. (28 sc)
Continue with bobble border and finishing as established for other pieces. Sew one large butterfly applique to the front. Add a satin bow with pearl button at the top edge.
Tips for Success
Blocking is essential. Dampen each piece and pin it to the finished dimensions on a foam mat. Let everything dry completely before assembly. This step makes a huge difference in how professional your finished set looks.
Take your time with the appliques. The butterflies and roses are what make this set special. Position them carefully before sewing, and use pins to hold everything in place.
Consider making the appliques first. Working all the small butterflies and roses while watching TV gives you a nice stockpile ready for finishing.
Test the tank cover fit. If your toilet tank is larger or smaller than standard, adjust by adding or removing rows. The beauty of working the panels separately is that you can customize easily.
You Did It!
Thank you so much for choosing this pattern. I hope you love making this lavender butterfly bathroom set crochet pattern as much as I loved designing it. There is something really satisfying about transforming a functional space into something beautiful with your own hands.
If you make this set, I would absolutely love to see it! Tag me on Instagram or share a photo in my Facebook group. Seeing your finished projects is honestly the best part of sharing patterns.
Save this pattern to your Pinterest boards so you can find it when you are ready to start. And if you make it, please leave a comment below. I read every single one, and your feedback helps other crocheters decide if this project is right for them. Happy hooking!
You Might Also Like
- Dusty Rose Open Weave Crochet Bolero Free Pattern
- Sunshine Daisy Bow Crochet Vest Free Crochet Pattern
- Lavender Dream Tiered Baby Dress Free Crochet Pattern
- Lavender Daisy Crochet Backpack Free Pattern