26 Giant Crochet Christmas Tree Patterns to Make This Season

Looking for a giant crochet Christmas tree that suits your space? These 26 patterns range from freestanding cones and floor cushions to wall trees, a rug and a table runner.
The construction matters as much as the silhouette. Some trees need a firm form or hanging support, while others rely on stuffing, seams or carefully finished edges to hold their shape.
For more ideas that build on this collection, explore 3D crochet Christmas tree patterns.
Before You Start
These patterns use US crochet terminology. Check the stitch terms and gauge notes for your chosen design before starting, especially if you usually follow UK patterns.
Measure the display space first, including the treeâs width at its base. For a fitted cone cover, choose the supporting form before you crochet so the cover can be sized to it. A stuffed tree needs room for its base as well as its height.
Consider how the finished piece will be used. Wall trees need suitable hanging points, while a floor rug should have a low-profile surface and a way to prevent slipping. If you change yarn, make a gauge swatch before committing to a large panel or fitted cover.
Crochet terminology: This article uses US crochet terms. Check the abbreviations for each project.
Giant Stuffed Spiral Cone Tree

This giant crochet Christmas tree has a simple, sculptural shape: a soft green cone with a broad circular base and a small brown trunk visible at the front. Its undecorated surface makes it a useful centrepiece on its own, while leaving room for lightweight decorations if you prefer a more festive look.
The cone is worked from the point downwards in a continuous spiral. Its increases are spread out rather than stacked close together, so the sides widen gradually instead of forming a series of abrupt steps. A firm fabric helps the stuffed tree keep that clean outline.
A wide, flat base is important for a freestanding soft tree. The brown trunk sits on the lower front rather than underneath, allowing the full green base to meet the floor. If you plan to change the height, the patternâs adjustment method keeps the cone and base matched.
Giant Stuffed Spiral Cone Tree

Quick-reference card. Follow the complete written instructions below.
Materials
- Bulky, smooth green yarn: Allow approximately 950â1,200 m; the amount will vary with your gauge and stuffing.
- Bulky brown yarn: Approximately 15â25 m for the trunk.
- 7 mm crochet hook: Or the size needed to make a firm fabric that holds stuffing inside.
- Polyester stuffing: Enough to fill the cone firmly at the bottom without stretching its stitches.
- Stitch marker, yarn needle and scissors: Move the marker to the first stitch of each round.
Size and Fit
One sample size: approximately 89â90 cm high and 36 cm across the circular base at the stated gauge. For a taller tree, add one complete five-round cone block for each approximately 4.7 cm of additional height, then add one increase round to the base for every block added. Each block also widens the tree by six stitches, or approximately 2 cm in diameter. For a shorter tree, omit complete blocks and remove the same number of base increase rounds. Keep the final four even cone rounds in either case.
Gauge
In firm single crochet, approximately 10 stitches across = 10 cm, and 21 rounds measured along the fabric = 20 cm. Check gauge on a generous swatch; a looser fabric may show stuffing and change the finished dimensions.
Abbreviations
US crochet terms.
- ch = chain
- sc = single crochet
- st(s) = stitch(es)
- inc = work 2 sc in the same stitch
- rep = repeat
Pattern
- Before you begin Work the cone and base in continuous spirals without joining rounds. Mark the first stitch of every round. The brown trunk is a small decorative piece at the lower front: do not place a narrow trunk underneath the tree, as the broad green base needs to rest on the floor.
- Cone, round 1 With green yarn, work 6 sc into a magic ring. Pull the ring closed. (6 sts)
- Cone, rounds 2â91 Work the following five-round block 18 times. For block number k, work 1 sc in each stitch for four rounds. On the fifth round, rep [sc in each of the next (k â 1) sts, inc in the next st] six times. For example, the increase round of block 1 is round 6: inc in each of the 6 sts (12 sts). The increase round of block 2 is round 11: rep [sc in next st, inc in next st] six times (18 sts). Continue this spacing through block 18, whose increase round is round 91: rep [sc in each of the next 17 sts, inc in next st] six times (114 sts).
- Cone, rounds 92â95 Sc in each stitch for four rounds (114 sts each round). Fasten off, leaving a long tail for sewing on the base.
- Circular base, rounds 1â19 With green yarn, work 6 sc into a magic ring for round 1. For round 2, inc in each stitch (12 sts). For each subsequent round, add one plain sc before each increase in the six-repeat sequence: round 3 is rep [sc in next st, inc in next st] six times (18 sts); continue in this manner through round 19, rep [sc in each of the next 17 sts, inc in next st] six times (114 sts). Fasten off. The base and cone now have matching 114-stitch edges.
- Stuff and close Stuff the cone a little at a time, keeping the point lightly filled. Add more stuffing towards the bottom so it holds its shape, but stop before the edge flares or the stitches stretch. Place the circular base against the cone opening with its right side facing out. Match the round beginnings, then sew the two 114-stitch edges together stitch for stitch. Add the last stuffing before closing the seam. Set the tree on its base and adjust the filling until the base lies flat.
- Brown trunk With brown yarn, ch 12. Row 1: sc in the second ch from the hook and in each remaining ch; turn (11 sts). Rows 2â4: ch 1, sc in each st; turn (11 sts). Fasten off, leaving a sewing tail. Centre this small rectangle on the lower front of the cone, with its bottom edge level with the green base seam. Sew all four edges down. It represents the visible trunk without lifting the base off the floor.
Finishing
- Weave in all ends securely.
- Check that the circular base rests evenly on the floor. If one area bulges, redistribute the stuffing rather than adding more.
- Keep any added decorations light, particularly near the point, so they do not pull the soft tree off balance.
Helpful Tips
- Count the six increases on every increase round. The four intervening even rounds are what make the widening gradual.
- If your stitches leave visible gaps, use a smaller hook before adding more stuffing.
- The separate base should remain flat. If it cups or ripples, check its stitch count and gauge before sewing it to the cone.
Fitted Crochet Cone Cover Tree

For a giant crochet Christmas tree with a clean, tapered shape, a fitted cover lets the cone provide the structure. The result looks substantial without needing to stuff or support a large crocheted piece, and the cover can be removed for storage.
This design is shaped around the particular cone you choose rather than a fixed set of measurements. Because cones vary in slope as well as height, checking how the fabric sits on the form is more useful than trying to match someone elseâs finished size. Aim for a smooth fit that does not have to be stretched into place.
A plain green surface gives decorations room to stand out, but it also works on its own for a simple display. Choose a stable spot for the finished tree and keep the foam or cardboard form away from candles, heaters and other sources of heat.
Fitted Crochet Cone Cover Tree

Quick-reference card. Follow the complete written instructions below.
Materials
- Cone form: A sturdy foam or cardboard cone at least 75 cm tall, with a stable, flat base.
- Yarn: Firm cotton-blend yarn in green, with enough from one dye lot to cover your chosen cone and make a drawstring. The amount depends on the form and your gauge.
- Hook: A size that makes a firm single-crochet fabric with your yarn, without making it difficult to slide the cover onto the cone.
- Notions: Stitch marker, tape measure, yarn needle and scissors.
Size and Fit
Made to fit your chosen cone. The sample method has no fixed finished circumference: try the cover on after every round, keeping its top at the cone tip. Aim for a close fit that slides into place without stretching hard. The lower edge should sit at the base; a drawstring adjusts its final fit.
Gauge
No fixed gauge is required. Work a small single-crochet swatch in the round to choose a firm fabric and note its approximate round height. Use the cone, not a stated stitches-per-centimetre gauge, to decide when to increase. All body rounds have a stitch count divisible by 6.
Abbreviations
US crochet terms.
- ch = chain
- sc = single crochet
- sl st = slip stitch
- st(s) = stitch(es)
Pattern
- Before you begin Work from the tip down in joined rounds. At the end of each round, sl st to the first sc; the joining sl st does not count as a stitch. Ch 1 to start the next round; this ch 1 does not count as a stitch. Mark the first sc so you can find it easily.
- Tip Make a magic ring. Work 6 sc into the ring, pull it closed and join. You have 6 sc. Place this tip over the cone before continuing.
- Choose each body round After each round, slide the cover onto the cone with the crocheted tip at the cone tip. Decide which of the following rounds to work next. If the cover becomes taut or will not slide to its natural height, work an increase round. If it fits closely or has a little room, work a plain round. Check again after that round. If an increase makes the cover roomy, work plain rounds until it fits closely again. Keep the fit smooth; do not pull the fabric down to make a short cover appear long enough.
- Plain round Ch 1, sc in every sc around, then join. The stitch count stays the same.
- Increase round Ch 1. Divide the current stitch count by 6; call the result X. Repeat [2 sc in the next st, sc in each of the next X minus 1 sts] six times, then join. This adds 6 sc. For example, with 12 sts, repeat [2 sc in the next st, sc in the next st] six times to reach 18 sts. With 6 sts, work 2 sc in each st to reach 12 sts.
- Approach the base Continue choosing plain or increase rounds until, with the cover fitted on the cone, its edge sits approximately one round-height above the base. Work one final plain or increase round, whichever gives a close fit at the base. If that round leaves the edge noticeably above or below the base, undo it and adjust the number of body rounds before working it again. Fasten off and weave in the ends.
- Adjustable drawstring Make a chain whose relaxed length is approximately the coneâs base circumference plus 30 cm for tying. Sl st in the second ch from the hook and in each remaining ch. Fasten off and weave in the ends. With the cover on the cone, weave the cord in and out between the posts of the final round, passing behind roughly two or three sc at a time. Bring both ends out together at the back. Pull only until the edge sits neatly at the base, then tie a bow so the cover can be removed.
Finishing
- Smooth the sleeve over the cone and check that the tip stays in place and the lower edge is level.
- If adding decorations, sew them securely to the cover without fastening the cover permanently to the form.
- Keep the finished tree away from candles, heaters and other sources of heat; foam and cardboard forms can be damaged or catch fire.
Helpful Tips
- Try the cover on after every round near changes in the coneâs width. It is easier to undo one round than to correct several rounds of poor fit.
- A very tight fabric can be difficult to remove. The drawstring should snug the lower edge, not squeeze or bend the form.
- If the cone has a particularly sharp tip, close the starting ring firmly and position it carefully over the point.
Seamed Ribbed Christmas Tree Cone
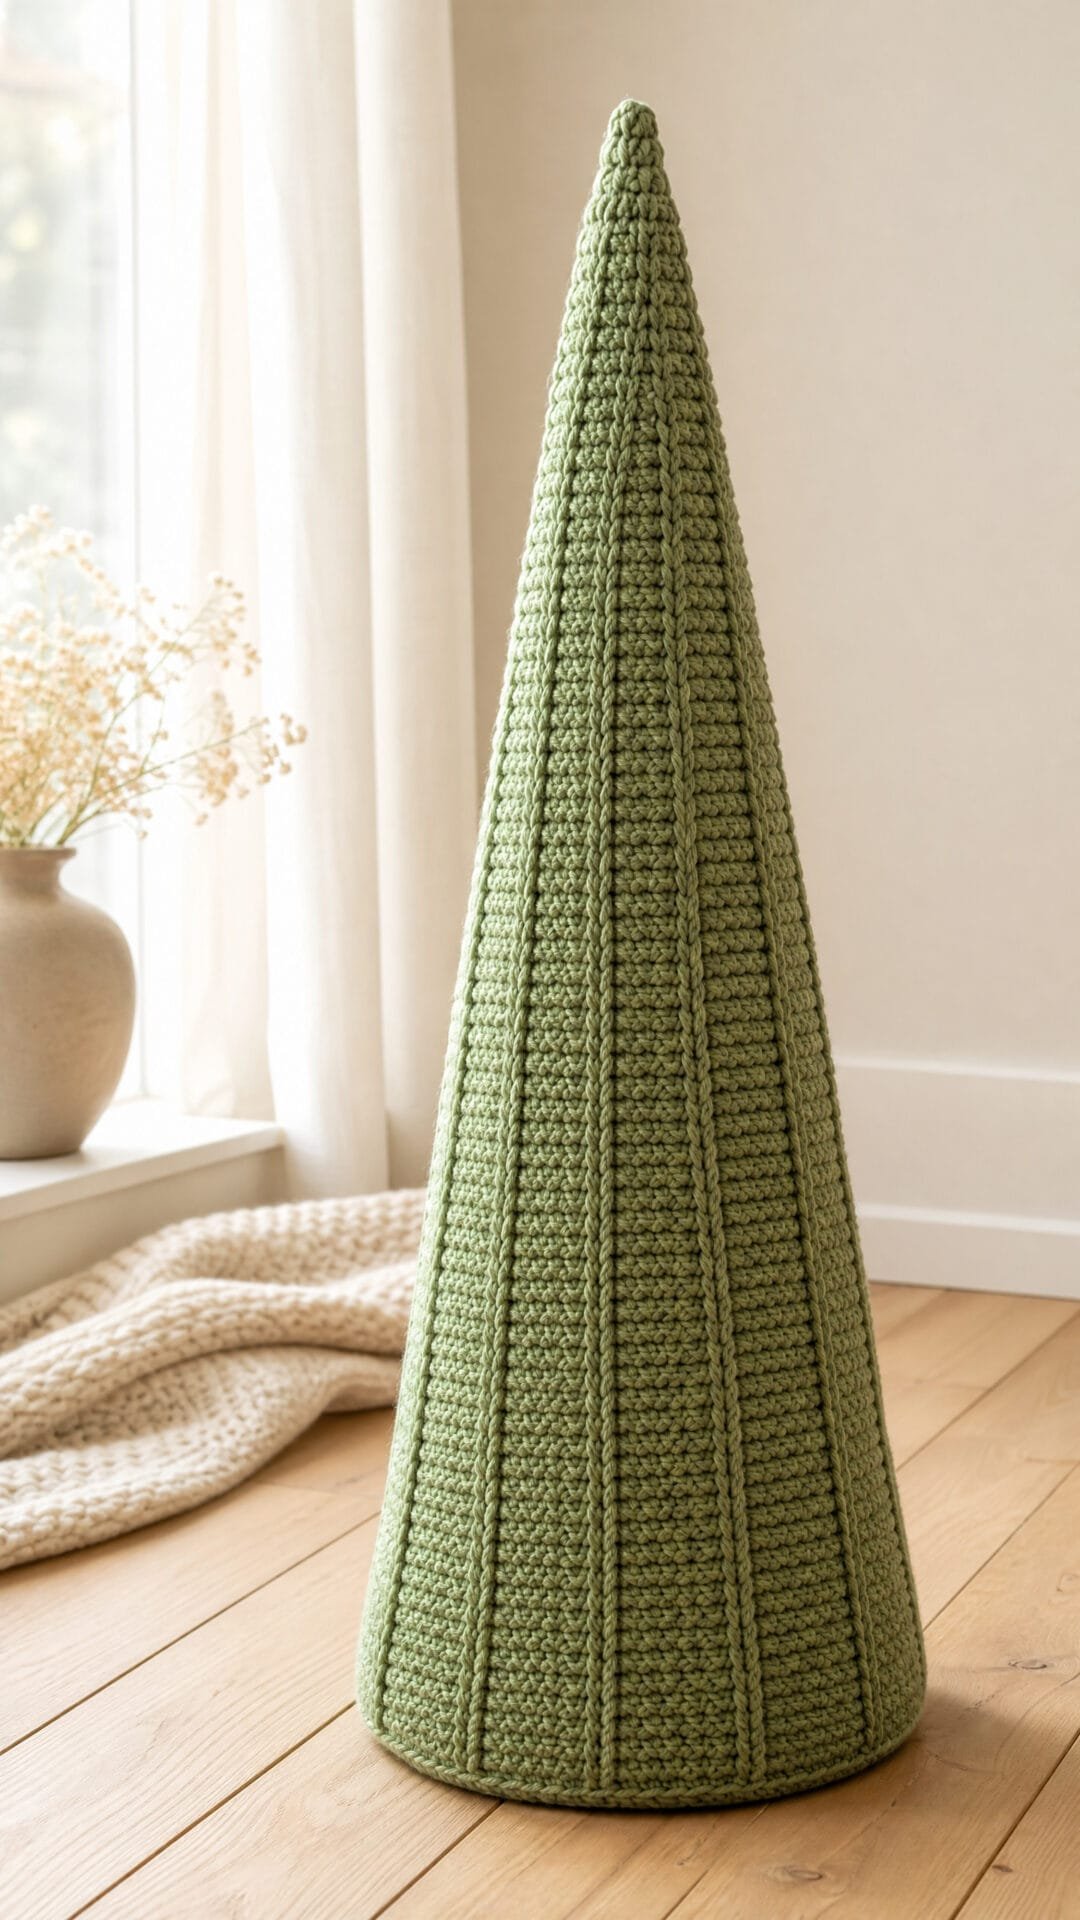
This giant crochet Christmas tree gets its height from a shaped flat panel rather than rounds. Its textured rows become prominent ribs on the standing cone, giving a simple silhouette plenty of definition without relying on decorations.
The panel follows a curved outline, so its lower edge can meet a separate flat base. That curve matters: a triangular panel might look tree-shaped on the table, but its straight lower edge would not sit evenly around a circular base.
The panelâs straight edges meet at the back, running from the tip towards the floor. Those edges measure the slope of the cone, which is longer than its upright height. Paper templates provide a useful check that the shaped panel and base will fit together before the seam is secured.
Seamed Ribbed Christmas Tree Cone

Quick-reference card. Follow the complete written instructions below.
Materials
- Bulky wool-blend yarn: Allow approximately 1,400â1,800 m, including yarn for the base. Yardage varies with yarn and stuffing density.
- 6.5 mm crochet hook: Adjust hook size to obtain gauge and a firm fabric that contains stuffing.
- Polyester stuffing: Enough to support an approximately 85 cm tall cone.
- Tapestry needle and stitch markers: For the seam, base attachment and even spacing.
- Large paper, pencil, ruler and tape measure: For the full-size cone and base templates.
Size and Fit
One size: approximately 85 cm tall with a base around 44â45 cm across. At gauge, the panel has two straight edges approximately 87.5 cm long and a curved outer edge that is brought to a 140 cm base circumference. Once joined, the straight edges become the coneâs sloping height, not its upright height. A base radius of approximately 22.3 cm gives an upright height close to 85 cm. Stuffing and the base edging can affect the final measurement.
Gauge
12 sc and 12 rows = 10 cm in back-loop sc, measured on a washed, dried flat swatch. Check both stitch and row gauge: the panel shaping assumes they are approximately equal. For the base, aim for approximately 12 sc per 10 cm around the outer edge; check its diameter against the paper template rather than relying on stitch count alone.
Abbreviations
US crochet terms.
- BLO = back loop only
- ch = chain
- rnd = round
- sc = single crochet
- sl st = slip stitch
- st(s) = stitch(es)
Pattern
- Make the paper templates On large paper, draw a quarter-circle with two perpendicular straight sides, each 87.5 cm from their shared tip. Its curved edge is the intended lower edge of the cone. Separately, draw a circle 44.6 cm in diameter for the base; its circumference is approximately 140 cm. Keep both templates for checking the crochet before assembly.
- Panel shaping rule Work 105 rows. Row 1 has 105 sc. For any row numbered r, its target number of sc is the nearest whole number to â(105² â (r â 0.5)²). Use an ordinary calculator; round .5 upwards. This follows the quarter-circle outline. Keep the tip-end edge straight and make all shortening at the outer, base-end edge. Turning chains and slip stitches used to reach a new starting point do not count as sc.
- Panel, row 1 Ch 106. Starting in the second ch from the hook, sc in each ch across; 105 sc. The first stitch is at the tip end and the last stitch is at the base end. Ch 1 and turn.
- Panel, even-numbered rows 2â104 These rows begin at the base end. Find the target sc count using the shaping rule. If the preceding row has more stitches, sl st across the excess stitches at this base end. Ch 1, then sc BLO across the remaining stitches to the tip end. Ch 1 and turn. Do not work into the slip stitches on the following row.
- Panel, odd-numbered rows 3â105 These rows begin at the tip end. Sc BLO across to the target count; leave any remaining stitches unworked at the base end. Ch 1 and turn unless this is row 105. Fasten off after row 105, which has 10 sc. The narrow final row is part of the curved base edge, not a second seam edge.
- Panel base edging With the right side facing, join yarn at the base end of row 1. Work 168 sc evenly along the shaped outer edge, ending at the tip-end end of row 105. Include the 10 stitches of row 105 in this count. The edging should follow the stepped outline without pulling it into a straight line; place additional stitches where needed along longer steps. Fasten off, leaving a tail for joining.
- Plain circular base Work in a spiral through both loops; mark the first stitch of each rnd. Rnd 1: 6 sc in a magic ring (6). Rnd 2: 2 sc in each st (12). Rnd 3: (sc in next st, 2 sc in next st) 6 times (18). Continue increasing 6 sts per rnd, spacing the increases evenly: on rnd n, repeat (sc in each of the next n â 2 sts, 2 sc in the next st) 6 times. Complete rnd 28 with 168 sc. The base should lie flat and measure approximately 44.6 cm across. Fasten off with a long sewing tail.
- Template check before stitching Lay the panel flat against the quarter-circle template. Its two straight edges should each be close to 87.5 cm, and the edged lower boundary should follow the templateâs curve without severe puckering. Bring the straight edges together temporarily with markers to check that the cone sits over the paper base circle. The panel edging and crochet base must each have 168 stitches and should each measure approximately 140 cm around. If the circle cups, ripples or differs noticeably in circumference, adjust hook size or redo the base before sewing; do not force a mismatched base onto the cone.
- Join and stuff With the panelâs right side out, bring the two straight edges together, aligning their tip and base ends. Sew them from tip to base with a neat mattress stitch, catching the foundation edge and the corresponding row ends without gathering either side. Centre the seam at the back. Mark the coneâs lower edge and the circular base into quarters, then sew the 168-stitch edging to the 168-stitch base, matching the markers and working approximately one stitch to one stitch. Leave an opening, stuff evenly from tip to base until the cone stands without bulging, then close the opening.
Finishing
- Secure ends on the inside.
- Roll the finished tree gently to even out stuffing, keeping the base flat and the back seam straight.
- Add decorations only after checking that their weight does not pull the cone off balance.
Helpful Tips
- The quarter-circle panel is intentional: a simple triangle has a straight lower edge that will not form the even circular base of this tree.
- Mark every tenth row. At gauge, each straight panel edge is about 87.5 cm; the finished upright height is shorter because the cone has a wide base.
- If the finished cone needs extra support, place a removable, suitably sized firm insert inside the base before closing it.
Layered Scallop Floor Tree

This floor-standing Christmas tree gets its full, branch-like shape from overlapping scalloped layers. The narrow tip stays visible, while the layers widen towards the base to give the tree a soft, tiered silhouette.
The design is fitted to the cone you use rather than relying on every cone having the same proportions. That makes it worth checking how each layer hangs in place: the scallops should fall freely and conceal the attachment area beneath them.
This is a decorative covering, not a freestanding crochet structure. A secure form supports the tree, leaving the layers to create the shape and movement that make it a striking seasonal display.
Layered Scallop Floor Tree

Quick-reference card. Follow the complete written instructions below.
Materials
- Medium-weight green yarn: Quantity depends on your gauge and cone; buy enough of one dye lot for all 19 rings.
- Crochet hook: A size that gives a firm but flexible fabric; 5 mm is a starting point.
- Cone form: Approximately 100 cm high and 46 cm across the base, securely supported and fully covered in green fabric.
- Notions: Tape measure, removable markers, yarn needle, scissors and thread suitable for sewing into the fabric cover.
Size and Fit
Sample layout: 100 cm-high cone with a 46 cm base diameter. Mark attachment lines 4, 9, 14 cm and every 5 cm thereafter through 89 cm from the tip; add a final line at 92 cm. This gives 19 rings. Each ring is sized separately. Aim for an approximately 8 cm drop from its attachment line to its scalloped edge, so upper rings cover the attachment lines beneath them. The final ring should reach the base. The green fabric remains visible at the narrow tip.
Gauge
Measure your own single-crochet stitch gauge before calculating ring counts. For the sample stitch check only, the assumed gauge is 16 sc per 10 cm. Also check the depth of your rounds and scallop: work enough plain rounds for each completed ring to drop approximately 8 cm.
Abbreviations
US crochet terms.
- ch = chain
- sc = single crochet
- dc = double crochet
- sl st = slip stitch
- st(s) = stitch(es)
Pattern
- Prepare the form Make sure the covered cone stands securely. Mark the attachment lines given in Size and Fit around its full circumference. Measure the cone around each line and again 8 cm lower, or at the base for the final ring.
- Calculate each ring Using your measured sc stitches per cm, choose the smallest multiple of 8 that is at least (attachment-line circumference + 1 cm) Ã stitches per cm. Call this A. For the target hem count B, choose the smallest multiple of 8 that is at least (circumference 8 cm lower + 2 cm) Ã stitches per cm. If this is less than A, use A instead. Recalculate for every ring; do not reuse a count simply because two lines look similar.
- Start a ring Ch A without pulling the chain tight. Join with a sl st to form a ring, checking that it is not twisted. Round 1: ch 1, sc in each ch, join with a sl st to the first sc. You have A sc. Keep the join at the back; do not turn. A loose foundation is important so the upper edge can sit smoothly against the form.
- Shape the ring Work joined rounds of sc, beginning each with ch 1 and ending with a sl st to the first sc; the ch 1 does not count as a st. Gradually increase from A to B before the edging, working no more than one set of 8 increases in any one round. For a set, divide the current round into eight equal sections and work 2 sc into one st near the middle of each section; sc in all other sts. Space increase rounds among the plain rounds rather than placing them together. Continue until the plain fabric, measured down from the foundation edge on the cone, is short of the intended 8 cm drop by roughly the depth of one scallop. Ten total sc rounds, including Round 1, are a starting point, not a fixed length.
- Scalloped edge With B sts in the final plain round, ch 1. Repeat around: sc in next st, skip next 3 sts, work 7 dc in next st, skip next 3 sts. Join with a sl st to the first sc and fasten off. Each repeat uses 8 old sts and makes one scallop. Check the finished drop on its marked position; if it is too short, undo the edging and add plain rounds before replacing it.
- Attach the layers Sew the rings to the fabric cover from the bottom upwards: attach the 92 cm ring first, then the 89 cm ring, continuing towards the tip. Sew along each foundation edge with secure stitches spaced around the circumference. Keep the shaped fabric and scallops free to hang down. As you add a ring, let its lower edge cover the attachment edge of the ring beneath it; do not stitch the scallops flat.
Finishing
- Weave in yarn ends and check that every foundation edge is securely attached to the fabric cover.
- Adjust the scallops by hand so the layers hang evenly, and confirm that the lowest edge reaches the base without trailing on the floor.
Helpful Tips
- Pin or temporarily baste a ring in place before sewing to check its drop and overlap.
- If your calculated foundation feels tight despite its allowance, use a looser starting chain or move up to the next multiple of 8.
- The cone and its support carry the weight: crochet rings are decoration, not structural bracing.
Stacked Circular Tier Christmas Tree

This floor-standing crochet Christmas tree gets its shape from separate, softly stuffed circular tiers. Their decreasing widths create a stepped silhouette that stays easy to recognise from across a room, while a short trunk and cone-shaped top complete the outline.
The appeal of this design is its sculptural shape rather than intricate surface detail. Keeping the tiers gently filled helps them hold their broad edges without losing the distinct steps between them. An internal display stand provides the support needed for a tall decorative piece.
It makes a striking seasonal display where there is room to appreciate its full outline. Plan its position with the base in mind, particularly in a busy room where it could be knocked.
Stacked Circular Tier Christmas Tree

Quick-reference card. Follow the complete written instructions below.
Materials
- Green sturdy acrylic or wool-blend yarn: Bulky-weight yarn; allow approximately 3,500â5,000 m for the sample and buy extra if you plan to match dye lots. Yardage varies considerably with yarn and stuffing density.
- Brown bulky-weight yarn: Approximately 250â400 m for the trunk.
- Crochet hook: Use a hook that makes a firm fabric with your yarn; 6 mm is a starting point.
- Stuffing and notions: Polyester filling, stitch markers, a yarn needle and strong matching yarn for assembly.
- Floor stand: A stable, weighted display base at least 45 cm across, with a firmly fixed, smooth-ended upright 15â18 mm in diameter that reaches approximately 78â80 cm above the base. Check that the assembled stand cannot tip under the finished tree.
Size and Fit
One sample size: approximately 90 cm tall and 60 cm across the bottom tier. From bottom to top, aim for tier diameters of approximately 60, 52, 44, 36, 28 and 20 cm. Each tier is approximately 11 cm deep; the visible trunk is approximately 12 cm high and the top cone approximately 12 cm high. These are finished, stuffed measurements. Measure your work: a flat-round stitch gauge alone does not predict a stuffed tierâs diameter.
Gauge
Approximately 12 sc and 12 rounds per 10 cm in firm sc on a side-wall swatch. Match the finished tier measurements rather than relying on this gauge to set the diameter of a flat circle.
Abbreviations
US crochet terms.
- ch = chain
- sc = single crochet
- inc = work 2 sc in the same stitch
- rnd = round
- st(s) = stitch(es)
Pattern
- Before you begin Work in continuous rounds unless told otherwise, marking the first stitch of each round. The six tiers are numbered from the broad bottom tier to the narrow top tier. Each tier has two annular faces, an outer side wall and a small inner tube. The inner tube keeps stuffing out of the passage for the standâs upright. Do not crochet tightly around the upright: the finished tiers must slide over it.
- Tier faces â make two per tier With green, ch 8 and slip stitch to form a ring. Rnd 1: work 12 sc into the ring (12). Rnd 2: *sc in next st, inc in next st; repeat from * 6 times (18). For each subsequent rnd n, work *(n â 1) sc, inc; repeat from * 6 times. End both faces of tier 1 after rnd 35 (216 sts), tier 2 after rnd 30 (186 sts), tier 3 after rnd 25 (156 sts), tier 4 after rnd 20 (126 sts), tier 5 after rnd 15 (96 sts), and tier 6 after rnd 10 (66 sts). Fasten off the first face. Leave the working yarn attached to the second face for its side wall. Check each face against its intended finished diameter before making both faces: if your yarn produces a markedly different size, change the number of face rounds consistently for that entire tier, then use its new final stitch count throughout the side wall and join.
- Outer side walls On the second face of each tier, work 13 rnds of sc without increasing, keeping its final face stitch count on every round. This gives an approximately 11 cm side wall at the stated gauge. If necessary, adjust the number of straight rounds to reach approximately 11 cm, and use that same number of rounds for the tierâs inner tube. Leave a long tail to join the outer edge.
- Inner tubes â make one per tier With green, ch 12 and slip stitch to form a ring, taking care not to twist it. Work 12 sc in each rnd for 13 rnds, or for the same number of rounds used on that tierâs side wall. Fasten off with a long sewing tail at each end. The tube forms the open central passage; do not stuff it.
- Assemble each tier Sew one end of the inner tube securely around rnd 1 of the side-wall face, then sew its other end around rnd 1 of the separate face. With outer edges aligned, sc through both outer edges to join them, placing one joining sc through each matching pair of stitches. Before closing the last quarter, add stuffing evenly between the inner tube and outer wall. Keep the faces gently domed, not taut, and keep the central passage clear. Finish the join and weave in the tail. Measure the stuffed tier across its widest point.
- Trunk sleeve With brown, ch 54 and slip stitch to form a ring without twisting. Work 54 sc in each rnd for 14 rnds, or until the sleeve measures approximately 12 cm high. Fasten off, leaving a long tail. For the upper annular cap, ch 8 and slip stitch to form a ring; work 12 sc into the ring for rnd 1, then follow the tier-face increase sequence through rnd 8 (54 sts). Sew the capâs outer edge to the sleeveâs upper edge. Slide the sleeve over the stand upright so its uncapped lower edge rests on the base. Stuff around the upright without obstructing it. Secure the sleeveâs lower edge to the stand using its designed fastening points or sturdy ties around the base; do not rely on stuffing to hold the tree upright.
- Stack and secure the tiers Slide tiers 1 to 6 over the stand upright in order, largest first. The lower face of tier 1 rests on the trunk. Sew tier 1 firmly to the trunk cap around their central openings. Sew each subsequent tier to the one below around the central openings, then add a second ring of evenly spaced joining stitches several centimetres farther out, concealed between the tiers. Do not sew across or fill the central passage. Settle the tiers level as you work; the upright supplies support, while the stitching prevents the tiers from shifting.
- Top cone With green, make a magic ring. Rnd 1: 6 sc in the ring. Rnd 2: inc in each st (12). Rnd 3: sc in each st (12). On every even-numbered rnd from rnd 4 through rnd 18, work 6 evenly spaced increases; on every odd-numbered rnd from rnd 5 through rnd 19, work sc evenly. Rnd 19 has 60 sts. For the coneâs separate base, start with 6 sc in a magic ring and increase by 6 sts on every rnd through rnd 10 (60 sts). Sew the base to the cone edge, stuffing lightly before closing. Centre the finished cone over tier 6âs opening and the end of the upright, and sew its base securely to the upper face of tier 6. The cone should cover the upright completely.
Finishing
- Weave in ends and redistribute stuffing until the tiers have even edges and distinct steps.
- Check that the cone covers the upright, the trunk and tiers are firmly attached, and the complete display stands level without tipping.
- Keep the tree away from flames and heat sources. It is a decorative floor display, not a climbing toy.
Helpful Tips
- Use a hook small enough that stuffing does not show through the fabric.
- Measure each tier after stuffing. If a tier is too narrow, first redistribute its stuffing; for a substantial difference, remake both faces with the same adjusted number of rounds.
- A lighter fill near the outer edge helps preserve the stepped outline.
Six-Panel Sculptural Tree

This giant crochet Christmas tree makes its shape a feature. Six tapered faces meet in visible vertical seams, giving the tree a crisp, sculptural outline rather than the rounded look of a typical stuffed decoration.
The broad hexagonal base carries that geometry through to the floor, while the firm fabric helps each face keep its shape. It is a striking choice for a festive corner where there is room to see both the tall silhouette and the panel lines.
Six-Panel Sculptural Crochet Christmas Tree

Quick-reference card. Follow the complete written instructions below.
Materials
- Chunky green yarn: Approximately 1.5â2 kg; the amount needed depends on the yarn and your gauge. Use the same yarn for the panels and base.
- Crochet hook: 8 mm, or a size that produces the firm gauge below.
- Toy stuffing: Enough to fill the tree evenly without stretching the panels.
- Tapestry needle, stitch markers and scissors: For marking rows, sewing and finishing.
Size and Fit
One sample size: approximately 100 cm tall, with a hexagonal base about 60 cm across opposite corners. Each of the six panel and base edges is approximately 30 cm wide. For extra height, work the same number of additional plain rows on every panel immediately after Row 11, then resume at Row 12. Nine extra rows add approximately 10 cm to each panel; the base does not change.
Gauge
8 sc and 9 rows = 10 cm in firm, turned single crochet. Check gauge on a swatch before starting. At this gauge, a 24-stitch panel base is approximately 30 cm wide and a 92-row panel measures approximately 102 cm along its centre; its assembled vertical height is near 100 cm.
Abbreviations
US crochet terms.
- ch = chain
- sc = single crochet
- sc2tog = single crochet two stitches together; decreases one stitch
- st(s) = stitch(es)
- RS = right side
Pattern
- Before you begin Work all pieces in turned rows. A turning ch 1 never counts as a stitch. Make six identical tree panels and six identical base wedges. Keep the finished panel bases and wedge outer edges at 24 stitches each.
- Tree panels: make six Ch 25. Row 1 (RS): Sc in the second ch from the hook and in each remaining ch; 24 sc. Rows 2â11: Ch 1, turn, sc in every st; 24 sc at the end of each row.
- Panel shaping Row 12: Ch 1, turn, sc2tog over the first 2 sts, sc across to the last 2 sts, sc2tog; 22 sc. Work 7 plain rows, with ch 1 and turn at the start of each row. Repeat this eight-row sequence 10 more times: decrease at both ends of Rows 20, 28, 36, 44, 52, 60, 68, 76, 84 and 92, working 7 plain rows between decrease rows. Row 92 has 2 sc. Fasten off, leaving a sewing tail at the tip. Make all six panels alike.
- Optional panel length To make a taller tree, insert the same number of additional plain rows after Row 11 of every panel. Then work the shaping sequence as written, beginning with the decrease described for Row 12. All subsequent row numbers shift by the number of rows added.
- Hexagonal base: make six wedges Ch 2. Row 1 (RS): Sc in the second ch from the hook; 1 sc. Row 2: Ch 1, turn, work 2 sc in the st; 2 sc. Rows 3â24: Ch 1 and turn. On odd-numbered rows, work 2 sc in the first st, then sc in each remaining st. On even-numbered rows, sc in each st until the last st, then work 2 sc in that st. Each row gains one stitch; Row 24 has 24 sc. Fasten off with a sewing tail.
- Check the matching edges Lay out all six panels and all six wedges before sewing. Each panel must have 92 rows and 24 stitches along its foundation edge; each wedge must have 24 rows and 24 stitches along Row 24. Compare matching edges at the same gauge. Correct any mismatched piece before assembly rather than stretching it to fit.
- Assemble the hexagon Arrange the six wedges with their narrow Row 1 ends meeting at the centre and their 24-stitch Row 24 edges forming the outside of the hexagon. Sew neighbouring 24-row radial edges together row-for-row. Secure the meeting point firmly and weave in the tails.
- Assemble and fill the tree Arrange the panels with their 24-stitch edges at the bottom and their 2-stitch tips at the top. With RS facing out, sew each pair of neighbouring panel sides together row-for-row, using an even whip stitch that remains visible on the outside. Join the sixth panel back to the first to close the cone. Sew the six panel tips securely together. Match each panelâs 24-stitch foundation edge to one 24-stitch outer edge of the base and sew them together stitch-for-stitch, leaving the last base edge open. Add stuffing in small amounts, distributing it into the corners and up towards the tip without pulling the seams out of shape. Sew the final 24-stitch edge closed.
Finishing
- Check that the base sits flat and redistribute stuffing through the fabric if a facet looks hollow or overfilled.
- Secure the top and all seam ends, then weave in remaining tails.
Helpful Tips
- Use a hook size that makes a dense fabric so stuffing does not show between stitches.
- Mark each decrease row on the first panel and use it as a reference for the other five.
- Keep the outside whip stitches similarly spaced to make the six panel lines look deliberate.
Granny-Square Cone Tree

This giant crochet Christmas tree uses granny-square patchwork as an openwork cover rather than a freestanding decoration. A plain, solid-coloured cone shows through the spaces and gives the tree its shape.
The graduated patchwork creates a clear taper while keeping the familiar texture of granny squares in view. Smaller motifs near the point help the cover narrow towards the top without losing that patchwork look.
The cone is essential to the finished effect: it supports the openwork and provides the silhouette. Choose one with a plain surface so the green motifs remain the focus rather than competing with a pattern underneath.
Granny-Square Cone Tree

Quick-reference card. Follow the complete written instructions below.
Materials
- Smooth, medium-weight green yarn: Allow approximately 700â900 m; the amount will depend on your yarn and gauge.
- Crochet hook: Start with a 5 mm hook, then change size if needed to obtain the stated square measurements.
- Rigid cone form: 80 cm tall, 80 cm in circumference at the base, tapering evenly to a point. Use a solid, plainly coloured surface beneath the openwork.
- Other supplies: Yarn needle, scissors, tape measure and removable stitch markers.
Size and Fit
Sample cover: approximately 80 cm tall, for the specified 80 cm cone. Each large square measures 10 Ã 10 cm and each small square 5 Ã 5 cm. The bottom ring measures 80 cm around. The joined rings become narrower in 10 cm steps; lightly easing their upper edges at each join lets the cover follow the cone. Crochet fabric should have enough give to stretch over the coneâs slightly longer sloping surface.
Gauge
A four-round square measures 10 Ã 10 cm and a two-round square measures 5 Ã 5 cm after laying flat without stretching. Check both sizes before making the full set. If one is substantially off, try a different hook or yarn rather than relying on tight joining to correct the fit.
Abbreviations
US crochet terms.
- ch = chain
- dc = double crochet
- sl st = slip stitch
- sp = space
- rnd = round
Pattern
- Make the granny-square centre Make a magic ring. Rnd 1: Ch 3 (counts as the first dc), work 2 dc into the ring, ch 2; work (3 dc, ch 2) into the ring three more times. Pull the ring closed and join with a sl st to the top of the beginning ch-3. You have four 3-dc groups and four corner ch-2 spaces.
- Work the second round Sl st across the next two dc and into the first corner ch-2 sp. Rnd 2: Ch 3 (counts as the first dc), then work (2 dc, ch 2, 3 dc) in that corner. Ch 1. In each of the next three corner ch-2 spaces, work (3 dc, ch 2, 3 dc), followed by ch 1. Join with a sl st to the top of the beginning ch-3. Fasten off here for a small square.
- Complete a large square For rnd 3, sl st across the next two dc and into the first corner ch-2 sp. Work the corner as on rnd 2: ch 3, then (2 dc, ch 2, 3 dc) in that space. Ch 1. Along each side, work 3 dc in each ch-1 sp, with ch 1 between groups and before the next corner. Work (3 dc, ch 2, 3 dc) in each remaining corner, with ch 1 before continuing along the next side. Join as before. Work rnd 4 in the same manner: begin in a corner, work (3 dc, ch 2, 3 dc) in every corner and 3 dc in every side ch-1 sp, placing ch 1 between neighbouring groups. Join and fasten off. Lay the square flat and check that it measures 10 Ã 10 cm.
- Make and arrange the motifs Make 35 large four-round squares and four small two-round squares. Arrange the large squares in seven separate rows containing, from bottom to top, 8, 7, 6, 5, 4, 3 and 2 squares. Each row will become one ring. Arrange the four small squares as a two-by-two panel for the eighth and highest ring.
- Join the rings With a yarn needle and matching yarn, whipstitch adjacent squares edge to edge through their outer loops. Do not overlap the squares or take a deep seam allowance. Close each of the seven large-square rows into a ring by joining its short ends. Join the four small squares into a two-by-two panel, then join the panelâs short ends to make a ring 10 cm tall and 10 cm around. Keep each ringâs top and bottom edges open.
- Join the graduated tiers Place the eight-square ring below the seven-square ring, right sides out. Their edges differ in length. Mark eight roughly equal sections around the upper edge of the lower ring and eight roughly equal sections around the lower edge of the next ring. Match the markers, then use small, evenly distributed running stitches to ease the longer edge to the shorter one. Whipstitch the edges together without pulling the join rigid. Repeat upward, joining rings of 7 to 6, 6 to 5, 5 to 4, 4 to 3, 3 to 2, and finally 2 large squares to the small-square ring. Each join reduces the circumference by approximately 10 cm.
- Fit the cover Slip the sleeve over the rigid cone with the eight-square ring at the base. Ease the fabric along the taper, allowing it to stretch lightly over the sloping surface. At the point, run yarn through the top edge of the small-square ring, draw it closed and secure it. If needed, use a few removable ties through motif spaces near the base to keep the cover in place; do not pull them so tightly that they distort the squares.
Finishing
- Weave in all ends, particularly at ring joins and the gathered point.
- Straighten the motifs by hand on the cone so the eased joins are distributed evenly.
- Keep the openwork tree away from flames, hot bulbs and other heat sources.
Helpful Tips
- Check the coneâs base circumference with a tape measure rather than measuring straight across its base.
- Baste a tier join before whipstitching it permanently if the easing is difficult to distribute.
- A plain, solid-coloured cone shows through the granny-square openings and provides all the structural support.
Framed Mesh Cone Christmas Tree

This giant crochet Christmas tree gets its airy outline from an open mesh draped over a visible cone-shaped frame. The gaps let the structure show through, giving the tree a light, architectural look rather than the solid silhouette of a stuffed decoration.
The frame provides the shape and stability; the crochet is decorative. A few lightweight paper stars suit the open design, but the mesh should not be used to support heavy ornaments or lights.
This is an intermediate project for crocheters who enjoy keeping a repeating mesh even as a shape widens. It works well as a floor display in a spot where the frame can stand securely without being bumped.
Framed Mesh Cone Christmas Tree

Quick-reference card. Follow the complete written instructions below.
Materials
- Yarn: Firm DK-weight cotton in green, approximately 300â400 m. Allow extra if your gauge differs.
- Hook: 4 mm crochet hook, or size needed to obtain the stated gauge.
- Frame: A stable, self-standing cone-shaped plant-support frame, 90 cm tall, with a 100 cm base circumference and approximately a 10 cm circumference 9 cm below the tip. Its sides should taper fairly evenly between those points.
- Other supplies: Tape measure, stitch marker, yarn needle, scissors, short lengths of matching cotton for ties, and suitable protective caps or tape for any exposed wire ends.
Size and Fit
One sample size: approximately 90 cm tall on the specified frame, with a base diameter of approximately 32 cm. The mesh begins about 9 cm below the frame tip and extends approximately 81 cm to the base. The capped tip remains visible. The frame measurements and mesh gauge work together; check both before starting.
Gauge
In the ch-4 mesh, 4 spaces measure approximately 10 cm across and 10 rounds measure approximately 15 cm vertically when gently opened without stretching. Make a mesh swatch to check the fabric. The starting ch-16 ring should measure approximately 10 cm around. Exact fit matters more than hook size.
Abbreviations
US crochet terms.
- ch = chain
- sc = single crochet
- sl st = slip stitch
- sp = space
- rnd = round
Pattern
- Prepare the frame Check that the frame stands securely on a level floor. Cap or thoroughly cover every exposed wire end before fitting the crochet. Mark a point approximately 9 cm below the tip; the frame circumference there should be approximately 10 cm. Keep the crochet clear of sharp joins.
- Starting ring Ch 16 and sl st in the first ch to form a ring, taking care not to twist it. Check that the ring measures approximately 10 cm around. The ring will sit at the marked point below the frame tip.
- Rnd 1 â 4 spaces Working into the starting chains, *sc in the next ch, ch 4, skip the next 3 ch; repeat from * 3 more times. Sl st in the first sc to join. You have 4 ch-4 spaces.
- Rnd 2 â 4 spaces *Sc in the next ch-4 sp, ch 4; repeat from * around. Sl st in the first sc to join. Work this plain-mesh round whenever an instruction below calls for a plain round.
- Rnd 3 â 6 spaces Increase round: beginning with the first ch-4 sp, work *(sc, ch 4, sc, ch 4) in the next ch-4 sp* in the first and third spaces of the previous round. Work (sc, ch 4) in each of its other two spaces. Sl st in the first sc to join. Each doubled space produces two new ch-4 spaces.
- Rnds 4â54 â widen the cone Work plain-mesh rounds except on every third round: rnds 6, 9, 12 and so on through rnd 54. On each of those increase rounds, double two opposite spaces as in rnd 3: work (sc, ch 4, sc, ch 4) in the first space and in the space numbered (half the previous roundâs space count + 1), counting the first space as number 1. Work (sc, ch 4) in every other space. Join each round with a sl st in its first sc. Each increase round adds 2 spaces. After rnd 54, you have 40 ch-4 spaces.
- Fit and secure Slip the mesh over the prepared frame, with the starting ring at the 9 cm mark and rnd 54 at the base. Using separate lengths of cotton, tie the starting ring to nearby uprights, then secure the lower edge to the base in at least eight evenly spaced places. Tie the mesh loosely to uprights at several points between top and bottom so the open spaces remain visible. Knot securely and weave in the ends; do not pull the mesh so tightly that it distorts or tips the frame.
Finishing
- Fasten off after rnd 54 and weave in the crochet ends. Check that all ties are secure and no sharp frame ends are exposed.
- If desired, tie a small number of lightweight paper stars through mesh spaces beside the frame uprights. The mesh is decorative, not a support for heavy ornaments or lights.
- Place the finished tree on a level floor where it will not be knocked over.
Helpful Tips
- Mark the first space of each round so the two increase positions are easy to locate.
- Try the mesh on the frame as you work. It should open gently over the cone rather than hang in deep folds or need hard stretching.
- If the swatch or starting ring does not match the stated measurements, change hook size and recheck before making the full cone. A substantially different frame needs its own gauge and increase plan.
Tiered Branch-Panel Floor Tree

This giant crochet Christmas tree gets its shape from separate, flat triangular branches rather than a continuous cone. Staggered tiers create an open, layered silhouette, with the central trunk visible between the branches.
It is an advanced project for anyone who enjoys precise assembly as much as crochet. Matching branches and an even arrangement are important to the overall shape, while internal reinforcement and a secure central support help the branches project outwards.
Think about where the tree will stand before starting. Its broad lower profile needs room to be seen from several sides, and a stable footing matters for a floor-standing display.
Tiered Branch-Panel Floor Tree

Quick-reference card. Follow the complete written instructions below.
Materials
- Aran-weight cotton yarn: Green for 40 triangular panels and a little brown to cover the visible pole. Buy enough of one dye lot for 20 paired branches; yardage depends on your gauge.
- Crochet hook: 5 mm, or the size needed to obtain a firm fabric at the stated gauge.
- Flexible plastic canvas: Enough to cut 20 triangular inserts, one for each finished branch.
- Branch dowels: Twenty lightweight, smooth 6 mm dowels: four each measuring 38 cm, 31 cm, 24 cm, 18 cm and 10 cm. Sand and cap both ends.
- Central pole and base: One smooth wooden pole approximately 25 mm in diameter, with 100 cm exposed above a purpose-made, weighted floor base. For a 10 cm-deep socket, use a 110 cm pole. Choose a base at least 60 Ã 60 cm, with a securely fixed socket suitable for the completed load.
- Fastenings and tools: Narrow cable ties long enough to go around the pole, strong sewing yarn, a yarn needle, scissors, tape measure, removable markers and a tool for trimming ties flush. Have a suitable smooth pole-end cap ready.
Size and Fit
One sample size: approximately 100 cm tall, measured from the top of the base to the capped pole end. The lowest branches extend approximately 40 cm from the pole, giving an approximately 80 cm branch spread. Dimensions depend on meeting both stitch and row gauge. The base supports the tree; it need not reach the branch tips.
Gauge
14 sc and 14 rows = 10 cm in flat rows of sc, measured without stretching. Make and measure a swatch before cutting canvas or dowels.
Abbreviations
US crochet terms.
- ch = chain
- sc = single crochet
- inc = work 2 sc in the indicated stitch
- st(s) = stitch(es)
Pattern
- Plan the tiers Make four finished branches for each of five tiers, for 20 branches total. Each branch uses two matching panels, so make eight panels at each row count: 56 rows for tier 1 (lowest), 46 for tier 2, 36 for tier 3, 28 for tier 4 and 16 for tier 5 (highest).
- Begin each triangular panel With green yarn, ch 3. Row 1: sc in the second ch from the hook and in the next ch; 2 sc. Ch 1 and turn after every row. The turning ch does not count as a stitch.
- Shape each panel Work sc across on every row except rows 5, 9, 13, 17 and every fourth row thereafter. On each of those increase rows, work inc in the first st, sc across to the last st, then inc in the last st; the row gains 2 sts. Stop after the row count for that tier. Fasten off, leaving a sewing length. At the stated gauge, the five panel lengths are approximately 40, 33, 26, 20 and 11 cm, respectively.
- Prepare the inserts Pair matching panels with their tips and final-row edges aligned. Use each pair as a template to cut one plastic-canvas triangle approximately 8 mm inside the crocheted outline on all sides. Smooth any sharp cut edges. Lay the appropriately sized dowel along the insert from near its tip towards the centre of its wide edge; neither dowel end should protrude beyond the crochet. Secure the dowel to the canvas with strong yarn through canvas holes at intervals along its length.
- Assemble the branches Sandwich one prepared insert between each matching pair of panels. Sew through both crocheted layers around the two sloping edges and across the wide edge, keeping the insert and dowel enclosed. At the wide edge, use a few additional stitches through nearby canvas holes to keep the insert from sliding. Repeat for all 20 branches. Do not rely on crochet alone to support the projecting branches.
- Prepare the support Secure the pole in its weighted base according to the base maker’s instructions, leaving 100 cm exposed. Smooth and cap its upper end. Measured upwards from the top of the base, mark tier centres at 20, 40, 60, 80 and 95 cm. The final-row edge of each branch sits vertically against the pole, centred on its mark, with its tip pointing outwards. At gauge, the tier 1 edges span approximately 10â30 cm in height; the successive tiers have shorter edges.
- Fasten the tiers At the 20 cm mark, position four tier 1 branches around the pole at roughly 90-degree intervals. For each branch, pass two narrow cable ties through secure stitches and canvas holes near opposite ends of its wide edge, then around the pole. Add a third tie at the centre of the wide edge to secure the dowel root against the pole. Tighten the ties so the branch cannot slide, without cutting into the crochet; trim the ends flush. Fit tiers 2â5 at their respective marks in the same way, rotating each tier approximately 45 degrees relative to the one below. Check that adjacent tiers do not obscure the fastenings.
- Cover the visible pole Wrap exposed sections of pole neatly with brown yarn, keeping the branch fastenings accessible for inspection. Secure the yarn ends. Leave the pole-end cap in place; do not cover it with a sharp or loose decoration.
Finishing
- Weave in all yarn ends and check every seam, canvas attachment and branch fastening.
- Check that the pole is firmly retained in its base and that all branch tips and trimmed ties are smooth.
- Place the tree on a level floor and gently check for tipping from every side before decorating. If it rocks, tips or branches droop, correct the support or fastenings before use.
- Use only lightweight decorations. Keep the tree away from flames, heaters and places where children or pets could pull it over.
Helpful Tips
- Match row gauge as well as stitch gauge: row gauge determines how far each branch projects.
- Mark increase rows before starting a batch of panels so paired triangles finish at the same size.
- Cut the plastic canvas only after crocheting a panel at gauge; it must sit inside the sewn edges without forcing them apart.
- A heavier decoration or a different base changes the stability requirement. Do not assume the stated base dimensions alone make the tree tip-proof.
If youâd like to keep building your crochet skills, take a look at crochet Christmas wall hangings.
Dowel-Branch Wall Tree

This giant crochet Christmas tree brings a festive focal point to the wall without taking up floor space. Its horizontal branches grow wider towards the bottom, giving the simple hanging arrangement a clear tree silhouette.
Crocheted sleeves soften the look of the wooden branches while the dowels keep them straight. Suspension cords connect the branches, and a separate strip beneath the lowest branch suggests a trunk. The exposed ends and visible cords give the piece a clean, understated look that suits lightweight decorations.
The outline depends on how the tree hangs, so the cords are adjustable while the branches are being levelled and spaced. Choose a wall fixing suited to both the wall and the finished weight; an ordinary hook should not be assumed to support it.
Dowel-Branch Wall Tree

Quick-reference card. Follow the complete written instructions below.
Materials
- Yarn: Approximately 350â450 m of sturdy aran-weight cotton for the sleeves, cords and trunk.
- Hook: 4 mm crochet hook, or a size that produces sleeves that fit the dowels snugly.
- Dowels: Five 12 mm diameter wooden dowels, cut to 22, 37, 52, 67 and 82 cm.
- Tools: Tape measure, scissors, yarn needle and a drill with a 3 mm bit. Sandpaper is useful for smoothing the dowels and drilled holes.
- Hanging: A wall fixing suitable for the wall type and the finished weight. Do not assume an ordinary hook will support the tree.
Size and Fit
One size: approximately 82 cm wide at the lowest dowel and 105 cm high from the hanging point to the bottom of the trunk, measured after hanging. The hanging point sits about 12 cm above the top dowel; the dowels are spaced about 18 cm apart vertically. The finished height may vary slightly when the cords are adjusted.
Gauge
Target gauge: 18 sc and 20 rows = 10 cm in flat single crochet. Check that a seven-stitch-wide sleeve wraps snugly around a 12 mm dowel with its long edges meeting. If your row gauge differs, work each sleeve to its stated measured length rather than relying on the row totals.
Abbreviations
US crochet terms.
- ch = chain
- sc = single crochet
- sl st = slip stitch
- st(s) = stitch(es)
Pattern
- Prepare the dowels Cut the dowels to 22, 37, 52, 67 and 82 cm. Drill one 3 mm hole through each dowel, 1 cm in from each end. Smooth all cut ends and holes so they will not abrade the cords.
- Make five branch sleeves For each sleeve, ch 8. Row 1: Sc in the second ch from the hook and in each remaining ch; 7 sc. Row 2: Ch 1, turn, sc in each st; 7 sc. Repeat Row 2 until the sleeves measure 18, 33, 48, 63 and 78 cm respectively. At the target gauge these are 36, 66, 96, 126 and 156 rows total. Fasten off, leaving a long tail on each sleeve for sewing.
- Cover the dowels Match each sleeve to the dowel that is 4 cm longer. Centre the sleeve on its dowel, leaving 2 cm of bare wood at each end so both drilled holes remain accessible. Bring the long edges together and sew them edge to edge around the dowel without overlapping them. Secure the sewing ends.
- Make the suspension cords Make two upper cords approximately 32 cm long and eight side cords approximately 36 cm long, measuring each before tying. For each cord, make a chain a little longer than the required length, sl st back along the chain, then measure and fasten off. Leave both ends long enough to secure when tying; the stated cord lengths include the portions used for knots.
- Connect the branches Lay the covered dowels in order from shortest at the top to longest at the bottom. At each side, tie a side cord through the drilled holes of two neighbouring dowels. Use one cord per side per gap, for eight side cords in all. Temporarily hang the assembly and adjust the knots until the dowels are level, centred beneath one another and approximately 18 cm apart vertically. Secure the knots and weave in the ends once satisfied.
- Form the hanging point Tie one upper cord through each hole of the shortest dowel. Bring their free ends together above its centre and tie them into a small hanging loop. Adjust the two sides so the hanging point is approximately 12 cm above the top dowel and the dowel stays level. Secure the knot and weave in the ends.
- Crochet and attach the trunk Ch 10. Row 1: Sc in the second ch from the hook and in each remaining ch; 9 sc. Row 2: Ch 1, turn, sc in each st; 9 sc. Repeat Row 2 until the strip measures approximately 22 cm, or 44 rows at the target gauge. Fasten off with a long sewing tail. Lay the top two rows over the centre front of the lowest sleeve and stitch them securely to the crochet fabric, without sewing around the dowel. The remaining approximately 21 cm hangs below the branch.
Finishing
- Hang the tree using a fixing appropriate to the wall and the finished weight, then check the level and spacing of every branch. Retie the adjustable cords if necessary and secure all final knots.
- Weave in remaining yarn ends. Keep decorations light and avoid adding anything that pulls a branch out of level.
Helpful Tips
- Make one short sleeve first to check its fit. If seven stitches will not meet neatly around your dowel, change hook size or adjust the sleeve width before making the remaining four.
- Measure sleeve lengths along their rows. Each should be 4 cm shorter than its dowel to leave the cord holes exposed.
- Adjust branch spacing while the piece is hanging; equal cord lengths alone will not guarantee equal vertical gaps.
Shaped-Row Wall Christmas Tree
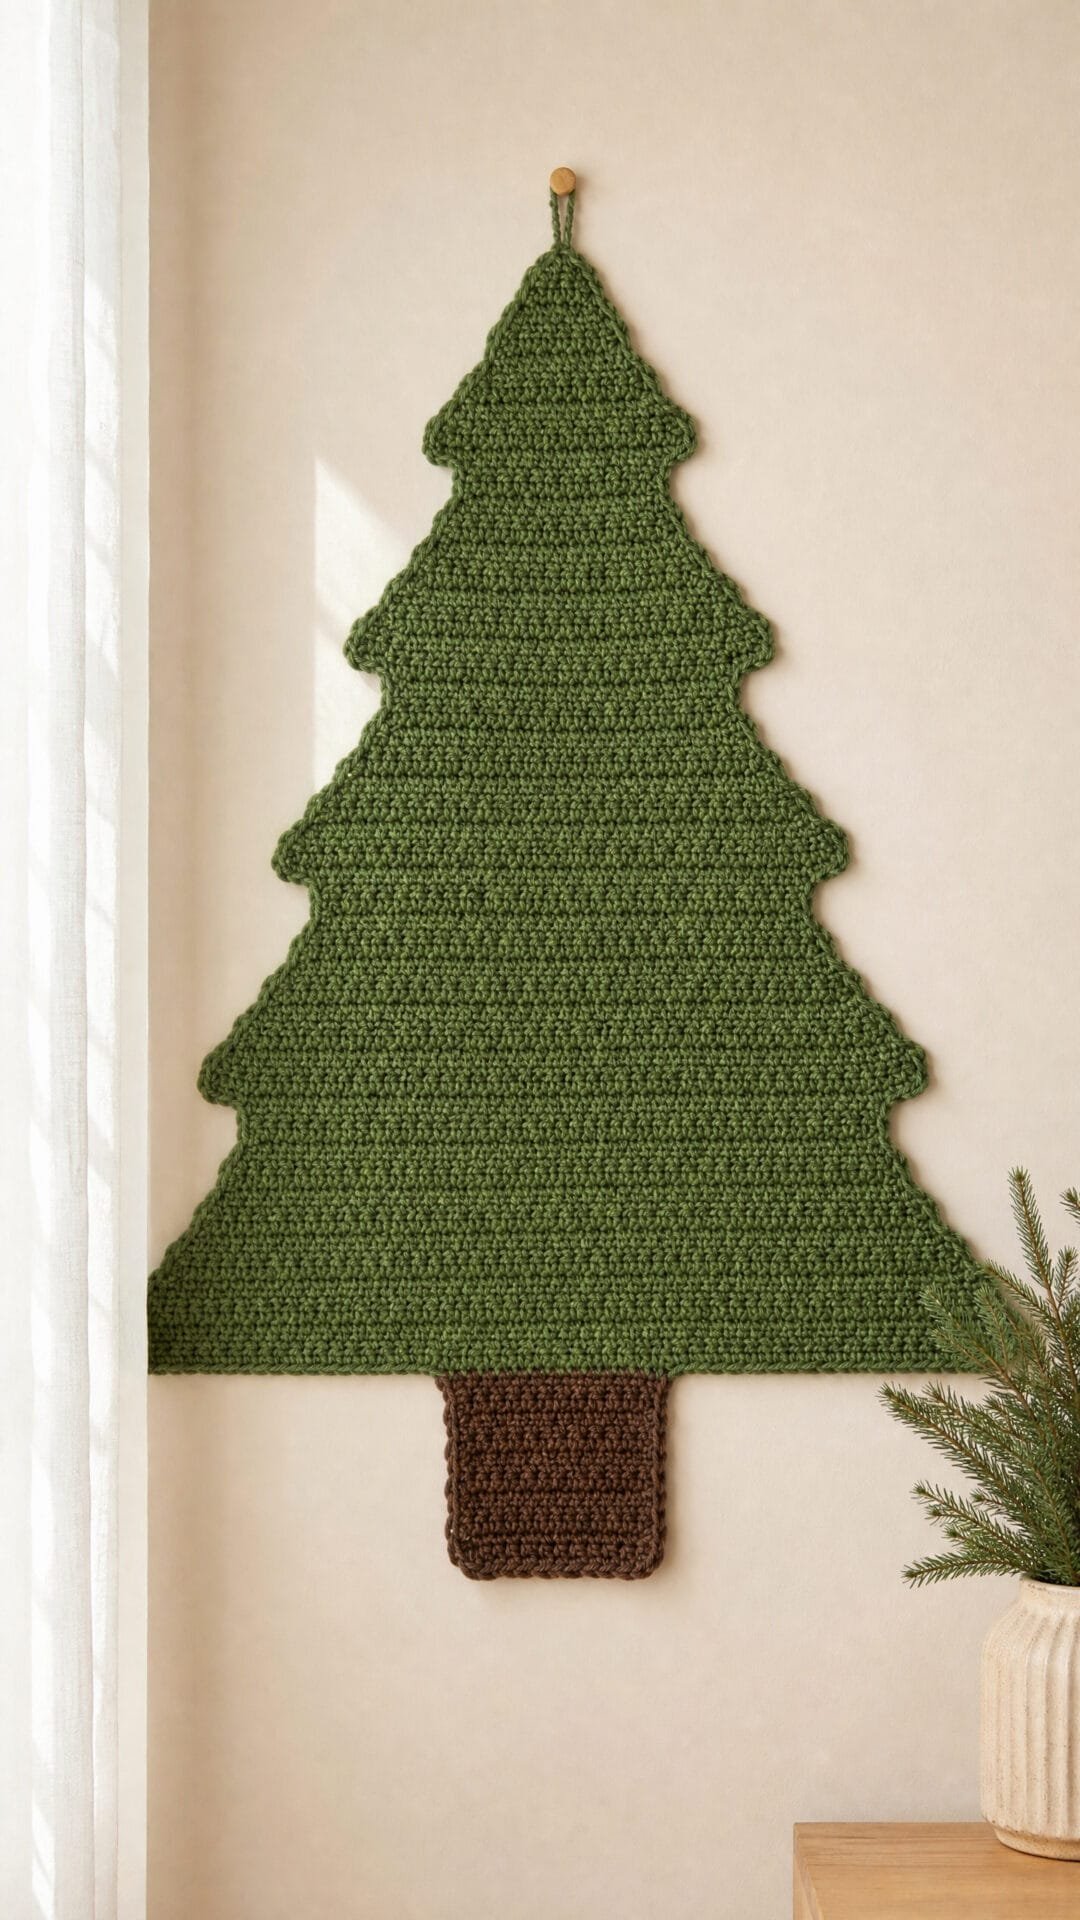
This giant crochet Christmas tree makes a striking wall display without taking up floor space. Its solid panel has a broad lower edge, a pointed top and gently stepped sides that suggest layers of branches.
The tree is worked as one shaped piece, with a separate trunk beneath it. That straightforward construction makes the outline easy to follow, while the full pattern provides the shaping schedule.
Plan where you want to hang the finished tree before you begin. Loops across its upper back help spread the weight, but the wall fixings must be suitable for your wall and the finished piece.
Shaped-Row Wall Christmas Tree

Quick-reference card. Follow the complete written instructions below.
Materials
- Medium-weight green yarn: Approximately 1,000â1,500 m; this is a planning estimate, not a tested quantity. Allow extra if your swatch uses more yarn.
- Medium-weight brown yarn: Approximately 50â100 m for the trunk.
- 5 mm crochet hook: Or the size needed to obtain gauge.
- Tapestry needle, scissors and stitch markers: Markers help identify the trunk position and hanging-loop locations.
- Four suitable wall hooks: Choose fixings rated for the finished tree and appropriate for your wall.
Size and Fit
One sample size: approximately 101 cm wide at the treeâs lower edge and 110 cm tall including the trunk, at the stated gauge. The tree panel is about 100 cm tall; the trunk adds about 10 cm when sewn edge to edge. These are calculated dimensions, not measured results.
Gauge
12 sc and 14 rows = 10 cm in flat single crochet. Make a row-and-stitch swatch, measure its centre without stretching, and change hook size if needed. At this gauge, a 100 cm lower edge calls for about 120 stitches; 121 gives an odd starting count and a centred point. Keep the specified 121-stitch start and 140-row schedule for this sample size. A different starting count would also require a new decrease schedule.
Abbreviations
US crochet terms.
- ch = chain
- sc = single crochet
- sc2tog = single crochet two stitches together; decreases by one stitch
- sc3tog = single crochet three stitches together; decreases by two stitches
- sl st = slip stitch
- st(s) = stitch(es)
Pattern
- Before you begin Work back and forth in rows. Ch 1 to turn after each row; turning chains do not count as stitches. On every decrease row except the final row, sc2tog over the first two stitches, sc across to the last two stitches, then sc2tog over those last two stitches.
- Tree lower section, row 1 With green, ch 122. Sc in the second ch from the hook and in each remaining ch. You have 121 sc.
- Tree lower section, rows 2â80 On every even-numbered row (2, 4, 6 and so on through row 80), work a decrease row as described above. On every odd-numbered row, sc across. Ch 1 and turn after each row. Row 80 ends with 41 sts.
- Tree upper section, rows 81â139 Sc across rows 81 and 82. Then work a decrease row on rows 83, 86, 89 and every third row through row 137. Sc across every other row through row 139. Ch 1 and turn after each row. Row 139 ends with 3 sts.
- Tree point, row 140 Sc3tog over the 3 remaining sts. Fasten off, leaving a tail to weave in.
- Separate trunk With brown, ch 26. Row 1: sc in the second ch from the hook and in each remaining ch (25 sc). Rows 2â14: ch 1, turn, sc across (25 sc). Fasten off, leaving a long sewing tail.
- Attach trunk Lay the tree flat, right side facing you. Along its 121-stitch lower edge, count 48 stitches in from either side and mark stitches 49â73. Place the trunkâs row-14 edge against those 25 centred tree stitches, with the trunk extending below the tree. Sew the edges together without overlapping the panels.
- Make and attach hanging loops With green, make four loops: ch 12, sl st into the first ch to form a ring, and fasten off with a long sewing tail. On the back of the tree, sew two loops firmly near row 80, centred around stitches 5 and 37 of that 41-stitch row. Sew a third near the centre of row 110 (stitch 11 of 21), and the fourth at the point, catching several stitches around rows 137â140 for strength. Stitch each ringâs base through several panel stitches; do not rely on a single loop of yarn.
Finishing
- Weave in ends securely. Lay the panel flat and gently shape its stepped sides; avoid stretching the point.
- Hold the tree against the wall to mark four hook positions corresponding to its loops. Fit suitable hooks, then hang and adjust each loop so the panelâs weight is shared.
Helpful Tips
- Count after every decrease row. Each ordinary decrease row removes two stitches in total.
- A gauge swatch helps you judge both the starting width and the height: 121 stitches give approximately 101 cm, while 140 tree rows plus 14 trunk rows give approximately 110 cm at the stated gauge.
- For a flatter wall display, keep the trunk seam edge to edge rather than placing one panel on top of the other.
Granny-Square Wall Christmas Tree

A granny-square wall Christmas tree brings the familiar texture of a crochet blanket into a festive shape without taking up floor space. Its stepped green outline and contrasting brown trunk read clearly as a tree, even without decorations.
This is a satisfying project for a confident beginner who enjoys making repeatable motifs. Consistently shaped squares give the branches a tidy, graphic look, while the modular design makes the growing tree easy to picture as you work.
Because this is a substantial wall hanging, its support matters as much as its appearance. The design gives each row its own support rather than asking the joins between squares to bear the weight of the tree above.
Granny-Square Wall Christmas Tree
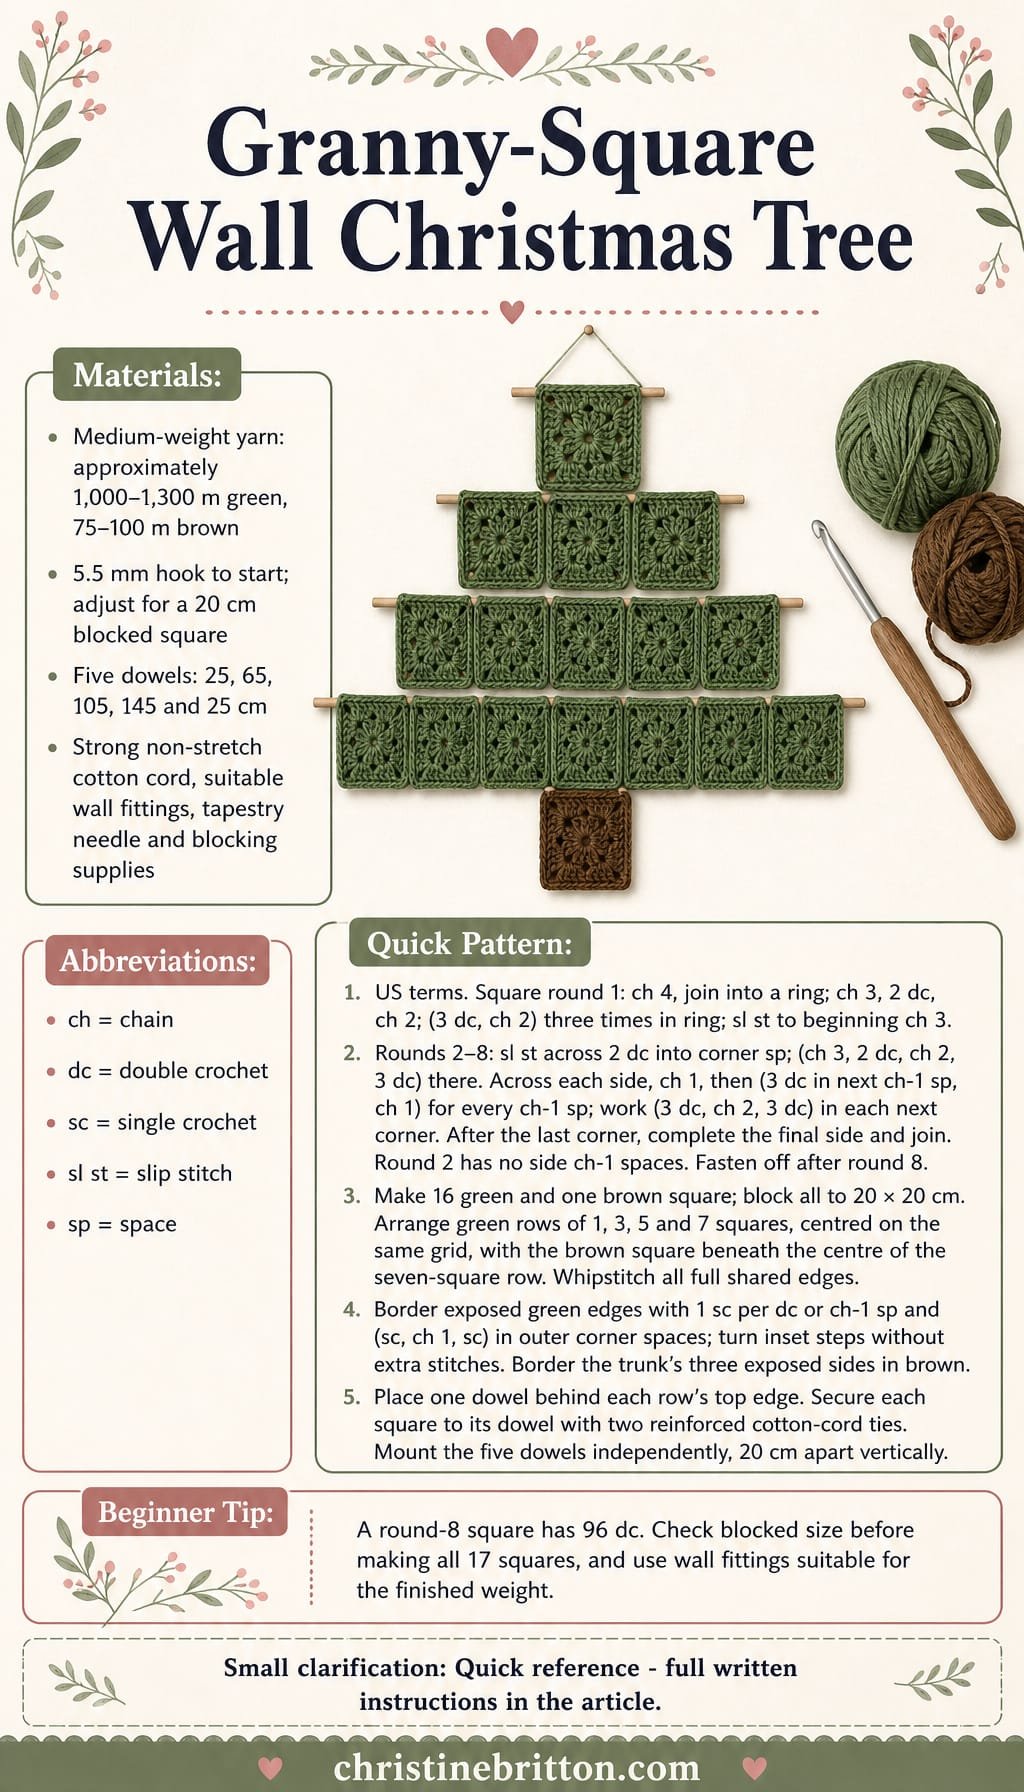
Quick-reference card. Follow the complete written instructions below.
Materials
- Medium-weight yarn: Approximately 1,000â1,300 m of green and 75â100 m of brown. Buy extra if your squares use more yarn at the required size.
- Crochet hook: Start with a 5.5 mm hook; adjust the hook size if needed to achieve the blocked square size.
- Dowels: Five sturdy dowels, approximately 25 cm, 65 cm, 105 cm, 145 cm and 25 cm long.
- Hanging supplies: Strong, non-stretch cotton cord for 34 square ties; suitable wall brackets or hooks for each dowel.
- Other: Tapestry needle, scissors, tape measure, blocking pins and a blocking surface.
Size and Fit
One wall hanging, approximately 140 cm wide across the lowest green row and 100 cm tall before the border, when each square is blocked to 20 Ã 20 cm. The border adds a little to both measurements. The dowel ends extend approximately 2.5 cm beyond their respective rows.
Gauge
One completed eight-round granny square, blocked, measures 20 Ã 20 cm. Make and block a green square before making the rest. If it is too small or large, change hook size; retain eight rounds for every square so the stitch counts and joins match.
Abbreviations
US crochet terms.
- ch = chain
- dc = double crochet
- sc = single crochet
- sl st = slip stitch
- sp = space
Pattern
- Square, round 1 With green or brown yarn, ch 4 and sl st in the first ch to form a ring. Ch 3 (counts as the first dc), 2 dc in the ring, ch 2. Work (3 dc in the ring, ch 2) three times. Sl st in the top of the beginning ch 3. You have four 3-dc groups and four corner ch-2 spaces.
- Square, rounds 2â8 At the start of each round, sl st across the next 2 dc and into the next corner ch-2 sp. Ch 3 (counts as the first dc), 2 dc, ch 2, 3 dc in that corner sp. For each of the next three sides: ch 1; work (3 dc in the next ch-1 sp, ch 1) across any ch-1 spaces on that side; then work (3 dc, ch 2, 3 dc) in the next corner ch-2 sp. After the fourth corner has been worked, ch 1; work (3 dc in the next ch-1 sp, ch 1) across any ch-1 spaces on the final side. Sl st in the top of the beginning ch 3. On round 2 there are no ch-1 spaces to work into, so simply ch 1 between corners. Fasten off after round 8.
- Make and block Make 16 green squares and one brown square. Weave in the ends, then block every square to 20 Ã 20 cm and allow it to dry completely.
- Lay out the tree Place the green squares right side up in four rows of 1, 3, 5 and 7 squares, centring each row beneath the previous one. The centres align vertically, and each wider row projects by one square on each side. Place the brown square beneath the centre square of the seven-square row. All square edges sit on the same 20 cm grid; there are no half-square offsets.
- Join Using green yarn for green-to-green edges and brown yarn where the trunk meets the foliage, whipstitch every full shared edge through matching edge stitches and spaces. Join neighbouring squares within each row, then join each row to the squares directly above it. Join the brown square to the centre green square of the lowest foliage row. Do not sew across exposed edges.
- Narrow border With green yarn, work one round of sc around the exposed outline of the green tree: work 1 sc in each exposed dc and 1 sc in each exposed ch-1 sp. At each exposed outer corner ch-2 sp, work (sc, ch 1, sc); at an inset step, turn without adding stitches. Fasten off. With brown yarn, border only the three exposed sides of the trunk in the same way. Keep the border relaxed so the stepped outline lies flat.
- Support and hang Lay the five dowels behind the top edges of the five rows, using the 25, 65, 105, 145 and 25 cm lengths from top to bottom. For each square, cut two lengths of strong cotton cord. Pass each cord through a top-edge ch-1 sp near an opposite upper corner, loop it around an adjacent dc post for reinforcement, then tie it securely to that rowâs dowel. This gives every square two ties to its own support. Mount each dowel independently on wall fittings suitable for the wall and the finished hangingâs weight, spacing the dowels 20 cm apart vertically. Check that the squares hang straight without relying on the motif joins to support another row.
Finishing
- Weave in any remaining ends and trim the cord tails after the hanging has been adjusted.
- Check the joins and ties, especially around the brown trunk, before displaying the tree.
Helpful Tips
- Number the blocked squares by row before joining so the 1â3â5â7 layout stays centred.
- If your trial square cannot reach 20 cm neatly with a different hook size, choose another yarn-and-hook combination rather than stretching the square to fit.
- Use wall fittings appropriate to the wall construction; do not rely on the crochet border or square joins as hanging points.
Corner-to-Corner Tree Wall Panel

This corner-to-corner wall panel makes the Christmas tree part of the fabric itself. A bold green silhouette and brown trunk stand out against a pale rectangular background, creating a festive hanging without separate appliqué pieces.
The colour chart shows the finished image in horizontal rows, but corner-to-corner crochet crosses that image diagonally. Keeping those two views distinct is the key to placing the branches and trunk accurately. This makes the project a satisfying choice for crocheters who are comfortable with the basic corner-to-corner block and ready to manage colour changes.
The finished appearance also depends on the fabric hanging evenly. Checking the blocked fabric before committing to the panel helps keep its proportions predictable, while a supported top edge helps the tree hang neatly on the wall.
Corner-to-Corner Tree Wall Panel

Quick-reference card. Follow the complete written instructions below.
Materials
- Medium-weight yarn: Allow approximately 700 m pale background yarn, 500 m green and 50 m brown. Quantities are estimates; buy extra if matching dye lots matters.
- Crochet hook: 7 mm, or the size needed for the target blocked block gauge.
- Hanging rod: An approximately 80 cm dowel or rod, no more than 15 mm in diameter.
- Other: Yarn needle, scissors, tape measure, stitch markers and optional small bobbins for colour changes.
Size and Fit
One wall panel: approximately 100 cm tall by 72.5 cm wide after blocking, excluding the rod pocket. It has 21 blocks across and 29 blocks vertically. To change its finished dimensions while keeping the chart, multiply the blocked width and height of one block by 21 and 29 respectively.
Gauge
Target blocked gauge: 10 corner-to-corner blocks measure 34.5 cm in either direction. Make a pale 7-by-7-block swatch, block it as you intend to block the panel, and measure across five central blocks; aim for 17.25 cm. Adjust the hook size before starting the panel. These are target measurements, not a claim of a tested gauge.
Abbreviations
US crochet terms.
- ch = chain
- dc = double crochet
- sc = single crochet
- sl st = slip stitch
- sp = space
- P, G, B = pale background, green tree and brown trunk; a number after a letter gives the number of consecutive blocks in that colour
Pattern
- Read the chart Each chart row has 21 blocks and is listed from left to right, starting at the bottom of the finished panel. Number its columns 1â21 and its rows 1â29. A block in column x and chart row y is worked on crochet diagonal x + y â 1. Mark off blocks on the chart as each diagonal is completed; crochet diagonals do not follow the printed chart rows.
- Colour chart, rows 1â10 1: P9 B3 P9; 2: P9 B3 P9; 3: P9 B3 P9; 4: P5 G11 P5; 5: P5 G11 P5; 6: P4 G13 P4; 7: P4 G13 P4; 8: P3 G15 P3; 9: P3 G15 P3; 10: P2 G17 P2.
- Colour chart, rows 11â20 11: P2 G17 P2; 12: P1 G19 P1; 13: P3 G15 P3; 14: P4 G13 P4; 15: P4 G13 P4; 16: P5 G11 P5; 17: P5 G11 P5; 18: P6 G9 P6; 19: P6 G9 P6; 20: P7 G7 P7.
- Colour chart, rows 21â29 21: P5 G11 P5; 22: P6 G9 P6; 23: P7 G7 P7; 24: P8 G5 P8; 25: P9 G3 P9; 26: P10 G1 P10; 27: P21; 28: P21; 29: P21.
- Corner-to-corner block For the first block, ch 6 and dc in the fourth, fifth and sixth chains from the hook. To begin an increasing diagonal, turn, ch 6 and dc in the fourth, fifth and sixth chains from the hook; sl st into the next block’s ch-3 sp. For each further block, ch 3, work 3 dc into that same sp and sl st into the next block’s ch-3 sp. On a fully increasing diagonal, work a block into every available sp.
- Shape the rectangle Work 49 crochet diagonals in total. Diagonals 1â21 increase from 1 to 21 blocks. Lay the work out so the edge that reaches 21 blocks will be the bottom, and the edge still growing will run up the side; the first block is the bottom-left chart square. On diagonals 22â29, hold the 21-block edge steady while the other edge grows: each diagonal has 21 blocks. Diagonals 30â49 decrease by one block each, ending with one block. Check chart coordinates whenever you turn so the trunk stays centred above the bottom edge.
- Work a non-growing edge If a diagonal starts at an edge that must not grow, turn and sl st across the three dc of the first block and into its ch-3 sp; ch 3 and work 3 dc in that sp for the first new block. If a diagonal ends at an edge that must not grow, sl st into the last available block’s ch-3 sp but do not make a new block there. Otherwise, begin with the ch-6 increasing block or work into that last sp as usual. Thus a diagonal with one growing edge retains its block count, while a diagonal with neither edge growing loses one block.
- Manage colours Work each complete block in its chart colour. Join the next colour for a new block before its starting chain, or use it for the joining sl st into the sp where that block begins. Use separate pale bobbins on opposite sides of the tree where helpful. Keep yarn changes and short carried strands on the back; cut and rejoin instead of floating yarn across long stretches of background.
- Top rod pocket With the right side facing, join pale yarn at a top corner along the 21-block edge. Work 3 sc evenly into the exposed edge of each block for 63 sc. Turn, ch 1 and sc in each sc. Repeat this sc row until the added flap measures approximately 5 cm deep. Fold the flap to the back and sew its long edge securely to the back of the panel, leaving both short ends open for the rod. Check that the rod passes through before closing the seam.
Finishing
- Weave in all ends on the back without pulling the fabric out of shape.
- Block the panel to approximately 72.5 cm by 100 cm, following the yarn care instructions. Allow it to dry fully before hanging.
- Slide the rod through the pocket and attach a suitable hanging cord to the rod ends, or use wall supports rated for the finished piece.
Helpful Tips
- Mark every fifth chart column and chart row to make diagonal colour placement easier to check.
- The pocket belongs on the pale top edge above chart row 29, not on the trunk end.
- A firm hanging rod helps support the width of this large panel; do not rely on a cord sewn directly to its top corners.
Filet Crochet Tree Wall Panel

This filet crochet wall panel makes the Christmas tree the centre of attention. Filled blocks form a bold silhouette, while open mesh lets the wall colour show through. Hang it against a contrasting background to make the shape especially clear.
The design is worked as a rectangle rather than shaped into separate branches. Its mirrored layout makes the tree easy to follow as it widens from the trunk and narrows towards the tip, and helps you spot a block that looks out of place.
This is a satisfying project if you enjoy the steady rhythm of filet crochet and want a decoration with a clean, graphic look. Give it space to be seen as a whole, and the tree needs little extra adornment.
Filet Crochet Tree Wall Panel

Quick-reference card. Follow the complete written instructions below.
Materials
- Smooth bulky-weight cotton yarn: Approximately 800â1,100 m in one colour. This is a planning allowance, not a tested yarn quantity.
- Crochet hook: 8 mm, or the size needed to achieve the blocked filet gauge.
- Two rods: Approximately 90 cm long and no more than 2 cm in diameter, with smooth ends.
- Other supplies: Tapestry needle, stitch markers, tape measure, blocking supplies and suitable hanging cord and wall fixing.
Size and Fit
The sample layout is approximately 80 cm wide by 100 cm tall after blocking, excluding the projecting rod ends and hanging cord. It has 32 filet squares across and 39 chart rows above one foundation row. Make and block a swatch before starting: the finished dimensions depend on your square width and row height. If your gauge differs, multiply the blocked width of one square by 32 and the blocked height of one row by 40 to estimate the panel size; choose rods about 10 cm longer than the resulting width.
Gauge
After blocking, 4 filet squares across and 4 rows high measure 10 Ã 10 cm. Include both open and filled squares in the swatch. The foundation row is counted as one row when estimating the finished height.
Abbreviations
US crochet terms.
- ch = chain
- dc = double crochet
- sc = single crochet
- O = open filet square: ch 2, skip the next two dc or the ch-2 space, dc in the next dc
- F = filled filet square: dc in each of the next two dc, or work 2 dc into the next ch-2 space; then dc in the next dc
Pattern
- How to read the layout Work the panel from bottom to top. Each row has 32 squares. Numbers before O or F tell you how many consecutive squares to work; for example, 14 O, 4 F, 14 O uses all 32 squares. The squares share their upright dc posts. The layout is symmetrical, so it reads the same after every turn.
- Foundation row Ch 99. Dc in the fourth ch from the hook and in every remaining ch. The skipped 3 ch count as the first dc: 97 dc in total. Turn.
- Work a filet row Ch 3 at the start of each chart row; this counts as the first edge dc. For each O, ch 2, pass over the next two dc or the next ch-2 space, and dc in the next dc. For each F, dc in the next two dc or work 2 dc into the next ch-2 space, then dc in the next dc. Work all 32 squares and turn, except after the final row. Each row spans 97 stitch positions when the chains are counted.
- Rows 1â4: trunk Work 14 O, 4 F, 14 O on each row.
- Rows 5â34: tree Work each of the following layouts for two rows, in order: 1 O, 30 F, 1 O; 2 O, 28 F, 2 O; 3 O, 26 F, 3 O; 4 O, 24 F, 4 O; 5 O, 22 F, 5 O; 6 O, 20 F, 6 O; 7 O, 18 F, 7 O; 8 O, 16 F, 8 O; 9 O, 14 F, 9 O; 10 O, 12 F, 10 O; 11 O, 10 F, 11 O; 12 O, 8 F, 12 O; 13 O, 6 F, 13 O; 14 O, 4 F, 14 O; 15 O, 2 F, 15 O.
- Rows 35â39: space above the tree Work 32 O on each row. Fasten off. Block the panel to square the mesh without stretching it beyond the intended dimensions.
- Make two rod-pocket bands For each band, ch to approximately the blocked width of the panel. Sc in the second ch from the hook and in each ch across; turn. Ch 1, sc across and turn for every subsequent row until the band measures approximately 10 cm deep. Check its width after the first few rows and restart with a different starting chain if needed. Make both bands the same width as the blocked panel, then block them to fit.
- Attach the pockets Place one band across the reverse of the top 10 cm of the panel and the other across the reverse of the bottom 10 cm. Sew each band’s two long edges to the panel, catching yarn strands without pulling the mesh out of shape. Leave both short ends of each band open for the rods.
Finishing
- Weave in ends without closing the open squares.
- Slide a rod through each pocket and check that the panel hangs flat. Add a secure hanging cord to the top rod.
- Hang from a wall fixing appropriate for the weight of the cotton panel and rods.
Helpful Tips
- Mark the first and last dc of each row so the panel does not gain or lose an edge post.
- Count each two-row tree tier before moving to the next narrower layout.
- If a filled square sits above an open square, place its two interior dc into the ch-2 space, not into the individual chains.
Tapestry Crochet Tree Banner

This tapestry crochet banner makes the Christmas tree part of the fabric itself, rather than adding a separate appliqué. The broad green silhouette stands out against the cream background, while a short brown trunk gives the design a simple, graphic finish.
It is an appealing project if you want a large seasonal wall decoration without a lot of small motifs to assemble. The dense fabric helps the treeâs edges look crisp, and the uncluttered design leaves room for other decorations nearby.
The main challenge is keeping the colour boundaries tidy as the tree narrows. It is worth pausing occasionally to check that the outline looks balanced and the fabric remains flat; small inconsistencies are easier to spot before they become part of the finished display.
Tapestry Crochet Tree Banner

Quick-reference card. Follow the complete written instructions below.
Materials
- Chunky cotton-blend yarn: Cream for the background and border, green for the tree, and brown for the trunk. Plan yarn quantities from your gauge swatch: the chart contains 5,232 cream, 2,736 green and 96 brown single crochet stitches, before the border and finishing.
- Crochet hook: Size needed to obtain gauge; try 7 mm as a starting point.
- Hanging rod: Approximately 85â90 cm long and no more than 15 mm in diameter.
- Other supplies: Tapestry needle, scissors, stitch markers and a measuring tape.
Size and Fit
One size, approximately 80 cm wide by 110 cm long when worked to the target gauge, bordered and folded into a rod pocket. The unbordered fabric is 84 stitches wide and 96 rows long. Gauge, border depth and the pocket fold will affect the finished measurements.
Gauge
Target gauge: 11 single crochet stitches and 8.5 rows per 10 cm in firm, unbordered fabric. Make a generous swatch and measure its centre; change hook size if needed. Keep colour changes as firm as the rest of the fabric.
Abbreviations
US crochet terms.
- ch = chain
- sc = single crochet
- sl st = slip stitch
- RS = right side
- WS = wrong side
Pattern
- Chart and colour changes Work from the bottom of the banner upwards. Every row has 84 sc; the turning ch 1 never counts as a stitch. A chart instruction of âcream 6, green 72, cream 6â, for example, means work that many consecutive sc in each colour. The designs are centred, so their colour sequences read the same from either end of a row. Change colour during the last pull-through of the stitch before a new colour begins. Use separate cream supplies for the background on either side of the tree or trunk. At each colour boundary, twist the yarns on the WS to close gaps; carry an unused strand across only a stitch or two, never across a wide section.
- Foundation and rows 1â8 With cream, ch 85. Row 1: sc in the second ch from the hook and in each ch across (84 sc). Rows 2â8: ch 1, turn, sc in each stitch across (84 sc per row).
- Trunk, rows 9â16 For each row, work cream 36, brown 12, cream 36. Ch 1 and turn after each row except the final row of the banner. All eight trunk rows have 84 sc.
- Tree, rows 17â88 Work the following 18 four-row bands in order. For band number k, starting with k = 0 and ending with k = 17, work four rows of cream (6 + 2k), green (72 â 4k), cream (6 + 2k). Thus rows 17â20 are cream 6, green 72, cream 6; rows 21â24 are cream 8, green 68, cream 8. Continue narrowing by four green stitches and adding two cream stitches at each side every four rows. The final band, rows 85â88, is cream 40, green 4, cream 40. Ch 1 and turn after each row.
- Top background, rows 89â96 Work all 84 sc of each row in cream. Join a cream supply at the beginning of row 89 rather than carrying yarn across the tree tip. Ch 1 and turn after rows 89â95. Fasten off after row 96.
- Stabilising border With the RS facing, join cream at a corner. Round 1: work 84 sc along each horizontal edge and 96 sc along each vertical edge, placing one sc in each row-end on the vertical edges. In addition, work 3 sc into the gap at each of the four corners. Join with a sl st to the first sc (372 sc). Round 2: ch 1, work 1 sc in each stitch around, except work 3 sc in the middle stitch of each three-stitch corner from Round 1. Join with a sl st (380 sc). Fasten off.
- Rod pocket Lay the banner RS down, with row 96 at the top. Fold the top four rows towards the WS so the bordered top edge lies at approximately row 89. Sew that edge to the WS along row 89, without stitching through to the RS. Leave both short ends of the fold open so a rod can slide through. The folded top rows form the pocket; do not fold the tree tip into it.
Finishing
- Weave in ends on the WS, taking care not to pull the colour boundaries out of line.
- Gently block the banner flat to square the edges; follow the yarn labelâs care instructions.
- Slide the rod through the pocket and hang it with suitable cord or wall fittings.
Helpful Tips
- Check that each four-row tree band has the same green width throughout before starting the next band.
- Keep the two cream background supplies separate during the colourwork to avoid long floats that could distort the banner.
- If the fabric feels loose enough to sag when hung, try a smaller hook and recheck the swatch dimensions before making the banner.
Fringed Branch Wall Tree

This giant crochet Christmas tree gives you the presence of a festive tree without taking up floor space. Its narrow centre supports a series of widening, fringed branches, creating a soft silhouette that sits flat against the wall rather than forming a freestanding cone.
The long fringe is the feature that gives this design its movement and texture. It also makes the tree a good choice for a simple display: the green yarn creates a recognisable outline without relying on heavy decorations.
Choose a display spot away from busy walkways, where the fringe will not be tugged or brushed constantly. Loose fringe should remain out of young childrenâs reach.
Fringed Branch Wall Tree

Quick-reference card. Follow the complete written instructions below.
Materials
- Medium-weight green yarn: Allow approximately 600â900 g, depending on your stitch size and the fullness of the fringe. Keep extra yarn for trimming and repairs.
- Crochet hook: Choose a size that makes firm, even single crochet with your yarn; 5 mm is a starting point.
- Yarn needle and scissors: For sewing the branches in place and trimming the fringe.
- Tape measure and removable markers: For sizing the strips and marking their positions.
- Wall fixings: Use several fixings suitable for your wall and the finished treeâs weight.
Size and Fit
One sample size: approximately 110 cm from the top of the spine to the lowest fringe tips, excluding wall fixings. The spine is 100 cm long. Nine branch strips, spaced 10 cm apart, measure approximately 12, 20, 28, 36, 44, 52, 60, 68 and 76 cm across, from top to bottom. Fringe drops increase from 12 cm at the top branch to 20 cm at the bottom branch.
Gauge
Exact gauge is not essential because the lengths are measured as you work. Make a firm fabric; a six-stitch-wide spine should be roughly 3â4 cm wide. Measure the completed branch strips and adjust their starting chains if needed.
Abbreviations
US crochet terms.
- ch = chain
- sc = single crochet
- st = stitch
- RS = right side
Pattern
- Spine Ch 7. Row 1: Sc in the second ch from the hook and in each remaining ch (6 sc). Each following row: Ch 1, turn, sc in each of the 6 sts. Repeat until the spine measures 100 cm. Fasten off, leaving a long tail for securing the top.
- Mark branch positions Lay the spine flat with its top at 0 cm. Mark points 10, 20, 30, 40, 50, 60, 70, 80 and 90 cm down from the top. These marks indicate where the LOWER edge of each branch strip will sit.
- Make nine branch strips Work one strip at each target width, in this order: 12, 20, 28, 36, 44, 52, 60, 68 and 76 cm. For each strip, make a foundation chain slightly longer than the target width. Row 1: Sc in the second ch from the hook and in each remaining ch. Row 2: Ch 1, turn, sc in each st. Fasten off. Measure the completed strip across; if necessary, remake it with more or fewer starting chains so it is close to its target width. Keep both rows the same stitch count.
- Attach the strips Lay the spine RS up. Centre the shortest strip across the spine with its lower long edge at the 10 cm mark. Sew the central section of the strip firmly through the spine, without gathering either piece. Repeat with the remaining strips in increasing width order, aligning their lower edges with the marks at 20â90 cm. Secure each seam and weave in its ends.
- Add fringe Working along the lower long edge of each strip, attach one folded strand to each sc with a larkâs head knot. For the strips from top to bottom, plan fringe drops of 12, 13, 14, 15, 16, 17, 18, 19 and 20 cm, measured down from that stripâs lower edge. Cut strands approximately twice the planned drop plus 8 cm to allow for folding, knotting and trimming. Pull each knot snugly against its stitch; leave the fringe untrimmed for now.
- Hang and trim Secure the spine to the wall at its top and at several further points down its length, including near the bottom. Use fixings appropriate to the wall and support the treeâs weight at more than one point. Once it hangs straight, trim each row of fringe to its planned drop. The lowest strip sits 90 cm below the top, so its 20 cm fringe gives a hanging height of approximately 110 cm.
Finishing
- Check that every branch seam and fringe knot is secure.
- Weave in remaining yarn ends and straighten the fringe by hand.
- Keep loose fringe out of young childrenâs reach.
Helpful Tips
- Mark the centre of each strip before sewing so the branches extend evenly on both sides of the spine.
- Measure fringe from the lower edge of its strip, not from the strip above.
- Trim only after hanging: the weight of the yarn may change how the fringe falls.
Woven Crochet Strip Wall Tree

This giant crochet Christmas tree makes a striking wall display without taking up floor space. Broad green strips cross in a visible weave, giving the tree a geometric look that works well with simple, modern Christmas decorations.
The graduated strips create a stepped triangular silhouette: the outer edges suggest a diagonal tree shape, while the open spaces between the strips keep the piece from looking solid or heavy. The woven texture provides plenty of visual interest even without ornaments.
This is an intermediate project suited to someone who enjoys careful layout as much as crochet. A clear stretch of wall will let the outline stand out, whether the tree is displayed on its own or used as a backdrop for other seasonal decorations.
Woven Crochet Strip Wall Tree

Quick-reference card. Follow the complete written instructions below.
Materials
- Aran-weight cotton yarn: Approximately 1.2â1.6 kg in green; the amount depends on the yarn and your gauge. Buy enough from one dye lot.
- 5 mm crochet hook: Adjust the hook size if needed to make a firm fabric at the stated gauge.
- Hanging bar: A sturdy wooden dowel or similar bar, at least 90 cm long, with wall fixings rated for the finished weight.
- Other supplies: Yarn needle, scissors, tape measure, pins, and strong clear hanging line or other suitable support cord.
Size and Fit
One wall-hanging size: approximately 88 cm wide at the base and 98 cm from the top of the crochet to the bottom. With the bar positioned just above it, the display is about 100 cm high. The dimensions are approximate and depend on gauge.
Gauge
12 single crochet stitches and 14 rows = 10 cm in firm, unblocked single crochet fabric. Each seven-stitch strip is approximately 6 cm wide. Check a sample strip before making the full set.
Abbreviations
US crochet terms.
- ch = chain
- sc = single crochet
- st(s) = stitch(es)
Pattern
- Make each strip Ch 8. Row 1: Sc in the second ch from the hook and in each remaining ch: 7 sc. Row 2: Ch 1, turn; sc in each of the 7 sts. Repeat Row 2 until the strip has the specified total number of rows, counting Row 1. Fasten off, leaving a tail suitable for securing an end. The turning ch does not count as a stitch.
- Vertical strips Make one centre strip of 134 rows; two strips of 106 rows; two of 78 rows; two of 50 rows; and two of 22 rows. At the stated gauge, their lengths are approximately 96, 76, 56, 36 and 16 cm respectively.
- Horizontal strips Make two strips of 11 rows, two of 39 rows, two of 67 rows, two of 95 rows and two of 123 rows. Their lengths are approximately 8, 28, 48, 68 and 88 cm respectively.
- Lay out the tree On a large flat surface, place the 134-row vertical strip at the centre. Place the pairs of vertical strips 10, 20, 30 and 40 cm to either side of its centre line, shortest on the outside. Align all their bottom ends. Their top ends will rise in steps towards the centre. Lay the horizontal strips across them, centred from left to right and spaced approximately 10 cm apart from centre line to centre line. From top to bottom, use lengths of 8, 8, 28, 28, 48, 48, 68, 68, 88 and 88 cm. The top two strips cross only the centre vertical; each successive pair reaches one additional vertical strip on each side. Adjust the spacing slightly so each newly reached vertical begins at the top edge of its first crossing and the bottom ends align near the lower edge of the last horizontal strip.
- Weave Beginning with the top horizontal strip, take it under the centre vertical. Take the second horizontal strip over the centre vertical. At every subsequent crossing, alternate over and under across that horizontal strip; on the next horizontal strip, reverse the direction at each shared vertical. Check that neighbouring crossings form a checkerboard weave. Keep every strip flat and its ends evenly placed.
- Secure and hang Pin the layout, then use matching yarn to sew each crossing discreetly through both strips without pulling the fabric out of shape. Secure the strip ends and weave in all tails. Position the hanging bar just above the top of the crochet. Tie the top of the centre vertical to the bar, then add strong, unobtrusive support lines from the bar to the top ends of the vertical strips at approximately 30 and 40 cm on both sides of centre. Adjust the lines until the tree hangs flat with its bottom level. Hang the bar from appropriately rated wall fixings.
Finishing
- Check the outline while the tree is hanging; adjust the support lines and any loose crossings before trimming their ends.
- If needed, lightly dampen and reshape individual strip ends. Let the work dry fully before hanging it against the wall.
Helpful Tips
- The stepped ends of the horizontal strips form the treeâs diagonal-looking outer edges. Centre each pair carefully for a balanced outline.
- A small sample strip is more useful than forcing the stated row counts to a different gauge. If your gauge differs, adjust your hook before making all 19 strips.
- Use wall fixings suited to your wall and the weight of the finished cotton hanging; do not rely on a decorative hook without a suitable rating.
Hexagon-Motif Wall Tree

This giant crochet Christmas tree turns individual hexagons into a honeycomb-style wall display. The staggered green motifs give the branches stepped, angled edges, while a small brown motif trunk makes the silhouette unmistakable.
Its modular construction makes the layout easy to see before the motifs are joined. Consistent blocking matters here: evenly shaped hexagons help the seams sit flat and keep the outline balanced.
The finished piece brings the presence of a large Christmas tree to a wall without taking up floor space. Its open, geometric outline works as a decoration in its own right, whether you prefer a simple festive look or a backdrop for lightweight ornaments.
Hexagon-Motif Wall Tree

Quick-reference card. Follow the complete written instructions below.
Materials
- Medium-weight yarn: Approximately 1,600â2,000 m green and 100â150 m brown. Yardage is an allowance, not a measured requirement.
- Crochet hook: Start with 4.5â5 mm; adjust as needed to achieve the blocked motif measurement.
- Yarn needle: For flat seams, reinforcement and weaving in ends.
- Blocking supplies: Mat, rustproof pins and a ruler.
- Wall hooks: Three fixings appropriate to the wall and the finished treeâs weight.
Size and Fit
With each blocked hexagon measuring 10 cm across its opposite flat sides, the assembled tree is approximately 98 cm tall and 90 cm wide at its lowest green row, before hanging loops. These dimensions assume regular, consistently blocked hexagons. To change size, use the blocked flat-to-flat width F: the width is approximately 9F and the height approximately 9.81F.
Gauge
One completed four-round hexagon, blocked, measures 10 cm across opposite flat sides. Make and block a sample before committing to all 48 motifs; change hook size if needed. Measure the flat-to-flat width, not the point-to-point diameter.
Abbreviations
US crochet terms.
- ch = chain
- dc = double crochet
- sl st = slip stitch
- sp = space
- rnd = round
Pattern
- Solid hexagon: rnd 1 With green yarn, make a magic ring. Ch 3 (counts as the first dc), dc in the ring, ch 2; then (2 dc in the ring, ch 2) five times. Join with a sl st to the top of the beginning ch-3 and tighten the ring. You have six 2-dc groups separated by six corner ch-2 spaces: 12 dc.
- Solid hexagon: rnd 2 Sl st into the next corner ch-2 sp. Ch 3 (counts as dc), dc, ch 2, 2 dc in the same corner sp. Dc in each dc up to the next corner sp. Work (2 dc, ch 2, 2 dc) in that sp. Continue around, working dc in every dc between corners and (2 dc, ch 2, 2 dc) in each remaining corner sp. Join to the top of the beginning ch-3: 36 dc and six corner ch-2 spaces.
- Solid hexagon: rnds 3â4 For each rnd, sl st into the next corner ch-2 sp. Ch 3 (counts as dc), dc, ch 2, 2 dc in that sp. Dc in every dc up to the next corner; work (2 dc, ch 2, 2 dc) in that corner sp. Repeat around and join to the beginning ch-3. Rnd 3 has 60 dc; rnd 4 has 84 dc. Fasten off after rnd 4.
- Make and block the motifs Make 45 green hexagons and three brown hexagons, all using the same four-round instructions. Weave in the starting ends. Block every motif to the same flat-to-flat width, keeping the six corners distinct, and let dry completely.
- Lay out the tree Place every hexagon with a point at the top and bottom. Number rows from the tip downward. Green rows 0â8 contain 1, 2, 3, 4, 5, 6, 7, 8 and 9 motifs respectively. Centre each row beneath the row above: odd-numbered rows straddle the treeâs centre line; even-numbered rows have one motif centred on it. Put two brown motifs side by side in row 9, centred beneath the green tree, and one brown motif centred beneath them in row 10. Each lower row nestles against the sloping edges of the row above. The staggered outer edges need no half-hexagon fillers.
- Join Pin the layout, then use matching yarn and a yarn needle to whipstitch every pair of touching motif edges. Join neighbouring motifs within each row and all touching sloping edges between rows, including the green-to-brown and brown-to-brown joins. With wrong sides together, catch corresponding outer loops of the edge stitches and the corner spaces; keep the stitches loose enough for each seam to lie flat. Do not sew across edges on the outside of the tree.
- Reinforce and hang With green yarn, sew a second pass through the seams beside the top motifâs two lower sloping edges. Reinforce the exposed upper corner space of that motif and the exposed upper outside corner spaces of the leftmost and rightmost motifs in green row 2. At each reinforced corner, attach doubled green yarn, ch 12 through both strands, then sl st back into the same corner space to form a hanging loop. Fasten off securely and weave the ends through several stitches. Hang from three wall hooks positioned to meet the loops without pulling the tree out of shape; use fixings suitable for the finished weight.
Finishing
- Weave in all remaining ends on the back.
- Lay the joined tree flat and ease the seams into shape. If needed, lightly re-block it and allow it to dry before hanging.
Helpful Tips
- Block the sample motif before buying yarn for the whole project: the blocked flat-to-flat width controls both finished dimensions.
- Photograph the pinned layout before joining so the brown trunk and staggered green rows stay in order.
- Do not hang the tree from the tip alone; use all three reinforced loops.
For another related project collection, browse crochet Christmas table runners.
Giant Advent Pocket Tree
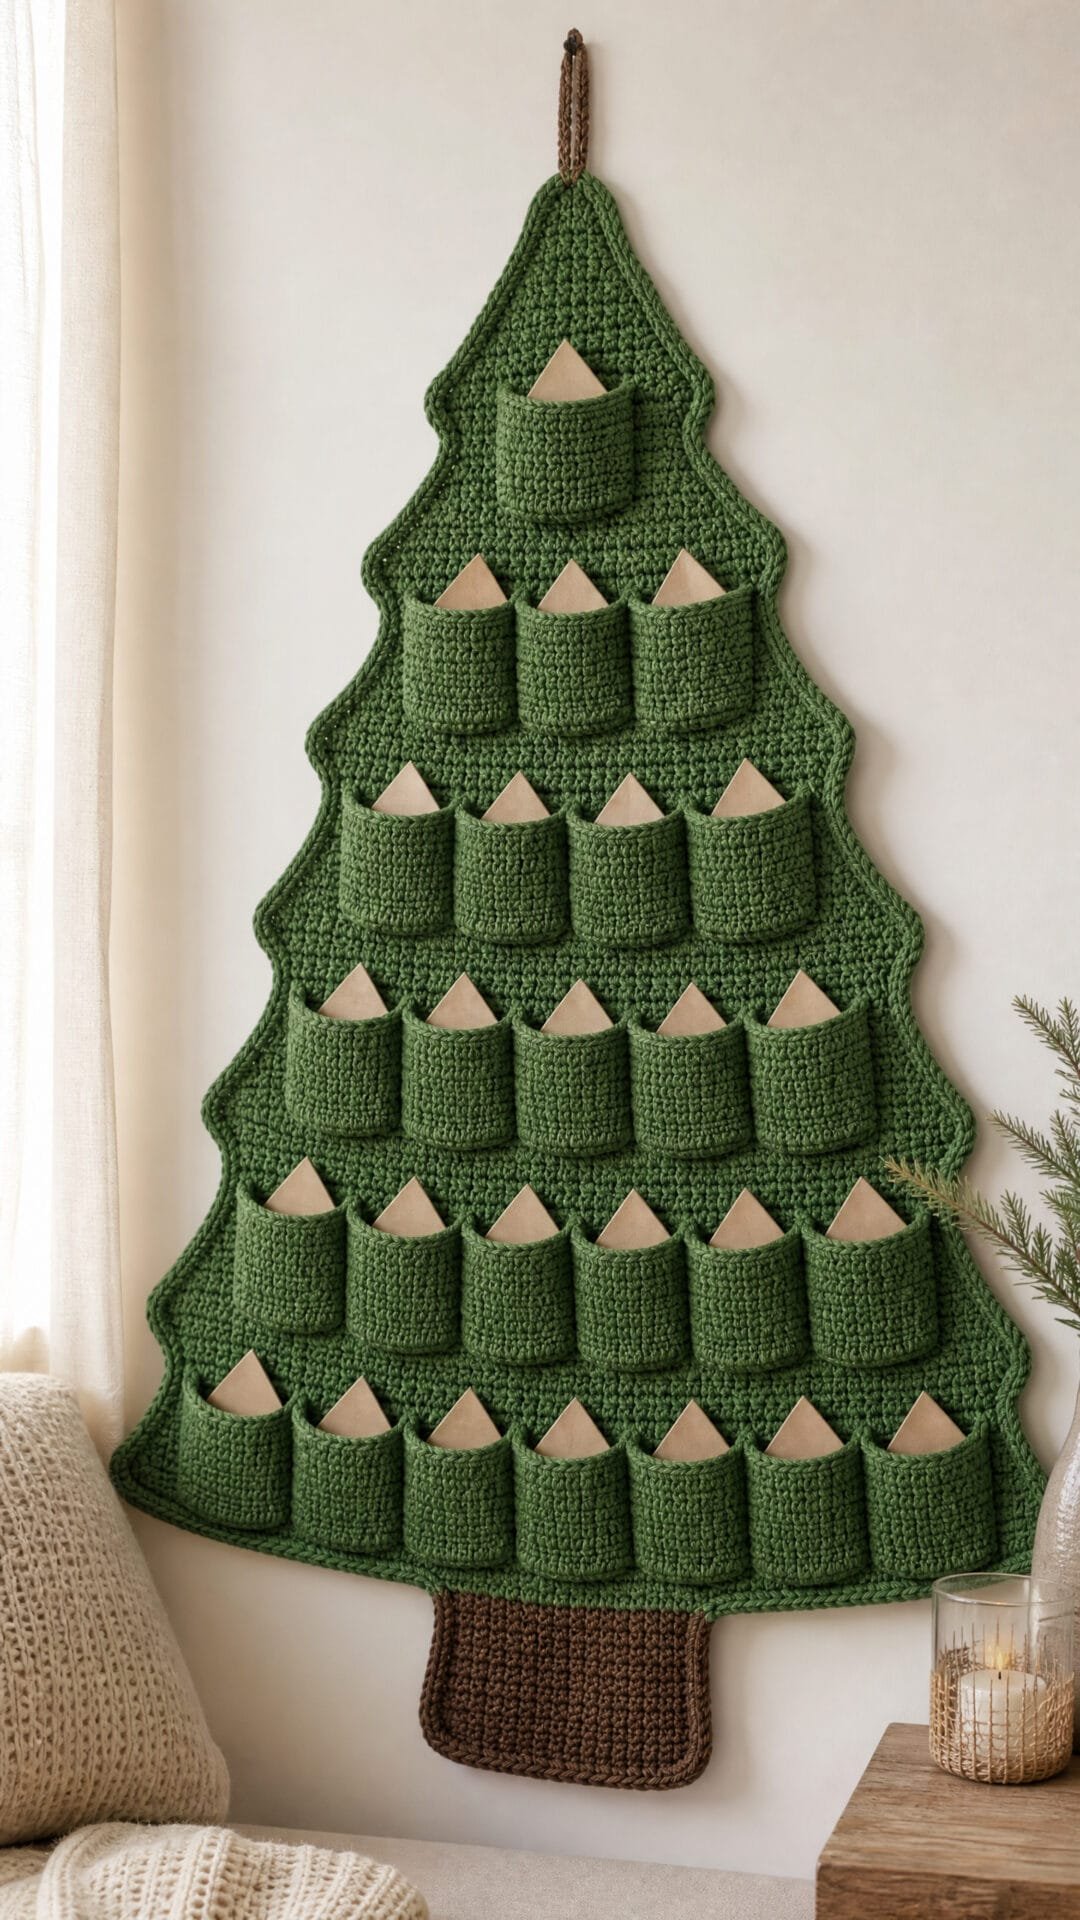
This giant crochet Christmas tree turns an empty wall into an Advent display. Its solid green silhouette provides a calm backdrop for tidy bands of pockets, with each opening accessible for a daily paper note or a very lightweight treat.
The shaped backing narrows towards the top, so pocket placement matters more here than on a rectangular hanging. Paper templates let you judge the spacing across each band before anything is attached, particularly where the tree becomes slimmer.
This is a decorative wall hanging rather than storage for gifts. Keep the contents light and choose a secure hanging position where the broad lower edge can lie comfortably against the wall.
Giant Advent Pocket Tree
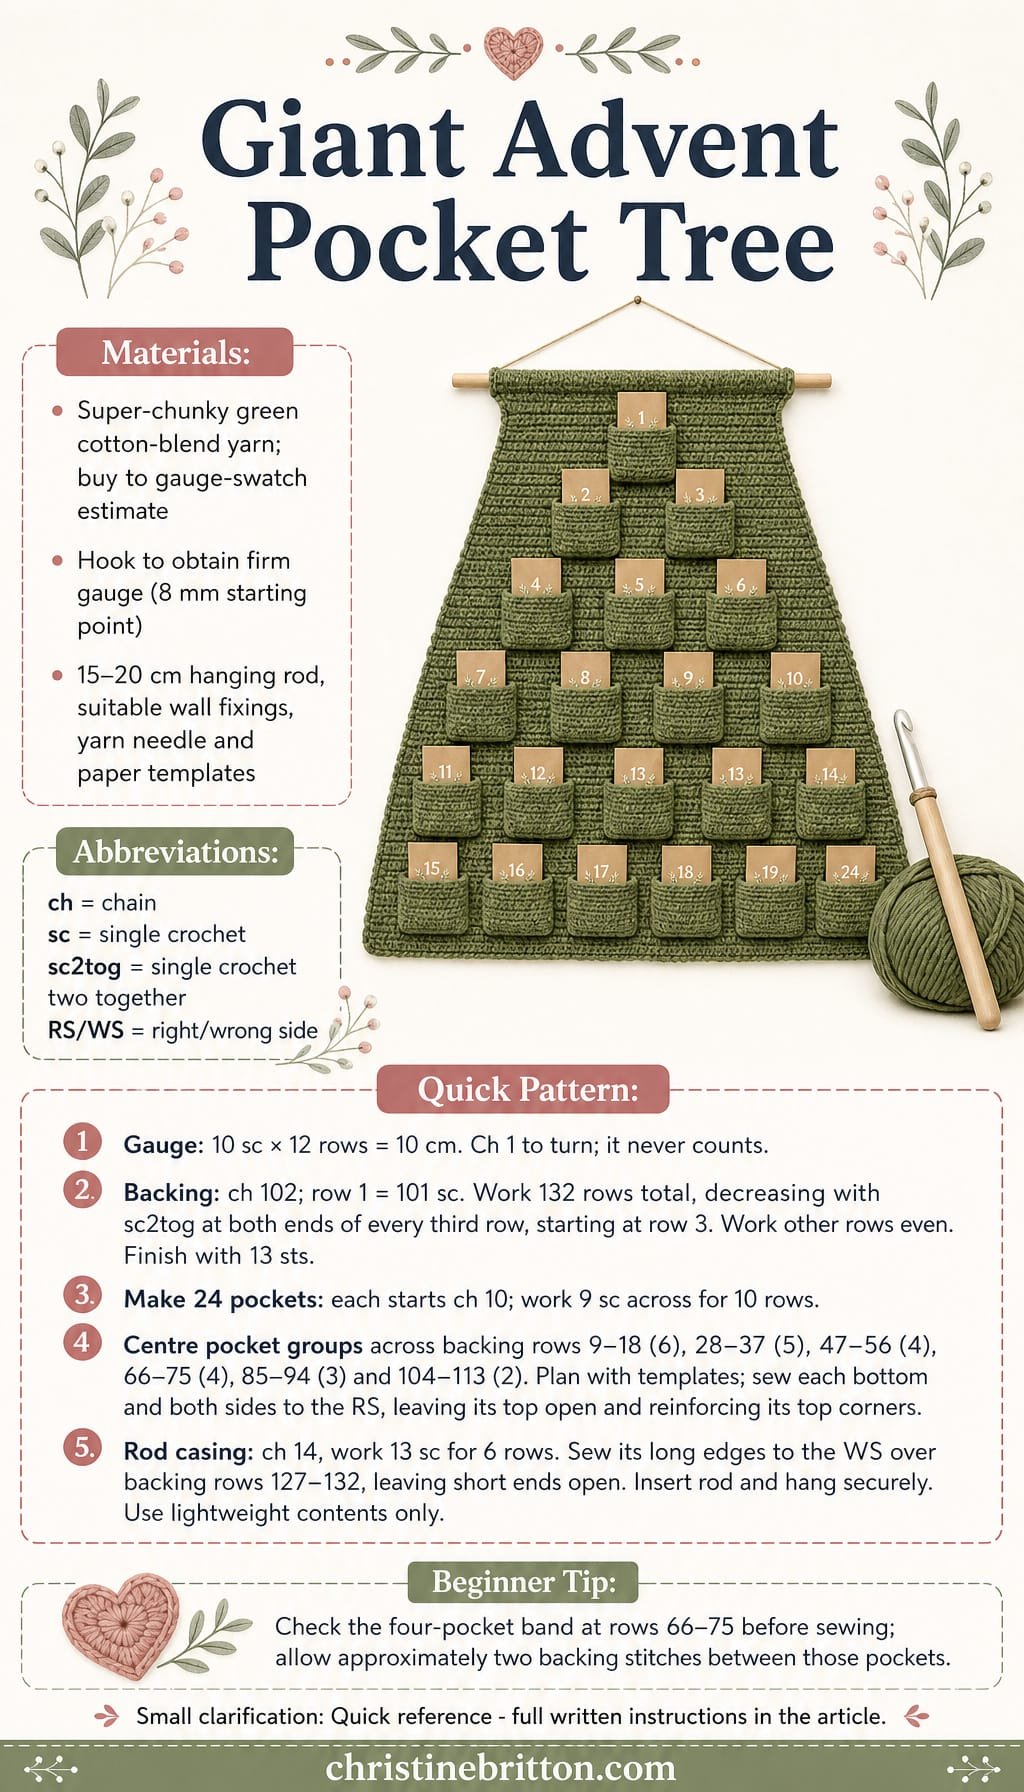
Quick-reference card. Follow the complete written instructions below.
Materials
- Super-chunky cotton-blend yarn: Green for the backing, 24 pockets and rod casing. Buy enough of one yarn to meet gauge; as a planning estimate, allow about 100 times the weight of your 10 cm square gauge swatch. This includes an allowance for seams and yarn variation.
- Crochet hook: Size needed to obtain gauge and make a firm fabric; 8 mm is a starting point.
- Hanging rod: A smooth, sturdy rod approximately 15â20 cm long that will pass through the finished casing, plus suitable wall fixings.
- Notions: Yarn needle, stitch markers, ruler, scissors and paper for pocket-placement templates. Optional discreet wall fixings for the lower corners.
Size and Fit
One size: approximately 110 cm tall and 101 cm wide at the base before any optional edging. Each pocket is approximately 9 cm wide and 8 cm deep. The finished size depends on meeting gauge. The narrow top hangs from a rod; discreet lower-corner fixings can help the wide base lie flat against the wall.
Gauge
10 single crochet stitches and 12 rows = 10 cm in firm, unblocked fabric. Make and measure a swatch before starting. A fabric with large gaps is unsuitable for the pockets.
Abbreviations
US crochet terms.
- ch = chain
- sc = single crochet
- sc2tog = single crochet two stitches together; one decrease
- st(s) = stitch(es)
- RS / WS = right side / wrong side
Pattern
- Before you begin Work in turned rows. Ch 1 to turn; it does not count as a stitch. Mark the RS of the backing. The row numbers below run upwards from the wide base. Make a paper rectangle approximately 9 Ã 8 cm for each pocket and plan the layout before sewing.
- Tree backing: rows 1â132 Ch 102. Row 1: sc in the second ch from the hook and in each ch across; turn. (101 sc.) Row 2: ch 1, sc in each st; turn. On every third row thereafterârows 3, 6, 9 and so on through row 132âch 1, sc2tog over the first 2 sts, sc in each st until 2 sts remain, sc2tog over the last 2 sts; turn unless this is row 132. On all other rows, ch 1, sc in each st; turn. Each decrease row removes 2 sts. Row 132 has 13 sts. Fasten off, leaving a tail to weave in.
- Make 24 pockets For each pocket, ch 10. Row 1: sc in the second ch from the hook and in each ch across; turn. (9 sc.) Rows 2â10: ch 1, sc in each st; turn except after row 10. Fasten off, leaving a long tail for sewing. All 24 pockets have 9 sts across and 10 rows.
- Plan the pocket rows Lay the backing RS up, with row 1 at the bottom. Centre pockets across these backing-row bands, placing each pocket’s bottom along the lower numbered row and leaving its top edge open at the higher numbered row: 6 pockets over rows 9â18; 5 over rows 28â37; 4 over rows 47â56; 4 over rows 66â75; 3 over rows 85â94; and 2 over rows 104â113. Leave approximately 3 backing stitches between pockets in each band, except the four-pocket band at rows 66â75, where approximately 2 stitches between pockets gives better side margins. The backing is widest at the bottom of each band: use the narrower, upper edge when checking that a layout fits. Leave the spaces between pocket bands clear.
- Attach the pockets Pin or mark all 24 paper templates first and check their spacing. Remove one template at a time and place a pocket on the RS with its starting-chain edge at the bottom. Using its sewing tail or a separate length of yarn, sew through the pocket and backing along the bottom and both sides. Do not sew the top edge shut. Take an extra small reinforcing stitch at each top corner; keep these stitches clear of the opening. Repeat for every pocket.
- Rod casing Ch 14. Work 13 sc across for 6 rows, turning with a ch 1 that does not count as a stitch. Fasten off with a long sewing tail. On the WS of the tree tip, centre the casing horizontally over backing rows 127â132. Sew its long edges to the backing near rows 127 and 132. Leave both short ends open so the rod can slide through. Check that the stitching is secure without pulling the tip out of shape.
- Hang Insert the rod through the casing and hang it from suitable wall fixings. If needed, secure the two lower corners discreetly to help the broad silhouette lie flat. Use the pockets only for paper notes or very lightweight treats; the tree is not designed to carry heavy gifts.
Finishing
- Weave in all ends securely, particularly at pocket corners and the rod casing.
- Smooth the backing into shape and check that all 24 pocket openings remain accessible.
- Hang securely and keep the pockets’ contents lightweight.
Helpful Tips
- Make the gauge swatch in the same firm fabric you intend to use for the backing; adjust the hook if the fabric has noticeable gaps.
- Position every paper pocket template before sewing the first pocket. The four-pocket band at rows 66â75 has the least spare width.
- Avoid stretching the backing while sewing: its sides narrow as the row numbers increase.
Giant Tree-Shaped Floor Cushion

This giant crochet Christmas tree brings a soft, playful shape to a festive room. Its stepped green branches and brown trunk make the silhouette easy to recognise, while the deep side edge gives it the plump feel of a floor cushion rather than a flat decoration.
Designed to rest on the floor, it can serve as a decorative accent or a spot for casual seating; it is not intended to stand upright. The shaped fabric liner helps keep the filling contained, particularly around the branch corners, so the outline stays comfortably defined.
Giant Tree-Shaped Floor Cushion

Quick-reference card. Follow the complete written instructions below.
Materials
- Bulky yarn: Durable green yarn for two tree panels and the gusset, plus brown yarn for two trunks. Buy sufficient yarn for two 82-row tree panels, two 8-row trunks and a 308-stitch by 12-row gusset; yardage depends on your yarn and gauge.
- Crochet hook: 6.5 mm, or the size needed to obtain gauge.
- Liner and filling: Closely woven cotton fabric, matching sewing thread and polyester cushion filling.
- Other: Tapestry needle, sewing needle, scissors, tape measure and stitch markers.
Size and Fit
One sample size: approximately 90 cm tall from trunk base to tree tip, 64 cm wide across the lowest branches and 12 cm deep, based on the stated gauge. Check that these dimensions suit the intended floor space.
Gauge
10 sc and 10 rows = 10 cm in flat single crochet. Make a swatch and adjust hook size if necessary; both stitch and row gauge affect the finished silhouette.
Abbreviations
US crochet terms.
- ch = chain
- sc = single crochet
- st(s) = stitch(es)
- RS = right side
Pattern
- Working notes Ch 1 to turn at the end of each row; the turning ch does not count as a stitch. Work into each stitch unless a row specifies otherwise. At each stepped narrowing row, leave the stated number of stitches unworked at BOTH ends of the previous row: after turning, skip that number at the beginning, work across, and stop with the same number remaining. Do not decrease gradually.
- Green tree panels â make two With green, ch 65. Row 1: sc in second ch from hook and each ch across (64 sc). Rows 2â12: sc across (64). Row 13: leave 4 sts unworked at each end as described in Working notes; work 56 sc. Rows 14â24: sc across (56). Row 25: leave 4 sts unworked at each end; work 48 sc. Rows 26â36: sc across (48). Row 37: leave 4 sts unworked at each end; work 40 sc. Rows 38â48: sc across (40). Row 49: leave 4 sts unworked at each end; work 32 sc. Rows 50â60: sc across (32). Row 61: leave 4 sts unworked at each end; work 24 sc. Rows 62â68: sc across (24). Row 69: leave 4 sts unworked at each end; work 16 sc. Rows 70â74: sc across (16). Row 75: leave 4 sts unworked at each end; work 8 sc. Rows 76â78: sc across (8). Row 79: leave 1 st unworked at each end; work 6 sc. Row 80: repeat this narrowing for 4 sc. Row 81: repeat for 2 sc. Row 82: ch 1, turn, skip the first st and sc in the second st (1). Fasten off. The foundation edge is the bottom of the tree.
- Brown trunks â make two With brown, ch 17. Row 1: sc in second ch from hook and each ch across (16). Rows 2â8: sc across (16). Fasten off. Sew the last row of one trunk to the centre 16 stitches of each tree panelâs foundation edge: stitches 25â40, counting from either end. Keep the trunks extending below the trees and match the panels so their RS will face outwards.
- Outline edging On each assembled tree-and-trunk panel, work one round of green sc around the outside silhouette. Work 1 sc in each exposed stitch along the tree base (24 on either side of the trunk), 1 sc in each of the 16 trunk foundation chains, 1 sc in each row end up both 8-row trunk sides, 1 sc in each row end along both 82-row tree sides, 1 sc in each exposed stitch across the horizontal branch steps, and 1 sc in the top stitch. Do not edge the concealed 16-stitch tree-to-trunk seam. The branch steps expose 63 stitches in total, giving 308 edging stitches per panel. Keep corners neat without adding extra stitches; use markers to identify the trunk corners and tree tip. Fasten off.
- Gusset With green, ch 309. Row 1: sc in second ch from hook and each ch across (308). Rows 2â12: sc across (308). Fasten off, leaving yarn for sewing. Sew the two short ends together to make a loop, taking care not to twist it. Each long edge has 308 stitches and the gusset is approximately 12 cm deep at gauge.
- Make the inner liner Use an assembled crochet panel as a template to draw two matching fabric tree-and-trunk shapes. Mark a stitching line approximately 0.5 cm inside the crochet outline, then add a 1 cm seam allowance outside that line before cutting. Measure around the marked stitching line. Cut a fabric gusset 13 cm wide and as long as that measured perimeter plus 2 cm for its short-end seam. Sew the gusset short ends together, then sew its long edges to the two fabric shapes with 1 cm seams. Leave an opening along one straight section for filling. Clip fabric seam allowances at corners where needed, without cutting the stitching. Turn right side out, fill until comfortably plump rather than rigid, and close the opening securely.
- Assemble the cover With RS facing out, sew one long edge of the crocheted gusset to the 308-stitch edging of the front panel, matching one gusset stitch to one edging stitch. Sew the other long edge to the back panel in the same way, leaving an opening along a straight section large enough to insert the filled liner. Insert the liner, settle it into the branch corners and trunk, then sew the remaining opening closed. Keep all seams secure for floor use.
Finishing
- Weave in all yarn ends securely.
- Shape the filled cushion by hand so the liner reaches each stepped branch without straining the crochet.
- Spot-clean or follow the care instructions for the yarn, fabric and filling used.
Helpful Tips
- Place markers at every change in branch width while making the second panel; matching the steps makes the gusset easier to sew on.
- If the edging puckers at a corner, ease the fabric and crochet into position rather than adding stitches: each panel edge must still have 308 stitches.
- For a washable cover, consider a removable liner arrangement before closing the final crochet seam.
Giant Tree Silhouette Floor Rug

This giant crochet Christmas tree brings a festive silhouette to the floor rather than the wall. Its pointed top, stepped green branches and short brown trunk give it a recognisable tree shape without raised decorations underfoot.
The branch outline depends on firm, even fabric. Keep your tension consistent and pay particular attention where the edges change direction: tight edges can curl, while excess fullness can make a branch wave. A low-profile border helps the shape remain clear without creating a bulky edge.
This is a floor covering, so grip matters as much as appearance. Use it only where it lies flat and stays securely in place, especially in a space where people will walk across the branches.
Giant Tree Silhouette Floor Rug

Quick-reference card. Follow the complete written instructions below.
Materials
- Washable cotton rug yarn: Approximately 900â1,200 m green and 80â120 m brown. Allow extra if your gauge or yarn usage differs.
- Crochet hook: 7 mm, or the size needed for a firm, flat fabric at the stated gauge.
- Washable non-slip rug backing: Enough to cover the finished tree and trunk, cut slightly inside their edges.
- Other supplies: Stitch markers, tape measure, yarn needle, scissors and strong thread suitable for securing the backing.
Size and Fit
One sample size: approximately 100 cm from point to trunk end and 95 cm across the widest green row at the stated gauge, before allowing for the narrow border. The green panel has 108 rows; the trunk adds 12 rows. Check the rug against the space where it will be used.
Gauge
12 sc and 12 rows = 10 cm in firm, flat rows before the border. Make a swatch and wash and dry it according to the yarn label before checking gauge. A different row gauge changes the length; a different stitch gauge changes the width.
Abbreviations
US crochet terms.
- ch = chain
- sc = single crochet
- sc2tog = single crochet two stitches together
- sl st = slip stitch
- st(s) = stitch(es)
Pattern
- Before you begin Work the green panel in turned rows. Ch 1 to turn after every row unless fastening off; the turning ch never counts as a st. An increase row begins with 2 sc in the first st, has 1 sc in each middle st and ends with 2 sc in the last st. A decrease row begins with sc2tog over the first 2 sts, has 1 sc in each middle st and ends with sc2tog over the last 2 sts. On an even row, work 1 sc in every st. Keep the side edges relaxed rather than pulling the turning chains tight.
- Green point, rows 1â30 With green, ch 3. Row 1: sc in the second ch from the hook and in the next ch; 2 sc. Rows 2â30: work an increase row on every even-numbered row and an even row on every odd-numbered row. You have 32 sc after row 30.
- First branch step, rows 31â40 Rows 31â32: work a decrease row on each row; 28 sc after row 32. Rows 33â40: work an increase row on every row; 44 sc after row 40.
- Middle tier, rows 41â66 Work an increase row on every even-numbered row and an even row on every odd-numbered row; 70 sc after row 66.
- Second branch step, rows 67â76 Rows 67â68: work a decrease row on each row; 66 sc after row 68. Rows 69â76: work an increase row on every row; 82 sc after row 76.
- Lower tier, rows 77â108 Work an increase row on every even-numbered row and an even row on every odd-numbered row; 114 sc after row 108. Fasten off green.
- Brown trunk, rows 1â12 Count 45 sts in from either end of green row 108. With brown, join in the next st (the 46th st), ch 1 and work 1 sc in each of sts 46â69; 24 sc. This is trunk row 1. Ch 1 and turn. For trunk rows 2â12, work 1 sc in each of the 24 sts, ch 1 and turn after rows 2â11 only. Fasten off. The 45 unworked green sts on each side form the exposed bottom edges of the tree.
- Low-profile border Join green at an exposed green bottom edge. Work one round of sc around the green outline, placing approximately 1 sc in each row end along the sides and 1 sc in each exposed st along the bottom. Work 3 sc at the point and 2 sc at each outer bottom corner. At each inward turn where a branch step or trunk meets an edge, use just 1 sc rather than adding corner sts. Change to brown at the trunk, working approximately 1 sc in each trunk row end and 1 sc in each st across its end, with 2 sc at each outer trunk corner. Change back to green where the trunk meets the opposite exposed green edge. Join with a sl st and fasten off. Adjust spacing along row ends if the border ripples or draws in; do not add another round.
Finishing
- Weave in ends securely. Wash and dry the rug according to the yarn label, then lay it flat and smooth the branch edges and corners without stretching them.
- Once completely dry, cut the washable non-slip backing to the rugâs silhouette, approximately 1â2 cm inside its edges. Follow the backing manufacturerâs instructions and secure it around the perimeter and at regular points across the centre so it cannot bunch or shift.
- Lay the rug on its intended floor and check that the backing grips, the branch edges lie flat and no corners catch feet. Do not use it where it slides or creates a trip hazard.
Helpful Tips
- Mark rows 30, 40, 66 and 76 so you can identify the branch sections while working.
- If a branch edge curls, check that each turned row contains the stated number of sts and that the border has not been worked too tightly. If it waves, reduce border sts along that section rather than adding another round.
- A firm fabric and a single sc border keep the rug lower-profile than a raised decorative edging.
Tree-Shaped Sofa Throw

A giant crochet Christmas tree need not stand upright to make an impression. This tree-shaped sofa throw spreads across a seat or sofa back, where its stepped outline reads clearly while the fabric remains soft enough to drape.
The broad, straight sections give this project a graphic look without asking you to shape branches within individual rows. It suits a simple colour scheme, letting the silhouette do the decorative work alongside cushions and other Christmas textiles.
If you plan to adapt it for a particular sofa, consider both the space available across the seat and how far you want the tip and trunk to extend. The patternâs adjustment notes use your own stitch and row gauge to help you plan those proportions before you begin.
Tree-Shaped Sofa Throw

Quick-reference card. Follow the complete written instructions below.
Materials
- Medium-weight washable yarn: Green for the bands and border, and brown for the trunk. Allow approximately 2,400â3,000 m in total; the amount will vary with yarn and tension.
- Crochet hook: 5 mm, or the size needed to obtain gauge.
- Yarn needle: For joining bands and weaving in ends.
- Stitch markers and tape measure: For marking band centres and checking dimensions.
Size and Fit
Sample size: approximately 140 cm from tip to bottom of trunk after edging, and approximately 140 cm across the widest green band before edging. The green tree is 119 cm long before edging; the trunk adds 19 cm. The single-round border adds a small amount to the overall measurements. The fabric is intended to lie loosely across a sofa.
Gauge
14 hdc stitches and 10 hdc rows = 10 cm in worked fabric. Check both stitch and row gauge before making the bands.
Abbreviations
US crochet terms.
- ch = chain
- hdc = half double crochet
- sc = single crochet
- sl st = slip stitch
- st(s) = stitch(es)
Pattern
- Before you begin Work seven separate green rectangles. Each is 17 rows high. Number them 1 to 7 from the widest bottom band to the narrowest tip band. Each band is 28 stitches narrower than the one below it. Ch 2 at the start of an hdc row does not count as a stitch.
- Green bands Make bands of 196, 168, 140, 112, 84, 56 and 28 hdc stitches, respectively. For each band, ch the required stitch count plus 2. Row 1: hdc in the third ch from the hook and in each remaining ch; turn. Rows 2â17: ch 2, hdc in each st across; turn after each row except the last. Fasten off, leaving a long tail for sewing. Count the stitches in every row so that each band keeps straight sides.
- Trunk With brown yarn, ch 30. Row 1: hdc in the third ch from the hook and in each remaining ch; turn. Rows 2â19: ch 2, hdc in each of the 28 sts across; turn after each row except the last. Fasten off, leaving a long sewing tail. The trunk measures approximately 20 cm wide by 19 cm long before edging.
- Join the tree Lay the bands flat with their long edges horizontal and their centres aligned. Join the top edge of Band 1 to the foundation edge of Band 2, matching one stitch to one stitch across all 168 stitches of Band 2. This leaves 14 exposed stitches at each end of Band 1’s top edge. Use a yarn needle and a loose whipstitch through corresponding edge loops, without gathering the fabric. In the same way, join each successive band above the previous one. Every join leaves 14 exposed stitches at each end of the wider band’s top edge. The unjoined top edge of Band 7 forms the tip.
- Attach the trunk Centre the trunk beneath the foundation edge of Band 1. Sew its 28-stitch top edge to the middle 28 stitches of that edge, matching one stitch to one stitch. This leaves 84 exposed stitches on either side of the trunk. Keep the seam flexible.
- Border With green yarn, join at any point on the outside edge and work one round of sc around the entire tree-and-trunk silhouette. On exposed horizontal edges, work one sc in each stitch or foundation-chain position. On vertical row ends, work seven sc over each complete group of five rows, spaced as evenly as possible; work three sc over the final two rows of a 17-row band, or six sc over the final four rows of the 19-row trunk. At each outward-pointing corner, work three sc in the corner position. At each inward step where a ledge meets the next band, and where the trunk meets Band 1, work one sc in the corner position rather than adding extra stitches. Adjust spacing slightly if the border begins to pull or ripple. Sl st to the first sc and fasten off.
- Adjusting the size For a different width, choose an even number N of stitches for the tip band and trunk. Make seven bands with 7N, 6N, 5N, 4N, 3N, 2N and N stitches. Each join then leaves N ÷ 2 exposed stitches at either side; the trunk leaves 3N exposed stitches at either side of the bottom edge. At your stitch gauge, estimate the widest width as 7N ÷ stitches per cm. For a different length, choose one row count H for every band and a row count T for the trunk: the unedged length is approximately (7H + T) ÷ rows per cm. Allow a small amount for the border, then work all seven bands to H rows and the trunk to T rows.
Finishing
- Weave in all ends securely, taking care not to tighten the joins.
- Lay the throw flat and smooth the stepped edges into shape. Wash and dry according to the yarn label; do not stretch the corners while drying.
Helpful Tips
- Mark the centre stitches before sewing so the tree remains symmetrical.
- A loose sewing seam helps the joined bands drape like a throw rather than forming rigid ridges.
- Check row gauge as well as stitch gauge: seven bands make small differences in band height noticeable.
Oversized Tree-Shaped Table Runner

Bring a giant crochet Christmas tree to the table without taking up floor space. This flat runner has a narrow tip, a broad base and small flares along its edges that suggest layers of branches. A centred trunk completes the silhouette.
The tree grows from tip to base, so you can see its shape develop as you work. Its low-profile surface suits a dining table or sideboard, where the outline can remain visible around everyday place settings.
Treat it as a decorative textile rather than a heatproof mat. Before choosing its position, consider how much of the tree you want to leave visible alongside plates, serving pieces or other decorations.
Oversized Tree-Shaped Table Runner

Quick-reference card. Follow the complete written instructions below.
Materials
- Green washable cotton yarn: Enough for a flat tree approximately 100 cm long and 42 cm wide at the base; check yardage as you work.
- Brown washable cotton yarn: A small amount for the trunk.
- Crochet hook: Size needed to meet gauge; try 5 mm as a starting point.
- Other: Stitch markers, tapestry needle and blocking supplies.
Size and Fit
At the stated gauge, approximately 110 cm long including the 10 cm trunk, and 42 cm wide at the broadest point. Check the available surface before starting. For a shorter runner, omit complete eight-row sections near the broad end, then work the trunk after a plain row; the base will also be narrower. Each omitted eight-row section reduces the length by approximately 6.7 cm.
Gauge
Aim for 12 sc stitches and 12 rows per 10 cm in a washed, blocked swatch. Row gauge determines the runnerâs length; stitch gauge determines its width.
Abbreviations
US crochet terms.
- ch = chain
- sc = single crochet
- sl st = slip stitch
- st(s) = stitch(es)
Pattern
- Tip â row 1 With green, ch 5. Sc in the second ch from the hook and in each remaining ch. 4 sc.
- Tree â rows 2â120 Ch 1 and turn before every row; the turning ch does not count as a stitch. Work 1 sc in each stitch, except on the increase rows below. On rows 8, 16, 24 and every subsequent multiple of 8 through row 120, work 2 sc in the first stitch and 2 sc in the last stitch. On rows 25, 49, 73 and 97, work 3 sc in the first stitch and 3 sc in the last stitch instead. Each branch-point row follows an eight-row increase, making a small flare on both edges. All other rows are plain. After row 120, there are 50 sc. Fasten off.
- Centred trunk â row 1 Lay the tree flat with row 120 at the broad end. Count 19 stitches in from either side of that row; the 12 stitches between them form the trunk placement. Join brown yarn in the first of those 12 stitches and work 1 sc in each of the 12 stitches. Leave the other 38 stitches of row 120 unworked. 12 sc.
- Trunk â rows 2â12 Ch 1, turn and sc in each of the 12 stitches. Repeat until 12 trunk rows have been worked in total. Fasten off.
- Subtle edging If an edging is wanted, work loose sl sts along the outer edges only, using green beside the tree and brown beside the trunk. Start a new strand at each colour change. Do not work across the join between tree and trunk; keep the edging relaxed so the runner lies flat.
Finishing
- Weave in ends securely.
- Wash according to the yarn label, then block the tree flat. Straighten the trunk and gently shape the four branch flares without stretching the edges.
- Let the runner dry fully before placing it on furniture. Keep it clear of candles and hot serving dishes.
Helpful Tips
- Mark rows 25, 49, 73 and 97 on a row counter or written tally: they use 3 sc at each edge, not the usual 2 sc.
- Check both ends of an increase row before turning. Missing an edge increase makes the tree asymmetrical.
- Choose a smooth, washable cotton and keep any edging loose so plates can sit steadily.
Padded Tier Door Tree

This giant crochet Christmas tree brings the shape of a decorated tree to a door without taking up floor space. Three overlapping green tiers give it a tall silhouette, while a short brown trunk completes the outline.
Each tier is a separate, lightly padded section rather than part of one large cushion. Flexible connections at the back let the sections hang together while keeping the decoration relatively shallow against the door.
The clean, undecorated shape works well if you prefer a simple Christmas display, and it leaves the overlapping tiers as the main feature. It is intended for a closed door with enough room for the decoration to hang freely.
Padded Tier Door Tree

Quick-reference card. Follow the complete written instructions below.
Materials
- Medium-weight yarn: Approximately 350â450 g green and 40â60 g brown; actual use will vary with yarn and gauge.
- Crochet hook: 5 mm (H/8), or the size needed to obtain gauge.
- Lightweight toy stuffing: Enough to give each section a little loft without making it firm.
- Notions: Yarn needle, stitch markers, tape measure and scissors.
- Door hanger: An over-door hanger suitable for the door and the finished decoration.
Size and Fit
Sample size at the stated gauge: approximately 91 cm from the top of the hanging loop to the bottom of the trunk, and 42 cm across the widest triangle. The three triangles are approximately 21, 27 and 34 cm tall. Hang them with 4 cm of overlap at each join; tuck 3 cm of the approximately 11 cm trunk behind the largest triangle and leave 8 cm of loop visible above the top tip. Check that the hanger, decoration and door have adequate clearance before use.
Gauge
12 sc and 14 rows = 10 cm in flat sc fabric. Measure an unpadded swatch. Triangle widths and heights, and therefore the finished hanging length, depend on gauge.
Abbreviations
US crochet terms.
- ch = chain
- sc = single crochet
- sl st = slip stitch
- st(s) = stitch(es)
- inc = work 2 sc in one stitch
Pattern
- Before you begin Work all panels in turned rows. Ch 1 to turn; the turning chain does not count as a stitch. Make a front and a back for each triangle, matching their row counts. Leave long yarn tails for sewing.
- Triangle panel With green, ch 4. Row 1: Sc in the second ch from the hook and in each remaining ch; 3 sc. Row 2: Ch 1, turn, inc in the first st, sc in each remaining st; 4 sc. Row 3: Ch 1, turn, sc across to the last st, inc in the last st; 5 sc. Continue working one inc on every row, alternating between the first and last stitch. The row count includes Row 1.
- Make six triangle panels Make two small panels of 30 rows each, ending with 32 sc across the base of each. Make two medium panels of 38 rows each, ending with 40 sc. Make two large panels of 48 rows each, ending with 50 sc. Fasten off each panel.
- Padded triangles Pair matching panels with wrong sides together and align their tips, row ends and bases. Sew around the edges with green yarn, leaving a short opening at the base. Add a thin, even layer of stuffing, keeping the tips and edges fairly flat, then close the opening. Repeat for all three triangles.
- Trunk With brown, make two identical panels. For each, ch 13. Row 1: Sc in the second ch from the hook and in each remaining ch; 12 sc. Rows 2â15: Ch 1, turn, sc in each st; 12 sc. Place the panels together, sew around three sides, add a little stuffing and sew the fourth side closed. The trunk is approximately 10 cm wide and 11 cm tall at gauge.
- Rear tabs Make four green tabs. For each, ch 5. Row 1: Sc in the second ch from the hook and in each remaining ch; 4 sc. Rows 2â12: Ch 1, turn, sc in each st; 4 sc. Fasten off with tails for sewing. Each tab is approximately 3.3 cm wide and 8.6 cm long at gauge.
- Arrange and join the tiers Lay the sections face down, with their tips pointing upwards. Centre the medium triangle behind the small one, placing its tip 4 cm above the small triangleâs base. Centre the large triangle behind the medium one in the same way, with its tip 4 cm above the medium triangleâs base. Use two tabs side by side at each overlap. On the back, sew approximately 2 cm of one tab end to the upper triangle, 2â4 cm above its base; sew approximately 2 cm of the other end to the lower triangle, 6â8 cm below its tip. Repeat with the second tab beside it, then join the other pair of triangles with the remaining two tabs. Keep the middle of each tab free between its sewn ends. Sew into the rear panels without pulling stitches through the fronts, and check that the tiers still hang in their measured positions.
- Attach trunk Centre the trunk behind the large triangleâs base, with its top 3 cm above the base and approximately 8 cm showing below. Sew the overlapped area of the trunk securely to the back of the large triangle, without stitching through its front.
- Hanging loop With green, make a chain measuring approximately 22 cm without stretching it; sl st back along the chain to reinforce it. Fold it into a loop that extends 8 cm above the small triangleâs tip, leaving approximately 3 cm at each end for anchoring. Sew both ends securely to the centre back of the small triangle, running the ends down from the tip. Weave in all remaining ends.
Finishing
- Hold the tree by its loop and adjust the tiers so their points are centred and both overlaps remain approximately 4 cm.
- Spread any bunched stuffing towards the centres of the sections; the decoration should remain shallow against the door.
- Place the loop on a suitable over-door hanger and check that the door opens and closes freely without trapping the tree.
Helpful Tips
- Use stitch markers at the first stitch of each row if alternating the increase position becomes difficult to track.
- If the triangles are much taller or wider than the sample dimensions, check gauge before assembling; changing gauge changes the overall door clearance.
- The rear tabs provide flexible joins. Do not fill the gaps between sections with stuffing or sew their full overlapping edges together.
Coiled Crochet Cord Floor Tree

If you want a giant crochet Christmas tree with a bold, sculptural look, this design gets its shape from a sturdy cone rather than from crochet alone. The cord creates a raised spiral that reads clearly across a room, while the support keeps the floor-standing tree upright.
The appeal is in the texture: close-set turns give the surface depth without calling for separate branches or ornaments. It works particularly well as a standalone decoration in a hallway or beside a fireplace, provided it is kept safely away from heat.
This is an intermediate project for crocheters comfortable working steadily on a longer piece. The amount of cord needed depends on how it sits against your particular support, so plan to assess the fit as the tree takes shape rather than relying on a fixed length.
Coiled Crochet Cord Floor Tree
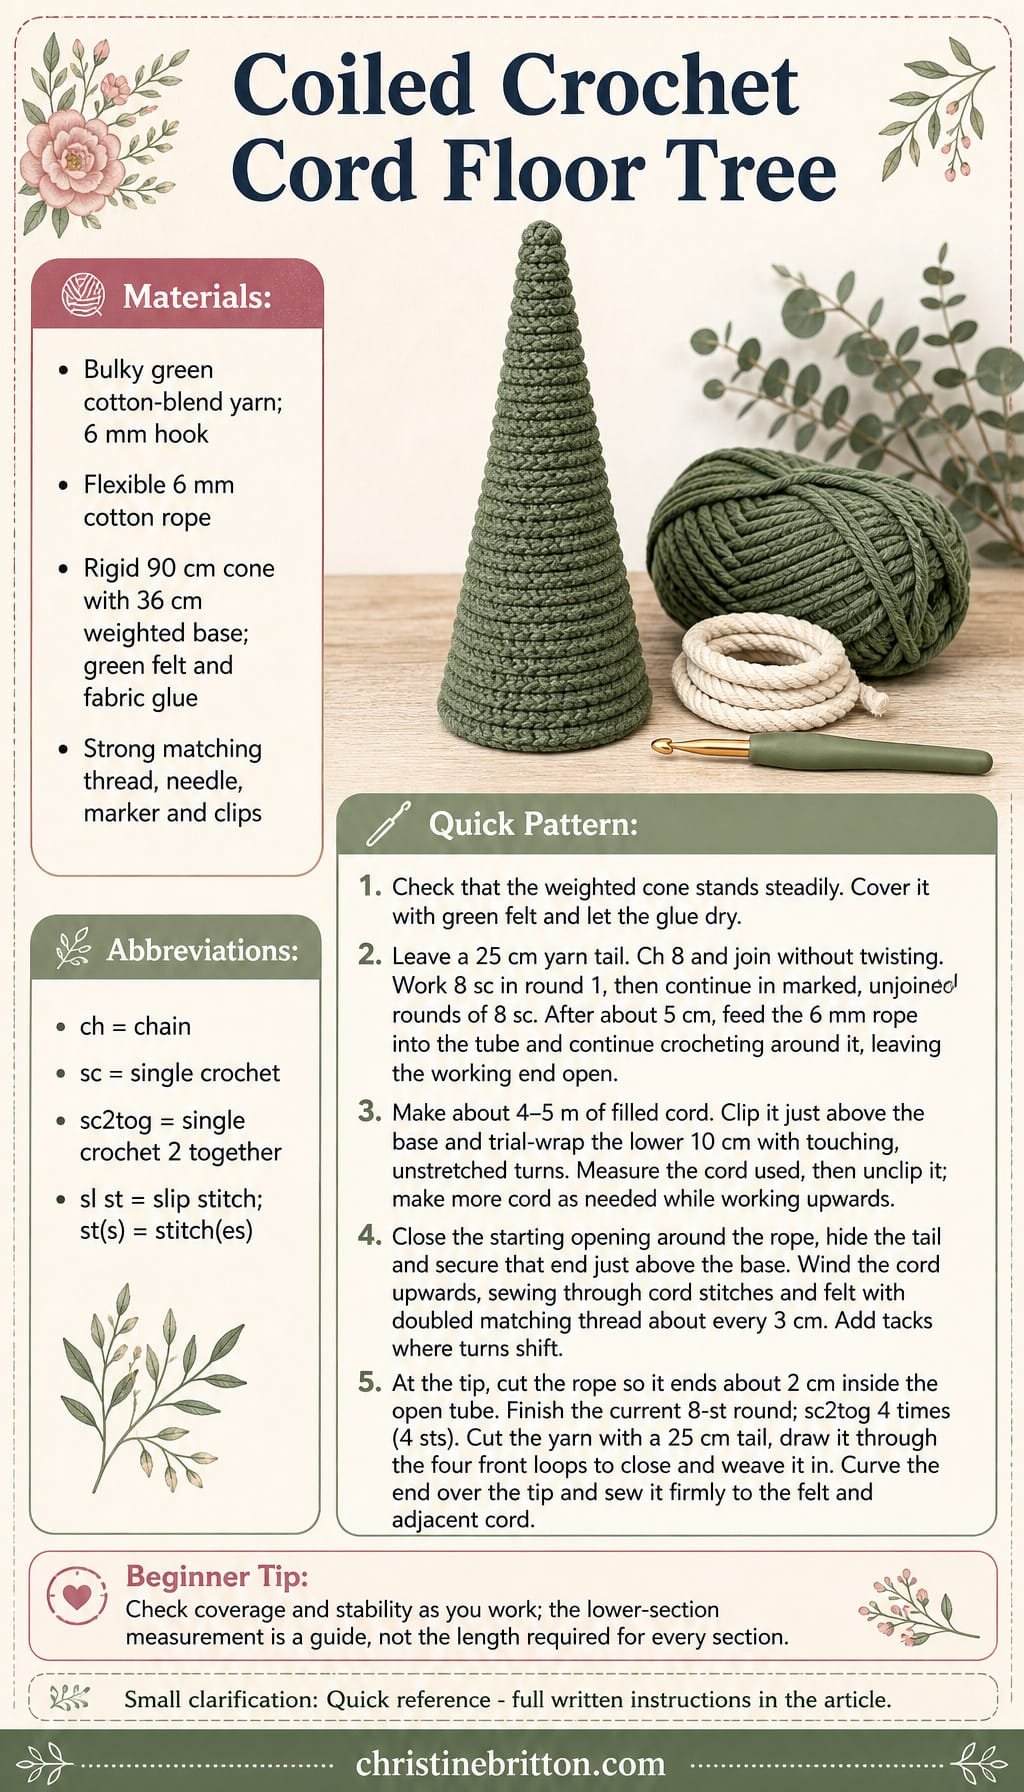
Quick-reference card. Follow the complete written instructions below.
Materials
- Bulky cotton-blend yarn: Green; quantity depends on your cord gauge and trial wrap. Keep enough of the same yarn to complete the full length.
- Crochet hook: 6 mm (J/10), or a size that makes a firm tube with no visible gaps around the rope.
- Cotton rope: Flexible 6 mm rope to fill the cord; obtain more as needed after the trial wrap.
- Cone and cover: A rigid cone approximately 90 cm tall with a 36 cm base diameter, a securely attached, weighted flat base, and green felt to cover the cone.
- Assembly supplies: Fabric glue for the felt, strong matching sewing thread, a sturdy sewing needle, stitch marker, clips, tape measure and scissors.
Size and Fit
One sample size: approximately 90 cm tall on a 36 cm-diameter base. The finished height may be slightly greater where the cord covers the tip. Use a stable floor-standing cone; do not rely on the crocheted cord to support the tree.
Gauge
Aim for a firm filled cord approximately 12â18 mm across, with the rope completely concealed. Exact crochet gauge is not critical. Trial-wrap the lower 10 cm of the cone to establish how much cord your chosen yarn, hook and wrapping tension require; no fixed cord length is assumed.
Abbreviations
US crochet terms.
- ch = chain
- sc = single crochet
- sc2tog = single crochet 2 stitches together
- sl st = slip stitch
- st(s) = stitch(es)
Pattern
- Prepare the support Check that the rigid cone is firmly fixed to its weighted, flat base and stands steadily before adding the cord. Cover the cone with green felt, securing the felt smoothly with fabric glue. Let it dry fully. The felt will provide a surface for sewing and will disguise any tiny spaces between turns.
- Begin the cord Leave a 25 cm yarn tail. Ch 8 and join with a sl st in the first ch, taking care not to twist the chain. Round 1: sc in each ch around (8 sc). Place a marker at the start of the round. Work subsequent rounds continuously, without joining or turning: sc in each st around (8 sc per round), moving the marker after every 8 sts.
- Fill and extend the cord After crocheting about 5 cm of tube, feed the 6 mm cotton rope through its open end and ease it down to the starting edge. Continue working 8 sc per round, feeding in rope as the tube grows. Keep the tube firm but flexible, and do not pull it longer when measuring or wrapping. If changing yarn, join at a round boundary and secure both yarn ends inside the tube; do not leave a knot on its outer surface. Leave the working end open while making the tree.
- Trial-wrap Make about 4â5 m of filled cord to begin. Starting just above the base, clip it temporarily to the felt and wind it upwards with neighbouring turns touching but not overlapping. Wrap until you have covered the lower 10 cm of the cone; crochet more cord if needed. Measure the cord used for that section, then unclip it. This trial establishes your own cord requirement for the widest part. Make additional cord as you work upwards, checking the remaining cone rather than multiplying the lower-section measurement across the whole tree.
- Wind and secure Close the starting opening around the rope with the starting yarn tail and hide the tail inside the tube. Secure that end just above the base. Wind the cord upwards in a continuous spiral, keeping the turns close and the rope unstretched. Using doubled matching thread, sew through cord stitches and the felt approximately every 3 cm along the spiral; use extra tacks wherever a turn shifts. Secure and hide thread ends as you go. Continue crocheting, filling, winding and sewing until the cord reaches the tip.
- Close the tip Cut the rope so it finishes about 2 cm inside the open end of the tube. Complete the current 8-st round. Next round: sc2tog 4 times (4 sts). Cut the yarn, leaving a 25 cm tail. Thread the tail through the front loops of the remaining 4 sts, pull the opening closed and weave the tail into the tube. Curve this closed end over the cone tip and sew it securely to the felt and adjacent cord, adding close-set tacks so the end cannot lift.
Finishing
- Check the spiral from all sides and add tacks wherever a turn is loose or felt shows more than a narrow seam.
- Check that the base remains level and the finished tree stands steadily. Keep the tree away from flames and heat sources.
Helpful Tips
- Make and sew the cord in manageable stages rather than trying to handle the full length at once.
- If the rope shows through the crochet, try a smaller hook or a fuller yarn before continuing.
- Keep tacking thread inside the crocheted stitches where possible so the securing stitches are unobtrusive.
Giant Tree Chair-Back Cover

Turn a dining chair into part of your Christmas display with a tall, solid tree silhouette that rises above the chair back. The lower part sits over the chair, so the decoration feels integrated with the furniture rather than balanced on top of it.
This is a project for an intermediate crocheter who enjoys shaping a large, simple form. The tree has a structured interior to help its point and sloping sides hold their shape, while the cover can be taken off when the chair is needed without it.
Choose a chair with a clear, accessible back and measure it before starting: chair backs vary in width, thickness and shape. Once fitted, check that the cover stays secure without affecting the chairâs comfort or stability, and keep it away from heat sources.
Giant Tree Chair-Back Cover

Quick-reference card. Follow the complete written instructions below.
Materials
- Medium-weight green yarn: Enough for two tree panels and two chair-back panels; the amount depends on your gauge and chair width.
- 5 mm crochet hook: Or the size needed to obtain gauge.
- 5 mm fluted polypropylene sheet: One piece large enough for the tree insert, with the flutes running vertically.
- Notions: Tape measure, stitch markers, yarn needle, scissors, and tape to cover the cut edges of the insert.
- Two removable ties: Long enough to go around the covered chair back.
Size and Fit
Sample size: approximately 44 cm wide across the tree base and sleeve, with an 85 cm tree above a 20 cm deep sleeve. It is intended for a chair back approximately 40 cm wide and 3 cm thick near its top, with at least 20 cm of unobstructed back below the top. Measure your chair before starting. For another chair, aim for a finished flat sleeve width of chair-back width plus thickness plus 1 cm ease. The tree base and both sleeve panels must have the same stitch count.
Gauge
12 sc and 14 rows = 10 cm in flat sc fabric. Check gauge before cutting the insert. At this gauge, 53 sc measure approximately 44 cm and 119 rows measure 85 cm.
Abbreviations
US crochet terms.
- ch = chain
- sc = single crochet
- sc2tog = single crochet two stitches together
- sc3tog = single crochet three stitches together
- st(s) = stitch(es)
Pattern
- Measure and plan Measure the width and thickness of the chair back near its top. The sample uses 53 sts across each panel. To change the width, choose an odd number N of sts that gives your target flat width at your gauge. Make both trees and both sleeve panels N sts wide. For the tree shaping, let D = (N â 1) ÷ 2. Work a paired decrease on rows numbered 1 + round(118k ÷ D), for each whole number k from 1 to D; round to the nearest whole row. The last of these is row 119. Use the sc3tog instruction on that final decrease row. Keep N within a range that gives a different decrease row for every k.
- Tree front and tree back Make two alike. Ch 54. Row 1: Sc in the second ch from the hook and in each ch across; 53 sts. Ch 1 and turn after every row. For rows 2â119, work sc in every st on an ordinary row. On each paired-decrease row other than row 119, sc2tog over the first 2 sts, sc across until 2 sts remain, then sc2tog over the last 2 sts. For the sample, these rows are 6, 10, 15, 19, 24, 28, 33, 37, 42, 46, 51, 55, 60, 65, 69, 74, 78, 83, 87, 92, 96, 101, 105, 110 and 114. There are 3 sts after row 114. Row 119: Sc3tog over the remaining 3 sts; 1 st. Fasten off.
- Front and rear sleeve panels Make two alike. Ch 54. Row 1: Sc in the second ch from the hook and in each ch across; 53 sts. Rows 2â28: Ch 1, turn, sc in each st across. Each panel is approximately 20 cm deep. Fasten off, leaving a length for seaming.
- Join the cover Lay out one tree above each sleeve panel, with the tree’s 53-st foundation edge against the panel’s row-28 edge. Sew each pair together across all 53 sts. Place the resulting front and back pieces together. Seam their tree side edges up to the point, then seam both sides of the sleeve. Leave the sleeve bottom entirely open; this opening also provides access to the space between the tree panels.
- Make and fit the removable insert Lay the finished cover flat and trace the inside of its tree pocket onto the polypropylene sheet. Cut a tree shape approximately 1 cm inside the seams, with a centred tab about 10 cm wide extending 18 cm below its base. Keep the sheet’s flutes vertical. Round the corners and cover every cut edge with tape. Slide the insert through the open sleeve bottom, point first, into the tree pocket; its tab remains inside the sleeve. Adjust the cut if the insert strains the crochet or prevents the sleeve fitting the chair.
- Fit to the chair Pull the open-bottom sleeve over the chair back until the tree base is at the chair’s top. Tie the two removable ties snugly around the covered chair back, one about 5 cm and the other about 17 cm below its top. Check that the insert stays upright and the chair remains comfortable and stable.
Finishing
- Weave in yarn ends, keeping the bottom opening clear for removing the insert.
- Remove the polypropylene insert before washing the crochet cover.
- Recheck the cover’s fit after laundering; do not force a tight sleeve over the chair.
Helpful Tips
- The sample width includes space for a 3 cm thick chair back. Measuring width alone may produce a sleeve that is too tight.
- If the insert bends or the tree leans, use a stiffer suitable sheet and check that its tab sits securely within the tied sleeve.
- Keep the cover and its insert away from candles, radiators, fireplaces and other heat sources.
Frequently Asked Questions
Which giant crochet Christmas tree pattern is best for a small room?
A wall-hung tree keeps the floor clear. The shaped-row, granny-square and dowel-branch designs offer different ways to build a large outline without a freestanding base.
How can I help a crocheted floor tree stand upright?
Choose a design with a suitable support or a broad, stable base. Cone covers need a firm form underneath; stuffed and tiered trees depend on even filling and careful assembly.
Can I use a different yarn from the one specified?
You can, but check gauge and fabric firmness first. A different yarn weight may change the finished size, and a softer fabric may not hold a shaped edge or stuffed cone as intended.
How should I hang a large crochet wall tree?
Use the hanging points specified by the pattern and fix them to a suitable surface. Spread the weight across the recommended points, and keep fringe or other loose strands out of young childrenâs reach.
Final Thoughts
Start with the treeâs location, then choose the construction that suits it. A supported cone gives a clear upright shape, while a wall panel or flat piece can bring the same Christmas outline to a tighter space.
Check size, support and finishing before choosing your yarn. Those decisions will do the most to help a large crochet tree look tidy on display.