29 Filet Crochet Christmas Patterns for Festive Stitching
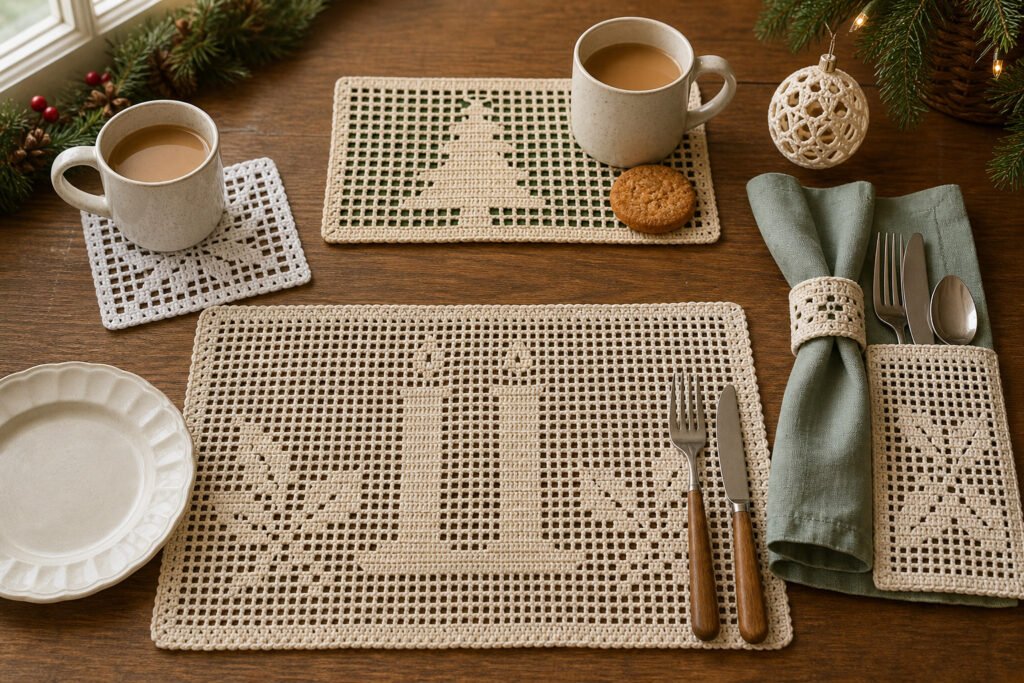
Looking for filet crochet Christmas patterns that go beyond a single decoration? These 29 projects use open and filled mesh to form snowflakes, trees, bells and other festive motifs across table linens, home décor and gifts.
Start with a small coaster or gift label if you want to practise reading a chart. Larger pieces, such as the café curtain and tree skirt, need more planning so their motifs fit the finished space.
For more ideas that build on this collection, explore mosaic crochet Christmas patterns.
Before You Start
Crochet terminology in this article is US terminology. Check the stitch key for each chart before you begin, particularly how it marks open and filled mesh. If you are new to filet, the snowflake coaster offers a smaller chart to follow before you commit to a long repeat.
Choose yarn to suit the job. Firm cotton yarn can help coasters, placemats and edgings hold a tidy shape and stand up to washing. For a window hanging, a smooth yarn and consistent tension will make the snowman easier to see against the light. Follow the care label for the yarn you choose.
Make a small mesh swatch and measure it after any planned washing or blocking. That measurement matters for fitted pieces, including the bottle sleeve, cushion cover and café curtain. For a repeating runner, work out the length using complete star repeats rather than stopping partway through a motif.
Crochet terminology: This article uses US crochet terms. Check the abbreviations for each project.
Snowflake Filet Coaster

This square coaster turns open and filled filet mesh into a bold snowflake. The open areas let a coloured tabletop show through, making the motif easier to see even on a small project.
It is a manageable way to practise reading a filet chart: the symmetrical design makes it easier to spot a misplaced open space as the motif develops. A plain outer edge gives the square a tidier, steadier outline.
Set it beside a festive mug or make a few for a Christmas table. As with any open-mesh coaster, moisture may pass through the spaces, so it is best used where a little condensation will not harm the surface.
Snowflake Filet Coaster

Quick-reference card. Follow the complete written instructions below.
Materials
- Cotton yarn: DK-weight, approximately 20–30 g in white or a contrasting colour
- Crochet hook: 3.5 mm, or a size that produces firm mesh
- Tapestry needle: For weaving in ends
- Blocking supplies: Pins and a suitable blocking surface
Size and Fit
One coaster, 11 filet cells wide by 11 rows high, plus one edging round. Finished dimensions depend on yarn, tension and blocking; aim to block the panel square.
Gauge
No fixed gauge. For a square panel, the width of one three-stitch filet cell should be close to the height of one row after blocking.
Abbreviations
US crochet terms.
- ch = chain
- dc = double crochet
- sc = single crochet
- sp = space
- st(s) = stitch(es)
Pattern
- Read the chart Each character is one filet cell: X is filled and . is open. The 11 chart lines run from the bottom of the coaster to the top. Read row 1 from right to left, row 2 from left to right, and alternate thereafter. The motif is symmetrical, so each printed line reads the same in either direction. Every row begins with a boundary dc and has 11 cells after it.
- Snowflake chart Row 11 X…X.X…X
Row 10 .X..X.X..X.
Row 9 ..X.X.X.X..
Row 8 …XXXXX…
Row 7 X.X.XXX.X.X
Row 6 XXXXXXXXXXX
Row 5 X.X.XXX.X.X
Row 4 …XXXXX…
Row 3 ..X.X.X.X..
Row 2 .X..X.X..X.
Row 1 X…X.X…X - Foundation and row 1 Ch 36. The first three chains count as the starting boundary dc. Following row 1 of the chart, work each X as a dc in each of the next three foundation chains. Work each . as ch 2, skip the next two foundation chains, dc in the next chain. Row 1 starts with X: dc in the fourth chain from the hook and in each of the next two chains. Continue cell by cell, ending with X and a dc in the last foundation chain.
- Rows 2–11 Ch 3 and turn; this counts as the starting boundary dc. Follow the next chart line. For each X, work one dc in each of the next two dc, or two dc into the next ch-2 sp if the cell below is open; then dc in the next boundary dc. For each ., ch 2, skip the next two dc or the next ch-2 sp, then dc in the next boundary dc. Work all 11 cells on every row. Do not fasten off after row 11.
- Firm outer round Ch 1. Work 3 sc in the last dc of row 11. Across the top, work 1 sc in each dc and 2 sc in each ch-2 sp until you reach the starting ch-3; work 3 sc in its top. Work 2 sc into the end of each of the 11 rows down the side. Work 3 sc in the first foundation chain, 1 sc in each of the next 31 foundation chains, and 3 sc in the last foundation chain. Work 2 sc into the end of each of the 11 rows up the other side. Join with a slip stitch to the first sc and fasten off.
Finishing
- Weave in the ends without pulling the mesh out of shape.
- Dampen and pin the coaster into a square, opening the mesh evenly. Leave it flat until completely dry.
Helpful Tips
- Count 11 cells on every row before turning. An open cell contains a ch-2 space; a filled cell contains two interior dc, and neighbouring cells share their boundary dc.
- On rows worked above open cells, place both interior dc into the ch-2 space, not into its individual chains.
- If the edging ripples or draws in, adjust the side-edge spacing slightly before blocking; keep the four corners flat.
Christmas Tree Mug Rug

A Christmas mug rug is a small way to bring filet crochet to the table. This landscape design leaves space for a drink and a biscuit, while the tree gives it a festive focus without making the surface feel busy.
The tree is formed by solid crochet against an open mesh background. Its broad silhouette is easier to recognise at mug-rug scale than tiny decorations, which could disappear among the openings.
A green underlay provides contrast through the mesh, making the cream tree stand out. It also gives the openwork a practical surface beneath it, so crumbs are less likely to reach the table.
Christmas Tree Filet Crochet Mug Rug

Quick-reference card. Follow the complete written instructions below.
Materials
- Yarn: Approximately 70 m of washable DK cotton in cream.
- Hook: 4 mm crochet hook, or a size that gives a firm, flat fabric.
- Notions: Yarn needle, scissors and tape measure.
- Underlay: A 26 × 17 cm piece of washable green cotton fabric, plus sewing supplies for a 1 cm hem.
Size and Fit
One sample size: approximately 25 × 16 cm at the stated gauge. The 19-cell width provides space for a mug beside a biscuit. The hemmed underlay measures approximately 24 × 15 cm, so it sits inside the crochet edges.
Gauge
Aim for approximately 10 filet cells across and 10 rows high measuring 13 × 12 cm after blocking. Exact gauge is not critical, but check the finished mat against your mug and fabric underlay before hemming.
Abbreviations
US crochet terms.
- ch = Chain.
- dc = Double crochet.
- F = Filled filet cell: work a dc into each of the next 2 dc, or work 2 dc into the next ch-2 space; then dc into the next boundary dc.
- O = Open filet cell: ch 2, skip the next 2 dc or the next ch-2 space; then dc into the next boundary dc.
Pattern
- How to read the chart Work the numbered rows from the bottom of the tree upwards, turning after every row. Each row has 19 cells. A number after F or O tells you how many consecutive cells of that type to make. The chart is symmetrical, so its cell sequence works in either direction. Each row begins with ch 3, which counts as the first boundary dc. Work the final dc of a row into the top of the previous row’s turning ch when that is the next boundary dc.
- Row 1: bottom border Ch 60. Dc in the fourth ch from the hook and in each remaining ch. Counting the first 3 skipped chains as the first dc, you have 58 dc positions: one starting boundary and 19 filled cells.
- Rows 2–3: trunk Turn, ch 3, then work F, O8, F, O8, F. Repeat this sequence for each of the two rows.
- Row 4: tree base Turn, ch 3; work F, O2, F13, O2, F.
- Row 5 Turn, ch 3; work F, O3, F11, O3, F.
- Row 6 Turn, ch 3; work F, O4, F9, O4, F.
- Row 7 Turn, ch 3; work F, O5, F7, O5, F.
- Row 8 Turn, ch 3; work F, O6, F5, O6, F.
- Row 9 Turn, ch 3; work F, O7, F3, O7, F.
- Row 10: tree tip Turn, ch 3; work F, O8, F, O8, F.
- Rows 11–12: space above the tree Turn, ch 3; work F, O17, F. Repeat for the second row.
- Row 13: top border Turn, ch 3; work F19. Fasten off.
Finishing
- Weave in the yarn ends and lightly block the filet rectangle flat, keeping its edges square.
- Fold and sew a 1 cm hem on all four sides of the green fabric to make an underlay approximately 24 × 15 cm.
- Place the fabric beneath the mug rug, centred inside its solid-cell border. Leave it unattached so it can be removed for washing or replaced.
Helpful Tips
- Each side edge is one filled cell wide, and the top and bottom borders are each one full row of filled cells.
- The filled tree appears cream against the green showing through the surrounding open cells.
- If your blocked mat differs substantially from 25 × 16 cm, measure its interior before cutting the fabric; cut the fabric 2 cm larger in each direction than the desired hemmed underlay.
Christmas Candle Placemat
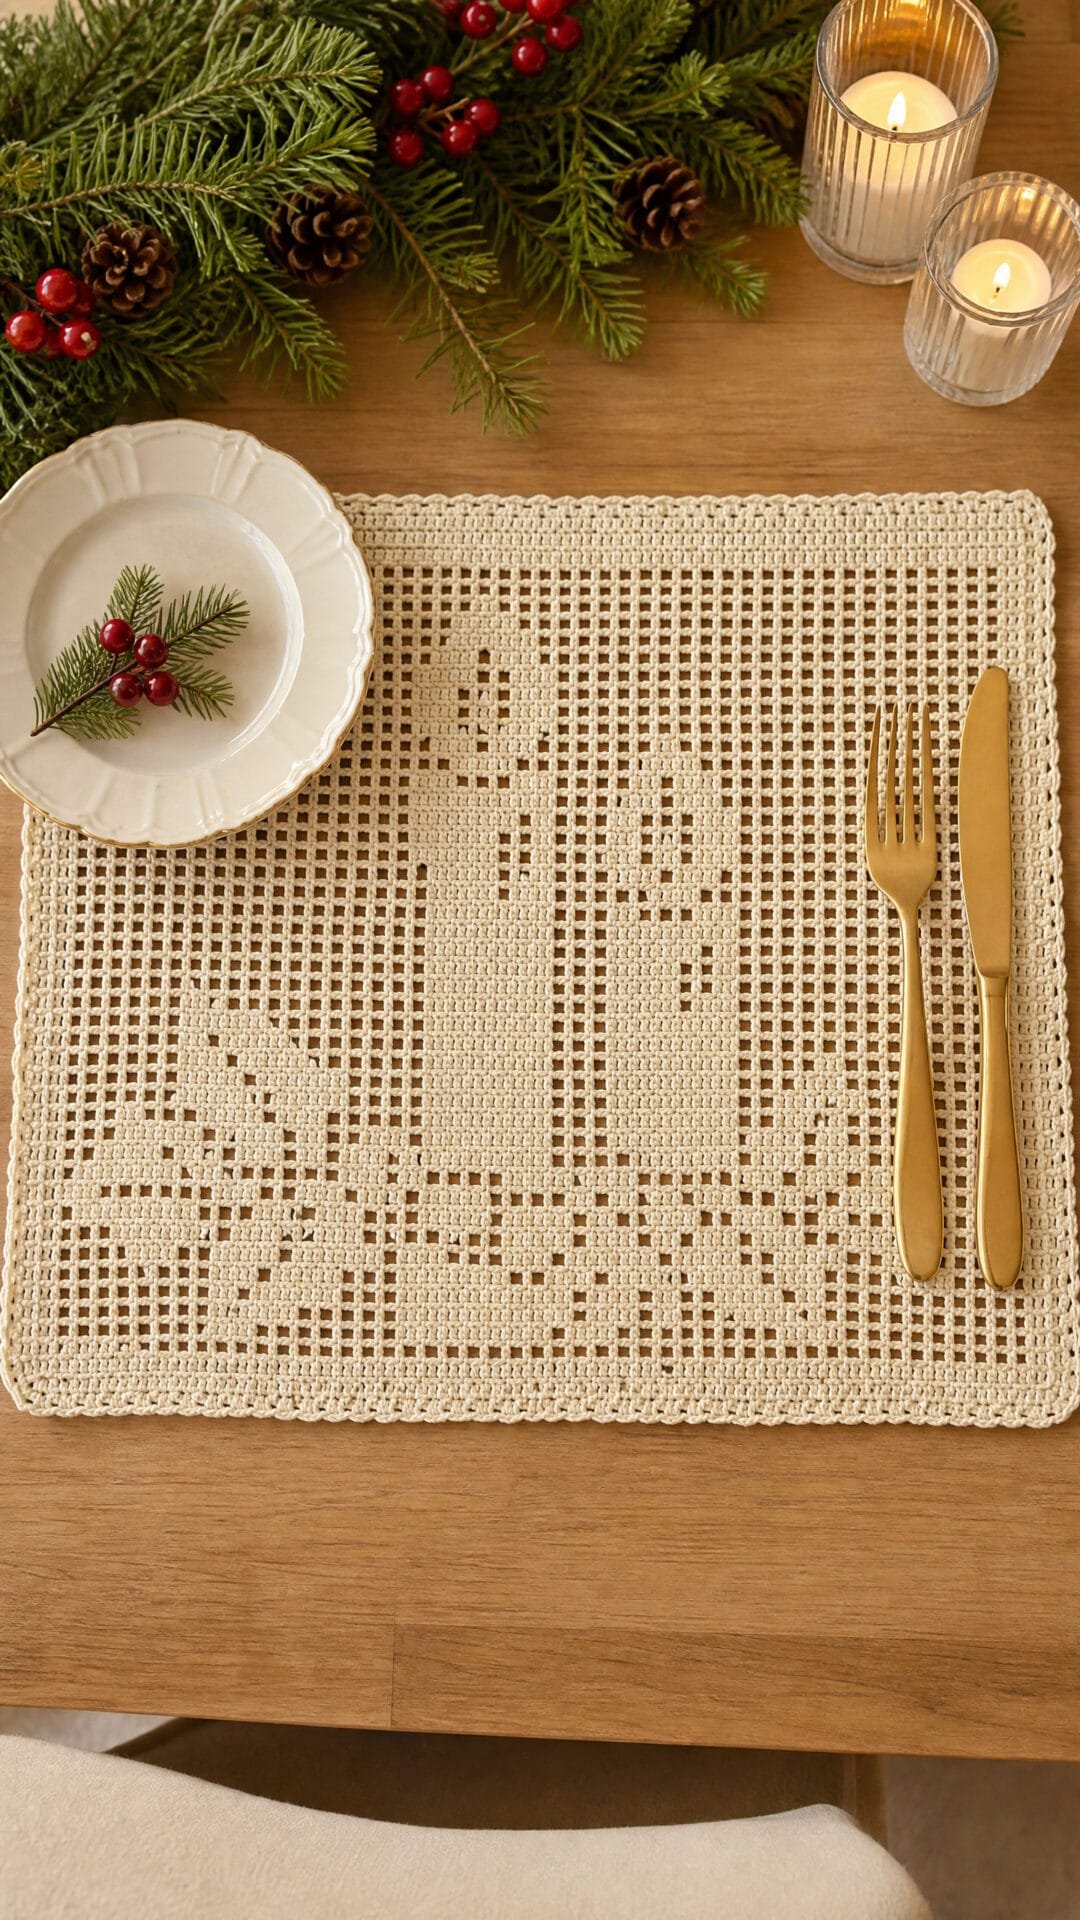
Two stylised candles give this filet crochet placemat a festive centrepiece without making the whole surface visually busy. Open mesh around the design lets the candles stand out, while a solid frame gives the rectangular panel a defined edge.
Think about where your tableware will sit when you arrange the place setting. A side plate towards one short end leaves more of the candle design visible; a large plate placed centrally may hide it. The plain mesh provides breathing room around the motif even when part of it is covered.
This is a decorative placemat rather than a heatproof mat. Use it beneath everyday tableware, but keep hot cookware and lit candles off the crochet.
Christmas Candle Filet Crochet Placemat

Quick-reference card. Follow the complete written instructions below.
Materials
- Smooth DK cotton yarn: Approximately 200–250 m in a pale colour; allow extra if your gauge differs.
- Crochet hook: 4 mm, or a size that gives the stated gauge.
- Tapestry needle: For weaving in ends.
- Blocking supplies: Pins and a suitable surface for your yarn.
Size and Fit
Sample target after blocking: approximately 45 cm wide × 29 cm deep, using a two-cell side border. The chart is 23 rows deep. Its width is a fixed 35-cell centre field plus one, two or three solid border cells on each side: 37, 39 or 41 cells overall. Before starting the placemat, use your measured cell width to calculate (35 + twice your chosen border width) × cell width. Choose the border of one, two or three cells that comes closest to 45 cm; if none is suitable, adjust your hook or yarn and swatch again. Border changes do not move the candles within the centre field.
Gauge
Target gauge after blocking: 10 filet cells across measure 11.5 cm; 8 rows measure 10 cm. Make a swatch at least 12 cells wide and 10 rows deep, with open mesh in the middle and solid cells at the sides. Measure across 10 complete cells and 8 rows away from the edges. At target gauge, the 39-cell sample is approximately 44.9 × 28.8 cm before rounding to the finished-size target.
Abbreviations
US crochet terms.
- ch = chain
- dc = double crochet
- sk = skip
- st = stitch
Pattern
- Read the chart Work the placemat from the bottom upwards, turning after every row. Each filet cell spans three stitch positions between its boundary posts. An open cell is ch 2, sk the next two dc or the next ch-2 space, then dc in the next dc. A solid cell is dc in each of the next two dc, or 2 dc in the next ch-2 space, then dc in the next dc. Adjacent cells share a boundary dc. At the start of a row, ch 3 counts as the first boundary dc; work the final dc into the top of the previous row’s turning ch 3. Numbers in the row instructions refer to cells, not individual stitches.
- Choose the side border After checking gauge, choose B = 1, 2 or 3 solid cells for each side border. The 35 centre-field cells are numbered 1–35 from left to right as you view each completed row from its working side. On every chart row, work B solid cells, the 35 centre-field cells as directed, then B solid cells. The two bottom and two top rows are entirely solid. Because the work turns, read each row’s cell sequence in the direction you are crocheting; the candle ranges are symmetrical, so the same ranges apply from either end.
- Foundation and row 1 Chain 3(35 + 2B) + 3: ch 114 for B = 1, ch 120 for B = 2, or ch 126 for B = 3. Dc in the fourth chain from the hook and in every chain to the end. The skipped three chains count as the first dc. This makes an entirely solid first row of 37, 39 or 41 cells respectively.
- Row 2 Ch 3, turn, and dc in every remaining dc across, ending in the top of the turning ch 3. This is a second entirely solid row.
- Rows 3–5 Work the B-cell solid border at each side. Work all 35 centre-field cells as open mesh on each row.
- Row 6: candle bases Between the solid side borders, work centre-field cells 9–17 and 19–27 solid. Work every other centre-field cell open.
- Row 7: upper bases Between the solid side borders, work centre-field cells 10–16 and 20–26 solid. Work every other centre-field cell open.
- Rows 8–14: candle bodies On each row, work centre-field cells 11–15 and 21–25 solid. Work all other centre-field cells open, keeping the solid side borders.
- Row 15: wicks Work centre-field cells 13 and 23 solid and all other centre-field cells open, between the solid side borders.
- Rows 16–17: flames On each row, work centre-field cells 12–14 and 22–24 solid. Work all other centre-field cells open, keeping the solid side borders.
- Row 18: flame tips Work centre-field cells 13 and 23 solid and all other centre-field cells open, between the solid side borders.
- Rows 19–21 Work the B-cell solid border at each side. Work all 35 centre-field cells as open mesh on each row.
- Rows 22–23 Work every cell solid across each row. Fasten off after row 23.
Finishing
- Weave in the ends on the wrong side without pulling the open mesh out of shape.
- Wash or dampen the cotton as its care label permits, then lay it flat. Pin the sides straight and block towards the calculated width and an approximately 29 cm depth at target row gauge. Allow it to dry fully.
Helpful Tips
- Mark the boundaries between the side borders and the 35-cell centre field. Check that each row still has 35 centre cells before working the far border.
- A side plate placed towards one short edge leaves more of the candles visible. A large dinner plate centred on the placemat may cover the motif.
- Do not place hot cookware or a lit candle directly on the placemat.
Repeating Star Table Runner

A line of spaced stars gives this filet crochet table runner a festive look without making the design feel crowded. The stars sit within open mesh, so the pattern remains easy to see against a wooden table, while the straight sides keep the runner’s silhouette simple.
This is a continuous strip rather than a collection of joined motifs. Repeating the star along its length keeps each motif in proportion; the plain mesh between stars gives each one room to stand out. Matching end borders make the design look balanced whichever way it is placed.
To choose the length, measure your table and decide how much bare surface you want to leave at each end. Use the remaining length to choose a whole number of star repeats, allowing for the end borders and the spaces between stars. If your preferred length falls between two options, choose the shorter arrangement rather than ending with a partial star.
Repeating Star Filet Crochet Table Runner

Quick-reference card. Follow the complete written instructions below.
Materials
- Yarn: 4-ply cotton in white or another chosen colour. Allow extra yarn for each additional star repeat and buy from one dye lot where possible.
- Hook: 2.5 mm crochet hook, or a size that gives a firm, open filet fabric.
- Other: Tapestry needle, scissors, rustproof pins and blocking mat.
Size and Fit
The runner is 19 filet cells wide. The five-star version has 79 rows. As a planning example only, at a blocked gauge of 5 cells and 6 rows per 6 cm, it would measure about 23 cm wide and 79 cm long. To choose a different length, measure your blocked row height, then select a whole number of stars, n, using (15n + 4) × row height. For a runner that stops short of the table ends, subtract the desired clearance at both ends from the table length before choosing n. Make at least one star; do not stop partway through a chart.
Gauge
Make and block a filet swatch before choosing the number of stars. Measure the width of several cells and the height of several rows, then calculate the blocked width as 19 × cell width and the blocked length as (15n + 4) × row height. The planning dimensions above are not a tested gauge.
Abbreviations
US crochet terms.
- ch = chain
- dc = double crochet
- sk = skip
- st = stitch
- O = open filet cell
- X = filled filet cell
Pattern
- Filet method Each row has 19 cells and 58 stitch positions, counting the beginning ch-3 as the first dc. At the start of every row after the foundation row, turn and ch 3; this stands above the first stitch. Work each O as ch 2, sk the next 2 stitch positions, dc in the next stitch position. Work each X as dc in each of the next 3 stitch positions. When working over an open cell, put the dc stitches into the individual chains, not around the ch-2 space. Work the last dc of a row into the top of the previous row’s beginning ch-3.
- Foundation row — row 1 Ch 60. Dc in the 4th ch from the hook and in each remaining ch. The skipped 3 chains count as the first dc: 58 dc positions, forming 19 filled cells. Turn.
- First end border — rows 2–4 Work 3 rows of 19 O cells. Turn after each row.
- Star chart The chart shows only the central 11 cells of a 19-cell row. For every chart row, work 4 O cells, the 11 chart cells, then 4 O cells. X means filled; a full stop means open. Work chart rows 1–11 in the order given. The rows read the same from either edge because each is symmetrical.
1 X………X
2 XX…….XX
3 .XX…..XX.
4 ..XXX.XXX..
5 …XXXXX…
6 ..XXXXXXX..
7 .XXXXXXXXX.
8 XXXXXXXXXXX
9 …XXXXX…
10 ….XXX….
11 …..X….. - Stars and spaces Work the 11 star-chart rows once for each star. Between stars only, work 4 rows of 19 O cells. Turn after every row. For the five-star version, work five complete charts with four sets of four plain-mesh rows between them. Do not add a plain-mesh separator after the final star.
- Second end border and final row After the final star, work 3 rows of 19 O cells to match the first end border. Turn, ch 3, then dc in each of the remaining 57 stitch positions for a solid final row of 58 dc positions. Fasten off.
Finishing
- Weave in ends without pulling the mesh out of shape.
- Wet-block or steam-block as appropriate for the cotton: pin the sides straight, square the corners and allow the runner to dry completely before unpinning.
Helpful Tips
- Use stitch markers at the boundaries of the central 11 cells if the four-cell side margins are easy to lose.
- Count cells across each row before turning; correcting a missed chain is easier before the next row is worked.
- Block the swatch as you intend to block the runner, since blocking affects both the open cells and the finished length.
Holly Filet Napkin Rings

These Holly Filet Napkin Rings bring a small, crisp leaf motif to a Christmas table. The contrast between open and filled filet cells makes the holly shape visible against a coloured napkin, while the narrow white band keeps the place setting simple.
Folded napkins can differ in bulk, so use the napkin you plan to set out as your guide. The band should reach around it comfortably without squeezing the folds, yet sit securely enough not to slide off when the napkin is lifted.
Holly Filet Napkin Rings
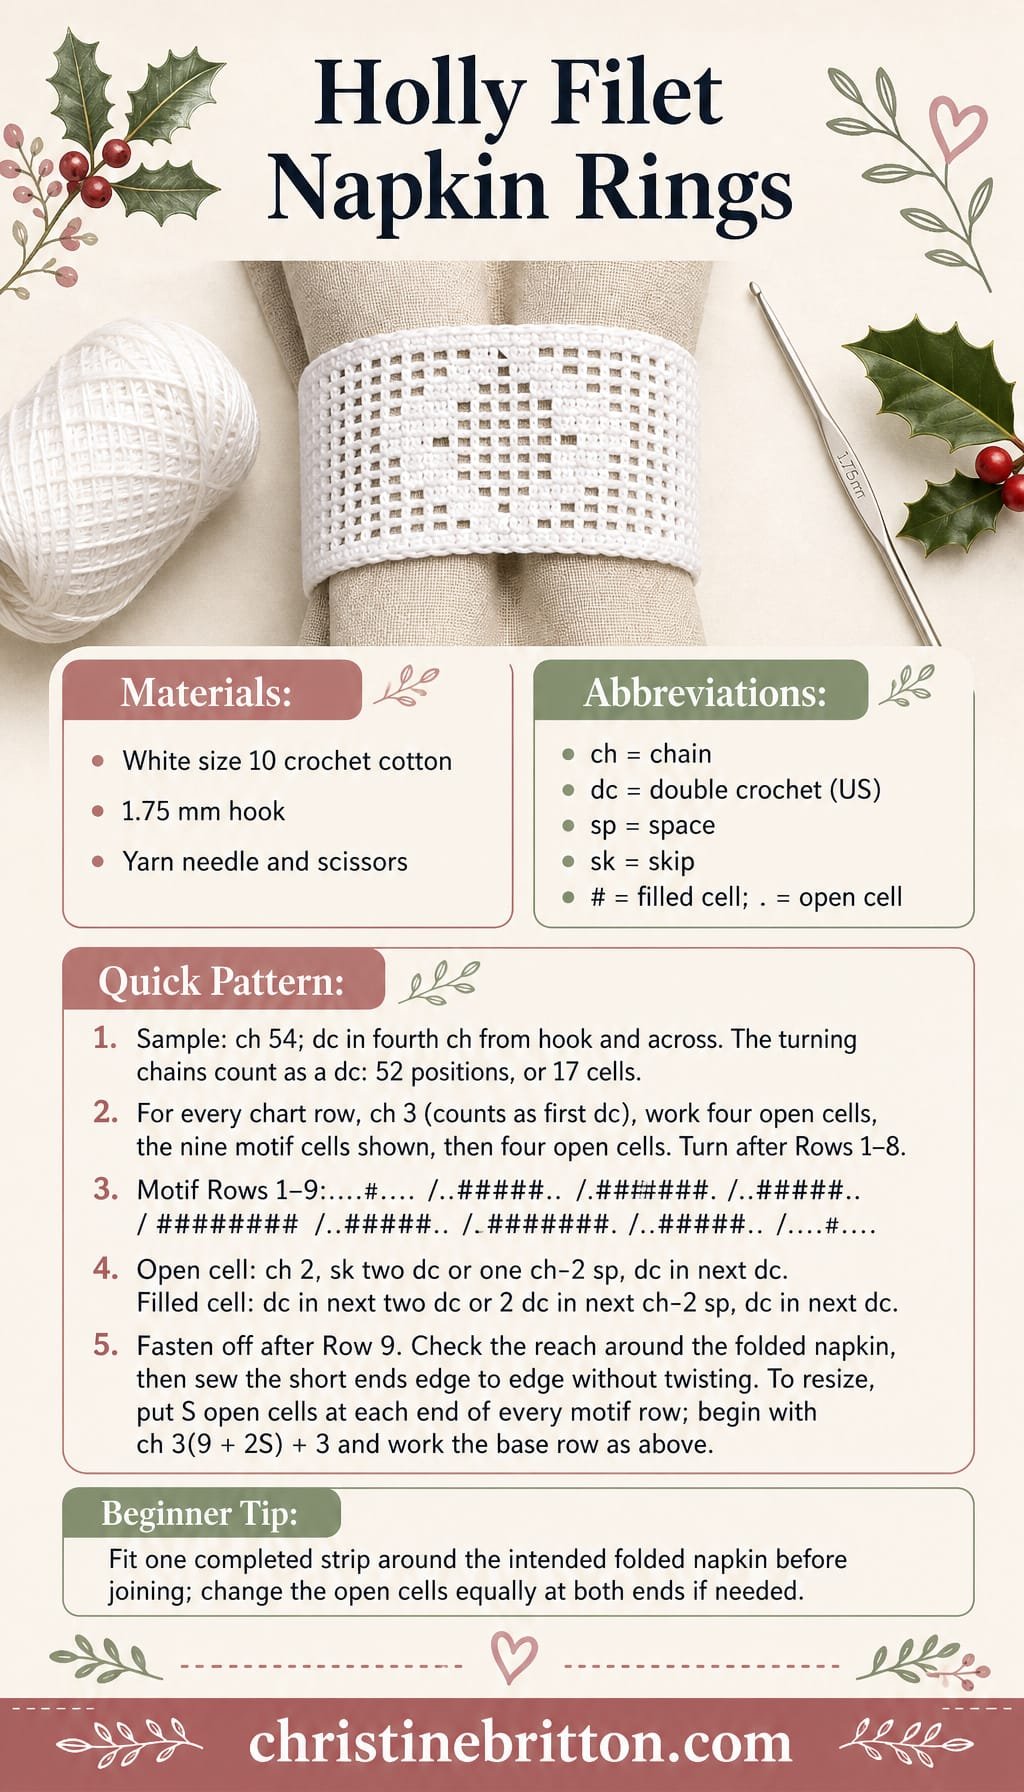
Quick-reference card. Follow the complete written instructions below.
Materials
- Size 10 crochet cotton: White; allow approximately 20 m per ring, with extra if you plan to adjust the length.
- Crochet hook: 1.75 mm, or a size that gives firm but flexible filet.
- Other: Yarn needle, scissors and a folded napkin for the fit check.
Size and Fit
The sample band has 17 filet cells across: four open cells, a nine-cell holly motif and four open cells. At 32 dc and 19 rows per 10 cm, its planned size before joining is approximately 16.25 cm long by 5.25 cm wide. Check it around the actual folded napkin rather than relying on that measurement. For a different length, use the same nine-cell motif with an equal number of open cells at each end. Adding or removing one cell at each end changes the length by six stitch positions, approximately 1.9 cm at the stated gauge.
Gauge
Planning gauge: 32 dc and 19 rows per 10 cm in solid dc. Exact gauge is less important than checking the band around the intended napkin. Work firmly enough that the filled cells remain distinct.
Abbreviations
US crochet terms.
- ch = chain
- dc = double crochet
- sp = space
- sk = skip
Pattern
- Read the filet chart Each character represents one cell: # is filled and . is open. Read the nine motif lines below from Row 1 to Row 9, working one line per row. The motif is symmetrical, so its placement stays the same after turning. Add four open cells before and four after every motif line for the sample band.
- Filet cells A turning ch 3 counts as the first dc at the edge of each row. Each cell uses the next three stitch positions and ends with a dc; neighbouring cells share that ending dc as their boundary. For an open cell, ch 2, sk the next two dc or the next ch-2 sp, then dc in the next dc. For a filled cell, dc in each of the next two dc, or work 2 dc into the next ch-2 sp, then dc in the next dc. Repeat the appropriate cell instruction across the row.
- Foundation and base row For the 17-cell sample, ch 54. Dc in the fourth ch from the hook and in every remaining ch. Counting the skipped three chains as the first dc, you have 52 dc positions. Turn.
- Row 1 — leaf tip Ch 3. Work four open cells, then the nine-cell motif ….#…., then four open cells. Turn.
- Row 2 Ch 3. Work four open cells, then ..#####.., then four open cells. Turn.
- Row 3 Ch 3. Work four open cells, then .#######., then four open cells. Turn.
- Row 4 — first notch Ch 3. Work four open cells, then ..#####.., then four open cells. Turn.
- Row 5 — widest point Ch 3. Work four open cells, then #########, then four open cells. Turn.
- Row 6 — second notch Ch 3. Work four open cells, then ..#####.., then four open cells. Turn.
- Row 7 Ch 3. Work four open cells, then .#######., then four open cells. Turn.
- Row 8 Ch 3. Work four open cells, then ..#####.., then four open cells. Turn.
- Row 9 — leaf tip Ch 3. Work four open cells, then ….#…., then four open cells. Fasten off, leaving a tail long enough to sew the short ends together.
- Adjusting the length For a different fit, choose an equal number of open cells for each side of the nine-cell motif. If that number is S, the row has 9 + 2S cells; chain 3(9 + 2S) + 3, then work the base row as written. Replace the four open cells at each end of every chart row with S open cells. Work all nine motif rows unchanged.
Finishing
- Weave in the starting tail. If desired, lightly dampen the strip and lay it flat to neaten the cells; let it dry before checking the fit.
- Wrap the strip around the intended folded napkin with its short ends meeting edge to edge. It should slide on without crushing the napkin but not fall off when the napkin is lifted. If the reach is wrong, remake the strip with one more or one fewer open cell at each end.
- Remove the strip from the napkin. Bring the short ends together without twisting the band and sew them edge to edge with the finishing tail. Secure and weave in the tail. Repeat for the number of rings needed.
Helpful Tips
- The filled cells form pointed ends and alternating wider edges; keep the open cells at both ends equal so the holly silhouette stays centred.
- Count across a row before turning. An accidental extra dc at an edge can make the seam flare.
- Make and fit one ring before crocheting the rest if your folded napkins vary in thickness.
Present Filet Cutlery Pocket

Give each festive place setting a small wrapped-present detail with this filet cutlery pocket. It keeps a fork and spoon together, while the gift motif remains visible on the front when the pocket is folded.
The contrast between open and solid filet areas makes the present readable without adding a separate decoration that could catch on cutlery. A firmer section at the opening helps the pocket hold its shape on the table.
For the clearest effect, set it against a plain napkin or table linen in a contrasting colour. It works as a reusable detail for a Christmas meal and can be paired with other understated decorations without crowding the place setting.
Present Filet Cutlery Pocket

Quick-reference card. Follow the complete written instructions below.
Materials
- Cotton yarn: Approximately 80 m of DK-weight cotton
- Crochet hook: 3.5 mm, or a size that gives the target gauge
- Other: Yarn needle, scissors and optional blocking pins
Size and Fit
One size: approximately 12.5 cm wide and 20 cm tall when folded, with a pocket approximately 10 cm deep. The sample rectangle has 15 filet cells across and 48 filet rows. Fold after row 32 so rows 33–48 form the front; the present sits above the folded edge.
Gauge
Aim for approximately 3 filet cells and 4 rows per 2.5 cm after blocking. Exact gauge is less important than a firm fabric and a pocket wide enough for the intended cutlery.
Abbreviations
US crochet terms.
- ch = chain
- sc = single crochet
- dc = double crochet
- sl st = slip stitch
- sp = space
- X = solid filet cell
- . = open filet cell
Pattern
- Filet method Read each 15-character chart line from left to right as you work that row. Ch 3 at the start of every filet row; it counts as the first dc. For each X, work 3 dc across the next three positions. For each ., ch 2, skip the next two positions, then dc in the next position. On later rows, when making an X over an open cell, work 2 dc into its ch-2 sp and 1 dc into the following dc. When making an open cell, skip either two dc or the ch-2 sp beneath it, as applicable. Each row spans 46 stitch positions.
- Foundation Ch 47. Sc in the second ch from the hook and in every remaining ch: 46 sc. Turn.
- Rows 1–33: back and lower section Ch 3, then work the remaining 15 cells as described in the filet method. For each of these rows use X………….X: one solid cell at each side and 13 open cells between them. Turn after each row.
- Row 34: base of present Ch 3 and work X..XXXXXXXXX..X. Turn.
- Rows 35–41: present box Ch 3 and work X..X…X…X..X on each row. Turn after each row.
- Row 42: lid Ch 3 and work X..XXXXXXXXX..X. Turn.
- Row 43: bow Ch 3 and work X….XX.XX….X. Turn.
- Row 44: bow Ch 3 and work X…X..X..X…X. Turn.
- Row 45: bow Ch 3 and work X….XX.XX….X. Turn.
- Rows 46–48: firm mouth band Ch 3 and work XXXXXXXXXXXXXXX on each row: 46 dc per row, counting the turning ch-3. Turn after rows 46 and 47. Fasten off after row 48.
- Fold and seam Lay the rectangle flat with the present facing you and row 48 at the far end. Fold rows 33–48 up over rows 17–32, creasing between rows 32 and 33. Row 48 is now the front pocket mouth, and the bow is above the box as viewed on the pocket. Sew each side edge from the fold to the mouth, matching front row 33 with back row 32 through front row 48 with back row 17. Leave the mouth open.
- Top edging Join yarn at one end of the front mouth. Working into the top of row 48 only, sl st once into each of its 46 dc, including the turning-chain top counted as a dc. Keep the slip stitches loose enough that the mouth does not draw in. Fasten off.
Finishing
- Weave in all ends securely.
- Dampen and pin the pocket square if needed, then let it dry completely before use.
Helpful Tips
- The chart lines show the cells in working order, not the order in which the folded pocket is viewed.
- Count each ch-2 sp as two stitch positions when checking the width of a filet row.
- For a tidy place setting, insert the cutlery handles into the pocket and leave the eating ends above the mouth.
Christmas Bell Filet Bunting

Filet crochet gives these Christmas bells their shape through a contrast of open spaces and solid fabric. Each rectangular flag carries the same motif, creating a coordinated bunting that looks at home across a mantel or shelf.
Because the flags are separate, you can make enough to suit your display rather than committing to a fixed-length garland. The chart is symmetrical, so the bell remains easy to recognise whichever side of a flag faces you as you work.
The flags can slide along their hanging cord, making it easy to spread them out or bring them closer together. Before choosing your final arrangement, consider where the bunting will hang and leave room at either end to secure it.
Christmas Bell Filet Bunting
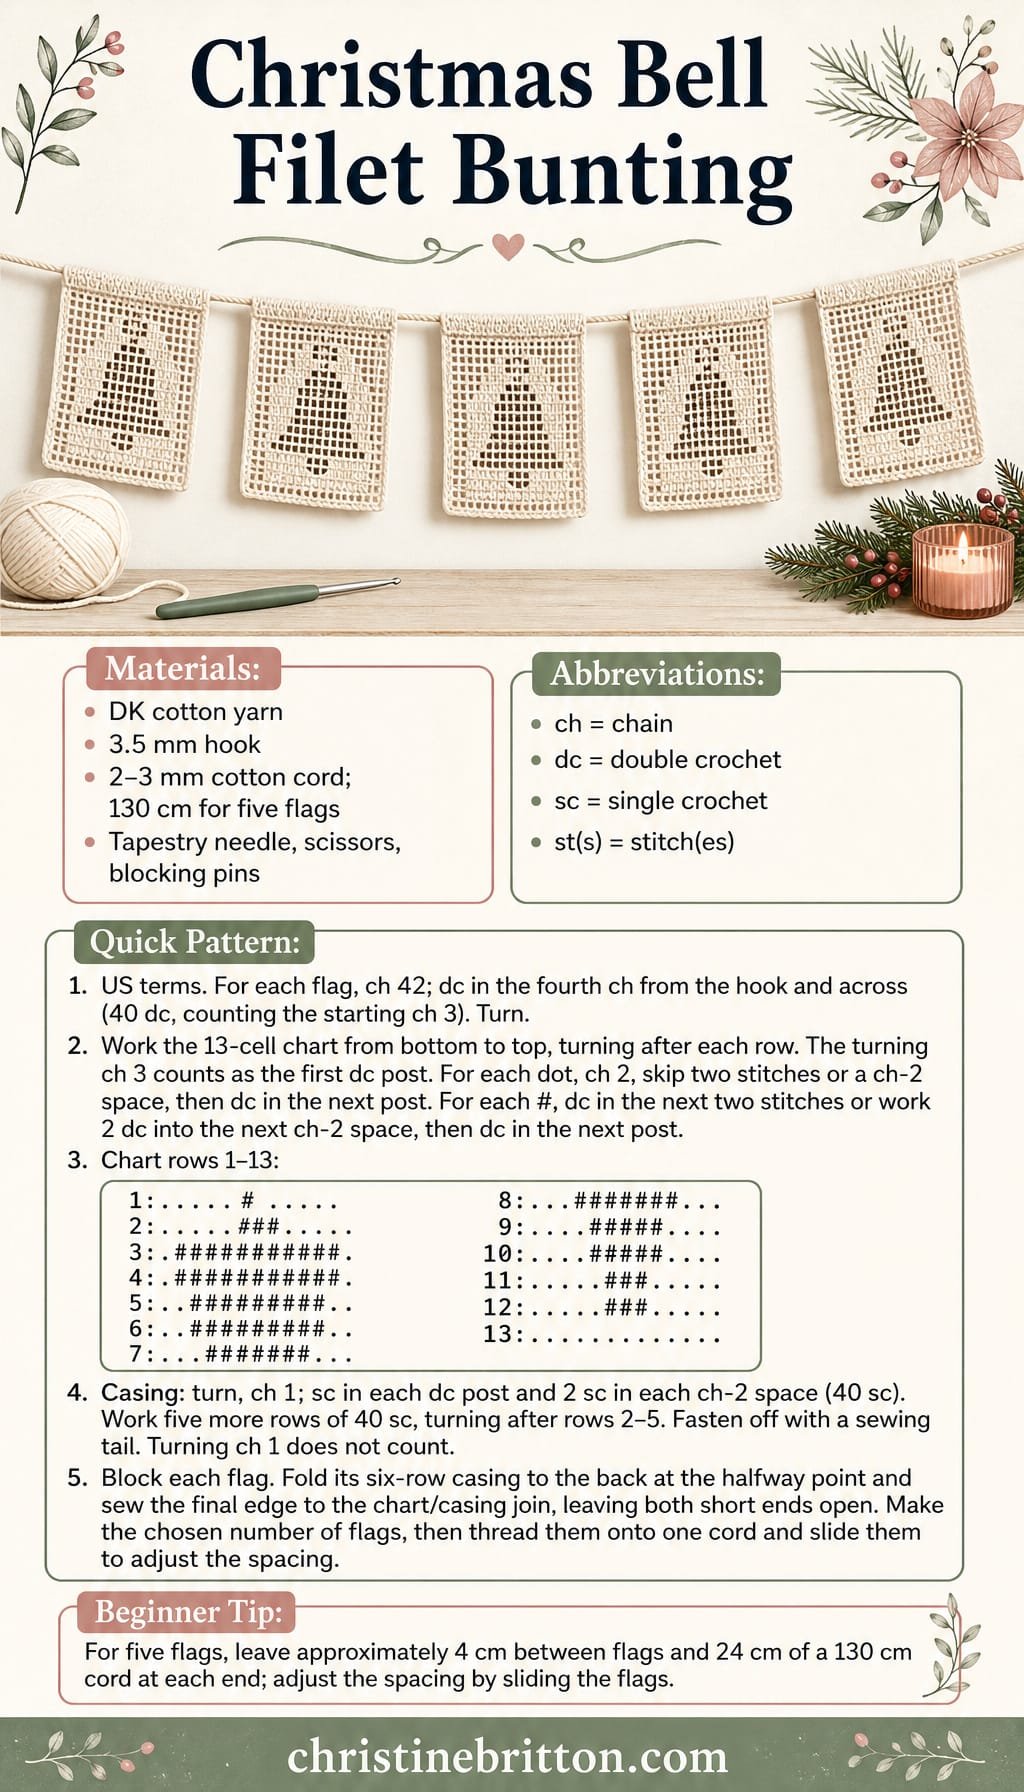
Quick-reference card. Follow the complete written instructions below.
Materials
- DK cotton yarn: For the flags; the amount needed depends on how many you make.
- 3.5 mm crochet hook: Or a size that gives a firm but flexible filet fabric.
- Cotton cord: Approximately 2–3 mm thick. For the five-flag example, cut a 130 cm length.
- Tapestry needle, scissors and blocking pins: For sewing the casings and finishing the flags.
Size and Fit
Make as many identical flags as you need. At the suggested target gauge, each flag is approximately 13 cm wide and 15 cm high, including its casing; these are estimates, not tested finished measurements. Five flags at this width, with four gaps of about 4 cm, occupy approximately 81 cm of cord. A 130 cm cord then leaves about 24 cm at each end for hanging.
Gauge
Suggested target after blocking: 10 filet cells and 10 chart rows measure approximately 10 cm in each direction. Exact gauge is not essential; measure one finished flag before cutting a cord for a different number or spacing of flags.
Abbreviations
US crochet terms.
- ch = Chain
- dc = Double crochet
- sc = Single crochet
- st(s) = Stitch(es)
Pattern
- Read the chart Each chart row has 13 cells. A dot is an open cell; # is a filled cell. Work rows 1–13 from bottom to top. Turn the work after every row. The bell is symmetrical, so the chart reads the same from either side.
- Filet cell method The turning ch 3 counts as the first dc post of each chart row. Work each of the 13 cells after that post. For an open cell, ch 2, skip the next two stitches or the next ch-2 space, then dc in the next dc post. For a filled cell, dc in each of the next two stitches, or work 2 dc into the next ch-2 space; then dc in the next dc post. Every row spans 40 stitch positions: the first post plus three positions per cell.
- Flag foundation Ch 42. Dc in the fourth ch from the hook and in each remaining ch: 40 dc. Turn.
- Bell chart Work the 13 rows below using the filet cell method. Keep the dots and # signs in their printed order. Row 1: ……#……; row 2: …..###…..; row 3: .###########.; row 4: .###########.; row 5: ..#########..; row 6: ..#########..; row 7: …#######…; row 8: …#######…; row 9: ….#####….; row 10: ….#####….; row 11: …..###…..; row 12: …..###…..; row 13: …………. . Each row is 13 cells wide.
- Casing After chart row 13, turn and ch 1. Casing row 1: sc in each dc post and work 2 sc into each ch-2 space across: 40 sc. Turn. Casing rows 2–6: ch 1, sc in each sc across: 40 sc. Turn after rows 2–5; fasten off after row 6, leaving a sewing tail. The turning ch 1 does not count as a stitch.
- Make the remaining flags Repeat the foundation, chart and casing for every flag. Five flags make the example bunting.
Finishing
- Weave in the foundation and chart ends. Lightly block each flag to straighten its sides and let it dry.
- Fold each six-row sc casing to the back at its halfway point. Using the sewing tail, stitch the final casing edge to the back of the flag along the join between chart row 13 and casing row 1. Sew across the width but do not close either short end: the fold must form a tunnel.
- Thread the cord through each tunnel. For five flags on a 130 cm cord, arrange gaps of approximately 4 cm between flags and leave approximately 24 cm at each end. Slide the flags to adjust the spacing before hanging.
Helpful Tips
- Count 13 cells on every chart row; even the entirely open top row has 13.
- When working into an open cell on the preceding row, place both dc of a filled cell into its ch-2 space rather than trying to work into individual chains.
- For another number of flags, estimate cord length as the combined flag widths plus your chosen gaps and hanging tails. Measure a finished flag for the most useful width.
Snowman Filet Window Hanging

A bright window makes a lovely backdrop for this snowman filet panel. Daylight passes through the open cells while the filled cells form a simple, graphic silhouette that reads clearly from across the room.
The narrow portrait shape suits a window where a larger decoration might block too much light. Its full-width dowel casing supports the fabric evenly, rather than pulling at the corners of the chart. Crisp, square cells make the contrast between the snowman and the open background especially clear.
Snowman Filet Window Hanging
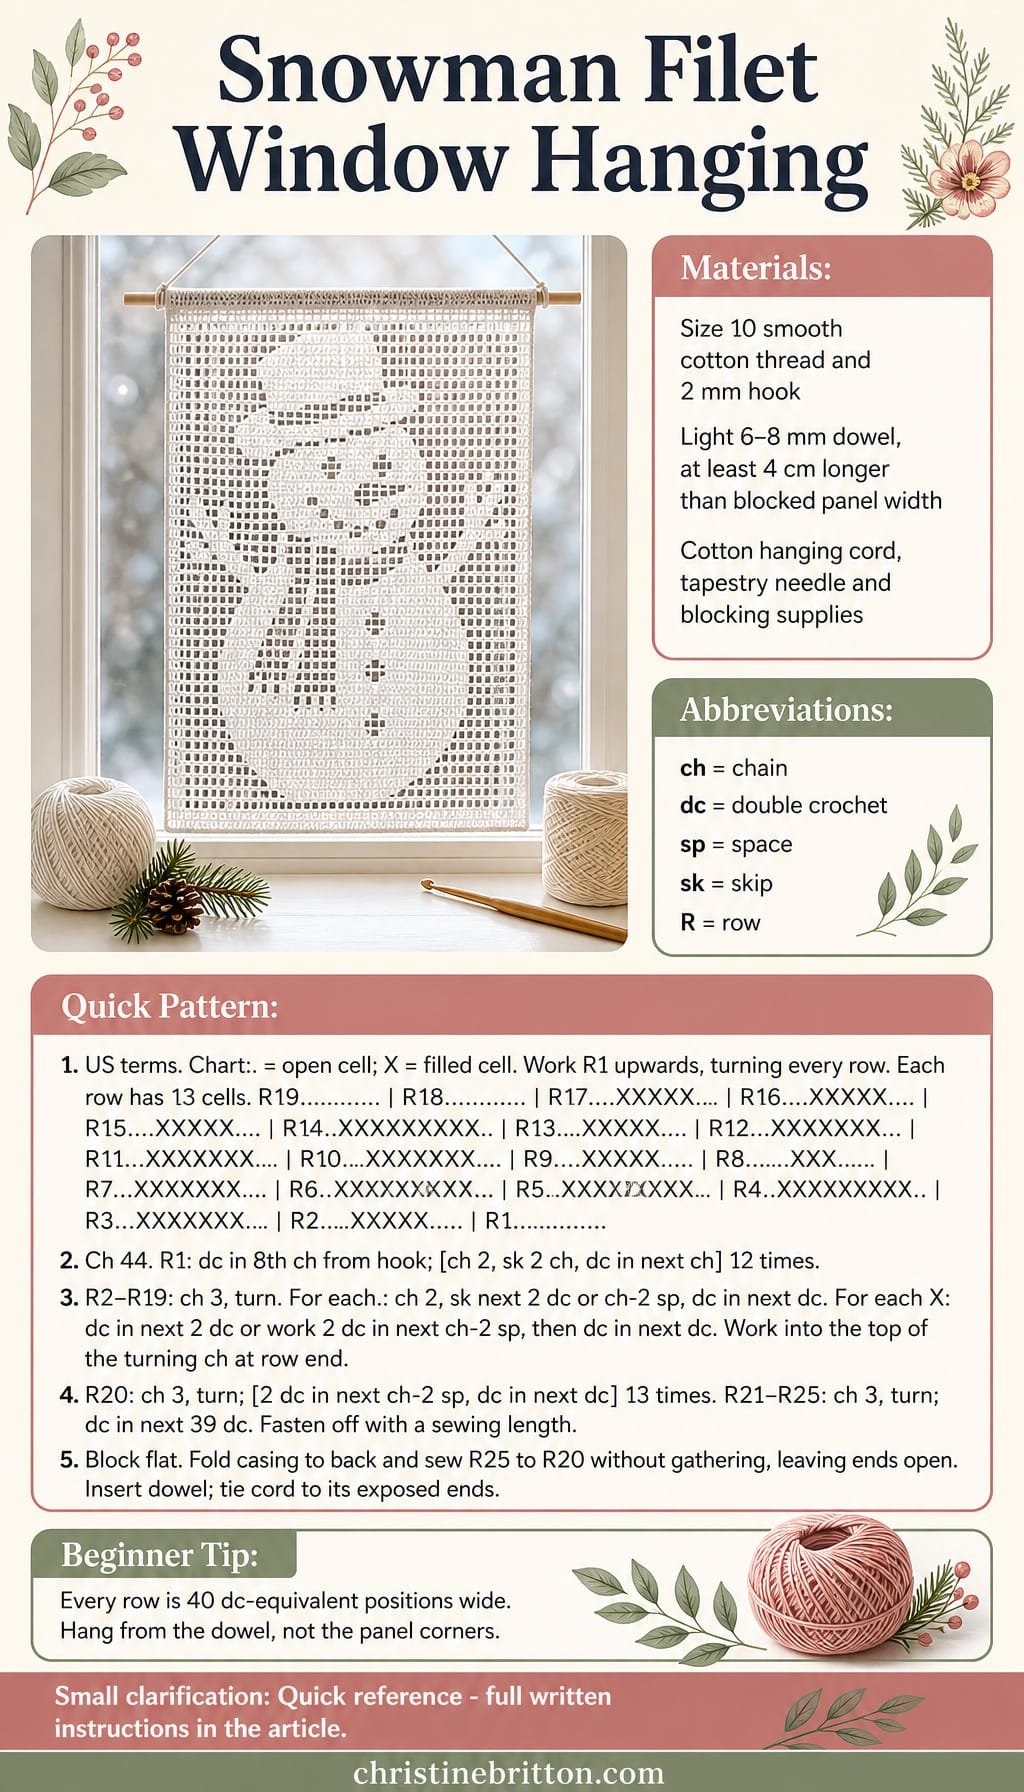
Quick-reference card. Follow the complete written instructions below.
Materials
- Smooth cotton crochet thread: Size 10, in white or another colour that contrasts with the window view
- Crochet hook: 2 mm, or a size that gives neat, open cells
- Light wooden dowel: Approximately 6–8 mm in diameter; cut it at least 4 cm longer than the blocked panel is wide
- Hanging cord: Smooth cotton cord or a length of the crochet thread
- Notions: Tapestry needle, scissors, rustproof pins and a blocking mat
Size and Fit
One sample size: 13 cells wide by 19 rows high, plus a six-row casing that is folded in half. At the suggested gauge, the filet panel is approximately 16.25 cm wide by 23.75 cm high; the folded casing adds approximately 3.75 cm to the hanging height. These are estimates, not tested finished measurements. Cut the dowel to suit the panel’s actual blocked width.
Gauge
Suggested blocked gauge: 4 filet cells and 4 rows measure approximately 5 cm in each direction. Exact gauge is not essential, but check the width before cutting the dowel.
Abbreviations
US crochet terms.
- ch = chain
- dc = double crochet
- sp = space
- sk = skip
- R = row
Pattern
- Read the chart Work the chart from R1 at the bottom to R19 at the top, turning after every row. Each character is one cell: . is open and X is filled. Every row has 13 cells. The motif is symmetrical, so the printed chart reads correctly from either working direction. The beginning ch-3 counts as the first dc of a row; work into its top when it is the final dc of the following row.
- Snowman chart R19 ………….
R18 ………….
R17 ….XXXXX….
R16 ….XXXXX….
R15 ….XXXXX….
R14 ..XXXXXXXXX..
R13 ….XXXXX….
R12 …XXXXXXX…
R11 …XXXXXXX…
R10 …XXXXXXX…
R9 ….XXXXX….
R8 …..XXX…..
R7 …XXXXXXX…
R6 ..XXXXXXXXX..
R5 ..XXXXXXXXX..
R4 ..XXXXXXXXX..
R3 …XXXXXXX…
R2 ….XXXXX….
R1 …………. - Foundation and R1 Ch 44. Dc in the 8th ch from the hook; this makes the first open cell. [Ch 2, sk 2 ch, dc in next ch] 12 times. You have 13 open cells across.
- R2–R19 Ch 3 and turn at the start of each row. Starting immediately after the turning ch, work the chart’s 13 cells in sequence. For each open cell: ch 2, sk the next two dc or the next ch-2 sp, then dc in the next dc. For each filled cell: work 1 dc in each of the next two dc, or 2 dc in the next ch-2 sp, then dc in the next dc. Each cell ends at the next dc of the previous row. Work that final dc into the top of the turning ch where applicable. Each row has 40 dc-equivalent positions across: one starting dc plus three positions per cell.
- Full-width casing, R20 R19 is entirely open. Ch 3 and turn. [Work 2 dc in the next ch-2 sp, then dc in the next dc] 13 times. Including the turning ch, you have 40 dc across the full width.
- Casing, R21–R25 Ch 3 and turn; dc in each of the next 39 dc. Repeat this row until R25 is complete. The casing is six solid rows deep, counting R20. Fasten off, leaving a length of thread for sewing.
Finishing
- Weave in ends other than the length reserved for sewing. Dampen and pin the panel square, including the casing while it is still flat. Let it dry completely.
- Fold the casing to the back, bringing the top edge of R25 down to R20. Sew corresponding stitches of R25 to R20 with loose, even stitches, leaving both short ends open. Do not gather the filet panel.
- Slide the dowel through the casing. Tie the hanging cord to the exposed dowel ends, outside the fabric, and adjust the knots until the panel hangs level.
Helpful Tips
- Count 13 cells at the end of every filet row; an open cell and a filled cell each occupy three positions.
- Keep the two dc worked into an open space side by side rather than pulling the space closed.
- If your blocked panel is wider than the sample estimate, use a longer dowel rather than stretching the casing to fit.
Christmas Tree Café Curtain

This Christmas tree café curtain brings a festive detail to a kitchen window without covering the whole pane. The trees appear as filled shapes against an airy filet background, so the design reads clearly in daylight.
Plan the width around the usable length of your hanging rod, rather than the window frame alone. The pattern uses complete tree repeats; a blocked swatch helps you choose enough repeats for the width you want while keeping the motifs intact.
The filet band gives the curtain its decorative focus, while a plain section above it lets you adjust the drop before the rod pocket. Check where you want the lower edge to fall on your window so the finished curtain suits the space.
Christmas Tree Filet Crochet Café Curtain

Quick-reference card. Follow the complete written instructions below.
Materials
- Yarn: Lightweight, washable cotton in white; quantity depends on the calculated width and pocket depth.
- Hook: A size suitable for your cotton that produces a firm but flexible filet fabric.
- Notions: Hanging rod, tape measure, stitch markers, yarn needle and blocking supplies.
Size and Fit
The illustrated calculation uses six tree repeats, giving 66 filet cells across. Measure the usable length of your rod between its supports, excluding finials. For gentle gathering, multiply that length by 1.2 to find your target flat width. Make and block the swatch described under Gauge; divide its 11-cell width by 11 to find one cell width, w. Choose T = the target flat width divided by (11 × w), rounded UP to a whole number; T is the number of trees. There are N = 11 × T cells across, including one open cell at each outside edge and two between trees. For example only, a 60 cm usable rod length and a blocked 11-cell width of 12 cm give a 72 cm target width and T = 6. Check the finished drop against your window before making the pocket; add plain open rows above the trees if you need more length.
Gauge
Make an 11-cell swatch: chain 36 and work 1 dc in the fourth chain from the hook and in every remaining chain (34 dc, counting the initial 3 chains as 1 dc). Work eight open-mesh rows as described in Row 2, then eight solid rows as described in Rod pocket. Wash and dry as you intend to care for the curtain, then block and measure. Measure the width of the 11 cells for the width calculation. Measure several solid rows and divide by the number measured to find solid-row height, h. Gauge varies with yarn and hook; use your own blocked measurements rather than the example width.
Abbreviations
US crochet terms.
- ch = chain
- dc = double crochet
- sp = space
- sk = skip
- T = number of tree repeats
- N = total number of filet cells; N = 11 × T
- P = even number of solid rows worked for the rod pocket
Pattern
- Reading the filet rows Each cell has three stitch positions between its boundary dc stitches. At the start of a row, ch 3 and turn; this counts as the first boundary dc. For an open cell (.), ch 2, sk the next two dc or the next ch-2 sp, then dc in the next boundary dc. For a solid cell (#), work 2 dc in the next two dc or 2 dc in the next ch-2 sp, then dc in the next boundary dc. Work the final boundary dc into the top of the previous row’s starting ch 3 when applicable. Read every row of the chart from the side you are working: its symmetrical trees and spacing make the same cell sequence usable in either direction.
- Row 1: firm lower edge Ch (3 × N + 3); for the six-tree example, ch 201. Dc in the fourth ch from the hook and in every remaining ch. Counting the initial 3 chains as 1 dc, you have (3 × N + 1) dc: 199 dc for six trees.
- Rows 2–3: lower open mesh Ch 3 and turn. Work N open cells across each row.
- Rows 4–12: tree band Work chart rows 1–9 below in order, one chart row per crochet row. For EACH chart row, ch 3 and turn; work one open cell, then the nine chart cells T times, placing two open cells between consecutive trees, and finish with one open cell. A dot is an open cell and # is a solid cell. The chart is written from the bottom of each tree upwards.
- Tree chart, bottom to top Chart row 1 (curtain row 4): …###…; row 2 (row 5): …###…; row 3 (row 6): #########; row 4 (row 7): .#######.; row 5 (row 8): ..#####..; row 6 (row 9): …###…; row 7 (row 10): ..#####..; row 8 (row 11): …###…; row 9 (row 12): ….#…. . Spaces between written chart rows are punctuation, not cells.
- Rows 13–15: upper open mesh Ch 3 and turn. Work N open cells across each row. If you need extra drop, add whole open-mesh rows here before starting the pocket; check the length while allowing for the folded pocket depth.
- Calculate the rod pocket Measure around the rod to obtain its circumference C in centimetres. Choose the smallest EVEN whole number P for which (P ÷ 2) × h is at least (C ÷ 2) + 1 cm, where h is your blocked solid-row height. The extra 1 cm allows ease. For instance, C = 7.9 cm and h = 0.85 cm give P = 12. These figures illustrate the calculation, not a tested gauge.
- Rows 16–(15 + P): solid pocket strip For each of P rows, ch 3 and turn. Across all N cells, work 2 dc in the next two dc or ch-2 sp, then dc in the next boundary dc. Each row has (3 × N + 1) dc. Fasten off, leaving a length for sewing.
- Fold the pocket With the curtain’s reverse side facing you, fold the solid strip at its midpoint, between solid rows P ÷ 2 and (P ÷ 2) + 1. Bring its final-row edge down to the back of the join between row 15 and the solid strip. Sew that edge securely along the join without catching the front layer. Leave both side ends open for the rod.
Finishing
- Weave in ends without closing the pocket openings.
- Wash and block the panel to its calculated flat width, keeping the tree cells square. Dry it fully before hanging.
- Slide the rod through the pocket and distribute the gathers evenly.
Helpful Tips
- Mark the first and last cell of every tree; the two open cells between trees are easy to overlook.
- If your rod is thicker than the one initially planned, recalculate P before folding the pocket.
- For a flatter curtain, reduce the 1.2 gathering factor when calculating the target width; always retain whole tree repeats.
Icicle Filet Shelf Edging
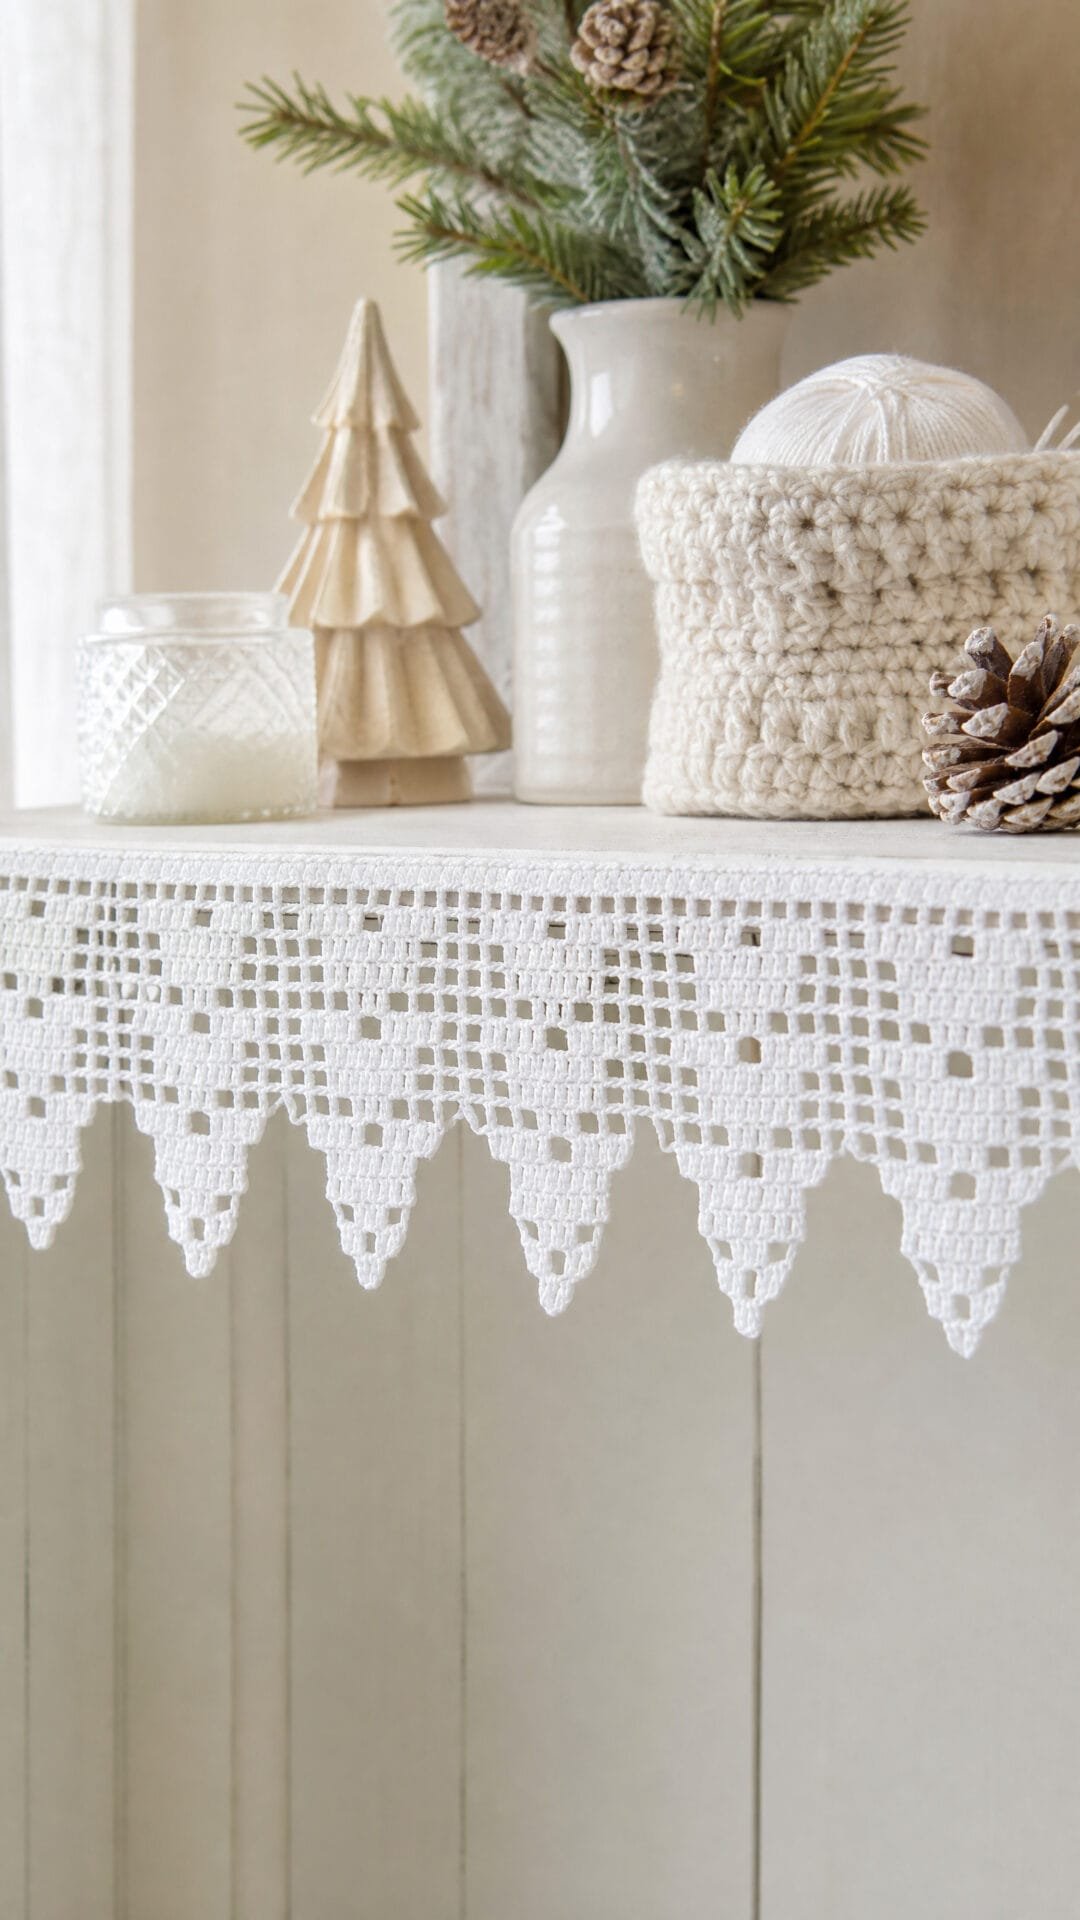
This narrow edging brings a wintry detail to a shelf or cupboard without covering the surface. The open filet pattern gives the trim a light, lacy look, while the straight upper edge sits neatly against the shelf.
The icicle points are formed separately along the completed band’s lower edge. This keeps the horizontal filet repeat uninterrupted, so you can adjust the length to suit your shelf without cutting through a point.
Choose a firm cotton if you want the little points to hold their shape. For a display that does not involve sewing into the furniture, removable shelf-edge clips or thread loops on suitable removable hooks are options; check that any adhesive is appropriate for the shelf’s finish.
Icicle Filet Shelf Edging

Quick-reference card. Follow the complete written instructions below.
Materials
- Size 10 crochet cotton: White; allow approximately 90–120 m for the 12-repeat sample, with extra thread if adjusting the length.
- Crochet hook: 1.75 mm, or a size that produces a firm, crisp fabric.
- Other: Scissors, tapestry needle and tape measure. For hanging, use removable shelf-edge clips or suitable removable adhesive hooks and thread loops.
Size and Fit
The sample has 12 repeats and 12 points. At the stated gauge, the band is approximately 48 cm wide before blocking. Each additional repeat adds 12 band stitches, one filet motif and one point; measure the shelf and add or remove whole repeats to suit. Let the points hang clear of the shelf edge.
Gauge
Approximately 30 dc across 10 cm in the solid band rows. Exact gauge is not essential, but it determines the finished width; check your width before working the points.
Abbreviations
US crochet terms.
- ch = chain
- dc = double crochet
- sc = single crochet
- sc2tog = single crochet two stitches together
- sc3tog = single crochet three stitches together
- sk = skip
- sp = space
- st = stitch
Pattern
- Before you begin The sample uses 12 repeats. For a different length, choose a whole number of repeats, R. The band has 12R + 1 stitches; chain 12R + 3 to begin. Turning ch-3 counts as a dc throughout the band. Turning ch-1 does not count as a stitch in the points.
- Band row 1 Ch 147. Dc in the fourth ch from the hook and in each remaining ch. The skipped 3 chains count as the first dc. Turn. 145 dc.
- Band row 2: filet motif Ch 3, sk the first st. Repeat the following sequence 12 times: [ch 2, sk the next 2 sts, dc in the next st] twice; dc in each of the next 3 sts; ch 2, sk the next 2 sts, dc in the next st. Turn. Each repeat makes three open filet cells and one filled cell; 73 dc and 36 ch-2 spaces.
- Band row 3 Ch 3, sk the first dc. Working across, dc in each remaining dc, including the top of the previous turning ch-3, and work 2 dc in each ch-2 sp. Turn. 145 dc.
- Band rows 4–5 Work row 4 as row 2, then row 5 as row 3. Fasten off after row 5. There are 145 dc along the lower edge, ready for the points.
- Mark the point positions Count the row-5 stitches from either end and mark stitches 1, 13, 25, 37, 49, 61, 73, 85, 97, 109, 121 and 133. Each mark starts one point. A point uses its marked stitch and the next 12 stitches, so neighbouring points use their shared boundary stitch as an anchor. Work each point separately; do not turn or shorten the filet band.
- Each point, row 1 Join thread with a slip stitch in a marked stitch. Ch 1, sc in the same st and in each of the next 12 row-5 stitches. Turn. 13 sc.
- Each point, rows 2–6 Ch 1, sc2tog over the first 2 sts, sc in each st until 2 sts remain, sc2tog over the last 2 sts; turn. Repeat this row until row 6 is complete. The stitch counts after rows 2–6 are 11, 9, 7, 5 and 3.
- Each point, row 7 Ch 1, sc3tog over the remaining 3 sts. Fasten off. Repeat all seven point rows at every marked position. The one-stitch tips and reductions on both sides form the short stepped icicles without breaking the horizontal filet repeat.
Finishing
- Weave in the ends. Gently dampen and pin the band straight, shaping each point; leave it to dry completely.
- To hang without sewing into the shelf, hold the top edge with removable shelf-edge clips. Alternatively, attach small thread loops to the band’s top edge and hang them from removable adhesive hooks suitable for the shelf finish. Follow the hook maker’s surface and removal instructions.
Helpful Tips
- The filled filet cell is made by working three dc into the next three stitches after an open cell; its fourth post is shared with the following cell.
- Count the 145 stitches after each solid row. If the band is longer than needed, remove a whole 12-stitch repeat rather than cutting a point in half.
- A shared boundary stitch receives one sc from each of its two neighbouring points. These are separate point rows, not an increase within the band.
If you’d like to keep building your crochet skills, take a look at crochet Christmas table runner patterns.
Reindeer Filet Mantel Scarf

This reindeer filet mantel scarf brings a quiet Christmas detail to a fireplace display. The repeating silhouettes run along a long, airy strip, with open mesh between them so each reindeer stands out.
Filet crochet creates the design through the contrast between filled and open squares. The block-style shapes and broad antler branches make the reindeer easier to recognise than a finer, more intricate motif would be, particularly when the scarf is viewed from across the room.
The scarf works well over a plain mantel or against a contrasting background that shows off the mesh. It is decorative rather than heat-resistant, so keep it clear of flames, hot surfaces and anything that could catch it.
Reindeer Filet Mantel Scarf

Quick-reference card. Follow the complete written instructions below.
Materials
- Cotton yarn: Approximately 250–350 m of 4-ply cotton for the sample size; allow more if adjusting the length.
- Crochet hook: 3 mm, or a size that gives an even, square-looking mesh.
- Other: Tape measure, stitch markers, yarn needle and blocking pins.
Size and Fit
Sample: approximately 114 cm long × 19 cm deep at the stated gauge, with four reindeer. Measure the mantel before starting. To adjust the length, use a whole number R of reindeer: the strip has 24R − 1 mesh cells along each row. Each added reindeer adds 24 cells, approximately 28.8 cm at the stated gauge. The two-cell mesh border at each end remains unchanged. The foundation chain is 3 × (24R − 1) + 5.
Gauge
Aim for approximately 10 mesh cells across × 10 rows = 12 × 10 cm after blocking. Check a filet swatch before choosing the number of reindeer; the finished dimensions are estimates based on this gauge, not measured results.
Abbreviations
US crochet terms.
- ch = chain
- dc = double crochet
- sp = space
- RS = right side
Pattern
- Plan the layout The sample uses R = 4 reindeer and 95 mesh cells per row: two open cells, then four 19-cell motifs separated by five open cells, then two open cells. Number the cells of each motif 1–19 from left to right as viewed from the RS. Motif positions stay fixed throughout; any motif cell not listed as filled is open.
- Filet cells An open cell is ch 2, skip the next two stitches or the next ch-2 sp, dc in the next boundary dc. For a filled cell, work 2 dc into the next ch-2 sp, or 1 dc in each of the next two dc if the cell below is filled; then dc in the next boundary dc. Each cell ends at a boundary dc shared with the following cell. At the start of every turned row, ch 5 counts as the first boundary dc and ch-2 sp; dc in the next boundary dc to complete the first open cell. All rows start and end with open cells.
- Foundation and Row 1 For the sample, ch 290. Dc in the 8th ch from the hook. *Ch 2, skip 2 ch, dc in the next ch; repeat from * to the end. This makes 95 open cells. Treat Row 1 as an RS row; subsequent odd-numbered rows are worked from right to left as viewed from the RS.
- Row 2 Turn, ch 5, dc in the next boundary dc. Work an open cell across each remaining cell. You have 95 open cells.
- Rows 3–17: reindeer Turn for each row. Begin with ch 5 and an open cell as described above, then follow the motif positions below across the row. On odd-numbered rows, read the motifs and their cell numbers from right to left; on even-numbered rows, read from left to right. Work five open cells between motifs and keep the two end cells open. Fill the same numbered positions in every motif. Motif cells are filled as follows: Row 3: 5–6, 10–11. Row 4: 5–6, 10–11. Row 5: 5–7, 10–11. Row 6: 4–11. Row 7: 3–11. Row 8: 2–12. Row 9: 1–13. Row 10: 9–13. Row 11: 10–16. Row 12: 11–19. Row 13: 12–18. Row 14: 13–16. Row 15: 12–17. Row 16: 12–13, 16–17. Row 17: 12–13, 16–17.
- Rows 18–19 Turn for each row. Work open cells across all 95 cells, matching the two plain mesh rows at the beginning of the scarf. Fasten off after Row 19.
Finishing
- Weave in the ends without pulling the mesh out of shape.
- Block the scarf flat, straightening the long edges and opening the mesh evenly. Let it dry completely before placing it on the mantel.
Helpful Tips
- Place markers after the first two cells, between the five-cell gaps and before the final two cells. Move them up as you work.
- The reindeer face right when viewed from the RS. Reading alternate rows in opposite directions preserves that orientation.
- Keep the two-cell-wide gaps in the upper antlers open on Rows 16 and 17; filling them would obscure the branches.
Pine Tree Filet Cushion Cover

Filet crochet gives this cushion its pine-tree motif through the contrast between open and solid areas. The simple square shape lets the tree take centre stage, making it a festive accent that can work beyond Christmas Day.
A dark green fabric lining provides an even background behind the openwork. Without it, the cushion insert could show through differently as it shifts, making parts of the motif look patchy.
The plain crocheted back has an overlapping envelope opening, so the insert can be removed without a zip or buttons. This is an intermediate project: the construction is straightforward, but the front calls for careful reading of the filet rows to keep the tree clearly defined.
Pine Tree Filet Cushion Cover
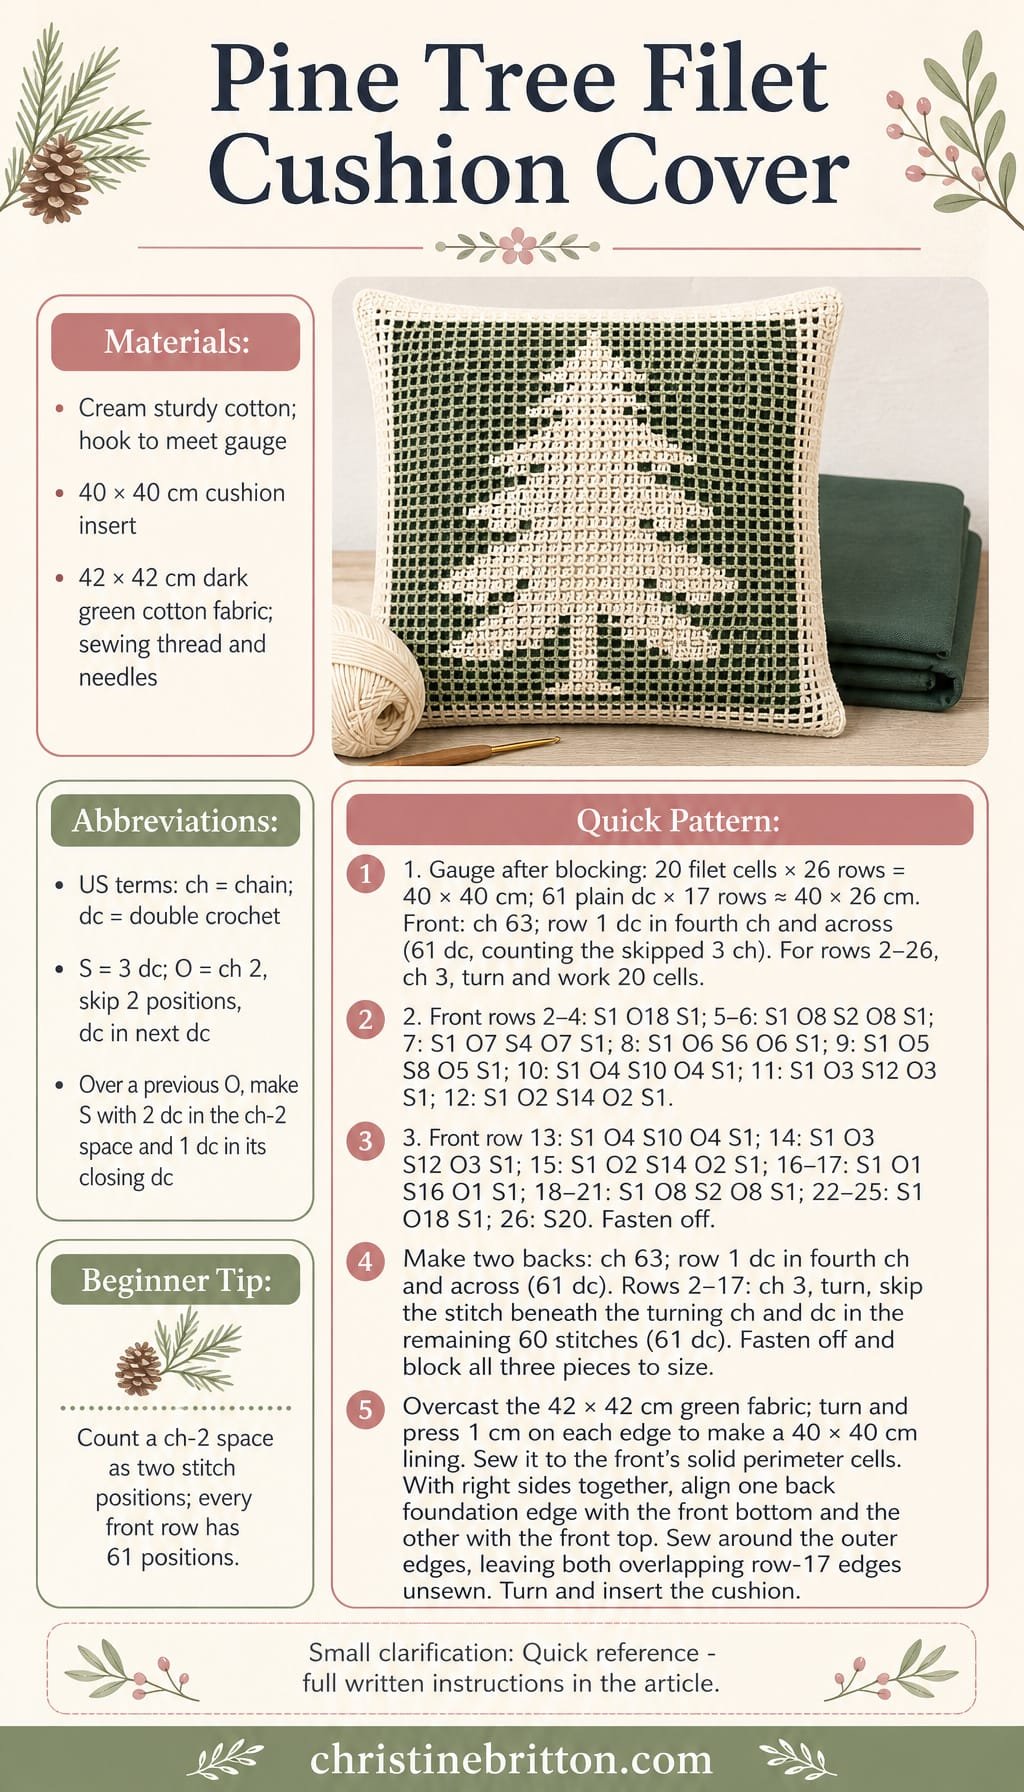
Quick-reference card. Follow the complete written instructions below.
Materials
- Yarn: Smooth, sturdy cotton in cream; use enough to make one 40 cm square filet front and two 40 × 26 cm back panels. Buy extra if adjusting the hook size to meet gauge.
- Hook: Size that gives the blocked gauge; approximately 4.5–5 mm is a starting point.
- Cushion insert: One 40 × 40 cm insert.
- Lining fabric: One 42 × 42 cm piece of dark green cotton, plus matching sewing thread.
- Other: Yarn needle, sewing needle, scissors, tape measure and pins or stitch markers.
Size and Fit
One size for a 40 × 40 cm cushion insert. The blocked front measures 40 × 40 cm. Each blocked back panel measures approximately 40 × 26 cm; with their outer edges aligned to the front, the panels overlap by approximately 12 cm. Check both the filet and plain-fabric gauges before making the cover, as the two stitch patterns may block differently.
Gauge
After blocking: 20 filet cells across and 26 rows high measure 40 × 40 cm. In plain dc, 61 stitches measure approximately 40 cm across and 17 rows measure approximately 26 cm high. Make swatches large enough to measure away from their edges. Adjust hook size if necessary; the finished panel measurements matter more than the suggested hook size.
Abbreviations
US crochet terms.
- ch = chain
- dc = double crochet
- st = stitch
- S = solid filet cell: work one dc in each of the next three stitch positions
- O = open filet cell: ch 2, skip the next two stitch positions, then dc in the next dc
Pattern
- Read the filet rows Work the front from the bottom upwards. Each row has 20 cells. A number after S or O tells you how many consecutive cells of that type to work; for example, S1 O8 S2 O8 S1 makes 20 cells. The turning ch 3 counts as the first dc, at the left edge of the row. Every cell then advances three stitch positions, ending in a dc. When making an S over an O from the previous row, work 2 dc into its ch-2 space and 1 dc in its closing dc. When making an O over an O, skip its ch-2 space and work the closing dc into the next dc. Do not work into the ch-2 loops individually.
- Front, row 1 Ch 63. Dc in the fourth ch from the hook and in each remaining ch. The skipped 3 ch count as the first dc: 61 dc total, forming 20 solid cells.
- Front, rows 2–6 For every following front row, ch 3 and turn, then work the listed 20 cells. Rows 2–4: S1 O18 S1. Rows 5–6: S1 O8 S2 O8 S1.
- Front, rows 7–12 Row 7: S1 O7 S4 O7 S1. Row 8: S1 O6 S6 O6 S1. Row 9: S1 O5 S8 O5 S1. Row 10: S1 O4 S10 O4 S1. Row 11: S1 O3 S12 O3 S1. Row 12: S1 O2 S14 O2 S1.
- Front, rows 13–17 Row 13: S1 O4 S10 O4 S1. Row 14: S1 O3 S12 O3 S1. Row 15: S1 O2 S14 O2 S1. Rows 16–17: S1 O1 S16 O1 S1.
- Front, rows 18–26 Rows 18–21: S1 O8 S2 O8 S1. Rows 22–25: S1 O18 S1. Row 26: S20. Fasten off.
- Back panels Make two identical plain panels. For each, ch 63. Row 1: dc in the fourth ch from the hook and in each remaining ch (61 dc, including the turning ch). Rows 2–17: ch 3, turn, then dc in each of the remaining 60 stitches; do not work into the stitch directly beneath the turning ch (61 dc total). Fasten off. The row-17 edge of each panel will be an edge of the envelope opening.
- Block and prepare the lining Block all three crocheted pieces to the stated measurements and let them dry completely. Wash and press the dark green fabric according to its care instructions. Overcast its raw edges, turn 1 cm to the wrong side on all four edges and press. The prepared lining should measure 40 × 40 cm.
- Line and assemble Lay the front wrong side up and centre the green lining on it, wrong side against the crochet. Sew the lining to the solid perimeter cells with small stitches, keeping the sewing away from the open motif. Lay one back panel over the front, right sides together, with its foundation edge aligned to the bottom edge of the front and its side edges aligned. Lay the second back panel over it with its foundation edge aligned to the top edge of the front. The panels overlap at the centre; their row-17 edges remain unsewn as the opening. Pin and sew around all four outside edges through the crochet layers, keeping the lining flat and caught securely at the perimeter. Turn right side out through the opening and insert the cushion.
Finishing
- Weave in yarn ends before attaching the lining.
- Check that the lining covers every open cell and lies flat before sewing on the back panels.
- Ease the insert into the corners, then smooth the overlapping back panels into place.
Helpful Tips
- Count each ch-2 space as two stitch positions when checking a filet row. Every front row spans 61 positions, although an open row contains fewer dc.
- Keep the opening edges of the back panels straight when sewing the outer seam; neither opening edge is sewn across.
- If a blocked panel misses its target measurement, correct the gauge before assembly rather than stretching one panel to fit another.
Christmas Cottage Filet Wall Hanging

This filet wall hanging brings a quiet, storybook feel to Christmas decorating. The cottage stands against an open mesh background, so the shape reads clearly when the panel is displayed on a wall.
The design relies on broad filled areas for the roof, door and chimney rather than tiny details that might get lost in the mesh. Open space around the cottage helps separate those features, while the plain border gives the panel a tidy frame.
If you enjoy filet crochet but want a motif that is easy to recognise from across a room, this is a satisfying festive project. The contrast between solid and open cells does the decorative work without adding intricate embellishment.
Christmas Cottage Filet Wall Hanging
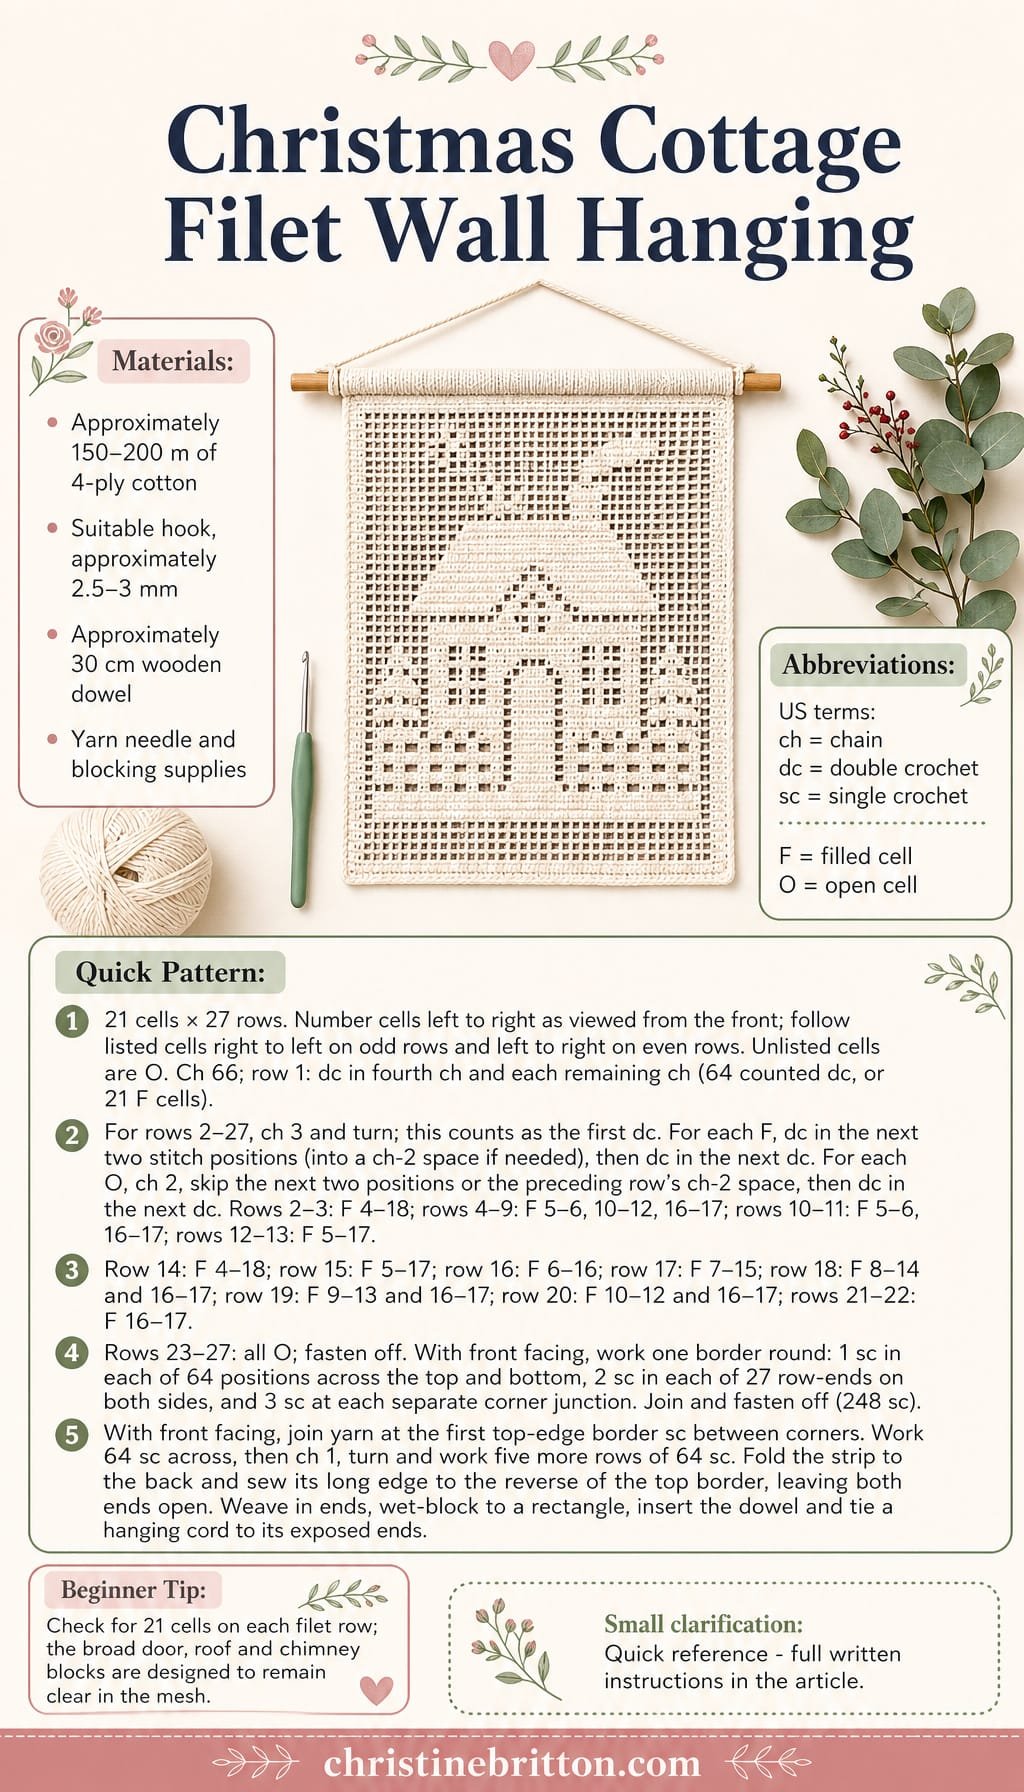
Quick-reference card. Follow the complete written instructions below.
Materials
- Cotton yarn: Approximately 150–200 m of 4-ply cotton; allow extra if you change the size.
- Crochet hook: A size suitable for your yarn and a firm, even filet mesh; 2.5–3 mm is a starting range.
- Wooden dowel: Approximately 30 cm long, or long enough to extend beyond both sides of your finished panel.
- Other tools: Yarn needle, scissors, pins and a blocking surface.
Size and Fit
The chart is 21 cells wide and 27 rows high. At a blocked gauge of 4 cells and 4 rows per 5 cm, the chart measures approximately 26 × 34 cm before the border and casing. Your finished dimensions will depend on your gauge.
Gauge
Planning gauge after blocking: 4 filet cells and 4 rows per 5 cm. Make a small filet swatch if the finished size or dowel length matters.
Abbreviations
US crochet terms.
- ch = chain
- dc = double crochet
- sc = single crochet
- F = filled filet cell
- O = open filet cell
Pattern
- Read the chart Number the 21 cells across the panel from left to right as viewed from the front. Work rows 1–27 from the bottom upwards, turning after every row. On odd-numbered rows, follow the listed cells from right to left; on even-numbered rows, follow them from left to right. Any cell not listed as filled is open. Keep the work flat as you go.
- Filet cell method Each row has 21 cells and 64 stitch positions. At the start of every row after row 1, ch 3 and turn; this counts as the first dc. For each F cell, work 1 dc in each of the next two stitch positions, then 1 dc in the next dc. If those two positions are a ch-2 space, work the two dc into that space. For each O cell, ch 2, skip the next two stitch positions or the preceding row’s ch-2 space, then dc in the next dc. Each cell ends at a dc shared with the following cell.
- Foundation and row 1 Ch 66. Dc in the fourth ch from the hook and in every remaining ch. The turning ch counts as a dc: 64 dc in total, forming 21 filled cells. This full-width row makes a simple ground line.
- Rows 2–3: ground Fill cells 4–18 on each row; work all other cells open.
- Rows 4–9: walls and door On each row, fill cells 5–6, 10–12 and 16–17. The central filled block forms the door.
- Rows 10–11: walls On each row, fill cells 5–6 and 16–17.
- Rows 12–13: top of walls On each row, fill cells 5–17.
- Row 14: roof Fill cells 4–18.
- Row 15: roof Fill cells 5–17.
- Row 16: roof Fill cells 6–16.
- Row 17: roof Fill cells 7–15.
- Row 18: roof and chimney Fill cells 8–14 and 16–17.
- Row 19: roof and chimney Fill cells 9–13 and 16–17.
- Row 20: roof peak and chimney Fill cells 10–12 and 16–17.
- Rows 21–22: chimney On each row, fill cells 16–17.
- Rows 23–27: open sky Work all 21 cells open on each row. Fasten off after row 27.
- Plain border With the front facing, join yarn at a corner. Work one round of sc: 1 sc in each of the 64 stitch positions across both the top and bottom, and 2 sc in each of the 27 row-ends along both sides. Work 3 sc at each corner junction, rather than counting a corner junction again as a row-end or edge stitch. Join to the first sc and fasten off. This gives 248 sc.
- Dowel casing With the front facing, join yarn in the first of the 64 top-edge border sc between the corner groups. Work 1 sc in each top-edge sc: 64 sc. Ch 1, turn and work 1 sc in each sc for five more rows, making a six-row strip. Fasten off with a long tail. Fold the strip to the back and sew its free long edge to the reverse of the top border. Leave both short ends open for the dowel.
Finishing
- Weave in ends. Wet-block the cotton panel to a rectangle, straightening the roof line and side edges without stretching the open cells out of shape. Let it dry fully.
- Slide the dowel through the casing. Tie a separate length of yarn or cord securely to both exposed dowel ends to make a hanger.
Helpful Tips
- Count the 21 cells on every row. The solid door is deliberately three cells wide, while the chimney is two cells wide, so both remain visible against the mesh.
- Mark rows 18–22 on a printed copy of the instructions: these rows contain the separate chimney block.
Fir Tree Filet Gift Bag

Solid and open filet cells form a fir tree on both sides of this reusable drawstring bag. It makes a decorative covering for a small Christmas gift without hiding the crochet work.
The open cells are part of the design, so coloured tissue can show through and bring out the tree motif. If the contents need more coverage, a fabric liner is another option.
This bag lies flat and has no gusset. It is best suited to a small, lightweight gift that fits comfortably inside without pulling the sides out of shape.
Fir Tree Filet Gift Bag

Quick-reference card. Follow the complete written instructions below.
Materials
- DK cotton yarn: Approximately 100 g in total, including yarn for the drawstring. Choose a cotton with enough body to support a small wrapped gift.
- 3.5 mm crochet hook: Adjust the hook size if needed to make a firm fabric that meets the stated gauge.
- Yarn needle and scissors: For seaming, threading the drawstring and weaving in ends.
- Optional fabric or tissue paper: Use a lightweight fabric liner or coloured tissue to cover the open cells.
Size and Fit
One sample size: approximately 18 cm wide and 16 cm high when laid flat after seaming. Suitable for a small, lightweight wrapped gift. The bag has no gusset.
Gauge
Aim for 24 dc stitches and 12 dc rows per 10 cm in a firm, flat swatch. Gauge affects the finished bag size; check it before making the panels.
Abbreviations
US crochet terms.
- ch = chain
- dc = double crochet
- sk = skip
- sp = space
Pattern
- Filet key Each panel is 15 cells wide. An open cell is ch 2, sk the next two stitch positions, dc in the next dc. A filled cell is dc in each of the next two stitch positions, then dc in the next dc. When the preceding row has an open cell, work its two dc into the ch-2 sp; when making an open cell, sk either two dc or one ch-2 sp. Begin every chart row with ch 3, turn; this counts as the first dc. Then work the 15 cells in order. Each row occupies 46 stitch positions, counting each ch as one position.
- Panel foundation Make two identical panels. For each panel, ch 48. Foundation row: dc in the fourth ch from the hook and in each remaining ch; the three skipped chains count as the first dc. You have 46 dc. Turn.
- Fir-tree chart, rows 1–15 Use the filet key for each row. Cell numbers run from 1 to 15 across the row; make every cell not named as filled an open cell. Rows 1–2: all open. Rows 3–4: fill cell 8. Row 5: fill cells 3–13. Row 6: fill cells 4–12. Row 7: fill cells 5–11. Row 8: fill cells 4–12. Row 9: fill cells 5–11. Row 10: fill cells 6–10. Row 11: fill cells 5–11. Row 12: fill cells 6–10. Row 13: fill cells 7–9. Row 14: fill cell 8. Row 15: all open. The motif is symmetrical, so these cell numbers apply even when the work is turned.
- Drawstring channel, row 1 Ch 3, turn. Work 2 dc in each ch-2 sp and 1 dc in each dc across the chart row, omitting a second stitch in the turning chain counted as the first dc. End with 46 dc.
- Drawstring channel, row 2 Ch 3, turn; dc in the next dc. Repeat [ch 2, sk the next 2 dc, dc in the next dc] 14 times; then ch 2, sk the next 2 dc, dc in the last dc. You have 15 ch-2 eyelets across the row.
- Drawstring channel, row 3 Ch 3, turn. Work 2 dc in each ch-2 sp and 1 dc in each dc across, ending with 46 dc.
- Drawstring channel, row 4 Ch 3, turn; dc in each remaining dc across. Fasten off, leaving a length for seaming.
- Join the bag Place the panels together with the sides you want facing out against each other. Match the foundation edges, row ends and eyelets. Sew the sides and foundation edges together with a firm, shallow seam, leaving the top edges open. Turn the bag right side out.
- Drawstring Make a chain approximately 80 cm long, or make a narrow cord of similar length. Secure its ends. Starting at an eyelet beside a side seam, thread it through all 15 eyelets on one panel and all 15 on the other, returning to the starting point. Leave both ends outside and knot them together. Pull gently to close.
Finishing
- Weave in all remaining yarn ends.
- For a fabric liner, make a simple pouch that fits inside the bag without stretching it. Keep its top edge below the drawstring eyelets and tack it to the bag at a few points. Alternatively, wrap the gift in tissue paper before placing it inside.
- Smooth the bag into shape. Do not use it for a gift heavy enough to distort the filet cells or seams.
Helpful Tips
- Count 15 cells on every chart row before turning. The final dc of each row goes into the top of the preceding row’s beginning ch-3.
- The two panels use the same chart; there is no separate reversed chart.
- If the cord catches while threading, attach a safety pin or blunt yarn needle to one end to guide it through the eyelets.
Star Filet Bottle Sleeve

A bottle can be an awkward gift to wrap neatly. This star-motif filet sleeve adds a festive layer while leaving the bottle’s shape visible through the openwork.
The repeating stars give the sleeve a decorative rhythm without making it look crowded. They show up particularly well when the bottle or its label contrasts with the crochet.
This is a project to plan around the bottle you intend to give, rather than a one-size-fits-all cover. The sleeve is designed to sit clear of the base so the bottle stands on its own, with the upper edge secured near the neck.
Star Filet Bottle Sleeve
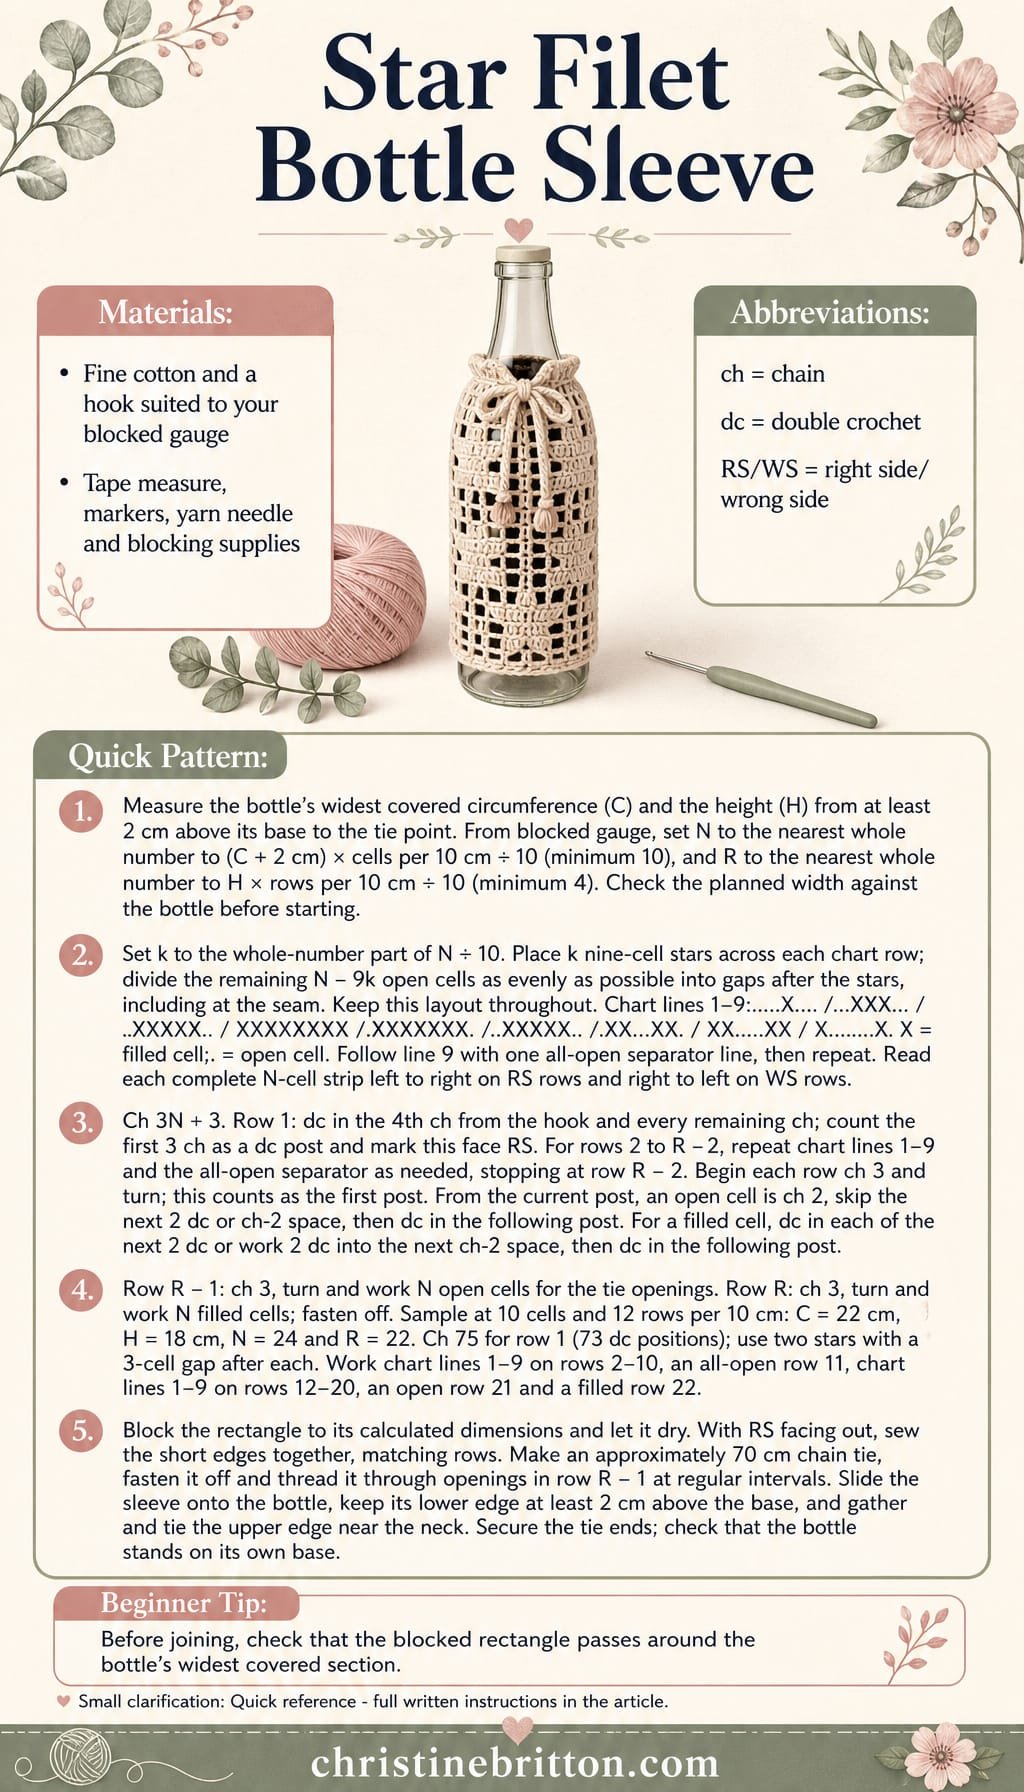
Quick-reference card. Follow the complete written instructions below.
Materials
- Cotton yarn: Fine cotton suitable for filet crochet; approximately 60–90 m for the sample sleeve, plus enough for a 70 cm tie
- Crochet hook: Size needed to achieve your measured gauge; 2.5 mm is a starting point
- Other: Tape measure, stitch markers, yarn needle and blocking supplies
Size and Fit
Sample calculation: for a bottle measuring 22 cm around its widest covered section, make a rectangle approximately 24 cm wide before seaming. Its approximately 18 cm height runs from 2 cm above the bottle base to a tie point 20 cm above the base. Check that the sleeve can pass over the widest section. For another bottle, measure that circumference (C) and the distance from a point at least 2 cm above its base to the intended tie point (H). Use the gauge method below to calculate the rectangle; do not assume that one sleeve fits every bottle.
Gauge
Work and block a filet swatch in your chosen yarn. Count cells and rows over 10 cm. The sample calculations use 10 cells and 12 rows per 10 cm, giving 24 cells across and 22 rows high. For your bottle, set N to the nearest whole number to (C + 2 cm) × cells per 10 cm ÷ 10; use at least 10 cells. Set R to the nearest whole number to H × rows per 10 cm ÷ 10; use at least 4 rows. Recheck the planned width against the bottle before seaming.
Abbreviations
US crochet terms.
- ch = chain
- dc = double crochet
- st = stitch
- RS = right side
- WS = wrong side
Pattern
- Plan the star strips Each star is 9 cells wide. Set k to the whole-number part of N ÷ 10. The remaining N − 9k cells are open-cell gaps after the stars, including the gap at the seam. Divide those gap cells as evenly as possible among the k gaps. For the sample, N = 24 and k = 2: work a 9-cell star, 3 open cells, a second 9-cell star and 3 open cells. Keep the same gap arrangement throughout.
- Star chart X means a filled cell and . means an open cell. Work chart lines 1–9 in this order, then one line of all-open cells; repeat this 10-row sequence as directed. Line 1: ….X….; line 2: …XXX…; line 3: ..XXXXX..; line 4: XXXXXXXXX; line 5: .XXXXXXX.; line 6: ..XXXXX..; line 7: .XX…XX.; line 8: XX…..XX; line 9: X…….X. For each chart line, place its 9 cells at every star position and work the planned gaps as open cells. Lay out each complete N-cell strip as viewed from the RS. Work across it left to right on RS rows and right to left on WS rows.
- Cell method At the start of a filet row, ch 3 and turn; the turning chain counts as the first dc post. Work one cell at a time from the post already made: for an open cell, ch 2, skip the next 2 dc or the next ch-2 space, and dc in the following post. For a filled cell, work 2 dc in the next 2 dc or 2 dc into the next ch-2 space, then dc in the following post. Each cell uses three stitch positions and ends at a post.
- Row 1: lower edge Ch 3N + 3. Dc in the 4th ch from the hook and in every remaining ch. Counting the first 3 ch as a dc, you have 3N + 1 dc positions. Mark this face as the RS. For the sample, ch 75 and finish with 73 dc positions.
- Rows 2 to R − 2: stars Using the cell method, work the star-chart sequence repeatedly across each row, turning after every row. Repeat chart lines 1–9 followed by the all-open separator line as needed; stop after row R − 2, even if that interrupts a sequence. For the 22-row sample, rows 2–10 use chart lines 1–9, row 11 is all-open, and rows 12–20 use chart lines 1–9 again.
- Row R − 1: tie openings Ch 3 and turn. Work N open cells across, regardless of the next chart line. For the sample, row 21 has 24 open cells.
- Row R: upper edge Ch 3 and turn. Work N filled cells across, making 2 dc into each ch-2 space and 1 dc in each following post. Fasten off. For the sample, row 22 has 73 dc positions.
- Seam and tie Block the rectangle to its calculated dimensions and let it dry. With RS facing out, sew the short edges together, matching rows to form an open-ended tube. Make a chain approximately 70 cm long and fasten it off. Thread it through the open cells of row R − 1, passing through openings at regular intervals. Place the sleeve on the bottle with its lower edge at least 2 cm above the base, then gather and tie the upper edge near the neck. Trim and secure the tie ends.
Finishing
- Weave in yarn ends without closing the filet openings.
- Check that the bottle stands directly on its own base, not on the sleeve.
- Retie the cord whenever the sleeve is moved to another bottle; the tie secures the top but does not replace checking the fit around the bottle body.
Helpful Tips
- Count cells rather than individual dc while working the chart. Every row spans N cells and ends with a post.
- Mark the RS and the seam-side gap before starting the stars, especially if your gaps are not all the same width.
- If the calculated width is too snug to slide over a shoulder or label, add cells to the open gaps before making the foundation chain and recalculate the foundation count.
Snowflake Filet LED Jar Cover

Filet crochet gives this jar cover its wintry look: the solid snowflake motif stands out against an open background, especially when the jar is softly lit. It makes a festive accent for a windowsill, mantelpiece or table.
A straight-sided jar lets the sleeve sit neatly against the glass, so the snowflake remains easy to see. In daylight, the contrast between the solid and open areas gives the cover its detail; after dark, gentle light brings the pattern into focus.
This decoration is for a battery-powered LED light only. Never put a candle or any other flame in the jar.
Snowflake Filet LED Jar Cover
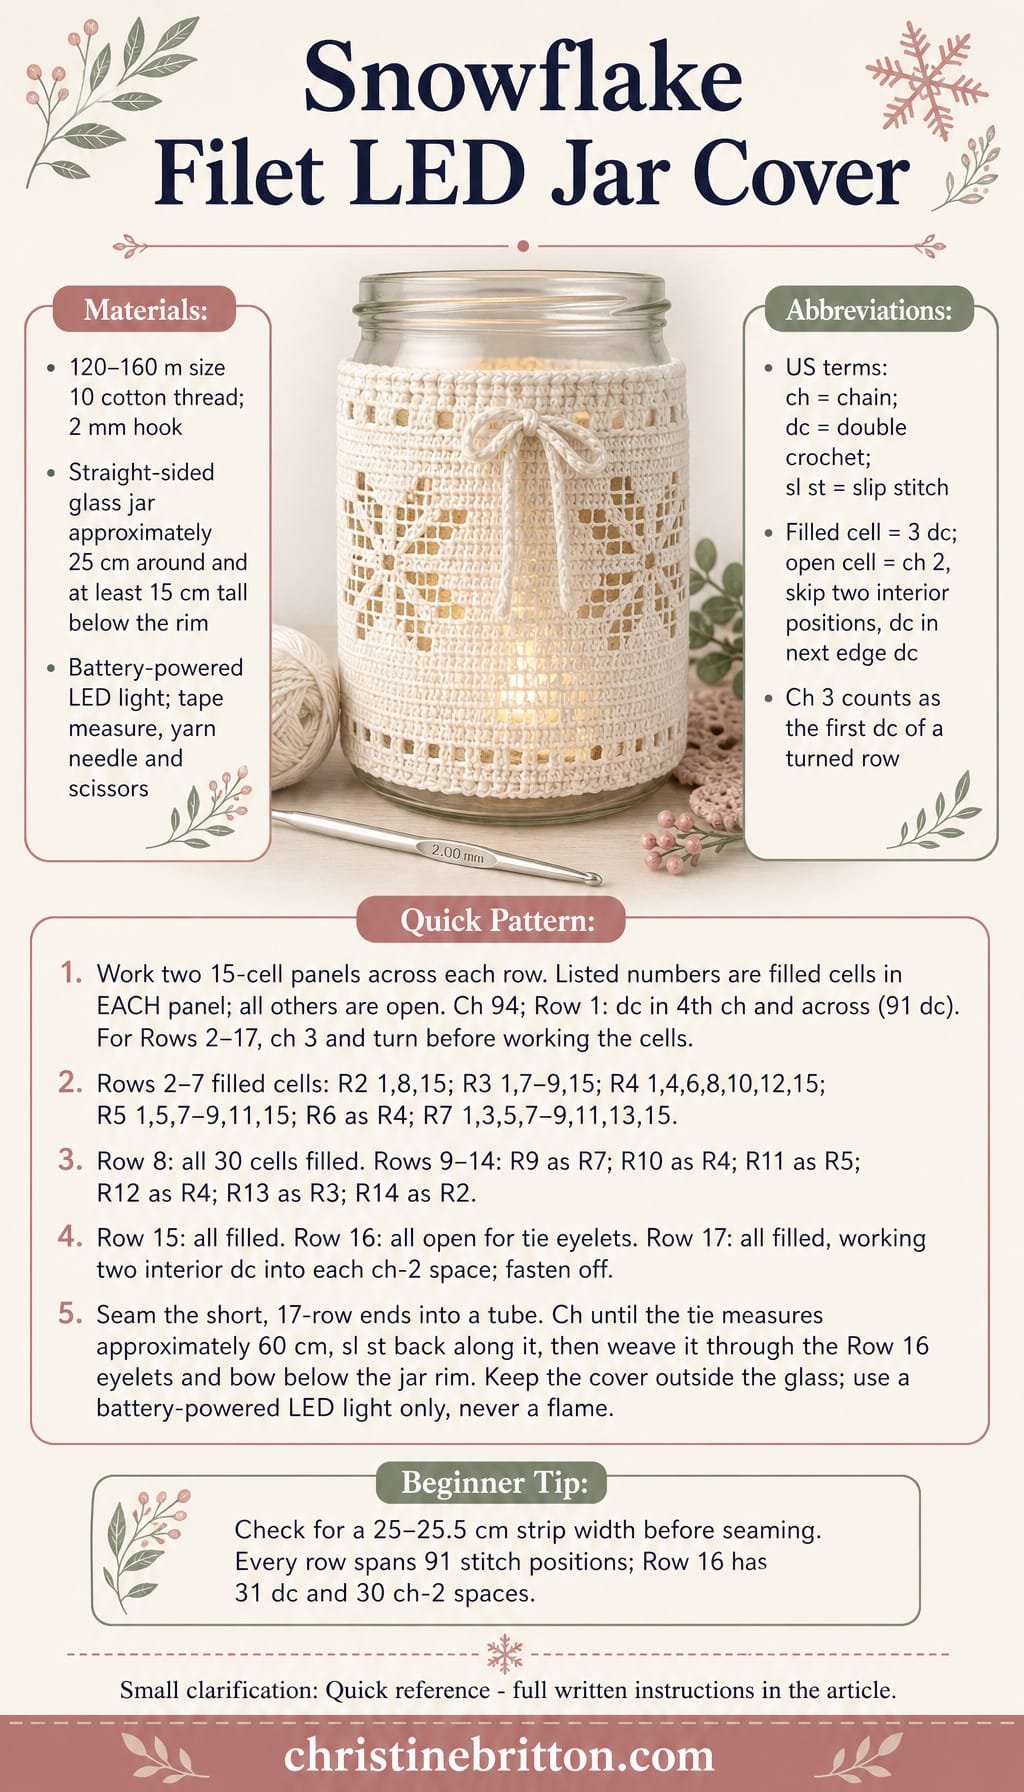
Quick-reference card. Follow the complete written instructions below.
Materials
- Size 10 cotton crochet thread: Approximately 120–160 m in white
- Crochet hook: 2 mm, or a size that gives the required cover width
- Glass jar: Straight-sided, approximately 25 cm in circumference, with at least 15 cm of straight-sided height below its rim
- Battery-powered LED light: Use inside the glass jar; do not use a candle or flame
- Notions: Tape measure, stitch marker, scissors and yarn needle
Size and Fit
One sample size fits a jar approximately 25 cm around. The 30-cell strip should measure 25–25.5 cm across before seaming, so it sits close to the outside of the glass without needing to stretch. At the suggested row gauge, the 17-row cover is approximately 14 cm tall. Check that the finished cover fits entirely on the jar’s straight-sided section, with its top edge below the rim.
Gauge
Aim for approximately 12 filet cells and 12 rows per 10 cm after gentle blocking. Width is the important fit check: work enough of the 30-cell strip to measure its width, and change hook size if needed to reach 25–25.5 cm. Gauge is a target for fitting the specified jar, not a claim of measured testing.
Abbreviations
US crochet terms.
- ch = chain
- dc = double crochet
- sl st = slip stitch
- st(s) = stitch(es)
- filled cell = Work 3 dc: two into the cell’s interior positions and one into its far-edge dc
- open cell = Ch 2, skip the cell’s two interior positions, then dc in its far-edge dc
Pattern
- How to read the filet rows Each row has 30 cells: two 15-cell snowflake panels side by side. The numbered cell lists below describe ONE panel; repeat that list for the second panel on the same row. Fill the listed cells and leave every unlisted cell open. Each row starts with an edge dc, then works 30 cells. When working a filled cell above an open cell, put its two interior dc into the ch-2 space; when working an open cell above a filled cell, skip the two interior dc. Always work the cell’s far-edge dc into the next dc of the previous row. Turn at the end of every row. The ch 3 at the start of a turned row counts as its first edge dc.
- Foundation and Row 1 — lower border Ch 94. Dc in the 4th ch from the hook and in each remaining ch: 91 dc. This is 30 filled cells plus the starting edge dc. Turn.
- Rows 2–7 — lower snowflake For each row, ch 3, turn, and work both 15-cell panels using these filled-cell numbers: Row 2: 1, 8, 15. Row 3: 1, 7, 8, 9, 15. Row 4: 1, 4, 6, 8, 10, 12, 15. Row 5: 1, 5, 7, 8, 9, 11, 15. Row 6: 1, 4, 6, 8, 10, 12, 15. Row 7: 1, 3, 5, 7, 8, 9, 11, 13, 15.
- Row 8 — snowflake centre Ch 3, turn. Work all 30 cells filled.
- Rows 9–14 — upper snowflake For each row, ch 3, turn, and work both panels using these filled-cell numbers: Row 9: 1, 3, 5, 7, 8, 9, 11, 13, 15. Row 10: 1, 4, 6, 8, 10, 12, 15. Row 11: 1, 5, 7, 8, 9, 11, 15. Row 12: 1, 4, 6, 8, 10, 12, 15. Row 13: 1, 7, 8, 9, 15. Row 14: 1, 8, 15.
- Rows 15–17 — top and tie eyelets Row 15: Ch 3, turn; work all 30 cells filled. Row 16: Ch 3, turn; work all 30 cells open to make the tie eyelets. Row 17: Ch 3, turn; work all 30 cells filled, placing two interior dc in each ch-2 space before working the next edge dc. Fasten off.
- Seam and tie Bring the two short, 17-row ends together without twisting the strip. Sew their row ends together with a neat, flat seam to form a tube. For the tie, ch until the chain measures approximately 60 cm, then sl st in each ch back to the start; fasten off. Weave the tie in and out of the Row 16 ch-2 spaces around the tube, bringing both ends out beside the seam.
Finishing
- Weave in the strip and tie ends. If needed, lightly dampen and shape the cover to its intended width; allow it to dry before putting it on the jar.
- Slide the cover over the outside of the glass. Draw up and bow the tie below the rim without pulling the filet out of shape.
- Place only a battery-powered LED light inside the jar. Keep the cotton cover outside the glass and away from the light’s battery compartment. Do not use a candle or any flame.
Helpful Tips
- Mark the boundary between the two 15-cell panels. Each panel includes its own border cells, so do not omit a cell where they meet.
- For every open cell, skip two stitch positions—not the far-edge dc that anchors the cell.
- Check the strip against the jar before seaming. Cotton filet has little stretch; choose a suitable jar or adjust hook size rather than forcing a narrow cover over the glass.
Holly Filet Tissue Box Cover

This filet cover gives an everyday tissue box a Christmas look without hiding the tissues. Holly motifs decorate all four sides, while the opening across the top stays clear for easy use.
Filet crochet creates the design through a contrast of open and filled spaces. The holly is stylised rather than detailed, so it reads as a festive motif without making the cover feel busy.
Measure the tissue box you plan to use before starting, rather than relying on its packaging description. The cover is intended to sit neatly over a firm box, with the bottom left open so it can be removed when the tissues need replacing.
Holly Filet Tissue Box Cover

Quick-reference card. Follow the complete written instructions below.
Materials
- Smooth cotton yarn: Enough to make six panels; choose a yarn that produces a firm, clearly defined filet fabric.
- Crochet hook: A size that gives the target blocked gauge with your chosen cotton.
- Other supplies: Tape measure, stitch markers, yarn needle, pins and blocking equipment.
Size and Fit
Sample cover: approximately 24 cm long × 12 cm wide × 9 cm high when blocked. It is designed for a box of approximately those dimensions, with a 2.4 cm × 12 cm crosswise opening on top. Measure your intended box before starting, including its height. The cover is open at the bottom and should slip over the box without stretching; if your box differs appreciably from the sample, choose a yarn and hook that give dimensions suitable for it rather than assuming the sample will fit.
Gauge
Target blocked gauge for the sample: 10 filet cells measure 10 cm across, and 10 rows measure 9 cm high. Check both directions with a swatch. At this gauge, 24 cells make a 24 cm long side, 12 cells make a 12 cm end, and 10 rows make a 9 cm side height. Twelve rows on each top strip leave approximately 2.4 cm between the strips across the 24 cm length. These are design targets, not measured results from a tested sample.
Abbreviations
US crochet terms.
- ch = chain
- dc = double crochet
- sk = skip
- sp = space
- cell = one filet unit between two consecutive dc posts
- open cell = ch 2, skip the two stitches or the ch-2 space below, dc in the next post
- filled cell = dc in each of the two stitches below, or work 2 dc into the ch-2 space below, then dc in the next post
Pattern
- Read the filet chart Each character is one cell: a full stop (.) is open and a hash (#) is filled. Each quoted chart row has 12 characters. Work chart row 1 first, then proceed upwards; read odd-numbered rows from right to left and even-numbered rows from left to right. Ch 3 at the start of rows 2–10 counts as the first edge dc, not as a cell. Work each cell into the next two stitches or ch-2 space and the following dc post as defined above. A filled cell does not change the number of cells.
- Holly chart Row 1: “…………”; row 2: “..##….##..”; row 3: “.####..####.”; row 4: “..###..###..”; row 5: “…######…”; row 6: “….####….”; row 7: “…##..##…”; row 8: “….#..#….”; row 9: “…..##…..”; row 10: “…………”. The paired upper shapes suggest holly leaves; the lower filled cells suggest berries and a stem.
- Foundation and row 1 For a panel N cells wide, ch (3 × N + 3). Dc in the sixth ch from the hook; the five skipped chains count as the first edge dc and the first ch-2 space. For each remaining cell, ch 2, sk 2 foundation chains, dc in the next ch. You now have N open cells. When working subsequent rows, ch 3 and turn, then work the required N cells across. Fasten off after the stated number of rows.
- Short side panels — make two Ch 39 and work foundation row 1 for 12 open cells. This is holly chart row 1. Work chart rows 2–10 across the 12 cells. Each finished panel is 12 cells wide and 10 rows high. Make the second panel in the same way.
- Long side panels — make two Ch 75 and work foundation row 1 for 24 open cells. On each of rows 2–10, work six open cells, the corresponding 12-cell holly chart row, then six open cells. Chart row 1 is entirely open, so the foundation row also represents the complete long-side row 1. Each finished panel is 24 cells wide and 10 rows high.
- Top strips — make two Ch 39 and work foundation row 1 for 12 open cells. Ch 3 and turn for each of rows 2–12, working 12 open cells across. Fasten off. Each strip is approximately 12 cm wide × 10.8 cm long at the target gauge.
- Block and assemble Block all six pieces to their sample dimensions before seaming. Place a short and a long side together with their bottom edges level; seam their 10-row vertical edges. Continue around all four sides to form a rectangle, leaving the bottom open. Place one top strip across the full 12 cm width at each end of the 24 cm top, with its outer short edge against a short side. Seam each strip to that short side and seam its long edges to the adjacent long sides. The inner short edges face one another but are not joined. At the target gauge, they leave an approximately 2.4 cm gap across the full width of the top. Use the intended firm tissue box as a form while checking the seams, but do not stitch the cover to the box.
Finishing
- Weave in ends securely, keeping them away from the dispensing opening.
- Slip the cover over the tissue box from the open bottom. Check that the top strips lie flat and that tissues pull freely through the gap.
Helpful Tips
- Count cells rather than individual dc when following the motif: every row of a short panel has 12 cells, and every row of a long panel has 24.
- If the blocked swatch does not match both target gauge measurements, change the hook or yarn before making panels. Changing stitch counts alone will also require a redesigned top opening.
- For a neat, unobstructed opening, leave both inner top-strip edges unseamed.
Christmas Candle Filet Bookmark

A candle motif gives this slim filet crochet bookmark a quiet Christmas feel. It is a small, useful gift that can be slipped inside a card, especially for someone who enjoys reading over the festive break.
The contrast between open mesh and solid stitches makes the candle visible without adding bulk. That matters in a bookmark: a raised decorative border can catch between pages or leave an impression, while a flat edge keeps the focus on the motif and the book.
This is a good project for a confident beginner who wants to practise following a filet chart. The simple silhouette is easy to recognise, and the narrow format makes it approachable without sacrificing the crisp look of traditional filet crochet.
Christmas Candle Filet Bookmark
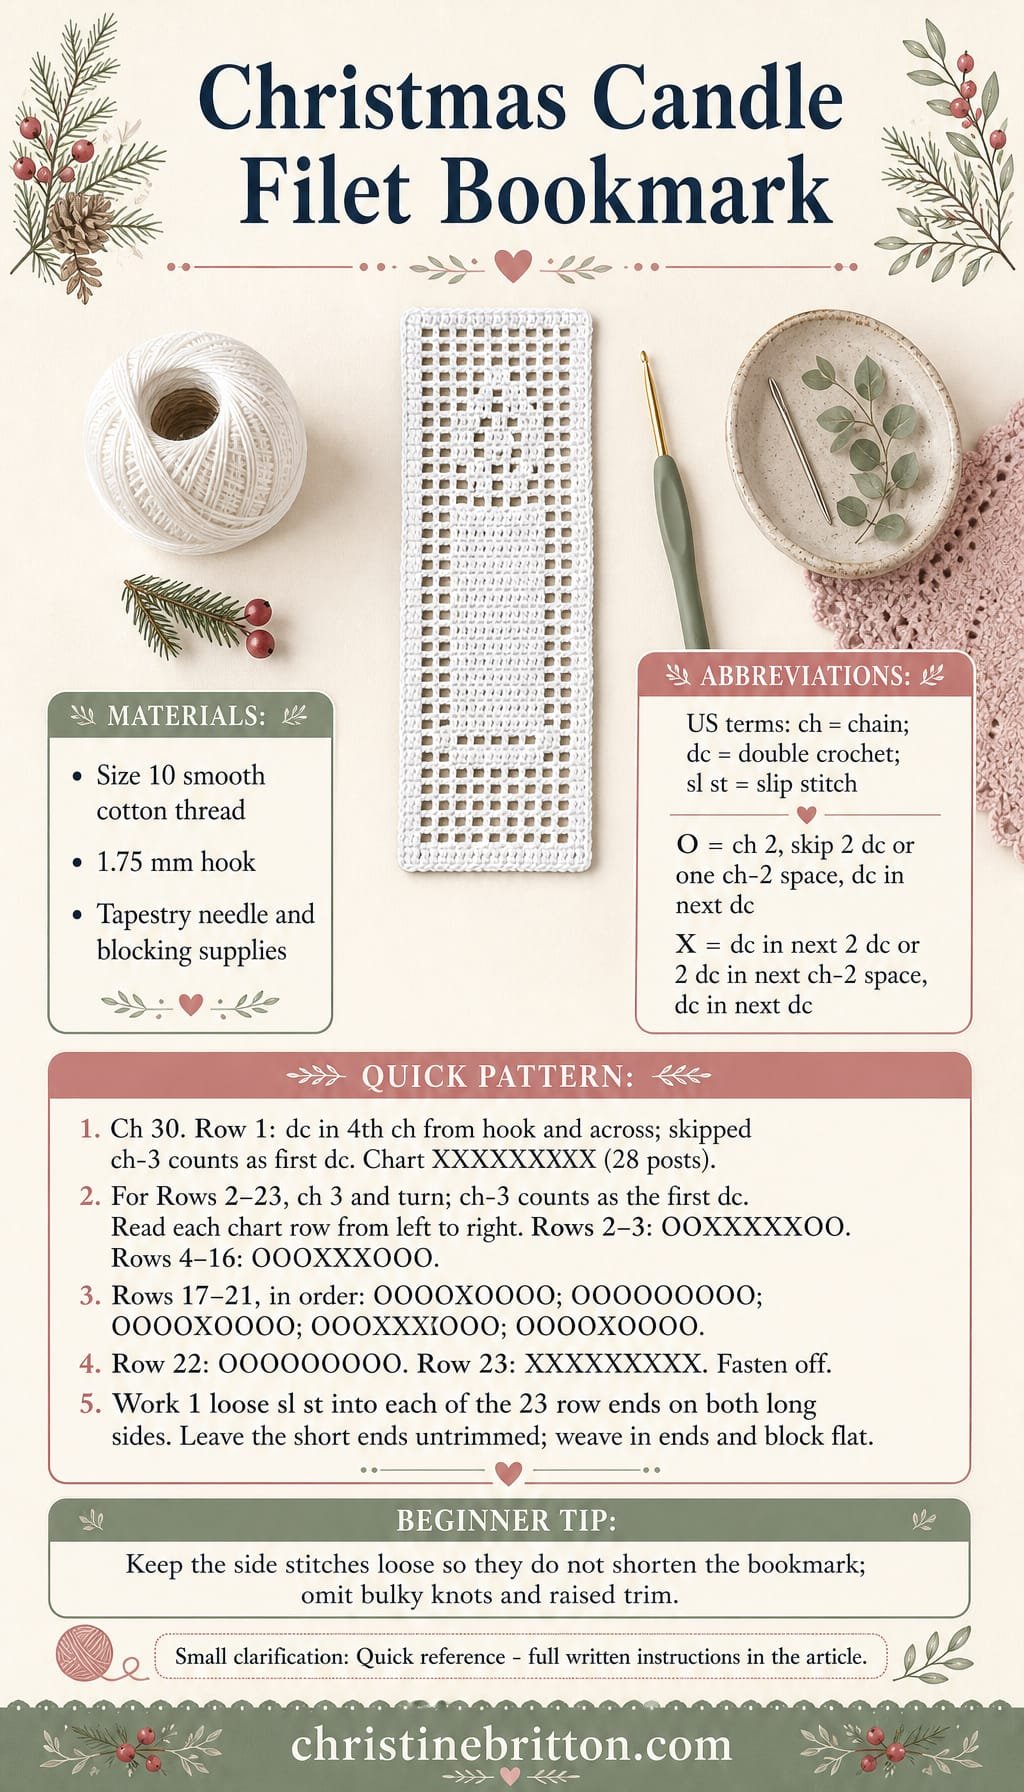
Quick-reference card. Follow the complete written instructions below.
Materials
- Smooth cotton crochet thread: A small amount of size 10 thread in one colour
- Crochet hook: 1.75 mm, or a size that gives an even, flexible mesh
- Tapestry needle: For weaving in ends
- Blocking supplies: Pins and a suitable surface
Size and Fit
One size: approximately 5 cm wide and 15 cm long if worked to the suggested gauge. The bookmark is 9 filet cells wide and 23 rows long; the loose slip-stitch edging adds negligible width.
Gauge
Planning gauge after blocking: 10 filet cells measure approximately 5.5 cm across, and 10 rows measure approximately 6.5 cm in length. Gauge is not critical, but check that your fabric is flat and flexible.
Abbreviations
US crochet terms.
- ch = chain
- dc = double crochet
- sl st = slip stitch
- O = open filet cell
- X = filled filet cell
Pattern
- Read the chart Each chart line has 9 cells. Work the rows in the numbered order below, reading each line from left to right as you crochet. The candle looks the same from either side, so there is no right-side chart reversal. Adjacent cells share a dc post.
- Filet cells At the start of Rows 2–23, ch 3 and turn; the ch-3 counts as the first dc post. For O, ch 2, skip the next 2 dc or the next ch-2 space, then dc in the next dc. For X, dc in each of the next 2 dc, or work 2 dc into the next ch-2 space; then dc in the next dc. Repeat the appropriate instruction once per chart symbol.
- Foundation and Row 1 Ch 30. Dc in the 4th ch from the hook and in every remaining ch. The skipped 3 chains count as the first dc: 28 dc posts in all, forming 9 filled cells. Chart: XXXXXXXXX.
- Rows 2–3: candle base Work each row from this chart: OOXXXXXOO.
- Rows 4–16: candle body Work each row from this chart: OOOXXXOOO.
- Row 17: wick Chart: OOOOXOOOO.
- Row 18: space above wick Chart: OOOOOOOOO.
- Rows 19–21: flame Work these charts in order: Row 19 OOOOXOOOO; Row 20 OOOXXXOOO; Row 21 OOOOXOOOO.
- Row 22: space above flame Chart: OOOOOOOOO.
- Row 23: top edge Chart: XXXXXXXXX. Fasten off.
- Low-profile side edging With the bookmark flat and a hook large enough to keep the edge loose, join thread at a lower corner of one long side. Work 1 loose sl st into the end of each of the 23 rows; fasten off. Repeat on the other long side. Leave the already-solid short ends untrimmed. If either edge shortens or puckers, undo it and remake the slip stitches more loosely.
Finishing
- Weave each end through several stitches on the back; avoid bulky knots.
- Dampen and pin the bookmark into a straight, flat rectangle, opening the mesh evenly. Allow it to dry fully before placing it in a book.
Helpful Tips
- Keep the filled cells firm enough to define the candle, but do not pull the open-cell chains tight.
- A flat finish matters more here than a decorative raised border: thick edging, beads and knots can press into book pages.
Stocking Filet Greeting Card

A stocking silhouette makes this small filet panel a festive focal point for a handmade Christmas card. Against a red card front, the open mesh lets the colour show through while the denser stitches keep the motif easy to recognise.
The crochet looks best when it sits flat with a clear border of card around it. Loose corner attachments hold it in place without pulling the mesh out of shape, so the card supports the panel rather than stretching it.
Stocking Filet Greeting Card

Quick-reference card. Follow the complete written instructions below.
Materials
- Crochet cotton: A small amount of cream size 10 cotton.
- Crochet hook: 2.25 mm, or a size that gives a panel that fits your card.
- Card: One folded red card approximately 12.7 × 17.8 cm when closed, plus a piece of paper to line the inside front.
- Other tools: Tapestry needle, blocking pins and mat, ruler, and a paper piercer or fine needle.
Size and Fit
Make one 11-cell-wide, 13-row panel for a card approximately 12.7 × 17.8 cm when closed. Block the panel without stretching it. It must measure no more than 10.7 cm wide and 15.8 cm high to leave at least 1 cm of clear card on every side. If it is too large, use a finer cotton or smaller hook and start again; do not pull it smaller when mounting.
Gauge
Fit matters more than a fixed gauge. Work the panel, block it, then check its dimensions against the card before mounting. Each row has 11 filet cells, equivalent to 34 stitch positions across.
Abbreviations
US crochet terms.
- ch = chain
- dc = double crochet
- open cell = ch 2, skip the next 2 stitch positions, dc in the next position
- solid cell = dc in each of the next 3 stitch positions
Pattern
- Read the chart Each line below has 11 cells. A dot (.) is an open cell and a hash (#) is a solid cell. The lines show the panel as viewed from the front, with Row 1 at the bottom. On odd-numbered rows, read the line from right to left; on even-numbered rows, read it from left to right. The stocking toe points left when the panel is viewed from the front.
- Chart Row 13: ………..
Row 12: ….#####..
Row 11: ….#####..
Row 10: …..###…
Row 9: …..###…
Row 8: …..###…
Row 7: …..###…
Row 6: …..###…
Row 5: ….####…
Row 4: ..######…
Row 3: .#######…
Row 2: .#####…..
Row 1: ……….. - Foundation Ch 36. Dc in the fourth ch from the hook and in each remaining ch. The three skipped chains count as the first dc, giving 34 dc in total. Turn.
- Work the panel For each chart row, ch 3 and turn; this ch 3 counts as the first dc and the starting edge of the first cell. Work each chart symbol in reading order. For an open cell, ch 2, skip the next 2 stitch positions, then dc in the next position. For a solid cell, dc in each of the next 3 positions. A ch-2 space from the previous row supplies two stitch positions: work into its individual chains when making a solid cell, or skip them when making an open cell. Work the last dc of a row into the top of the previous row’s turning ch where applicable. Do not add a second edge stitch between cells; adjacent cells share their boundary dc.
- Finish the crochet After Row 13, fasten off and weave in the ends. Dampen the panel and pin it square without stretching the mesh. Leave it pinned until dry, then measure it against the closed card.
- Mount the panel Centre the dry panel on the card front. Mark the positions of its four corner dc posts and pierce two small holes close together at each position. At each corner, pass a short length of cotton through the holes and loosely around the corner post, then knot it inside the card. Leave enough slack for the panel to lie flat without widening the mesh. Cover the knots with the inside-front paper liner.
Finishing
- Check that all four edges of the panel have a visible card margin and that the corner attachments do not distort the mesh.
- Attach the inside-front liner and add a greeting inside the card.
Helpful Tips
- Count cells rather than individual dc: every row must contain 11 cells.
- If working into the individual chains of an open cell is fiddly, use a hook with a finer tip; working around the whole ch-2 space will not preserve the stated stitch positions.
- Keep the mounting threads loose. The card supports the panel; the threads only stop its corners from lifting.
Bell Filet Gift Label

This filet bell adds a handmade Christmas detail to a wrapped present. Its simple silhouette is designed to stay recognisable at gift-label scale, where a more intricate motif could be lost in the mesh.
The open background will show up best against plain or contrasting wrapping paper. A separate paper tag can carry the recipient’s name, leaving the crocheted bell decorative and ready to use again.
Bell Filet Gift Label

Quick-reference card. Follow the complete written instructions below.
Materials
- Fine cotton crochet thread: A small amount in one colour
- Crochet hook: A size suited to the thread; 1.75 mm is a starting point
- Tapestry needle and scissors: For finishing
- Paper tag, pen and narrow ribbon or string: For the name and for attaching the label to a present
Size and Fit
One rectangular label, 11 filet cells wide by 10 rows high, plus a single-round border. Its finished measurements depend on the thread and tension; choose fine cotton to keep it suitable for a gift label.
Gauge
Exact gauge is not essential. Use a hook that produces firm double crochet stitches and clearly open chain spaces.
Abbreviations
US crochet terms.
- ch = chain
- dc = double crochet
- sc = single crochet
- sl st = slip stitch
Pattern
- Read the chart Each character represents one filet cell: . is an open cell and # is a filled cell. Read the rows from 1 at the bottom to 10 at the top. Turn after every row except row 10. The bell is symmetrical, so the printed rows can be read from either working direction.
- Chart Row 10: ………..
Row 9: …..#…..
Row 8: ….###….
Row 7: ….###….
Row 6: …#####…
Row 5: …#####…
Row 4: …#####…
Row 3: ..#######..
Row 2: …..#…..
Row 1: ……….. - Filet cells At the start of rows 2–10, ch 3; this counts as the first dc and the starting post of the first cell. For each open cell, ch 2, skip the next 2 dc or the next ch-2 space, then dc in the next dc. For each filled cell, work 2 dc in the next ch-2 space or 1 dc in each of the next 2 dc, as applicable, then dc in the next dc. The final dc of each cell is the starting post of the following cell.
- Foundation and row 1 Ch 36. The first 3 chains count as the starting dc. Working into the foundation chain, repeat (ch 2, skip the next 2 chains, dc in the next chain) 11 times. Turn.
- Rows 2–10 Work each row from the chart using the filet-cell instructions. After row 10, do not turn and do not fasten off.
- Border Ch 1. Work 3 sc in the corner at the end of row 10. Work sc across the top edge, approximately 2 sc into the side of each row along the first side, sc across the foundation edge, and approximately 2 sc into the side of each row along the remaining side. Work 3 sc at each of the other three corners. Distribute the side stitches evenly and avoid working twice into stitches already used for a corner. Join with a sl st to the first border sc.
- Corner loop From the joined corner, ch 25 and sl st into the same corner sc to form a loop. Fasten off.
Finishing
- Weave in the ends without pulling the mesh out of shape.
- Gently shape the label flat. If desired, lightly dampen it and let it dry flat.
- Write a short name on the separate paper tag. Pass ribbon or string through the crochet loop and the paper tag, then tie both to the present.
Helpful Tips
- Count the cells rather than only the double crochets: every row must have 11 cells.
- If the spaces obscure the bell, try a slightly smaller hook before changing the chart.
- Keep the paper tag separate when removing the label so the crochet piece can be used again.
For another related project collection, browse crochet Christmas cards.
Fir Tree Filet Book Sleeve

A book makes a thoughtful Christmas gift, and this fir-tree filet sleeve turns its wrapping into something the recipient can keep. The tree is worked into the front panel rather than added afterwards, giving the cover a simple, graphic look.
Filet crochet is openwork, so the opaque lining gives the tree a clear background while keeping the book cover from showing through. The back continues into a soft flap that folds over the opening and closes with ties, with no hard button to press against the book.
Choose the book before you begin. Its cover width, spine and height all affect the space it needs inside the finished sleeve, so use the actual book to check the fit before adding the lining. That extra check is especially useful if the book has a thick spine or a cover you want to protect from rubbing.
Fir Tree Filet Book Sleeve

Quick-reference card. Follow the complete written instructions below.
Materials
- DK cotton yarn: Enough for two book-sized panels, a flap and four ties.
- Crochet hook: Choose a size that gives a firm but flexible filet fabric with your yarn.
- Opaque woven cotton fabric: Enough for two lining pieces sized from the finished sleeve.
- Sewing supplies: Needle, thread, pins or clips, and scissors.
- Other tools: Tape measure and yarn needle.
Size and Fit
Made to fit one measured book. With the book closed, measure its height H, front-cover width W from spine to fore edge, and spine thickness T. Aim for each crocheted body panel to measure at least W + T/2 + 2 cm wide and H + 2 cm high. The extra room accommodates the book, seams and lining. Check the actual joined sleeve around the book before cutting the lining.
Gauge
Gauge determines the size. Make a swatch 10 filet cells wide: chain 23, work 1 dc in the fourth chain from the hook and in each remaining chain, then work 10 rows of empty cells as described below. Measure the width of 10 cells between the outer post centres, and the height of the 10 mesh rows. Divide each measurement by 10 to estimate the size of one cell and one mesh row. Keep the swatch relaxed when measuring.
Abbreviations
US crochet terms.
- ch = chain
- dc = double crochet
- RS = right side
- WS = wrong side
- N = number of filet cells across each panel
- R = number of mesh rows in each body panel, excluding the foundation row
Pattern
- Choose the panel size Divide the target panel width (W + T/2 + 2 cm) by your measured cell width. Round up to a whole number, then choose the next odd number if necessary; this is N. Use at least 15 cells so the 13-cell tree has an empty-cell border on both sides. Estimate the mesh rows needed for the target height from your swatch, allowing for the foundation row. Choose R of at least 17, so there are at least two plain mesh rows above and below the tree. If 17 rows would make the panel too tall for the book, use finer yarn and a suitable hook, then swatch again.
- How to work the filet cells Every panel row has N cells between N + 1 boundary posts. To begin a mesh row, ch 3 and turn; this counts as the first dc post. For an empty cell, ch 1, skip the next dc or ch-1 space, then dc in the next dc post. For a filled cell, dc in the next dc or ch-1 space, then dc in the next dc post. Repeat the indicated cells across. A filled cell replaces one ch-1 space with a dc; it does not add a cell. Work into spaces rather than into their chains.
- Tree chart The chart is 13 cells wide and 13 rows high. Read its rows from bottom to top; each string below runs left to right as the tree is seen from the front. A dot is an empty cell and # is a filled cell. Because the tree and its borders are symmetrical, use the same sequence of cells when working in either direction. Centre each chart row between (N – 13)/2 empty cells on each side.
1 ……#……
2 ……#……
3 .###########.
4 .###########.
5 ..#########..
6 ..#########..
7 …#######…
8 …#######…
9 ….#####….
10 ….#####….
11 …..###…..
12 …..###…..
13 ……#…… - Front panel Ch 2N + 3. Foundation row: dc in the fourth chain from the hook and in every remaining chain. Counting the turning chain as a dc, you have 2N + 1 dc positions. Work R mesh rows. Put chart row 1 on mesh row floor((R – 13)/2) + 1; work the following 12 chart rows on consecutive mesh rows. Work all cells outside the chart as empty cells, and make every other mesh row entirely of empty cells. Check the panel against the book. If it needs a little more height, add plain mesh rows at the top and make the back body the same height.
- Back panel and flap Work the foundation row as for the front, followed by the same number of body mesh rows, all with empty cells. Do not fasten off. Continue in empty-cell mesh for a flap approximately 6 cm long, measured from the top of the back body. Fasten off. The flap remains the full width of the back panel and folds over the sleeve opening.
- Join and check Place the panels together with the flap extending beyond the front panel’s top edge. Whipstitch the sides and bottom through the outer posts and foundation-row edges, leaving the front top edge open. Do not seam the flap. Turn right side out, insert the book and check that it slides in without stretching the crochet. If it does not, remake the panels with more cells; a lining will reduce, not increase, the available space.
- Make and fit the lining With the book removed, measure the usable inside width and depth of the joined sleeve. Cut two opaque fabric pieces, each 2 cm wider and 2 cm taller than those inside measurements. Sew their sides and bottoms together with 1 cm seam allowances. Turn the top edge inward by 1 cm and stitch the hems, leaving the top open. Slip the lining into the crochet sleeve with the lining seam allowances against the crochet. Hand-stitch its top edge to the inside of the sleeve opening, without stitching across the opening or catching the flap. Try the book inside again.
- Add the ties Make four soft ties, each about 20 cm long, using chains or short lengths of yarn doubled for strength. Secure two along the free edge of the flap, roughly one-third and two-thirds of the way across. Fold the flap over the filled sleeve and mark where those ties reach the front. Secure the other two ties at the matching positions on the front, stitching through and reinforcing the lining fabric. Tie each pair in a bow; do not pull tightly enough to distort the filet.
Finishing
- Weave in yarn ends and secure sewing threads.
- Lightly block the sleeve if needed, keeping its measured width and height.
- Let it dry fully before inserting the book.
Helpful Tips
- An opaque lining in a contrasting colour makes the tree easier to see and prevents a book cover from showing through the open cells.
- Choose a smooth fabric that will not snag on the book’s corners.
- If rounding N up produces a generous sleeve, compare the crocheted panels with the actual book before seaming; do not rely on the gauge calculation alone.
Snowflake Filet Journal Wrap
This snowflake filet wrap gives a plain journal a festive cover without enclosing it in a sleeve. The narrow band sits around the closed book, leaving the page edges visible and the cover easy to open.
The snowflakes stand out against the open filet background, giving the wrap a decorative look without making it bulky. It’s a useful project if you enjoy reading a small chart and watching a motif emerge as you crochet.
A journal’s shape can change as its pages fill, so the ties let you loosen and retie the wrap over time. That makes it a thoughtful Christmas gift for someone who uses their notebook throughout the year.
Snowflake Filet Journal Wrap

Quick-reference card. Follow the complete written instructions below.
Materials
- Cotton crochet thread or fine cotton yarn: Choose a firm cotton that holds a bow without stretching excessively; the amount needed depends on your journal.
- Crochet hook: Use a size suited to your cotton that produces distinct filet squares.
- Tapestry needle and scissors: For securing and trimming ends.
- Tape measure and journal: Measure the closed journal and check the strip against it as you work.
Size and Fit
The strip is 9 filet cells wide; its finished width depends on your yarn and gauge. Measure around the closed journal at mid-height, including the spine and page edges. Make the strip approximately 5 cm shorter than that circumference, so its ends do not meet. The two ties bridge the gap and fasten in a bow. Check the fit around the actual journal before fastening off; adjust the strip length with open-mesh rows.
Gauge
No fixed gauge is required. After working several rows, measure your cell width and row height. Use those measurements to judge how many motif repeats will fit, then check the strip against the journal. Keep the filet squares even and the fabric flexible enough to follow the spine.
Abbreviations
US crochet terms.
- ch = chain
- dc = double crochet
- sl st = slip stitch
- st = stitch
Pattern
- Filet method Each row has 9 cells. On rows after Row 1, ch 3 and turn; this counts as the first boundary dc. Work the chart from right to left on right-side rows and left to right on wrong-side rows. For each open cell (.), ch 2, skip the next 2 stitches or chains, then dc in the next dc. For each filled cell (#), dc in each of the next 2 stitches or chains, then dc in the next dc. Work into the individual chains of an open cell, not around its ch-2 space.
- Foundation and first open rows Ch 32. Row 1: Dc in the 8th ch from the hook, then [ch 2, skip 2 ch, dc in next ch] 8 times. You have 9 open cells. Rows 2–4: Ch 3, turn, and work 9 open cells.
- Snowflake chart A dot is an open cell and # is a filled cell. Work one chart line per row, beginning with Line 1 on Row 5. The lines are: 1 ….#….; 2 .#..#..#.; 3 ..#.#.#..; 4 …###…; 5 #########; 6 …###…; 7 ..#.#.#..; 8 .#..#..#.; 9 ….#….. The chart is symmetrical, so it reads the same in either direction.
- Motifs and length Work chart Lines 1–9 for Rows 5–13. For each further snowflake, work 3 open-mesh rows, then chart Lines 1–9 again. Repeat only while another complete snowflake will fit within your target strip length. Finish by working open-mesh rows until the strip is approximately 5 cm shorter than the journal circumference. Fasten off.
- Ties Join cotton at the middle of one short end, centred beneath or above the fifth cell. Chain a tie; aim for about 25 cm of finished tie length. Sl st back along the chain without pulling it tight, secure the yarn and weave in the end. Make an identical tie at the other short end. Measure each completed tie and add more chain before working back if needed.
Finishing
- Weave in all ends securely without tightening the filet edges.
- Lay the strip around the closed journal at mid-height, with the snowflakes facing out. Bring the ends towards the page-edge side and tie a bow across the gap.
- If the strip pulls against the spine, add open-mesh rows before finishing the second tie. If its ends overlap, remove open-mesh rows. The ties should secure the wrap without compressing the journal.
Helpful Tips
- Use a journal that closes naturally when checking fit; pressing it shut can give a misleading measurement.
- Count the 9 cells on every row. The all-filled middle row of each snowflake is a useful place to check that none has been missed.
- A firm cotton and a bow, rather than a tight knot, make the wrap easier to retie as the journal fills.
Christmas Tree Tea Towel Edging

A filet crochet border gives a plain tea towel a festive detail without covering the fabric you use every day. The repeated Christmas tree motifs create a decorative strip along one end, with openwork that lets the towel show through.
Choose complete motif repeats so the design ends evenly, then compare the blocked strip with the width of your prewashed towel. Centring it before attachment helps the border look balanced and avoids squeezing an extra motif into a space that is too narrow.
For a towel that will be used and laundered, choose cotton with care instructions compatible with the towel. Blocking the crochet before sewing it on makes the final fit easier to judge and helps keep the border flat.
Christmas Tree Tea Towel Edging

Quick-reference card. Follow the complete written instructions below.
Materials
- Cotton yarn: Washable 4-ply cotton; allow enough for your chosen number of repeats.
- Crochet hook: 2.5 mm, or a size that gives a firm filet fabric without making it stiff.
- Plain tea towel: Prewash and dry it as you intend to launder the finished towel.
- Sewing supplies: Matching washable cotton thread, needle, pins and tape measure.
Size and Fit
The sample uses three tree repeats: 81 filet cells across and 10 rows high. Its finished width depends on your yarn and tension. For another width, use any whole number of nine-cell repeats. After blocking, centre the band on the towel, ideally leaving at least 1 cm of towel visible at each side. If it is too long, remake it with fewer repeats; if too short, add a repeat or adjust your yarn and hook.
Gauge
Work and block a nine-cell-wide, 10-row sample using the instructions below to find the width of one repeat in your yarn. Use that measurement to choose a whole number of repeats for the towel. Check the blocked full band against the prewashed towel before sewing; no fixed gauge is required.
Abbreviations
US crochet terms.
- ch = chain
- dc = double crochet
- sk = skip
- filled cell (1) = Work 2 dc into the next two dc, or 2 dc into the next ch-2 space; then work 1 dc into the next boundary dc.
- open cell (0) = Ch 2, skip the next two dc or the next ch-2 space, then work 1 dc into the next boundary dc.
Pattern
- Read the filet chart Each chart digit is one cell: 1 is filled and 0 is open. Work the nine-digit sequence once per tree repeat on every chart row. The sequences are symmetrical, so they read the same when the work is turned. The dc at the end of one cell is also the starting boundary of the next; do not add an extra dc between cells.
- Foundation and Row 1 For the three-repeat sample, ch 246. For a different number of repeats, ch 27 times the number of repeats, plus 3. Dc in the fourth ch from the hook and in every remaining ch; turn. The skipped 3 ch count as the first dc. The sample has 244 dc posts, including that turning chain, forming 81 filled cells.
- Rows 2–9 Ch 3 and turn at the start of each row; this counts as the first boundary dc. Work the row’s nine-cell sequence once for each repeat, using the filled- and open-cell instructions above. When a filled cell follows an open cell, put both interior dc into its ch-2 space. Work the last boundary dc into the top of the previous row’s turning ch. Row 2: 000000000. Rows 3 and 4: 000010000. Row 5: 011111110. Row 6: 001111100. Row 7: 000111000. Row 8: 000010000. Row 9: 000000000.
- Row 10 Ch 3, turn, then work a filled cell for every cell across. Work the last dc into the top of Row 9’s turning ch. Fasten off, leaving an end to weave in.
Finishing
- Weave in the yarn ends. Wet-block the band according to the cotton yarn’s care instructions, straightening its long edges without stretching it beyond the intended fit. Let it dry completely.
- Lay the blocked band along the towel’s lower edge with Row 10 uppermost, so the trees stand upright. Centre it and pin Row 10 to the back of the towel’s lower hem, overlapping the hem by about 3–5 mm. Keep the towel and band flat.
- Using matching washable thread, sew along Row 10 with small, even stitches through the towel hem and the crochet edge. Secure the thread ends. Wash and dry the finished towel according to the care instructions for both the towel and cotton yarn.
Helpful Tips
- Choose cotton with care instructions compatible with the towel; avoid a delicate yarn if the towel will be machine-washed.
- Count nine cells per tree on every chart row. A missed boundary dc can shift the rest of the trees.
- Measure the blocked band rather than the unblocked crochet before attaching it.
Bauble Filet Apron Pocket

A bauble motif gives a plain apron pocket a festive focal point without changing how the pocket works. The filet panel sits on the outside, so the decoration is visible while the existing fabric pocket remains usable.
Open filet mesh is decorative rather than a dependable place to hold utensils: handles can catch in the openings, and the mesh is not intended to carry their weight. The fabric beneath it does that job, making this a practical way to add Christmas detail to an apron you already use.
Bauble Filet Apron Pocket

Quick-reference card. Follow the complete written instructions below.
Materials
- Washable cotton yarn: A small amount of DK-weight cotton in a colour that contrasts with the apron.
- Crochet hook: A size suited to the yarn; 3.5–4 mm is a starting range for DK cotton.
- Apron: One with an intact fabric pocket large enough for the finished panel.
- Sewing supplies: Matching thread, needle, scissors, pins and a ruler.
Size and Fit
The sample panel is 11 filet cells wide by 11 rows high. Its finished measurements depend on your yarn and tension. Before sewing, wash and dry the panel as you intend to wash the apron. It must fit on the pocket front with at least 5 mm clear of each side and the bottom seam, and its top edge at least 1 cm below the pocket opening. If it does not fit, change yarn or hook size; do not stretch it into place.
Gauge
No fixed gauge is required because existing apron pockets vary. Check the finished, washed panel against the pocket using the clearances given above.
Abbreviations
US crochet terms.
- ch = chain
- dc = double crochet
- sp = space
Pattern
- Read the filet chart Each of the 11 characters in a row is one cell: a dot (.) is open and X is filled. Work Row 1 at the bottom of the chart and continue upwards. Each row is symmetrical, so its cells read the same from either working direction.
- Work the cells Each row begins with one dc or a turning ch 3 counted as one dc. For an open cell, ch 2, skip the next two dc or the next ch-2 sp, then dc in the next boundary dc. For a filled cell, work one dc in each of the next two dc, or work two dc in the next ch-2 sp; then dc in the next boundary dc. When the boundary at the end of a row is a turning ch 3, work into its top. Each cell adds three stitch positions, whether filled or open.
- Foundation and Row 1 Ch 37. The first three chains count as the first dc. For each of Row 1’s 11 open cells, ch 2, skip the next two foundation chains and dc in the next chain. Row 1, bottom of motif: ………..
- Rows 2–11 Ch 3 and turn before each row; the ch 3 counts as its first dc. Work the cells as described above, using these rows in order. Row 2: …..X…..; Row 3: …XXXXX…; Row 4: ..XX…XX..; Row 5: .XX…..XX.; Row 6: .XX…..XX.; Row 7: .XX…..XX.; Row 8: ..XX…XX..; Row 9: …XXXXX…; Row 10: …..X…..; Row 11: ….XXX….. Fasten off and weave in the ends.
- Attach to the pocket Wash and dry the panel, then position it flat on the outside of the existing pocket, observing the stated clearances. Pin without stretching. Hand-sew around all four outer edges, catching the edge stitches and the pocket-front fabric with small, secure stitches. Keep the pocket opening uncovered. Reach inside the pocket as you sew so the needle does not catch the apron body or stitch the pocket shut.
Finishing
- Remove the pins and check that all four panel edges are secure.
- Put a hand inside the pocket to confirm that its opening and full fabric lining remain usable.
Helpful Tips
- A piece of card slipped inside the pocket can help separate its front from the apron body while you position the panel; remove it before checking the finished pocket.
- Use the fabric pocket, not the filet mesh, to hold utensils.
Star Filet Christmas Stocking
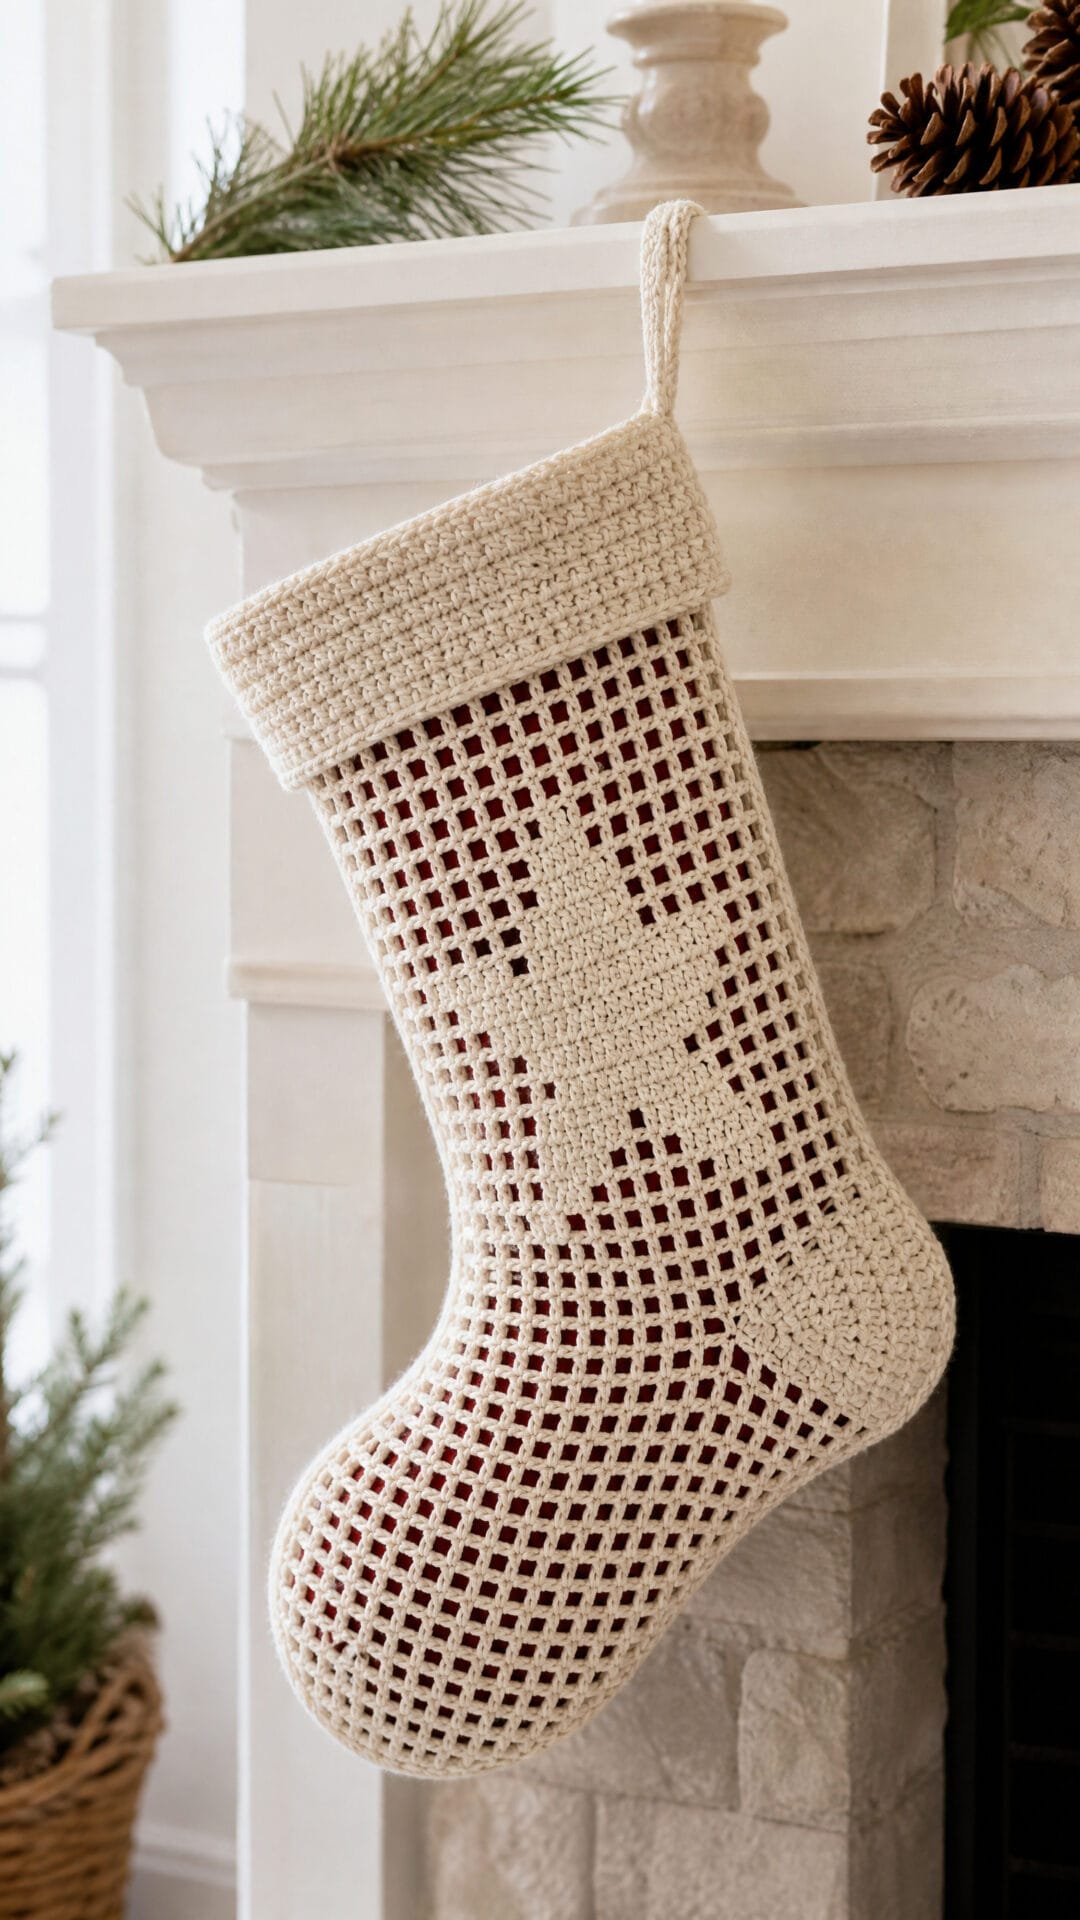
This decorative stocking uses open and filled filet spaces to make a star stand out on the leg. A contrasting lining can make the motif easier to see while giving the open mesh a practical backing.
Matching flat panels create the stocking outline, with a stepped foot extending beyond the leg. The shape keeps the star in a clear, uninterrupted area and gives the stocking a traditional silhouette.
The lining supports small, lightweight treats, and the hanging loop is anchored at the lined top rather than relying on open mesh. This is a stocking for festive display, not a bag intended to carry heavy contents.
Star Filet Christmas Stocking

Quick-reference card. Follow the complete written instructions below.
Materials
- Cream DK cotton yarn: Approximately 200–250 m; keep extra yarn available if your gauge differs.
- Crochet hook: 4 mm, or a size that gives the stated gauge.
- Firm woven cotton fabric: Approximately 45 × 90 cm for the lining; a contrasting colour helps the star stand out.
- Sewing supplies: Matching sewing thread, needle or sewing machine, scissors and pins.
- Other tools: Tapestry needle, stitch markers, ruler and blocking supplies.
Size and Fit
One sample size. At the stated blocked gauge, each panel measures approximately 16.5 cm across the leg, 25.5 cm across the foot and 36.5 cm from cuff to bottom before seaming. The toe projects approximately 9 cm beyond the leg. These are calculated panel dimensions, not tested finished measurements. The lining and seams will reduce the usable interior slightly.
Gauge
10 filet cells across and 10 rows high measure approximately 15 × 14 cm after blocking. One cell spans three stitch positions between its boundary posts. Check gauge on a small filet swatch before making both panels.
Abbreviations
US crochet terms.
- ch = chain
- dc = double crochet
- sc = single crochet
- st(s) = stitch(es)
- open cell = ch 2, skip the next two stitch positions or the previous row’s ch-2 space, dc in the next boundary dc
- filled cell = dc in each of the next two stitches, or work 2 dc into the previous row’s ch-2 space; dc in the next boundary dc
Pattern
- Read the grid Make two identical panels. Work from the cuff down, turning after every row. Each row begins with ch 3, which counts as its first dc and the boundary post of its first cell. Work the specified cells in order across the row; neighbouring cells share a boundary post. When placing a filled cell over an open cell, work its 2 dc into the ch-2 space, then dc in the next boundary dc. When placing an open cell over a filled cell, skip its next two dc before working the boundary dc. The star grid reads from left to right in the direction you are working that row: # means filled and . means open. Its nine columns are symmetrical, so the same sequence works when the panel is turned.
- Panel: cuff and leg, Rows 1–4 Ch 36. Row 1: Dc in the fourth ch from the hook and in every remaining ch; the turning ch and 33 worked dc give 34 dc positions, or 11 filled cells. Turn. Rows 2–4: Ch 3, work 11 open cells, turn. Each row remains 11 cells wide.
- Panel: star, Rows 5–13 For each row, ch 3, work one open cell, then the nine star cells shown below, then one open cell; turn. Row 5: ….#…. Row 6: ….#…. Row 7: …###… Row 8: ######### Row 9: .#######. Row 10: ..#####.. Row 11: ..##.##.. Row 12: .##…##. Row 13: ##…..##. Count the symbols rather than the number of dc: every row has 11 cells.
- Panel: lower leg, Rows 14–18 Rows 14–17: Ch 3, work 11 open cells, turn. Row 18: Ch 3, work 11 filled cells, placing 2 dc into each ch-2 space and a dc in each following boundary dc; turn. Row 18 has 34 dc positions. Its working end is the toe side of the panel.
- Panel: extend the foot, Row 19 At the toe-side end of Row 18, ch 21 and turn. Dc in the fourth through twentieth chains from the hook: 17 dc worked into chains. Dc in the toe-side edge dc of Row 18, then dc in each of its remaining 33 dc. Including the initial turning ch, Row 19 has 52 dc positions, or 17 filled cells. The chain extension adds six whole cells at the toe side.
- Panel: foot, Rows 20–26 Rows 20–25: Ch 3, work one filled cell, 15 open cells and one filled cell; turn. Row 26: Ch 3, work 17 filled cells across, filling every ch-2 space as described above. Fasten off. Make the second panel exactly the same way. When one panel is flipped over for assembly, their outlines should match.
- Block and prepare the lining Block both panels to matching dimensions without stretching the mesh. Lay one flat on the fabric and trace its outline. Add a 1 cm seam allowance around both sides, the stepped toe and the bottom; add 2 cm above the cuff edge for a hem. Cut two fabric pieces to this template. With fabric right sides together, sew the sides and lower edges using a 1 cm seam allowance, leaving the top open. Clip the seam allowance at the inside corner of the step without cutting the stitching. Turn the top edge of the lining towards its wrong side by 1 cm, then 1 cm again, and stitch the hem. Leave the lining wrong side out so its right side will face into the stocking.
- Seam and line the stocking Place the crochet panels with right sides together and matching toe extensions. Sew through the outer edge posts around the sides, step, toe and bottom, leaving the cuff open; do not rely on ch-2 spaces for the seam. Turn the crochet shell right side out. Slip the lining inside with its right side facing the stocking interior. Match the seams and cuff edges, then hand-stitch the lining hem to the inside of the crochet cuff, catching solid stitches rather than open mesh.
- Hanging loop Ch 26. Sc in the second ch from the hook and in each remaining ch for 25 sc. Fasten off, leaving tails for sewing. Fold the strip into a loop. At the heel-side top corner, sew both ends securely through the solid crochet cuff and a small patch of doubled lining fabric. Keep the loop attachment clear of the open cells. Hang only lightweight contents from the finished stocking.
Finishing
- Weave in yarn ends without pulling the filet grid out of shape.
- Check that the lining covers the open mesh and that its hem lies flat below the cuff edge.
- Press the fabric lining if needed, keeping the iron away from the crochet unless the yarn care instructions permit pressing.
Helpful Tips
- Mark every third stitch position on a solid row if you find it difficult to count cell boundaries.
- The two filled edge cells on foot Rows 20–25 provide sturdier posts for seaming.
- A contrasting lining makes the filled star easier to read; the lining, not the mesh, should contain small treats.
Snowflake Filet Tree Skirt

This white filet crochet tree skirt brings a quiet snowflake motif to the base of a small Christmas tree. Its split design lets you arrange it around a stand rather than trying to slip it over the tree.
The skirt is formed from widening wedge-shaped panels. Each snowflake sits within a stable central chart area, while open filet meshes expand the fabric beyond it. That contrast keeps the motifs easy to see and gives the outer edge room to spread.
This is an intermediate project for crocheters comfortable reading a filet chart and keeping track of a charted area as the surrounding fabric grows. The pattern includes a measurement-based option for accommodating a different stand opening.
Snowflake Filet Tree Skirt
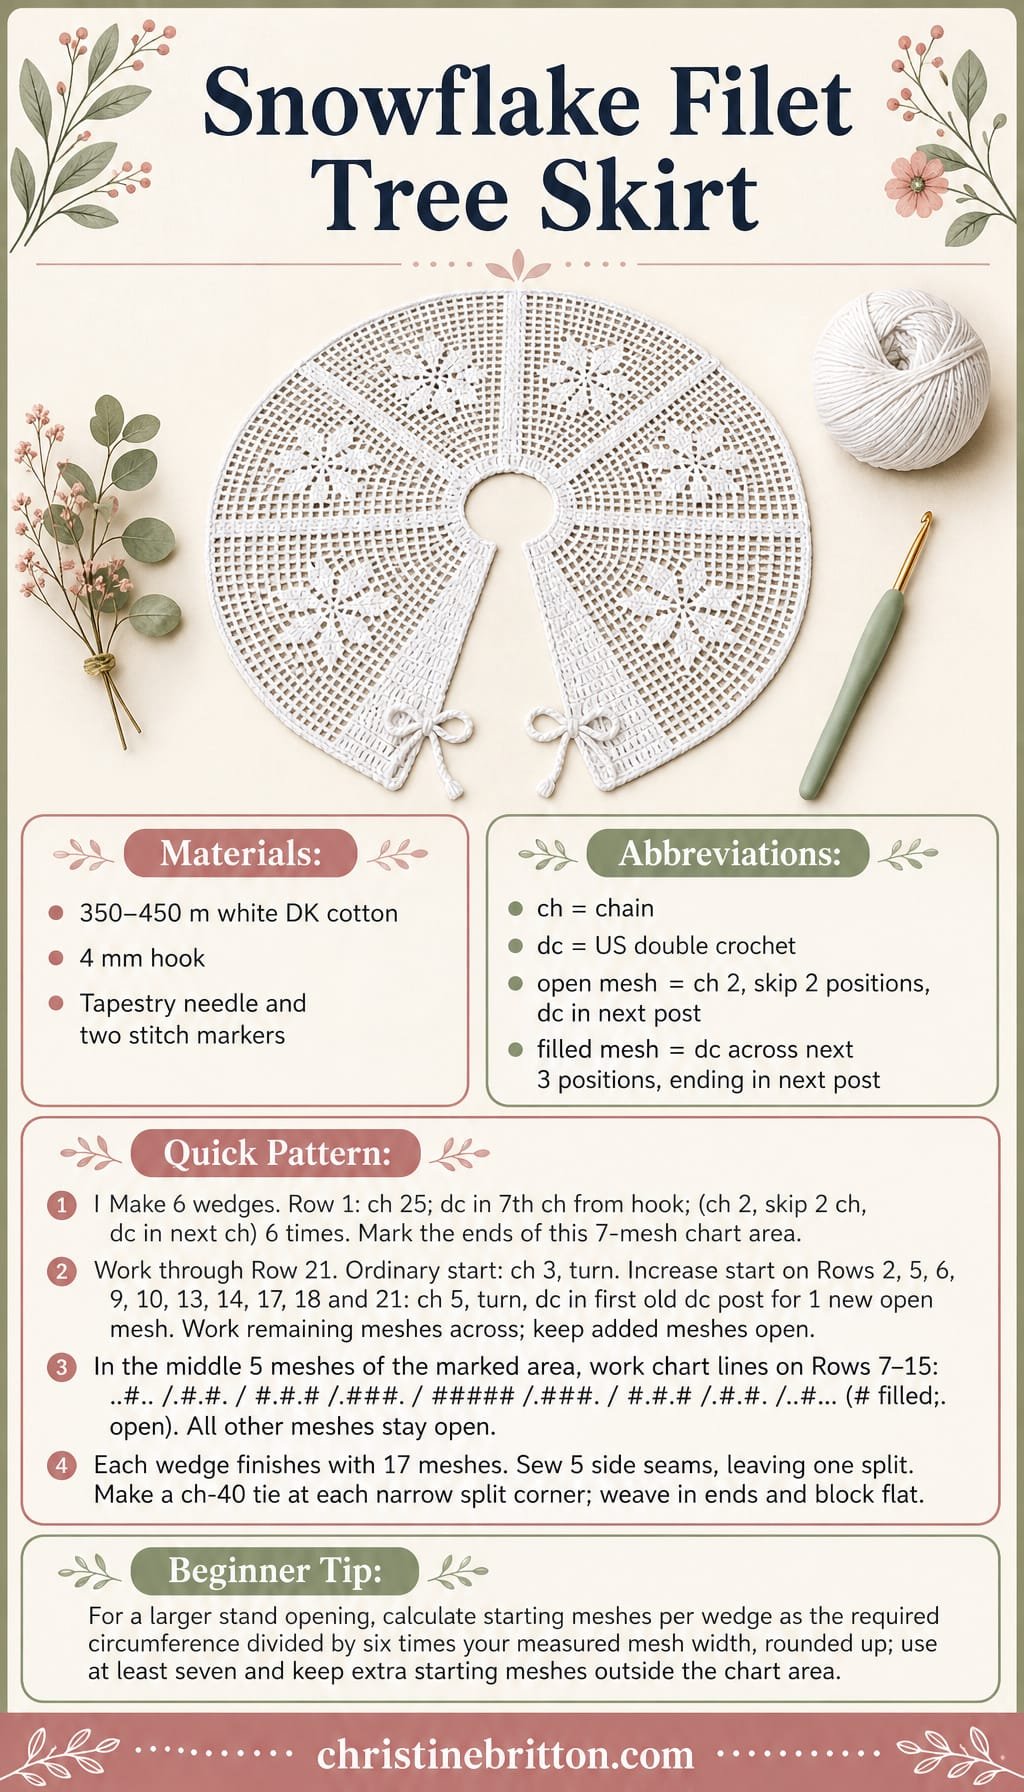
Quick-reference card. Follow the complete written instructions below.
Materials
- White DK cotton yarn: Approximately 350–450 m; allow more if adjusting the size.
- Crochet hook: 4 mm, or a size that gives the stated gauge.
- Other supplies: Tapestry needle, scissors, tape measure and two removable stitch markers.
Size and Fit
Sample size: approximately 16 cm across the stand opening, 39 cm across the outer edge and 12.5 cm deep. The opening is intended to surround a small stand, not stretch over one. To enlarge it, measure the diameter you need, including clearance. Multiply that diameter by 3.14, divide by six times your measured mesh width, and round up to find the starting meshes per wedge. Start with at least seven; add any extra starting meshes as open meshes outside the marked seven-mesh chart area. Work the same 21 rows and ten increases on every wedge. Each extra starting mesh adds approximately 2.3 cm to both the opening and outer diameters at the stated gauge.
Gauge
Approximately 10 open meshes = 12 cm wide and 10 rows = 6 cm high in blocked filet crochet. Check both measurements: mesh width affects the opening, while row height affects the skirt depth.
Abbreviations
US crochet terms.
- ch = chain
- dc = double crochet
- st = stitch
- mesh = one filet square between two dc posts
Pattern
- Filet rules Each mesh spans three stitch positions. For an open mesh, ch 2, pass over the next two positions and dc in the next post. For a filled mesh, dc in each of the next three positions, ending in the next post. When filling over an open mesh, work the first two dc into its ch-2 space. The beginning ch 3 counts as the first dc post.
- Snowflake chart Read each chart line across the central five meshes; # means filled and . means open. Work all meshes outside these five as open. Use these lines on Rows 7–15 respectively: Row 7 ..#..; Row 8 .#.#.; Row 9 #.#.#; Row 10 .###.; Row 11 #####; Row 12 .###.; Row 13 #.#.#; Row 14 .#.#.; Row 15 ..#… The design is symmetrical, so it reads the same when a row is worked in the opposite direction.
- Row 1: make a wedge Ch 25. Dc in the 7th ch from the hook; (ch 2, skip 2 ch, dc in next ch) six times. You have seven open meshes. Mark the dc post at each end: the seven meshes between those posts are the permanent chart area. Turn.
- Ordinary rows Ch 3, counting as the first post. Work across the existing meshes using the filet rules and the chart line for that row; turn. Outside Rows 7–15, work every mesh open. Keep the chart area between the marked posts, transferring each marker to its corresponding new post as you work. Any mesh added outside a marker remains open.
- Increase rows Increase at the beginning of Rows 2, 5, 6, 9, 10, 13, 14, 17, 18 and 21 only. Instead of the ordinary ch 3, ch 5, turn, then dc in the first dc post of the previous row. The ch 5 and dc form one new open mesh outside the existing edge. Work across all the previous row’s meshes as directed, then turn. Move a marker only when you reach the corresponding post of the original seven-mesh chart area. Because these increases fall at the beginnings of both odd and even rows, they widen both sides of the wedge.
- Complete the wedges Work Rows 2–21 as directed, using ordinary starts on rows not listed as increases. Row 21 ends with 17 meshes. Fasten off, leaving a sewing tail along one side. Make six identical wedges. For a larger opening, use the calculated starting mesh count on all six wedges and retain the same increase-row schedule and centred seven-mesh chart area.
- Join and tie Lay the wedges side by side with their narrow ends together. Sew adjoining row-end edges from top to bottom, matching rows, to make five seams. Leave the two remaining side edges unjoined as the split. At each of the two narrow corners beside the split, join yarn, ch 40 and fasten off to make a tie. Weave in the tie ends securely.
Finishing
- Weave in the sewing tails and any remaining ends.
- Gently block the skirt flat, easing the wedges into a split ring without pulling the snowflakes out of shape.
- Place it around the stand and tie the narrow ends together. Keep the ties clear of lights and electrical fittings.
Helpful Tips
- Check the mesh count at the end of every increase row; an increase adds one mesh, not one stitch.
- Keep the two markers on the boundaries of the original seven meshes. The snowflake uses the middle five, leaving one original open mesh on each side.
- For the enlargement calculation, use your measured mesh width rather than the sample gauge.
Filet Advent Pocket Hanging

This filet Advent pocket hanging brings a little openwork to the daily countdown. Each numbered pocket sits against a firm fabric backing, so the finished piece has the look of a crochet decoration while keeping its shape on the wall.
The pockets are intended for lightweight surprises such as notes, paper activities or small wrapped treats rather than heavy gifts. Bear in mind that tiny loose items may slip through the filet openings; a paper envelope makes them easier to tuck away.
The repeated pocket shape makes this an approachable intermediate project, with the numerals providing the main point of interest. The pattern below gives a sample pocket size and a way to plan the backing around the dimensions your crochet reaches after blocking.
Filet Advent Pocket Hanging

Quick-reference card. Follow the complete written instructions below.
Materials
- DK cotton yarn: Approximately 150–250 g, depending on tension and yarn; use one colour or remnants.
- Crochet hook: 3.5 mm, or a size that gives firm, even filet squares.
- Firm woven fabric: For the sample layout, cut one 50 × 70 cm backing and one 50 × 6 cm strip for the hanging channel.
- Sewing supplies: Matching thread, sewing needle or machine, pins, ruler and scissors.
- Hanging supplies: A dowel approximately 52 cm long, plus suitable cord and a secure wall fixing.
Size and Fit
Each sample pocket is intended to measure approximately 9 cm wide × 8 cm high after blocking. With 1 cm fabric hems, the sample backing finishes at 48 × 68 cm. Pocket openings are approximately 9 cm wide; choose contents that are light and too large to slip through the filet openings. To use pockets of a different blocked width P and height Q, keep 3 cm side margins, 2 cm between columns, 7 cm above the first row, 2 cm between rows and 3 cm below the last row. Finished backing width = 4P + 12 cm; finished height = 6Q + 20 cm. Add 2 cm to each fabric cutting dimension for 1 cm hems.
Gauge
Work and block one 9-cell × 7-row pocket before cutting the backing. For the sample layout, it should measure approximately 9 × 8 cm. Exact stitch gauge is less important than measuring every pocket consistently and calculating the backing from its blocked dimensions.
Abbreviations
US crochet terms.
- ch = chain
- dc = double crochet
- RS / WS = right side / wrong side
- . = one open filet cell
- # = one filled filet cell
Pattern
- Filet method Each pocket is 9 cells wide and 7 rows high. One cell spans three stitch positions between boundary dc stitches. For an open cell, ch 2, skip the next two stitches or the previous row’s ch-2 space, and dc in the next boundary dc. For a filled cell, work 2 dc into the previous row’s ch-2 space, or 1 dc in each of its next two dc, then dc in the next boundary dc. At the start of every row after Row 1, ch 5 and turn; this counts as the first boundary dc and the ch 2 of an open first cell. Dc in the next boundary dc, then work the remaining eight cells as charted. The first and last cells of every row are open.
- Numeral charts These five-row glyphs are written top to bottom; each group of three symbols is one chart row. 0: ### / #.# / #.# / #.# / ###. 1: .#. / ##. / .#. / .#. / ###. 2: ### / ..# / ### / #.. / ###. 3: ### / ..# / ### / ..# / ###. 4: #.# / #.# / ### / ..# / ..#. 5: ### / #.. / ### / ..# / ###. 6: ### / #.. / ### / #.# / ###. 7: ### / ..# / ..# / ..# / ..#. 8: ### / #.# / ### / #.# / ###. 9: ### / #.# / ### / ..# / ###. For 1–9, place three open cells on either side of the three-cell glyph. For 10–24, place one open cell, the first digit, one open cell, the second digit and one open cell. This makes nine cells across in either case.
- Make 24 pockets Make one pocket for each number from 1 to 24. Ch 32. Row 1 (RS): dc in the 8th ch from the hook; *ch 2, skip 2 ch, dc in the next ch; repeat from * eight times more. You have 9 open cells. Rows 2–6: use the five rows of the appropriate numeral chart, beginning with its bottom row for Row 2 and ending with its top row for Row 6. On WS rows 2, 4 and 6, read each assembled chart row from left to right as it will appear on the RS. On RS rows 3 and 5, read it from right to left. Follow the filet method for open and filled cells. Row 7: ch 5, turn, dc in the next boundary dc; work eight more open cells. Fasten off, leaving a sewing tail if desired.
- Block and prepare backing Block the pockets to consistent dimensions without stretching the numbers out of shape. Measure their blocked width and height before cutting fabric; use the formula in Size and fit if they differ from the sample. For the sample, turn and stitch a 1 cm hem on all four sides of the 50 × 70 cm backing to finish at 48 × 68 cm. Mark four 9 cm-wide columns with 3 cm side margins and 2 cm gaps. Mark six 8 cm-high rows, starting 7 cm below the finished top edge, with 2 cm gaps between rows.
- Sew pockets Lay pockets 1–4 across the first row, 5–8 across the second, and continue in order through 21–24 on the sixth row. With the RS and numbers facing out, pin each pocket to its marked position. Sew securely along its two sides and bottom, catching the outer filet edge and backing fabric; leave the top completely open. Check that the corner joins are secure. Keep stitches clear of the pocket opening.
- Add hanging channel Turn under and stitch 1 cm at both short ends and both long edges of the 50 × 6 cm fabric strip, leaving a 48 × 4 cm strip. Centre it horizontally on the back of the hanging, with its upper edge approximately 1 cm below the finished top. Stitch both long edges to the backing, leaving the short ends open to form a channel. Slide in the dowel and attach cord securely to its projecting ends.
Finishing
- Weave in or secure all yarn ends and trim sewing threads.
- Check that all 24 pocket tops remain open and that every side and base is firmly attached.
- Hang from a secure fixing. Fill with lightweight items only; do not overload the fabric, channel or dowel.
Helpful Tips
- Read the numeral charts from the bottom upwards while crocheting; the glyph list itself is printed top to bottom.
- If tiny contents might pass through the open cells, place them in a larger paper envelope or add a fabric lining to the pocket before sewing it down.
- Mark all pocket positions on the backing before stitching so the gaps remain even.
Star Filet Present Ribbon

This openwork ribbon gives a simply wrapped gift a delicate star detail without making the decoration disposable. The patterned centre sits against the parcel, while plain ends keep the bow easy to tie and let the stars remain visible.
The length depends on the route the ribbon takes around your particular box, including its depth. Plan around that route rather than assuming a standard parcel size, and allow the star design to finish on a complete repeat. A box with a deeper profile may need more ribbon even if its front looks similar in size.
Star Filet Present Ribbon

Quick-reference card. Follow the complete written instructions below.
Materials
- Size 10 crochet cotton: Choose a washable cotton; the amount depends on the parcel and finished length.
- 1.75 mm crochet hook: Adjust the hook size if needed for firm, even filet stitches.
- Tape measure, scissors and yarn needle: For measuring the parcel and finishing the ends.
Size and Fit
One adjustable size, seven filet cells wide. Measure once around the wrapped box along the exact route the ribbon will take; call this measurement R. Make the starred section at least R + 3 cm long, with a plain section of at least 20 cm at each end. Allow longer ends if you want a generous bow. Finished length will be at least R + 43 cm; completing a full star repeat may make it longer.
Gauge
No fixed gauge is required. Before planning repeats, work a sample of the seven-cell width and one eight-row star repeat in your chosen cotton. Measure the repeat’s length to estimate how many repeats your parcel needs, then check the actual ribbon against R as you work. Keep the filet cells square and the edges even.
Abbreviations
US crochet terms.
- ch = chain
- dc = double crochet
- sk = skip
Pattern
- Filet method Each row has seven cells between eight upright posts. The turning ch 3 counts as the first dc. For an open cell (.), ch 2, skip the next two dc or the next ch-2 space, then dc in the next dc. For a filled cell (X), work two dc in the next two dc or two dc into the next ch-2 space, then dc in the next dc. Work the final dc of a row into the top of the previous row’s turning ch 3 when you reach that edge. Read each seven-character row from left to right after turning; the star is symmetrical, so it faces the same way on either side.
- Foundation Ch 24. Dc in the fourth ch from the hook and in each remaining ch. Counting the skipped three chains as the first dc, you have 22 upright posts. Turn.
- First plain tie end Ch 3, then work seven open cells. Turn. Repeat this all-open row until the section from the foundation edge measures at least 20 cm. Do not count this section towards the measured route around the box.
- Star repeat, row 1 Ch 3; work …X… (three open cells, one filled cell, three open cells). Turn.
- Star repeat, row 2 Ch 3; work ..XXX.. (two open, three filled, two open). Turn.
- Star repeat, row 3 Ch 3; work XXXXXXX (seven filled cells). Turn.
- Star repeat, row 4 Ch 3; work .XXXXX. (one open, five filled, one open). Turn.
- Star repeat, row 5 Ch 3; work ..XXX.. (two open, three filled, two open). Turn.
- Star repeat, row 6 Ch 3; work .X…X. (one open, one filled, three open, one filled, one open). Turn.
- Star repeat, row 7 Ch 3; work X…..X (one filled, five open, one filled). Turn.
- Star repeat, row 8 Ch 3; work seven open cells as a separator. Turn. Repeat rows 1–8 until the starred section, measured from the end of the first plain tie end, is at least R + 3 cm long. Finish a complete eight-row repeat.
- Second plain tie end Continue in all-open rows until this end measures at least 20 cm from the last star-repeat row. For a firm finishing edge, ch 3 and work one dc in each dc and two dc in each ch-2 space across: 22 upright posts including the turning ch 3. Fasten off.
Finishing
- Weave in the ends securely.
- Lightly dampen and lay the ribbon flat, easing the cells into shape. Let it dry before measuring its final length.
- Wrap the starred section around the parcel and tie the plain ends. If the blocked length does not give you the tie length you want, add rows to an end before fastening off.
Helpful Tips
- Mark the point where the first plain end finishes so you can measure only the starred section against R + 3 cm.
- For a larger bow, decide on longer plain ends before starting; the 20 cm minimum is intended for a small tie.
- When changing from an open cell to a filled cell, place both new dc into the ch-2 space rather than trying to stitch into its individual chains.
Christmas Cracker Filet Sleeve

This removable filet sleeve gives a reusable fabric cracker-shaped parcel a festive star motif without permanently covering the parcel. The contrast between open mesh and filled areas makes the geometric design especially effective when the fabric underneath is a different colour.
Choose a parcel with a clearly defined central body and gathered fabric at either end. The sleeve is intended to sit over the body, leaving the gathered ends visible, so it works best as a decorative cover rather than a traditional pulling cracker.
Christmas Cracker Filet Sleeve

Quick-reference card. Follow the complete written instructions below.
Materials
- 4-ply cotton yarn: Approximately 25 g for the panel and two ties
- Crochet hook: 2.5 mm, or a size that gives the stated gauge
- Yarn needle and scissors: For seaming and weaving in ends
- Reusable fabric cracker-shaped parcel: Sample size: a central body approximately 15 cm long and 10 cm around, with gathered fabric extending beyond both ends
Size and Fit
At the stated gauge, the panel is approximately 15.75 cm long and 11.25 cm around when seamed, allowing some ease over the sample fabric body. The ties draw in the openings beside the gathered ends. Measure the filled fabric body before starting; do not rely on the dimensions of its unfilled fabric.
Gauge
Four filet cells across and four rows each measure approximately 3 cm in the finished mesh, laid flat without stretching. Adjust the hook size if needed; the panel dimensions depend on this gauge.
Abbreviations
US crochet terms.
- ch = chain
- dc = double crochet
- O = open filet cell: ch 2, leave the cell interior unworked, dc in the next post
- F = filled filet cell: work 2 dc in the cell interior, then dc in the next post
Pattern
- Reading the rows Each row has 21 cells and 22 posts, including the post at each edge. In rows after Row 1, ch 3 and turn; this counts as the first post. For O, ch 2, pass over either the previous row’s ch-2 space or its two interior dc, and dc in the next post. For F, work 2 dc into a previous ch-2 space, or one dc in each of its two interior dc, then dc in the next post. A number after O or F tells you how many consecutive cells to make. The row designs are symmetrical, so they read the same after turning.
- Foundation and Row 1 Ch 66. Dc in the sixth ch from the hook; the skipped chains form the first O cell. Work 9 more O cells by repeating [ch 2, skip 2 foundation chains, dc in next chain]. Make 1 F cell by working dc in each of the next 3 chains. Work 10 O cells as before. Row 1 is O10, F1, O10: 21 cells.
- Row 2 Ch 3, turn. Work O9, F3, O9.
- Row 3 Ch 3, turn. Work O8, F5, O8.
- Row 4 Ch 3, turn. Work O7, F7, O7.
- Row 5 Ch 3, turn. Work O3, F2, O2, F7, O2, F2, O3.
- Row 6 Ch 3, turn. Work O4, F2, O1, F7, O1, F2, O4.
- Row 7 Ch 3, turn. Work O5, F11, O5.
- Row 8 Ch 3, turn. Work O2, F17, O2.
- Rows 9–15 Ch 3 and turn at the start of each row. Work Row 9: O5, F11, O5; Row 10: O4, F2, O1, F7, O1, F2, O4; Row 11: O3, F2, O2, F7, O2, F2, O3; Row 12: O7, F7, O7; Row 13: O8, F5, O8; Row 14: O9, F3, O9; Row 15: O10, F1, O10. Fasten off.
- Seam the sleeve Bring the foundation edge and the top of Row 15 together, keeping the 21-cell edges aligned. With the yarn needle, sew these two long edges together, matching the 22 post positions. This makes a tube whose length runs across the filet rows. Keep the seam flexible and leave both tube openings clear.
- Make and add the ties Make two separate chain cords, each approximately 45 cm long when laid relaxed; fasten off and secure their ends. At one tube opening, weave a cord alternately in and out through the outermost open cell of each of the 15 rows, taking both cord ends out beside the seam. Repeat with the second cord through the open cells at the other opening. Slide the tube over the fabric cracker’s central body and tie each cord in a bow beside a gathered end. Untie the bows to remove the sleeve.
Finishing
- Weave in panel ends without closing any edge cells needed for the ties.
- Straighten the filet cells gently by hand. If desired, lightly dampen the sleeve and let it dry flat before fitting it to the fabric parcel.
Helpful Tips
- Count cells rather than individual stitches: every row must contain 21 cells, whether they are open or filled.
- Keep the ties separate from the panel and use bows rather than permanent knots so the sleeve remains removable.
- If the filled fabric body is substantially larger or smaller than the sample, use a different yarn and hook combination only after checking that the resulting 21-cell by 15-row panel will fit.
Frequently Asked Questions
What is filet crochet?
Filet crochet builds pictures from a grid of open and filled mesh spaces. A chart shows which spaces to work on each row, so counting carefully helps keep the motif in place.
Which Christmas filet project should I try first?
The snowflake coaster, bell gift label and candle bookmark are smaller options marked for confident beginners. Choose one with a chart you can read clearly, and check your mesh count after each row.
How can I make a filet motif easier to see?
Use a smooth yarn that shows the mesh clearly, and place the finished piece against a contrasting background where appropriate. Blocking can also straighten the grid so the filled spaces form a clearer shape.
Can I change the size of a filet table runner or curtain?
Yes, if the design uses repeats. Measure your space and add or remove complete motifs, allowing for borders and any hanging method. A swatch will help you estimate the finished size.
Is the filet jar cover safe to use with a candle?
No. Use a battery-powered LED light only, and keep the crochet away from flames and hot bulbs.
Final Thoughts
Filet crochet can bring a clear Christmas motif to anything from a gift label to a table runner. Pick the project that suits your space, then check the chart, measurements and finishing needs before you begin.