Dusty Rose Mesh Crochet Sneaker Boots Free Pattern
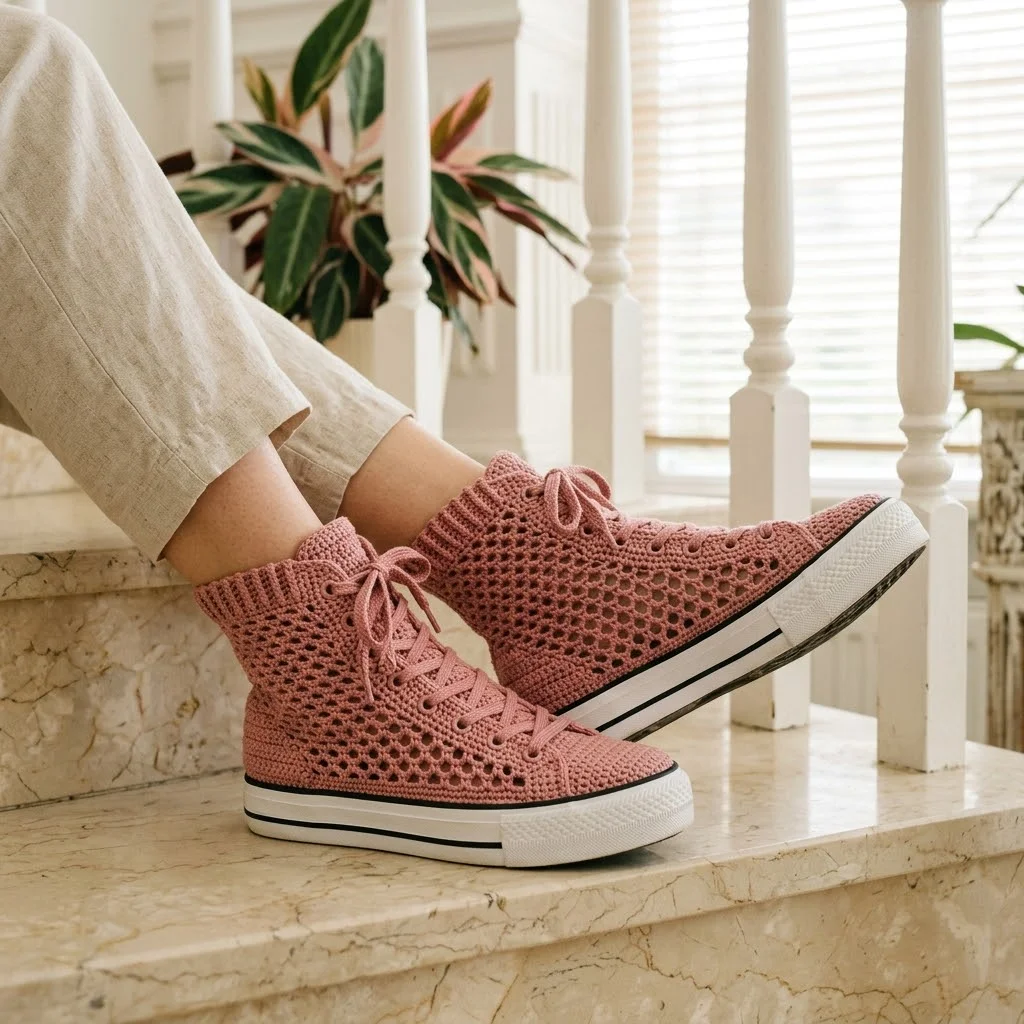
I call these my “Marble Steps” sneakers, and they’ve been sitting in my pattern notebook for almost three years now. I originally designed them for my niece who wanted something that looked like real high-tops but felt like slippers. She saw a pair of crocheted sneakers online and begged me to figure out how to make them. After countless swatches, a few failed attempts, and one very late night with graph paper, I finally cracked the mesh construction that gives these their signature breathable look. Now I’m sharing this pattern with you because honestly, they deserve to be worn by more than just my niece.
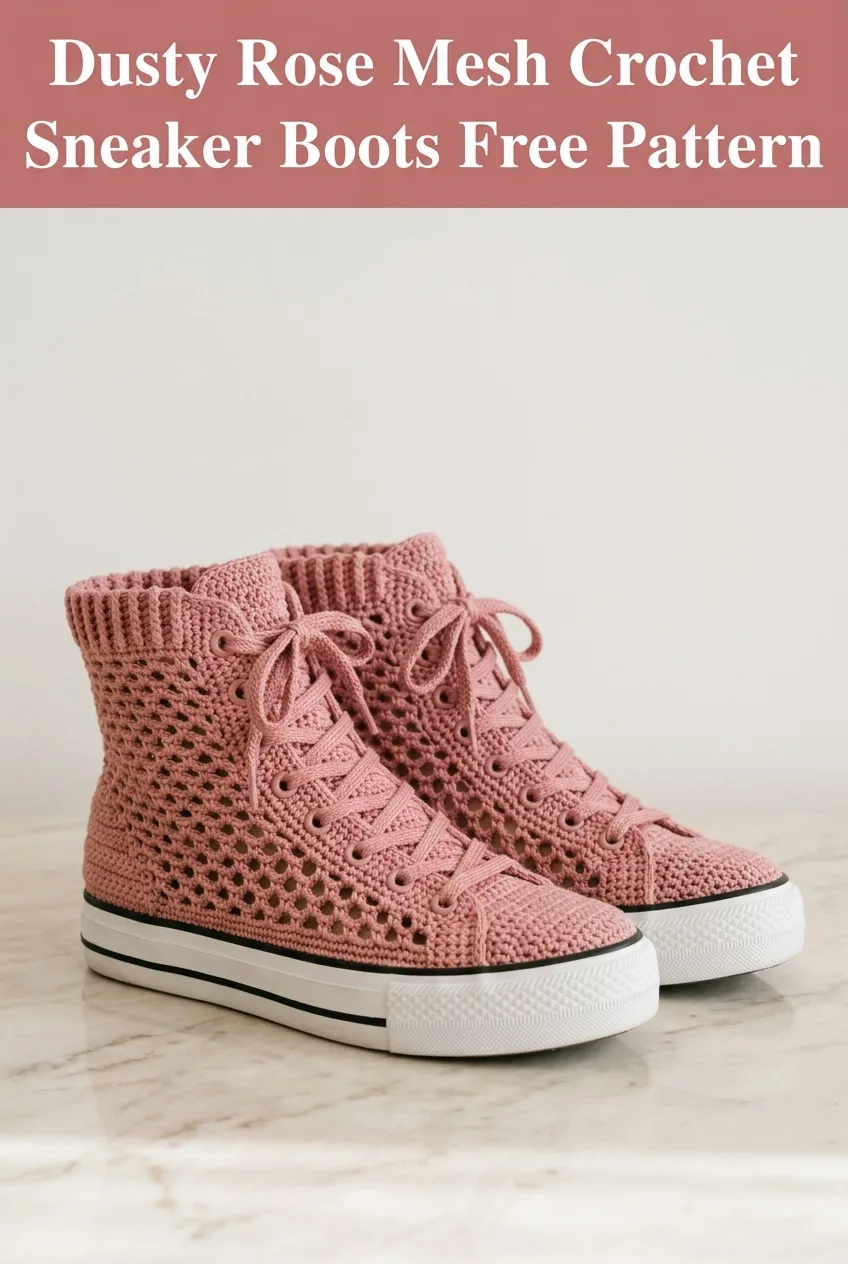
About This Crochet Sneaker Boot Pattern
These crochet sneaker boots combine the classic silhouette of high-top sneakers with an open mesh stitch pattern that makes them perfect for warmer weather. The dusty rose color gives them a soft, modern aesthetic, but you could easily customize these in any shade you love.
What makes this crochet pattern special is the construction method. You’re essentially building a shoe from the sole up, working the upper in a mesh pattern that creates those signature holes you see in the design. The ribbed ankle cuff adds structure and that authentic sneaker vibe.
Skill level: Intermediate. If you can work single crochet, chain stitches, and follow shaping instructions, you can absolutely make these. The mesh pattern looks complex but it’s actually just a simple repeat once you get going.
Materials Needed
Yarn:
I recommend a cotton or cotton blend yarn for this project because it holds structure better than acrylic and won’t stretch out with wear. Look for a yarn with tight twist for durability.
Hook:
Additional Supplies:
Gauge: 18 stitches and 20 rows = 4 inches in single crochet with 3.5mm hook. Gauge matters here because the shoe needs to fit properly over the sole.
Stitch Abbreviations and Definitions
Before we dive into the step by step instructions, let me walk you through every stitch you’ll encounter.
Ch = Chain. Wrap yarn over hook, pull through loop on hook. This creates your foundation and spaces in the mesh.
Sl st = Slip stitch. Insert hook, yarn over, pull through stitch AND loop on hook in one motion. Used for joining rounds.
Sc = Single crochet. Insert hook into stitch, yarn over, pull up a loop (2 loops on hook), yarn over, pull through both loops. This is your workhorse stitch for the solid sections.
Dc = Double crochet. Yarn over, insert hook into stitch, yarn over, pull up a loop (3 loops), yarn over, pull through 2 loops, yarn over, pull through remaining 2 loops. Creates taller stitches for the mesh sections.
Sc2tog = Single crochet two together (decrease). Insert hook in first stitch, pull up loop, insert hook in next stitch, pull up loop (3 loops on hook), yarn over, pull through all 3 loops. Reduces your stitch count by one.
BLO = Back loop only. Work into only the back loop of the stitch below, leaving the front loop unworked. This creates the ribbed texture on the ankle cuff.
FLO = Front loop only. Work into only the front loop of the stitch below.
Size Information
This pattern is written for a women’s US size 7 to 8 (EU 38 to 39). The mesh construction has some natural give, so it accommodates a small size range.
To adjust sizing: Add or subtract 4 stitches to your starting chain for each full size difference. You may also need to add or subtract 2 rows in the foot length section.
Crochet Sneaker Pattern Instructions

Part 1: The Sole Foundation
The sole piece gets crocheted separately and then attached to your rubber sole base. This creates a cushioned layer between your foot and the rubber.
Row 1: Ch 31. Sc in 2nd ch from hook and in each ch across. (30 sts)
Row 2: Ch 1, turn. 2 sc in first st, sc in next 28 sts, 2 sc in last st. (32 sts)
Row 3: Ch 1, turn. 2 sc in first st, sc in next 30 sts, 2 sc in last st. (34 sts)
Rows 4 to 6: Ch 1, turn. Sc in each st across. (34 sts)
Row 7: Ch 1, turn. Sc2tog, sc in next 30 sts, sc2tog. (32 sts)
Row 8: Ch 1, turn. Sc2tog, sc in next 28 sts, sc2tog. (30 sts)
Now you’ll work around the entire perimeter to create a raised edge.
Edging Round: Ch 1, do not turn. Work 3 sc in corner, sc evenly along short end (about 8 sc), 3 sc in corner, sc in each st along foundation chain (30 sc), 3 sc in corner, sc along other short end (about 8 sc), 3 sc in corner, sc along top edge (30 sc). Sl st to first sc to join.
Don’t panic if your count is slightly different on the short ends. Just keep it even on both sides.
Part 2: The Toe Cap
The toe cap is worked in solid single crochet for durability and that classic sneaker look.
Starting at the center front of your sole edging, count 15 stitches to the right of center front.
Row 1: Join yarn with sl st. Ch 1, sc in same st and in next 29 sts. (30 sts across front)
Row 2: Ch 1, turn. Sc2tog, sc in next 26 sts, sc2tog. (28 sts)
Row 3: Ch 1, turn. Sc2tog, sc in next 24 sts, sc2tog. (26 sts)
Row 4: Ch 1, turn. Sc2tog, sc in next 22 sts, sc2tog. (24 sts)
Rows 5 to 8: Ch 1, turn. Sc in each st across. (24 sts)
Do not fasten off. You’ll continue directly into the mesh upper section.
Part 3: The Mesh Upper
This is where the magic happens. The mesh pattern is created by alternating double crochet stitches with chain spaces.
Important: The mesh is worked in joined rounds, not rows.
Setup Round: Ch 1, sc evenly around the entire opening where the upper will attach, picking up stitches from the toe cap sides and the remaining sole edging. Aim for approximately 72 stitches total. Sl st to join. Place marker.
If you end up with 70 or 74 stitches, that’s perfectly fine. Just make sure it’s an even number.
Round 1 (Mesh Pattern Begins): Ch 4 (counts as dc plus ch 1), skip next st, *dc in next st, ch 1, skip next st*. Repeat from * around. Sl st to 3rd ch of beginning ch-4 to join. (36 dc, 36 ch-1 spaces)
Round 2: Ch 4, dc in next dc, ch 1. *Dc in next dc, ch 1*. Repeat from * around. Sl st to join. (36 dc, 36 ch-1 spaces)
Rounds 3 to 12: Repeat Round 2.
You should now have a tube of mesh fabric rising from the sole. The holes create that distinctive breathable sneaker look.
Part 4: Shaping the Tongue Area
The tongue sits at the front center and is worked flat.
Identify the center front 8 stitches of your mesh round.
Row 1: Join yarn in first of these 8 dc. Ch 4, dc in next dc, ch 1. Continue across 8 dc total, working dc, ch 1 in each. (8 dc)
Rows 2 to 10: Ch 4, turn. Dc in each dc across with ch 1 between each. (8 dc)
Row 11 (Edging): Ch 1, turn. Sc in each dc and ch-1 space across top. Then sc evenly down side, across bottom attachment, and up other side. Sl st to join. Fasten off.
Part 5: The Eyelet Panels
The eyelet panels flank the tongue and hold your laces. Work one panel on each side of the tongue opening.
Right Panel:
Row 1: Join yarn at top right corner of mesh, just beside the tongue. Ch 1, sc in next 10 sts along top edge of mesh. (10 sts)
Rows 2 to 4: Ch 1, turn. Sc in each st across. (10 sts)
Row 5 (Eyelet Row): Ch 1, turn. Sc in first st, *ch 2, skip 2 sts, sc in next st*. Repeat from * twice more, sc in last st. (4 sc, 3 ch-2 spaces for lacing)
Rows 6 to 8: Ch 1, turn. Sc in each st and 2 sc in each ch-2 space. (10 sts)
Row 9 (Eyelet Row): Repeat Row 5.
Rows 10 to 12: Repeat Rows 6 to 8.
Fasten off.
Left Panel: Work the same as the right panel on the opposite side of the tongue.
Part 6: The Ribbed Ankle Cuff
The ribbed cuff gives these sneakers their authentic high-top look and helps them stay up on your ankle.
Switch to your smaller hook if desired for a tighter ribbing.
Round 1: Join yarn at back center of the sneaker top opening. Ch 1, sc evenly around entire opening, including across tops of eyelet panels and tongue. Aim for approximately 60 stitches. Sl st to join.
Round 2: Ch 1, sc in BLO of each st around. Sl st to join. (60 sts)
Rounds 3 to 12: Repeat Round 2.
This back loop only technique creates the horizontal ridges that mimic real sneaker ribbing.
Final Round: Ch 1, sl st loosely in BLO of each st around. Fasten off.
Part 7: Finishing and Assembly
Weave in all ends carefully using your tapestry needle. Make sure no ends poke through to the inside where they might irritate your foot.
Attach the crocheted sole to the rubber sole base:
1. Apply fabric glue evenly across the top of the rubber sole
2. Press your crocheted sole piece firmly onto the glue
3. Allow to dry completely (at least 24 hours)
4. For extra durability, you can hand stitch around the perimeter using a sturdy thread
Make the laces:
Chain approximately 120 stitches (or desired length). Sl st in 2nd ch from hook and in each ch across. Fasten off. Weave ends back into the lace.
Lace up your sneakers by threading through the eyelet holes, starting at the bottom and working up.
Tips for Success
Tension matters. Keep your tension consistent throughout, especially in the mesh section. Too loose and the sneakers won’t hold their shape. Too tight and they won’t fit over your foot.
Try them on as you go. After completing the mesh upper, slip your work over your foot (before attaching to the rubber sole) to check the fit. Easier to adjust now than later.
Block if needed. If your mesh looks uneven, a light steam blocking can even things out beautifully.
Customize the height. Want low-tops instead? Stop the mesh section after Round 8 and reduce the cuff to 6 rounds.
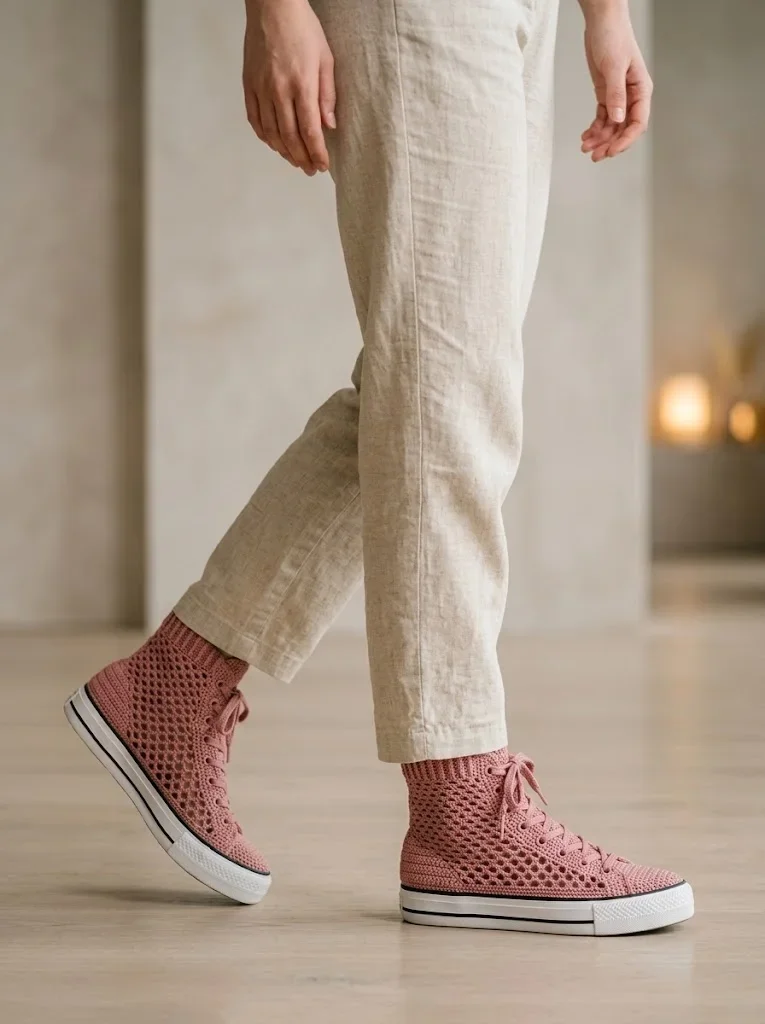
Caring for Your Crochet Sneakers
Hand wash in cool water with mild detergent. Reshape and air dry away from direct heat. The rubber soles can be wiped clean with a damp cloth.
These sneakers work best as indoor footwear or for light outdoor use on dry days. Think of them as the perfect transition between slippers and actual shoes.
I really hope you love making these dusty rose mesh crochet sneaker boots as much as I loved designing them. If you give this crochet tutorial a try, please save it to your Pinterest boards so you can find it easily when you’re ready to start. And I would absolutely love to see your finished sneakers, so drop a comment below or tag me on Instagram when you make your pair!
You Might Also Like
- Tinkerbell Green Fairy Baby Dress Free Crochet Pattern
- Coral Sunset Gradient Chain Purse Free Crochet Pattern
- Cozy Gray Hexagon Sofa Throw Free Crochet Pattern
- Terracotta Rust Textured Clutch Bag Free Crochet Pattern