Dusty Rose Lace Panel Crochet Sweater Free Pattern
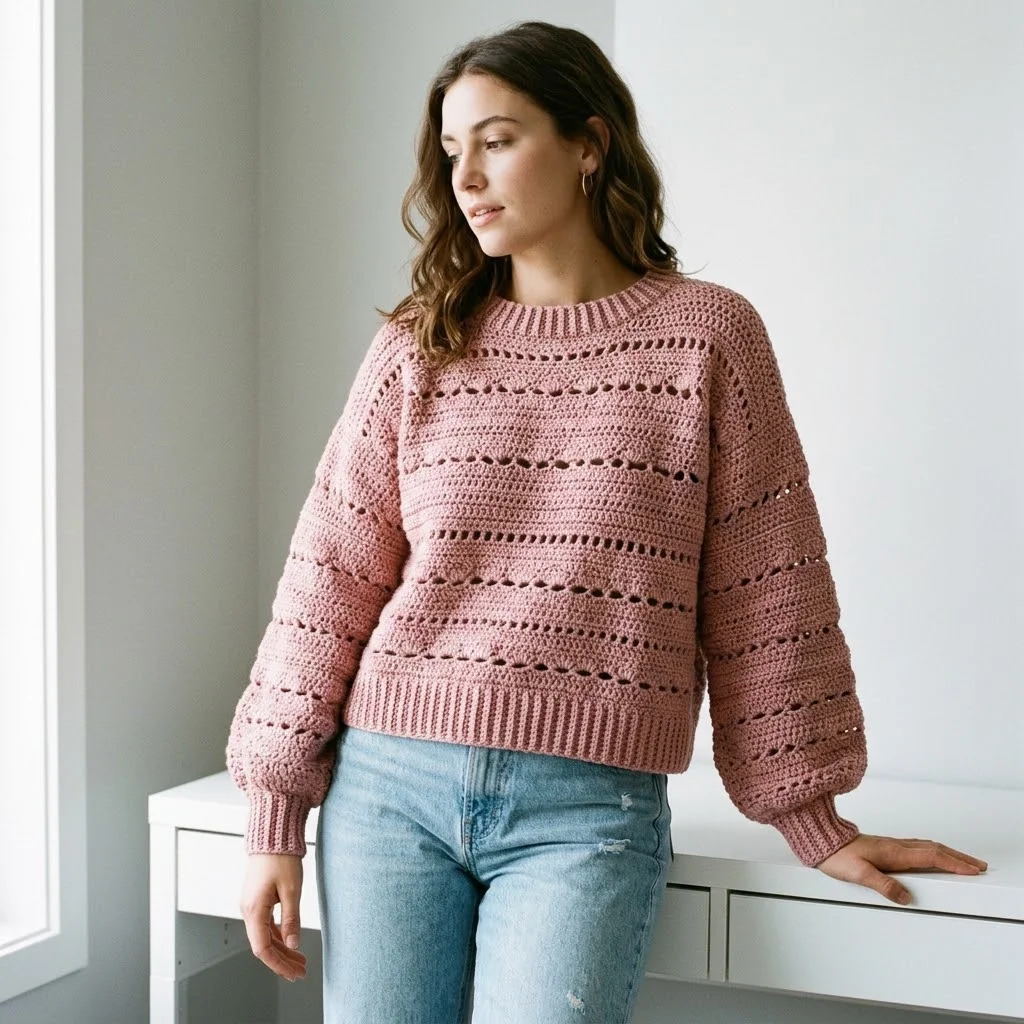
This is a relaxed fit crochet sweater featuring horizontal lace panels and ribbed trim. It uses double crochet, chain spaces, and basic ribbing. The construction is worked flat in pieces and seamed together. Intermediate skill level recommended.
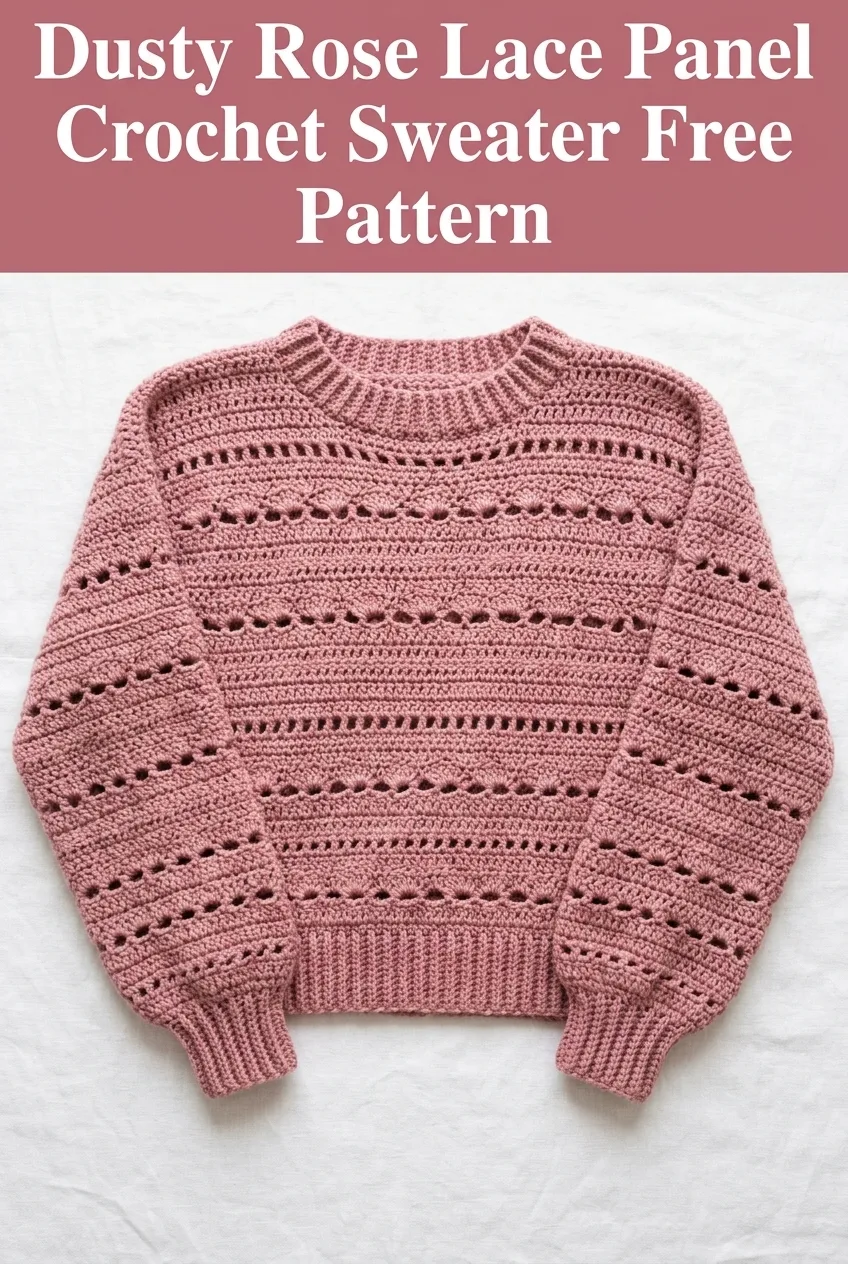
I’ve been wanting to design a sweater that looks intricate but relies on a simple repeating stitch pattern, and this dusty rose beauty is exactly that. The lace panels create visual interest without complicated techniques, and the balloon sleeves give it that modern, cozy vibe that works from late summer through early spring.
Why You’ll Love This Crochet Sweater Pattern
This Dusty Rose Lace Panel Crochet Sweater strikes the perfect balance between classic and contemporary. The horizontal eyelet rows break up the solid fabric just enough to add texture and breathability without sacrificing warmth. The ribbed neckline, hem, and cuffs create a polished finish that looks store bought.
What makes this crochet pattern approachable is the repetition. Once you learn the lace panel sequence, you’ll work it the same way across the body and sleeves. No complicated shaping until you reach the neckline, and even that is straightforward.
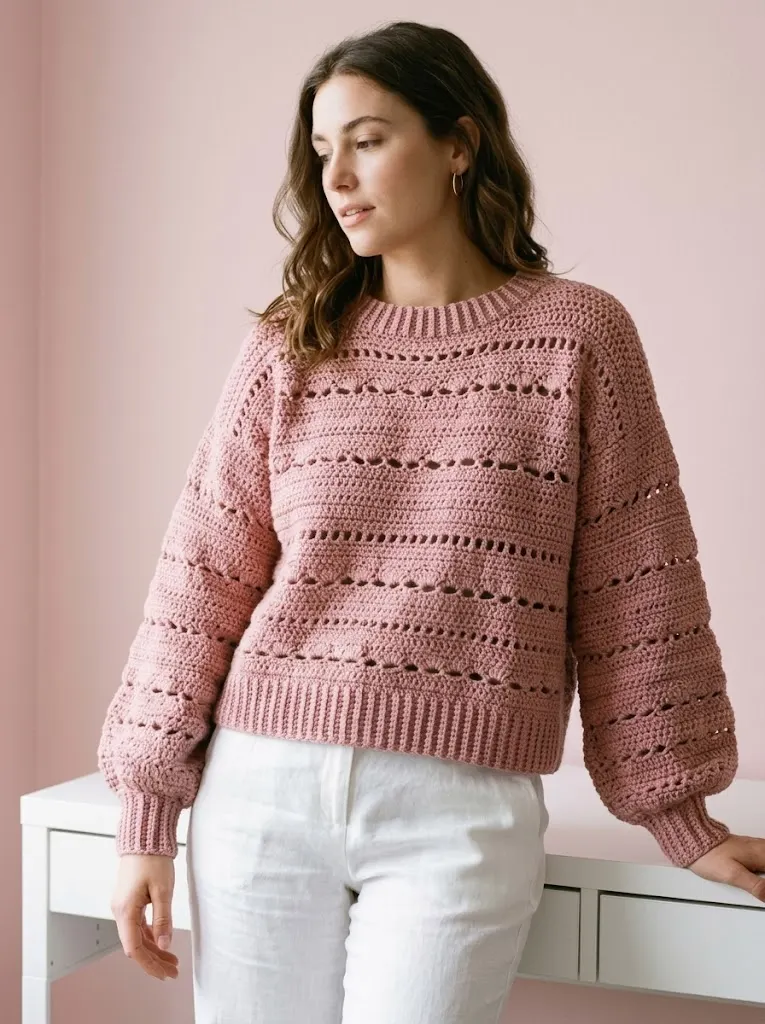
The balloon sleeves are my favorite detail. They’re roomy through the forearm and taper at the wrist with a fitted ribbed cuff. Comfortable for layering, flattering on most body types, and absolutely on trend.
Materials Needed
Yarn:
Hook:
Notions:
Gauge:
Skill Level
This crochet sweater pattern is intermediate level. You should be comfortable with:
If you’ve made a simple cardigan or crocheted blanket with texture stitches, you’re ready for this project.
Size Information
This pattern is written for size Medium with a finished bust measurement of approximately 42 inches. The sweater has 4 to 6 inches of positive ease for a relaxed fit.
To adjust sizing, add or subtract multiples of 6 stitches to your foundation chain. Each repeat of the lace pattern uses 6 stitches.
Finished Measurements (Size Medium):
Abbreviations and Stitch Definitions
Let me walk you through every stitch you’ll need. I’ll explain each one in plain terms so there’s no confusion.
Ch = Chain. Wrap yarn over hook and pull through the loop on your hook. This creates one chain stitch.
Sl st = Slip stitch. Insert hook, yarn over, pull through both the stitch and the loop on your hook in one motion. Used for joining and moving across stitches.
Sc = Single crochet. Insert hook, yarn over and pull up a loop (2 loops on hook), yarn over and pull through both loops.
BLO = Back loop only. Instead of inserting your hook under both loops of a stitch, you only go under the back loop. This creates the ridged ribbing texture.
Dc = Double crochet. Yarn over, insert hook, yarn over and pull up a loop (3 loops on hook), yarn over and pull through 2 loops (2 loops remain), yarn over and pull through remaining 2 loops.
Dc2tog = Double crochet two together. A decrease stitch. Work a dc but stop before the final pull through (2 loops on hook), then start another dc in the next stitch and stop at the same point (3 loops on hook), yarn over and pull through all 3 loops. You’ve turned 2 stitches into 1.
Sk = Skip. Pass over the indicated stitch without working into it.
Sp = Space. The hole or gap created by chain stitches in the previous row.
Rep = Repeat.
Special Techniques
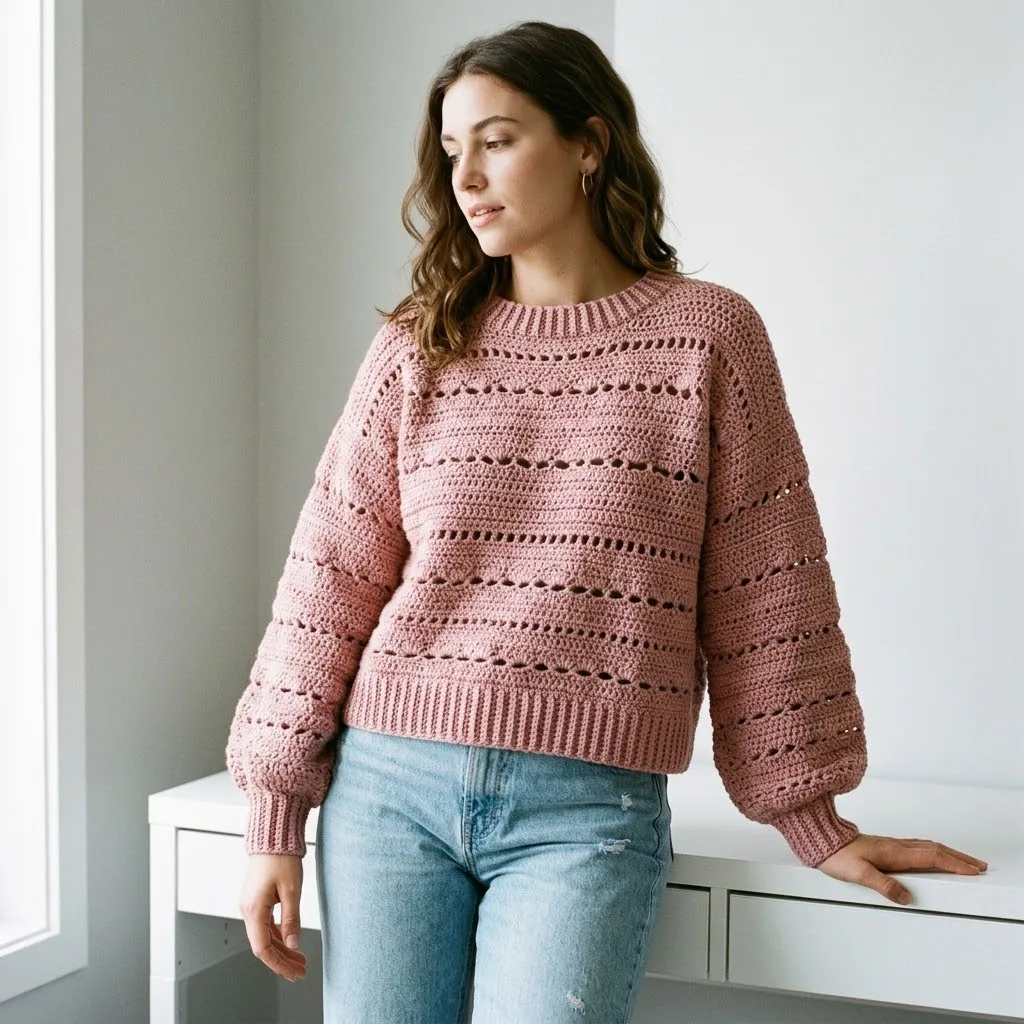
Lace Panel Row
The lace effect in this sweater comes from a simple eyelet technique. You’ll skip stitches and work chains to create small holes in a horizontal line. Here’s how it works:
Lace Row: Ch 3 (counts as dc), dc in next st, *ch 1, sk 1, dc in next 2 sts*, rep from * to * across, turn.
Recovery Row: Ch 3, dc in each dc and each ch-1 sp across, turn.
These two rows together create one lace panel. The chain spaces make the holes, and the recovery row fills everything back in with solid double crochet.
Ribbing
The ribbed sections at the hem, cuffs, and neckline use back loop only single crochet worked in short rows perpendicular to the main fabric. This creates vertical ridges that have stretch and look like knit ribbing.
Pattern Instructions
Back Panel
Ribbing:
Using smaller hook, ch 11.
Row 1: Sc in 2nd ch from hook and in each ch across, turn. (10 sc)
Rows 2 through 70: Ch 1, sc in BLO of each st across, turn. (10 sc)
You should have approximately 70 rows or until the ribbing measures 20 inches unstretched. Fasten off but do not cut yarn.
Body:
Rotate ribbing 90 degrees. Using larger hook, work along the long edge of the ribbing.
Row 1: Ch 3 (counts as first dc here and throughout), work 69 dc evenly across the long edge of ribbing, turn. (70 dc)
Rows 2 through 5: Ch 3, dc in each st across, turn. (70 dc)
Row 6 (Lace Row): Ch 3, dc in next st, *ch 1, sk 1, dc in next 2 sts*, rep from * to * across, turn. (70 sts including ch-1 sps)
Row 7 (Recovery Row): Ch 3, dc in each dc and each ch-1 sp across, turn. (70 dc)
Rows 8 through 11: Ch 3, dc in each st across, turn. (70 dc)
Rep Rows 6 through 11 five more times, or until piece measures approximately 15 inches from bottom of ribbing.
Armhole Shaping:
Next Row: Sl st across first 5 sts, ch 3, dc across to last 5 sts, leave remaining sts unworked, turn. (60 dc)
Continue in established pattern (solid rows with lace panels every 6th row) for 6 more inches.
Shoulder and Neck Shaping:
Right Shoulder: Ch 3, dc in next 17 sts, turn, leaving remaining sts unworked. (18 dc)
Work 2 more rows on these 18 sts. Fasten off.
Left Shoulder: Skip center 24 sts for neck opening. Rejoin yarn in next st, ch 3, dc in remaining 17 sts, turn. (18 dc)
Work 2 more rows. Fasten off.
Front Panel
Work exactly as back panel through armhole shaping.
Continue in pattern for 4 inches after armhole shaping begins.
Front Neck Shaping:
Right Shoulder: Ch 3, dc in next 22 sts, turn. (23 dc)
Next Row: Ch 3, dc2tog, dc across, turn. (22 dc)
Next Row: Ch 3, dc across to last 3 sts, dc2tog, dc in last st, turn. (21 dc)
Continue decreasing at neck edge every row until 18 sts remain. Work even until front measures same length as back. Fasten off.
Left Shoulder: Skip center 14 sts. Rejoin yarn, work to mirror right shoulder with decreases at opposite edge.
Sleeves (Make 2)
Cuff Ribbing:
Using smaller hook, ch 9.
Row 1: Sc in 2nd ch from hook and each ch across, turn. (8 sc)
Rows 2 through 30: Ch 1, sc in BLO of each st across, turn. (8 sc)
Sleeve Body:
Rotate and work along long edge with larger hook.
Row 1: Ch 3, work 39 dc evenly across long edge of ribbing, turn. (40 dc)
Rows 2 through 4: Ch 3, dc in each st across, turn. (40 dc)
Row 5 (Increase Row): Ch 3, 2 dc in next st, dc across to last 2 sts, 2 dc in next st, dc in last st, turn. (42 dc)
Rows 6 through 9: Continue in pattern, working lace row on Row 6 and recovery row on Row 7.
Continue working in pattern with lace panels every 6 rows. Work increase row every 4th row until you have 56 dc.
Work even in pattern until sleeve measures 20 inches from cuff.
Sleeve Cap Shaping:
Next Row: Sl st across 4 sts, ch 3, dc across to last 4 sts, leave remaining unworked, turn. (48 dc)
Next 4 Rows: Ch 3, dc2tog, dc across to last 3 sts, dc2tog, dc in last st, turn.
Fasten off.
Neckband
Seam shoulders together using mattress stitch or whip stitch.
Using smaller hook, join yarn at back left shoulder seam.
Round 1: Ch 1, work approximately 80 sc evenly around entire neck opening, sl st to first sc to join.
Ribbing: Ch 7.
Row 1: Sc in 2nd ch from hook and each ch across, sl st in next 2 sc of neckline, turn. (6 sc in ribbing)
Row 2: Sk sl sts, sc in BLO of each ribbing st, turn.
Row 3: Ch 1, sc in BLO of each st, sl st in next 2 sc of neckline, turn.
Rep Rows 2 and 3 around entire neckline. Join ends of ribbing with sl st. Fasten off and weave in ends.
Assembly
1. Pin front and back panels together at shoulders, matching lace rows.
2. Seam shoulders using your preferred method.
3. Fold sleeves in half lengthwise to find center of sleeve cap. Pin to shoulder seam.
4. Pin sleeve to armhole opening, easing any fullness.
5. Seam sleeves to body.
6. Seam side seams from hem to underarm.
7. Seam sleeve seams from cuff to underarm.
8. Weave in all ends.
9. Block gently to measurements, being careful not to flatten the ribbing.
Finishing Tips
Blocking: Lay flat on a towel, spritz with water, and pin to measurements. Let dry completely. Avoid stretching the ribbed sections.
Seaming: I prefer mattress stitch for the side seams because it creates an invisible join. For the shoulders, whip stitch works well and lies flat.
Yarn Ends: Weave ends through several stitches on the wrong side, then double back to secure. Trim close to fabric.
Customization Ideas
You can make this crochet sweater pattern your own in several ways.
Color: This pattern works beautifully in solid colors that show off the lace detail. Jewel tones, neutrals, and pastels all look stunning.
Length: Add more solid rows between lace panels to lengthen the body. Add extra repeat sections to the ribbing for a longer hem.
Sleeves: For a fitted sleeve instead of balloon style, skip the increase rows and work straight from cuff to underarm.
Neckline: For a wider boat neck, increase the center skipped stitches on front and back panels.
Troubleshooting Common Issues
Lace holes are uneven: Make sure you’re working into the chain space on the recovery row, not into the chain stitch itself. The chain space is the hole, and your hook should go through that hole.
Ribbing is too tight: Use a larger hook for the ribbing, or work your chains more loosely.
Sleeves are too poofy: Work fewer increase rows, or stop increasing earlier in the sleeve.
Gauge is off: Adjust your hook size. If your fabric is too stiff, go up a hook size. If it’s too loose and floppy, go down.
Care Instructions
I really hope you enjoy making this Dusty Rose Lace Panel Crochet Sweater! It’s one of those projects that looks impressive but builds on simple techniques you probably already know. The rhythm of the lace panels becomes almost meditative once you get going.
If you make this sweater, I would absolutely love to see it! Tag me on Instagram or share your finished project on Facebook. Seeing your versions is genuinely the best part of sharing patterns.
Save this crochet sweater pattern to your Pinterest boards so you can find it when you’re ready to cast on. And please drop a comment below if you make it or have any questions. I’m always here to help, and I love hearing from you!
You Might Also Like
- Ocean Blue Chameleon Amigurumi Free Crochet Pattern
- Coastal Blue Granny Square Patchwork Cardigan Free Pattern
- Ocean Teal Woven Purse on Linen Free Pattern
- Sunset Peach Woven Crochet Clutch Free Pattern