Dusty Rose Grid Mesh Romper Free Crochet Pattern
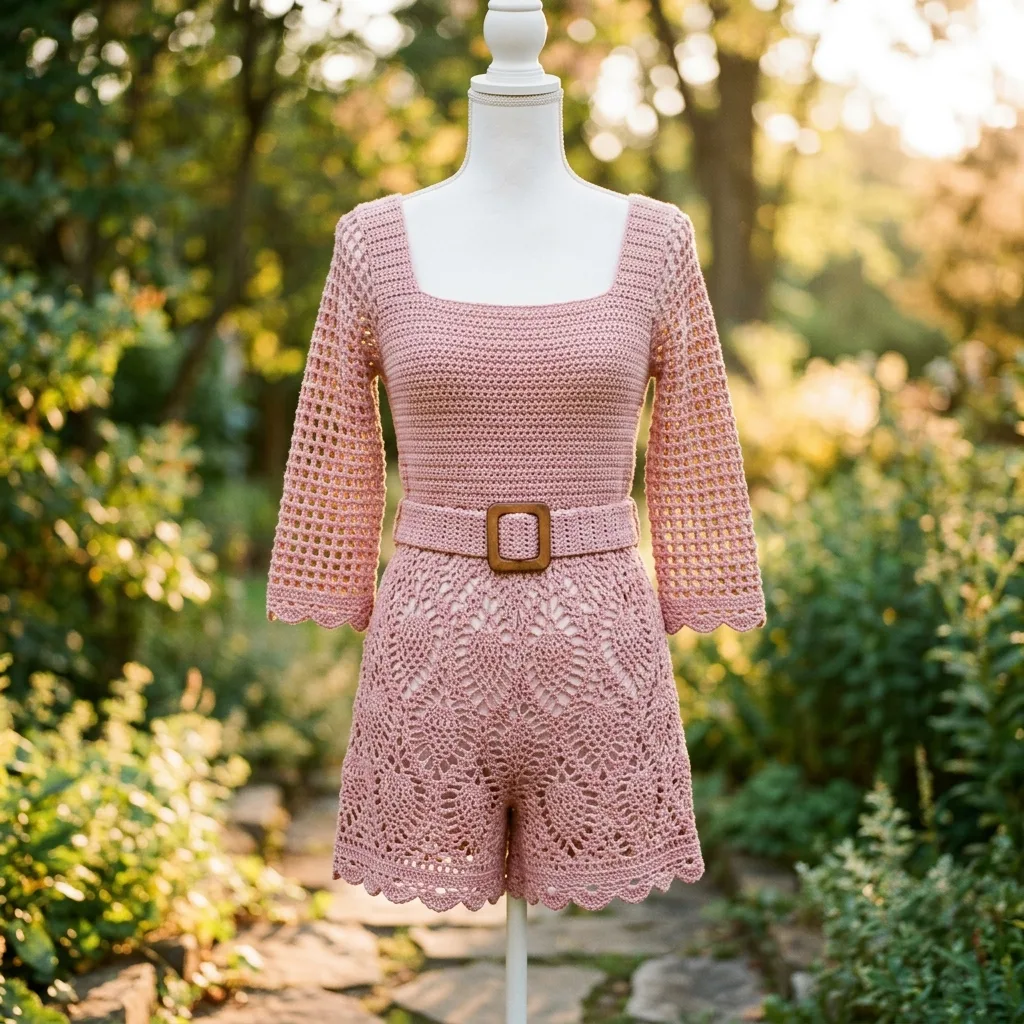
I don’t know about you, but I have been waiting for a crochet romper pattern that actually looks like something I would wear out of the house. Not a costume. Not a beach coverup that stays in the beach bag. A real, honest-to-goodness romper with structure, style, and that effortless summer vibe.
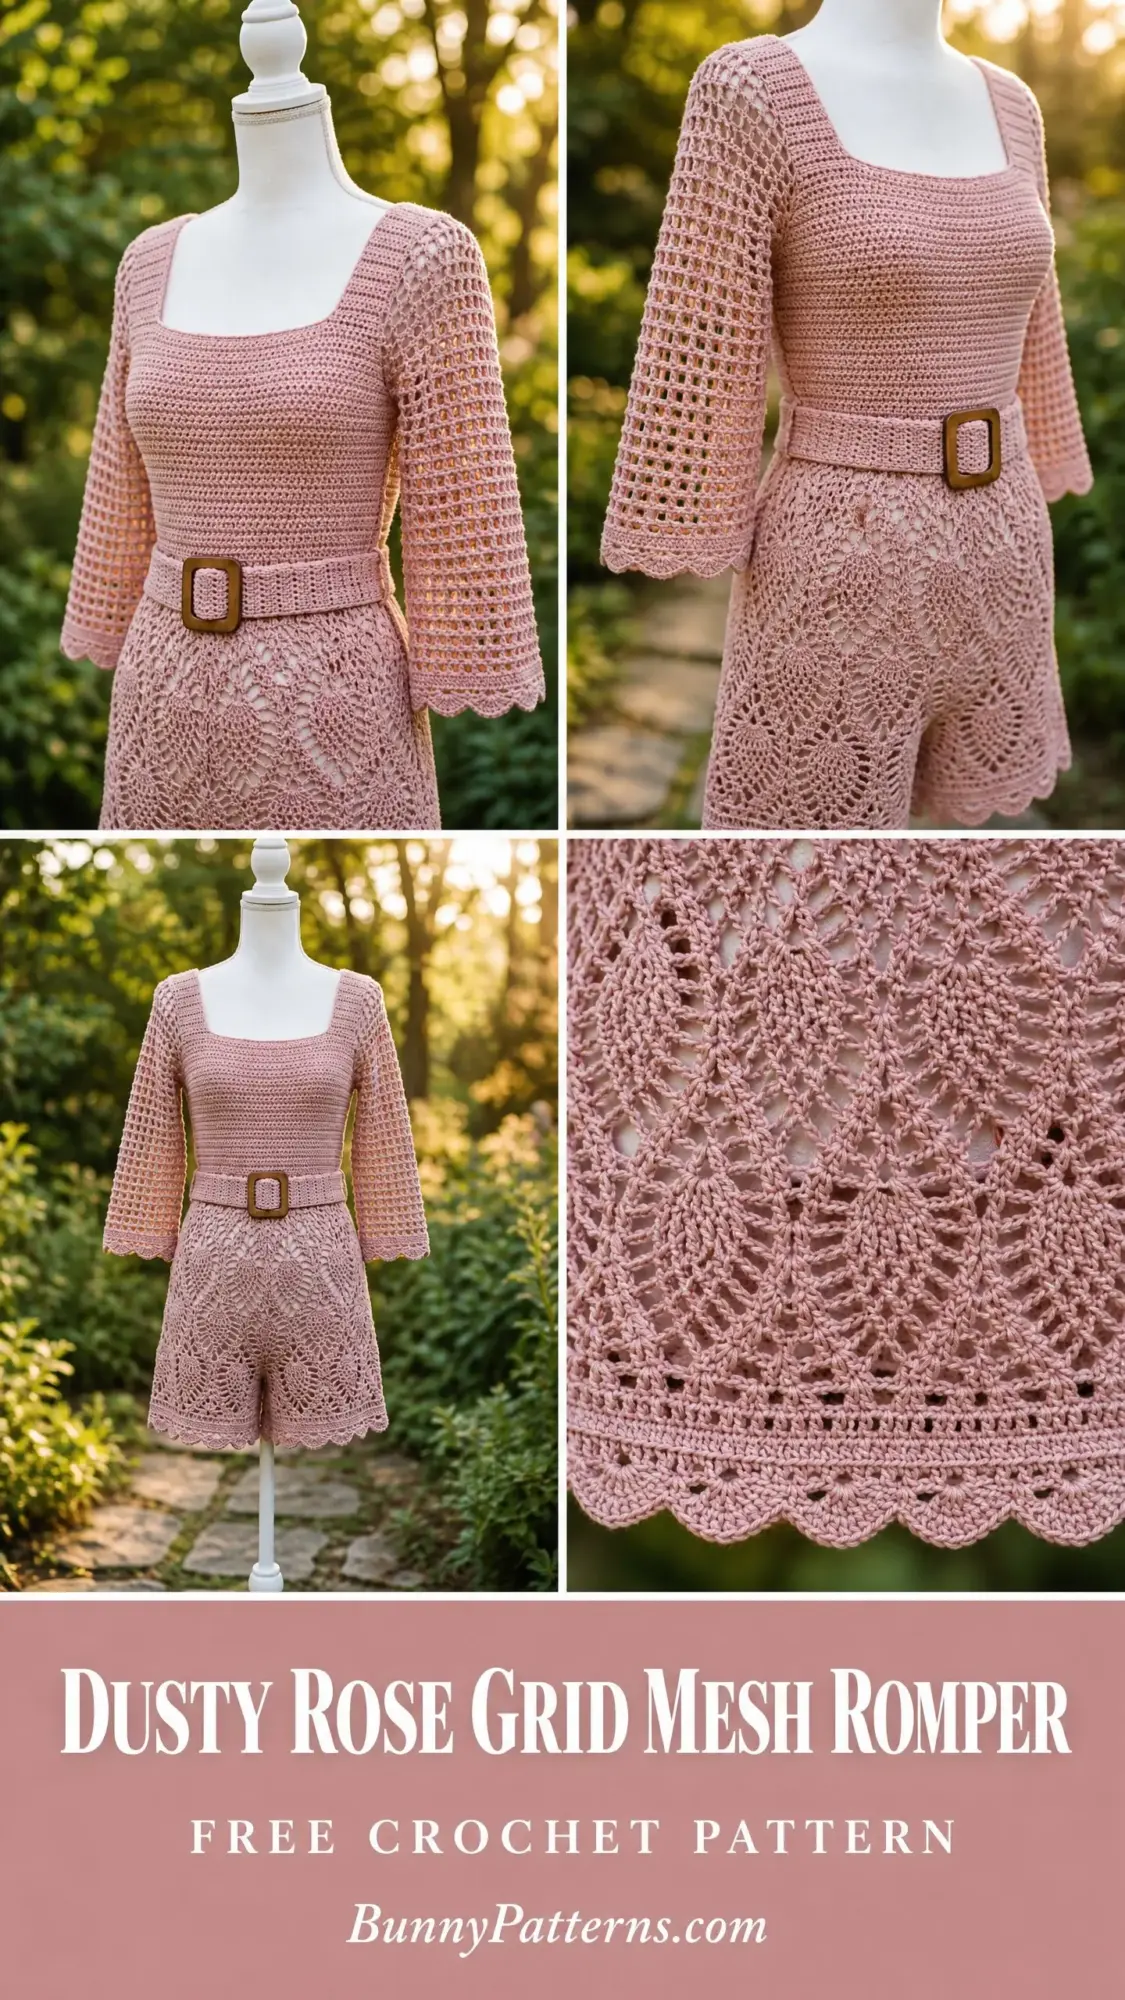
This dusty rose beauty is exactly that. The fitted bodice gives it shape. The open grid mesh sleeves keep things breezy. And those pineapple lace shorts? Absolute showstopper. All in one cohesive piece that looks far more complicated than it actually is.
If you have been eyeing lace crochet but felt intimidated, this project will walk you through it gently. The pineapple motif sounds fancy, but it is really just shells, chains, and gradual decreases. By the time you finish the first pineapple tier, you will wonder why you waited so long to try it.
Why This Romper Pattern Works
This is not your average crochet garment. The construction is thoughtful, with each section using the technique best suited for its purpose. The bodice uses solid double crochet (dc) for stability and shape. The sleeves use an open grid mesh for breathability and visual interest. The shorts feature that gorgeous pineapple lace that looks intricate but follows a logical, repeating pattern.
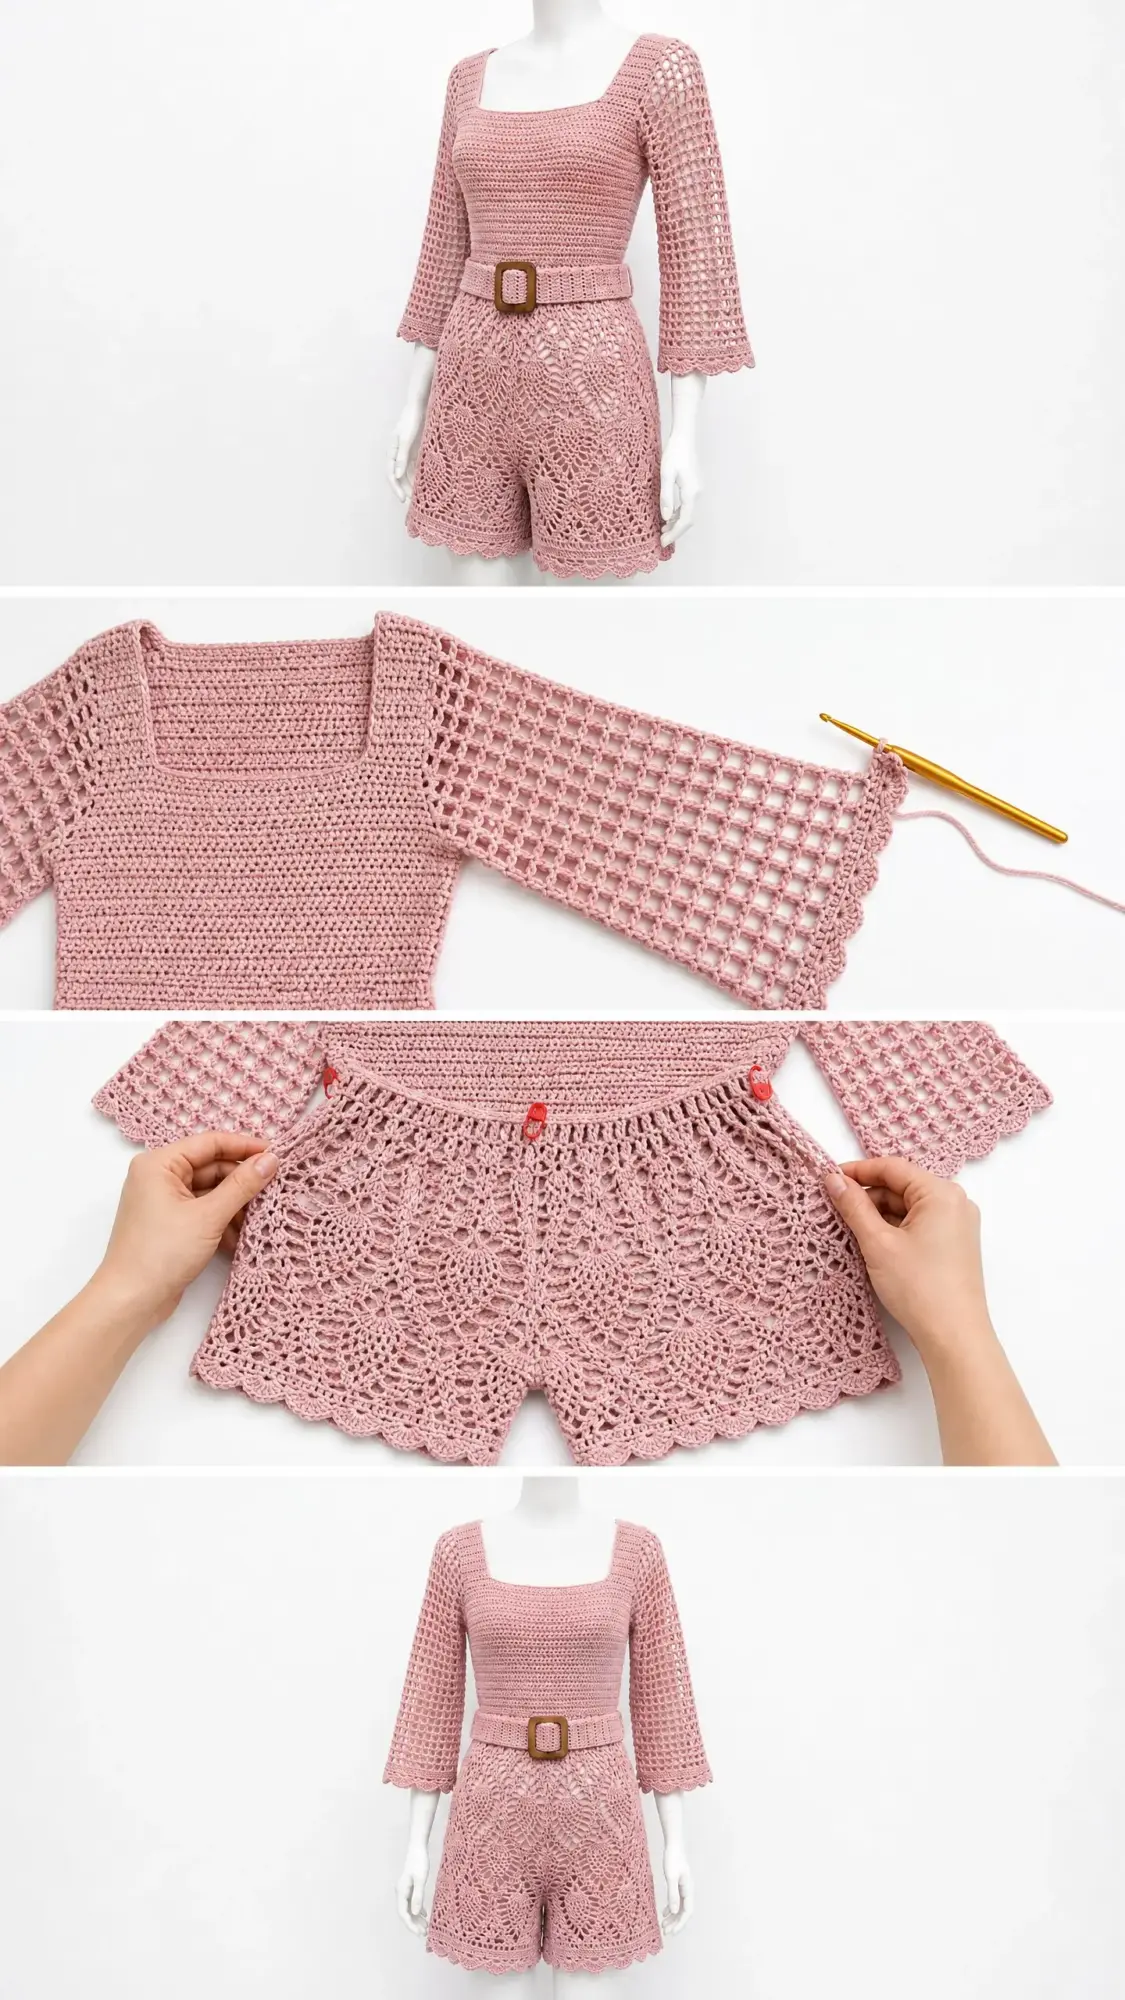
Everything is worked flat in separate pieces and then seamed together. This means you can try on pieces as you go, adjust for fit, and catch mistakes before they become major frogging sessions.
The coordinating belt with a square wooden buckle ties everything together, literally. It cinches the waist and adds a natural, earthy accent against that soft dusty rose pink.
Skill Level
This pattern is rated Advanced Beginner to Intermediate. If you can work double crochet confidently and are ready to try something with a bit more texture, you are ready for this romper.
The bodice is straightforward rows of double crochet. The sleeves use a simple chain and double crochet grid. The pineapple lace is the most advanced section, but the instructions break it down row by row. If you can follow written instructions and count your stitches, you can absolutely make this.
Estimated time to complete: 30 to 50 hours depending on your experience level and the size you are making.
Finished Measurements
This pattern is written for sizes Small (Medium, Large, XL). Numbers in parentheses indicate the changes for larger sizes.
| Measurement | Small | Medium | Large | XL |
|---|---|---|---|---|
| Bust | 34 in / 86 cm | 36 in / 91 cm | 38 in / 97 cm | 40 in / 102 cm |
| Waist | 28 in / 71 cm | 30 in / 76 cm | 32 in / 81 cm | 34 in / 86 cm |
| Hip | 36 in / 91 cm | 38 in / 97 cm | 40 in / 102 cm | 42 in / 107 cm |
| Inseam | 5 in / 13 cm | 5.5 in / 14 cm | 5.5 in / 14 cm | 6 in / 15 cm |
| Total Length | 26 in / 66 cm | 27 in / 69 cm | 27.5 in / 70 cm | 28 in / 71 cm |
| Sleeve Length | 14 in / 36 cm | 14.5 in / 37 cm | 15 in / 38 cm | 15 in / 38 cm |
Materials Needed
Yarn: DK weight (CYCA 3), 100% mercerized cotton or cotton-acrylic blend
Total Yardage: 1200 (1350, 1500, 1650) yards / 1097 (1234, 1372, 1509) meters
Color: Dusty rose pink, single colorway throughout
Recommended Yarn Options
1. Paintbox Yarns Simply DK (100% premium acrylic, 137 yards per 50g skein, colorway Dusty Rose). Budget-friendly with excellent stitch definition for lace work.
2. Drops Safran (100% Egyptian cotton, 175 yards per 50g skein). Soft and drapey, perfect for warm weather wear. Available in beautiful muted rose tones.
3. Lion Brand 24/7 Cotton DK (100% mercerized cotton, 186 yards per 100g skein). Widely available, machine washable, and holds lace patterns beautifully.
Substitution tip: Choose a yarn with good stitch definition. Avoid fuzzy or brushed yarns because they will hide your beautiful pineapple lace pattern. Mercerized cotton or cotton blends work best for the drape and structure shown.
Tools
Gauge
Bodice gauge (US E-4 / 3.5 mm hook):
18 dc x 10 rows = 4 inches / 10 cm in double crochet
Lace gauge (US F-5 / 3.75 mm hook):
One complete pineapple repeat (16 sts wide) = 3 inches / 7.5 cm
6 rows of pineapple pattern = 3 inches / 7.5 cm
Grid mesh gauge (US F-5 / 3.75 mm hook):
16 sts (8 mesh units) x 10 rows = 4 inches / 10 cm
Please check your gauge. This is a fitted garment. Even a small deviation over multiple rows will significantly change your finished dimensions. Take the time to swatch and block your swatch before starting.
Abbreviations
Special Stitches
Pineapple Shell
Work 9 dc into the same stitch or chain space. This creates the wide fan base of the pineapple motif. (9 dc total)
Pineapple Decrease
Work a partial dc into each specified stitch (yarn over, insert hook, pull up loop, yarn over, pull through 2 loops), then yarn over and pull through all remaining loops on hook. This reduces each tier of the pineapple by 2 stitches per row.
Grid Mesh Stitch
Row 1 (RS): Ch 4 (counts as dc, ch 1), skip 1 st, dc in next st, [ch 1, skip 1 st, dc in next st] across, turn.
Row 2: Ch 4 (counts as dc, ch 1), dc in first ch-sp, [ch 1, dc in next ch-sp] across, dc in 3rd ch of t-ch, turn.
Repeat Row 2 for pattern. Each mesh unit consists of 1 dc plus 1 ch-sp.
Scallop Edging
Sl st in first st, [skip 1 st, 5 dc in next st, skip 1 st, sl st in next st] across. Work this edging along any finished edge designated as a scallop hem.
Pattern Notes Before You Begin
1. The romper is constructed in pieces: Front Bodice, Back Bodice, two Sleeves, Front Shorts Panel, Back Shorts Panel, and Belt Strip. All pieces are blocked before seaming.
2. The bodice is worked flat from the bottom up in solid double crochet rows.
3. The pineapple lace shorts panels are worked flat from waist to hem. After seaming side seams and inseam, the waist edges join to the bottom of the bodice.
4. Sleeves are worked flat in grid mesh from cuff up, with gentle increases for the sleeve cap.
5. Throughout the instructions, stitch counts are for size Small. Changes for Medium, Large, and XL appear in parentheses.
6. The ch-3 turning chain counts as the first dc on every dc row unless otherwise stated.
7. Blocking is mandatory. All lace sections need blocking to open fully.
Step-by-Step Instructions
Front Bodice Panel
Using US E-4 / 3.5 mm hook, ch 79 (83, 89, 93).
Row 1 (RS): Dc in 4th ch from hook (counts as 2 dc), dc in each ch across, turn. (77, 81, 87, 91 dc)
Row 2: Ch 3 (counts as dc here and throughout), dc in each dc across, turn. (77, 81, 87, 91 dc)
Rows 3 to 15: Rep Row 2. (77, 81, 87, 91 dc each row)
After Row 15, the bodice measures approximately 6 inches from the foundation edge. Place a stitch marker at each end of this row to indicate the waist join line.
Waist Shaping (Front Bodice)
Row 16: Ch 3, dc2tog, dc in each dc to last 2 dc, dc2tog, turn. (75, 79, 85, 89 dc)
Row 17: Ch 3, dc in each dc across, turn. (75, 79, 85, 89 dc)
Row 18: Ch 3, dc2tog, dc in each dc to last 2 dc, dc2tog, turn. (73, 77, 83, 87 dc)
Row 19: Ch 3, dc in each dc across, turn. (73, 77, 83, 87 dc)
Row 20: Ch 3, dc2tog, dc in each dc to last 2 dc, dc2tog, turn. (71, 75, 81, 85 dc)
Rows 21 to 23: Rep Row 17 (work even). (71, 75, 81, 85 dc each row)
Bust Shaping (Front Bodice)
Row 24 (inc): Ch 3, 2 dc in next dc, dc in each dc to last 2 dc, 2 dc in next dc, dc in last dc, turn. (73, 77, 83, 87 dc)
Row 25: Work even. (73, 77, 83, 87 dc)
Row 26 (inc): Rep Row 24. (75, 79, 85, 89 dc)
Row 27: Work even. (75, 79, 85, 89 dc)
Row 28 (inc): Rep Row 24. (77, 81, 87, 91 dc)
Rows 29 to 33: Work even. (77, 81, 87, 91 dc each row)
Square Neckline Shaping (Front Bodice)
The neckline opening spans the center 25 (25, 27, 27) stitches.
Row 34 Right Shoulder: Ch 3, dc in next 25 (27, 29, 31) dc, turn, leaving remaining sts unworked. (26, 28, 30, 32 dc)
Row 35: Ch 3, dc in each dc across, turn. (26, 28, 30, 32 dc)
Row 36: Ch 3, dc in each dc across, turn. (26, 28, 30, 32 dc)
Fasten off right shoulder.
Row 34 Left Shoulder: Join yarn to the 51st (53rd, 57th, 59th) st from the right edge (after the center neck stitches are skipped). Ch 3, dc in each remaining dc across, turn. (26, 28, 30, 32 dc)
Rows 35 to 36: Work even. (26, 28, 30, 32 dc each row)
Fasten off left shoulder.
Checkpoint: Front bodice should measure approximately 14 (14.5, 14.5, 15) inches from foundation to shoulder edge. The center neck opening measures approximately 5.5 (5.5, 6, 6) inches wide.
Back Bodice Panel
Work exactly as Front Bodice Rows 1 to 33.
Square Neckline Shaping (Back Bodice)
Work identical to Front Bodice neckline shaping, Rows 34 to 36, for both shoulders.
Fasten off.
Front Shorts Panel
The shorts section features the pineapple lace pattern. The panel is worked flat from waist to hem.
Using US F-5 / 3.75 mm hook, ch 78.
Row 1 (RS): Sc in 2nd ch from hook, sc in each ch across, turn. (77 sc)
Row 2: Ch 3 (counts as dc), dc in next 2 sc, [ch 2, skip 2 sc, dc in next sc, ch 2, skip 2 sc, 9 dc in next sc (pineapple shell), ch 2, skip 2 sc, dc in next sc, ch 2, skip 2 sc, dc in next 3 sc] 3 times, ch 2, skip 2 sc, dc in next sc, ch 2, skip 2 sc, 9 dc in next sc, ch 2, skip 2 sc, dc in next sc, ch 2, skip 2 sc, dc in last 3 sc, turn.
This row places 4 pineapple shell bases, each with 9 dc, bordered by dc groups and ch-2 spaces.
Row 3 (Pineapple Tier 1): Ch 3, dc in next 2 dc, [ch 2, sc in ch-2 sp, ch 2, dc in first dc of shell, (ch 1, dc) in each remaining dc of shell (8 more ch-1 spaces created), ch 2, sc in ch-2 sp, ch 2, dc in next 3 dc] across, turn.
This row fans out each 9-dc shell into a tier with ch-1 spaces between each dc, creating 9 dc with 8 ch-1 spaces between them per pineapple.
Row 4 (Pineapple Tier 2): Ch 3, dc in next 2 dc, [ch 2, skip ch-2 sp, dc in first dc of fan, (ch 1, dc) in each of next 7 dc of fan, ch 2, dc in next 3 dc] across, turn.
Each pineapple now has 8 dc with 7 ch-1 spaces.
Row 5 (Pineapple Tier 3): Ch 3, dc in next 2 dc, [ch 2, dc in first dc of fan, (ch 1, dc) in each of next 6 dc of fan, ch 2, dc in next 3 dc] across, turn.
Each pineapple now has 7 dc with 6 ch-1 spaces.
Row 6 (Pineapple Tier 4): Ch 3, dc in next 2 dc, [ch 2, dc in first dc of fan, (ch 1, dc) in each of next 5 dc of fan, ch 2, dc in next 3 dc] across, turn.
Each pineapple now has 6 dc with 5 ch-1 spaces.
Row 7 (Pineapple Tier 5): Ch 3, dc in next 2 dc, [ch 2, dc in first dc of fan, (ch 1, dc) in each of next 4 dc of fan, ch 2, dc in next 3 dc] across, turn.
Each pineapple now has 5 dc with 4 ch-1 spaces.
Row 8 (Pineapple Tier 6): Ch 3, dc in next 2 dc, [ch 2, dc in first dc of fan, (ch 1, dc) in each of next 3 dc of fan, ch 2, dc in next 3 dc] across, turn.
Each pineapple now has 4 dc with 3 ch-1 spaces.
Row 9 (Pineapple Tier 7): Ch 3, dc in next 2 dc, [ch 2, dc in first dc of fan, (ch 1, dc) in each of next 2 dc of fan, ch 2, dc in next 3 dc] across, turn.
Each pineapple now has 3 dc with 2 ch-1 spaces.
Row 10 (Pineapple Tier 8): Ch 3, dc in next 2 dc, [ch 3, dc2tog over (first dc of fan, skip ch-1 sp, last dc of fan), ch 3, dc in next 3 dc] across, turn.
Each pineapple closes to a single dc2tog cluster, completing the pineapple point.
Row 11 (Transition row): Ch 3, dc in next 2 dc, [ch 2, sc in ch-3 sp, sc in dc2tog cluster, sc in ch-3 sp, ch 2, dc in next 3 dc] across, turn.
Checkpoint: After Row 11, the shorts front panel should measure approximately 4.5 to 5 inches from the foundation row. For sizes Large and XL, work a second pineapple repeat (Rows 2 to 11) before proceeding to the hem edging.
Shorts Front Hem Edging
Row 12: Ch 1, sc evenly across the bottom edge, working 1 sc into each dc and 2 sc into each ch-sp, turn. Adjust to (76 sc) for clean scallop repeats.
Row 13 (Scallop Edge): Sl st in first sc, [skip 1 sc, 5 dc in next sc, skip 1 sc, sl st in next sc] across. (19 scallops)
Fasten off.
Back Shorts Panel
Work exactly as Front Shorts Panel.
Fasten off.
Sleeves (Make 2)
The sleeves are worked flat in grid mesh from cuff to shoulder with increases along both edges for shaping.
Using US F-5 / 3.75 mm hook, ch 63 (65, 67, 69).
Row 1 (RS): Dc in 6th ch from hook (counts as dc, ch 1, skip 1 ch), [ch 1, skip 1 ch, dc in next ch] across, turn. (30, 31, 32, 33 mesh units)
Row 2: Ch 4 (counts as dc, ch 1), dc in first ch-sp, [ch 1, dc in next ch-sp] across, dc in 3rd ch of t-ch, turn. (30, 31, 32, 33 mesh units)
Rows 3 to 5: Rep Row 2. (30, 31, 32, 33 mesh units each row)
Sleeve Increases
Row 6 (inc): Ch 4, dc in first ch-sp, ch 1, dc in same ch-sp (inc made at beg), [ch 1, dc in next ch-sp] across to last ch-sp, ch 1, dc in last ch-sp, ch 1, dc in same ch-sp (inc made at end), turn. (32, 33, 34, 35 mesh units)
Rows 7 to 9: Work even. (32, 33, 34, 35 mesh units each row)
Row 10 (inc): Rep Row 6. (34, 35, 36, 37 mesh units)
Rows 11 to 13: Work even. (34, 35, 36, 37 mesh units each row)
Row 14 (inc): Rep Row 6. (36, 37, 38, 39 mesh units)
Rows 15 to 17: Work even. (36, 37, 38, 39 mesh units each row)
Row 18 (inc): Rep Row 6. (38, 39, 40, 41 mesh units)
Rows 19 to 21: Work even. (38, 39, 40, 41 mesh units each row)
Row 22 (inc): Rep Row 6. (40, 41, 42, 43 mesh units)
Rows 23 to 25: Work even. (40, 41, 42, 43 mesh units each row)
Row 26 (inc): Rep Row 6. (42, 43, 44, 45 mesh units)
Rows 27 to 30: Work even. (42, 43, 44, 45 mesh units each row)
Sleeve Cap Shaping
Row 31 (dec): Sl st across first 4 mesh units (bind off 4 units at beg), ch 3, dc in next ch-sp, [ch 1, dc in next ch-sp] to last 4 mesh units, turn, leaving last 4 units unworked. (34, 35, 36, 37 mesh units)
Row 32 (dec): Sl st across first 2 mesh units, ch 3, dc in next ch-sp, [ch 1, dc in next ch-sp] to last 2 mesh units, turn. (30, 31, 32, 33 mesh units)
Row 33 (dec): Ch 4, sk first ch-sp, dc in next ch-sp, [ch 1, dc in next ch-sp] to last ch-sp before end, turn, leaving last ch-sp unworked. (28, 29, 30, 31 mesh units)
Row 34: Rep Row 33. (26, 27, 28, 29 mesh units)
Row 35: Rep Row 33. (24, 25, 26, 27 mesh units)
Row 36: Rep Row 33. (22, 23, 24, 25 mesh units)
Fasten off, leaving a 12-inch tail for seaming.
Sleeve Cuff Scallop Edging
With RS facing, join yarn to the foundation chain edge at the right corner. Work sc across to produce 60 (64, 64, 68) sc (nearest multiple of 4), then work scallop edging.
Scallop Row: Sl st in first sc, [skip 1 sc, 5 dc in next sc, skip 1 sc, sl st in next sc] across. (15, 16, 16, 17 scallops)
Fasten off.
Belt Strip
Using US E-4 / 3.5 mm hook, ch 151 (159, 167, 175).
Row 1: Dc in 4th ch from hook, dc in each ch across, turn. (149, 157, 165, 173 dc)
Row 2: Ch 3, dc in each dc across, turn. (149, 157, 165, 173 dc)
Row 3: Ch 3, dc in each dc across. (149, 157, 165, 173 dc)
Fasten off, leaving a 6-inch tail.
Belt Scallop Ends
Join yarn at one short end of the belt. Work a simple sc border around, adding a scallop to each short end: [skip 1 st, 5 dc in next st, skip 1 st, sl st in next st] twice across each short end.
Fold one end through the bar of the wooden buckle and slip stitch or sew securely through approximately 1 inch of the end to attach it.
Finishing and Assembly
Step 1: Block All Pieces
Wet block all pieces by submerging in cool water, gently squeezing out excess water, and pinning to finished measurements on a foam blocking mat. Allow to dry completely before seaming. Blocking is critical for the pineapple lace shorts to open to their full dimensions.
Step 2: Shoulder Seams
Hold Front Bodice and Back Bodice with RS together. Using a tapestry needle and yarn, work a mattress stitch seam along each shoulder edge. Each shoulder seam spans 26 (28, 30, 32) dc.
Step 3: Side Seams (Bodice)
With RS together, seam the left and right side edges of the bodice from the underarm point down to the waist. Leave the bottom edge open to attach the shorts. The top 7 (7.5, 8, 8.5) inches of each side edge remain open for sleeve insertion.
Step 4: Set In Sleeves
Fold each sleeve in half lengthwise with RS together and seam the underarm seam from cuff to the last row before cap shaping. Match the center top of the sleeve cap to the shoulder seam. Pin the sleeve cap into the armhole opening, easing extra fabric evenly. Seam using mattress stitch or slip stitch join. Repeat for second sleeve.
Step 5: Shorts Side Seams
Hold Front Shorts Panel and Back Shorts Panel with RS together. Seam both side edges from waist to leg hem, leaving the center inseam open.
Step 6: Inseam
Fold the shorts so front and back leg openings align. Seam the inseam on each leg separately from the crotch point down to the hem edge.
Step 7: Attach Shorts to Bodice
Align the waist edge of the assembled shorts with the bottom edge of the assembled bodice (at the stitch marker line). With RS together, join with a slip stitch seam or mattress stitch.
Step 8: Neckline Edging
Join yarn at any corner of the square neckline. Work 1 round of sc evenly around the entire neckline opening. Join with sl st.
Next round: Ch 1, sl st in each sc around. Join and fasten off.
Step 9: Leg Opening Edging (Optional)
If leg openings feel uneven, work 1 round of sc evenly around each leg opening, then work the scallop edging row.
Step 10: Weave In All Ends
Weave all yarn tails securely through the WS of the fabric. For lace sections, weave through at least 3 to 4 stitches in multiple directions.
Size Customization Tips
To size up beyond XL: Add 1 full pineapple repeat (approximately 16 foundation chain stitches per panel) to the shorts width and add 4 to 6 dc to each bodice panel.
To lengthen the shorts: Work a second complete pineapple tier (Rows 2 to 11 repeated) before the hem edging. This adds approximately 4.5 to 5 inches of length.
To lengthen the bodice: Add rows of solid dc to the pre-waist-shaping section (after Row 15). Each 2 rows adds approximately 0.8 inch.
To adjust sleeve length: Add or remove even rows between the increase rows. Each 2 rows adds approximately 0.8 inch.
Final Thoughts on This Crochet Romper Pattern
This dusty rose grid mesh romper is the kind of project that makes you feel like a real garment maker. You are not just following instructions. You are building something beautiful, piece by piece, with techniques that will serve you well in future projects.
The pineapple lace may seem intimidating at first glance. But once you work through that first tier and see the pattern emerge, you will feel that wonderful click of understanding. Trust the process. Count your stitches. Block generously.
When you slip this romper on for the first time and that belt cinches at the waist, you are going to feel incredible. This is wearable art, made by your own hands.
Thank you so much for choosing this pattern. I genuinely hope you love making it as much as I loved designing it. If you finish your romper, I would absolutely love to see it! Share your photos on Instagram or Facebook and tag me so I can celebrate with you.
If this pattern is calling your name, go ahead and save it to your Pinterest boards so you can find it when you are ready to start. And please drop a comment below if you make one. I love hearing about your projects and seeing what colors you choose!
You Might Also Like
- Coral Reef Charm Bracelet Free Crochet Pattern
- Coral Sunset Mandala Crochet Two-Piece Free Pattern
- Ocean Breeze Granny Square Tote Free Crochet Pattern
- Dusty Rose T-Shirt Yarn Backpack Free Crochet Pattern