Dusty Rose Granny Square Summer Dress Free Crochet Pattern
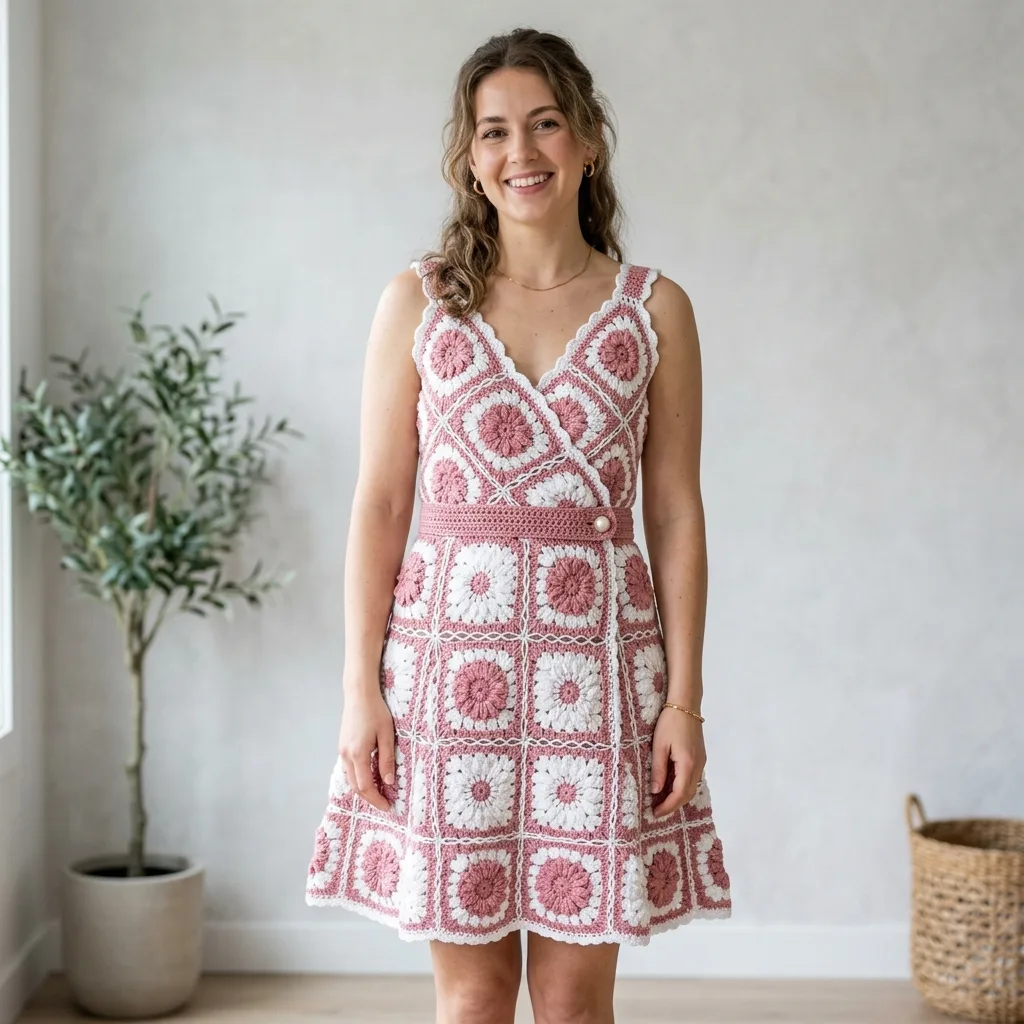
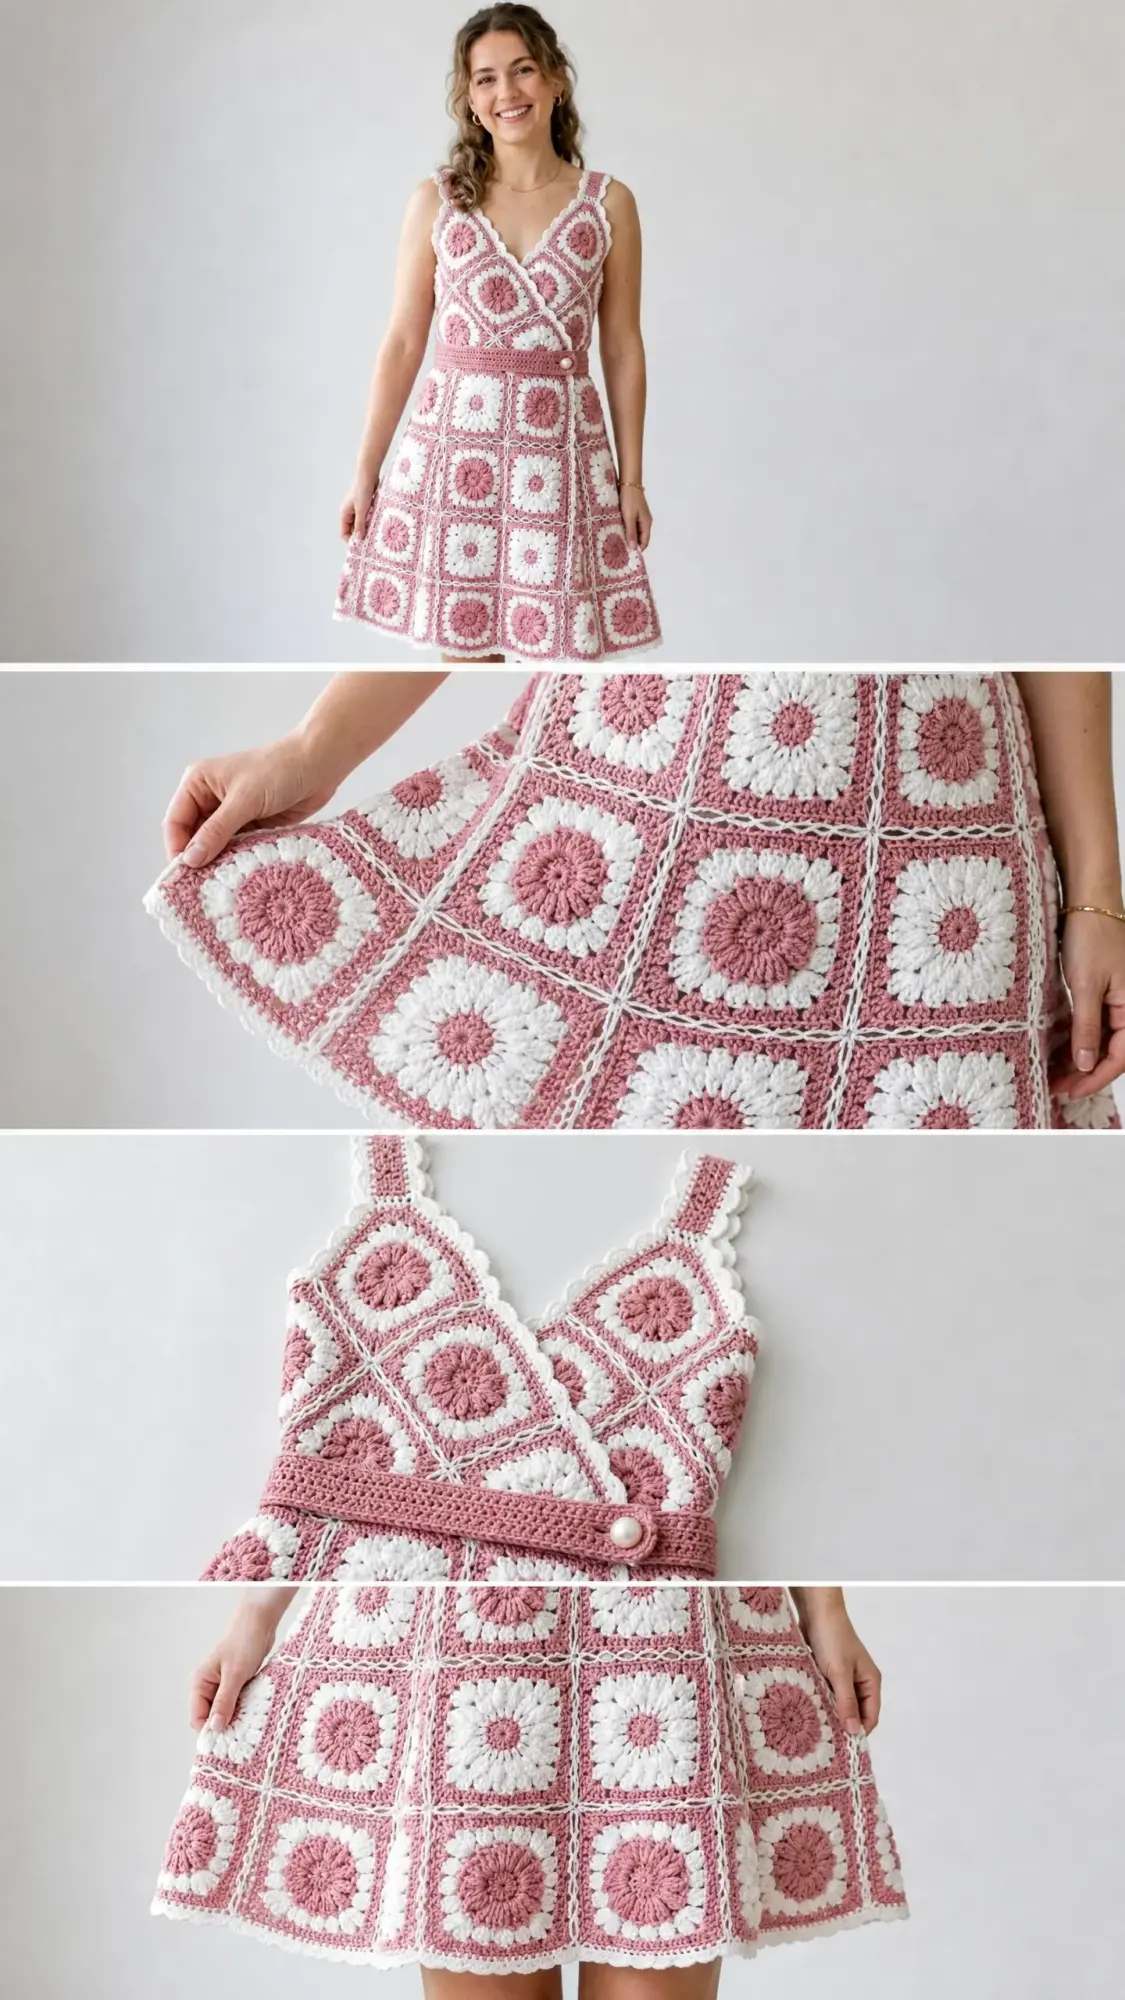
This is a knee-length summer dress made entirely from joined granny squares with raised daisy centers. The bodice uses smaller squares set on point for that diagonal lattice look. The skirt flows from larger squares in a grid pattern. A crocheted belt cinches the waist, and scallop edging finishes the neckline and hem.
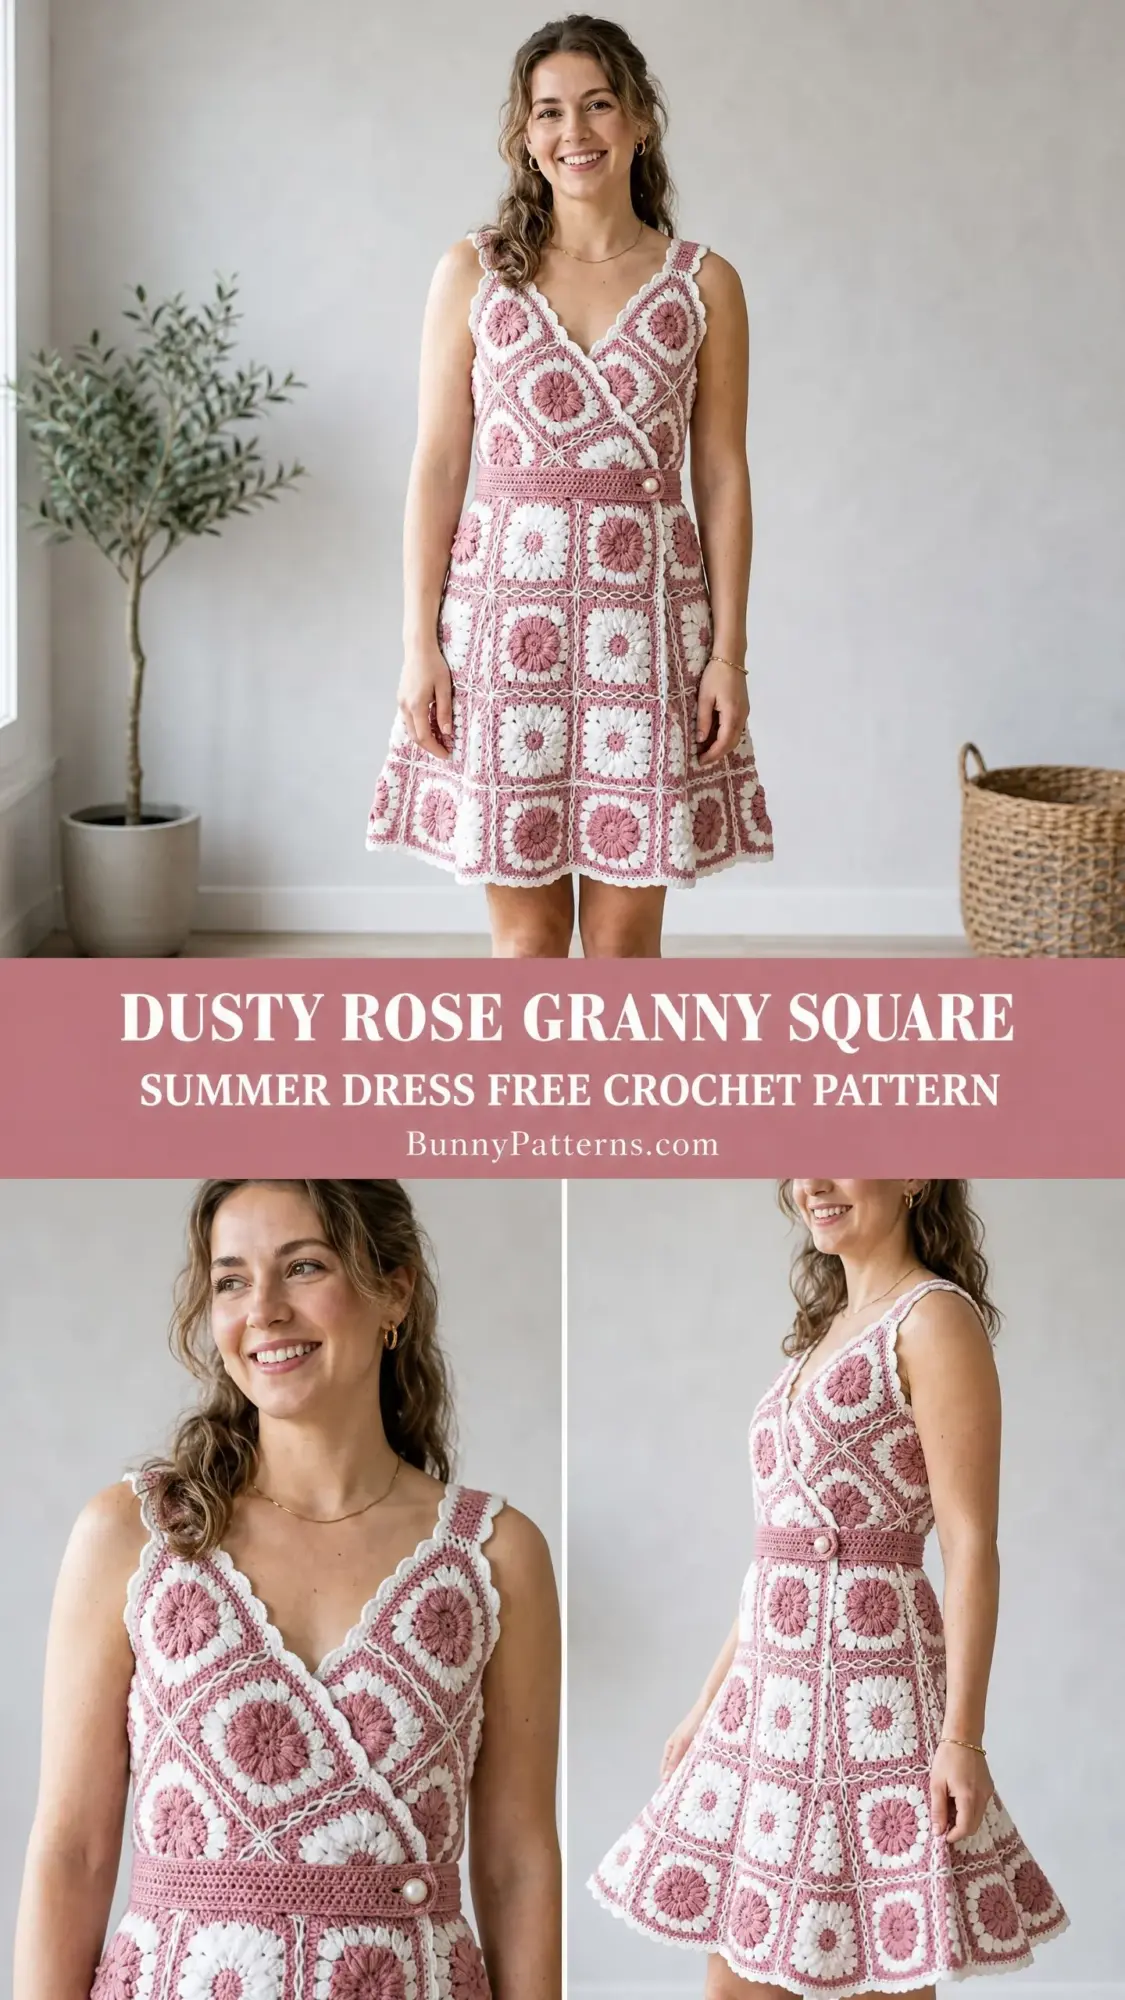
If you can make a granny square and join motifs, you can make this dress. The construction breaks down into simple repeated units. No complex shaping rows. No intimidating garment math. Just squares, joining, and a straightforward belt.
The two-color palette of dusty rose and cream white keeps things visually interesting without overwhelming. Let me walk you through every step.
About This Crochet Pattern
This dress sits in the advanced beginner to intermediate skill range. You should feel comfortable working in the round, reading granny square patterns, and joining motifs as you go. The raised daisy stitch in the center of each square adds texture, but I will explain exactly how to create it.
Finished measurements for size Small/Medium:
Time estimate: Approximately 60 to 90 hours depending on your working speed. Joining and finishing usually take 10 to 15 hours of that total.
Materials Needed
Yarn:
Suggested yarns:
Choose any smooth, tightly plied DK weight yarn with clear stitch definition. Avoid fuzzy or halo yarns because they will obscure the daisy texture.
Hooks:
Notions:
Gauge
Gauge matters here because this is a fitted garment. Check your gauge before starting.
If your small square measures larger than 4 inches, go down one hook size. If smaller, go up one hook size. Even half an inch difference per square will significantly affect fit when multiplied across the entire garment.
Abbreviations
Special Stitches
Raised Daisy Petal (RDP)
This stitch creates a protruding petal on the right side of your fabric. Insert your hook into the designated stitch or chain space of the round below the current working round. Yarn over and pull up a long loop, approximately 3/4 inch (2 cm) tall. Yarn over and draw through 2 loops twice to complete a tall single crochet. Work 5 of these stitches into the same stitch or space below to create one petal cluster.
Granny Corner Cluster (GCC)
Work 2 dc, ch 2, 2 dc all into the same chain-2 corner space. This creates one granny corner.
Granny Side Cluster (GSC)
Work 3 dc into the same chain-1 side space. This creates one side cluster between corners.
Join As You Go (JAYG)
When working the final round of a new motif, replace the ch-2 corner spaces and ch-1 side spaces with slip stitch joins into the corresponding spaces of the adjacent completed motif. Work 2 dc, sl st into adjacent corner sp, 2 dc for corners. Work 3 dc, sl st into adjacent side sp for sides.
Scallop Edging
Work sc, hdc, 3 dc, hdc, sc all into the same stitch or space for one scallop shell. Skip 2 stitches between each scallop.
Pattern Notes
1. The dress has three separate pieces: bodice (two panels), skirt, and belt. Join after blocking.
2. All motifs are worked in the round and never turned unless specified.
3. Bodice squares are set on point, meaning rotated 45 degrees so a corner points up and down.
4. Color sequence for every motif: Yarn A for rounds 1 and 2 (daisy center). Yarn B for round 3 (petals). Yarn A for round 4 (granny border). Yarn B for round 5 or final round (joining round).
5. Begin each round with a standing stitch or ch 3 (counts as first dc) unless instructed otherwise. End each round with a sl st to the beginning stitch.
6. Fasten off and weave in ends after each color change.
7. Block all motifs flat before assembly.
Section 1: Small Daisy Granny Square (Bodice Motif)
Make 18 squares for size Small/Medium.
Using Yarn A, make a magic ring.
Round 1: Ch 3 (counts as dc), work 11 dc into ring, sl st to top of beg ch-3 to join. Fasten off Yarn A. (12 dc)
Round 2: Join Yarn A to any dc with a standing sc. Working in BLO only, sc in same st, sc in each dc around, sl st to first sc to join. Fasten off Yarn A. (12 sc in BLO)
Round 3 (Petal Round): Join Yarn B to the front loop of any stitch from Round 1 that was left unworked. Work 5 RDP stitches inserting hook into the corresponding front loop of Round 1 below for each petal cluster. Work [5 RDP into front loop of next st, ch 1, skip next front loop] 6 times. (6 petals, 6 ch-1 spaces)
Round 4: Join Yarn A to any ch-1 space between petals with a standing sc. Work [sc in ch-1 sp, ch 3] 6 times around, sl st to first sc to join. (6 sc, 6 ch-3 spaces)
Round 5 (Granny Border): Join Yarn A to any ch-3 space. In the same sp work beg GCC [ch 3, 2 dc], ch 1, skip next ch-3 sp, [2 dc, ch 2, 2 dc] into next ch-3 sp (corner made), ch 1, skip next ch-3 sp. Rep from bracket 3 times, ending last rep without skip, sl st to top of beg ch-3 to join. Fasten off Yarn A. (4 corners with ch-2 sps, 4 ch-1 side sps, 16 dc total)
Round 6 (Joining/Border Round): Join Yarn B to any corner ch-2 sp with a standing sc. Work GCC [2 dc, ch 2, 2 dc] in same corner sp, ch 1, work GSC [3 dc] in side ch-1 sp, ch 1, [work GCC in corner ch-2 sp, ch 1, work GSC in side ch-1 sp, ch 1] 3 times, sl st to top of beg ch-3 to join. Fasten off Yarn B. (4 corner clusters, 4 side clusters, 28 dc total, 4 ch-2 corner sps, 8 ch-1 sps)
Completed small square measures 4 inches / 10 cm after blocking.
Section 2: Large Daisy Granny Square (Skirt Motif)
Make 24 squares for size Small/Medium.
Using Yarn A, make a magic ring.
Round 1: Ch 3 (counts as dc), work 11 dc into ring, sl st to top of beg ch-3 to join. Fasten off Yarn A. (12 dc)
Round 2: Join Yarn A to any dc with a standing sc. Working in BLO only, sc in same st, sc in each dc around, sl st to first sc to join. Fasten off Yarn A. (12 sc in BLO)
Round 3 (Petal Round): Join Yarn B to the unworked front loop of any stitch from Round 1. Work [5 RDP into front loop of next st, ch 1, skip next front loop] 6 times around, sl st to first RDP to join. Fasten off Yarn B. (6 petal clusters, 6 ch-1 spaces)
Round 4: Join Yarn A to any ch-1 space between petals. Work [sc in ch-1 sp, ch 3] 6 times, sl st to first sc to join. Fasten off Yarn A. (6 sc, 6 ch-3 sps)
Round 5 (First Granny Border): Join Yarn A to any ch-3 sp. In same sp work [ch 3, 2 dc, ch 2, 2 dc], ch 1, skip next ch-3 sp, [2 dc, ch 2, 2 dc, ch 1, skip next ch-3 sp] 3 times, sl st to top of beg ch-3. Fasten off Yarn A. (4 corner clusters with ch-2 sps, 4 ch-1 side sps, 16 dc)
Round 6 (Second Granny Border): Join Yarn B to any corner ch-2 sp. Work [ch 3, 2 dc, ch 2, 2 dc] in same corner sp, ch 1, [3 dc in ch-1 side sp, ch 1, 2 dc in next corner ch-2 sp, ch 2, 2 dc in same corner sp, ch 1] 3 times, 3 dc in last ch-1 side sp, ch 1, sl st to top of beg ch-3. Fasten off Yarn B. (4 corner clusters, 4 side clusters, 28 dc total, 4 ch-2 corner sps, 8 ch-1 sps)
Round 7 (Third Granny Border): Join Yarn A to any corner ch-2 sp. Work [ch 3, 2 dc, ch 2, 2 dc] in same corner sp, [ch 1, 3 dc in next ch-1 sp] twice, ch 1, [2 dc, ch 2, 2 dc in corner ch-2 sp, ch 1, 3 dc in next ch-1 sp, ch 1, 3 dc in next ch-1 sp, ch 1] 3 times, sl st to top of beg ch-3. Fasten off Yarn A. (4 corner clusters, 8 side clusters, 40 dc total, 4 ch-2 corner sps, 12 ch-1 sps)
Round 8 (Final/Joining Border): Join Yarn B to any corner ch-2 sp. Work [ch 3, 2 dc, ch 2, 2 dc] in same corner sp, [ch 1, 3 dc in next ch-1 sp] 3 times, ch 1, [2 dc, ch 2, 2 dc in corner ch-2 sp, ch 1, 3 dc in next ch-1 sp, ch 1, 3 dc in next ch-1 sp, ch 1, 3 dc in next ch-1 sp, ch 1] 3 times, sl st to top of beg ch-3. Fasten off Yarn B. (4 corner clusters, 12 side clusters, 52 dc total, 4 ch-2 corner sps, 16 ch-1 sps)
Completed large square measures 5.5 inches / 14 cm after blocking.
Section 3: Joining the Skirt
The skirt is a grid of 4 squares wide by 6 squares tall, forming a tube when seamed.
Lay out 24 large squares in a 4-column by 6-row rectangle.
Use the JAYG method on Round 8 of each new square as you work it. Begin from the top left square and work across rows, joining each new square to the right side of the previous square and to the bottom of the square in the row above.
When joining at corners where four squares meet, work 2 dc, insert hook through all 4 corner ch-2 sps, yo and draw through, yo and draw through remaining 2 loops on hook, 2 dc.
After all 24 squares are joined flat, hold the left and right edges together with right sides facing. Sl st or sc through the corresponding edge stitches to seam the skirt into a tube. This seam runs vertically along the center back.
The joined skirt tube should measure approximately 22 inches / 56 cm tall and 36 inches / 91 cm in circumference.
Section 4: Skirt Top Edging
Join Yarn A to any corner or side space along the top edge of the skirt tube with a standing sc.
Round 1: Work sc evenly around the entire top edge, working 1 sc into each dc, 2 sc into each ch-1 side space, and 3 sc into each corner ch-2 space. Sl st to first sc to join. (52 sc)
Round 2: Ch 1, sc in each sc around, sl st to first sc to join. Fasten off Yarn A. (52 sc)
Section 5: Skirt Bottom Scallop Edging
Join Yarn B to any corner sp along the bottom hem of the skirt tube.
Round 1: Work sc evenly around the bottom edge. Adjust to 54 sc to accommodate the scallop repeat. Sl st to first sc. (54 sc)
Round 2 (Scallop): Sl st into first sc, [skip 2 sc, work Scallop Edging into next sc, skip 2 sc, sl st into next sc] around, ending with sl st into first sl st to join. Fasten off Yarn B. (9 scallop shells)
Section 6: Bodice Panels
For each bodice panel, arrange 9 small squares in a 3-by-3 grid. Join using JAYG on Round 6 of each new square.
Make 2 panels of 9 small squares each. Total small squares needed: 18.
Each joined panel measures approximately 12 inches / 30 cm by 12 inches / 30 cm.
Bodice Strap Extension
Make 2 strap strips, each consisting of 2 small squares joined side by side. Each strap strip measures 4 inches / 10 cm wide and 8 inches / 20 cm long.
Attach one short end of each strap strip to the top back corner of each bodice panel using a sl st seam on the wrong side.
Bodice Top and Neckline Edging
Join Yarn B to the top edge of the assembled bodice front.
Work 1 round sc around the full neckline V and strap edges, working 1 sc in each available dc and 2 sc in each corner sp. Adjust count to the nearest multiple of 6.
Work one round of scallop edging as in Section 5. Fasten off Yarn B.
Section 7: Belt
Using Yarn A and F-5 hook, ch 121.
Row 1: Hdc in 3rd ch from hook and in each ch across, ch 2, turn. (119 hdc)
Row 2: Hdc in each hdc across, ch 2, turn. (119 hdc)
Row 3: Hdc in each hdc across, ch 2, turn. (119 hdc)
Row 4: Hdc in each hdc across. Do not turn. (119 hdc)
Belt Edging: Work 1 rnd sc around the entire belt rectangle. At each corner work 3 sc. Join with sl st. Fasten off Yarn A.
Belt length: approximately 34 inches / 86 cm. Belt height: approximately 1.5 inches / 4 cm.
Sew the decorative button to the right end of the belt, approximately 1/2 inch from the end and centered vertically.
Button loop: Join Yarn A to the left end of the belt, ch 8, sl st into the same stitch to form a loop. Fasten off and weave in end.
Section 8: Joining Bodice to Skirt
Layer the two bodice panels with right sides up, overlapping them at center front so the right panel sits on top of the left panel to create the wrap neckline.
Pin both panels together along the bottom edge. Sew or sl st the bottom edge of both panels together as one unit through all layers where they overlap.
Place the belt around the joined waist and pin it in position. Using Yarn A threaded on a tapestry needle, whipstitch or sl st the top edge of the skirt to the bottom edge of the bodice panels with the belt sandwiched between them. Sew through all three layers.
Bring the free end of each shoulder strap over the shoulder and pin it to the front neckline point of the opposite front panel. Sew the strap securely to the bodice front.
Section 9: Armhole and Back Neckline Edging
Join Yarn B to the armhole opening at the underarm junction.
Work 1 rnd sc around the armhole opening, adjusting count to the nearest multiple of 6.
Work 1 round scallop edging as in Section 5. Fasten off.
Repeat for second armhole.
Size Customization Tips
To increase the size: Add additional squares. Each additional column of large squares in the skirt adds approximately 5.5 inches to the circumference. Each additional small square in the bodice panel width adds approximately 4 inches.
For a longer skirt: Add additional rows of large squares. Each row adds approximately 5.5 inches to length.
For a shorter dress: Omit one row of large skirt squares to reduce length by 5.5 inches.
For larger cup sizes: Add one additional row of small squares to each bodice panel, or work bodice squares in the large motif size.
Always adjust the belt starting chain to match your actual waist measurement plus 3 to 4 inches for ease and overlap.
Finishing and Blocking
Block all motifs individually before joining. Pin each small square to exactly 4 inches and each large square to exactly 5.5 inches on blocking mats. Wet block by spraying with water. Allow to dry completely.
After full assembly, lightly steam block the completed dress using a pressing cloth between the iron and fabric.
Weave in all ends securely. Thread the tail through at least 4 stitches in one direction, then reverse direction for another 4 stitches.
Care Instructions
Hand wash in cool water with gentle soap. Do not wring or twist. Roll in a clean towel and gently press to remove excess water. Lay flat to dry. Reshape while damp if needed. Do not tumble dry or hang dry.
If using machine washable yarn, wash on the delicate cycle in a mesh laundry bag with cool water and low spin.
You Made It!
Thank you so much for choosing this dusty rose granny square summer dress crochet pattern. I hope you love how the raised daisy centers add that extra texture and dimension to each square. This project takes time, but the result is a truly wearable piece of art.
I would absolutely love to see your finished dress. Tag me on Instagram or share in my Facebook group so I can admire your work. There is nothing better than seeing these patterns come to life in your hands.
If you found this crochet tutorial helpful, save it to your Pinterest boards so you can find it when you are ready to start. And please leave a comment below if you make this dress. I read every single one and would love to hear how yours turns out.
You Might Also Like
- Blush Pink Tiered Ruffle One-Shoulder Dress Crochet Pattern
- Lavender Purple Dreamy Peplum Crochet Top Pattern
- Watermelon Slice Couple Amigurumi Free Crochet Pattern
- Spring Garden Granny Square Bag Free Crochet Pattern