Daisy Granny Square Cardigan Set Free Crochet Pattern
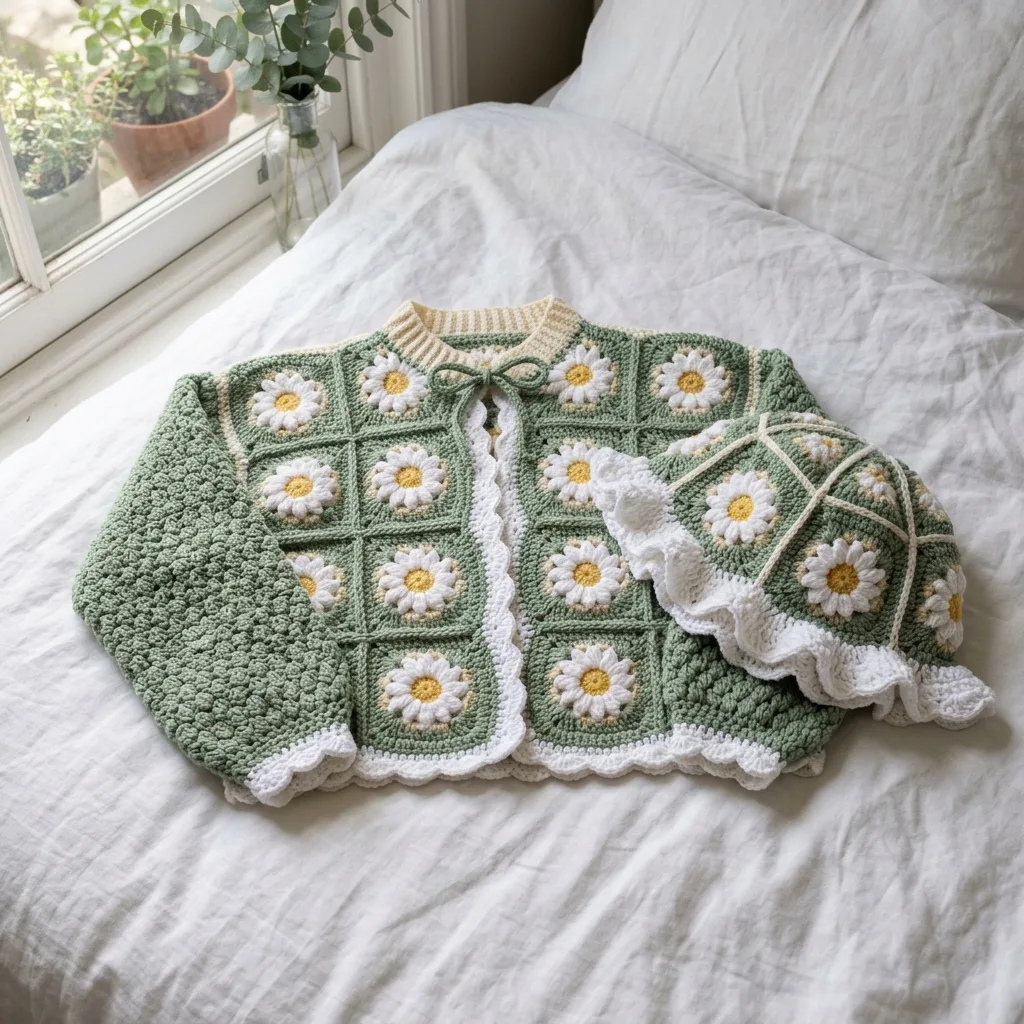
Looking for a handmade gift that feels like a warm hug? This daisy granny square cardigan set keeps you cozy while looking absolutely adorable. The matching bucket bag makes it a complete ensemble perfect for spring outings or gifting to someone special.
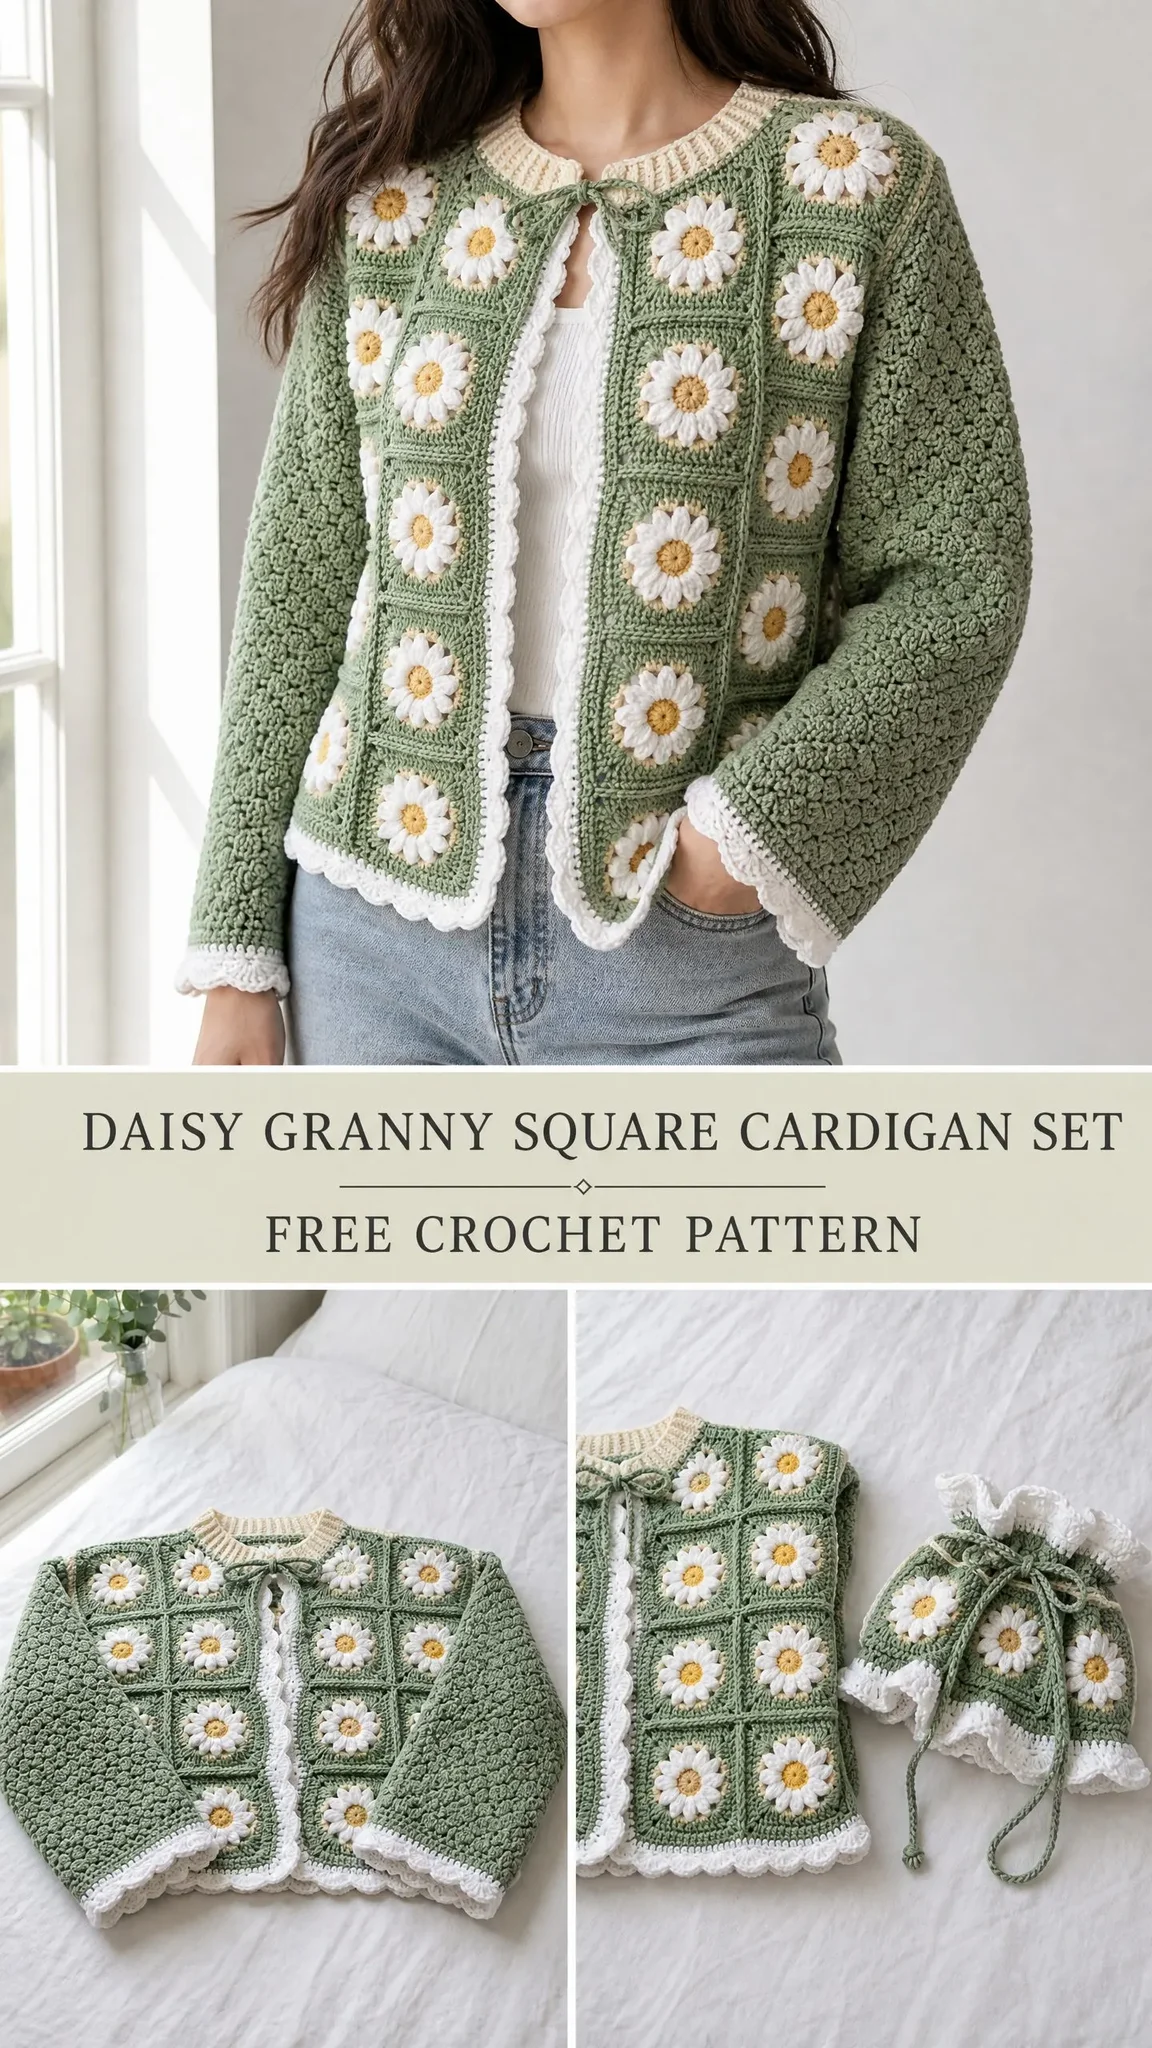
This crochet pattern uses classic granny square construction combined with a charming three-dimensional daisy motif. The cardigan works up as a cropped, slightly oversized fit with sweet scalloped edging and a tie closure at the neckline. You will need solid experience with granny squares, joining techniques, and working in the round to complete this project successfully.
Plan for 50 to 72 hours of crafting time for the complete set. The cardigan alone takes 40 to 60 hours, while the bucket bag adds another 8 to 12 hours. This makes a wonderful project to work on over several weeks or months, savoring each daisy as it blooms under your hook.
About This Crochet Pattern
This intermediate to advanced crochet pattern creates a coordinating two-piece set. The cropped cardigan features a bodice and sleeves constructed entirely from individual daisy granny squares joined using the join-as-you-go method. Solid moss stitch panels fill in the side and underarm areas for a fitted, structured silhouette.
The design includes a cream ribbed neckband worked in rows and seamed, plus white scalloped picot edging trimming the center front opening and hem. A small drawstring bow closure sits at the neckline for a feminine finishing touch.
The matching bucket bag uses hexagonal daisy motifs joined together, topped with a ruffled white crochet trim at the opening and a simple drawstring cord. Both pieces share the same beautiful daisy motif and color palette of sage green, cream, and golden yellow.
Finished Measurements
Cardigan:
Bag:
Materials Needed
Yarn
You will need worsted weight yarn (category 4) in four colors:
Yarn Suggestions
Option 1: Lion Brand Vanna’s Choice (100% acrylic, 170 yards per 3.5 oz skein). Colors: Sage for Color A, Linen or Cream for Color B, White for Color C, Gold for Color D. Machine washable and holds stitch definition well.
Option 2: Paintbox Yarns Simply DK (100% acrylic, 137 yards per 1.76 oz ball). Note that this is DK weight, so swatch carefully and consider adjusting to a US size E-4 (3.5 mm) hook to match gauge.
Option 3: Cascade 220 (100% Peruvian wool, 220 yards per 3.5 oz skein). Beautiful drape and blocks magnificently. Not machine washable. Use color 9461 (Sage), 8010 (Ecru), 8505 (White), and 7827 (Goldenrod).
Substitution Note: Any smooth worsted weight yarn with good stitch definition works well. Avoid fuzzy or hairy yarns since the daisy petals must remain clearly defined.
Hooks
Notions
Gauge
With US size G-6 (4.0 mm) hook:
Daisy Granny Square: 4 inches x 4 inches / 10 cm x 10 cm (blocked, measured through center)
Moss Stitch: 18 stitches x 20 rows = 4 inches x 4 inches / 10 cm x 10 cm
Gauge matters enormously for this garment. Block your swatch before measuring. Even one square off in motif size, multiplied across all squares, changes the garment size significantly.
Abbreviations
Special Stitches
Daisy Flower
The daisy flower is worked as an independent motif. The granny square gets worked around it afterward.
Round 1 (Center, Color D):
Make a magic ring.
Ch 1.
Work 10 sc into the ring.
Pull ring closed.
Join with sl st to first sc.
(10 sc)
Round 2 (Petals, Color C):
Join Color C to any sc with a sl st.
Ch 1.
In same stitch: sc 1, ch 3, sc 1 (first petal base).
In next sc: sc 1, ch 3, sc 1.
Rep in each remaining sc around.
Join with sl st to first sc.
(10 petal groups, each a sc-ch3-sc)
Round 3 (Petal Bodies, Color C):
Sl st into the ch-3 space of the first petal base.
Ch 1.
Work 5 dc into same ch-3 sp.
Work 5 dc into each remaining ch-3 sp around (10 ch-3 spaces total).
Join with sl st to top of first dc.
(50 dc, forming 10 petals of 5 dc each)
Fasten off Color D and Color C, leaving tails for weaving.
Daisy Granny Square
Worked around completed daisy flower in Color A.
Round 1 (Color A):
Hold the completed daisy so you see the gap between petal groups.
There are 10 such gaps.
Join Color A in any gap with a sl st.
Ch 3 (counts as dc).
2 dc in same gap.
Skip next gap.
(3 dc, ch 2, 3 dc) in next gap (corner made).
Skip next gap.
3 dc in next gap.
Skip next gap.
(3 dc, ch 2, 3 dc) in next gap (corner made).
Skip next gap.
3 dc in next gap.
Skip next gap.
(3 dc, ch 2, 3 dc) in next gap (corner made).
Skip next gap.
(3 dc, ch 2) in next gap.
Join with sl st to top of beginning ch-3.
(4 corners with ch-2 spaces, 4 sides with one 3-dc group each; 36 dc total + 4 ch-2 corner spaces)
Round 2 (Color A):
Sl st to corner ch-2 sp.
Ch 3 (counts as dc).
(2 dc, ch 2, 3 dc) in corner sp.
Ch 1.
3 dc in sp between corner and next dc-group on side.
Ch 1.
(3 dc, ch 2, 3 dc) in next corner sp.
Ch 1.
3 dc in sp between corner and next dc-group.
Ch 1.
Rep around all 4 corners.
Join with sl st to top of beginning ch-3.
(48 dc + 4 ch-2 corner sps + 8 ch-1 sps)
Round 3 (Color A):
Sl st to corner ch-2 sp.
Ch 3.
(2 dc, ch 2, 3 dc) in corner sp.
Ch 1.
3 dc in next ch-1 sp.
Ch 1.
3 dc in next ch-1 sp.
Ch 1.
(3 dc, ch 2, 3 dc) in corner sp.
Rep for all 4 corners.
Join with sl st to top of beginning ch-3.
(60 dc + 4 ch-2 corner sps + 12 ch-1 sps)
Fasten off. Block each square to exactly 4 inches x 4 inches before joining.
Moss Stitch (Flat)
Foundation: Chain an even number of stitches.
Row 1 (RS): Sc in 2nd ch from hook. Ch 1. Skip 1 ch. (Sc in next ch. Ch 1. Skip 1 ch.) Rep to last ch. Sc in last ch. Turn.
Row 2 (WS): Ch 1. Sc in first sc. Ch 1. (Sc in next ch-1 sp. Ch 1.) Rep to last sc. Sc in last sc. Turn.
Rep Row 2 for pattern. Always sc into sc from previous row, and ch 1 over ch-1 spaces.
Scallop Edging
With right side facing, join yarn in first stitch.
Sc in first stitch.
Skip 2 stitches.
5 dc in next stitch.
Skip 2 stitches.
Sc in next stitch.
Rep across the edge.
The receiving edge stitch count must be a multiple of 6.
Ribbed Neckband
Worked in rows in Color B using the F-5 (3.75 mm) hook in BLO for every row.
Foundation ch: 8.
Row 1: Sc in 2nd ch from hook and in each ch across. (7 sc)
Row 2: Ch 1. Turn. Sc in BLO of each sc across. (7 sc)
Rep Row 2 until band fits around the neckline opening (approximately 22 inches for the stated size).
Pattern Notes Before You Begin
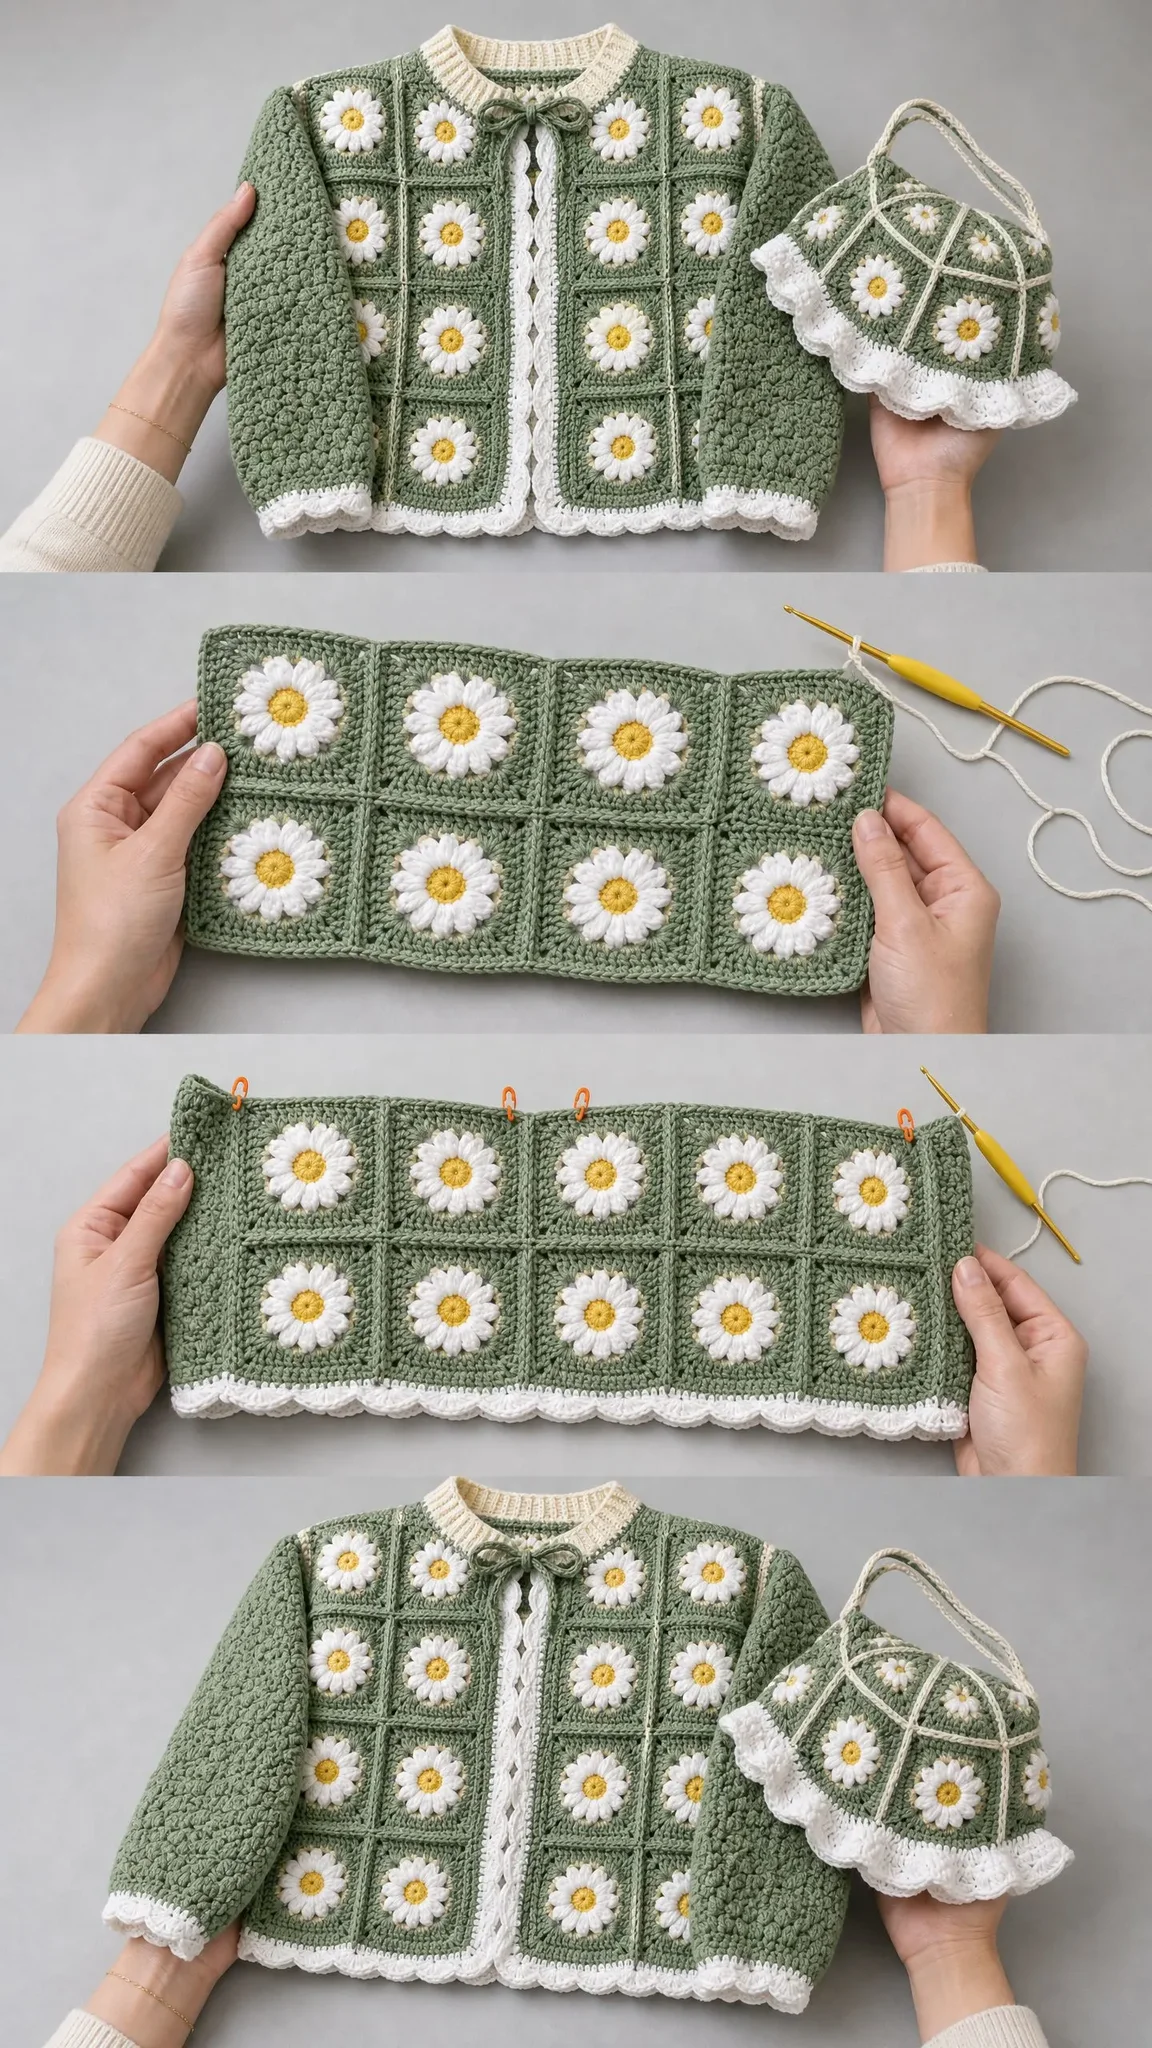
1. The cardigan body is constructed by joining completed and blocked daisy granny squares into panels using the join-as-you-go method on the final round of each new square.
2. Construction order: make all granny squares, join into front and back panels, work moss stitch side panels, seam shoulders, work sleeves top-down from the armhole, add neckband, add edging, add bow tie closure.
3. The bag is constructed by joining hexagonal daisy motifs in a flower configuration (one center surrounded by six), then adding the ruffle trim and drawstring cord.
4. Join-as-you-go method: On Round 3 of each new square, when you reach a side that should join to a finished square, replace each ch-1 sp with a sl st into the corresponding ch-1 sp of the neighboring square. Replace each ch-2 corner sp with ch-1, sl st into the ch-2 corner sp of the neighbor, ch-1.
5. All squares must be blocked to exactly 4 inches x 4 inches before joining.
6. The scallop edging at center front and hem requires the receiving stitch count to be a multiple of 6. Adjust your pickup row if needed.
7. Turning chains: For moss stitch, ch-1 at the turn does NOT count as a stitch throughout this pattern.
8. The cardigan front opening does not have buttons. It closes with a tie bow worked in Color A, threaded through ch-2 spaces at the neckline.
Cardigan Instructions
Part 1: Make the Daisy Granny Squares
Make 32 complete daisy granny squares as described above (complete through Round 3 of the granny square).
Block all 32 squares to 4 inches x 4 inches.
Square layout plan:
Part 2: Joining Body Squares
Begin with the back panel. Arrange 16 squares in a 4×4 grid on a flat surface.
Row 1 of Joining (horizontal joins):
Hold squares with RS facing outward. Using Color A and G-6 hook, join yarn in corner ch-2 sp of first square.
Work JAYG across the shared edge: ch 1, sl st into corresponding ch-2 corner sp of second square, ch 1, (sl st into ch-1 sp of first square, sl st into corresponding ch-1 sp of second square) 3 times across the side, ch 1, sl st into corner ch-2 sp of first square, sl st into corner ch-2 sp of second square, ch 1. Fasten off.
Rep to join all 4 squares in Row 1 horizontally.
Rep for rows 2, 3, and 4.
Column Joining (vertical joins):
Join Row 1 to Row 2 along horizontal shared edges using same JAYG method.
Rep for Row 2 to Row 3, and Row 3 to Row 4.
Back panel complete: 16 inches wide x 16 inches tall.
Join Left Front Panel (8 squares, 2×4 grid) the same way.
Join Right Front Panel (8 squares, 2×4 grid) the same way.
Each front panel measures 8 inches wide x 16 inches tall.
Part 3: Shoulder Seams
Place back panel flat, RS up.
Place right front panel on right side of back panel, RS together.
Each shoulder seam spans 2 squares = 8 inches. The center 8 inches of the back forms the neckline opening.
Join right shoulder: Using Color A, sc through both layers across the top edge of the right front panel aligned with the right 2 squares of the back panel. Work 24 sc across shoulder (approximately 3 sc per inch). Fasten off.
Join left shoulder the same way on the opposite side. (24 sc each shoulder)
Part 4: Moss Stitch Side Panels
Each side panel measures 2 inches wide x 16 inches tall.
Foundation chain (Color A, G-6 hook): Chain 10.
Row 1: Sc in 2nd ch from hook. (Ch 1, skip 1, sc in next ch) 4 times. (9 stitches: 5 sc + 4 ch-1 sps)
Row 2: Ch 1, turn. Sc in first sc. (Ch 1, sc in next ch-1 sp) 3 times. Ch 1, sc in last sc. (9 stitches)
Rep Row 2 until panel measures 16 inches.
Make 2 side panels total.
Seam each side panel to the open side edges of the back and front panels using Color A and a yarn needle with mattress stitch.
Part 5: Sleeves
Upper Sleeve Square Ring:
Make 3 daisy granny squares for each sleeve (6 squares total).
Block to 4 inches x 4 inches.
Join 3 squares in a row using JAYG. Then join the first square to the last square to form a ring.
Ring circumference: 12 inches from squares.
Sleeve Moss Stitch Panel:
Foundation chain: 10.
Work same as side panel in moss stitch.
Work until panel measures 4 inches tall.
Join to open sides of the 3-square ring, forming a complete tube (14 inch circumference).
Join Sleeve to Armhole:
Hold sleeve tube with RS facing body RS. Align and pin.
Using Color A, sc through both layers around the armhole.
Work approximately 42 sc around armhole. (42 sc)
Lower Sleeve (worked in the round in Moss Stitch, Color A):
Round 1: Join Color A to bottom edge of sleeve ring at side panel. Work sc evenly around: 42 sc. Place marker, join, do not turn. (42 sc)
Set-up Round: (Sc, ch 1, skip 1 sc) around, ending with join to first sc. (21 sc, 21 ch-1 sps)
Rounds 2 through 24:
Sl st to first ch-1 sp.
(Sc in ch-1 sp, ch 1, skip next sc) around.
Join with sl st to first sc.
(21 sc, 21 ch-1 sps each round)
Work even with no shaping for 8 inches (approximately Rounds 1 through 20).
Sleeve Taper:
Work decrease round removing 6 stitches evenly spaced (at every 7th unit).
(42 – 6 = 36 units: 18 sc + 18 ch-1 sps)
Work rounds evenly at 36 units for 1 inch more.
Sleeve Cuff Ruffle (Color C, F-5 hook):
Pickup round: Join Color C to any stitch at wrist edge with RS facing. Work 36 sc evenly around. (36 sc)
Ruffle Round 1: Sc in first sc. Skip 2. 5 dc in next sc. Skip 2. Sc in next sc. Rep around. 6 scallops. Join.
Ruffle Round 2: Sl st to center dc of first 5-dc shell. Ch 3. 4 dc in same st. Sc in next sc. 5 dc in center dc of next shell. Sc in next sc. Rep around. Join.
Ruffle Round 3: Rep Round 2 for fuller ruffle effect.
Fasten off. Weave ends.
Make second sleeve the same way.
Part 6: Neckband
Work ribbed neckband as described in special stitches.
Work until band measures approximately 22 inches (the circumference of the neckline opening).
Seam short ends together.
Join band to neckline opening by sc-ing through the outer edge of the ribbed band and the neckline simultaneously with Color B.
Bow Tie Closure:
Cut a length of Color A approximately 36 inches.
Thread through the ch-2 corner spaces at the center-top neckline area.
Tie in a bow on the right side.
Part 7: Center Front and Hem Edging
Pickup Round: Join Color C to bottom right front corner with RS facing. Work 108 sc evenly around the entire hem. Join. (108 sc)
Scallop Edging Round: Sc, skip 2, 5 dc in next, skip 2, sc. Rep 18 times around. Join. Fasten off.
Center Front Edging:
Pickup along right front edge: 48 sc up the right front from hem to neckband.
Work scallop edging up the right front edge. Fasten off.
Pickup along left front edge: 48 sc. Work scallop edging. Fasten off.
Hexagonal Daisy Motif (For Bag)
Round 1 (Color D):
Magic ring.
Ch 3 (counts as dc).
11 dc in ring.
Join with sl st to top of beginning ch-3.
Pull ring closed.
(12 dc)
Round 2 (Color C, petals):
Ch 1.
(Sc, ch 3, sc) in same st.
(Sc, ch 3, sc) in each remaining dc around.
Join with sl st to first sc.
(12 petal bases)
Round 3 (Color C):
Sl st to first ch-3 sp.
Ch 2.
4 hdc in same sp.
5 hdc in each remaining ch-3 sp around.
Join with sl st to top of beg ch-2.
(60 hdc, 12 petals)
Round 4 (Color A, hexagon frame):
Join Color A in any gap between petal clusters.
Ch 3.
2 dc in same sp.
(Ch 2, 3 dc) in each of 5 remaining gaps between petal clusters.
Ch 2.
Join with sl st to top of beg ch-3.
(6 groups of 3 dc, 6 ch-2 corner sps)
Round 5 (Color A):
Sl st to corner ch-2 sp.
Ch 3.
(2 dc, ch 2, 3 dc) in same sp.
3 dc in space between corner groups.
(3 dc, ch 2, 3 dc) in next corner sp.
Rep around all 6 corners.
Join with sl st to top of beg ch-3.
(54 dc + 6 ch-2 sps)
Make 7 hexagonal motifs total for the bag.
Join motifs in a flower configuration: one center hexagon surrounded by six. Add ruffle trim using the scallop edging technique and create a simple drawstring cord from a chain worked to desired length.
Helpful Tips for Success
Blocking is essential. I cannot stress this enough. Your daisy squares must measure exactly 4 inches x 4 inches after blocking, or your garment sizing will be off. Take the time to wet block or steam block each square before joining.
Keep your tension consistent. The three-dimensional daisy petals can pull your work tighter than expected. Check your gauge frequently, especially in the first few squares.
Count your stitches. With the multiple color changes and detailed petal construction, it’s easy to lose track. Count after each round to catch mistakes early.
Weave ends as you go. With so many color changes and individual motifs, you will have many ends to weave. Handling them as you complete each square saves hours of finishing work later.
Wrapping Up Your Daisy Granny Square Cardigan Set
This crochet pattern brings together classic granny square techniques with charming daisy motifs to create a truly special handmade set. The sage green, cream, and golden yellow color palette feels fresh and timeless. Whether you make this for yourself or as a thoughtful gift, the finished cardigan and matching bag will become treasured pieces.
Take your time with this project and enjoy the process of watching each daisy bloom. The repetitive nature of making the squares becomes meditative, and the join-as-you-go construction lets you see your progress with each completed section.
Thank you so much for choosing this pattern for your next crochet project. I would absolutely love to see your finished daisy cardigan set, so please tag me on Instagram or share in our Facebook group when you complete yours.
If this daisy granny square cardigan set is calling your name, save this pattern to your Pinterest boards so you can find it whenever you’re ready to start. And if you make one, please drop a comment below to share how it turned out. I love hearing from you and seeing your beautiful creations!
You Might Also Like
- Dusty Rose Grid Mesh Romper Free Crochet Pattern
- Sunshine Daisy Book Cover Free Crochet Pattern
- Lavender Garden Bobble Pullover Free Crochet Pattern
- Warm Autumn Terracotta Shoulder Bag Free Crochet Pattern