23 Crochet Ugly Christmas Sweater Patterns for Festive Stitching

Looking for a crochet ugly Christmas sweater pattern with colour, texture or a boldly festive motif? These 23 designs range from bobble baubles and candy-cane stripes to snowflake yokes, patchwork cardigans and a present-shaped pocket.
The construction varies as much as the decoration. You can choose a drop-shoulder pullover for simpler shaping, a top-down raglan for fit checks as you work, or a more involved colourwork design if you enjoy planning a chart.
For more ideas that build on this collection, explore more crochet Christmas sweater patterns.
Before You Start
Stitch terminology: US crochet terms. Check the terms used in any other pattern you consult, as US and UK stitch names differ.
Start with the finished measurements rather than your usual clothing size. A drop-shoulder sweater, fitted raglan yoke and open cardigan allow different amounts of ease. Compare the chest width, sleeve length and underarm depth with a garment you already like wearing.
Swatch in the stitch pattern and colours the design calls for, then wash and dry the swatch as you plan to care for the sweater. This matters for tapestry, mosaic and Tunisian crochet, where colourwork and fabric density can change the gauge and drape. For a motif cardigan, check the blocked size of several squares before making the full set.
Plan the finishing alongside the festive details. Weave in colour-change ends securely, keep decorations clear of seams where possible, and make sure cardigan front edges and necklines have enough structure to hold their shape.
Crochet terminology: This article uses US crochet terms. Check the abbreviations for each project.
Bobble Bauble Drop-Shoulder Pullover

This cream pullover gets its deliberately over-the-top Christmas look from scattered red, green and gold bobbles. They stand proud of the front fabric like little baubles, giving the sweater plenty of festive character without large areas of colourwork.
Because the bobbles replace ordinary stitches, they add texture without widening the front panel. The surrounding fabric needs enough ease to sit flat rather than pull around each raised spot; a small bobble swatch can help you judge how your yarn behaves before you commit to the sweater.
The straightforward drop-shoulder shape keeps the focus on the decorated front. Its plain back is smoother against a chair or beneath a coat, making this a playful jumper that is still practical to wear.
Bobble Bauble Drop-Shoulder Pullover

Quick-reference card. Follow the complete written instructions below.
Materials
- Medium-weight wool-blend yarn: Approximately 1,600 m of smooth cream yarn, plus approximately 15 m each of red, green and gold. Buy extra cream yarn if you need to lengthen the sweater.
- Crochet hook: 5 mm, or the size needed to obtain the washed gauge.
- Notions: Stitch markers, tape measure, yarn needle and scissors.
Size and Fit
One sample size: 110 cm finished chest, intended for a chest of approximately 100–105 cm. Each body panel is 55 cm wide and 60 cm long before the hem band; the hem adds approximately 5 cm. The armhole is 20 cm deep. Each sleeve is approximately 42 cm from armhole to cuff before its 5 cm cuff is added. Dimensions depend on achieving the stated washed gauge.
Gauge
16 half double crochet stitches and 12 rows = 10 cm after washing and drying flat. Make a swatch larger than 10 cm, wash it as you will wash the sweater, and measure its centre. Change hook size if necessary before starting the panels. A bobble swatch is useful for checking that the raised stitches lie comfortably without pulling the surrounding fabric.
Abbreviations
US crochet terms.
- ch = chain
- sc = single crochet
- hdc = half double crochet
- dc = double crochet
- st = stitch
- BLO = back loop only
- RS / WS = right side / wrong side
- yo = yarn over
- hdc2tog = half double crochet two stitches together
- bobble = Work five unfinished dc into one stitch: for each dc, yo, insert hook, pull up a loop, yo and pull through two loops. With six loops on the hook after the fifth repetition, yo and pull through all six loops. The bobble counts as one stitch.
Pattern
- Before you begin A turning ch 1 does not count as a stitch. Work the first hdc into the first stitch of each row. Row 1 of each panel is a RS row, so the even-numbered bobble rows are worked from the WS; nudge each bobble towards the RS. Wash and dry the gauge swatch before relying on the dimensions given.
- Front panel: body With cream, ch 89. Row 1 (RS): hdc in the second ch from the hook and in each ch across; 88 hdc. Rows 2–64: ch 1, turn, hdc in each stitch across; 88 stitches. On rows 14, 22, 30, 38, 46, 54 and 62, replace the specified hdc stitches with contrast-colour bobbles as directed below. Stitch positions are counted from the beginning of the row being worked. Do not add stitches beside a bobble.
- Front panel: bauble placement Row 14: bobbles at stitches 12, 44 and 76 in red, green and gold. Row 22: stitches 28 and 60 in gold and red. Row 30: stitches 12, 44 and 76 in green, gold and red. Row 38: stitches 28 and 60 in green and gold. Row 46: stitches 12, 44 and 76 in gold, red and green. Row 54: stitches 28 and 60 in red and green. Row 62: stitches 12, 44 and 76 in red, green and gold. For each bobble, leave the cream yarn at the WS, join the contrast yarn in the designated stitch, make the bobble, then drop the contrast yarn and resume cream in the next stitch. Cut the contrast yarn with tails long enough to weave in securely. Keep the cream strand loose between stitches so the fabric does not pucker.
- Front panel: neck and shoulders After row 64, mark the first 30 stitches, centre 28 stitches and last 30 stitches. Work rows 65–72 back and forth over the first 30 stitches only, with ch 1 turns; fasten off. Join cream at the outer edge of the other shoulder and work 8 rows over its 30 stitches. Leave the centre 28 stitches unworked. Each shoulder ends at row 72, giving a front neck depth of 8 rows.
- Back panel With cream, ch 89. Row 1: hdc in the second ch from the hook and across; 88 hdc. Rows 2–70: ch 1, turn, hdc across; 88 stitches. Mark 30 stitches at each side and leave the centre 28 unworked. Work rows 71–72 over each 30-stitch shoulder separately, as for the front. The back remains plain and its neck is 2 rows deep.
- Join shoulders and sides Block the panels to the stated measurements without stretching the neck edges. With RS together, seam each 30-stitch front shoulder to its matching back shoulder. Seam each side from the bottom of the panels through row 48. Leave rows 49–72 open on both the front and back at each side: these 24-row edges form each 20 cm-deep armhole.
- Sleeves Make two. With the sweater RS facing, join cream at an underarm. Work 64 hdc evenly around one armhole: 32 along its 24 front row ends and 32 along its 24 back row ends. For even spacing, work approximately 4 stitches across every 3 row ends. Do not join; turn to work the sleeve flat. This pick-up round is sleeve row 1. Rows 2–50: ch 1, turn and work hdc across. On rows 8, 16, 24, 32, 40 and 48, replace the first two stitches with hdc2tog and the last two stitches with hdc2tog. Every other row is worked even. There are 52 stitches after row 48; rows 49–50 remain at 52. Fold the sleeve lengthwise with RS together and seam its row ends from underarm to cuff edge. Repeat for the second sleeve.
- Hem and cuff ribbing Make two hem strips and two cuff strips in cream. For each strip, ch 11. Row 1: sc in the second ch and across; 10 sc. Row 2: ch 1, turn, sc BLO across. Repeat row 2 until each hem strip measures 55 cm along its long edge and each cuff strip measures 32.5 cm along its long edge, measured relaxed. Fasten off. With RS together, sew a long edge of each hem strip to the bottom of a body panel, easing evenly if needed; join the short strip ends at the side seams. Sew each cuff strip’s short ends together, then sew a long edge to a 52-stitch sleeve opening. The ribbing adds approximately 5 cm to the body and each sleeve.
- Crew-neck edging With RS facing, join cream at a back shoulder seam. Work one round of sc around the neck: one sc in each of the 28 unworked front and 28 unworked back stitches, and approximately 4 sc for every 3 row ends along each shaped neck side. Spread the stitches evenly and join with a slip stitch; approximately 84 sc is expected. Measure this finished neckline edge without stretching it. For a narrow ribbed neckband, ch 6; row 1: sc in the second ch and across (5 sc); subsequent rows: ch 1, turn, sc BLO across. Continue until the strip’s relaxed long edge is approximately 90% of the measured neckline circumference. Join its short ends, then sew a long edge evenly around the neckline, stretching the band gently to fit. Check that it passes comfortably over the head before securing the seam.
Finishing
- Weave in every contrast-colour tail on the WS without tightening the front fabric.
- Weave in cream ends and secure the shoulder, side, sleeve and ribbing seams.
- Wash and dry flat according to the yarn label, arranging the bobbles to face outwards.
Helpful Tips
- The bobbles replace ordinary stitches rather than adding stitches, so the front keeps the same count as the plain back. Leave a little slack in the cream yarn behind each bobble to prevent puckering.
- Mark the first and last stitch of long rows; missing an edge stitch can change the panel width or shoulder count.
- The back has no bobbles, making it smoother where it rests against a chair or coat.
- Check cuff and neckband fit before sewing down their full lengths. The rib strips are measured after crocheting, so their row counts may differ from yours.
Tinsel-Stripe Top-Down Raglan

This top-down raglan makes deliberately uneven stripes the centre of the joke: festive colours clash across the yoke, then continue down the body and sleeves. Narrow white bands give the exuberant pullover a tidy frame without toning it down.
Because the yoke is worked in joined rounds, the back raglan join gives colour changes a less conspicuous place to land. Once the body and sleeves are separated, their joins sit at the underarms. Keeping track of the stripe sequence on each section helps the colours line up at the split.
Try the yoke on before separating the sleeves to check that it reaches the underarms comfortably and leaves room around the upper arms. Choose washable yarns of similar thickness for a more consistent fabric, and avoid especially heavy remnants that could make the finished sweater cumbersome.
Tinsel-Stripe Top-Down Raglan

Quick-reference card. Follow the complete written instructions below.
Materials
- Medium-weight yarn: Approximately 1,100–1,500 m total in red, green, pink and white. Choose washable acrylic or a washable wool blend, using remnants of similar thickness; heavy yarns may make the finished sweater uncomfortable.
- Crochet hooks: A hook that achieves gauge, plus one approximately 1 mm larger for the starting chain.
- Notions: Four movable stitch markers, a tapestry needle and scissors.
Size and Fit
One adult sample size: approximately 110 cm finished chest, 27 cm yoke depth and 38 cm from underarm to the start of the hem band. The sleeves measure approximately 38 cm from underarm to the start of the cuff bands. These are dimensions calculated from the stated gauge, not measured results. For a comfortable fit, compare the 110 cm chest with the wearer’s chest and desired ease. Try on the yoke before separating: its front and back sections should reach the underarms without pulling, and the sleeves should have room around the upper arms. The 88-stitch starting opening is approximately 55 cm at stitch gauge; check that it passes comfortably over the wearer’s head before adding the neck band.
Gauge
16 half double crochet (hdc) stitches and 12 hdc rounds = 10 cm, worked in joined rounds and measured after washing and drying the swatch as the yarn label directs. Change hook size if needed; the stated chest and lengths depend on this gauge.
Abbreviations
US crochet terms.
- ch = chain
- sc = single crochet
- hdc = half double crochet
- hdc2tog = half double crochet two stitches together; decreases one stitch
- sl st = slip stitch
- st(s) = stitch(es)
- rnd = round
Pattern
- Round and colour rules Join each rnd with a sl st to its first stitch. Ch 1 to begin the next rnd; this chain never counts as a stitch. For the striped fabric, repeat this 14-rnd colour sequence: 4 red rnds, 3 green, 5 pink and 2 white. Number the yoke rnds 1–32, then continue the sequence separately on the body and each sleeve from rnd 33. Change colour when making the joining sl st at the end of the preceding rnd. The join lies at a back raglan marker on the yoke, then at an underarm on the body and sleeves. Carry a colour only across a short gap; otherwise fasten it off and weave in the ends.
- Neckline set-up With the larger hook and red, ch 88 loosely. Join with a sl st in the first chain, taking care not to twist. Change to the gauge hook. Set-up rnd: ch 1, hdc in each chain, join. There are 88 sts. Starting immediately after the join, mark the boundaries between these sections: back 30 sts, sleeve 14 sts, front 30 sts and sleeve 14 sts. The join is the fourth boundary, between the last sleeve and the back. Keep all four markers at the boundaries as the work grows. Check now that the neckline passes over the wearer’s head.
- Yoke increase rnd At each of the four marked boundaries, work 2 hdc in the stitch immediately before the marker and 2 hdc in the stitch immediately after it; work 1 hdc in every other stitch. Move each marker to the boundary between the resulting stitch groups. Join. This adds 8 sts: each back, front and sleeve section gains 2 sts.
- Yoke even rnd Work 1 hdc in each stitch, slipping the markers as needed, and join. The stitch count does not change.
- Complete the yoke Work increase rnds on yoke rnds 1–4, 6–9, 11–14, 16–19, 21–24 and 26–28. Work even rnds on 5, 10, 15, 20, 25 and 29–32. After rnd 32 there are 272 sts: back 76, first sleeve 60, front 76, second sleeve 60. The calculated yoke depth is approximately 27 cm. Try it on before separating; check the underarm position and upper-sleeve room.
- Separate body and sleeves — body rnd 33 Starting at the back raglan join, ch 1 and hdc across the 76 back sts. Ch 12 for the first underarm and leave the next 60 sleeve sts unworked. Hdc across the 76 front sts. Ch 12 for the second underarm, leave the remaining 60 sleeve sts unworked and join to the first back hdc. There are 176 body positions: 152 hdc and 24 chains. Place a marker at an underarm for tracking the body join if helpful.
- Body and hem Work body rnds 34–78 even, making 1 hdc in each stitch or underarm chain on rnd 34 and 1 hdc in each stitch thereafter. Join each rnd. Keep the 14-rnd colour sequence aligned with the rnd numbers. There are 176 sts throughout. For a narrow hem band, change to white and work 3 joined rnds of sc, 176 sts per rnd. Fasten off.
- First sleeve With the right side facing, begin at the midpoint of one 12-chain underarm. Work into the unused underside loops of the chains. Sleeve rnd 33: ch 1, hdc in 6 underarm chains, hdc in the 60 waiting sleeve sts, then hdc in the remaining 6 underarm chains; join. There are 72 sts. Begin this sleeve’s colour sequence at rnd 33, matching the body at the underarm.
- Sleeve shaping Work sleeve rnds 34–77. On every second rnd of this section — rnds 35, 37, 39 and so on through 65 — ch 1, hdc2tog over the first 2 sts, hdc to the last 2 sts, hdc2tog over those sts and join. Work all other rnds even in hdc. These 16 decrease rnds reduce 72 sts to 40 sts. After rnd 77, change to white and work 3 joined rnds of sc, 40 sts per rnd. Fasten off. Work the second sleeve in the same way.
- Neck band With white and the right side facing, join yarn at the back of the starting edge. Work 1 sc into each of the 88 starting chains, join, then work 1 further joined rnd of sc, keeping 88 sts. Keep the band relaxed; use a larger hook for it if needed so the opening still passes over the wearer’s head.
Finishing
- Use yarn tails to close any small gaps at the underarms without drawing the fabric tight.
- Weave in ends securely, paying particular attention to stripe changes.
- Wash and dry according to the yarn labels, then lay the sweater flat and ease the bands into shape.
Helpful Tips
- Choose remnants of similar thickness so the stripes do not change the sweater’s gauge or weight unexpectedly.
- Keep yoke colour changes at the back raglan join, where they are less conspicuous. After separation, the joins sit at the underarms.
- The unequal stripe widths are intentional. Count colour-sequence rounds separately for the body and each sleeve after yoke rnd 32 so the stripes align at the separation.
- If the sample yoke depth or chest does not suit the wearer, recalculate the raglan and underarm counts rather than adding unplanned increase rnds: each extra increase rnd changes the body and sleeve stitch counts.
Holly-Colour Granny Square Cardigan
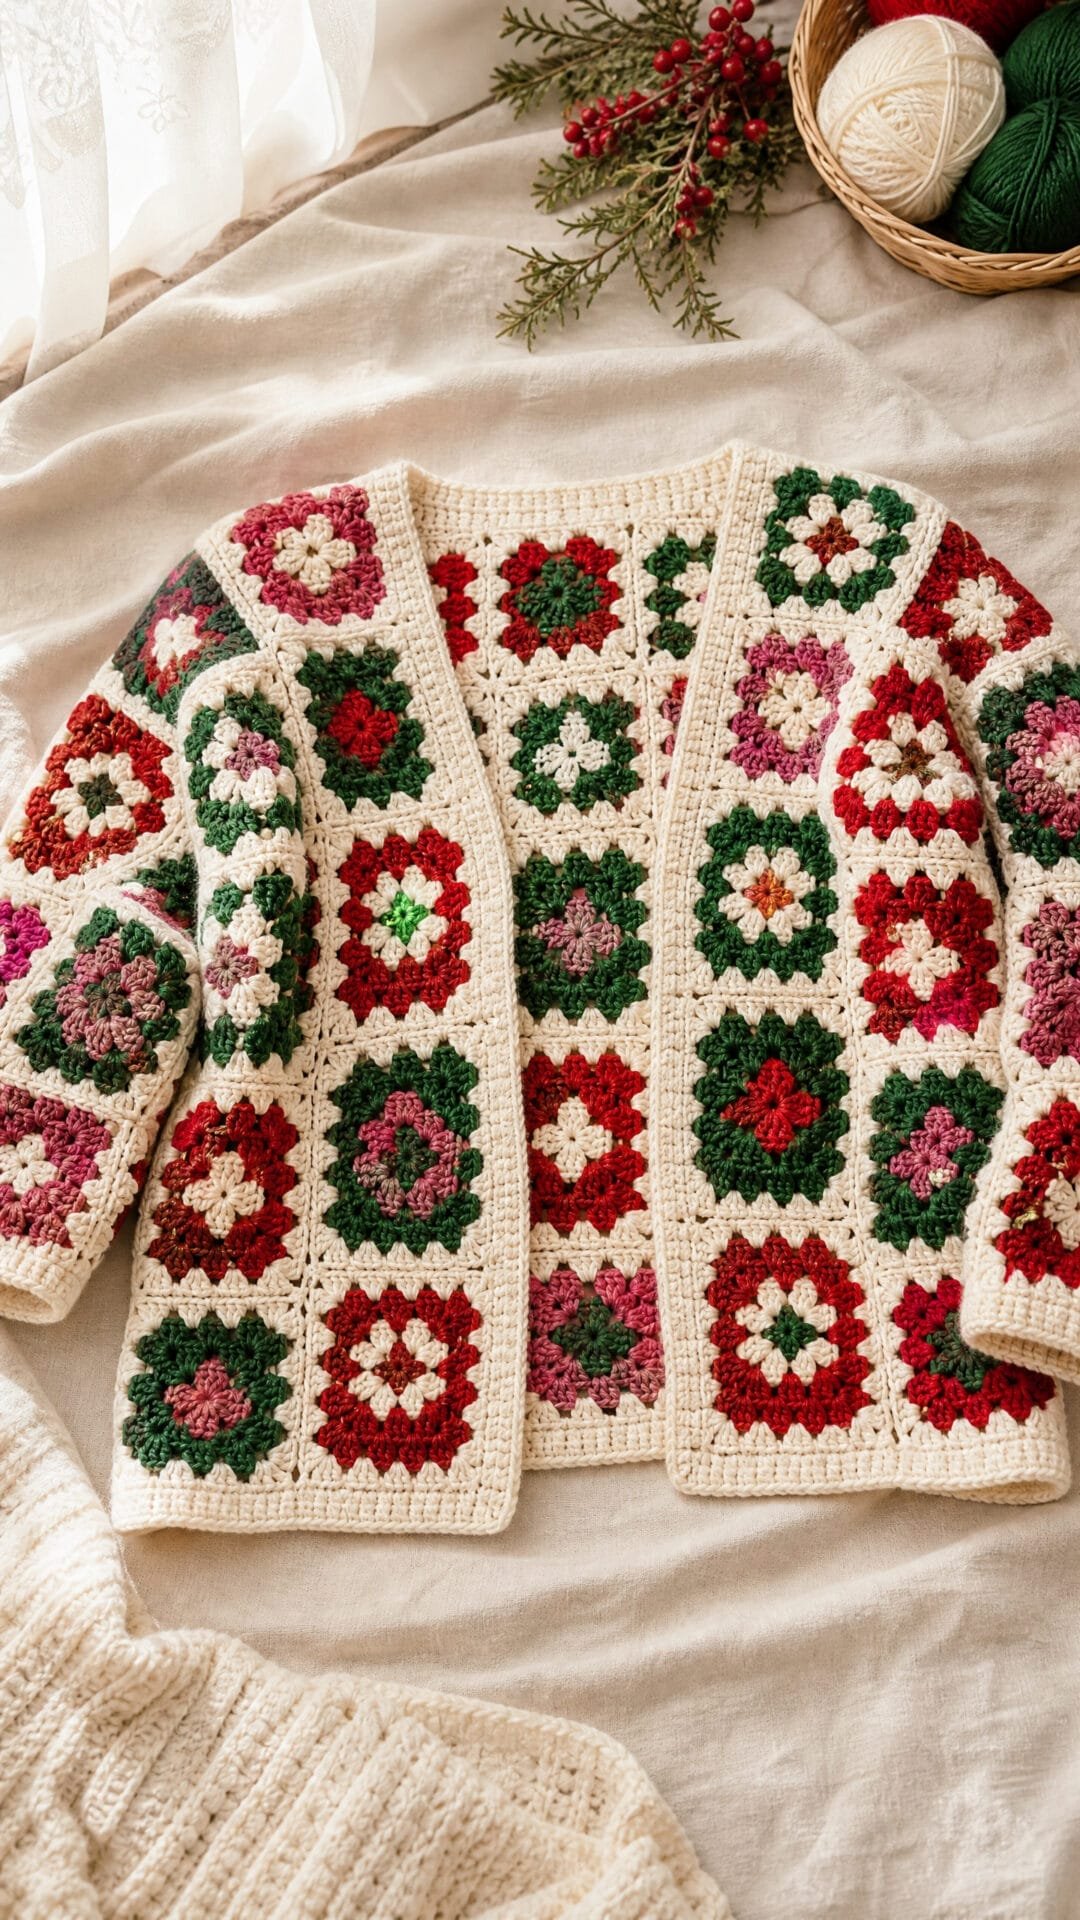
This open cardigan gets its festive character from green, red, cream and berry-pink granny squares rather than tiny sewn-on decorations. The bold patchwork makes it a cheerful choice when an understated Christmas jumper simply will not do.
Colour placement matters as much as colour choice here. Looking at the fronts beside the back before joining makes it easier to spread the brighter squares across the cardigan, creating an irregular layout that still feels balanced.
Consistent square sizes help the panels meet cleanly and the open fronts hang evenly. Small differences between individual motifs can become much more noticeable once they sit side by side, so this is a project where taking care over the squares pays off in the overall shape.
Holly-Colour Granny Square Cardigan

Quick-reference card. Follow the complete written instructions below.
Materials
- Medium-weight, smooth yarn: Green, red, cream and berry-pink. Allow approximately 1,600–2,000 m in total, including yarn for joining and edging; requirements vary with yarn and tension.
- Crochet hook: Size needed to make a blocked 10 cm square; 5 mm is a starting point.
- Other: Tapestry needle, stitch markers, tape measure and blocking supplies.
Size and Fit
One sample size. The blocked back is 50 cm wide and the two fronts are 30 cm wide each, giving a planned 110 cm chest circumference when the front edges are brought together before edging. The cardigan is worn open; there are no buttons or closures. Body length is approximately 60 cm before edging. Each armhole is 20 cm deep. Sleeves are approximately 50 cm from shoulder to cuff before the cuff is added. Choose the size by comparing the 110 cm planned circumference with a cardigan whose fit you like.
Gauge
One completed five-round granny square, blocked, measures 10 × 10 cm. Make and block a sample square before making the panels. All 104 squares must be the same finished size; adjust hook size if necessary.
Abbreviations
US crochet terms.
- ch = chain
- dc = double crochet
- sc = single crochet
- sc2tog = single crochet two stitches together
- sl st = slip stitch
- sp = space
Pattern
- Square: round 1 Ch 4; sl st into the first ch to form a ring. Ch 3 (counts as the first dc), 2 dc into the ring, ch 2. Work (3 dc, ch 2) into the ring three more times. Sl st into the top of the beginning ch 3. There are four 3-dc groups and four corner ch-2 spaces.
- Square: rounds 2–5 Sl st across to the next corner ch-2 sp. For each round, work (ch 3, 2 dc, ch 2, 3 dc) in that corner sp. Working around the square, place (3 dc, ch 1) in each intervening ch-1 sp; in every remaining corner ch-2 sp, work (3 dc, ch 2, 3 dc). Ch 1 between neighbouring groups along each side, but not between the two groups within a corner. At the end of the round, ch 1 if needed to reach the beginning corner, then sl st into the top of the beginning ch 3. On round 2 there are no intervening side spaces: work only the four corners, with a ch 1 between corners. Fasten off after round 5. Each finished square has five 3-dc groups along each side, counting its corner groups.
- Make and arrange the squares Make 104 squares, changing whole-square colours as desired. Block every square to 10 × 10 cm and let it dry before joining. Lay out the back as 5 columns by 6 rows (30 squares). Lay out each front as 3 columns by 6 rows, but omit the square at the top inner corner nearest the opening (17 squares per front). Lay out each sleeve as 4 columns around the arm by 5 rows from cuff to shoulder (20 squares per sleeve). Move colours around while the pieces are laid out so no one colour dominates either front. Keep the two omitted front squares on opposite inner corners when the fronts are placed beside the back.
- Join the panels With a tapestry needle and yarn, whipstitch adjoining square edges together through corresponding edge stitches and chain spaces, matching corners without pulling them tight. Join squares into their five separate panels. Check each panel lies flat and measures the planned number of squares in each direction.
- Join the body Place the fronts against the back with right sides together and their inner edges facing the cardigan opening. At each shoulder, join the top edges of the two outer front squares to the two outer back squares. Leave the centre back square unjoined for the back neck. The missing top inner square on each front forms a 10 cm-deep front neckline. Join each front outer side edge to the corresponding back side edge from hem upwards for 4 squares (40 cm). Leave the upper 2 squares (20 cm) open on each side for an armhole.
- Make and attach the sleeves Fold each sleeve panel so its two 50 cm long edges meet; join those edges to make a tube. The upper edge is 4 squares, or 40 cm, around. With right sides together, sew that edge evenly around a body armhole: 20 cm along the back opening and 20 cm along the front opening. Place the sleeve seam at the underarm and the midpoint of its upper edge at the shoulder seam. Repeat for the other sleeve.
- Cuffs With the right side facing, join yarn at a sleeve seam. Work 12 sc evenly across the exposed edge of each of the 4 squares at the wrist, for 48 sc; sl st to the first sc. Next round: (sc in each of the next 4 stitches, sc2tog) 8 times; sl st to join (40 sc). Work 3 more rounds of 40 sc, joining each round. Fasten off and repeat on the other sleeve.
- Front and neck edging With the right side facing, join yarn at one lower front corner. Work one row of sc evenly up that front edge, around its stepped neckline, across the back neck and around the other front neckline and edge to the opposite lower corner. Place stitches evenly so the fabric stays flat; turn and work a second sc row back along the same route. Fasten off. This edging steadies the open fronts; it is not intended to pull them together.
Finishing
- Weave in all ends, especially at square corners and panel joins.
- Lightly block the assembled cardigan without stretching the front edges or cuffs.
Helpful Tips
- Block a sample square first, then check squares as you work; even a small size difference is noticeable across five or six joined squares.
- Photograph the square layout before joining so the chosen colour arrangement is easy to restore.
- Pin shoulder, underarm and sleeve midpoints before attaching each sleeve to distribute its four-square edge evenly around the armhole.
Snowflake Tapestry Yoke Sweater

This crochet ugly Christmas sweater pattern puts the festive detail where it will be noticed: a ring of geometric off-white snowflakes across a navy shoulder yoke. The rest of the sweater stays plain, giving the colourwork room to stand out without making the whole garment feel busy.
Tapestry crochet keeps the snowflakes integrated into the fabric rather than added afterwards. The unused colour needs to travel loosely behind the stitches; if it is pulled tight, the yoke can lose the stretch needed to sit comfortably across the shoulders.
Before the work separates into body and sleeves, check the yoke on the intended wearer. Its lower edge should reach the underarms without pulling, so this is the useful moment to assess the fit rather than judging it by appearance alone.
Snowflake Tapestry Yoke Sweater

Quick-reference card. Follow the complete written instructions below.
Materials
- Smooth medium-weight yarn: Approximately 1,100 m of navy and 200 m of off-white. Choose yarns of similar weight and fibre content.
- Crochet hook: 5 mm, or the size needed to obtain gauge.
- Notions: Stitch markers, tapestry needle and tape measure.
Size and Fit
One sample size: approximately 110 cm finished chest, 60 cm from neckline to hem and 45.5 cm sleeve length from underarm to cuff. Intended for a chest of approximately 100–105 cm. The neckline has 80 stitches, or approximately 50 cm at gauge; check that it passes comfortably over the wearer’s head before continuing.
Gauge
16 sc and 18 rounds = 10 cm in joined rounds, using the main hook. Check gauge again in tapestry crochet before working the snowflakes; avoid tightening the carried yarn.
Abbreviations
US crochet terms.
- ch = chain
- sc = single crochet
- sc2tog = single crochet two stitches together
- sl st = slip stitch
- BLO = back loop only
- st(s) = stitch(es)
- rnd = round
Pattern
- Working method Work joined rounds throughout. At the start of each round, ch 1 and sc in the first stitch; at the end, sl st to the first sc. The starting ch 1 and joining sl st do not count as stitches. Keep the beginning-of-round marker at centre back. Work into both loops unless BLO is specified.
- Neck and increasing yoke With navy, ch 80 loosely and join with a sl st, taking care not to twist. Rnd 1: ch 1, sc in each ch; join. 80 sts. On rnds 2, 5, 8, 11, 14, 17, 20, 23, 26, 29 and 32, increase 16 stitches evenly: if the round starts with N stitches, work (sc in each of the next N ÷ 16 − 1 stitches, 2 sc in the next stitch) 16 times. On every other round through rnd 32, sc in each stitch. There are 256 stitches after rnd 32.
- Snowflake key For rnds 33–43, use navy for the background and off-white for the listed snowflake stitches. Each chart row is 16 stitches wide; repeat it 16 times around the 256-stitch yoke. Numbers refer to stitch positions 1–16 within each repeat. Work every stitch in sc, changing colour on the final yarn-over of the preceding stitch. Carry the unused yarn inside the stitches, loosely enough for the yoke to stretch.
- Snowflake rnds 33–43 Rnd 33: off-white at positions 8–9. Rnd 34: positions 7–10. Rnd 35: positions 2, 5, 8, 9, 12 and 15. Rnd 36: positions 3, 6, 8, 9, 11 and 14. Rnd 37: positions 4, 7–10 and 13. Rnd 38: positions 1–3, 5–12 and 14–16. Rnd 39: repeat rnd 37’s positions. Rnd 40: repeat rnd 36’s positions. Rnd 41: repeat rnd 35’s positions. Rnd 42: repeat rnd 34’s positions. Rnd 43: repeat rnd 33’s positions. Fasten off off-white. Work rnds 44–45 in navy, sc in every stitch. 256 sts.
- Check yoke depth At the stated round gauge, 45 yoke rounds measure approximately 25 cm from the neckline. Try on the yoke before splitting: its lower edge should reach the underarms without pulling. The stitch allocation below depends on the 256-stitch count, so check both depth and count before proceeding.
- Split for body and sleeves Beginning at the centre-back marker, sc in the next 40 stitches for half the back. Place the next 48 stitches on waste yarn for the first sleeve; ch 8. Sc in the next 80 stitches for the front. Place the next 48 stitches on waste yarn for the second sleeve; ch 8. Sc in the remaining 40 stitches for the other half of the back; join. The body has 176 stitches: 160 yoke stitches and 16 underarm chains.
- Body With navy, work 56 rounds of sc evenly around the 176 body stitches, working one sc into each underarm chain on the first round. For the hem, work 7 further rounds of sc BLO without shaping. Fasten off.
- Sleeves Work both sleeves alike in navy. Rejoin yarn at one end of an underarm opening. Work one sc into the unused underside of each of its 8 chains, then one sc in each of the 48 held sleeve stitches; join and mark this as sleeve rnd 1. 56 sts. Continue in joined sc rounds. On sleeve rnds 6, 12, 18, 24, 30, 36, 42, 48, 54, 60, 66 and 72, work sc2tog over the first 2 stitches, sc to the last 2 stitches, then sc2tog over those last 2 stitches. Work all other rounds even through rnd 76. 32 sts remain. Work 6 rounds of sc BLO for the cuff; fasten off. Repeat for the second sleeve.
Finishing
- Weave in ends, taking care not to draw the colourwork or underarms tight.
- Gently wash and lay flat to dry, arranging the snowflake yoke evenly.
Helpful Tips
- Swatch with both colours: tapestry crochet can be tighter than plain single crochet.
- Spread the stitches along the hook after each colour change so the carried strand preserves the yoke’s stretch.
- Check yoke depth on the intended wearer before the sleeve split rather than relying on the round count alone.
Sideways Candy Cane Stripe Pullover

Bold red-and-white stripes give this pullover its candy-cane look. Working the body sideways makes the stripes appear vertical when worn, while green cuffs and a wide cream neckline add a playful Christmas contrast.
In this construction, each body row runs from shoulder to hem, but the accumulated rows form the width of the front and back. Washed row gauge therefore controls the finished chest measurement; the stitches within each row determine the body length. Check both directions of your gauge before starting, as a small difference across many rows can noticeably change the fit.
Straight, consistent row edges help the colour blocks meet neatly at the seams. Keep colour changes relaxed rather than drawing the edge tight, and use corresponding stripes on the front and back as a visual check when aligning the panels. This helps the vertical bands stay upright instead of appearing to lean where they join.
Sideways Candy Cane Stripe Pullover

Quick-reference card. Follow the complete written instructions below.
Materials
- Medium-weight yarn: Red and white for the body and sleeves, green for the cuffs, and cream for the neckline. Choose yarns of similar weight and fibre content. The amount required depends on yarn length and your gauge.
- Crochet hook: 5 mm as a starting point; change size to obtain the washed gauge.
- Other: Stitch markers, tape measure, yarn needle and scissors.
Size and Fit
One sample size: approximately 110 cm finished chest, 60 cm body length and 47 cm sleeve length from cuff to shoulder, when made to gauge. Allow roughly 10 cm of ease for a 100 cm chest. Each body panel is 55 cm wide: 66 sideways rows at 12 rows per 10 cm. Row gauge therefore determines the chest measurement, even though the rows themselves run from shoulder to hem.
Gauge
After washing and drying a half double crochet swatch as you will care for the pullover: 14 hdc stitches and 12 rows = 10 cm. Check both directions. At this gauge, 84 stitches give a 60 cm body length, and 66 rows give a 55 cm panel width. Swatch in the stripe colours and check gauge again after colour changes.
Abbreviations
US crochet terms.
- ch = chain
- hdc = half double crochet
- sc = single crochet
- sl st = slip stitch
- st(s) = stitch(es)
Pattern
- Stripe and turning rules For each body panel, work four rows red, then four rows white; repeat this eight-row sequence through row 66. Start both panels with red so matching row numbers have matching colours. For each sleeve, work rows 1–7 in green. Starting at row 8, work four rows red, then four rows white, repeating to row 56. Unless a row says otherwise, ch 1 and turn at the end of each row; the turning chain does not count as a stitch. Change colour on the final yarn-over of the preceding row. Cut and secure the old yarn rather than pulling a tight float along the edge.
- Back With red, ch 85. Row 1: hdc in the second ch from the hook and in each remaining ch; 84 hdc. Rows 2–66: hdc in each st across; 84 hdc per row. Keep the specified stripe sequence. Each row runs between shoulder and hem. Mark the first and last 20 rows along the shoulder edge for the shoulder seams; leave the central 26 rows for the back neckline.
- Front: first shoulder With red, ch 85. Row 1: hdc in the second ch from the hook and in each remaining ch; 84 hdc. Rows 2–20: hdc in each st across; 84 hdc per row. Row 20 finishes at the shoulder edge.
- Front: neck shaping Row 21: ch 1 and turn. Sl st loosely in the first 11 sts, then hdc in each of the remaining 73 sts; 73 hdc. Rows 22–46: ch 1, turn and hdc in each of the 73 sts. Row 46 finishes at the neck edge. The omitted 11 stitches make an approximately 8 cm front-neck depth.
- Front: second shoulder Row 47: from the neck edge at the end of row 46, ch 12, then turn. Hdc in the second ch from the hook and in the next 10 ch, then hdc in all 73 sts of row 46; 84 hdc. Rows 48–66: ch 1, turn and hdc in each st; 84 hdc per row. Continue the body stripe sequence by row number, including across the neck shaping.
- Sleeves: make two With green, ch 43. Row 1: hdc in the second ch from the hook and in each remaining ch; 42 hdc. Rows 2–7: hdc across; 42 hdc. From row 8, follow the sleeve stripe sequence. On each increase row—12, 17, 22, 27, 32, 37, 42, 47 and 52—work 2 hdc in the first st, hdc across to the last st, and work 2 hdc in the last st. On every other row through row 56, hdc across without increasing. Each increase row adds 2 sts; row 56 has 60 sts. Make the second sleeve the same way.
- Shoulders and sides Lay the panels together with hems aligned and matching stripe rows opposite one another. Seam front rows 1–20 to back rows 1–20 along the shoulder edge; repeat for rows 47–66 at the other shoulder. Keep rows 21–46 open for the neck. At each side, seam from the hem upwards through the first 54 sts of the outermost body row. Leave the upper 30 sts of both front and back unseamed for the armhole.
- Attach sleeves Fold each sleeve lengthwise and seam its row ends from the green cuff to row 56. With the shoulder seam centred at the top of the armhole, sew the sleeve’s 60-stitch top edge to the 60-stitch opening: 30 unseamed body stitches on the front and 30 on the back. Match the sleeve centre to the shoulder seam, then ease the two halves evenly without pulling the body stripes sideways. Repeat for the second sleeve.
- Cream neckline Join cream yarn at a shoulder seam. For round 1, work 1 sc into each of the 26 exposed row ends along the back neck, each of the 26 exposed row ends along the front neck, and each of the 11 stitches on both short front-neck edges; 74 sc. Join with a sl st to the first sc. Rounds 2–3: ch 1, sc in each of the 74 sts and join; do not count the ch 1 as a stitch. Work loosely so the neckline remains wide and passes comfortably over the head.
Finishing
- Weave in ends, taking care not to cinch the colour-change edges.
- Wash and dry according to the yarn label, then lay flat to the stated measurements. Align the stripes while damp and let the seams dry without stretching them.
Helpful Tips
- Count body rows rather than using stitch count to judge chest width: the combined width of the two 66-row panels forms the 110 cm chest.
- Mark every four-row colour block on both panels. Matching row numbers and stitch-for-stitch shoulder seams prevent the stripes from leaning where the panels meet.
- Keep all 84 body stitches at full-length rows and all 73 stitches at shortened front-neck rows. An accidental stitch change will make a stripe slope.
- If three rounds of cream edging make the neck too firm, use a larger hook for the edging rather than stretching the shaped opening.
Oversized Present Intarsia Sweater
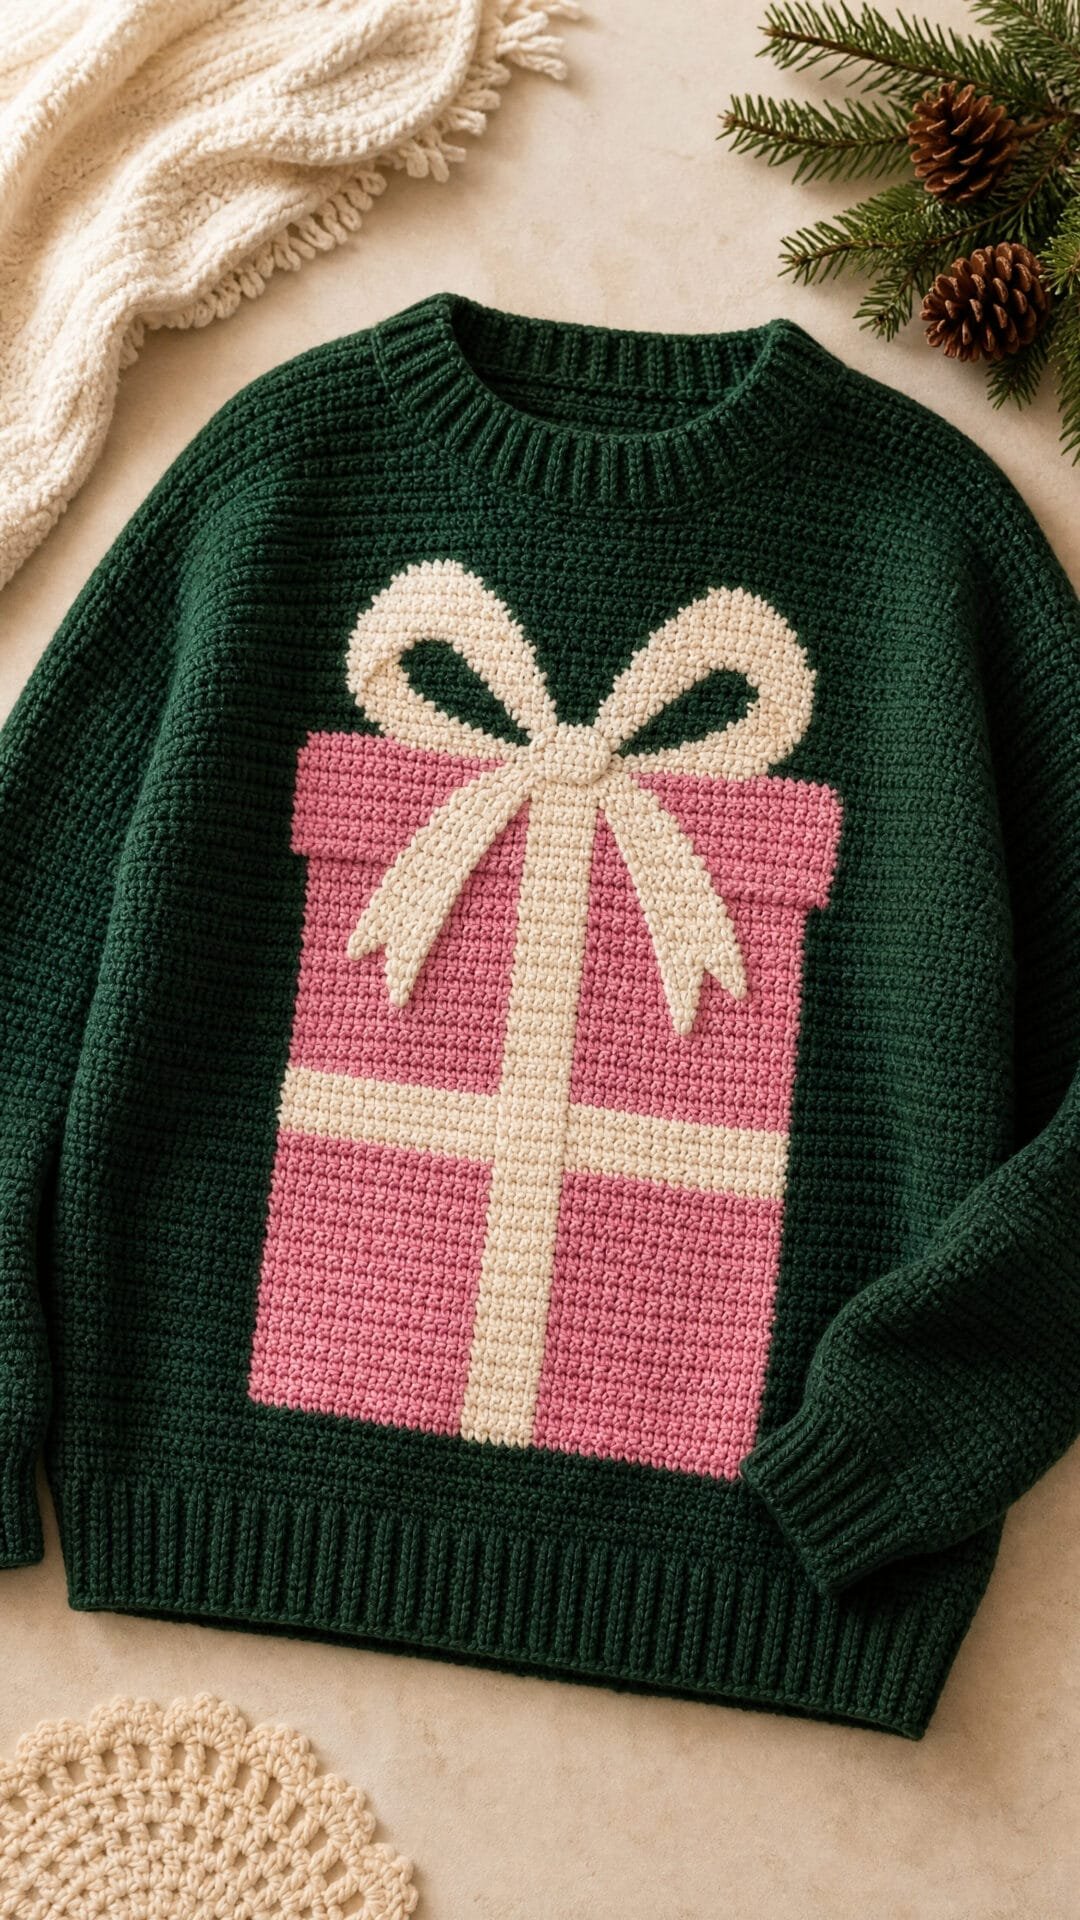
One oversized present gives this Christmas pullover its playful, deliberately bold look. The pink parcel and cream ribbon stand out against a dark green background, while the exaggerated bow draws the eye to the centre of the front.
Intarsia is well suited to a motif this large: separate yarn supplies keep long strands from running behind the picture. Keeping the colour changes neat matters most where the ribbon crosses the parcel and where the bow breaks into separate areas.
The picture sits below the armhole and neckline, so the opening does not cut into the design. This is an advanced project where it pays to plan the colour areas and check how the shaped sleeves meet the body before assembly.
Oversized Present Intarsia Sweater
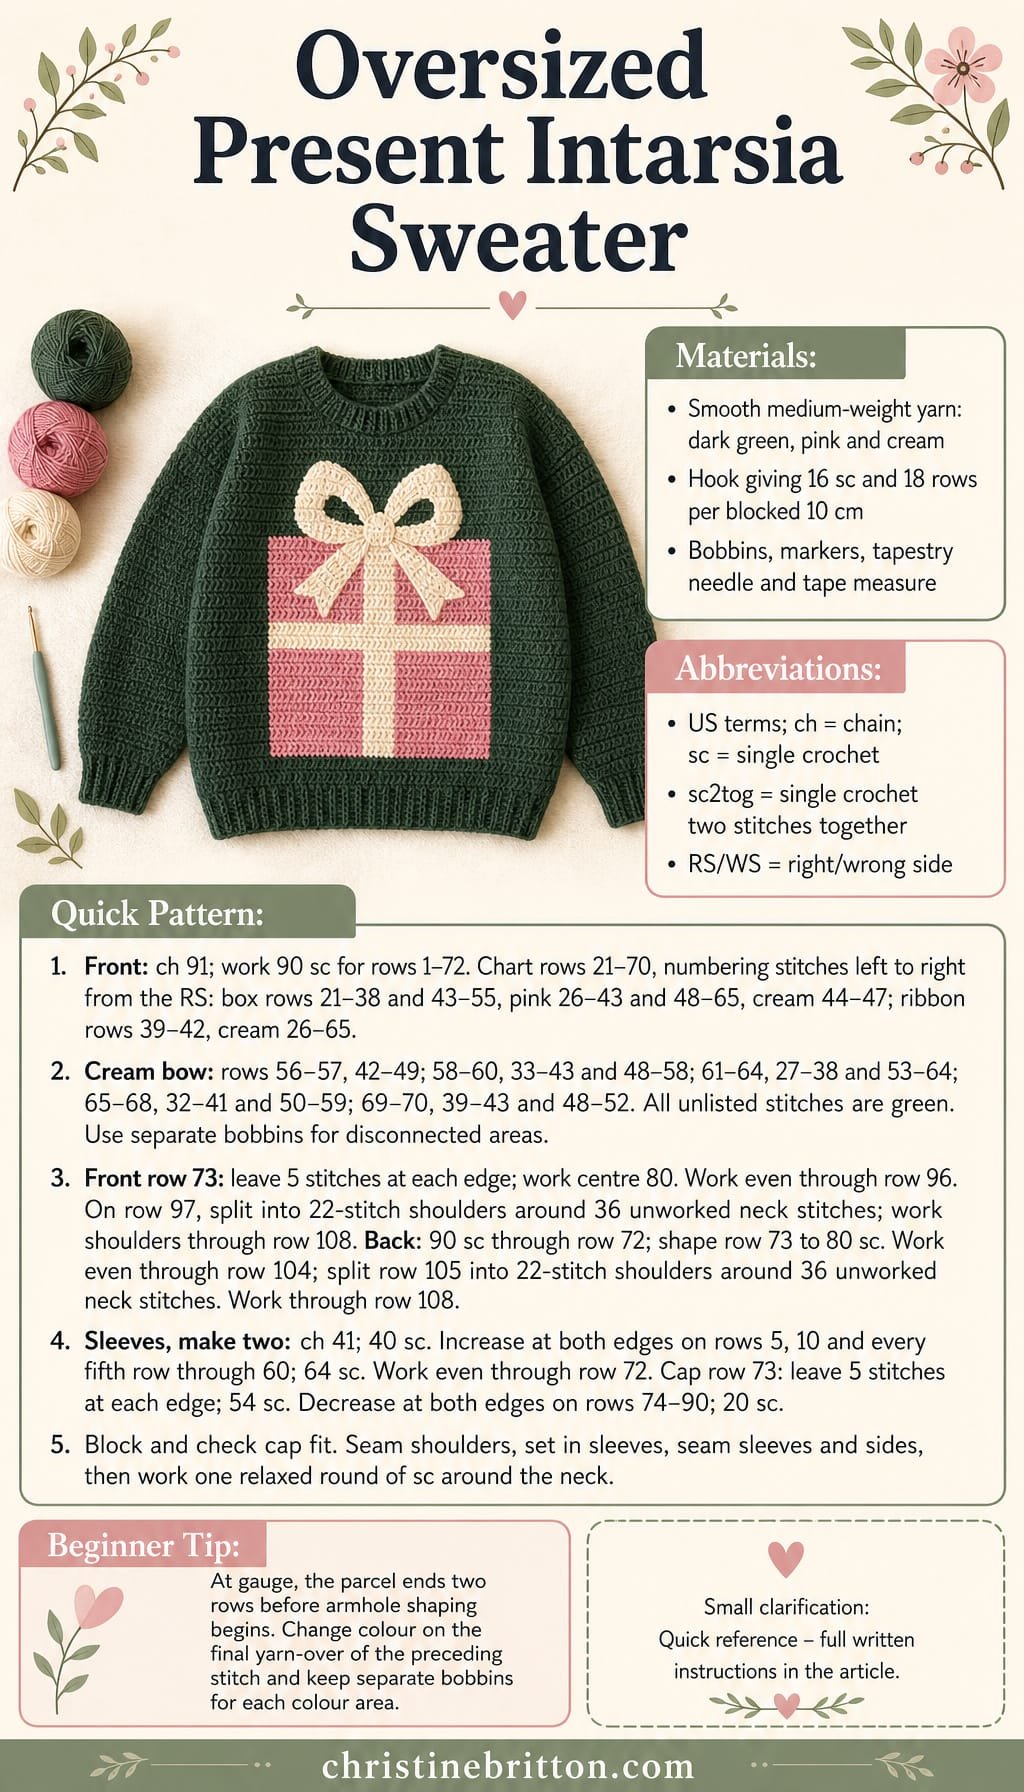
Quick-reference card. Follow the complete written instructions below.
Materials
- Smooth medium-weight yarn: Dark green for the body and sleeves, pink for the parcel and cream for the ribbon and bow. Yarn quantities depend on your yarn and gauge; obtain enough of each dye lot to complete the garment.
- Crochet hook: A size that gives the stated blocked gauge; 5 mm is a starting point.
- Other supplies: Stitch markers, yarn bobbins or small balls, tapestry needle, scissors and a tape measure.
Size and Fit
One sample size: approximately 110 cm finished chest, 60 cm body length and 40 cm sleeve length to the underarm. Each body panel begins 56.25 cm wide at gauge. The chest estimate allows one stitch at each side edge of each panel for seaming. The straight armhole is 20 cm deep; the sleeve cap is approximately 10 cm high. Check the blocked pieces against these measurements before assembly.
Gauge
16 sc and 18 rows = 10 cm in blocked single crochet. Make and block a swatch before starting: the parcel chart, body width and sleeve-cap fit all depend on this gauge.
Abbreviations
US crochet terms.
- ch = chain
- sc = single crochet
- sc2tog = single crochet two stitches together
- RS = right side
- WS = wrong side
Pattern
- Working notes The turning ch 1 never counts as a stitch. Turn after every row. Row 1 is a RS row. For the front chart, number the 90 stitches from left to right as seen from the RS, regardless of which direction you are crocheting. Change colour on the final yarn-over of the stitch before the new colour. Use a separate bobbin for each disconnected colour area, including the green areas on either side of the parcel; do not carry yarn across the picture. On WS rows, follow the same stitch numbers from right to left.
- Front: lower body With dark green, ch 91. Row 1: sc in the second ch from the hook and in each ch across; 90 sc. Rows 2–72: ch 1, sc in each stitch across. Work the parcel chart on rows 21–70, using green for every stitch not assigned another colour. Rows 71–72 are entirely green.
- Front parcel chart All ranges include both end stitches. Rows 21–38 and 43–55: work stitches 26–43 pink, 44–47 cream and 48–65 pink. Rows 39–42: work stitches 26–65 cream for the horizontal ribbon. Rows 56–57: work stitches 42–49 cream. Rows 58–60: work stitches 33–43 and 48–58 cream. Rows 61–64: work stitches 27–38 and 53–64 cream. Rows 65–68: work stitches 32–41 and 50–59 cream. Rows 69–70: work stitches 39–43 and 48–52 cream. Work all other stitches on these rows in green. The two cream areas on a bow row are separate intarsia areas.
- Front: armholes and neck Row 73: fasten off, leave the first 5 stitches of row 72 unworked, join green in the next stitch and sc across the following 80 stitches; leave the final 5 stitches unworked. Rows 74–96: ch 1, sc across; 80 sc. Row 97: mark the centre 36 stitches for the neck. With one supply of green, work 22 sc at one edge; leave the marked 36 stitches unworked and use a second supply of green to work 22 sc at the other edge. Rows 98–108: work each 22-stitch shoulder separately, ch 1 and sc across on every row. Fasten off.
- Back With dark green, ch 91. Row 1: sc in the second ch from the hook and in each ch across; 90 sc. Rows 2–72: ch 1, sc across. Row 73: shape as for the front, leaving 5 stitches unworked at each end and working the centre 80 stitches. Rows 74–104: ch 1, sc across; 80 sc. Row 105: work 22 stitches for one shoulder, leave the centre 36 stitches unworked for the neck, and work 22 stitches for the other shoulder with a separate supply of yarn. Rows 106–108: work each shoulder separately in sc. Fasten off.
- Sleeves: make two With dark green, ch 41. Row 1: sc in the second ch from the hook and in each ch across; 40 sc. Rows 2–72: ch 1 and sc across, except on rows 5, 10, 15 and every fifth row through row 60, work 2 sc in the first stitch and 2 sc in the last stitch. There are 12 increase rows and 64 stitches after row 60. Work rows 61–72 even; the sleeve measures approximately 40 cm to the underarm.
- Sleeve caps Row 73: fasten off, leave the first 5 stitches of row 72 unworked, join yarn in the next stitch and sc across the following 54 stitches; leave the final 5 stitches unworked. Rows 74–90: ch 1, sc2tog, sc across until 2 stitches remain, sc2tog. Decrease 2 stitches on each of these 17 rows, ending with 20 stitches on row 90. Fasten off. Each cap is approximately 10 cm high.
Finishing
- Weave in intarsia ends on the WS, securing them within matching colour areas without pulling the picture out of shape. Block all four pieces to gauge and check that the two body armholes match and that each sleeve cap fits its armhole with no more than slight easing.
- Place the front and back RS together and seam the 22-stitch shoulders. Sew each sleeve-cap centre to a shoulder seam, then pin and sew each cap edge around the armhole towards the underarm. Distribute any slight easing evenly; do not gather the cap.
- Seam each sleeve from cuff to underarm, then continue down the body side, taking approximately one stitch at each side edge into the seam. Repeat on the other side.
- For a simple neck edge, join green at a shoulder seam with the RS facing. Work one round of sc evenly around the opening, placing one sc in each neck-edge stitch and spacing stitches evenly along the short vertical edges. Join and fasten off. Keep the edge relaxed so the neckline remains comfortable to pull on.
Helpful Tips
- Label bobbins with their chart areas. When colours meet, bring the new yarn up from beneath the old yarn on the WS to avoid holes.
- The picture ends at row 70, below the row-73 armhole shaping, so neither the armhole nor the neck cuts into the parcel.
- If your blocked stitch or row gauge differs, change hook size or yarn before making the panels. Changing only the chart width will not correct the linked body and sleeve measurements.
- Check cap fit before sewing: at the stated gauge, each body armhole has a 20 cm straight section plus its short underarm step. Ease the shaped cap around that opening rather than stretching the armhole.
Pixel Tree Corner-to-Corner Sweater
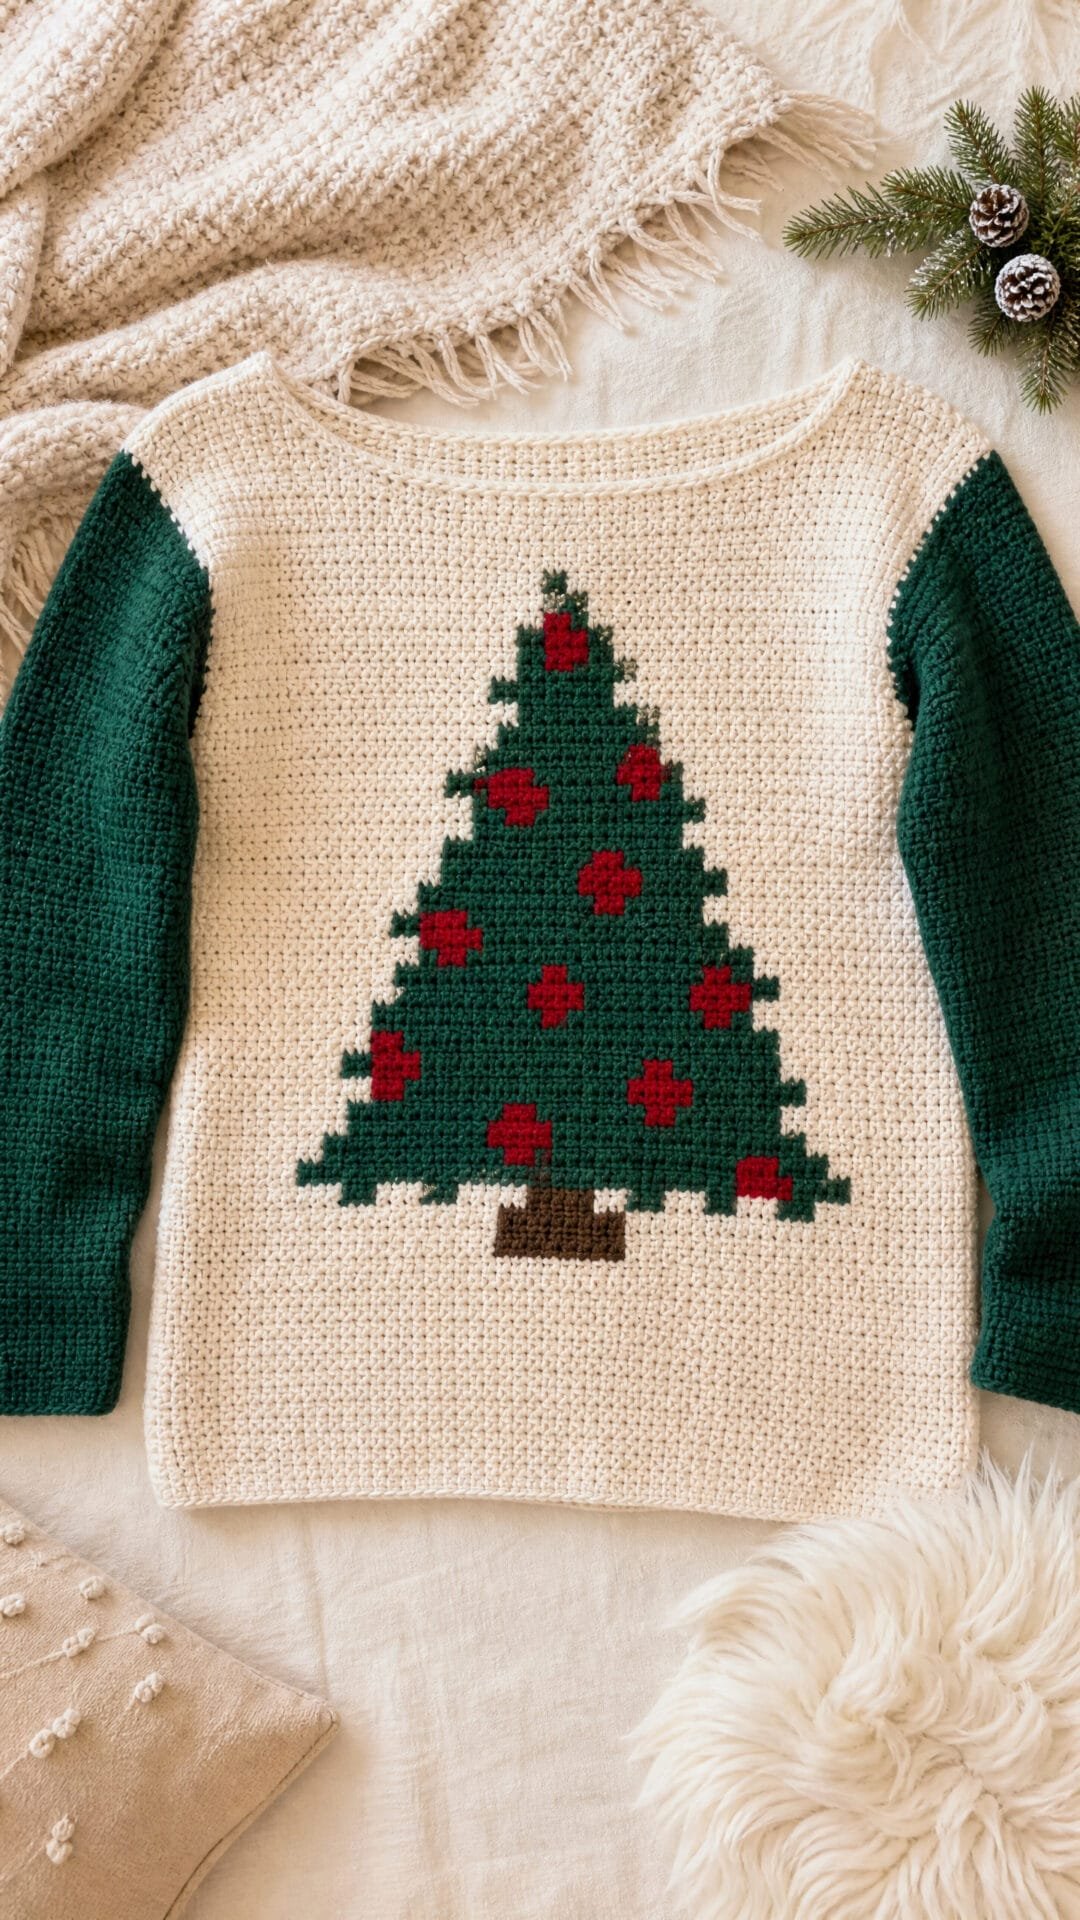
Corner-to-corner crochet gives this Christmas tree its crisp, pixelated outline. Ornament accents break up the blocky motif, while the plain back and sleeves keep the finished pullover from feeling too busy.
A washed tile swatch matters especially here: tile width determines both the scale of the tree and the width of the body. A small change in tile size affects the whole garment, so check the fabric after washing rather than judging it straight off the hook.
Corner-to-corner fabric can shift along its diagonals, particularly around an open neckline. A firm border helps the boat neck hold its shape without disguising the tiled texture.
Pixel Tree Corner-to-Corner Sweater

Quick-reference card. Follow the complete written instructions below.
Materials
- Soft medium-weight yarn: Cream for both body panels, green for the tree, dark green for the sleeves and red for six ornaments. Yarn quantities depend on your washed tile gauge; use your swatch to estimate requirements and allow extra for seams.
- Crochet hooks: A hook that produces the C2C tile gauge below, plus a hook that produces the stated single-crochet sleeve gauge.
- Other supplies: Stitch markers, tape measure, yarn needle and scissors.
Size and Fit
One sample size: approximately 110 cm finished chest. Each 23-tile body panel measures 57.5 cm wide before seaming. Seaming approximately 1.25 cm in from each side edge leaves 55 cm of width per panel. The 24-tile body length is approximately 60 cm before any finishing. Each sleeve is approximately 45 cm around at the upper edge and 49 cm long. For this sample size, achieve the washed gauges rather than changing the tile count: a different tile width changes both the tree’s size and the finished chest.
Gauge
After washing and drying a C2C swatch as you will treat the sweater: 4 tiles across and 4 tiles high = 10 cm. Measure across several central tiles, not the outer edge. For sleeves, 16 sc and 18 rows = 10 cm after washing. Adjust hook sizes or yarn if necessary before starting; sleeve and tile gauges are independent.
Abbreviations
US crochet terms.
- ch = chain
- dc = double crochet
- sc = single crochet
- sl st = slip stitch
- st = stitch
- C2C = corner-to-corner
Pattern
- Tile method For the first tile, ch 6 and dc in the fourth, fifth and sixth chains from the hook. To add a tile at a growing edge, turn, ch 6 and dc in the fourth, fifth and sixth chains. Sl st into the neighbouring tile’s ch-3 space, then ch 3 and work 3 dc in that space to make the next tile; repeat this joining step across the diagonal. At an edge that must stop growing, turn without ch 6, sl st across the three dc of the end tile and into its ch-3 space, then ch 3 and work 3 dc in that space. Continue across the diagonal. Each ch-3 and 3-dc group forms one tile.
- Panel layout Make each panel 23 tiles wide by 24 tiles high, starting at its lower left corner when viewed from the right side. Number columns x = 1–23 from left to right and rows y = 1–24 from hem to shoulder. Work diagonal passes in increasing order of x + y, from 2 through 47. On passes with an even x + y, visit tiles in increasing x order; on odd passes, visit them in decreasing x order. Grow both edges until the panel is 23 tiles wide. Stop growing the x edge, continue growing the y edge to 24 tiles high, then stop growing both edges and decrease to the final tile. There are 46 diagonal passes and 552 tiles.
- Front colour chart Use cream except at the coordinates specified here. Work the green trunk at rows y = 4–6, columns x = 11–13. Work green foliage at rows y = 7–9, x = 6–18; y = 10–12, x = 7–17; y = 13–15, x = 8–16; y = 16–18, x = 9–15; y = 19, x = 10–14; y = 20, x = 11–13; and y = 21, x = 12. Replace green with red at these six ornament tiles: (x, y) = (7, 8), (16, 9), (10, 11), (14, 13), (11, 16) and (13, 18). Change colour for the whole tile, completing the preceding stitch with the new colour. Use separate short lengths or bobbins where practical, and secure ends on the wrong side rather than carrying a contrasting strand across cream tiles.
- Back Make a second 23-by-24-tile panel entirely in cream, using the same tile method and gauge. Wash, dry and lay both panels flat before seaming; they should have the same dimensions.
- Sleeves Make two identical sleeves in dark green at the single-crochet gauge. Ch 73. Row 1: sc in the second ch from the hook and in each ch across; turn — 72 sc. Ch 1 and turn at the start of every subsequent row; the turning ch does not count as a stitch. Work sc in every stitch on rows 2–88, except on rows 4, 8, 12 and every fourth row through row 80: sc2tog over the first two stitches, sc across to the last two stitches and sc2tog over those last two stitches. These 20 decrease rows remove two stitches each, leaving 32 sc. Rows 81–88 are even. Fasten off, leaving yarn for seams. The 72-stitch edge is the sleeve top; the 32-stitch edge is the cuff.
- Shoulders and armholes Place front and back right sides together. At each top edge, sew the outer six tiles together at each shoulder, leaving the centre 11 tiles of each panel unsewn for a straight boat neck. On both side edges, mark a point 22.5 cm, or nine tile heights, below the shoulder. Sew each side from the hem to its marker, taking approximately 1.25 cm inside the panel edges. Leave the upper 22.5 cm of front and back open for each armhole.
- Set in sleeves Fold each sleeve lengthwise with right sides together and sew its long edges to form a tube. With the body inside out, position the sleeve inside an armhole, right sides together. Match the sleeve underarm seam to the body side seam and the midpoint of the 72-stitch sleeve top to the shoulder seam. Sew the sleeve top evenly to the front and back armhole edges without stretching; its approximately 45 cm circumference matches two 22.5 cm armhole edges. Repeat for the second sleeve.
- Neckline border Turn right side out. Join cream yarn at a shoulder seam. For round 1, work approximately four sc per exposed neckline tile: 44 sc along the 11 front tiles and 44 sc along the 11 back tiles. Join with a sl st — 88 sc. For round 2, ch 1, work one sc in each sc and join — 88 sc. Fasten off. Keep both rounds firm but flat; if the edge draws in, adjust the hook rather than adding decreases.
Finishing
- Weave in ends on the wrong side, securing each colour change without pulling the tiles out of shape.
- Wash and dry according to the yarn label, then lay the sweater flat. Smooth the neckline border and seams without stretching the C2C panels.
Helpful Tips
- A washed tile swatch determines garment width as well as motif scale: at 2.5 cm per tile, the 13-tile-wide lower foliage section is 32.5 cm across. If tiles grow wider, the tree and chest grow wider together.
- C2C fabric can shift along its diagonal seams. The shoulder seams and two rounds of sc at the neck help hold the boat-neck opening in shape.
- Mark the first tile of each diagonal pass and tick off chart coordinates as you work; several passes contain both cream and tree tiles.
Hexagon Christmas Party Cardigan

This crochet ugly Christmas sweater pattern takes the party-cardigan route: bold stripes, a relaxed shape and deliberately mismatched festive cuffs. One half is red-led and the other green-led, giving the finished cardigan a playful look without relying on appliqués or novelty decorations.
The folded-hexagon construction is particularly useful if you want control over the fit. The main shapes determine the room through the chest and upper arms, while the body and sleeves can be lengthened independently. That distinction helps you avoid making the whole cardigan wider just to gain a little extra length.
Before committing to the joins, check the folded shapes against the fit you want and make sure the open fronts hang comfortably. The neat front band gives the exuberant stripes a more settled edge, so the cardigan feels festive enough for a Christmas party but remains easy to wear afterwards.
Hexagon Christmas Party Cardigan

Quick-reference card. Follow the complete written instructions below.
Materials
- Medium-weight yarn: Red, green and a contrasting colour for the bands and cuffs. The quantity depends on your yarn, gauge and chosen length; keep enough of each cuff colour to complete that cuff.
- Crochet hook: Use the size recommended for your yarn, adjusting if needed to make a fabric that drapes without large gaps.
- Notions: Stitch markers, tape measure, yarn needle and scissors.
Size and Fit
Make one adjustable size. Aim for approximately 110 cm around the closed chest: with the two folded halves pinned together at the centre back and the front edges brought together without stretching, the chest should measure about 55 cm across when laid flat. This is a garment measurement, not a promised result from a particular round count. Pin and check the folded layout as you work; stop adding complete hexagon rounds when the chest and upper sleeves have the ease you want. Wrist and hem extensions are added separately.
Gauge
Work at least six rounds of the granny hexagon as a gauge swatch, using your intended hook and yarn. Measure the swatch and its folded shape after treating it as you intend to treat the cardigan. There is no fixed stitches-per-10-cm gauge: use your measured swatch and repeated folded fittings to choose the number of rounds.
Abbreviations
US crochet terms.
- ch = chain
- dc = double crochet
- sc = single crochet
- sc2tog = single crochet two stitches together
- sl st = slip stitch
- sp = space
- RS = right side
Pattern
- Hexagon set-up Make two hexagons. Start the first with red and use green for contrasting stripes; reverse those colours for the second. Change colour at the start of any round and fasten off the unused colour. A beginning ch 3 counts as the first dc of a 3-dc group. Join each round with a sl st to the top of that ch 3. Turn after every round so both faces of the granny fabric have a similar appearance.
- Hexagon round 1 Ch 4; sl st into the first ch to make a ring. Ch 3, work 2 dc into the ring, ch 2. Work [3 dc into the ring, ch 2] five times. Join and turn. You have six 3-dc groups and six ch-2 corner spaces.
- Hexagon round 2 Sl st into the next ch-2 corner sp. Ch 3, 2 dc, ch 2 and 3 dc in that same corner sp. For each of the remaining five corners, ch 1, then work (3 dc, ch 2, 3 dc) in the corner sp. Ch 1 and join; turn. You have 12 groups.
- Hexagon round 3 and onwards Sl st into the next ch-2 corner sp. Work (ch 3, 2 dc, ch 2, 3 dc) there. *Ch 1, work 3 dc in each ch-1 sp across to the next corner, placing ch 1 between successive groups; ch 1 before the corner group. Work (3 dc, ch 2, 3 dc) in that corner sp. Repeat from * around the remaining corners and sides, working the intervening ch-1 spaces in the same way. Ch 1 and join; turn. Each new round adds one 3-dc group to each of the six sides. Continue until both hexagons have the same number of rounds and their pinned, folded layout meets your chest and upper-arm fit check.
- Fold and identify the edges Lay one hexagon out and name its six corners A to F in order around the edge. Fold it with RS out along the line from A to D: A-B-C-D lies over A-F-E-D. The paired edges A-B and A-F are the sleeve-top seam; the paired edges B-C and F-E form the open wrist; C-D and E-D remain separate body edges. Mark one of those body edges as centre back and the other as centre front. Fold the second hexagon as its mirror image, so the marked back edges can meet and both wrists point outwards.
- Join the cardigan On each half, sew the paired sleeve-top edges together from A to the wrist corner B/F. Do not sew the wrist edges B-C and F-E closed. Lay the halves side by side with their marked back edges together, then sew those back edges together from their lower ends at D towards C/E. Leave the two centre-front edges unjoined. Try the cardigan on or pin it over clothing before fastening off the seams; the back join must be central and both wrists must remain open.
- Extend and edge the body If more body length is wanted, join yarn at the lower front corner and work sc evenly along the entire lower hem to the other front corner; turn, ch 1 and work one sc in each sc. Repeat these rows to the desired length. Work an even row of sc around each open front edge and around the back neckline, keeping the band flat at corners. Turn, ch 1 and work one sc in each sc for two more rows, or until the opening feels stable. Do not pull the band tight enough to draw in the fronts.
- Extend the sleeves and make mismatched cuffs Join contrasting yarn at each open wrist and work one round of sc evenly around its two exposed edges; join with a sl st. Check that the opening passes comfortably over the hand. For a longer sleeve, continue in joined sc rounds to the desired length. To narrow it gradually, work four sc2tog decreases spaced approximately evenly around a round, then one plain round; repeat that two-round sequence only while the cuff still passes over the hand. Finish with two plain sc rounds. Use red for one cuff and green for the other, choosing the colour that contrasts with its sleeve.
Finishing
- Weave in ends securely, particularly at colour changes and the centre-back seam.
- Lay the cardigan flat and gently shape both halves to match. Follow the yarn label when washing or blocking.
Helpful Tips
- Keep the two hexagons at the same round count; change stripe colours rather than construction to make them intentionally different.
- Pin the fold and sleeve-top seams before sewing. The wrist is made from two open edges, not from a single corner.
- Try on a cuff before adding decreases. Stop decreasing as soon as the opening is comfortably hand-sized.
If you’d like to keep building your crochet skills, take a look at crochet Christmas cardigan patterns.
Garland V-Neck Cardigan

This cardigan turns its V-neck into part of the Christmas decoration. Paired green garland lines follow each sloping front edge, while small red dots give the cream fabric a festive look without covering the neckline.
The fronts grow from the shoulders, with increases at their inner edges shaping the V. That shaping matters to the decoration: the garland should follow the changing edge rather than run down a straight stitch column. Keep the surface stitching relaxed so the fronts can lie flat.
The button band gives the cardigan a tidy finish, but the closures are best judged on the finished fabric. Overlap the bands as they will be worn and check each button position against its own buttonhole; equal-looking spacing does not guarantee that every closure will sit comfortably.
Garland V-Neck Cardigan

Quick-reference card. Follow the complete written instructions below.
Materials
- Medium-weight yarn: Cream for the cardigan, green for the garland lines and a small amount of red for the dots. Buy quantities appropriate to your swatch and chosen length.
- Crochet hook: Size needed to obtain the stated gauge, plus a hook suitable for firm surface slip stitches.
- Five buttons: Choose buttons only after checking that each passes securely through a sample two-chain buttonhole.
- Other supplies: Stitch markers, tape measure, yarn needle and scissors.
Size and Fit
One sample size, planned for an approximately 110 cm buttoned chest. At gauge, the 172-stitch body measures 107.5 cm across before the bands. Four rows of single crochet should make a band about 2.5 cm wide; with the bands fully overlapped, this adds approximately 2.5 cm to the closed circumference. Check both measurements on your own fabric before relying on the finished size. The body has 72 half-double-crochet rows from shoulder to hem, approximately 60 cm before edging.
Gauge
16 hdc and 12 hdc rows = 10 cm in the main fabric, after washing and drying as the garment will be treated. For the stated buttoned-chest estimate, also check that four sc band rows measure approximately 2.5 cm in width. Adjust the hook or band plan if your swatches differ.
Abbreviations
US crochet terms.
- ch = chain
- sc = single crochet
- hdc = half double crochet
- sl st = slip stitch
- hdc2tog = half double crochet two stitches together
- st(s) = stitch(es)
Pattern
- Foundation and back With cream, ch 87. Sc in the second ch from the hook and each remaining ch: 86 sc. Mark the first and last 31 foundation stitches for the shoulders; the centre 24 form the back neck. Working into the sc stitches, make back rows 1–24: ch 1, turn, hdc in each st across. The turning ch does not count as a stitch. Fasten off after row 24. Keep the unused underside loops of the foundation accessible for the fronts.
- Two V-neck fronts For each front, join cream to the underside loops of one marked 31-stitch shoulder section. Front row 1: ch 1, work 31 hdc across that section. Do not work into the centre 24 foundation stitches. Mark the end facing the centre back neck as the inner edge. Work rows 2–24 in hdc, turning with ch 1. On every even-numbered row—2, 4 and so on through 24—work 2 hdc in the stitch at the marked inner edge, and 1 hdc in every other stitch. Move the marker to the new inner-edge stitch. Work odd-numbered rows without increases. Each front has 43 stitches after row 24. Make the second front in the same way, with its increases at its own inner edge.
- Join and work body Lay the pieces with the back between the fronts and the outer edges aligned at each underarm. Attach cream at the inner edge of one front. Body row 25: ch 1, hdc across its 43 stitches from inner edge to underarm; continue directly across the adjacent 86 back stitches and then the other 43 front stitches, joining the layers at the two underarms as you work: 172 hdc. The opposite inner edge remains open. For rows 26–72, ch 1, turn and hdc in each of the 172 stitches. Fasten off. There are 48 joined-body rows, approximately 40 cm at gauge.
- Sleeves At one underarm, join cream and work sleeve round 1 into the armhole row ends: place 4 hdc across every 3 row ends, working 32 hdc along the 24 front row ends and 32 along the 24 back row ends. Join with a sl st to the first hdc; 64 hdc. Ch 1 at the start of each subsequent round and join each round in the same way; joining stitches and starting chains do not count. Work rounds 2–48 in hdc. On rounds 4, 8, 12 and every fourth round through 48, decrease twice, placing one hdc2tog near each side of the sleeve and keeping the decreases opposite one another. All other rounds are even. After round 48, work 4 even rounds of sc for the cuff. Fasten off and repeat for the second sleeve.
- Garland stripes and dots On each front, use green to surface-slip-stitch two lines following the V slope from shoulder row 1 to row 24. Keep one line about 3 stitches in from the inner edge and the second about 6 stitches in, following the changing edge position rather than a fixed stitch column. Catch the fabric about once per row without pulling it tight. For each red dot, make a magic ring, work 6 sc into it and join with a sl st; fasten off. Make 12 dots and sew three along each green line, leaving the lines visible.
- Button band With cream and the right side facing, join at the right-front hem. Band row 1: sc up the right-front edge, placing 4 sc across each group of 3 hdc row ends (96 sc across 72 rows); work 1 sc into each of the 24 exposed back-neck foundation stitches; then work down the left-front edge at the same rate (96 sc). Total: 216 sc. For band row 2, ch 1, turn and sc in all 216 stitches. For row 3, ch 1, turn and begin at the right-front hem again. Along that front, replace stitches 8–9, 20–21, 32–33, 44–45 and 56–57 with a ch 2 over each skipped pair; sc in every other stitch across the band. Each ch-2 space counts as two stitches, so the effective count remains 216. For row 4, ch 1, turn and sc across, working 2 sc into each ch-2 space. Fasten off.
Finishing
- Weave in ends and gently block the cardigan to its planned measurements without stretching the V edges.
- Try on or lay the finished cardigan flat with the bands overlapped. Mark button positions opposite the five actual buttonholes, checking each position separately on the finished fabric; do not assume identical spacing or a chain-loop reach.
- Sew on the buttons and check that each closure sits flat and stays secure.
Helpful Tips
- The front increases are balanced: each front gains one stitch on the same 12 even-numbered rows.
- Keep surface slip stitches loose enough for the V-neck fabric to lie flat.
- If your band is not approximately 2.5 cm wide, measure the buttoned chest with the finished bands overlapped rather than treating 110 cm as an exact result.
Dolman-Sleeve Snowman Sweater
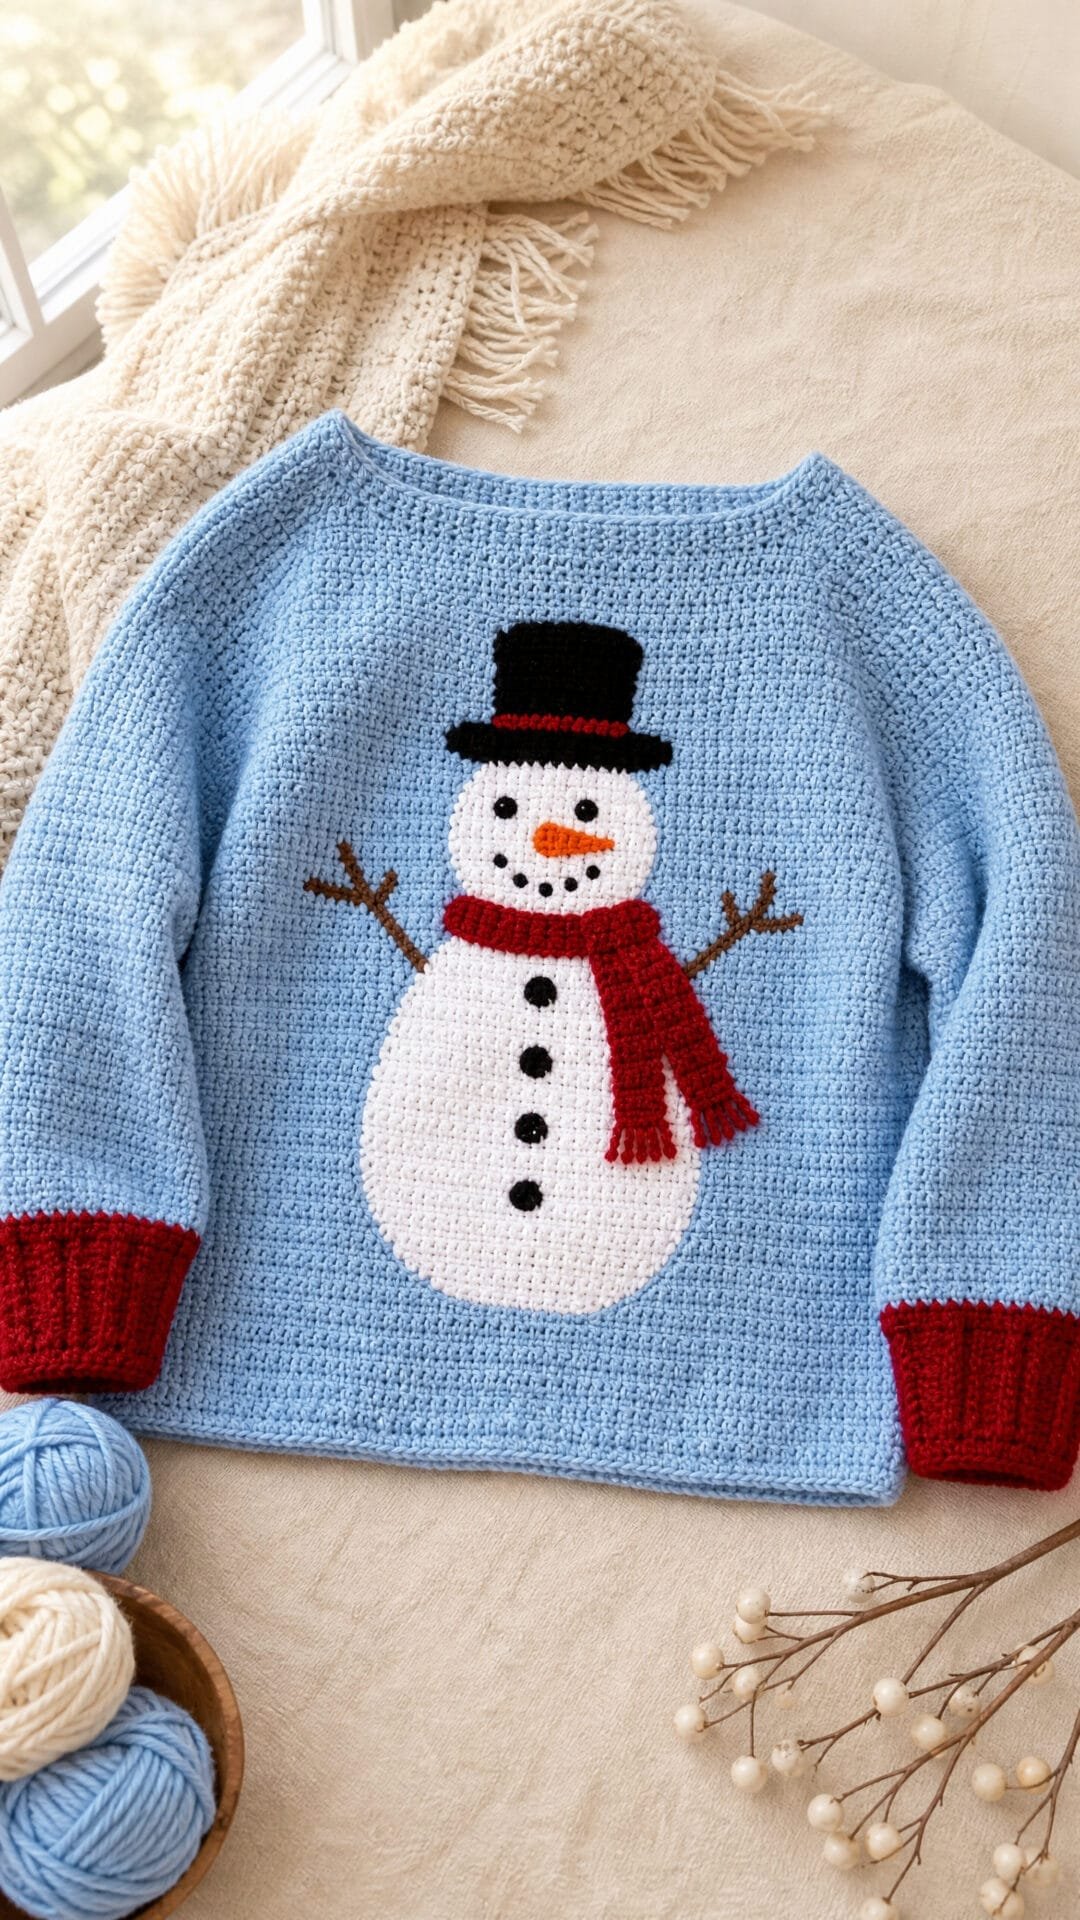
This crochet ugly Christmas sweater pattern puts the snowman centre stage against a sky-blue front. Its roomy body gives the motif space to read clearly, while the boat neck and red cuffs keep the look playful without adding bulky decorations.
The sleeves grow out from the body rather than being made as separate pieces. That broad, uninterrupted line creates a relaxed drape across the shoulders; a lightweight fabric helps it fall softly instead of standing away from the arms.
The snowman is worked flat into the front, with close-to-the-fabric details that are easier to wear under a coat or at a crowded Christmas gathering than dangling embellishments. It is a cheerful choice if you want an unmistakably festive sweater that still feels practical to put on.
Dolman-Sleeve Snowman Sweater

Quick-reference card. Follow the complete written instructions below.
Materials
- Sky-blue DK yarn: Allow approximately 700–900 m; buy enough of one dye lot for your chosen length and swatch.
- White DK yarn: Approximately 80 m for the snowman.
- Red DK yarn: Approximately 50 m for the cuffs and scarf detail.
- Small amounts of dark and orange yarn: For embroidered eyes, buttons and nose.
- Crochet hook: Start with 4 mm, then change size if needed to meet gauge.
- Notions: Yarn needle, stitch markers and tape measure.
Size and Fit
One sample size: 110 cm finished body chest, measured around the two 55 cm-wide body panels before the sleeves begin. Designed for a relaxed fit; compare 110 cm with a sweater you like to wear. Each panel is approximately 58 cm from hem to shoulder. At the widest point, each panel measures approximately 115 cm from sleeve tip to sleeve tip. The unseamed boat-neck opening is 30 cm wide. These dimensions are calculated from gauge, not from a tested sample.
Gauge
16 hdc and 12 rows = 10 cm in the main fabric after washing and drying a swatch as you intend to care for the sweater. Check both stitch and row gauge before starting: they determine the chest, sleeve reach and garment length.
Abbreviations
US crochet terms.
- ch = chain
- hdc = half double crochet
- sc = single crochet
- st(s) = stitch(es)
- RS = right side
- WS = wrong side
Pattern
- Construction and colourwork Make two flat panels from hem to shoulder. Rows 1–46 form the straight body; rows 47–54 add width alternately at the two edges to form the dolman sleeves. Rows 55–70 run straight across the full width. Work the snowman into the front panel only. For the colourwork, count stitch positions 1–88 across each body row from either edge: every white span is centred, so it reads the same in either working direction. Use a separate sky-blue yarn supply on each side of a white span and twist yarns together at each colour change. Do not carry sky-blue yarn across the white.
- Front: body rows 1–46 With sky-blue yarn, ch 89. Row 1: hdc in the second ch from the hook and in each remaining ch; 88 hdc. For rows 2–46, ch 1, turn, and hdc in each st; 88 hdc per row. Work the white stitches shown in the Snowman placement instruction on rows 12–43; all other stitches remain sky blue. After row 46, do not make the usual ch 1: begin the sleeve-extension method instead.
- Snowman placement on the front On rows 12–13, work positions 37–52 in white; rows 14–15, positions 33–56; rows 16–25, positions 29–60; rows 26–28, positions 33–56; rows 29–30, positions 39–50; rows 31–32, positions 36–53; rows 33–40, positions 35–54; rows 41–42, positions 37–52; and row 43, positions 40–49. All positions outside these spans are sky blue. Change colour during the final yarn-over of the stitch immediately before a new colour begins.
- Sleeve-extension method for both panels At the end of each row from row 46 through row 53, ch 13 and turn. On the next row, hdc in the second ch from the hook and in the next 11 chains, then hdc in every stitch of the preceding row. The 12 worked chains add 12 stitches at that edge. Because the work turns each row, successive extensions alternate sides. Do not work into the unused turning chain as an extra stitch.
- Front: rows 47–70 Work rows 47–54 in sky blue using the sleeve-extension method. The row totals are 100, 112, 124, 136, 148, 160, 172 and 184 hdc respectively. Do not add chains after row 54. For rows 55–70, ch 1, turn, and hdc across all 184 stitches. Fasten off.
- Back Make a second panel exactly as for the front, including all sleeve extensions, but use sky blue throughout; omit the snowman. Both panels end with 184 hdc on row 70.
- Flat snowman details Before assembly, embroider two small dark eyes and an orange nose on the white head. Add three dark buttons down the body and a short red scarf across the join between head and body. Secure every yarn end on the WS. Keep the embroidery close to the fabric rather than adding beads, pom-poms or hanging scarf ends.
- Seaming and neckline Place the panels with RS together and align their top rows. On each side, seam 68 stitches of row 70 from the sleeve tip towards the centre. Leave the central 48 stitches of each panel unseamed for the 30 cm boat-neck opening. Seam the matching lower edges from each hem up the straight body sides and along the stepped underside of each sleeve to its outer tip. Leave the short outer sleeve-tip edges open for the hands and forearms. The alternating extensions mirror when the panels are placed RS together; ease any one-row difference at a sleeve-tip corner into the seam. Turn RS out.
- Red cuffs At each sleeve opening, join red yarn at the underarm seam. Work one round of sc, placing one sc in each row-end along the front and back outer sleeve-tip edges: 33 sc around each opening. Join to the first sc. Work three more joined rounds of one sc in each sc, keeping 33 sc per round. Fasten off without pulling the opening tight.
Finishing
- Weave in all ends on the WS, taking particular care with the colour-change ends.
- Wash and dry as for the gauge swatch, then lay flat and check the 110 cm body chest and 30 cm neckline opening.
- If the neck edges curl, work a loose round of sky-blue sc around the opening without reducing its width.
Helpful Tips
- Mark the centre of the front panel before starting the snowman; its white spans are symmetrical around the centre.
- A lightweight, drapey DK yarn helps the broad dolman shoulder line fall softly rather than standing out stiffly.
- Check that your hand passes comfortably through a 33-sc cuff before fastening off; use a larger hook for the cuff rounds if necessary.
Saddle-Shoulder Holiday Lights Sweater

This crochet ugly Christmas sweater pattern gives festive lights a clear route across the upper chest and shoulders. Against the charcoal pullover, the colourful ovals stand out without covering the defined shoulder line.
The narrow shoulder saddles establish the distance from the neck towards each sleeve before the front and back take shape. Their length affects where the sleeves sit, so it is worth checking the shoulder placement and armhole fit before continuing with the rest of the garment. The sleeves attach around the openings formed by the panels and saddle ends, keeping that shoulder structure visible.
The lights are flat appliqués added after the sweater is assembled. Positioning them along a gently curving green cord gives the strand a continuous look, while leaving space between the shapes helps the shoulder fabric bend and the decorations lie flat.
Saddle-Shoulder Holiday Lights Sweater

Quick-reference card. Follow the complete written instructions below.
Materials
- Medium-weight yarn: Charcoal for the sweater, green for the light cord, and small amounts of several bright colours for the bulbs. Choose a smooth yarn that shows the pickup stitches clearly. Quantities depend on your gauge and chosen length.
- Crochet hook: A size that gives the stated half-double crochet gauge in charcoal yarn.
- Other: Stitch markers, tapestry needle, scissors and a measuring tape.
Size and Fit
One sample size: approximately 110 cm finished chest circumference, measured around the joined body below the armholes. The front and back are each 55 cm wide at the stated gauge. From the centre of a shoulder saddle to the hem is approximately 64 cm before any change from blocking. Each armhole opening is approximately 37.5 cm around; check that this and the finished chest give your intended fit before making both panels.
Gauge
16 half-double crochet stitches and 12 rows or rounds = 10 cm in charcoal yarn. Make and measure a washed swatch in the fabric you intend to use; adjust hook size to obtain gauge. At this gauge, pick up 27 stitches along each 20-row saddle edge and 24 stitches along each 18-row armhole edge.
Abbreviations
US crochet terms.
- ch = chain
- sc = single crochet
- hdc = half-double crochet
- hdc2tog = half-double crochet two stitches together; decreases one stitch
- sl st = slip stitch
- st(s) = stitch(es)
Pattern
- Working notes Turning chains do not count as stitches. Work panel rows in hdc, turning with ch 1. Work sleeves in joined, turned hdc rounds: join with a sl st to the first hdc, then ch 1 and turn before the next round. Place a marker at each sleeve’s underarm join. Use a mattress stitch through the outer loops for body seams so the stated panel widths are not substantially taken into the seams.
- Two shoulder saddles With charcoal, make two alike. Ch 13. Row 1: hdc in the second ch from the hook and in each remaining ch; turn. 12 hdc. Rows 2–20: ch 1, hdc in each st; turn. 12 hdc per row. Each saddle is approximately 7.5 cm wide from its front long edge to its back long edge, and 16.7 cm long from neck to sleeve. Mark the foundation-chain end as the neck end and row 20 as the sleeve end.
- Upper front Lay the saddles side by side with their neck ends facing one another and their sleeve ends pointing outward. Keep them untwisted. Work from the sleeve end towards the neck end along the front long edge of the first saddle: join charcoal and work 27 hdc evenly into its 20 row ends. Ch 34 for the front neck bridge. Work 27 hdc evenly into the front long edge of the second saddle, from neck end to sleeve end; turn. This is front Row 1: 27 hdc, 34 chains and 27 hdc, giving 88 positions for the next row. Row 2: ch 1, hdc in each of the 27 hdc, work 34 hdc into the individual neck-bridge chains, then hdc in the remaining 27 hdc; turn. 88 hdc. For each 20-row pickup, work one hdc into every row end and a second hdc into row ends 3, 6, 9, 12, 15, 18 and 20.
- Finish front Rows 3–72: ch 1, hdc in each of the 88 sts; turn. Fasten off after Row 72. Mark the side edges immediately below Row 18: Rows 1–18 remain open for the armholes, while Rows 19–72 form the side seams.
- Back Turn the work over. Using the free back long edges of the same two saddles, make the back exactly as for the front: pick up 27 hdc along one saddle, ch 34 between their neck ends, and pick up 27 hdc along the other. Work back Row 2 into all 88 positions, then continue through Row 72. Mark the side edges below Row 18. The two 34-chain bridges form the front and back of the neck opening; the short neck ends of the saddles form its sides.
- Join body With the wrong sides facing, mattress-stitch each front side edge to its corresponding back side edge from Row 72 up to the marker below Row 18. Do not sew Rows 1–18 or the outer short end of either saddle: these three edges together form each sleeve opening. Check that the joined body has 88 front and 88 back stitches around its lower edge.
- Sleeves Make two alike in charcoal. With the right side facing, join yarn at an underarm. Sleeve Round 1: work 24 hdc evenly into the 18 exposed front row ends up to the saddle, 12 hdc across the saddle’s outer short end, and 24 hdc evenly into the 18 exposed back row ends down to the underarm; join, ch 1 and turn. 60 hdc. For each 18-row pickup, work one hdc in every row end and an extra hdc in row ends 3, 6, 9, 12, 15 and 18. Rounds 2–48: work hdc around, join, ch 1 and turn, except on Rounds 4, 8, 12 and every fourth round through Round 48. On each decrease round, work hdc2tog over the first two sts after the underarm marker and hdc2tog over the last two sts before the marker; work hdc in all other sts. There are 12 decrease rounds and 36 sts after Round 48. Fasten off. At the stated round gauge, the sleeve measures approximately 40 cm from underarm to wrist.
- Neck edging With charcoal and the right side facing, join yarn at a saddle neck end. Work 34 sc along the exposed edge of the front neck bridge, 12 sc across one saddle’s neck end, 34 sc along the back bridge and 12 sc across the other saddle’s neck end; join. 92 sc. Work one further round of 92 sc and join. Fasten off. Keep the edging loose enough to pass comfortably over the head; check the opening before weaving in the ends.
- Flat light bulbs Make 12 bulbs in assorted bright colours. For each, ch 7. Working around both sides of the chain, work 2 sc in the second ch from the hook, sc in each of the next 4 ch, 3 sc in the last ch, sc in each of the next 4 unused loops on the opposite side, then 1 sc in the same chain that holds the first 2 sc. Join with a sl st to the first sc; 14 sc. Fasten off, leaving a tail for sewing. Ease each small oval flat with your fingers; do not stuff or add raised edging.
Finishing
- Weave in structural ends and lay the sweater flat. With green yarn, surface-slip-stitch or embroider a gently curving cord across the upper front, roughly six panel rows below the saddles. Continue the cord out over both shoulder saddles so the lights read as one strand across the chest and shoulders. Keep the surface stitches loose enough for the fabric to stretch.
- Arrange eight bulbs across the upper front and two on each shoulder saddle, spacing them along the green cord and keeping them clear of the neck edging. Sew around each bulb’s edge with its yarn tail, catching the sweater fabric lightly so the oval stays flat. Weave the tails in on the inside.
- Check the side seams, sleeve joins and neck opening, then block gently to the intended dimensions without stretching the appliqués.
Helpful Tips
- Mark the neck and sleeve ends of both saddles before picking up stitches; reversing one saddle will twist the shoulder line.
- Count the 27-stitch saddle pickups and 24-stitch armhole pickups as you work. Even spacing matters more than forcing several stitches into one row end.
- Pin the bulbs in place and try on the sweater before sewing them down. Leave small gaps between ovals so the shoulder fabric can bend.
- If your washed swatch does not meet gauge, change hook size rather than relying on the listed stitch counts to produce the stated chest measurement.
Filet Christmas Tree Layering Sweater

This crochet ugly Christmas sweater pattern uses the contrast between open mesh and filled blocks to reveal a Christmas tree on the front. The design feels festive without relying on colour changes or added decorations, and the openwork gives the tree a clear outline over a plain top.
Think of this as a light layering piece rather than a warm winter jumper. Its loose shape suits a Christmas gathering indoors, while the mesh makes what you wear underneath part of the look. A simple, high-contrast layer will help the tree stand out.
Filet crochet rewards careful attention to the placement of each block, especially where the tree narrows. It is a satisfying choice if you enjoy a graphic motif and want a Christmas sweater that feels playful without being heavily embellished.
Filet Christmas Tree Layering Sweater
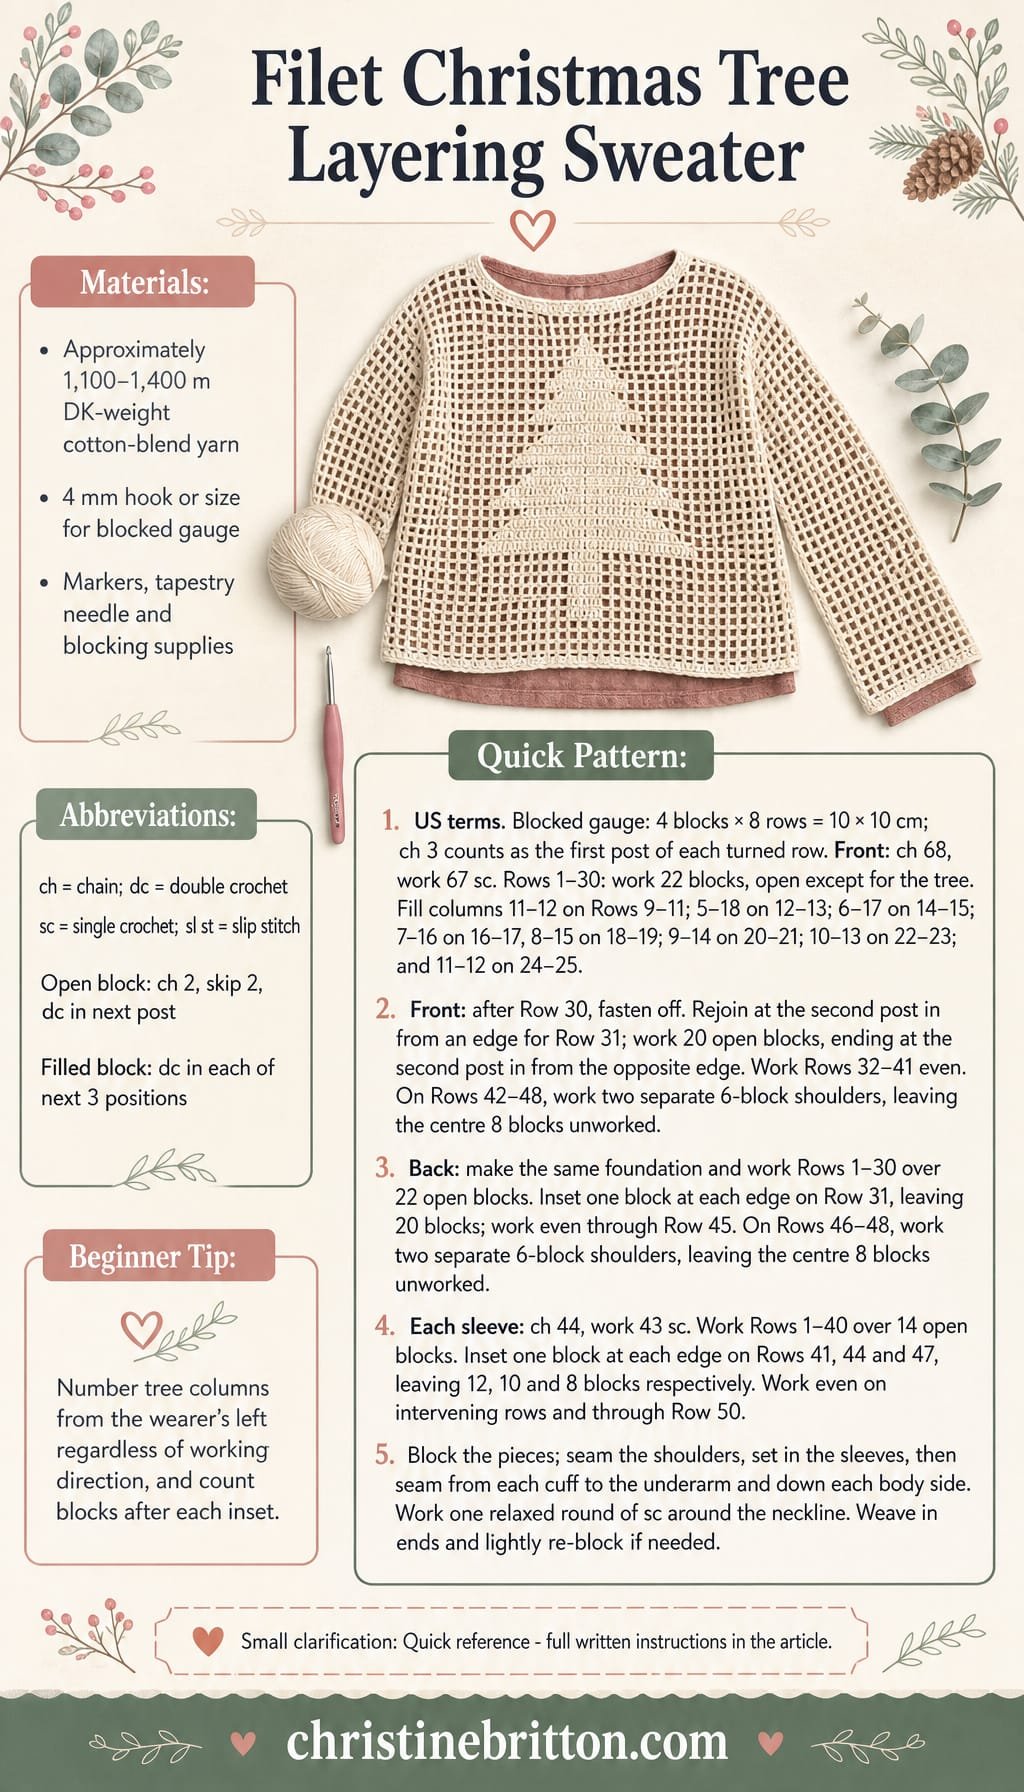
Quick-reference card. Follow the complete written instructions below.
Materials
- DK-weight cotton-blend yarn: A firm, lightweight blend in forest green; allow approximately 1,100–1,400 m. Check yardage against your blocked swatch.
- Crochet hook: 4 mm, or the size needed to achieve the blocked gauge
- Other: Stitch markers, tapestry needle, tape measure and blocking supplies
Size and Fit
One sample size: approximately 110 cm finished chest, 60 cm body length and 50 cm sleeve length from cuff to underarm, excluding the sleeve cap. Each blocked body panel is 22 filet blocks, or 55 cm, wide below the armholes. The fit is deliberately loose for layering. The straight sleeves measure approximately 35 cm around before seaming and have loose, unshaped cuffs.
Gauge
After blocking, 4 filet blocks and 8 mesh rows = 10 cm in each direction. One block is approximately 2.5 cm wide and one row approximately 1.25 cm high. Make and block a mesh swatch before starting; panel and sleeve dimensions depend on this gauge.
Abbreviations
US crochet terms.
- ch = chain
- dc = double crochet
- sc = single crochet
- sl st = slip stitch
- st = stitch
Pattern
- Filet method An open block is ch 2, skip the next 2 stitches or chains, dc in the next post. A filled block is dc in each of the next 3 positions: work into both individual chains if they belong to an open block on the previous row. Each row begins with ch 3, which counts as the first dc post. Turn at the end of every row. Each block runs from one dc post to the next; a row of 22 blocks has 23 posts. When following the tree placement, number columns 1–22 from the wearer’s left to right, regardless of which way you are working.
- Front foundation and lower panel Ch 68. Sc in the second ch from the hook and in each remaining ch: 67 sc. Row 1: ch 3, turn; work 22 open blocks across, using the first sc as the starting post and ending in the last sc. Continue for 22 blocks on every row through Row 30. Work open blocks except where the tree placement calls for filled blocks.
- Front tree placement On Rows 9–11, fill columns 11–12 for the trunk. For the branches, fill columns 5–18 on Rows 12–13; 6–17 on Rows 14–15; 7–16 on Rows 16–17; 8–15 on Rows 18–19; 9–14 on Rows 20–21; 10–13 on Rows 22–23; and 11–12 on Rows 24–25. Keep all other blocks open. The tree widens downwards towards its trunk.
- Front armholes After Row 30, fasten off. For Row 31, join yarn to the second post in from either side of Row 30. Ch 3 and work 20 open blocks across, ending at the second post in from the opposite side. This leaves one whole block unworked at each armhole edge. Work Rows 32–41 even over these 20 blocks.
- Front neck and shoulders Rows 42–48 are worked as two separate 6-block shoulders, leaving the centre 8 blocks unworked. For the first shoulder, work Row 42 over blocks 1–6 of Row 41, then turn and work even through Row 48. For the second shoulder, join yarn at the post between blocks 14 and 15 of Row 41; work Row 42 over blocks 15–20, then work even through Row 48. Fasten off each shoulder.
- Back Make the foundation and Rows 1–30 exactly as for the front, but keep every block open. Shape the armholes on Row 31 as for the front, then work even over 20 blocks through Row 45. Work Rows 46–48 as two separate 6-block shoulders, leaving the centre 8 blocks unworked. Fasten off.
- Sleeves: make two Ch 44. Sc in the second ch from the hook and in each remaining ch: 43 sc. Work Rows 1–40 over 14 open blocks, using the filet method above. The straight section measures approximately 50 cm from cuff to underarm at the stated gauge.
- Sleeve caps After sleeve Row 40, fasten off. For Row 41, join yarn at the second post in from either side, ch 3 and work 12 open blocks, ending at the second post in from the opposite side. Work Rows 42–43 even. After Row 43, fasten off and repeat the same one-block inset at each edge on Row 44, leaving 10 blocks; work Rows 45–46 even. Repeat the inset on Row 47, leaving 8 blocks; work Rows 48–50 even. Fasten off. Make the second sleeve to match.
- Assembly Block the pieces to the gauge-based dimensions without overstretching the mesh. Seam the 6-block shoulders. With right sides facing, centre each sleeve-cap top along its armhole opening and pin the remaining cap edges to the front and back armhole edges, matching the underarm corners. Sew in the sleeves, easing the mesh gently where needed. Seam from each cuff to the underarm, then down each body side to the hem.
- Neckline edging Join yarn at a shoulder seam. Work one compact round of sc evenly around the front and back neck openings, placing stitches into the exposed posts and row ends rather than pulling across the open mesh. Join with a sl st and fasten off. Keep the edging relaxed enough for the neck to pass comfortably over the head.
Finishing
- Weave in all ends securely, especially at the inset armholes and sleeve caps.
- Lightly re-block the seams and neckline if needed; let the sweater dry flat.
Helpful Tips
- Mark the tree’s centre between columns 11 and 12 before working Row 9.
- Check the block count after every inset row. An inset removes one complete block at each edge, not merely a chain space.
- Pin the sleeve caps before sewing. Their stepped edges should be eased into the armholes without gathering.
Mosaic Fair-Isle-Look Pullover
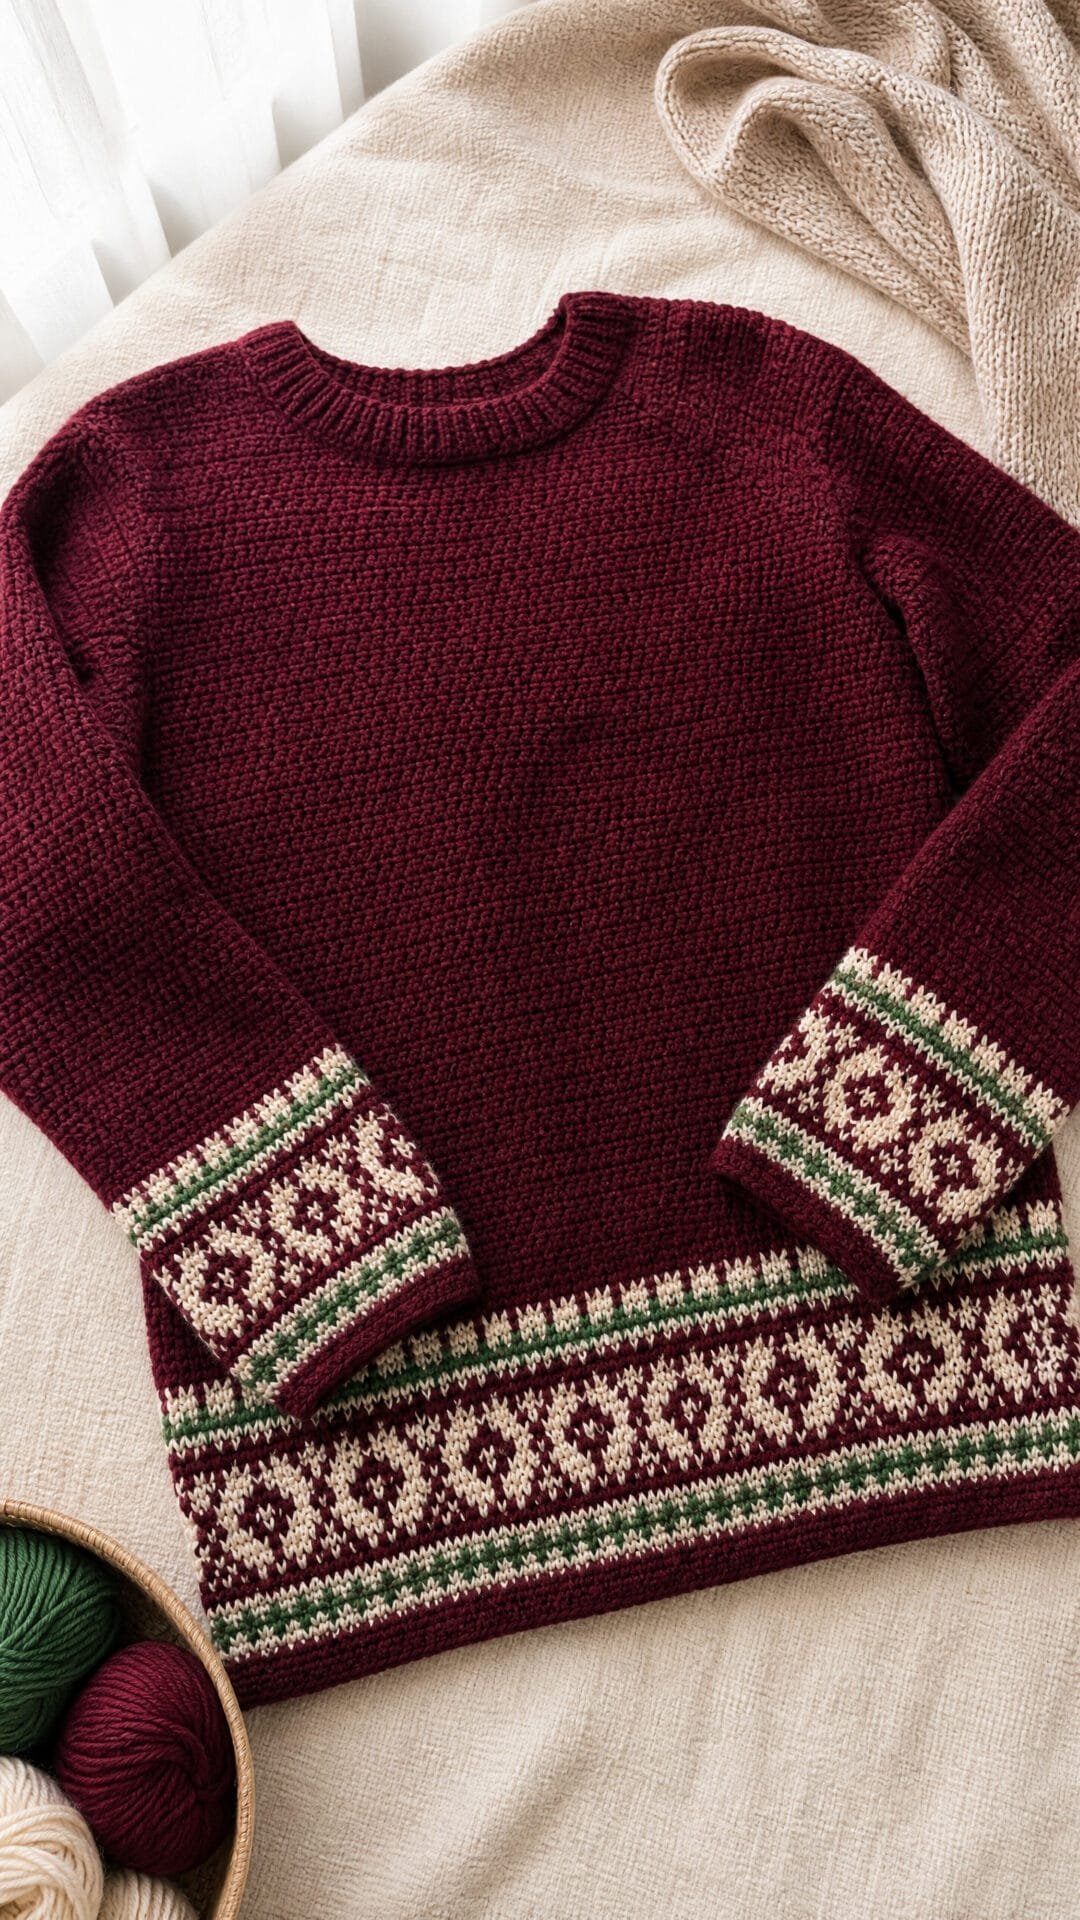
This burgundy pullover puts its festive fussiness at the hem and cuffs, where cream-and-green geometric bands suggest parcels and star-like shapes. The rest of the jumper stays plain, giving the deliberately busy pattern room to stand out.
Overlay mosaic crochet creates the colourwork with just one working colour per round. Its raised stitches produce a thicker, less stretchy fabric than the plain sections, so a band that looks right laid flat may feel different when worn.
Plan the body circumference around complete motif repeats rather than stopping a design partway round. A washed swatch of both fabrics will help you judge how the patterned bands and plain sections sit together before you commit to the pullover.
Mosaic Fair-Isle-Look Pullover

Quick-reference card. Follow the complete written instructions below.
Materials
- Smooth sport-weight yarn: Burgundy main colour, approximately 1,400–1,700 m; cream and green contrast colours, approximately 100 m each. Allow extra yarn if adjusting length.
- Crochet hooks: Start with a 4 mm hook for the mosaic bands. Have adjacent sizes available to obtain gauge, including for the plain sections.
- Notions: Stitch markers, yarn needle, tape measure and blocking supplies.
Size and Fit
One sample size: approximately 110 cm finished chest, 60 cm shoulder-to-hem length and 45 cm sleeve length, at the stated washed gauge. The body has 240 stitches around: twenty complete 12-stitch motif repeats. Choose this size with the ease you prefer; do not cut a motif repeat short to change the chest measurement.
Gauge
Target washed gauge in joined, unturned rounds: 24 stitches across 11 cm and 24 rounds across 10 cm, measured away from the join. Swatch the mosaic band and the burgundy back-loop-only fabric. Change hook size for the plain fabric if needed so its stitch and row gauges match the targets; the denser mosaic fabric may need a different hook. At this gauge, 240 stitches measure approximately 110 cm around.
Abbreviations
US crochet terms.
- ch = chain
- sc = single crochet
- dc = double crochet
- BLO = back loop only
- FLO = front loop only
- sl st = slip stitch
- st(s) = stitch(es)
Pattern
- Mosaic method Work joined rounds without turning. Number the stitches within each 12-stitch repeat from 1 to 12. Unless a round specifies otherwise, work sc BLO in every stitch. At a listed mosaic position, work a dc into the unused FLO of the stitch in the same column two rounds below, passing in front of the intervening stitch; skip that intervening stitch. The dc replaces one sc, so the stitch count stays unchanged. Join each round with a sl st to its first working stitch. Starting chains do not count as stitches. Use a standing dc when a round begins with a mosaic dc.
- Fourteen-round band Apply these rounds to both the body and sleeves. Rounds 1–2: burgundy sc BLO. Round 3: cream mosaic dc at positions 3 and 10 of each repeat; sc BLO elsewhere. Round 4: burgundy sc BLO. Round 5: green mosaic dc at positions 2, 4, 9 and 11. Round 6: burgundy sc BLO. Round 7: cream mosaic dc at positions 1, 5, 7 and 12. Round 8: burgundy sc BLO. Round 9: green mosaic dc at positions 2, 4, 9 and 11. Round 10: burgundy sc BLO. Round 11: cream mosaic dc at positions 3 and 10. Round 12: burgundy sc BLO. Round 13: green mosaic dc at positions 2, 4, 9 and 11. Round 14: burgundy sc BLO. Work sc BLO in every unlisted position. Bring the resting colour up discreetly at the round join rather than carrying it across the fabric; fasten off the contrast colours after their final rounds.
- Body tube With burgundy, ch 240 and sl st into a ring without twisting. Work band rounds 1–14 over 240 stitches, repeating the 12-stitch positions twenty times around. Continue in burgundy sc BLO for rounds 15–96, maintaining 240 stitches. The tube measures approximately 40 cm from the hem at the stated row gauge. Mark the round join as one side and the point 120 stitches away as the other side.
- Front and back, lower armholes Work the two halves separately, turning after each row. For front rows 97–128, work burgundy sc BLO across the 120 stitches between the side markers; ch 1 and turn at each row end. Join yarn to the remaining 120 stitches and work back rows 97–140 in the same way. Keep 120 stitches in every row. The front’s lower armhole section is 32 rows deep; the back’s is 44 rows deep.
- Front neckline and shoulders At front row 129, divide the 120 stitches into 36 shoulder stitches, 48 centre neck stitches and 36 shoulder stitches. Leave the centre 48 unworked. Work each set of 36 shoulder stitches separately in burgundy sc BLO through row 144, turning after every row. Each front shoulder is 16 rows above the neck division and remains 36 stitches wide.
- Back neckline and shoulders At back row 141, divide the 120 stitches into 36 shoulder stitches, 48 centre neck stitches and 36 shoulder stitches. Leave the centre 48 unworked. Work each set of 36 shoulder stitches separately in burgundy sc BLO through row 144. Seam each 36-stitch back shoulder to its matching front shoulder. Each armhole remains open for 48 row edges on the front and 48 on the back.
- Sleeves, make two With burgundy, ch 48 and join without twisting. Work band rounds 1–14 over four complete 12-stitch repeats. Work all subsequent rounds in burgundy sc BLO. On round 18, increase by working 2 sc BLO in each of two stitches placed opposite one another; work 1 sc BLO in every other stitch. Repeat these two increases on rounds 22, 26, 30 and every fourth round through round 94: twenty increase rounds in total. Place later increases close to the same two marked lines. Work even through round 108. The sleeve has 88 stitches at its top and measures approximately 45 cm long at the stated row gauge.
- Attach sleeves With right sides together, pin each sleeve top to an armhole, aligning one sleeve increase line with the underarm and the opposite line with the shoulder seam. Sew the 88 sleeve-top stitches evenly to the 96 armhole row edges, easing eight additional row edges across the seam without gathering. Repeat for the second sleeve.
- Neck edging With burgundy, join yarn at a shoulder seam. Work one round of sc around the neck: one sc in each of the 48 unworked front-neck stitches and 48 back-neck stitches, and approximately one sc in each row edge along the front and back neck sides. Join and fasten off. Adjust the spacing at corners if necessary so the edging lies flat.
Finishing
- Weave in ends, paying particular attention to colour changes at the band joins.
- Wash according to the yarn label and lay flat to dry to the intended measurements. Avoid stretching the thicker mosaic bands.
Helpful Tips
- Make a joined-round swatch large enough to measure away from its seam; a flat, turned swatch will not accurately represent these bands.
- Keep the overlay dc loose enough to reach the FLO two rounds below without pulling the band inward.
- Mark the first stitch of every 12-stitch repeat. The body needs twenty repeats and each cuff needs four.
Four-Corner Square-Yoke Sweater

This crochet Christmas sweater puts clashing red, lime and pink granny-stitch colour around the neckline, while the cream body and sleeves give the bold yoke room to shine. Its square shape is the design feature: one edge sits across the front, one across the back, and the other two extend over the shoulders.
The corners make the yoke wider as it grows deeper, so its shape matters as much as its appearance. Before the body and sleeves are divided, check that the shoulder edges sit comfortably and the yoke reaches the underarm without pulling. Continuing the colourful yoke for extra depth also adds width to every edge; it is not a way to lengthen the shoulders alone.
The neckline needs to pass comfortably over the head, but it need not be made wider to achieve the intended relaxed chest. Swatching both the granny-stitch and plain fabrics helps you judge how they will sit together before committing to the sweater.
Four-Corner Square-Yoke Christmas Sweater

Quick-reference card. Follow the complete written instructions below.
Materials
- Yarn: Soft medium-weight yarn in cream, red, lime and pink. Allow approximately 1,300–1,600 m in total, with cream as the main colour. Buy enough of one dye lot for the cream sections.
- Hook: 5 mm crochet hook, or the size needed to obtain gauge
- Notions: Four removable stitch markers, tapestry needle and tape measure
Size and Fit
One relaxed adult sample size: approximately 110 cm finished chest. The neckline begins with 112 chains, approximately 56 cm at the stated stitch gauge. The 17-round yoke is approximately 21 cm deep. Each front and back edge measures approximately 46 cm; a 9 cm underarm bridge brings each half of the body to approximately 55 cm. The body is approximately 58 cm long from neckline to hem. Sleeves are deliberately roomy at the top and taper to a narrower cuff. Check that the foundation chain passes comfortably over the wearer’s head before joining it; adjust hook size or choose a stretchier yarn if needed rather than adding unplanned width to the neckline.
Gauge
20 dc and 8 rounds = 10 cm in plain dc worked in joined rounds. On the yoke, approximately 5 granny clusters and 8 rounds = 10 cm. Make and wash swatches in both fabrics before starting. Measurements are planning targets, not a claim of tested fit.
Abbreviations
US crochet terms.
- ch = chain
- sl st = slip stitch
- sc = single crochet
- dc = double crochet
- dc2tog = double crochet two stitches together
- BLO = back loop only
- st(s) = stitch(es)
Pattern
- Before you start A granny cluster is 3 dc worked into one space. Joining sl sts and turning chains do not count as stitches. Join each round without turning. The four ch-2 corner spaces divide the yoke into equal edges; mark them and move the markers up each round. Make the foundation chain loosely, checking that it will pass over the wearer’s head.
- Yoke round 1 With red, ch 112 and sl st to the first ch without twisting. Treat the ring as four consecutive sections of 28 chains. In each section, work 3 dc in its first chain, then [ch 1, skip 3 chains, 3 dc in the next chain] 6 times; skip the remaining 3 chains of that section and ch 2 for the corner. Repeat for all four sections and sl st to the first dc. Mark each corner ch-2 space. There are 7 clusters and 6 ch-1 spaces along each edge, or 28 clusters in total.
- Yoke rounds 2–17 Fasten off after every round and join the next colour in any marked corner space, cycling lime, pink, red throughout rounds 2–17. In the starting corner work (3 dc, ch 2, 3 dc). Along the next edge, ch 1, work 3 dc in each ch-1 space, placing ch 1 between successive clusters, then ch 1 before working (3 dc, ch 2, 3 dc) in the next corner. Continue in this way around the remaining edges and corners; after the final edge, ch 1 and sl st to the first dc. Each new round adds one cluster to each edge. Round 17 has 23 clusters and 22 ch-1 spaces per edge. Fasten off.
- Check yoke and identify sections Lay the square yoke flat with one edge at the front neckline. The opposite edge is the back; the two remaining edges sit over the shoulders and become sleeve tops. Check the yoke depth, front width and armhole room before dividing. Stop increasing only when the yoke reaches the underarm comfortably: for this sample, that is round 17. The following split counts apply specifically to a 17-round yoke.
- Body split and round 1 Join cream in a front corner ch-2 space. Work 1 dc in that corner space, 1 dc in each of the 69 dc and 22 ch-1 spaces along the front edge, and 1 dc in the next corner space: 93 dc across the front. Ch 17 for the underarm and skip the entire adjoining sleeve edge. Work 1 dc in the next corner space, 1 dc in each dc and ch-1 space along the back edge, and 1 dc in its final corner space: 93 dc across the back. Ch 17 for the second underarm, skip the other sleeve edge and sl st to the first dc. Each corner space used for the body remains available for one sleeve stitch later. The body has 186 dc and two 17-chain underarms.
- Body rounds 2–28 Ch 2 and work 1 dc in each dc and each underarm chain on round 2; join. Work rounds 3–28 with 1 dc in every stitch, joining each round. Keep the start of the round at the underarm. From round 2 onwards there are 220 dc per round.
- Body hem Work 3 joined rounds of sc BLO, making 1 sc in each stitch. The first hem round is worked into the back loops of the last dc round. Fasten off.
- Sleeve round 1 With cream, join at one end of an underarm bridge. Work 1 dc in each of its 17 chains, then 1 dc in the adjacent corner ch-2 space, 1 dc in each of the 69 dc and 22 ch-1 spaces along the skipped sleeve edge, and 1 dc in its final corner ch-2 space. Join to the first dc. There are 110 dc. Repeat for the second sleeve. If a small gap appears beside a corner, close it when weaving in the yarn end rather than adding an uncounted stitch.
- Sleeve shaping, rounds 2–35 On each sleeve, rounds 2–31: ch 2, dc2tog over the first 2 stitches, dc in every stitch until 2 remain, dc2tog over the final 2 stitches, then join. Each round decreases by 2 stitches, taking 110 stitches to 50. Rounds 32–35: ch 2, dc in each of the 50 stitches and join.
- Sleeve cuffs Cuff round 1: [sc in the next 3 stitches, sc2tog over the next 2 stitches] 10 times; join. There are 40 sc. Work 2 more joined rounds of 1 sc BLO in each stitch. Fasten off and repeat on the second cuff.
Finishing
- Weave in all ends securely, especially at colour changes and underarms.
- Close any small underarm corner gaps with the yarn tails without pulling the fabric tight.
- Wash according to the yarn label and lay flat to dry, shaping the square neckline and yoke corners.
Helpful Tips
- The square yoke grows across the shoulders as well as downwards. Measure its depth and check armhole room before dividing; extra yoke rounds also increase sleeve and body widths.
- Do not substitute a tighter foundation chain to control the neckline: the sweater still needs to pass over the head.
- Keep the colourful rounds confined to the yoke if you want the cream body and sleeves to provide a visual break.
Patchwork Advent Cardigan

This open-front cardigan takes its cue from an Advent calendar: uneven red, green, gold and cream rectangles give it a cheerful patchwork look without requiring lettering or intricate picture motifs. Optional flat stars and small geometric marks add festive detail while keeping the blocks easy to recognise.
The design mixes plain and subtly textured crochet, so colour placement does much of the visual work. Before joining, it helps to view the blocked pieces together and check that the brighter colours and decorated blocks feel balanced across the back and both fronts.
Because the rectangles meet edge to edge, the seams can lie flatter than overlapping patchwork joins. Paying attention to the finished dimensions of textured pieces is particularly worthwhile here: a consistent fit between neighbouring blocks helps the cardigan hang smoothly.
Patchwork Advent Cardigan

Quick-reference card. Follow the complete written instructions below.
Materials
- Medium-weight yarn: Approximately 1,100–1,400 m total in red, green, gold and cream. Allow extra cream for the front band and motifs.
- Crochet hook: Size needed to obtain gauge; 5 mm is a starting point.
- Tapestry needle, stitch markers and tape measure: For blocking, marking the armholes and sewing flat seams.
Size and Fit
One sample size. Approximately 110 cm around the chest when the front bands meet, 60 cm from hem to shoulder, with 50 cm sleeves. The body panels measure 105 cm around before the two 2.5 cm-wide front bands are added. Compare the 110 cm finished chest with your preferred cardigan measurement; no other size is specified.
Gauge
16 hdc stitches and 12 rows = 10 cm in blocked plain hdc. A 21-stitch tile should measure 13.125 cm wide; a 42-stitch tile, 26.25 cm. Block 12-row tiles to 10 cm high and 24-row tiles to 20 cm high. Check the dimensions of textured tiles as well as plain ones before assembly.
Abbreviations
US crochet terms.
- ch = chain
- sc = single crochet
- hdc = half double crochet
- dc = double crochet
- sl st = slip stitch
- BLO = back loop only
- RS/WS = right side/wrong side
Pattern
- Make the rectangles Make each tile separately. For a 21-stitch tile, ch 22; for a 42-stitch tile, ch 43. Row 1: hdc in the second ch from the hook and in each remaining ch. Ch 1 and turn; the turning ch never counts as a stitch. Work hdc across each subsequent row until the tile has 12 or 24 rows, as specified in the layouts below. For texture on selected tiles, work rows 2 onward in hdc BLO instead; keep each tile’s stated stitch and row count. Fasten off and block every tile to its gauge dimensions.
- Back layout Arrange the back in four horizontal bands, listed left to right as viewed from the RS. Band 1: one 42-stitch × 24-row red tile, then two 21-stitch × 24-row tiles in green and cream. Band 2: one 21-stitch × 12-row gold tile, one 42-stitch × 12-row green tile, then one 21-stitch × 12-row red tile. Band 3: two 21-stitch × 24-row tiles in cream and gold, then one 42-stitch × 24-row red tile. Band 4: two 42-stitch × 12-row tiles in green and cream. Each band is 84 stitches, or 52.5 cm, wide; the four bands total 72 rows, or 60 cm, high.
- Front layouts Each front is 42 stitches (26.25 cm) wide and 72 rows (60 cm) high. For the left front, arrange successive bands from hem to shoulder: two 21-stitch × 24-row tiles in cream and red; one 42-stitch × 12-row gold tile; one 42-stitch × 24-row green tile; two 21-stitch × 12-row tiles in red and cream. For the right front: one 42-stitch × 24-row green tile; two 21-stitch × 12-row tiles in gold and red; two 21-stitch × 24-row tiles in cream and green; one 42-stitch × 12-row red tile. The layouts are uneven, but both fronts finish at the same dimensions.
- Join the patchwork With RS facing, place neighbouring blocked tiles edge to edge. Sew their matching edges with small mattress stitches, catching one edge loop at a time rather than overlapping the fabric. Join tiles within each horizontal band first, then join the bands. Keep the 21- and 42-stitch edges aligned at their shared boundaries; ease only minor blocking differences. Weave ends into the WS instead of knotting them at seam intersections.
- Join shoulders and sides At each shoulder, sew the outer 26 stitches of a front’s top edge to the outer 26 stitches of the back’s top edge. This leaves 32 back stitches (20 cm) and the inner 16 stitches (10 cm) of each front unsewn for a square neckline. Sew each side from the hem upwards for 48 rows (40 cm). Leave the upper 24 rows (20 cm) of both the front and back open at each side for an armhole.
- Sleeves Make two, worked from cuff to upper arm in plain hdc. Ch 33. Row 1: hdc in the second ch and across (32 stitches). Ch 1 and turn after every row. On rows 2, 4, 8, 12, 16, 20, 24, 28, 32, 36, 40, 44, 48, 52, 56 and 60, work 2 hdc in the first stitch and 2 hdc in the last stitch, working 1 hdc in every stitch between. On all other rows, work 1 hdc in every stitch. After row 60 there are 64 stitches across the upper edge. Block each sleeve to 50 cm long, 20 cm around at the cuff and 40 cm around at the upper edge. Fold lengthwise with RS together and sew the long sleeve seam; turn RS out.
- Attach sleeves With the cardigan WS out and each sleeve RS out, insert a sleeve into an armhole so their RS face. Match the sleeve seam to the underarm seam and the centre of its 64-stitch upper edge to the shoulder seam. Sew the upper edge evenly around the armhole: its 40 cm length matches the two 20 cm body edges. Repeat for the other sleeve, then turn the cardigan RS out.
- Continuous front and neck band Make one uninterrupted strip in cream. Ch 5; hdc in the second ch and across (4 stitches). Ch 1, turn and work 4 hdc per row for a total of 192 rows. Block the strip to approximately 2.5 cm wide and 160 cm long. Starting at one hem, sew one long edge of the strip, edge to edge, up the 60 cm front opening, across that front’s 10 cm unsewn top edge, across the 20 cm back neck, across the other 10 cm unsewn front top edge and down the second 60 cm opening. The path totals 160 cm. Turn the strip neatly at the square neckline corners, folding and securing a small mitre on the WS if needed. Do not stretch the strip or overlap it with the body.
- Optional flat stars and geometric marks For each small star, make an adjustable ring and work 10 sc into it; close the ring. Repeat five times: sl st in the next sc, ch 4, sc in the second ch from the hook, hdc in the next ch, dc in the next ch, then sl st in the next sc. Fasten off and sew stars flat to selected tiles, away from seams. To suggest calendar numbers without making lettering, stitch groups of one, two or three short, parallel cream bars onto a few other tiles. Keep all decorative yarn ends on the WS.
Finishing
- Weave in remaining ends without drawing the tile seams tight.
- Lightly block the assembled cardigan to its stated dimensions, keeping the front bands level at the hem.
- Leave the fronts open, or close them with a removable pin; the 110 cm chest measurement assumes the band edges meet without overlapping.
Helpful Tips
- Use hdc BLO on only some tiles for quiet texture. If a textured tile will not block to the same dimensions as a plain tile, remake it with adjusted tension or use plain hdc instead.
- Mattress-stitch tiles edge to edge. Sewing one tile on top of another creates the bulky ridges this layout is designed to avoid.
- Lay out all bands before sewing so the colours and optional motifs are balanced across the fronts and back.
Short-Row Peppermint Swirl Sweater

A bold peppermint swirl makes this cream pullover a Christmas jumper with plenty of character. Alternating red and white short-row wedges form a circular inset on the front, while the rest of the sweater stays deliberately simple so the motif takes centre stage.
A short-row disc depends on more than the gauge of a flat piece of fabric. Stitch width affects the distance from its centre to its edge, while row height affects how the wedges spread around the outside. Check the diameter and flatness of the complete disc after blocking rather than relying on a single wedge to predict the result.
The cream front is built around a shaped opening, leaving straight outer edges for the body. That surrounding fabric helps the pullover hang evenly instead of asking the swirl to support the front’s shape; if the disc cups or ripples, adjust its gauge before incorporating it into the panel.
Short-Row Peppermint Swirl Sweater

Quick-reference card. Follow the complete written instructions below.
Materials
- Smooth medium-weight yarn: Cream for the body and most of the sleeves, plus red and white for the disc and red for the cuffs. Obtain enough of each colour for your gauge and chosen length; yarn quantities have not been measured.
- Crochet hook: A size that gives the stated single-crochet gauge; use a different size for the disc if needed to meet its blocked diameter.
- Other supplies: Stitch markers, tape measure, yarn needle, scissors and blocking supplies.
Size and Fit
One sample size: 110 cm finished chest, approximately 62 cm body length and 54 cm sleeve length from cuff to shoulder. Front and back are each 55 cm wide. The straight body is intended to have ease over the wearer’s chest; compare 110 cm with a well-fitting jumper before starting. Armhole depth is 20 cm on each body edge.
Gauge
20 sc and 30 rows = 10 cm in blocked cream fabric. The disc also needs a blocked diameter of approximately 20 cm. Its diameter depends on both stitch width along each radial wedge and row height around the outside: matching the flat row gauge alone does not establish the disc size. Make and block a complete sample disc before working the front. Change hook size or yarn tension and remake it if necessary; do not force an oversized disc into the opening.
Abbreviations
US crochet terms.
- ch = chain
- sc = single crochet
- sc2tog = single crochet two stitches together
- st(s) = stitch(es)
- RS = right side
Pattern
- Before you begin Turning chains do not count as stitches. Work into both loops unless instructed otherwise. Number body rows from the lower edge. The opening instructions give the number of stitches to leave open on each side of its centre line; work the two cream side sections separately while the opening is present.
- Peppermint wedge: make 10 Make five red and five white wedges. With the chosen colour, ch 21. Row 1: sc in second ch from hook and in each remaining ch; 20 sc. Mark the end of Row 1 as the OUTER end. Fasten off and rejoin the same colour at the outer end, ready to work towards the centre. Rows 2–3: work 18 sc from the outer end towards the centre, turn, then work 18 sc back to the outer end. Rows 4–5: work 16 sc towards the centre, turn, then 16 sc back. Continue in two-row pairs, working 14, 12, 10, 8, 6, 4 and finally 2 sc per row. There are 19 rows in all. Fasten off, leaving a long tail. The first row is one radial edge; the stepped edge formed by the short rows is the other.
- Join and block the disc Arrange the wedges red, white, red, white around a common centre, with all marked outer ends at the perimeter. Pin them on a flat surface before sewing. Sew each stepped edge to the next wedge’s first-row edge, distributing the stepped edge evenly rather than matching stitches one for one. Bring the ten narrow tips together and secure them without pulling them into a knot. Sew the last wedge to the first. Block the disc flat and measure across its centre in several directions. Proceed with the stated front counts only when the blocked disc is approximately 20 cm across and lies flat.
- Back With cream, ch 111. Row 1: sc in second ch from hook and across; 110 sc. Rows 2–180: ch 1, turn, sc across; 110 sc. For the shallow back neck, work Rows 181–186 on the first 33 sts only. Join yarn to the last 33 sts of Row 180 and work six matching rows for the other shoulder. Leave the centre 44 sts unworked.
- Front: lower panel With cream, ch 111. Work Rows 1–63 as for the back; 110 sc per row. Mark the centre between stitches 55 and 56. Rows 64–123 form the shaped opening. On each of these rows, the left and right sections each contain 55 minus n stitches, where n is the half-opening value in the next instruction. The 2n central stitches remain open.
- Front: shaped opening For opening Rows 1–30 (body Rows 64–93), use these n values in order: 4, 6, 8, 9, 11, 12, 12, 13, 14, 15, 15, 16, 16, 17, 17, 18, 18, 18, 18, 19, 19, 19, 19, 20, 20, 20, 20, 20, 20, 20. For opening Rows 31–60 (body Rows 94–123), use the same list in reverse order. Start each side section in the corresponding outer stitches of Row 63: on Row 64 work the outermost 51 stitches on each side, leaving eight central stitches unworked. Keep each section’s outside edge straight. When n rises, work one sc2tog at the edge beside the opening for each stitch that section must lose on that row. When n falls, work two sc into each of the required number of stitches beside the opening to gain that many stitches. When n is unchanged, work even. Place increases or decreases at the inside edge regardless of which direction that row is worked. Count each section at the end of every row.
- Front: upper panel and neck At the end of Row 123, each side section has 51 sts. For Row 124, work 51 sc across one side section towards the opening, ch 8 across the gap, then work 51 sc across the other side section; 110 working stitches, counting the chains. Rows 125–162: sc across all 110 stitches, working into each of the eight chains on Row 125. For the front neck, work Rows 163–186 on the first 33 sts only. Join yarn to the last 33 sts of Row 162 and work 24 matching rows for the other shoulder. Leave the centre 44 sts unworked.
- Set the disc into the front Block the cream front to 55 cm wide and 62 cm long. Centre the blocked disc behind the opening, with its top and bottom at the opening’s top and bottom. Pin at the top, bottom and both widest points, then pin between them. Sew the shaped cream edge to the disc edge with small, even stitches, easing the minor steps in the opening’s outline. Do not pull either piece smaller as you sew. The solid cream fabric on both sides of the opening stays part of the continuous front panel and resists the swirl’s tendency to twist the front.
- Sleeves: make two With red, ch 45. Row 1: sc in second ch from hook and across; 44 sc. Work even through Row 18 for a 6 cm cuff. Change to cream. Work Rows 19–162 in sc. Increase once at each end of cream Rows 8, 16, 24 and every subsequent eighth cream row through cream Row 144: 18 paired increase rows, 80 sts after the last row. To increase, work two sc in the first and last stitch of the row. The cream section measures approximately 48 cm and the complete sleeve approximately 54 cm.
- Assemble With RS together, sew each 33-st front shoulder to its matching 33-st back shoulder. On each body side edge, measure and mark 20 cm down from the shoulder. Centre a sleeve’s 40 cm-wide upper edge at the shoulder seam and sew one half to the front armhole edge and the other half to the back armhole edge. Sew each sleeve’s underarm seam and the corresponding body side seam, stopping the body seam at its armhole marker. Repeat on the other side.
Finishing
- With cream, work one loose round of sc around the neck opening, placing extra stitches at the four neck corners so the edging lies flat. Join and fasten off.
- Weave in ends, taking particular care at the disc centre and colour changes.
- Block the completed sweater to the planned dimensions without stretching the circular inset.
Helpful Tips
- The alternating wedge colours create the peppermint effect without carrying yarn across a wedge.
- Pin and measure the whole blocked disc, not just an individual wedge. More row height around the outside makes a larger circumference; a disc that cups or ripples needs its gauge corrected before it is sewn in.
- Keep the front’s outer edges straight while shaping only the edges beside the opening. This is what lets the front hang like a rectangular sweater panel.
For another related project collection, browse Christmas granny square crochet patterns.
Tunisian Plaid Christmas Sweater

This relaxed pullover uses broad red, green and cream checks for a festive look, with a plain cream neckline and cuffs to give the plaid a clear frame. The checks come from colour changes across narrow Tunisian crochet strips, rather than from surface embroidery.
Tunisian crochet makes a substantial fabric, which suits the bold checks but can feel stiff if worked too tightly. A hook larger than the yarn label suggests may give the fabric more drape. Because Tunisian fabric also tends to curl, assess the feel and dimensions of a blocked, joined swatch rather than an unblocked strip.
The design rewards careful planning: consistent colour changes and flexible joins help the checks read clearly across the front and back. It is an engaging Christmas sweater project for crocheters who are comfortable managing Tunisian colourwork and assembling flat pieces.
Tunisian Plaid Christmas Sweater

Quick-reference card. Follow the complete written instructions below.
Materials
- DK-weight yarn: Red, green and cream in quantities sufficient for a 110 cm finished chest; the amount depends on yarn choice and length adjustments.
- Tunisian crochet hook: A cable hook, approximately 6 mm or the size needed for the blocked gauge. Choose a hook larger than the yarn label suggests if needed for drape.
- Standard crochet hook: Approximately 4 mm, or a size that makes comfortable, non-tight neck and cuff bands.
- Notions: Stitch markers, tapestry needle, scissors and blocking equipment.
Size and Fit
One relaxed sample size: 110 cm finished chest, approximately 60 cm body length from shoulder to hem, and 40 cm sleeve length before cuffs. Each joined body panel is planned to measure 55 cm wide. The neckline opening is approximately 24 cm wide, with a 10 cm-deep front cut-out. These are target dimensions at blocked gauge, not measured results.
Gauge
Aim for 14 Tunisian simple stitch columns and 12 completed rows per 10 cm, measured on a blocked, joined two-strip swatch. Each 11-stitch strip should contribute approximately 7.9 cm of panel width; seven joined strips should measure 55 cm. Block the swatch before assessing curling, drape or dimensions. If the joined width differs, change hook size and swatch again before starting the sweater.
Abbreviations
US crochet terms.
- ch = chain
- sc = single crochet
- sl st = slip stitch
- TSS = Tunisian simple stitch
- forward pass = pick up loops across the row, leaving them on the Tunisian hook
- return pass = work the loops off the hook, leaving one live loop
Pattern
- Tunisian method Work every strip and sleeve flat. To start, ch the required stitch count, pull up a loop in the second chain and each remaining chain; the loop already on the hook counts as the first stitch. For each return pass, yarn over and pull through one loop, then yarn over and pull through two loops repeatedly until one loop remains. For subsequent forward passes, work TSS under each front vertical bar, working the final edge stitch under both strands of its edge loop. A forward and return pass together count as one row. To change colour between rows, complete the return pass, cut the old yarn and draw the new yarn through the live loop; snug the old loop so just one new live loop remains. At the end of a piece, sl st loosely across the vertical bars to bind off without adding a counted row.
- Check layout Number the seven strip positions 1 to 7 from left to right as each panel faces you. Work each 12-row tier in one colour. For rows 1–12 use red in odd positions and green in even positions; rows 13–24, cream and red; rows 25–36, green and cream; rows 37–48, red and green; rows 49–60, cream and red; rows 61–72, green and cream. In each pair, the first colour is for odd positions and the second for even positions. Keep the same position numbers for the front and back so their checks align at the side seams.
- Back panel Make seven separate strips. For each, ch 11 and work 72 TSS rows using its position’s colours from the check layout. Bind off. Block the strips, then seam their long edges in position order, matching row ends and keeping the seams flexible. The joined panel has the width of 77 stitch columns and should measure approximately 55 cm wide by 60 cm long.
- Front panel Make seven strips using the same position colours. Work positions 1, 2, 6 and 7 for 72 rows each. Work positions 3, 4 and 5 for 60 rows each, ending after the fifth tier. Bind off and block. Seam adjacent long edges only where both strips have fabric. The three shorter centre strips leave a rectangular front-neck cut-out approximately 24 cm wide and 10 cm deep.
- Sleeves Make two alike. For each sleeve, ch 39 and work 48 TSS rows: rows 1–12 cream, 13–24 red, 25–36 green and 37–48 cream. On rows 6, 12, 18, 24, 30, 36, 42 and 48, increase once near each end of the forward pass: pull up one extra loop under the horizontal strand between the first two vertical bars, and another under the horizontal strand between the last two vertical bars, as well as working the usual stitches. Each increase row adds two stitches; there are 55 stitches after row 48. Bind off and block. The top edge should measure approximately 39 cm, close to the 40 cm armhole opening.
- Assembly With right sides facing, seam the top edges of front and back positions 1–2 together, then positions 6–7 together. Leave back positions 3–5 unseamed for the back neck. Seam each side from the hem through row 48; leave rows 49–72 open for an armhole approximately 20 cm deep on each panel. Centre each sleeve’s 55-stitch top edge over an armhole opening and sew it to both sides of the opening, easing the small difference in length evenly. Fold each sleeve and seam its underarm from cuff to armhole.
- Neckline With the standard hook and cream yarn, join at a back shoulder. Work approximately 33 sc across the back-neck edge, 14 sc evenly down one 12-row front-neck side, 33 sc across the front-neck bottom and 14 sc evenly up the other side; join with a sl st. Work two more rounds of sc without increasing, joining each round. Keep the band relaxed; use a larger standard hook if it draws in.
- Cuffs With the standard hook and cream yarn, join at a sleeve seam. Work approximately 39 sc evenly around the foundation edge of the sleeve; join with a sl st. Work three more rounds of sc without increasing, joining each round. Repeat on the other sleeve.
Finishing
- Weave in ends securely, especially at strip colour changes and seams.
- Lightly block the assembled sweater to settle seams and reduce remaining Tunisian curl; do not stretch the neck or cuffs out of shape.
Helpful Tips
- Tunisian fabric can curl strongly before blocking. Judge the fabric and the 55 cm panel target only after blocking a joined swatch.
- Mark every twelfth row and label each strip with its position number before seaming.
- Use a cable long enough to hold the widest 55-stitch sleeve row comfortably, even though the body strips are narrow.
Chevron Candlelight Pullover

The Chevron Candlelight Pullover uses wide gold, orange and cream zigzags against a deep blue body to evoke rows of flickering candle flames. The effect comes from colour changes within the fabric, so there are no loose embellishments to catch on a coat or scarf.
This is an intermediate project for crocheters comfortable managing several colour areas. The plain blue sleeves give the busy body room to shine, while the solid blue upper section keeps the shoulder line and neckline visually calm.
The front and back chevrons are mirrored so their colours meet at the side seams. Keeping track of the right-side column direction matters here: the work turns from row to row, but the placement of each peak stays fixed across the finished fabric.
Chevron Candlelight Pullover

Quick-reference card. Follow the complete written instructions below.
Materials
- Medium-weight yarn: Deep blue for the body, sleeves and edging; gold, orange and cream for the chevrons. Buy quantities to suit your yarn’s metreage, allowing extra for separate colourwork bobbins.
- Crochet hook: Size needed to obtain the washed gauge.
- Other supplies: Stitch markers, tape measure, yarn needle and scissors.
Size and Fit
One sample size: 110 cm finished chest, measured around the joined body. Each body panel is 55 cm wide. Body length is approximately 67 cm; underarm depth is 20 cm. Sleeve length is approximately 48 cm. These dimensions depend on achieving the stated washed gauge.
Gauge
16 half double crochet stitches and 12 rows = 10 cm in washed fabric. Make and wash a swatch before starting: the 88-stitch panel width is what sets the planned 110 cm chest.
Abbreviations
US crochet terms.
- ch = chain
- hdc = half double crochet
- sc = single crochet
- RS = right side
- WS = wrong side
- st(s) = stitch(es)
Pattern
- Colourwork key Number each body-panel row from the hem upwards. Viewed from the RS, number the 88 stitch columns 1–88 from left to right. For each column, use the offset sequence 0, 1, 2, 3, 4, 5, 6, 7, 8, 7, 6, 5, 4, 3, 2, 1, repeating every 16 columns. Add the offset to the row number. Work that stitch in deep blue if the result is 1–16, gold if 17–28, deep blue if 29–32, orange if 33–44, deep blue if 45–48, cream if 49–60, or deep blue if 61–72. This key applies to rows 1–64; rows 65–80 are entirely deep blue. Use separate bobbins for separate colour areas. Change colour on the final yarn-over of the preceding stitch and twist yarns together on the WS at each change.
- Front panel With deep blue, ch 89. Row 1: hdc in the second ch from the hook and in each remaining ch; turn — 88 hdc. Rows 2–68: ch 1, hdc in each st; turn — 88 hdc. Do not count the turning ch as a stitch. Follow the colourwork key for rows 1–64 and work rows 65–68 in deep blue. On odd-numbered rows, read columns 1–88 in working order; on even-numbered rows, read columns 88–1.
- Front neckline and shoulders Row 69: in deep blue, work 28 hdc, leave the centre 32 sts unworked, and join a second ball of deep blue to work the remaining 28 hdc. Rows 70–80: work each 28-stitch shoulder separately in hdc, turning after each row. Fasten off after row 80. The straight, unworked centre forms a 20 cm-wide front neckline, approximately 10 cm deep.
- Back panel Make as for the front through row 76, but mirror the colourwork: for each back column, use the offset assigned to front column 89 minus that column number. Thus back column 1 uses front column 88’s offset, and back column 88 uses front column 1’s offset. This brings matching colours together at both side seams. Row 77: work 28 hdc, leave the centre 32 sts unworked, and join a second ball to work the remaining 28 hdc. Work each 28-stitch shoulder separately through row 80; fasten off.
- Sleeves — make two With deep blue, ch 41. Row 1: hdc in the second ch from the hook and in each remaining ch; turn — 40 hdc. Rows 2–58: ch 1 and work hdc across, turning after each row. On rows 5, 9, 13, 17, 21, 25, 29, 33, 37, 41, 45 and 49, work 2 hdc in the first st and 2 hdc in the last st instead of one in each; work one hdc in every other st. Each increase row adds 2 sts. After row 49 there are 64 sts; keep 64 sts through row 58. Fasten off, leaving a sewing length.
- Assembly Block the pieces to the planned dimensions without stretching the colourwork out of shape. With RS together, seam the 28-stitch shoulders. Seam each side from the hem through body row 56, leaving rows 57–80 open for the armholes. Position a sleeve-top midpoint at each shoulder seam and sew its 64 top stitches around the armhole. On each 24-row armhole edge, distribute 32 sleeve stitches evenly: match four sleeve stitches to each group of three row ends, attaching two of those stitches at the third row end. Fold each sleeve lengthways and seam from cuff to underarm.
- Neckline edging With RS facing, join deep blue at a shoulder seam. Work one relaxed round of sc around the neckline, placing one sc in each of the 32 front and 32 back horizontal neck stitches and approximately one sc in each exposed row end along the vertical edges. Join and fasten off. Keep the edging loose enough to pass comfortably over the head.
Finishing
- Weave in all ends on the WS, taking care not to draw the chevrons inward.
- Wash and dry according to the yarn label, then check the chest measurement and ease of the neckline.
Helpful Tips
- Mark stitch column 1 on the RS of each panel. The chart columns stay fixed even though working direction reverses on alternate rows.
- Check the first and last stitch colours against the mirrored back panel before seaming; corresponding side edges should match.
- The colour changes create the zigzags. Do not increase or decrease within the body-panel colourwork.
Bottom-Up Raglan Snowfall Sweater

This red pullover starts with a light scattering of white flecks near the hem, then builds into a busier snowfall across the shoulders. The snow is worked into the fabric with controlled colour changes, rather than added as dangling decorations.
The body and sleeves are made as separate tubes before they meet at the underarms. From there, shaping follows four consistent raglan lines. Keeping those lines clear of white flecks makes the construction easy to see against the increasingly snowy yoke.
Swatch, wash and check both stitch and round gauge before starting: the planned chest width and yoke depth depend on them. As the neckline takes shape, check that the opening will pass comfortably over the wearer’s head rather than relying on its appearance alone.
Bottom-Up Raglan Snowfall Sweater
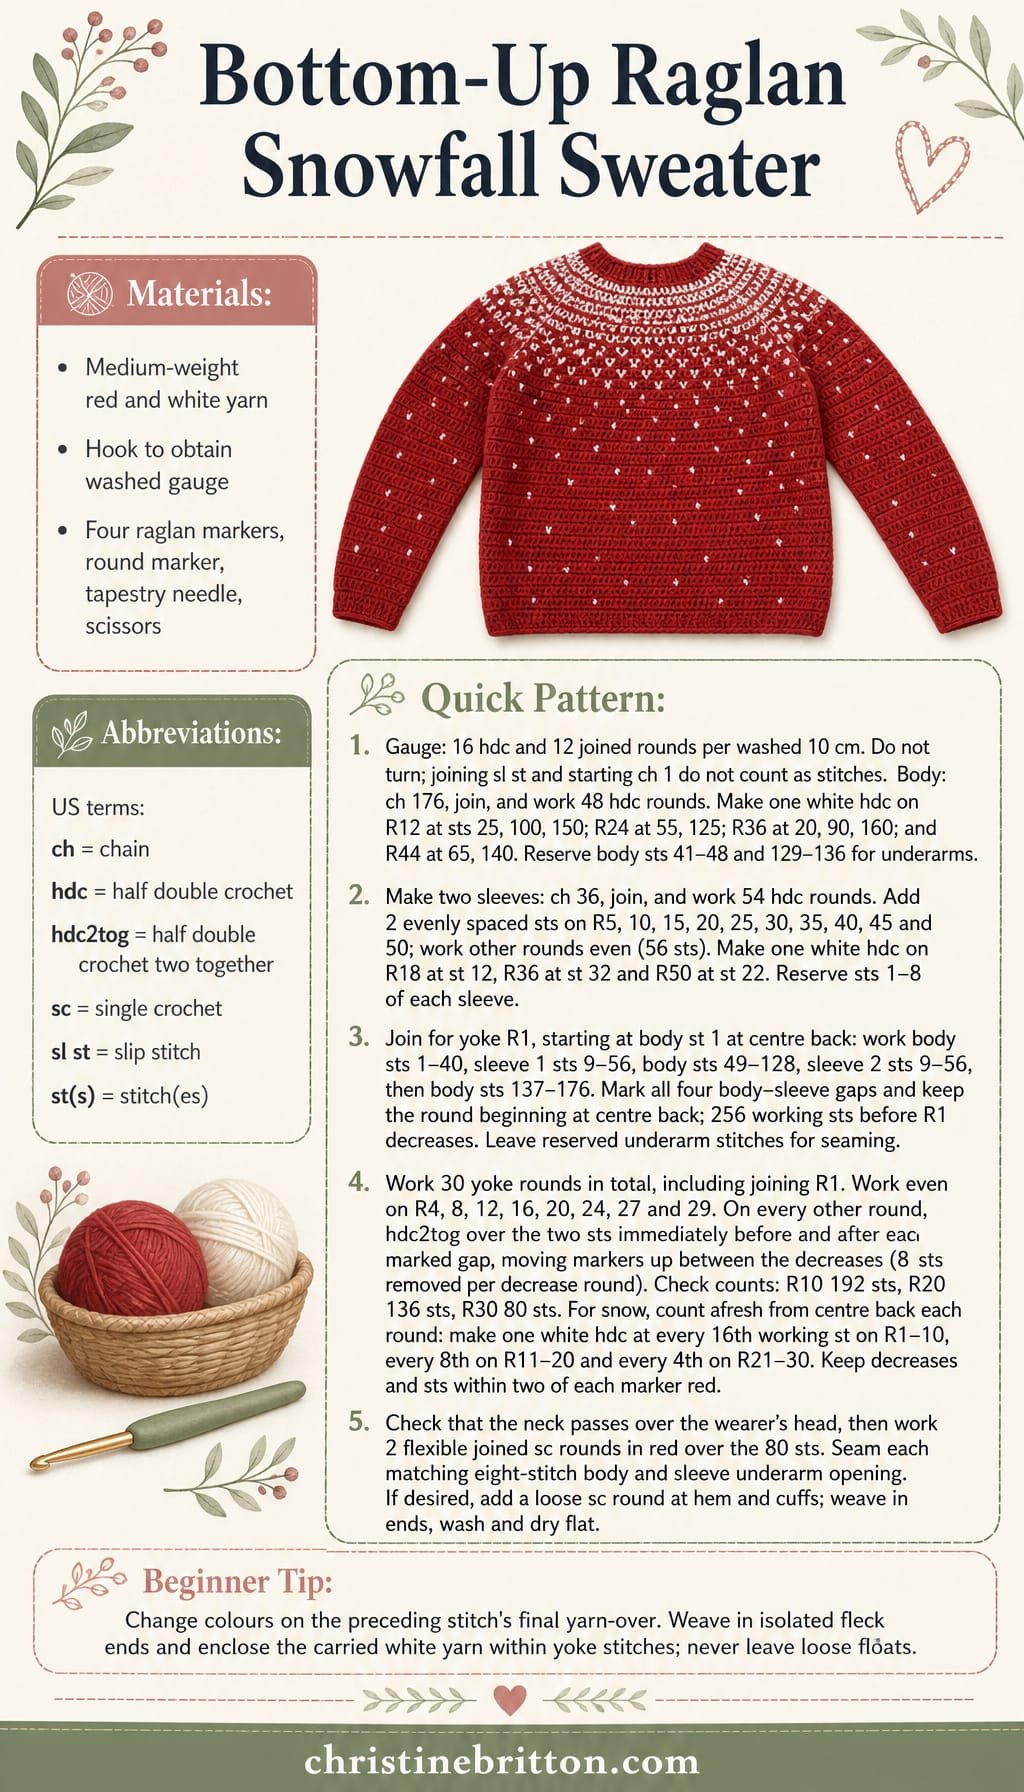
Quick-reference card. Follow the complete written instructions below.
Materials
- Medium-weight yarn: Red for the main fabric and a smaller amount of white for the snow stitches. Buy enough red yarn for a 110 cm chest pullover at your chosen length; yardage depends on your yarn and gauge.
- Crochet hook: Size needed to obtain the stated washed gauge.
- Other supplies: Four stitch markers, removable round marker, tapestry needle, scissors and tape measure.
Size and Fit
One size: approximately 110 cm finished chest, 40 cm body length from hem to underarm, 45 cm sleeve length from cuff to underarm, and 25 cm yoke depth at the stated gauge. The neck opening is approximately 50 cm around before edging. Compare the chest with a comfortable sweater you own; this pattern does not include grading for other sizes.
Gauge
Target washed gauge in joined rounds of half double crochet: 16 stitches and 12 rounds per 10 cm. Make and wash a generous swatch in the round, then measure it flat. At this gauge, 176 body stitches give a 110 cm chest. Change hook size if needed before beginning; stitch and round gauge both affect the finished dimensions.
Abbreviations
US crochet terms.
- ch = chain
- hdc = half double crochet
- hdc2tog = half double crochet two stitches together: yarn over, insert hook in the next stitch and pull up a loop; insert hook in the following stitch and pull up a loop; yarn over and pull through all four loops
- sc = single crochet
- sl st = slip stitch
- st(s) = stitch(es)
Pattern
- Working method and colour changes Work joined rounds without turning. Join each round with a sl st to its first hdc, then ch 1 to begin the next round; neither the join nor ch 1 counts as a stitch. For each white snow stitch, change to white on the final yarn-over of the preceding stitch. Work one hdc in white, then change back to red on its final yarn-over. For isolated flecks, use a short white strand and weave in both ends. Across the closely spaced yoke flecks, carry white enclosed within the red stitches so there are no loose floats or dangling pieces.
- Body With red, ch 176, taking care not to twist the chain, and sl st to form a ring. Round 1: ch 1, hdc in each chain; join (176 sts). Work through Round 48 in hdc, maintaining 176 sts. For sparse snow, make one white hdc at the following numbered stitches, counting from the first hdc of each specified round: Round 12: 25, 100, 150; Round 24: 55, 125; Round 36: 20, 90, 160; Round 44: 65, 140. All other stitches remain red. Fasten off after Round 48. Number the body stitches 1–176 from the round beginning at centre back. For the joining round, reserve stitches 41–48 and 129–136 as the two eight-stitch underarms; do not cut them away.
- Sleeves — make two With red, ch 36, join without twisting, then work Round 1 in hdc (36 sts). Continue in joined hdc rounds through Round 54. Increase by working 2 hdc in each of two evenly spaced stitches on Rounds 5, 10, 15, 20, 25, 30, 35, 40, 45 and 50; each increase round adds 2 sts. Work all other sleeve rounds even. There are 56 sts after Round 50; maintain 56 through Round 54. On each sleeve, make one white hdc at stitch 12 of Round 18, stitch 32 of Round 36 and stitch 22 of Round 50. Fasten off. Number each sleeve’s stitches 1–56 from its round beginning at the underarm. Reserve stitches 1–8 of each sleeve for the underarm; stitches 9–56 will join the yoke.
- Join body and sleeves Attach red at body stitch 1 at centre back. For Yoke Round 1, hdc across body stitches 1–40; place a marker in the gap, then hdc across stitches 9–56 of the first sleeve. Place a marker, hdc across body stitches 49–128, place a marker, hdc across stitches 9–56 of the second sleeve, place a marker, then hdc across body stitches 137–176. Join the round (256 working sts: 160 body and 48 from each sleeve). The four markers sit between the body and sleeve panels. Keep the round beginning at centre back and move the markers up in the same four gaps as the yoke grows. Leave the reserved underarm stitches unworked until finishing.
- Raglan yoke Work 30 yoke rounds in total, counting the joining round as Round 1. Work even on Rounds 4, 8, 12, 16, 20, 24, 27 and 29. On every other yoke round, decrease at all four marked raglan gaps: hdc2tog over the two stitches immediately before a marker and hdc2tog over the two stitches immediately after it, moving the marker back into the gap between those two decreases. Each decrease round removes 8 sts. After Rounds 10, 20 and 30, check for 192, 136 and 80 sts respectively. Before working white stitches, establish the raglan decreases in red; keep all decrease stitches and the stitches within two stitches of each marker red.
- Yoke snowfall On Yoke Rounds 1–10, make a single white hdc at every 16th working stitch; on Rounds 11–20, at every 8th; and on Rounds 21–30, at every 4th. Count anew from the first worked stitch at centre back on each round. If a planned white stitch falls within two stitches of a raglan marker or is part of a decrease, work it in red instead. This leaves the raglan lines clear while the snow becomes denser towards the shoulders.
- Neck edging After Yoke Round 30, check that the 80-stitch neck opening passes comfortably over the wearer’s head before fastening off. Work 2 joined rounds of sc in red, one sc in each stitch, keeping 80 sts and a flexible tension. If the opening is too small, undo the edging and check the yoke gauge; do not tighten it with a smaller hook.
Finishing
- Match each set of eight reserved sleeve stitches to its corresponding eight reserved body stitches. Sew each underarm opening closed with a flexible seam.
- Work one loose round of sc around the hem and each cuff if desired, without changing their circumference noticeably.
- Weave in all colour-change and construction ends securely. Wash according to the yarn label and lay flat to dry.
Helpful Tips
- Mark the first body stitch at centre back before identifying the two underarms; this keeps the front and back panels centred.
- Count after every raglan decrease round. Each of the four markers must retain one decrease on either side.
- The stitch and round counts are a gauge-based plan, not measured results from a tested sample.
Gift-Pocket Hooded Sweater

This green hooded pullover turns a practical kangaroo pocket into an oversized wrapped present. The red pocket provides the colour contrast, while flat cream bands give it the look of gift ribbon without adding bulky decoration.
The pocket is designed to remain useful, with hand entrances at the sides. Its decorative bands sit on the pocket fabric rather than catching the sweater underneath, and secure opening corners help it stand up to regular use.
The seamless body provides a straightforward base for the shaped upper sections and sleeves. The separate hood has a relaxed depth; checking its opening on the assembled sweater before edging helps avoid a border that pulls it tight.
Gift-Pocket Hooded Sweater

Quick-reference card. Follow the complete written instructions below.
Materials
- Medium-weight washable yarn: Approximately 1,100–1,400 m green, 150–220 m red and 50–90 m cream. Allow extra if lengthening the sweater.
- Crochet hook: Use a size that gives the stated gauge; 5 mm is a starting point.
- Other: Stitch markers, tapestry needle, scissors and tape measure.
Size and Fit
One sample size: approximately 110 cm finished chest, 55 cm body length from hem to shoulder, and 50 cm sleeve length from armhole to cuff. Choose the size by comparing the finished chest with a comfortable sweater. The body is worked without waist shaping.
Gauge
14 single crochet stitches and 16 rows or rounds = 10 cm in plain single crochet after washing and drying as you intend to care for the sweater. Check gauge before starting: the 154-stitch body depends on it for its 110 cm circumference.
Abbreviations
US crochet terms.
- ch = chain
- sc = single crochet
- sc2tog = single crochet two stitches together
- st(s) = stitch(es)
Pattern
- Before you begin Use green for the body, upper panels, sleeves and hood. Use red for the pocket and cream for its bands. A turning or joining ch 1 never counts as a stitch. Join rounds with a slip stitch in the first sc; do not turn rounds. Turn flat rows.
- Seamless body Ch 154 in green without twisting; slip stitch into the first ch to form a ring. Round 1: ch 1, sc in each ch, join (154 sc). Rounds 2–56: ch 1, sc in each st, join (154 sc). The body measures approximately 35 cm from the hem. Place a marker at the beginning of the round and another after st 77. The two 77-stitch sections are the front and back; the markers indicate the underarms.
- Front upper panel Work flat across the first 77 stitches between underarm markers. Rows 1–24: ch 1, sc across 77 stitches, turn. At the end of row 24, mark the centre 35 stitches: stitches 22–56, counting across that row. Rows 25–32, first shoulder: work only across the outer 21 stitches on one side, turning at the neck edge each row (21 sc per row). Fasten off. Join green at the outer edge of the other shoulder and work its outer 21 stitches for 8 rows in the same way. Leave the centre 35 stitches unworked to form the front neck edge.
- Back upper panel and shoulders Join green at the other underarm marker. Work rows 1–30 flat across the remaining 77 body stitches (77 sc per row). For rows 31–32, work the outer 21 stitches on each side separately as for the front, leaving the centre 35 stitches unworked. With right sides together, sew each 21-stitch front shoulder edge to its matching back shoulder edge. The unsewn panel sides form armholes, each bordered by 32 front and 32 back row ends.
- Sleeves At one underarm, join green. Pick up 56 sc evenly around the armhole: 7 sc in each group of 8 row ends, across all 64 front and back row ends. Join. Work 72 rounds of sc. On rounds 6, 12, 18 and every sixth round through round 72, work one sc2tog near the underarm and another approximately halfway around the sleeve; work sc in all other stitches. Each decrease round removes 2 stitches, taking the sleeve from 56 to 32 stitches over 12 decrease rounds. Work 8 more rounds even on 32 stitches for the cuff. Fasten off. Repeat for the second sleeve.
- Hood Starting at the centre of the front neck edge, pick up 88 green sc around the neckline, ending back at the front centre: 18 along the first part of the 35-stitch front neck edge, 7 along the first 8-row front neck side, 2 along the 2-row back neck side, 35 along the back neck edge, 2 along the other back neck side, 7 along the other front neck side, and 17 along the rest of the front neck edge. Do not join. Turn and work 44 rows of 88 sc. The flat piece is approximately 27.5 cm deep from neckline to crown. Fold the final 88-stitch edge in half and sew its two 44-stitch halves together to close the crown. Before edging, try the hood on the garment and measure its front opening along the two exposed row-edge sides; at gauge, their combined length is approximately 55 cm. If a different depth is needed, add or remove hood rows before closing the crown and adjust the edging pick-up accordingly. For the 44-row hood, work one row of green sc around the front opening, picking up 39 sc along each exposed side (78 sc total). Do not pull this edging tight.
- Gift bands Make the pocket decorations before attaching the pocket to the sweater. For the horizontal cream band, ch 55; work 54 sc across for 5 rows. For the vertical band, ch 7; work 6 sc across for 28 rows. Fasten off both bands.
- Kangaroo pocket In red, ch 55. Work 54 sc across for 28 rows, turning after each row; fasten off. The pocket is approximately 39 cm wide and 17.5 cm high. Lay the vertical cream band down its centre and the horizontal band across rows 12–16. Sew all band edges flat to the red pocket only, including the overlap; keep stitches from showing through into the eventual pocket space. Centre the decorated pocket on the front of the sweater with its lower edge approximately 6 cm above the hem. Sew its lower edge and full top edge to the sweater. On each side, sew only the lower 12 row ends, leaving the upper 16 row ends unattached as hand openings. At the top of each opening, secure the attachment firmly without stitching the opening closed.
Finishing
- Weave in ends on the inside and secure the pocket-opening corners.
- Wash and dry according to the yarn label; lay the sweater flat to shape the hood and gift bands.
Helpful Tips
- Mark the front and back sections before splitting the body; each must contain 77 stitches.
- Keep cream-band sewing stitches within the red pocket fabric. Sewing a band through to the sweater can obstruct a hand opening.
- Check the hood opening on the assembled garment before adding its edging. An edging worked too tightly will shorten the opening.
Star Medallion Cardigan

This Star Medallion Cardigan turns festive crochet into an intentionally overdecorated layer. Bright star centres draw the eye, while the open spaces between the round motifs keep the overall effect light rather than bulky.
Round motifs leave awkward gaps where several meet. Smaller filler motifs make those spaces look deliberate without hiding the star shapes or closing up the openwork. Worn over a plain shirt, the contrast lets the colours and details stand out.
This is an advanced project for crocheters who enjoy planning as much as making. A layout based on blocked motifs helps you judge the cardigan’s proportions and colour placement before the panels come together.
Star Medallion Cardigan
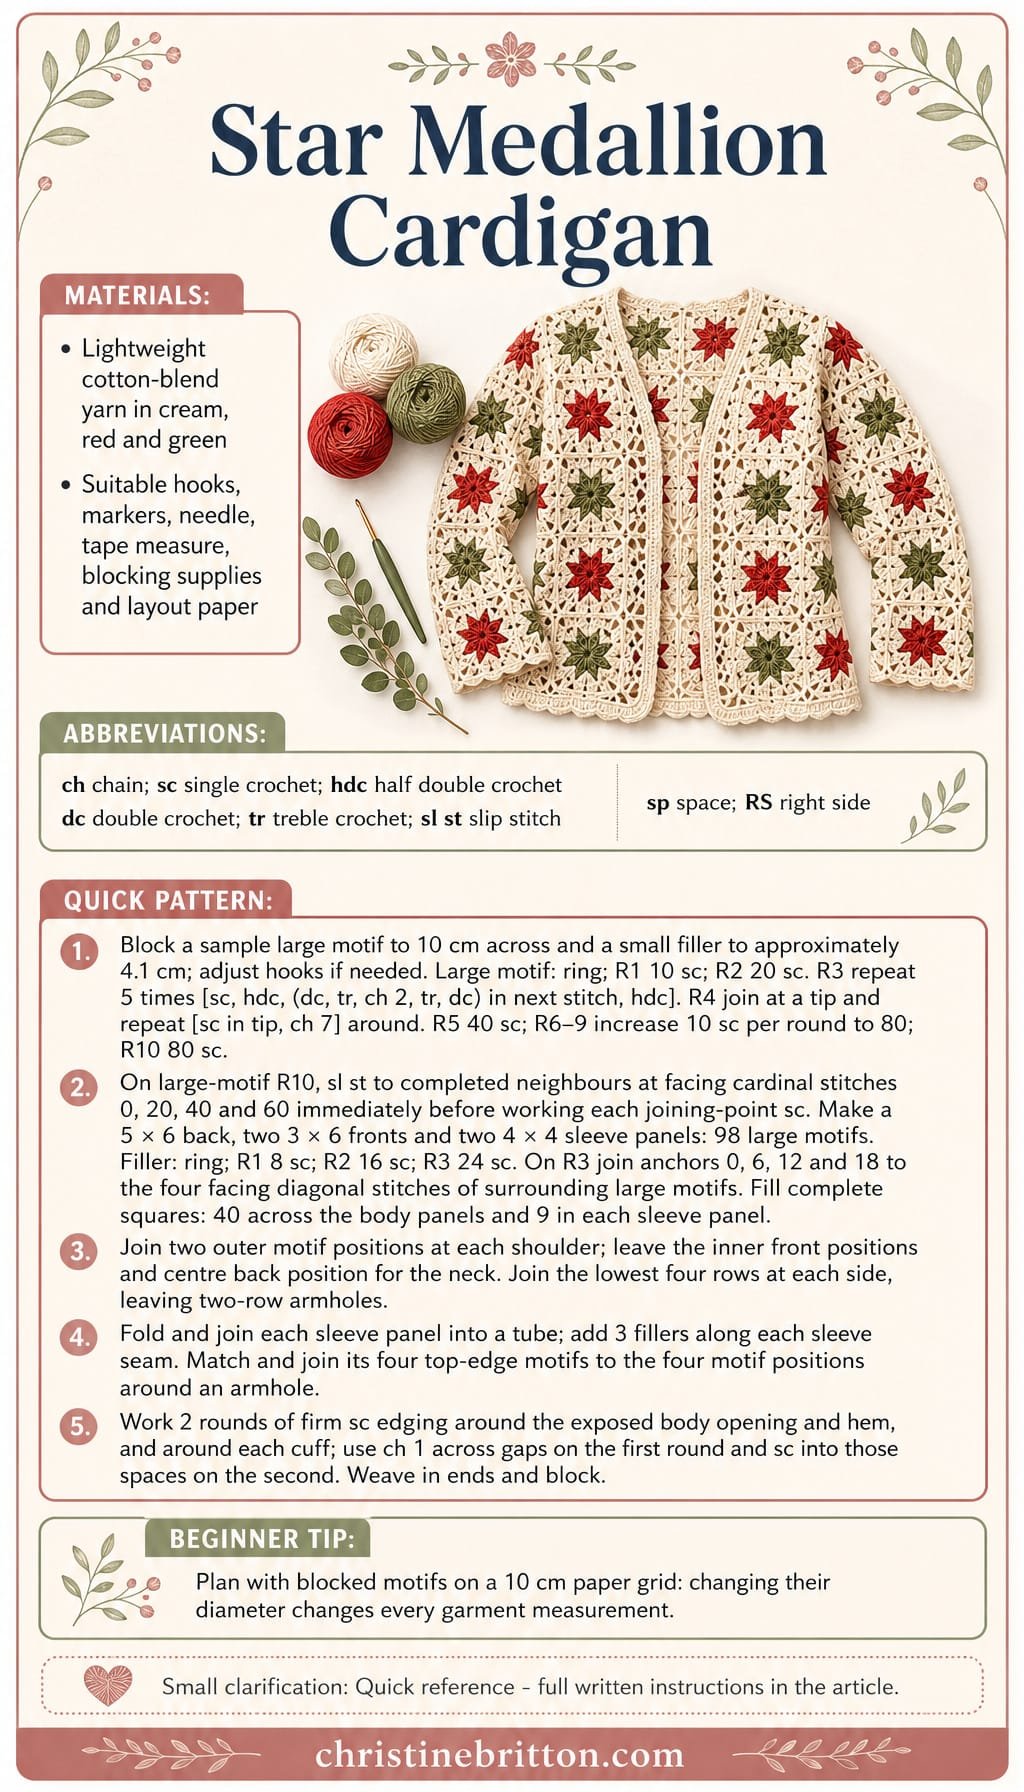
Quick-reference card. Follow the complete written instructions below.
Materials
- Lightweight cotton-blend yarn: Cream, red and green. Use the same yarn weight for every motif; the quantity required depends on your blocked motif gauge.
- Crochet hooks: A hook suitable for the yarn, plus other sizes if needed to meet the blocked motif measurements.
- Other supplies: Stitch markers, tapestry needle, scissors, tape measure, blocking supplies and paper for a full-size panel layout.
Size and Fit
One sample size: approximately 110 cm around the closed chest before the edging band, with a 60 cm body length. The back is 5 large motifs wide by 6 high (about 50 × 60 cm); each front is 3 wide by 6 high (about 30 × 60 cm). Each sleeve is a 4-motif-wide tube, 4 motifs long (about 40 cm around and 40 cm long). These dimensions depend on large motifs blocking to 10 cm across. The cardigan is worn open; compare the 110 cm layout with your desired garment chest measurement before making all the motifs.
Gauge
Block one complete large motif and measure its diameter in two directions. For the stated size, aim for 10 cm across; change hook size or yarn if necessary, then make and block another sample before committing to the layout. Aim for approximately 4.1 cm across each blocked small filler motif, adjusting its hook if needed. Motif dimensions, not row gauge, determine the cardigan measurements.
Abbreviations
US crochet terms.
- ch = chain
- sc = single crochet
- hdc = half double crochet
- dc = double crochet
- tr = treble crochet
- sl st = slip stitch
- sp = space
- RS = right side
Pattern
- Plan the layout On paper, draw a 10 cm grid for a 5-column, 6-row back; two 3-column, 6-row fronts; and two 4-column, 4-row sleeve panels. Each grid cell holds one large round motif. Mark which motifs will be cream, red or green, keeping the star centres conspicuous. The sample uses 98 large motifs: 30 for the back, 18 for each front and 16 for each sleeve. Work with the layout in front of you and keep the RS of every motif facing the same way.
- Large star-centred motif, rounds 1–3 Make an adjustable ring. Round 1: work 10 sc into the ring; join with a sl st to the first sc and tighten the ring. Round 2: ch 1, work 2 sc in each sc around; join (20 sc). Round 3: ch 1, repeat [sc in next sc, hdc in next sc, (dc, tr, ch 2, tr, dc) in next sc, hdc in next sc] 5 times; join to the first sc. The five ch-2 spaces are the star tips. Fasten off this colour if changing to a contrasting surround.
- Large motif, rounds 4–9 Round 4: join the surround colour in any star-tip ch-2 sp. Repeat [sc in tip sp, ch 7] around all five tips; join to the first sc (5 sc and five ch-7 arches). Round 5: ch 1, sc in each sc and each ch around; join (40 sc). Round 6: ch 1, repeat [sc in next 3 sc, 2 sc in next sc] 10 times; join (50 sc). Round 7: ch 1, repeat [sc in next 4 sc, 2 sc in next sc] 10 times; join (60 sc). Round 8: ch 1, repeat [sc in next 5 sc, 2 sc in next sc] 10 times; join (70 sc). Round 9: ch 1, repeat [sc in next 6 sc, 2 sc in next sc] 10 times; join (80 sc). Keep the round-4 arches loose enough to encircle, rather than flatten, the star.
- Large motif, joining round 10 Ch 1 and work 1 sc in each of the 80 stitches of round 9; join and fasten off. Number these new sc 0–79, with stitch 0 being the first sc. Stitches 0, 20, 40 and 60 are the four cardinal joining points; stitches 10, 30, 50 and 70 face the diagonal gaps. When a neighbouring large motif is already in place, pause immediately before working each cardinal joining-point sc that faces it. Sl st into the corresponding cardinal sc of that neighbour, then work the new sc as usual. This adds a connection without replacing a sc. Join only to neighbours already made; leave unoccupied sides free. Weave in ends, then block to the planned diameter.
- Make the body panels Make each panel one row at a time using the paper layout. On every large motif’s round 10, join to any completed motif immediately beside or below it at the facing cardinal points. Complete the 5 × 6 back and both 3 × 6 fronts. The joins hold the round motifs in a grid; spaces between groups of four motifs are intentional.
- Small filler motif Make an adjustable ring. Round 1: work 8 sc into the ring; join. Round 2: ch 1, work 2 sc in each sc; join (16 sc). Round 3: ch 1, repeat [sc in next sc, 2 sc in next sc] 8 times; join (24 sc). On round 3, count its stitches 0–23 from the first sc. Before working each anchor sc numbered 0, 6, 12 or 18, sl st into the diagonal joining-point sc facing the gap on the corresponding surrounding large motif; then work the anchor sc as usual. Orient the filler so its four anchors face the four large motifs. Make one filler in each complete four-motif square: 20 in the back and 10 in each front, for 40 body-panel fillers. Block the joined panels flat.
- Shoulders and sides With RS facing out, place the fronts against the back. At each shoulder, join the outer two motifs of the front top row to the corresponding outer two motifs of the back top row, matching their exposed cardinal points with a secure needle-and-yarn join. Leave the middle back motif and the inner top-row motif of each front unjoined for the neck and front opening. Join each front to the back at the matching side cardinal points over the lowest four rows. Leave the upper two rows on each side open for an armhole approximately 20 cm deep.
- Sleeves Make two 4-column, 4-row panels of large motifs, joining adjacent motifs during round 10 as for the body. Add a small filler to each of the nine complete four-motif squares in each sleeve panel. Fold each panel lengthways with RS out and join its two long edges at the matching cardinal points to form a tube; the top and bottom edges remain open. Add a small filler in each of the three four-motif gaps that cross that long seam. Each sleeve therefore has 12 fillers. At each armhole, match the four motifs around the sleeve’s top edge with the two exposed back-side motifs and two exposed front-side motifs. Join at their matching cardinal points, checking that the sleeve seam sits at the underarm.
- Firm edging band With RS facing, join yarn at the lower corner of one front. Work one round of sc along the exposed motif edges around the fronts, back neckline and lower hem; place one sc in each available edge stitch and use a ch 1 to cross any gap that would otherwise pull the edging tight. Join. Work a second round with one sc in each sc and each ch-1 space; join and fasten off. Edge each sleeve cuff in the same way. The band follows the motifs’ scalloped outline rather than forcing their round edges into a straight line.
Finishing
- Weave in all ends securely and check that every motif join and sleeve attachment is firm.
- Block the assembled cardigan to the paper layout without stretching the star points or pulling the joins out of alignment.
- Let it dry completely before wearing over a plain shirt.
Helpful Tips
- Make and block a complete large motif before calculating the layout. Do not infer its diameter from row gauge.
- A small filler belongs only where four large motifs surround a gap; do not force one into an open neckline, armhole or outer edge.
- Check the fit on the paper layout before joining the shoulders. Changing motif diameter changes the chest, length and armhole together.
Ribbed Polo Christmas Sweater

This crochet ugly Christmas sweater pattern takes its festive cue from striped North Pole decorations. Bold red bands stand out against a cream ribbed fabric, giving the pullover a cheerful look without lettering or appliqué.
The polo shape sets it apart from a classic crew-neck Christmas jumper. A short, overlapping button opening sits beneath a broad fold-over collar, adding structure while keeping the design relaxed and wearable.
This is an intermediate project because the stripes need to line up across separate ribbed panels, and the front overlap affects how the finished sweater sits. Taking care with those details helps the collar, opening and bands look like parts of one cohesive design.
Ribbed Polo Christmas Sweater

Quick-reference card. Follow the complete written instructions below.
Materials
- Medium-weight smooth yarn: Cream for the main fabric and red for the bands. Buy enough for a 110 cm chest pullover; yarn requirements vary with fibre and meterage.
- Crochet hook: Choose a size that gives the stated washed gauge.
- Two buttons: Choose buttons that pass securely through the loops you make.
- Notions: Stitch markers, tape measure, yarn needle and scissors.
Size and Fit
One sample size: approximately 110 cm finished chest, 60 cm body length, 40 cm upper-sleeve circumference and 53 cm sleeve length including cuff. Intended for approximately 96–102 cm wearer chest. The front measures 55 cm across when its two 29 cm halves overlap by 3 cm; the back measures 55 cm.
Gauge
Design gauge after washing and drying the swatch: 15 half double crochet stitches and 10 back-loop rows per 10 cm, measured relaxed. Swatch in the rib pattern, then also measure its row-direction width gently stretched. The 55 cm back should stretch to at least 57.5 cm without distortion. Match the relaxed gauge for the fixed counts below; do not substitute stretched measurements when setting panel widths.
Abbreviations
US crochet terms.
- ch = chain
- hdc = half double crochet
- sc = single crochet
- BLO = back loop only
- sc2tog = single crochet two stitches together
- st(s) = stitch(es)
Pattern
- Before you begin Each body row runs from hem to shoulder; each sleeve row runs from cuff edge to sleeve top. On every panel, ch 1 to turn; the turning chain does not count as a stitch. Work the first row into the foundation chain and subsequent rows in BLO. Change yarn colour on the final yarn-over of the stitch before a new colour begins. Keep unused yarn neat on the wrong side rather than carrying red across long cream sections.
- Body colour sequence Use this sequence on every 90-st body row: cream sts 1–18, red sts 19–24, cream sts 25–51, red sts 52–57, then cream sts 58–90. Because alternate rows run from shoulder to hem, read the sequence in reverse on those rows. The red bands sit approximately 12–16 cm and 34–38 cm above the hem.
- Back In cream, ch 91. Row 1: hdc in the second ch from the hook and each remaining ch, following the body colour sequence; 90 sts. Rows 2–55: ch 1, turn, hdc BLO across, following the sequence at the same positions measured from the hem. Fasten off. The relaxed panel measures approximately 55 cm across and 60 cm high.
- Front halves Make two panels exactly as for the back, but work 29 rows on each; each measures approximately 29 cm across and 60 cm high. Mark the inner long edge of each half. From the hem, mark a point 48 cm up each inner edge: the fabric above these marks forms the 12 cm front opening.
- Front overlap Lay the front halves right side up, with their inner edges overlapping by 3 cm. Choose which half will sit on top. Sew through both layers along the 48 cm lower section, from hem to opening mark, keeping the overlap even. Leave the upper 12 cm separate. The assembled front measures 55 cm across when laid flat.
- Sleeve colour sequence On every 72-st sleeve row, work cream sts 1–12, red sts 13–18, cream sts 19–40, red sts 41–46, then cream sts 47–72, counting from the cuff edge. Reverse the order when working from sleeve top towards cuff.
- Sleeves Make two. In cream, ch 73. Row 1: hdc in the second ch from the hook and each remaining ch, following the sleeve colour sequence; 72 sts. Rows 2–40: ch 1, turn, hdc BLO across, maintaining the bands. Fasten off. Each flat sleeve measures approximately 40 cm across its row ends and 48 cm from cuff edge to top.
- Shoulders and armholes With right sides together, seam each outer 19 cm of the front and back top edges for the shoulders. The unseamed back neck is 17 cm wide; the two front neck edges are approximately 10 cm each. On each body side, measure 20 cm down from the shoulder and mark the armhole bottom. Match the centre of a sleeve’s 40 cm top edge to the shoulder seam, then sew its top edge around the 20 cm front and 20 cm back armhole edges. Repeat for the other sleeve.
- Side and sleeve seams Fold the sweater right sides together. Sew each body side from hem to armhole bottom, then sew the corresponding sleeve’s long edges from underarm to cuff edge. Turn right side out.
- Cuffs At one sleeve’s wrist opening, join cream yarn at the seam. Round 1: work 1 sc into each of the 40 row ends around; join, 40 sc. Round 2: ch 1, sc2tog around; join, 20 sc. Work hdc BLO in joined rounds over these 20 sts until the cuff measures 5 cm beyond the sleeve panel. Keep the joining seam aligned and do not increase. Fasten off. Repeat for the other cuff.
- Opening edges and buttons Work 1 row of sc up each 12 cm opening edge, aiming for 18 evenly spaced sc; do not pull the edges short. On the overlapping side, make two button loops at approximately 3 cm and 9 cm above the opening base. For each loop, join yarn at the edge, chain enough to fit a button snugly, secure the chain back to the edge and fasten off. Close the overlap to mark the matching positions on the underlapping half, then sew the buttons there. Check that the closed front remains 55 cm wide.
- Fold-over collar The collar attaches only to the horizontal neck edges, not down the buttoned opening. At the stated gauge, the back neck is 17 cm and the two front neck edges total approximately 20 cm. In cream, ch 57. Row 1: hdc in the second ch from the hook and across; 56 sts. Rows 2–10: ch 1, turn, hdc BLO across. The strip measures approximately 37 cm along its foundation edge and 10 cm deep. With right sides together, sew its foundation edge along one front neck edge, the back neck and the other front neck edge, easing the small length difference evenly. Turn the collar out and fold it down over the sweater.
Finishing
- Weave in ends on the wrong side without drawing the ribbing tight.
- Wash and dry according to the yarn label, then lay flat. Check the chest with the buttons closed and the collar folded down.
Helpful Tips
- Use markers at each colour boundary; on return rows, count stitch positions from the hem or cuff rather than from the hook.
- Keep the front overlap at 3 cm while seaming. Joining the inner edges without an overlap would make the finished chest wider than intended.
- If the washed swatch does not match the relaxed design gauge, change hook size and swatch again before using these fixed stitch and row counts.
Longline Christmas Mantel Cardigan

This longline cardigan gives the ugly Christmas sweater theme a more wearable shape. Its navy body provides a backdrop for bright zigzags beside the lower front openings, while stocking-shaped pockets add a playful detail without bulky appliqué.
The separate panels create an open front that slopes towards a shaped shawl collar. Mirrored neckline shaping and sleeves that widen towards the shoulders make this an advanced project worth laying out carefully before assembly.
Pockets, embroidery and a long collar can all pull on the front edges. Keeping the decorations flat and supporting the openings and pocket attachments helps the cardigan hang evenly rather than sag or pucker.
Longline Christmas Mantel Cardigan

Quick-reference card. Follow the complete written instructions below.
Materials
- Main yarn: Approximately 1,300–1,600 m of lightweight DK wool-blend yarn in navy. Check the washed gauge before buying or cutting yarn.
- Contrast yarn: Approximately 80 m of compatible yarn for pocket cuffs and zigzag embroidery.
- Hook: Size needed to obtain gauge; try 4 mm as a starting point.
- Notions: Stitch markers, yarn needle, sewing needle, matching thread and narrow cotton twill tape for reinforcing the fronts and pockets.
Size and Fit
One sample size. The target closed chest is approximately 110 cm, with a target length of approximately 75 cm from shoulder to hem. Each front is 44 stitches wide and the back is 88 stitches wide at the stated washed gauge. The cardigan has an open front, so the closed-chest figure describes the combined panel widths rather than a buttoned closure. Adjust hook size to meet gauge; do not add rows for length without also reconsidering pocket and trim placement.
Gauge
16 half double crochet stitches and 12 rows = 10 cm in a washed, dried and relaxed swatch. Turning chains do not count as stitches. Measure both stitch and row gauge before starting: 90 body rows give the approximately 75 cm target length.
Abbreviations
US crochet terms.
- ch = chain
- hdc = half double crochet
- sc = single crochet
- sl st = slip stitch
- hdc2tog = half double crochet two stitches together; decreases one stitch
- RS / WS = right side / wrong side
Pattern
- Back With main yarn, ch 89. Row 1: hdc in the second ch from hook and in each remaining ch; 88 hdc. Ch 1 and turn after every row. Work even through Row 90, keeping 88 stitches. Mark the side edges between Rows 58 and 59 for the armholes. At the top edge, mark the centre 32 stitches for the back neck; the 28 stitches on each side are the shoulders.
- Fronts Make two mirror-image panels. For each, ch 45; work 44 hdc in Row 1 and work even through Row 58. Mark the outer side edge between Rows 58 and 59. On Rows 59, 61, 63 and every following odd-numbered row through Row 89, decrease one stitch at the front-opening edge using hdc2tog over its first or last two stitches as appropriate. Work all other rows even. Row 90 has 28 stitches. Place the decreases on opposite edges of the two panels so they mirror each other. The shaped edges are the front necklines; the straight edges are the outer sides.
- Shoulder and side seams Block the panels to the dimensions indicated by the washed gauge without stretching them. With RS together, seam each 28-stitch front shoulder to a 28-stitch back shoulder. Seam each side from the hem through Row 58. Leave Rows 59–90 open on both the front and back at each armhole: 32 row ends on each side of an armhole.
- Sleeves Make two. With main yarn, ch 37. Row 1: 36 hdc. Ch 1 and turn after every row. On every even-numbered row from Row 2 through Row 48, work 2 hdc in the first stitch and 2 hdc in the last stitch; work other rows even. There are 84 stitches after Row 48. Work even through Row 60. The sleeve measures approximately 50 cm from cuff to top at row gauge. Fold each sleeve lengthwise, seam its row ends, and centre its 84-stitch top edge at a shoulder seam. Pin its ends at the underarm, then sew the top edge around the armhole, distributing it evenly across the 64 body row ends. Ease in the small difference rather than gathering.
- Shaped shawl collar With RS facing and main yarn, start at one front hem. Work 1 sc into each of the 90 row ends up that front opening, 1 sc in each of the 32 back-neck stitches, then 1 sc into each of the 90 row ends down the other front opening: 212 sc. Ch 1, turn. Collar Row 1: hdc across all 212 stitches. Fasten off. For Row 2, join yarn in stitch 33 of Row 1 and work 148 hdc, ending in stitch 180. Ch 1, turn; Row 3: 148 hdc. Fasten off. For Row 4, join in stitch 17 of Row 3 and work 116 hdc; turn and work Row 5 even. Repeat this short-row method: join in stitch 17 of Row 5 and work 84 hdc for Rows 6–7, then join in stitch 17 of Row 7 and work 52 hdc for Rows 8–9. Fasten off. Each new pair leaves 16 stitches unworked at each end of the preceding pair, making the collar deepest around the back neck. Neaten the exposed stepped outer edge with loosely worked sc if desired; keep it flat rather than pulling it tight.
- Stocking-shaped pockets Make two mirror-image pockets in main yarn. Ch 11; Row 1: 10 hdc. Ch 1 and turn after each row. Rows 2–5: work 2 hdc in the first and last stitches of each row; 18 stitches after Row 5. Rows 6–9: work even. Rows 10–12: increase one stitch at the designated heel edge of each row by working 2 hdc in its edge stitch; 21 stitches after Row 12. Rows 13–15: decrease one stitch at that same heel edge with hdc2tog; 18 stitches after Row 15. Rows 16–20: work even. Make the second pocket with the heel shaping at the opposite edge. Along the top of each pocket, work two rows of 18 sc in contrast yarn for a cuff. Fasten off. The cuffs form the open pocket tops.
- Pocket placement and reinforcement Block both pockets flat. Centre one on each 44-stitch front, positioning its bottom near body Row 15 and its cuff near Row 36; orient the toe and heel as mirrored pairs. On the WS of each front, hand-sew a piece of twill tape behind the proposed pocket sides and bottom, without stretching the fabric. Sew the pocket sides and bottom securely through the panel and tape, leaving its cuff open. Reinforce the two upper corners with small stitches through all layers. Do not load the pockets with heavy items.
- Mantel zigzags On each front, mark lines approximately 3 and 8 stitches in from the front-opening edge. Using contrast yarn and a flat back stitch, embroider a zigzag between those lines: move from the inner line at body Row 6 to the outer line at Row 9, and back to the inner line at Row 12. Repeat this six-row sequence through Row 54. Keep the embroidery loose enough for the fronts to lie flat, and secure ends on the WS.
Finishing
- Sew narrow cotton twill tape along the WS of both front openings, from hem to the neckline beneath the collar. Cut it to the relaxed edge length, not a stretched length, and secure it with small stitches that do not show prominently on the RS.
- Weave in ends and lightly block the assembled cardigan to the gauge-based dimensions. Check that the collar and reinforced fronts hang evenly; adjust any overly tight edging stitches before wearing.
Helpful Tips
- Wash and dry the gauge swatch as the finished cardigan will be cared for. A change in row gauge changes the longline length and sleeve length.
- Pin pockets and zigzags in place before sewing. Their placement keeps the embroidery clear of the pocket openings and the shaped upper front edges.
- Twill tape supports the weight of the pockets and collar without adding bulky crochet stitches to the opening edges. Sew it on with the cardigan laid flat so the fronts do not sag or pucker.
Frequently Asked Questions
Which design should I choose if I am new to crocheting garments?
Look at the confident-beginner drop-shoulder pullover or granny square cardigan first. Both still call for careful measuring, gauge checks and neat finishing.
Are these all free crochet Christmas sweater patterns?
Do not assume every design is free. Check the individual pattern details before choosing one, including any materials list and sizing information.
How can I keep a heavily decorated sweater comfortable?
Think about where motifs sit against the body and under the arms. Flat colourwork or stripes avoid the bulk of raised details, while a plain back can make a textured front easier to wear.
What should I check before making a colourwork sweater?
Make a swatch using the intended colourwork method, not just the plain body stitch. Check gauge, drape and whether the fabric feels comfortable at the shoulders and underarms.
Final Thoughts
The best choice is the one whose shaping and finishing you will enjoy as much as its festive design. Compare the fit and fabric first, then pick the baubles, stripes, trees or bold colourwork that suit your plans.