12 Crochet Christmas Sweaters for Dogs

Looking for a crochet dog Christmas sweater that suits your dogâs shape as well as the season? These 12 patterns range from striped pullovers to panelled designs, a granny-square back and a side-opening cardigan.
The constructions offer different ways to handle the neck, chest and foreleg openings. Compare those details before choosing festive colours: a comfortable fit matters more than the motif.
For more ideas that build on this collection, explore crochet Christmas hats for dogs.
Before You Start
These patterns use US crochet terminology. Check the measurements and gauge given in your chosen pattern before starting, especially if you change yarn. Chest width affects comfort, while back length determines where the sweater ends. Measure your dog while standing naturally, and allow enough ease for movement without leaving loose fabric that could snag.
Construction makes a practical difference. A neck-down yoke or raglan gives you chances to check the fit as the sweater grows. Flat panels and side seams offer another way to adjust the foreleg openings. The side-opening cardigan may suit a dog that dislikes having clothing pulled over its head, provided the fastening lies flat and stays secure.
Pick a yarn that can be washed after walks and avoid scratchy fibres or loose decorations your dog might chew. Try the sweater on before finishing every seam. Your dog should be able to walk, sit and lie down comfortably, with no pressure at the throat or behind the legs. Remove the garment if it causes rubbing or distress, and supervise your dog while it is worn.
Crochet terminology: This article uses US crochet terms. Check the abbreviations for each project.
Striped Raglan Christmas Dog Sweater
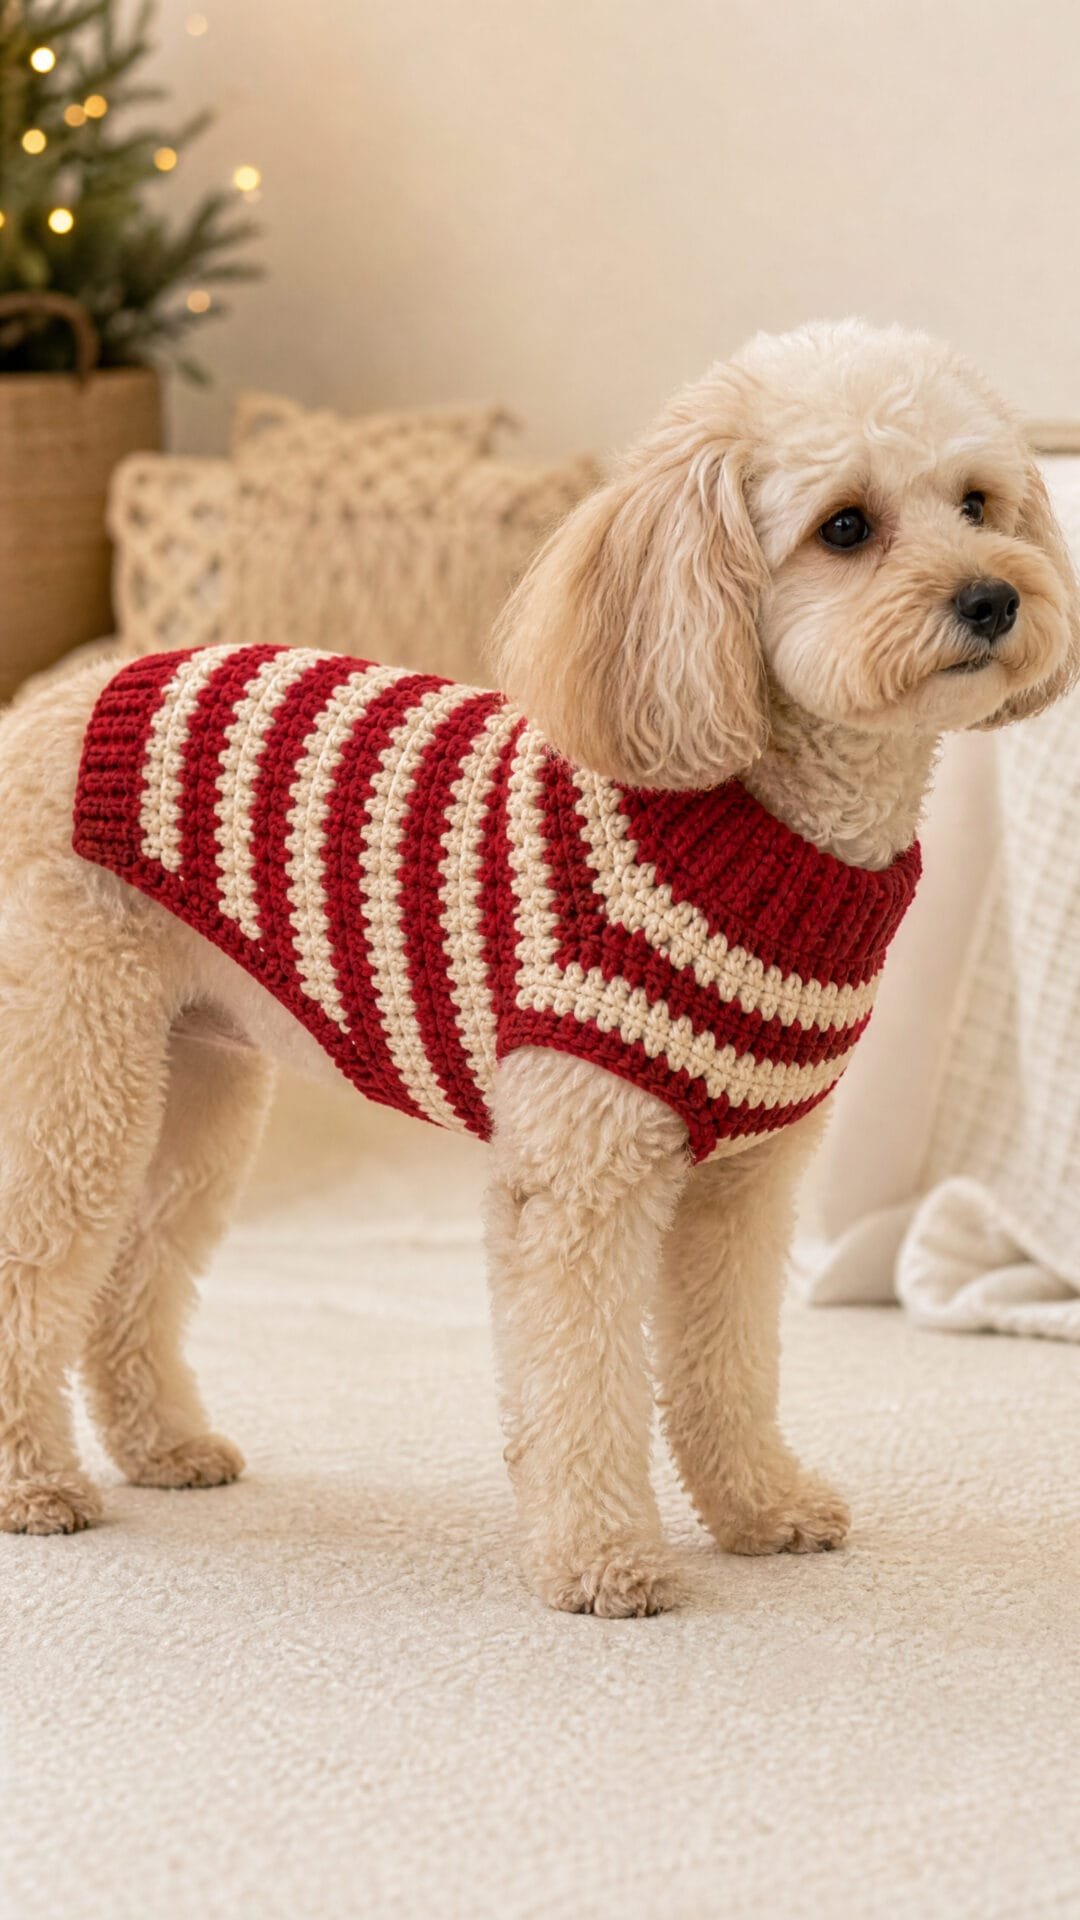
Red and cream stripes give this crochet dog Christmas sweater a festive look without adding decoration that could catch during play. Its neck-down raglan shape makes the developing fit easier to assess before the body is complete, while the shorter underside leaves room for comfortable movement.
Measure your dog while they are standing: take the neck measurement where the collar will sit, the chest around its widest point behind the forelegs, and the back along the spine to the intended hem. These measurements matter more than a general breed label, as dogs with similar back lengths can have very different chest shapes.
As the four raglan lines grow, keep an eye on how the yoke sits across the shoulders. The key check comes when the foreleg sections are separated: compare the working body circumference with your dog’s chest measurement and allow enough ease for movement. If it is substantially out of range, use a size-specific recalculation rather than simply extending the yoke, which would also enlarge the foreleg openings.
Striped Raglan Christmas Dog Sweater
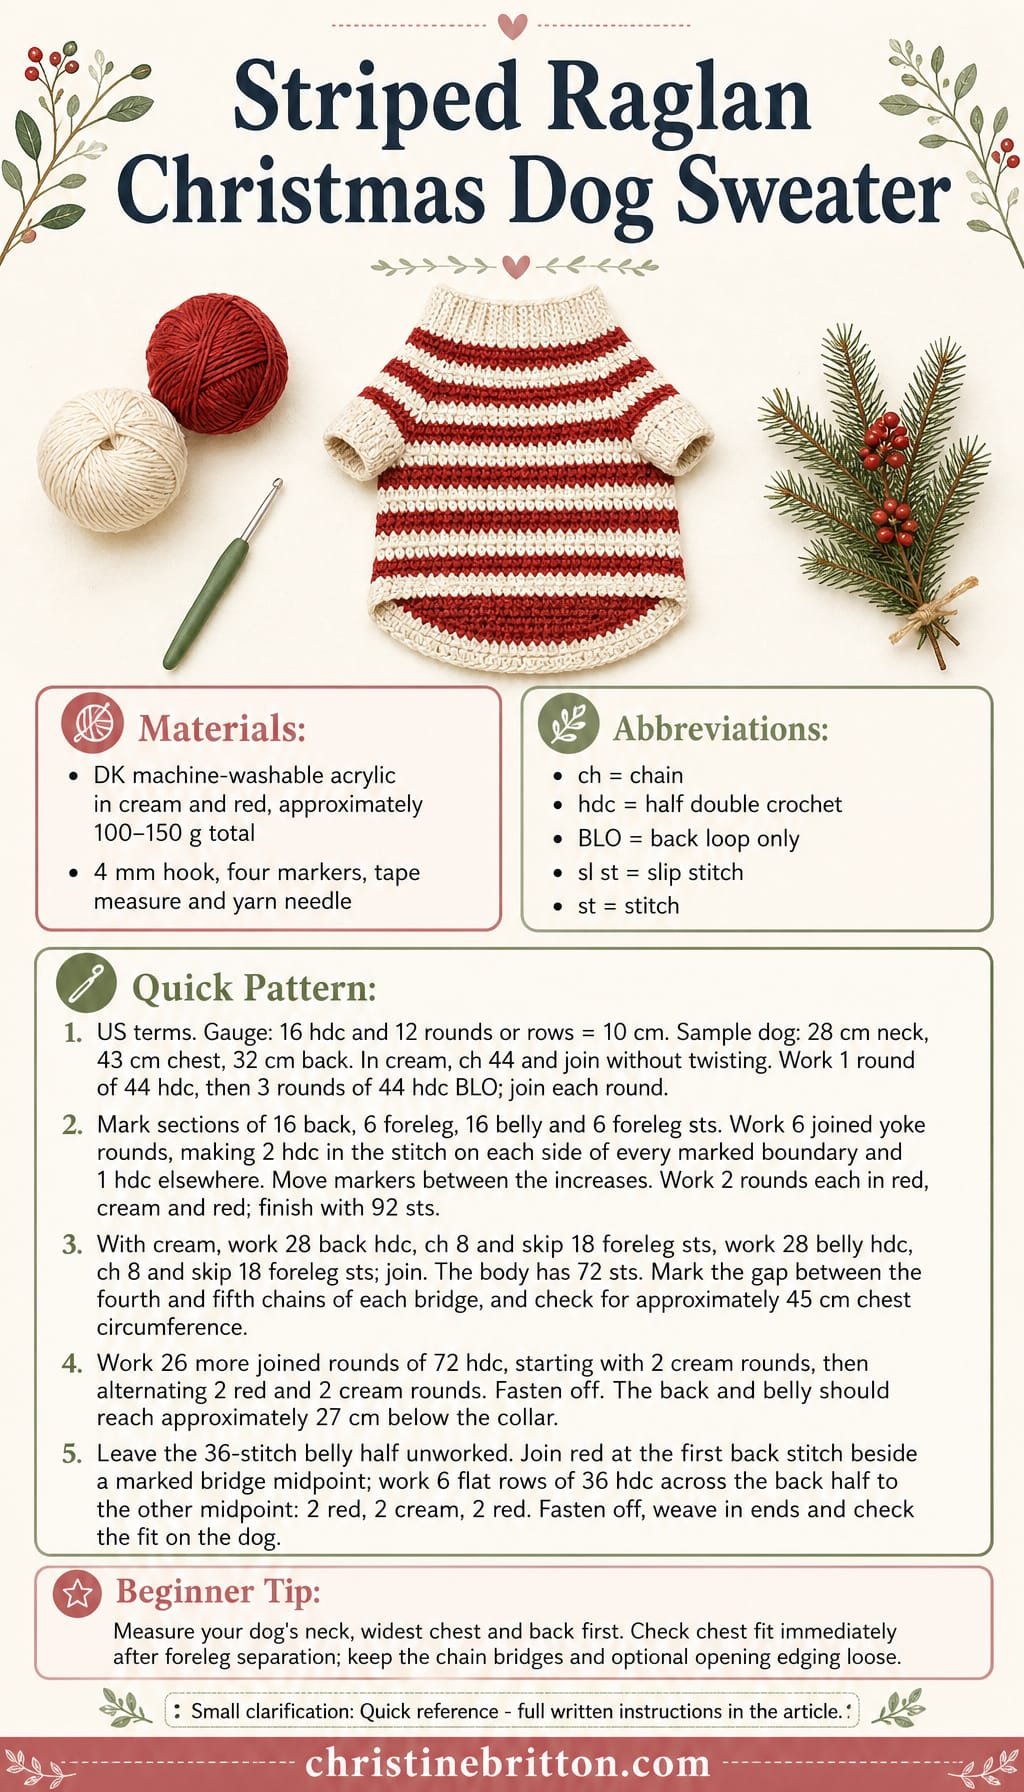
Quick-reference card. Follow the complete written instructions below.
Materials
- DK acrylic yarn: Smooth, machine-washable yarn in red and cream; allow approximately 100â150 g total for the sample size.
- Crochet hook: 4 mm, or the size needed to obtain gauge.
- Notions: Four removable stitch markers, tape measure and yarn needle.
Size and Fit
Sample size: 28 cm neck, 43 cm chest and 32 cm back, measured from the base of the neck to the desired back hem. Measure your dog while standing: take the neck measurement where the collar will sit, the chest around its widest point behind the forelegs, and the back along the spine. The 44-stitch collar measures approximately 27.5 cm and should stretch comfortably over the head. At separation, the 72-stitch body measures approximately 45 cm around, giving 2 cm of chest ease. Each foreleg opening measures approximately 16 cm around. The back is approximately 32 cm from the bottom of the collar; the underside is approximately 5 cm shorter. Check these measurements against your dog before continuing.
Gauge
16 hdc and 12 hdc rounds or rows = 10 cm in the main fabric. Check gauge before starting; the collar’s back-loop fabric may stretch differently.
Abbreviations
US crochet terms.
- ch = chain
- hdc = half double crochet
- BLO = back loop only
- sl st = slip stitch
- st(s) = stitch(es)
Pattern
- Preparation Use cream for the collar. For the yoke and body, change colour every two rounds: red for yoke rounds 1â2, cream for 3â4 and red for 5â6. Begin the body with two cream rounds, then alternate two red rounds and two cream rounds. Change colour when making the joining sl st at the end of the preceding round. A starting ch 1 never counts as a stitch.
- Collar Ch 44 and sl st in the first ch to form a ring, taking care not to twist it. Round 1: Ch 1, hdc in each ch; join with a sl st to the first hdc. (44 sts.) Rounds 2â4: Ch 1, hdc BLO in each st; join. (44 sts each round.)
- Set up the raglan sections Beginning at the first stitch of the next round, identify four consecutive sections: back 16 sts, first foreleg 6 sts, belly 16 sts and second foreleg 6 sts. Place a marker between sections at each of the four boundaries. Keep the start of each round at the first back stitch.
- Yoke rounds 1â6 On each round, ch 1. At every marked boundary, work 2 hdc in the last stitch before the marker and 2 hdc in the first stitch after it; work 1 hdc in every other stitch. Move each marker to the boundary between those two increased stitches, then join to the first hdc. Each round adds 8 sts. After round 6 there are 92 sts: back 28, foreleg 18, belly 28, foreleg 18. Lay the yoke flat and check that the neck sits comfortably without pulling.
- Separate the forelegs With cream, ch 1 and hdc across the 28 back sts. Ch 8, skip the next 18 foreleg sts, hdc across the 28 belly sts, ch 8 and skip the final 18 foreleg sts; join to the first hdc. The working body has 72 sts, counting each chain as one stitch. Each opening consists of 18 skipped stitches and an 8-chain bridge. Mark the gap between the fourth and fifth chains of each bridge; these gaps divide the body into a 36-stitch back half and a 36-stitch belly half. Measure the body around the chest now: at gauge it is approximately 45 cm. Check that it fits over your dog’s 43 cm chest without restricting movement before working further.
- Striped body Work 26 more joined rounds of hdc over all 72 body stitches, starting with the first cream round after separation. Ch 1 at the start of each round and join to the first hdc. Work rounds 1â2 in cream, 3â4 in red, and continue changing colour every two rounds. The separation round is not included in these 26 rounds. Fasten off after body round 26. The back and belly should now reach approximately 27 cm below the bottom of the collar, including the yoke.
- Longer back hem Leave the 36-stitch belly half unworked. Join red yarn at the first stitch on the back side of one marked bridge midpoint. Row 1: Ch 1, hdc across the 36 back-half stitches to the stitch immediately before the other marked midpoint; turn. Rows 2â6: Ch 1, hdc in each of the 36 sts; turn except after row 6. Work rows 1â2 in red, 3â4 in cream and 5â6 in red. These six rows add approximately 5 cm to the back only. Fasten off.
Finishing
- Weave in ends securely, especially at the underarm bridges and colour changes.
- Neaten the openings with one round of loosely worked sl sts if desired. Do not draw the edges in.
- Check the finished neckline, chest, foreleg openings and hem on the dog. Remove the sweater if it rubs, catches a leg or restricts movement.
Helpful Tips
- The four raglan markers sit between stitches, not in a centre raglan stitch. Each adjacent pair of increases forms a visible increase line.
- The 72-stitch chest circumference is the key fit check. If your dog’s measurements differ substantially from the sample, use a size-specific recalculation rather than adding unplanned yoke rounds: another increase round also enlarges both foreleg sections.
- Keep chain bridges relaxed so the foreleg openings do not tighten when worn.
Snowfall Round-Yoke Dog Sweater

This crochet dog Christmas sweater puts small cream snow marks across the shoulders while keeping the rest of the blue body simple. The scattered motif gives it a festive look without bulky decorations that might get in a dogâs way.
The neck-down circular yoke widens through increases distributed around the rounds, rather than along raglan lines. That helps the fabric spread smoothly over the shoulders. Below the yoke, separate back and belly sections create short foreleg openings before the plain body continues.
Keep the inside as tidy as the outside: loose colourwork strands can catch a paw as the sweater goes on. The pattern uses individual snow marks with no long floats or attached pieces. Before dressing your dog, check that the neck passes comfortably over its head, the forelegs can move freely and the belly stays clear for toileting.
Snowfall Round-Yoke Dog Sweater
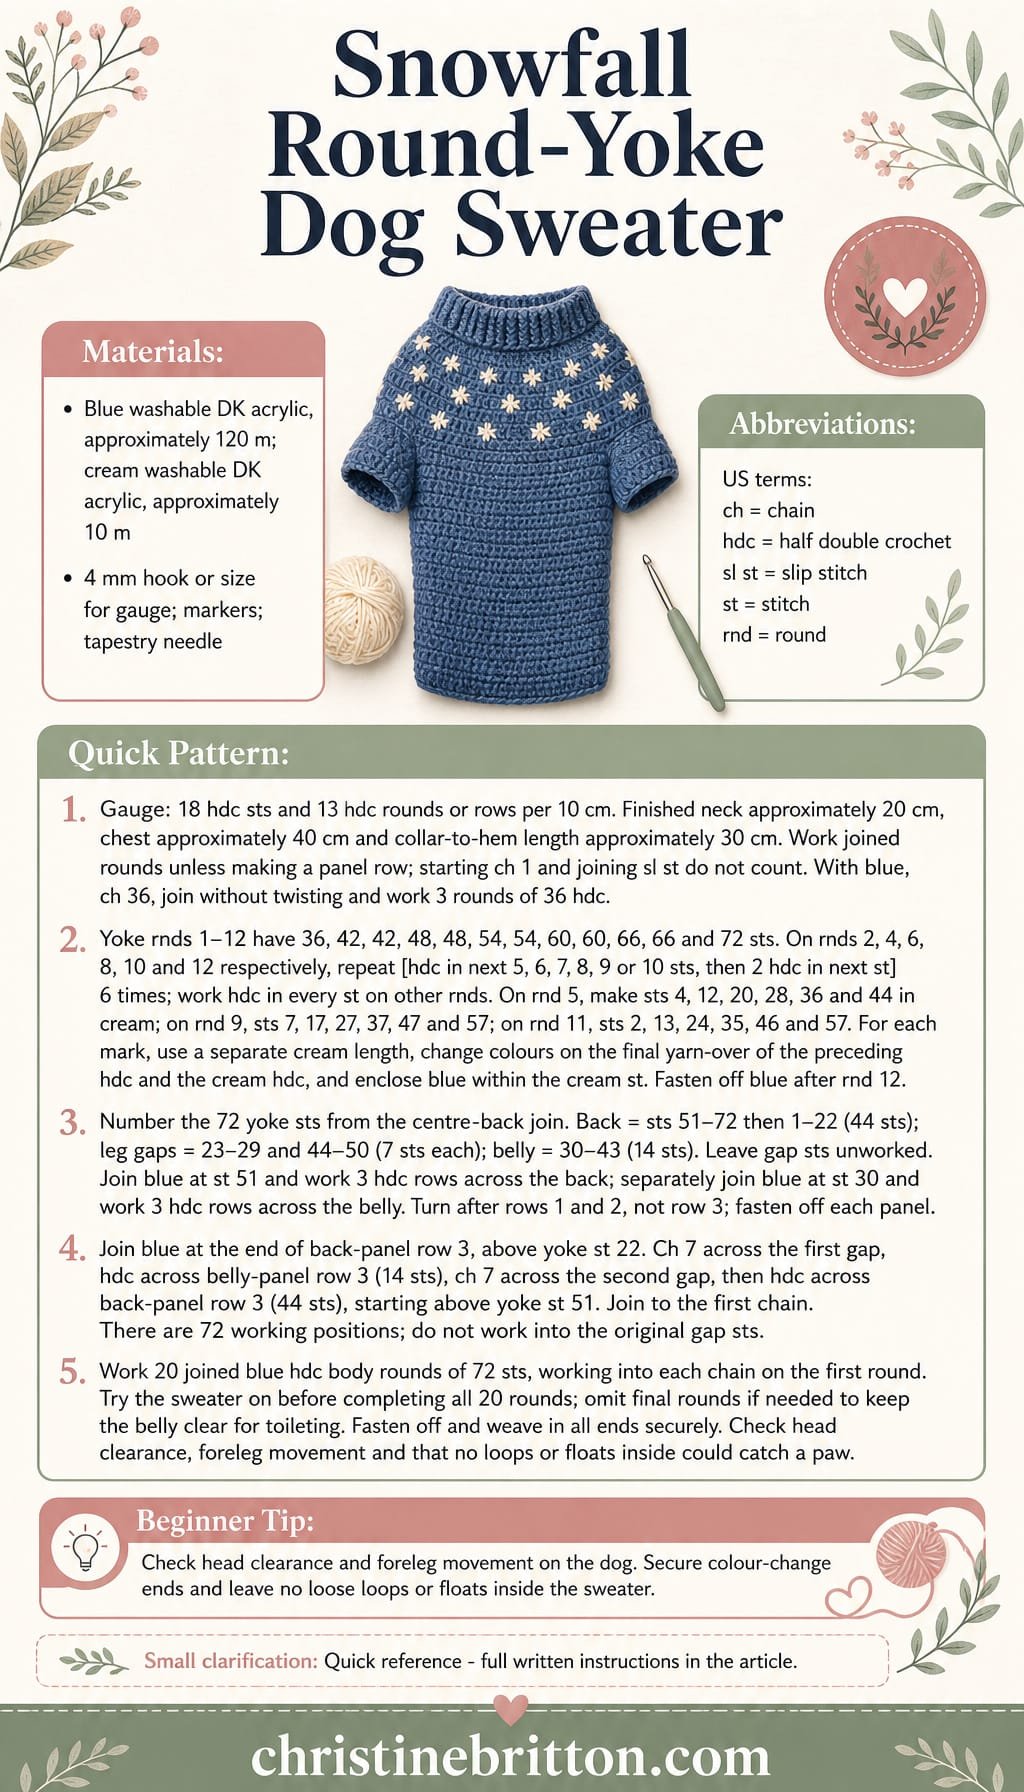
Quick-reference card. Follow the complete written instructions below.
Materials
- Blue washable DK acrylic yarn: Approximately 120 m for the main colour
- Cream washable DK acrylic yarn: Approximately 10 m for individual snow marks
- 4 mm crochet hook: Or size needed to obtain the stated gauge
- Stitch markers and tapestry needle: For marking sections and securing ends
Size and Fit
One small-dog size. At the stated gauge, the neck opening is approximately 20 cm around, the yoke reaches approximately 40 cm around, and the length from collar top to hem is approximately 30 cm. Intended for a dog with an 18â19 cm neck, a 38â39 cm chest, a head that passes comfortably through the neck opening, and forelegs that fit the approximately 4 cm wide by 2.3 cm deep openings. Check these measurements on the dog before starting. The belly length should leave the toilet area clear; if necessary, stop the body rounds earlier and finish both back and belly at that shorter length.
Gauge
18 hdc stitches and 13 hdc rounds or rows = 10 cm in plain hdc fabric, measured without stretching. Check gauge before starting; it determines the fit and length.
Abbreviations
US crochet terms.
- ch = chain
- hdc = half double crochet
- sc = single crochet
- sl st = slip stitch
- st(s) = stitch(es)
- rnd(s) = round(s)
- rep = repeat
Pattern
- Working method With blue, work joined rounds unless a panel row is specified. Join each round with a sl st to its first hdc; ch 1 to start the next round. The ch 1 and joining sl st never count as stitches. Number the stitches of each yoke round from its first hdc. For every cream mark, use a separate short length of cream yarn: change to cream on the final yarn-over of the preceding hdc, work the marked hdc, then change back to blue on its final yarn-over. Enclose the blue yarn within that one cream stitch rather than leaving a loose strand behind it. Leave cream ends long enough to weave in securely on the inside.
- Collar Ch 36 with blue. Without twisting the chain, sl st into the first ch to form a ring. Rnd 1: ch 1, hdc in each ch, join. 36 sts. Rnds 2â3: ch 1, hdc in each st, join. 36 sts each round.
- Circular yoke, rnds 1â4 Yoke rnd 1: hdc in each st; 36 sts. Rnd 2: [hdc in next 5 sts, 2 hdc in next st] 6 times; 42 sts. Rnd 3: hdc in each st; 42 sts. Rnd 4: [hdc in next 6 sts, 2 hdc in next st] 6 times; 48 sts.
- Circular yoke, rnds 5â8 Rnd 5: hdc in each st, making sts 4, 12, 20, 28, 36 and 44 in cream; 48 sts. Rnd 6: [hdc in next 7 sts, 2 hdc in next st] 6 times; 54 sts. Rnd 7: hdc in each st; 54 sts. Rnd 8: [hdc in next 8 sts, 2 hdc in next st] 6 times; 60 sts.
- Circular yoke, rnds 9â12 Rnd 9: hdc in each st, making sts 7, 17, 27, 37, 47 and 57 in cream; 60 sts. Rnd 10: [hdc in next 9 sts, 2 hdc in next st] 6 times; 66 sts. Rnd 11: hdc in each st, making sts 2, 13, 24, 35, 46 and 57 in cream; 66 sts. Rnd 12: [hdc in next 10 sts, 2 hdc in next st] 6 times; 72 sts. Fasten off blue after joining this round.
- Mark the foreleg sections Place the round join at the centre of the dog’s back. Number the 72 stitches from the first hdc after that join. Back: sts 51â72 followed by sts 1â22, giving 44 sts across the join. First leg gap: sts 23â29. Belly: sts 30â43, giving 14 sts. Second leg gap: sts 44â50. Mark each boundary. The 14 gap stitches are left unworked, not decreased.
- Back panel Join blue to yoke st 51. Row 1: ch 1, hdc in sts 51â72 and then sts 1â22; turn. 44 sts. Rows 2â3: ch 1, hdc in each of the 44 sts; turn after row 2 only. Fasten off after row 3. The final stitch of row 3 lies above yoke st 22.
- Belly panel Join blue to yoke st 30. Row 1: ch 1, hdc in sts 30â43; turn. 14 sts. Rows 2â3: ch 1, hdc in each of the 14 sts; turn after row 2 only. Fasten off after row 3. The final stitch of row 3 lies above yoke st 43.
- Rejoin around the legs Join blue at the final stitch of back-panel row 3, above yoke st 22. Ch 7 across the first leg gap without pulling it closed; hdc in the 14 sts of belly-panel row 3; ch 7 across the second leg gap; hdc in the 44 sts of back-panel row 3, starting at the edge above yoke st 51. Join with a sl st to the first chain of this joining round. Count 72 working positions: 14 chains and 58 hdc. Do not work into the original 14 gap stitches.
- Plain body Work 20 more joined rounds in blue: ch 1, hdc in each of the 72 working positions, including each chain on the first of these rounds; join. Keep 72 sts in every round. Try the sweater on the dog before completing all 20 rounds; for a shorter safe belly length, omit some of the final rounds. Fasten off.
Finishing
- Weave every cream end securely through several stitches on the inside. Check that the enclosed blue yarn at each snow mark has no exposed loop that could catch a paw.
- Weave in the blue ends. Check the foreleg openings for loose ends or tight chain bridges, and remove all markers.
- Lay the sweater flat and check the finished length. Wash according to the yarn label and dry flat.
Helpful Tips
- Evenly spaced increases add six stitches around each increase round, so the yoke expands smoothly over the shoulders rather than creating four raglan lines.
- Check the neck opening over the dog’s head before continuing; do not rely on the stated circumference alone if the yarn has little stretch.
- Supervise the dog while wearing the sweater. The openings should allow free foreleg movement, and the hem should not interfere with toileting.
Bottom-Up Candy Cane Dog Sweater
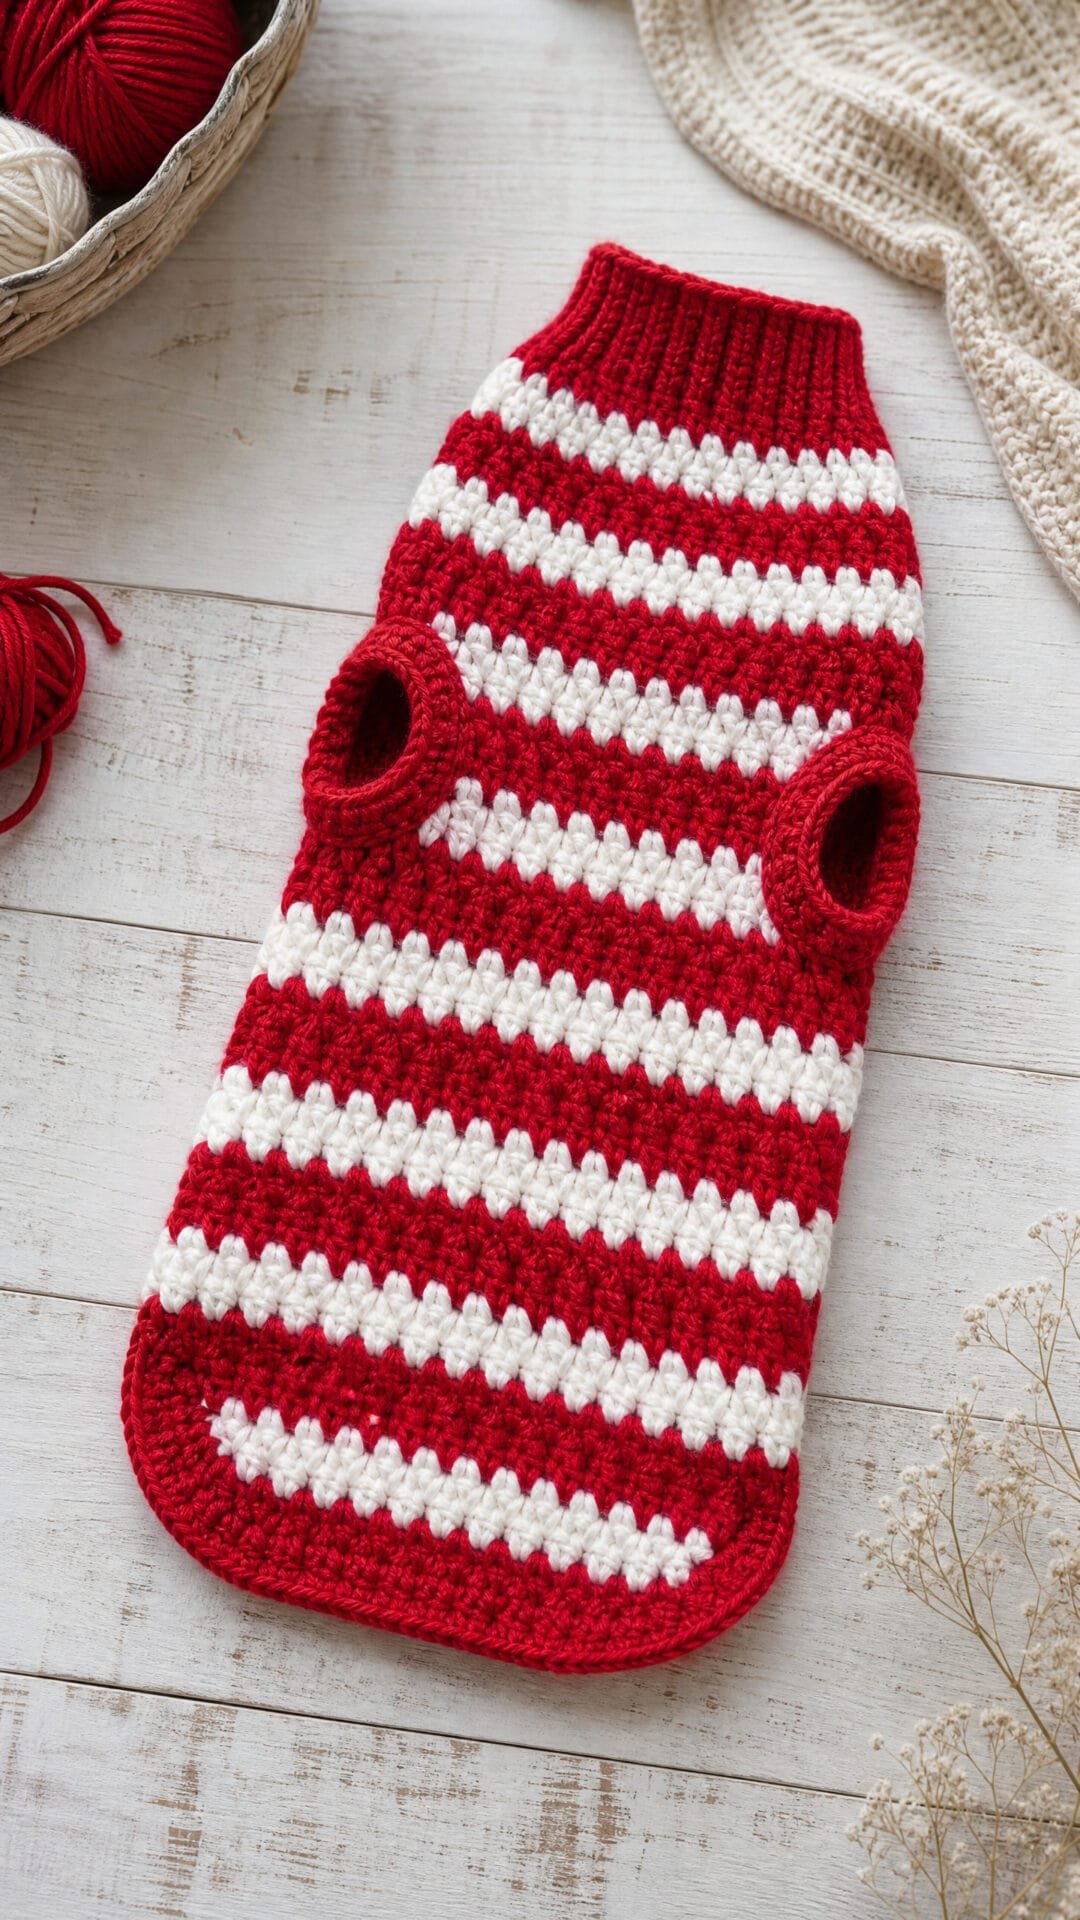
This candy-cane pullover brings cheerful red-and-white stripes to a practical dog sweater. Its longer back offers extra coverage, while the shorter chest keeps fabric away from the underside where it could get in the way.
The sweater is built upwards from the hem. At the shoulders, the fabric separates around the forelegs before coming together again at the neck, creating openings without bulky sleeves. A narrow ribbed collar gives the neckline a neat, flexible finish.
Fit matters more than a size label for a dog sweater. Compare the developing body with your dogâs chest, and make sure the foreleg openings sit comfortably at the sides rather than pulling across the shoulders. The written pattern below gives the sample construction and its fit checks.
Bottom-Up Candy Cane Dog Sweater

Quick-reference card. Follow the complete written instructions below.
Materials
- DK acrylic yarn: Washable, smooth yarn in red and white; approximately 100 g total. Allow extra yarn if adjusting the length.
- Crochet hook: 4 mm, or the size needed to obtain gauge
- Other: Stitch markers, tape measure, yarn needle and scissors
Size and Fit
One sample size: for a dog measuring approximately 38 cm around the chest just behind the forelegs and 29 cm around the neck. At gauge, the 52-stitch body measures approximately 40 cm around and the 40-stitch neck approximately 31 cm around. The chest underside is approximately 24 cm from collar edge to hem; the back is approximately 29 cm because of its extra 6-row lower section. The foreleg openings are approximately 3 cm wide and 7 cm high. Measure your dog and check the developing body against its chest; the openings should begin just below the forelegs. Do not rely on the sample size if these positions or the neck measurement do not suit your dog.
Gauge
13 hdc and 12 hdc rows or rounds = 10 cm in the main fabric. Check that each 34-stitch and 18-stitch sc hem band has a combined width of approximately 40 cm before joining them. Lengths are approximate because the sc hems and dc collar have different row heights.
Abbreviations
US crochet terms.
- ch = chain
- sc = single crochet
- hdc = half double crochet
- dc = double crochet
- hdc2tog = half double crochet two stitches together
- BLO = back loop only
- FPdc = front post double crochet
- BPdc = back post double crochet
- st = stitch
- sl st = slip stitch
Pattern
- Before you start Beginning chains used to turn or raise a round do not count as stitches. Join rounds with a sl st to the first stitch. Work the body and panels in a candy-cane sequence of 2 red rows or rounds, then 2 white; change colour on the final yarn-over of the preceding stitch. Number the stitches of each completed body round from 1 to 52, starting at the join, to locate the foreleg openings.
- Back hem With red, ch 35. Row 1: sc in the second ch from the hook and in each ch across (34 sc). Change to white. Row 2: ch 1, turn, sc BLO across (34 sc). Change to red. Back extension rows 1â6: ch 2, turn, hdc across (34 hdc). Fasten off. This extra lower section makes the back longer than the chest.
- Chest hem With red, ch 19. Row 1: sc in the second ch from the hook and in each ch across (18 sc). Change to white. Row 2: ch 1, turn, sc BLO across (18 sc). Fasten off. The top edge of this band will join the top edge of the back extension; its lower edge remains higher than the back hem.
- Join hems and work lower body With red, join yarn at one end of the top edge of the back extension. Round 1: ch 2, hdc across its 34 stitches, then hdc across the 18 stitches of the chest hem’s top edge; join (52 hdc). The two pieces meet at the sides and now form a tube. Place a marker at the round join. Round 2: red hdc in each stitch. Rounds 3â4: white hdc in each stitch. Rounds 5â6: red hdc in each stitch. Rounds 7â8: white hdc in each stitch. Rounds 9â10: red hdc in each stitch. Rounds 11â12: white hdc in each stitch. Each round has 52 hdc. The lower body above the hems should now measure approximately 10 cm. Check the circumference against the dog’s chest and check that the next section will begin at the forelegs.
- Mark foreleg spaces On round 12, count from the join. Stitches 3â32 form the 30-stitch back panel; stitches 37â50 form the 14-stitch chest panel. Leave stitches 33â36 and stitches 51â52 plus 1â2 unworked: these are the two 4-stitch lower edges of the foreleg openings. Move markers if needed so these spaces sit at the dog’s sides before continuing; keep the same panel and opening counts.
- Back panel Join red to stitch 3 of round 12. Row 1: ch 2, hdc in stitches 3â32 (30 hdc). Rows 2â8: ch 2, turn, hdc across (30 hdc). Work rows 1â2 red, 3â4 white, 5â6 red and 7â8 white. Fasten off.
- Chest panel Join red to stitch 37 of round 12. Row 1: ch 2, hdc in stitches 37â50 (14 hdc). Rows 2â8: ch 2, turn, hdc across (14 hdc). Match the back panel’s colour sequence. Fasten off. The panels should reach the same upper level, with an opening between them at each side.
- Rejoin above forelegs Join red at one end of the back panel’s top edge. Joining round: ch 2, hdc across all 30 back-panel stitches, ch 4 across the first opening, hdc across all 14 chest-panel stitches, ch 4 across the second opening; join (52 stitches, counting the 8 chains). Do not work down the sides of the openings.
- Shape neck Continue in red. Decrease round: ch 2, repeat [hdc2tog, hdc in each of the next 2 stitches] 12 times, then hdc in each of the last 4 stitches; work into the 4 chains as stitches when reached and join (40 hdc). Check that this opening will pass comfortably over the dog’s head before adding the collar.
- Ribbed collar Change to white. Collar round 1: ch 3, dc in each stitch around; join (40 dc). Collar rounds 2â4: ch 3, repeat [FPdc around the next stitch, BPdc around the next stitch] around; join (40 stitches). Fasten off. The post-stitch ribs give the collar some stretch; the ch 3 does not count as a stitch.
Finishing
- Weave in all ends securely, particularly where the hem pieces first join and at the corners of the foreleg openings.
- Lay the sweater flat. The chest hem should sit higher than the back hem without being sewn down to the back extension.
- Try the sweater on the dog while supervised. Check that the collar passes over the head, the body allows comfortable movement, and neither foreleg opening rubs. Remove it if the fit is restrictive.
Helpful Tips
- Count the 52 body stitches after every colour change; adding a stitch at a round join will move the foreleg openings out of position.
- The back extension adds length below the body’s starting round. Do not add those 6 rows to the chest hem, or the underside clearance will disappear.
- Keep the eight bridging chains loose enough to span the tops of the foreleg openings without pulling the panels together.
Holly Two-Panel Dog Sweater

This crochet dog Christmas sweater has a green back, a shorter cream chest and a flat holly-coloured stripe near the back hem. Red edging adds a festive contrast without raised or detachable decorations.
The two-panel construction makes it easier to see how the sweater will sit before the seams are secured. The chest panel stops above the back hem, helping to keep the lower abdomen clear. Open sections in the side seams give the forelegs room to move naturally.
Check the panel placement against your dog before closing the side seams. The foreleg openings should sit where the legs emerge from the chest, without pulling when your dog stands or walks; the neck must also pass comfortably over the head. If the panels themselves are too small, edging will not make the sweater fit.
Holly Two-Panel Dog Sweater
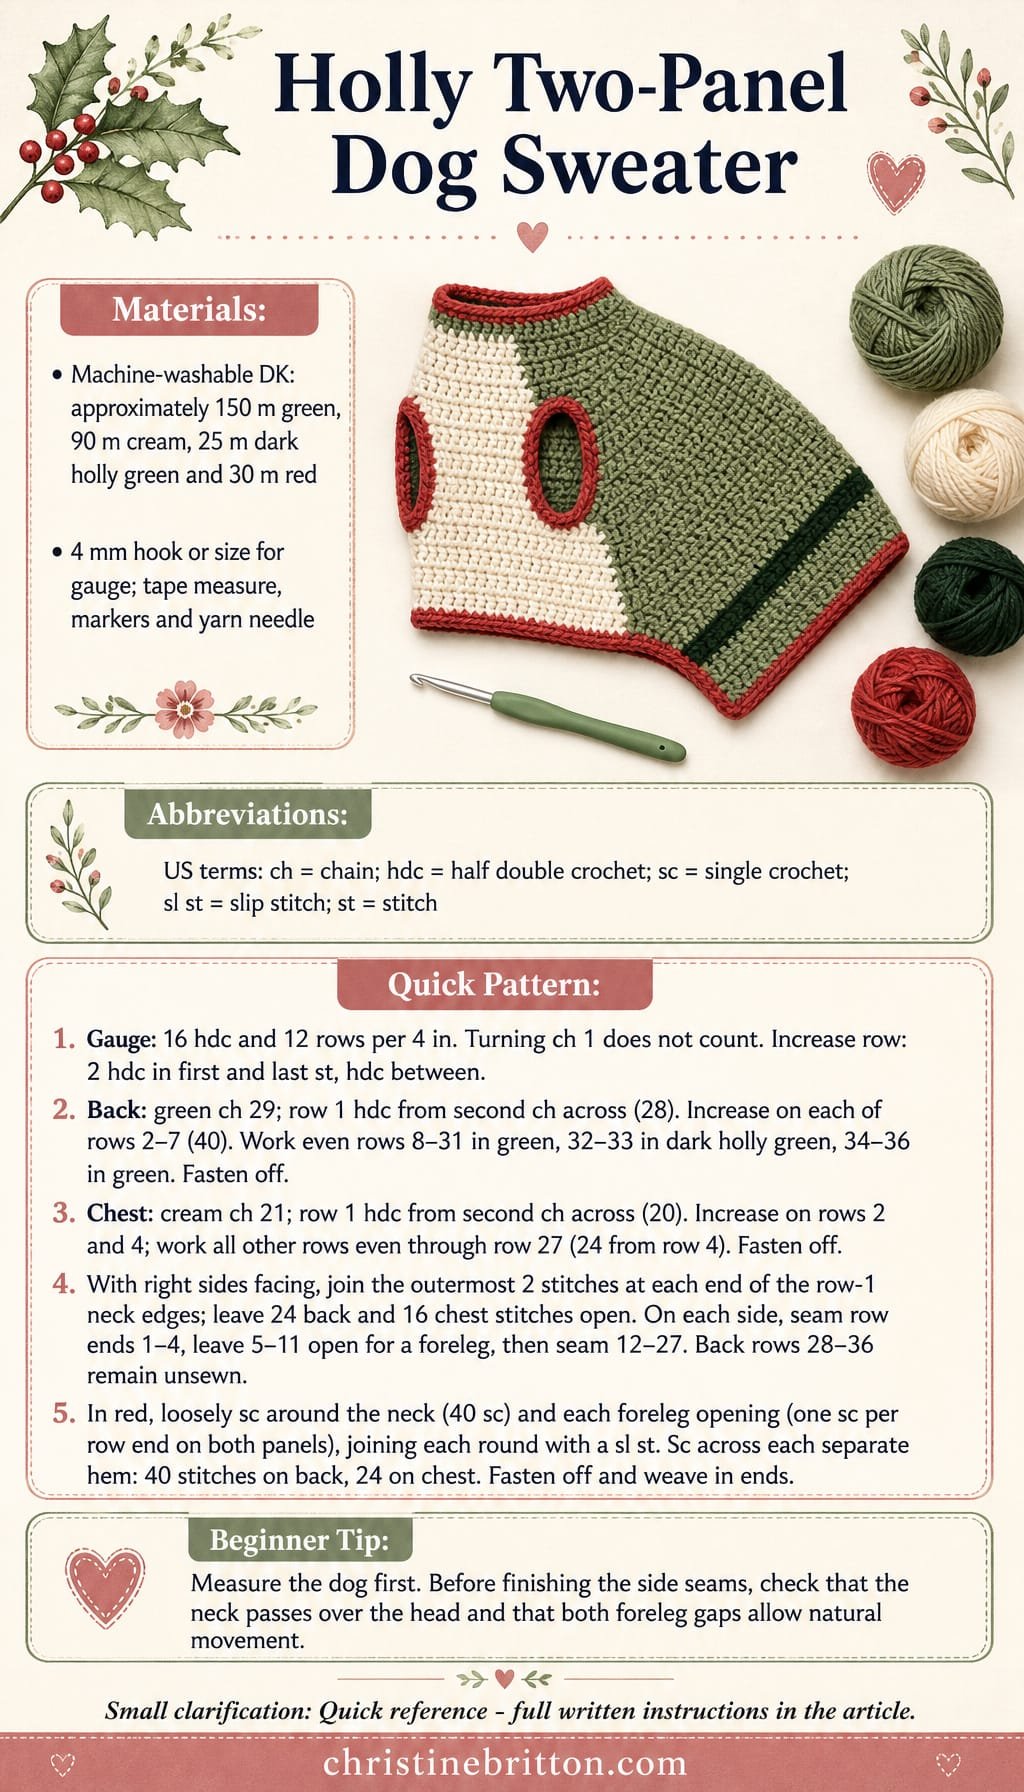
Quick-reference card. Follow the complete written instructions below.
Materials
- Smooth, machine-washable DK yarn: Allow approximately 150 m green for the back, 90 m cream for the chest, 25 m dark holly green for the stripe and 30 m red for edging. Quantities are estimates.
- Crochet hook: 4 mm, or the size needed to obtain gauge.
- Other: Tape measure, stitch markers, yarn needle and scissors.
Size and Fit
One sample size: calculated body circumference 16 in (40.5 cm), with a 10 in (25.5 cm) neck opening before edging. The back is approximately 12 in (30.5 cm) long; the chest panel is approximately 9 in (23 cm) long, leaving the last 3 in (7.5 cm) of the back uncovered underneath. Intended for a dog measuring approximately 15 in (38 cm) around the chest and 9 in (23 cm) around the neck, whose head can pass comfortably through the finished neck opening. Measure the dogâs back from the base of the neck to the desired hem, around the widest part of the chest, around the neck and around the widest part of the head before starting. Compare the panel lengths and combined full widths with those measurements before seaming. If the calculated size, head opening or foreleg placement does not suit the dog, choose a different size rather than relying on the edging to stretch.
Gauge
Target gauge in hdc fabric: 16 stitches and 12 rows = 4 in (10 cm), before edging. Make a swatch and change hook size if needed; the stated dimensions are calculated from this gauge, not measured from a finished sample.
Abbreviations
US crochet terms.
- ch = chain
- hdc = half double crochet
- sc = single crochet
- sl st = slip stitch
- st(s) = stitch(es)
Pattern
- Before you begin Work each panel flat from the neck towards the hem. A turning ch 1 does not count as a stitch. For an increase row, work 2 hdc in the first stitch, hdc across to the last stitch, then work 2 hdc in the last stitch. These are separate panels; do not join them while crocheting.
- Green back: rows 1â9 With green, ch 29. Row 1: hdc in the second ch from the hook and in each ch across; 28 hdc. Ch 1 and turn after this and every following row. Rows 2â7: work an increase row on every row; 40 hdc after row 7. Rows 8â9: hdc in each stitch across; 40 hdc.
- Green back: rows 10â36 Rows 10â31: hdc in each stitch across in green. Change to dark holly green for rows 32â33 and work hdc evenly across each row. Change back to green for rows 34â36 and work hdc evenly across each row. Every row from 7 to 36 has 40 hdc. Fasten off.
- Cream chest: rows 1â27 With cream, ch 21. Row 1: hdc in the second ch from the hook and in each ch across; 20 hdc. Ch 1 and turn after this and every following row. Rows 2 and 4: work an increase row. Rows 3 and 5: hdc in each stitch across. There are 24 hdc after row 4. Rows 6â27: hdc in each stitch across; 24 hdc per row. Fasten off.
- Check placement and seam shoulders Lay the panels flat with their row-1 neck edges together, right sides facing. Each panel widens towards its hem. Before sewing, check the back and chest lengths against the dog and check that their full widths add up to approximately 16 in (40.5 cm). On one end of the neck edges, sew the outermost 2 stitches of the back to the outermost 2 stitches of the chest. Repeat at the other end. Leave the middle 24 back stitches and 16 chest stitches unsewn for the neck opening. Turn right side out when the seams are complete.
- Seam sides and leave foreleg gaps Align the panels at the neck; the chest hem will stop 9 rows before the back hem. On each side, sew the row-end edges of back and chest rows 1â4 together. Leave the row-end edges of rows 5â11 unsewn for a foreleg opening, then sew rows 12â27 together. Do not sew the backâs remaining rows 28â36 to anything. Each unsewn foreleg section spans 7 rows, approximately 2â in (6 cm) at gauge. Before fastening off the seams, gently try the sweater on the dog and confirm that the openings sit around the forelegs without rubbing or restricting movement.
- Flat red edging With red, work one loose round of sc around the neck opening, placing one sc in each exposed foundation stitch; join with a sl st. The 24 exposed back stitches and 16 exposed chest stitches give 40 sc. Work one loose round of sc around each foreleg opening, placing one sc in each row end on both panels; join with a sl st. Work one row of sc across the 40-stitch back hem and one row across the 24-stitch chest hem. Fasten off. Keep all edging flat; do not add raised berries or other decorations.
Finishing
- Weave in all ends securely on the inside and check the seams for loose strands.
- Wash according to the yarn label and dry flat. Try the sweater on the dog under supervision; remove it if the neck, chest or foreleg openings feel tight or affect movement.
Helpful Tips
- Mark rows 5 and 11 on both side edges before seaming so the foreleg gaps match.
- The chest panel ends earlier than the back to keep fabric clear of the lower abdomen.
- Work edging loosely. If it draws an opening in, redo it with a larger hook; extra edging cannot correct an undersized panel or neck opening.
Side-to-Side Festive Dog Sweater
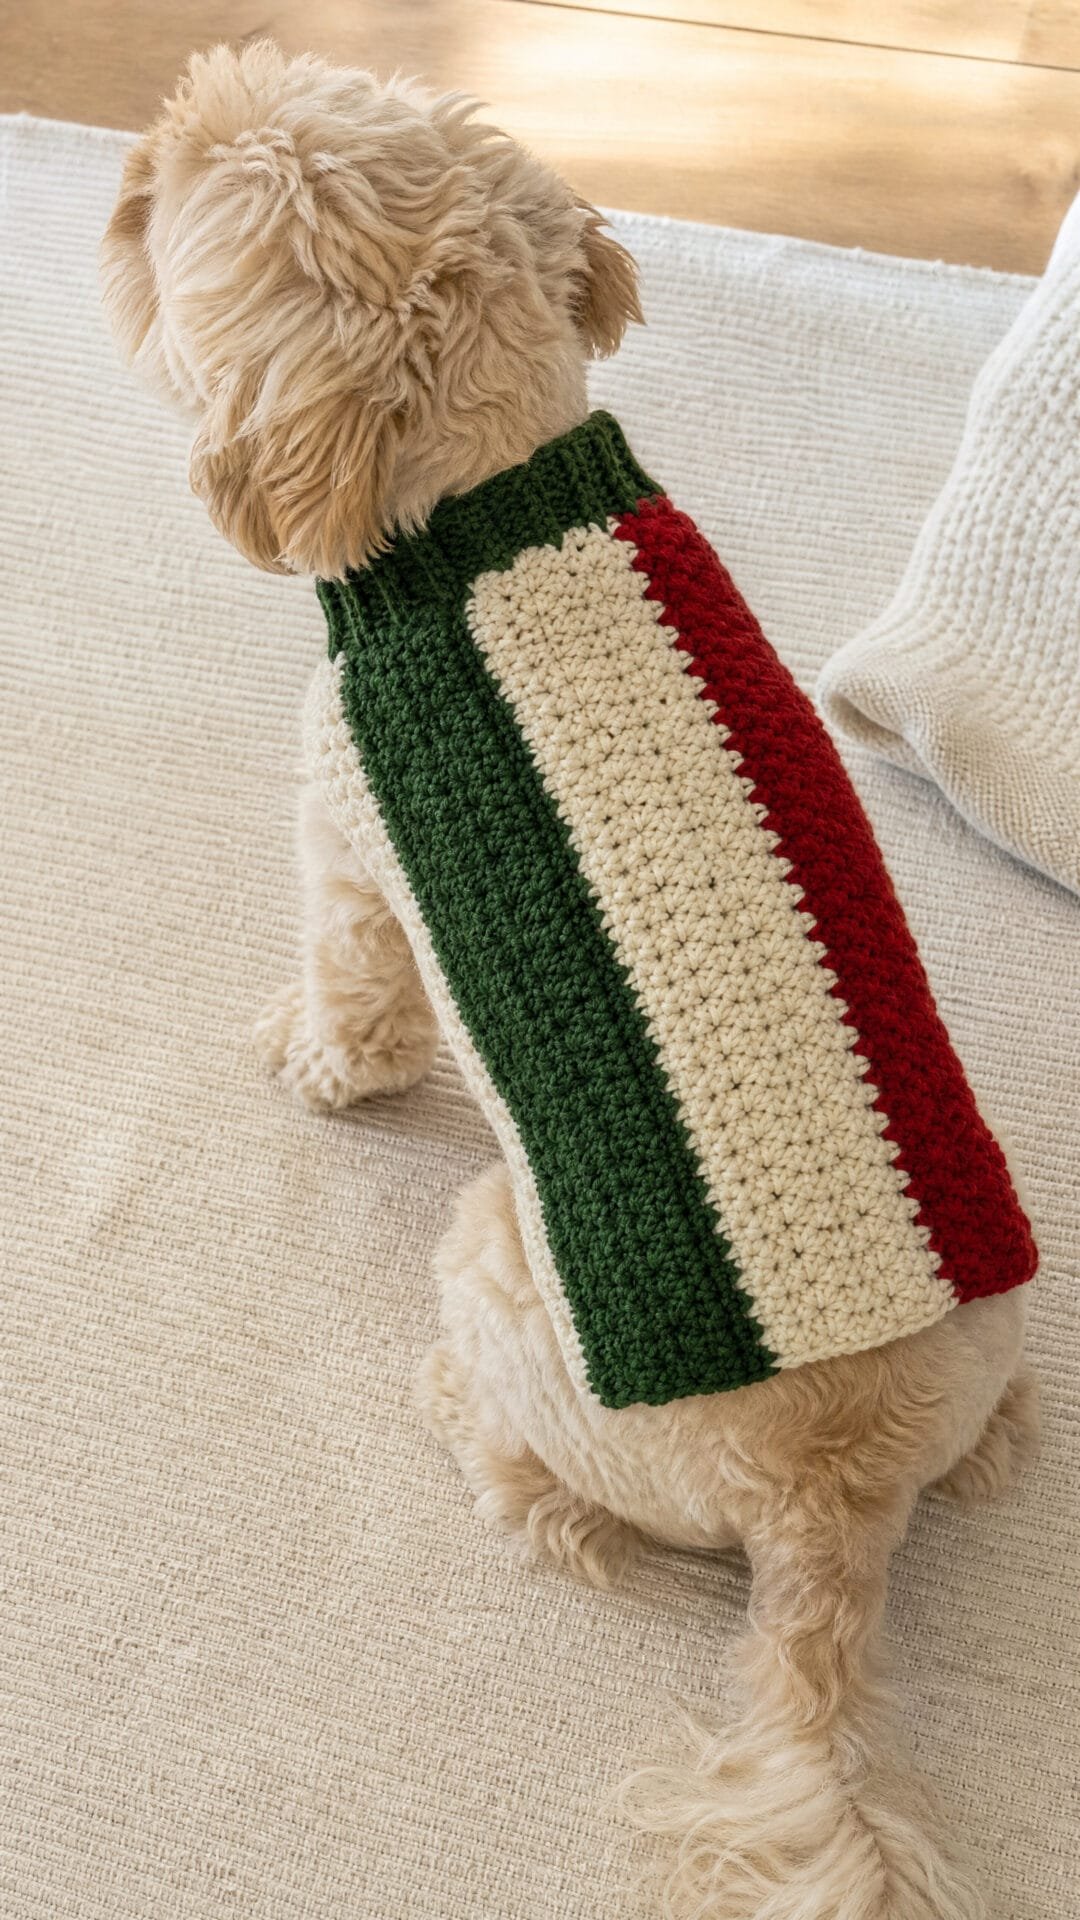
This crochet dog Christmas sweater turns the usual construction sideways: the back panel grows from one side of the dog to the other, while each row runs lengthways along the back. Changing colour between groups of rows creates broad green, cream and red stripes that run from collar towards tail.
The starting row establishes most of the back length, with shaping at the neck end completing the length and forming the shoulders. That makes the dog’s back measurement especially important before you begin; adding more rows would make the panel wider around the body, not longer.
A separate, shorter belly strip gives coverage beneath the chest without extending under the hindquarters. Check the fit as you assemble the panels, particularly around the neck and forelegs, so the finished sweater is comfortable for walking and play.
Side-to-Side Festive Dog Sweater
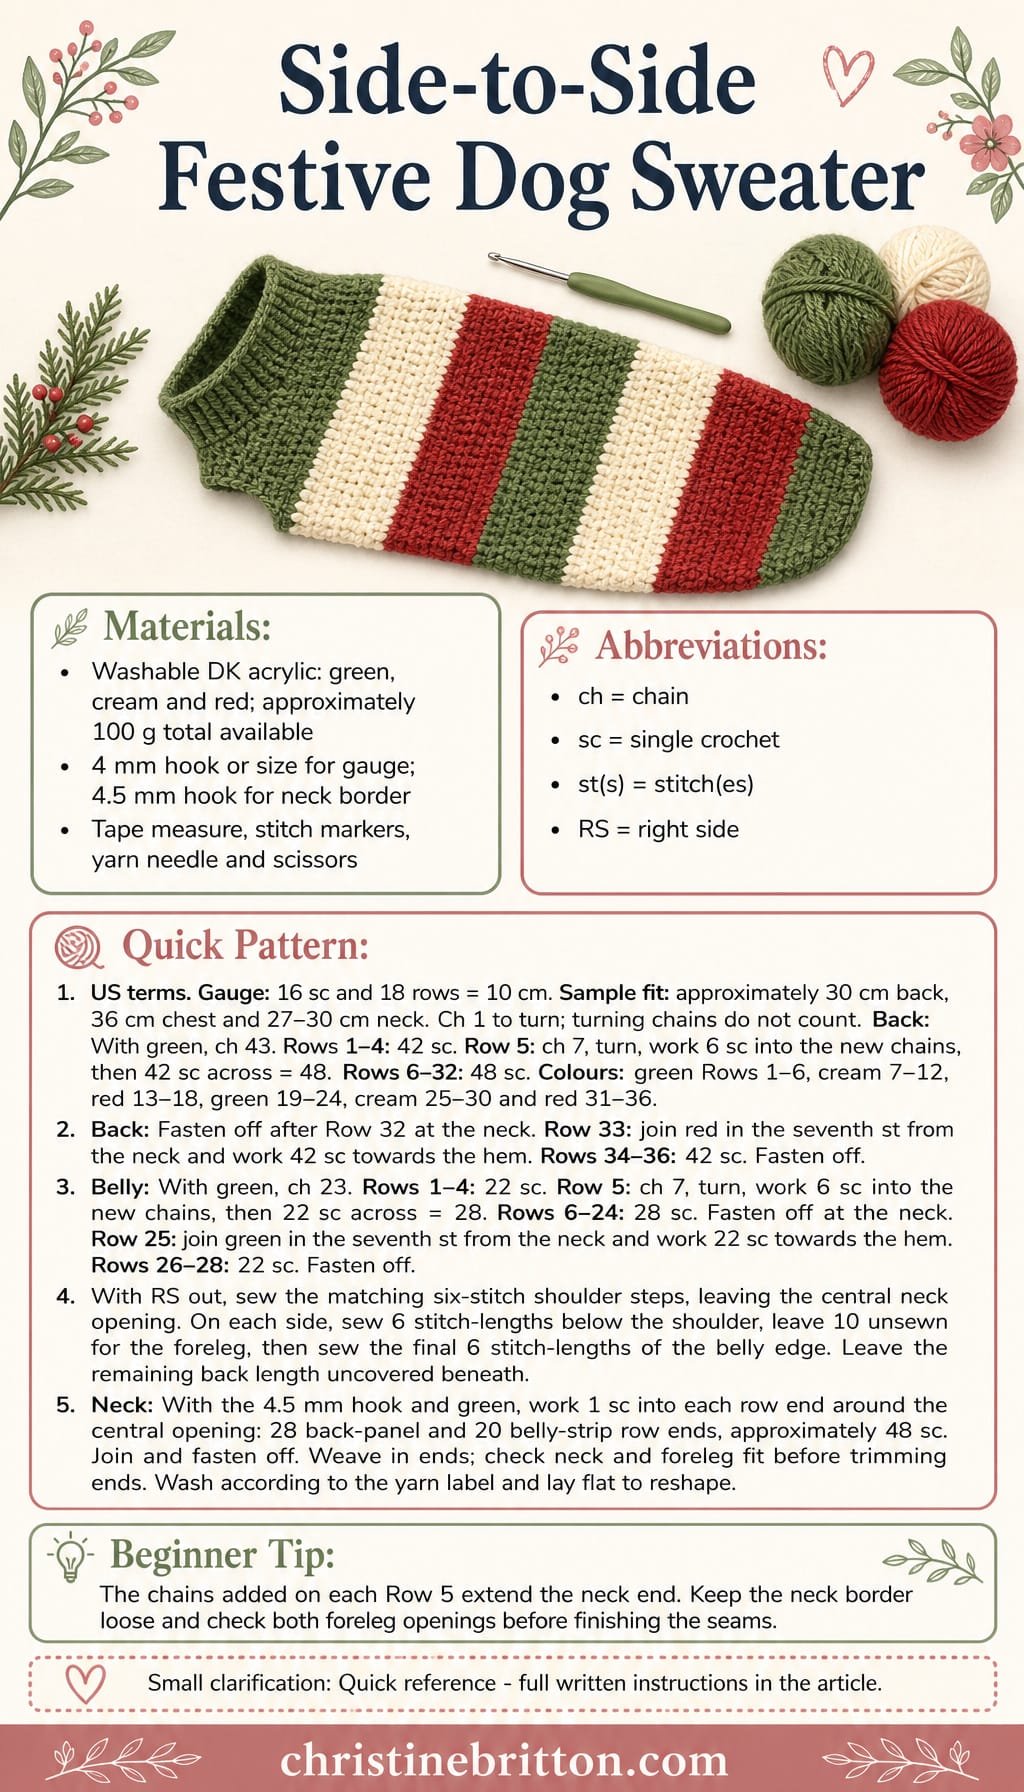
Quick-reference card. Follow the complete written instructions below.
Materials
- Yarn: Washable DK acrylic in green, cream and red. Have approximately 100 g in total available; the amount used will vary with gauge.
- Hooks: 4 mm hook, or size needed for gauge; 4.5 mm hook for the neck border.
- Notions: Tape measure, stitch markers, yarn needle and scissors.
Size and Fit
One sample size for a dog with a back length of about 30 cm, a chest circumference of about 36 cm and a neck circumference of about 27â30 cm. The back panel is approximately 30 cm long and 20 cm wide; the belly strip is approximately 17.5 cm long and 15.5 cm wide. Together their widths give approximately 35.5 cm around the chest before seaming. Each foreleg opening is approximately 6.25 cm long along the body. Measure the dog before starting: the 30 cm length is set by the first back-panel row, so this sample size is not suitable if that length or the stated circumferences do not fit.
Gauge
Aim for 16 sc and 18 rows over 10 cm in worked-flat single crochet, measured without stretching. Check gauge before starting; it controls the back length, panel widths and leg openings.
Abbreviations
US crochet terms.
- ch = chain
- sc = single crochet
- st(s) = stitch(es)
- RS = right side
Pattern
- Before you begin Each row runs from collar towards hem or back again. The first back-panel row has 42 sc and covers the lower 26.25 cm of the 30 cm back length. Six stitches are added at its neck end on Row 5, bringing the full back length to 48 sc. Ch 1 to turn unless told otherwise; turning chains do not count as stitches. Keep the same RS facing out on both panels during assembly.
- Back panel, Rows 1â4 With green and the 4 mm hook, ch 43. Row 1: Sc in the second ch from the hook and in each ch across; 42 sc. Rows 2â4: Ch 1, turn, sc in each st across; 42 sc. After Row 4, the working yarn is at the neck end.
- Back panel, Row 5 Ch 7, turn. Sc in the second ch from the hook and in each of the next 5 ch, then sc in each of the 42 stitches of Row 4; 48 sc. The six new stitches extend the neck end, not the hem end.
- Back panel, Rows 6â32 Ch 1, turn, and sc in each of the 48 sts across every row. Use green through Row 6, cream for Rows 7â12, red for Rows 13â18, green for Rows 19â24, cream for Rows 25â30 and red for Rows 31â32. Change colour in the final pull-through of the last stitch of the preceding row. Fasten off after Row 32; this row ends at the neck.
- Back panel, Rows 33â36 Keep the RS orientation established by the earlier rows. With red, join yarn to the seventh stitch of Row 32, counting away from the neck. Sc in that stitch and every remaining stitch towards the hem; 42 sc. Rows 34â36: Ch 1, turn, sc in each st across; 42 sc. Fasten off. The six stitches left unworked at the neck form the second shoulder step.
- Belly strip, Rows 1â4 With green, ch 23. Row 1: Sc in the second ch from the hook and in each ch across; 22 sc. Rows 2â4: Ch 1, turn, sc in each st across; 22 sc. The working yarn is now at the neck end.
- Belly strip, Rows 5â24 Row 5: Ch 7, turn. Sc in the second ch from the hook and in each of the next 5 ch, then sc in each of the 22 stitches of Row 4; 28 sc. Rows 6â24: Ch 1, turn, sc in each st across; 28 sc. Fasten off after Row 24, at the neck end.
- Belly strip, Rows 25â28 Join green to the seventh stitch of Row 24, counting away from the neck. Sc in that stitch and every remaining stitch towards the hem; 22 sc. Rows 26â28: Ch 1, turn, sc in each st across; 22 sc. Fasten off.
- Shoulder seams Place the panels with RS facing out and their neck ends together, with the belly strip centred beneath the back. At each side, sew the six-stitch shoulder step of the back panel to the matching six-stitch step of the belly strip. These seams connect the short outer rows to the full-length centre rows; do not sew across the central neck opening.
- Side seams and leg openings On each side, align the outer edge of the belly strip with the corresponding outer edge of the back panel, starting just below the shoulder seam. Working down from the neck, sew the first 6 stitch-lengths of the belly edge to the back edge. Leave the next 10 stitch-lengths unsewn on both panels for a foreleg opening. Sew the final 6 stitch-lengths of the belly edge to the back edge. Repeat on the other side. Each 22-stitch outer belly edge is therefore divided into 6 sewn, 10 open and 6 sewn stitch-lengths. The remaining back-panel length towards the tail stays uncovered beneath.
- Neck border With the 4.5 mm hook and green, join yarn at a shoulder seam. Ch 1 and work one sc into each row end around the central neck opening: 28 back-panel row ends and 20 belly-strip row ends, for approximately 48 sc. Join with a slip stitch to the first sc and fasten off. Keep the border relaxed; it must pass comfortably over the dog’s head.
Finishing
- Weave in ends securely on the inside, taking particular care at colour changes and seams.
- Try the sweater on the dog before trimming the yarn ends. Check that the neck passes over the head without strain, the forelegs move freely and the belly strip does not extend into the hind-leg area.
- Wash and dry according to the yarn label, then lay flat to reshape.
Helpful Tips
- Mark the neck end of both panels before seaming; each six-stitch extension belongs at the collar, not the tail.
- Carry out a trial fit before closing the side seams. Adjust seam placement if necessary, keeping both foreleg openings equal and large enough for comfortable movement.
- Avoid tight knots or bulky joins where the shoulder seams may rub.
If youâd like to keep building your crochet skills, take a look at Christmas granny square patterns.
Folded T-Shape Christmas Dog Sweater

This crochet dog Christmas sweater begins as a flat T-shaped piece rather than a tube. The red neck section leads into a cream back, while a broad green band gives the widened chest section its festive look.
The shape makes more sense when you picture it folded: the narrow centre lies along the dogâs back, and the two extensions wrap underneath to meet at the chest. Short shoulder seams help shape the head opening. Farther back, the side seams sit behind the forelegs, leaving an opening on each side rather than closing the wrap all the way to the body.
A pinned fit check is especially useful for this construction, because the openings depend on where the seams sit as well as the size of the flat fabric. The dog should be able to move its forelegs freely and wear the chest wrap without it pulling tight. If the folded piece does not fit comfortably, stretching it or sewing the seams more firmly will not solve the problem.
Folded T-Shape Christmas Dog Sweater
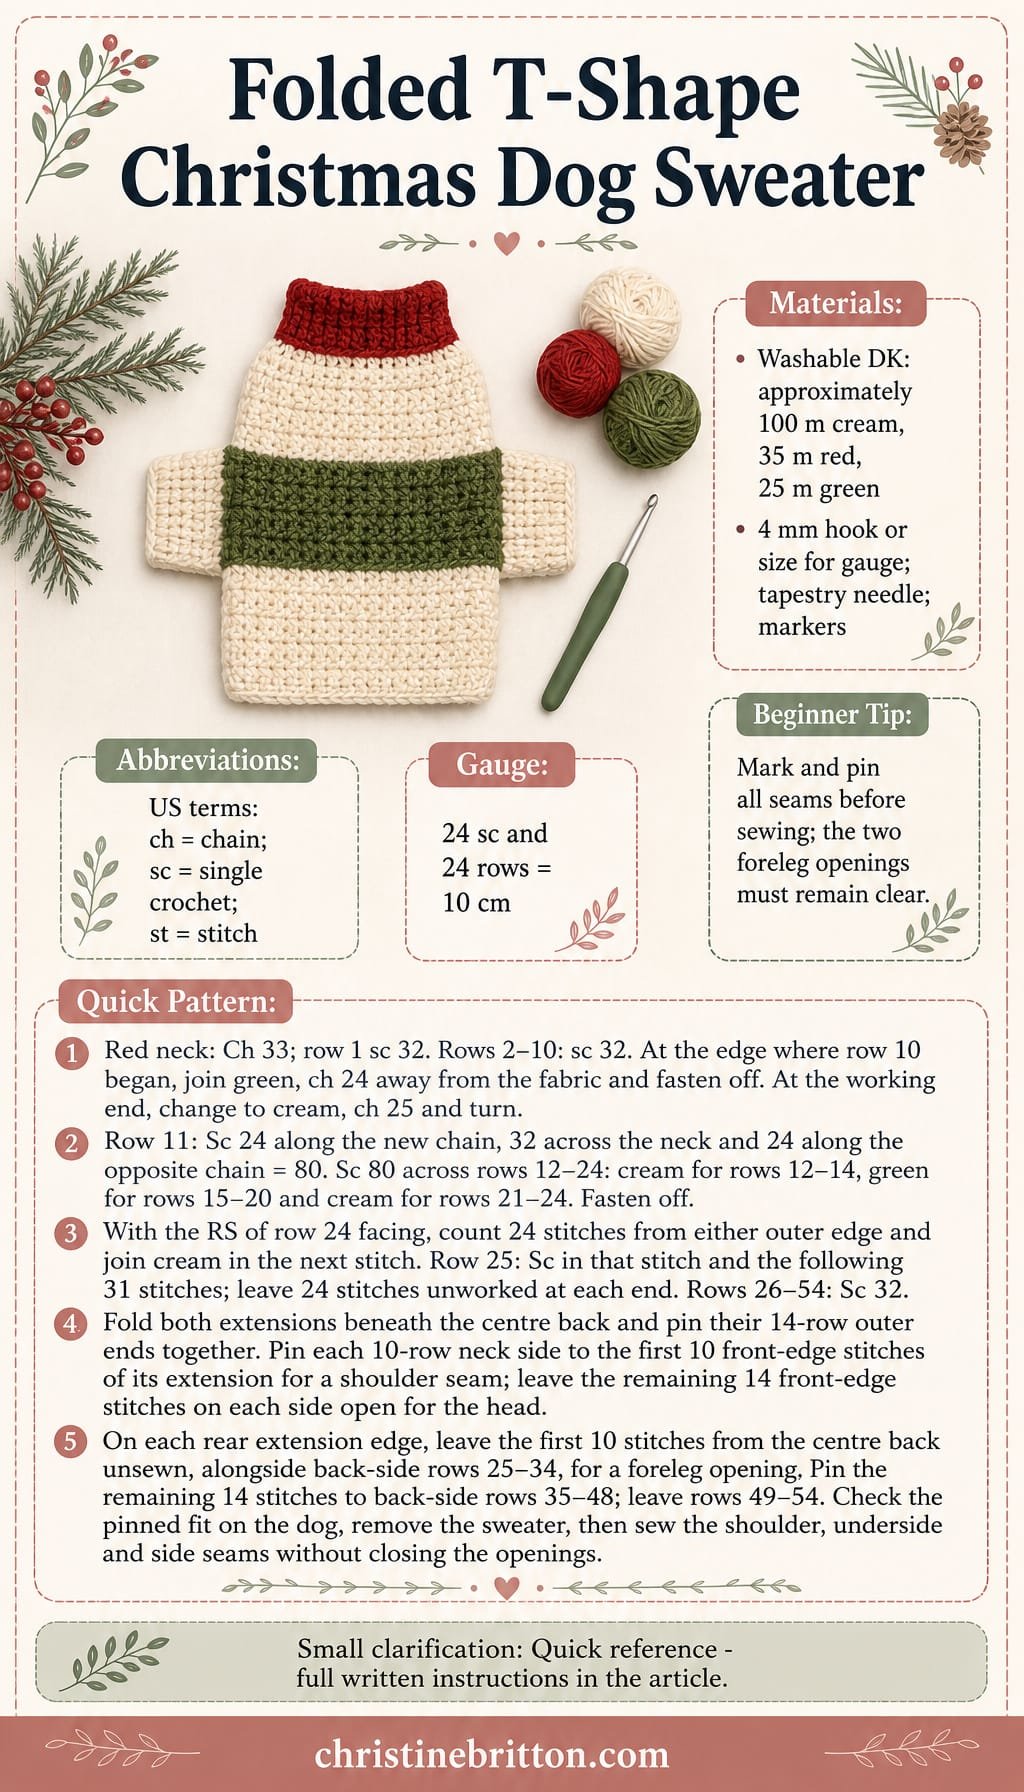
Quick-reference card. Follow the complete written instructions below.
Materials
- Washable DK yarn: Approximately 100 m cream, 35 m red and 25 m green; allow extra if adjusting the size.
- Crochet hook: 4 mm, or the size needed to obtain gauge.
- Tapestry needle and stitch markers: For marking the fold lines, openings and seams.
Size and Fit
One small-dog size. The flat piece measures approximately 22.5 cm from neck edge to back hem. Its centre back is approximately 13.3 cm wide; the full width across the chest extensions is approximately 33.3 cm before seaming. Intended for a dog with a chest circumference of about 29â31 cm, a head circumference no greater than about 23 cm and a back length of about 22 cm. The approximate head-opening perimeter is 25 cm. Check these measurements against the dog, allowing comfortable ease, before making permanent seams.
Gauge
24 single crochet stitches and 24 rows = 10 cm in flat single crochet, after laying the fabric flat. Gauge matters here because the stitch and row lengths are paired in the seams.
Abbreviations
US crochet terms.
- ch = chain
- sc = single crochet
- st(s) = stitch(es)
- RS = right side
- WS = wrong side
Pattern
- Understand the fold before starting The first 10 rows form the narrow red neck section. Rows 11â24 widen into a crossbar: its middle 32 stitches continue the back, and its 24-stitch extension on each side will fold under the chest. Rows 25â54 form the rest of the narrow back. The two outer ends of the crossbar meet beneath the dog. Each neck-section side is seamed to part of the crossbarâs front edge to shape the head opening. On the rear edge of each extension, leave a gap beside the back panel for a foreleg opening before sewing the remaining edge to the back-panel side. Mark and pin every seam, then check the folded fit on the dog before sewing.
- Neck section, rows 1â10 With red, ch 33. Row 1: Sc in the second ch from the hook and in each remaining ch; 32 sc. Rows 2â10: Ch 1, turn, sc in each st; 32 sc per row. At the end of row 10, do not fasten off.
- Prepare the two extensions At the edge where row 10 began, join green temporarily and ch 24 away from the fabric. Fasten off green. This is the far extension. At the working end of row 10, change to cream, ch 25 and turn. These chains will become the near extension in row 11.
- Widened chest section, rows 11â24 Row 11: Sc in the second ch from the hook and across the next 23 chains, sc across the 32 neck-section stitches, then sc into each of the 24 chains of the far extension; 80 sc. Change colour as directed while keeping the same stitch count. Rows 12â14: Ch 1, turn, sc across in cream. Rows 15â20: Work the same way in green. Rows 21â24: Work the same way in cream. Each row has 80 sc. Fasten off after row 24.
- Narrow back, rows 25â54 With the RS of row 24 facing, count 24 stitches in from either outer edge and join cream in the next stitch. Row 25: Ch 1, sc in that stitch and the following 31 stitches; 32 sc. The 24 stitches at each end of row 24 remain unworked. Rows 26â54: Ch 1, turn, sc across; 32 sc per row. Fasten off.
- Mark and pin the folds Lay the piece flat with the neck section at the top. On rows 11â24, mark the boundary between the middle 32 stitches and each 24-stitch extension. Fold both extensions towards the WS beneath the centre back, bringing their outer short ends together at the centre underside. Pin those ends together along all 14 rows. On the front edge of each extension, count and mark the first 10 stitches outwards from the centre back. Pin each marked length to the adjacent 10-row side edge of the neck section; these are the shoulder seams. The remaining 14 front-edge stitches of each extension stay open and help form the head opening.
- Mark the foreleg openings and side seams On the rear edge of each extension, count 10 stitches outwards from the centre back and leave them unsewn. On the corresponding side edge of the narrow back, leave rows 25â34 unsewn. Together, these open edges form one foreleg opening on each side. Pin the remaining 14 rear-edge stitches of each extension to rows 35â48 on that side of the back. Rows 49â54 remain free at the back hem.
- Fit, then sew With all seams pinned, gently try the sweater on the dog. Confirm that the head passes comfortably through the front opening, the chest wrap is not tight, and each foreleg moves freely through its marked opening. Remove the sweater before adjusting pins or sewing. Sew the two shoulder seams, the meeting extension ends beneath the chest, and the two 14-stitch side seams with a flexible mattress stitch. Do not sew across the head or foreleg openings.
Finishing
- Weave in every end securely on the inside, taking particular care at the wing corners and colour changes.
- Lay the sweater flat and check that both foreleg openings are clear and approximately alike.
- If needed, lightly smooth the fabric into shape according to the yarn care instructions; do not stretch the openings to force a fit.
Helpful Tips
- Mark the 32-stitch centre of the widened section as soon as row 11 is complete; it makes both the narrowing and the folds easier to identify.
- The 10 open stitches plus 10 open row edges at each foreleg opening give an approximate perimeter of 8.3 cm at gauge. Check the dogâs leg movement rather than relying on that figure alone.
- If the pinned sweater is tight, do not sew it into place or rely on stretching the yarn. Choose a different size or recalculate the piece for the dogâs measurements.
- Avoid loose ties or detachable decorations, and supervise a dog wearing a handmade garment.
Christmas Granny Square Dog Sweater
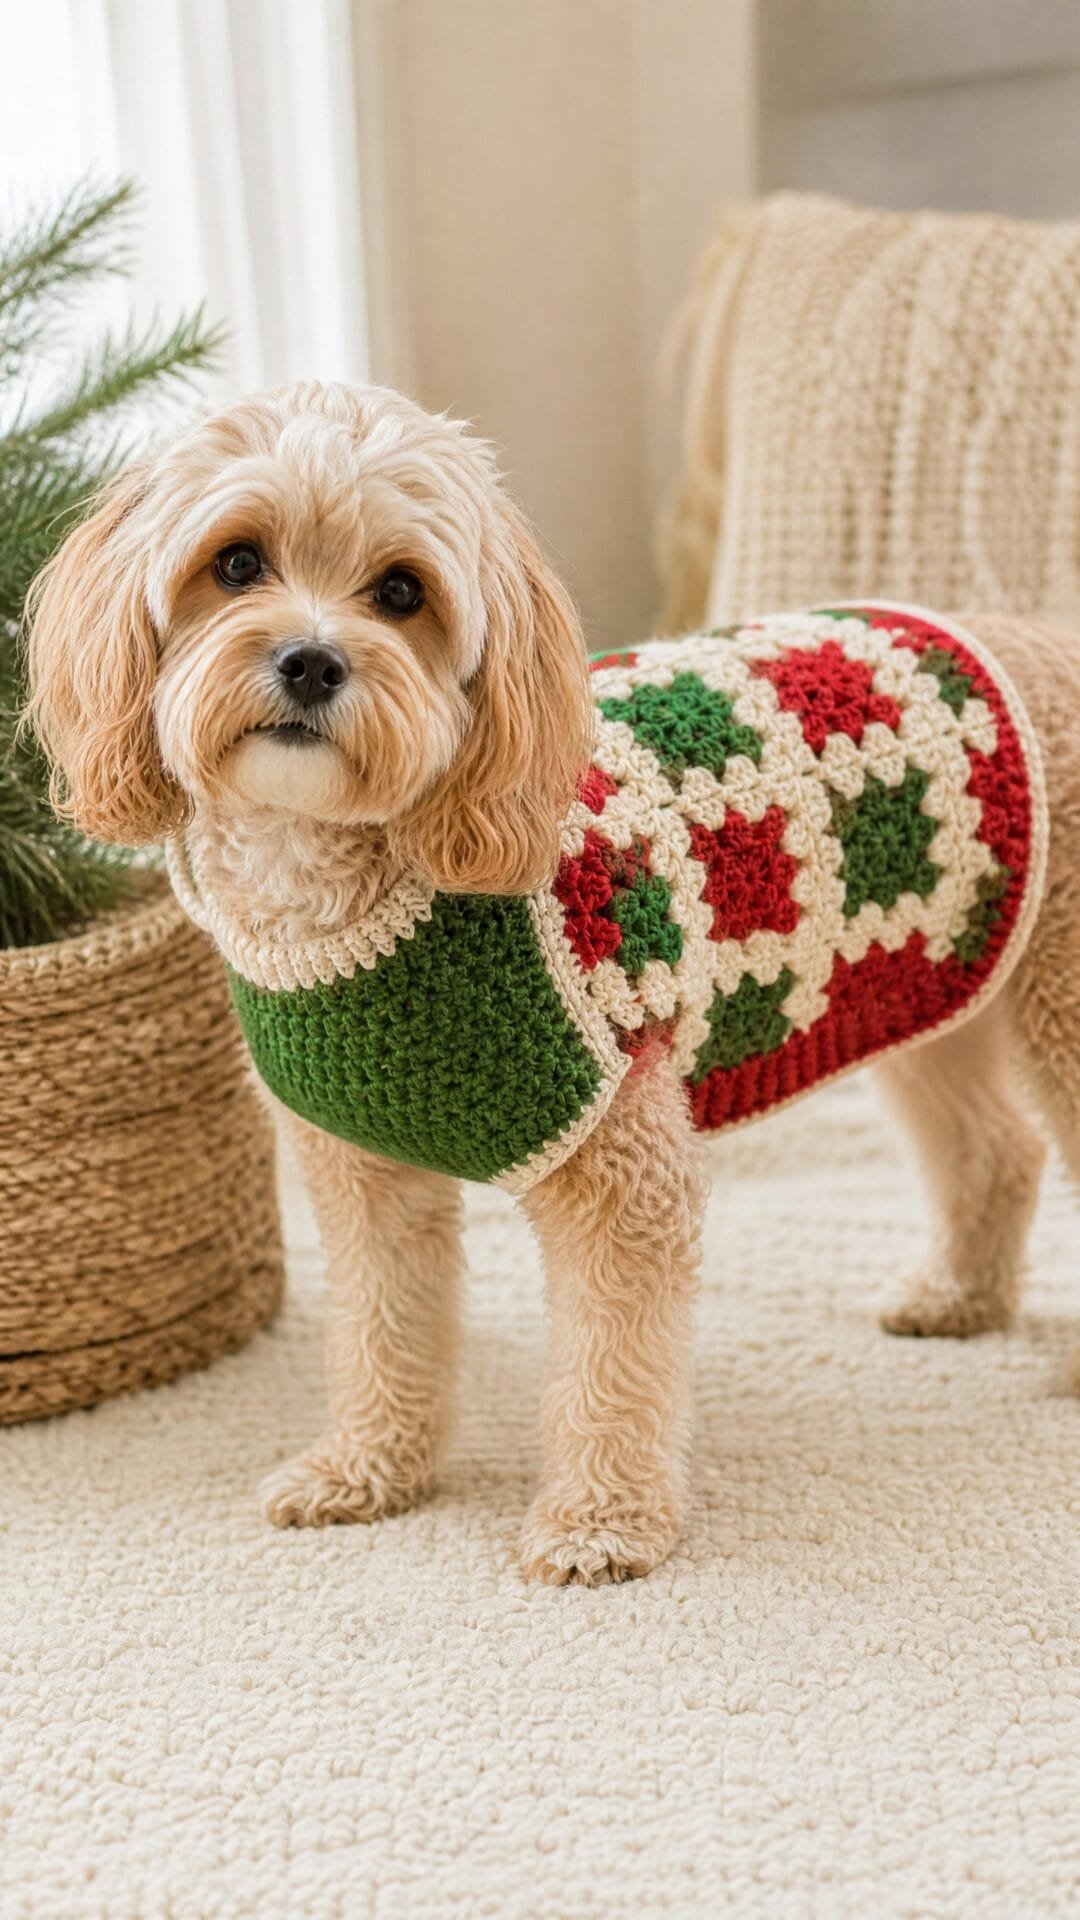
This Christmas Granny Square Dog Sweater puts a cheerful patchwork across the back, where the red, green and cream squares are easy to see. The plain green chest panel keeps the underside less bulky and lets the patchwork remain the focus.
The layout is designed around the individual dog rather than an assumed square size. That makes it worth taking time over the planning: neatly joined squares create a flatter back panel and make the plain sections easier to fit alongside it.
This is an intermediate project for crocheters comfortable making and joining granny squares. As with any dog pullover, comfort matters more than a perfectly symmetrical patchwork layout: the neckline needs to pass over the head easily, and the foreleg openings should allow a natural stride.
Christmas Granny Square Dog Sweater

Quick-reference card. Follow the complete written instructions below.
Materials
- Yarn: Machine-washable DK yarn in red, green and cream. The amount depends on the dog’s measurements and your finished square size.
- Hook: A size suitable for your DK yarn, plus a hook one size larger for the neckline if needed.
- Other: Tape measure, stitch markers or clips, yarn needle and scissors.
Size and Fit
Made to the dog’s measurements. With the dog standing, measure C around the chest at its widest point; L from the intended neckline to the tail end of the back panel; E from that neckline to the desired end of the shorter belly panel; A from the neckline to the start of a foreleg opening; and G along the body for the length of that opening. Measure H around the widest part of the head. Allow 2â4 cm of ease at the chest, and check that the planned finished body circumference is at least H plus 2 cm so the pullover can pass over the head. Choose E shorter than L, with at least 2 cm between A + G and E for the lower side seams. Mark A and A + G on both sides during assembly; check the pinned openings on the dog before sewing. Keep the belly hem clear of areas that need to remain uncovered.
Gauge
Make and finish one three-round square as you will finish the sweater. Measure its width S without stretching; use that measurement to plan the grid. Also make a single-crochet swatch for the chest panel and count its stitches per 10 cm. After joining the squares, measure the actual back-panel width before calculating the chest-panel width. Row lengths and fit are checked against measurements rather than an assumed DK gauge.
Abbreviations
US crochet terms.
- ch = chain
- ch-sp = chain space
- dc = double crochet
- sc = single crochet
- sl st = slip stitch
- BLO = back loop only
- RS = right side
Pattern
- Plan the patchwork Set the intended finished body circumference B to C plus 2â4 cm. Using your measured square width S, choose a whole number N of squares across that puts the back width near half of B. Choose M whole squares down so M Ã S is no longer than L; the remaining back length will be worked in plain rows. Use at least two squares in each direction. If two squares will not fit across the planned back or down its length, use smaller squares before continuing. Make N Ã M squares, alternating solid red, green and cream squares in the grid.
- Square, round 1 With one colour, make a magic ring. Ch 3 (counts as dc), 2 dc in ring, ch 2; work [3 dc in ring, ch 2] three times. Pull ring closed and sl st to top of beginning ch-3. You have four 3-dc groups and four corner ch-2 spaces.
- Square, round 2 Sl st in the next 2 dc and into the corner ch-sp. Ch 3, 2 dc, ch 2, 3 dc in that corner; ch 1. Work [3 dc, ch 2, 3 dc] in each of the next three corner spaces, with ch 1 between corners and after the last corner. Sl st to top of beginning ch-3.
- Square, round 3 Sl st in the next 2 dc and into the corner ch-sp. Ch 3, 2 dc, ch 2, 3 dc in that corner; ch 1, 3 dc in the next side ch-1 space, ch 1. Work [3 dc, ch 2, 3 dc] in each remaining corner, followed each time by ch 1, 3 dc in the next side ch-1 space, ch 1. Sl st to top of beginning ch-3 and fasten off. Make every square identically.
- Join the back Arrange N columns and M rows with RS facing. Whip-stitch neighbouring squares together along their matching edges, first into rows and then joining the rows. Match the stitches and chain spaces without pulling the seams tight. Measure the joined back’s width and length. If joining has changed its width appreciably from N Ã S, use the joined measurement for the chest calculation.
- Adjust the back length If the joined back is shorter than L, join green yarn at one tail-end corner. Work sc evenly across that end: on each square’s outer edge, work 1 sc in each of its 9 dc, two ch-1 spaces and two corner ch-2 spaces. This gives 13 sc per square across the row. Ch 1, turn; work 1 sc in each sc for subsequent rows. Stop when the back reaches L without stretching; a difference smaller than one row is acceptable. Fasten off. The opposite, square-only edge is the neckline.
- Make the chest panel Subtract the measured joined back width from B to find the target chest width. Using the sc swatch, chain enough stitches for that width, plus 1 turning chain; check the width rather than relying on a preset stitch count. Work sc in the second ch from the hook and in each ch across. For every following row, ch 1, turn and sc in each stitch; the turning chain does not count as a stitch. Continue until the panel measures E from its foundation edge. Fasten off. The foundation edge is the neckline.
- Seam and leave foreleg gaps With RS facing out, place the back and chest panel neckline edges level. Clip each pair of side edges together. From each neckline, mark distances A and A + G along both adjoining edges. Sew each side from the neckline to A, leave A to A + G open for the foreleg, then sew from A + G to the end of the chest panel. Match lengths evenly rather than forcing a stitch-for-stitch seam between granny squares and sc rows. The back extends beyond the chest hem. Check the pinned fit and openings before completing the seams.
- Neckline and edges With green and, if helpful, the larger hook, work one loose round of sc around the neckline opening. On the square edge, begin with about 1 sc in each dc and each chain space; on the chest foundation edge, begin with 1 sc per stitch. Add stitches if needed to keep the edge flat and large enough to pass comfortably over H plus 2 cm. Join without tightening, then work one loose round of sc BLO and fasten off. Work one flat round of sc around each foreleg opening, spacing stitches evenly along row ends. Edge the exposed back sides and tail hem, and the chest hem, with sc. Do not edge across the sewn side seams.
Finishing
- Weave in ends securely, keeping the patchwork seams flat.
- Wash and dry according to the yarn label; lay the sweater flat to check its finished dimensions.
- Check that the neckline passes over the head without force and that the foreleg openings allow a full step before the dog wears it unsupervised.
Helpful Tips
- If the calculated chest width is very narrow or negative, choose fewer squares across or make smaller squares; do not try to correct the whole difference with tight seams.
- A square’s width can change slightly when joined, which is why the chest width is calculated after assembling the back.
- If the body must be made uncomfortably loose to pass over the head, this pullover construction is not suitable for that set of measurements.
Diagonal Corner-to-Corner Dog Sweater
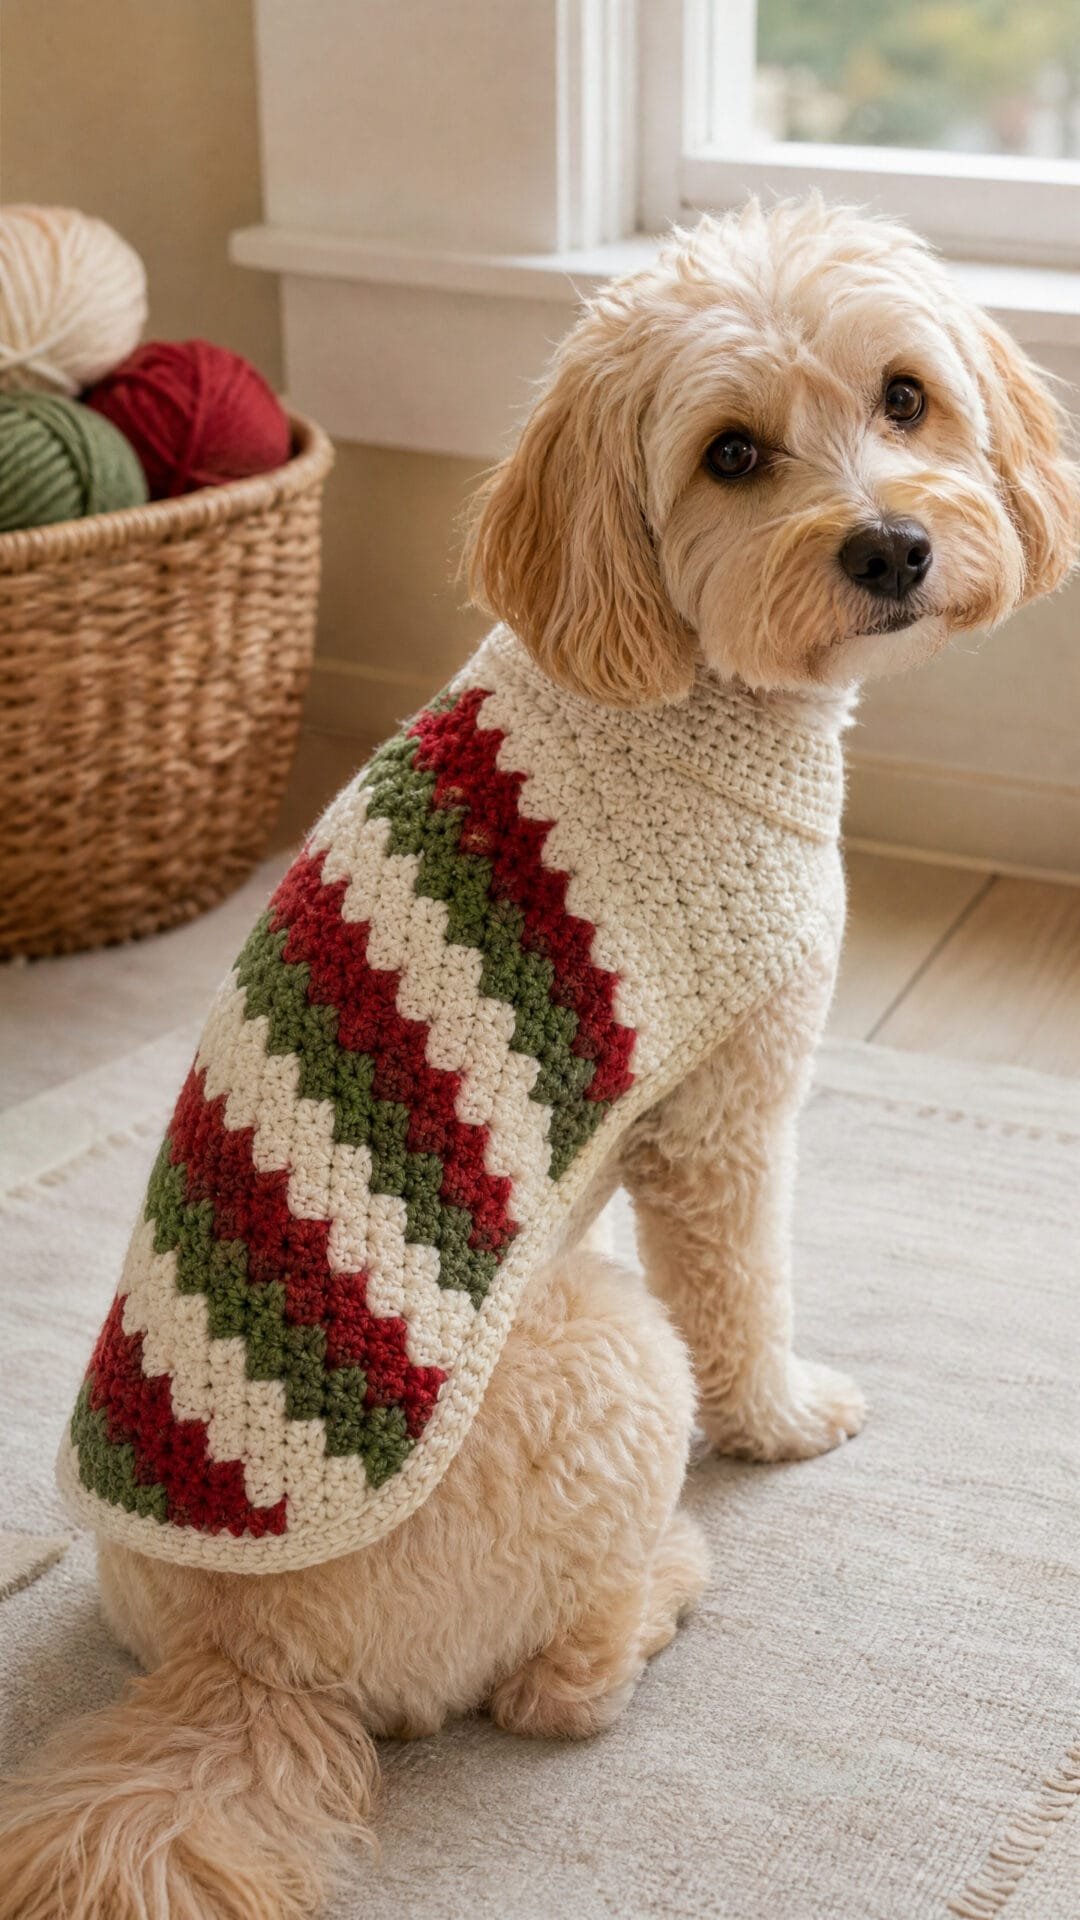
This crochet dog Christmas sweater uses diagonal red, green and cream colour blocks across the back, with a plain cream underside. The corner-to-corner fabric gives the stripes a graphic look without turning the back into a square motif.
The back panel grows diagonally until it reaches the intended width. Its shaping then holds that width while adding length, before the final diagonal closes the rectangle. This makes the panel better suited to a dog’s back than a square corner-to-corner piece.
A shorter chest panel leaves more of the underside uncovered, while an edge helps the diagonal fabric keep its shape where the panels meet. Check the dog’s measurements before choosing this sample size: comfortable neck and foreleg openings matter as much as back coverage.
Diagonal Corner-to-Corner Dog Christmas Sweater
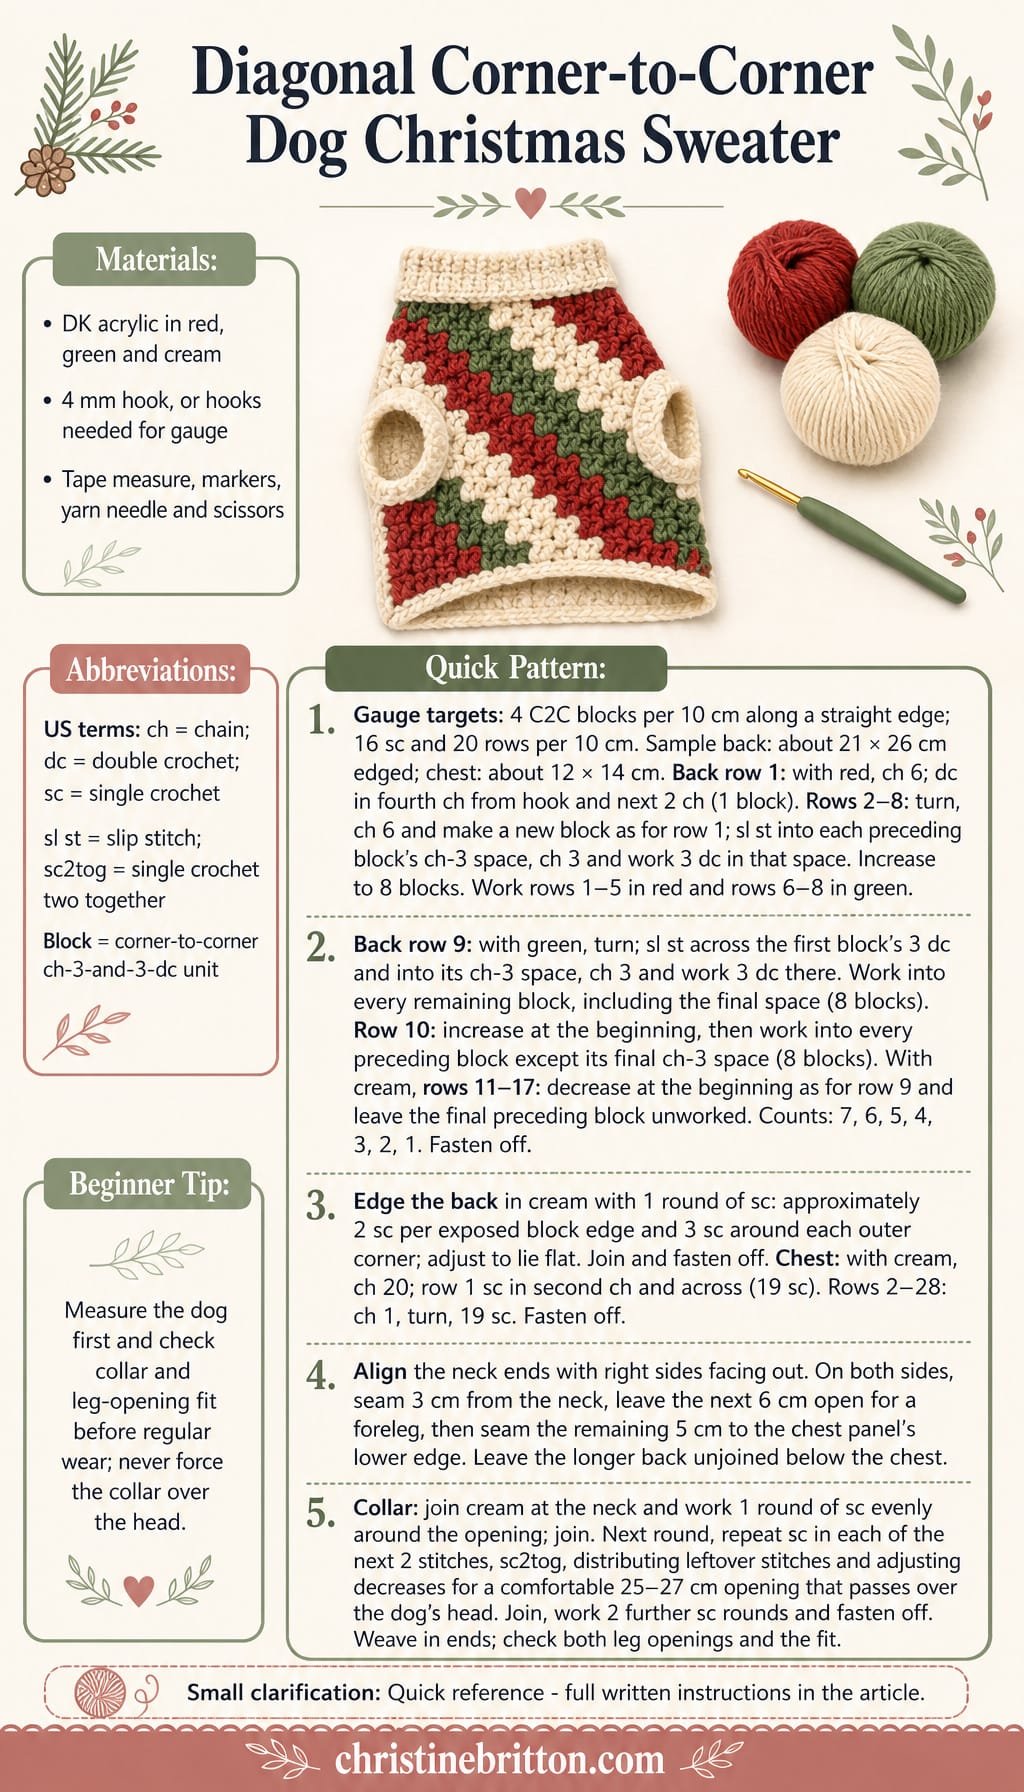
Quick-reference card. Follow the complete written instructions below.
Materials
- DK acrylic yarn: Soft, smooth yarn in red, green and cream; allow approximately 50 g of cream and 25 g each of red and green for the sample size.
- Crochet hooks: 4 mm hook, or sizes needed to meet the suggested gauges.
- Other supplies: Tape measure, stitch markers, yarn needle and scissors.
Size and Fit
One sample size: back panel approximately 21 cm wide and 26 cm long after edging; chest panel approximately 12 cm wide and 14 cm long. The joined body measures approximately 33 cm around, before allowing for the small amount taken up by seams. The collar is shaped towards a 25â27 cm circumference. Measure the dog around the fullest part of the chest, around the neck and from the base of the neck towards the tail before starting. Allow comfortable ease, check that the 6 cm foreleg openings suit the dog, and do not rely on the sample dimensions alone for fit.
Gauge
Suggested gauge before edging: approximately 4 corner-to-corner blocks per 10 cm along a straight panel edge; for the chest panel, approximately 16 sc and 20 rows per 10 cm. These are working targets, not measured test results. Make swatches and adjust hook size if needed. At the suggested gauges, the 8-by-10-block back is approximately 20 by 25 cm before its edging.
Abbreviations
US crochet terms.
- ch = chain
- dc = double crochet
- sc = single crochet
- sl st = slip stitch
- sc2tog = single crochet two stitches together
- block = one corner-to-corner unit made from ch 3 and 3 dc, or the starting ch-6 equivalent
Pattern
- Corner-to-corner method Work the back in turned diagonal rows. To increase at the beginning of a row, ch 6, dc in the fourth ch from the hook and in each of the next 2 ch. This makes a new block. To work into a block from the preceding row, sl st into its ch-3 space, ch 3 and work 3 dc in that same space. On an ordinary increasing row, work into every block of the preceding row. To decrease at the beginning of a row, do not make a ch-6 block: sl st across the 3 dc of the first block and into its ch-3 space, then ch 3 and work 3 dc in that space. Turn at the end of every row.
- Back panel, rows 1â8 With red, make row 1: ch 6; dc in the fourth ch from the hook and in each of the next 2 ch (1 block). For rows 2â8, increase at the beginning and work a block into every block of the preceding row. You will have 2, 3, 4, 5, 6, 7 and 8 blocks respectively. Work rows 1â5 in red. Change to green at the start of row 6, fastening off and weaving in colour ends securely.
- Back panel, rows 9â10 Keep 8 blocks in each row to extend the panel into a rectangle. Row 9: with green, decrease at the beginning, then work a block into every remaining block of row 8, including its final ch-3 space (8 blocks). Row 10: increase at the beginning, then work into each block of row 9 except its final ch-3 space; leave that final space unworked (8 blocks).
- Back panel, rows 11â17 Change to cream at the start of row 11. Decrease at the beginning of each row and leave the final block of the preceding row unworked. Rows 11â17 have 7, 6, 5, 4, 3, 2 and 1 blocks respectively. Fasten off. The two short, straight sides are the neck and tail ends; either may be placed at the neck.
- Stabilising edge With cream, work 1 round of sc around the back panel. Work approximately 2 sc per exposed block edge and 3 sc around each outer corner, adjusting spacing where needed so the edge lies flat. Join with a sl st and fasten off. Check the panel against the dog’s measured back length and intended back coverage before assembly.
- Cream chest panel Ch 20. Row 1: sc in the second ch from the hook and in each remaining ch (19 sc). Rows 2â28: ch 1, turn, sc in each stitch (19 sc). Fasten off. At the suggested sc gauge, this panel is approximately 12 cm wide and 14 cm long.
- Join panels and leave foreleg openings Place the panels with their neck ends aligned and their right sides facing out. Mark both long edges 3 cm and 9 cm down from the neck end of the chest panel. On each side, seam the first 3 cm from the neck, leave the next 6 cm open for a foreleg, then seam the remaining 5 cm to the chest panel’s lower edge. Use a flat seam and do not stitch across either leg opening. The longer back panel remains unjoined below the chest panel.
- Collar Join cream yarn at the neck opening. Round 1: work sc evenly around the back and chest neck edges; join with a sl st. Round 2: repeat (sc in each of the next 2 stitches, sc2tog) around, distributing any leftover stitches evenly; join. Check the opening: aim for approximately 25â27 cm, and adjust the number of decreases if necessary so it can pass comfortably over the dog’s head without being loose around the neck. Work 2 more rounds of sc without decreases, joining each round. Fasten off.
Finishing
- Weave in all ends securely, especially at colour changes and seams.
- Lay the sweater flat and check that the back edge is stable, both foreleg openings match and the chest panel has not been stretched while seaming.
- Try the sweater on the dog under supervision. The collar must pass easily over the head; the foreleg openings must allow a normal stride. Remove the sweater if it restricts movement or catches on the legs.
Helpful Tips
- Count blocks at the end of every diagonal row. Rows 9 and 10 are the rectangle-shaping rows: each must still contain 8 blocks.
- Change colour at the start of the stated row so each diagonal stripe is easy to follow.
- The edging is intended to steady the corner-to-corner fabric, not pull it in. Add or omit evenly spaced sc if it ripples or cups.
For another related project collection, browse crochet Christmas sweaters.
Vertical-Panel Christmas Dog Sweater
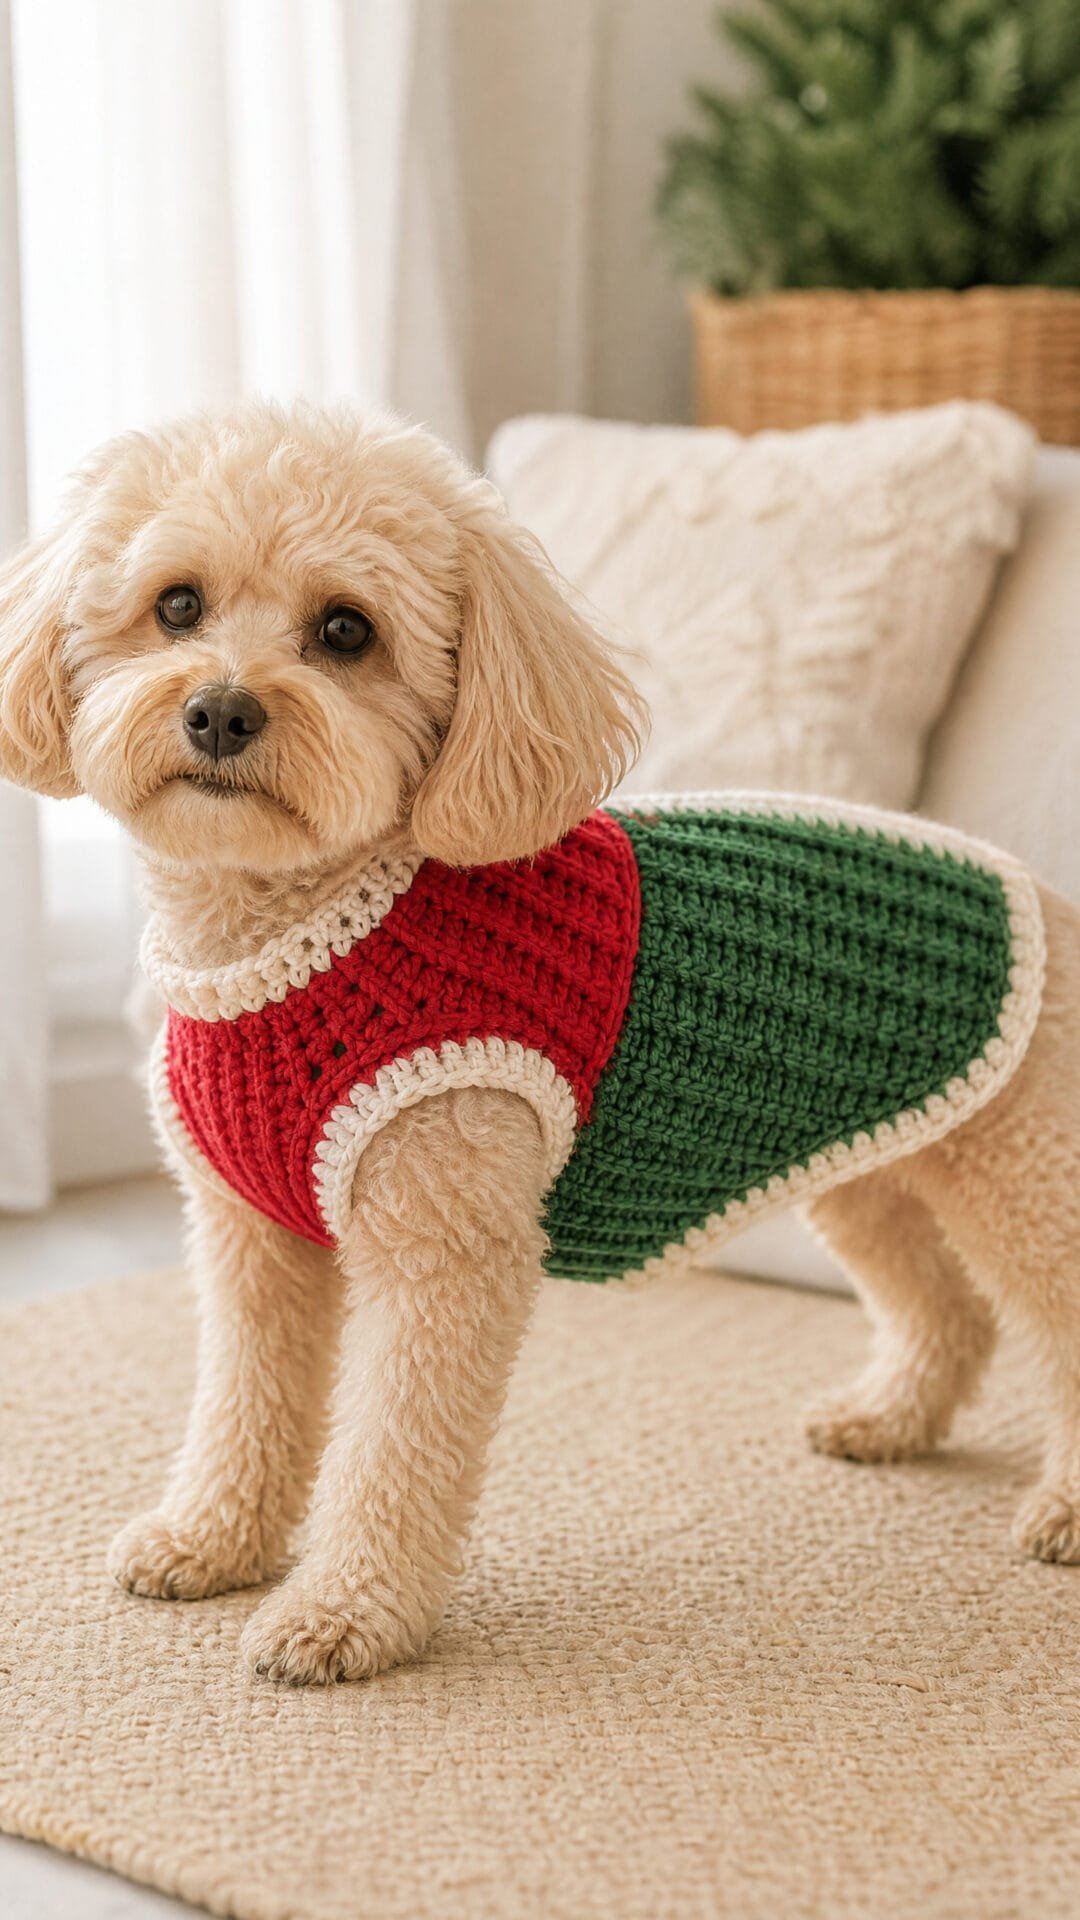
This crochet dog Christmas sweater gets its bold red-and-green look from narrow strips running lengthwise, rather than colour changes across the fabric. The separate back and underside panels create a pullover shape, while the longer back provides a little extra coverage towards the tail.
The strip construction makes small fit adjustments easier to plan. If the body needs a little more or less room, adjusting the widths at the outer edges can preserve the centred colour-blocking without adding another full strip. Check the neck opening against your dogâs head and allow enough space at the sides for comfortable foreleg movement.
Cream edging frames the neckline and both hems without closing the longer back extension. As with any dog garment, check the fit while your dog is supervised and remove the sweater if it restricts movement.
Vertical-Panel Christmas Dog Sweater
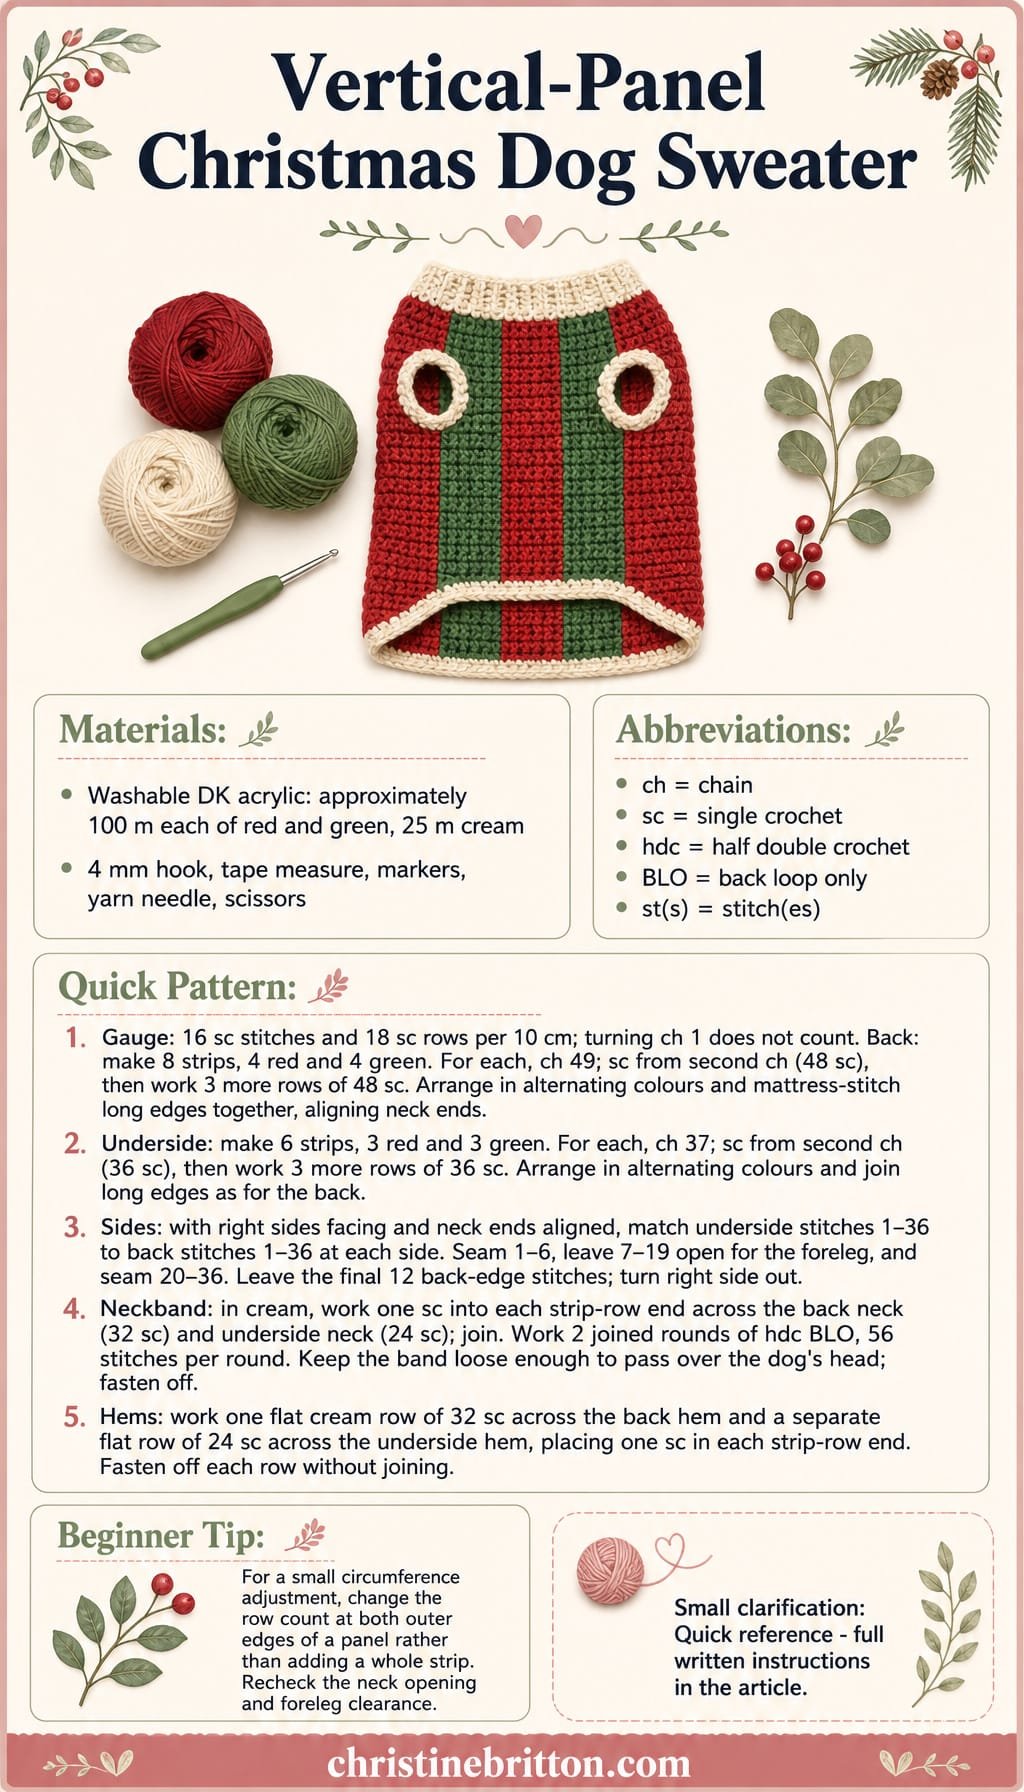
Quick-reference card. Follow the complete written instructions below.
Materials
- Washable DK acrylic yarn: Red, green and cream; allow approximately 100 m of each red and green and 25 m of cream.
- Crochet hook: 4 mm, or a size that gives the stated gauge.
- Other: Tape measure, stitch markers, yarn needle and scissors.
Size and Fit
One sample size: approximately 31 cm around the chest before seaming, with a 30 cm back panel from neckline to hem edge and a 22.5 cm underside panel. The cream hem adds roughly one row to each length. Intended for a dog with a chest circumference of about 29â30 cm, a head circumference no greater than 29 cm and a suitable neck-to-tail-base length of about 30â31 cm. Measure the dog before starting; the neck opening must pass comfortably over its head. At the stated row gauge, each extra or omitted panel row changes its width by about 0.56 cm. For a small width adjustment, add one to three rows to an outermost strip at each side of a panel, or omit that many rows from those strips; make matching changes on both sides to keep the panel centred. Recheck the combined back-and-underside circumference and neck opening before working the neckband.
Gauge
16 sc stitches and 18 sc rows = 10 cm in flat fabric. Check gauge before making the strips, especially the row gauge, which determines panel width. Length estimates exclude edging.
Abbreviations
US crochet terms.
- ch = chain
- sc = single crochet
- hdc = half double crochet
- BLO = back loop only
- st(s) = stitch(es)
Pattern
- Before you begin The first and last stitches of each strip mark its neck and hem ends. Keep those ends aligned throughout assembly. Chain 1 at the start of a turned row does not count as a stitch.
- Back strips: make 8 Make four red and four green strips. For each strip, ch 49. Row 1: sc in the second ch from the hook and in each remaining ch; 48 sc. Rows 2â4: ch 1, turn, sc in each st; 48 sc. Fasten off. Each strip is approximately 30 cm long and four rows wide.
- Join the back Arrange the eight strips red, green, red, green, red, green, red, green. With neck ends aligned, mattress-stitch the long edge of each strip to the next, matching all 48 stitches along each of the seven joins. Do not join the short neck or hem ends. The back is 32 rows wide, approximately 17.8 cm at the stated gauge.
- Underside strips: make 6 Make three red and three green strips. For each strip, ch 37. Row 1: sc in the second ch from the hook and in each remaining ch; 36 sc. Rows 2â4: ch 1, turn, sc in each st; 36 sc. Fasten off. Each strip is approximately 22.5 cm long and four rows wide.
- Join the underside Arrange the six strips red, green, red, green, red, green. Align the neck ends and mattress-stitch adjacent long edges together, matching all 36 stitches along each of the five joins. Leave the short ends open. The underside is 24 rows wide, approximately 13.3 cm at the stated gauge.
- Side seams and foreleg openings Place the panels with right sides facing and neck ends aligned. At each side, match underside stitches 1â36 to back stitches 1â36, counting from the neck. Seam stitches 1â6 together. Leave stitches 7â19 unseamed on both panels for a foreleg opening. Seam stitches 20â36 together. Back stitches 37â48 extend beyond the underside; leave these edges free. Repeat on the other side. Turn right side out. Check that both openings are clear and comfortable before weaving in the seam ends.
- Cream neckband With cream, work around the entire neckline, placing one sc in the end of each strip row: 32 sc across the back and 24 sc across the underside, for 56 sc. Join to the first sc. Rounds 2â3: ch 1, hdc BLO in each st around; join to the first hdc. Keep the working yarn relaxed so the finished band can pass over the dog’s head. Fasten off. Each round has 56 stitches.
- Flat cream hems At the back hem, join cream at one side and work one sc into the end of each strip row across the short edge: 32 sc. Fasten off; do not join into a round. Repeat across the underside hem for 24 sc. These separate, flat hems leave the longer back extension free.
Finishing
- Weave in all ends securely, keeping knots and firm yarn tails away from the foreleg openings.
- Lay the sweater flat and check that the panels and openings match on both sides.
- Try it on the dog under supervision. The neckband should pass over the head without forcing, and the forelegs should move freely. Do not leave a dog unattended while wearing a garment.
Helpful Tips
- If you alter a panel’s width, add or omit rows at its two outer edges rather than adding another four-row strip. This keeps the lengthwise colour-blocking centred.
- The neckband follows the combined panel width. Recheck the head-opening measurement after any width adjustment; widening only one panel also changes the position of the side seams.
- For a different back length, change the foundation chain on every back strip by the same number of chains. Change every underside strip consistently as well, and reposition the foreleg gaps using the dog’s measurements.
Festive Side-Opening Dog Cardigan
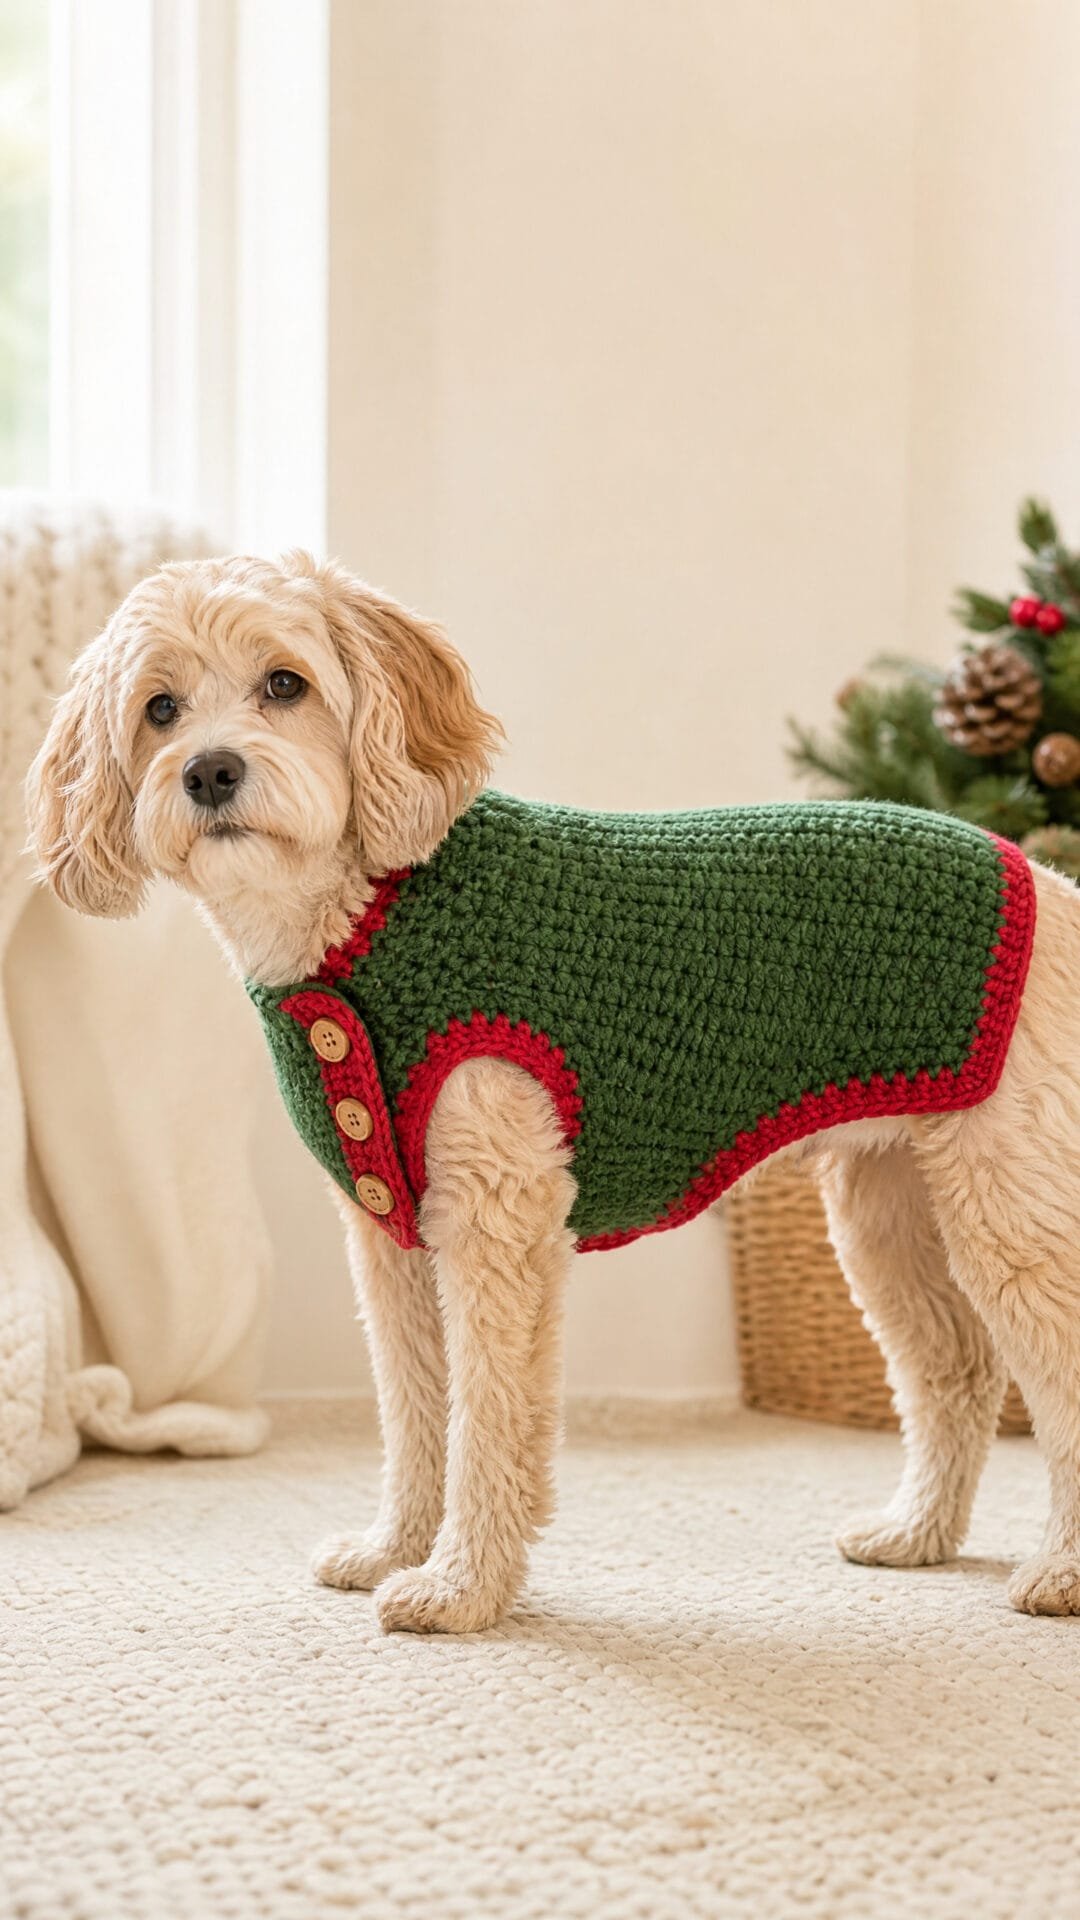
For a dog that dislikes clothes being pulled over its head, this festive cardigan offers a different way in. Its broad opening sits along one side of the chest, while the green body and red border give it a Christmas look.
The overlapping flaps close flat rather than relying on small buttons or dangling ties. When putting it on, make sure the neck rests comfortably and the side opening closes without crowding either foreleg. A dog should be able to stand and walk naturally in it.
Supervise your dog whenever the cardigan is worn. Check the fastening and its stitching regularly for wear or chewing, and take the garment off if anything loosens or the fit seems uncomfortable.
Festive Side-Opening Dog Cardigan
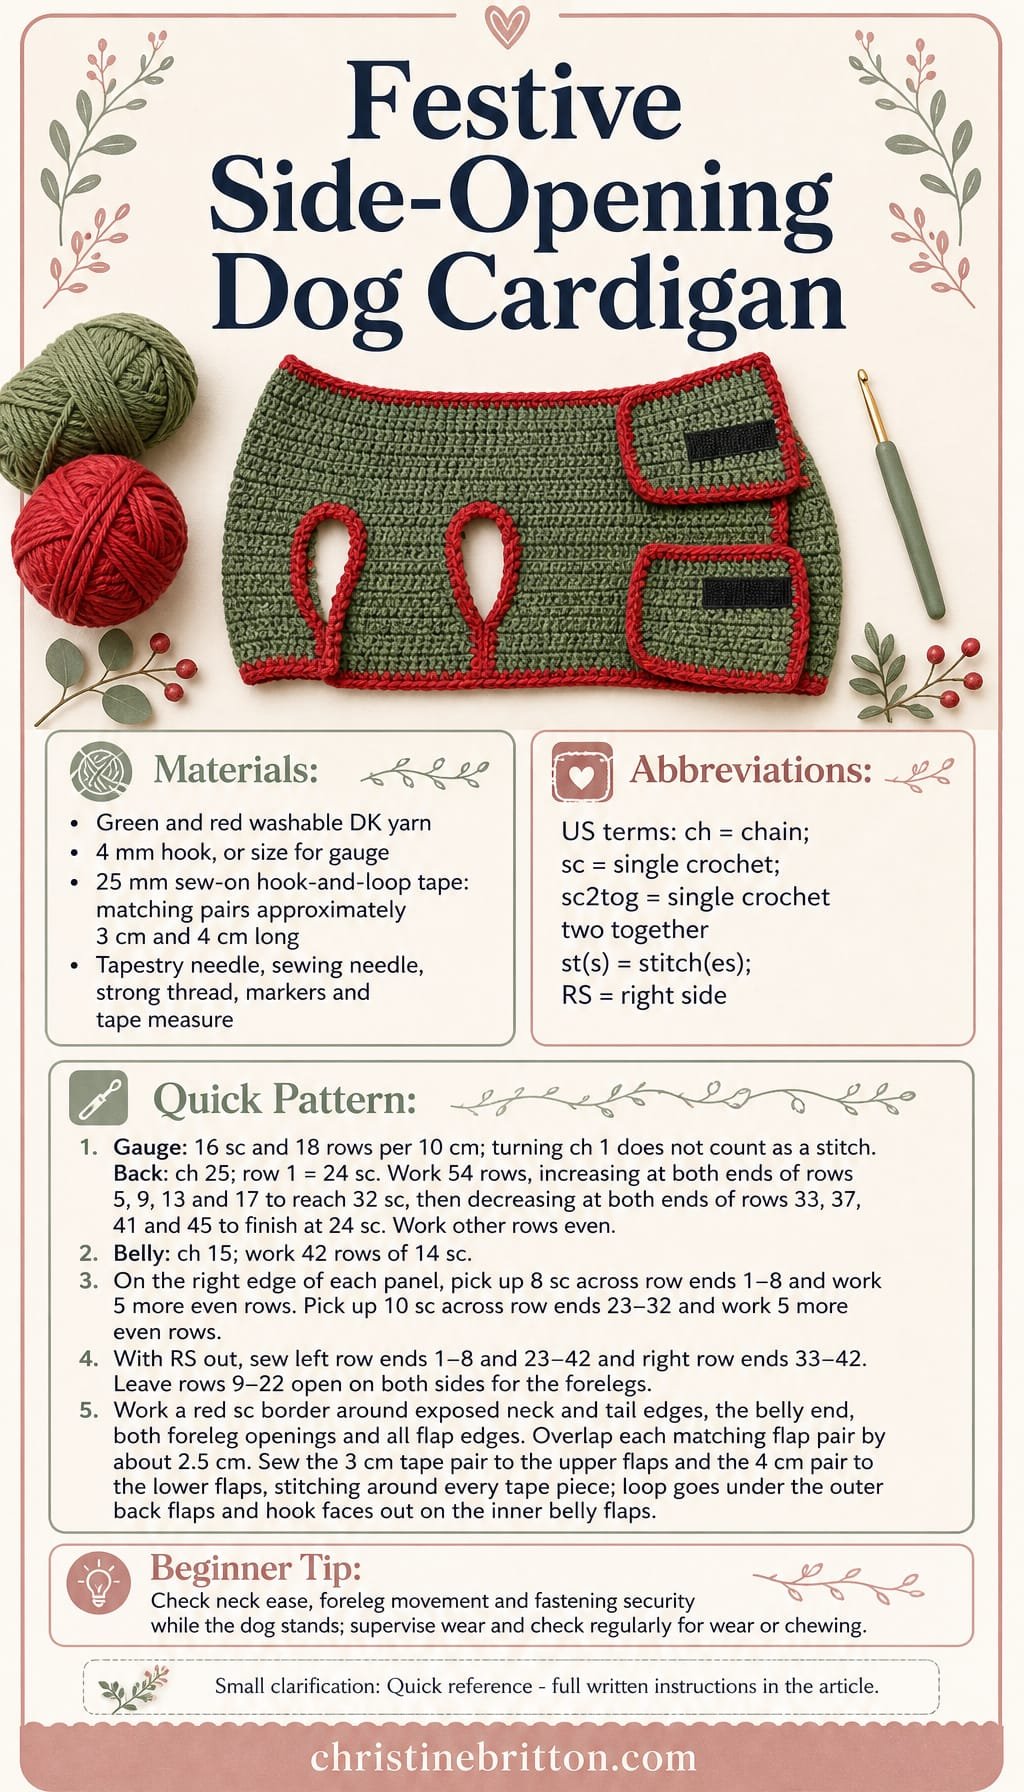
Quick-reference card. Follow the complete written instructions below.
Materials
- Smooth, washable DK yarn: Green for the panels and flaps; a small amount of red for the border. Check the yarn’s care instructions.
- 4 mm crochet hook: Or the size needed to obtain gauge.
- 25 mm-wide sew-on hook-and-loop tape: Cut two matching pairs, approximately 3 cm and 4 cm long. Use sew-on tape, not adhesive-backed tape.
- Tapestry needle, sewing needle and strong matching thread: For the seams, border ends and securely stitched fastening.
- Stitch markers and tape measure: For marking row ranges and checking the fit.
Size and Fit
One sample size: approximately 30 cm from neck to tail along the back, with a 23 cm belly panel. At the stated gauge, the unbordered panels give an approximate 28 cm closed circumference at the neck edge and 33 cm at the broadest part of the chest when the flaps overlap by 2.5 cm. Allow for the red border and check the fit on the individual dog: the neck must lie without tension, and the chest should have comfortable ease. The openings for the forelegs are approximately 8 cm long along each side. Do not use the sample size if it restricts movement or places an edge against a leg.
Gauge
16 sc and 18 rows = 10 cm in flat sc fabric before edging. Make a gauge swatch; a different gauge changes every dimension.
Abbreviations
US crochet terms.
- ch = chain
- sc = single crochet
- sc2tog = single crochet two stitches together
- st(s) = stitch(es)
- RS = right side
Pattern
- Before you begin Work flat in green. A turning ch 1 does not count as a stitch. Number rows from the neck edge towards the tail on both panels. Mark rows 1â8, 9â22, 23â32 and 33â42 along their side edges; matching row numbers will meet during assembly.
- Shaped back Ch 25. Row 1: sc in the second ch from the hook and in each ch across; 24 sc. Ch 1 and turn after every row. Work rows 2â4 even. On each of rows 5, 9, 13 and 17, work 2 sc in the first and last st, with sc in every st between; the counts after those rows are 26, 28, 30 and 32 sc. Work all intervening rows and rows 18â32 even. On each of rows 33, 37, 41 and 45, sc2tog over the first 2 sts and over the last 2 sts, working sc between; the counts after those rows are 30, 28, 26 and 24 sc. Work all intervening rows and rows 46â54 even. Fasten off. The last 12 rows form the uncovered tail extension.
- Belly panel Ch 15. Row 1: sc in the second ch from the hook and in each ch across; 14 sc. Ch 1, turn and work 41 more rows of 14 sc. Fasten off after row 42. Keep its neck edge aligned with the back’s neck edge during assembly.
- Right-side closure flaps Make two flaps on the right edge of the back and two matching flaps on the right edge of the belly panel. For each panel, join green at the row-1 end of its right edge. First flap, row 1: sc into each row end from rows 1â8; 8 sc. Ch 1, turn and work 5 further rows of 8 sc, then fasten off. Rejoin at the row-23 end on the same edge. Second flap, row 1: sc into each row end from rows 23â32; 10 sc. Ch 1, turn and work 5 further rows of 10 sc, then fasten off. Each flap extends six rows outwards from its panel. Leave rows 9â22 free for the right foreleg.
- Permanent seams and leg openings With RS facing out, match the back and belly neck edges and corresponding row ends. Sew their left edges together across rows 1â8 to form the left shoulder, and again across rows 23â42. Leave left-edge rows 9â22 unsewn for the left foreleg. On the right, permanently sew the back and belly row ends together across rows 33â42 only. Rows 9â22 remain open for the right foreleg; the flap pairs at rows 1â8 and 23â32 will close separately. Do not sew either flap across a leg opening.
- Red border Using red, work one round of sc around the exposed neck and tail edges, the belly end, both foreleg openings and the free edges of all four flaps. Space stitches evenly along row ends, work extra stitches at outer corners as needed to keep them flat, and do not crochet across a leg opening or through a permanent seam. Join, fasten off and weave in ends. If the border pulls an opening tight, undo and rework it more loosely.
- Broad side fastening Lay each back flap over its matching belly flap, overlapping by approximately 2.5 cm; keep both foreleg openings unobstructed. Position the approximately 3 cm tape pair lengthwise on the row-1â8 flaps and the approximately 4 cm pair on the row-23â32 flaps, away from their ends. Put the softer loop pieces on the undersides of the outer back flaps and the hook pieces on the outward-facing sides of the inner belly flaps. Sew firmly around all four edges of every tape piece, stitching through the crochet fabric and its reinforced sc border. Keep thread ends secured and inaccessible to chewing. Close the fastenings and check the fit before use.
Finishing
- Weave in every yarn end securely and inspect the permanent seams, flap edges and tape stitching.
- Try the cardigan on while the dog is standing. The neck and chest must close without tension; neither foreleg opening should rub or limit a step. Remove the garment if the fit is not comfortable.
- Supervise wear. Check the tape and stitching regularly for wear or chewing, and remove the cardigan immediately if any part loosens.
Helpful Tips
- Mark the four row ranges on both panels before seaming; this makes the two foreleg openings easier to keep symmetrical.
- Fasten both tape pairs before assessing chest ease. Adjusting the overlap changes the circumference, but must never bring a flap across a leg opening.
- The hook tape faces outwards on the inner flaps when the cardigan is open, rather than towards the dog’s skin. Keep the fastening clear of fur when closing it.
Integrated-Bib Christmas Dog Sweater
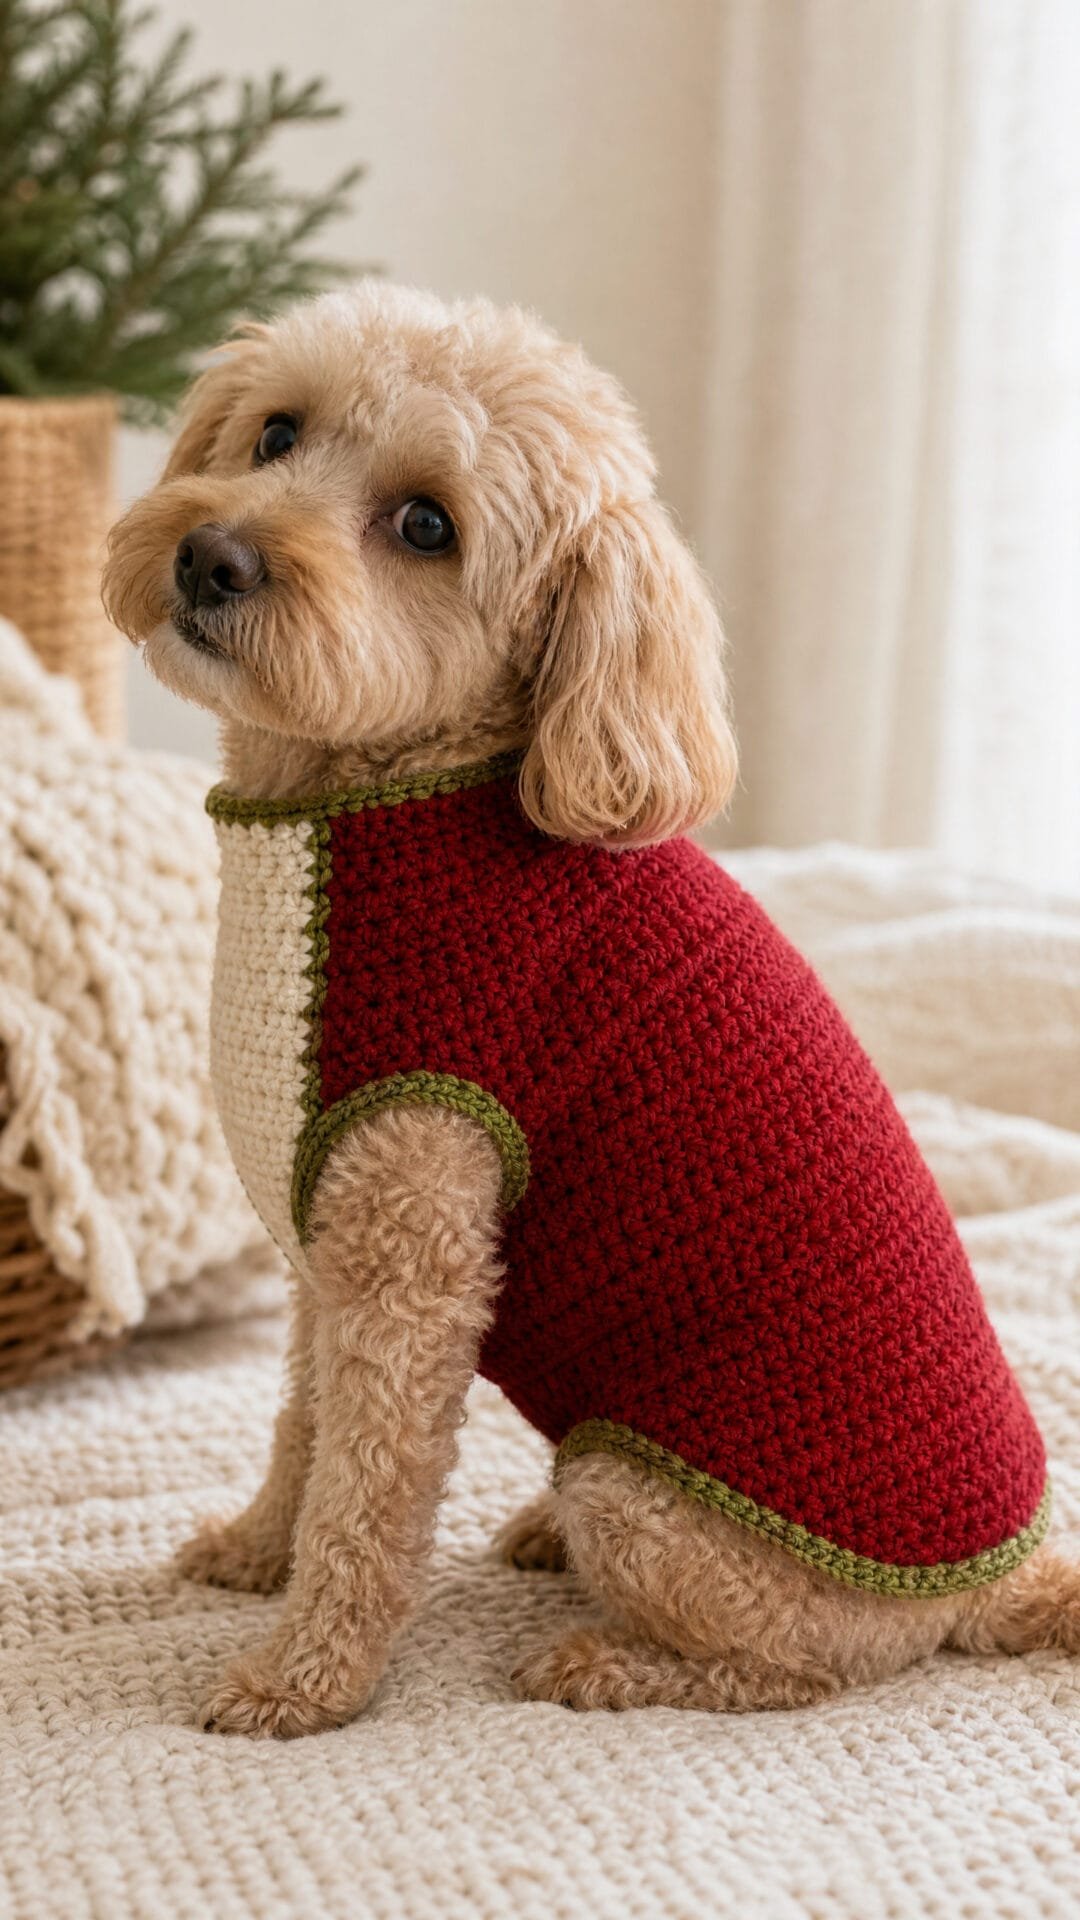
This crochet dog Christmas sweater pairs a deep red back with a cream belly bib and a narrow green border. The main fabric is continuous: the bib grows from one side of the back rather than being made as a separate full panel.
Working the bib across the underside gives it a different shape from the back. It narrows to allow room for movement and ends sooner, leaving the rear underside open. Small side connections hold it in place while preserving an opening for each foreleg.
Fit matters more than a snug-looking photograph. Before wearing, check that the sweater sits comfortably around the neck and chest, lets both forelegs move freely and leaves toileting areas clear.
Integrated-Bib Christmas Dog Sweater
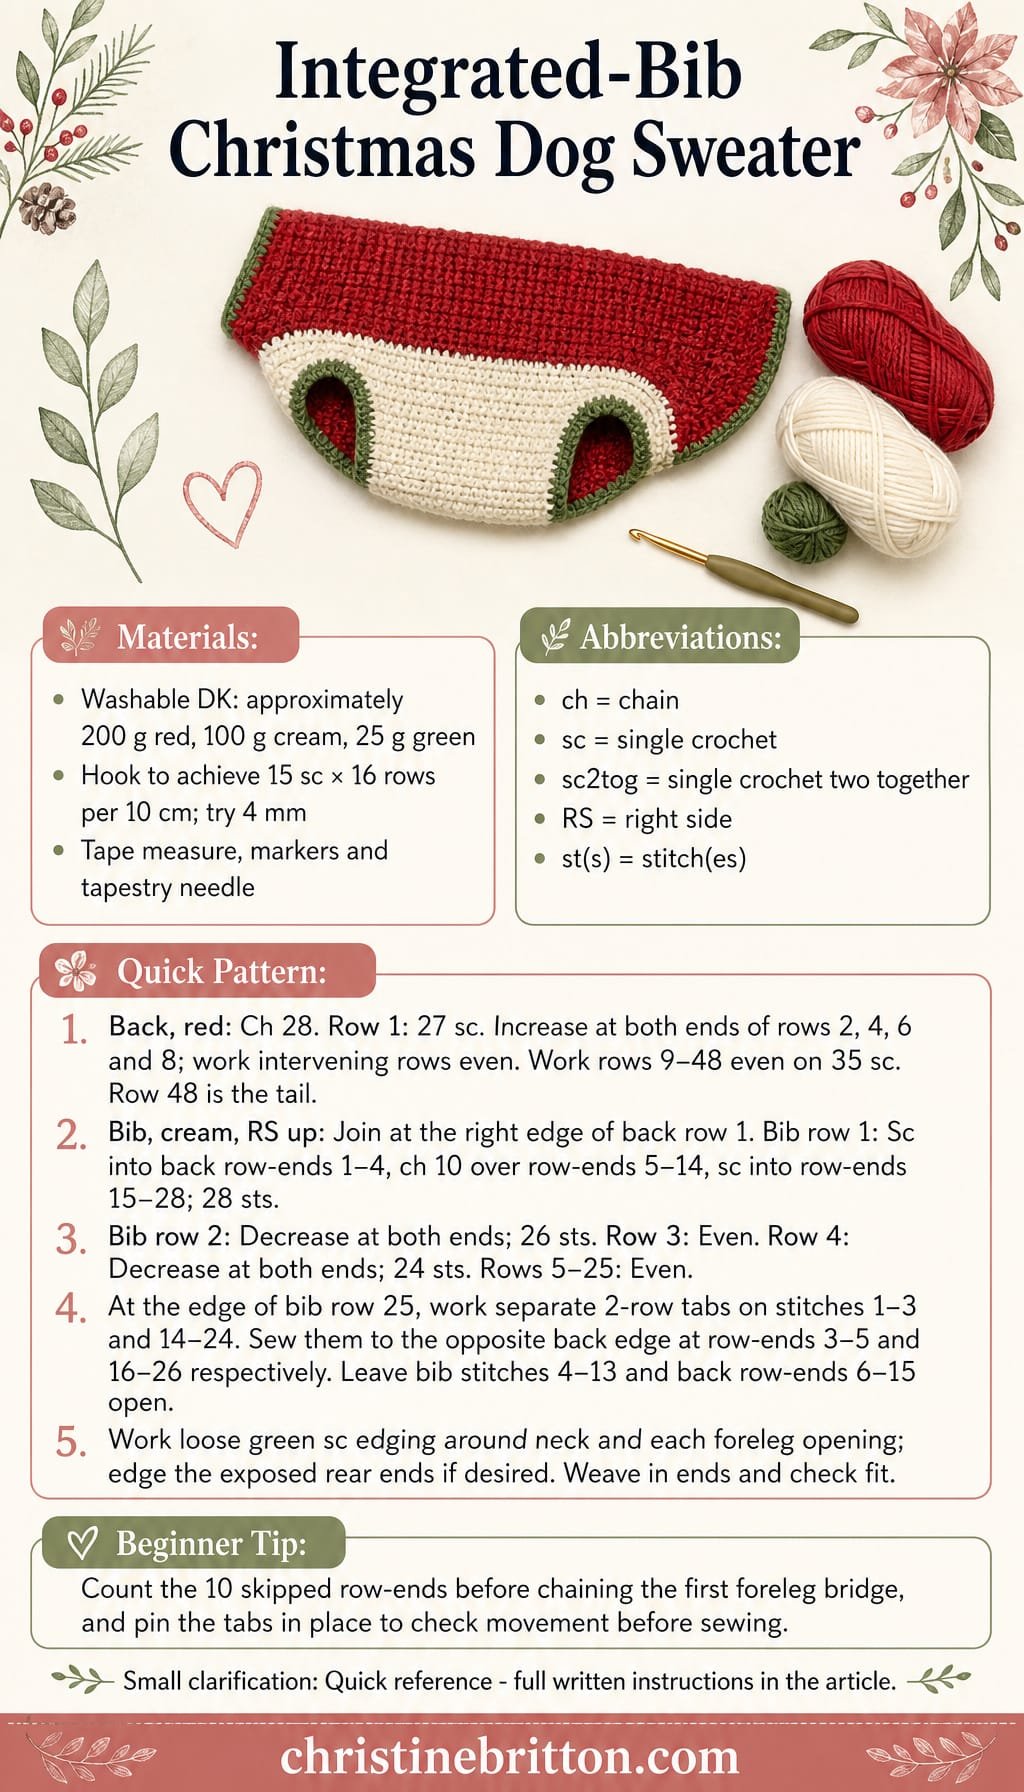
Quick-reference card. Follow the complete written instructions below.
Materials
- Washable DK yarn: Approximately 200 g deep red, 100 g cream and 25 g green. These are purchasing allowances, not tested yardages.
- Crochet hook: Size needed to obtain gauge; try 4 mm as a starting point.
- Notions: Tape measure, stitch markers, tapestry needle and scissors.
Size and Fit
One sample size for a dog with a 39â40 cm chest, approximately 33â34 cm neck and at least 30 cm of available back length from the base of the neck towards the tail. Before edging, the back is approximately 30 cm long and 23.3 cm wide at the chest. The bib is approximately 18.7 cm long where it meets the back, tapering to 16 cm at its other side; the back is therefore longer than the underside. The joined chest circumference is approximately 40.2 cm. Check the garment against your dog before fastening the tabs: it should not pull across the chest or cover the genitals.
Gauge
15 single crochet stitches and 16 rows = 10 cm in the main fabric after washing and drying. Make a swatch; gauge determines both the circumference and the placement of the foreleg openings.
Abbreviations
US crochet terms.
- ch = chain
- sc = single crochet
- sc2tog = single crochet two stitches together; decreases one stitch
- RS = right side
- st(s) = stitch(es)
Pattern
- Construction and row counting Work the red back flat from neck to tail. With the RS facing, grow the cream bib sideways from the right-hand long edge near the neck. A chain bridge in the bibâs first row leaves one foreleg opening; two short tabs join its far edge to the other side of the back, leaving the second opening. Number the back rows from the neck, and mark row 1 and both long edges before starting the bib. Turning chains do not count as stitches.
- Back With red, ch 28. Row 1: Sc in the second ch from the hook and in each ch across; 27 sc. Ch 1, turn. Rows 2, 4, 6 and 8: Work 2 sc in the first st, sc across to the last st, and work 2 sc in the last st; ch 1, turn. Rows 3, 5 and 7: Sc across; ch 1, turn. You have 35 sc after row 8. Rows 9â47: Sc across; ch 1, turn. Row 48: Sc across; fasten off. The first-row end is the neck; row 48 is the tail end.
- Bib and first foreleg opening Lay the back RS up, neck at the top. At its right-hand long edge, join cream at the end of back row 1. Bib row 1: Working down that edge, make 1 sc into each row-end of back rows 1â4; ch 10 and skip the row-ends of back rows 5â14; make 1 sc into each row-end of back rows 15â28. There are 28 bib stitches, counting the 10 chains as stitches. Ch 1, turn. Keep the chain bridge loose enough to curve around a foreleg.
- Shape the bib Bib row 2: Sc2tog over the first 2 sts, sc across to the last 2 sts, sc2tog; ch 1, turn. You have 26 sc. Row 3: Sc across; ch 1, turn. Row 4: Repeat row 2; 24 sc. Rows 5â24: Sc across; ch 1, turn. Row 25: Sc across; fasten off. The bibâs free edge has 24 stitches. Its first 3 stitches are nearest the neck; its last 11 are nearest the tail.
- Neck-side connecting tab Keep the back RS up. Join cream at stitch 1 of bib row 25. Tab row 1: Sc in stitches 1â3 of that row; ch 1, turn. Tab row 2: Sc in each of the 3 sts; fasten off. Without twisting the fabric, sew the tabâs free edge to the row-ends of back rows 3â5 on the left-hand long edge, matching its neckward stitch to row 3.
- Tail-side connecting tab Join cream at stitch 14 of bib row 25. Tab row 1: Sc in stitches 14â24; ch 1, turn. Tab row 2: Sc in each of the 11 sts; fasten off. Sew this tabâs free edge to the row-ends of back rows 16â26 on the left-hand long edge, matching stitch 14 to row 16. Leave bib stitches 4â13 and back row-ends 6â15 unjoined: that gap is the second foreleg opening. The unjoined back edges below the bib remain open for underside clearance.
- Green edging With green, work one loose round of sc around the neck opening, and a separate round around each foreleg opening. Work approximately 1 sc per stitch, chain or row-end, adjusting at corners so the edges lie flat. Add a single row of green sc across the backâs tail edge and along the exposed rear end of the bib if desired; fasten off. Do not join the open edges behind the bib.
Finishing
- Weave in all ends and smooth the garment to the stated gauge; do not stretch the openings to a fixed measurement.
- Try the sweater on the dog under supervision. Check that both forelegs move freely, the neck and chest do not constrict, and the bib finishes clear of toileting areas.
- If the edging tightens an opening, remove and rework that round with looser stitches or a larger hook.
Helpful Tips
- Mark the skipped back row-ends before working bib row 1; the chain bridge must span exactly rows 5â14.
- Check the two tab placements with the sweater on the dog before sewing permanently. The tabs should lie flat, without crossing the foreleg openings.
- The cream bib is worked across the underside, not from neck to tail. This change of direction keeps the bib continuous with the back while allowing a shorter underside.
Short-Sleeve Winter Walk Dog Sweater
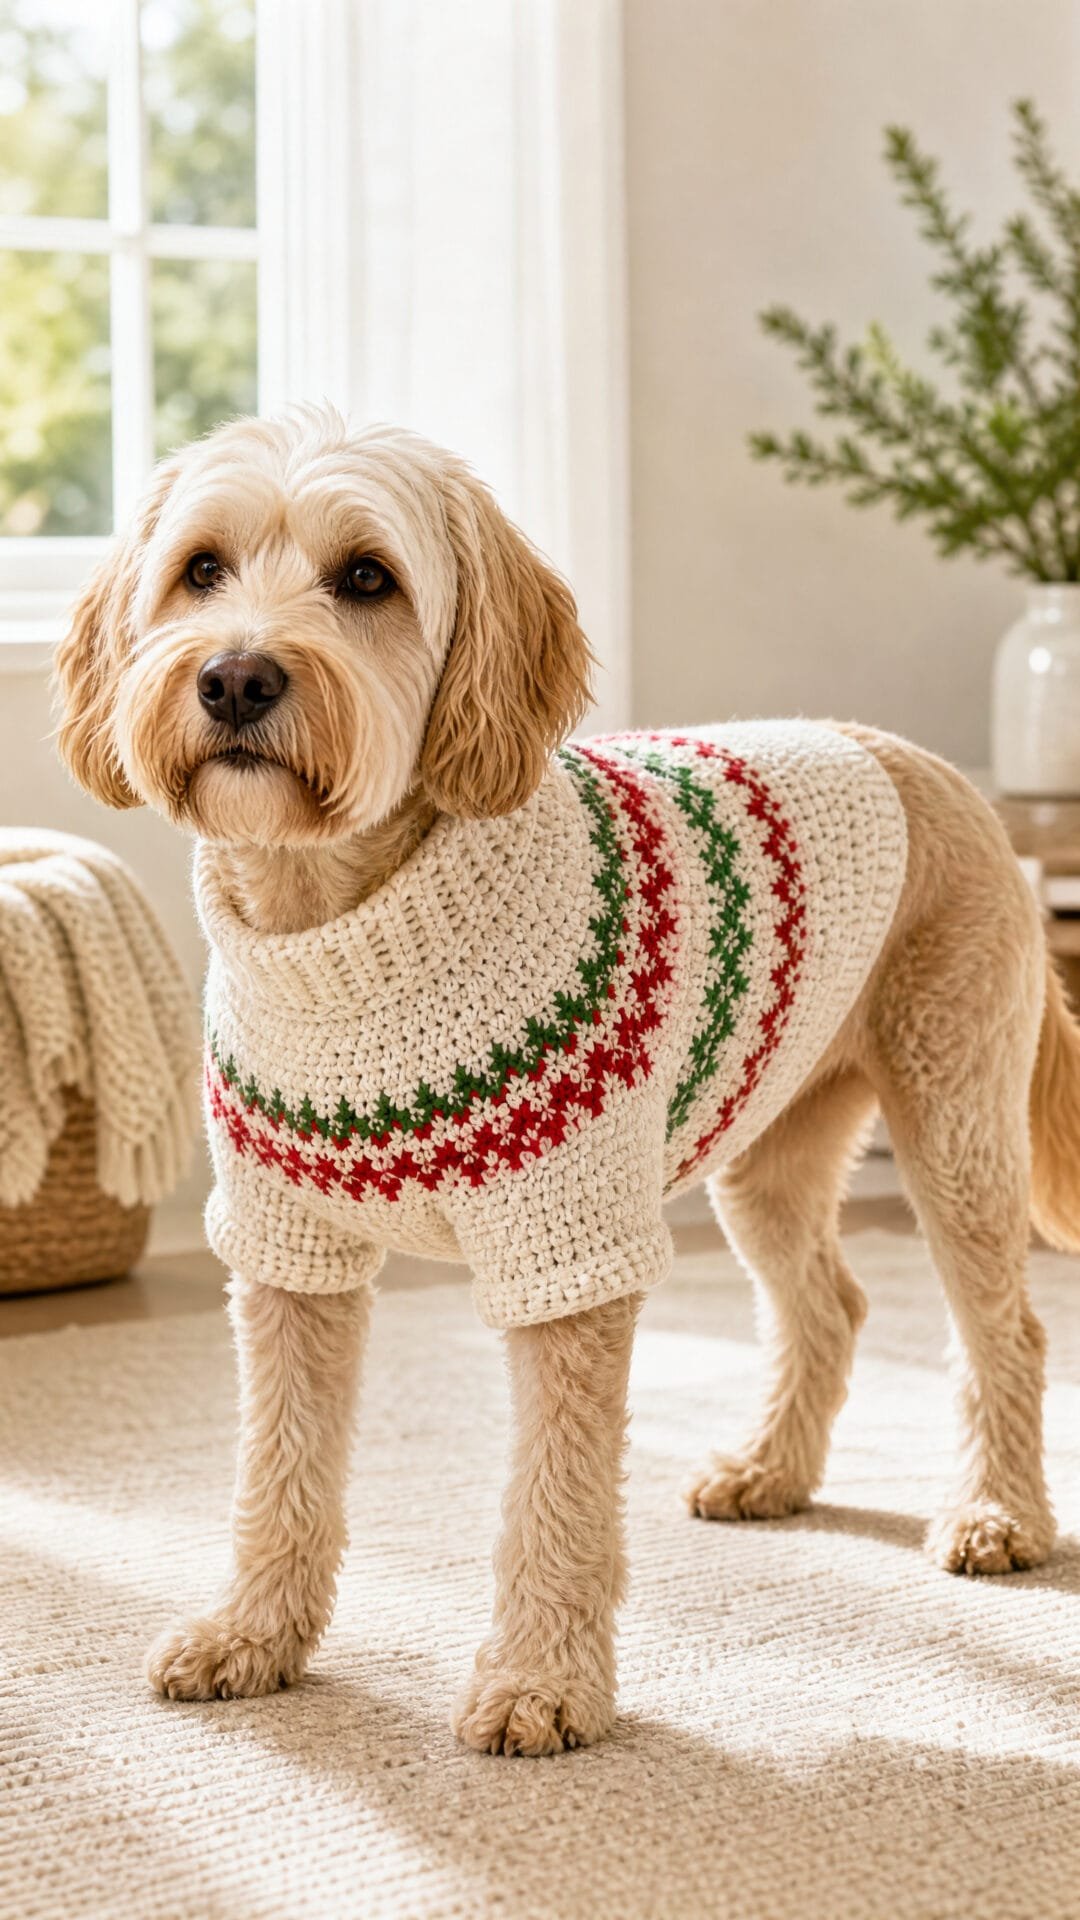
This cream pullover brings a festive touch to winter walks with red-and-green bands across the body and short cream sleeves. Its shaped back and shorter chest panel leave the underside open behind the front legs.
The sleeves are made separately and attached to the armholes, so the openings need to fit comfortably before the sleeves go on. Check the body on your dog while they are standing, then watch them take a few steps: an opening that pulls or sits too low can restrict movement.
Sleeve length needs the same moving check. A hem may sit above the elbow when your dog is still but catch it during a stride. Keep both sleeves clear of the elbows as the dog walks, and make sure the neckline passes over the head comfortably.
Short-Sleeve Winter Walk Dog Sweater

Quick-reference card. Follow the complete written instructions below.
Materials
- Washable DK yarn: Approximately 200 m cream, 65 m red and 65 m green; choose yarn suitable for regular laundering.
- Crochet hooks: 4 mm hook, or size needed for gauge, plus a 5 mm hook for the neckline.
- Other: Tapestry needle, stitch markers, tape measure and two removable clips or safety pins for fitting.
Size and Fit
One sample size: for a dog with an approximately 40 cm chest, a neck no larger than 28 cm and a front-leg circumference no larger than 18 cm at the armhole. The joined body measures approximately 44 cm around, allowing about 4 cm chest ease. The back is approximately 30 cm long from its top edge; the chest panel is approximately 22 cm long. Each armhole measures approximately 20 cm around before its sleeve is attached. Check that the approximately 29 cm neckline can pass comfortably over the dog’s head; do not rely on stretching it over a larger head. Also check the dog’s back length and the position of the front legs against the panel lengths before starting.
Gauge
16 hdc stitches and 12 hdc rows = 10 cm in smooth fabric with the 4 mm hook, after washing and drying as the yarn label directs. Both stitch and row gauge matter: they set the body width, armhole size and sleeve circumference.
Abbreviations
US crochet terms.
- ch = chain
- hdc = half double crochet
- BLO = back loop only
- sl st = slip stitch
- st(s) = stitch(es)
- rnd = round
Pattern
- Before you begin Make two flat panels, then two separate sleeve tubes. Use the 4 mm hook unless stated otherwise. A turning ch 2 does not count as a stitch. Work colour changes on the last yarn-over of the preceding row’s final hdc. For both panels, use cream for rows 1â7, red for 8â10, green for 11â13, cream for 14â16, red for 17â19, green for 20â22, and cream from row 23 onwards.
- Back panel With cream, ch 32. Row 1: hdc in the third ch from the hook and in each remaining ch; turn. (30 sts.) Rows 2â7: ch 2, work 2 hdc in the first st, hdc in each st up to the last st, and 2 hdc in the last st; turn. (42 sts after row 7.) Rows 8â36: ch 2, hdc in each st across; turn, except after row 36. (42 sts.) Fasten off, leaving a tail for seaming.
- Chest panel With cream, ch 18. Row 1: hdc in the third ch from the hook and in each remaining ch; turn. (16 sts.) Rows 2â7: increase at both ends exactly as for the back panel. (28 sts after row 7.) Rows 8â26: ch 2, hdc in each st across; turn, except after row 26. (28 sts.) Fasten off, leaving a tail for seaming.
- Join the body and mark the armholes Lay the panels with their row 1 top edges level and right sides together. On each side, seam the row-end edges of rows 1â7 together; leave the row-end edges of rows 8â19 open for an armhole; then seam rows 20â26 together. Do not seam the remaining back-panel rows 27â36 to anything. Match row numbers as you sew, using a flexible seam that does not pull the panels narrower. Turn right side out. Each armhole consists of 12 back-panel row edges plus 12 chest-panel row edges: approximately 10 cm on each side of the opening, or 20 cm around.
- Check the fit before making sleeves Clip the body seams securely and, with the dog standing, check that each armhole lies around the upper front leg without pulling. Watch the dog take a few steps: identify where the elbows reach and confirm that a sleeve extending approximately 2.5 cm from the armhole will end above them. If an armhole itself is too low, tight or misplaced, adjust the panel seaming before adding sleeves; a sleeve will not fix a restrictive opening.
- Make two short sleeves With cream and the 4 mm hook, ch 32 and sl st in the first ch to form a ring, taking care not to twist it. Rnd 1: ch 1, hdc in each ch around, sl st to the first hdc. (32 sts.) Rnds 2â3: ch 1, hdc in each st around, sl st to the first hdc. (32 sts per rnd.) Fasten off, leaving a long sewing tail. Make a second identical sleeve. Three rounds give an approximate 2.5 cm sleeve depth; if the standing and walking fit check shows that is too deep, work only one or two rounds on both sleeves instead.
- Attach the sleeves Place each sleeve’s foundation-chain edge against an armhole, with the sleeve extending outwards. Pin or clip it at the top and bottom of the opening. Sew 16 sleeve-chain stitches along the 12 back-panel row edges and the other 16 along the 12 chest-panel row edges, distributing the stitches evenly; do not gather either edge or sew across the leg opening. Repeat for the second sleeve. The 32-stitch sleeve circumference is approximately 20 cm at gauge, matching the approximately 20 cm armhole edge.
- Stretchable neckline With cream and the 5 mm hook, join yarn at a top-edge seam. Rnd 1: ch 1, work 1 loose hdc into each of the 30 back-panel and 16 chest-panel row-1 stitches, sl st to the first hdc. (46 sts.) Rnd 2: ch 1, work 1 loose hdc BLO in each st, sl st to the first hdc. (46 sts.) Fasten off. Keep both rounds and the join relaxed so the neckline can flex; check that it passes over the dog’s head without force.
Finishing
- Weave in ends securely, keeping the side seams, neckline and sleeve joins flexible.
- Wash and dry according to the yarn label, then recheck the chest, neckline and leg openings.
- Try the finished sweater on while the dog is standing and walking. Both sleeve hems must remain above the elbows throughout a normal stride; shorten the sleeves if they do not.
Helpful Tips
- The back extends beyond the chest panel to leave the underside open behind the short chest seam.
- Do not use a tight slip-stitch seam at the armholes: the sleeve should match the opening, not reduce it.
- Supervise the first wear and remove the sweater if the dog shows discomfort or a leg catches.
Frequently Asked Questions
How do I choose a size for a crochet dog Christmas sweater?
Use your dogâs neck, chest and back measurements, then compare them with the chosen pattern. Check the fit during making rather than relying on a breed label.
Which construction is easier to adjust around the forelegs?
Panelled designs let you check the position of the side seams and leg openings before joining. A neck-down yoke or raglan also allows fit checks as you work.
What yarn works well for a dog sweater?
Look for a smooth, washable yarn in the weight required by the pattern. Avoid yarn that feels scratchy, sheds heavily or has loose decorative strands.
Is a side-opening cardigan better than a pullover?
It can be a useful option if your dog resists clothing going over its head. The fastening still needs to stay secure without rubbing or restricting movement.
Final Thoughts
Start with the construction that best suits your dogâs shape and tolerance for dressing, then use colour and stripes to give it a Christmas feel. Check the fit before weaving in the final ends so there is still room to adjust.