Crochet Christmas Tree Applique Pattern (Keychain-Ready, Double Layer)
If you’re looking for a crochet Christmas tree applique pattern that’s cute and sturdy, this one is perfect. We’ll crochet a textured tree canopy, add a small trunk, then make two identical pieces and join them with a clean white slip-stitch border. The result is a flat appliqué that also works beautifully as a Christmas tree keychain (or ornament, gift topper, garland piece, stocking add-on… you name it).
Table of Contents
Quick Overview (so you know what you’re making)
- Project type: Flat appliqué + double-layer keychain finish
- Skill level: Beginner → Easy intermediate (shell shaping + border join)
- Time: ~25–45 minutes
- Stitches used: MR, ch, sl st, sc, dc
- Need help? See How to Crochet a Chain Stitch, How to Single Crochet, and How to Double Crochet.
- Main idea: Make 2 trees → join with white border → add hanging loop → attach keyring
Finished Size
Size depends on yarn + hook, but expect roughly 2.5–3.5 in (6–9 cm) tall (without loop).
If you want help choosing yarn + hook sizing, check Yarn Weight, Gauge, and Hook Size Guide.
Materials
- Green yarn (tree)
- Brown yarn (trunk)
- White yarn (outline border)
- Hook: 2.5 mm–4.0 mm (match your yarn and the look you want)
- Stitch marker (optional but helpful)
- Scissors + yarn needle
- Keyring (or lobster clasp / jump ring)
Yarn choices that work best
- Cotton yarn = crisp stitches + great for appliqués sewn onto bags/hats
- Acrylic yarn = soft + great for keychains and ornaments
Tip: For a super clean outline, keep your slip stitches relaxed and consistent.
Abbreviations (US Terms)
- MR = magic ring (if you struggle with this, see Magic Ring vs Chain Circle)
- ch = chain (see How to Crochet a Chain Stitch)
- sl st = slip stitch
- sc = single crochet (see How to Single Crochet)
- dc = double crochet (see How to Double Crochet)
- sk = skip
- st(s) = stitch(es)
Note: This pattern is written in US terms. If you crochet in UK terms, use US vs UK Crochet Terms Conversion Chart.
For an official stitch abbreviation reference, you can link Craft Yarn Council Crochet Abbreviations.
Pattern Notes (read this once — it saves confusion)
- The tree canopy is crocheted in joined rounds.
- The trunk is crocheted in rows (you’ll turn your work).
- You’ll make two identical trees, place them wrong sides together, and join with white sl sts around the edge to create the border.
- At the top, you’ll crochet a loop (ch 12–18) for hanging / keyring attachment.
Tree Canopy Pattern (Rounds 1–3)
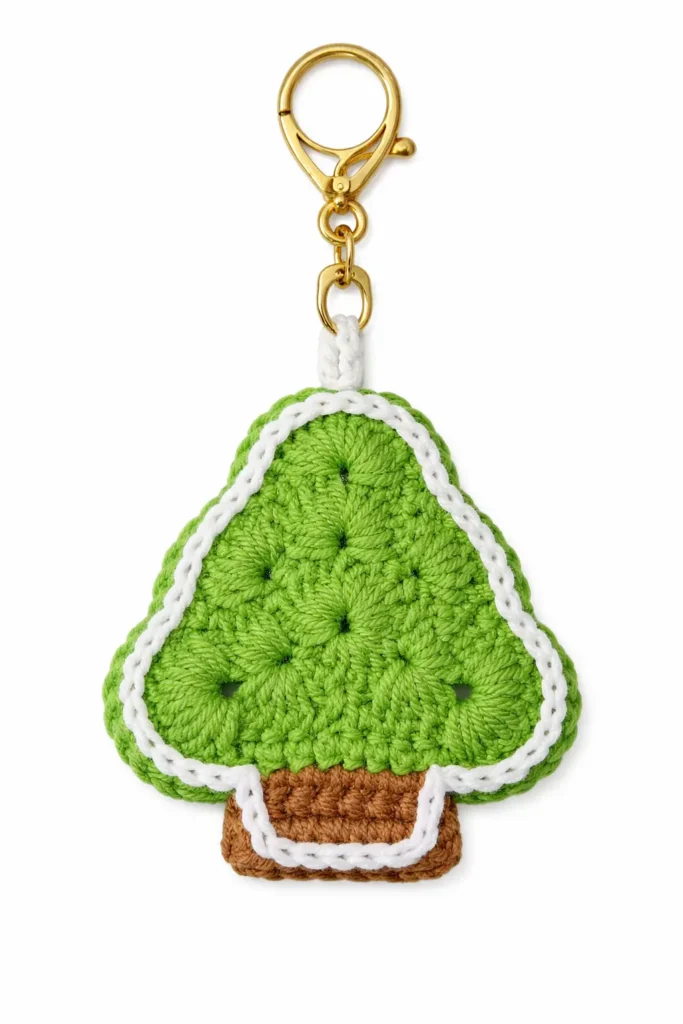
Before you start, make sure you’re comfortable with double crochet (dc) and chain stitches (ch). If you don’t like working into a magic ring, see Magic Ring vs Chain Circle for an easy alternative.
Tree Canopy (Top) — Make 2 Identical Pieces
Color: Green
Rounds are joined (not worked in a spiral).
R1
- MR, ch 3, 16 dc into ring.
- Join with sl st to the top of the starting ch-3.
Note: Some crocheters count the starting ch-3 as a stitch. That’s okay—just keep the circle flat and consistent.
R2
You’ll create the “tree layers” using shell groups.
- In the same stitch: (ch 3, 4 dc, ch 1, 5 dc)
sk 2, sc, sk 2 - In next stitch: (5 dc, ch 1, 5 dc)
sk 2, sc, sk 2 - In next stitch: (5 dc, ch 1, 5 dc)
sk 1, sc, sk 1 - Join with sl st.
R3
This round builds the final “branches” and fills the canopy.
- sc in next 3 sts, sk 1
- In the ch-1 space (from R2): 10 dc
sk 2, sc, sk 2 - In the sc stitch (from R2): 5 dc
sk 2, sc, sk 2 - In next ch-1 space: 10 dc
sk 2, sc, sk 2 - In next sc stitch: 5 dc
sk 2, sc, sk 2 - In next ch-1 space: 10 dc
sk 2, sc in next 4 sts, sl st - Fasten off and weave in the yarn tail (for now).
Quick Check (so you know it looks right)
Your canopy should look like a layered tree with three rounded “branch levels”, and it should lie mostly flat. If it’s ruffling, try a slightly bigger hook or loosen your tension (sizing help here: Yarn Weight, Gauge, and Hook Size Guide).
Tree Trunk (Brown) + Where to Attach
Now we’ll add the trunk to each tree canopy (you’re making 2 identical pieces total).
Where to attach the brown yarn (important)
Lay your green tree canopy flat with the “pointy top” facing up. Look at the bottom edge of the canopy.
- Find the bottom row of single crochets along the base.
- Start on the bottom-right single crochet (this matches the original note: “from the first sc on the right”).
Tip: If you get confused, place a stitch marker on that bottom-right sc before attaching the brown yarn.
Tree Trunk — Make 2 (one for each tree)
Color: Brown
Worked in rows (you will turn your work).
Row 1
- Attach brown yarn to the bottom-right sc.
- 7 sc, ch 1, turn (7)
Row 2
- 7 sc, ch 1, turn (7)
Row 3
- 7 sc (7)
- Fasten off, leaving a short tail for weaving in.
Repeat the trunk on the second canopy piece.
Quick check
Each canopy should now have a neat 3-row brown rectangle trunk centered-ish at the base (it’s normal if it sits slightly right depending on your exact stitch count and tension).
Pin for Later
Assembly (White Border + Hanging Loop + Keyring)
This is where your project becomes extra neat and sturdy. You’ll sandwich the two trees together, then slip stitch around the edge to create that clean white outline.
Step 1: Prep your two pieces
- You should have 2 identical trees (green canopy + brown trunk).
- Weave in any loose ends on both pieces except if you want to hide them inside (you can also tuck tails between layers before closing).
Step 2: Place pieces together
Put the two trees wrong sides together (back-to-back), so the “right sides” face outward.
Step 3: Join with the White Outline (Slip Stitch Border)
Color: White
Join white yarn anywhere along the edge (most people start near the bottom of the trunk).
Work sl st all the way around, catching both layers in every stitch.
- Go slowly and keep tension even so the border looks smooth.
- In corners/points: if the edge starts pulling, add one extra sl st in the corner to help it lie flat.
- Along curved branch bumps: place your slip stitches evenly so the edge looks rounded, not jagged.
If you need help understanding slip stitch placement, you can compare it to the “neat edging” used in many appliqués—slow and steady gives the cleanest outline.
Step 4: Add the Hanger Loop (Top)
When you reach the top point of the tree:
- ch 12–18 (choose your loop length)
- sl st back into the same top point to form a loop
Continue slip stitching around until you reach your starting point.
Finish with a final sl st, fasten off, and weave in the tail neatly.
Step 5: Attach the Keyring
- Slide your keyring (or jump ring / lobster clasp) through the crocheted loop.
- That’s it — your crochet Christmas tree applique pattern is now a Christmas tree keychain.
Options (Use it as an Applique or Ornament)
Applique version (no keyring)
Skip the loop and sew your tree onto:
- stockings, hats, tote bags, gift pouches, or garlands
A fun matching make: a tiny stocking looks adorable next to this tree — see Crochet Mini Christmas Stocking Pattern.
Ornament version
Keep the loop, but attach a ribbon instead of a keyring.
You can pair it with your mini hat ornament here: Crochet Mini Santa Hat Pattern.
Variations, Troubleshooting, and FAQs (Crochet Christmas Tree Applique Pattern)
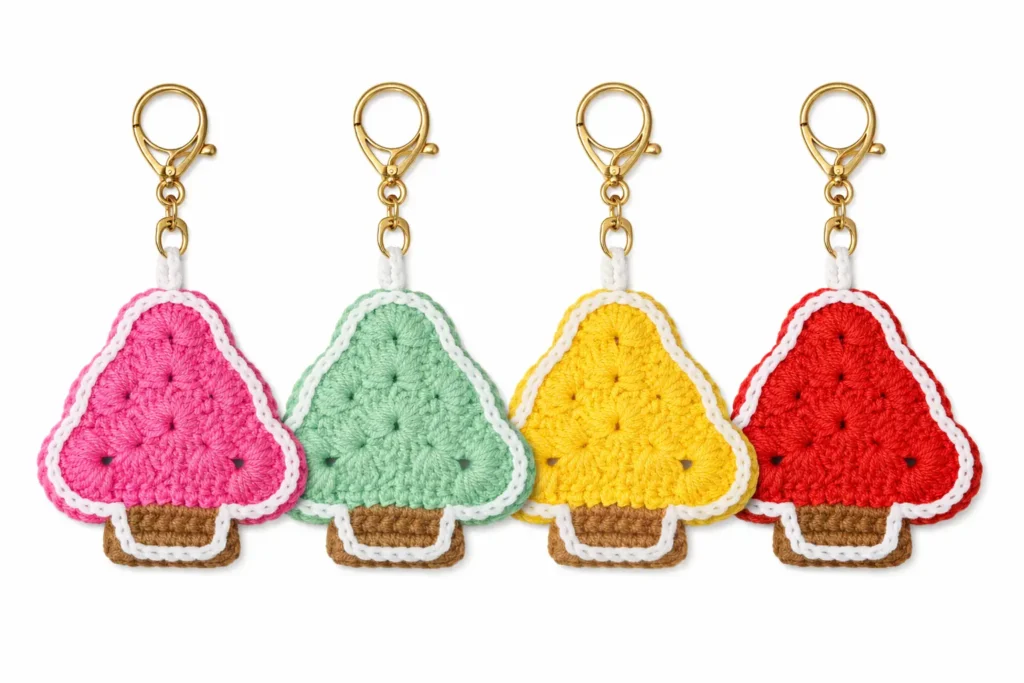
Cute Variations (easy upgrades)
- Color swaps (fastest win)
Make a “winter tree” in sage green, a “vintage tree” in dark forest green, or a “pink Christmas” tree to match your cute styles (like Pink Cat Amigurumi Pattern Free). - Add a tiny star topper
Stitch a small star (or a few tight yellow stitches) at the top before you join the two layers. - Beads = instant sparkle
Sew a few seed beads or tiny pearls on the branch bumps (before assembling). - Applique-only (flat & quick)
Make one tree piece and finish the edge with a simple round of slip stitches — perfect for stockings, hats, gift bags, and cards.
Troubleshooting (quick fixes)
My tree canopy is wavy / ruffling
- Your tension might be loose, or your hook might be too big. Try a smaller hook or slightly tighter dc tension.
- Make sure you’re joining rounds cleanly and not adding extra stitches by accident.
My tree curls instead of lying flat
- Your tension is likely too tight. Relax your dc stitches, or go up one hook size.
- Block it lightly (steam-block acrylic carefully, or wet-block cotton).
The white border looks tight and pulls the shape
- Use looser slip stitches, or switch to a slightly larger hook just for the border.
- Add one extra sl st around sharp corners/points if it’s puckering.
My outline looks bumpy or uneven
- Place border stitches evenly, especially around the curved “branch bumps.”
- Don’t force one slip stitch into every tiny space aim for smooth spacing.
The trunk looks off-center
- Double-check the attachment point: start from the bottom-right sc as written, then crochet the 7 sc rows.
- Minor shift is normal; it still looks great once the border is added.
My hanger loop is too long/short
- For keychains: ch 12–14 usually looks neat.
- For ornaments: ch 16–18 gives more room.
FAQs (crochet Christmas tree applique pattern)
Is this crochet Christmas tree applique pattern beginner-friendly?
Yes. If you know chains, single crochet, and double crochet, you can make it. The only “extra” step is the clean slip-stitch border join.
Can I make this as a flat applique without turning it into a keychain?
Absolutely. Crochet one tree piece, add a simple edge, and sew it onto stockings, hats, bags, or garlands. If you want more applique-style holiday makes, try Crochet Gingerbread Snowflake Applique Pattern.
How do I stop the Christmas tree applique from curling or waving?
Most curling comes from tight tension; most waving comes from loose tension. Adjust hook size, keep dc stitches consistent, and consider a light block at the end.
What yarn is best for a Christmas tree applique?
Cotton gives crisp stitches for appliqués. Acrylic is soft and great for keychains and ornaments. Use the yarn/hook combo that matches the size you want
Can I turn this Christmas tree applique into an ornament instead of a keychain?
Yes—keep the loop and attach ribbon or a string hanger instead of a keyring.
Do I have to use a magic ring in this Christmas tree applique?
No. You can start with a chain-circle method if you prefer.
Can I make the Christmas tree bigger or smaller?
Yes—change yarn weight and hook size. Thinner yarn makes a mini tree; thicker yarn makes a larger applique/keychain.
What can I pair with this tree for a cute Christmas set?
A mini stocking is perfect: Crochet Mini Christmas Stocking Pattern. You can also make a full “tree theme” by trying the 3D version here: Free Crochet Christmas Tree Pattern.