22 Crochet Christmas Trains to Add to Your Making List

Looking for a crochet Christmas train to hang on the tree, add to a gift or display at home? These 22 projects include flat motifs, ornaments, a stuffed locomotive, a carriage basket and a play mat.
The choice is about more than size. Flat trains work well on stockings and bunting, while a cushion cover, tree skirt or Advent calendar needs more planning for fit and finishing.
For more ideas that build on this collection, explore crochet Christmas appliqué ideas.
Before You Start
Crochet terminology: US. Check each project’s materials and gauge before choosing yarn, particularly for the coaster, colourwork pieces and items made to fit a measured object. Cotton is a practical choice for the coaster because it gives the two flat layers a firm, tidy finish.
Think about construction before picking a design. The garland uses separate train panels and a supporting cord, while the Advent calendar needs space for 24 pockets. Flat ornaments benefit from neat edges and securely attached hanging loops; the stuffed locomotive needs its wheels fixed firmly in place.
For household pieces, measure first rather than relying on a standard size. The cushion cover is based on its insert, the tree skirt has a measured centre opening, and the teapot cosy must leave the fittings accessible. If a train is intended for a young child to handle, check that any attached details are secure.
Crochet terminology: This article uses US crochet terms. Check the abbreviations for each project.
Flat Christmas Train Appliqué

This flat crochet Christmas train brings a festive touch to a plain stocking, gift bag or cushion without adding much bulk. Its simple locomotive silhouette is easy to recognise, while the contrasting cab, chimney and wheels give it plenty of character.
The engine body and smaller details are made as separate pieces, so their outlines can be shaped before the train is assembled. This makes it a manageable project for a confident beginner who wants to try an appliqué rather than a freestanding decoration.
The wheels look most balanced when their centres sit on the same horizontal line; comparing the centres is more reliable than judging their lower edges. When the train is attached to fabric, the background should stay relaxed and flat, since tight sewing can make it pucker.
Flat Christmas Train Appliqué

Quick-reference card. Follow the complete written instructions below.
Materials
- DK cotton-blend yarn: Small amounts of green for the engine body, red for the cab and charcoal for the chimney and wheels.
- 3.5 mm crochet hook: Or a size that produces a firm fabric.
- Yarn needle and scissors: For assembly and sewing the appliqué in place.
- Pins and blocking mat: For shaping the pieces before assembly.
- Plain stocking, gift bag or cushion: The background for the finished appliqué.
Size and Fit
Approximately 10 cm wide and 8 cm tall when made to the stated gauge. The dimensions are approximate because wheel size and blocking can vary.
Gauge
18 sc and 20 rows measure approximately 10 cm in turned rows. Gauge is not critical, but use a firm fabric so the appliqué holds its shape.
Abbreviations
US crochet terms.
- ch = chain
- inc = work 2 sc in the same stitch
- MR = magic ring
- sc = single crochet
- sl st = slip stitch
- st = stitch
Pattern
- Engine body With green, ch 19. Row 1: Sc in the second ch from the hook and in each remaining ch; turn. 18 sc. Rows 2–6: Ch 1 (does not count as a st), sc in each st; turn. 18 sc per row. Fasten off, leaving a tail for assembly.
- Cab With red, ch 9. Row 1: Sc in the second ch from the hook and in each remaining ch; turn. 8 sc. Rows 2–6: Ch 1, sc in each st; turn. 8 sc per row. Fasten off, leaving a tail for assembly.
- Chimney With charcoal, ch 4. Row 1: Sc in the second ch from the hook and in each remaining ch; turn. 3 sc. Rows 2–4: Ch 1, sc in each st; turn. 3 sc per row. Fasten off, leaving a tail for assembly.
- Wheels Make two in charcoal. Round 1: Work 6 sc into an MR; pull the ring closed and join with a sl st to the first sc. 6 sc. Round 2: Ch 1, inc in each sc around; join with a sl st to the first sc. 12 sc. Fasten off, leaving a tail for assembly. The joining sl sts and starting ch do not count as stitches.
- Block and assemble Gently dampen the pieces, pin the turned-row pieces square and the wheels round, and let them dry. Lay the body horizontally. Sew the cab’s bottom edge along the rightmost 8 stitches of the body’s top edge (body stitches 11–18). Sew the chimney’s bottom edge along stitches 3–5 of that top edge. Position the wheel centres beneath approximately body stitches 4 and 15, with each wheel overlapping the body’s lower edge by about 5 mm. Check that the wheel centres sit on the same horizontal line, then sew each wheel securely to the body through its upper edge. Weave in any remaining assembly ends.
- Attach to the background Lay the assembled train on the stocking, bag or cushion and pin it in place without stretching either layer. Using matching yarn or sewing thread, make small stitches around the outer edges, including both wheels. Add a few discreet stitches through the middle of the long body to stop it lifting. Keep the background flat as you sew: do not pull the stitches tight enough to gather it.
Finishing
- Remove the pins and check that both wheels remain level and the background lies flat.
- Weave in and trim all sewing ends on the back.
Helpful Tips
- If an MR is unfamiliar, ch 2 and work 6 sc into the second ch from the hook for each wheel’s first round.
- Pin both wheels before sewing either one; comparing their centres is easier than judging their lower edges.
- If attaching the train to a finished bag or stocking, keep the needle out of the opposite layer.
Stuffed Christmas Toy Locomotive

This plump Christmas locomotive is designed as a soft, freestanding decoration for a mantelpiece or seasonal display. Its wheels are fixed, so it is a display piece rather than a rolling toy.
The engine and upright cab are separate stuffed shapes. Firm, even stuffing helps each hold a distinct outline, making the cab stand out above the body rather than blending into one long tube.
This intermediate project brings together rounded and oval shaping. Yarn-stitched details give the locomotive its character without small hard fittings.
Stuffed Christmas Toy Locomotive

Quick-reference card. Follow the complete written instructions below.
Materials
- Smooth DK yarn: Red for the body, green for the cab and charcoal for the chimney and wheels; a small amount of cream or white for window stitching.
- Crochet hook: 3 mm, or a size that makes a firm fabric with no gaps for stuffing.
- Polyester toy stuffing: For the body, cab, chimney and wheels.
- Notions: Stitch marker, yarn needle and scissors.
Size and Fit
One sample size: approximately 11 cm long, 9 cm high and 6 cm wide, including the wheels. Size is approximate and will vary with yarn, gauge and stuffing.
Gauge
Approximately 24 sc and 26 rounds to 10 cm in firmly worked continuous rounds. Exact gauge is less important than making a dense fabric that contains the stuffing.
Abbreviations
US crochet terms.
- ch = chain
- sc = single crochet
- inc = work 2 sc in the same stitch
- dec = single crochet 2 stitches together
- BLO = back loop only
- rnd = round
Pattern
- Before you begin Work the body, cab and chimney in continuous rounds without joining or turning. Move a marker to the first stitch of each new rnd. Stuff the separate shapes firmly but evenly as their openings narrow. All fastening and embroidered details use yarn rather than hard fittings.
- Red body The starting end is the front of the engine. Rnd 1: Make a magic ring and work 6 sc into it (6). Rnd 2: Inc in each stitch (12). Rnd 3: (Sc 1, inc) 6 times (18). Rnd 4: (Sc 2, inc) 6 times (24). Rnd 5: (Sc 3, inc) 6 times (30). Rnd 6: (Sc 4, inc) 6 times (36). Rnds 7–20: Sc in each stitch (36). Rnd 21: (Sc 4, dec) 6 times (30). Rnd 22: (Sc 3, dec) 6 times (24). Begin stuffing firmly. Rnd 23: (Sc 2, dec) 6 times (18). Rnd 24: (Sc 1, dec) 6 times (12). Add stuffing as needed. Rnd 25: Dec 6 times (6). Cut the yarn, thread it through the remaining front loops and pull closed. This closed end is the rear.
- Green cab The oval base runs lengthwise along the engine. Ch 9. Rnd 1: Starting in the second ch from the hook, sc in each of the next 7 chains; work 3 sc in the last chain. Continue along the other side of the foundation chain: sc in the next 6 chains and work 2 sc in the final chain (18). Rnd 2: Inc in the first stitch, sc in the next 6, inc in each of the next 3, sc in the next 6, and inc in each of the last 2 stitches (24). Rnd 3: Sc BLO around (24). Rnds 4–13: Sc around (24). Rnd 14: (Sc 2, dec) 6 times (18). Stuff the cab, keeping its oval base flat. Rnd 15: (Sc 1, dec) 6 times (12). Rnd 16: Dec 6 times (6). Cut the yarn and draw the opening closed. The shaped, closed end is the roof.
- Charcoal chimney Rnd 1: Make a magic ring and work 6 sc into it (6). Rnd 2: Inc around (12). Rnd 3: Sc BLO around (12). Rnds 4–7: Sc around (12). Fasten off with a long sewing tail. Lightly stuff through the open base; the closed starting end is the top.
- Four charcoal wheels Make 8 matching wheel faces. For each face, rnd 1: Make a magic ring and work 6 sc into it (6). Rnd 2: Inc around (12). Rnd 3: (Sc 1, inc) 6 times (18). Fasten off. Pair the faces to make 4 wheels, with wrong sides together. For each pair, join charcoal yarn and sc through both layers of each matching edge stitch (18 sc around). Before closing the last few stitches, add a little stuffing. Finish the edge and leave a long tail for sewing.
- Assembly and yarn details Lay the red body horizontally, with its starting end at the front. Sew the open base of the chimney to the top around body rnds 8–10. Position the cab lengthwise on the upper rear of the body, with its base centred around body rnds 17–19; sew securely around the whole oval base. Place one front wheel on each side near body rnds 9–11 and one rear wheel on each side near rnds 18–20. Sew through each wheel’s inner face and edge into the lower side of the body, leaving the wheel bottoms slightly below the body. Set the engine on a flat surface while positioning the wheels so all four touch it. With cream or white yarn, stitch a small rectangular window on each broad side of the cab, about 3 stitches wide and 4 rounds high. Add a few short yarn stitches to suggest a front lamp or door if desired; secure all yarn ends inside the toy.
Finishing
- Check that the cab and chimney stand upright, then add securing stitches wherever either shape moves.
- Check that all four wheels meet a flat surface. Reinforce their attachments with yarn if the engine rocks.
- Weave in or bury all remaining ends securely.
Helpful Tips
- Stuff the red body firmly along its straight middle and the cab firmly at its base. Separately stuffed shapes retain a clearer engine-and-cab silhouette than a single long stuffed tube.
- Keep wheel stuffing light so the paired faces hold their shape without becoming rounded balls.
- This is a decorative stuffed locomotive, not a wheeled toy with moving parts.
Round Train Christmas Bauble

This crochet Christmas train takes an unusual route: its body is a round tree bauble rather than a long locomotive. A little cab, chimney and pair of wheels give it a train silhouette while keeping it compact enough to sit among the branches.
The design is a good choice if you enjoy making small, shaped decorations but want something beyond a plain bauble. Its details are deliberately light so they do not overwhelm the sphere; the written pattern below also explains how to check that the finished train hangs with its wheels underneath.
Round Train Christmas Bauble

Quick-reference card. Follow the complete written instructions below.
Materials
- DK yarn: Approximately 15 g red for the body, plus small amounts of green for the cab, dark grey for the chimney and black for the wheels.
- Crochet hook: 3 mm, or a size that makes a firm fabric with no gaps for stuffing.
- Polyester toy stuffing: A small amount; stuff lightly.
- Notions: Stitch marker, tapestry needle and scissors.
- Hanging loop: Approximately 25 cm of sturdy yarn or narrow cord.
Size and Fit
One bauble. At the suggested gauge, the sphere is approximately 5.5 cm across; the attached parts add a little to its outline. Adjust hook size if necessary to keep the stuffing enclosed rather than to achieve an exact finished measurement.
Gauge
Approximately 21 sc and 24 rounds per 10 cm in firm, unstuffed single crochet. Exact gauge is not essential.
Abbreviations
US crochet terms.
- ch = chain
- sc = single crochet
- inc = work 2 sc in the same stitch
- dec = single crochet 2 stitches together
- MR = magic ring
- st(s) = stitch(es)
Pattern
- Before you begin Work the sphere and chimney in continuous rounds without joining; mark the first stitch of each round. Turning chains on the cab do not count as stitches. Leave long tails on the small parts for sewing.
- Red sphere, rounds 1–6 Round 1: Work 6 sc in an MR (6). Round 2: Inc in each st (12). Round 3: (1 sc, inc) 6 times (18). Round 4: (2 sc, inc) 6 times (24). Round 5: (3 sc, inc) 6 times (30). Round 6: (4 sc, inc) 6 times (36).
- Red sphere, rounds 7–12 Sc in each st for 6 rounds (36 sts in each round).
- Red sphere, rounds 13–17 Round 13: (4 sc, dec) 6 times (30). Round 14: (3 sc, dec) 6 times (24). Round 15: (2 sc, dec) 6 times (18). Add a small amount of stuffing, keeping the sphere round but not firm. Round 16: (1 sc, dec) 6 times (12). Round 17: Dec 6 times (6). Fasten off, pass the tail through the front loops of the remaining 6 sts and pull closed. Weave in the end.
- Green cab Ch 5. Row 1: Sc in the second ch from the hook and in each remaining ch (4). Ch 1, turn. Rows 2–3: Sc in each st (4); ch 1 and turn after row 2 only. Fasten off, leaving a sewing tail. This is a small, flat cab panel.
- Dark grey chimney Round 1: Work 6 sc in an MR (6). Rounds 2–3: Sc in each st (6). Fasten off, leaving the starting ring closed and the final edge open for sewing to the sphere.
- Black wheels: make two For each wheel, round 1: Work 6 sc in an MR (6). Round 2: Inc in each st (12). Fasten off, leaving a sewing tail. Keep the circles flat; do not stuff.
- Arrange and sew Choose one side of the sphere as the display face, with the initial ring at the top. Treat the left of that face as the locomotive’s front. Sew the cab flat against the upper-right area, roughly over body rounds 4–7. Sew the chimney’s open edge to the upper-left area, roughly at body round 4, keeping its closed tip pointing upwards. Sew one wheel at the lower left and one at the lower right, with their centres roughly over body rounds 12–13. Keep a visible gap between the wheels. Catch only the outer sphere stitches while sewing so the attachments do not pull the body out of shape.
Finishing
- Weave in all sewing tails securely.
- Thread the loop yarn or cord through two nearby body stitches close to the top ring. Temporarily tie it, lift the bauble and check that the wheels hang below the cab and chimney. If it tips, move the loop slightly towards the heavier side and check again.
- Once balanced, tie the loop securely, leave an opening large enough for a tree branch and hide or trim the ends. Keep the bauble away from flames and hot lights.
Helpful Tips
- Use a smaller hook if stuffing shows between stitches.
- A light amount of stuffing helps the sphere hold its shape without making the additions pull it off balance.
- If a child may handle the bauble, sew each part on firmly and use a securely knotted hanging loop.
Christmas Train Carriage Basket

This crochet Christmas train carriage doubles as a small, open basket for wrapped sweets or lightweight craft supplies. Its rectangular base and upright sides give it a recognisable carriage shape while leaving the contents easy to reach.
Gold window outlines add detail without closing in the basket, and flat dark wheels sit on the long sides. The wheels stay clear of the bottom edge, so the carriage rests on its base rather than rocking on them.
This is a good project if you are comfortable working around the edge of a crochet piece and want to try surface crochet. A firm fabric helps the sides hold their shape; keep the basket for light contents rather than anything that might pull them outwards.
Christmas Train Carriage Basket

Quick-reference card. Follow the complete written instructions below.
Materials
- Worsted-weight cotton yarn: Green for the basket, a small amount of gold for the windows and a small amount of dark yarn for four wheels
- Crochet hook: 4 mm, or a size that produces a firm fabric
- Notions: Stitch markers, yarn needle and scissors
Size and Fit
One sample size: approximately 11 cm long × 7 cm wide × 5 cm high at the stated gauge. Intended for light, wrapped treats or small craft supplies, not heavy contents.
Gauge
Approximately 16 sc and 18 rows = 10 cm in firm, flat single crochet. Exact gauge is not critical, but the fabric should have no large gaps.
Abbreviations
US crochet terms.
- ch = chain
- sc = single crochet
- sl st = slip stitch
- BLO = back loop only
- inc = work 2 sc in the same stitch
- rnd = round
- st = stitch
Pattern
- Base With green, ch 19. Row 1: Sc in the second ch from the hook and in each ch across; 18 sc. Rows 2–12: Ch 1, turn, sc in each st across; 18 sc. Fasten off. The base has 18 stitches along each long edge and 12 row ends along each short edge.
- Pick up the sides With the right side of the base facing, join green at the first stitch of Row 12. Rnd 1: Work 18 sc across Row 12, 12 sc evenly down the row ends of the first short edge, 18 sc along the underside of the foundation chain, and 12 sc evenly up the row ends of the second short edge. Join with a sl st to the first sc; 60 sc. Mark the first stitch of each 18-stitch long side. Keep these markers aligned as you work.
- Upright sides Work joined rounds; each beginning ch 1 does not count as a stitch. Rnd 2: Ch 1, sc BLO in each st around, join; 60 sc. Rnds 3–10: Ch 1, sc in both loops of each st around, join; 60 sc. Fasten off. The BLO round makes a fold between the flat base and the upright sides.
- Four flat wheels With dark yarn, make four discs. For each disc, make a magic ring. Rnd 1: Work 6 sc in the ring, pull closed and join; 6 sc. Rnd 2: Ch 1, inc in each st around, join; 12 sc. Rnd 3: Ch 1, (sc in the next st, inc in the next st) six times, join; 18 sc. Fasten off, leaving a tail for sewing.
- Gold windows Make one outlined window on each long side. Count stitches from that side’s marker. With gold yarn held behind the fabric, bring a loop to the outside at stitch 8 of Rnd 7. Surface-crochet a loose sl-st outline across to stitch 11, up to Rnd 9, back to stitch 8 and down to the starting point. Pass the hook through the fabric at each point to draw through yarn from behind. Finish the loop on the inside and secure the ends. Keep the surface stitches loose enough that the side stays flat.
- Attach the wheels On each long side, position one wheel centred near stitch 5 and one near stitch 14, with each centre approximately level with Rnd 5. Sew around each disc’s edge, keeping its entire lower edge above the base fold. Check that the basket sits flat before securing the yarn tails.
Finishing
- Weave in all ends securely.
- Shape the corners by hand and stand the basket on its base. Reposition any wheel that touches the surface beneath it.
Helpful Tips
- If the base curls, use a smaller hook or tighten your tension rather than adding stitches to the side rounds.
- Use wrapped sweets only; the basket is not intended for unwrapped food.
Linked Christmas Train Garland

This crochet Christmas train brings a cheerful railway scene to a mantelpiece: a red engine leads green and cream wagons, with contrasting wheels and embroidered details giving each carriage its own character. The flat construction keeps the display light and easy to arrange.
The wagons are repeatable, so you can make the train longer or shorter to suit your display. Lay the panels out at a spacing you like before deciding on the final length; the joins should sit comfortably rather than being pulled taut.
A separate hanging cord supports the panels, leaving the couplings to connect the train visually instead of carrying its weight. That distinction helps the garland hang neatly across a mantel or shelf.
Linked Christmas Train Garland

Quick-reference card. Follow the complete written instructions below.
Materials
- DK yarn: Red for the engine and wagon embroidery; green and cream for the wagons; charcoal for the wheels and couplings. Use a colour of your choice for the hanging cord.
- 3.5 mm crochet hook: Adjust only if needed to make firm fabric.
- Tapestry needle, scissors and stitch marker: For assembly, embroidery and marking the first stitch of each wheel round.
Size and Fit
Sample train: one engine and four wagons, arranged with approximately 2 cm between panels. At the stated gauge, the panel-and-gap span is approximately 61 cm; the engine body is about 13 cm wide and each wagon about 10 cm wide. The engine rises approximately 8 cm above its body’s lower edge, excluding the wheel overhang. Add or omit wagons to change the length: allow approximately 12 cm of panel-and-gap span per wagon added or removed. Check the laid-out span before making the hanging cord.
Gauge
Target gauge: 20 sc and 22 rows = 10 cm in flat sc fabric. Gauge affects the finished length; matching it exactly is less important than making firm panels and measuring the train before assembly.
Abbreviations
US crochet terms.
- ch = chain
- sc = single crochet
- sl st = slip stitch
- inc = work 2 sc in one stitch
- MR = magic ring
- RS/WS = right side/wrong side
Pattern
- Working notes Turning ch 1 and joining sl sts do not count as stitches. Turn after every flat row. Leave sewing tails on the engine pieces and wheels. The engine faces left, with its chimney towards the left and its cab towards the right; the wagons follow on its right.
- Engine body With red, ch 27. Row 1: sc in the second ch from the hook and in each remaining ch; 26 sc. Rows 2–10: ch 1, turn, sc in each stitch; 26 sc. Fasten off. The row-10 edge is the top.
- Engine cab and chimney Cab: with red, ch 11. Row 1: sc in the second ch from the hook and across; 10 sc. Rows 2–8: ch 1, turn, sc across; 10 sc. Fasten off. Chimney: with red, ch 5. Row 1: sc in the second ch from the hook and across; 4 sc. Rows 2–4: ch 1, turn, sc across; 4 sc. Fasten off.
- Wagons Make four 20-stitch, 10-row panels. For each, ch 21 in its main colour. Row 1: sc in the second ch from the hook and across; 20 sc. Rows 2–8: ch 1, turn, sc across; 20 sc. Change to its rail colour at the end of row 8. Rows 9–10: ch 1, turn, sc across; 20 sc. Fasten off. Make wagons 1 and 3 with green main colour and cream rails; make wagons 2 and 4 with cream main colour and green rails.
- Wagon details With red yarn and a tapestry needle, embroider on the RS without pulling the fabric tight. On wagon 1, work one vertical line around the centre from row 2 to row 8. On wagon 2, embroider an X centred on the panel. On wagon 3, work two vertical lines, approximately at stitch columns 6 and 15, from row 2 to row 8. On wagon 4, embroider an X around the left third of the panel. Secure the ends on the WS.
- Wheels Make 10 wheels in charcoal. Round 1: work 8 sc in an MR; join with a sl st to the first sc. Round 2: ch 1, inc in each stitch around; join with a sl st to the first sc; 16 sc. Fasten off. Sew two wheels to each panel, letting approximately half of each wheel extend below its lower edge. Place the engine wheel centres around stitch columns 5 and 22, and each wagon’s wheel centres around columns 4 and 17. Sew through the wheel area that overlaps the panel, leaving its lower edge free.
- Couplings and layout Make four charcoal couplings. For each, ch 11, sl st in the second ch from the hook and in each remaining ch; 10 sl sts. Fasten off with a sewing tail at each end. Lay the engine and wagons 1–4 in order, RS up, with a relaxed gap of approximately 2 cm between panels. Centre one coupling at mid-height on each pair of facing body edges. Sew approximately 1 cm of each coupling end to the WS of its panel. If a finished coupling will not span the gap plus both sewn ends without stretching, remake it with additional chains and sl sts.
- Separate hanging cord Measure the relaxed span of the laid-out train, including its gaps. In the cord colour, make a chain longer than that span by at least 30 cm. Sl st back along the chain, then check its relaxed length; remake it longer if it measures less than the span plus 30 cm. Fasten off and secure the yarn ends into the cord. With approximately 15 cm of cord extending beyond each end of the train, lay the cord along the WS of the top edge of each wagon and the engine body’s row-10 edge. Stitch it securely at both top corners of every panel. Across each gap, leave enough cord to maintain the 2 cm spacing without tension on the coupling.
Finishing
- Weave in all remaining ends and gently flatten the panels by hand.
- Hang the garland from the cord ends. Arrange the panels before securing the ends so the cord, rather than the couplings, carries their weight.
- Keep the yarn garland away from flames, hot mantel fittings and other heat sources.
Helpful Tips
- Attach the engine cord to the back of its body edge, even where the cab meets that edge; do not try to run the cord across the top of the taller cab.
- For a longer train, make another wagon, two wheels and one coupling per added wagon. Extend the cord by at least the measured width of that wagon plus its gap.
- For a shorter train, omit wagons and use one fewer coupling for each wagon omitted.
Christmas Train Scene Cushion

Bring a little Christmas crochet to the sofa with a cream cushion cover featuring a red carriage, a green locomotive and snow falling around the train. The scene is worked into a flat tapestry-crochet front, while an overlapping envelope back lets you remove the insert without disturbing the design.
Check both stitch and row gauge before committing to the front panel. Stitch gauge affects its width, while row gauge affects its height; getting one direction right does not guarantee the cover will fit in the other. Smooth yarn helps keep the colour changes and small details clear.
Measure the cushion insert you plan to use rather than relying on its labelled size. The pattern includes a sample and a measurement-based adjustment for a larger insert, keeping the full train scene centred. Compare the completed front with your insert before making the back panels.
Christmas Train Scene Cushion

Quick-reference card. Follow the complete written instructions below.
Materials
- Smooth aran-weight yarn: Cream (C) for the background and back; smaller amounts of red (R), green (G), charcoal (K) and pale grey (S). Allow extra cream if enlarging the cover.
- Crochet hook: 4.5 mm, or the size needed to obtain gauge.
- Cushion insert: Measure its width and height before starting. The sample calculations use an insert measuring 29 × 29 cm.
- Other tools: Tape measure, stitch markers, scissors and yarn needle.
Size and Fit
At the stated gauge, the 42-stitch × 48-row sample front measures approximately 30 × 30 cm before seaming and is intended for a measured 29 × 29 cm insert. To fit another insert, let W and H be its measured width and height in centimetres. Make the front N stitches wide, where N is the nearest whole number to (W + 1) × 1.4; work T rows, where T is the nearest whole number to (H + 1) × 1.6. N must be at least 42 and T at least 48 to contain the entire scene. Centre the 42-stitch chart within each chart row: work floor((N − 42) ÷ 2) extra cream stitches before it and the remaining extra cream stitches after it. Add floor((T − 48) ÷ 2) plain cream rows below the chart and the remaining extra rows above it. Make each back panel N stitches wide and B rows tall, where B is the smallest whole number not less than 2T ÷ 3. The panels overlap by 2B − T rows. A seam approximately 0.5 cm in from each edge gives an opening about 1 cm smaller than the unseamed panel in each direction. Recheck the finished front against the measured insert before making the backs.
Gauge
14 single crochet stitches and 16 rows = 10 × 10 cm in turned rows with the chosen hook. Make and measure a washed, dried swatch; a different stitch or row gauge changes the front dimensions and the insert it will fit.
Abbreviations
US crochet terms.
- ch = chain
- sc = single crochet
- st(s) = stitch(es)
- RS / WS = right side / wrong side
- C / R / G / K / S = cream / red / green / charcoal / pale grey
- N / T / B = front stitch count / front row count / rows in each back panel
- floor = round down to a whole number
Pattern
- Reading the scene The 42-position chart below is read from the bottom upwards. Positions 1–42 always run from the viewer’s left to right on the finished RS, regardless of which way you are crocheting. Every chart row contains 42 sc. Work C at every position not assigned another colour. An inclusive range such as 9–12 covers four stitches. Where K wheel positions interrupt an R or G range, K takes precedence. On an RS row you work from position 1 towards 42; on a WS row you work from position 42 towards 1.
- Changing colours Work the last yarn-over of the preceding sc with the new colour. Carry the unused yarn inside stitches across short sections of the train, keeping it loose enough for the fabric to lie flat. Use separate small balls or bobbins for distant motifs rather than carrying yarn across a long cream area; secure ends on the WS. Work the pale-grey snow in the same way.
- Front panel For the 29 × 29 cm sample insert, with C ch 43. Row 1: sc in the second ch from the hook and in each ch across; turn. (42 sc.) Row 2: ch 1 (does not count as a st), sc in each st across; turn. Continue in turned sc rows, working chart rows 1–48 below in sequence. The foundation row is chart row 1, and chart row 48 completes the sample front. Do not add a turning chain after the final row. For another measured insert, use N stitches and T rows as calculated under Size and fit: ch N + 1, work the extra plain rows below the chart first, then chart rows 1–48 centred across N stitches, then the extra plain rows above. Every row has N sc.
- Chart rows 1–9 Rows 1–2: all C. Row 3: S at 9–10 and 30–31. Row 4: all C. Row 5: S at 17–18 and 36. Row 6: all C. Row 7: S at 5–6 and 24. Row 8: all C. Row 9: S at 13–14 and 33.
- Chart rows 10–16 Row 10: K at 4–40 (track). Row 11: all C. Rows 12–13: K at 6–40. Rows 14–16: R at 6–23 and G at 27–40, except work K at 9–12, 18–21, 29–32 and 36–39 for the wheels.
- Chart rows 17–24 Rows 17–19: R at 6–23 and G at 27–40. Row 20: R at 6–23 and G at 27–40, except C at 10–13 and 17–20 for carriage windows. Rows 21–22: as row 20, and also C at 31–34 for the cab window. Row 23: R at 6–23 and G at 27–40, except C at 31–34. Row 24: R at 5–24 and G at 26–40.
- Chart rows 25–36 Row 25: R at 7–22, G at 27–35 and K at 37–39. Row 26: G at 27–35, K at 37–39 and S at 8–9. Row 27: G at 27–35, K at 37–39 and S at 11–12. Row 28: G at 27–35 and K at 37–39. Row 29: G at 26–35 and K at 37–39. Row 30: K at 37–39 and S at 9–10 and 21. Row 31: K at 37–39 and S at 15–16. Row 32: S at 34–36 and 39–40. Row 33: S at 7–8 and 34–35. Row 34: S at 32–33 and 36–37. Row 35: S at 13 and 35–36. Row 36: S at 21–22 and 30–31.
- Chart rows 37–48 Row 37: all C. Row 38: S at 5–6 and 39–40. Row 39: all C. Row 40: S at 15–16 and 30. Row 41: all C. Row 42: S at 9 and 34–35. Row 43: all C. Row 44: S at 22–23. Row 45: all C. Row 46: S at 6–7 and 37. Rows 47–48: all C. Fasten off after the final row.
- Envelope back Make two identical cream panels. For the sample, ch 43; sc in the second ch from the hook and across (42 sc). Turn. For each following row, ch 1, sc across and turn, until each panel has 32 rows. Fasten off. For another measured insert, ch N + 1 and work B rows per panel, keeping N sc in every row. The final-row edges form the envelope opening; no edging is added.
- Assemble Lay the front RS up. Place one back panel over its upper portion and the other over its lower portion, with both back panels’ RS facing the front. Align their outer edges with the front’s outer edges; their free final-row edges overlap across the middle. Pin or mark the corners and the points where the overlapping edges meet the sides. Sew all four outer edges approximately 0.5 cm in from the edge, catching both back layers at each overlapped side. Do not sew across the envelope opening. Turn RS out through the opening and insert the measured cushion.
Finishing
- Weave in yarn ends on the WS, keeping them clear of the envelope opening.
- Smooth the seams and corners by hand; avoid stretching the front out of square.
- Remove the insert through the overlapping back panels when the cover needs washing.
Helpful Tips
- A larger stitch gauge number makes the same 42-stitch chart narrower; a larger row gauge number makes its 48 rows shorter. Check both directions before choosing the front dimensions.
- Mark every tenth chart position while working colourwork, especially on WS rows, when the numbered positions are encountered in reverse order.
- Keep carried strands relaxed and use bobbins for widely separated snowflakes to avoid puckering or visible floats on the cream background.
- If your measured insert requires fewer than 42 stitches or 48 rows under the sizing formula, use a smaller insert or change gauge; cropping the chart would remove part of the scene.
Colourwork Christmas Train Stocking

This crochet Christmas train stocking pairs a green background with a red locomotive on the front. A charcoal heel and cream cuff give the design a festive look that works well as a hanging decoration.
The stocking is made from two flat shaped panels, with the train worked into the front panel rather than added afterwards. Keep the carried colourwork yarn relaxed so the fabric lies flat and the motif stays clear.
The sample proportions in the pattern are targets, not tested measurements. For a longer stocking, use the pattern’s plain-leg adjustment on both panels to keep them aligned.
Colourwork Christmas Train Stocking

Quick-reference card. Follow the complete written instructions below.
Materials
- DK yarn: Approximately 100 g green, 25 g red, 25 g cream and 20 g charcoal. Allow extra green if lengthening the leg.
- 4 mm crochet hook: Or a size that gives the stated gauge.
- Tapestry needle and stitch markers: For seaming, embroidery and marking the top opening.
Size and Fit
Sample targets at the stated gauge: approximately 15 cm across the flat leg, 24 cm from heel edge to toe, and 23 cm from the base to the top of the cuff, excluding the hanging loop. To increase the hanging length, add the same even number of plain green leg rows after Row 22 on both panels. Each additional two rows adds approximately 1 cm at the stated gauge.
Gauge
16 single crochet stitches and 18 rows = 10 cm in flat single crochet. Check gauge before making both panels.
Abbreviations
US crochet terms.
- ch = chain
- sc = single crochet
- sl st = slip stitch
- st(s) = stitch(es)
- RS/WS = right side/wrong side
Pattern
- Before you begin Make two identical flat panels: a front with the train and a plain back. Ch 1 at the beginning of a row and turn; the turning chain never counts as a stitch. Work the first sc into the first stitch. In each panel, Rows 1–12 form the foot and Rows 13–36 form the narrower leg. When reading the colour positions, count columns from the heel-side edge of the panel, not from the end where you begin that row.
- Heel and foot: both panels With charcoal, ch 39. Row 1: Beginning in the second ch from the hook, sc in the first 7 chains with charcoal, then sc in the remaining 31 chains with green; turn. You have 38 sts. Rows 2–6: Sc across, working columns 1–7 in charcoal and columns 8–38 in green; ch 1 and turn after each row. On these rows, carry the green yarn inside the 7 charcoal stitches. Change colour on the final pull-through of the stitch before the next colour. Rows 7–12: With green, sc across all 38 sts; ch 1 and turn after each row. Fasten off charcoal after Row 6.
- Shape the leg: both panels Row 13: Starting at the heel-side edge after turning Row 12, sc in the first 24 sts. Leave the remaining 14 sts unworked; ch 1 and turn. The working width is now 24 sts. Rows 14–36: Sc in each of the 24 sts, ch 1 and turn after each row, except do not ch 1 after the final row. On the front panel only, replace the plain-green instructions for Rows 17–22 with the train colourwork below. On the back panel, keep these rows green. Fasten off, leaving a long green tail for seaming.
- Front-panel train colourwork Work 24 sc on each of Rows 17–22. The red columns are: Row 17, columns 5–20; Row 18, columns 5–20; Row 19, columns 8–20; Row 20, columns 8–14 and 18–20; Row 21, columns 8–14 and 18–20; Row 22, columns 18–20. Work all other columns in green. Carry the unused red strand inside the stitches across the full width of these six rows, keeping it relaxed. Change colour on the final pull-through of the preceding stitch. Odd-numbered rows are worked from column 1 towards column 24; even-numbered rows are worked from column 24 towards column 1. Fasten off red after Row 22.
- Train wheels With charcoal and a tapestry needle, embroider two small filled wheels on the RS of the front panel, centred below the red body at columns 8 and 18 of Row 16. Keep the embroidery within the panel so it will not be caught in the seam.
- Seam Lay the panels with wrong sides together, heel sides and toes aligned. Using green and a tapestry needle, seam through the edge loops along both side edges and around the foot: from one top corner down the heel side, across the base, around the toe, back along the top of the foot and up the other side of the leg. Do not seam the top opening. Keep the top stitches accessible for the cuff.
- Cream cuff Join cream at the top opening. Round 1: Sc in each of the 24 top stitches on the front and each of the 24 top stitches on the back; sl st to the first sc. You have 48 sts. Rounds 2–5: Ch 1, sc in each of the 48 sts, and sl st to the first sc. Fasten off and weave in the end.
- Reinforced hanging loop Join cream securely through the cuff and panel seam at the heel-side top corner. Ch 20 and sl st back into the same seam point to form a loop. Work 24 sc around the entire chain loop, spacing them evenly; sl st into the seam point and fasten off. Pass both yarn ends through the cuff and panel seam several times, then weave them in securely.
Finishing
- Weave in all remaining ends on the inside of the stocking.
- Gently shape the stocking and cuff to the target dimensions without stretching the carried colourwork.
Helpful Tips
- Keep the carried red strand loose enough that the front panel lies flat.
- Mark the heel-side edge before starting the train: colour columns always refer to that fixed edge, including on rows worked in the opposite direction.
- For a longer stocking, add plain green rows after the motif rather than within it, and add the same number to both panels.
Railway Track Table Runner

This crochet Christmas train table runner suggests a railway without needing a train motif. Dark raised rails run along a cream background, while alternating red and green sleepers bring a festive rhythm to the centre of the table.
The runner begins as a flat rectangle, so you can choose a length that suits your table before adding the track. Keep the full sleeper repeat when adjusting the length; this leaves the pattern balanced at both ends. The written pattern gives the placement details.
The track sits on the surface of the fabric rather than being built into the main rectangle. Aim for relaxed surface stitches so the runner stays flat beneath place settings or a centrepiece.
Railway Track Table Runner

Quick-reference card. Follow the complete written instructions below.
Materials
- Cream DK cotton yarn: Approximately 200 g for the sample size; allow more for a longer runner.
- Dark DK cotton yarn: Approximately 25 g for the rails.
- Red and green DK cotton yarn: Approximately 15 g of each for the sleepers.
- Hook: 4 mm crochet hook, or a size that gives a firm fabric.
- Notions: Yarn needle, scissors, tape measure and stitch markers.
Size and Fit
The sample uses 144 body rows and is approximately 81 cm long and 17 cm wide at the stated gauge. To adjust the length, use a body-row count that is a multiple of 8, with at least 16 rows. For a target finished length in centimetres, choose the nearest multiple of 8 to (target length minus 1.1) × 1.8. Each change of 8 rows alters the length by approximately 4.4 cm and keeps the sleeper repeat complete. Check the length as you work, since yarn and tension affect the finished measurement.
Gauge
Planning gauge: 16 sc and 18 rows per 10 cm in the main fabric, before blocking. Gauge is useful for estimating length; adjust the row count to suit your table.
Abbreviations
US crochet terms.
- ch = chain
- sc = single crochet
- sl st = slip stitch
- st(s) = stitch(es)
Pattern
- Main rectangle With cream, ch 26. Row 1: sc in the second ch from the hook and in each ch across (25 sc). Rows 2–144: ch 1, turn, sc in each st across (25 sc). Fasten off. For another length, stop after your chosen multiple of 8 rows instead of row 144. Number the rows from the foundation edge so you can place the track details accurately.
- Plain border Join cream at a corner with the right side facing. Work 25 sc across the last row, then ch 2 for the corner. Down the long side, work 7 sc in the next 7 row ends and skip the eighth row end; repeat this sequence to the next corner. Ch 2. Work 25 sc into the foundation-chain edge, then ch 2. Work the same 7-sc, skip-one-row-end sequence along the second long side, then ch 2 and sl st to the first sc. Fasten off. Repeat the long-side sequence once for each group of 8 body rows; do not work into the ch-2 corner spaces.
- Sleepers With the right side facing, mark stitch columns 6 and 20, counting across the width of the cream body, not the border. Work a short line of red surface sl sts across body row 4, from column 6 towards column 20. To begin, hold the yarn behind the fabric and draw a loop to the front at column 6. Insert the hook at column 7, draw the yarn through the fabric and the loop on the hook to make a surface sl st. Continue once in each column through column 20; fasten off on the wrong side. Make another sleeper on every fourth body row through row 140, alternating green and red. For an adjusted length of N rows, place sleepers on rows 4, 8, 12 and so on through row N minus 4. Keep the surface stitches loose enough for the fabric to lie flat.
- Rails With dark yarn and the right side facing, make one longitudinal rail over stitch column 6. Draw up a loop from the wrong side at body row 1, then work one surface sl st at the same column in each successive row through the final body row. Fasten off on the wrong side. Repeat along column 20. Work over the ends of the sleepers so the two rails read as continuous lines.
Finishing
- Weave in all ends on the wrong side, taking care not to pull the rails or sleepers tight.
- Lightly damp-block the runner flat, straightening the long edges and leaving it to dry before use.
Helpful Tips
- Mark every fourth row while making the rectangle; the marks will guide sleeper placement.
- Surface crochet should sit on top of the fabric rather than draw it up. If the runner puckers, loosen the track stitches.
- Keep the final sleeper four rows from the end of the body, matching the four-row space before the first sleeper.
If you’d like to keep building your crochet skills, take a look at crochet Christmas bauble patterns.
Open-Window Train Ornament

The open cab window gives this crochet Christmas train its character. Hang it against a tree and you can see the branches or lights through the little locomotive, rather than through a solid patch of crochet.
The train has a flat silhouette, with a cab above the body and a genuine gap between its window posts. A bridge forms the top of the opening, and a relaxed edging gives the inside a neat outline without closing it up. If the edging is too tight, it can pull the sides of the window together.
This is an appealing Christmas crochet ornament for makers who enjoy shaping a small project in rows. The smokestack and dark wheels make the locomotive recognisable, while its open window is the detail that stands out on the tree.
Open-Window Crochet Christmas Train Ornament

Quick-reference card. Follow the complete written instructions below.
Materials
- DK cotton yarn: Small amounts of green for the train and dark grey or black for the wheels
- 3 mm crochet hook: Adjust if needed to make a firm fabric
- Yarn needle and scissors: For assembly and weaving in ends
Size and Fit
One ornament, approximately 10 cm wide and 6–7 cm tall, excluding the hanging loop. Size will vary with yarn and tension.
Gauge
Suggested gauge: approximately 20 sc and 22 rows to 10 cm in flat sc. Exact gauge is not essential, but the fabric should be firm enough to hold the window open.
Abbreviations
US crochet terms.
- ch = chain
- sc = single crochet
- sl st = slip stitch
- st(s) = stitch(es)
Pattern
- Body, Row 1 With green, ch 21. Sc in the second ch from the hook and in each remaining ch. Turn. (20 sc)
- Body, Rows 2–5 Ch 1, sc in each st across, turn. After Row 5, you are at the left-hand end of the body, ready to work towards the cab on the right. (20 sc per row)
- Cab, Row 6 Ch 1, turn. Sl st loosely in the first 10 sts to move across the top of the locomotive body; these slip stitches do not form part of the cab stitch count. Sc in each of the remaining 10 sts, turn. (10 sc)
- Cab, Row 7 Ch 1, sc in each st across, turn. You are now at the left edge of the cab. (10 sc)
- Window left post, Rows 8–10 Row 8: Ch 1, sc in the first 3 sts only, leaving the next 7 sts unworked; turn. Row 9: Ch 1, sc in all 3 sts; turn. Row 10: Ch 1, sc in all 3 sts. Do not fasten off. The working yarn is at the inside edge of this post. (3 sc in each row)
- Window right post, Rows 8–10 With a separate length of green, join at the rightmost st of Row 7. Row 8: Ch 1, sc in that st and the next st towards the left; turn. Rows 9–10: Ch 1, sc in both sts, turn after Row 9 only. Fasten off. The last st of Row 10 is at the inside edge of this post. (2 sc in each row)
- Bridge and cab roof, Rows 11–12 Using the yarn still attached to the left post, ch 5 across the opening and sl st into the last st of the right post’s Row 10. Fasten off; this makes the window’s top edge. Join green at the outside, leftmost st of the left post’s Row 10. Row 11: Ch 1, sc across the 3 left-post sts, sc in each of the 5 bridge chains, then sc across the 2 right-post sts; turn. Row 12: Ch 1, sc in each of the 10 sts across. Fasten off. (10 sc in each roof row)
- Window edging Join green at the bottom-left inside corner of the opening. Working into the window edge rather than across its centre, sl st along the 5 exposed Row 7 sts at the bottom, up the 3 row ends of the right post, across the undersides of the 5 bridge chains, and down the 3 row ends of the left post. Join to the first edging sl st and fasten off. Keep the slip stitches loose enough that the window stays open. (16 edging sl sts)
- Smokestack With green, ch 4. Row 1: Sc in the second ch from the hook and in each remaining ch; turn. Rows 2–3: Ch 1, sc in all 3 sts, turning after Row 2. Fasten off, leaving a sewing tail. Sew the bottom of this small rectangle upright to the top of the body, over approximately the fourth to sixth body stitches from the left. It sits in front of, and does not cover, the cab window.
- Wheels, make two With dark yarn, make a magic ring. Round 1: Work 6 sc into the ring; join with a sl st to the first sc. Round 2: Ch 1, work 2 sc in each st around; join with a sl st to the first sc. Fasten off, leaving a sewing tail. (12 sc)
- Hanging loop Join green at the upper-left corner of the cab roof. Ch 16 and sl st back into the same corner to form a loop. Fasten off and secure both ends on the back.
Finishing
- Sew one wheel behind the lower edge of the body beneath approximately body stitches 3–6 and the other beneath stitches 15–18. Catch only the upper portion of each wheel so its lower edge remains visible.
- Weave in all ends. Gently flatten the ornament by hand, keeping the window clear; do not stretch its bridge or posts.
Helpful Tips
- Place the wheel and smokestack sewing stitches through the fabric rather than pulling tightly on a single edge loop.
- The five middle stitches of Cab Row 7 are deliberately left unworked when making the posts. They provide the bottom edge of the window.
- If the window edging draws the sides together, undo it and remake the slip stitches more loosely.
Double-Layer Locomotive Coaster

This crochet Christmas train is a practical little decoration for a festive drinks table. Its broad locomotive body gives a mug a plain, level place to sit, while the chimney and wheels add the train shape beyond the cup area.
Two matching flat silhouettes give the coaster a thicker feel without putting raised details beneath the mug. The joined construction also leaves the central surface free of decorative stitching.
Before joining the layers, check that your usual mug sits comfortably within the plain body. Cotton is a sensible choice for a coaster used with warm drinks, though the finished piece should not be treated as a heatproof mat.
Double-Layer Locomotive Coaster

Quick-reference card. Follow the complete written instructions below.
Materials
- Red cotton yarn: Aran or worsted weight; approximately 80–110 m
- Charcoal cotton yarn: The same weight; approximately 20–30 m for the wheels
- Crochet hook: 4 mm, or the size needed to meet gauge
- Notions: Yarn needle, scissors and a ruler
Size and Fit
At the target gauge, each body is approximately 15 cm wide by 10 cm high. The wheels extend approximately 1.7 cm below it and the chimney approximately 2.1 cm above it, giving an overall height of about 14 cm. Centre a mug with a base no wider than 8 cm on the plain body; the chimney and wheels sit outside that area.
Gauge
Target gauge: 20 sc and 24 rows = 10 cm in flat sc. Check gauge on the body before making the second layer. Exact gauge is less important than a flat fabric and a body large enough for your mug base.
Abbreviations
US crochet terms.
- ch = chain
- sc = single crochet
- sc2tog = single crochet two stitches together: draw up a loop in each of the next two stitches, yarn over and draw through all three loops
- st = stitch
Pattern
- Before you begin Make two matching silhouettes, following every step from Body through Wheels for each one. The turning ch does not count as a st. For placement, lay each body flat with Row 1 at the bottom and Row 24 at the top, and number the 30 columns from left to right. Do not attach decorations to the central face of either body.
- Body — make two With red, ch 31. Row 1: Sc in the second ch from the hook and in each remaining ch; 30 sc. Rows 2–24: Ch 1, turn, sc in each st; 30 sc. Fasten off after Row 24.
- Chimney — work on each body With the body positioned as described above, join red in top-edge st 4 of Row 24, counting from the left. Chimney Row 1: Sc in sts 4–7; 4 sc. Rows 2–5: Ch 1, turn, sc in each st; 4 sc. Fasten off. The chimney extends beyond the top edge; do not fold it onto the body.
- Wheels — work on each body Use charcoal and work into the bottom foundation-chain loops directly beneath the numbered body columns. First wheel, Row 1: Join in column 3 and sc across the loops beneath columns 3–8; 6 sc. Row 2: Ch 1, turn, sc in each st; 6 sc. Row 3: Ch 1, turn, sc2tog, sc in each of the next 2 sts, sc2tog; 4 sc. Row 4: Ch 1, turn, sc in each st; 4 sc. Fasten off. Make the second wheel in the same way, joining beneath column 23 and working across columns 23–28. Both wheels extend below the body.
- Join the layers Weave in the chimney and wheel ends. Place the two silhouettes directly on top of each other with their chimneys, wheels and body edges aligned; the faces touching may be either side of the crochet fabric. Keep remaining yarn ends between the layers. With red and a yarn needle, whipstitch through the edge loops around the outline, changing to charcoal around the exposed wheel edges. Follow the indents beside the chimney and between the wheels rather than stitching across them. Keep the seam at the perimeter, not on either central cup surface.
Finishing
- Secure and conceal the seam ends between the layers.
- Lay the coaster flat and gently shape the edges. Let it dry completely if you dampen it to block.
Helpful Tips
- Check your mug base against the plain body before seaming; it should sit entirely within the body with space around it.
- Keep the whipstitches snug but not tight, so the doubled coaster lies flat.
- Use cotton rather than a heat-sensitive synthetic fibre for a coaster intended for warm mugs.
Drawstring Train Carriage Gift Pouch

This crochet Christmas train carriage doubles as a reusable gift pouch. Its rectangular base helps it sit upright, while the stitched windows and flat wheels give it the look of a little railway carriage without taking up space inside.
The drawstring openings sit above the windows so the top can gather freely without snagging the stitching or pulling the decoration out of shape. That separation matters when the pouch is opened and closed repeatedly.
Choose a small wrapped gift that rests comfortably inside rather than stretching the fabric. A secure closure needs stops at the cord ends so they cannot slip through the openings, as well as a firm tie to keep the gathered top closed.
Drawstring Train Carriage Gift Pouch

Quick-reference card. Follow the complete written instructions below.
Materials
- DK yarn: Red for the pouch, charcoal for four wheels, green for the cord and a small amount of cream for the windows.
- Crochet hook: 3.5 mm, or a size that makes a firm fabric without large gaps.
- Other tools: Yarn needle, stitch marker, scissors and tape measure.
Size and Fit
One small gift-pouch size. At the suggested gauge, the base is approximately 9 × 4.5 cm and the pouch is approximately 8 cm high before gathering. Check that your wrapped gift fits inside without stretching the fabric.
Gauge
Aim for approximately 20 sc and 22 rows or rounds per 10 cm in firm fabric. Exact gauge is not essential, but a looser fabric will make a larger, more open pouch.
Abbreviations
US crochet terms.
- ch = chain
- sc = single crochet
- sl st = slip stitch
- st(s) = stitch(es)
Pattern
- Base, Row 1 With red, ch 19. Sc in the second ch from the hook and in each remaining ch; 18 sc. Turn.
- Base, Rows 2–10 Ch 1, sc in each of the 18 sts; turn after each row. Do not fasten off.
- Body, Round 1 Ch 1. Working around the outside of the base, make 18 sc across the sts of Row 10, 10 sc along the first short side (one in each row end), 18 sc along the foundation-chain edge and 10 sc along the other short side; 56 sc. Join with a sl st to the first sc. The first and third groups of 18 mark the long sides of the carriage.
- Body, Rounds 2–14 Ch 1, sc in each st around; join to the first sc. Keep the first st of each round above the first st of the previous round; 56 sc per round. The ch 1 and joining sl st never count as stitches.
- Eyelets, Round 15 Ch 1. *Sc in each of the next 2 sts, ch 2, skip the next 2 sts; repeat from * 14 times. Join to the first sc. You have 14 ch-2 eyelets and 56 positions around the round, counting each chain as one position.
- Top edge, Round 16 Ch 1. Work 1 sc in each sc and 2 sc in each ch-2 space around; join to the first sc. There are 56 sc.
- Top edge, Rounds 17–18 Ch 1, sc in each st around; join to the first sc. Fasten off after Round 18; 56 sc per round.
- Wheels, make four With charcoal, make a magic ring and work 6 sc into it. Join to the first sc and pull the ring closed. Ch 1, work 2 sc in each st, and join; 12 sc. Fasten off, leaving a long tail for sewing.
- Windows With cream yarn and a yarn needle, stitch two small rectangular window outlines on each long side of the pouch. Place them across approximately sts 4–6 and 12–14 of each 18-st long side, spanning approximately Rounds 6–9. Keep the stitching on the pouch wall, well below the eyelets.
- Attach wheels Sew two wheels to the bottom of each long side, centred near sts 3–4 and 15–16 of that side. Stitch the upper part of each flat wheel to approximately Rounds 1–3, leaving its lower edge visible below the pouch wall. Secure the yarn tails on the inside without sewing the pouch sides together.
- Drawstring With green, ch approximately 110, or enough that the cord will measure at least 45 cm after the next step. Sl st in the second ch from the hook and in each ch to the end. Fasten off and secure both cord ends. Starting from outside the pouch, pass one end into the first eyelet, then weave it alternately out and in through all 14 eyelets. It should emerge from the fourteenth eyelet beside the starting end.
Finishing
- Weave in loose yarn tails and check that no wheel stitching closes the pouch interior.
- Tie a small, firm knot at each end of the drawstring so it cannot slip back through an eyelet.
- Place the wrapped gift inside, pull both cord ends evenly to gather the top, then tie them together in a secure double knot. Add a bow with any remaining length if desired.
Helpful Tips
- If the gift has sharp corners, wrap it before placing it in the pouch to protect the crochet fabric.
- Stitch the windows before threading the cord. The plain rounds between the windows and eyelets give the top room to gather without pulling on the embroidery.
- If your cord is shorter than 45 cm after slip stitching, remake it with a longer starting chain so there is enough length to thread, tighten and tie.
Railway Track Train Bookmark

This crochet Christmas train bookmark turns a little stretch of railway track into a useful place marker. Its cream centre, dark rails and sleepers make the narrow strip recognisable even when the book is closed, while the red locomotive peeks out above the pages.
The flat track is the part that belongs inside the book. Keeping the wider engine beyond the top edge gives it room to be seen without pressing a raised decoration between the pages. It is a cheerful choice for a festive reading gift, especially for someone who loves trains.
Railway Track Train Bookmark

Quick-reference card. Follow the complete written instructions below.
Materials
- Cotton yarn: Small amounts of cream, charcoal and red sport-weight cotton.
- Crochet hook: 3 mm, or a size that makes a firm, flexible fabric.
- Tapestry needle and scissors: For the sleepers, engine details and sewing.
Size and Fit
The sample track is 7 stitches wide and 72 rows long: approximately 3 cm wide and 24 cm long at the suggested gauge. The engine is approximately 4 cm wide. With its lower edge overlapping the track, the finished bookmark is approximately 26 cm long. For a shorter or longer track, subtract or add rows in multiples of 6; work the final sleeper 2 rows before the last row.
Gauge
Approximately 24 sc and 30 rows to 10 cm in firm, flat fabric. Gauge is a guide, not a measured test result.
Abbreviations
US crochet terms.
- ch = chain
- sc = single crochet
- st(s) = stitch(es)
- RS = right side
Pattern
- Colour changes Use one small charcoal bobbin for each rail and cream yarn for the centre. Change colour on the final yarn-over of the stitch before the new colour begins. Turn the work at the end of every row; do not carry charcoal across the cream centre. Leave tails to weave in rather than knotting them.
- Track, row 1 With cream, ch 8. Working into the second ch from the hook, make 1 charcoal sc using the first bobbin, 5 cream sc, then 1 charcoal sc using the second bobbin. Change colour on the preceding stitch as described above. 7 sts.
- Track, rows 2–72 Ch 1 and turn. Work 1 charcoal sc, 5 cream sc and 1 charcoal sc in each row. At the start of a row, use the charcoal bobbin waiting at that edge. After row 72, fasten off and weave in the tails without bulky knots. 7 sts per row.
- Sleepers With a tapestry needle and a single strand of charcoal yarn, make one straight horizontal stitch across the five cream stitches of each of these rows: 4, 10, 16, 22, 28, 34, 40, 46, 52, 58, 64 and 70. Anchor each end just inside its rail. Keep the stitches flat and weave their tails into the fabric without knots. There are 12 sleepers.
- Engine body, rows 1–4 With red, ch 11. Row 1: sc in the second ch from the hook and in each remaining ch; 10 sc. Rows 2–4: ch 1, turn, sc in each st; 10 sc.
- Engine cab, rows 5–8 Row 5: ch 1, turn, sc in the first 4 sts; leave the remaining 6 sts unworked. Rows 6–8: ch 1, turn, sc in each of the 4 sts. Fasten off. The cab rises above one end of the long body.
- Engine details On the RS, embroider two small, flat charcoal wheel circles near the lower edge of the body. Space them apart and keep the stitches within the red fabric. Add a small cream window to the cab with two short straight stitches. Weave in all tails without knots.
- Attach the engine Lay the track RS up with row 72 at the top. Centre the engine over that end, cab pointing away from the track, and overlap its lower edge with the final row of the track. Sew the overlap securely with small, flat stitches. The body and cab should project beyond the track, ready to sit outside the book.
Finishing
- Gently flatten the bookmark by hand or with light blocking suitable for the yarn; let it dry fully before use.
- Check the back for loose embroidery strands or bulky tails that could catch on a page.
Helpful Tips
- Keep the cream centre and sleepers lightly tensioned so the track does not pucker.
- Use three small yarn bobbins to keep the two charcoal rails separate while working the strip.
- Place only the narrow track between pages; leave the engine outside the closed book.
Filet Christmas Train Wall Hanging

This filet Christmas train uses open squares to draw a locomotive and its smoke against a filled cream mesh. Worked flat in mercerised cotton, the panel is finished with a sewn casing for a wooden dowel. It is an intermediate project suited to crocheters comfortable following a chart and keeping track of stitch positions.
Start at row 1, the bottom of the original chart, and work upwards. Each line contains 21 cells, printed in three groups of seven; the spaces between groups are only counting aids. A dot marks a filled cell and O marks an open cell. With the right side facing, read odd-numbered rows from right to left and even-numbered rows from left to right, turning after each row.
At the suggested blocked gauge, the charted panel is approximately 21 cm wide. Check your own blocked width before choosing a dowel: it should be at least 8 cm longer than the panel, leaving room to tie the hanging cord beyond the casing. A 30 cm dowel projects about 4.5 cm at each side of a 21 cm panel.
Filet Christmas Train Wall Hanging

Quick-reference card. Follow the complete written instructions below.
Materials
- Mercerised cotton yarn: Approximately 100 m of cream sport-weight cotton; allow extra for a gauge swatch.
- Crochet hook: 3 mm, or a size that gives an even, blockable mesh.
- Wooden dowel: 30 cm long and approximately 8 mm in diameter. The dowel must extend beyond both sides of the finished panel.
- Hanging cord: Approximately 50 cm of sturdy cotton cord.
- Other supplies: Tapestry needle, scissors, pins and blocking surface.
Size and Fit
One sample size: 21 filet cells wide by 15 rows high, plus an eight-row top casing. At the suggested blocked gauge, the charted panel is approximately 21 cm wide by 15 cm high. Check the width of your blocked work before cutting a substitute dowel: use one at least 8 cm longer than the panel.
Gauge
Aim for approximately 10 filet cells and 10 filet rows per 10 cm after blocking. Exact gauge is not essential, but the mesh should be reasonably square and the finished panel must fit on the dowel.
Abbreviations
US crochet terms.
- ch = chain
- dc = double crochet
- sc = single crochet
- st = stitch
- RS = right side
Pattern
- Read the original chart Each line has 21 cells, shown in three groups of seven for easier counting; spaces between groups are not cells. A dot (.) is a filled cell and O is an open cell. The O cells form the train and its smoke. Row 1 is the bottom edge. With the RS facing, read odd-numbered rows from right to left and even-numbered rows from left to right. Turn the work after every row.
- Chart, top to bottom 15 ……. ……. …….
14 ……. ……. …O…
13 ……. ……. …O…
12 ……. ……. ..OO…
11 ……. ……. ..OO…
10 ..OOOOO OO..OOO OOOOO..
9 ..OOOOO OO..OOO OOOOO..
8 ..O.O.O OO..O.O OOOO.O.
7 ..OOOOO OO..OOO OOOOOO.
6 .OOOOOO OOOOOOO OOOOOO.
5 .OOOOOO OOOOOOO OOOOOO.
4 …OO.. OO…OO .OO.OO.
3 …OO.. OO…OO .OO.OO.
2 ……. ……. …….
1 ……. ……. ……. - Foundation and row 1 Ch 66. Dc in the fourth ch from the hook and in every remaining ch. The skipped three chains count as the first dc: 64 dc in total, making 21 filled cells. Turn.
- Rows 2–15 Ch 3 at the start of each row; it counts as the first dc at the edge of the first cell. Follow the corresponding chart line in the reading direction given above. For each filled cell (.), work dc into the next three stitch positions. If those positions include an open cell from the previous row, work 2 dc into its ch-2 space, then dc into the next dc. For each open cell (O), ch 2, skip the next two stitch positions or the next ch-2 space, then dc in the next dc. Repeat for all 21 cells; the last dc completes the far edge of the row. Turn after rows 2–14. After row 15, the upper edge is entirely dc.
- Top casing, rows 16–23 Ch 1 and turn; the turning ch does not count as a st. Sc in each of the 64 dc across row 15. Turn. For each of the next seven rows, ch 1, sc in each of the 64 sc, and turn. Fasten off, leaving a long tail for sewing.
- Form the casing Fold the eight-row sc strip down against the wrong side. Using the long tail, sew its free edge to the back of row 15 along the full width, catching the bases of the top-edge stitches without pulling the filet mesh out of shape. Leave both short ends of the casing open.
Finishing
- Weave in the remaining ends. Damp-block the panel, pinning the edges straight and the filet cells as close to square as the fabric allows. Let it dry completely.
- Slide the dowel through the casing. It should project by about 4.5 cm on each side if the panel is 21 cm wide.
- Tie the hanging cord securely near each end of the dowel, beyond the panel. Adjust the knots until the upper edge hangs level.
Helpful Tips
- Count 21 cells on every chart line before starting that row. The spaces dividing the printed groups of seven do not represent stitches.
- When changing from an open cell to a filled cell, put both replacement dc into the ch-2 space rather than into its individual chains.
- If your blocked panel differs from the sample width, choose a dowel at least 8 cm longer than your panel so its ends remain accessible for the hanging cord.
Christmas Train Advent Calendar

This crochet Christmas train turns the Advent countdown into a reusable wall decoration. A flat red engine leads green carriages with 24 clearly numbered cream pockets, ready for small paper notes or slim wrapped treats.
The pockets are arranged so the dates are easy to find, while the train shape gives the calendar a cheerful, connected look. It is an intermediate project suited to a maker who enjoys assembling separate pieces and keeping details neatly aligned.
Each part hangs from the supported dowel; the links between the train pieces are decorative rather than weight-bearing. Use only light contents, check that the wall supports are suitable, and hang the calendar out of children’s reach where appropriate.
Christmas Train Advent Calendar

Quick-reference card. Follow the complete written instructions below.
Materials
- Sturdy DK cotton yarn: Green for four carriage panels, cream for 24 pockets, red for the engine and decorative links, black for wheels, and a dark contrasting colour for embroidered numbers. Quantities depend on yarn and tension.
- Crochet hook: 3.5 mm, or the size needed to obtain gauge.
- Dowel and supports: One sturdy 132 cm (52 in) dowel, approximately 12 mm in diameter, and three suitable wall brackets or hooks to support it at both ends and near the centre.
- Notions: Tapestry needle, stitch markers, scissors, measuring tape and pins.
Size and Fit
Each main piece is approximately 23 cm wide × 25 cm high (9 × 10 in). The cream pockets are approximately 9 cm wide × 5.5 cm high (3½ × 2¼ in). Arrange the five main pieces with approximately 2.5 cm (1 in) between them: they occupy about 124.5 cm (49 in) of the 132 cm (52 in) dowel, leaving about 4 cm (1½ in) at each end. The engine roof and chimney extend above its main piece.
Gauge
16 single crochet stitches and 18 rows = 10 cm (4 in) in flat single crochet, after blocking. Check gauge before making the panels so the pockets fit the stated layout.
Abbreviations
US crochet terms.
- ch = chain
- sc = single crochet
- sl st = slip stitch
- st/sts = stitch/stitches
- RS = right side
- rnd = round
Pattern
- Before you begin Work flat pieces in turned rows. A ch 1 at the start of a row does not count as a stitch. Number the stitches across each main piece 1–36, and its rows 1–45 from bottom to top. Leave long tails where a piece will be sewn on.
- Four green carriage panels Make four. Ch 37. Row 1: sc in the second ch from the hook and in each ch across; turn. (36 sc.) Rows 2–45: ch 1, sc in each st across; turn, except after the final row. Fasten off. Each panel is approximately 9 × 10 in at gauge.
- Red engine header Make one main engine piece in red exactly as for a carriage panel: ch 37, work 36 sc across Row 1, then work even through Row 45. For the cab roof, ch 18; work 17 sc across, then work even for three more rows. Sew its first row along the top of the engine at stitches 20–36, allowing the roof to extend upwards. For the chimney, ch 6; work 5 sc across, then work even for four more rows. Sew its first row along the engine top at stitches 5–9, with the chimney extending upwards. Keep the engine flat.
- Two black wheels Make two. Ch 2. Rnd 1: work 6 sc in the second ch from the hook; join with a sl st to the first sc. Rnd 2: ch 1, work 2 sc in each sc; join with a sl st to the first sc. (12 sc.) Fasten off. Sew the wheels onto the RS of the engine near its bottom, centred approximately at stitches 8 and 29. Secure them without pulling the engine out of shape.
- Twenty-four cream pockets Make 24 alike. Ch 15. Row 1: sc in the second ch from the hook and in each ch across; turn. (14 sc.) Rows 2–10: ch 1, sc in each st across; turn, except after Row 10. Fasten off, leaving a long sewing tail. Each pocket is approximately 3½ × 2¼ in at gauge. Embroider its number clearly on the RS in a dark contrasting colour before attaching it; make one pocket for each number from 1 to 24.
- Pocket placement On each green panel, place a left pocket across panel stitches 3–16 and a right pocket across stitches 21–34. Make three rows of pockets: the bottom pocket edges align with panel Rows 5, 19 and 33 respectively. Each pocket occupies 10 panel rows, leaving its Row 10 edge open at the top. With the RS facing, pin and sew each pocket down both sides and across its bottom edge only. Do not sew across the opening. On the first carriage, put numbers 1 and 2 in the top row, 3 and 4 in the middle row, and 5 and 6 in the bottom row, reading left to right. Repeat this arrangement with 7–12, 13–18 and 19–24 on the remaining carriages.
- Ten reinforced hanging tabs Make two tabs for each of the five main pieces, using the main piece’s yarn colour. For each tab, ch 5; sc in the second ch from the hook and across. (4 sc.) Ch 1 and turn; work 4 sc across for 15 more rows, making 16 rows in total. Fasten off with a long tail. Position each pair at main-piece stitch columns 5–8 and 29–32. Wrap each tab over the dowel and sew both short ends securely to the back of its main piece across Rows 42–45, stitching through all four tab stitches and the panel fabric. The tab must encircle the dowel; do not rely on a single yarn loop or a decorative link to bear the weight.
- Four decorative carriage links Make four in red. Ch 9; sc in the second ch from the hook and across. (8 sc.) Fasten off. Arrange the engine first, followed by the four numbered carriages, with approximately 1 in gaps. Sew one end of a link to each facing panel edge around Rows 23–24, allowing approximately ½ in of the link to overlap each piece and 1 in to span the gap. These links are decorative: each piece hangs from its own two tabs.
Finishing
- Weave in all ends securely. Check that every pocket remains open at the top and every embroidered number is legible.
- Slide the five pieces onto the dowel in order. Space them evenly, then install the dowel on suitable supports at both ends and near the centre. Check that the supports, wall fixings and dowel are appropriate for the finished calendar and its contents.
- Fill pockets only with light paper notes or small, slim wrapped treats. Do not add heavy items. Hang the calendar out of children’s reach where appropriate; the dowel, yarn links and contents must not be accessible for pulling or play.
Helpful Tips
- Pin all six pockets on a carriage before sewing to check spacing and alignment.
- For a neat result, embroider the numbers before attaching the pockets and keep securing stitches away from the pocket openings.
- If your gauge differs, change hook size before making the pieces; the specified stitch-column layout assumes 16 sc and 18 rows per 4 in.
Christmas Train Finger Puppet

This crochet Christmas train turns a fingertip into a little locomotive for festive stories and imaginative play. The green engine has a flat cab with a stitched front window, a red chimney and embroidered wheels, giving it plenty of character without bulky decorations.
The body is worked as a firm, open-bottom tube with a closed top. Because finger fit matters more than a nominal size, the pattern includes a sample and a measurement-based way to adjust the opening. Check that the puppet slides on comfortably before continuing with the upper part of the engine.
Its small scale makes this a satisfying project for crocheters who enjoy shaping and adding stitched details. Keep the finger opening unobstructed so the finished train remains comfortable to wear.
Christmas Train Finger Puppet

Quick-reference card. Follow the complete written instructions below.
Materials
- DK yarn: Approximately 10–15 g green and a small amount of red, plus short lengths of white and black for embroidery.
- Crochet hook: 3 mm, or a size that gives a firm fabric without gaps.
- Other: Yarn needle, stitch marker and tape measure.
Size and Fit
The sample is for a finger measuring approximately 6 cm around. At the stated gauge, its 16-stitch opening measures approximately 6.7 cm around and the puppet is approximately 5 cm tall. For a different finger, make a starting chain in a multiple of 4 that measures about 0.5–0.8 cm more than the finger circumference. For example, 12 stitches measure approximately 5 cm and 20 stitches approximately 8.3 cm at this gauge. Check the fit after a few rounds: the tube should slide on without squeezing. Add or omit plain body rounds to adjust the length.
Gauge
24 sc and 26 rounds = 10 cm in firm, unstuffed fabric. Measure the circumference of the worked tube rather than relying on gauge alone.
Abbreviations
US crochet terms.
- ch = chain
- sc = single crochet
- dec = single-crochet decrease: work 2 stitches together
- sl st = slip stitch
- rnd = round
Pattern
- Body opening With green, ch 16. Taking care not to twist the chain, sl st into the first ch to form a ring. Do not close this opening later; it is where the finger goes. Work in continuous rounds and mark the first stitch of each round.
- Body, rnds 1–10 Rnd 1: sc in each ch around (16 sc). Rnds 2–10: sc in each stitch around (16 sc). Try the tube on after rnd 3 and check that it slides comfortably over the finger.
- Closed top, rnds 11–13 Rnd 11: (sc in next 2 stitches, dec) 4 times (12 sc). Rnd 12: (sc in next stitch, dec) 4 times (8 sc). Rnd 13: dec 4 times (4 sc). Fasten off, thread the tail through the front loops of the remaining 4 stitches and pull closed. Weave in the tail.
- Flat cab With green, ch 7. Row 1: sc in the second ch from the hook and in each remaining ch (6 sc). Ch 1, turn. Rows 2–4: sc in each stitch (6 sc); ch 1 and turn after rows 2 and 3 only. Fasten off, leaving a sewing tail. With white yarn, stitch a small rectangular front window in the centre of the cab. Keep the stitches within the rectangle so the edges remain free for sewing.
- Attach cab Lay the body flat with the joining point of the starting chain at the back. Centre the cab on the opposite, front-facing side, over approximately body stitches 6–11 and rnds 6–9. Sew around its four edges with the green tail, catching only the outer surface of the body where possible. Keep the finger opening clear.
- Red chimney With red, ch 5. Row 1: sc in the second ch from the hook and across (4 sc). Ch 1, turn. Rows 2–3: sc across (4 sc); ch 1 and turn after row 2 only. Fasten off with a long tail. Roll the rectangle so its short row ends meet, then sew those ends together to make a tiny open tube. Sew one end securely to the closed top of the engine, catching stitches around the closure. Do not stuff it.
- Wheels With black yarn, embroider two small wheel outlines on the front of the body below the cab, over approximately rnds 2–4. Place one around stitches 3–4 and the other around stitches 13–14, adjusting their position by eye so they appear even when the puppet is worn. Stitch through the crochet fabric rather than adding loose or detachable pieces.
Finishing
- Weave in all ends securely, keeping knots and bulky tails away from the inside of the finger opening.
- Check that the chimney, cab and embroidered details are secure, and that the closed top has no gap.
Helpful Tips
- For a starting count of 4k stitches, repeat the decrease sequence k times in each shaping round: (sc 2, dec), then (sc 1, dec), then dec. This leaves k stitches to draw closed.
- If the adjusted opening fits but the puppet is too short or long, change the number of plain body rounds; keep the three shaping rounds unchanged.
- Embroidered wheels and window details avoid small detachable embellishments.
For another related project collection, browse free crochet Christmas garland patterns.
Train Border Christmas Tree Skirt

A cream tree skirt gives the red engines and green carriages a clear backdrop beneath the Christmas tree. The little trains sit around the outer band, where they can be seen among the presents and branches.
This design is built from flat, widening wedges. Measuring the tree stand before you begin lets you plan the centre opening for the stand you have, rather than relying on a fixed opening that may not fit.
One radial edge remains open so the skirt can be placed around the stand without lifting the tree. The train pieces are made separately, making it easier to arrange them evenly around the border before attaching them.
Train Border Christmas Tree Skirt

Quick-reference card. Follow the complete written instructions below.
Materials
- Aran-weight yarn: Cream for the skirt, red for eight engines and green for 16 carriages, plus a small amount of charcoal for wheels. Quantities depend on the measured opening, skirt depth and yarn chosen.
- Crochet hook: Use a hook that gives the stated gauge with your yarn; 5 mm is a starting point.
- Other supplies: Tape measure, stitch markers, yarn needle and scissors.
Size and Fit
Sample: for a tree stand measuring 6 in (15 cm) across its widest point, the centre opening is approximately 8 in (20 cm) across flats. With 46 panel rows, the skirt is approximately 32 in (81 cm) across flats. To adjust, measure the stand’s widest diameter in inches. Allow 2 in for clearance, then make N = the next whole number at or above 1.243 × (stand diameter + 2); N is the stitch count in each panel’s first row. Work approximately 3.75 rows per inch of desired skirt depth, rounding to a whole row count R of at least 7. Make eight identical panels. The opening is eight-sided rather than perfectly circular; check the stand against the joined opening before adding motifs.
Gauge
12 sc and 15 rows = 4 in (10 cm) in flat sc. Make a swatch and check both stitch and row gauge: they affect the centre opening, skirt depth and how flat the wedges lie.
Abbreviations
US crochet terms.
- ch = chain
- sc = single crochet
- sl st = slip stitch
- st(s) = stitch(es)
- R = the chosen number of panel rows
- N = the chosen first-row stitch count for each panel
Pattern
- Choose the panel counts For the sample 6 in stand, N = 10 and R = 46. For another size, calculate N and R as described under Size and Fit. The panel stitch count after row R is N + 2 × floor((R − 1) ÷ 3). Make all eight panels with the same counts.
- Eight cream wedges For each panel, ch N + 1. Row 1: sc in the second ch from the hook and in each remaining ch; N sc. For every subsequent row through row R, ch 1 and turn. On rows 4, 7, 10 and every third row thereafter, work 2 sc in the first st, sc across to the last st, then 2 sc in the last st. On all other rows, sc in every st. Fasten off. For the sample, each panel ends with 40 sc on row 46.
- Join and check the opening Lay the eight panels side by side with their narrow foundation edges towards the centre. Sew adjacent row-end edges together from centre to outer edge with flat, edge-to-edge seams. Make seven joins; leave the eighth radial join completely open from the centre opening to the outer edge. Lay the skirt flat and check that the stand will fit through and sit within the opening. If it will not, remake the panels with a larger N before proceeding.
- Edge the skirt With cream, work one continuous round of sc along the skirt’s entire boundary: across the outer edges, down one open radial edge, around the centre opening and out along the other open radial edge. Work one sc in each available stitch on the outer and centre edges. Along row ends, begin with approximately 3 sc for every 4 rows, adjusting if the edge pulls in or ruffles. Work 2 sc at each of the four corners where an open radial edge meets the outer or centre edge. Fasten off. The radial edges remain separate; do not sew or crochet them together.
- Eight red engines For each flat engine body, ch 12. Row 1: sc in the second ch from the hook and across; 11 sc. Rows 2–4: ch 1, turn, sc across; 11 sc. Fasten off. For each cab, ch 5. Row 1: sc in the second ch from the hook and across; 4 sc. Rows 2–3: ch 1, turn, sc across; 4 sc. Fasten off. For each chimney, ch 3. Row 1: sc in the second ch from the hook and in the next ch; 2 sc. Rows 2–3: ch 1, turn, sc across; 2 sc. Fasten off.
- Sixteen green carriages For each carriage, ch 10. Row 1: sc in the second ch from the hook and across; 9 sc. Rows 2–4: ch 1, turn, sc across; 9 sc. Fasten off.
- Forty-eight charcoal wheels For each wheel, ch 2 and work 6 sc in the second ch from the hook. Join with a sl st to the first sc and fasten off, leaving a sewing tail. Make two wheels for each engine and carriage.
- Arrange the train border On each wedge, arrange one engine followed by two carriages, with small gaps between the three bodies. Place the engine cab above the back end of its body and the chimney above the front end; place two wheels beneath each body. Keep the train within its wedge’s outer band, with the wheels clear of the edging. Pin all eight sets in place before sewing so that none covers an open edge or a seam.
Finishing
- Sew the cabs, chimneys and wheels to their bodies, then sew each assembled train to the skirt with matching yarn.
- Weave in all ends. Lay the skirt flat and gently reshape the edges without stretching the centre opening.
- Wrap the open radial edges around the tree stand for placement; leave them unjoined so the skirt remains removable.
Helpful Tips
- If your stitch gauge differs from the stated gauge, calculate N using your measured stitches per inch: N = round up [(stand diameter + 2 in) × 0.4142 × stitches per inch].
- Use the same hook, yarn and tension for all eight wedges. Compare panels as you work so their radial edges remain the same length.
- Pin the trains with a little space between wheels and outer edging; this helps keep the motifs visible beneath the tree.
Christmas Train Tissue Box Cover

A tissue box becomes a little Christmas locomotive with this removable cover. Red walls give it its engine shape, while a green roof frames the opening so tissues can still be pulled out easily.
Measure the rectangular box you plan to cover before working out your panel dimensions. Tissue boxes vary, and a cover that sits neatly on one may be too tight or loose on another. The open bottom makes it easy to replace the box when it is empty.
Flat wheels and a cab-window outline add character without making the sides bulky. The lightweight chimney sits away from the dispensing opening, keeping the train decorative without getting in the way of everyday use.
Christmas Train Tissue Box Cover

Quick-reference card. Follow the complete written instructions below.
Materials
- Firm cotton yarn: Red for the walls, green for the roof and cab outline, and black for the wheels and chimney. Choose one yarn weight throughout; quantities depend on your box dimensions.
- Crochet hook: A size that produces firm, opaque single crochet with your yarn.
- Other supplies: Tape measure, stitch markers, yarn needle, scissors and the rectangular tissue box you intend to cover.
Size and Fit
Measure your own box before calculating any panels: L is its long horizontal dimension, W its short horizontal dimension and H its height. For a removable cover, add 0.5 cm to each measurement. At your washed swatch gauge, round (L + 0.5 cm) × stitches per cm to obtain N; round (W + 0.5 cm) × stitches per cm to obtain K; round (W + 0.5 cm) × rows per cm to obtain M; and round (H + 0.5 cm) × rows per cm to obtain V. N is the top and long-wall stitch count; K is the end-wall stitch count; M is the top row count; V is every wall’s row count. Check that the calculated panels will fit before joining. As a calculation example, a 22 × 11 × 7 cm box at 20 stitches and 20 rows per 10 cm gives N = 45, K = 23, M = 23 and V = 15. The finished size is determined by your box and gauge.
Gauge
Make and measure a washed single-crochet swatch before calculating the panels. A planning gauge of 20 sc and 20 rows per 10 cm is used only for the numerical example; use your own measurements for your box.
Abbreviations
US crochet terms.
- ch = chain
- sc = single crochet
- sl st = slip stitch
- st(s) = stitch(es)
Pattern
- Calculate the roof slot Choose G, an odd or even number of stitches matching the parity of N, for a slot about 5.5–6 cm long. Set A = (N − G) ÷ 2. Choose B, an even number of rows for a slot about 2 cm wide. Set P = (M − B − 1) ÷ 2, rounded down, and R = M − P − B − 1. You need A at least 6 stitches and P and R at least 2 rows; if your box does not allow this, use a narrower slot. For the example, G = 11, A = 17, B = 4, P = 9 and R = 9. Place the roof’s starting edge at the front of the train.
- Green roof: rows before the slot Ch N + 1. Row 1: sc in the second ch from the hook and in every remaining ch; N sc. Ch 1, turn. Work sc in every st for a total of P full-width rows, making a turning ch 1 that does not count as a stitch whenever another row follows.
- Green roof: two sides of the slot For the next B rows, work two separate A-stitch strips, leaving the middle G stitches of the last full-width row unworked. For the first strip, start at one outside edge, work A sc towards the centre, ch 1 and turn; work each subsequent row in sc. Fasten off after B rows. Join a second length of green yarn at the opposite outside edge of that same full-width row. Work A sc towards the centre and make B rows in the same way. Do not work into the middle G stitches. Because B is even, both working ends finish at their outside edges.
- Green roof: bridge and finish From the outside edge of the first strip, work 1 sc in each of its A stitches towards the opening, ch G across the opening, then work 1 sc in each of the second strip’s A stitches from the opening to its outside edge. This bridge row has N stitches or chains in all. Ch 1, turn. Work R more full-width rows of N sc, working into each bridge chain on the first of these rows. Fasten off. The unworked space between the solid row and bridge row is the dispensing slot.
- Red walls Make two long walls: ch N + 1; sc in the second ch from the hook and across for N sc. Work V rows of N sc in total. Make two end walls in the same way, beginning with ch K + 1 and working V rows of K sc. A turning ch 1 never counts as a stitch. Fasten off, leaving sewing tails.
- Join the cover With the roof right side facing out, sew its two long edges to the top edges of the long walls. Sew its two short edges to the top edges of the end walls. Ease any small difference between the roof’s M-row short edge and an end wall’s K-stitch edge evenly; do not gather either edge sharply. Sew the four vertical wall corners together. Leave the bottom entirely open. Slip the cover over the box and check that tissues pull freely through the slot.
- Flat wheels Make four in black. Round 1: work 6 sc into a magic ring; join with a sl st to the first sc. Round 2: ch 1, work 2 sc in each st; join (12 sc). Round 3: ch 1, repeat (1 sc in the next st, 2 sc in the next st) around; join (18 sc). Fasten off. Sew two wheels flat to each long wall, near the lower edge and spaced towards the front and back. Keep all wheel stitching on the cover, not through the tissue box.
- Cab outline On one long red wall, use green yarn and surface sl sts to outline a small rectangular cab window near the back, above the rear wheel. Keep the outline below the roof seam. If the available space is tight, reduce the rectangle rather than covering a wheel or pulling the wall out of shape.
- Lightweight chimney In black, ch 7 and sl st into the first ch to form a ring without twisting. Work 6 sc around the ring for each of 4 rounds; work in a spiral and mark the first st of each round. Fasten off without stuffing. Sew the tube upright to the front section of the green roof, at least 1 cm from its edges and clear of the dispensing slot.
Finishing
- Weave in ends, keeping the roof slot unobstructed.
- Check that the cover lifts off easily and that neither the chimney nor its attachment stitches catch the tissues.
Helpful Tips
- Measure a fresh tissue box if its packaging changes; boxes sold under the same name can differ in size.
- Before sewing, pin the roof to the walls and check the corner alignment and slot position.
- If your tissue box has a narrow dispensing membrane, centre the crocheted slot over its usable opening rather than shifting the chimney towards it.
Train Centre Christmas Wreath

This crochet Christmas train takes centre stage in a small decorative wreath. The leafy green frame adds texture without obscuring the red-and-cream locomotive across the opening.
The engine is made as a separate, double-layered motif, giving its flat silhouette more structure. It suits makers who enjoy assembling small crochet pieces into a display decoration.
A train suspended across an open wreath needs support at both ends to stay level. Concealed attachments hold its base to the rigid structure beneath the crochet, spreading the weight so the locomotive is less likely to sag when the wreath hangs. This is an indoor decoration rather than a toy.
Train Centre Christmas Wreath

Quick-reference card. Follow the complete written instructions below.
Materials
- DK yarn: Green for the wreath, red for the engine, cream for the chassis and window, and a small amount of black for the wheels.
- Rigid craft ring: 15 cm outside diameter, approximately 5 mm thick.
- Crochet hook: 3.5 mm, or a size that gives a firm fabric.
- Notions: Yarn needle, scissors and four removable stitch markers.
Size and Fit
One decorative size. With a 15 cm ring, the train is approximately 12 cm wide and sits across the opening. The hanging loop is additional to the ring diameter.
Gauge
Approximately 20 sc and 22 rows to 10 cm in firm, flat sc fabric. Check the train width before assembly: each 24-sc chassis should measure approximately 12 cm.
Abbreviations
US crochet terms.
- ch = chain
- sc = single crochet
- hdc = half double crochet
- dc = double crochet
- sl st = slip stitch
- st(s) = stitch(es)
Pattern
- Wreath, round 1 With green, make a slip knot. Insert the hook through the ring and work 90 sc around it, drawing up each loop from behind so the stitches encase the ring. Spread them evenly and join with a sl st to the first sc. Keep the stitches firm but not crowded.
- Wreath, leafy round Ch 1. Working into the 90 sc, repeat [sc in each of the next 3 sts, (sc, hdc, dc, hdc, sc) in the next st, sc in each of the next 2 sts] 15 times. Join with a sl st to the first sc and fasten off. Arrange the raised fans towards the front of the wreath.
- Hanging loop Choose the top of the wreath. Join green through a stitch around the ring at that point, ch 18 and sl st back into the same stitch. Fasten off and secure both ends on the back.
- Cream chassis: make two Ch 25. Row 1: sc in the second ch from the hook and in each ch across; 24 sc. Rows 2–3: ch 1, turn, sc in each st across; 24 sc. Fasten off. The two pieces form the front and back of the train’s base.
- Red engine and cab: make two Ch 19. Row 1: sc in the second ch from the hook and in each ch across; 18 sc. Rows 2–5: ch 1, turn, sc in each st across; 18 sc. Fasten off. With the top edge of row 5 facing you, join red at its left-hand corner. Row 6: sc in the first 8 sts along that edge; leave the other 10 sts unworked. Rows 7–9: ch 1, turn, sc in each of the 8 sts. Fasten off. The taller section is the rear cab; the shorter end points forwards.
- Chimney: make two With red, ch 4. Row 1: sc in the second ch from the hook and in each ch across; 3 sc. Rows 2–3: ch 1, turn, sc in each st across; 3 sc. Fasten off.
- Wheels: make two With black, work 6 sc into a magic ring and join with a sl st to the first sc. Ch 1, work 2 sc in each st around; 12 sc. Join, fasten off and leave a tail for sewing.
- Assemble the train Place the two red engine pieces together with their cab ends aligned. Place the two chimney pieces together and tuck their bottom edges between the engine layers on the top edge near the front, clear of the cab. Sew around the engine edges, catching the chimney securely. Place the two cream chassis pieces together and sew around their edges. Sew the bottom edge of the engine to one long edge of the chassis, aligning its 18 sts with chassis sts 4–21; this leaves three chassis stitches showing at each end. Sew the wheels to the front of the chassis, centred approximately over sts 6 and 19, with part of each wheel below its lower edge. Embroider a small cream window on the front of the cab. Weave in all assembly ends.
- Attach to the wreath Lay the wreath flat with its hanging loop at the top. Centre the train horizontally across the opening, cab on the left, with the chassis approximately at the ring’s mid-height. Mark the four chassis corners: upper left, lower left, upper right and lower right. At each corner, take a separate approximately 25 cm length of cream yarn through both chassis layers, pass it around the rigid ring beneath the green stitches, and tie its ends firmly on the back. Keep the four ties evenly tensioned so the train stays level. Tuck any visible lengths behind the leafy fans and weave the ends into the back.
Finishing
- Check that the chassis lies flat and that all four ties grip the rigid ring rather than only the green crochet.
- Hang the wreath by its loop and adjust the ties if one side of the train drops.
Helpful Tips
- A firm hook size and two-layer train help the motif hold its shape without wire or glue.
- Spread the wreath stitches evenly before making the leafy round; bunching them makes the ring harder to cover neatly.
- This is an indoor decorative wreath, not a toy. Keep it away from rain and exposed flames.
Train Flag Christmas Bunting

This crochet Christmas train spreads its story across separate triangular flags: a little engine leads a line of festive carriages. The cream background gives each colourwork motif room to stand out, while the pointed shape makes the bunting feel light enough for a shelf or mantelpiece.
The engine and carriages have their own charts, so the train reads clearly rather than looking like a row of identical decorations. This is a good project if you enjoy small colourwork motifs and want to practise keeping colour changes tidy on the reverse of your work.
The flags sit at regular intervals along a crocheted cord. Keep the engine at the leading end and the carriages in their planned order so the finished display reads as one continuous train, with the gaps giving each motif a little breathing room.
Train Flag Christmas Bunting
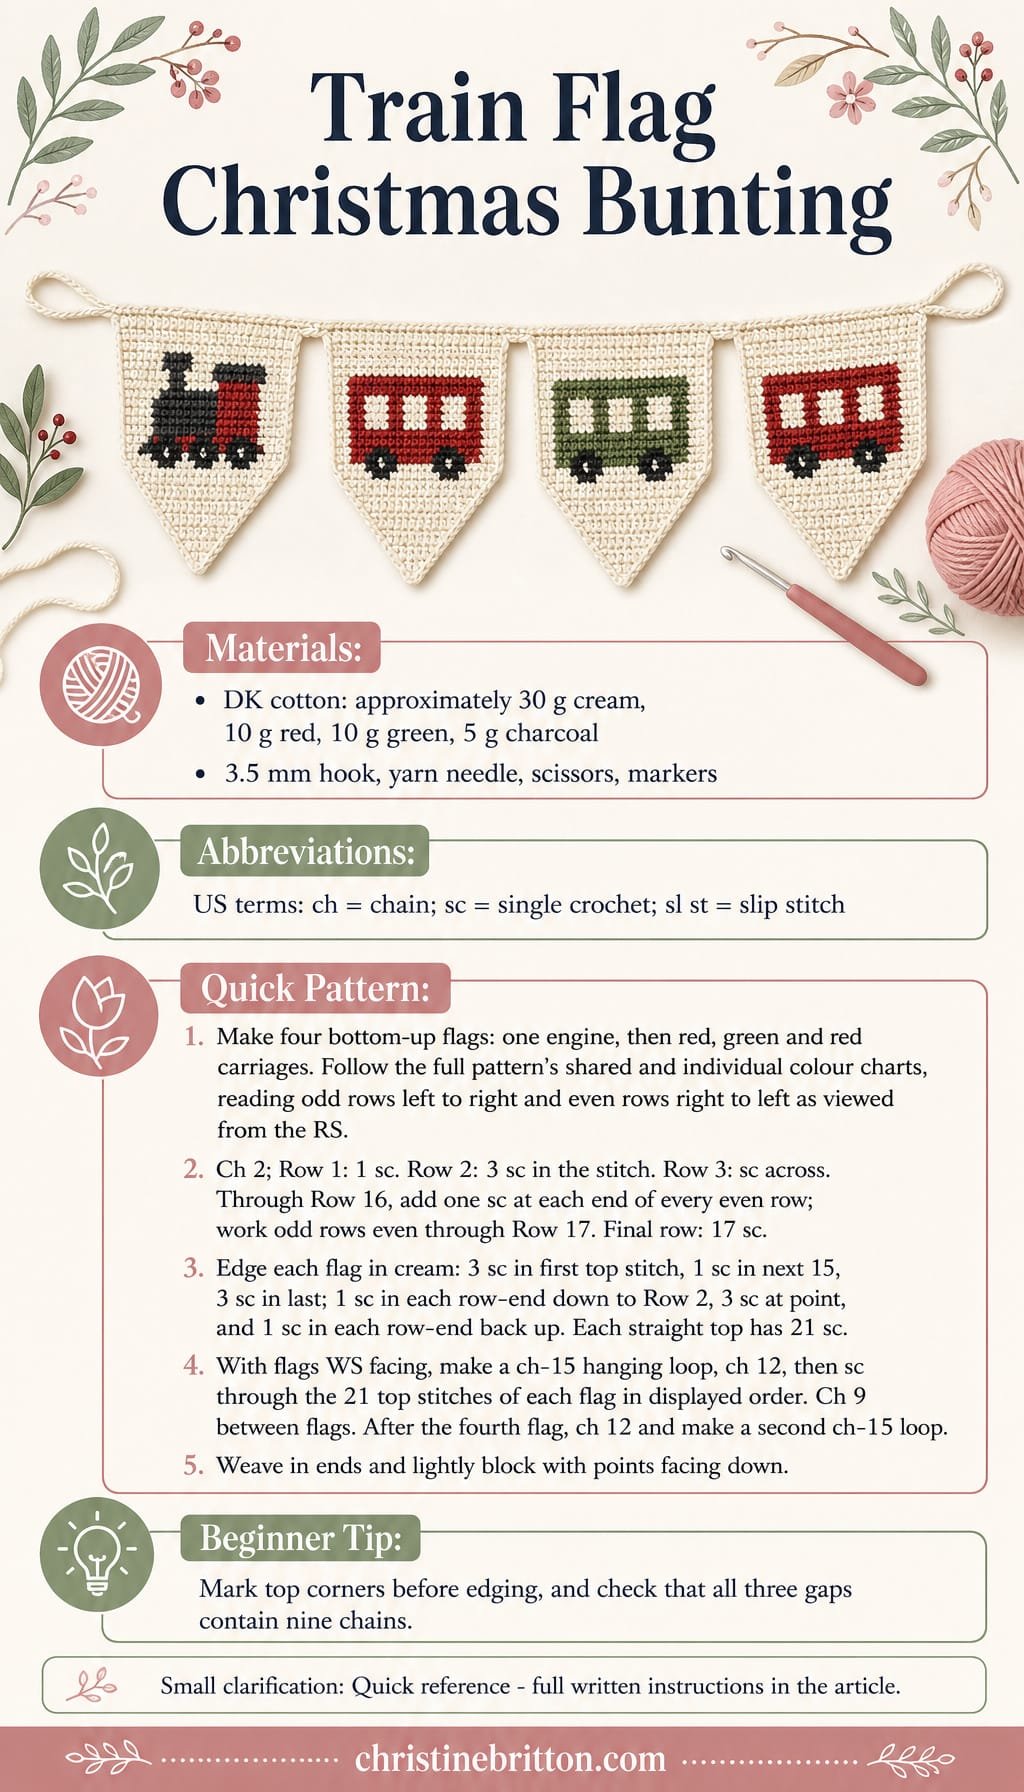
Quick-reference card. Follow the complete written instructions below.
Materials
- DK cotton yarn: Approximately 30 g cream (C), 10 g red (R), 10 g green (G) and 5 g charcoal (W).
- Crochet hook: 3.5 mm, or a size that gives a firm, even fabric.
- Other supplies: Yarn needle, scissors and stitch markers.
Size and Fit
Four flags. At the stated gauge, each unedged triangle is approximately 8.5 cm wide across the top and 8.5 cm deep. The finished bunting spans approximately 65–70 cm between the hanging loops. Its exact length depends on the gauge of the edging and cord.
Gauge
Approximately 20 sc and 20 rows per 10 cm in colourwork fabric. Gauge is a sizing guide, not a claim of a measured sample.
Abbreviations
US crochet terms.
- ch = chain
- sc = single crochet
- sl st = slip stitch
- st(s) = stitch(es)
- RS / WS = right side / wrong side
Pattern
- Chart key and reading direction Each letter represents one sc: C = cream, R = red, G = green and W = charcoal. The chart strings show the flags as viewed from the RS, from left to right. Work upwards from Row 1. With the RS facing on odd-numbered rows, read those rows left to right; turn and read even-numbered rows right to left. Ch 1 to turn; turning chains do not count as stitches. Change colour on the last pull-through of the preceding sc. Use short lengths of yarn or separate bobbins, and keep unused yarn on the WS.
- Triangle shaping For each flag, ch 2 in cream. Row 1 (RS): sc in second ch from hook — 1 sc. Row 2: ch 1, turn, work 3 sc in the stitch — 3 sc. Row 3: ch 1, turn, sc across. On every subsequent even-numbered row through Row 16, ch 1, turn, work 2 sc in the first stitch, sc across to the last stitch, then work 2 sc in the last stitch. On every odd-numbered row through Row 17, ch 1, turn and sc across. Follow the appropriate chart colours as you make the stitches. The stitch counts for Rows 1–17 are 1, 3, 3, 5, 5, 7, 7, 9, 9, 11, 11, 13, 13, 15, 15, 17, 17.
- Shared chart rows Use these rows for all four flags: Row 1 C; Rows 2–3 CCC; Rows 4–5 CCCCC; Rows 6–7 CCCCCCC; Rows 8–9 CCCCCCCCC.
- Engine chart Make one. Continue after shared Row 9: Row 10 CCWCCCCCWCC; Row 11 CRRRRRRRRRC; Row 12 CRRRRRRRRGGCC; Row 13 CCRRRRRRGGGCC; Rows 14–15 CCCRRCCCCGGGCCC; Rows 16–17 CCCCCCCCCCCCCCCCC. The red projection at the left is the engine’s chimney; the green section is its cab.
- Carriage chart Make three: red, green, then red. In the following strings, M means the chosen carriage colour for that entire flag. Continue after shared Row 9: Row 10 CCWCCCCCWCC; Row 11 CMMMMMMMMMC; Row 12 CMMMMMMMMMMCC; Row 13 CCMMMMMMMMMCC; Rows 14–15 CCCMMMMMMMMMCCC; Rows 16–17 CCCCCCCCCCCCCCCCC.
- Edge each flag Fasten off the chart colours. With the RS facing, join cream in the first stitch at one end of Row 17. Work 3 sc in that stitch, 1 sc in each of the next 15 stitches, and 3 sc in the last stitch. Continue down the adjacent sloping edge with 1 sc in each row-end from Rows 17 through 2. Work 3 sc around the Row 1 point. Work up the other slope with 1 sc in each row-end from Rows 2 through 17; sl st to the first edging sc and fasten off. Each flag has 21 edging stitches across its straight top edge, including the corner stitches.
- Arrange and attach to the cord Lay the flags RS up in their displayed left-to-right order: engine, red carriage, green carriage, red carriage. Keep all points facing down. To attach them in that order while crocheting across each top edge, turn the arranged flags over together so their WS faces you. With cream, ch 15 and sl st into the first chain to form a hanging loop. Ch 12 for the first end gap. Working from right to left as the WS faces you, make 1 sc through each of the 21 top-edge stitches of the engine flag. Ch 9; attach the red carriage with 21 sc in the same way. Repeat the ch-9 gap and 21-sc attachment for the green carriage, then for the final red carriage. Ch 12 for the second end gap, then ch 15 and sl st into the first chain of those 15 to form the second hanging loop. Fasten off. Turn the bunting RS up to check the displayed order.
Finishing
- Weave in all ends on the WS, taking care not to pull the points out of shape.
- Lightly dampen and pin the flags flat, aligning their top edges and points. Allow them to dry before hanging.
- Hang by the two cord loops. Keep the bunting away from flames and hot light fittings.
Helpful Tips
- Mark the two top corner stitches before edging; both receive 3 sc and are included in the 21-stitch attachment edge.
- At a colour change, bring the new yarn up neatly from the WS. Separate short yarn lengths help avoid long floats across the cream background.
- Work every flag at the same gauge so the repeated 9-chain gaps space the train evenly.
Train-End Winter Scarf

This crochet Christmas train scarf puts a red-and-green locomotive near each end, framed by a cream border. The charcoal centre stays plain where the scarf rests against the neck, so the festive detail is visible without covering the whole length.
The two motifs face towards the scarf ends, keeping the wheels in the same outward position when it is worn. This is an intermediate colourwork project: it suits crocheters who are comfortable following a chart and keeping an even tension through changes of colour.
Train-End Winter Scarf

Quick-reference card. Follow the complete written instructions below.
Materials
- DK yarn: Allow approximately 350 g charcoal, 30 g red, 30 g green and 50 g cream. Quantities are allowances; actual use varies with gauge and yarn.
- Crochet hook: 4 mm, or the size needed for the stated gauge.
- Notions: Tape measure, yarn needle, scissors, stitch markers and small yarn bobbins.
Size and Fit
Sample: 27 stitches wide and 340 rows long before the border, approximately 15 × 170 cm at the stated gauge. The border adds approximately 0.5 cm at each edge; its finished dimensions will vary. For another width, choose an odd stitch count of at least 27 and add the same number of charcoal stitches to both sides of every chart row. For another length, choose a target length before the border. Multiply that length in cm by your measured row gauge per 10 cm, divide by 10 and round to a whole row. Use at least 38 rows; the number of plain middle rows is the total minus 38.
Gauge
Target gauge: 18 single crochet stitches and 20 rows per 10 cm in charcoal, measured over a relaxed swatch. Check your own stitch and row gauge before calculating adjustments.
Abbreviations
US crochet terms.
- ch = chain
- sc = single crochet
- st(s) = stitch(es)
- R = red stitch in the chart
- G = green stitch in the chart
- . = charcoal stitch in the chart
Pattern
- Reading the train chart Each chart row contains 27 sc, read from the beginning to the end of that crochet row. A number after a symbol gives the number of consecutive stitches: for example, .5 G3 means five charcoal sc followed by three green sc. The train is worked in red and green against a charcoal background. When you turn, begin the next chart row at the new working edge. Chart row 1 is the wheel end of the motif.
- Train chart Chart row 1: .27; row 2: .5 G3 .8 G3 .8; row 3: .4 R17 .6; rows 4–5: .3 R20 .4; rows 6–8: .3 R12 G7 R1 .4; rows 9–11: .4 R11 G7 .5; rows 12–13: .6 R3 .6 G7 .5; row 14: .5 R5 .5 G8 .4; row 15: .15 G8 .4.
- Colour changes Make each stitch in its chart colour, changing yarn on the final yarn-over of the preceding sc. Use separate small bobbins for separated colour areas, including isolated charcoal areas. Do not carry a float across a gap longer than two stitches; start another bobbin instead. Keep the colourwork face consistent on both motifs and weave in all ends securely.
- Foundation and first end With charcoal, ch 28. Row 1: sc in the second ch from the hook and in each remaining ch; turn. You have 27 sc. Rows 2–4: ch 1, sc in each st; turn. The turning ch does not count as a stitch. Rows 5–19: work chart rows 1–15 in order, making 27 sc in each row. Ch 1 and turn between rows.
- Plain middle Rows 20–321: with charcoal, ch 1, sc in each of the 27 sts; turn. This gives the sample 302 plain middle rows. For an adjusted length, work the calculated number of plain middle rows instead.
- Second end Sample rows 322–336: work chart rows 15 down to 1, one chart row per crochet row, with 27 sc in each row. Reading the chart in reverse row order puts the wheels towards this scarf end too. Ch 1 and turn between rows. Rows 337–340: with charcoal, ch 1, sc in each st; turn after rows 337–339 only. Fasten off charcoal.
- Cream border Join cream in a corner gap. Work one round of sc around the scarf: 27 sc across each short end and, along each long side, 9 evenly spaced sc for every 10 scarf rows, omitting the edge of the tenth row in each group. Work 3 sc into each of the four corner gaps in addition to the end and side stitches. Join to the first sc and fasten off. For the 340-row sample, each long side has 306 sc and the round has 678 sc in total. If you changed the width or length, use your new end stitch count and distribute side stitches evenly at the same rate.
Finishing
- Weave in every yarn end on the wrong side, securing colour changes without pulling the fabric tight.
- Gently wash or steam according to the yarn label and lay the scarf flat to dry, straightening the border without stretching the colourwork.
Helpful Tips
- Use a marker to identify the front face before starting the first train; keep that face consistent when making the second.
- The plain middle can be lengthened or shortened without changing either 15-row motif or the four plain rows at each end.
- If the border ripples, check that the side stitches are spaced at nine per ten rows rather than placing one in every row.
Crochet Christmas Railway Play Mat

This crochet Christmas railway play mat gives a separate toy train its own festive route. The green play surface has an oval track that leaves room around the railway for children to move the train and create their own Christmas journeys.
The rails and sleepers sit close to the fabric rather than forming a raised track. That low profile helps a small locomotive rest on the railway without having to balance on a ridge, while the flexible mat can be rolled away between playtimes.
The engine is not part of this pattern. Supervise young children when they use the mat with a separate train or other loose parts, and check regularly that the track stitching remains secure.
Crochet Christmas Railway Play Mat

Quick-reference card. Follow the complete written instructions below.
Materials
- Green washable worsted-weight yarn: Approximately 220–260 m for the mat and edging.
- Charcoal washable worsted-weight yarn: Approximately 15–25 m for the two rails.
- Cream washable worsted-weight yarn: Approximately 8–12 m for the sleepers.
- 4 mm crochet hook: Or the size needed to obtain gauge.
- Yarn needle, removable fabric marker, paper and flexible tape measure: For marking the route and stitching the sleepers.
Size and Fit
One sample size. The mat body is approximately 37.5 cm wide by 24.5 cm high at the stated gauge; the edging adds approximately 0.5–1 cm on each side. The outer rail measures 29 cm wide by 16 cm high, leaving space between the route and the mat edge. It is a play surface for a separate small toy train, not a pattern for the train.
Gauge
16 sc and 18 rows = 10 cm in flat single crochet before edging. Check gauge if the finished dimensions matter; keep the fabric firm enough to lie flat but flexible enough to roll.
Abbreviations
US crochet terms.
- ch = chain
- sc = single crochet
- sl st = slip stitch
- st(s) = stitch(es)
- RS = right side
- WS = wrong side
Pattern
- Mat body With green, ch 61. Row 1: Sc in the second ch from the hook and in each ch across; 60 sc. Rows 2–44: Ch 1, turn, sc in each st across; 60 sc per row. Fasten off. The body should be approximately 37.5 x 24.5 cm at the stated gauge.
- Mark the railway Lay the mat flat with the RS facing. Find its centre. On paper, draw two smooth, centred ovals: an outer oval 29 x 16 cm and an inner oval 25 x 12 cm. Their corresponding ends and tops should be 2 cm apart. Transfer both outlines lightly to the mat with a removable marker. Keep the curves within the fabric, without stretching it.
- Surface-crochet the rails Work each oval separately in charcoal. Hold the working yarn behind the mat. Bring a loop through to the RS at any marked point, then insert the hook through the fabric at the next point on the line, draw up a loop and pull it through the loop on the hook to make a surface sl st. Continue around the oval, placing stitches close enough to follow the curve smoothly without gathering the mat. Join to the first surface stitch, fasten off and secure both ends on the WS. Repeat for the second oval. Both rails should lie flat against the mat.
- Stitch the sleepers Imagine a centreline halfway between the rails. Use a flexible tape measure to mark 24 approximately even positions around that centreline. At each position, use cream yarn and a yarn needle to stitch across the 2 cm gap from one rail towards the other. Make each sleeper from three short, flat stitches rather than one long, snag-prone stitch. Secure the ends on the WS and keep the cream stitches within the railway.
- Edge the mat With green and the RS facing, join yarn at a corner. Work one round of sc evenly around the mat: approximately one sc in each stitch across the top and bottom, one sc in each row end along the sides, and 3 sc at each corner. Join with a sl st to the first sc and fasten off. If the edge ripples, use fewer side stitches; if it pulls in, add side stitches. The finished mat should lie flat.
Finishing
- Weave in all ends securely on the WS and remove the route markings.
- Lay the mat flat and gently shape it without stretching the rails. Let it dry fully before rolling it for storage.
- Set a separate toy engine on the finished track; do not attach it to the mat.
Helpful Tips
- Surface slip stitches give the rails a low profile, helping a small locomotive sit on the track rather than balance on a raised ridge.
- Test a removable marker on a yarn offcut before marking the mat.
- Supervise young children whenever the mat is used with a separate train or other loose parts; check the stitching and fastened-off ends regularly.
Christmas Train Teapot Cosy

Give a teapot a festive look with a cream cosy and a small red locomotive travelling across the lower front. The train is a flat detail, so it adds character without making the cosy bulky.
This design follows the shape of the teapot body rather than treating the handle and spout as part of its circumference. Openings at the sides keep both accessible, while the uncovered top leaves the lid free to lift.
Teapots vary considerably, especially around their fittings. Before settling on the train’s position, check the cosy against the intended teapot while it is cold: the decoration should sit clear of the spout, and the fabric should not interfere with a comfortable grip or a clean pour.
Christmas Train Teapot Cosy

Quick-reference card. Follow the complete written instructions below.
Materials
- Cream yarn: Wool or a washable wool blend suitable for a teapot cosy; quantity depends on your teapot and gauge.
- Red and dark yarn: Small amounts for the flat locomotive and its wheels. Choose yarns with compatible care instructions.
- Crochet hook: A size that gives a firm single-crochet fabric with your chosen yarn.
- Other tools: Tape measure, stitch markers, tapestry needle, scissors and pins.
Size and Fit
Made to measure. With the lid in place, choose a bottom edge below the handle and spout attachments and a top edge just below the lid rim; measure the vertical distance H between them in cm. Measure the body circumference, excluding the projecting handle and spout, at both edges: Cbottom and Ctop. Check where each fitting attaches relative to the bottom edge. The method adds 1 cm of ease to each circumference. The finished top edge stays open so the lid can be lifted. If a proposed side opening or appliqué crowds a fitting, adjust its position while fitting the panels to the cold teapot.
Gauge
Make and measure a single-crochet swatch in the cream yarn. Record stitches per cm as S and rows per cm as G; use your measured figures rather than a prescribed gauge. Make both panels with the same hook and tension.
Abbreviations
US crochet terms.
- ch = chain
- sc = single crochet
- sc2tog = single crochet two stitches together
- sl st = slip stitch
- st(s) = stitch(es)
- R, N, T, K = calculated panel rows, first-row stitches, last-row stitches and number of shaping rows
Pattern
- Calculate the panels Round ((Cbottom + 1) × S ÷ 2) to the nearest whole stitch for N. Round ((Ctop + 1) × S ÷ 2) for a provisional top width; choose the nearest top stitch count T that differs from N by an even number. Round H × G for R. Let K = |T − N| ÷ 2. Each panel will have N stitches at the bottom and T at the top. Use a finer yarn and recalculate if N is below 18, T is below 8, R is below 12, or K exceeds R − 1; those limits allow room for the appliqué and the stated shaping method.
- Panel 1: first row With cream, ch N + 1. Sc in the second ch from the hook and each remaining ch; N sc. This is Row 1 and the bottom edge. Ch 1 and turn; turning chains do not count as stitches.
- Shape the panel If K is zero, work 1 sc in each st on every row from Row 2 through Row R. Otherwise, mark shaping rows numbered 1 + ceil(j × (R − 1) ÷ K), for each whole number j from 1 through K. Work 1 sc in each st on unmarked rows. On each marked row, if T is smaller than N, sc2tog over the first two sts, sc across to the last two sts, then sc2tog: two stitches decreased. If T is larger than N, work 2 sc in the first st, sc across to the last st, then 2 sc in the last st: two stitches increased. Ch 1 and turn after each row except Row R. Fasten off after Row R; it has T stitches.
- Panel 2 Make a second panel exactly like the first. Hold the panels against the cold teapot with their first rows at the chosen bottom edge. Choose the panel facing away from your usual pouring position as the decorated front.
- Mark the side openings At each side, measure from the chosen bottom edge to the lowest and highest points where the handle or spout meets or obstructs the body; call these L and U in cm. Allow at least 0.5 cm clearance below L and above U. On both panels mark an opening from row A = max(1, floor((L − 0.5) × G)) through row B = min(R, ceil((U + 0.5) × G)). Calculate A and B separately for the handle side and spout side. While the panels are pinned in place, enlarge either opening if the projecting fitting needs more clearance. Do not join across a marked opening.
- Join the lower sides With the panels aligned and right sides out, use cream yarn and mattress stitch to join their corresponding side edges from Row 1 through Row A − 1 on each side, where those rows exist. Leave Rows A through B open. If an opening starts at Row 1, leave that lower side unjoined. Check that the cosy can be eased into position on the cold teapot without pulling against a fitting.
- Close the upper sides Above each opening, make removable ties at Row B + 1 and Row R where those are different rows; if only one row is available, make one pair. For each tie, secure cream yarn to the side edge of one panel, ch 16, fasten off and secure the yarn end. Make a matching tie at the corresponding row on the other panel. Pair and knot the ties to bring the edges together above the opening. If an opening reaches Row R, leave that side unjoined at the top rather than tying across the fitting. Leave the top edges of the front and back panels unjoined for lid access.
- Red locomotive Ch 13 in red. Row 1: sc in the second ch from the hook and across (12 sc). Rows 2–4: ch 1, turn, sc across (12 sc). Row 5: ch 1, turn, sc in the first 5 sts only (5 sc); leave the remaining sts unworked. Rows 6–8: ch 1, turn, sc across the 5-st cab. Fasten off. With red yarn, embroider a short upright chimney above the opposite, front end of the long body. The cab is at the rear.
- Wheels and placement Make two dark wheels: place 6 sc in a magic ring, pull closed and sl st to the first sc. Fasten off, leaving sewing tails. Sew the wheels near the third and tenth stitches along the locomotive’s bottom edge. Pin the flat train across the lower front panel, keeping its wheels above the cosy’s bottom edge and the whole motif clear of the spout opening and side joins. Sew it down with matching yarn. If it does not fit with clear space around it, use finer appliqué yarn and a smaller hook while retaining the stated stitch counts.
Finishing
- Weave in all ends securely, keeping the side openings unobstructed.
- Put the cosy on a cold teapot, settle the lower edge and tie the upper sides. Check that the handle is comfortable to grip, the spout pours freely and the lid lifts without catching.
- Remove the cosy before washing; follow the care instructions for the least washable yarn used.
Helpful Tips
- Measure the teapot body, not a line stretched over its handle or spout.
- If an attachment is angled, include its full obstructed height when marking that side opening.
- Retie the upper sides loosely rather than stretching the fabric tight against the teapot.
- Keep yarn and ties clear of direct flame and hot hob surfaces.
Frequently Asked Questions
Which crochet Christmas train project should I try first?
The flat appliqué, bauble, bookmark and table runner are marked confident beginner. Pick the appliqué if you want to practise a train shape before moving on to joined parts or colourwork.
Are all 22 projects tree decorations?
No. Alongside ornaments, the list includes a basket, stocking, cushion cover, scarf, play mat and other pieces for the home.
What yarn works best for the train coaster?
Use cotton and check the target gauge. Its two matching layers make a thicker coaster, and a mug base no wider than 8 cm should sit on the plain body, away from the chimney and wheels.
Do I need to measure before starting?
Yes, for projects made to fit something specific. Measure the cushion insert, teapot or tree opening as needed, and check the planned hanging space for a garland or Advent calendar.
Final Thoughts
Whether you want one small train ornament or a larger seasonal piece, choose a project whose construction suits its job. A little attention to gauge, fit and secure finishing will help the finished train look tidy and work as intended.