15 Free Crochet Christmas Square Patterns to Make This Season

Looking for a free crochet Christmas square pattern? This collection brings together 15 festive squares, from a striped granny square to snowflakes, holly, a wreath and a poinsettia.
The designs use different methods, including corner-to-corner, filet, tapestry and mosaic crochet. Choose one by the technique you want to practise, or compare their edges and textures before planning a larger project.
For more ideas that build on this collection, explore Christmas granny square patterns.
Before You Start
These patterns use US crochet terminology. Check stitch names against the terms you normally use, particularly if you have learnt from UK patterns.
Pick yarn to suit the finished project. A smooth yarn makes the gift, snowflake and candy cane colour blocks easier to read, while a firm background helps bobbles and appliqué sit neatly. For squares you intend to join, use a consistent yarn weight and compare your gauge.
Gather the colours for your chosen motif before starting. The corner-to-corner snowflake has separate colour sections, while the holly square uses pieces made separately and attached to a background. Weave in ends securely before the squares are joined or handled.
Crochet terminology: This article uses US crochet terms. Check the abbreviations for each project.
Christmas Stripe Granny Square
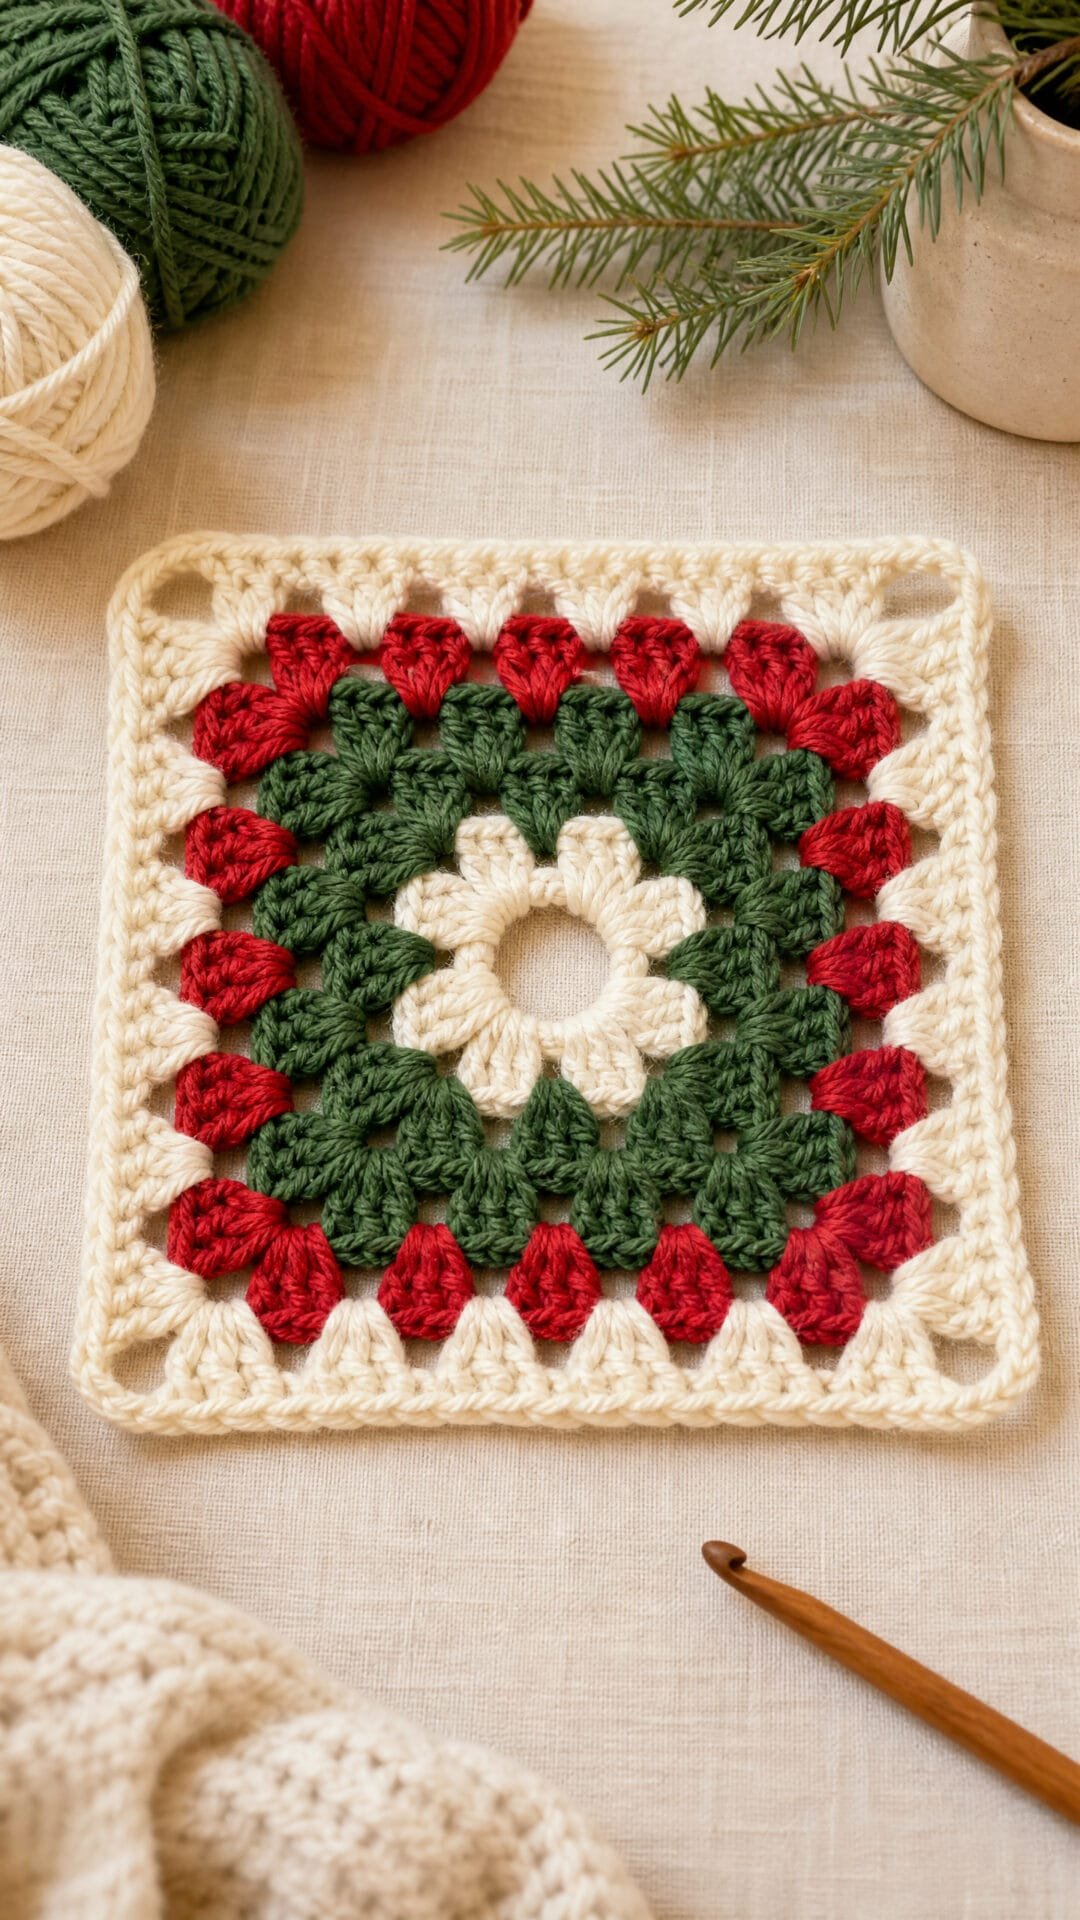
This Christmas Stripe Granny Square gives the familiar granny-square shape a festive look. Its open centre and defined corners keep the classic construction easy to recognise, while the cream, green and red bands make the colour the focus.
Keeping colour changes at round boundaries makes each stripe read as a continuous band. A change partway through a round would interrupt that effect, particularly along a side where the contrast is easy to spot.
Itâs a straightforward choice if youâre new to granny squares and want a repeatable motif for a coordinated Christmas project. The optional outer round lets you choose the version that suits your project while keeping the squares consistent.
Christmas Stripe Granny Square

Quick-reference card. Follow the complete written instructions below.
Materials
- Smooth DK yarn: Small amounts of cream, green and red
- Crochet hook: 4 mm, or a size suited to your yarn
- Tapestry needle and scissors: For fastening off and weaving in ends
Size and Fit
The sample square has five rounds; an optional sixth round makes a larger square. Finished size depends on yarn, hook and tension. To make matching squares, use the same materials and number of rounds for each, then compare and block them to the same dimensions.
Gauge
Gauge is not critical. Keep your tension consistent across squares.
Abbreviations
US crochet terms.
- ch = chain
- dc = double crochet
- sl st = slip stitch
- sp = space
Pattern
- Before you begin The starting ch 3 counts as the first dc of each round. Join each round with a sl st to the top of that ch 3, then fasten off. Join the next colour with a sl st in any corner ch-2 sp. Keep all colour changes at round boundaries.
- Round 1 â cream Ch 4 and join with a sl st to form a ring. Ch 3, work 2 dc in the ring, ch 2. Work (3 dc in the ring, ch 2) three times. Join and fasten off. You have four 3-dc groups and four corner ch-2 spaces.
- Expansion round â use for rounds 2â6 Join the specified colour in any corner ch-2 sp. Ch 3, then work (2 dc, ch 2, 3 dc) in that same corner sp. For each of the next three sides: ch 1; work (3 dc, ch 1) in every side ch-1 sp along that side, if there are any; then work (3 dc, ch 2, 3 dc) in the next corner ch-2 sp. For the final side, ch 1 and work (3 dc, ch 1) in every side ch-1 sp, if there are any. Join and fasten off. On round 2 there are no side ch-1 spaces to work into; the ch 1 between corners creates them for round 3.
- Round 2 â green Work one expansion round. You have 24 dc.
- Round 3 â red Work one expansion round, placing a 3-dc group in the one side ch-1 sp on each side. You have 36 dc.
- Round 4 â cream Work one expansion round, placing a 3-dc group in each of the two side ch-1 spaces on each side. You have 48 dc.
- Round 5 â green Work one expansion round, placing a 3-dc group in each of the three side ch-1 spaces on each side. You have 60 dc. Stop here for the five-round square.
- Optional round 6 â red For a larger matching square, work one expansion round, placing a 3-dc group in each of the four side ch-1 spaces on each side. You have 72 dc. Work this round on every square intended for the same join.
Finishing
- Weave in the ends on the reverse, following stitches of the same colour so they do not show across a contrasting stripe.
- Gently block the square to even out its four corners. Check that squares intended to be joined have the same number of rounds and matching edges.
Helpful Tips
- Count corner ch-2 spaces as you work: there should always be four.
- Each expansion round adds one 3-dc group to each side. Fastening off before the next round prevents a colour change partway along a stripe.
Tapestry Crochet Gift Square
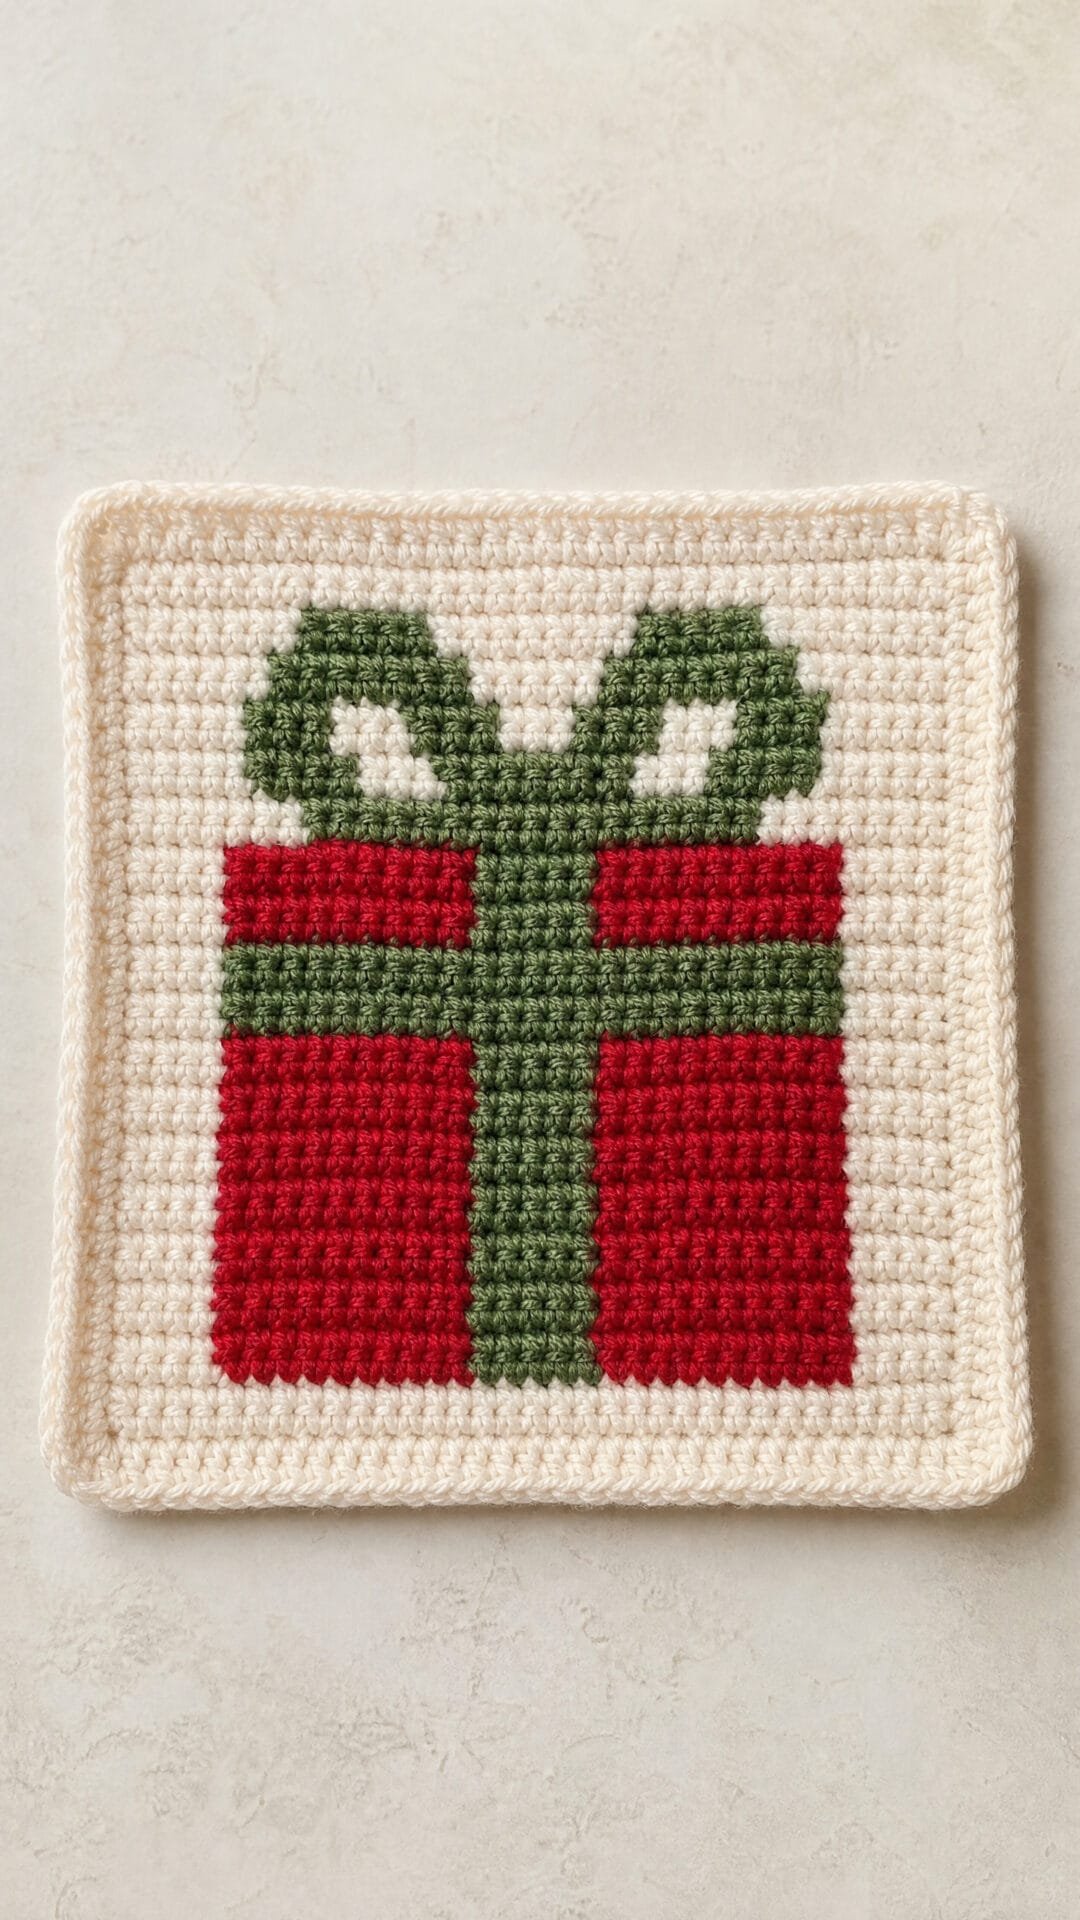
This Christmas square turns a wrapped present into a tidy picture: a red gift box and green ribbon stand out against a cream background. Its firm, flat fabric makes the colour blocks easy to see, whether the square is displayed on its own or alongside other festive motifs.
The small pixel chart keeps the design approachable because each square of colour corresponds to one stitch. Neat colour management matters more than a complicated motif here: loose strands behind the work help the fabric lie flat, while separate short lengths can prevent darker yarn from showing through the cream. It is a satisfying choice if you are comfortable with basic crochet and ready to practise clean colour changes.
Tapestry Crochet Gift Square

Quick-reference card. Follow the complete written instructions below.
Materials
- DK yarn: Small amounts of smooth cream (A), red (B) and green (C). Choose colours with clear contrast.
- Crochet hook: 3.5 mm, or a size that gives a firm fabric without making it stiff
- Other: Scissors, yarn needle and a ruler
Size and Fit
At the suggested gauge, the 15-stitch by 15-row centre is approximately 7.5 cm square. The border adds roughly 0.5 cm on each side, giving an estimated finished size of 8.5 cm square. Block gently if needed to straighten the edges.
Gauge
Aim for approximately 20 sc and 20 rows per 10 cm in a firm, flat single crochet fabric. Consistent stitch and row size matters more than matching a precise finished measurement.
Abbreviations
US crochet terms.
- ch = chain
- sc = single crochet
- sl st = slip stitch
- st = stitch
- RS / WS = right side / wrong side
Pattern
- Read the chart Each character represents one sc: . = cream A, R = red B, G = green C. Each row has 15 stitches. The chart is printed from bottom to top, with row 1 at the bottom. For right-handed crochet, read odd-numbered rows from right to left and even-numbered rows from left to right as viewed from the RS; reverse those directions if working left-handed. The motif is symmetrical, so its appearance is the same either way. Turn after every row.
- Gift chart 15 ……………
14 ……………
13 ……G.G……
12 …..GGGGG…..
11 ….GGGGGGG….
10 .RRRRRRGRRRRRR.
9 ..RRRRRGRRRRR..
8 ..RRRRRGRRRRR..
7 ..RRRRRGRRRRR..
6 ..RRRRRGRRRRR..
5 ..RRRRRGRRRRR..
4 ..RRRRRGRRRRR..
3 ……………
2 ……………
1 …………… - Foundation and row 1 With A, ch 16. Sc in the second ch from the hook and in each remaining ch; 15 sc. This is row 1 and the RS. Ch 1 and turn. The turning ch does not count as a stitch.
- Rows 2â15 Work 1 sc in each of the 15 stitches, following the corresponding chart row for colour. Ch 1 and turn after rows 2â14. Do not turn after row 15. To change colour, work the last stitch of the old colour up to its final pull-through, then complete that stitch with the new colour. Keep unused yarn on the WS. Carry it loosely behind a short colour section, or use separate short lengths where a carry would show through the cream. Do not pull carried strands tight.
- Plain border With the RS facing and A attached at the end of row 15, ch 1. Sc in that last stitch of row 15; work 13 sc along the ends of rows 14â2; work 3 sc in the end of row 1. Work 13 sc across the underside of the foundation, using the interior chain positions and leaving its two end positions for the corners. Work 3 sc in the opposite end of row 1; work 13 sc along the ends of rows 2â14. Work 3 sc in the first stitch of row 15; work 13 sc across the remaining interior stitches of row 15; work 2 sc in its last stitch. Sl st to the first border sc. The first and last border stitches together form a three-sc corner. Fasten off. Border count: 64 sc.
Finishing
- Weave in ends on the WS, securing colour changes without drawing the fabric in.
- Gently block into a square, keeping the present’s edges straight. Let it dry flat.
Helpful Tips
- A simple chart works well here because each square of colour corresponds to exactly one stitch; check each row against the chart before turning.
- For the cream stitches on either side of the gift, separate lengths of A can look neater than carrying red across the background. Join and secure those lengths on the WS.
- The bow uses small green sections. Leave enough slack behind nearby stitches for the fabric to lie flat, but avoid carrying green across a long cream area.
Corner-to-Corner Snowflake Square

This corner-to-corner square uses a blue background to frame a centred white pixel snowflake. The motif emerges as the square grows diagonally, making it a festive choice for a blanket or a display of Christmas squares.
The block construction is approachable if you already know corner-to-corner crochet, but the colourwork calls for more attention. Some white areas are separated by blue, so small, separate yarn supplies are more practical than stretching a strand between them. Expect extra ends to deal with compared with a single-colour square.
Keep the snowflake chart close and check your position as the direction of work changes. Consistent blocks will help the motif read clearly and give the blue edging a neat foundation.
Corner-to-Corner Snowflake Square
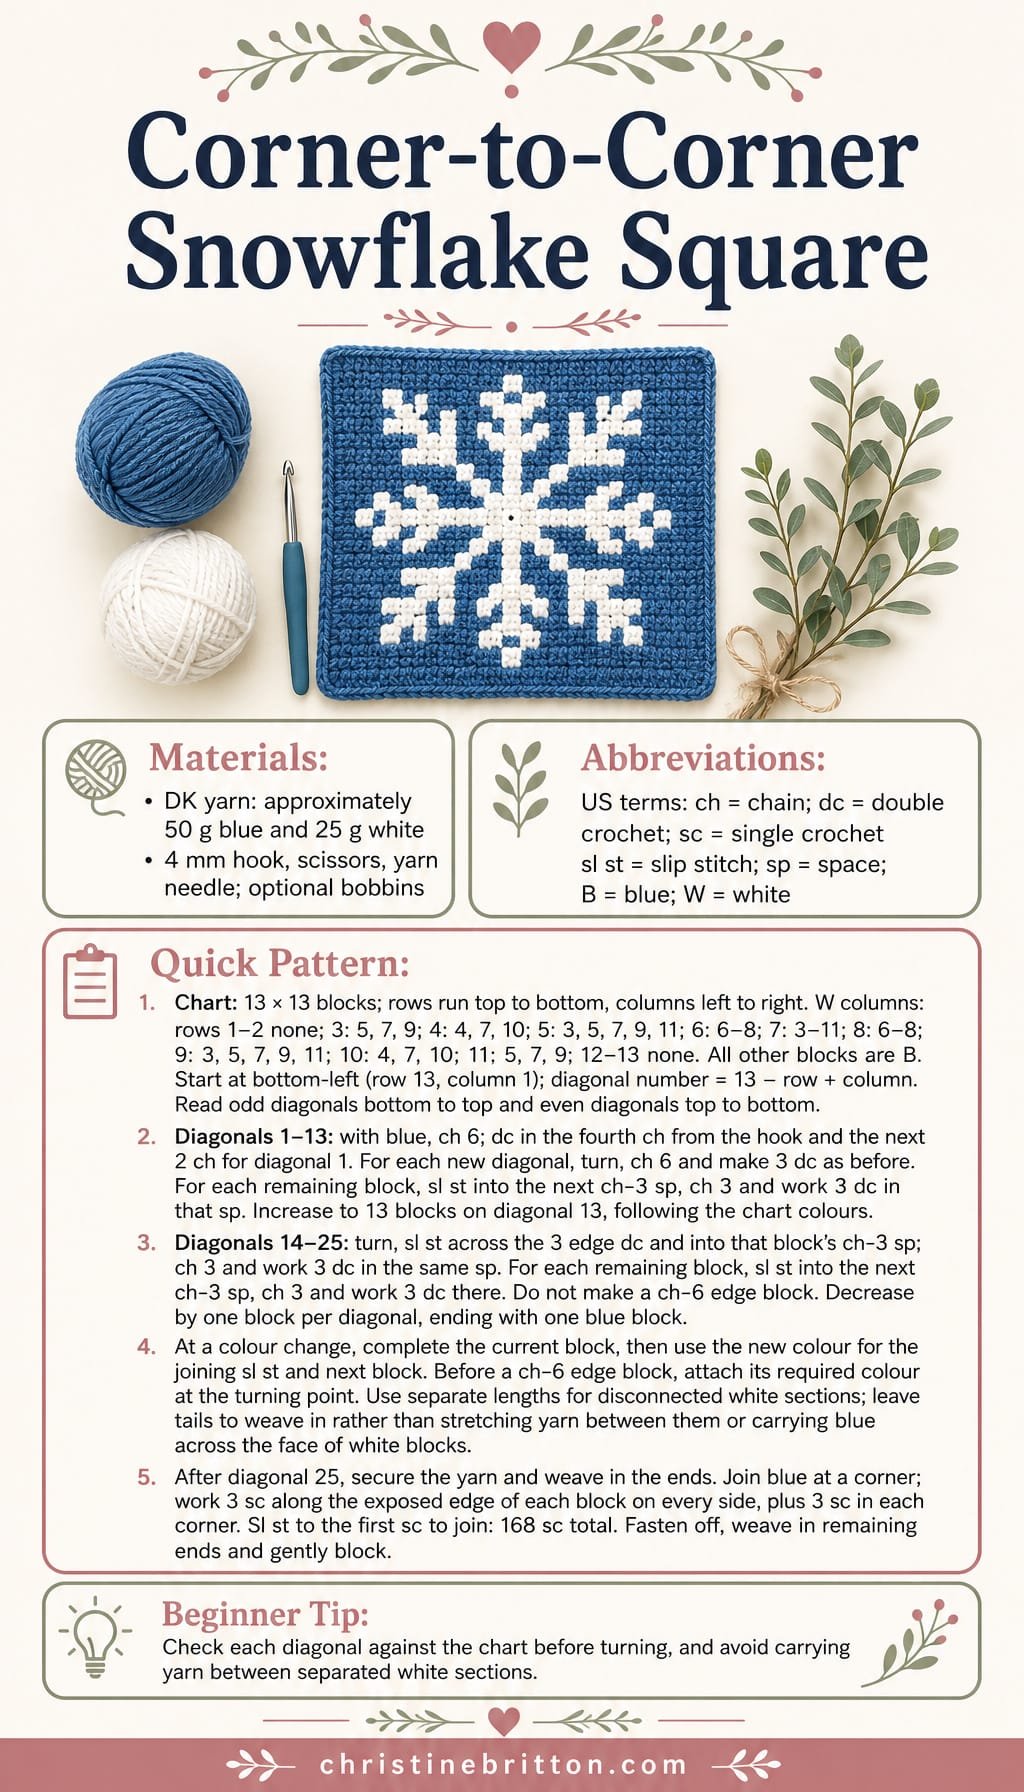
Quick-reference card. Follow the complete written instructions below.
Materials
- DK yarn: Allow approximately 50 g blue for the background and border, and 25 g white for the snowflake. Usage varies with tension.
- Crochet hook: 4 mm, or a size that gives you firm, even blocks
- Notions: Scissors, yarn needle and optional small bobbins for separate colour sections
Size and Fit
One 13-by-13-block square. Its finished measurement depends on your yarn and tension; make a swatch if you need it to match another square. The instructions produce the same number of blocks on every side.
Gauge
No fixed gauge is required. Keep the blocks consistent and check that the piece lies flat before adding the border.
Abbreviations
US crochet terms.
- ch = chain
- dc = double crochet
- sc = single crochet
- sl st = slip stitch
- sp = space
- B = blue block
- W = white block
Pattern
- Read the snowflake chart The chart has 13 rows, numbered from top to bottom, and 13 columns, numbered from left to right. Make the listed columns white; every other block is blue. Rows 1 and 2: no white blocks. Row 3: columns 5, 7, 9. Row 4: columns 4, 7, 10. Row 5: columns 3, 5, 7, 9, 11. Row 6: columns 6, 7, 8. Row 7: columns 3â11 inclusive. Row 8: columns 6, 7, 8. Row 9: columns 3, 5, 7, 9, 11. Row 10: columns 4, 7, 10. Row 11: columns 5, 7, 9. Rows 12 and 13: no white blocks.
- Follow the diagonal order Start at the chartâs bottom-left block (row 13, column 1). Work 25 diagonals, numbered 1â25. A block at chart row r and column c belongs to diagonal 13 â r + c. On odd-numbered diagonals, read the blocks from bottom to top; on even-numbered diagonals, read them from top to bottom. Check each block against the chart before working it.
- Diagonal 1 With blue, ch 6. Dc in the fourth ch from the hook and in each of the next 2 ch. The skipped 3 ch and 3 dc form one block.
- Diagonals 2â13: increase Turn and ch 6; dc in the fourth ch from the hook and in the next 2 ch to make the first block of the new diagonal. For each remaining block, sl st into the next blockâs ch-3 sp on the preceding diagonal, ch 3 and work 3 dc in that sp. Each diagonal adds one block, ending with 13 blocks on diagonal 13.
- Diagonals 14â25: decrease Turn. Sl st across the 3 dc at the edge and into that blockâs ch-3 sp; ch 3 and work 3 dc in the same sp for the first block. Make each remaining block by sl st into the next ch-3 sp, ch 3 and working 3 dc in that sp. Do not start with a ch-6 block. Each diagonal has one fewer block than the last; diagonal 25 has one blue block.
- Manage the colours Use separate small lengths or bobbins for white sections that are not adjacent along a diagonal. At a colour change, complete the current block, then use the new colour to make the joining sl st and the next blockâs ch 3 and 3 dc. For a new ch-6 edge block, attach its required colour at the turning point before chaining. Leave tails to weave in; do not carry blue across the face of white blocks or stretch yarn between separated white sections.
- Blue border After diagonal 25, secure the yarn and weave in the ends. With blue, join at a corner. Work 3 sc evenly along the exposed edge of each of the 13 blocks on every side, plus 3 sc into each corner. Join with a sl st to the first sc. The border has 39 side sc per side and 3 sc per corner, for 168 sc altogether.
Finishing
- Fasten off and weave in all remaining ends securely on the wrong side.
- Gently block the square to straighten its edges, following the care instructions for your yarn.
Helpful Tips
- Mark the chart position after every diagonal; the direction of reading reverses each time.
- Wind small white bobbins before starting. Detached white pixels need their own yarn supply rather than a long strand across the back.
- Keep turning chains and joining slip stitches relaxed so the square does not pull in at the edges.
Filet Crochet Christmas Candle Square

This Christmas square uses the contrast between open and filled filet mesh to create a centred candle with a small flame. The design relies on a clear silhouette rather than colour changes, giving it a quiet, traditional look.
Filet crochet rewards an even, unhurried rhythm: keeping the open spaces consistent helps the candle stand out against its background. The solid border gives the airy design a defined edge.
If you use the square as a cushion front, a plain backing in a contrasting colour will make the candle easier to see through the open mesh. It also lets the design remain the focus without adding another motif.
Filet Crochet Christmas Candle Square

Quick-reference card. Follow the complete written instructions below.
Materials
- Yarn: Smooth cream DK cotton or cotton-blend yarn, approximately 50â80 g
- Hook: 3.5 mm crochet hook, or a size that gives you an even mesh
- Other: Yarn needle, scissors, pins and a blocking mat
Size and Fit
One square, approximately 21 cm à 21 cm when blocked to the suggested gauge. The chart is 17 cells wide and 17 rows high.
Gauge
Aim for 4 filet cells across and 4 rows high measuring approximately 5 cm à 5 cm after gentle blocking. Adjust your hook if needed; an even mesh matters more than an exact finished size.
Abbreviations
US crochet terms.
- ch = chain
- dc = double crochet
- F = filled filet cell
- O = open filet cell
Pattern
- Mesh convention Each cell spans 3 stitch positions and shares its final dc post with the next cell. At the start of every row, ch 3 and turn; this counts as the first dc post. For F, work 1 dc in each of the next 3 positions. For O, ch 2, skip the next 2 positions, then dc in the next dc post. When working F above an O, place 2 dc into the ch-2 space, then dc in the following post. A ch-2 space counts as 2 positions when you work above it. Read every row sequence from the turning edge across; the candle is symmetrical, so the chart works in either direction.
- Row 1: foundation and lower frame Ch 54. Dc in the 4th ch from the hook and in every remaining ch. The unused first 3 chains count as the first dc. You have 52 dc posts, equivalent to 17 F cells.
- Row 2 Ch 3, turn. Work F, 15 O, F.
- Rows 3â11: candle body For each of these 9 rows, ch 3, turn. Work F, 5 O, 5 F, 5 O, F.
- Row 12: space above candle Ch 3, turn. Work F, 15 O, F.
- Rows 13â14: lower flame For each row, ch 3, turn. Work F, 6 O, 3 F, 6 O, F.
- Row 15: flame tip Ch 3, turn. Work F, 7 O, F, 7 O, F.
- Row 16: space above flame Ch 3, turn. Work F, 15 O, F.
- Row 17: upper frame Ch 3, turn. Work 17 F, filling each ch-2 space as described in the mesh convention. Fasten off.
Finishing
- Weave in the ends without pulling the mesh out of shape.
- Dampen the square and pin it gently to a square shape, aligning the outer filled cells. Allow it to dry completely.
- For a cushion, place the square over a plain fabric or crocheted backing in a contrasting colour so the open cells are easy to see.
Helpful Tips
- Mark off each row as you complete it; the candle body occupies nine consecutive rows.
- Keep the ch-2 spans relaxed so the open cells remain close in size to the filled cells.
- Each row has 17 cells. The first and last cells are always filled, forming the side edges.
Bobble Christmas Tree Square

This Christmas square uses raised green bobbles to give the tree a clear triangular shape against a pale background. A small brown trunk anchors the design, while the otherwise simple surface lets the texture take centre stage.
The background should feel firm enough to support the bobbles without becoming stiff. If it starts to curl, a slightly looser fabric is preferable to pulling the edges into shape; the finished square should lie flat.
Colour handling matters here because the pale background can reveal yarn carried behind it. Keeping the contrast yarn out of the open background helps the tree look crisp from the front, making this a useful project for practising tidy colourwork alongside textured stitches.
Bobble Christmas Tree Square
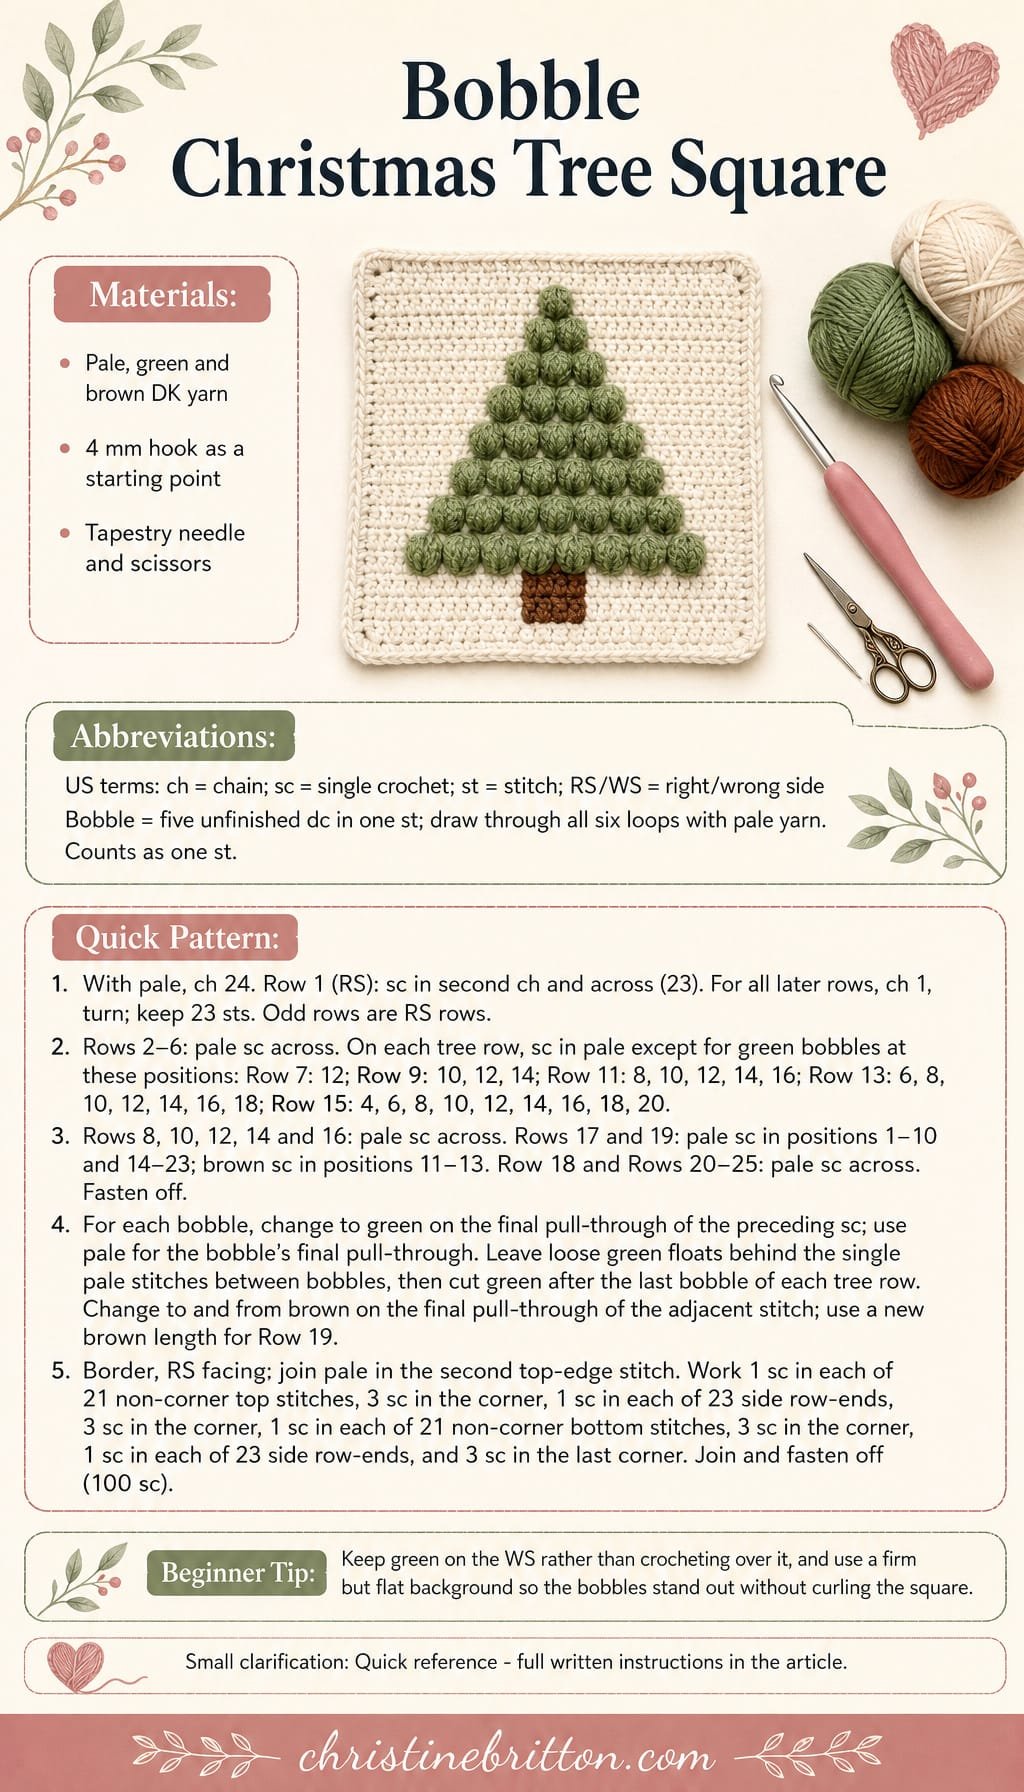
Quick-reference card. Follow the complete written instructions below.
Materials
- DK yarn: Pale yarn for the background and border, plus small amounts of green for the tree and brown for the trunk.
- Crochet hook: Use a size that produces a firm, flat single crochet fabric; 4 mm is a starting point.
- Tapestry needle and scissors: For weaving in ends and finishing.
Size and Fit
One square, approximately 14 cm across if worked close to the suggested gauge. The background is 23 stitches wide and 25 rows high before the border.
Gauge
Suggested gauge: approximately 18 sc and 20 rows per 10 cm in flat single crochet. Gauge is not critical, but use a hook that makes an opaque background without causing the square to curl.
Abbreviations
US crochet terms.
- ch = chain
- sc = single crochet
- st(s) = stitch(es)
- RS = right side
- WS = wrong side
- bobble = Work five unfinished double crochets in the indicated stitch: for each, yarn over, insert hook, draw up a loop, yarn over and draw through two loops. With six loops on the hook, yarn over and draw through all six loops. The bobble counts as one stitch.
Pattern
- Before you begin All stitch positions below are counted from the beginning of the named row. Every row has 23 stitches, including each bobble as one stitch. Rows 1, 3, 5 and the other odd-numbered rows are RS rows. Ch 1 to turn; this turning chain never counts as a stitch. Work bobbles only on the RS, pushing each one towards you as you finish it.
- Colour changes For a green bobble, work the preceding pale sc until its final pull-through, then complete that pull-through with green. Work the bobble in green, using pale yarn for the final pull-through through all six loops. Where two bobbles are separated by one pale sc, let the green yarn run loosely behind that sc on the WS; do not crochet over it. Use green for the final pull-through of the intervening sc before making the next bobble. After the last bobble in a row, cut the green, leaving a tail to weave in. Keep the pale yarn in use across the row. Do not carry green across the long pale sections.
- Foundation and Rows 1â6 With pale yarn, ch 24. Row 1 (RS): Sc in the second ch from the hook and in each remaining ch; 23 sc. Rows 2â6: Ch 1, turn, sc in each st; 23 sc per row.
- Tree: Rows 7â15 On each listed RS row, ch 1, turn, and work across all 23 positions, making a green bobble at each specified position and a pale sc at every other position. Row 7: bobble at position 12. Row 9: bobbles at positions 10, 12 and 14. Row 11: bobbles at positions 8, 10, 12, 14 and 16. Row 13: bobbles at positions 6, 8, 10, 12, 14, 16 and 18. Row 15: bobbles at positions 4, 6, 8, 10, 12, 14, 16, 18 and 20. Rows 8, 10, 12 and 14: Ch 1, turn, sc in pale yarn across all 23 stitches. Each row ends with 23 stitches.
- Trunk: Rows 16â19 Row 16: Ch 1, turn, sc across in pale yarn. Row 17 (RS): Ch 1, turn, sc in pale yarn in positions 1â10, changing to brown on the final pull-through of position 10. Sc in brown in positions 11â13, changing back to pale on the final pull-through of position 13. Cut the brown, then sc in pale yarn in positions 14â23. Row 18: Ch 1, turn, sc across in pale yarn. Row 19 (RS): Repeat Row 17 with a new length of brown yarn. Each row has 23 stitches.
- Background: Rows 20â25 Ch 1, turn at the start of each row and sc across all 23 stitches in pale yarn. Fasten off after Row 25.
- Plain border With the RS facing, join pale yarn in the second stitch along the top edge (Row 25), near a corner. Work towards the opposite top corner. Sc once in each of the 21 non-corner stitches along the top edge; work 3 sc in the top corner stitch. Working down the side, sc once in each row-end from Row 24 through Row 2; work 3 sc in the bottom corner stitch. Sc once in each of the 21 non-corner foundation-edge stitches; work 3 sc in the next bottom corner stitch. Working up the other side, sc once in each row-end from Row 2 through Row 24; work 3 sc in the remaining top corner stitch. Join with a slip stitch to the first border sc and fasten off. The border has 100 sc: 21 on each horizontal edge, 23 on each side and 12 across the four corners.
Finishing
- Weave in the green and brown ends on the WS without pulling the bobbles or trunk out of shape.
- Gently block the square to an even shape if needed; allow it to dry flat.
Helpful Tips
- A firm background helps the bobbles stand proud. If the square curls, try a slightly larger hook rather than tightening the side edges or green floats.
- Keep each one-stitch green float loose and on the WS. The green should not be carried inside pale stitches, where it could show through the background.
- Count all 23 positions on every patterned row; a bobble replaces one sc rather than adding a stitch.
Puff Stitch Snowdrift Square
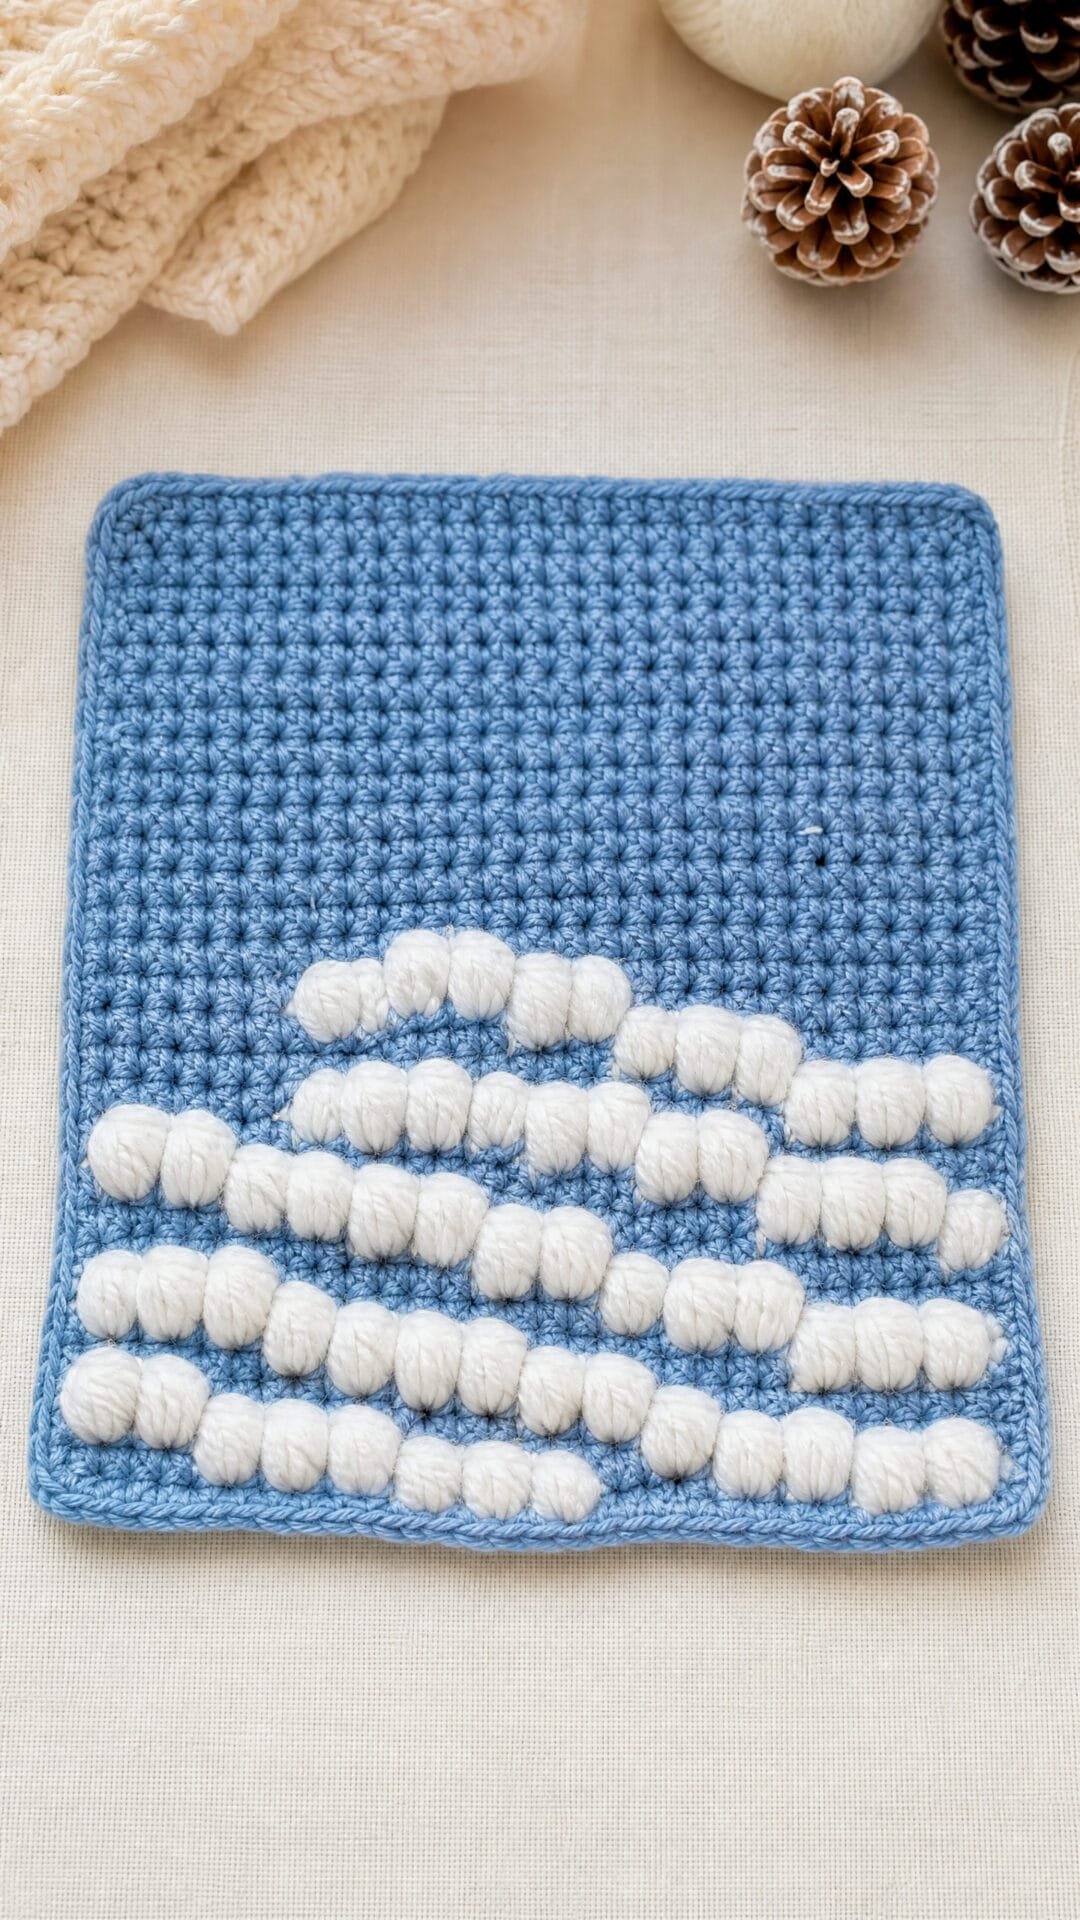
This Puff Stitch Snowdrift Square uses scattered white texture against a blue background to suggest snow settling in gentle, uneven bands. The puffs are separate rather than joined into solid lines, giving the design a softer look than a charted snow scene.
The textured area sits below a stretch of plain crochet, leaving space for the snowdrifts to stand out. Itâs a Christmas square that can sit alongside other festive motifs without relying on a picture worked into the fabric.
Puff stitches are easier to keep neat when the yarn is smooth and firmly plied. A lightly plied yarn may split as the hook passes through the gathered loops, making the puffs harder to close cleanly.
Puff Stitch Snowdrift Square
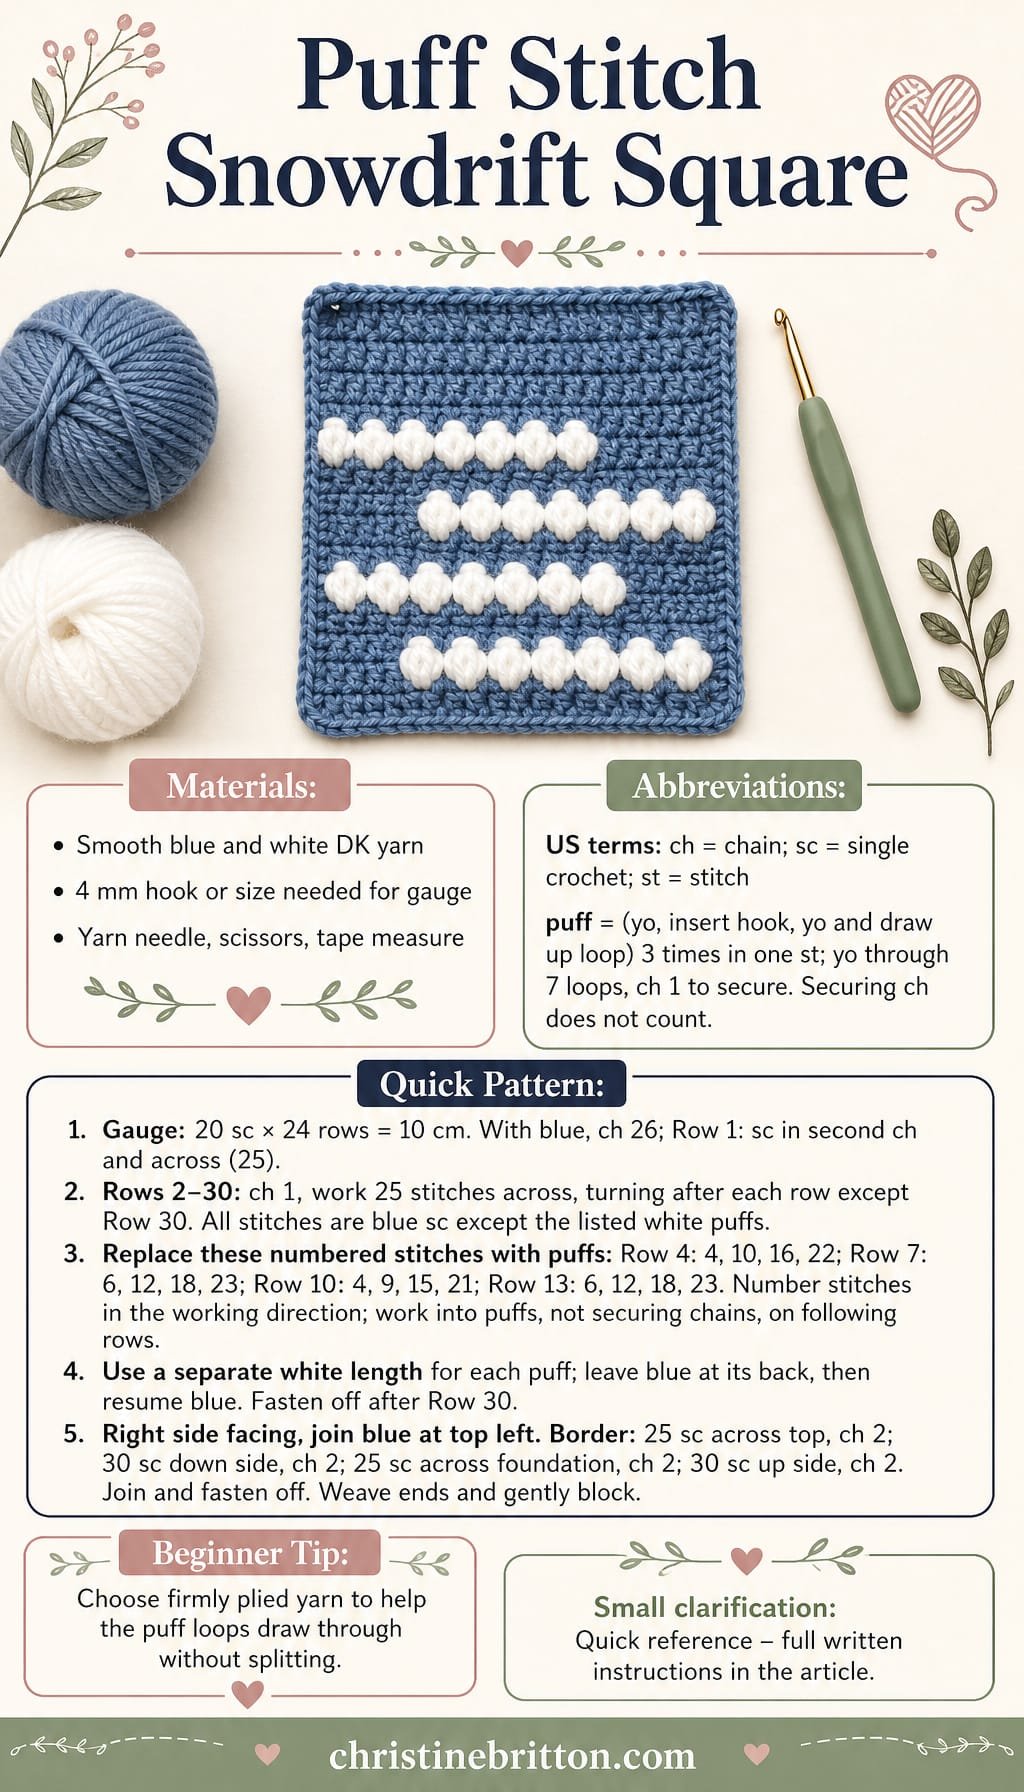
Quick-reference card. Follow the complete written instructions below.
Materials
- Blue DK yarn: Smooth, firmly plied yarn for the square and border
- White DK yarn: Smooth, firmly plied yarn; allow sixteen lengths of approximately 35â40 cm for the individual puffs
- Crochet hook: 4 mm, or the size needed for gauge
- Other: Yarn needle, scissors and tape measure
Size and Fit
One sample size: approximately 13.5 cm square after a gentle block. The 25-stitch, 30-row centre measures approximately 12.5 cm each way at the stated gauge; the single-round border adds approximately 1 cm overall. Puff rows are worked from the bottom upwards.
Gauge
20 sc and 24 rows = 10 cm in plain, turned sc rows after a gentle block. Check both stitch and row gauge if the finished dimensions matter.
Abbreviations
US crochet terms.
- ch = chain
- sc = single crochet
- st = stitch
- puff = With white yarn, work (yarn over, insert hook in the indicated stitch, yarn over and draw up a loop) three times in that stitch; yarn over and draw through all seven loops, then ch 1 to secure. The securing ch does not count as a stitch.
Pattern
- Colour and counting Work the square in turned rows with blue yarn. Number the stitches in every row 1â25 in the direction you are working. Each puff replaces one sc and counts as one stitch. For each puff, leave the blue yarn at the back of that stitch, use a separate white length to make the puff, then resume blue for the next sc. Leave white tails long enough to weave in securely; do not carry white between puffs.
- Foundation and Row 1 With blue, ch 26. Sc in the second ch from the hook and in each remaining ch. Turn. (25 sc)
- Rows 2â3 Ch 1, sc in each of the 25 stitches, turn. The turning ch does not count as a stitch. (25 sc per row)
- Row 4 â first snowdrift band Ch 1. Work across in blue sc, replacing stitches 4, 10, 16 and 22 with white puffs. Turn. (25 stitches)
- Rows 5â6 Ch 1, sc in each stitch with blue, turn. Work into each puff stitch, not its securing ch. (25 sc per row)
- Row 7 â second band Ch 1. Work across in blue sc, replacing stitches 6, 12, 18 and 23 with white puffs. Turn. (25 stitches)
- Rows 8â9 Ch 1, sc in each stitch with blue, turn. (25 sc per row)
- Row 10 â third band Ch 1. Work across in blue sc, replacing stitches 4, 9, 15 and 21 with white puffs. Turn. (25 stitches)
- Rows 11â12 Ch 1, sc in each stitch with blue, turn. (25 sc per row)
- Row 13 â fourth band Ch 1. Work across in blue sc, replacing stitches 6, 12, 18 and 23 with white puffs. Turn. (25 stitches)
- Rows 14â30 Ch 1, sc in each stitch with blue, turn after Rows 14â29 only. Fasten off after Row 30. (25 sc per row)
- Blue border With the right side facing, join blue at the top-left corner. Sc in each of the 25 stitches across the top; ch 2 for the corner. Work 30 sc evenly down the first side, one at each row end; ch 2. Work 25 sc across the foundation edge; ch 2. Work 30 sc up the other side, one at each row end; ch 2. Slip stitch to the first border sc and fasten off. The border has 110 sc and four ch-2 corners.
Finishing
- Weave in each white tail on the wrong side, taking care not to flatten the puffs or pull the blue fabric out of shape.
- Weave in the blue ends. Gently block the square to approximately 13.5 cm square, keeping the textured bands below the plain upper section.
Helpful Tips
- Smooth, firmly plied DK yarn lets the hook draw through all seven puff loops more consistently. Lightly plied yarn can split as the hook passes through the gathered loops, making puffs harder to work cleanly.
- Draw the three puff loops up to a similar height before closing them. If a puff pulls the square inward, loosen those loops rather than adding a stitch.
If youâd like to keep building your crochet skills, take a look at Christmas tapestry crochet patterns.
Popcorn Christmas Wreath Square
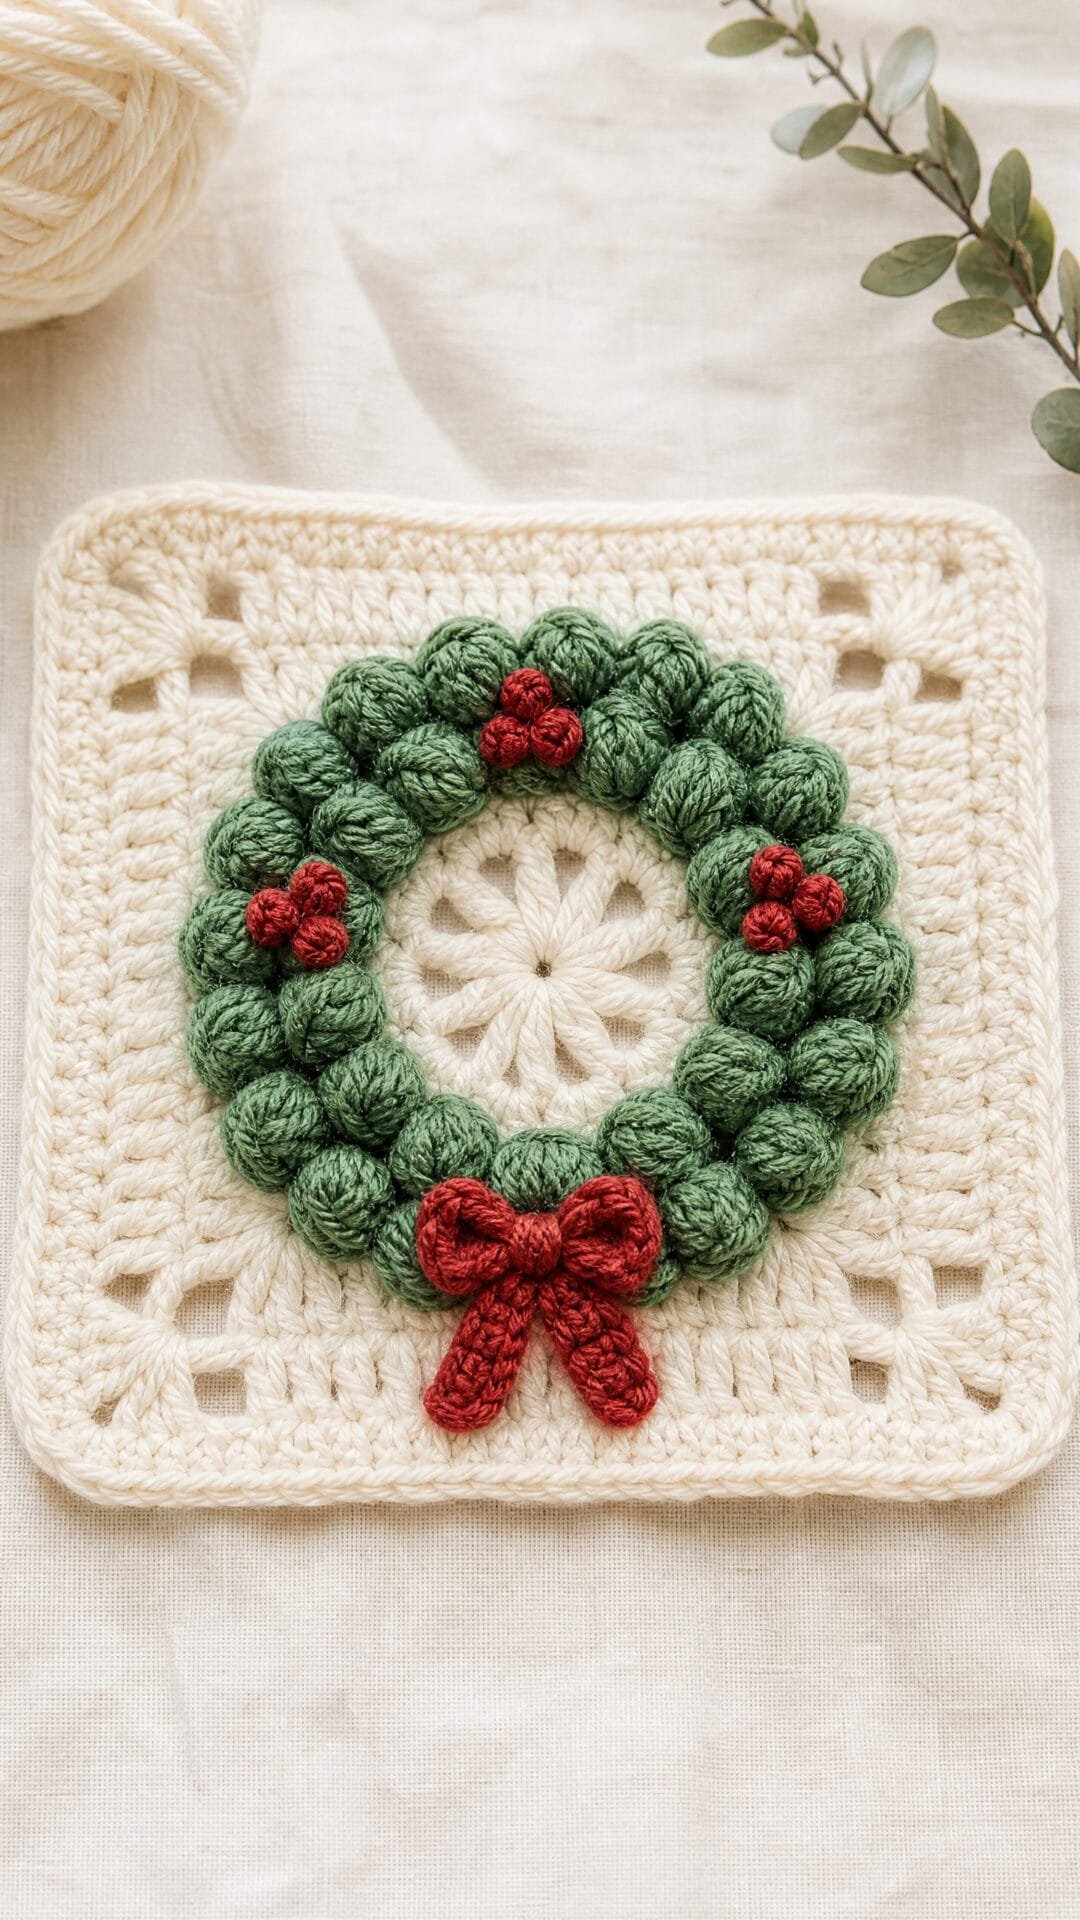
The raised green popcorns give this Christmas square the look of a little wreath against a cream centre. Small red accents sit on the wreath itself, adding colour without interrupting its circular shape.
The contrast between the textured ring and the quieter background is what makes the motif stand out. Four defined corners turn it into a square, while the plain cream area around the wreath gives it breathing room.
That clear outer edge also makes the square useful in a larger project: neighbouring squares can meet without crowding the raised decoration. It is a festive choice for anyone who enjoys a textured motif but wants the wreath to remain the focal point.
Popcorn Christmas Wreath Square
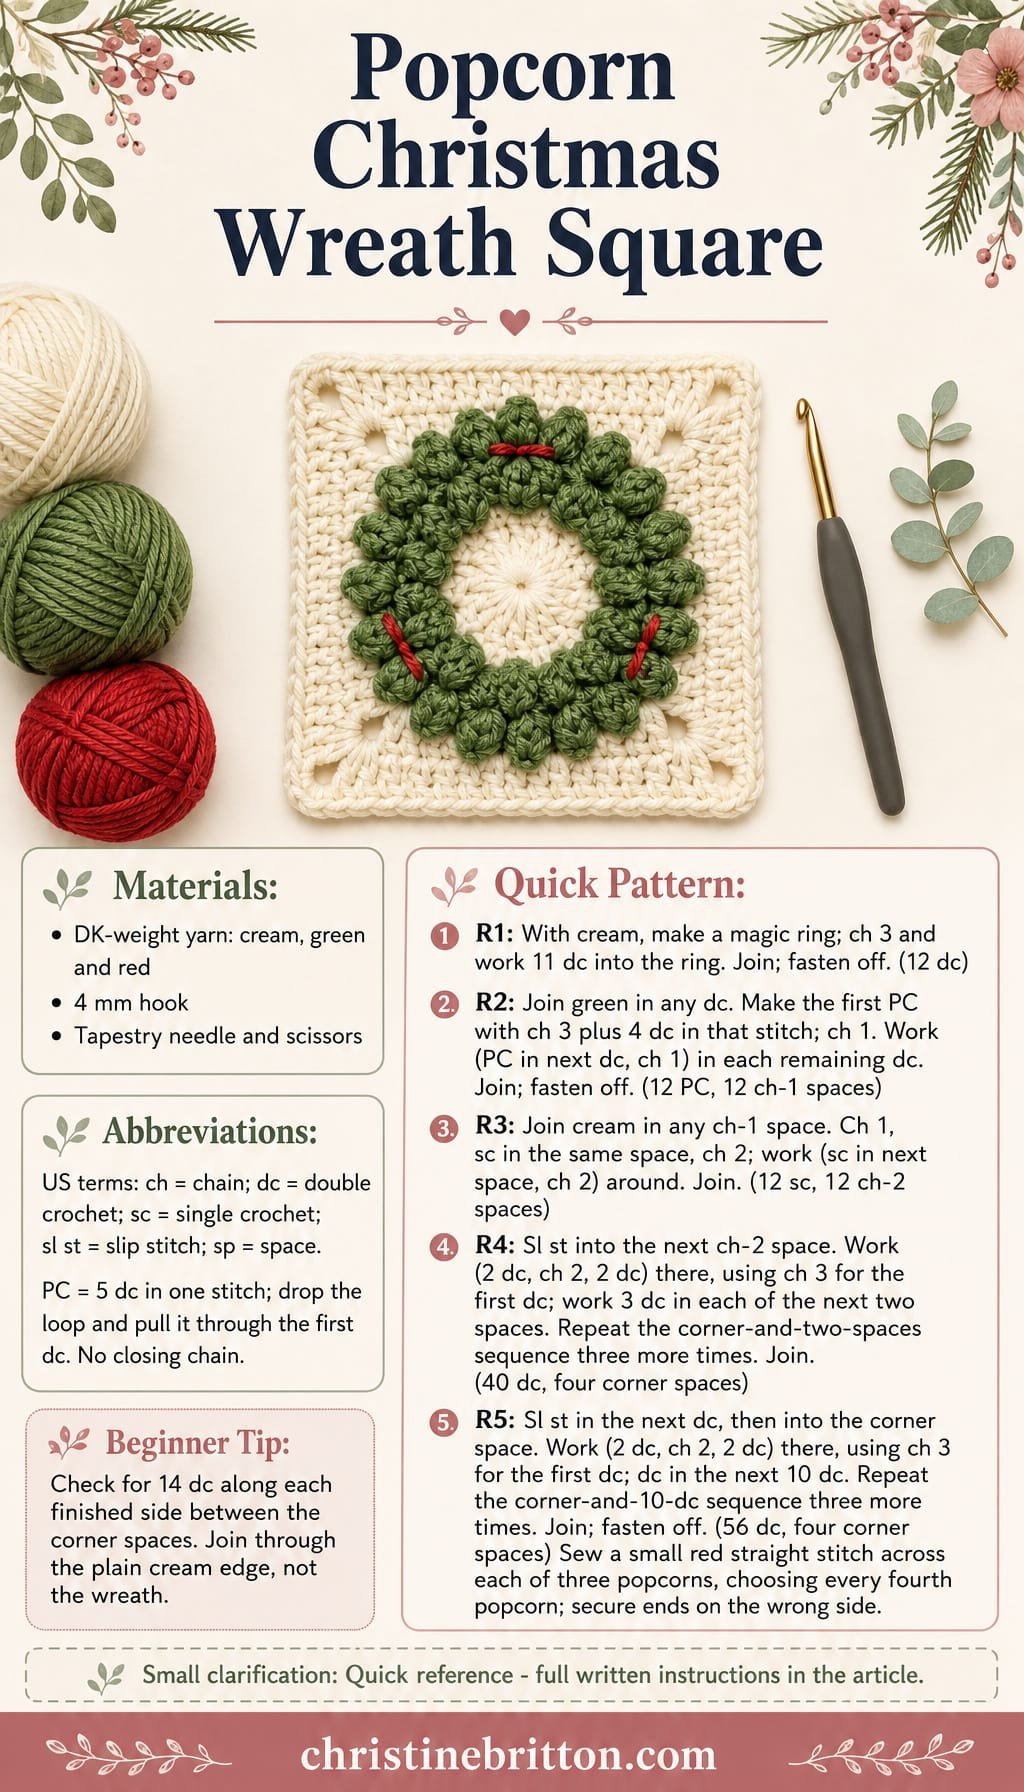
Quick-reference card. Follow the complete written instructions below.
Materials
- DK-weight yarn: Small amounts of cream, green and red.
- Crochet hook: 4 mm, or a size suitable for your yarn.
- Tapestry needle and scissors: For the red accents and weaving in ends.
Size and Fit
Makes one square. The final round has 14 dc along each side between corner spaces. Finished dimensions depend on yarn and tension; measure your first square if making a set.
Gauge
Not critical. Use the same yarn, hook and tension throughout a set so the squares match.
Abbreviations
US crochet terms.
- ch = Chain.
- dc = Double crochet.
- sc = Single crochet.
- sl st = Slip stitch.
- sp = Space.
- PC = Popcorn: work 5 dc in the indicated stitch. Lengthen and drop the working loop, insert the hook through the top of the first dc from front to back, then pull the dropped loop through. Do not add a closing chain.
Pattern
- Round 1 â cream centre With cream, make a magic ring. Ch 3 (counts as the first dc), work 11 dc into the ring and pull it closed. Join with a sl st to the top of the beginning ch-3. Fasten off. (12 dc)
- Round 2 â green wreath Join green with a sl st in any dc. Ch 3 (counts as the first dc of the first popcorn), work 4 more dc in the same stitch and close the popcorn by pulling the dropped loop through the top of the beginning ch-3. Ch 1. Work (PC in the next dc, ch 1) in each of the remaining 11 dc. Join with a sl st to the top of the first popcorn. Fasten off. (12 PC and 12 ch-1 spaces)
- Round 3 â space around the wreath Join cream with a sl st in any ch-1 space. Ch 1 (does not count as a stitch), sc in the same space, ch 2. Work (sc in the next ch-1 space, ch 2) around. Join with a sl st to the first sc. (12 sc and 12 ch-2 spaces)
- Round 4 â form the corners Sl st into the next ch-2 space. Ch 3 (counts as the first dc), dc in the same space, ch 2, then work 2 dc in the same space. Work 3 dc in each of the next two ch-2 spaces. Repeat [(2 dc, ch 2, 2 dc) in the next ch-2 space, then 3 dc in each of the next two ch-2 spaces] three times. Join with a sl st to the top of the beginning ch-3. (40 dc and four corner ch-2 spaces; 10 dc along each side between corner spaces)
- Round 5 â plain outer round Sl st in the next dc, then sl st into the corner ch-2 space. Ch 3 (counts as the first dc), dc in the same corner space, ch 2, then work 2 dc in the same space. Dc in each of the next 10 dc. Repeat [(2 dc, ch 2, 2 dc) in the next corner space, then dc in each of the next 10 dc] three times. Join with a sl st to the top of the beginning ch-3. Fasten off. (56 dc and four corner ch-2 spaces; 14 dc along each side between corner spaces)
- Red accents Thread a short length of red yarn onto a tapestry needle. Make one small straight stitch across the front of each of three green popcorns, choosing every fourth popcorn around the wreath. Keep the stitches on the popcorns rather than across the cream background. Secure the ends on the wrong side.
Finishing
- Weave in all ends on the wrong side without pulling the popcorn ring out of shape.
- Gently shape the four corners. If joining several squares, use the plain cream outer round as the joining edge.
Helpful Tips
- Count the 12 chain spaces before starting Round 3; missing one will throw off the four evenly spaced corners.
- Keep the red stitches small so they add colour without covering the raised green popcorns.
- Leave the cream rounds visible around the wreath when joining squares, rather than stitching through the popcorns.
Holly Appliqué Crochet Square

A solid cream background gives the holly motif a clean outline, while the separate green leaves and red berries add colour without changing the squareâs fabric. The leaves have a shaped profile rather than the look of a traditional granny-square cluster, making this a useful choice when you want a more pictorial Christmas motif.
Because the decorations sit on the surface, secure attachment matters if the square will be handled often or joined into a larger project. Anchoring the leaf edges and pointed tips helps stop them catching or curling upwards; close attachment around the berries helps them sit flat, too.
The plain border frames the motif without competing with it. This square works well as a festive accent among simpler squares, or as a repeated motif in a coordinated Christmas project.
Holly Appliqué Crochet Square

Quick-reference card. Follow the complete written instructions below.
Materials
- DK yarn: Small amounts of cream for the square, green for the leaves and red for the berries
- Crochet hook: 4 mm, or a size that gives the stated gauge
- Tapestry needle: For sewing on the motifs and weaving in ends
- Scissors: For cutting yarn
Size and Fit
One decorative square, approximately 11 cm across including the border when made to gauge. It may be used as a motif for a larger project.
Gauge
Aim for 21 sc and 24 rows over 10 cm in the cream fabric, measured after light blocking. The appliqués do not need a separate gauge.
Abbreviations
US crochet terms.
- ch = chain
- sc = single crochet
- hdc = half double crochet
- dc = double crochet
- tr = treble crochet; yarn over twice before inserting the hook
- sl st = slip stitch
- st(s) = stitch(es)
Pattern
- Cream square, row 1 Ch 22. Sc in the second ch from the hook and in each ch across. Turn. (21 sc)
- Cream square, rows 2â24 Ch 1, sc in each st across; turn after rows 2â23. After row 24, fasten off. (21 sc per row)
- Green holly leaves, make 2 Ch 10. Working along one side of the chain, sl st in the second ch from the hook, then work sc, hdc, dc, tr, tr, dc, hdc, sc in the next 8 chains. Ch 1 to turn around the end of the chain. Working back along the opposite side of the foundation chain, sc in the same end chain, then work hdc, dc, tr, tr, dc, hdc, sc, sl st in the next 8 chains. Fasten off, leaving a long tail for sewing. Each leaf has a narrow slip-stitch tip and a wider end.
- Red berries, make 3 Ch 2. Work 6 sc in the second ch from the hook. Sl st to the first sc to close the circle. Fasten off, leaving a tail for sewing. (6 sc per berry)
- Arrange and sew on the motifs Lay the two leaves diagonally near the centre of the square, with their wider ends close together and their narrow tips pointing outwards. Sew each leaf flat with its green tail, taking small stitches along both edges and through each tip. Arrange the three berries over the wider leaf ends. Sew around every berry edge with its red tail, keeping stitches within the red fabric where possible.
- Cream border Join cream yarn with a sl st in any corner st of the square. Work (sc, ch 1, sc) in that corner st. Working around the square, sc in each of the 19 non-corner sts along the next horizontal edge; work (sc, ch 1, sc) in its corner st. Sc in each of the 22 row ends between the corners along the side; work (sc, ch 1, sc) in the next corner st. Repeat the horizontal edge and side instructions once more, ending at the starting corner. Sl st to the first border sc and fasten off. (90 sc and 4 ch-1 corner spaces)
Finishing
- Weave in all ends on the back, taking care not to pull the appliqués out of shape.
- Lightly block the square to neaten its edges; let it dry flat.
Helpful Tips
- Sewing through both edges and the tip of each leaf helps stop it lifting if the square will be handled often.
- The 22 side stitches of the border go into the ends of rows 2â23. The first and last row ends meet the corner stitches and do not receive separate side stitches.
Mosaic Candy Cane Square

This Christmas square uses overlay mosaic crochet to give a candy cane a bold, blocky silhouette against a cream background. The hook curves across the top, while small breaks in the red stem suggest familiar candy-cane stripes. It would make a cheerful addition to a festive patchwork project or a set of seasonal decorations.
Overlay mosaic crochet builds its design by bringing selected stitches forward over the spaces in an earlier row. That gives the cane its crisp edges while the intervening colour sits visually behind it. The yarn is not stranded across the back: each colour is cut at the end of its row.
Working every row from the right side keeps the chart direction consistent, but it also leaves ends along the sides. A neat border frames the motif and gives those edges a more settled appearance.
Mosaic Candy Cane Square

Quick-reference card. Follow the complete written instructions below.
Materials
- Yarn: Small amounts of smooth, similar-weight cream and red yarn; DK cotton or cotton-blend yarn will show the stitches clearly.
- Hook: A hook suitable for your yarn; 4 mm is a starting point for DK yarn.
- Other: Scissors, yarn needle and blocking pins.
Size and Fit
One square, approximately 12 cm across if the unbordered 17-column by 21-row panel measures about 10 cm square. The finished size depends on yarn and tension. Block gently to square; this pattern has no size adjustment.
Gauge
Gauge guide, not a tested measurement: aim for 17 chart columns and 21 rows to measure about 10 cm by 10 cm before the border. Check the panel before adding the border if its final size matters.
Abbreviations
US crochet terms.
- ch = chain
- sc = single crochet
- dc = double crochet
- sl st = slip stitch
- BLO = back loop only
- FL = front loop
- RS = right side
Pattern
- Read the chart The chart has 17 columns, numbered 1â17 in the direction you work. Every row begins at column 1 on the RS; do not turn. The listed columns are red candy-cane cells. Every unlisted column is cream background. Rows 2, 4, 6, 8, 10, 12, 14, 16, 18 and 20 are red-yarn rows. The following cream-yarn row repeats the same red-cell positions as the red row immediately before it, leaving those red stitches visible through chain spaces. Row 1 is the cream foundation; row 21 repeats the positions from row 20.
- Candy-cane chart Red cells by row: 2: 11â13; 4: 11â13; 6: none; 8: 11â13; 10: none; 12: 11â13; 14: 5â7 and 11â13; 16: 5â7 and 11â14; 18: 6â14; 20: 8â12. All other cells are background. The breaks at rows 6 and 10 make the stem look striped; the widening upper rows and short left-hand drop form the hook.
- Foundation, row 1 With cream, ch 18. Sc in the second ch from the hook and in each remaining ch: 17 sc. This is an RS row. Fasten off; keep the RS facing you and return to the row-1 starting edge for row 2.
- Joining each new row Work every subsequent row from column 1 towards column 17, with the RS facing. At the column-1 edge, join the specified yarn with a sl st into the side of the preceding row; this anchoring sl st is not a chart column and will be hidden by the border. Make the first chart stitch as directed below. At the end of each row, fasten off, leave a tail long enough to secure, and return to the column-1 edge. Do not carry the other colour across the row or turn the work.
- Red rows 2â20 On each even-numbered row, use red. For every listed red cell, work 1 sc in the BLO of the stitch directly below if that cell was cream background on the preceding row. If the preceding row has a ch-1 space at that cell, instead work 1 dc into the exposed FL of the red stitch two rows below, in the same column; the dc passes in front of the ch-1 space. For each unlisted cell, ch 1 and skip the stitch or ch-1 space directly below. Each sc, dc or ch-1 space occupies one chart column. Follow the red-cell positions for that row.
- Cream rows 3â21 On each odd-numbered row after row 1, use cream. At every red-cell position from the preceding even row, ch 1 and skip the red stitch below so its colour remains visible. At each background position, work 1 dc into the exposed FL of the cream stitch two rows below, passing in front of the red ch-1 space. If that older cream row has a ch-1 space in the same column instead, work 1 sc in the BLO of the red ch-1 space directly below to establish a new cream stitch. Row 21 follows the red-cell positions of row 20. Fasten off after row 21.
- Border round 1 With the RS facing, join cream at the top-left corner of row 21. Work 3 sc in that corner stitch, sc in each of the 15 top-edge stitches or spaces between corners, and 3 sc in the top-right corner stitch. Work 1 sc into each of the 19 row ends for rows 20â2 along the right side. Work 3 sc into the bottom-right corner foundation stitch, 1 sc into each of the 15 foundation stitches between corners, and 3 sc into the bottom-left corner foundation stitch. Work 1 sc into each of the 19 row ends for rows 2â20 along the left side. Join with a sl st to the first sc: 80 sc. Enclose the secured row-end tails under the side-edge stitches where practical.
- Border round 2 Ch 1, then sc in every stitch around, working 3 sc in the centre stitch of each corner group from round 1. Join with a sl st to the first sc: 88 sc. Fasten off.
Finishing
- Secure each row-end tail on the wrong side before trimming it. The cream border covers the row joins and helps enclose the tails without leaving them loose at the edge.
- Weave in the border ends. Dampen and block the piece gently to an even square, without stretching the front-loop double crochets.
Helpful Tips
- A dc placed in the older stitchâs FL covers the chain space in front of it. The yarn from the intervening row stays behind that dc rather than being carried through the working stitches.
- Keep each ch-1 space loose enough to receive a BLO sc on a later row. Count chain spaces as columns, not as increases.
- Small glimpses of red may remain where a red section ends; the cream rows and border make cream the dominant background.
- If the two side edges draw in, loosen the joining sl sts and the first stitch of each row rather than adding chart columns.
Spike Stitch Icicle Square

This winter-blue square gives a simple strip of white yarn the look of icicles. The white stitches reach into earlier blue rows at different depths, so their points hang unevenly beneath the band near the top.
The effect adds texture without changing the squareâs outline, making it a useful choice if you want a festive motif that still sits neatly beside other squares. It could become part of a seasonal blanket, a cushion front or a small wall hanging.
The contrast between blue and white makes the icicles easy to see. A firm fabric helps the points stand out while keeping the background pleasantly flat.
Spike Stitch Icicle Square
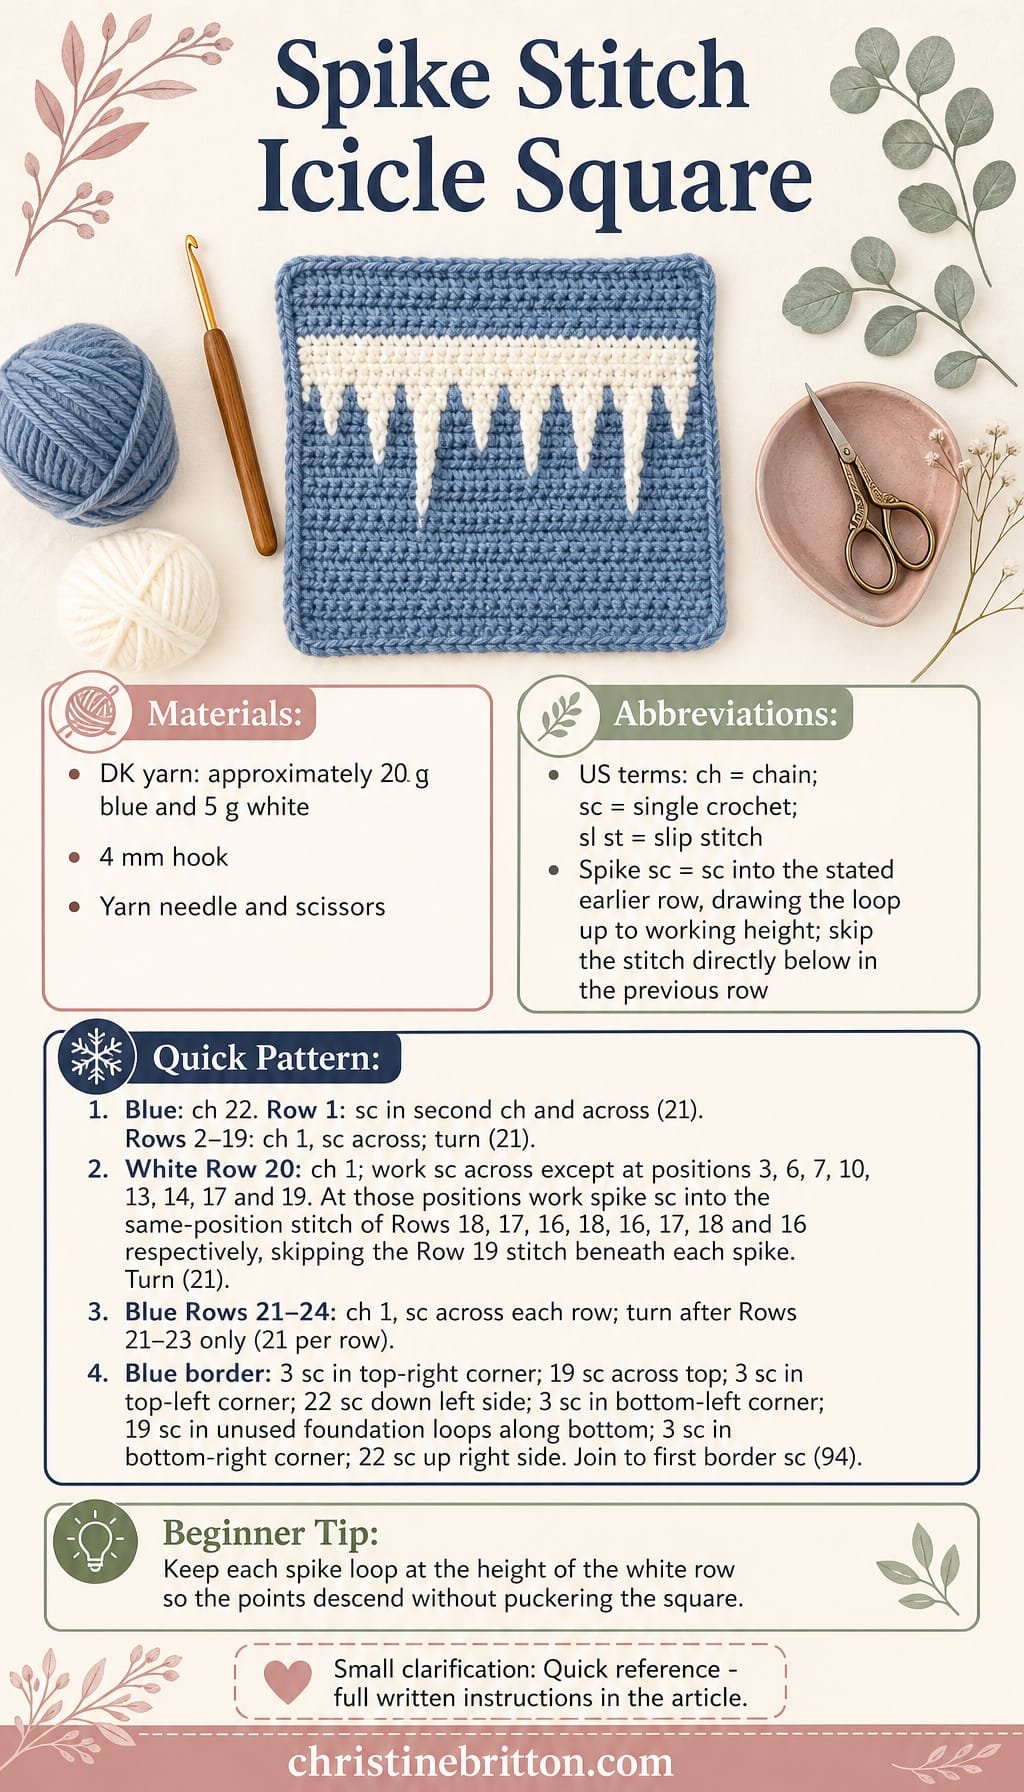
Quick-reference card. Follow the complete written instructions below.
Materials
- DK yarn: Approximately 20 g winter blue and 5 g white
- Crochet hook: 4 mm, or a size that gives you a firm fabric
- Notions: Yarn needle and scissors
Size and Fit
One square, approximately 15 cm across including the border when worked to the suggested gauge. The exact size may vary with your yarn and tension.
Gauge
Approximately 16 single crochet stitches and 18 rows per 10 cm in the unbordered blue fabric. Gauge is a guide; keeping the fabric firm and the sides square matters most for this project.
Abbreviations
US crochet terms.
- ch = chain
- sc = single crochet
- sl st = slip stitch
- st = stitch
- spike sc = Insert the hook into the specified stitch of an earlier row, draw up a loop to the height of the working row, yarn over and draw through both loops. Skip the stitch directly beneath it in the previous row.
Pattern
- Foundation and Rows 1â19 With blue, ch 22. Row 1: Sc in the second ch from the hook and in each remaining ch; turn. (21 sc.) Rows 2â19: Ch 1 (does not count as a stitch), sc in each st across; turn. (21 sc per row.) Keep the edges straight by working into both the first and last stitch of every row.
- Row 20: White icicle band Change to white at the end of Row 19. Ch 1 and work across Row 20, counting stitch positions from 1 to 21. Work a regular sc at every position except these eight: at positions 3, 6, 7, 10, 13, 14, 17 and 19, work a spike sc into the stitch at the same position of Row 18, 17, 16, 18, 16, 17, 18 and 16 respectively. For each spike, skip its corresponding Row 19 stitch; do not also work into it. Turn. (21 stitches.) The longer spikes form the lower icicle points.
- Rows 21â24 Change back to blue at the end of Row 20. Ch 1, sc in each stitch across; turn. Repeat for Rows 22â24. Do not turn after Row 24. (21 sc per row.)
- Blue border Continuing with blue, work 3 sc in the top-right corner stitch (the last stitch of Row 24). Sc in each of the next 19 stitches across the top, then work 3 sc in the top-left corner stitch. Work 1 sc into each row end down the left side for Rows 23â2 (22 sc). Work 3 sc in the bottom-left corner stitch of Row 1. Along the bottom, work 1 sc into an unused foundation-chain loop beneath each of the 19 middle Row 1 stitches. Work 3 sc in the bottom-right corner stitch of Row 1. Work 1 sc into each row end up the right side for Rows 2â23 (22 sc). Sl st to the first border sc. (94 border stitches.)
Finishing
- Fasten off and weave in all ends on the wrong side.
- Lightly block the square, easing the edges straight and the corners into shape. Avoid stretching the spike stitches.
Helpful Tips
- Before starting the white row, mark the stitch positions that will become spikes. Count across the row after making them: each spike replaces one ordinary stitch.
- Draw each spike loop up to the height of Row 20 without pulling the earlier row upwards. This keeps the white band level while the icicle points vary in length.
- When changing colour, complete the final yarn-over of the previous rowâs last stitch with the new colour.
For another related project collection, browse free mosaic crochet Christmas patterns.
Mitred Present-Wrap Granny Square

This Christmas granny square turns the familiar granny texture on the diagonal. It grows from a corner rather than the centre, giving the finished square the look of folded gift wrap without adding a separate bow or appliqué.
Broad, contrasting bands make the diagonal construction the focus. The small gaps between the granny clusters keep the fabric recognisably crocheted, while the plain border gives the angled design a tidy frame.
Use it as an accent among simpler squares in a festive blanket or cushion, or repeat it for a coordinated set of Christmas decorations. Keeping the bands in the same order across a set will make the squares look intentional when placed side by side.
Mitred Present-Wrap Granny Square

Quick-reference card. Follow the complete written instructions below.
Materials
- DK yarn: Small amounts of cream, red and green; use yarns of the same weight.
- Crochet hook: A size suited to your yarn; 4 mm is a starting point for DK yarn.
- Notions: Four removable stitch markers, scissors and a yarn needle.
Size and Fit
One square, 8 tiles along each side before the border. Finished measurements depend on yarn and tension. For a different size, increase to the desired number of tiles in Row 8’s place, then work one fewer decrease row than increase rows; each side will have that chosen number of tiles.
Gauge
Gauge is not critical. Keep the three-double-crochet tiles consistent, and measure a completed side before making matching squares. Use the same yarn, hook and tile count for every square you intend to join.
Abbreviations
US crochet terms.
- ch = chain
- dc = double crochet
- sc = single crochet
- sl st = slip stitch
- sp = space
Pattern
- Construction and colours Each tile is a group of 3 dc beside a ch-3 sp. Rows 1â8 grow by one tile per row; Rows 9â15 shrink by one tile per row. Work Rows 1â3 in cream, 4â6 in red, 7â9 in green, 10â12 in cream and 13â15 in red. Change colour by drawing the new colour through on the final pull-through of the preceding row’s last stitch. Turn after every row except Row 15.
- Row 1 â 1 tile With cream, ch 6. Dc in the fourth, fifth and sixth chains from the hook. The three skipped chains form this tile’s ch-3 sp. Turn.
- Row 2 â 2 tiles Ch 6; dc in the fourth, fifth and sixth chains from the hook to make the new edge tile. Sl st into the ch-3 sp of the Row 1 tile; ch 3 and work 3 dc into that same sp. Turn.
- Rows 3â8 â increase For each row, ch 6 and work dc in the fourth, fifth and sixth chains from the hook. Then, working across every tile of the preceding row in turn, sl st into its ch-3 sp, ch 3 and work 3 dc into that same sp. Turn. Each row has one more tile than the last; Row 8 has 8 tiles. Mark the two outer ends of Row 8 as corners.
- Rows 9â15 â decrease For each row, turn if not already turned. Sl st into each of the 3 dc of the tile nearest the hook, then sl st into that tile’s ch-3 sp. Ch 3 and work 3 dc into the same sp: this is the first tile of the new row. For each following tile of the preceding row except its last, sl st into its ch-3 sp, ch 3 and work 3 dc into that same sp. Sl st into the final preceding-row ch-3 sp without making a tile there. Rows 9â15 contain 7, 6, 5, 4, 3, 2 and 1 tile respectively. Fasten off after Row 15.
- Balancing border Mark the starting corner and the finishing corner; together with the two marked Row 8 corners, these are the square’s four corners. Join cream yarn at any marked corner. Work 3 sc at that corner, then 2 sc evenly along each of the 8 tile-length edge sections up to the next corner. Repeat the corner and edge treatment around all four sides; join to the first sc. This gives 76 sc in total: 16 edge sc per side plus 3 sc at each corner. If an edge ruffles, spread its sc more evenly rather than adding stitches.
Finishing
- Fasten off the border yarn and weave in all ends securely on the wrong side.
- Gently block the square so its four sides are even and its corners sit square; let it dry before joining it to other squares.
Helpful Tips
- Count tiles, not individual dc stitches, when checking diagonal rows.
- The last sl st of a decrease row anchors its edge; do not work 3 dc into that final space.
- If adjusting the tile count, plan colour changes by row number so matching squares have the same bands.
Moss Stitch Christmas Tartan Square

This tartan-inspired Christmas square combines broad colour bands with fine crossing lines for a check that feels festive without looking busy. The moss-stitch texture gives the fabric a softly woven appearance, making it a lovely choice for a display of Christmas crochet squares.
The narrow vertical lines sit on the surface of the fabric rather than being worked into the base. Because moss-stitch spaces are staggered, the lines have a gentle side-to-side movement rather than the rigid look of printed tartan.
Restrained colour placement helps the check remain clear at a small scale. It works well as a standalone decoration or alongside simpler squares, where its orderly pattern can add variety without overwhelming the arrangement.
Moss Stitch Christmas Tartan Square

Quick-reference card. Follow the complete written instructions below.
Materials
- DK yarn: Small amounts of green, red and cream.
- Crochet hook: 4 mm, or a size that gives you a relaxed fabric.
- Notions: Yarn needle, scissors and ruler.
Size and Fit
Make one square to your chosen size. The sample-width instructions begin with 26 chains; work rows until the unbordered height matches the unbordered width. The number of rows will depend on your yarn and tension. Make a matching set with the same yarn, hook and row count.
Gauge
No fixed gauge is required. Measure after several rows and again near the end; stop when the base is approximately square. Keep surface slip stitches loose enough that they do not shorten the fabric.
Abbreviations
US crochet terms.
- ch = chain
- ch-1 sp = chain-one space
- sc = single crochet
- sl st = slip stitch
- RS = right side
Pattern
- Foundation With green, ch 26. The turning chain is not counted as a stitch.
- Row 1 Sc in the second ch from the hook. *Ch 1, skip the next ch, sc in the next ch; repeat from * across. You have 13 sc and 12 ch-1 spaces. Turn.
- Row 2 Ch 2, sc in the first ch-1 sp. *Ch 1, sc in the next ch-1 sp; repeat from * across the remaining spaces. Ch 1, sc in the last sc. You have 13 sc and 12 ch-1 spaces. Turn.
- Remaining base rows Repeat Row 2. Work Rows 1â4 in green, Row 5 in cream and Rows 6â9 in red. Continue that nine-row colour sequenceâfour green rows, one cream row, four red rowsâuntil the base height approximately matches its width. Change colour at the end of the preceding row, cutting and fastening off the old colour. Finish at the end of any row; do not add extra rows merely to complete a colour band. Fasten off.
- Vertical cream lines Lay the base RS up with Row 1 at the bottom. On every row, count its 12 ch-1 spaces from the same left-hand edge as you view the square. Make one line through the third space of each row and another through the tenth space of each row. For each line, hold cream yarn behind the fabric. At the target space in Row 1, insert the hook from front to back, catch the yarn and pull a loop to the front. Insert the hook into the target space in Row 2, pull up a loop from behind and draw it through the loop on the hook to make a surface sl st. Continue upwards, making one relaxed surface sl st in the target space of each row. Fasten off at the top and repeat for the second line. The moss-stitch spaces are staggered, so each line will shift slightly from side to side.
- Plain border With the RS facing, join green at any corner. Ch 1. Work 3 sc at each corner of the base. Between corners, work 1 sc in every sc and ch-1 sp along the top and bottom, excluding the corner sc already used; along each side, work 1 sc into the end of every row except the two corner rows. Join with a sl st to the first border sc and fasten off. Keep the border relaxed so it does not pull in the edges.
Finishing
- Weave in all ends on the wrong side without drawing the fabric tight.
- Gently shape the square and let it dry flat, following the yarn labelâs care instructions.
Helpful Tips
- Use cream sparingly: one row per nine-row colour sequence and just two vertical lines keep the check clear.
- Count each vertical lineâs spaces from the same visual edge on every row, even though the work was turned while crocheting.
- If the border pulls in, loosen your tension or use a slightly larger hook for that round.
Surface-Stitch Star Garland Square

This Christmas square uses surface crochet to draw a cream garland and three outlined stars across a solid dark-green background. The decoration sits on the fabric rather than being made as separate pieces, giving the square a clean, graphic look.
The garland arches gently towards the centre, with the stars rising above it. A temporary visual guide helps you judge the route before stitching, so the stars remain distinct from one another and their points are easy to recognise.
Surface stitches look best when they rest lightly on the background rather than pulling it in. The finished design would sit well among plainer squares in a festive cushion or throw.
Surface-Stitch Star Garland Square

Quick-reference card. Follow the complete written instructions below.
Materials
- DK yarn: Approximately 45 g dark green for the square and border, plus 10 g cream for the surface stitching
- Crochet hook: 4 mm, or a size that gives the stated gauge
- Notions: Removable stitch markers or short lengths of scrap yarn, tapestry needle and scissors
Size and Fit
One sample square: approximately 25 cm across after the border, depending on tension. The 37-stitch by 41-row centre is designed to be approximately square at the stated gauge.
Gauge
Approximately 16 sc and 18 rows to 10 cm over the unbordered square. Gauge is a guide, not a measured test result; check that your centre lies flat and is close to square before adding the surface design.
Abbreviations
US crochet terms.
- ch = chain
- sc = single crochet
- sl st = slip stitch
- st = stitch
Pattern
- Make the green centre With dark green, ch 38. Row 1: Sc in the second ch from the hook and in each ch across; turn. You have 37 sc. Rows 2â41: Ch 1 (this does not count as a stitch), sc in each of the 37 sts; turn after rows 2â40 only. Fasten off after row 41. Lay the square with row 1 at the bottom and row 41 at the top, with its right side facing you.
- Map the design Number the stitches 1â37 from left to right as the square faces you, and the rows 1â41 from bottom to top. In every coordinate (column, row), place the surface stitch through the fabric at that stitch position. Mark the garland ends (2,13) and (36,13), its low point (19,20), and the three star tips (8,15), (19,20) and (30,15). Before stitching, trace the routes below with removable markers or scrap yarn. Check that each star outline is distinguishable from its neighbours.
- Surface-stitch the garland Hold cream yarn behind the square and bring up a loop at (2,13). With the yarn remaining behind the fabric, insert the hook from front to back at each successive position below, draw up a loop and pull it through the loop on the hook to make a loose surface sl st. Work the first position once, then follow: (3,13), (4,14), (5,14), (6,14), (7,15), (8,15), (9,16), (10,16), (11,17), (12,17), (13,18), (14,18), (15,19), (16,19), (17,20), (18,20), (19,20), (20,20), (21,20), (22,19), (23,19), (24,18), (25,18), (26,17), (27,17), (28,16), (29,16), (30,15), (31,15), (32,14), (33,14), (34,14), (35,13), (36,13). Cut the yarn, pull the end through the final loop and take it to the back.
- Surface-stitch three stars Work each star separately in cream. Its starting coordinate is also its top tip on the garland: (8,15), (19,20), then (30,15). For each star, add the following (column, row) offsets to its starting coordinate. Bring up a fresh loop at offset (0,0), then make one loose surface sl st at each subsequent position, following this route: (0,1), (1,2), (1,3), (2,4), (3,4), (4,4), (5,4), (4,5), (3,6), (3,7), (4,8), (4,9), (4,10), (3,9), (2,9), (1,8), (0,8), (-1,8), (-2,9), (-3,9), (-4,10), (-4,9), (-4,8), (-3,7), (-3,6), (-4,5), (-5,4), (-4,4), (-3,4), (-2,4), (-1,3), (-1,2), (0,1), (0,0). The final stitch closes the outline at the tip. Cut and take the yarn to the back after each star; do not carry it across the front to the next outline. These offsets place the stars within columns 3â13, 14â24 and 25â35 respectively.
- Add the plain border With the right side facing, join dark green at the top-left corner stitch. Ch 1. Work 3 sc in that corner stitch, 1 sc in each of the next 35 top-edge stitches and 3 sc in the top-right corner stitch. Work 1 sc into each of the 39 side row ends between the corner rows, then 3 sc in the bottom-right corner stitch. Work 1 sc into each of the 35 intermediate foundation-chain positions along the bottom, then 3 sc in the bottom-left corner position. Work 1 sc into each of the remaining 39 side row ends and join with a sl st to the first border sc. Fasten off. Border count: 160 sc.
Finishing
- Weave in all cream ends on the back, keeping them out of sight on the front. Weave in the green ends.
- Gently block the square flat if needed, checking that the border does not pull in and the star outlines remain open.
Helpful Tips
- Make surface slip stitches loosely: tight stitches can pucker the green fabric or close up the points of a star.
- Use temporary marks at the outer points of each star before beginning its outline: offsets (5,4), (4,10), (-4,10) and (-5,4), plus its top tip (0,0). Remove the marks as you reach them.
- At a shared star tip, work into the same fabric position as the garland stitch without pulling either cream loop tight.
Poinsettia Flower Granny Square

This poinsettia square brings a floral centre to a familiar granny-style shape. The layered petals stand proud of the background, while the square edge gives the motif a tidy outline for a Christmas project.
The raised flower makes this square particularly appealing on a decorative cushion front, where its texture can be seen and appreciated. It is less practical for a heavily used blanket: exposed petals may snag on clothing or be flattened by frequent handling and washing.
The contrast between the flower and its simple border lets the poinsettia remain the focus. Paired with plainer squares, it could serve as an accent without making the whole project feel too busy.
Poinsettia Flower Granny Square
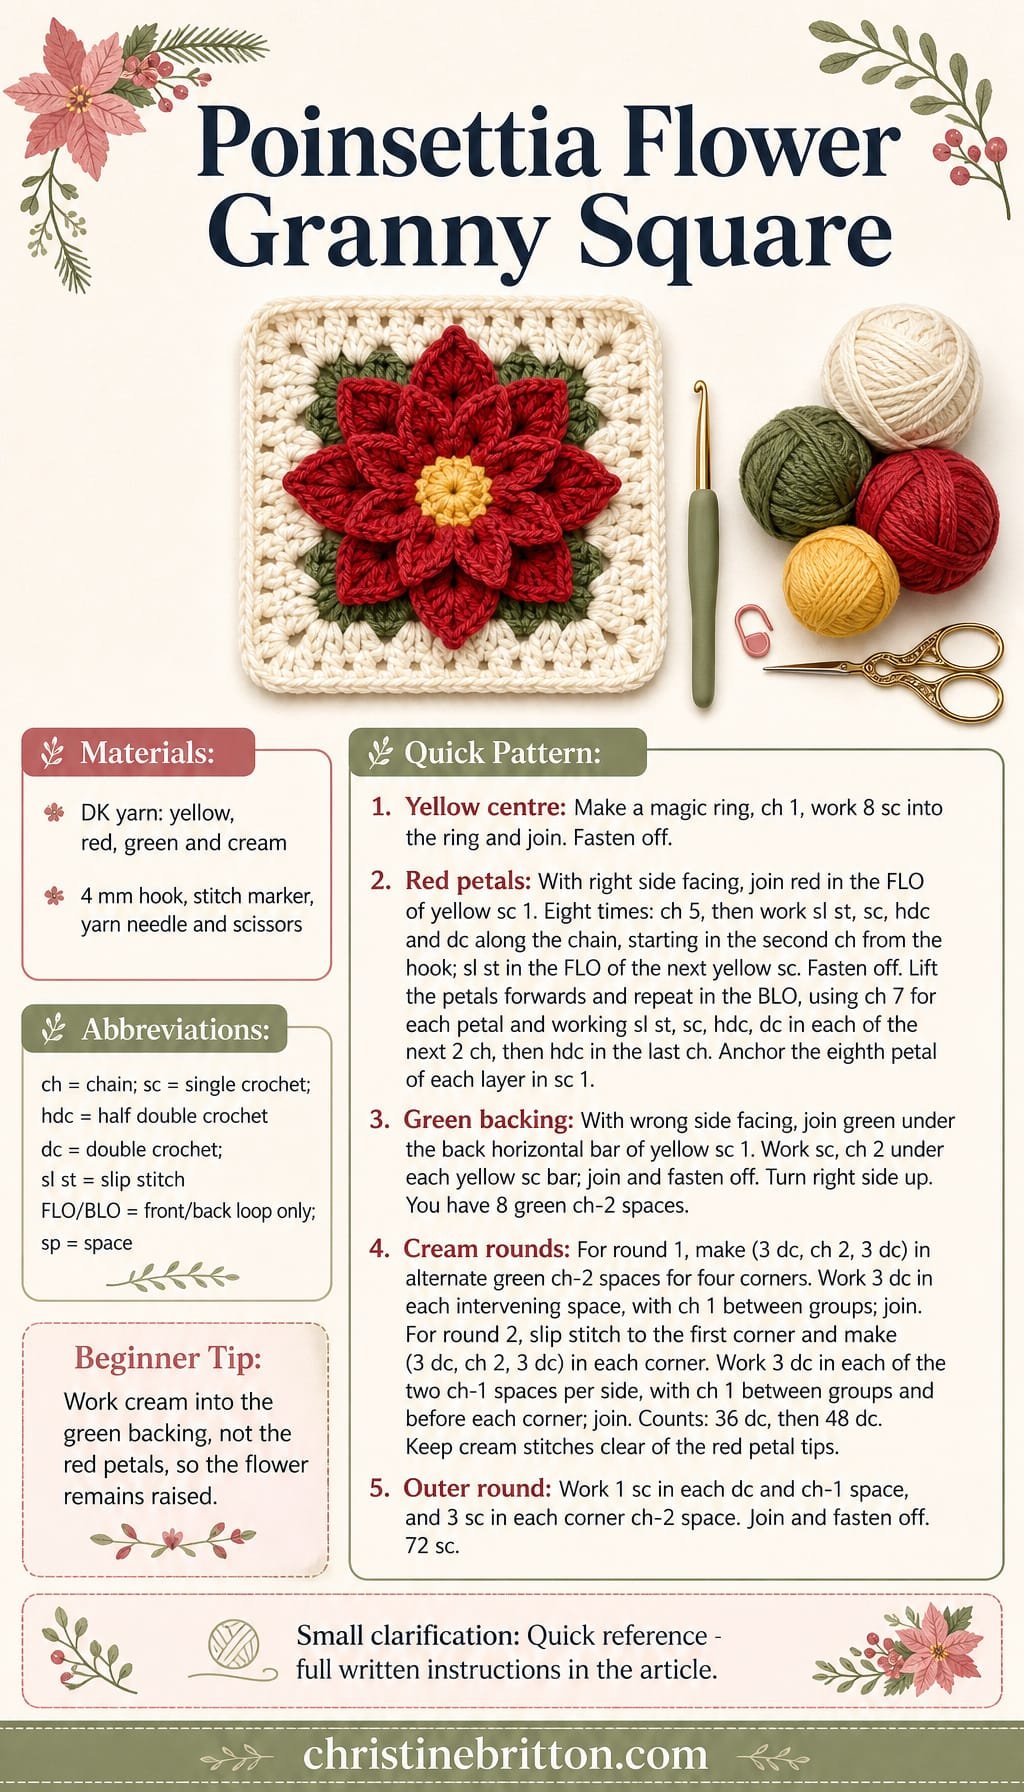
Quick-reference card. Follow the complete written instructions below.
Materials
- DK yarn: Small amounts of yellow, red, green and cream in the same yarn weight
- Crochet hook: 4 mm, or a size that gives you a fabric you like
- Notions: Stitch marker, yarn needle and scissors
Size and Fit
Makes one square. Finished dimensions depend on your yarn and tension. For matching squares, use the same yarn, hook and number of rounds throughout, then block each square to the same measurements without stretching the flower.
Gauge
Gauge is not critical for one motif. Check that the cream edge lies flat; change hook size if it consistently cups or ripples.
Abbreviations
US crochet terms.
- ch = chain
- sc = single crochet
- hdc = half double crochet
- dc = double crochet
- sl st = slip stitch
- FLO = front loop only
- BLO = back loop only
- sp = space
Pattern
- Yellow centre With yellow, make a magic ring. Ch 1, work 8 sc into the ring and pull it closed. Sl st in the first sc to join. Fasten off. Number the sc 1â8 in working order if you need help locating the petal anchors.
- First red petal layer With the right side facing, join red with a sl st in the FLO of yellow sc 1. Repeat 8 times: ch 5, sl st in the second ch from the hook, sc in the next ch, hdc in the next ch, dc in the last ch, then sl st in the FLO of the next yellow sc. On the eighth repeat, the anchor is sc 1 again. Fasten off. Each shaped chain forms one petal; do not work along its opposite edge.
- Second red petal layer Still with the right side facing, lift the first petals forwards. Join red with a sl st in the BLO of yellow sc 1. Repeat 8 times: ch 7, sl st in the second ch from the hook, sc in the next ch, hdc in the next ch, dc in each of the next 2 ch, hdc in the last ch, then sl st in the BLO of the next yellow sc. On the eighth repeat, anchor in sc 1 again. Fasten off. Keep these eight longer petals behind the first layer.
- Green backing round Turn the flower so its wrong side faces you. On the back of each yellow sc, locate the horizontal bar just below its top loops. Join green in the bar of sc 1. Work 1 sc under that bar, ch 2; repeat for the bars of sc 2â8. Sl st in the first green sc to join and fasten off. You have 8 green sc and 8 ch-2 spaces. Turn the flower right side up again.
- Cream squaring round Number the green ch-2 spaces 1â8 around the flower. Spaces 1, 3, 5 and 7 will be corners. Join cream in space 1; ch 3 (counts as the first dc), then work 2 dc, ch 2, 3 dc in that space. *Ch 1, work 3 dc in the next space, ch 1, then work (3 dc, ch 2, 3 dc) in the next space. Repeat from * twice more. Ch 1, work 3 dc in space 8, ch 1 and sl st in the top of the beginning ch 3. Keep all cream stitches in the green spaces, leaving the red petal tips free.
- Second cream granny round Sl st across the next 2 dc and into the first corner ch-2 space. Ch 3 (counts as the first dc), then work 2 dc, ch 2, 3 dc in that corner. *Ch 1, work 3 dc in the next ch-1 space, ch 1, work 3 dc in the next ch-1 space, ch 1, then work (3 dc, ch 2, 3 dc) in the next corner. Repeat from * twice more. Ch 1, work 3 dc in the next ch-1 space, ch 1, work 3 dc in the last ch-1 space, ch 1 and sl st in the top of the beginning ch 3.
- Even outer round Ch 1. Work 1 sc in each dc and 1 sc in each ch-1 space around; work 3 sc in each corner ch-2 space. Sl st in the first sc to join. Fasten off.
Finishing
- Weave in ends on the back without stitching the petals flat.
- Lightly block the cream square edge to shape, keeping pressure off the raised flower.
Helpful Tips
- The yellow centreâs back horizontal bars provide green anchors without using the red petal tips.
- If making a cushion front, place the raised flower where it will not be pressed against a seam.
- When joining motifs, sew or crochet through the cream outer edges only.
Four Mini Granny Patchwork Square

This Christmas square brings small granny motifs together in a patchwork of festive colour. The shifting colour placement makes each motif distinct, while the outer border gives the larger square a cohesive look.
Matching the motifsâ final-round edge stitches matters more than aiming for a stated finished measurement. Corresponding joining points let the seams sit neatly without stretching one motif to fit another, even when your tension affects the overall size.
Four Mini Granny Patchwork Square
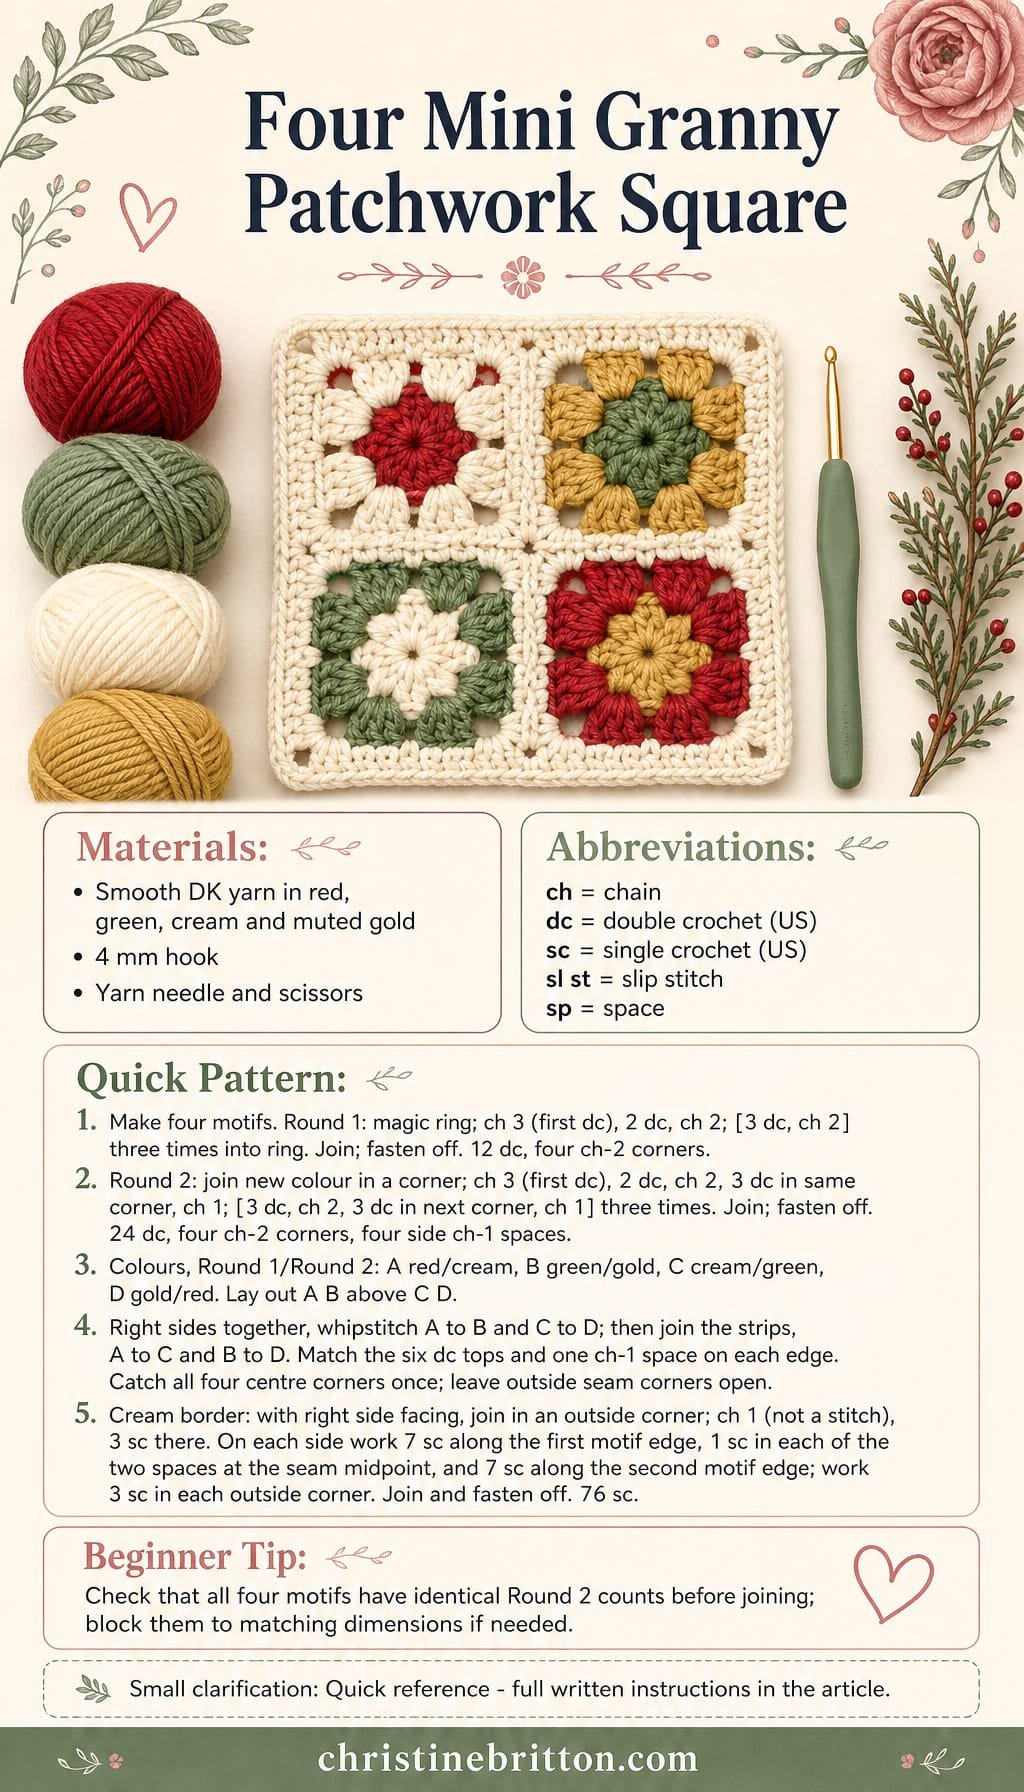
Quick-reference card. Follow the complete written instructions below.
Materials
- Smooth DK yarn: Small amounts of red, green, cream and muted gold
- Crochet hook: 4 mm, or a size that gives you a fabric you like
- Yarn needle and scissors: For seaming and weaving in ends
Size and Fit
One square made from four two-round motifs in a two-by-two arrangement. Finished size depends on your yarn, hook and tension. Make all four motifs the same size; if needed, gently block them to matching dimensions before joining.
Gauge
No fixed gauge. Each motif must have 24 dc, four corner ch-2 spaces and four side ch-1 spaces after Round 2. Each edge has seven matching seam positions: six dc tops and one ch-1 space.
Abbreviations
US crochet terms.
- ch = chain
- dc = double crochet
- sc = single crochet
- sl st = slip stitch
- sp = space
Pattern
- Colour layout Make four motifs using these Round 1/Round 2 colours: A red/cream; B green/muted gold; C cream/green; D muted gold/red. Arrange A beside B, with C below A and D below B. Use cream for the outer border.
- Mini motif â Round 1 Make a magic ring. Ch 3 (counts as first dc), work 2 dc into the ring, ch 2. [Work 3 dc into the ring, ch 2] three times. Pull the ring closed and sl st into the top of the beginning ch 3. Fasten off. Count: 12 dc and four corner ch-2 spaces.
- Mini motif â Round 2 Join the second colour in any corner ch-2 sp. Ch 3 (counts as first dc), work 2 dc, ch 2 and 3 dc in the same sp, then ch 1. [Work 3 dc, ch 2 and 3 dc in the next corner ch-2 sp, then ch 1] three times. Sl st into the top of the beginning ch 3. Fasten off. Count: 24 dc, four corner ch-2 spaces and four side ch-1 spaces. Make all four motifs this way.
- Join the patchwork Lay out the motifs in the stated arrangement. Hold A and B right sides together. Whipstitch their touching edges through corresponding dc tops and ch-1 spaces, matching all seven positions; unfold. Join C to D the same way. Place the joined strips right sides together and whipstitch A to C, then B to D, again matching seven positions on each motif edge. At the centre, catch the four meeting corner spaces together once and secure the seam. Do not pull the outer-edge corner spaces closed: they are needed for the border.
- Outer border With the patchwork right side facing, join cream in an outside corner ch-2 sp. Ch 1 (does not count as a stitch). Work 3 sc in that corner sp. Working around the outside, *work 1 sc in each of the six dc tops and the side ch-1 sp along the first motif edge; work 1 sc in each of the two corner ch-2 spaces that meet at the seam; work 1 sc in each of the six dc tops and the side ch-1 sp along the next motif edge; work 3 sc in the next outside corner ch-2 sp. Repeat from * three more times, omitting the final 3 sc because that first corner has already been worked. Sl st into the first sc and fasten off. Count: 76 sc.
Finishing
- Weave in all ends on the wrong side, taking care not to tighten the seams or close the border stitches.
- Gently block the completed square if you want straighter edges. Let it dry completely before using it.
Helpful Tips
- Check every motif after Round 2, before sewing. Equal edge counts make the four joins easier to align than a target measurement would.
- At each outside seam midpoint, keep both adjoining ch-2 spaces visible so the border can receive one sc in each.
Frequently Asked Questions
Which Christmas square should I try first?
The Christmas Stripe Granny Square is marked beginner and uses an open centre with clear colour bands. The puff-stitch snowdrift and spike-stitch icicle squares are options for confident beginners.
Can I join different squares in one project?
Yes, if their finished sizes and edge stitch counts work together. Make a sample of each design you want to combine and adjust the borders where needed before joining.
Which designs need a chart or careful colour planning?
The tapestry gift square is charted. The corner-to-corner snowflake has separate colour sections, and the mosaic candy cane uses a stepped overlay-mosaic design.
Are all 15 squares suitable for a flat blanket?
Not necessarily. The raised poinsettia is better suited to decorative projects, and textured motifs may need extra thought if you want a smooth blanket surface.
Final Thoughts
Choose a square by its construction as well as its Christmas motif. A consistent yarn weight and careful attention to borders will make it easier to use several designs together.
For a decorative piece, let texture take the lead; for a flatter project, look first at the striped, filet or colourwork squares.