20 Crochet Christmas Sacks for a Handmade Holiday

Looking for a crochet Christmas sack that suits the gift rather than just the wrapping? These 20 designs range from slim book sacks and bottle covers to roomy toy sacks and small Advent treat holders.
Choose by the shape and weight of the present, then look at how each sack closes. Drawstrings, ties, flaps and open tops give different results, while textured and colourwork designs offer more ways to personalise the wrapping.
For more ideas that build on this collection, explore crochet Christmas gift bag patterns.
Before You Start
US crochet terminology is used throughout these patterns. Check the stitch abbreviations before you begin if you usually follow UK terms.
Measure the present, including any box or protective wrapping, and compare it with the sackâs base, body and opening. A bottle sack needs room at the neck, while a gathered sack must still open wide enough to admit the gift.
Match the fabric to its job. A firm, close-textured yarn works well for parcels that need coverage or shape. Open mesh and shell lace are decorative covers, so wrap anything you do not want to show through. Weave in ends securely and check handles, seams and closures before filling the sack.
Crochet terminology: This article uses US crochet terms. Check the abbreviations for each project.
Round-Base Drawstring Christmas Sack

This crochet Christmas sack is a simple way to make gift wrapping part of the present. Its flat circular base helps it stand upright, while the broad opening makes it easy to tuck a gift inside before drawing the top closed.
Before working the sides, lay the base flat and compare it with the giftâs footprint. The gift should sit comfortably within the circle; if it is a box, check the corners as well as the straight edges. Making that check now is much easier than discovering later that the opening is too narrow.
The finished sack has a clean, cylindrical shape, with a contrasting drawstring adding a festive touch. The pattern below is made to measure, so it can be adapted to the gift rather than relying on one fixed finished size.
Round-Base Drawstring Christmas Sack

Quick-reference card. Follow the complete written instructions below.
Materials
- Smooth medium-weight yarn: Red for the sack and cream for the drawstring. The amount needed depends on the gift size.
- Crochet hook: 5 mm, or a size that gives you a firm fabric that lies flat at the base.
- Notions: Stitch marker, tape measure and yarn needle.
Size and Fit
Made to measure. For a round gift, increase the base until its diameter is at least 2 cm wider than the gift. For a rectangular gift, measure the longest diagonal across its footprint and make the base at least 2 cm wider than that. Check the gift against the finished base before starting the walls. Work the walls until they measure at least 5 cm taller than the gift, measured vertically from the base fold; then add the eyelet round and a rim at least 2 cm deep.
Gauge
No fixed gauge is required. Keep the base flat and measure it as you work; its diameter, rather than a stated round count, determines when to begin the walls.
Abbreviations
US crochet terms.
- ch = chain
- dc = double crochet
- sc = single crochet
- sl st = slip stitch
- BLO = back loop only
- st(s) = stitch(es)
Pattern
- Base, round 1 With red, make an adjustable ring. Ch 2 (this does not count as a stitch), work 12 dc into the ring, pull it closed and sl st to the first dc to join. Place a marker in the first stitch. (12 dc)
- Base, round 2 Ch 2, work 2 dc in each stitch around and join to the first dc. (24 dc)
- Base, round 3 Ch 2, *dc in the next stitch, 2 dc in the following stitch; repeat from * around and join. (36 dc)
- Base, round 4 Ch 2, *dc in the next 2 stitches, 2 dc in the following stitch; repeat from * around and join. (48 dc)
- Base, round 5 and further increases For round 5, ch 2, *dc in the next 3 stitches, 2 dc in the following stitch; repeat from * around and join. (60 dc) If the base is not yet wide enough, continue in the same way, working one more single dc between increases on each successive round. Every increase round adds 12 stitches; round number n has 12n stitches.
- Check the base Lay the circle flat and measure across its widest point. Compare it with the gift using the allowance in Size and Fit. Stop increasing only after the base is wide enough. Note your stitch count: it will be a multiple of 12.
- Turn up the sides Ch 1, sc BLO in every stitch around and sl st to the first sc to join. The ch 1 does not count as a stitch. This round forms the fold between base and walls; do not increase.
- Walls Ch 1, sc through both loops in every stitch around and join to the first sc. Repeat this joined round without increases until the vertical wall height, measured from the base fold, is at least 5 cm more than the gift’s height. Keep the same stitch count on every round.
- Eyelet round Ch 1, *sc in the next 2 stitches, ch 2, skip the next 2 stitches; repeat from * around and join to the first sc. The wall stitch count is divisible by 4, so the repeat fits without adjustment.
- Rim Ch 1, work 1 sc in each sc and 2 sc in each ch-2 space; join. Continue with joined rounds of 1 sc in every stitch until the fabric above the eyelet openings measures at least 2 cm. Fasten off and weave in the ends.
- Drawstring With cream, make a chain approximately the sack’s circumference plus 45 cm long. Sl st into the second chain from the hook and into each remaining chain. Check the finished cord: it should measure at least the sack’s circumference plus 35 cm. If it has shortened below that length, remake it with a longer starting chain. Fasten off and weave in the cord ends securely.
- Thread the cord Starting at a front eyelet, weave one end through successive eyelets all the way around. Bring it out through the eyelet beside the starting one so both ends hang at the front. Pull gently to gather the opening and tie a bow.
Finishing
- Weave in all yarn ends without closing the eyelets.
- Set the sack upright and ease the base flat. Loosen the cord fully before placing the gift inside.
Helpful Tips
- Measure a rectangular gift across its longest base diagonal, not just its width: the broadest part needs to pass through the sack opening.
- If the base cups or ripples markedly, adjust hook size and remake the base before starting the walls.
- Move the marker to the first stitch of each round so the joining slip stitch is not mistaken for a stitch.
Folded Flat Gift Sack
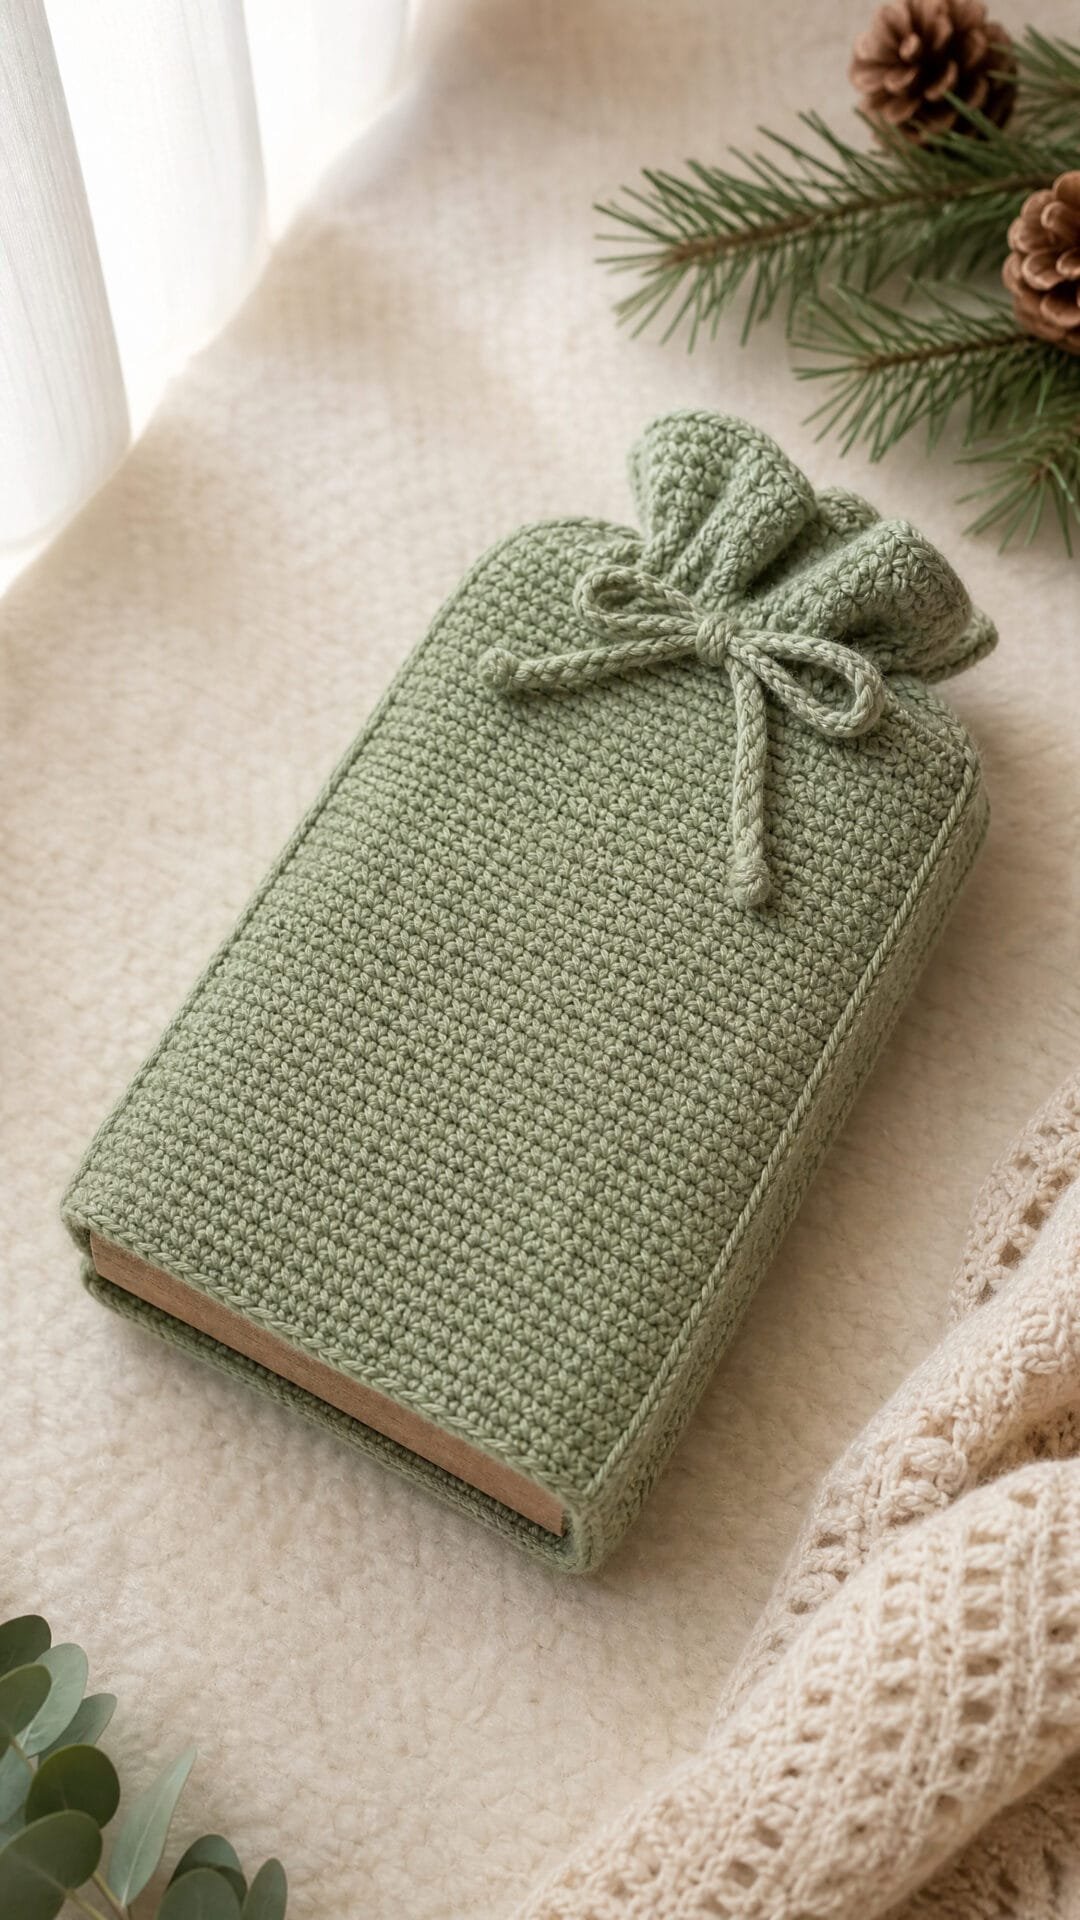
A book or slim card game can be awkward to wrap neatly. This crochet Christmas sack offers a soft, reusable alternative with a flat shape that suits a fairly shallow present.
The sack begins as one long rectangle, folded to make the base. Firm fabric helps it hold its shape, while the gathered opening gives the parcel a simple festive finish without adding bulk.
Check the rectangle against the present before closing the sides. Leave enough room for it to slide in comfortably once the seams are in place, and make sure its top will sit below the drawstring rather than pushing into the gathered opening.
Folded Flat Gift Sack

Quick-reference card. Follow the complete written instructions below.
Materials
- Aran or worsted-weight yarn: Approximately 100â130 m in green or your chosen colour, including yarn for the cord
- 5 mm crochet hook: Or a size that gives a firm fabric
- Yarn needle: For seaming and threading the cord
- Scissors and tape measure: For checking the rectangle against the intended gift
Size and Fit
Sample size: approximately 21.5 cm wide and 25 cm high when folded flat, before gathering. Intended for a fairly flat gift of about 14 Ã 20 Ã 2 cm. Before starting, measure around the giftâs width and thickness; half that circumference is the minimum flat width needed to surround it. Allow at least another 3 cm for ease and seams. Check that the gift will slide between the side seams and sit below the drawstring before finishing the second seam.
Gauge
Planning gauge: approximately 13 hdc stitches and 10 rows per 10 cm. Check your fabric and the giftâs measurements as you work; a firm fabric matters more than an exact gauge.
Abbreviations
US crochet terms.
- ch = chain
- hdc = half double crochet
- sk = skip
- st(s) = stitch(es)
Pattern
- Foundation Ch 29. The foundation sets a width of 28 stitch positions.
- Rows 1â2 Row 1: Hdc in the third ch from the hook and in each remaining ch; 28 hdc. Ch 2 and turn. Row 2: Hdc in each st across; 28 hdc. Ch 2 and turn. The turning ch does not count as a stitch throughout.
- Row 3: first eyelets Hdc in the first 2 sts. [Ch 1, sk 1 st, hdc in each of the next 3 sts] 6 times. Hdc in the last 2 sts. Ch 2 and turn. You have 22 hdc and 6 ch-1 eyelets: 28 stitch positions.
- Rows 4â47 Hdc in each hdc and each ch-1 space across; 28 hdc on Row 4. Continue working 28 hdc across on every row through Row 47. Ch 2 and turn after each row. Keep the long edges straight.
- Row 48: second eyelets Hdc in the first 2 sts. [Ch 1, sk 1 st, hdc in each of the next 3 sts] 6 times. Hdc in the last 2 sts. Ch 2 and turn. The 6 eyelets will align with those at the other short end when the rectangle is folded.
- Rows 49â50 Hdc in each hdc and each ch-1 space across on Row 49; 28 hdc. Ch 2 and turn. Hdc in each st across on Row 50; 28 hdc. Fasten off. The rectangle is approximately 21.5 Ã 50 cm at the planning gauge.
- Fold and seam Fold the rectangle between Rows 25 and 26 to form the base, bringing Rows 1 and 50 together at the open top. Align the side edges and both eyelet rows. With yarn and a needle, seam one long side edge from the fold to the opening. Seam the other side in the same way, but pause before fastening off to slide the intended gift inside. There must be enough room to insert it without forcing the seams, and its top must remain below the eyelets. Complete and secure the seam, then remove the gift while threading the cord.
- Cord Make a cord approximately 85 cm long by chaining loosely, then fasten off. Starting at one side of the opening, weave it in and out through all 6 eyelets on the front panel. Carry it around the far side and weave back through all 6 eyelets on the back panel, so both cord ends emerge near the starting side. Insert the gift, draw the opening together and tie the ends in a bow.
Finishing
- Weave in the rectangle and seam ends securely.
- Trim and secure the cord ends so they will not unravel.
- Smooth the sack flat before inserting the gift; do not tighten the drawstring until the gift is fully inside.
Helpful Tips
- If your gift is wider than the sample allowance, check the rectangle against it before seaming rather than relying on the suggested gauge.
- Keep the side seams close to the outer edges so they take up as little usable width as possible.
- A flat book may slide in easily while a boxed game of the same front-facing width may need more room because of its thickness.
Square-Base Parcel Sack

A gift sack is easier to fill when its bottom offers a flat place for the present to rest. This boxy crochet Christmas sack is particularly suited to folded clothes or small parcels stacked neatly, rather than a gift that would settle awkwardly into a narrow-bottomed bag.
The defined square base gives the filled sack a more even footprint, while the sides leave room around the contents. It is still a soft crochet bag, not a rigid box: how steadily it stands will depend on what you put inside.
The contrasting base and sides make the shape easy to see, and the gathered opening gives it a festive finish. It can be folded away between Christmases, ready to use again for another thoughtfully wrapped gift.
Square-Base Parcel Sack

Quick-reference card. Follow the complete written instructions below.
Materials
- Medium-weight yarn: Cream for the base and dark green for the sides and cord; choose a yarn that makes a firm fabric at the stated gauge.
- Crochet hook: A size that gives the stated gauge; 4 mm is a suggested starting point.
- Stitch markers: Four removable markers for the corners, plus an optional marker for the beginning of each round.
- Other: Yarn needle, scissors and tape measure.
Size and Fit
One sample size: approximately 8 in (20 cm) square at the base and 9 in (23 cm) high at the stated gauge. The soft sides can flex around a gift; check the parcel against the base dimensions before starting.
Gauge
12 sc and 12 rows = 4 in (10 cm) in firm, turned sc fabric. Check both directions: 24 stitches and 24 rows should make an approximately 8 in (20 cm) square before the sides are added.
Abbreviations
US crochet terms.
- ch = chain
- sc = single crochet
- sl st = slip stitch
- st(s) = stitch(es)
Pattern
- Base, row 1 With cream, ch 25. Sc in the second ch from the hook and in each remaining ch; 24 sc.
- Base, rows 2â24 Ch 1, turn, and sc in each st across; 24 sc per row. After row 24, do not turn. Check that the piece is approximately square.
- Base perimeter, round 1 Ch 1. Work 24 sc evenly into the 24 row ends down the adjacent side, 24 sc along the underside of the foundation chain, 24 sc into the 24 row ends up the opposite side, and 24 sc across the stitches of row 24. These are four separate groups of 24; do not add extra corner stitches. Place a marker in the last sc of each group to identify the four corners. Sl st to the first sc to join; 96 sc.
- Sides, rounds 2â25 Change to dark green at the start of round 2. For each round, ch 1, sc in the same st as the join and in each remaining st, then sl st to the first sc to join; 96 sc per round. The ch 1 and joining sl st never count as stitches. After each round, move each corner marker to the sc directly above it so the four corner lines stay aligned. Do not increase at the corners.
- Eyelet band, round 26 Ch 1. Repeat [sc in next st, ch 1, skip next st] around. Sl st to the first sc to join; 48 sc and 48 ch-1 spaces.
- Top edge, rounds 27â28 Round 27: Ch 1, sc in the same st as the join, then sc in every remaining sc and every ch-1 space; join to the first sc with a sl st. Round 28: Ch 1, sc in the same st as the join and in each remaining st; join to the first sc with a sl st. Each round has 96 sc. Fasten off.
- Cord With dark green, make a chain long enough to form a finished cord of approximately 48â52 in (122â132 cm) after edging it. Sl st in the second ch from the hook and in each ch to the end. Measure the finished cord; if it is too short, remake it with a longer starting chain. Fasten off.
- Thread the cord Weave the cord in and out of the 48 eyelets, beginning and ending at adjacent eyelets near the centre of one side. Pull gently to gather the opening and tie the ends in a bow.
Finishing
- Weave in all ends securely, including the colour-change ends.
- Smooth the base into a square and ease the marked corner lines into place. Lightly block if appropriate for the yarn; do not expect the sack to become rigid.
- Place a flat-bottomed gift or neatly stacked parcels on the base to help the filled sack stand evenly.
Helpful Tips
- Keep the perimeter stitches evenly spaced. Adding stitches at the corners changes the count and can make the sides flare.
- If the 24-row base is not approximately as tall as it is wide, adjust your hook or tension and check gauge again before making the sides.
- A firm medium-weight yarn supports the shape better than a loose, drapey fabric, but the sack will still fold for storage.
Oval-Base Bottle Gift Sack

Give a bottle a handmade Christmas wrapping with this oval-base crochet sack. Work around both sides of a foundation chain to form the base, then build a close-textured body and shape the neck for a ribbon threaded through six eyelets.
This sample is intended for a slim bottle about 24 cm tall and no more than 6 cm across its widest point. Measure your bottleâs height and widest point before starting. Check its bottom against the completed base, its widest point against the body, and its passage through the shaped opening before fastening off. If the rim needs to sit higher than the bottle top, add whole straight-body rounds before working the neck.
The sack is decorative gift wrapping, not protection against breakage. Carry the gift by the bottle, rather than by the ribbon or crocheted sack.
Oval-Base Bottle Gift Sack

Quick-reference card. Follow the complete written instructions below.
Materials
- Yarn: Approximately 120â160 m smooth DK-weight cotton-blend yarn; burgundy suits the pictured design.
- Hook: 4 mm crochet hook, or a size that gives a firm fabric at the stated gauge.
- Tie: Approximately 80 cm narrow ribbon or cord.
- Notions: Stitch marker, yarn needle, scissors and tape measure.
Size and Fit
One sample size, intended for a slim bottle approximately 24 cm tall and no more than 6 cm across its widest point. Measure your actual bottle across its widest point and from its base to its top before starting. The sack has 54 stitches around the straight body and approximately 47 rounds from the base to the rim. Fit depends on the bottleâs shape as well as gauge: check that its bottom sits inside the completed oval, its widest point passes comfortably through the body, and it can be inserted through the shaped opening before fastening off. The rim should reach above the bottle top; add plain body rounds before shaping if more height is needed.
Gauge
Approximately 16 sc and 18 rounds per 10 cm in joined rounds of sc, measured without stretching. Gauge is a guide; check the base and opening against the bottle rather than relying on stitch count alone.
Abbreviations
US crochet terms.
- ch = chain
- sc = single crochet
- sl st = slip stitch
- BLO = back loop only
- inc = work 2 sc in the next stitch
- dec = single crochet 2 stitches together
- sk = skip
Pattern
- Working method Work in joined rounds. At the end of each round, sl st to its first sc; ch 1 before starting the next round. The joining sl st and turning ch do not count as stitches. Work the first stitch of each new round into the same stitch as the join. Move a marker to that first stitch to keep the oval increases aligned.
- Oval base, round 1 Ch 12. Sc in the second ch from the hook and in the next 9 ch. Work 3 sc in the last ch. Turn the foundation to work along its unused underside: sc in the next 9 ch, then work 2 sc in the underside of the ch that holds the first sc. Join. 24 sc.
- Oval base, round 2 Ch 1. Inc in the first stitch, sc in the next 9 stitches, inc in each of the next 3 stitches, sc in the next 9 stitches, and inc in each of the last 2 stitches. Join. 30 sc.
- Oval base, round 3 Ch 1. (Inc, sc in the next stitch) once; sc in the next 9 stitches; (inc, sc in the next stitch) 3 times; sc in the next 9 stitches; (inc, sc in the next stitch) 2 times. Join. 36 sc.
- Oval base, round 4 Ch 1. (Inc, sc in the next 2 stitches) once; sc in the next 9 stitches; (inc, sc in the next 2 stitches) 3 times; sc in the next 9 stitches; (inc, sc in the next 2 stitches) 2 times. Join. 42 sc.
- Oval base, round 5 Ch 1. (Inc, sc in the next 3 stitches) once; sc in the next 9 stitches; (inc, sc in the next 3 stitches) 3 times; sc in the next 9 stitches; (inc, sc in the next 3 stitches) 2 times. Join. 48 sc.
- Oval base, round 6 Ch 1. (Inc, sc in the next 4 stitches) once; sc in the next 9 stitches; (inc, sc in the next 4 stitches) 3 times; sc in the next 9 stitches; (inc, sc in the next 4 stitches) 2 times. Join. 54 sc. Set the bottle on the oval now: its bottom should fit without pushing beyond the crocheted edge.
- Straight body, round 1 Ch 1. Working BLO, sc in each of the 54 stitches. Join. 54 sc. This creates the turn from the base to the sides.
- Straight body, rounds 2â38 Ch 1, sc in each stitch through both loops, and join. Repeat for 37 rounds, keeping 54 sc in every round. Compare the tube with the bottle. For a taller bottle, add whole plain rounds here, then continue with the neck shaping; each added round increases the height by approximately 0.6 cm at the stated gauge.
- Neck shaping, round 1 Ch 1. (Sc in the next 7 stitches, dec) 6 times. Join. 48 sc.
- Neck shaping, round 2 Ch 1, sc in each stitch, and join. 48 sc.
- Neck shaping, round 3 Ch 1. (Sc in the next 6 stitches, dec) 6 times. Join. 42 sc.
- Neck shaping, round 4 Ch 1, sc in each stitch, and join. 42 sc.
- Neck shaping, round 5 Ch 1. (Sc in the next 5 stitches, dec) 6 times. Join. 36 sc.
- Neck shaping, round 6 Ch 1, sc in each stitch, and join. 36 sc. Check that the actual bottle can still pass through the opening before continuing.
- Eyelet round Ch 1. (Sc in the next 4 stitches, ch 1, sk the next stitch, sc in the next stitch) 6 times. Join to the first sc. There are 30 sc and 6 ch-1 spaces.
- Rim, rounds 1â2 For each round, ch 1, sc in every sc and every ch-1 space on the first round, or in every sc on the second round; join. 36 sc per round. Fasten off.
Finishing
- Weave in ends without pulling the oval out of shape.
- Thread the ribbon through all 6 eyelets. Place the bottle in the sack, draw the ribbon in gently and tie a bow; do not cinch it tightly against a cap or closure.
- Make a final comparison with the actual bottle: check the base, the body at its widest point and the opening. Carry the bottle by the bottle itself, not by the ribbon or sack.
Helpful Tips
- A smooth cotton-blend yarn makes it easier to see the stitches and gives the sack a neat surface.
- If the base or shaped opening is too tight, use a larger hook and reassess the fit before working the full body. A taller bottle needs extra straight-body rounds before the decreases, not extra rounds after the eyelets.
- This decorative sack does not cushion glass or prevent breakage.
Granny-Square Patchwork Christmas Sack
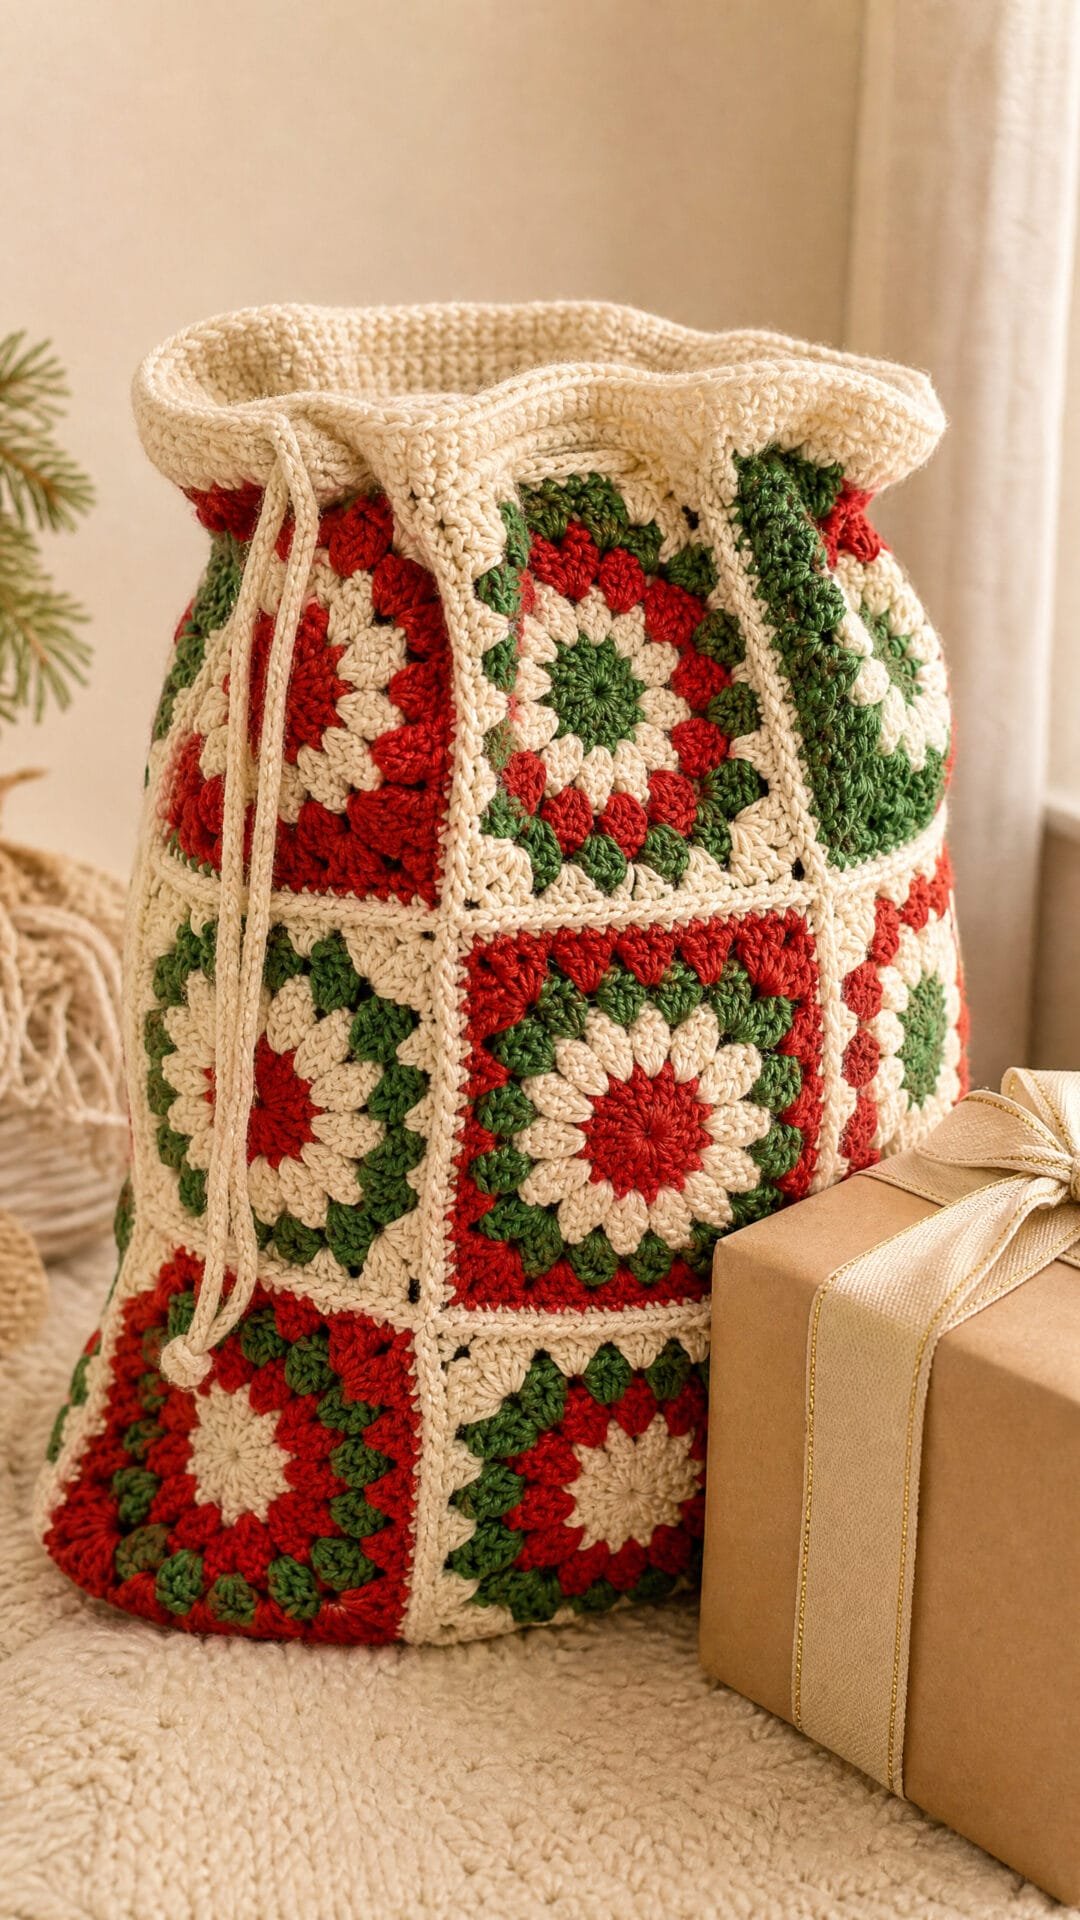
This crochet Christmas sack turns colourful granny squares into a little patchwork gift bag. Its separate panels make it easy to plan a mix of festive colours before bringing the sack together, while the visible seams add to its handmade character.
Neat joins matter here: squares that match along their edges sit together more cleanly, particularly where the sides meet the base. The plain, continuous rim brings the separate panels together around the opening and gives the drawstring a more even edge to gather.
The open granny-square fabric makes this a lovely choice for a wrapped gift or a small present tucked inside a pouch. Use a lining if you want to carry loose, tiny items that might slip through the spaces.
Granny-Square Patchwork Christmas Sack

Quick-reference card. Follow the complete written instructions below.
Materials
- Yarn: Washable medium-weight (aran/worsted) yarn in red, green and cream; allow approximately 150 m in total, plus extra if your squares work up larger.
- Hook: 5 mm crochet hook, or a size that gives firm fabric without making the squares stiff.
- Notions: Yarn needle, stitch markers and scissors.
Size and Fit
One sample size. If each finished square measures approximately 11 cm across, the sack has an approximately 11 Ã 11 cm base and is approximately 13 cm tall including the rim. All five squares must finish at the same size. To change the size, use a different yarn and suitable hook for all five squares; keep the four-round construction and matching edge counts.
Gauge
One four-round granny square measures approximately 11 cm across after gently shaping. Exact gauge is less important than making all five squares match.
Abbreviations
US crochet terms.
- ch = chain
- dc = double crochet
- sc = single crochet
- sl st = slip stitch
- sp = space
- rnd = round
Pattern
- Make five matching squares Make one base square and four side squares. Vary the red, green and cream colour order for a patchwork effect, but use the same yarn, hook and four rounds for every square. Fasten off after each round and join the next colour in any corner ch-2 sp. A beginning ch 3 counts as one dc throughout the squares.
- Square rnd 1 Make a magic ring. Ch 3, work 2 dc into the ring, ch 2; (3 dc into the ring, ch 2) three times. Sl st to the top of the beginning ch 3. Fasten off. You have four 3-dc groups and four corner ch-2 spaces.
- Square rnd 2 Join yarn in any corner ch-2 sp. Ch 3, 2 dc, ch 2 and 3 dc in that sp, ch 1. In each of the other three corner ch-2 spaces, work (3 dc, ch 2, 3 dc), then ch 1. Sl st to the top of the beginning ch 3; fasten off.
- Square rnd 3 Join yarn in any corner ch-2 sp. Ch 3, 2 dc, ch 2 and 3 dc in that sp; ch 1, work 3 dc in the next side ch-1 sp, ch 1. Repeat the same sequence at each of the other three corners and its following side ch-1 sp. Sl st to the top of the beginning ch 3; fasten off.
- Square rnd 4 Join yarn in any corner ch-2 sp. Ch 3, 2 dc, ch 2 and 3 dc in that sp; ch 1, work 3 dc in the next side ch-1 sp, ch 1, work 3 dc in the next side ch-1 sp, ch 1. Repeat the same sequence at each of the other three corners and the two ch-1 spaces following it. Sl st to the top of the beginning ch 3; fasten off. Check that every square has 48 dc, twelve side ch-1 spaces and four corner ch-2 spaces.
- Join the box Lay the base square flat and place one side square against each base edge, with right sides facing out. Using yarn and a needle, whipstitch each side squareâs lower edge to its base edge, matching the twelve dc, three side ch-1 spaces and two corner ch-2 spaces along that edge. Catch each matched corner space once rather than stitching into each of its two chains. Fold the sides upwards and whipstitch each pair of neighbouring side edges in the same way, from the base to the top. Secure the yarn at all four base corners, where three squares meet. Leave the four upper side-square edges unjoined and open.
- Continuous rim, rnd 1 With the sack right side out, join yarn at a top corner. Work around the entire opening: on each of the four upper square edges, make 2 sc in the first corner ch-2 sp, 1 sc in each of its twelve dc, 1 sc in each of its three side ch-1 spaces, and 2 sc in the last corner ch-2 sp. Each upper corner belongs to its own square, even where two squares meet at a vertical seam. Sl st to the first sc. You have 76 sc.
- Eyelet rim, rnd 2 Ch 1; repeat (sc in the next 8 stitches, ch 2, skip the next 2 stitches, sc in the next 9 stitches) four times. Sl st to the first sc. You have four ch-2 eyelets; each repeat uses 19 stitches of the previous round.
- Top rim, rnd 3 Ch 1. Work 1 sc in each sc and 2 sc in each ch-2 eyelet sp around. Sl st to the first sc and fasten off. You have 76 sc. Do not crochet through the eyelets when making the drawstring.
- Drawstring Make a cord approximately 120 cm long by chaining to that length, then slip stitching back along the chain. Fasten off securely. Weave the cord through the four eyelets, travelling around the sack beneath the top round and bringing both ends out through the same eyelet. Adjust the cord length if needed, knot its ends and pull to close.
Finishing
- Weave in all ends, paying particular attention to the base corners and the upper ends of the side seams.
- Gently shape the sack so the base sits flat and the continuous rim lies evenly around the opening.
Helpful Tips
- Count every square before joining: matching edge counts make the visible seams much tidier.
- Place a marker in the first sc of each rim round so the join does not become a fifth eyelet.
- This small sack suits lightweight gifts; the granny-square openings are not intended to hold loose tiny items without a lining.
Wide-Mouth Handled Toy Sack

This crochet Christmas sack is made for lightweight toys and wrapped gifts that are awkward to tuck into a smaller drawstring bag. Its broad base and straight sides give it a roomy shape, while the open mouth makes it easy to see and reach what is inside.
The handles are openings worked into the upper edge rather than separate straps. They keep the sack looking simple and make it easy to move around the room, but this is not a load-tested bag. Support the base when moving it with gifts inside.
Set it beside the tree as part of a handmade Christmas display, or use it to gather soft toys ready for gifting. The structured pattern card and full written pattern below provide the construction details.
Wide-Mouth Handled Toy Sack

Quick-reference card. Follow the complete written instructions below.
Materials
- Chunky-weight yarn: Approximately 400â500 m; allow more if adjusting the size.
- Crochet hook: 6 mm, or the size needed to make a firm fabric.
- Stitch marker: For marking the first stitch of each round.
- Yarn needle: For weaving in ends.
Size and Fit
One sample size: approximately 25 cm across the base and 28 cm tall, with an approximately 80 cm circumference around the straight sides. The reinforced mouth is slightly wider. Dimensions are estimates based on the target gauge; this is a sack for lightweight contents, not a tested load-bearing bag.
Gauge
Target gauge: 12 sc and 12 rounds over 10 cm in firm, unblocked single crochet. Check your gauge if finished dimensions matter.
Abbreviations
US crochet terms.
- ch = chain
- sc = single crochet
- st(s) = stitch(es)
- BLO = back loop only
Pattern
- Before you begin Work in a continuous spiral; do not join rounds or turn. Place a marker in the first stitch of each round and move it up as you work.
- Base, rounds 1â2 Round 1: Make a magic ring and work 6 sc into it. Pull closed. (6 sts) Round 2: Work 2 sc in each st around. (12 sts)
- Base, rounds 3â16 For each round number n from 3 through 16, work [sc in each of the next (n â 2) sts, 2 sc in the next st] 6 times. Each round adds 6 sts: round 3 ends with 18 sts, and round 16 ends with 96 sts. The base should lie broadly flat; adjust hook size if the fabric is noticeably ruffled or cupped.
- Sides, rounds 17â46 Round 17: Sc BLO in each st around to define the base edge. (96 sts) Rounds 18â46: Sc in each st around. (96 sts each round)
- Handle openings, round 47 Sc in the next 12 sts, ch 20 loosely, skip the next 16 sts, sc in the next 32 sts, ch 20 loosely, skip the next 16 sts, then sc in the remaining 20 sts. Keep both chains untwisted and arched above the skipped stitches. The two openings sit opposite one another. (104 stitch or chain positions)
- Reinforced rim, rounds 48â50 Round 48: Sc in each sc and in each chain around. (104 sts) Rounds 49â50: Sc in each st around. (104 sts each round) Fasten off.
Finishing
- Weave in all ends securely, particularly near the handles.
- Ease the base and rim into shape by hand. Do not stretch the handle openings closed.
Helpful Tips
- Mark both groups of 16 stitches to be skipped before working round 47; their starting points are 48 stitches apart.
- Keep the handle chains loose enough to leave openings for a hand. If they pull tight, undo and remake that round rather than forcing the rim into shape.
- Carry lightweight contents only, supporting the base when needed. No carrying capacity has been tested.
Hanging Advent Treat Sack

This crochet Christmas sack is a small place to tuck an individually wrapped treat or folded note. Its narrow opening leads into a rounded body, giving it the look of a miniature gift sack rather than a flat pouch. Make one as a little surprise, or repeat the same design for an Advent display.
The neck tie and hanging loop have separate jobs: the tie gathers the opening, while the loop supports the sack on a branch or hook. That makes it easy to display alongside other Christmas crochet decorations without relying on the bow to hold the contents up.
Hanging Advent Treat Sack

Quick-reference card. Follow the complete written instructions below.
Materials
- Yarn: Approximately 20â30 g of DK cotton per sack, in cream, red or your chosen colours. Firmly worked cotton helps keep small contents inside.
- Hook: 3 mm crochet hook, or a size that gives a firm fabric and the stated gauge.
- Other: Tapestry needle, stitch marker and scissors.
Size and Fit
One sample size. At the stated gauge, the opening is approximately 12 cm around, the widest part approximately 18 cm around, and the sack approximately 11 cm long from opening to closed base. It is intended for a small, individually wrapped treat or folded note that will pass through the opening.
Gauge
Approximately 20 sc and 24 rounds per 10 cm in firmly worked sc. Gauge determines the finished size; keep the stitches close enough that the intended contents cannot slip through the fabric.
Abbreviations
US crochet terms.
- ch = chain
- sc = single crochet
- sl st = slip stitch
- st(s) = stitch(es)
- sc2tog = single crochet two stitches together; a decrease of one stitch
Pattern
- Working method Work the sack from the top down in joined rounds without turning. At the end of each round, sl st to the first sc to join; ch 1 to begin the next round. Neither the joining sl st nor the beginning ch 1 counts as a stitch. Mark the first sc of each round if helpful.
- Opening, rounds 1â2 Ch 24 and sl st into the first ch to form a ring, taking care not to twist it. Round 1: Ch 1, sc in each ch around; join. (24 sc) Round 2: Ch 1, sc in each st around; join. (24 sc)
- Drawstring eyelets, rounds 3â4 Round 3: Ch 1, (sc in each of the next 2 sts, ch 1, skip the next st) 8 times; join. (16 sc and 8 ch-1 spaces; 24 stitch positions) Round 4: Ch 1, sc in each sc and each ch-1 space around; join. (24 sc)
- Widen the body, rounds 5â7 Round 5: Ch 1, (sc in each of the next 3 sts, 2 sc in the next st) 6 times; join. (30 sc) Round 6: Ch 1, sc in each st around; join. (30 sc) Round 7: Ch 1, (sc in each of the next 4 sts, 2 sc in the next st) 6 times; join. (36 sc)
- Body, rounds 8â22 For each of rounds 8â22: Ch 1, sc in each st around; join. (36 sc per round)
- Shape and close the base, rounds 23â27 Round 23: Ch 1, (sc in each of the next 4 sts, sc2tog) 6 times; join. (30 sc) Round 24: Ch 1, (sc in each of the next 3 sts, sc2tog) 6 times; join. (24 sc) Round 25: Ch 1, (sc in each of the next 2 sts, sc2tog) 6 times; join. (18 sc) Round 26: Ch 1, (sc in the next st, sc2tog) 6 times; join. (12 sc) Round 27: Ch 1, sc2tog 6 times; join. (6 sc) Fasten off with a long tail. Thread the tail through the front loop of each of the remaining 6 stitches, pull firmly to close the hole, and secure the tail inside.
- Separate hanging loop Ch 36. Sc in the second ch from the hook and in each remaining ch. (35 sc) Fasten off, leaving a long tail at each end. Fold the strip into a loop. At the back of the opening, sew its two ends firmly to the top edge, positioning them approximately 3 stitches apart. Pass the needle through each end and its attachment stitches several times, then secure the tails inside. This loop is for hanging, not for closing the sack.
- Neck tie Ch 75, or enough chains to make a cord approximately 30â35 cm long when finished. Sl st in the second ch from the hook and in each remaining ch; the 75-chain version has 74 sl sts. Fasten off and secure the ends. Weave the cord alternately in and out of all 8 ch-1 eyelets from round 3, bringing both ends to the front. Insert a treat or note, then draw the opening in gently and tie a bow. The tie closes the neck; the separate loop takes the hanging weight.
Finishing
- Weave in any remaining ends without leaving loose strands inside the sack.
- Check that the base is fully closed and that both ends of the hanging loop are securely sewn before filling or hanging.
- Shape the sack by hand. Hang it from its loop rather than its neck tie.
Helpful Tips
- If the fabric has gaps large enough for the intended contents to escape, use a smaller hook and check the resulting size before continuing.
- Choose small, individually wrapped treats; do not place unwrapped food directly in the sack.
- For an Advent display, repeat this same pattern as many times as needed. Keep filled sacks away from heat and out of reach of children who might pull on them.
If youâd like to keep building your crochet skills, take a look at crochet Christmas gift tag patterns.
Sideways-Ribbed Christmas Sack
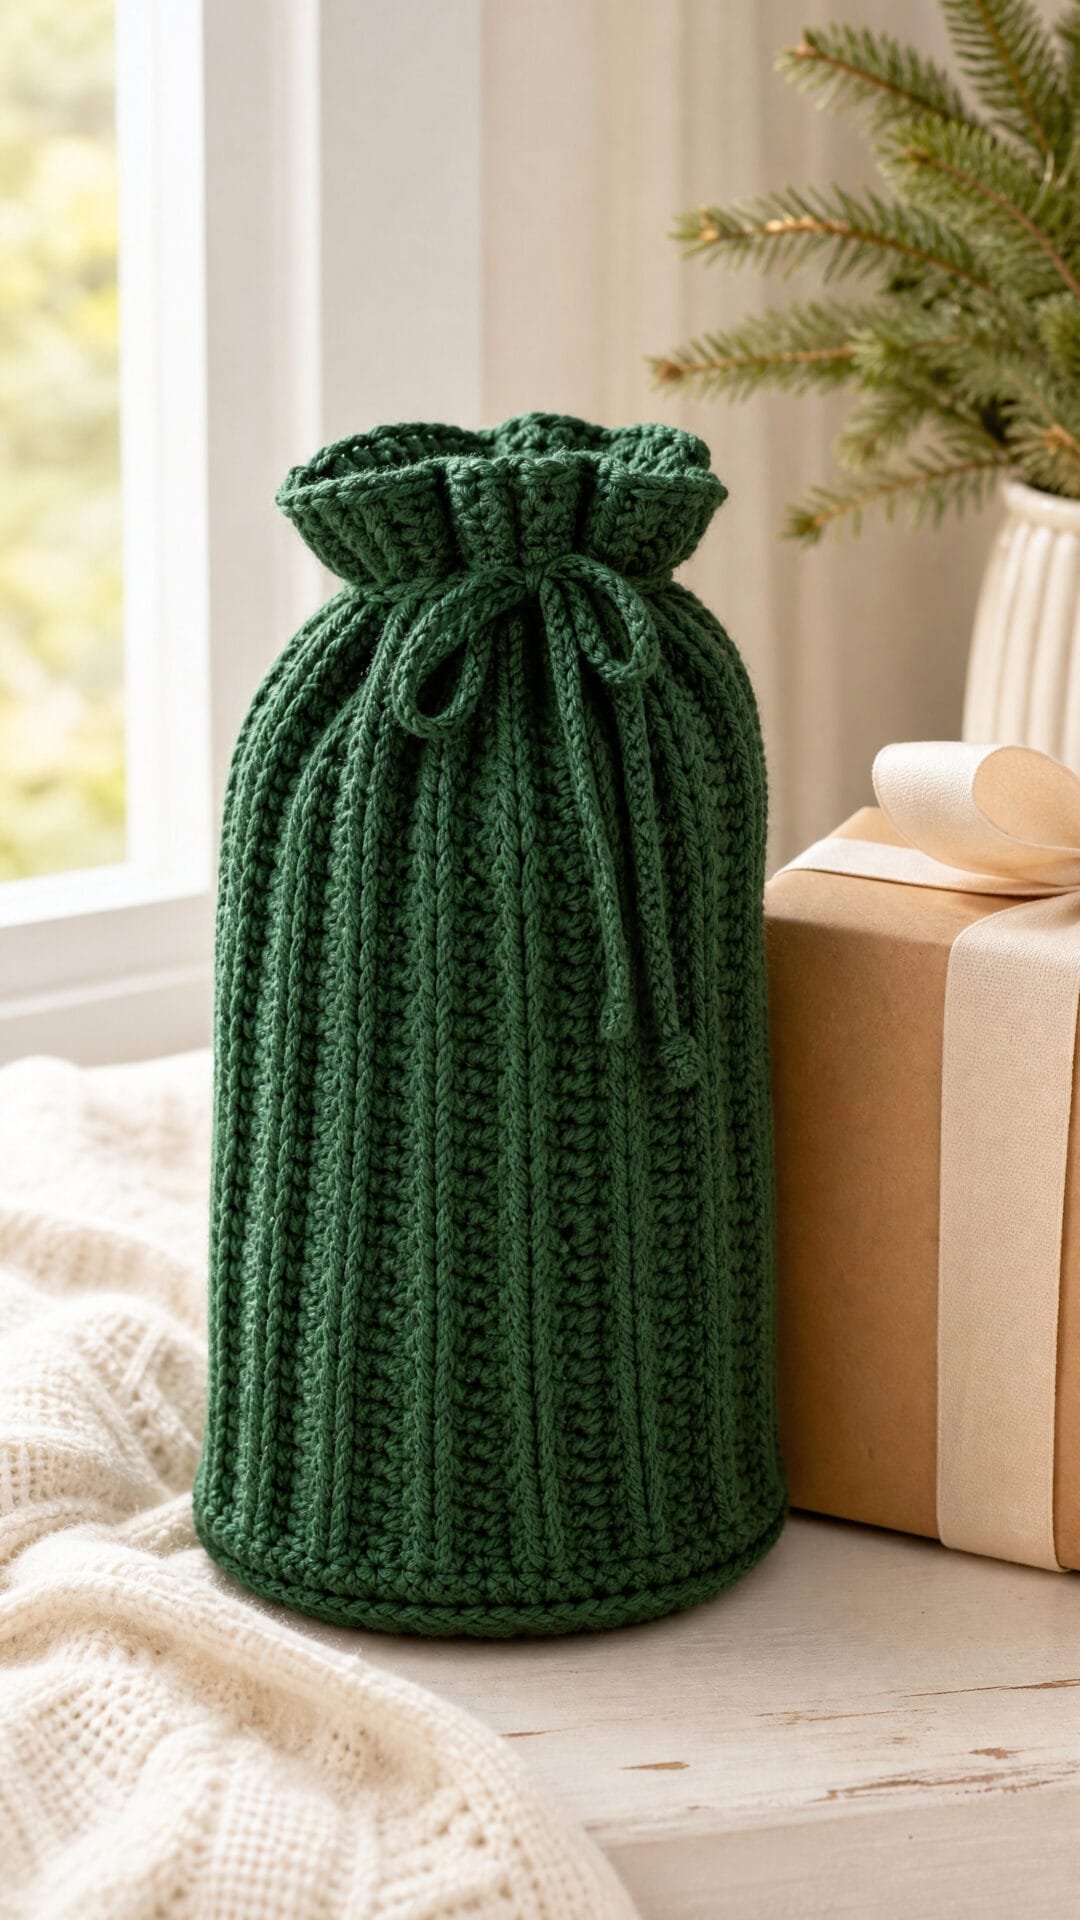
Working the body sideways turns its textured crochet rows into pronounced vertical ribs once the sack takes shape. In forest green, the effect gives this Christmas gift sack a simple, structured look, while the separate flat base provides a defined bottom.
The length of the sideways panel determines how roomy the sack will be, so compare it with the gift before closing the side seam. At the top, the firm eyelet edging supports the opening; draw the cord gently rather than tugging the crochet fabric wider to keep the mouth neat for future use.
Sideways-Ribbed Christmas Sack

Quick-reference card. Follow the complete written instructions below.
Materials
- Bulky yarn: Approximately 300 m in forest green, including yarn for the cord
- Crochet hooks: 6 mm for the body and base; 5 mm for the firm mouth edging
- Tapestry needle: For joining the body, sewing in the base and weaving in ends
- Stitch marker: For marking the beginning of base rounds
Size and Fit
One sample size. At the stated gauge, the body is approximately 50 cm around and 30 cm tall before the edging; the base is approximately 16 cm across. Allow 2â4 cm of ease around the gift. The 60 sideways rows set the sackâs circumference, so measure the rectangle along its row ends and compare it with the gift before joining.
Gauge
Approximately 12 sc and 12 rows per 10 cm in back-loop sc with the 6 mm hook. Check that the finished base measures approximately 50 cm around its outer edge so it fits the tube without pulling.
Abbreviations
US crochet terms.
- ch = chain
- sc = single crochet
- BLO = back loop only
- sl st = slip stitch
- inc = work 2 sc in the same stitch
- rnd = round
Pattern
- Sideways body With the 6 mm hook, ch 37. Row 1: Sc in the second ch from the hook and in each remaining ch; turn. (36 sc) Rows 2â60: Ch 1 (does not count as a stitch), sc BLO in each of the 36 stitches; turn. Fasten off, leaving a long tail for the seam. The 36 stitches give the body its height; the 60 rows give it its circumference.
- Join the tube Check the rectangleâs length along its row ends against the gift, allowing 2â4 cm of ease. Bring the foundation-chain edge and the edge of row 60 together without twisting the rectangle. Sew them together, matching all 36 stitches. This makes a tube with 60 row ends around each opening.
- Circular base With the 6 mm hook, make a magic ring. Rnd 1: Work 6 sc into the ring. (6) Work the following rounds in a continuous spiral, marking the first stitch. Rnd 2: Inc in each stitch. (12) Rnds 3â10: Repeat [sc in each of the next (rnd number minus 2) stitches, inc in the next stitch] 6 times. The counts at the end of rnds 3â10 are 18, 24, 30, 36, 42, 48, 54 and 60 sc. Fasten off, leaving a long sewing tail.
- Attach the base Place the base against the lower opening with right sides facing. Sew its 60 outer stitches to the 60 lower row ends, matching one stitch to one row end all the way around. Turn the sack right side out. The base should lie flat without gathering the tube.
- Firm eyelet edging With the 5 mm hook and the right side facing, join yarn at the upper opening beside the seam. Rnd 1: Ch 1, work 1 sc into each of the 60 upper row ends; join with a sl st to the first sc. (60 sc) Rnd 2: Ch 1, repeat [sc in each of the next 2 sc, ch 2, skip the next 2 sc] 15 times; join with a sl st to the first sc. (30 sc and 15 ch-2 eyelets) Rnd 3: Ch 1, repeat [sc in each of the next 2 sc, work 2 sc into the next ch-2 space] 15 times; join. (60 sc) Rnd 4: Ch 1, sc in each stitch around; join and fasten off. (60 sc) Keep the stitches firm, but do not pull the opening wider as you work.
- Cord With the 5 mm hook, make a firm chain approximately 95 cm long and fasten off securely. Weave it in and out through all 15 eyelets, bringing both ends out through adjacent eyelets near the seam. Tie the ends to close the sack gently.
Finishing
- Weave in all yarn ends securely.
- Smooth the ribs by hand and check that the base sits flat.
- Close the mouth with the cord rather than stretching or sharply tugging the eyelet edging.
Helpful Tips
- Count rows as you work: each of the 60 row ends needs a matching base stitch and an edging stitch.
- If the base has 60 stitches but its outer edge does not fit the tube, adjust your base-hook size and remake it rather than adding or removing base stitches.
- The smaller edging hook and unchanged 60-stitch circumference help the mouth retain its shape.
Open-Mesh Gift Sack

This crochet Christmas sack makes the wrapping part of the display. Its solid base supports a wrapped gift, while the open mesh lets festive colours and prints show through. A neat rim gives the airy shape a defined edge.
It is best suited to a wrapped parcel rather than a collection of loose gifts. Small items could slip through the openings, so place them in a separate fabric bag if you want to give them together.
The contrast between the sturdy base and the open body makes this a satisfying project for a confident beginner. After the gift is opened, the sack can be kept for another Christmas rather than discarded with the wrapping.
Open-Mesh Gift Sack

Quick-reference card. Follow the complete written instructions below.
Materials
- Yarn: Approximately 150â180 m of smooth DK cotton for the sack and drawstring. A smooth yarn makes the chain spaces easier to see.
- Hook: 4 mm crochet hook, or the size needed for gauge.
- Notions: Stitch marker, yarn needle and scissors.
Size and Fit
One sample size. The base is intended to be approximately 12 cm across, with 16 mesh rounds above it; finished dimensions depend on gauge and how the mesh hangs. It is intended for a wrapped parcel no more than about 9 cm across and 12 cm tall. Check the parcel against your work before making the rim. For extra height, add complete mesh rounds, keeping 20 chain spaces in every round.
Gauge
Aim for 15 sc and 17 rounds over 10 cm in solid sc fabric. Check gauge on a swatch; mesh height will vary with yarn and tension.
Abbreviations
US crochet terms.
- ch = chain
- sc = single crochet
- sl st = slip stitch
- st(s) = stitch(es)
- rnd = round
Pattern
- Before you begin Work the solid base in a spiral, marking its first stitch and moving the marker up each round. Do not join or turn until instructed for the mesh. In the joined mesh and rim rounds, joining slip stitches and starting chains do not count as stitches.
- Base, rnd 1 Make a magic ring and work 6 sc into it. Pull the ring closed. (6 sc)
- Base, rnds 2â10 Rnd 2: Work 2 sc in each st. (12 sc) Rnd 3: [Sc in next st, 2 sc in next st] 6 times. (18 sc) Rnd 4: [Sc in next 2 sts, 2 sc in next st] 6 times. (24 sc) Continue in the same way, adding one plain sc to each repeat in every new round: rnd 5 has 3 plain sc before each increase (30 sc), rnd 6 has 4 (36 sc), rnd 7 has 5 (42 sc), rnd 8 has 6 (48 sc), rnd 9 has 7 (54 sc), and rnd 10 has 8 (60 sc).
- Mesh, rnd 11 Remove the marker. Sc in the next st, [ch 5, skip the next 2 sts, sc in the next st] 19 times, ch 5, skip the final 2 sts, then sl st in the first sc to join. (20 sc anchors and 20 ch-5 spaces)
- Mesh, rnds 12â26 At the start of each round, sl st into the first ch-5 space and sc in that space. [Ch 5, sc in the next ch-5 space] 19 times, ch 5, then sl st in the first sc to join. Repeat this round 15 times in total, or add complete repeats for a taller sack. Each round has 20 sc anchors and 20 ch-5 spaces.
- Rim, rnd 27 Sl st into the first ch-5 space. Ch 1, work 3 sc in that space, then work 3 sc in each of the remaining 19 ch-5 spaces. Sl st in the first sc to join. (60 sc)
- Rim, rnds 28â30 Ch 1, sc in each of the 60 sts and sl st in the first sc to join. Repeat for 3 rounds in total. Fasten off. (60 sc in each round)
- Drawstring Chain until the chain measures at least 65 cm when laid relaxed; fasten off, leaving tails for securing. Weave it in and out through all 20 ch-5 spaces of the last mesh round, directly below the solid rim. Bring both ends out through adjacent spaces, check that it draws the opening closed, then knot the ends securely.
Finishing
- Weave in the base and rim yarn ends without pulling the mesh out of shape.
- Lightly shape the base and mesh by hand. Place a wrapped parcel inside and pull the drawstring closed; use a separate fabric bag for any loose small items.
Helpful Tips
- Count the ch-5 spaces rather than every chain stitch: there should be 20 spaces all the way up the mesh.
- If the mesh is too open for the intended gift, use an inner fabric bag rather than relying on the crochet to contain it.
Mosaic Snowflake Panel Sack

This crochet Christmas sack puts a geometric cream snowflake at the centre of a navy front panel. The motif is worked into the fabric with overlay mosaic crochet, so it has a crisp, graphic look without a separate sewn-on decoration.
The chart asks you to pay attention to colour placement and to work from the right side throughout. It is a satisfying choice if you already know the basics of mosaic crochet and want a Christmas gift sack with a more intricate focal point.
A plain back keeps the snowflake in focus, while the rectangular shape gives the finished sack a tidy outline. It makes a useful alternative to disposable gift wrapping and can be brought out again each Christmas.
Mosaic Snowflake Panel Sack

Quick-reference card. Follow the complete written instructions below.
Materials
- Medium-weight yarn: Approximately 150 m navy and 60 m cream. Choose yarns of similar weight.
- Crochet hook: 4 mm, or the size needed to obtain gauge.
- Other: Tapestry needle, scissors and stitch markers.
Size and Fit
One sample size. At the stated gauge, the 29-stitch panels measure approximately 18 cm wide before seaming. With one stitch taken into each side seam, expect an opening approximately 17 cm wide when laid flat and a height of approximately 19 cm including the border. These are gauge-based estimates, not tested measurements.
Gauge
Approximately 16 stitches and 18 rows per 10 cm in the panel fabric. Check gauge on a swatch that includes chains and dropped stitches; adjust the hook if needed.
Abbreviations
US crochet terms.
- ch = chain
- sc = single crochet
- sl st = slip stitch
- BLO = back loop only
- FLO = front loop only
- RS = right side
- WS = wrong side
Pattern
- How the mosaic chart works Each chart character represents one stitch position, not necessarily one stitch worked into the preceding row. C means cream should show; N means navy should show. Work every chart row from right to left with the RS facing, fastening off after each row and joining the next colour at the right edge. Odd-numbered chart rows use cream; even-numbered chart rows use navy. At a position matching the working colour, make sc BLO into the stitch immediately below. If that position has a ch space immediately below, instead make a dropped US double crochet into the available front loop of the stitch two rows below, working in front of the ch space. At a position showing the other colour, ch 1 and skip the stitch immediately below; the preceding row’s colour shows through. Do not work into the skipped ch space when making a dropped stitch.
- Chart The chart is 21 positions wide and 21 rows high. Read row 1 first, then upwards through row 21; work each printed row from its right-hand end to its left-hand end. Add four background positions on each side as directed below. Every printed row has 21 characters.
01 NNNNNNNNNNCNNNNNNNNNN
02 NNNNNNNNNNCNNNNNNNNNN
03 NNNNCNNNNNCNNNNNCNNNN
04 NNNNNCNNNNCNNNNCNNNNN
05 NNNNNNCNNNCNNNCNNNNNN
06 NNNNNNNCNNCNNCNNNNNNN
07 CNNNNNNNCNCNCNNNNNNNC
08 NCNNNNNNCCCNâNNNNNNCN
09 NNCNNNNCCCCCCCNNNNCNN
10 NNNCNNNCCCCCCCNNNCNNN
11 CCCCCCCCCCCCCCCCCCCCC
12 NNNCNNNCCCCCCCNNNCNNN
13 NNCNNNNCCCCCCCNNNNCNN
14 NCNNNNNNCCCNâNNNNNNCN
15 CNNNNNNNCNCNCNNNNNNNC
16 NNNNNNNCNNCNNCNNNNNNN
17 NNNNNNCNNNCNNNCNNNNNN
18 NNNNNCNNNNCNNNNCNNNNN
19 NNNNCNNNNNCNNNNNCNNNN
20 NNNNNNNNNNCNNNNNNNNNN
21 NNNNNNNNNNCNNNNNNNNNN
In rows 08 and 14, the displayed break after CCC is only a text separator: read each as NCNNNNNNCCCNNNNNNNCN, with no space or extra stitch. - Front panel: foundation With navy, ch 30. Row 1 (RS): sc in the second ch from the hook and in each remaining ch; 29 sc. Rows 2â5: ch 1, turn, sc in each stitch; 29 sc. Fasten off after row 5. Keep row 1 marked as the bottom edge.
- Front panel: chart rows 1â21 Chart row 1 is panel row 6; chart row 21 is panel row 26. For each row, join the specified colour at the right edge with the RS facing and work across 29 positions: one edge sc into the first stitch, three N background positions, the 21 chart positions, three N background positions, and one edge sc into the last stitch. Work both edge sc through both loops for a secure selvedge. Work each background N position by the same chart rules as a printed N. Fasten off after every row. On cream rows, the edge sc will be cream; these edge stitches are taken into the side seams.
- Front panel: top Panel row 27: join navy at the right edge, RS facing. Sc into the first edge stitch. Across the next 27 positions, make a dropped double crochet into the navy stitch two rows below wherever panel row 26 has a ch space; otherwise sc BLO into the cream stitch immediately below. Sc through both loops into the last edge stitch. There are 29 stitches. Rows 28â31: ch 1, turn and sc in each stitch across. Fasten off.
- Plain back panel With navy, ch 30. Row 1: sc in the second ch from the hook and in each remaining ch; 29 sc. Rows 2â31: ch 1, turn and sc in each stitch; 29 sc. Fasten off.
- Seam Place the panels with wrong sides together, aligning their foundation edges and row ends. Using navy, seam the base and both sides with a whipstitch or mattress stitch, taking approximately one stitch in from each side edge. Leave both 29-stitch top edges open. Enclose the front panel’s short mosaic yarn ends in the side seams as you work; weave in any ends that do not reach a seam securely on the WS. Turn the sack RS out.
- Eyelet border The opening has 27 exposed stitch positions on each panel after the side seam allowances, or 54 positions around. Join navy at a side seam. Round 1: work one sc into each exposed top stitch around; 54 sc. Join with a sl st to the first sc. Round 2: ch 1, then repeat (sc in next stitch, ch 1, skip next stitch) 27 times; 27 sc and 27 ch-1 spaces. Join with a sl st to the first sc. Round 3: ch 1, work one sc in each sc and each ch-1 space around; 54 sc. Join and fasten off.
- Drawstring With navy, chain until the relaxed chain measures approximately 85 cm. Sl st into the back bump of each chain to make a firmer cord, then fasten off. Thread the cord through the round-2 eyelets, beginning and ending beside the same side seam. Tie the ends together or knot them separately.
Finishing
- Weave in all remaining ends on the WS without pulling the mosaic fabric out of shape.
- Ease the panel seams straight by hand. If appropriate for the chosen yarn, lightly block the sack without stretching the eyelets.
- Pull the drawstring to close the opening and tie a bow.
Helpful Tips
- The chart’s 21 positions sit between four background positions on either side, making 29 positions across. The outermost position on each edge is always an sc selvedge.
- Keep each ch-1 space loose enough for the next row’s dropped stitch to pass in front of it without puckering.
- Before making a dropped stitch, check that you are catching the stitch two rows below rather than working into the ch space.
Tapestry Christmas Tree Sack

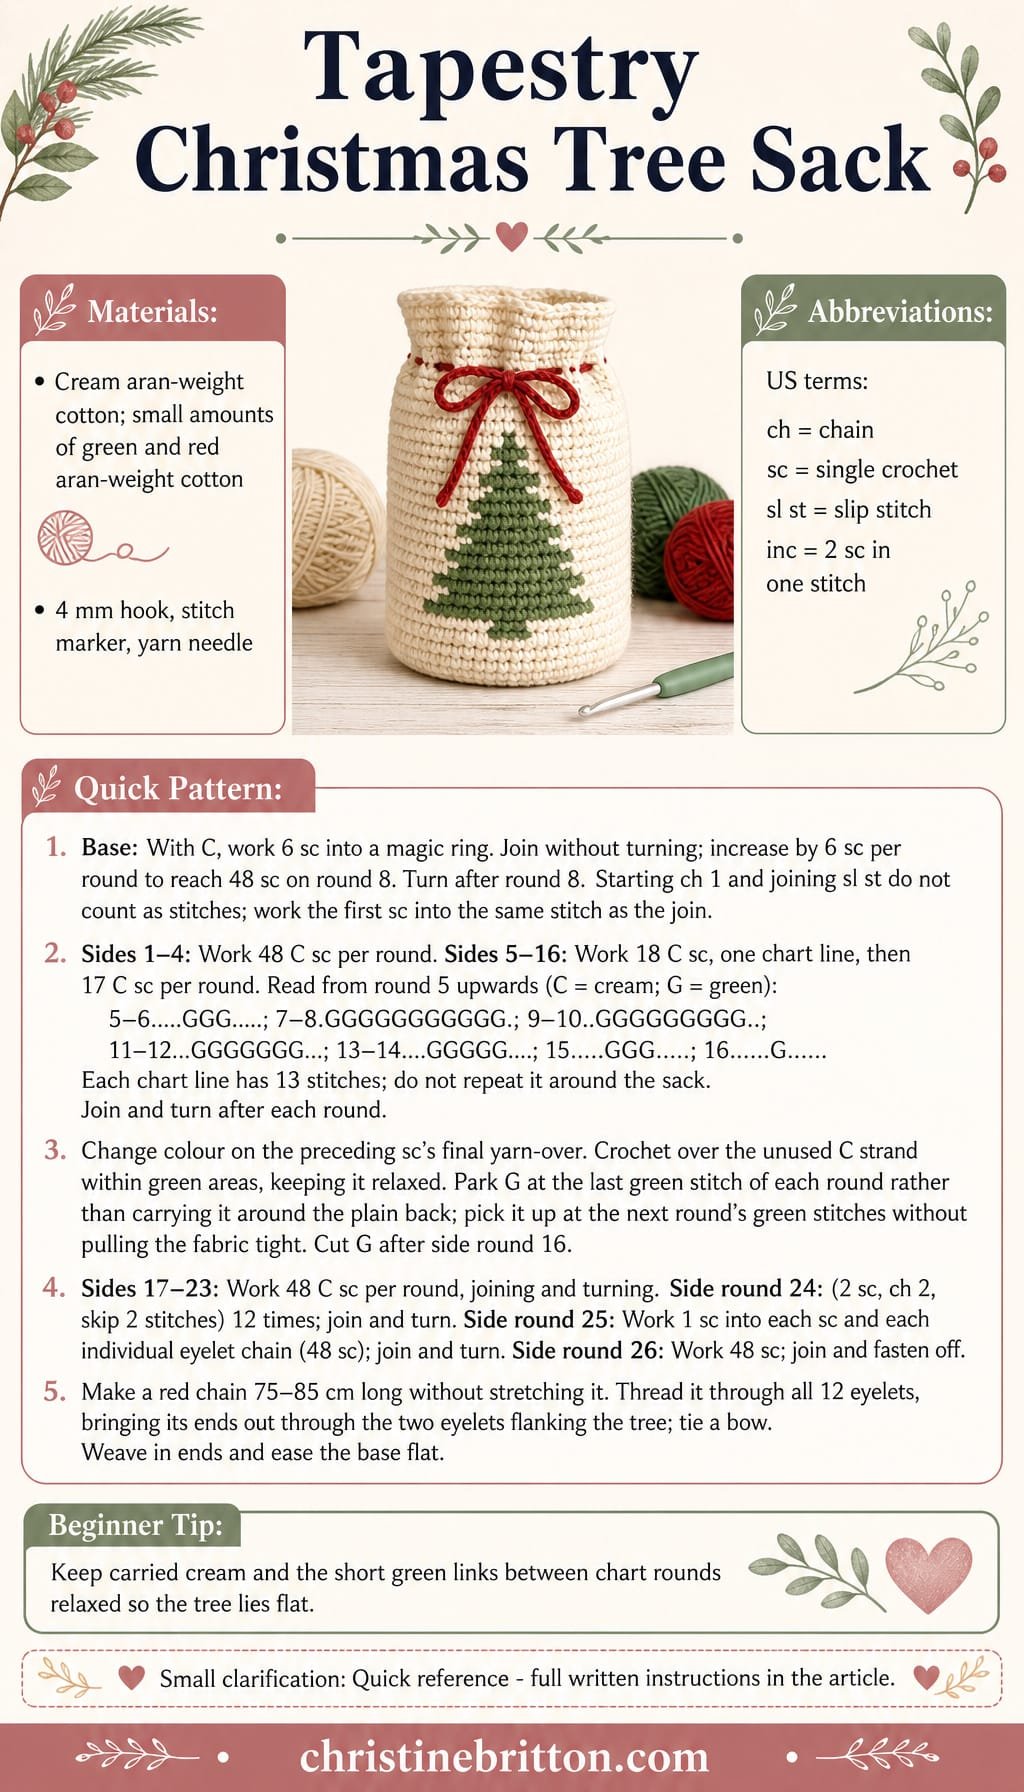
The green tree is worked into the front of this cream crochet Christmas sack, rather than sewn on afterwards. Its simple shape stands out against the plain fabric, while a red tie adds a festive finish without competing with the motif.
Colour management matters as much as the tree design here. The closely worked fabric hides the unused cream yarn within the green areas, and the green yarn stays near the motif between turned rounds instead of stretching across the inside of the sack. Keeping those strands relaxed helps the front lie smooth.
This is a decorative sack for small, lightweight Christmas gifts or treats, not a bag for carrying heavy presents. The chart and its placement are designed for this particular sack, so use the written pattern below rather than substituting a different tree chart without adjusting the layout.
Tapestry Christmas Tree Sack
Quick-reference card. Follow the complete written instructions below.
Materials
- Cream aran-weight cotton yarn: Main colour for the base and sack.
- Green aran-weight cotton yarn: A small amount for the tree motif.
- Red aran-weight cotton yarn: For the drawstring.
- 4 mm crochet hook: Or the size needed to obtain a firm fabric at the stated gauge.
- Stitch marker and yarn needle: For tracking the first stitch and weaving in ends.
Size and Fit
One small sack, approximately 30 cm around, 9.5 cm across the base and 14â15 cm high at the stated gauge. The drawstring closes the opening; it is not intended to bear a heavy load.
Gauge
16 sc and 18 joined, turned rounds = 10 cm in cream using a firm tension. Check the stitch gauge around the sack; a different gauge changes its circumference.
Abbreviations
US crochet terms.
- ch = chain
- sc = single crochet
- sl st = slip stitch
- inc = work 2 sc in one stitch
- st(s) = stitch(es)
- C = cream
- G = green
Pattern
- Before you begin The base is worked in joined rounds without turning. The sides are joined and turned after every round. A starting ch 1 and a joining sl st never count as stitches. On every round, work the first sc into the same stitch as the join, then continue around; mark that first sc. Join to the marked sc.
- Base, rounds 1â4 With C, make a magic ring. Round 1: Ch 1, work 6 sc into the ring; join. (6) Round 2: Ch 1, inc in each st; join. (12) Round 3: Ch 1, (1 sc, inc) 6 times; join. (18) Round 4: Ch 1, (2 sc, inc) 6 times; join. (24)
- Base, rounds 5â8 Round 5: Ch 1, (3 sc, inc) 6 times; join. (30) Round 6: Ch 1, (4 sc, inc) 6 times; join. (36) Round 7: Ch 1, (5 sc, inc) 6 times; join. (42) Round 8: Ch 1, (6 sc, inc) 6 times; join. (48) Turn after round 8.
- Sides, rounds 1â4 Ch 1, sc in each of the 48 stitches; join and turn. Repeat for four side rounds, keeping 48 sc in each.
- Tree chart and placement Work the following 13-stitch chart once per round on side rounds 5â16. Each line is one round; read the lines from round 5 upwards. C means one cream sc and G means one green sc. Round 5: …..GGG…..; 6: …..GGG…..; 7: .GGGGGGGGGGG.; 8: .GGGGGGGGGGG.; 9: ..GGGGGGGGG..; 10: ..GGGGGGGGG..; 11: …GGGGGGG…; 12: …GGGGGGG…; 13: ….GGGGG….; 14: ….GGGGG….; 15: …..GGG…..; 16: ……G……. Each line has exactly 13 stitches. On every chart round, work 18 C sc, the 13 chart stitches, then 17 C sc; join and turn. This places the tree opposite the round join. The chart is not repeated around the sack.
- Managing the colours On side round 5, introduce G on the final yarn-over of the C stitch immediately before the first G stitch. For every colour change, make the final yarn-over of the preceding sc with the new colour. Lay the unused C strand along the tops of the stitches and crochet over it while working G; keep it relaxed. When a chart line returns to C, leave G at its last green stitch. Do not carry G through the remaining cream stitches or around the back. Because the rounds turn and the chart is symmetrical, the next round approaches that parked strand from the other side of the motif. Pick it up at the next green stitch, leaving just enough slack between rounds that the fabric lies flat. After round 16, cut G with a tail for weaving in.
- Plain sides, rounds 17â23 With C only, ch 1 and sc in each stitch; join and turn after every round. (48 sc per round)
- Eyelets, side round 24 Ch 1, (sc in each of the next 2 stitches, ch 2, skip the next 2 stitches) 12 times; join and turn. This uses all 48 stitches of the previous round and makes 12 eyelets.
- Top edge, side rounds 25â26 Ch 1, work 1 sc in each sc and 1 sc in each individual chain of the eyelet round; join and turn. (48 sc) Work one more round of 48 sc; join, fasten off and weave in the end.
- Red drawstring With red, make a chain approximately 75â85 cm long when laid flat without stretching. Fasten off securely. Starting at an eyelet just to one side of the tree, thread the chain in and out through all 12 eyelets, bringing both ends out at the two eyelets flanking the tree. Tie the ends in a bow.
Finishing
- Weave in the green ends on the inside of the tree without pulling the motif out of shape.
- Weave in the base and top-edge ends. Check the inside of the sack for any loose strands before filling it.
- Ease the base flat and straighten the drawstring so the opening gathers evenly.
Helpful Tips
- Keep the carried cream strand loose enough that the green stitches do not pucker.
- Do not substitute a wider tree chart without recalculating the 18-stitch and 17-stitch cream sections; the round must still total 48 stitches.
- If a firmer drawstring is wanted, make a crocheted cord, but measure its finished length before threading it through the eyelets.
Shell-Lace Parcel Sack

This crochet Christmas sack is a decorative way to present a wrapped gift. Its solid base gives the parcel a place to sit, while the open shell-lace sides let the wrapping colour show through.
The lace is part of the appeal, but it also means the sack is better suited to a parcel than to loose sweets or small treats. Choose wrapping that you are happy to have visible through the openings; a plain paper can make the shell pattern stand out.
This is an intermediate project because the fabric changes from a firm base to open lace and then to a neat drawstring edge. The finished look is soft and festive without hiding the gift-shaped form inside.
Shell-Lace Parcel Sack
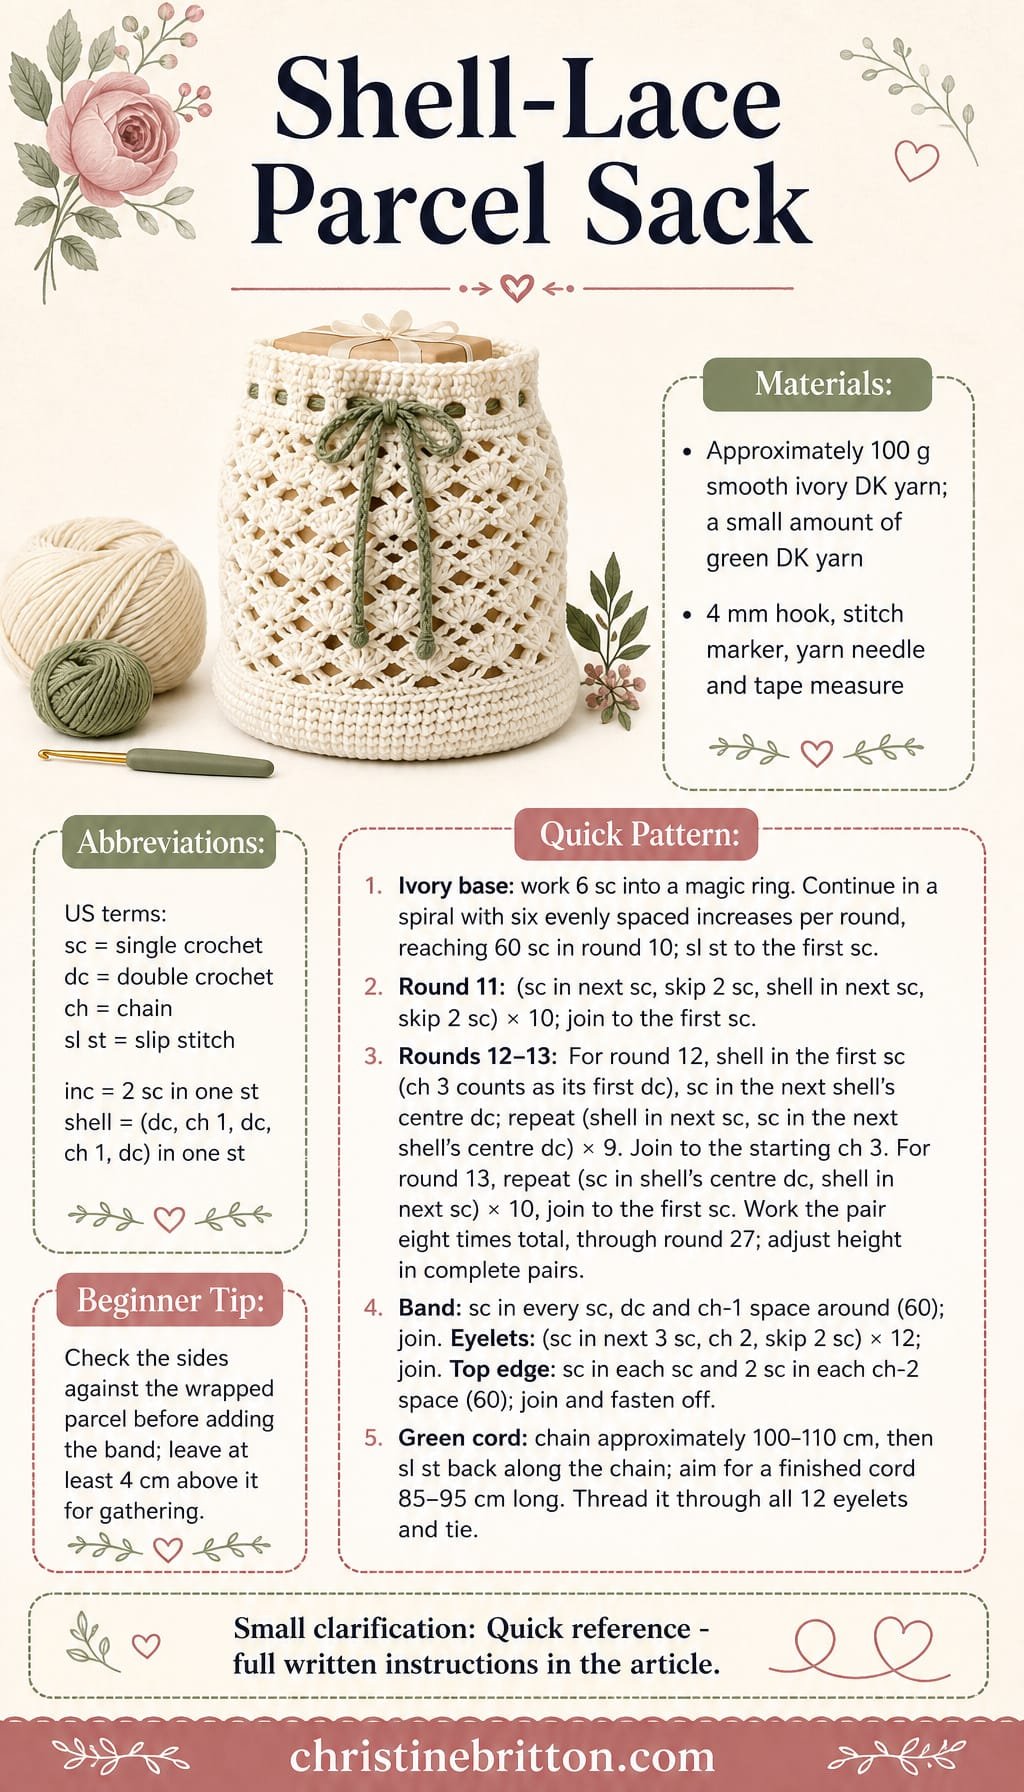
Quick-reference card. Follow the complete written instructions below.
Materials
- Ivory DK yarn: Approximately 100 g of smooth yarn with clear stitch definition.
- Green DK yarn: A small amount for the drawstring.
- 4 mm crochet hook: Or the size needed for a firm base.
- Stitch marker, yarn needle and tape measure: For tracking the base rounds, weaving in ends and checking the fit.
Size and Fit
One sample size: a 60-stitch base, approximately 12 cm across at the suggested stitch gauge, with 17 shell-lace rounds. The finished height depends on your round height. Check it against the intended wrapped parcel: before adding the band, the sides should reach at least 4 cm above the parcel so the top can gather. A parcel with a footprint of about 10 Ã 7 cm or smaller is a practical starting point. Add or remove pairs of shell rounds to adjust the height without changing the band.
Gauge
Aim for approximately 16 sc per 10 cm in a firm swatch. Exact gauge is less important than a base that holds its shape and an opening that fits the wrapped parcel. Check the height directly against the parcel; shell-round height varies by yarn and maker.
Abbreviations
US crochet terms.
- ch = chain
- dc = double crochet
- sc = single crochet
- sl st = slip stitch
- st(s) = stitch(es)
- inc = work 2 sc in the same stitch
- shell = (dc, ch 1, dc, ch 1, dc) in the indicated stitch
Pattern
- Construction notes Work the base in a continuous spiral, marking its first stitch. Work the sides and band in joined rounds. A starting ch 1 does not count as a stitch; the starting ch 3 in a shell counts as its first dc. Slip-stitch joins do not count as stitches. Do not turn.
- Base, rounds 1â2 With ivory, work 6 sc into a magic ring. Mark the first sc. Round 1: 6 sc. Round 2: inc in each sc around. (12 sc)
- Base, rounds 3â10 Round 3: (sc in next sc, inc in next sc) 6 times. (18 sc) Round 4: (sc in next 2 sc, inc in next sc) 6 times. (24 sc) Continue the same increase sequence, working one more sc before each inc in every round: round 5 has 30 sc; round 6, 36 sc; round 7, 42 sc; round 8, 48 sc; round 9, 54 sc; and round 10, 60 sc. After round 10, sl st into its first sc to close the spiral.
- Shell-lace round 11 Ch 1. Starting in the same sc as the join, (sc in next sc, skip next 2 sc, shell in next sc, skip next 2 sc) 10 times. Sl st into the first sc. (10 sc, 10 shells)
- Shell-lace round 12 Work a shell in the first sc of the previous round, using ch 3 as its first dc: ch 3, ch 1, dc, ch 1, dc all in that sc. Sc in the centre dc of the next shell. Then (shell in next sc, sc in centre dc of next shell) 9 times. Sl st into the top of the starting ch 3. (10 sc, 10 shells)
- Shell-lace round 13 Ch 1. Sc in the centre dc of the first shell, then shell in the next sc. Repeat (sc in centre dc of next shell, shell in next sc) 9 more times. Sl st into the first sc. (10 sc, 10 shells)
- Complete the sides Work rounds 12â13 a total of eight times, ending with round 27. For every repeat of round 12, make the starting shell in the first sc; for every repeat of round 13, make the first sc in the centre dc of the first shell. Check the sides against the wrapped parcel. To change the height, add or remove complete pairs of these rounds, finishing after a round 13 repeat.
- Solid band round Ch 1. Starting in the first sc, work 1 sc in each sc, each of the 3 dc and each of the 2 ch-1 spaces around. Sl st into the first sc. (60 sc)
- Eyelet round Ch 1. Starting in the first sc, (sc in next 3 sc, ch 2, skip next 2 sc) 12 times. Sl st into the first sc. (36 sc and 12 ch-2 spaces)
- Top edge Ch 1. Work 1 sc in each sc and 2 sc in each ch-2 space around. Sl st into the first sc and fasten off. (60 sc)
- Green drawstring With green, chain until the chain measures approximately 100â110 cm. Sl st back along the chain and fasten off; aim for a finished cord approximately 85â95 cm long. If it is shorter, remake it with a longer starting chain. Thread it through all 12 eyelets, alternating from outside to inside and inside to outside. Both ends should emerge on the outside; tie them to close the sack.
Finishing
- Weave in all ends, keeping the inside of the base smooth.
- Lay the sack flat and straighten the shells and band by hand. If desired, lightly block according to the yarn label without stretching the eyelets.
- Insert a wrapped parcel before drawing the cord closed. Keep the shell openings visible rather than relying on the sack to conceal unwrapped contents.
Helpful Tips
- The centre dc is the middle of the three dc in each shell; the two ch-1 spaces sit on either side of it.
- If the circular base cups tightly, check that all six increases were made in the current round. If it ruffles, check for extra increases.
- The solid band is worked into the stitches and chain spaces of the final lace round, not around the entire shells.
Corner-to-Corner Gusset Sack

A flat gift pouch can struggle with a bulky present. This crochet Christmas sack has a separate gusset that gives the base and sides depth, while the front and back show off diagonal corner-to-corner stripes.
The two faces use the same stripe sequence, so their edges line up neatly when assembled. The plain gusset provides a quiet contrast and lets the diagonal pattern remain the focus.
Corner-to-corner fabric and the plainer gusset can behave differently, so the gusset length is based on the finished panel edges rather than a fixed number of rows. Matching panels also help the corners sit neatly and the drawstring top stay level.
Corner-to-Corner Gusset Sack

Quick-reference card. Follow the complete written instructions below.
Materials
- DK-weight yarn: Approximately 250 m of colour A for the striped panels and band, and 150 m of contrasting colour B for the stripes and gusset. Allow extra if adjusting the size.
- Crochet hook: 4 mm, or the size needed for the target gauge.
- Notions: Tapestry needle, stitch markers, scissors and tape measure.
Size and Fit
One sample size: approximately 20 cm wide by 25 cm high, with a 5 cm-deep gusset, before filling. Each blocked panel has an 8-block top and base and 10-block sides. The gusset is made to fit the measured edges, rather than to a fixed row count.
Gauge
Target gauge after blocking: 4 C2C blocks measure 10 cm along a straight panel edge; 16 sc and approximately 18 rows measure 10 cm in gusset fabric. Check the panel dimensions before making the gusset. These are target measurements, not a claim of a tested sample.
Abbreviations
US crochet terms.
- ch = chain
- dc = double crochet
- sc = single crochet
- sl st = slip stitch
- sp = space
- C2C block = ch-3 and 3 dc worked into a ch-3 space, or the starting ch-6 and 3 dc that form the first block of an increasing row
Pattern
- Colour plan Make both panels with the same colours on the same numbered rows: rows 1â2 in A, 3â4 in B, 5â6 in A, and so on, changing colour every two rows. Row 17 is in A. Fasten off at colour changes and attach the next colour where the following row begins; weave in the ends before assembly.
- Panel 1: increasing rows With A, ch 6. Row 1: dc in the fourth ch from the hook and in each of the next 2 ch (1 block). Row 2: turn, ch 6, dc in the fourth ch from the hook and in each of the next 2 ch; sl st in the ch-3 sp of the previous row, ch 3, work 3 dc in the same sp (2 blocks). Rows 3â8: turn, ch 6 and work 3 dc as for the first block of row 2. Then, for each ch-3 sp across the previous row, sl st in the sp, ch 3 and work 3 dc in the same sp. Each row gains 1 block; row 8 has 8 blocks.
- Panel 1: rectangular section Rows 9â10: turn and sl st across the 3 dc of the first block and into its ch-3 sp. Ch 3 and work 3 dc in that same sp. Work a block in every remaining ch-3 sp across: sl st in the sp, ch 3, 3 dc in the same sp. Each of these rows has 8 blocks. The decreased starting edge and continued far edge establish the panelâs rectangular shape.
- Panel 1: decreasing rows Rows 11â17: turn and sl st across the 3 dc of the first block and into its ch-3 sp. Ch 3 and work 3 dc in that same sp. Continue making blocks in the next ch-3 spaces, but leave the final ch-3 sp without a block; sl st into that final sp instead. Each row has 1 block fewer than the row before: 7 blocks on row 11, down to 1 block on row 17. Fasten off.
- Panel 2 Make a second panel exactly as for panel 1. Block both panels to the same dimensions. Orient them with an 8-block edge at the top and base and the 10-block edges at the sides.
- Measure and make the gusset Measure one blocked panel along a side, across the base and up the other side. With B, ch 9. Row 1: sc in the second ch from the hook and in each remaining ch; turn (8 sc). Row 2: ch 1, sc in each sc; turn. Repeat row 2 until the strip measures the sum of those three panel edges, approximately 70 cm at the target gauge. Do not stretch it while measuring. Its width should be approximately 5 cm. Fasten off, leaving yarn for seaming.
- Assembly Mark the gusset at the distance of one panel side from each short end; the distance between the markers should match the panel base. With right sides facing out, whipstitch one long gusset edge to the side, base and other side of panel 1, matching the markers to the bottom corners. Attach the other long gusset edge to panel 2 in the same way. Ease any small difference evenly; leave both 8-block top edges and both short gusset ends open.
- Top band Join A at a top corner. Round 1: work 4 sc along each of the 8 blocks on each panel top and 1 sc in each of the 8 stitches across each gusset end; join with a sl st in the first sc (80 sc). Place or adjust the stitches evenly so the edge lies flat. Rounds 2â3: ch 1, sc in every stitch; join (80 sc). Round 4, eyelets: ch 1, repeat [sc in each of the next 2 stitches, ch 2, skip the next 2 stitches] 20 times; join (40 sc and 20 ch-2 spaces). Round 5: ch 1, sc in each sc and work 2 sc in each ch-2 sp; join (80 sc). Rounds 6â7: ch 1, sc in every stitch; join (80 sc). Fasten off.
- Drawstring With B, make a chain long enough to measure approximately 80â90 cm after finishing. Sl st along the chain to form a firm cord; add chains if needed to reach the finished length. Fasten off. Weave the cord through all 20 eyelets, starting and ending at two neighbouring eyelets near the centre front.
Finishing
- Weave in all ends securely, paying particular attention to the top corners and gusset seams.
- Tie a small knot at each drawstring end if desired. Check that the cord slides freely before placing a gift inside.
Helpful Tips
- Count blocks at the end of every C2C row. Both panels must have the same row counts for their edges to match.
- Measure the blocked panel edges for the gusset; its row count is only an estimate because row height varies.
- If the top band draws in or flares, distribute its round-one stitches more evenly before continuing.
Tunisian Woven-Look Gift Sack

This crochet Christmas sack has a close, woven-look surface that suits a flat parcel. The rust-coloured fabric gives it a warm, understated look, while the drawstring mouth makes the wrapping part of the gift.
Tunisian simple stitch creates a denser fabric than many open crochet stitches, but its edges can curl and its width can vary. A blocked swatch is worth making before you begin. The side seams and regular-crochet border help the finished sack hold its shape without losing the flexibility needed to gather the top.
Tunisian Woven-Look Gift Sack

Quick-reference card. Follow the complete written instructions below.
Materials
- Aran-weight yarn: Approximately 300â400 m in rust; allow extra if your swatch is denser.
- Tunisian crochet hook: Approximately 7 mm, with room for 31 loops; adjust the size to obtain the stated gauge.
- Regular crochet hook: Approximately 5 mm for the border and drawstring.
- Notions: Yarn needle, scissors, tape measure and blocking pins.
Size and Fit
Approximately 24â25 cm wide when laid flat and 32â33 cm tall, including the border. Before folding, the blocked Tunisian rectangle measures approximately 26 Ã 60 cm. Suitable for a flat parcel smaller than the finished sack, with room to gather the mouth.
Gauge
Target blocked gauge: approximately 12 Tunisian simple stitches and 12 completed rows per 10 cm. Make and block a swatch before starting: Tunisian stitch width and curl vary. At this gauge, 31 stitches give a rectangle about 26 cm wide and 72 rows give about 60 cm in length.
Abbreviations
US crochet terms.
- ch = chain
- sc = single crochet
- sl st = slip stitch
- st(s) = stitch(es)
- TSS = Tunisian simple stitch
Pattern
- Swatch and set-up Swatch in TSS, block according to the yarn label and check both stitch and row gauge. Use a Tunisian hook that holds 31 loops comfortably. Work each Tunisian row in two passes; do not turn the work between passes.
- Foundation row â Row 1 With the Tunisian hook, ch 31 loosely. Forward pass: insert hook in the second ch from the hook, yarn over and draw up a loop; repeat in each remaining ch. There are 31 loops on the hook, including the original loop. Return pass: yarn over and draw through 1 loop, then yarn over and draw through 2 loops repeatedly until 1 loop remains. The foundation row counts as Row 1.
- Tunisian rectangle â Rows 2â72 For each row, skip the first vertical bar. Insert hook under the next vertical bar, yarn over and draw up a loop; continue across the interior bars. For the final stitch, insert hook under both strands of the edge stitch and draw up a loop. There are 31 loops on the hook. Work the return pass as for Row 1. Complete 72 rows in total. The rectangle should measure approximately 60 cm along its row-edge sides after blocking.
- Bind off and block After the return pass of Row 72, skip the first vertical bar and sl st under each subsequent vertical bar, working the final sl st under both strands of the edge stitch: 30 sl sts. Fasten off. Block the rectangle to approximately 26 Ã 60 cm, easing out curl without stretching it beyond the target measurements. Let it dry fully.
- Fold and seam Fold the rectangle in half along its 60 cm length so the foundation-chain edge meets the bound-off edge. The fold is the base; the two aligned short edges form the mouth. Sew each side through the outermost row-edge bars, joining 36 row-end pairs per side. Leave the entire mouth open. Turn right side out.
- Border â Round 1 With the regular hook, join yarn at one side seam at the mouth. Work 1 sc through the joined corner at that seam, 29 sc evenly across the first lip between the seams, 1 sc through the joined corner at the second seam, and 29 sc evenly across the second lip. Join with a sl st to the first sc: 60 sc. Keep the border relaxed so it does not pull the mouth in.
- Border â Round 2 Ch 1, sc in each of the 60 sc around. Join to the first sc: 60 sc.
- Eyelets â Round 3 Ch 1, *sc in each of the next 3 sc, ch 2, skip the next 2 sc; repeat from * 12 times around. Join to the first sc: 36 sc and 12 ch-2 eyelets, equivalent to 60 stitch positions.
- Border â Rounds 4â5 Round 4: ch 1, sc in each sc and work 2 sc in each ch-2 eyelet; join to the first sc: 60 sc. Round 5: ch 1, sc in each sc around; join and fasten off: 60 sc.
- Drawstring With the regular hook, make a chain about 105â110 cm long. Sl st in the second ch from the hook and in each ch back to the start. Check that the finished cord is about 95â100 cm long; remake or adjust its starting chain if needed. Weave it in and out through all 12 eyelets, beginning and ending at the same eyelet. Knot the cord ends securely.
Finishing
- Weave in all yarn ends, taking care not to close any eyelets.
- If the mouth still curls, lightly block the finished border as permitted by the yarn label and let it dry before drawing the cord tight.
Helpful Tips
- Count the loops on the hook during each forward pass: there should always be 31 before the return pass.
- Working the final Tunisian stitch under both strands of the edge stitch helps form a firm seaming edge.
- The side seams and crochet border help control curl, but a blocked swatch is the best guide to the finished width.
For another related project collection, browse crochet Christmas wine bottle covers.
Hexagonal-Base Christmas Sack
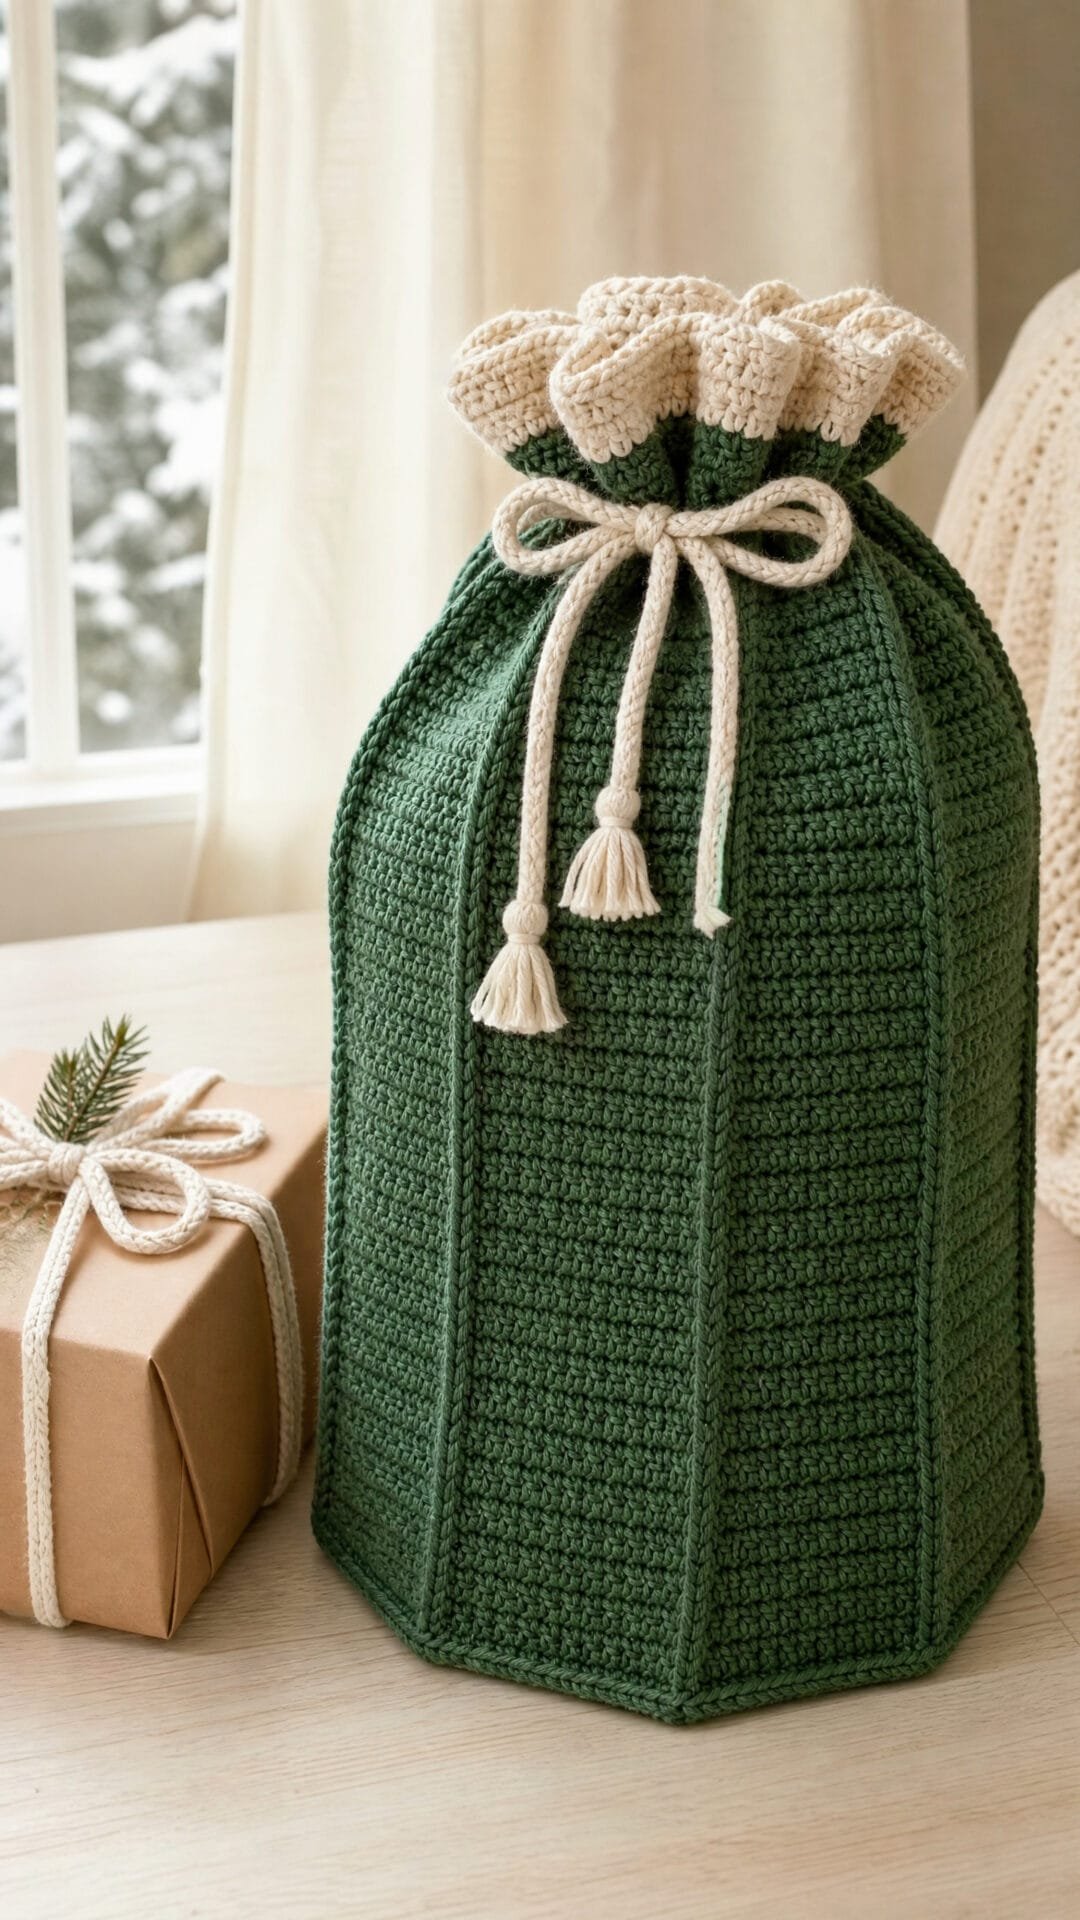
This crochet Christmas sack has a flat, six-sided footprint that suits a small boxed gift. Its upright panels give it a more defined shape than a soft pouch, while the gathered cream rim adds a festive contrast.
The sides are made as separate panels attached to the edges of the base, then joined along their neighbouring sides. Keeping the panels even helps the seams meet neatly and gives the rim a level edge. The openwork band provides a place for the drawstring without interrupting the sackâs hexagonal shape.
Hexagonal-Base Christmas Sack

Quick-reference card. Follow the complete written instructions below.
Materials
- Green DK-weight cotton yarn: Approximately 100 m for the base, panels and drawstring
- Cream DK-weight cotton yarn: Approximately 25 m for the rim
- 4 mm crochet hook: Or a size that gives a firm fabric
- Other tools: Six removable stitch markers, a yarn needle and scissors
Size and Fit
One sample size. At the stated gauge, the base is approximately 13 cm across its opposite flat sides and the sack is approximately 11 cm tall, including the rim. Allow clearance for the seams and drawstring: choose a box no wider than 10 cm and no taller than 8 cm.
Gauge
Aim for 16 sc and 18 rows over 10 cm in a firm, turned sc fabric. Gauge affects the finished dimensions; keep all six panels at the same row count.
Abbreviations
US crochet terms.
- ch = chain
- sc = single crochet
- sl st = slip stitch
- RS = right side
- WS = wrong side
- ch-2 space = space beneath two chain stitches
Pattern
- Base, round 1 With green yarn, make a magic ring. Work (2 sc, ch 2) six times into the ring. Pull the ring closed and join with a sl st to the first sc. There are 12 sc and six corner ch-2 spaces.
- Base, rounds 2â6 Ch 1; this does not count as a stitch. Work 1 sc in every sc and (sc, ch 2, sc) in each of the six corner ch-2 spaces. Join with a sl st to the first sc. Repeat this round until round 6 is complete. The sc counts after rounds 2â6 are 24, 36, 48, 60 and 72. Each straight edge now has 12 sc between its corner spaces. Fasten off.
- Mark the panel edges With the RS of the base facing, identify the six groups of 12 sc between adjacent corner ch-2 spaces. Each group forms one panel edge. Leave the corner spaces free when attaching panels.
- Six side panels, row 1 For the first panel, join green yarn in the first sc of one marked edge. Ch 1, sc in that stitch and in the next 11 sc of the same edge; ch 1 and turn. There are 12 sc. Work towards the next corner space, but do not crochet into it.
- Six side panels, rows 2â16 Sc in each of the 12 stitches. Ch 1 and turn after rows 2â15 only. After row 16, fasten off, leaving a long tail for seaming. With the base RS facing each time, repeat rows 1â16 on each of the other five edges. Every panel must have 16 rows and 12 sc per row.
- Assemble the sides Fold the panels upwards, with the base RS facing out. Use each panel’s long tail to sew its side at the row-16 end to the adjoining side of the preceding panel. Match the ends of all 16 rows and sew from the top down to the base. Repeat at all six joins to form a standing hexagon. Secure the tails and, if needed, tack each base corner space neatly beneath its seam.
- Cream rim, round 1 Join cream yarn at a top seam. Ch 1, then sc in each of the 12 top stitches on each panel, working across seams without adding stitches. Join with a sl st to the first sc. There are 72 sc.
- Cream rim, eyelet round 2 Ch 1. Repeat (sc in each of the next 4 sc, ch 2, skip the next 2 sc) 12 times. Join with a sl st to the first sc. There are 48 sc and 12 eyelet ch-2 spaces.
- Cream rim, rounds 3â4 Round 3: Ch 1, sc in every sc and work 2 sc into every eyelet ch-2 space; join to the first sc. There are 72 sc. Round 4: Ch 1, sc in every sc; join to the first sc. There are 72 sc. Fasten off.
- Drawstring With green yarn, ch 125. Sc in the second ch from the hook and in every remaining ch for 124 sc. Fasten off. Weave the cord in and out through the 12 eyelets, beginning and ending at the same eyelet.
Finishing
- Weave in all ends, keeping the inside of the sack tidy for the gift.
- Ease the base flat and straighten the six seams by hand. Do not stretch the eyelet rim out of shape.
- Place the gift inside, draw the cord gently to gather the cream rim, and tie a bow.
Helpful Tips
- Mark each corner ch-2 space as you work the base; the 12 sc between markers belong to one panel.
- Count panel rows before seaming. A mismatched row count will make the top edge uneven.
- If your fabric is loose enough for box corners to show through, use a smaller hook and reassess the finished size.
Bias-Striped Gathered Sack

Diagonal red-and-cream stripes give this crochet Christmas sack its festive look without adding decoration. The colour changes travel across the fabric as you work, while balanced shaping keeps the panel consistent for seaming. Itâs an appealing project if you enjoy keeping track of a repeating colour pattern.
The sack has a soft, gently gathered bottom rather than a flat, reinforced base. That makes it best suited to lightweight gifts, such as small textiles or other soft presents, rather than heavy or sharp-edged items.
A separate tie draws in the eyeleted mouth, so the top can be opened again without disturbing the gathered base. Keep the fabric supple as you work; it will be easier to draw into soft gathers and will give the finished sack its relaxed shape.
Bias-Striped Gathered Sack

Quick-reference card. Follow the complete written instructions below.
Materials
- Medium-weight yarn: Approximately 150 m each of red and cream in a flexible yarn.
- Crochet hook: A size suitable for your yarn and a supple fabric; 5 mm is a starting point.
- Strong cord: Approximately 60 cm to secure the bottom gathers.
- Tie: A separate 100 cm length of strong yarn or soft cord.
- Notions: Stitch marker, yarn needle and scissors.
Size and Fit
One sample size: the panel is 60 stitches wide and 42 rows high. At the suggested gauge, it is approximately 37.5 cm around when seamed, 18.75 cm wide when the tube is laid flat, and 30 cm high before the bottom is gathered. These are calculated dimensions, not measured results; gathering reduces the usable height.
Gauge
Aim for approximately 16 hdc and 14 rows per 10 cm. Gauge is not essential, but a firm or stiff fabric will be harder to gather.
Abbreviations
US crochet terms.
- ch = chain
- sc = single crochet
- hdc = half double crochet
- hdc2tog = half double crochet two stitches together
- sl st = slip stitch
- st(s) = stitch(es)
- sp = space
Pattern
- Colour placement The stripes are made within the rows, not by changing colour at the end of each row. Mark the end of the foundation row where its first hdc is worked; call this the marked edge. In every row, number the 60 stitches from 1 at the marked edge to 60 at the opposite edge, regardless of which direction you are crocheting. For row number r and stitch position p, use red when the remainder of (p + r â 2) divided by 12 is 0â5; use cream when it is 6â11. Thus row 1, counted from the marked edge, repeats 6 red hdc, 6 cream hdc five times. The colour boundary moves one stitch per row, making diagonal stripes. Carry the unused yarn neatly inside the hdc and change colour on the final yarn-over of the preceding stitch. Treat each hdc2tog as one stitch position and work both of its legs in the colour assigned to that position.
- Foundation and row 1 With red, ch 62. Hdc in the third ch from the hook and in each remaining ch, following the colour placement rule: 60 hdc. Mark the edge at the first hdc.
- Rows 2â42: bias panel Turn after every row; ch 1 to turn, but do not count it as a stitch. On even-numbered rows, work hdc2tog over the first 2 sts, hdc in each st until 1 st remains, then work 2 hdc in the last st. On odd-numbered rows from row 3 onwards, work 2 hdc in the first st, hdc in each st until 2 sts remain, then hdc2tog over those last 2 sts. Follow the colour placement rule throughout. Each row ends with 60 stitch positions. The increase stays at the marked edge and the decrease at the opposite edge.
- Side seam Fasten off and weave in the yarn ends. Fold the panel so its two 42-row side edges meet, with the foundation edge forming one end of the tube and row 42 the other. Without twisting the panel, whipstitch the side edges together, matching the row ends. Leave the foundation loops accessible for gathering and the row-42 stitches accessible for the top edging.
- Gathered bottom Using a yarn needle, run the 60 cm strong cord through every second foundation loop around the bottom edge, including across the seam. Pull evenly to close the opening. Tie the cord securely, run its ends through the gathers again and weave them in on the inside. This is a gathered closure, not a reinforced flat base.
- Top set-up round With the mouth at the top, join red or cream yarn at the seam. Work 1 sc in each of the 60 stitches of row 42. Join with a sl st to the first sc: 60 sc.
- Eyelet round Ch 1; repeat [sc in each of the next 2 sts, ch 1, skip the next st] 20 times. Join with a sl st to the first sc: 40 sc and 20 ch-1 spaces, or 60 positions around the mouth.
- Top edging Ch 1; work 1 sc in each sc and 1 sc in each ch-1 sp around. Join with a sl st to the first sc: 60 sc. Fasten off and weave in the end.
- Separate tie Starting beside the seam, weave the separate 100 cm tie in and out of successive eyelets around the mouth. Bring both ends out beside the seam, pull gently to gather the opening and tie a bow.
Finishing
- Check that the bottom cord is securely knotted and that no opening remains large enough for the intended lightweight gift to slip through.
- Ease the gathers into an even circle and arrange the mouth gathers before tying the bow.
Helpful Tips
- Keep the carried colour relaxed so the panel remains supple; a tight carry will draw in the diagonal stripes.
- Place a removable marker at the marked edge. Colour positions are always counted from that edge, even when a row begins at the opposite edge.
- Use this gathered-bottom sack for lightweight gifts, not heavy or sharp-edged objects.
Puff-Panel Gusset Sack
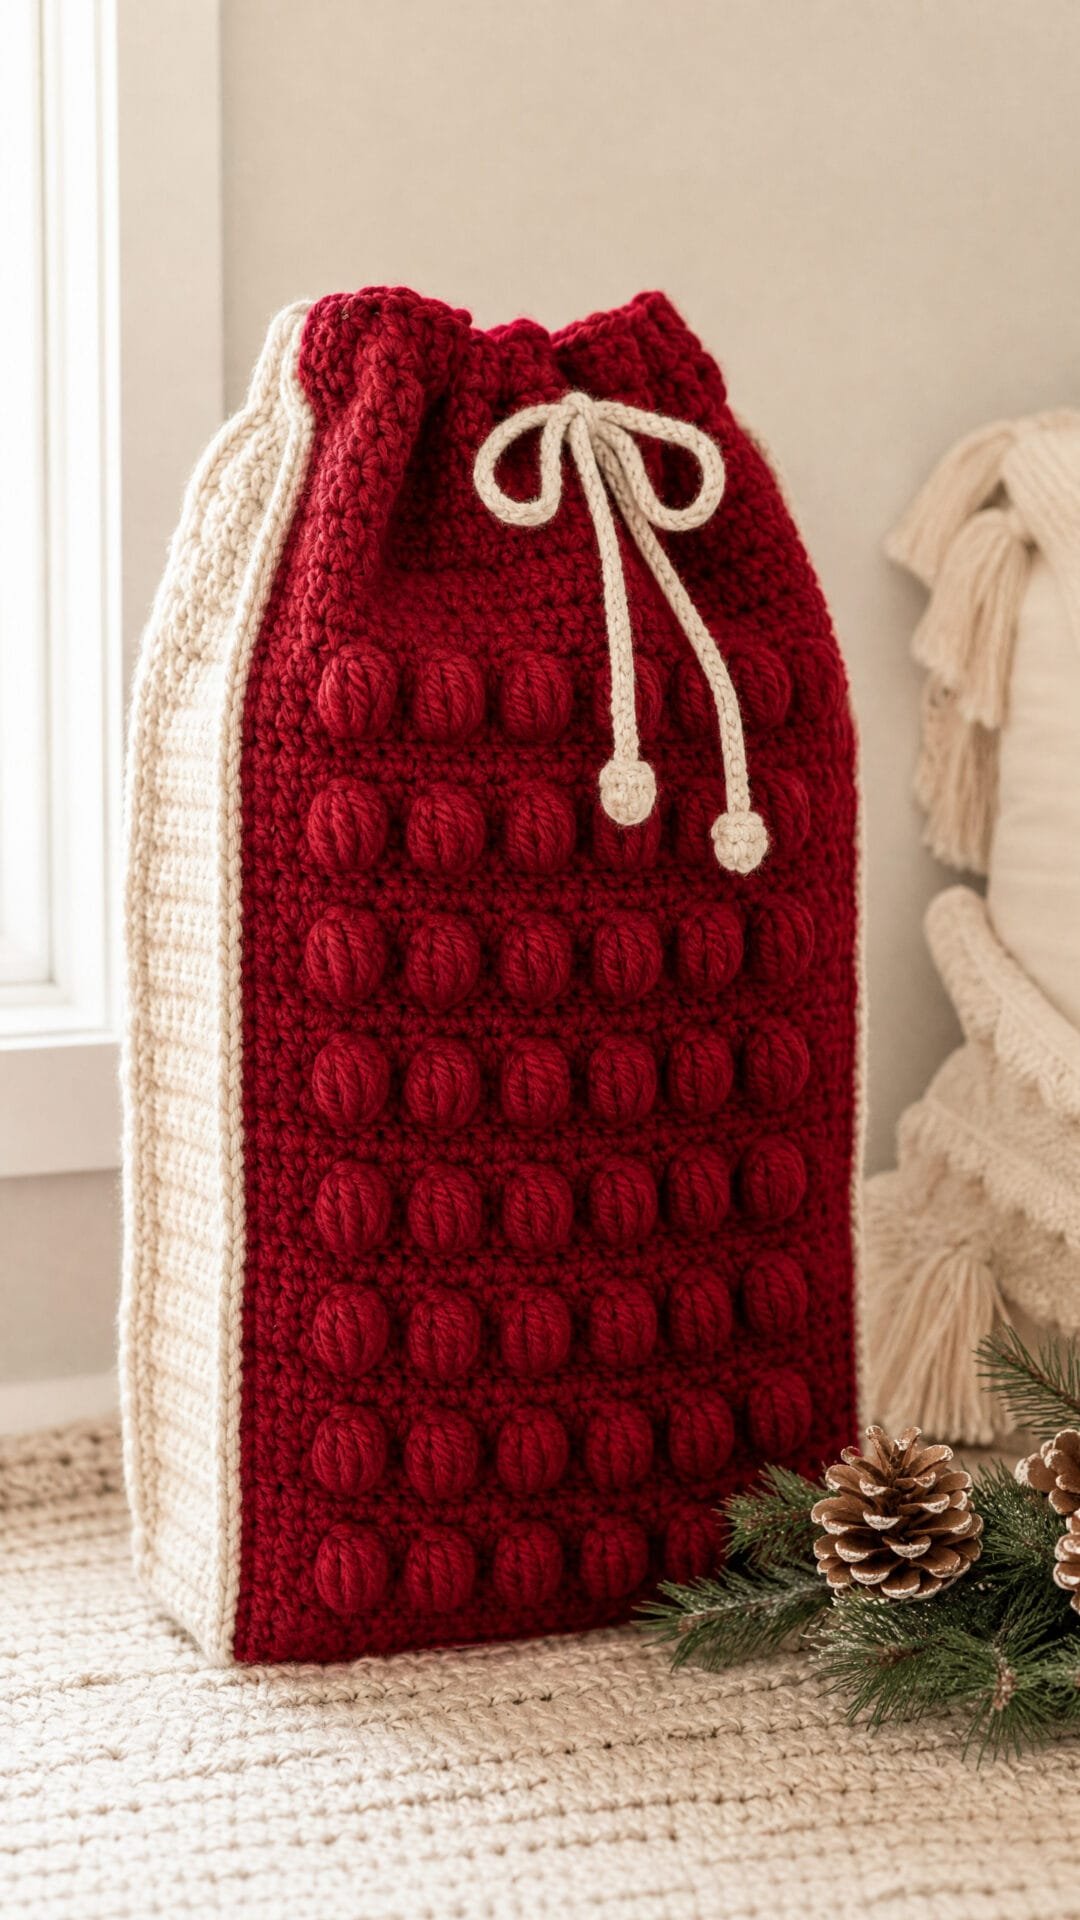
This crochet Christmas sack puts a small field of raised puffs on the front, where they can catch the light without making the whole bag bulky. The back stays plain, while a contrasting gusset gives the rectangular sack its sides and base.
The puffs sit well away from the edges, so the seams have a flatter surface to meet. That makes this an appealing project if you enjoy textured crochet but want a gift sack that can still sit neatly when filled.
For an even-looking panel, aim to pull the loops of each puff to a similar height. If one stands noticeably taller than its neighbours, adjust it while the stitch is still fresh rather than tugging at the surrounding fabric. A smooth, plied yarn will help the raised shapes remain distinct.
Puff-Panel Gusset Christmas Sack
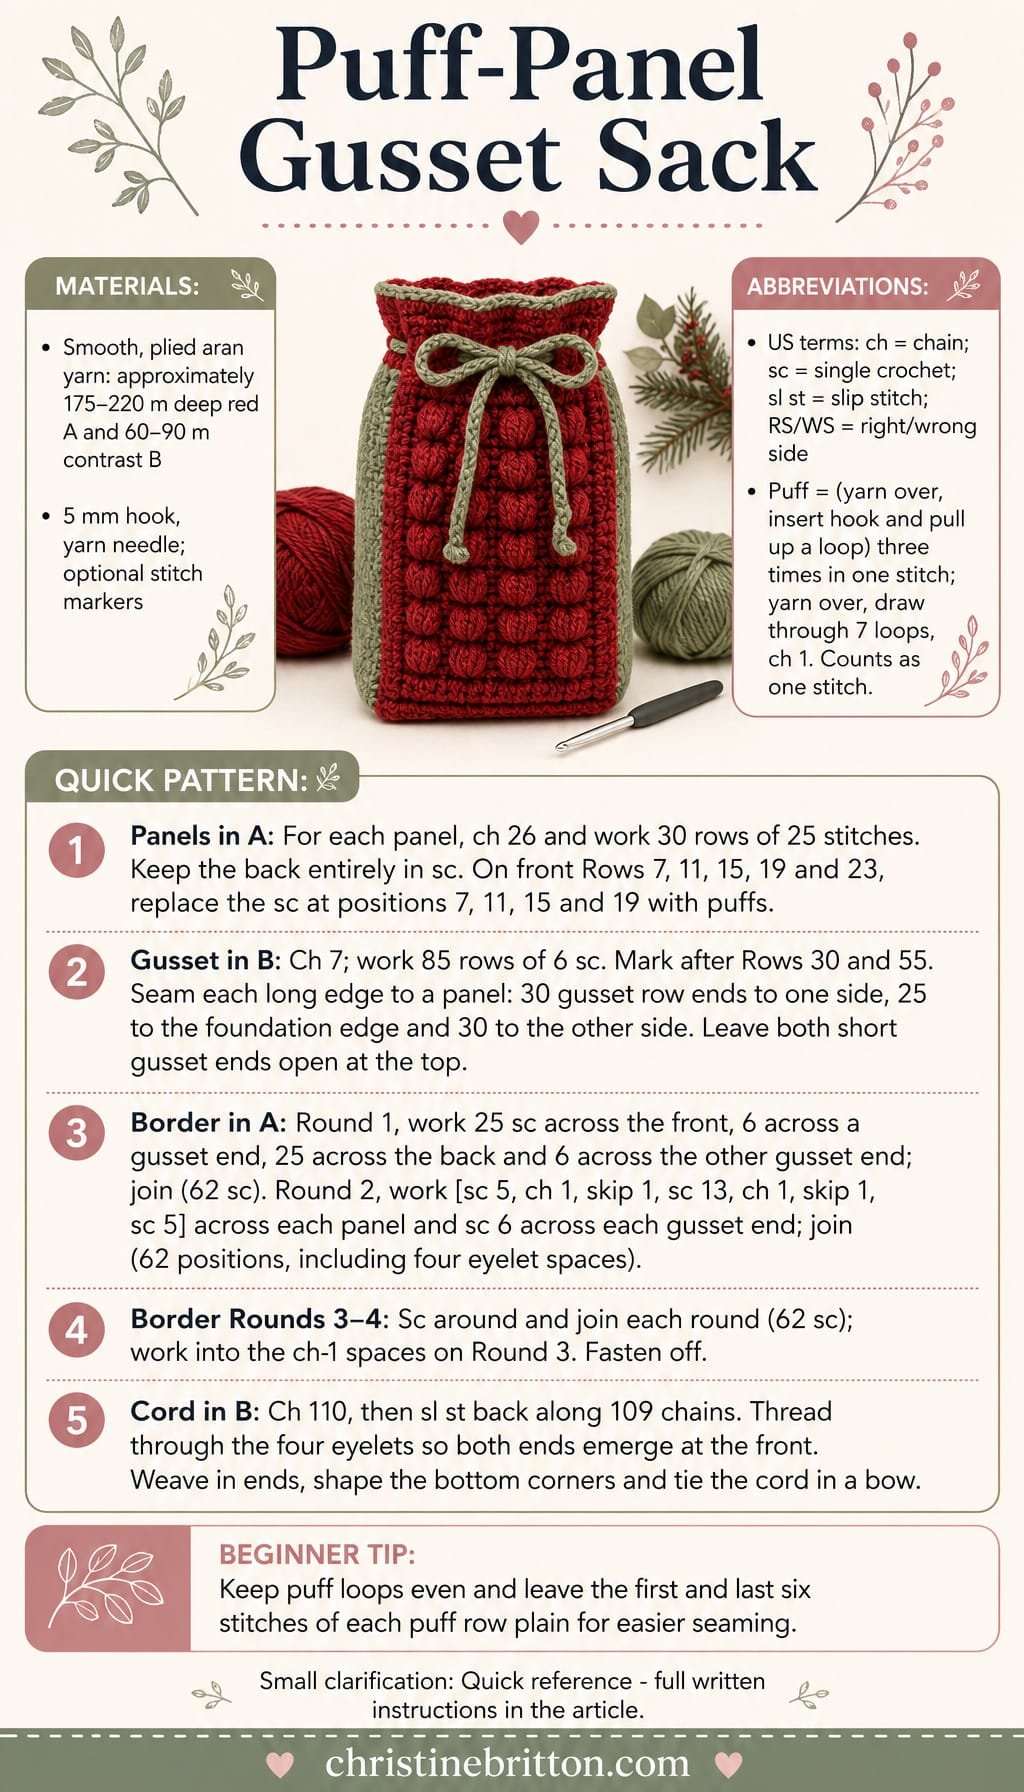
Quick-reference card. Follow the complete written instructions below.
Materials
- Smooth, plied aran-weight yarn: Approximately 175â220 m of deep red (A) for the panels and border, and 60â90 m of a contrasting colour (B) for the gusset and cord. Choose yarns of the same weight.
- 5 mm crochet hook: Or the size needed to achieve a firm fabric at the stated gauge.
- Yarn needle: For seaming and weaving in ends.
- Stitch markers: Optional, for marking the gusset corners and panel joins.
Size and Fit
One sample size. At the stated gauge, the sack measures approximately 15.5 cm across the front, 3.75 cm deep and 21 cm high, including the top border. The front and back are each 25 stitches wide by 30 rows high. The gusset is 6 stitches wide by 85 rows long: 30 rows for one side, 25 for the base and 30 for the other side.
Gauge
16 sc and 16 rows = 10 cm in plain sc worked flat. The puffs may make the front locally thicker; match the plain sections and check that all three pieces align before seaming.
Abbreviations
US crochet terms.
- ch = chain
- sc = single crochet
- sl st = slip stitch
- st(s) = stitch(es)
- RS/WS = right side/wrong side
- puff = Yarn over, insert hook in the indicated stitch and pull up a loop; repeat this action three times in the same stitch. Yarn over and draw through all 7 loops on the hook, then ch 1 to secure. The entire puff, including its securing chain, counts as one stitch.
Pattern
- Front panel With A, ch 26. Row 1 (RS): Sc in the second ch from the hook and in each ch across; 25 sc. Ch 1 and turn. Rows 2â30: Work one stitch into each of the 25 stitches, ch 1 and turn after each row except Row 30. On Rows 7, 11, 15, 19 and 23, work a puff instead of an sc in stitches 7, 11, 15 and 19; work sc in every other stitch. Work all other rows entirely in sc. Each row has 25 stitches. Fasten off. The first and last six stitches of every puff row remain plain, clear of the side seams.
- Back panel With A, ch 26. Row 1: Sc in the second ch from the hook and in each ch across; 25 sc. Ch 1 and turn. Rows 2â30: Sc in each stitch across; 25 sc per row. Ch 1 and turn after each row except Row 30. Fasten off.
- Continuous gusset With B, ch 7. Row 1: Sc in the second ch from the hook and in each ch across; 6 sc. Ch 1 and turn. Rows 2â85: Sc in each stitch across; 6 sc per row. Ch 1 and turn after each row except Row 85. Fasten off. Mark the points between Rows 30 and 31 and between Rows 55 and 56 along both long edges. Rows 31â55 form the 25-row base section.
- Seam the pieces With the puff side facing out, place one long edge of the gusset against the front panel. Starting at the top of the front’s right-hand side, sew one gusset row end to each of the 30 panel row ends. Turn the corner and sew the next 25 gusset row ends to the undersides of the front’s 25 foundation-chain stitches. Turn the second corner and sew the remaining 30 gusset row ends to the front’s other side, ending at the top. Do not add a stitch at either corner. Attach the back panel to the gusset’s other long edge in the same way, with its RS facing out and its top level with the front. The two short gusset ends remain open at the top. Use a firm, flexible seam and check the row-to-stitch alignment before securing the ends.
- Top border, Round 1 With A, join yarn at the top of the front, immediately after a gusset end. Working around the opening, sc in each of the 25 front stitches, each of the 6 stitches across the first gusset end, each of the 25 back stitches and each of the 6 stitches across the second gusset end. Join with a sl st to the first sc; 62 sc. Work into stitches at the rim, not into the side seams.
- Top border, Round 2: eyelets Ch 1; the turning chain does not count as a stitch. Across the front, sc in the next 5 stitches, ch 1 and skip 1 stitch, sc in the next 13 stitches, ch 1 and skip 1 stitch, then sc in the next 5 stitches. Sc across the 6 gusset stitches. Repeat the same 25-position eyelet sequence across the back, then sc across the final 6 gusset stitches. Join with a sl st to the first sc. There are 58 sc and four ch-1 spaces: 62 positions in total.
- Top border, Rounds 3â4 Ch 1 and sc in every stitch and ch-1 space around; join with a sl st to the first sc. Round 3 has 62 sc. For Round 4, ch 1, sc in each stitch around and join; 62 sc. Fasten off.
- Drawstring With B, ch 110. Sl st in the second ch from the hook and in each remaining ch; 109 sl sts. Fasten off, leaving ends to weave in. Starting at the outside of one front eyelet, pass the cord to the inside, around the inside of the first side, out through the adjacent back eyelet, across the outside of the back to its second eyelet, then inside around the other side and out through the remaining front eyelet. Both cord ends should emerge at the front.
Finishing
- Weave in all ends securely, taking care not to flatten the puffs.
- Ease the two bottom corners into shape and lightly block the sack if needed.
- Pull the drawstring evenly and tie its ends in a bow. Keep the cord loose enough to open the sack fully.
Helpful Tips
- Use smooth, plied yarn rather than a fuzzy yarn so the puff outlines remain visible.
- Pull each puff loop up to a similar height before drawing through all seven loops. Keep the securing chain snug, but not tight.
- If a puff seems taller than its neighbours, adjust its loops before making the next stitch rather than tightening the whole row.
- Mark the two transitions between side and base on the gusset; each 30-row side must meet 30 panel row ends, while its 25-row base meets 25 foundation stitches.
Foldover-Flap Parcel Sack

This crochet Christmas sack is designed for a fairly flat wrapped present. Its parcel-like shape gives a gift a handmade covering without the bulk of a gathered opening.
The back extends into a foldover flap, while red edging makes the closure stand out against the charcoal fabric. The crocheted ties are functional rather than decorative: they meet at the front to keep the flap in place without a drawstring.
Because the ties travel around the filled sack, their fit depends on the present inside. Checking them against the actual gift helps the flap sit neatly instead of pulling at its corners.
Foldover-Flap Parcel Sack

Quick-reference card. Follow the complete written instructions below.
Materials
- Aran-weight yarn: Approximately 250â300 yd (230â275 m) in charcoal and 35â50 yd (32â46 m) in red. Allow extra red yarn if your filled sack needs longer ties.
- Hook: 5 mm crochet hook, or a size that gives a firm fabric.
- Other: Yarn needle, scissors, stitch markers and a flexible tape measure.
Size and Fit
At the suggested gauge, approximately 9 in (23 cm) wide and 11 in (28 cm) high when laid flat, with a 4 in (10 cm) flap folded over the front. This sample size is intended for a fairly flat wrapped present. Measure tie length around the filled sack; a chain count alone will not determine the fit.
Gauge
Aim for 12 sc and 12 rows per 4 in (10 cm) in the main fabric. Gauge affects the finished dimensions; the fabric should be firm enough to support the parcel.
Abbreviations
US crochet terms.
- ch = chain
- sc = single crochet
- sl st = slip stitch
- st(s) = stitch(es)
- RS = right side
Pattern
- Front panel With charcoal, ch 28. Row 1: Sc in the second ch from the hook and in each remaining ch; turn. You have 27 sc. Rows 2â33: Ch 1 (does not count as a st), sc in each of the 27 sts; turn. Fasten off. Mark the top edge after Row 33 so it is not mistaken for the bottom.
- Back panel and integral flap With charcoal, ch 28. Work Rows 1â33 exactly as for the front panel. Continue in the same panel for Rows 34â45: Ch 1, sc in each of the 27 sts; turn. Fasten off. Rows 34â45 form the flap; do not make or attach a separate piece.
- Seam the sack Place the panels with RS together. Match their foundation edges for the bottom and match Rows 1â33 along both sides. With charcoal and a yarn needle, whipstitch the bottom through corresponding foundation-chain loops, then sew each side through corresponding row ends. Leave the front panelâs top edge open and the extra 12 back-panel rows unsewn. Turn the sack RS out.
- Edge the flap With the flap unfolded, join red at one side where Row 34 begins. Work 1 sc in each of the 12 exposed row ends up to the tip. Work 3 sc in the first st of Row 45, 1 sc in each of the next 25 sts, and 3 sc in the last st. Work 1 sc in each of the 12 exposed row ends down the other side. Fasten off. The first and last sts of Row 45 are the two tip corners.
- Measure and make two ties Put the intended wrapped present in the sack and fold the flap down over the front. For each tie, measure from its flap-tip corner around the nearest side, across the back, around the opposite side and to the centre of the front. Add approximately 6â8 in (15â20 cm) for a knot or bow. At one red-edged tip corner, join red with a sl st and ch until the chain reaches the measured length. Sl st in the second ch from the hook and in each ch back to the corner; sl st into the corner to secure and fasten off. Repeat at the other tip corner. Check each completed cord around the filled sack: slip-stitching back along a chain can shorten it, so remake a tie longer if needed.
- Close Fold the flap over the opening. Take each tie around its nearest side, across the back and around the opposite side. Bring the free ends to the centre of the front and tie them together over the folded flap.
Finishing
- Weave in ends securely, keeping the sack opening clear.
- With the present inside, check that the flap overlaps the front and the tied cords hold it down without pulling the corners out of shape.
Helpful Tips
- Use a stitch marker in the first and last stitch of a row if straight panel edges are difficult to track.
- A wider or bulkier present changes the tiesâ route. Measure with the actual gift inside rather than relying on an estimated number of chains.
Reversible Double-Wall Sack

This crochet Christmas sack offers two looks in one: turn it through its mouth to choose which colour faces out. Each layer has its own closed base, while the sides remain separate, giving the finished sack a substantial feel without fixing one colour permanently on show.
The double wall uses roughly twice as much yarn as a single-layer sack, so it is worth allowing for both layers when planning your project. It also makes matching their shape important: even with identical instructions, the two colours may work up slightly differently.
The drawstring needs to pass through the openings in both layers. If those openings do not line up, the cord can catch between the walls rather than gather the mouth neatly. The pattern below covers how to compare the layers and keep the openings paired.
Reversible Double-Wall Christmas Sack
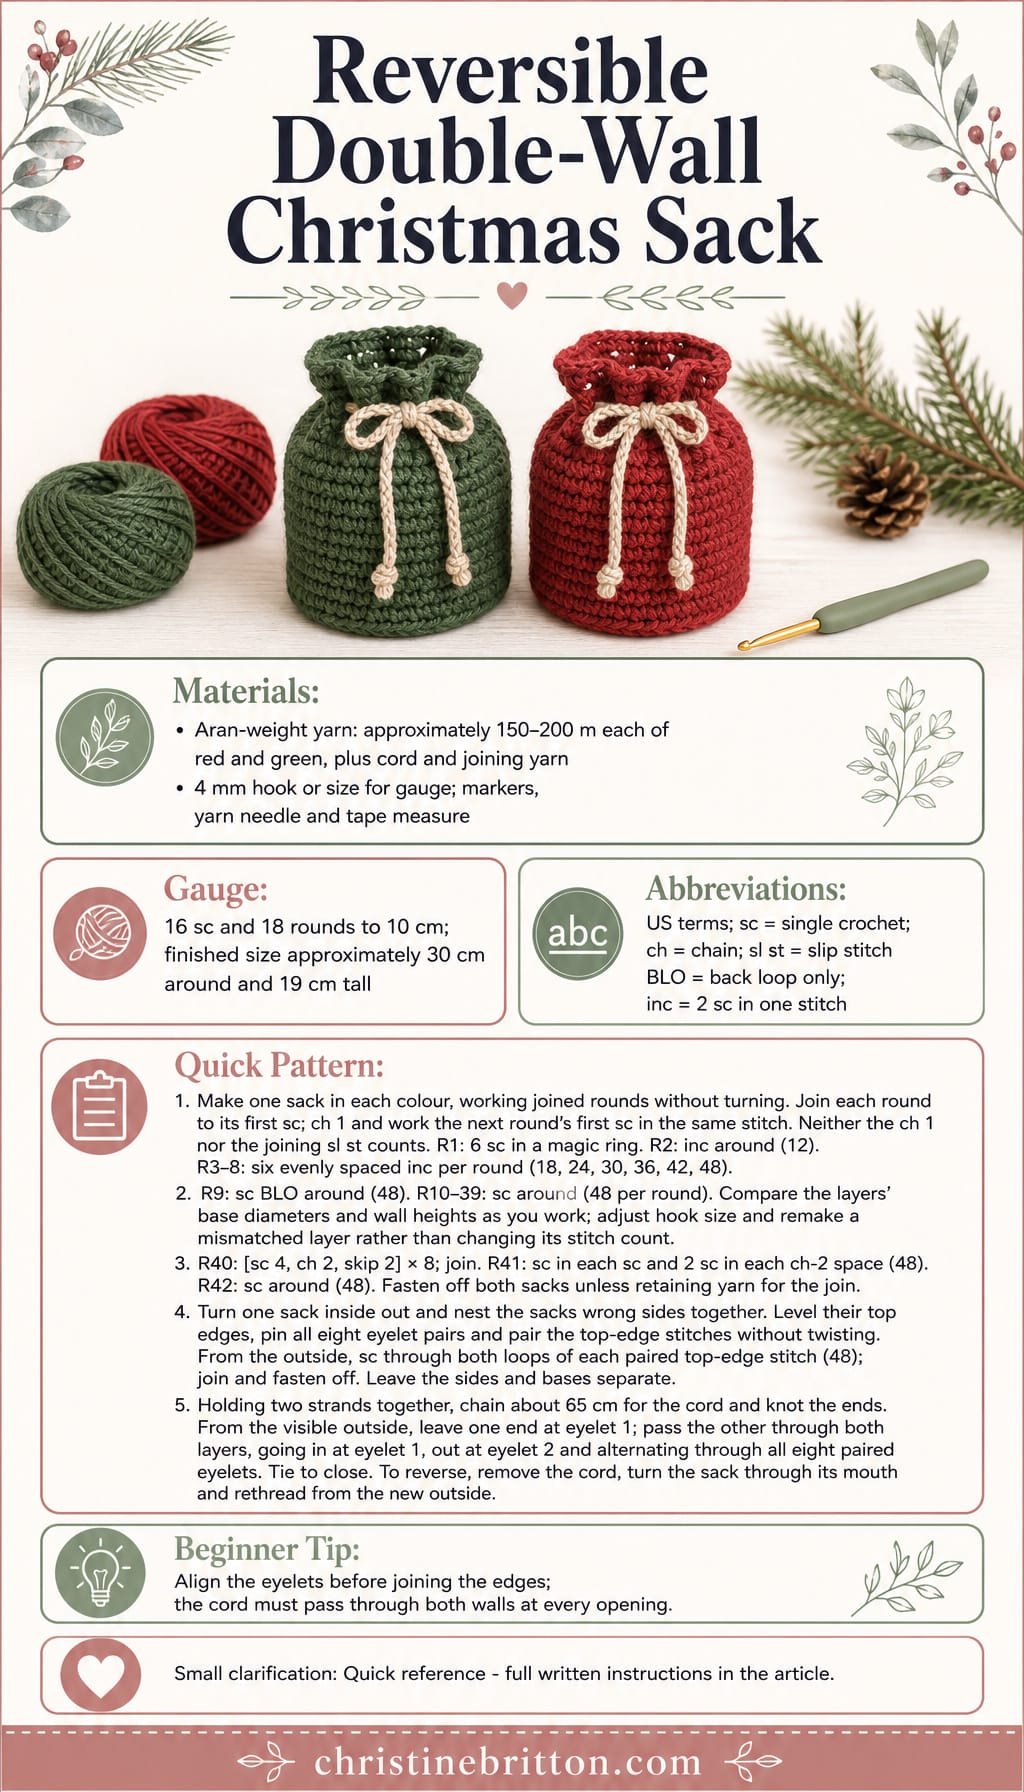
Quick-reference card. Follow the complete written instructions below.
Materials
- Aran-weight yarn: Approximately 150â200 m each of red and green, plus a few metres of either colour for the cord. Keep enough of one colour for the joining round.
- Crochet hook: 4 mm, or the size needed to obtain the stated gauge in both colours.
- Other supplies: Stitch markers or pins, yarn needle, scissors and tape measure.
Size and Fit
One sample size: approximately 30 cm around the mouth, 9â10 cm across the base and 19 cm tall before gathering, at the stated gauge. The two layers must have the same circumference and height so their eyelets can be paired.
Gauge
Aim for 16 sc and 18 rounds to 10 cm in the main fabric. Check both yarn colours: matching stitch counts alone will not guarantee matching layers.
Abbreviations
US crochet terms.
- ch = chain
- sc = single crochet
- sl st = slip stitch
- BLO = back loop only
- inc = work 2 sc in the same stitch
- st(s) = stitch(es)
Pattern
- Before you begin Make two identical sacks, one in each colour. Work in joined rounds throughout. Join each round with a sl st to its first sc; ch 1 to begin the next round and work its first sc in the same stitch as the join. The ch 1 and joining sl st do not count as stitches. Do not turn.
- Base, rounds 1â4 Round 1: Make a magic ring, ch 1, work 6 sc into the ring and join. Round 2: Inc in each st around (12 sc). Round 3: Repeat [sc in next st, inc in next st] 6 times (18 sc). Round 4: Repeat [sc in next 2 sts, inc in next st] 6 times (24 sc).
- Base, rounds 5â8 Round 5: Repeat [sc in next 3 sts, inc in next st] 6 times (30 sc). Round 6: Repeat [sc in next 4 sts, inc in next st] 6 times (36 sc). Round 7: Repeat [sc in next 5 sts, inc in next st] 6 times (42 sc). Round 8: Repeat [sc in next 6 sts, inc in next st] 6 times (48 sc).
- Sides, rounds 9â39 Round 9: Sc BLO in each st around (48 sc). Rounds 10â39: Sc in each st around (48 sc per round). As you make the second sack, compare its base diameter and its wall height with the first, including partway up the sides. If they differ appreciably, adjust your hook size and remake the mismatched layer rather than changing its stitch count.
- Eyelets, round 40 Repeat [sc in next 4 sts, ch 2, skip next 2 sts] 8 times; join to the first sc. This makes eight eyelets, spaced six stitch positions apart.
- Top, rounds 41â42 Round 41: Sc in each sc and work 2 sc into each ch-2 space; join (48 sc). Round 42: Sc in each st around (48 sc). Fasten off both sacks, unless you are using one working yarn for the join.
- Nest and join Turn one sack inside out and place it inside the other. Their wrong sides should touch; the right side of one faces out and the right side of the other faces into the bag. Bring their top edges level. Pair and pin all eight eyelets, then pair the stitches around the top edges without twisting either layer. With the outside of the sack facing you, join yarn at the top and work 1 sc through both loops of each paired top-edge stitch, all the way around (48 joining sc). Join with a sl st and fasten off. Do not stitch the side walls or bases together.
- Cord With two strands of yarn held together, crochet a chain approximately 65 cm long, measured relaxed. Fasten off and knot each end securely; aim for about 60 cm of usable cord after knotting. Identify the eight paired eyelets. Starting with both the cord and your hand on the visible outside of the sack, leave one end outside eyelet 1. Feed the other end through both layers at eyelet 1 into the bag, out through both layers at eyelet 2, then alternately in and out through successive paired eyelets. It will emerge outside at eyelet 8, beside the first end. Pull the ends to gather the mouth and tie them.
Finishing
- Weave in yarn ends without sewing the two bases or side walls together.
- Check that the cord passes cleanly through both layers at every eyelet and does not catch between them.
- To change which colour faces out, untie and remove the cord, turn the sack through its mouth, then rethread from the newly visible outside using the same route.
Helpful Tips
- Pinning every pair of eyelets before joining the top is easier than trying to align them after the edges are secured.
- If the two colours work up at different gauges, use different hook sizes for their respective layers while keeping all round and stitch counts the same.
- The joining edge may show as a contrasting trim when the sack is reversed.
Christmas Pudding-Shaped Gift Sack

This crochet Christmas sack turns the wrapping into part of the present. Its rounded brown body suggests a Christmas pudding, while a cream scalloped collar gives the impression of icing without getting in the way of the tied opening. Holly leaves on the front add a small festive detail.
The shape has a broad middle that narrows towards the top, so it is best suited to a gift that can pass comfortably through the opening. Check your intended gift before committing to the narrower section; the decorative collar will not make the opening stretch further.
Firm fabric helps the sack hold its pudding shape and keeps its contents from showing through. This is an appealing project if you are comfortable shaping in the round and want a reusable gift container that looks festive even before it is opened.
Christmas Pudding-Shaped Gift Sack

Quick-reference card. Follow the complete written instructions below.
Materials
- Medium-weight yarn: Approximately 200â250 g brown, 30â40 g cream and a small amount of green. Amounts vary with yarn and tension.
- Crochet hook: 5 mm, or a size that produces a firm fabric without large gaps.
- Notions: Stitch marker, yarn needle and scissors.
Size and Fit
At the suggested gauge, the base is approximately 18 cm across and the opening is approximately 23 cm wide when laid flat. The sack is roughly 20â23 cm high. It is intended for a gift no wider than about 12 cm and no taller than about 17 cm. Check that the gift passes through the opening before completing Round 36.
Gauge
Aim for approximately 14 sc and 16 rounds per 10 cm in firm single crochet. Exact gauge is less important than a sturdy fabric and an opening that admits the gift.
Abbreviations
US crochet terms.
- ch = chain
- dc = double crochet
- hdc = half double crochet
- inc = work 2 sc in one stitch
- sc = single crochet
- sc2tog = single crochet 2 stitches together
- sk = skip
- sl st = slip stitch
- st(s) = stitch(es)
Pattern
- Before you begin Work the brown sack in continuous rounds unless stated otherwise. Mark the first stitch of each round and move the marker upwards as you work. Numbers in brackets give the stitch count at the end of a round.
- Base â Rounds 1â5 With brown, make a magic ring. Round 1: Work 8 sc into the ring. [8] Round 2: Inc in each st. [16] Round 3: (Sc in next st, inc in next st) 8 times. [24] Round 4: (Sc in next 2 sts, inc in next st) 8 times. [32] Round 5: (Sc in next 3 sts, inc in next st) 8 times. [40]
- Base â Rounds 6â10 Round 6: (Sc in next 4 sts, inc in next st) 8 times. [48] Round 7: (Sc in next 5 sts, inc in next st) 8 times. [56] Round 8: (Sc in next 6 sts, inc in next st) 8 times. [64] Round 9: (Sc in next 7 sts, inc in next st) 8 times. [72] Round 10: (Sc in next 8 sts, inc in next st) 8 times. [80]
- Broad middle â Rounds 11â30 Round 11: Working in back loops only, sc in each st. [80] Rounds 12â30: Working through both loops again, sc in each st. [80 each round]
- Shoulder â Rounds 31â39 Round 31: (Sc in next 8 sts, sc2tog) 8 times. [72] Rounds 32â35: Sc in each st. [72 each round] Place the intended gift through the top now. If it will not pass comfortably, undo Round 31 and use a smaller gift; do not continue decreasing around an unsuitable gift. Round 36: (Sc in next 7 sts, sc2tog) 8 times. [64] Rounds 37â39: Sc in each st. [64 each round]
- Eyelets and rim â Rounds 40â43 Round 40: (Sc in next 3 sts, ch 1, sk next st) 16 times. [48 sc and 16 ch-1 spaces] Round 41: Sc in every sc and every ch-1 space. [64] Rounds 42â43: Sc in each st. [64 each round] Sl st in the next st and fasten off.
- Cream collar With cream, ch 64 and sl st into the first ch to form a ring, taking care not to twist it. Work in joined rounds; beginning chains and joining slip stitches do not count as stitches. Collar Round 1: Ch 1, sc in each ch; join to the first sc. [64] Collar Round 2: Ch 1, sc in each st; join. [64] Collar Round 3: (Sl st in next st, sk next st, work 5 dc in next st, sk next st) 16 times; join to the first sl st and fasten off. [16 scallops] With the collar’s foundation edge uppermost and its scallops hanging down, sew the foundation edge to the outside of sack Round 38, matching its 64 chains to the 64 sack stitches. Keep the eyelets uncovered.
- Holly leaves â make two With green, ch 9. Starting in the second ch from the hook, work sl st, sc, hdc, dc, dc, hdc, sc, sl st along the chain. Ch 1; rotate the work to use the unused loops on the other side of the foundation chain. Working back towards the first stitch, work sl st, sc, hdc, dc, dc, hdc, sc, sl st. Sl st to the first sl st, fasten off and leave a tail for sewing. Sew both leaves securely to the front of the brown middle, arranging them at an angle.
- Drawstring With cream or brown, make a chain long enough to measure approximately 110 cm after slip-stitching back along it. Fasten off. Starting at the front, weave the cord alternately in and out through all 16 eyelets so that both ends emerge at the front. Tie the ends together or knot each end, leaving enough length to draw the opening closed and tie a bow.
Finishing
- Weave in all ends, securing the collar and leaves without stitching the sack shut.
- Put the gift inside, draw the opening closed and tie the cord. The scallops should remain visible below the eyelet band.
Helpful Tips
- If the fabric has gaps large enough for the gift to show, use a smaller hook and recheck the finished base and opening sizes.
- The collar is decoration, not an extra closure; keep its top edge below the eyelets.
- A long drawstring can be a hazard for young children. Use or display the sack accordingly.
Frequently Asked Questions
Which crochet Christmas sack should I choose for a book?
The Folded Flat Gift Sack is shaped for a book or another fairly flat present. Check the finished width and opening against the wrapped book before starting.
Will an open-mesh sack hide the gift inside?
No. The Open-Mesh Gift Sack and Shell-Lace Parcel Sack are designed to show a wrapped parcel, so add inner wrapping if you want to conceal the contents.
What matters most when making a drawstring sack?
Check that the gift passes through the opening before finishing the rim. Keep the drawstring channel clear and leave enough tie length to close the sack securely.
Are these sacks suitable for heavy presents?
Some designs are intended for lightweight gifts, including the Bias-Striped Gathered Sack. For anything heavier, consider the base, seam strength and whether the sack will be carried by handles.
Final Thoughts
A handmade sack can become part of the gift and be used again next Christmas. Start with the presentâs shape, then choose the base, fabric and closure that will hold it comfortably.