17 Free Crochet Christmas Lights Patterns to Save for Your Next Project

Looking for a crochet christmas lights free pattern? These 17 projects turn colourful bulbs into garlands, ornaments, table decorations and larger pieces for your home.
Choose a flat design for bunting, coasters or a bookmark, or try stuffed bulbs for more shape. The collection also includes charted colourwork, a scarf and a freestanding tree, so you can pick a project that suits your skills.
For more ideas that build on this collection, explore free crochet Christmas garland patterns.
Before You Start
These patterns use US crochet terminology. Check each project’s materials and finished measurements before choosing yarn or changing the size.
Think about how the finished piece will be used. A coaster needs to sit flat beneath a glass, while a garland or ornament needs firm joins and securely fastened ends. Bulky yarn may give small bulb motifs more thickness than you want.
For colourwork projects, gather your bulb colours and a contrasting background before starting. Weave in ends as you complete sections so they do not show through flat motifs or leave loose strands on pieces that will be handled.
Crochet terminology: This article uses US crochet terms. Check the abbreviations for each project.
Stuffed Christmas Light Bulb Garland

This stuffed Christmas light bulb garland brings the look of colourful festive lights to a mantel or shelf without needing a plug. The rounded bulbs have narrow necks and short grey caps, giving each one a recognisable light-bulb shape.
Each bulb is made separately, then attached to a decorative crocheted cord. That makes it easy to arrange the colours in a sequence you like or change the colour mix while keeping the bulb construction the same.
This is a project for a confident beginner who is comfortable working in spiral rounds and shaping small stuffed pieces. It is a decorative garland, not a working light string; keep it away from flames and other heat sources.
Stuffed Christmas Light Bulb Garland
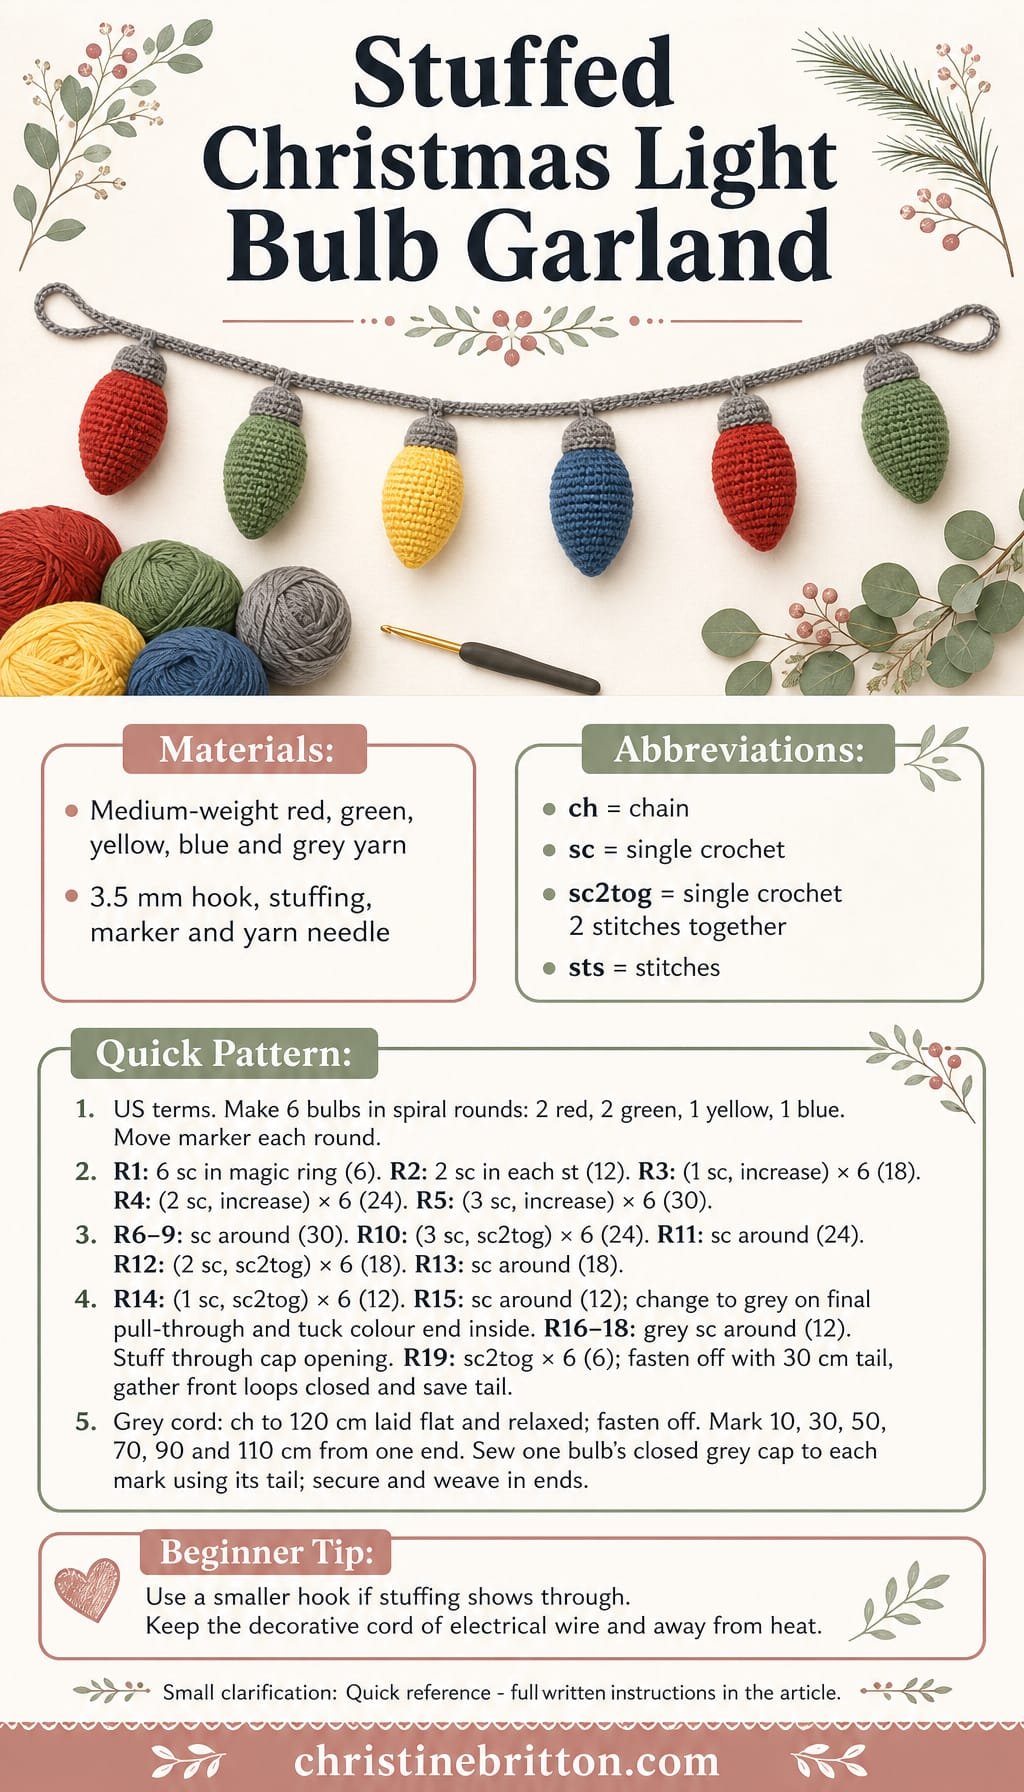
Quick-reference card. Follow the complete written instructions below.
Materials
- Medium-weight yarn: Small amounts of red, green, yellow and blue for the bulbs, plus grey for all six caps and the cord. Smooth yarn helps the shaping show clearly.
- 3.5 mm crochet hook: Adjust hook size if needed to make a firm fabric that holds the stuffing.
- Polyester stuffing: A small amount for each bulb.
- Stitch marker and yarn needle: For marking spiral rounds, closing the caps and attaching the bulbs.
Size and Fit
Each bulb is approximately 5 cm wide and 8.5 cm long at the stated gauge. Crochet the cord until it measures approximately 120 cm when laid flat and relaxed. Six bulbs attached at the stated positions will be approximately 20 cm apart.
Gauge
Approximately 20 sc and 22 rounds = 10 cm in spiral sc. Gauge is a guide; a firm fabric with no visible stuffing is more important than an exact match.
Abbreviations
US crochet terms.
- ch = chain
- sc = single crochet
- sc2tog = single crochet the next 2 stitches together
- st(s) = stitch(es)
Pattern
- Before you begin Make six bulbs: two red, two green, one yellow and one blue. Work each bulb in continuous spiral rounds without joining. Mark the first stitch of each round and move the marker up as you work. The tip is made first; the grey cap is made last.
- Bulb tip — Rounds 1–5 With a bulb colour, make a magic ring. Round 1: 6 sc in the ring. (6 sts) Round 2: 2 sc in each st. (12 sts) Round 3: *1 sc, 2 sc in next st; repeat from * around. (18 sts) Round 4: *2 sc, 2 sc in next st; repeat from * around. (24 sts) Round 5: *3 sc, 2 sc in next st; repeat from * around. (30 sts)
- Bulb body — Rounds 6–13 Rounds 6–9: Sc in each st around. (30 sts each round) Round 10: *3 sc, sc2tog; repeat from * around. (24 sts) Round 11: Sc in each st around. (24 sts) Round 12: *2 sc, sc2tog; repeat from * around. (18 sts) Round 13: Sc in each st around. (18 sts)
- Neck — Rounds 14–15 Round 14: *1 sc, sc2tog; repeat from * around. (12 sts) Round 15: Sc in each st around. (12 sts) Change to grey in the final pull-through of the last sc of Round 15. Cut the bulb-colour yarn and tuck its end inside.
- Grey cap and closure — Rounds 16–19 Rounds 16–18: With grey, sc in each st around. (12 sts each round) Push small pieces of stuffing through the cap opening, filling the bulb body and neck without overfilling the cap. Round 19: Sc2tog 6 times. (6 sts) Fasten off, leaving a 30 cm grey tail. Thread the tail through the front loops of the remaining 6 stitches and pull closed. Keep the tail for attaching the bulb to the cord.
- Decorative cord With grey, make a chain until it measures approximately 120 cm when laid flat and relaxed. Fasten off. The cord is a crocheted chain only: do not add electrical wire.
- Attach the bulbs Lay the cord flat and mark points 10, 30, 50, 70, 90 and 110 cm from one end. At each mark, use a bulb’s remaining grey tail to sew its closed cap end securely around the cord with several passes. Knot discreetly beneath the cap and weave in the tail. The bulbs hang below the cord; rotate their colours into any arrangement you like.
Finishing
- Weave in the cord ends. Check that each cap is firmly attached and that no stuffing shows through the fabric.
- Hang the garland by the cord, away from flames, hot bulbs and other heat sources. It is a decorative garland, not an electrical light string.
Helpful Tips
- If your stitches leave gaps, use a smaller hook rather than packing in more stuffing.
- A yarn needle or blunt tool can help guide small pieces of stuffing through the narrow cap opening.
- For a different number of bulbs, make the cord to your chosen length and mark evenly spaced attachment points before sewing; the bulb rounds stay the same.
Flat Christmas Light Window Bunting
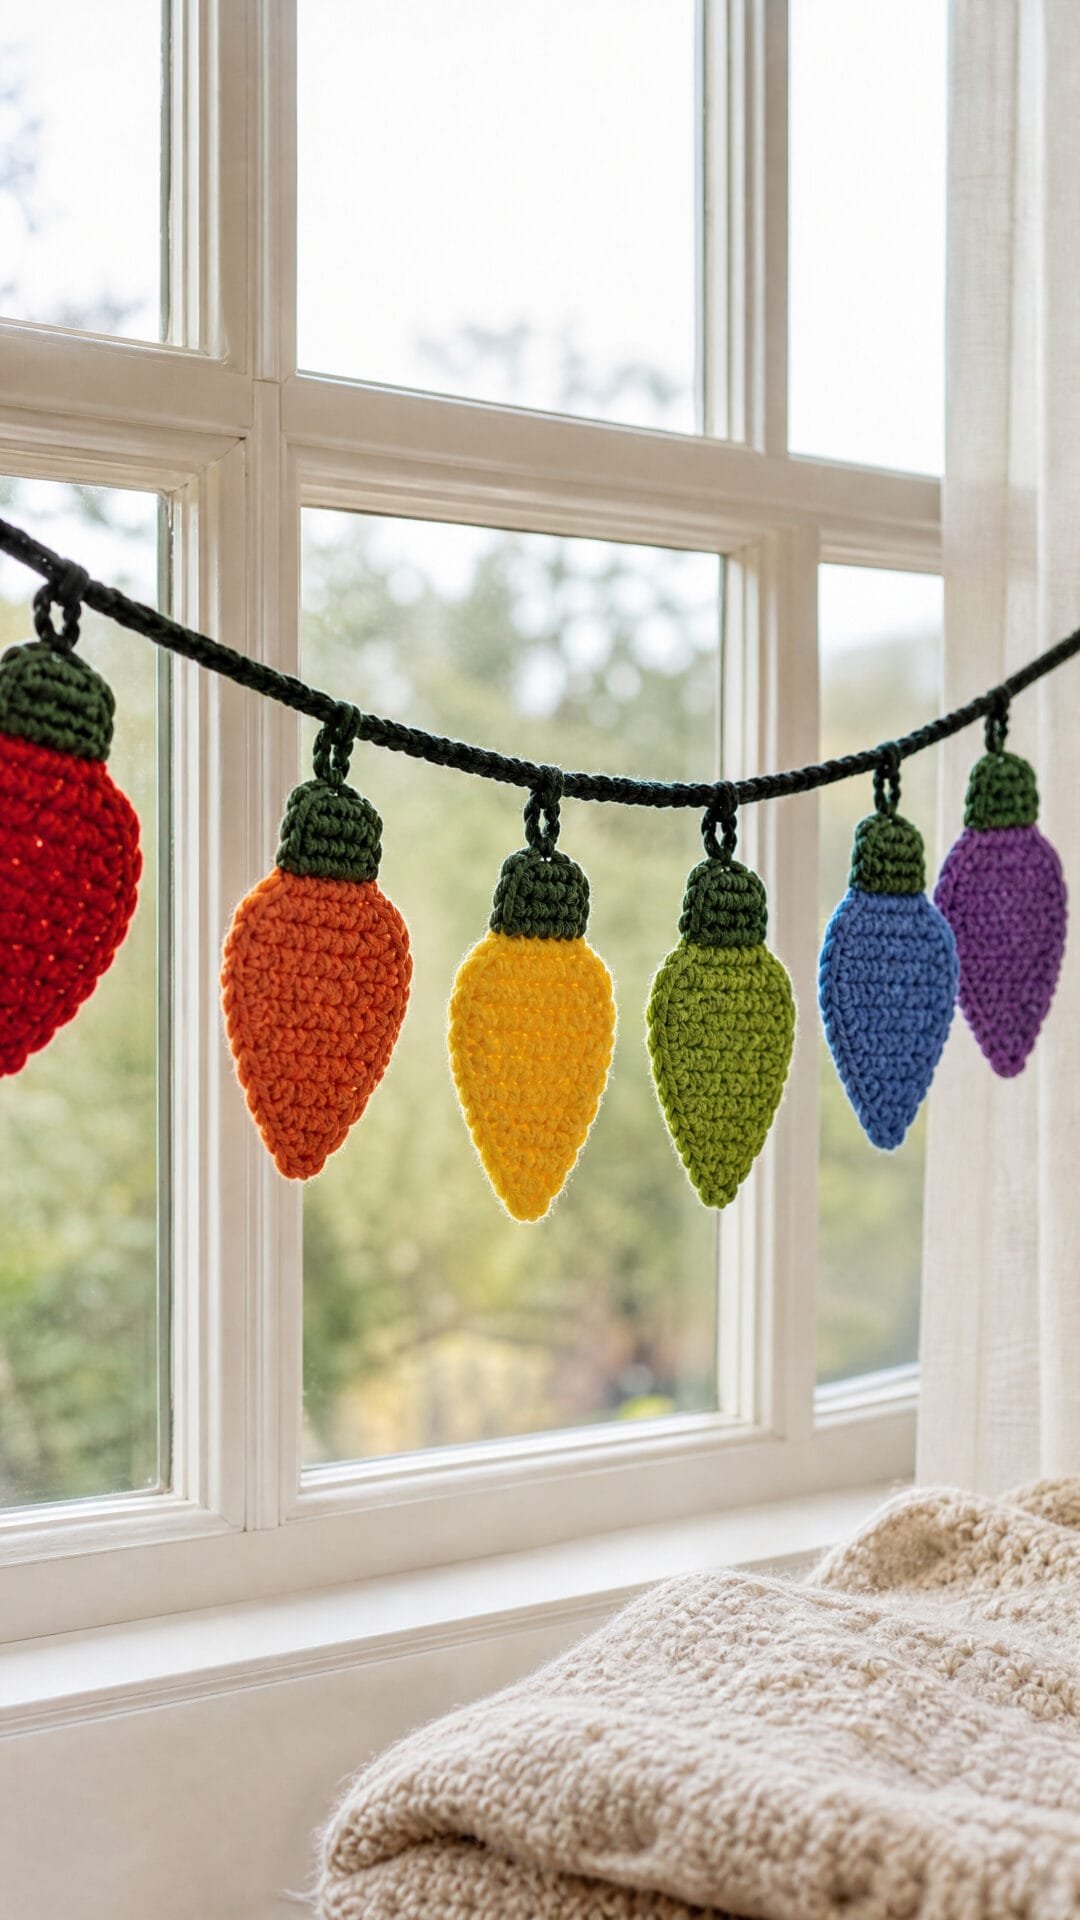
If you like the look of a crochet Christmas light garland but want something less bulky for a window, this bunting uses flat, unstuffed bulbs. Their bright colours stand out against the narrow dark cord without taking up much space.
The shaped bulbs have contrasting caps and hang individually, giving the strand the playful outline of festive lights. It’s a decorative alternative to an illuminated display, not a cover for working lights.
Flat Christmas Light Window Bunting

Quick-reference card. Follow the complete written instructions below.
Materials
- DK cotton yarn: Approximately 30 g in assorted bulb colours, 15 g for the caps and 15 g in a dark colour for the cord. Quantities are allowances and will vary with your tension.
- 3.5 mm crochet hook: Or a size that gives you a firm fabric that lies flat.
- Tapestry needle and scissors: For attaching the bulbs and weaving in ends.
Size and Fit
Sample strand: six bulbs on a cord approximately 60 cm long, with attachment points about 10 cm apart. Each bulb is approximately 5 cm across at its widest point; finished dimensions depend on your gauge. To change the strand length, work a cord with 10 single crochets beyond each outer bulb and 20 single crochets between attachment points.
Gauge
Approximately 20 sc and 22 rows = 10 cm in firm, unblocked fabric. Gauge is not critical, but check that the bulbs lie flat.
Abbreviations
US crochet terms.
- ch = chain
- sc = single crochet
- sc2tog = single crochet two stitches together; one decrease
- sl st = slip stitch
- st(s) = stitch(es)
Pattern
- Before you begin Make six bulbs. Turning chains do not count as stitches. The bulb is worked from its narrow bottom towards the cap; work one turning ch before each new row unless directed otherwise.
- Bulb, Row 1 With a bulb colour, ch 3. Sc in the second ch from the hook and in the next ch. (2 sc)
- Bulb, Row 2 Ch 1, turn. Work 2 sc in each st. (4 sc)
- Bulb, Rows 3–5 For each row, ch 1 and turn. Work 2 sc in the first st, sc in each st across to the final st, then 2 sc in the final st. You will have 6 sc after Row 3, 8 sc after Row 4 and 10 sc after Row 5.
- Bulb, Rows 6–7 For each row, ch 1, turn and sc in each st across. (10 sc)
- Bulb, Row 8 Ch 1, turn. Sc2tog, sc in the next 6 sts, sc2tog. (8 sc)
- Bulb, Row 9 Ch 1, turn. Sc2tog, sc in the next 4 sts, sc2tog. (6 sc)
- Bulb, Row 10 Ch 1, turn. Sc2tog, sc in the next 2 sts, sc2tog. Fasten off the bulb colour. (4 sc)
- Cap, Rows 11–12 Join the cap colour with a sl st in the first st of Row 10. Ch 1 and sc in each of its 4 sts for Row 11. Ch 1, turn and sc in each st for Row 12. (4 sc in each row)
- Hanging loop From the end of Row 12, ch 8 and sl st into the first sc of Row 12. Fasten off. The chain forms a loop spanning the top of the cap. Repeat the bulb, cap and loop instructions until you have six bulbs.
- Cord With the dark yarn, ch 121. Sc in the second ch from the hook and in each remaining ch. (120 sc) Fasten off.
- Assembly Lay the cord flat and count its sc stitches from either end. Place one bulb loop at each of cord stitches 10, 30, 50, 70, 90 and 110. Using a tapestry needle and matching yarn, stitch each loop securely around its marked cord stitch without closing the loop. Keep the bulbs facing the same way.
Finishing
- Weave in all ends, taking care not to pull the caps out of shape.
- Lightly damp-block the bulbs and cord flat if needed, and let them dry before hanging.
- Hang from suitable removable window fixings. Keep the bunting away from flames and heat; do not attach it to working lights.
Helpful Tips
- Firm cotton and a consistent tension help the flat bulbs hold their outline without stuffing.
- For a longer strand at the same spacing, add 20 sc to the cord and one bulb for each additional attachment point.
Christmas Light Bulb Granny Square Blanket

This Christmas light bulb granny square blanket puts the lights at the centre of the design. Each cream square frames a distinct bulb motif, so the festive effect comes from the bulb shapes rather than colour changes alone.
The bulbs are flat appliqués, giving the blanket a colourful surface without bulky decoration where you might want to curl up. Their sockets make the shapes recognisable even when the bulbs point in different directions.
This is a good project if you enjoy making repeatable motifs but want the finished blanket to feel more playful than a traditional granny-square design. Try arranging the bulb colours before joining so they look scattered across the blanket rather than clustered in one area.
Christmas Light Bulb Granny Square Blanket

Quick-reference card. Follow the complete written instructions below.
Materials
- Cream, machine-washable medium-weight yarn: For 20 granny squares, joining and the border.
- Machine-washable medium-weight yarn in four bulb colours: Small amounts of red, green, gold and blue; make five bulbs in each colour.
- Grey machine-washable medium-weight yarn: A small amount for the bulb sockets.
- Crochet hook: 5 mm, or a size suited to your yarn that produces comfortable, even fabric.
- Tapestry needle and scissors: For sewing on the bulbs, joining squares and weaving in ends.
Size and Fit
One sample layout: 4 squares across by 5 squares down (20 squares total). Finished dimensions depend on your yarn, hook and tension; no fixed finished measurement is assumed. Make one square and one bulb first to check that the appliqué sits within the square without reaching its outer edge.
Gauge
An exact gauge is not essential. Work all 20 squares at a consistent tension and check that they are the same size before joining.
Abbreviations
US crochet terms.
- ch = chain
- dc = double crochet
- sc = single crochet
- sc2tog = single crochet two stitches together; counts as one stitch
- sl st = slip stitch
- sp = space
- st(s) = stitch(es)
Pattern
- Granny-square base: make 20 Use cream for every square. Ch 4 and join with a sl st in the first ch to form a ring. At the start of each round, ch 3 counts as the first dc. Join each round with a sl st in the top of that starting ch 3.
- Square round 1 Ch 3, work 2 dc into the ring, ch 2. [3 dc into the ring, ch 2] three times. Join. You have four 3-dc groups and four corner ch-2 spaces: 12 dc.
- Square round 2 Sl st in the next 2 dc and into the next corner ch-2 sp. Work (ch 3, 2 dc, ch 2, 3 dc) in that sp. [Ch 1, work (3 dc, ch 2, 3 dc) in the next corner ch-2 sp] three times. Ch 1 and join. You have 24 dc, four corner ch-2 spaces and one side ch-1 space on each side.
- Square round 3 Sl st in the next 2 dc and into the next corner ch-2 sp. Work (ch 3, 2 dc, ch 2, 3 dc) in that sp. [Ch 1, work 3 dc in the next side ch-1 sp, ch 1, work (3 dc, ch 2, 3 dc) in the next corner ch-2 sp] three times. Ch 1, work 3 dc in the remaining side ch-1 sp, ch 1 and join. You have 36 dc and two side ch-1 spaces on each side.
- Square round 4 Sl st in the next 2 dc and into the next corner ch-2 sp. Work (ch 3, 2 dc, ch 2, 3 dc) in that sp. [Ch 1, work 3 dc in the next side ch-1 sp, ch 1, work 3 dc in the following side ch-1 sp, ch 1, work (3 dc, ch 2, 3 dc) in the next corner ch-2 sp] three times. Ch 1, work 3 dc in each of the two remaining side ch-1 spaces with ch 1 between the groups, ch 1 and join. You have 48 dc and three side ch-1 spaces on each side. Fasten off.
- Bulb appliqué: make 20 Work five bulbs in each of red, green, gold and blue. Each bulb is worked back and forth in sc; ch 1 and turn after each row unless instructed to fasten off. The turning ch does not count as a stitch. The grey socket is worked directly onto the narrow end of the coloured bulb.
- Bulb rows 1–5 With a bulb colour, ch 6. Row 1: sc in the second ch from the hook and in each remaining ch; 5 sc. Row 2: work 2 sc in the first st, sc in each of the next 3 sts, 2 sc in the last st; 7 sc. Row 3: work 2 sc in the first st, sc in each of the next 5 sts, 2 sc in the last st; 9 sc. Rows 4–5: sc in each st across; 9 sc per row.
- Bulb rows 6–8 Row 6: sc2tog, sc in each of the next 5 sts, sc2tog; 7 sc. Row 7: sc2tog, sc in each of the next 3 sts, sc2tog; 5 sc. Row 8: sc2tog, sc in the next st, sc2tog; 3 sc. Fasten off the bulb colour.
- Socket rows 9–10 Join grey yarn in the first st of row 8, ready to work across its three sts. Row 9: work 2 sc in the first st, sc in the next st, 2 sc in the last st; 5 sc. Ch 1 and turn. Row 10: sc in each st across; 5 sc. Fasten off.
- Attach the appliqués Centre one bulb on the right side of each cream square, with its socket pointing towards one side. Rotate the bulbs as you like for a scattered-lights effect. Using matching yarn and small stitches around each appliqué’s edge, sew it to the square without pulling the granny fabric out of shape.
- Join the blanket Arrange the squares in five rows of four, distributing the bulb colours across the layout. With right sides facing up, use cream yarn and a tapestry needle to sew adjacent square edges together with a neat mattress stitch. Match corners and corresponding 3-dc groups; catch the edge stitches securely without drawing the seams tight. Join the squares within each row, then join the five rows into one blanket.
- Continuous border With the right side facing, join cream yarn at any outer corner ch-2 sp. Border round 1: work (sc, ch 2, sc) in that corner sp. Along each outside edge, work 1 sc in each dc and 1 sc in each side ch-1 sp. At each junction between two squares, place 1 sc in each of the two adjoining corner spaces and close any remaining gap with your sewing needle later if needed. Work (sc, ch 2, sc) in each of the other three outer corner spaces. Continue around all four sides and join with a sl st to the first sc. Border round 2: ch 1, sc in each sc around, working (sc, ch 2, sc) in each outer corner ch-2 sp. Join with a sl st to the first sc and fasten off.
Finishing
- Weave in all ends securely, especially at the sewn-on appliqués.
- Check the seams and outer square junctions for gaps; close any gaps with a few small stitches in cream yarn.
- Lay the blanket flat and gently shape the corners. Wash and dry according to the yarn label.
Helpful Tips
- Keep the appliqués flat: sew around their edges rather than adding stuffing or a raised edging.
- Lay out all 20 squares before joining so the four bulb colours are spread across the blanket.
- If a border edge begins to ripple or pull in, undo that section and adjust your stitch spacing at the seam junctions.
Tapestry Crochet Christmas Lights Wall Hanging

This wall hanging captures the look of a connected string of Christmas lights in a single rectangular panel. Bright bulbs and a winding dark wire stand out against a pale background, making it a cheerful decoration for a small wall space or a festive gallery arrangement.
The design uses a stitch chart to place the colour changes directly into the fabric, rather than attaching separate bulbs afterwards. It is a good project if you are comfortable with basic crochet and ready to practise keeping colourwork neat; the limited palette helps the shapes remain clear without making the panel feel busy.
Think about where you would like to display it when choosing your colours. Traditional reds and golds give it a familiar Christmas feel, while a brighter mix can make the lights look playful against the quiet background. The chart in the pattern below provides the placement for the complete connected design.
Tapestry Crochet Christmas Lights Wall Hanging

Quick-reference card. Follow the complete written instructions below.
Materials
- DK cotton or cotton-blend yarn: Approximately 25 g pale background colour (A), 10 g dark wire colour (W), and 5 g each of red (R), yellow (Y) and teal (T). Amounts are allowances, not measured usage.
- Crochet hook: 4 mm, or a size that makes a firm fabric without pulling the colourwork tight.
- Dowel: Approximately 18 cm long and 6 mm in diameter.
- Other supplies: Tapestry needle, scissors and small yarn bobbins.
Size and Fit
One sample size. The chart is 21 stitches wide by 15 rows high. At the suggested gauge, expect a panel approximately 13 cm wide by 9.5 cm high after bordering; the cord adds a variable hanging height. The 18 cm dowel extends beyond both sides of the panel.
Gauge
Suggested gauge: 18 sc and 18 rows = 10 cm in colourwork fabric before bordering. Exact gauge is not essential, but check the width of your panel against the dowel before making the sleeve.
Abbreviations
US crochet terms.
- ch = chain
- sc = single crochet
- sl st = slip stitch
- RS = right side
- WS = wrong side
Pattern
- Read the chart Each letter represents one sc: A = pale background, W = dark wire or bulb socket, R = red, Y = yellow and T = teal. Spaces divide each chart row into three blocks of seven stitches; do not crochet the spaces. Rows are shown as the image looks from the RS, from left to right, but are worked from the bottom upwards. Work odd-numbered rows from right to left as viewed from the RS; work even-numbered rows from left to right. The turning ch does not count as a stitch.
- Colour changes On the stitch before a new colour, make the final yarn-over and pull-through with the new colour. Keep carried strands on the WS and carry a colour across no more than three stitches; use a separate small bobbin or fasten off and rejoin for more distant areas. Keep floats loose enough for the panel to lie flat.
- Foundation and row 1 With A, ch 22. Sc in the second ch from the hook and in each remaining ch: 21 sc. This is chart row 1. Ch 1 and turn.
- Rows 2–15 Work one sc in each stitch, following the corresponding chart row. Ch 1 and turn after rows 2–14; do not turn after row 15. Each row has 21 sc.
01 AAAAAAA AAAAAAA AAAAAAA
02 AAAAAAA AAAAAAA AAAAAAA
03 AAAAAAA AAAAAAA AAAAAAA
04 AAAARAA AAAYAAA AATAAAA
05 AAARRRA AAYYYAA ATTTAAA
06 AARRRRR AYYYYYA TTTTTAA
07 AARRRRR AYYYYYA TTTTTAA
08 AAARRRA AAYYYAA ATTTAAA
09 AAAWWWA AAWWWAA AWWWAAA
10 WWWWWWW AAAWAAW WWWWWWW
11 AAAAAAW WWWWWWW AAAAAAA
12 AAAAAAA AAAAAAA AAAAAAA
13 AAAAAAA AAAAAAA AAAAAAA
14 AAAAAAA AAAAAAA AAAAAAA
15 AAAAAAA AAAAAAA AAAAAAA - Plain border Fasten off the chart colours. With the RS facing, join A at an edge and work one round of sc. Work 19 sc across each horizontal edge between its corner stitches, 13 sc along each vertical edge into the ends of rows 2–14, and 3 sc in each of the four corner sites. Join with a sl st to the first sc and fasten off: 76 border sc. Each bordered top edge has 25 sc, including its two groups of 3 corner stitches.
- Top sleeve With the RS facing, locate the 21 centred stitches of the 25-stitch top border, leaving two border stitches unused at each end. Join A at the first of those 21 stitches. Sleeve row 1: ch 1, sc through the back loop of each of the 21 centred stitches. Sleeve rows 2–5: ch 1, turn, sc in each stitch. Fasten off with a long sewing tail. Fold the strip to the WS and sew its free long edge to the back of the panel, roughly five panel rows below the top. Catch the backs of stitches so the seam does not show on the front. Leave both short ends open for the dowel.
- Hanging cord With A or W, make a chain approximately 45 cm long and fasten off, leaving tails for tying. Do not pull the chain tight when measuring; the hanging height can be adjusted when it is attached.
Finishing
- Weave in ends on the WS, taking care not to draw the colourwork out of shape.
- Lightly block the panel square and let it dry before inserting the dowel through the sleeve.
- Tie one end of the cord securely to each exposed end of the dowel. Adjust the cord so the panel hangs level.
Helpful Tips
- Check each seven-stitch chart block as you work; the spaces in the chart are visual guides only.
- The sockets in row 9 meet the coloured bulbs below and the wire above. Row 11 connects the two longer sections of wire in row 10.
- If carried yarn shows through the pale background, use separate bobbins for those colour sections instead.
Crochet Christmas Light Bulb Coasters

These Christmas light bulb coasters bring a playful touch to a festive drinks table while giving cold glasses a place to sit. Make them in different bulb colours for a coordinated set, or choose shades that suit your other Christmas decorations.
The broad, flat bulb body provides the resting area for a glass. A short neck and contrasting cap make the light-bulb shape recognisable without adding raised detail beneath the drink. Before making a full set, check that your usual glass sits comfortably on the finished coaster.
Crochet Christmas Light Bulb Coasters

Quick-reference card. Follow the complete written instructions below.
Materials
- DK cotton yarn: One bulb colour per coaster, plus a small amount of grey for each cap.
- Crochet hook: 3.5 mm, or a size that produces a firm, close fabric.
- Notions: Stitch marker, yarn needle, scissors and tape measure.
Size and Fit
Sample coaster: aim for a bulb body approximately 10–11 cm long and 7–8 cm wide, with a finished length of approximately 12–13 cm including the neck and cap. Exact dimensions depend on your yarn and tension; measure the completed outline rather than calculating it from row gauge. The body is intended for a drinking glass with a base no wider than approximately 5.5 cm. Check that your own glass sits securely before making a set.
Gauge
Approximately 20 sc over 10 cm in firm, flat fabric. Gauge is a guide to choosing yarn and hook, not a prediction of the finished oval’s dimensions.
Abbreviations
US crochet terms.
- ch = chain
- sc = single crochet
- sl st = slip stitch
- st(s) = stitch(es)
- rnd = round
- rep = repeat
Pattern
- Before you begin Work the oval in joined rnds without turning. At the end of each rnd, join with a sl st to its first sc; the join is not a stitch. Ch 1 before the next rnd, then work its first sc into the same stitch as the join. Do not count the ch 1 as a stitch. Keep the body flat and even; do not add a raised border.
- Bulb body, rnd 1 With a bulb colour, ch 8. Work 3 sc in the second ch from the hook, 1 sc in each of the next 5 ch, and 3 sc in the last ch. Working back along the underside of the foundation chain, sc in each of the remaining 5 ch. Join. 16 sts.
- Bulb body, rnd 2 Ch 1. [2 sc in each of the next 3 sts, sc in each of the next 5 sts] twice. Join. 22 sts.
- Bulb body, rnd 3 Ch 1. [(2 sc in next st, sc in next st) 3 times, sc in each of the next 5 sts] twice. Join. 28 sts.
- Bulb body, rnds 4–8 At each rounded end, increase in 3 evenly spaced stitches; keep the 5 straight-side stitches between the ends unchanged. For rnd 4: ch 1, [(sc in next 2 sts, 2 sc in next st) 3 times, sc in next 5 sts] twice; join. 34 sts. For rnd 5, use 3 sc before each increase in the same sequence; 40 sts. For rnds 6, 7 and 8, use 4, 5 and 6 sc respectively before each increase; the stitch counts are 46, 52 and 58. Ch 1 at the start of each rnd and join at the end. Fasten off after rnd 8.
- Neck Count from the first sc of rnd 8. Its first 24 stitches form one rounded end. With the right side facing, join the bulb colour in stitch 9 of that rnd. Ch 1, sc in stitch 9 and each of the next 7 stitches, ending in stitch 16. Turn, ch 1 and sc in each of the 8 neck stitches. Fasten off. The neck has 2 rows of 8 sc and sits centrally on the rounded end.
- Contrasting cap With the right side facing, join grey yarn at one end of the neck’s final row. Ch 1 and sc across its 8 stitches. Turn, ch 1 and sc across all 8 stitches once more. Fasten off. The cap has 2 rows of 8 sc; keep its edges flat rather than adding bulky trim.
Finishing
- Weave ends into the back of the fabric without bunching the centre of the bulb.
- Gently shape the coaster while damp and dry it flat. Do not stretch it to reach the suggested measurements.
- Set a glass on the dry coaster to check that its base fits within the broad body and does not rock. Make additional coasters in other bulb colours if desired.
Helpful Tips
- Cotton absorbs condensation; a firm tension helps the coaster remain level beneath a cold drink.
- Place any optional embroidery near the outer edge, away from the area where the glass rests.
- If your first coaster is too narrow for your glass, use a slightly thicker cotton or a larger hook while keeping the fabric firm, then make a new sample and check its finished dimensions.
Christmas Light Bulb Gift Pouch

This Christmas light bulb gift pouch turns a familiar festive shape into reusable wrapping. The rounded red body gives it the look of an oversized bulb, while the contrasting grey neck keeps the opening accessible for a small present.
It works especially well for a little wrapped surprise that would otherwise get lost in a larger gift bag. Allow for the wrapping as well as the gift itself when choosing what to put inside: the drawstring gathers the neck but cannot make a bulky parcel pass through it.
The pouch can be untied and used again next Christmas. It is decorative gift wrap, not a cover for a lit bulb or candle; keep the drawstring away from young children.
Christmas Light Bulb Gift Pouch

Quick-reference card. Follow the complete written instructions below.
Materials
- Red yarn: Sturdy DK-weight cotton or acrylic for the bulb; allow approximately 35 g.
- Grey yarn: Matching DK-weight yarn for the neck and drawstring; allow approximately 10 g.
- Crochet hook: 4 mm, or the size needed to obtain the stated gauge.
- Notions: Stitch marker, yarn needle and scissors.
Size and Fit
Approximately 8–9 cm across when filled and 11–13 cm tall, depending on the contents. The 36-stitch neck has an approximate unstretched circumference of 20 cm and an opening about 6 cm across. Choose a small wrapped gift no wider than 5 cm and no taller than about 7 cm. Test that it passes through the narrowed neck before working the eyelets; the drawstring is not intended to force a larger gift through.
Gauge
18 sc and approximately 20 rounds = 10 cm in the round with the 4 mm hook. Gauge is useful for the opening size; if your stitches are tighter, check the gift against the actual opening.
Abbreviations
US crochet terms.
- ch = chain
- sc = single crochet
- sc2tog = single crochet two stitches together
- st(s) = stitch(es)
- rnd = round
Pattern
- Working method Work in continuous rounds without joining or turning. Place a marker in the first stitch of each round and move it up as you work. A ch-1 space counts as one stitch position in Rnd 23.
- Rnd 1 — base With red, make a magic ring and work 6 sc into the ring. Pull the ring closed. (6 sts)
- Rnd 2 Work 2 sc in each st around. (12 sts)
- Rnd 3 Repeat [sc in next st, 2 sc in next st] 6 times. (18 sts)
- Rnd 4 Repeat [sc in next 2 sts, 2 sc in next st] 6 times. (24 sts)
- Rnd 5 Repeat [sc in next 3 sts, 2 sc in next st] 6 times. (30 sts)
- Rnd 6 Repeat [sc in next 4 sts, 2 sc in next st] 6 times. (36 sts)
- Rnd 7 Repeat [sc in next 5 sts, 2 sc in next st] 6 times. (42 sts)
- Rnd 8 Repeat [sc in next 6 sts, 2 sc in next st] 6 times. (48 sts)
- Rnds 9–20 — bulb body Sc in each st around for 12 rounds. (48 sts each round) On the final yarn-over of the last sc of Rnd 20, change to grey. Cut the red yarn, leaving a tail to weave in.
- Rnd 21 — narrow the neck With grey, repeat [sc in next 2 sts, sc2tog] 12 times. (36 sts)
- Rnd 22 — fit check Sc in each st around. (36 sts) Before continuing, check that the wrapped gift passes through the neck without stretching it hard. If it does not, choose a smaller gift.
- Rnd 23 — eyelets Repeat [sc in next 2 sts, ch 1, skip next st] 12 times. (24 sc and 12 ch-1 spaces; 36 stitch positions)
- Rnds 24–25 — neck edge Rnd 24: Sc in every sc and every ch-1 space around. (36 sts) Rnd 25: Sc in each st around. (36 sts) Fasten off and weave in the end.
- Drawstring With grey and the 4 mm hook, make a chain approximately 65 cm long. Fasten off, leaving a short tail at each end. Thread the chain in and out through all 12 eyelets, bringing its ends out through two adjacent eyelets. Tie a small knot at each end of the chain to secure the tails.
Finishing
- Weave in the remaining yarn ends without sewing the pouch opening closed.
- Place the gift inside, gather the neck gently with the drawstring and tie a bow. Untie it to remove the gift and reuse the pouch.
Helpful Tips
- A firm fabric helps the rounded bulb hold its shape; use a smaller hook if there are large gaps between stitches.
- Check the wrapped gift rather than the unwrapped item: ribbon or bulky paper can affect whether it fits through the neck.
- This pouch is a decoration and gift wrap, not a holder for a lit bulb or candle. Keep the drawstring away from young children.
If you’d like to keep building your crochet skills, take a look at crochet Christmas coaster patterns.
Christmas Lights Mesh Table Runner

This Christmas Lights Mesh Table Runner brings a festive touch to the dining table without covering it in bulky decorations. Its open mesh keeps the runner visually light, while the centre remains largely plain for place settings and serving dishes.
Dark, winding cords and colourful flat bulbs frame the long edges like a string of Christmas lights. Keeping the decoration towards the outside lets it be seen without placing raised details beneath plates.
The runner’s length can be adjusted to suit your table. It works well as a seasonal centrepiece on its own or beneath a modest arrangement; the bulbs are fabric decorations, not holders for candles or tea lights.
Christmas Lights Mesh Table Runner

Quick-reference card. Follow the complete written instructions below.
Materials
- Pale DK cotton yarn: For the mesh panel; the amount depends on your chosen length.
- Dark DK cotton yarn: For the surface-crocheted cords and bulb sockets.
- Coloured DK cotton yarn: Small amounts in your choice of bulb colours.
- 4 mm crochet hook: Adjust if needed to make a mesh that lies flat.
- Yarn needle and removable markers: For positioning and sewing on the bulbs.
Size and Fit
The sample-width panel has 25 mesh spaces across. Its length is adjustable: work at least 16 rows, then continue until the unbordered mesh reaches your chosen length, such as 120 cm. The border adds a little to both dimensions. Check the width after several rows; to change it, start with 2 chains per desired mesh space, plus 3 chains.
Gauge
No fixed gauge is required. Measure your mesh after at least 10 rows to judge the finished width and decide how many more rows your table needs. Keep your tension relaxed enough for the panel to lie flat.
Abbreviations
US crochet terms.
- ch = chain
- dc = double crochet
- sc = single crochet
- sc2tog = single crochet two stitches together
- sl st = slip stitch
- RS = right side
Pattern
- Mesh foundation and Row 1 With pale yarn, ch 53. Dc in the fifth ch from the hook; the skipped chains form the first dc post and first ch-1 space. (Ch 1, skip the next foundation ch, dc in the next ch) 24 times. You have 25 mesh spaces and 26 dc posts, counting the beginning chain as a post.
- Mesh Row 2 Ch 4 and turn; this counts as the first dc and ch-1 space. Skip the first mesh space, dc in the next dc. (Ch 1, skip the next mesh space, dc in the next dc) 24 times. Work the final dc into the top of the beginning chain of the previous row.
- Continue the panel Repeat Row 2 until the unbordered panel reaches your chosen length. Work at least 16 rows in total. Count the completed mesh rows and call this number R; you will need it to space the bulbs and check the border.
- Even border After the last mesh row, ch 1 without turning. Work 3 sc into the top of the corner post beside your hook. Down the first long edge, work 2 sc into the end of each of the R mesh rows. Work 3 sc into the base of the corner post. Across the foundation edge, work 1 sc into the base of each of the 24 interior posts and 1 sc into each of the 25 gaps between post bases. Work 3 sc into the remaining foundation corner. Work 2 sc into each row-end up the second long edge, then 3 sc into the top of its corner post. Across the final-row edge, work 1 sc into each of the 24 interior dc posts and 1 sc into each of the 25 ch-1 spaces. Join with a sl st to the first border sc and fasten off. The border has 4R + 110 sc, excluding the joining sl st.
- Winding light cords Lay the panel RS up. With dark yarn, make one surface-sl-st cord beside each long edge, beginning at Row 3 and ending at Row R minus 2. Follow the third dc post in from that edge for Rows 3–8, the fourth post for Rows 9–14, then alternate in six-row sections. At each row, make one loose surface sl st around the chosen post near its top; when changing columns, carry the stitch diagonally across no more than one mesh space. To form each stitch, bring the hook from the front to the back beside the post and back to the front on its other side, draw up the yarn, and pull it through the loop on the hook. Start the second cord from its own long edge and repeat. Fasten off at both ends, keeping the panel flat.
- Bulb, Row 1 With a bulb colour, ch 5. Sc in the second ch from the hook and in each remaining ch: 4 sc. The foundation edge will be the socket end.
- Bulb, Rows 2 and 3 Row 2: Ch 1, turn, 2 sc in the first sc, sc in each of the next 2 sc, 2 sc in the last sc: 6 sc. Row 3: Ch 1, turn, sc in each sc: 6 sc.
- Bulb, Rows 4 and 5 Row 4: Ch 1, turn, sc2tog, sc in each of the next 2 sc, sc2tog: 4 sc. Row 5: Ch 1, turn, sc2tog twice: 2 sc. Fasten off. Row 5 forms the tip.
- Bulb socket Join dark yarn at one end of the bulb’s four-stitch foundation edge. Work 1 sc into each of its 4 foundation-chain loops. Fasten off. Make one bulb for each marked position on both long edges.
- Position and attach bulbs On each long edge, mark Rows 6, 14, 22 and so on, stopping at or before Row R minus 5. The two edges should have matching marks. Place one bulb at each mark, between its cord and the nearest border, with the socket beside the cord and the tip pointing towards the outer edge. Sew the socket, tip and sides lightly to mesh posts or border stitches rather than pulling yarn tightly across open spaces. Keep every bulb flat and clear of the plain centre.
Finishing
- Weave in ends on the wrong side without drawing the mesh out of shape.
- Gently damp-block the runner flat if needed, straightening the short ends and allowing it to dry fully before use.
Helpful Tips
- Make a bulb first and hold it against the panel before sewing all the appliqués; small changes in tension can change how much mesh it covers.
- Keep surface slip stitches loose so the cords do not shorten or gather the long edges.
- This is a fabric decoration, not a holder for candles or hot tea lights.
Corner-to-Corner Christmas Lights Cushion

This cushion brings Christmas lights to a sofa without adding anything that dangles or catches. The coloured bulbs and stepped cord are worked into the front, giving the design a crisp, pixel-style look rather than a sewn-on decoration.
Corner-to-corner colourwork suits this kind of graphic image, but it does ask you to keep track of the chart as the diagonals grow and shrink. Keeping colour changes tidy will help the lights stand out against the background and leave the fabric comfortable to use.
The plain back keeps the focus on the festive front. Because the finished cover depends on your yarn and tension, make the fabric first and choose a cushion pad to suit it rather than relying on an assumed size.
Corner-to-Corner Christmas Lights Cushion
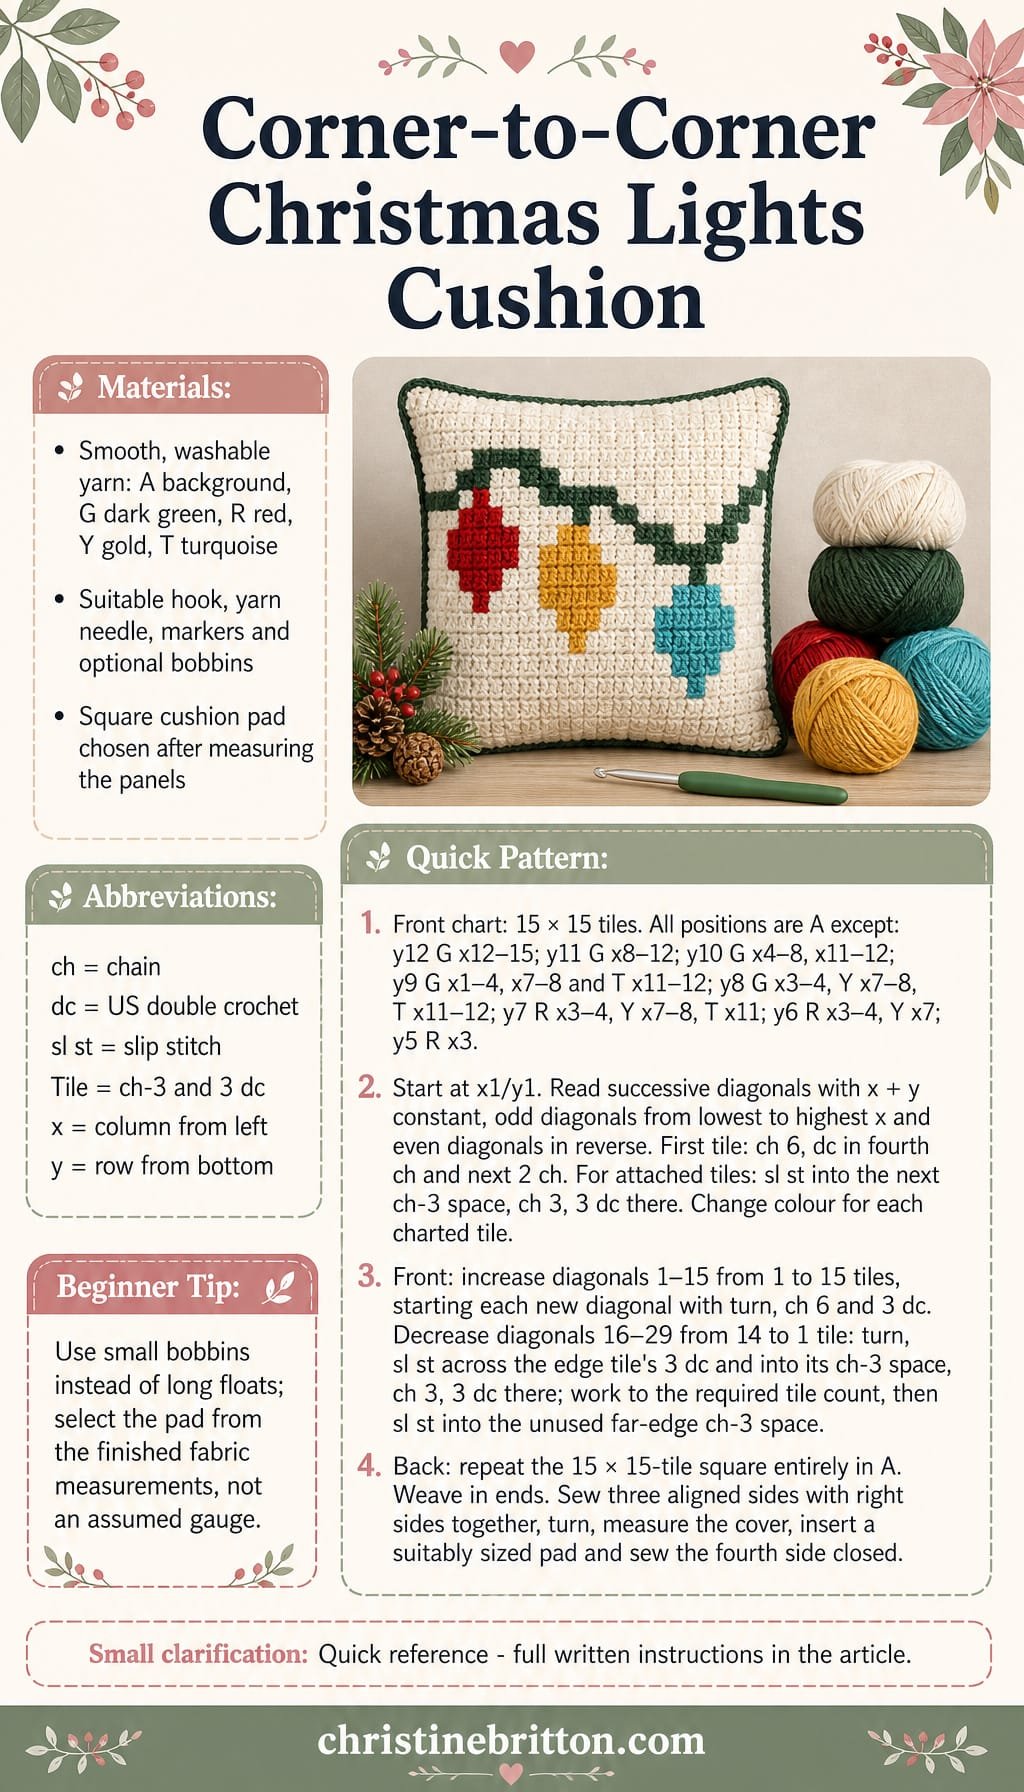
Quick-reference card. Follow the complete written instructions below.
Materials
- Smooth, washable yarn: One background colour (A), dark green for the cord and sockets (G), and small amounts of red (R), gold (Y) and turquoise (T) for the bulbs. Use the same yarn weight throughout; allow enough background yarn for both panels.
- Crochet hook: Choose a size that makes a firm, even fabric with your yarn. A 4 mm hook is a starting point for DK yarn, not a tested gauge.
- Cushion pad: Choose after measuring the finished panels; use the pad-selection method below.
- Notions: Stitch markers, scissors, a yarn needle and optional small yarn bobbins for colourwork.
Size and Fit
Make two 15 × 15-tile squares. Their finished dimensions depend on your yarn, hook and tension; no fixed cover size is claimed. After making and laying both panels flat, measure their width and height. Select a square, compressible cushion pad whose stated dimensions are close to those measurements and that can be eased into the cover without stretching the stitches markedly. If the panels differ slightly, use the smaller panel measurement when selecting the pad.
Gauge
No fixed gauge is required. For an advance size estimate, make a 5 × 5-tile corner-to-corner swatch with your chosen yarn and hook, lay it flat, and multiply its width by 3 to estimate the width of a 15-tile panel. Make the panels first and use their actual finished measurements to select the pad.
Abbreviations
US crochet terms.
- ch = chain
- dc = double crochet
- sl st = slip stitch
- tile = one corner-to-corner block, made from a ch-3 and 3 dc
- A, G, R, Y, T = background, dark green, red, gold and turquoise yarn respectively
Pattern
- Read the colour chart The front chart is 15 tiles wide by 15 tiles high. Number columns x = 1–15 from left to right and rows y = 1–15 from bottom to top when viewing the finished front. Every position is A unless another colour is listed below. Work the chart by diagonals: diagonal 1 contains x1/y1; each subsequent diagonal contains positions for which x + y is one greater than on the preceding diagonal. On odd-numbered diagonals, read from lowest x to highest x; on even-numbered diagonals, reverse that direction. Orient the work so its first tile is the bottom-left tile of the finished front.
- Front chart, rows 15–9 Rows y15, y14 and y13: all A. Row y12: G at x12–15. Row y11: G at x8–12. Row y10: G at x4–8 and x11–12. Row y9: G at x1–4 and x7–8; T at x11–12. All unlisted positions in these rows are A.
- Front chart, rows 8–1 Row y8: G at x3–4; Y at x7–8; T at x11–12. Row y7: R at x3–4; Y at x7–8; T at x11. Row y6: R at x3–4; Y at x7. Row y5: R at x3. Rows y4, y3, y2 and y1: all A. All unlisted positions in rows y5–8 are A. The G tiles form the stepped cord and bulb sockets; R, Y and T form the three hanging bulbs.
- Make a C2C tile For the first tile, ch 6; dc in the fourth ch from the hook and in each of the next 2 ch. The skipped 3 ch and 3 dc form one tile. To attach another tile to the preceding diagonal, sl st into the next tile’s ch-3 space, ch 3, then work 3 dc into that space.
- Front: increasing diagonals Using the chart colours in reading order, work diagonals 1–15. To start each new diagonal after the first, turn, ch 6 and work a dc in the fourth ch from the hook and in each of the next 2 ch. Attach successive tiles to the ch-3 spaces along the preceding diagonal as described above. Make one more tile on each diagonal, reaching 15 tiles on diagonal 15. Change yarn before working each tile that needs a new colour. Use separate small bobbins where helpful, and keep carried yarn short and on the wrong side.
- Front: decreasing diagonals Work diagonals 16–29, decreasing by one tile on each diagonal. At the beginning of each, turn and sl st across the 3 dc of the edge tile and into its ch-3 space; ch 3 and work 3 dc into that space for the first tile. Continue attaching tiles across the preceding diagonal, stopping when the required number of tiles has been made. Do not work a tile into the final unused ch-3 space at the far edge; sl st into that space to secure the edge. Diagonal 16 has 14 tiles and diagonal 29 has 1 tile. Fasten off and weave in ends.
- Plain back Using A throughout, make a second 15 × 15-tile C2C square by the same increasing and decreasing method: diagonals 1–15 increase from 1 to 15 tiles, and diagonals 16–29 decrease from 14 to 1 tile. Fasten off and weave in ends.
- Join and fill Lay the panels together with right sides facing and align their corners and 15-tile edges. With A and a yarn needle, sew three sides together using an even seam through corresponding edge stitches; avoid pulling the seam tight. Turn right side out and lay the cover flat to check its dimensions before selecting the cushion pad. Insert the pad, turn the remaining raw edges inward and sew the fourth side closed through corresponding edge stitches.
Finishing
- Secure and trim remaining yarn ends.
- Ease the pad into the corners and smooth the cover without stretching the colourwork.
Helpful Tips
- Put a marker at each corner before joining so corresponding tile edges stay aligned.
- Keep colour changes tidy on the wrong side. Long floats may catch on the cushion pad, so use another small bobbin rather than carrying yarn across a large background area.
- For a different cushion size while retaining this 15 × 15 chart, change yarn weight or hook size and measure the resulting panels before buying a pad.
Crochet Christmas Lights Wreath

This crochet Christmas lights wreath captures the cheerful look of a string of festive bulbs without needing a plug or batteries. A covered ring gives the decoration its shape, while a winding dark cord and raised, colourful bulbs add depth.
The contrast between the smooth cover and dimensional bulbs makes this a lovely piece to display on an interior door or wall. It suits a playful Christmas scheme, but the compact design can sit alongside more traditional decorations too.
The bulbs are decorative crochet shapes, not working lights. Display the wreath away from candles and other heat sources, and use its hanging loop rather than the decorative cord to support it.
Crochet Christmas Lights Wreath

Quick-reference card. Follow the complete written instructions below.
Materials
- Wreath form: Foam ring measuring 15 cm across the outside, with a tube approximately 3 cm thick
- Cover yarn: Firm aran-weight yarn, approximately 50 g
- Cord yarn: A small amount of dark DK-weight yarn
- Bulb yarn: Small amounts of DK-weight yarn in red, green and yellow
- Hooks: 4 mm for the cover and 3 mm for the cord and bulbs, or sizes needed to achieve firm fabric
- Other supplies: A little toy stuffing, yarn needle, scissors, stitch marker and pins
Size and Fit
One sample size for the specified 15 cm wreath form. The strip is approximately 9.4 cm wide and 37.8 cm long at the target gauge: wide enough to wrap around the 3 cm-thick tube and long enough to follow the ring’s centreline. Check the strip against your form before seaming; foam forms can vary.
Gauge
Target gauge for the cover: 16 sc and 18 rows per 10 cm using the cover yarn. A firm fabric matters more than an exact gauge. Check that 15 sc wrap around the tube without a gap and that 68 rows reach around the ring without pulling it out of shape.
Abbreviations
US crochet terms.
- ch = chain
- sc = single crochet
- sl st = slip stitch
- inc = work 2 sc in the next stitch
- dec = single-crochet 2 stitches together
- rnd = round
Pattern
- Cover strip With the cover yarn and 4 mm hook, ch 16. Row 1: Sc in the second ch from the hook and in each ch across; 15 sc. Rows 2–68: Ch 1, turn, sc in each stitch across; 15 sc. The turning ch does not count as a stitch. Fasten off, leaving a long sewing tail. Before joining, hold the strip around the wreath tube and then along the ring’s centreline to check its fit.
- Cover the form Sew the short ends of the strip together, matching all 15 stitches, to make a loop. Place the loop around the wreath form. Bring its two long edges together at the back and sew them together, matching the 68 row ends on each edge. Keep the seam snug rather than pulling it tight enough to distort the form. Secure and weave in the tails.
- Dark cord With dark DK yarn and the 3 mm hook, make a relaxed chain approximately 55 cm long. Sl st in the second ch from the hook and in each remaining ch. Fasten off, leaving tails for attaching it. Pin the cord to the front of the covered wreath in a gentle side-to-side winding path around the ring. Take both ends to the back. Stitch the cord to the cover at intervals of about 2–3 cm; ease any spare length into the curves rather than stretching it.
- Bulbs — make six Use the 3 mm hook and make two bulbs in each colour. Work in continuous rounds; mark the first stitch of each round. Rnd 1: Work 6 sc into a magic ring; 6 sc. Rnd 2: Inc in each stitch; 12 sc. Rnds 3–4: Sc in each stitch; 12 sc. Rnd 5: (Sc in the next stitch, dec) four times; 8 sc. Rnd 6: Sc in each stitch; 8 sc. Add a small amount of stuffing. Rnd 7: Dec four times; 4 sc. Fasten off with a long tail, thread it through the front loops of the four remaining stitches and pull the opening closed. Keep the tail for attachment.
- Arrange and attach Place the six bulbs around the front of the wreath in red, green, yellow, red, green, yellow order. Set each narrow end against the cord and angle the rounded end away from it. Pin first to check the spacing. With each bulb’s tail, stitch its narrow end and a little of its underside to the cover, catching the cord at the narrow end so the pieces read as one strand. Secure the tails at the back of the cover.
Finishing
- Weave in all remaining ends.
- For a hanging loop, chain approximately 12 cm with the cover yarn, fasten off, and sew both ends securely to the top back of the cover. Hang the wreath by this loop rather than by the decorative cord.
- This wreath contains no working lights. Keep it away from candles, hot bulbs and other heat sources.
Helpful Tips
- If the cover strip does not fit your particular form, adjust its starting chain for the measured distance around the tube and its number of rows for the measured distance around the centre of the ring. Keep the stitch count the same on every row.
- Use only a little stuffing in each bulb so it holds its shape without becoming heavy.
- Pin the cord and all six bulbs before sewing; this makes it easier to balance the winding line and colour spacing.
Christmas Light Bulb Bookmark
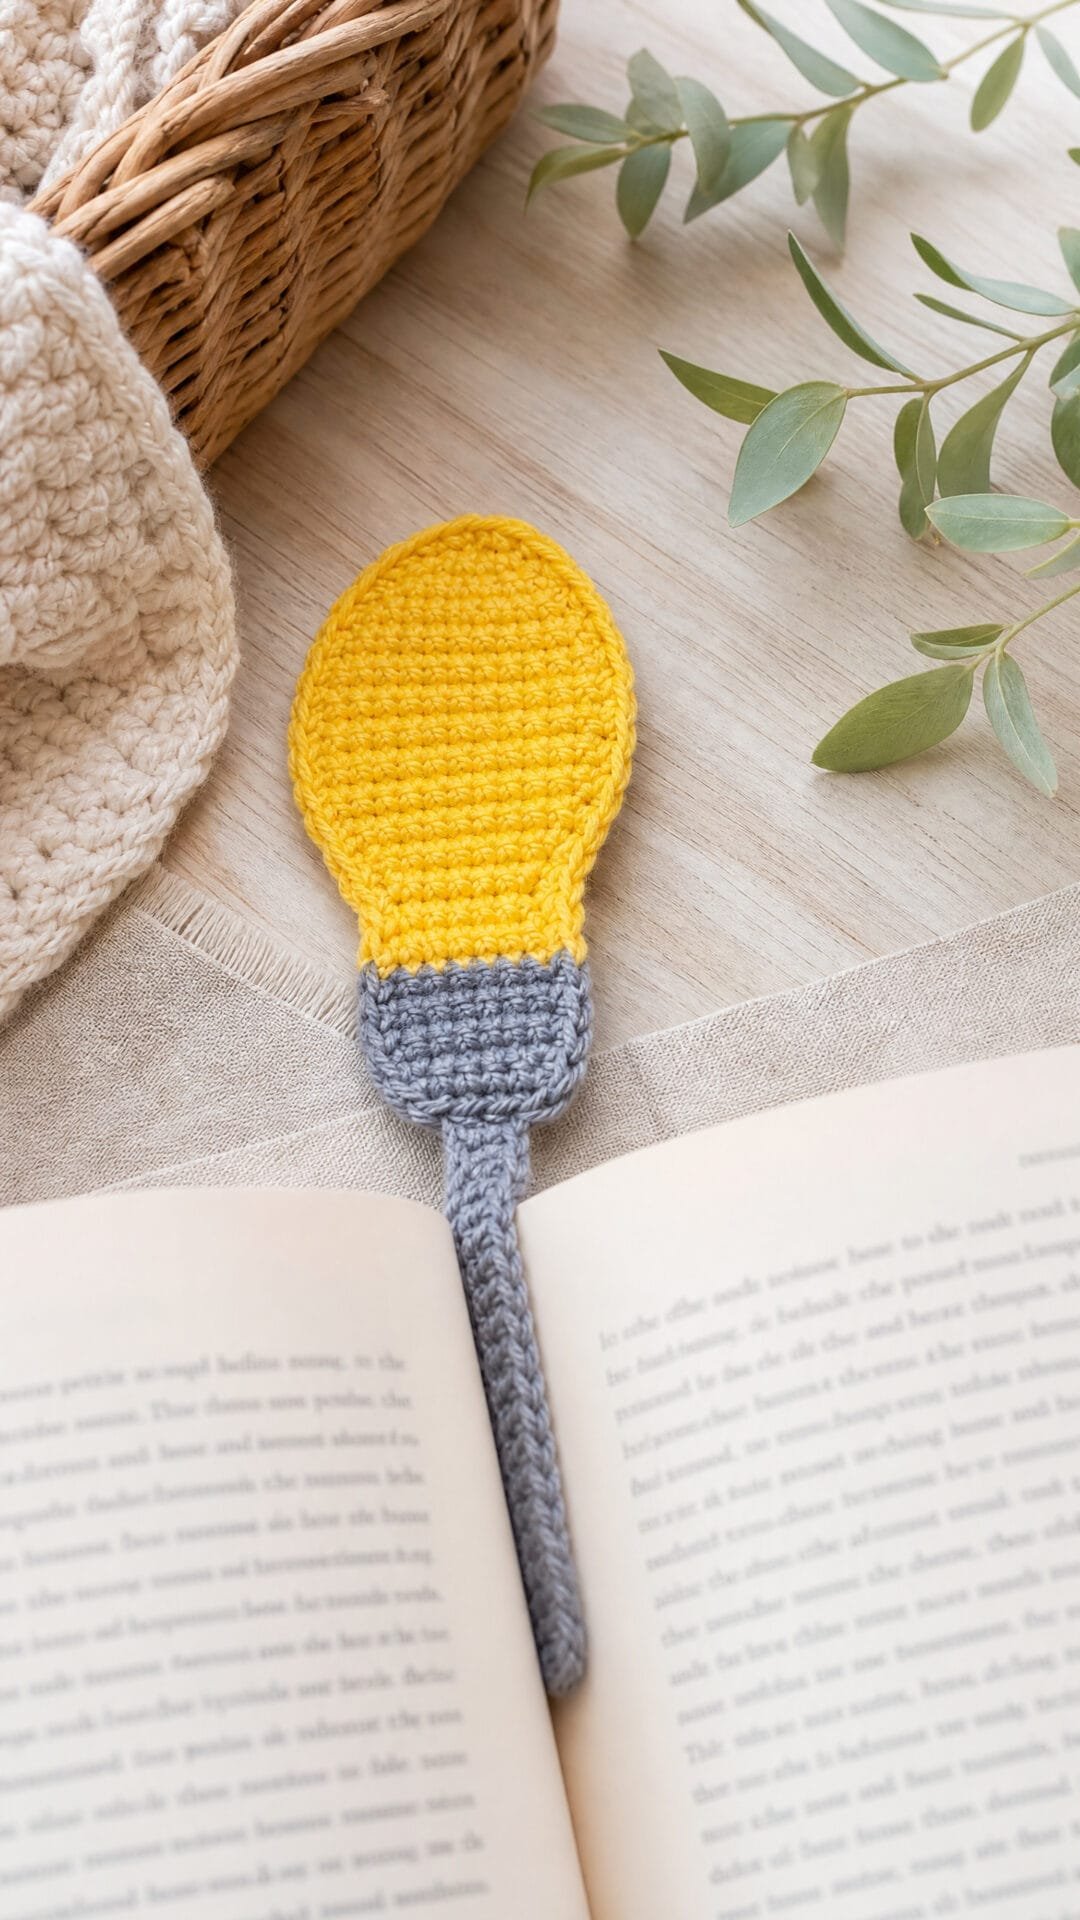
This Christmas light bulb bookmark turns a familiar festive shape into something useful. The yellow bulb sits above the top edge of your book, while the narrow grey strip marks your place between the pages.
Unlike a stuffed decoration, the bulb is flat, so it keeps the look of a Christmas light without adding much bulk to a book. The simple silhouette makes it a cheerful little gift for a reader or an addition to a Christmas book parcel.
This is a good project if you are comfortable working in rows and want a small seasonal make with a practical purpose. Choose the book you have in mind before making the strip so the bookmark suits its pages.
Christmas Light Bulb Bookmark

Quick-reference card. Follow the complete written instructions below.
Materials
- Fine cotton yarn: Small amounts of yellow and grey; use a smooth yarn that makes a thin, firm fabric.
- Crochet hook: 2 mm, or a size that gives you compact stitches.
- Tapestry needle and scissors: For weaving in ends and trimming yarn.
Size and Fit
One adjustable size. The bulb is 10 stitches wide at its widest point; its finished dimensions depend on your yarn and tension. Measure the intended book from the top to the bottom of a page. Work the strip to roughly 1 cm shorter than that measurement, measured from the top of the cap, so the bulb can sit above the book. Check the fit before fastening off.
Gauge
Exact gauge is not essential. Keep the stitches close and flat, and use the intended book to determine the strip length.
Abbreviations
US crochet terms.
- ch = chain
- sc = single crochet
- sc2tog = single crochet 2 stitches together; one decrease
- st(s) = stitch(es)
Pattern
- Before you begin Work in turned rows. Ch 1 to turn after every row; the turning chain does not count as a stitch. The bulb begins at its narrow, rounded end and grows towards the cap.
- Bulb, row 1 With yellow, ch 3. Sc in the second ch from the hook and in the next ch. 2 sts.
- Bulb, rows 2–5 Row 2: Work 2 sc in each st. 4 sts. Row 3: Work 2 sc in the first st, sc in each of the next 2 sts, and 2 sc in the last st. 6 sts. Row 4: Work 2 sc in the first st, sc in each of the next 4 sts, and 2 sc in the last st. 8 sts. Row 5: Work 2 sc in the first st, sc in each of the next 6 sts, and 2 sc in the last st. 10 sts.
- Bulb, rows 6–9 Sc in each of the 10 sts across each row. 10 sts at the end of each row.
- Bulb, rows 10–12 Row 10: Sc2tog, sc in each of the next 6 sts, sc2tog. 8 sts. Row 11: Sc2tog, sc in each of the next 4 sts, sc2tog. 6 sts. Row 12: Sc2tog, sc in each of the next 2 sts, sc2tog. On the final yarn-over of the last sc2tog, pull through with grey to change colour. 4 sts.
- Cap, rows 13–15 With grey, sc in each of the 4 sts across each row. 4 sts at the end of each row. Cut the yellow yarn after the colour change, leaving a tail to weave into the bulb.
- Strip, row 16 With grey, sc2tog twice across the 4 cap stitches. 2 sts.
- Strip, row 17 onwards Sc in each of the 2 sts across every row. Continue until the strip, measured from the top of the cap, is roughly 1 cm shorter than the intended book’s page height. Hold it against the book to check the length, then fasten off.
Finishing
- Weave the yellow end into the yellow bulb and the grey ends into nearby stitches. Keep the strip flat, and avoid knots or bulky seams where it will sit between pages.
- Gently smooth the bulb and strip into shape. If needed, lightly dampen and lay them flat to dry.
Helpful Tips
- For a neater colour change, complete the last stitch of row 12 with grey as directed, rather than starting grey with a separate knot.
- If the fabric feels thick between pages, try finer cotton or a smaller hook while keeping the stitches comfortable to work.
Two-Panel Christmas Light Bulb Ornaments
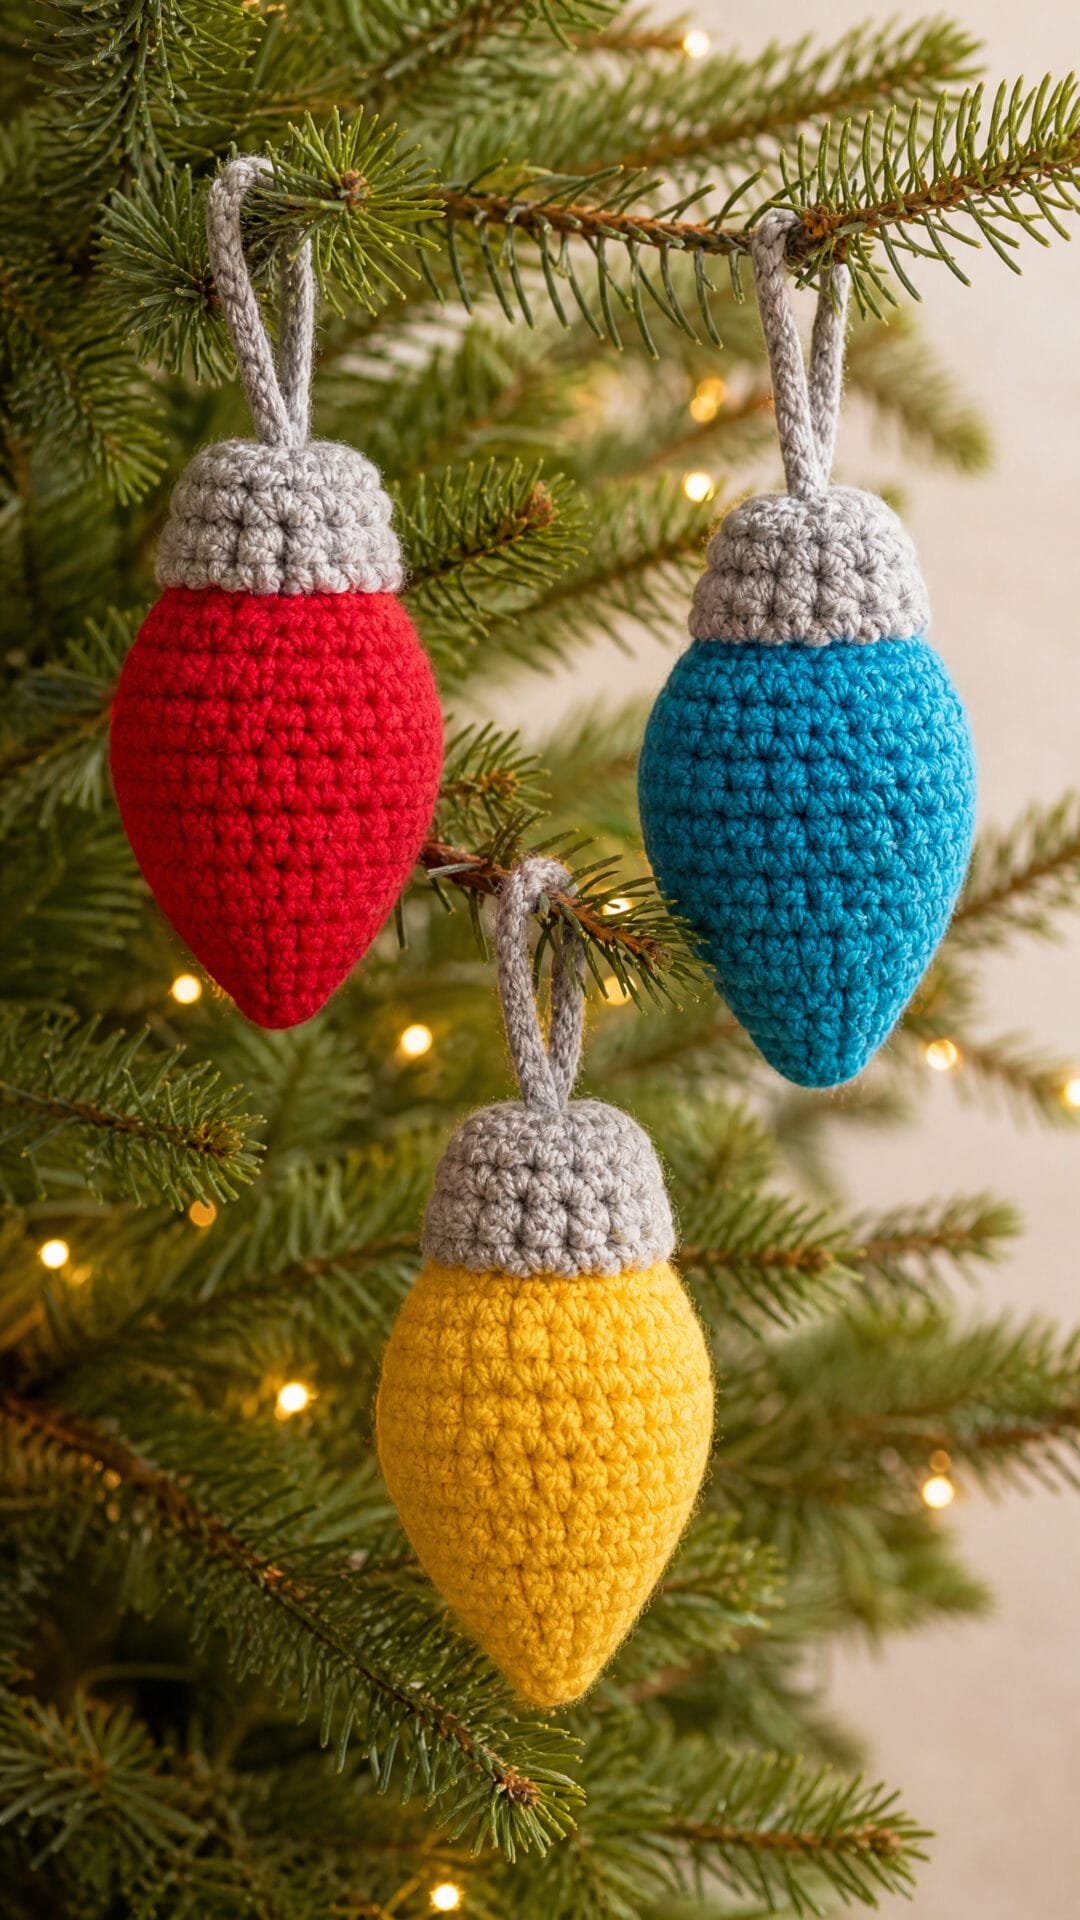
These Christmas light bulbs offer a different look from the spiral-worked bulbs in a garland. Their flat-panel construction gives each ornament a clear outline and a softly padded shape that sits neatly among tree branches.
Hang them individually wherever your tree needs a little colour, or make several in different shades for a coordinated set. The contrasting cap and edge help each bulb read as a miniature Christmas light, even when it is tucked between the needles.
Two-Panel Christmas Light Bulb Ornaments

Quick-reference card. Follow the complete written instructions below.
Materials
- Medium-weight yarn: Approximately 10 g in a bulb colour and 5 g in a contrasting colour per ornament; smooth yarn helps define the outline.
- Crochet hook: 4 mm, or a size that makes a firm fabric without large gaps.
- Polyester stuffing: A small amount per ornament.
- Yarn needle and scissors: For fastening off and weaving in ends.
Size and Fit
One sample size: approximately 6 cm wide and 7 cm tall, excluding the hanging loop. The loop is approximately 3–4 cm tall when folded. Finished dimensions will vary with yarn and tension.
Gauge
Approximately 16 sc and 18 rows per 10 cm in flat sc. Exact gauge is not essential, but the stitches should be close enough to hold a little stuffing.
Abbreviations
US crochet terms.
- ch = chain
- sc = single crochet
- sc2tog = single crochet two stitches together; one decrease
- sl st = slip stitch
- st(s) = stitch(es)
Pattern
- Before you begin Make two identical panels. Work in rows, turning after every row. A turning ch 1 does not count as a stitch. The bulb starts at its narrow bottom and widens towards the middle.
- Bulb panel, Row 1 With bulb-colour yarn, ch 3. Sc in the second ch from the hook and in the next ch; turn. (2 sc)
- Row 2 Ch 1, work 2 sc in each st; turn. (4 sc)
- Row 3 Ch 1, work 2 sc in the first st, sc in each of the next 2 sts, 2 sc in the last st; turn. (6 sc)
- Row 4 Ch 1, work 2 sc in the first st, sc in each of the next 4 sts, 2 sc in the last st; turn. (8 sc)
- Rows 5–6 Ch 1, sc in each of the 8 sts; turn. (8 sc per row)
- Row 7 Ch 1, sc2tog, sc in each of the next 4 sts, sc2tog; turn. (6 sc)
- Row 8 Ch 1, sc2tog, sc in each of the next 2 sts, sc2tog; turn. (4 sc)
- Row 9 Ch 1, sc2tog twice; turn. (2 sc) Fasten off the bulb colour.
- Cap, Rows 10–11 Join the contrasting yarn at the beginning of Row 10. Ch 1, sc in each of the 2 sts; turn. For Row 11, ch 1 and sc in each of the 2 sts. Fasten off. Repeat Rows 1–11 to make the second matching panel.
- Join and stuff Place the panels together with their wrong sides facing. With contrasting yarn, join through both layers at one top corner of the cap. Sc through both layers in each of the 2 cap-top sts, along the 11 row ends down one side, into the underside of each of the 2 foundation-chain stitches at the bottom, and along the row ends up the other side. Work one joining sc per stitch or row end, with no extra corner stitches. When 3 row ends remain, add a small amount of stuffing; do not overfill. Join through the remaining 3 row ends and sl st in the first joining sc. (26 joining sc)
- Hanging loop Fasten off the edging yarn. Attach contrasting yarn between the 2 joined stitches at the top of the cap. Ch 12, then sl st back into the same space to form a loop. Fasten off securely.
Finishing
- Weave in all ends securely, keeping the bulb lightly padded and fairly flat.
- Gently shape the outline with your fingers. Make additional bulbs in different colours to hang separately on tree branches.
Helpful Tips
- Count the stitches after each shaping row so both panels match before joining.
- If stuffing shows through, use a smaller hook or less stuffing rather than pulling the edging tight.
- For a neater edge, insert the hook through both panels at corresponding row ends as you join.
Christmas Lights Decorative Stocking

This Christmas Lights Decorative Stocking brings the look of a glowing light string to a hanging gift stocking. It is intended for small, lightweight gifts or festive display, not for wearing as footwear.
A dark, curling line gives the front its light-string shape, while colourful flat bulbs add definition without making the stocking bulky. The contrast helps the motif read clearly when the stocking is hanging.
The stocking has a folded cuff and a hanging loop for display. Keep it away from candles and tea lights; it is a textile decoration, not a light holder.
Christmas Lights Decorative Stocking
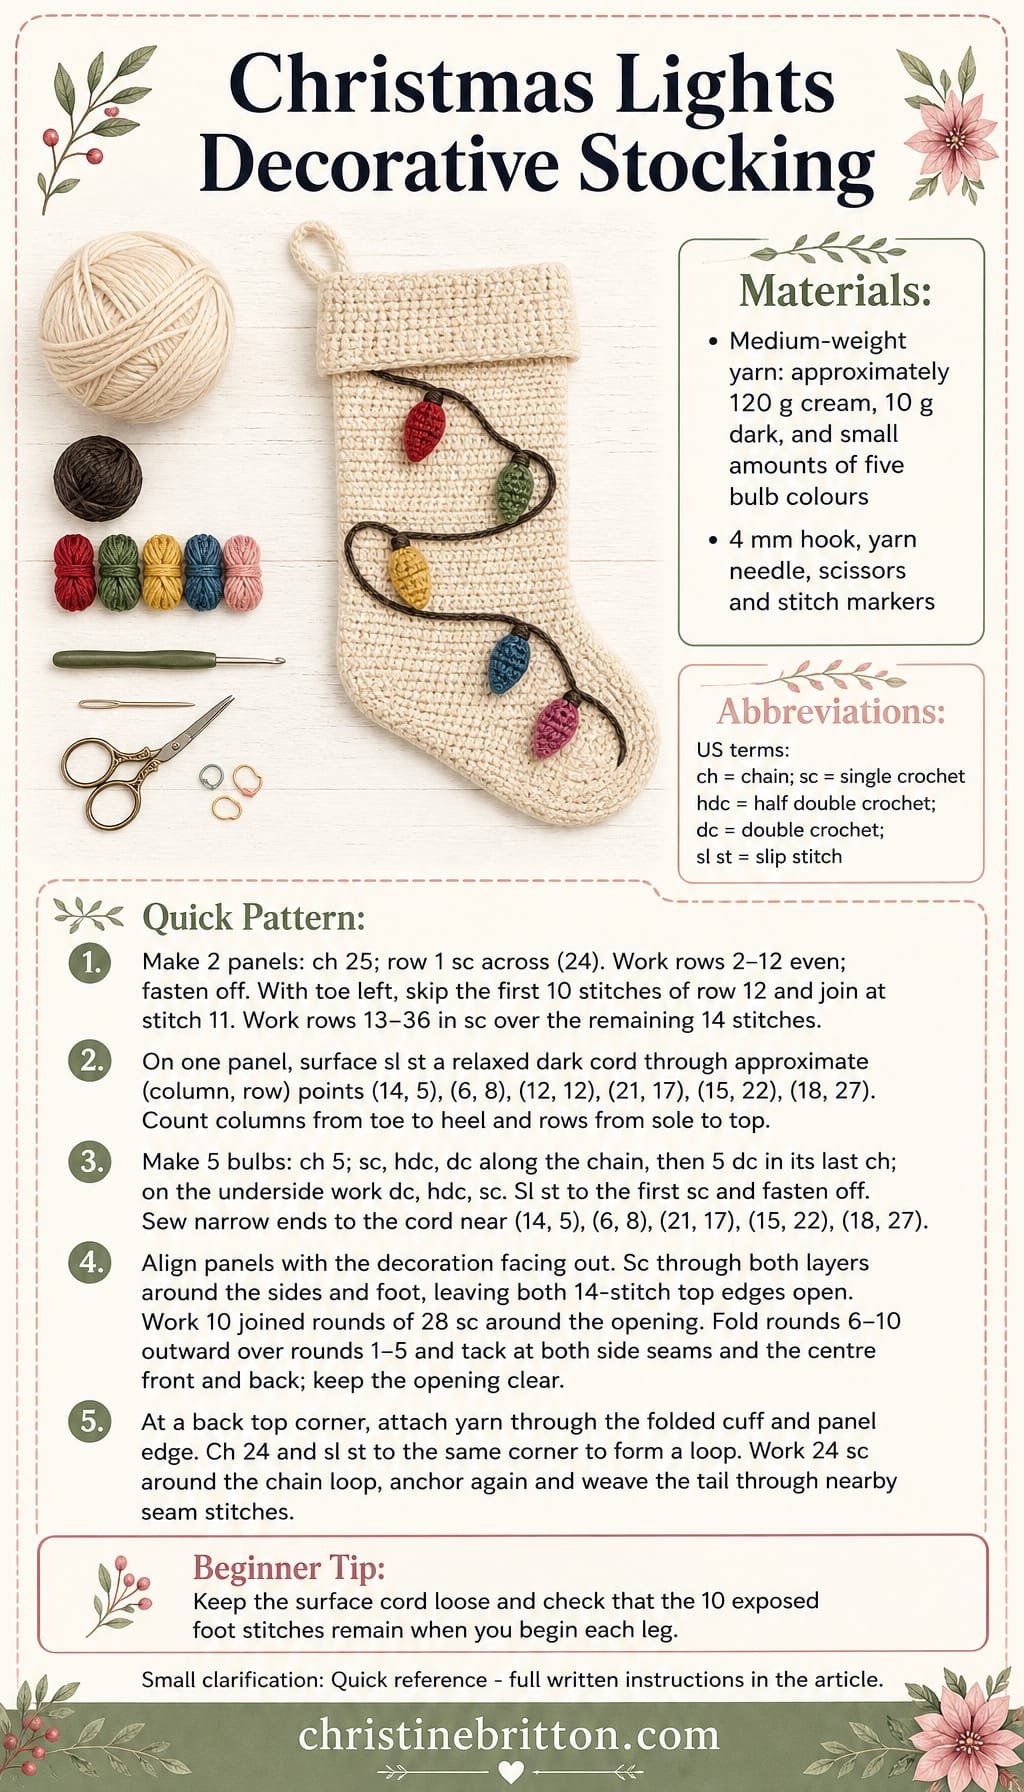
Quick-reference card. Follow the complete written instructions below.
Materials
- Medium-weight yarn: Approximately 120 g cream for the stocking and cuff, 10 g dark yarn for the cord, and small amounts of red, amber, green, blue and pink for the bulbs.
- Crochet hook: 4 mm hook, or size needed to meet gauge.
- Other supplies: Yarn needle, scissors, removable stitch markers and a ruler.
Size and Fit
One decorative size. At the stated gauge, aim for a stocking approximately 10¼ in (26 cm) tall including the folded cuff, with a foot approximately 6 in (15 cm) long. These are calculated aims, not tested finished measurements. The stocking is not sized to fit a foot.
Gauge
16 sc and 16 rows = 4 in (10 cm) in flat sc fabric. Check gauge if the finished size matters.
Abbreviations
US crochet terms.
- ch = chain
- sc = single crochet
- hdc = half double crochet
- dc = double crochet
- sl st = slip stitch
- st(s) = stitch(es)
- RS = right side
Pattern
- Panel plan Make two identical flat cream panels. Each has a 24-stitch-wide foot for 12 rows and a 14-stitch-wide leg for another 24 rows. For the decorated front, lay the panel with its toe to the left and its leg rising on the right. In the placement directions, count columns 1–24 from toe to heel and rows 1–36 from sole to top. The leg occupies columns 11–24 above row 12.
- Panels — rows 1–12 For each panel, ch 25. Row 1: sc in the second ch from the hook and in each ch across; turn. (24 sc) Rows 2–12: ch 1, sc in each st across; turn. (24 sc per row) Fasten off after row 12. Lay the panel with the last row uppermost and the toe on the left.
- Panels — rows 13–36 Count 10 stitches in from the toe end of row 12; these form the exposed top of the foot. Join cream yarn in the next stitch, column 11. Row 13: ch 1, sc in columns 11–24; turn. (14 sc) Rows 14–36: ch 1, sc in each st across; turn. (14 sc per row) Fasten off. Do not work into the 10 exposed foot stitches while making the leg. Repeat the entire panel for the back.
- Surface cord Decorate one panel before joining. Keep its toe to the left. With removable markers, plot a flowing line through these approximate column-and-row points, in order: (14, 5), (6, 8), (12, 12), (21, 17), (15, 22) and (18, 27). Join dark yarn at the first point. With the yarn held behind the panel, draw loops to the front and work surface sl sts along the marked route, choosing nearby spaces between stitches for a gentle curve. Do not pull the fabric tight. Fasten off securely on the wrong side.
- Flat bulbs — make five Make one in each bulb colour. Ch 5. Working along the foundation chain, sc in the second ch from the hook, hdc in the next ch, dc in the next ch, 5 dc in the last ch. Rotate to work along the unused underside of the chain: dc in the next ch, hdc in the next ch, sc in the last ch. (11 sts around the chain.) Sl st to the first sc and fasten off, leaving a sewing tail. The narrow end is the bulb’s attachment point.
- Attach bulbs Sew the narrow ends of the five bulbs over the cord near (14, 5), (6, 8), (21, 17), (15, 22) and (18, 27), respectively. Point each rounded end away from the cord so the dark line remains easy to see. Stitch through the bulb and front panel only, and secure the tails on the wrong side.
- Join panels Place the panels together with toes and edges aligned, keeping the decorated side facing out. The back panel’s opposite face will face out; the sc fabric works on either side. With cream yarn, join through both layers at one top corner. Sc evenly down the inner edge of the leg, across the 10 exposed stitches at the top of the foot, around the toe, along the sole and up the outer edge to the other top corner. Work an extra sc at a corner if needed to let the seam lie flat. Fasten off. Leave both 14-stitch top edges unjoined: together they form the 28-stitch opening.
- Folded cuff Join cream yarn at a top side seam. Round 1: sc in each of the 14 top-edge stitches on the front and 14 on the back; sl st to the first sc. (28 sc) Rounds 2–10: ch 1, sc in each st around; sl st to the first sc. (28 sc per round) Fasten off. Fold rounds 6–10 towards the outside over rounds 1–5, placing the final edge near the original top opening. Tack that edge discreetly at both side seams and at the centre front and back. The fold becomes the new top edge; keep the opening clear.
- Reinforced hanging loop At the back, attach cream yarn securely near the outer top corner of the folded cuff, catching the cuff and panel edge. Ch 24 and sl st into the same corner to close the loop. Work 24 sc around the chain loop, then sl st into the anchoring corner. Fasten off and weave the tail through several nearby seam stitches to reinforce the attachment.
Finishing
- Weave in all remaining ends, taking care not to draw the surface cord or bulb stitches too tight.
- Gently shape the foot and cuff by hand. Hang only after the loop attachment is secure.
Helpful Tips
- Mark the bulb positions before making the cord; adjust the curve slightly if it helps separate neighbouring bulbs.
- Keep the surface slip stitches relaxed so the front panel stays flat.
- This stocking is intended for lightweight gifts or display. Do not use it as a candle or tea-light holder.
For another related project collection, browse crochet Christmas appliqué patterns.
Christmas Light String Scarf
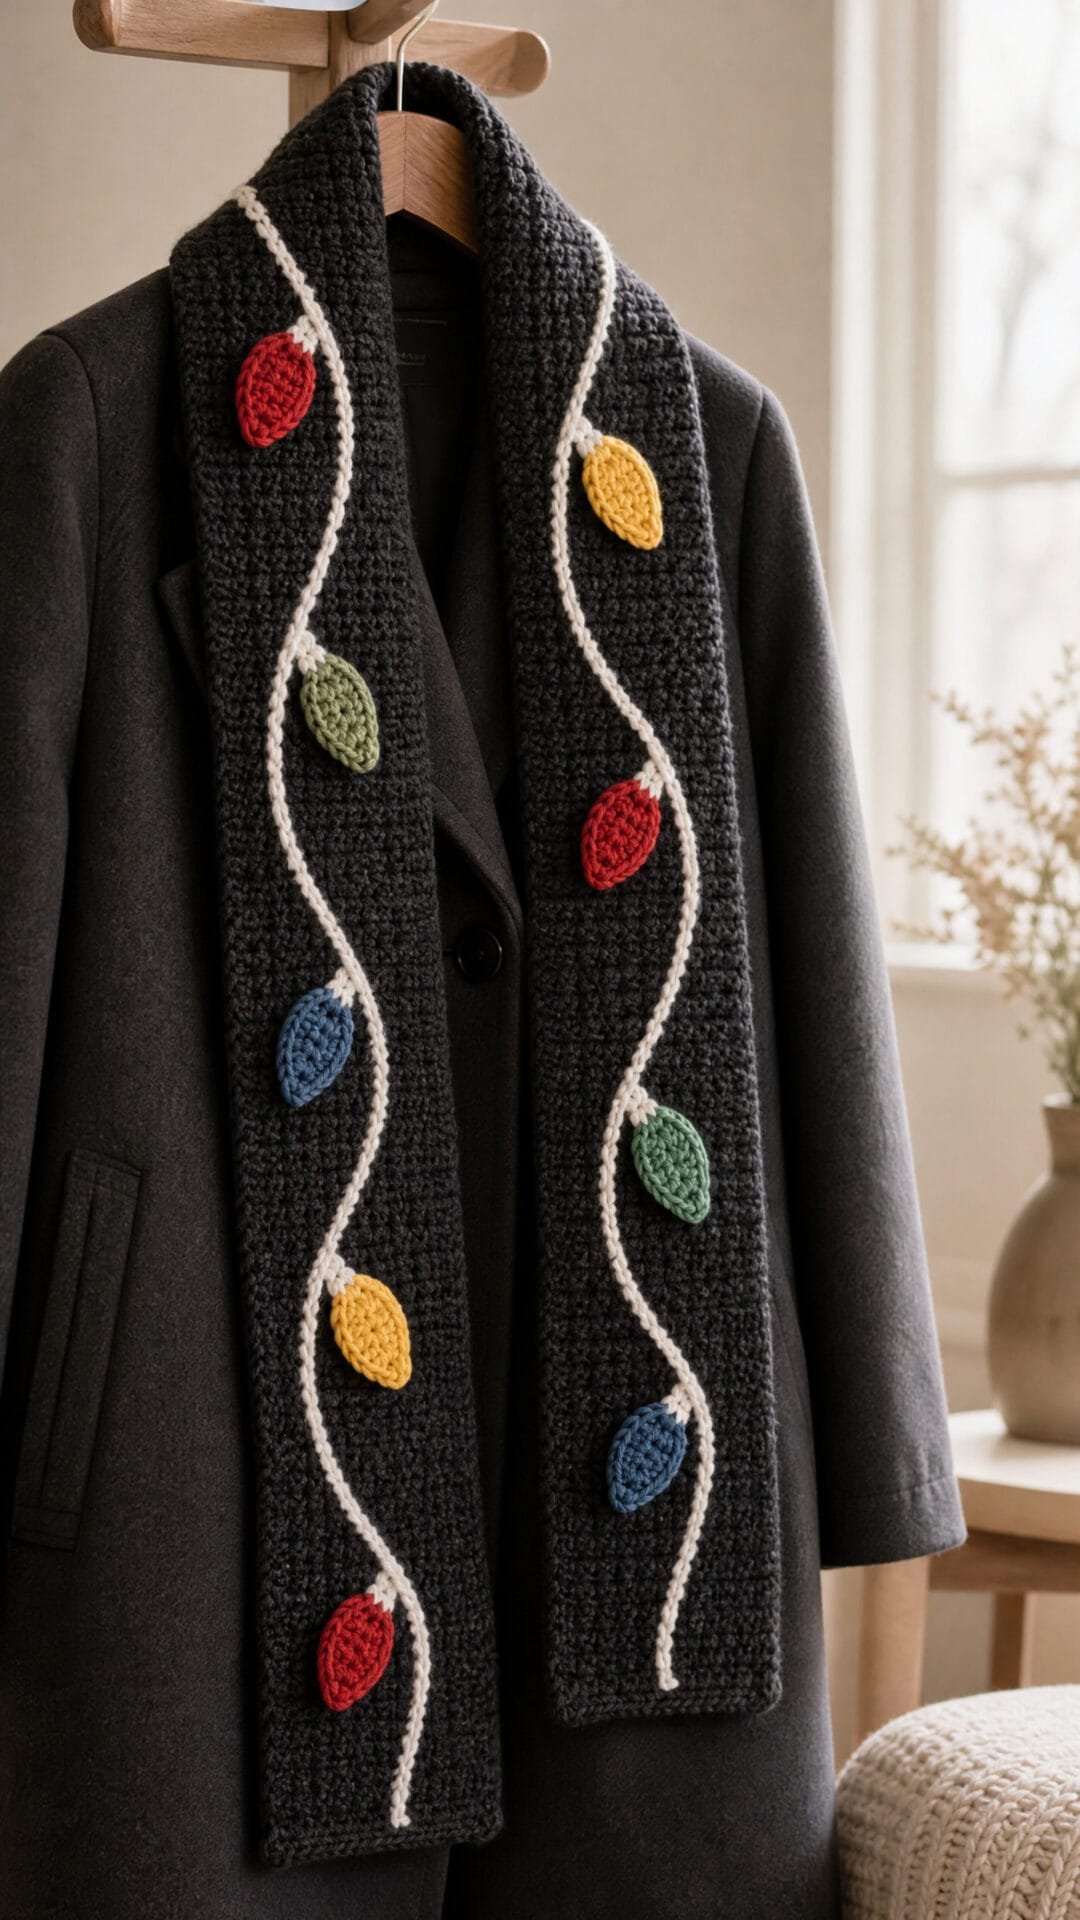
Christmas lights needn’t stay on the tree. This scarf brings their cheerful colour to a wearable design, with a winding line and flat bulbs that read clearly against a dark background.
The decorations sit close to the scarf rather than standing proud of it, making the design better suited to wearing under a coat or carrying in a bag. Its gentle curves give the impression of a loosely draped string of lights without interrupting the scarf’s simple shape.
Christmas Light String Scarf

Quick-reference card. Follow the complete written instructions below.
Materials
- DK-weight yarn: Soft, washable yarn in a dark main colour for the scarf, a contrasting colour for the light string, and small amounts of four bulb colours. Check yarn labels for care instructions.
- Crochet hooks: A 4 mm hook for the scarf and bulbs, or a size that gives you a comfortable fabric; a smaller hook may help with the surface slip stitches.
- Notions: Tapestry needle, scissors, tape measure and removable stitch markers.
Size and Fit
Sample size: approximately 19 cm wide by 160 cm long at the planning gauge. For another length, continue the rectangle to your chosen measurement. The eight bulb positions can be scaled to any length: place the first 10% of the finished length from one short end, the last 10% from the other, and space the remaining six evenly between them.
Gauge
Planning gauge: 16 hdc stitches and 12 rows per 10 cm. Gauge is not critical, but measure your own fabric for the finished width and length; this gauge gives 30 hdc stitches a width of approximately 19 cm.
Abbreviations
US crochet terms.
- ch = chain
- sc = single crochet
- hdc = half double crochet
- sc2tog = single crochet two stitches together
- sc3tog = single crochet three stitches together
- st(s) = stitch(es)
- RS = right side, the side on which the lights will show
- WS = wrong side
Pattern
- Scarf rectangle With the main colour, ch 32. Row 1: Hdc in the third ch from the hook and in each remaining ch; 30 hdc. Row 2: Ch 1, turn, hdc in each st; 30 hdc. Repeat Row 2 until the scarf measures approximately 160 cm from the starting edge, or your chosen length. Fasten off. The turning ch does not count as a stitch.
- Mark the light string Lay the scarf flat with the RS facing. For the 160 cm sample, mark bulb centres approximately 16, 34, 53, 71, 89, 107, 126 and 144 cm from the starting short edge. Measure across from the same long edge each time: put the first mark 6 cm in, the second 12 cm in, and continue alternating 6 cm and 12 cm. Mark a line starting point 4 cm from the starting short edge, level with the first bulb mark, and an end point 4 cm from the opposite short edge, level with the last bulb mark. For a different scarf length, use the percentage spacing in Size and Fit and keep the alternating positions across the width.
- Surface slip-stitch line Hold the contrasting yarn on the WS. Draw a loop to the RS at the marked starting point. Following a gentle path through each bulb mark to the end point, insert the hook through the fabric at closely spaced points, draw up the yarn from the WS and pull it through the loop on the hook to make surface slip stitches. Gradually move across the scarf between marks rather than making sharp sideways steps. Keep the stitches relaxed so the scarf lies flat, and avoid long yarn floats on the WS. Fasten off and weave in both ends.
- Flat bulbs Make eight bulbs, two in each of four colours. For each bulb, ch 4. Row 1: Sc in the second ch from the hook and in each remaining ch; 3 sc. Row 2: Ch 1, turn, work 2 sc in the first st, sc in the next st, and 2 sc in the last st; 5 sc. Row 3: Ch 1, turn, sc in each st; 5 sc. Row 4: Ch 1, turn, sc2tog, sc in the next st, sc2tog; 3 sc. Row 5: Ch 1, turn, sc3tog; 1 sc. Fasten off, leaving a long tail for sewing. The turning ch does not count as a stitch.
- Attach the bulbs Centre one bulb over each marked point on the surface line, alternating colours and turning the narrow ends in either direction as desired. Using each bulb’s tail, sew around its entire edge with small stitches, catching scarf stitches without pulling them tight. Secure the tail on the WS and weave it through several stitches. Check that no bulb edge lifts or has a loose loop before wearing.
Finishing
- Weave in all remaining ends neatly on the WS, keeping the reverse free of long, loose strands.
- Gently wash or block according to the yarn labels and lay flat to dry without stretching the surface line.
- Check the attachments again after laundering and repair any loosened stitches.
Helpful Tips
- If the surface slip stitches pucker, undo that section and work them more loosely; the scarf should still drape.
- Pin the bulbs in place before sewing so their spacing and colour order are easy to assess.
- Choose soft, washable yarn rather than stiff craft cotton for a scarf worn against clothing.
Christmas Light Bulb Napkin Rings

These Christmas light bulb napkin rings bring a cheerful touch to a festive table without needing actual lights. Each reusable band holds a folded fabric napkin and displays a single flat bulb motif, so the decoration is easy to spot at each place setting.
A mix of bright bulb colours can give every place setting its own character, while matching colours create a more coordinated look. The narrow bands keep the napkins as the focus and make these a practical choice for Christmas dinners and other seasonal gatherings.
Christmas Light Bulb Napkin Rings
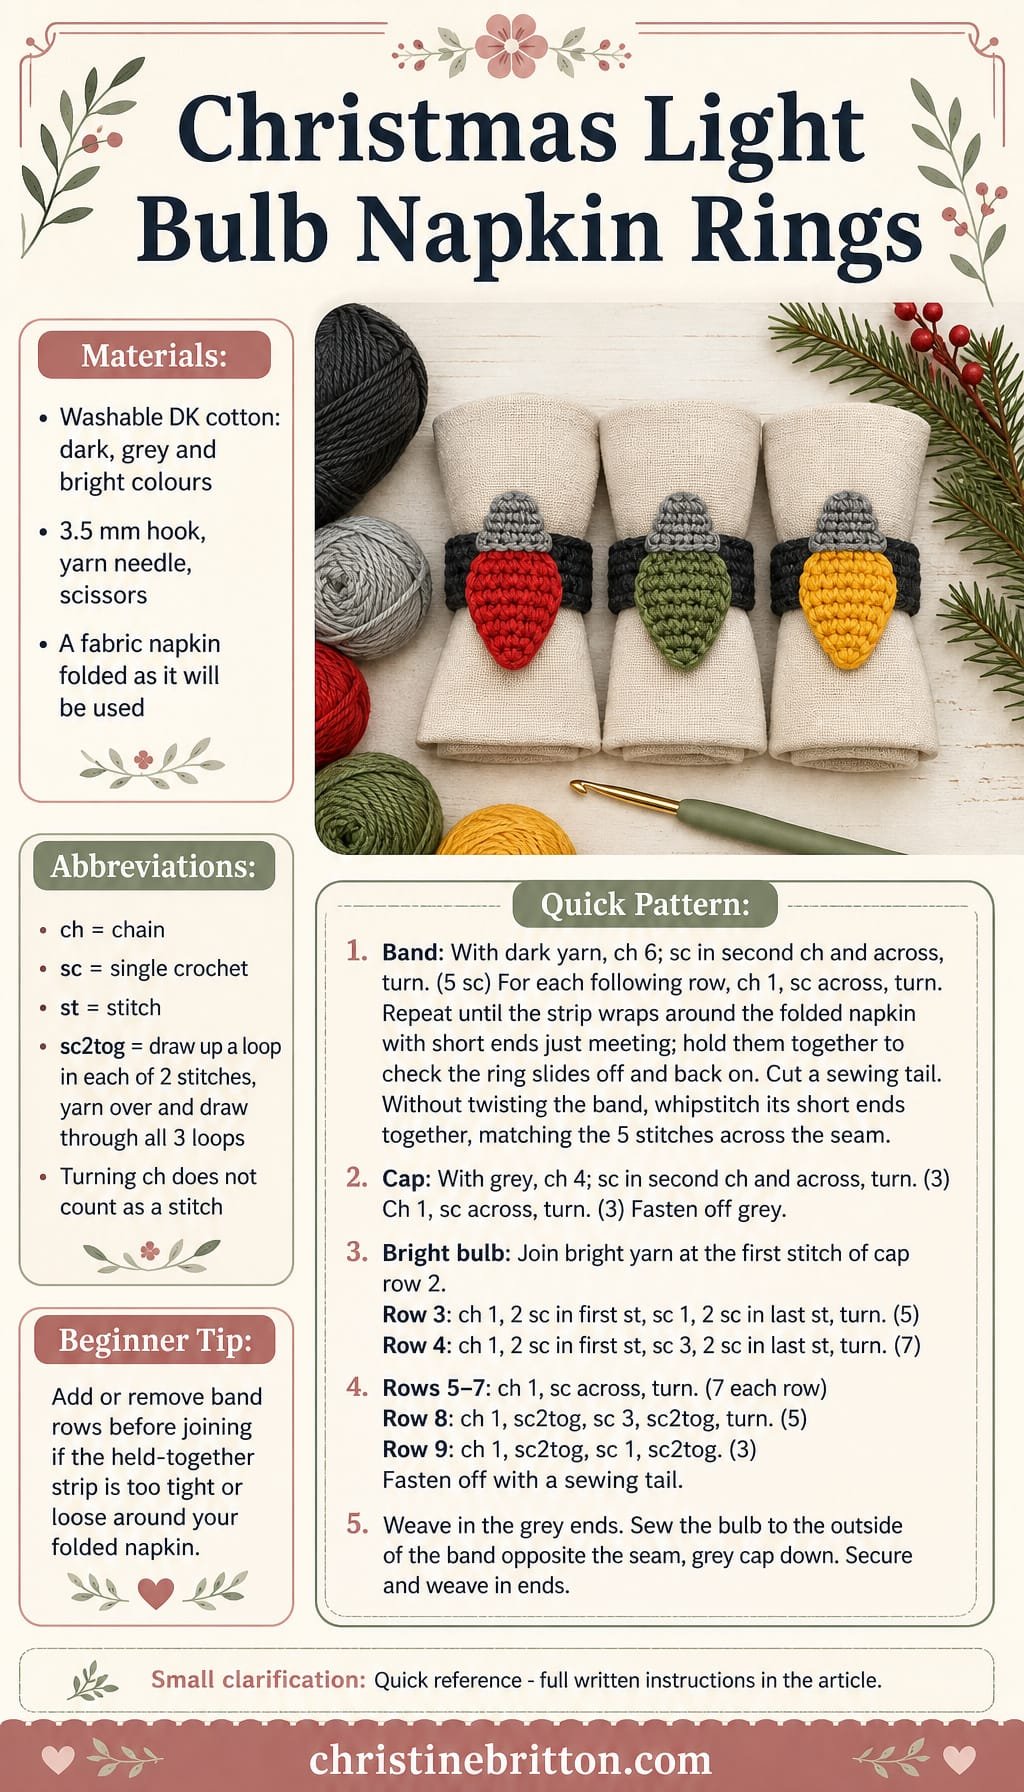
Quick-reference card. Follow the complete written instructions below.
Materials
- Washable DK cotton yarn: Small amounts of dark yarn for each band, grey for each bulb cap and a bright colour for each bulb.
- Crochet hook: 3.5 mm, or a size that gives a firm fabric without large gaps.
- Yarn needle and scissors: For joining the band, attaching the bulb and weaving in ends.
- Fabric napkin: Fold it as you intend to use it before sizing the band.
Size and Fit
The band is 5 sc wide. Its length is adjustable: work rows until the strip wraps around your folded napkin with its short ends just meeting, without compressing the fabric. Temporarily hold the ends together and check that the resulting ring can slide off and back on. Add or remove rows before joining if needed.
Gauge
Exact gauge is not essential. Use firm, even stitches and size each band by wrapping it around the folded napkin.
Abbreviations
US crochet terms.
- ch = chain
- sc = single crochet
- st = stitch
- sc2tog = single crochet two stitches together: draw up a loop in each of the next 2 stitches, then yarn over and draw through all 3 loops
Pattern
- Before you begin Make one band and one bulb for each napkin ring. Turning chains do not count as stitches. In the bulb instructions, working 2 sc in one stitch increases the count by 1.
- Band, row 1 With dark yarn, ch 6. Sc in the second ch from the hook and in each remaining ch. Turn. (5 sc)
- Band, row 2 onwards Ch 1, sc in each of the 5 stitches, turn. Repeat this row, checking the strip around your folded napkin as you go. Stop when the short ends just meet and the held-together band can slide off and back on. Do not fasten off yet.
- Join the band Cut the yarn, leaving a tail for sewing. Bring the two short ends together without twisting the strip. With the yarn needle, whipstitch the ends together, matching all 5 stitches across the seam. Secure the tail.
- Bulb cap, rows 1–2 With grey yarn, ch 4. Row 1: sc in the second ch from the hook and in each remaining ch; turn. (3 sc) Row 2: ch 1, sc in each st; turn. (3 sc) Fasten off the grey yarn.
- Bulb, row 3 Join a bright yarn to the first stitch of row 2. Ch 1, work 2 sc in the first st, sc in the next st, and 2 sc in the last st; turn. (5 sc)
- Bulb, row 4 Ch 1, work 2 sc in the first st, sc in each of the next 3 stitches, and 2 sc in the last st; turn. (7 sc)
- Bulb, rows 5–7 Ch 1, sc in each of the 7 stitches, turn. Repeat for a total of 3 rows. (7 sc each row)
- Bulb, row 8 Ch 1, sc2tog, sc in each of the next 3 stitches, sc2tog; turn. (5 sc)
- Bulb, row 9 Ch 1, sc2tog, sc in the next stitch, sc2tog. (3 sc) Fasten off, leaving a tail for sewing. The grey cap is the bottom of the bulb.
Finishing
- Weave in the grey yarn ends on the back of the bulb.
- Lay the band flat with its seam at the back. Centre the bulb on the opposite side, grey cap down, and sew around its edges with the bright yarn tail. Catch the band stitches without pulling the bulb out of shape.
- Secure and weave in all remaining ends. Slide the finished ring onto the folded napkin.
Helpful Tips
- For a set of matching rings, fold all the napkins the same way before sizing the bands.
- If the band feels too tight when you test it with the ends held together, add a row or two before sewing the seam.
- Use washable cotton and follow the yarn label’s care instructions when laundering the rings.
Christmas Light Jar Sleeve

This Christmas Light Jar Sleeve turns a plain jar into a festive display piece without making the jar a permanent part of the project. A solid lower band provides a backdrop for the colourful bulbs, while the openwork above lets the glass show through.
The light string is a raised surface detail, and the bulbs are flat motifs rather than anything that lights up. That gives the sleeve the look of Christmas lights without wires, and makes it a cheerful option for a shelf or mantelpiece.
Display the jar unlit. Never use a real flame with the sleeve, and do not put yarn over a working electrical light or cover its vents.
Christmas Light Jar Sleeve

Quick-reference card. Follow the complete written instructions below.
Materials
- Cotton yarn: DK weight in a background colour, a cord colour and several bulb colours. Small amounts are sufficient; the amount needed depends on your jar.
- Crochet hook: 3.5 mm, or a size that produces a firm fabric you can still work into comfortably.
- Other supplies: Plain jar, tape measure, stitch marker, yarn needle and scissors.
Size and Fit
Made to measure for a straight-sided jar. Measure its widest circumference, including anything the sleeve must pass over when removed. Call this C. Measure from 1 cm above the base to 1 cm below the rim; call this usable height H. Choose a jar tall enough for four solid rounds and at least two mesh rounds. The sleeve has the same circumference from bottom to top, so it can slide off over the rim. After three solid rounds, check its relaxed circumference against C: aim for C plus 1–2.5 cm of ease. Adjust the foundation count and restart if needed. Stop adding mesh rounds when another round would make the sleeve taller than H.
Gauge
No fixed gauge is required. Your yarn, hook and tension determine the stitch count. The three-round circumference check is essential: measure the sleeve without stretching it, and redo the foundation with more or fewer pairs of chains until it has the stated ease. Check height as you work.
Abbreviations
US crochet terms.
- ch = chain
- dc = double crochet
- sc = single crochet
- sc2tog = single crochet two stitches together
- sl st = slip stitch
- st(s) = stitch(es)
- sp = space
- N = the number of mesh cells around the sleeve; choose an integer of at least 12
Pattern
- Choose the foundation count Estimate N, starting with at least 12. With background yarn, ch 2N and sl st in the first ch to form a ring, taking care not to twist it. The foundation must pass comfortably over the widest part of the jar. If the circumference check after round 3 fails, undo the work and change N; each change of one to N changes the foundation by two chains.
- Solid round 1 Ch 3 (counts as the first dc in the first foundation ch). Dc in each of the remaining foundation chains. Sl st to the top of the beginning ch-3 to join. Do not work an extra dc in the joining point. You have 2N dc.
- Solid rounds 2–4 Ch 3 (counts as the first dc), dc in each remaining dc around, and sl st to the top of the beginning ch-3. You have 2N dc after each round. After round 3, measure the relaxed circumference and adjust N as described under Size and fit before continuing.
- Mesh round 1 Ch 3 (counts as a dc above the first dc), ch 1, skip the next dc. Repeat [dc in the next dc, ch 1, skip the next dc] N−1 times. Sl st to the top of the beginning ch-3. You have N dc posts and N ch-1 spaces.
- Further mesh rounds Ch 3 (counts as a dc above the first dc), ch 1. Repeat [dc in the next dc, ch 1] N−1 times, working each dc into a dc post and leaving each ch-1 space unworked. Sl st to the top of the beginning ch-3. Repeat until the sleeve fits within usable height H and another round would exceed it; work at least two mesh rounds in total. Fasten off.
- Surface slip-stitch cord Keep the sleeve off the jar. With cord-colour yarn behind the solid section, insert the hook from front to back through a gap between dc posts in solid round 2 and pull a loop to the front. Working around that same round, insert the hook through each successive gap between posts, pull up the yarn from behind and draw it through the loop on the hook to make a surface sl st. Continue to the starting gap, fasten off and secure the ends on the inside. Keep the cord loose enough that the sleeve still passes over the jar.
- Flat bulbs Make as many as you want to space around the jar; four to six is a useful starting point. For each bulb, use a bulb colour and ch 2. Row 1: work 2 sc in the second ch from the hook (2 sc). Row 2: ch 1, turn, work 2 sc in each sc (4 sc). Row 3: ch 1, turn, sc in each sc (4 sc). Row 4: ch 1, turn, sc2tog twice (2 sc). Fasten off. For the cap, join cord-colour yarn at one end of row 4, ch 1, sc in each of its 2 sc and fasten off, leaving a tail for sewing.
- Attach the bulbs With the sleeve lying flat, space the bulbs around the cord. Sew each cap beside the cord and tack the coloured body to solid dc posts; position the whole bulb within the solid section where it fits. Sew rather than glue so the motifs remain secure and the sleeve stays washable. Keep stitches and tails on the inside tidy enough that they will not catch as the sleeve is removed.
Finishing
- Weave in all ends and check that the cord and bulbs do not tighten the sleeve.
- Slide the sleeve over the empty jar and confirm that it passes back over the widest part without forcing it.
- Display the jar unlit. Never use a real flame with the sleeve. Do not put yarn over a working electrical light or cover its vents.
Helpful Tips
- If the three-round circumference is too small or too large, change N and restart rather than stretching the fabric to fit.
- Mark the first dc of each round; the joining sl st and beginning ch-3 can otherwise look like an extra stitch.
- If your bulbs are too large for the solid section, use a smaller hook or finer cotton for the motifs.
Christmas Light Bulb Headband

This Christmas light bulb headband adds a playful festive detail to a practical cold-weather accessory. Four colourful bulbs sit across the front of the dark band, with a fine connecting line that makes them read as a little string of lights.
The design is worked into the fabric rather than attached as appliqués, helping the inside stay flatter against your head. Its wide shape gives a little extra coverage for outdoor walks, markets and other chilly December outings.
Fit matters as much as the decoration here: the band should feel secure without pressing, and the decorated front still needs to stretch comfortably. Allow time to check how your chosen yarn behaves before settling on the circumference.
Christmas Light Bulb Headband

Quick-reference card. Follow the complete written instructions below.
Materials
- Main yarn: Soft DK yarn with good recovery in a dark colour; approximately 60 m.
- Contrast yarn: Small amounts of DK yarn in four bulb colours and a fifth colour for the wire and sockets.
- Crochet hook: 4 mm hook, or a size that produces a comfortable, firm fabric.
- Notions: Tape measure, removable stitch markers, yarn needle and scissors.
Size and Fit
Sample: 88 stitches around by 22 rows deep, approximately 49 cm around and 11 cm wide at the stated gauge, intended for a 54 cm head. Measure around the head where the band will sit. Make a short swatch to assess stretch, then choose an even stitch count that produces a flat length slightly shorter than that measurement but stretches comfortably to it. Keep at least 64 stitches so the 32-stitch front panel fits. Before working the motifs, pin or temporarily sew the short ends together and try the band on; change the stitch count if it feels tight or slips.
Gauge
Approximately 18 stitches and 20 rows = 10 cm in single crochet through the back loop, measured relaxed. Use your own gauge and stretch check to set the circumference; the sample measurements are estimates, not a substitute for the fit check.
Abbreviations
US crochet terms.
- ch = chain
- sc = single crochet
- BLO = back loop only
- MC = main colour
- W = wire and socket colour
- RS / WS = right side / wrong side
Pattern
- Set up the band Choose an even stitch count N using the size and fit guidance; the sample uses N = 88. With MC, ch N + 1. Row 1 (RS): Sc in the second ch from the hook and in each remaining ch; N sc. Ch 1 and turn. The turning ch never counts as a stitch.
- Rows 2–7 Sc BLO in every stitch; ch 1 and turn after each row. Work 7 rows in total. Mark the 32-stitch front panel: its first stitch is (N − 32) ÷ 2 + 1 when stitches are numbered from left to right as viewed from the RS. For the 88-stitch sample, the panel occupies stitches 29–60.
- Read the colourwork The panel consists of four adjacent eight-stitch cells, numbered 1–8 within each cell from left to right as viewed from the RS. Assign a different bulb colour to each cell, in your chosen left-to-right order. Work MC outside the panel and wherever no contrast stitch is specified. On RS rows, follow the positions left to right; on WS rows, follow them right to left. Work every stitch BLO, including colourwork stitches. Change colour on the final yarn-over of the preceding stitch. Use a separate small yarn source for each bulb and each socket, carrying MC neatly through the short contrast sections rather than carrying four bulb colours across the panel.
- Row 8: connecting wire Work MC to the panel, W across all 32 panel stitches, then MC to the end. Ch 1 and turn. Fasten off W, leaving a tail to weave in.
- Rows 9–10: sockets On each row, work stitches 3–5 of each eight-stitch cell in W; work all other stitches in MC. Use a separate small source of W for each socket so there are no long strands behind the band. Ch 1 and turn after each row. Fasten off the socket yarns after row 10.
- Rows 11–16: bulbs In each cell, use its assigned bulb colour at these positions: row 11, stitches 3–5; rows 12–14, stitches 2–6; row 15, stitches 3–5; row 16, stitch 4. Work every other stitch in MC. These rows form four bulbs rising from the sockets. Ch 1 and turn after each row. Fasten off the bulb yarns after row 16.
- Rows 17–22 With MC, sc BLO across every row. Ch 1 and turn after rows 17–21 only. After row 22, fasten off with a tail long enough to sew the band.
- Join With the RS facing out, bring the two short, 22-row ends together without twisting the band. Sew corresponding row ends together to form the back seam. The stitch count N runs around the head; the 22 rows form the width.
Finishing
- Weave in all colourwork tails securely on the WS, keeping the inside as flat as possible.
- Try on the finished band and check that the seam and colourwork sit comfortably.
- Gently reshape the band without overstretching the ribbing.
Helpful Tips
- If MC shows through a pale bulb colour where it is carried, let MC lie behind those few stitches instead; secure any short strand neatly on the WS.
- Keep yarn changes relaxed so the front panel can stretch with the rest of the band.
- Use removable markers at both edges of the panel and between its eight-stitch cells.
Bobble-Light Crochet Christmas Tree
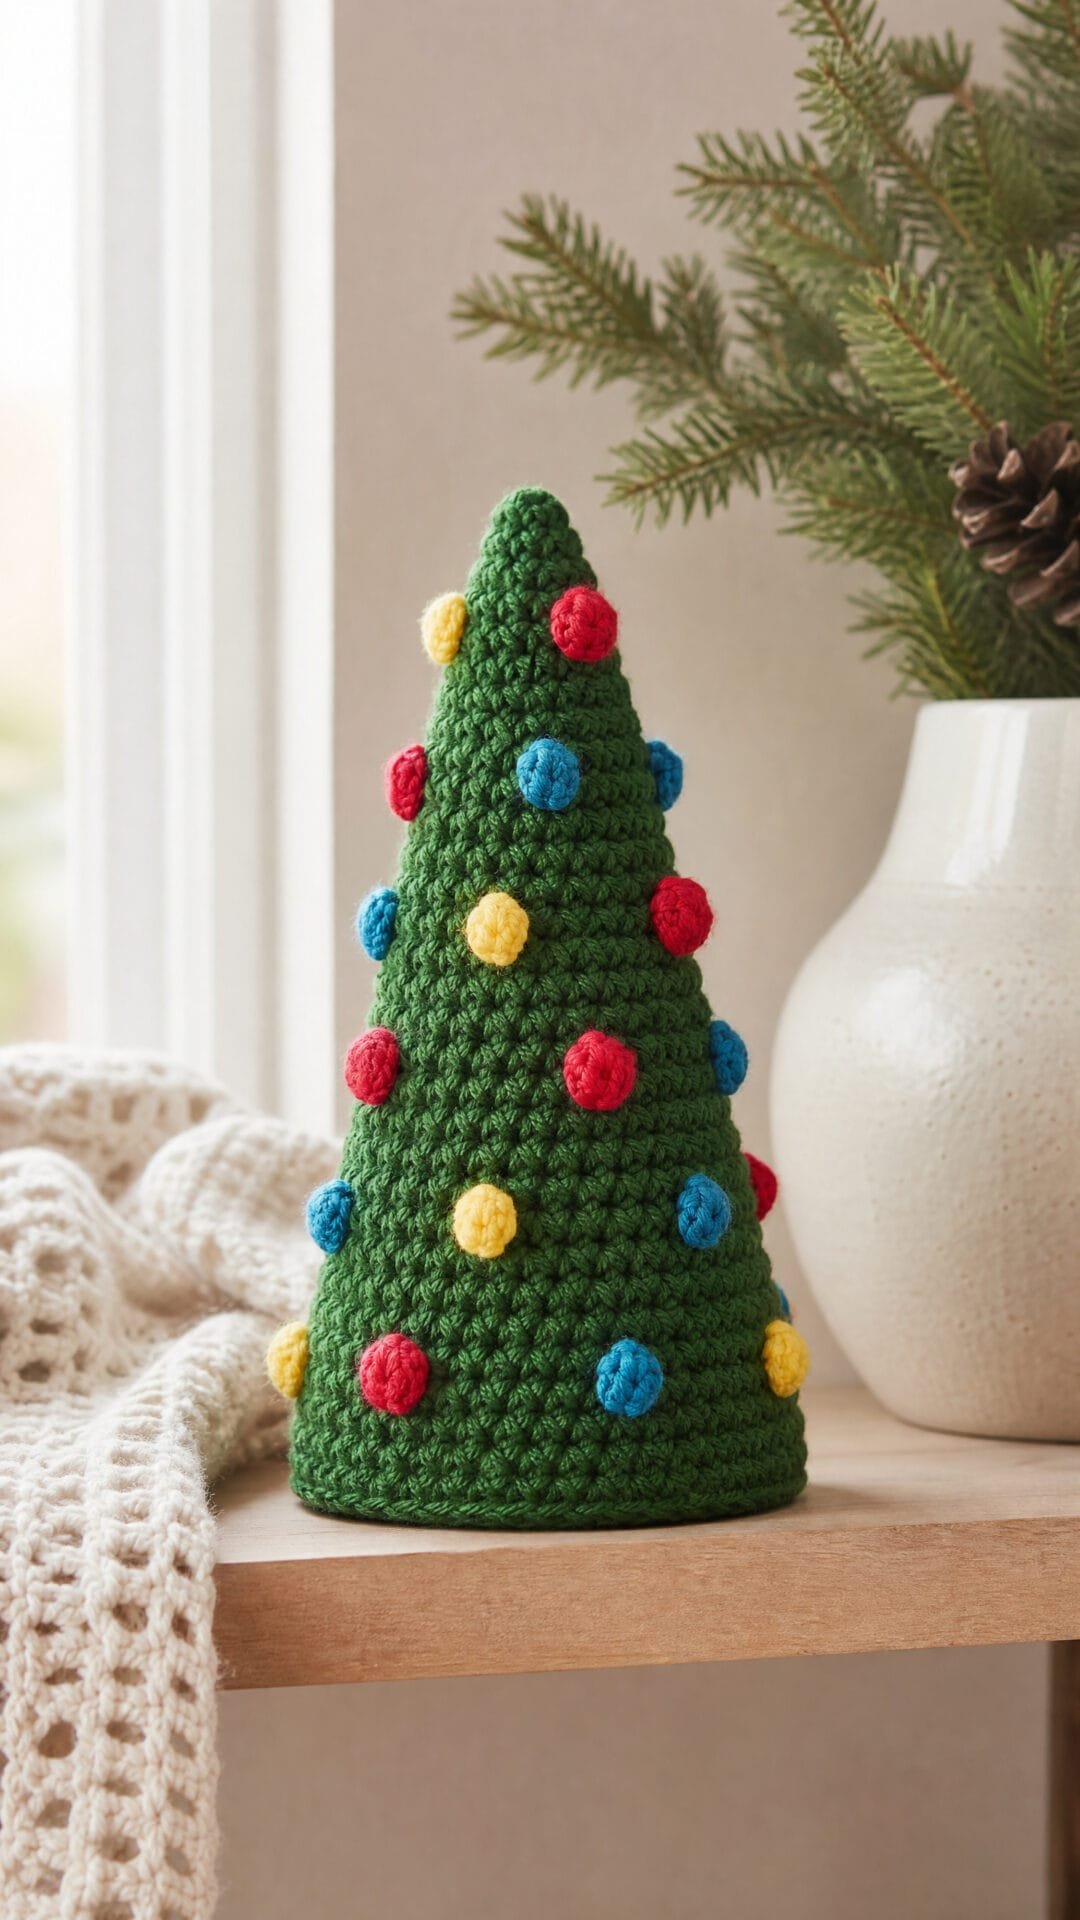
This freestanding crochet tree brings the look of colourful Christmas lights to a shelf or mantel without a string of bulbs. Raised bobbles dot the green cone, so the lights are part of the crochet fabric rather than separate decorations to attach.
The pattern is a satisfying choice if you enjoy shaping a small three-dimensional project and keeping track of colour placement. A flat base helps the tree stand on its own, while the textured lights give it plenty of character from every angle.
These are decorative crochet lights, not electrical components. Display the finished tree on its own or alongside other handmade Christmas decorations for a cheerful seasonal grouping.
Bobble-Light Crochet Christmas Tree

Quick-reference card. Follow the complete written instructions below.
Materials
- Yarn: Firm medium-weight (aran) yarn: green for the cone and base, plus small amounts of red, yellow and blue for the bobbles.
- Hook: 4 mm crochet hook, or a size that makes a firm fabric with no gaps large enough for stuffing to show.
- Other: Stitch marker, tapestry needle, scissors and a small amount of toy stuffing.
Size and Fit
One size. Approximately 10 cm tall with a base approximately 10–11 cm across; finished dimensions depend on yarn and tension.
Gauge
Gauge is not critical. As a guide, aim for approximately 16 sc and 18 rounds per 10 cm in a firm fabric. The cone and base must each finish with 54 stitches around their edges.
Abbreviations
US crochet terms.
- MR = magic ring
- sc = single crochet
- inc = work 2 sc in the next stitch
- bobble = In one stitch, work 4 unfinished dc: for each, yarn over, insert hook, draw up a loop, yarn over and draw through 2 loops. With 5 loops on the hook, yarn over and draw through all 5 loops. One bobble counts as one stitch.
Pattern
- Before you begin Work the cone and base in continuous rounds; do not join or turn. Move a marker to the first stitch of each round. Count stitch positions from that marker. All bobbles are worked on the outside of the cone.
- Bobble colours For each bobble, change from green to the specified colour on the final draw-through of the sc immediately before it. Work the 4 unfinished dc of the bobble in that colour, then use green to draw through the 5 loops and complete the bobble. Continue in green. Use a fresh length of colour for each bobble and secure its ends on the inside; do not carry contrasting yarn across the green fabric.
- Cone R1 With green, work 6 sc in an MR. Pull the ring closed. (6)
- Cone R2 Sc in each stitch. (6)
- Cone R3 Inc in each stitch. (12)
- Cone R4 Sc in each stitch. (12)
- Cone R5 Repeat [sc, inc] 6 times. (18)
- Cone R6 Work one stitch in each stitch, replacing stitches 4, 10 and 16 with bobbles: red at 4, yellow at 10 and blue at 16. (18)
- Cone R7 Repeat [sc in next 2 stitches, inc] 6 times. (24)
- Cone R8 Sc in each stitch. (24)
- Cone R9 Repeat [sc in next 3 stitches, inc] 6 times. (30)
- Cone R10 Work one stitch in each stitch, replacing stitches 4, 11, 18 and 25 with bobbles: blue, red, yellow and blue respectively. (30)
- Cone R11 Repeat [sc in next 4 stitches, inc] 6 times. (36)
- Cone R12 Sc in each stitch. (36)
- Cone R13 Repeat [sc in next 5 stitches, inc] 6 times. (42)
- Cone R14 Work one stitch in each stitch, replacing stitches 5, 13, 21, 29 and 37 with bobbles: yellow, blue, red, yellow and blue respectively. (42)
- Cone R15 Repeat [sc in next 6 stitches, inc] 6 times. (48)
- Cone R16 Sc in each stitch. (48)
- Cone R17 Repeat [sc in next 7 stitches, inc] 6 times. (54)
- Cone R18 Work one stitch in each stitch, replacing stitches 5, 14, 23, 32, 41 and 50 with bobbles: red, yellow, blue, red, yellow and blue respectively. (54) Fasten off.
- Base R1–R2 With green, work 6 sc in an MR; pull closed. For R2, inc in each stitch. (6, then 12)
- Base R3–R9 Increase by 6 stitches each round: R3 repeat [sc, inc] 6 times (18); R4 repeat [sc in next 2 stitches, inc] 6 times (24); R5 repeat [sc in next 3 stitches, inc] 6 times (30); R6 repeat [sc in next 4 stitches, inc] 6 times (36); R7 repeat [sc in next 5 stitches, inc] 6 times (42); R8 repeat [sc in next 6 stitches, inc] 6 times (48); R9 repeat [sc in next 7 stitches, inc] 6 times (54). Do not fasten off.
- Join cone and base Place the base beneath the cone with both right sides facing out. Align their 54-stitch edges. With the green yarn still attached to the base, sc through both layers in each pair of edge stitches. Add a little stuffing before closing the last 10 stitches, keeping the base flat. Complete all 54 joining sc, then fasten off.
Finishing
- Weave in the joining yarn and any remaining ends securely.
- Shape the cone by hand and settle the stuffing so the base rests flat.
Helpful Tips
- A bobble replaces one sc; it does not add a stitch.
- If a bobble sits towards the inside, gently push it outwards before stuffing.
- Stuff lightly: too much stuffing will round the base and make the tree less stable.
Frequently Asked Questions
Which crochet Christmas lights project should I start with?
The flat bookmark, napkin rings or coasters are smaller choices. Check the individual pattern’s skill level and materials before you begin.
Can I make a crochet Christmas light garland without stuffing?
Yes. Choose the flat window bunting for a lighter hanging decoration. The stuffed bulb garland gives each light a rounded shape.
What yarn works well for crochet Christmas light coasters?
Cotton is a useful choice because it absorbs moisture. Keep the bulb motif flat and check that your glass rests securely on the finished coaster.
Are these crochet lights suitable for use with real lights?
They are decorative crochet projects, not covers for electric bulbs. Display the jar sleeve unlit, and keep all yarn pieces away from flames and heat.
Final Thoughts
From a single bulb ornament to a connected garland, these 17 patterns offer different ways to bring the Christmas-lights shape into crochet. Pick a construction style that suits where you plan to display or use the finished piece.
For a tidy result, check the shape as you work and take time to fasten off and secure any bulbs or hanging cords.