14 Free Crochet Christmas Heart Patterns for a Handmade Holiday
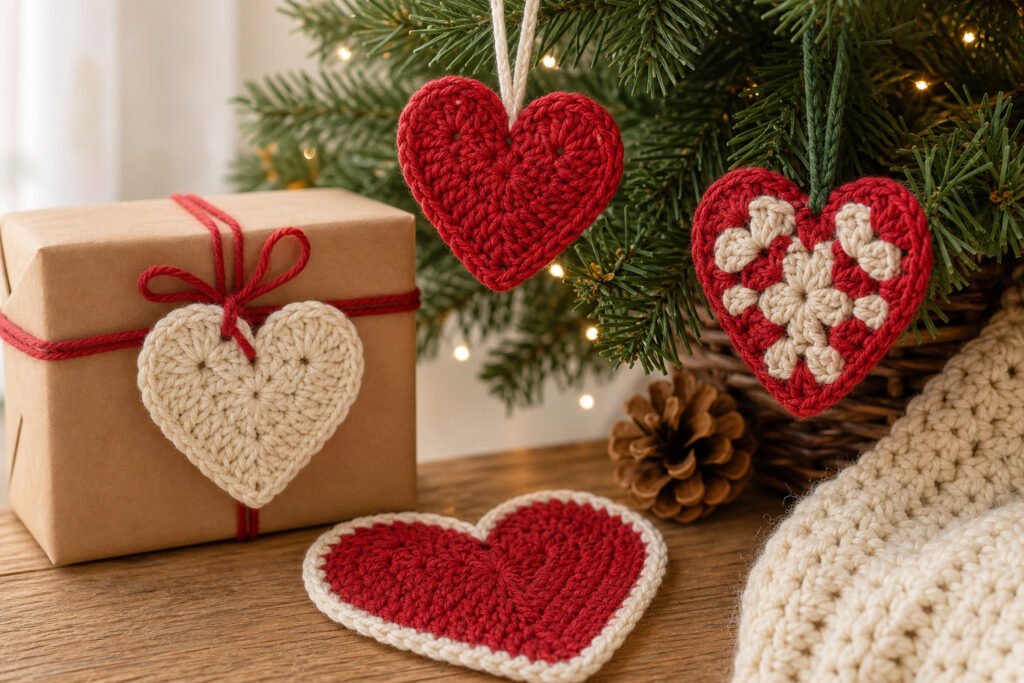
Looking for a crochet christmas hearts free pattern? This collection brings together 14 heart designs for tree decorations, gift tags, a garland and festive table accents.
Choose a flat motif when you want something easy to store, or a padded heart for more shape on a branch. The patterns range from a single-round ornament to projects involving short rows, colour changes and joining.
For more ideas that build on this collection, explore free crochet Christmas gift tag patterns.
Before You Start
These patterns use US crochet terminology. Check the stitches and materials listed for your chosen heart before starting, as a flat tag and a stuffed ornament need different finishing supplies.
Think about where the heart will go. A hanging decoration needs a secure loop, while the coaster needs to lie flat and the shallow basket needs enough firmness to hold light, wrapped treats.
For joined or mirrored pieces, check the shape before closing the seam. Weave in loose ends securely, and block flat openwork or table pieces if they need help holding their outline.
Crochet terminology: This article uses US crochet terms. Check the abbreviations for each project.
Single-Round Christmas Heart Ornament

This small, flat Christmas heart is worked in one round around a central ring. Groups of tall treble crochets form the two lobes, shorter double crochets slope towards the bottom, and a single treble crochet makes the lower point. Smooth cotton helps show the stitch shapes clearly.
For the cream hanging loop, chain until the loop fits over your intended branch with a little room to spare. Check it before fastening off rather than relying on a fixed chain count.
Single-Round Christmas Heart Ornament

Quick-reference card. Follow the complete written instructions below.
Materials
- Smooth cotton yarn: A small amount of 4-ply cotton in red for the heart and cream for the hanging loop.
- Crochet hook: 3 mm, or a size that gives you firm stitches with your chosen cotton.
- Tapestry needle and scissors: For fastening off and weaving in ends.
Size and Fit
One small ornament. Its finished dimensions depend on your yarn and tension. Size the hanging loop by holding the chain in a loop against the intended branch before securing it; the branch should pass through with a little room to spare.
Gauge
Exact gauge is not essential. Work firmly enough for the heart to hold its shape.
Abbreviations
US crochet terms.
- ch = chain
- dc = double crochet
- tr = treble crochet
- sl st = slip stitch
Pattern
- Heart round With red, make a magic ring. Ch 3, then work 3 tr, 3 dc, ch 1, 1 tr, ch 1, 3 dc, 3 tr and ch 3, all into the ring.
- Close and shape Sl st into the ring to finish the round. Pull the ring closed and fasten off. The treble groups rise into the lobes, the double crochets slope towards the bottom, and the single treble forms the lower point.
- Adjustable hanging loop At the top indentation, between the two ch-3 sections, join cream yarn around the closed centre ring. Make a chain, then hold its working end back at the joining point to form a loop. Check the loop against the intended branch and add or undo chains until it fits with a little room to spare. Sl st back into the same joining point and fasten off.
Finishing
- Weave in the red and cream ends on the back of the heart.
- Smooth the lobes and lower point into shape. If needed, lightly dampen and lay the ornament flat to dry.
Helpful Tips
- Work every stitch and chain section of the heart round from the central ring; do not turn or begin a second round.
- If the heart curls, try a slightly larger hook or loosen your tension.
Point-Up Heart Gift Tag

This flat heart makes a decorative tag for a wrapped Christmas present. It begins at the narrow lower point and widens through the body before the top is divided into two separately shaped lobes. The small notch between them gives the heart its familiar outline and leaves a discreet place for a tie.
Firm cotton helps the heart lie flat against gift wrapping rather than curling or drooping. If you want to add a recipientâs name, the lower centre of the back offers space for a plain fabric label; its smooth surface makes writing easier to read than lettering placed directly on the crochet.
Point-Up Heart Gift Tag

Quick-reference card. Follow the complete written instructions below.
Materials
- Cream DK cotton yarn: A small amount for the heart. Cotton helps the tag hold its shape.
- 3 mm crochet hook: Or a size that makes firm, opaque stitches with your yarn.
- Red cotton yarn: Approximately 25 cm for the tie.
- Tapestry needle and scissors: For weaving in ends.
- Plain cotton fabric, sewing needle and thread: Optional, for a writable label on the back. Add a fabric pen if needed.
Size and Fit
One size: 16 stitches across at the widest point and 12 rows from the lower point to the lobe tops. Finished dimensions depend on your yarn and tension.
Gauge
Gauge is not critical. Aim for firm stitches so the tag lies flat and any writing on its backing does not show through.
Abbreviations
US crochet terms.
- ch = chain
- sc = single crochet
- inc = work 2 sc in one stitch
- sc2tog = single crochet 2 stitches together
- st(s) = stitch(es)
Pattern
- Lower point With cream cotton, ch 2. Row 1: Work 2 sc in the second ch from the hook. Ch 1, turn. (2 sts)
- Row 2 Inc in each st. Ch 1, turn. (4 sts)
- Rows 3â8 On each row, inc in the first st, sc across to the last st, and inc in the last st. Ch 1 and turn after each row. Stitch counts at the ends of Rows 3â8: 6, 8, 10, 12, 14 and 16.
- First lobe, Row 9 Sc in the first 8 sts only, leaving the other 8 sts unworked. Ch 1, turn. (8 sts)
- First lobe, Rows 10â12 Row 10: Sc2tog, sc in the next 4 sts, sc2tog. Ch 1, turn. (6 sts) Row 11: Sc2tog, sc in the next 2 sts, sc2tog. Ch 1, turn. (4 sts) Row 12: Sc2tog twice. Fasten off. (2 sts)
- Second lobe, Row 9 With the same side facing as when you began the first lobe, join the cream yarn in the first of the 8 unworked Row 8 sts. Sc across those 8 sts. Ch 1, turn. (8 sts)
- Second lobe, Rows 10â12 Repeat Rows 10â12 of the first lobe, then fasten off. Both lobes should have the same shape.
Finishing
- Weave in the cream ends. Smooth the heart flat, arranging the two lobes around the small centre notch.
- For a written tag, cut a small piece of plain cotton fabric to fit within the lower central area on the back, clear of the edges and lobes. Write the name on the fabric, then sew it in place with small stitches around its edge. The fabric provides a plain surface for legible writing.
- Thread the red cotton yarn through an upper stitch gap beside the centre notch. Bring the ends together and tie them around the present.
Helpful Tips
- Keep the turning ch loose enough to make the first stitch of each row easy to find; it does not count as a stitch.
- If the heart feels floppy, use a smaller hook rather than adding extra stitches.
- Write on the fabric before sewing it on so ink cannot reach the crochet or the gift wrapping.
Granny-Square Heart Tree Decoration

This Christmas heart keeps the open, clustered look of a granny square while giving it a softer outline. The square forms a recognisable centre and a pointed base; the rounded lobes turn it into a heart without hiding the granny-style texture.
The orientation matters more than it might first appear. One corner becomes the bottom point, while the opposite corner forms the dip between the lobes. Centre the hanging loop at that dip so the heart sits upright on a tree branch or gift wrap.
Granny-Square Heart Tree Decoration
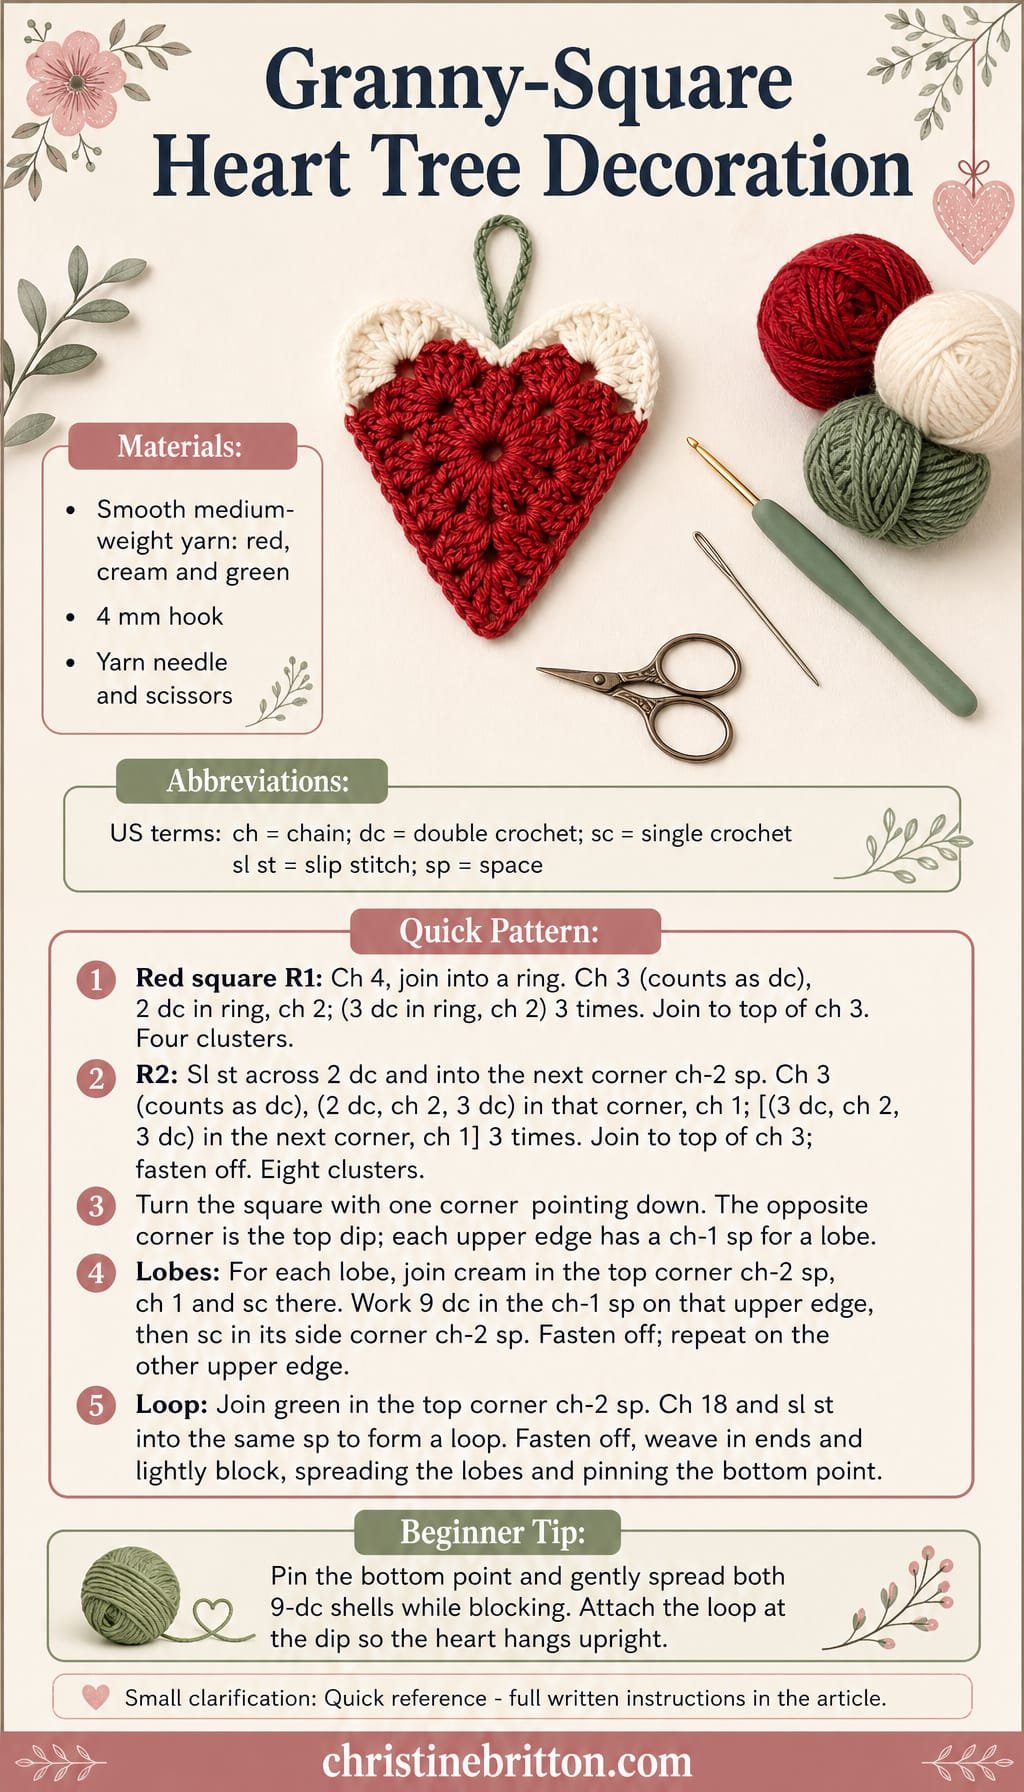
Quick-reference card. Follow the complete written instructions below.
Materials
- Yarn: Small amounts of smooth, medium-weight yarn in red for the square, cream for the lobes and green for the loop.
- Crochet hook: 4 mm hook, or a size that gives you a firm but flexible fabric.
- Notions: Yarn needle and scissors; pins for light blocking if needed.
Size and Fit
One size. The square has two rounds, each lobe has 9 dc, and the hanging loop has 18 chains. Finished dimensions vary with yarn and tension; lengthen or shorten the loop to suit your tree.
Gauge
Gauge is not critical. Keep the clusters firm enough to hold the heart shape, without making the fabric stiff.
Abbreviations
US crochet terms.
- ch = chain
- dc = double crochet
- sc = single crochet
- sl st = slip stitch
- sp = space
Pattern
- Square, round 1 With red, ch 4 and sl st in the first ch to form a ring. Ch 3 (counts as the first dc), work 2 dc in the ring and ch 2. Work (3 dc in the ring, ch 2) three times. Sl st to the top of the beginning ch 3. You have four 3-dc clusters and four corner ch-2 spaces.
- Square, round 2 Sl st across the next 2 dc and into the next corner ch-2 sp. Ch 3 (counts as the first dc), then work (2 dc, ch 2, 3 dc) in that corner sp. Ch 1. In each of the next three corner ch-2 spaces, work (3 dc, ch 2, 3 dc), then ch 1. Sl st to the top of the beginning ch 3. Fasten off. You have eight 3-dc clusters, four corner ch-2 spaces and four edge ch-1 spaces.
- Orient the heart Turn the square so one corner points down. Call the opposite corner the top corner, with a right and left corner at the sides. The top corner will be the dip between the lobes; the ch-1 spaces on the two edges leading from it are the lobe spaces.
- Right lobe Join cream with a sl st in the top corner ch-2 sp. Ch 1 and sc in the same sp. Work 9 dc in the ch-1 sp between the top and right corners. Sc in the right corner ch-2 sp. Fasten off.
- Left lobe Join cream with a sl st in the top corner ch-2 sp. Ch 1 and sc in the same sp. Work 9 dc in the ch-1 sp between the top and left corners. Sc in the left corner ch-2 sp. Fasten off.
- Hanging loop Join green with a sl st in the top corner ch-2 sp, at the dip between the lobes. Ch 18, then sl st back into the same corner sp to form a loop. Fasten off.
Finishing
- Weave in all ends securely, taking care not to pull the top dip closed.
- Lightly block the heart, spreading the cream shells into rounded lobes and pinning the red bottom corner into a point. Let it dry fully before hanging.
Helpful Tips
- Identify the top corner before adding cream: each lobe uses one of the two ch-1 spaces immediately beside that corner, not a space on a lower edge.
- If the shells cup, ease them open while blocking rather than adding stitches; both lobes should have the same 9-dc count.
- The green loop belongs at the top dip, not on either lobe, to help the heart hang upright.
Openwork Lace Heart Window Hanging

This airy crochet heart is designed to hang where daylight can shine through its lace-like centre. Its pointed base and two rounded upper lobes give it a recognisable heart shape without filling in the openwork.
The chain spaces are part of the design, so aim to keep them visibly open rather than pulling them tight. Clear stitch definition helps the mesh look delicate, while the outlined edge keeps the silhouette easy to see against a window or mantel.
The separately shaped lobes create a small dip at the top. Giving that dip and the bottom point room to show helps the finished decoration read as a heart, even when light is passing through the stitches.
Openwork Lace Heart Window Hanging
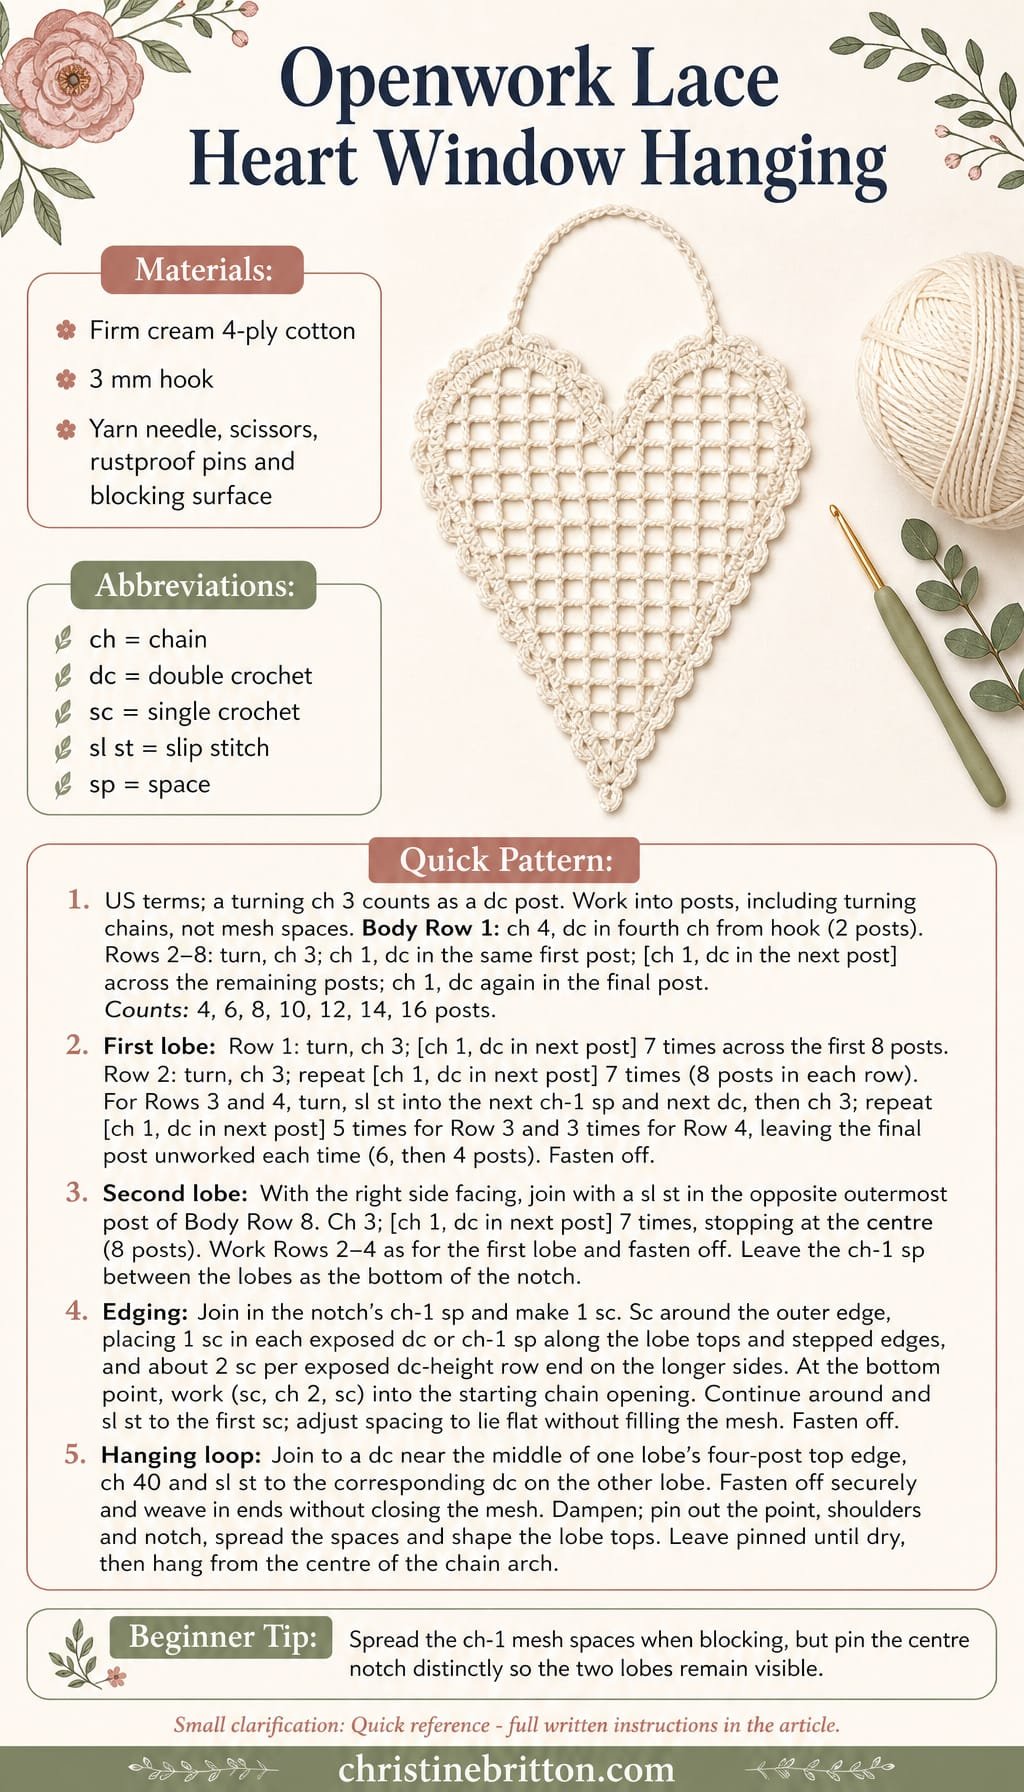
Quick-reference card. Follow the complete written instructions below.
Materials
- Yarn: A small amount of firm 4-ply cotton in cream; avoid fuzzy yarn, which can obscure the open spaces.
- Hook: 3 mm crochet hook, or a size that gives a firm fabric without closing the chain spaces.
- Other: Yarn needle, scissors, rustproof pins and a blocking mat or towel.
Size and Fit
One size. The widest body row has 16 dc posts separated by 15 ch-1 spaces. The body is 8 rows high, with 4 additional rows in each lobe. Finished measurements depend on your yarn, tension and blocking.
Gauge
Exact gauge is not essential. Keep the dc posts firm and the ch-1 spaces visibly open; make a small swatch first if you need to judge the scale for a particular window.
Abbreviations
US crochet terms.
- ch = chain
- dc = double crochet
- sc = single crochet
- sl st = slip stitch
- sp = space
Pattern
- Before you begin Each mesh row consists of dc posts with one ch between neighbouring posts. A turning ch 3 counts as the first dc of its row. When working into a dc from the previous row, include its turning ch 3 as a dc post. Do not work into the ch-1 spaces unless instructed.
- Body Row 1: point Ch 4. Dc in the fourth ch from the hook. The beginning chain counts as a dc followed by a ch-1 sp: 2 dc posts and 1 ch-1 sp.
- Body Rows 2â8: tapered mesh For each row, turn and ch 3 (counts as a dc in the first post). Ch 1, dc in that same first post. Then ch 1 and dc in each remaining dc post across. Finally, ch 1 and dc once more in the final post. Each row gains 2 posts. The post counts for Rows 2â8 are 4, 6, 8, 10, 12, 14 and 16 respectively. Do not fasten off after Row 8.
- First lobe, Row 1 Turn and ch 3 (counts as a dc in the outermost post). Work [ch 1, dc in the next dc post] 7 times, using only the first 8 posts of Body Row 8. Leave the remaining 8 posts unworked: 8 posts.
- First lobe, Row 2 Turn and ch 3. Work [ch 1, dc in the next dc post] 7 times: 8 posts.
- First lobe, Row 3 Turn. Sl st into the next ch-1 sp, then sl st into the next dc post. Ch 3 (counts as a dc in that post). Work [ch 1, dc in the next dc post] 5 times. Leave the final post unworked: 6 posts.
- First lobe, Row 4 Turn. Sl st into the next ch-1 sp, then sl st into the next dc post. Ch 3 (counts as a dc in that post). Work [ch 1, dc in the next dc post] 3 times. Leave the final post unworked: 4 posts. Fasten off.
- Second lobe, Rows 1â4 With the right side of the heart facing you, join yarn with a sl st to the outermost dc post at the opposite end of Body Row 8. Ch 3 (counts as a dc in that post), then work [ch 1, dc in the next dc post] 7 times, stopping at the centre: 8 posts. Work Rows 2â4 exactly as for the first lobe, turning after each row as instructed. Fasten off. The ch-1 sp between the two groups of 8 posts on Body Row 8 remains the bottom of the notch between the lobes.
- Outline edging Join yarn in the ch-1 sp at the bottom of the notch and make 1 sc there. Work sc around the outside edge of the heart, placing 1 sc in each exposed dc or ch-1 sp along the lobe tops and their stepped edges, and about 2 sc along each exposed dc-height row end on the longer sides. At the bottom point, work (sc, ch 2, sc) into the starting chain opening. Continue around the other side and sl st to the first sc. Adjust the spacing of edge stitches where needed so the outline lies flat; do not fill the mesh spaces inside the heart. Fasten off.
- Hanging loop Join yarn to a dc near the middle of one lobeâs four-post top edge. Ch 40 and sl st to the corresponding dc on the other lobeâs top edge. Fasten off securely. The chain forms an arch that can rest on a hook at its centre.
Finishing
- Weave in the ends without drawing the chain spaces closed.
- Dampen the heart and pin out the bottom point, both outer shoulders and the notch between the lobes. Gently spread the mesh spaces and ease the lobe tops into rounded curves.
- Leave pinned until completely dry. Hang from the centre of the chain arch.
Helpful Tips
- For a clearer lace effect, choose smooth, firm cotton and avoid tightening the ch-1 spaces as you work.
- Count dc posts rather than chain spaces at the end of each mesh row. There should always be one fewer ch-1 space than posts.
- Keep the edging light. Its purpose is to define the outline, not to cover the openwork.
Short-Row Ribbed Heart Decoration

This Christmas heart gets its softly curved lobes and tapered point from rows of changing lengths, rather than taller stitches along the edge. Back-loop slip stitches create narrow ribs that give the small decoration texture without obscuring its outline.
The two matching halves can look surprisingly different when placed in the same direction. Before they are sewn together, arrange them as mirror images: the lobes should rise above the centre notch, while the lower edges should meet in a point. If the shape looks uneven, check the chain extension that raises each lobe and make sure the short rows follow the intended edge.
Slip-stitch fabric is easiest to handle when it stays flexible enough to reveal the back loops and short-row turns. A relaxed, consistent tension also helps the ribs remain distinct across the finished heart.
Short-Row Ribbed Heart Decoration

Quick-reference card. Follow the complete written instructions below.
Materials
- Yarn: A small amount of soft, smooth DK yarn in burgundy; choose a yarn that shows the short-row turns clearly.
- Crochet hook: 4 mm, or a size that lets you work slip stitches without pulling them tight.
- Notions: Yarn needle, scissors and a removable stitch marker.
Size and Fit
One sample size. At the suggested gauge, the heart is approximately 7 cm wide and 9 cm tall, excluding the hanging loop. These dimensions are estimates calculated from the stitch and row counts, not measured results.
Gauge
Aim for approximately 24 back-loop slip stitches and 30 rows per 10 cm. Exact gauge is not essential, but keep the stitches loose enough to find their back loops.
Abbreviations
US crochet terms.
- ch = Chain
- sl st = Slip stitch
- BLO = Back loop only
- st(s) = Stitch(es)
Pattern
- Before you begin Make two identical halves. Unless a row says otherwise, work sl sts in BLO and make a ch 1 before turning; the turning chain never counts as a stitch. On a shortened row, leave the stated stitches unworked and turn. Work into the stitches of the immediately preceding row, not into older, unworked stitches.
- Row 1 â centre edge Ch 19. Sl st in the back bump of the second ch from the hook and in each remaining ch. (18 sts) The unused chain loops form the edge to be seamed later. Mark the end where Row 1 began: this is the centre-notch end. The opposite end is the lower point.
- Row 2 Ch 1, turn; sl st in BLO of all 18 sts. You are back at the centre-notch end. Do not make a turning ch before Row 3.
- Row 3 â raise the lobe Ch 5. Sl st in the second ch from the hook and the next 3 chs, then sl st in BLO of the next 15 sts of Row 2. Leave its last 3 sts unworked. (19 sts)
- Row 4 Ch 1, turn; sl st in BLO of all 19 sts.
- Row 5 Ch 1, turn; sl st in BLO of the next 16 sts. Leave 3 sts unworked at the lower edge. (16 sts)
- Row 6 Ch 1, turn; sl st in BLO of all 16 sts.
- Row 7 Ch 1, turn; sl st in BLO of the next 13 sts. Leave 3 sts unworked at the lower edge. (13 sts)
- Row 8 Ch 1, turn; sl st in BLO of the next 11 sts. Leave 2 sts unworked at the lobe top. (11 sts)
- Row 9 Ch 1, turn; sl st in BLO of the next 8 sts. Leave 3 sts unworked at the lower edge. (8 sts)
- Row 10 Ch 1, turn; sl st in BLO of the next 6 sts. Leave 2 sts unworked at the lobe top. (6 sts) Fasten off. Make the second half in the same way.
- Check the shape Lay the halves flat with their Row 1 foundation edges together, lower points aligned and lobes curving away from one another. Flip one half over to make the pair mirror each other. Before sewing, check that the raised lobe tops sit above the marked centre-notch ends and that the stepped lower edges meet in a tapering point. If a lobe sits below the notch, check the four added chain stitches in Row 3.
Finishing
- With a yarn needle and matching yarn, sew the two Row 1 foundation edges together through their unused chain loops. Start at the lower point and stop at the marked centre-notch ends. Keep the seam flat and do not sew the lobe tops together.
- Weave in the ends. If needed, gently smooth the short-row steps into the heart outline without stretching out the ribs.
- For a hanging loop, thread a separate length of yarn through the back of the centre seam just below the notch. Tie its ends securely together and tuck the knot to the back.
Helpful Tips
- A smooth yarn makes it easier to see which stitches belong to the immediately preceding row.
- If the fabric feels stiff or the back loops are difficult to enter, try a larger hook rather than tightening the slip stitches.
- Pin the halves in position before seaming so the points and centre-notch ends stay aligned.
If youâd like to keep building your crochet skills, take a look at free crochet Christmas garland patterns.
Padded Two-Panel Heart Ornament
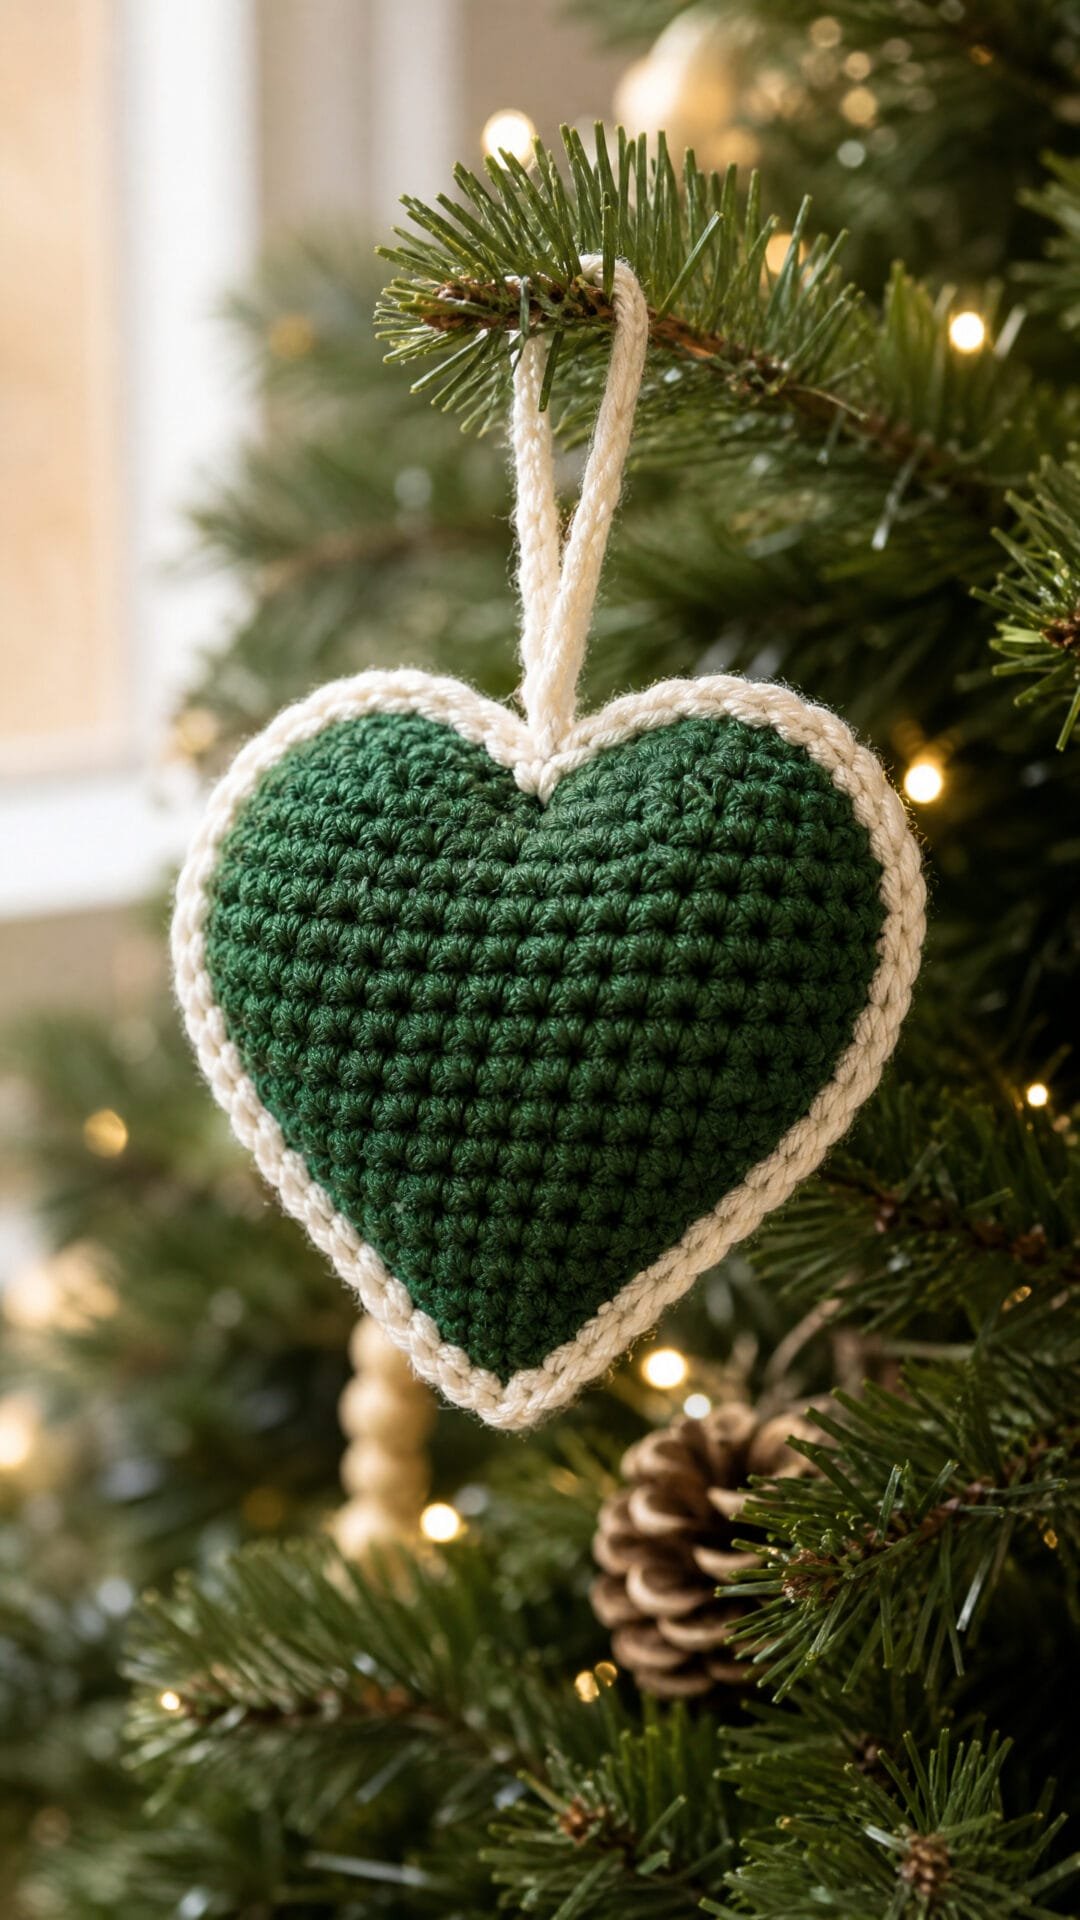
This Christmas heart has a soft, rounded profile that stands out among flatter tree decorations. Its forest-green faces and contrasting cream edge give the shape a crisp outline without making it look rigid.
The heart is formed from two matching shaped panels. Their separate lobes create a clear centre notch, while the seam brings the panels together to hold a little padding. The hanging loop sits at the notch so the ornament hangs with its point below.
This is a good choice if you are comfortable working back and forth in rows and want to practise keeping two shaped pieces aligned. Aim for a gently plump finish: too much padding can push through the fabric or distort the heartâs outline.
Padded Two-Panel Christmas Heart Ornament
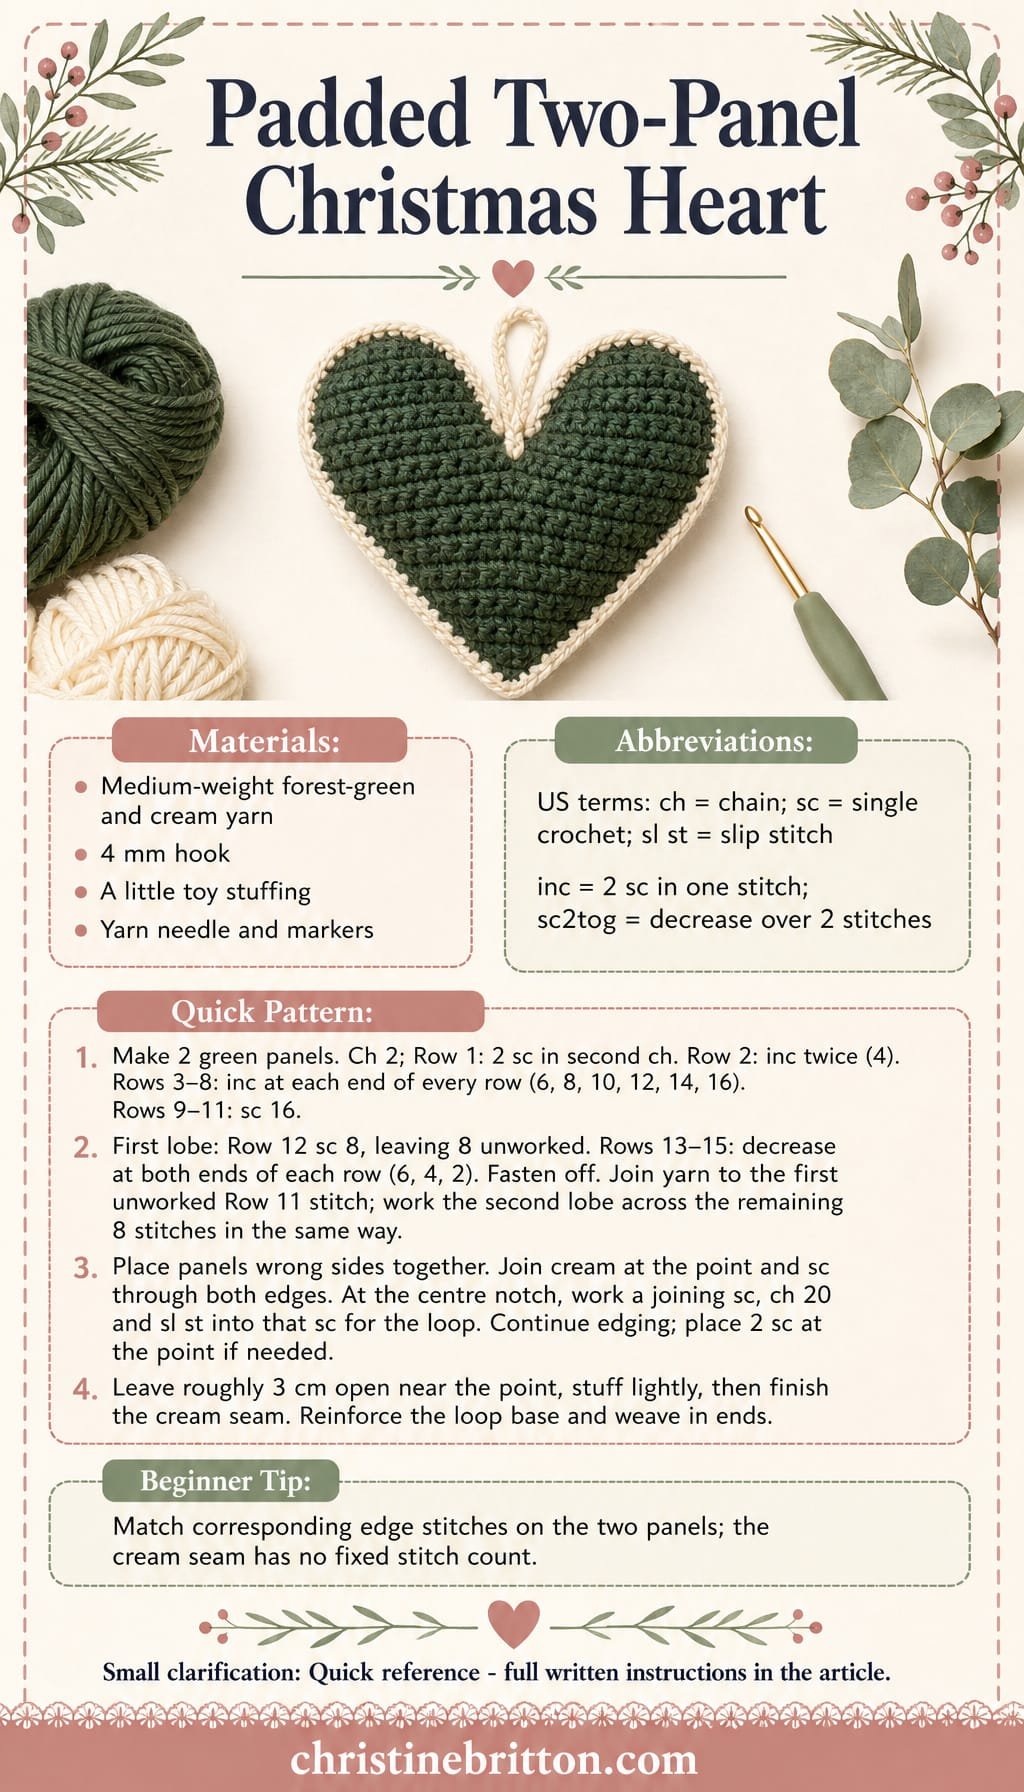
Quick-reference card. Follow the complete written instructions below.
Materials
- Medium-weight yarn: Approximately 20 m forest green for the panels and 8 m cream for the edging and loop.
- Crochet hook: 4 mm, or a size that produces firm fabric without visible gaps.
- Toy stuffing: A small handful.
- Other supplies: Yarn needle, scissors and removable stitch markers.
Size and Fit
One sample size: approximately 10 cm wide and 9 cm tall, excluding the hanging loop. The heart is lightly padded rather than firmly filled.
Gauge
Approximately 16 sc and 17 rows to 10 cm in flat sc fabric. Exact gauge is not essential, but the stitches should be close enough to contain the stuffing.
Abbreviations
US crochet terms.
- ch = chain
- sc = single crochet
- sl st = slip stitch
- inc = work 2 sc in the same stitch
- sc2tog = single crochet 2 stitches together
Pattern
- Panel 1: point and body With forest green, ch 2. Row 1: Work 2 sc in the second ch from the hook; turn. Row 2: Inc in each stitch; turn â 4 sc. Rows 3â8: Inc in the first stitch, sc across to the last stitch, inc in the last stitch; turn. You will have 6, 8, 10, 12, 14 and 16 sc respectively. Rows 9â11: Sc in each of the 16 stitches; turn after Rows 9 and 10. After Row 11, turn to begin the first lobe.
- Panel 1: first lobe Row 12: Sc in the first 8 stitches only; turn, leaving the other 8 stitches of Row 11 unworked. Row 13: Sc2tog, sc 4, sc2tog; turn â 6 sc. Row 14: Sc2tog, sc 2, sc2tog; turn â 4 sc. Row 15: Sc2tog twice â 2 sc. Fasten off.
- Panel 1: second lobe With the same face of the panel towards you as when you worked Row 12, join forest green in the first unworked stitch of Row 11. Row 12: Sc in that stitch and the remaining 7 unworked stitches; turn â 8 sc. Work Rows 13â15 exactly as for the first lobe. Fasten off.
- Panel 2 Make a second panel exactly like Panel 1. Weave the green yarn ends into the wrong sides. Place the panels together with wrong sides facing, matching the point, both lobes and the centre notch. Use markers to hold the edges together.
- Cream edging and hanging loop Join cream through both panels at the bottom point. Working through both layers, sc around the outside edge, placing stitches evenly into corresponding row ends along the sides and into corresponding stitches across each lobe top. At the centre notch, work a joining sc through both panels between the lobes. Ch 20, then sl st into that same joining sc to form the loop. Continue joining around the second lobe and down the other side. Where the point needs room to lie flat, work 2 sc into the corresponding point stitches. Keep the paired edges aligned rather than forcing a set number of edging stitches.
- Stuff and close Stop when approximately 3 cm of the side edge remains open near the point. Add small pieces of stuffing, spreading them into both lobes without stretching the stitches. Continue working cream sc through both panels to close the opening. Sl st into the first edging stitch and fasten off, leaving a tail long enough to reinforce the loop.
Finishing
- Thread the cream tail onto a yarn needle. Stitch through the base of the loop and both panels at the centre notch several times, then weave the tail securely beneath the edging.
- Ease the stuffing away from the seam and shape the point and lobes by hand. Weave in any remaining ends.
Helpful Tips
- If stuffing shows between stitches, use a smaller hook or a little less stuffing.
- Mark the eighth stitch of Row 11 before shaping the lobes so both halves remain equal.
- The edging stitch count may vary with tension; matching the insertion points on the two panels matters more than reaching a particular count.
Continuous-Round Stuffed Christmas Heart

This rounded crochet heart brings a soft, handmade touch to a Christmas tree and also works as a gift topper. Its plump shape gives it more presence than a flat appliqué, while the cleft at the top keeps the heart silhouette distinct.
The shape begins with two separate lobes that become one continuous spiral. As the body narrows towards the lower point, keep an eye on both sides so the heart stays balanced. Add the stuffing before the opening gets too small to reach the lobes comfortably.
A firm, close fabric helps the heart hold its shape without showing the stuffing. If you are new to shaping in continuous rounds, a stitch marker makes it easier to follow the changes as you work.
Continuous-Round Stuffed Christmas Heart
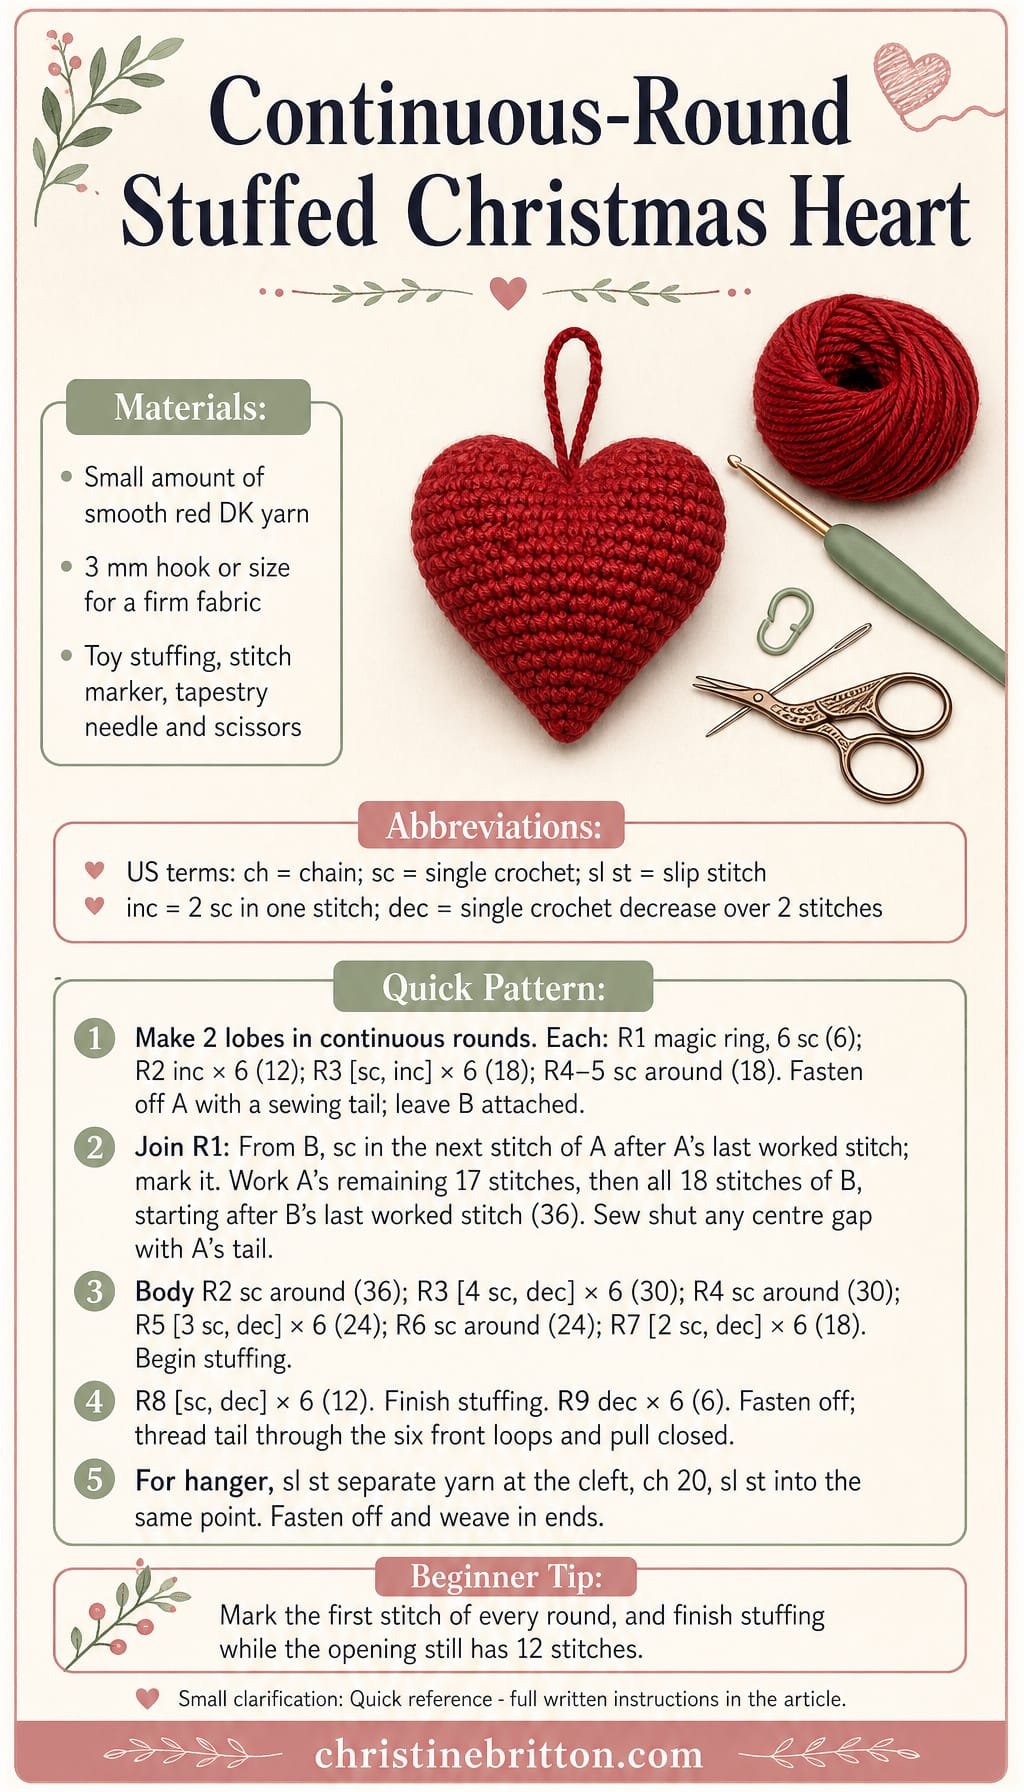
Quick-reference card. Follow the complete written instructions below.
Materials
- Smooth red yarn: Small amount of DK-weight yarn; a smooth, tightly worked fabric helps keep the stuffing inside.
- Crochet hook: 3 mm, or a size that produces a firm fabric without visible gaps.
- Polyester toy stuffing: A small amount.
- Stitch marker: Move it to the first stitch of each round.
- Tapestry needle and scissors: For closing the point, securing the cleft and weaving in ends.
Size and Fit
One ornament size. At the suggested gauge, expect approximately 7.5 cm across and 5â6 cm from the top of a lobe to the point; these are calculated estimates, not tested measurements. The hanging loop adds approximately 4 cm when folded.
Gauge
Approximately 24 sc and 28 rounds per 10 cm in a firm fabric. Exact gauge is not essential, but stitches should be close enough to contain the stuffing.
Abbreviations
US crochet terms.
- ch = chain
- dec = single crochet decrease: insert hook in next stitch and pull up a loop, insert hook in following stitch and pull up a loop, yarn over and pull through all three loops
- inc = work 2 single crochets in the same stitch
- sc = single crochet
- sl st = slip stitch
Pattern
- Before you begin Work in continuous rounds without joining or turning. Mark the first stitch of each round. Make two identical lobes.
- Lobe A, rounds 1â5 Round 1: Make a magic ring and work 6 sc into it (6). Round 2: Inc in each stitch (12). Round 3: [Sc in next stitch, inc in next stitch] 6 times (18). Rounds 4â5: Sc in each stitch (18). Fasten off, leaving a tail long enough to sew any gap at the centre of the lobes.
- Lobe B, rounds 1â5 Repeat lobe A, but do not fasten off. Keep the working yarn attached for the joining round.
- Join, round 1 With lobe B on the hook, sc into the next stitch of lobe A after its last worked stitch. Mark this as the first stitch of the new round. Sc in the remaining 17 stitches of A, then sc in all 18 stitches of B, beginning with the next stitch after Bâs last worked stitch (36). Do not add chains or extra stitches between the lobes. Use Aâs tail to sew closed any small gap at the centre of the join; secure the tail inside.
- Body, rounds 2â4 Round 2: Sc in each stitch (36). Round 3: [Sc in next 4 stitches, dec] 6 times (30). Round 4: Sc in each stitch (30).
- Body, rounds 5â7 Round 5: [Sc in next 3 stitches, dec] 6 times (24). Round 6: Sc in each stitch (24). Round 7: [Sc in next 2 stitches, dec] 6 times (18). Begin adding small pieces of stuffing, filling both lobes evenly.
- Body, rounds 8â9 Round 8: [Sc in next stitch, dec] 6 times (12). Finish stuffing now, before the opening becomes too narrow; keep the heart rounded without stretching the stitches. Round 9: Dec 6 times (6). Fasten off with a long tail. Thread the tail through the front loop of each remaining stitch, pull closed and secure inside the heart.
- Hanging loop Join a separate length of yarn with a sl st at the cleft between the lobes. Ch 20, then sl st back into the same attachment point to form a loop. Fasten off and weave both ends securely into the heart.
Finishing
- Shape the stuffed lobes with your fingers so the cleft remains visible and the lower point is centred.
- Check that the centre join and closed point do not expose stuffing. Secure any loose ends before hanging.
Helpful Tips
- If stuffing shows through, use a smaller hook rather than packing the heart more firmly.
- Move the marker every round: the joining round has 36 stitches, with 18 from each lobe.
- Keep the decrease stitches firm to maintain a neat lower point.
Heart-Shaped Gift Note Pocket

This crochet heart doubles as a reusable gift decoration and a place for a short handwritten message. Its full heart-shaped back gives it a familiar outline, while a shorter, pointed front forms the pocket.
The pocket opens along the straight upper edge of the front panel. It is suited to a small, folded note: enough paper can sit inside to hold it in place while the greeting remains visible above the opening. A lightweight message works better here than a bulky card or gift.
The gift ties are attached to the back of the heart, above the pocket opening. That placement lets the decoration sit against a wrapped present without drawing the pocket mouth closed, so the note stays easy to see and remove.
Heart-Shaped Gift Note Pocket

Quick-reference card. Follow the complete written instructions below.
Materials
- DK cotton yarn: Approximately 25 g in cream; choose a firm, smooth cotton.
- Crochet hook: 3.5 mm, or a size that makes a firm fabric.
- Yarn needle and scissors: For joining the panels and weaving in ends.
- Gift note: A small piece of paper to fold to fit the finished pocket.
Size and Fit
At the suggested gauge, the back is approximately 10 cm wide and 6.5 cm high. The front opening is approximately 8 cm wide when laid flat, and the pocket is approximately 3.5 cm deep from opening to point. Fold a note to no more than about 5 cm wide, with approximately 2.5â3 cm tucked inside so its top remains visible.
Gauge
Approximately 20 sc and 22 rows per 10 cm in flat fabric. Exact gauge is not essential, but a firm fabric helps the pocket hold a note. Dimensions are estimates based on this gauge, not measured results.
Abbreviations
US crochet terms.
- ch = chain
- sc = single crochet
- sc2tog = single crochet two stitches together; one decrease
- st(s) = stitch(es)
Pattern
- Before you begin Work in turned rows. Ch 1 at the beginning of a row does not count as a stitch. To increase at an edge, work 2 sc in that edge stitch.
- Back panel: point and body Ch 2. Row 1: Work 2 sc in the second ch from the hook. (2 sts) Rows 2â10: Ch 1, turn; work 2 sc in the first st, 1 sc in each st across until one st remains, and 2 sc in the last st. (4 sts after Row 2; increase by 2 sts per row to 20 sts after Row 10.) Do not fasten off.
- Back panel: first lobe Row 11: Ch 1, turn; sc in the next 10 sts. Leave the other 10 sts of Row 10 unworked. (10 sts) Row 12: Ch 1, turn; sc2tog, sc in the next 8 sts. (9 sts) Row 13: Ch 1, turn; sc2tog, sc in the next 7 sts. (8 sts) Row 14: Ch 1, turn; sc2tog, sc in the next 6 sts. (7 sts) Fasten off.
- Back panel: second lobe With Row 10 facing you, join yarn in the unworked stitch nearest the first lobe. Row 11: Sc in that stitch and in the remaining 9 unworked sts, working towards the outer edge. (10 sts) Row 12: Ch 1, turn; sc in the next 8 sts, sc2tog. (9 sts) Row 13: Ch 1, turn; sc in the next 7 sts, sc2tog. (8 sts) Row 14: Ch 1, turn; sc in the next 6 sts, sc2tog. (7 sts) Fasten off. The gap between the lobes forms the heartâs notch.
- Front pocket panel Ch 2. Row 1: Work 2 sc in the second ch from the hook. (2 sts) Rows 2â8: Ch 1, turn; work 2 sc in the first st, 1 sc in each st across until one st remains, and 2 sc in the last st. (16 sts after Row 8.) Fasten off, leaving a long tail for joining. Row 8 is the straight, open edge of the pocket.
- Join the pocket Lay the front panel on the back panel with points together and Row 8 of the front aligned with Row 8 of the back. Using the front panelâs long tail and a yarn needle, whipstitch through both layers along one sloping edge, through the point, and up the other sloping edge. Catch the corresponding row-end edges of Rows 1â8 on each panel, using about one stitch per row end. Secure the yarn without sewing across the front panelâs Row 8 edge; this edge must stay open.
- Back-panel ties Attach yarn to a stitch on the back panel only, near the centre of one lobe on Row 12. Ch 55 and fasten off. Make a second 55-ch tie in the corresponding position on the other lobe. Secure and weave the yarn ends into the back panel. The ties sit above the pocket opening: tie them around a gift without passing them through the front panel or drawing its top edge together.
Finishing
- Weave in all ends, keeping the pocket mouth clear.
- Gently smooth the heart into shape. Slip in a folded, lightweight note with its top peeking above the opening.
- Tie the two back-panel cords around gift ribbon or beneath a bow; do not use the pocket to support a heavy item.
Helpful Tips
- If the note catches on the seam, fold it slightly narrower rather than forcing the pocket wider.
- Keep the joining stitches firm but not so tight that they curl the sides of the heart.
Centre-Out Christmas Heart Coaster

This heart is made for the Christmas table rather than the tree. Its rounded lobes and defined point give it a festive shape, while a low-profile edge lets a mug sit steadily without catching on a raised border.
Keeping the fabric flat matters more here than adding a hanging loop: a coaster should support the mug across its base, not curl beneath it. An absorbent yarn is a practical choice for catching condensation, and it is worth checking the heart on a level surface as it grows. The shaping calls for a little attention, making this a satisfying intermediate project.
Centre-Out Christmas Heart Coaster
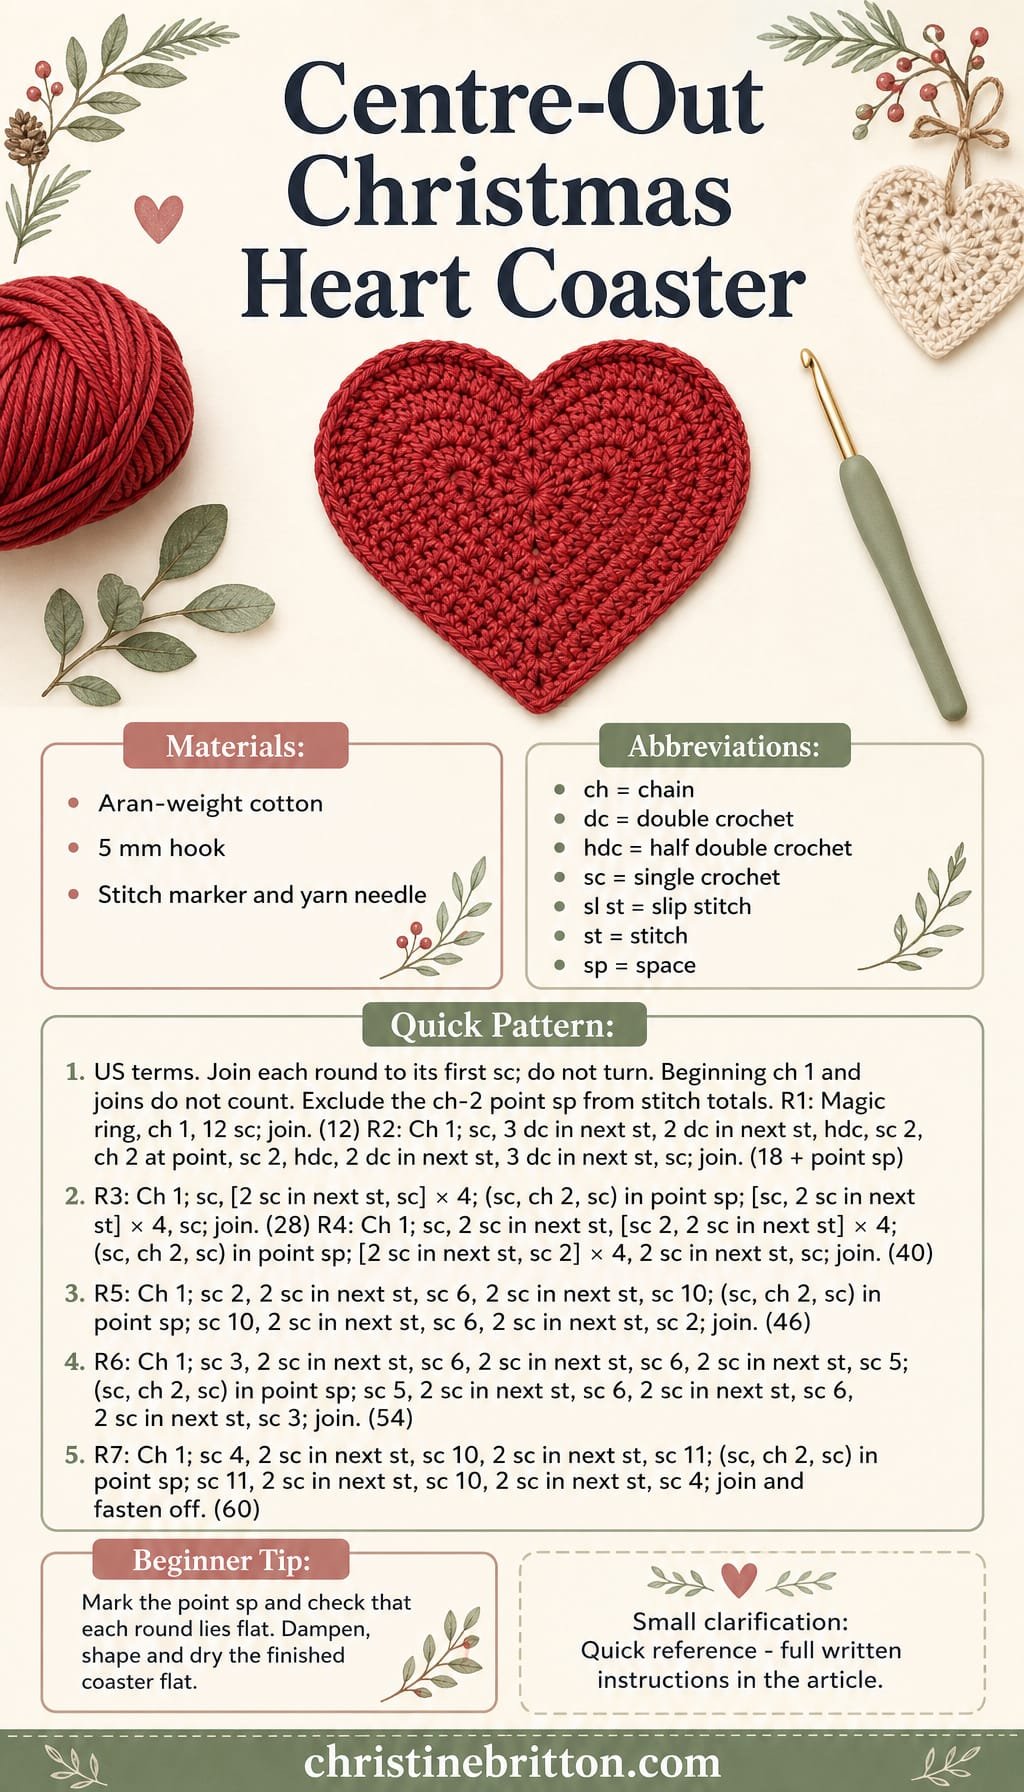
Quick-reference card. Follow the complete written instructions below.
Materials
- Yarn: A small amount of aran-weight, absorbent cotton in red
- Hook: 5 mm crochet hook, or a size that produces a firm but flat fabric
- Notions: Stitch marker, yarn needle and scissors
Size and Fit
One coaster. Aim for approximately 11â13 cm across at its widest point; the finished measurement will depend on your yarn and tension. Check that your mug base sits comfortably within the heart.
Gauge
Gauge is not critical. As a guide, aim for approximately 13 sc and 12 rounds per 10 cm in single crochet. Prioritise a fabric that lies flat and is dense enough for a mug.
Abbreviations
US crochet terms.
- ch = chain
- dc = double crochet
- hdc = half double crochet
- sc = single crochet
- sl st = slip stitch
- st(s) = stitch(es)
- sp = space
Pattern
- Before you begin Work joined rounds with the right side facing; do not turn. The first and last stitches of each round meet at the dip between the lobes. Join with a sl st to the first sc. A beginning ch 1 and joining sl st never count as stitches. From Round 2 onwards, make a ch-2 sp at the lower point; work into that space on the following round. Stitch totals exclude the ch-2 sp.
- Round 1 â central ring Make a magic ring. Ch 1, work 12 sc into the ring and pull it closed. Join to the first sc. (12 sc)
- Round 2 â establish the heart Ch 1. Working in order around the ring: sc in the first st, 3 dc in the next st, 2 dc in the next st, hdc in the next st, sc in each of the next 2 sts, ch 2 for the lower point, sc in each of the next 2 sts, hdc in the next st, 2 dc in the next st, 3 dc in the next st, sc in the last st. Join. (18 sts and one ch-2 sp)
- Round 3 Ch 1. Across the 9 sts from the dip towards the point, work sc in the first st, then [2 sc in the next st, sc in the next st] 4 times. Work (sc, ch 2, sc) in the point sp. Across the remaining 9 sts, work [sc in the next st, 2 sc in the next st] 4 times, then sc in the last st. Join. (28 sc and one ch-2 sp)
- Round 4 Ch 1. Across the 14 sts towards the point, sc in the first st, 2 sc in the next st, then [sc in each of the next 2 sts, 2 sc in the next st] 4 times. Work (sc, ch 2, sc) in the point sp. Across the remaining 14 sts, work [2 sc in the next st, sc in each of the next 2 sts] 4 times, then 2 sc in the next st and sc in the last st. Join. (40 sc and one ch-2 sp)
- Round 5 Ch 1. Across the 20 sts towards the point, sc in each of the first 2 sts, 2 sc in the next st, sc in each of the next 6 sts, 2 sc in the next st, and sc in each of the last 10 sts. Work (sc, ch 2, sc) in the point sp. Across the remaining 20 sts, sc in each of the first 10 sts, 2 sc in the next st, sc in each of the next 6 sts, 2 sc in the next st, and sc in each of the last 2 sts. Join. (46 sc and one ch-2 sp)
- Round 6 Ch 1. Across the 23 sts towards the point, sc in each of the first 3 sts, 2 sc in the next st, sc in each of the next 6 sts, 2 sc in the next st, sc in each of the next 6 sts, 2 sc in the next st, and sc in each of the last 5 sts. Work (sc, ch 2, sc) in the point sp. Across the remaining 23 sts, sc in each of the first 5 sts, 2 sc in the next st, sc in each of the next 6 sts, 2 sc in the next st, sc in each of the next 6 sts, 2 sc in the next st, and sc in each of the last 3 sts. Join. (54 sc and one ch-2 sp)
- Round 7 â low-profile edging Ch 1. Across the 27 sts towards the point, sc in each of the first 4 sts, 2 sc in the next st, sc in each of the next 10 sts, 2 sc in the next st, and sc in each of the last 11 sts. Work (sc, ch 2, sc) in the point sp. Across the remaining 27 sts, sc in each of the first 11 sts, 2 sc in the next st, sc in each of the next 10 sts, 2 sc in the next st, and sc in each of the last 4 sts. Join, fasten off and weave in the ends. (60 sc and one ch-2 sp)
Finishing
- Dampen the coaster and gently shape the two lobes and lower point. Lay it flat to dry; do not stretch the centre open.
- Use it only once completely dry. Keep it away from open flames and very hot cookware.
Helpful Tips
- Place a marker in the ch-2 point sp so you do not mistake either adjacent sc for the point.
- Check each round on a flat surface. If the edge cups, try a slightly larger hook; if it ripples, try a slightly smaller one. Avoid adding a tall decorative border beneath a mug.
- Cotton is absorbent and washable, making it more practical for a coaster than a hanging-ornament yarn chosen solely for sparkle.
Heart-Base Mini Gift Basket
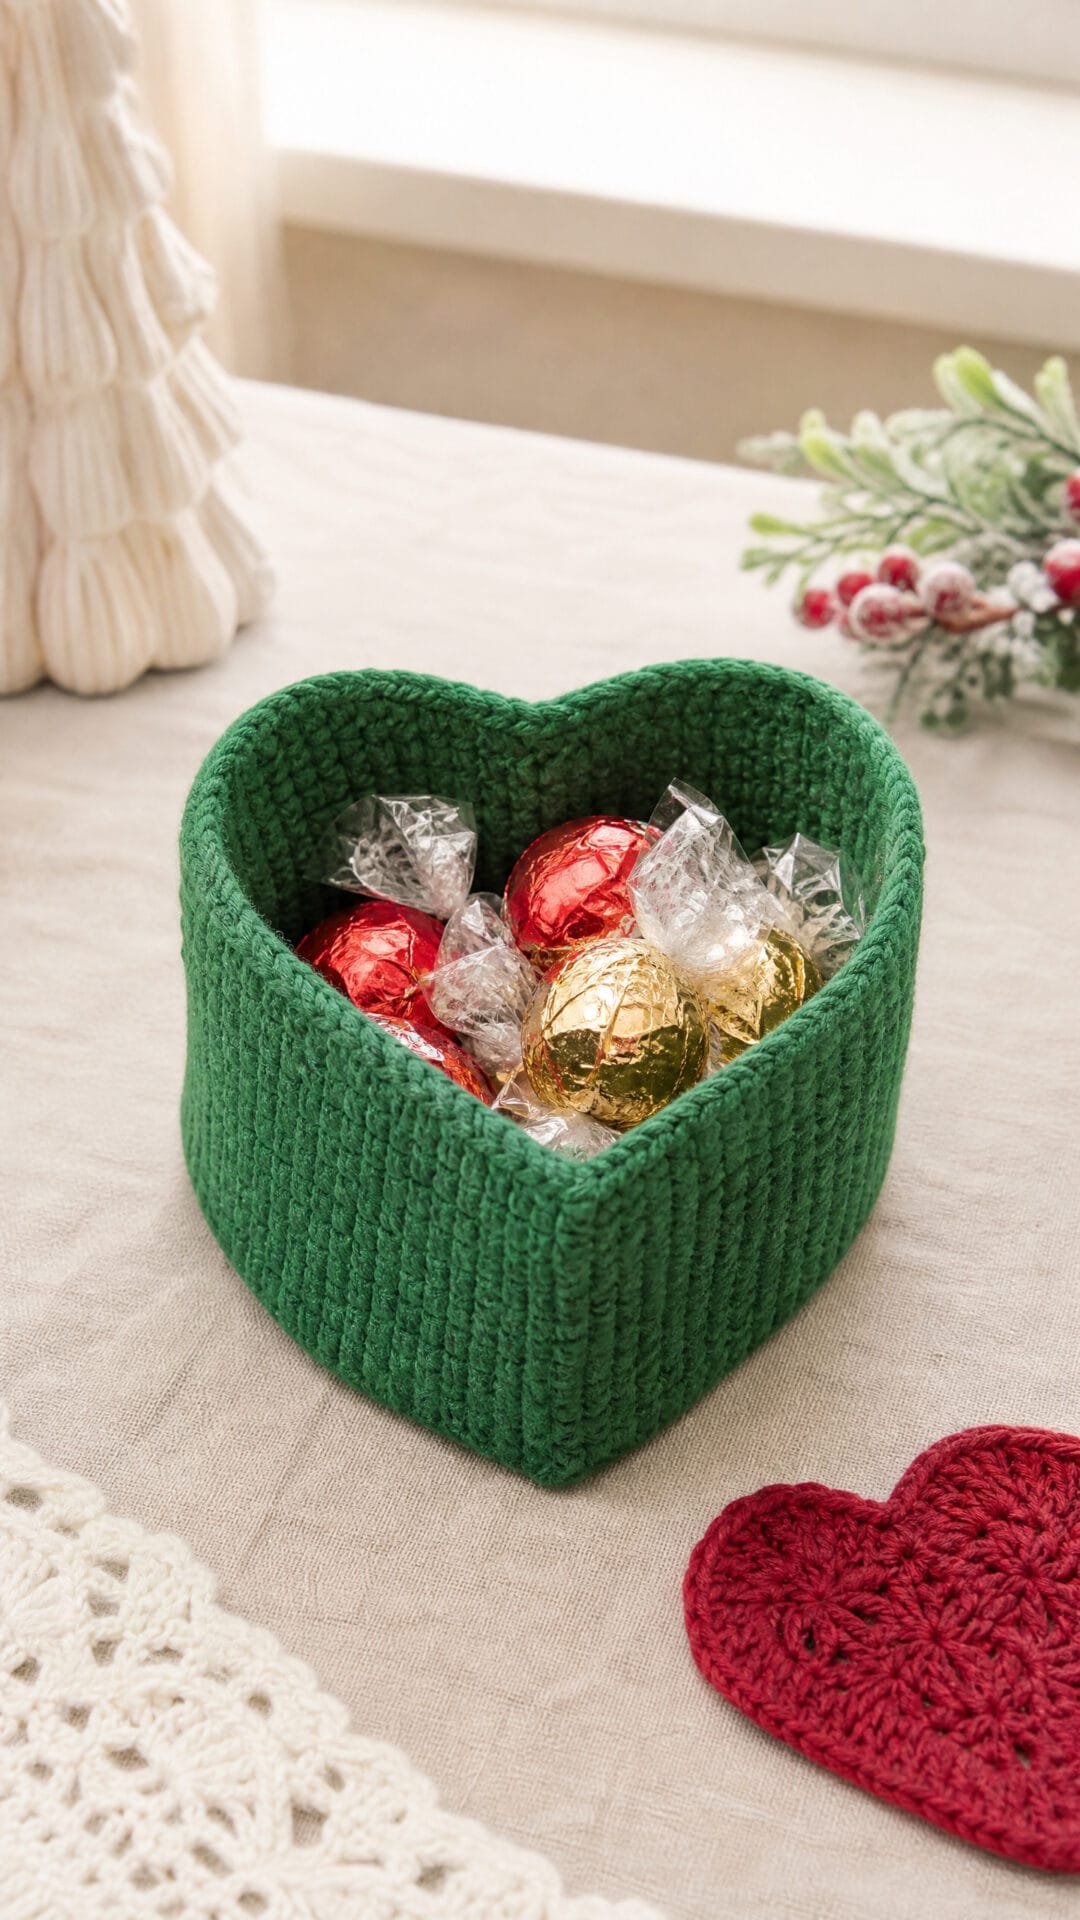
This little heart-shaped basket makes a festive place to set out wrapped sweets or keep gift tags close to hand. Its shallow profile suits a table, shelf or place setting without hiding the heart outline.
The base is made flat, beginning at the lower point and opening into two rounded lobes. A defined edge gives the upright wall a clear place to rise, so the basket keeps its heart shape rather than looking like a rounded dish.
The point and the dip between the lobes are the details most likely to soften as the wall grows. Markers help you keep those features aligned, while a firm fabric and a shallow wall help the basket stand neatly. It is best suited to light contents rather than heavier gifts.
Heart-Base Mini Gift Basket
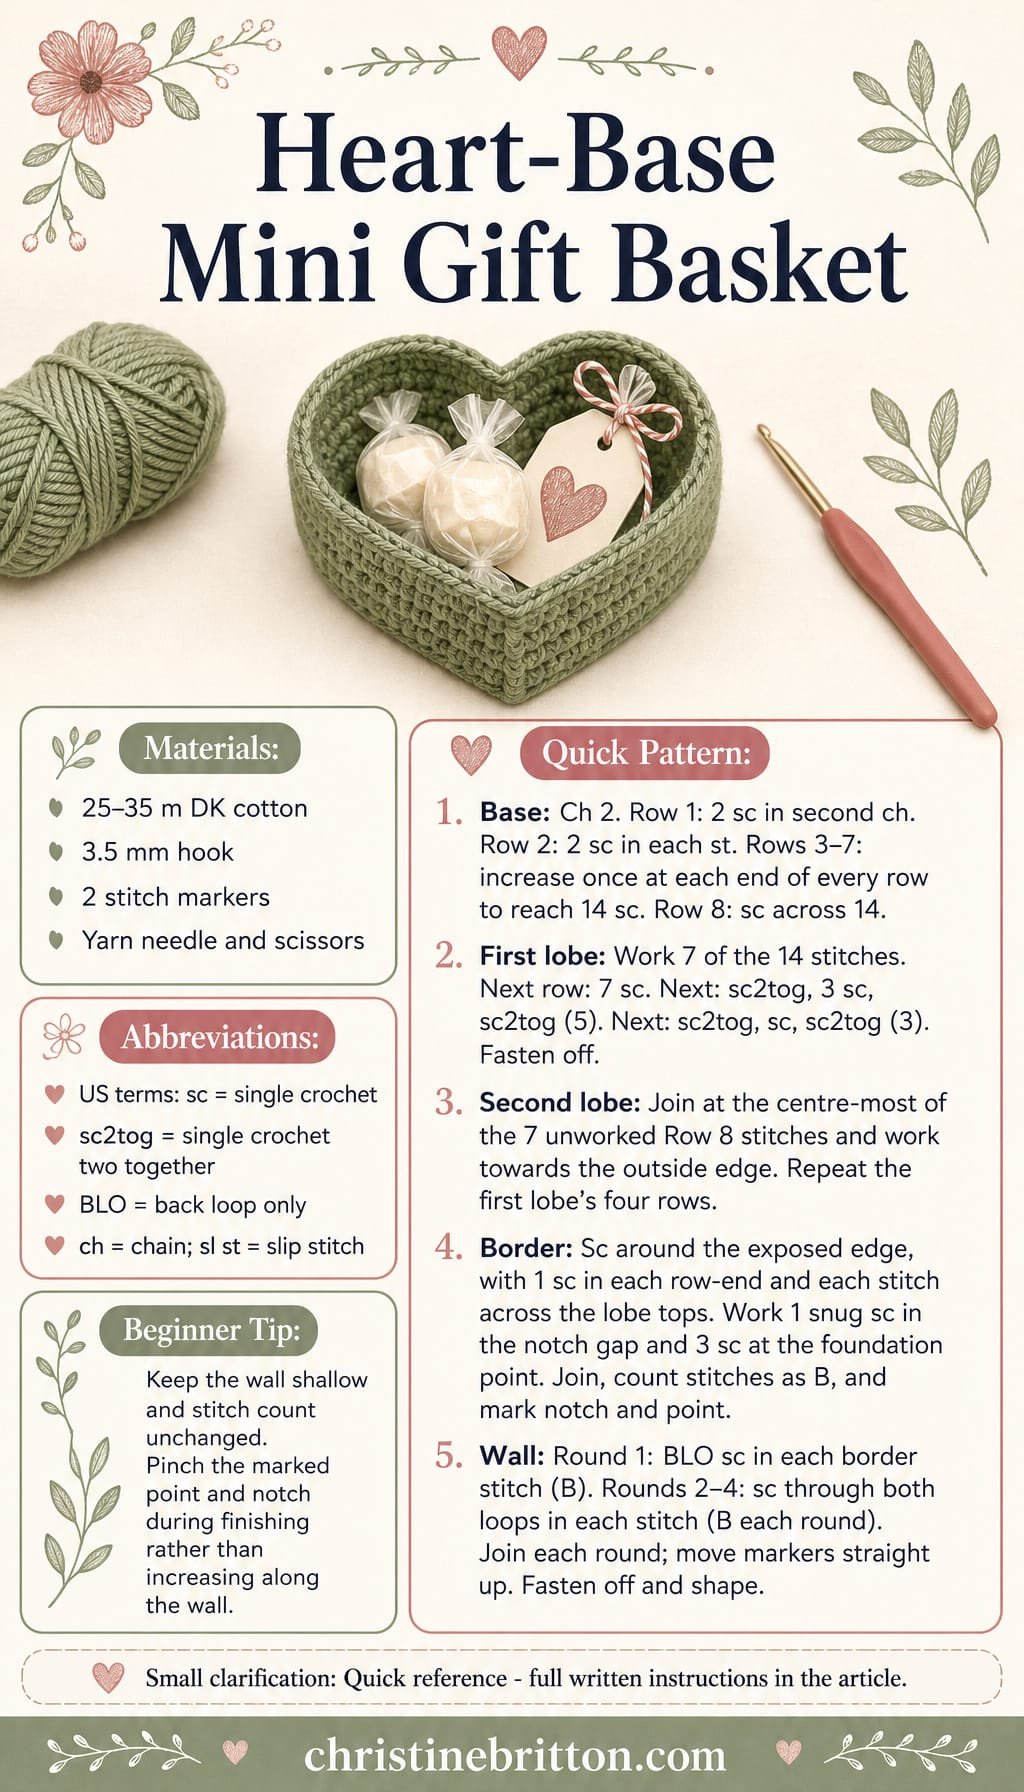
Quick-reference card. Follow the complete written instructions below.
Materials
- Cotton yarn: Approximately 25â35 m of DK-weight cotton in green
- Crochet hook: 3.5 mm, or a size that makes a firm fabric with your yarn
- Stitch markers: Two, in different colours if possible
- Yarn needle and scissors: For weaving in ends
Size and Fit
One small table basket. At the suggested gauge, the base is approximately 8 cm wide and 6 cm from point to lobe tops; the wall is approximately 2 cm high. Finished dimensions depend on your yarn and tension.
Gauge
Approximately 20 sc and 22 rows per 10 cm in firm, flat single crochet. Exact gauge is less important than a dense fabric that stands upright.
Abbreviations
US crochet terms.
- ch = chain
- sc = single crochet
- sc2tog = single crochet two stitches together
- BLO = back loop only
- sl st = slip stitch
- st = stitch
Pattern
- Before you begin Work the base in turned rows. A turning ch 1 never counts as a stitch. Keep your stitches firm, but not so tight that the base curls.
- Base, Rows 1â8 Ch 2. Row 1: Work 2 sc in the second ch from the hook; turn. (2 sc) Row 2: Ch 1, work 2 sc in each st; turn. (4 sc) Rows 3â7: Ch 1, work 2 sc in the first st, sc in each st until one remains, work 2 sc in the last st; turn. You will have 6, 8, 10, 12 and 14 sc respectively. Row 8: Ch 1, sc in each st; turn. (14 sc)
- First lobe, Rows 9â12 Row 9: Ch 1, sc in the first 7 stitches of Row 8, leaving its other 7 stitches unworked; turn. (7 sc) Row 10: Ch 1, sc in each st; turn. (7 sc) Row 11: Ch 1, sc2tog, sc in the next 3 stitches, sc2tog; turn. (5 sc) Row 12: Ch 1, sc2tog, sc in the next st, sc2tog. (3 sc) Fasten off.
- Second lobe, Rows 9â12 With the same side of the base facing you as when you began the first lobe, locate the 7 unworked stitches of Row 8. Join yarn with a sc in the unworked stitch nearest the centre gap, then sc in the other 6 unworked stitches towards the outside edge; turn. This is Row 9. (7 sc) Work Rows 10â12 exactly as for the first lobe. Fasten off.
- Border Join yarn at the bottom point. Work one round of sc around the outer edge of the heart: place 1 sc in each exposed row-end along the sides and lobe slopes, and 1 sc in each of the 3 stitches across the top of each lobe. At the notch, place 1 sc into the gap between the two groups of 7 Row 8 stitches, drawing it snugly enough to define the V without puckering the base. At the bottom point, place 3 sc in the foundation tip. Join with a sl st to the first border sc. Count your border stitches and call this number B; it will be your stitch count for every wall round. Mark the notch stitch and the middle of the 3 point stitches.
- Wall, Round 1 Ch 1. Working BLO, sc in each border stitch around, with no increases or decreases. Join with a sl st to the first sc. (B sc) Move the notch and point markers up into the stitches directly above their previous positions.
- Wall, Rounds 2â4 Ch 1, sc through both loops of each stitch around. Join with a sl st to the first sc and move both markers up after each round. Keep the marked stitches in line; do not add stitches at the point or notch. (B sc each round) Fasten off after Round 4.
Finishing
- Weave in all ends securely on the inside.
- Shape the basket by gently pressing the wall upright. Pinch the marked point into a crisp corner and press the marked notch inward to retain the heart outline.
- If desired, lightly dampen the cotton and leave the basket shaped until completely dry. Fill only with light, wrapped items.
Helpful Tips
- A firm cotton fabric and a shallow wall help the basket stand without stiffener.
- Count the border before starting the wall. The exact total can vary with where stitches are placed in the row-ends, but every subsequent round must retain that total.
- Do not work extra wall stitches to emphasise the point; use the marker and finishing shape instead.
For another related project collection, browse crochet Christmas ornament patterns.
Bobble-Heart Christmas Napkin Ring

A handmade napkin ring brings a small Christmas detail to the table without taking up space around the plates. The raised red heart gives this one a clear focal point, while the simple band lets the napkin remain the centre of the place setting.
The heart is formed as part of the band rather than attached afterwards. Space between the bobbles helps its outline read clearly; keeping the surrounding fabric even also prevents the motif from looking crowded.
Check the band around the napkin folded as you intend to serve it before joining the ends. A loose fold and a thick fold can need different amounts of room, so the intended table setting is the best guide to fit.
Bobble-Heart Christmas Napkin Ring

Quick-reference card. Follow the complete written instructions below.
Materials
- Smooth cotton yarn: Small amounts in cream for the band and red for the heart; choose the same yarn weight for both colours.
- Crochet hook: A size that gives the stated gauge; 3.5 mm is a starting point for DK cotton.
- Tapestry needle and scissors: For joining the band and weaving in ends.
Size and Fit
One sample size: approximately 5 cm wide, with a band length of 13.75 cm before joining at the stated gauge. Check it around the intended folded napkin before sewing: the ends should meet comfortably without stretching the band. To alter the length while keeping the heart centred and its bobbles on wrong-side rows, add or remove 2 plain rows before the heart and 2 plain rows after it for each 1.25 cm change in length. Each such adjustment changes the total by 4 rows.
Gauge
15 sc and 16 rows = 5 cm square in plain sc, worked flat. Gauge affects both the band length and the heartâs proportions.
Abbreviations
US crochet terms.
- ch = chain
- sc = single crochet
- st(s) = stitch(es)
- RS / WS = right side / wrong side
- bobble = Work four partially completed double crochets in one stitch, then close them together as instructed; counts as one stitch.
Pattern
- Before you begin Work the band flat, turning after every row. Row 1 is an RS row; the even-numbered rows are WS rows. Work the red bobbles on WS rows so they stand out on the RS, which will face outwards on the finished ring. Turning chains do not count as stitches.
- Red bobble and colour changes For each marked bobble, work the preceding cream sc until its final yarn-over and draw through with red. In the marked stitch, with red, repeat four times: yarn over, insert hook in the stitch, yarn over and draw up a loop, yarn over and draw through 2 loops. You will have 5 loops on the hook. Yarn over with cream and draw through all 5 loops. Continue in cream. Each bobble replaces one sc and counts as one stitch. Keep the red yarn on the WS between bobbles, with its short floats loose enough not to pull the cream stitches together. Cut the red yarn after each bobble row, leaving ends to weave in.
- Foundation and plain rows With cream, ch 16. Row 1 (RS): sc in the second ch from the hook and in each ch across; 15 sc. Ch 1, turn. Rows 2â15: sc in each of the 15 sts across. Ch 1 and turn after each row.
- Heart, row 16 On this WS row, sc across, replacing stitches 4, 6, 10 and 12 with red bobbles. Work sc in every other stitch; 15 sts. Ch 1, turn.
- Heart, rows 17â28 On each odd-numbered row, work 15 cream sc, ch 1 and turn. On the even-numbered rows, work cream sc except at these red bobble positions: row 18: stitches 3, 5, 7, 9, 11 and 13; row 20: stitches 4, 6, 8, 10 and 12; row 22: stitches 5, 7, 9 and 11; row 24: stitches 6, 8 and 10; row 26: stitches 7 and 9; row 28: stitch 8. Each row has 15 sts. Ch 1 and turn after every row.
- Finish the band and check the fit Rows 29â44: work 15 cream sc on every row. Ch 1 and turn after rows 29â43; fasten off after row 44, leaving a long cream tail for sewing. Wrap the band around the intended folded napkin with the bobbles facing out and bring the short ends together. If the fit needs changing, use the paired plain-row adjustment in Size and fit and remake the band before joining.
Finishing
- Weave in the red ends on the WS without pulling the bobble rows tight.
- With the RS facing out, bring the foundation edge and the final-row edge together without overlapping them. Use the long cream tail to sew the 15 corresponding stitch positions together, forming a ring. Secure and weave in the tail.
- Slip the ring over the folded napkin and arrange the heart on the visible outer face.
Helpful Tips
- Use smooth cotton rather than a fuzzy yarn so the spaces between the bobbles remain visible.
- Count across every bobble row: each bobble occupies one stitch, so the band must stay 15 stitches wide.
- When checking fit, use the fold you intend to use at the table; a thicker fold needs a longer band.
Corner-to-Corner Heart Wall Hanging

This corner-to-corner wall hanging turns a pixel-style heart into a graphic Christmas decoration for a door or wall. The plain background gives the heart a clear outline, while the square panel keeps the design looking balanced when displayed.
The colour changes are the part to watch: the heart includes separate red areas, so keeping those areas independent avoids visible strands across the pale background. Consistent tension matters too, particularly around the turns, where tighter blocks can make a square panel lean.
A hanging rod suits this design because it supports the straight top edge across its full width rather than pulling on the corners. That even support helps the heart hang upright and keeps its shape easy to see.
Corner-to-Corner Heart Wall Hanging
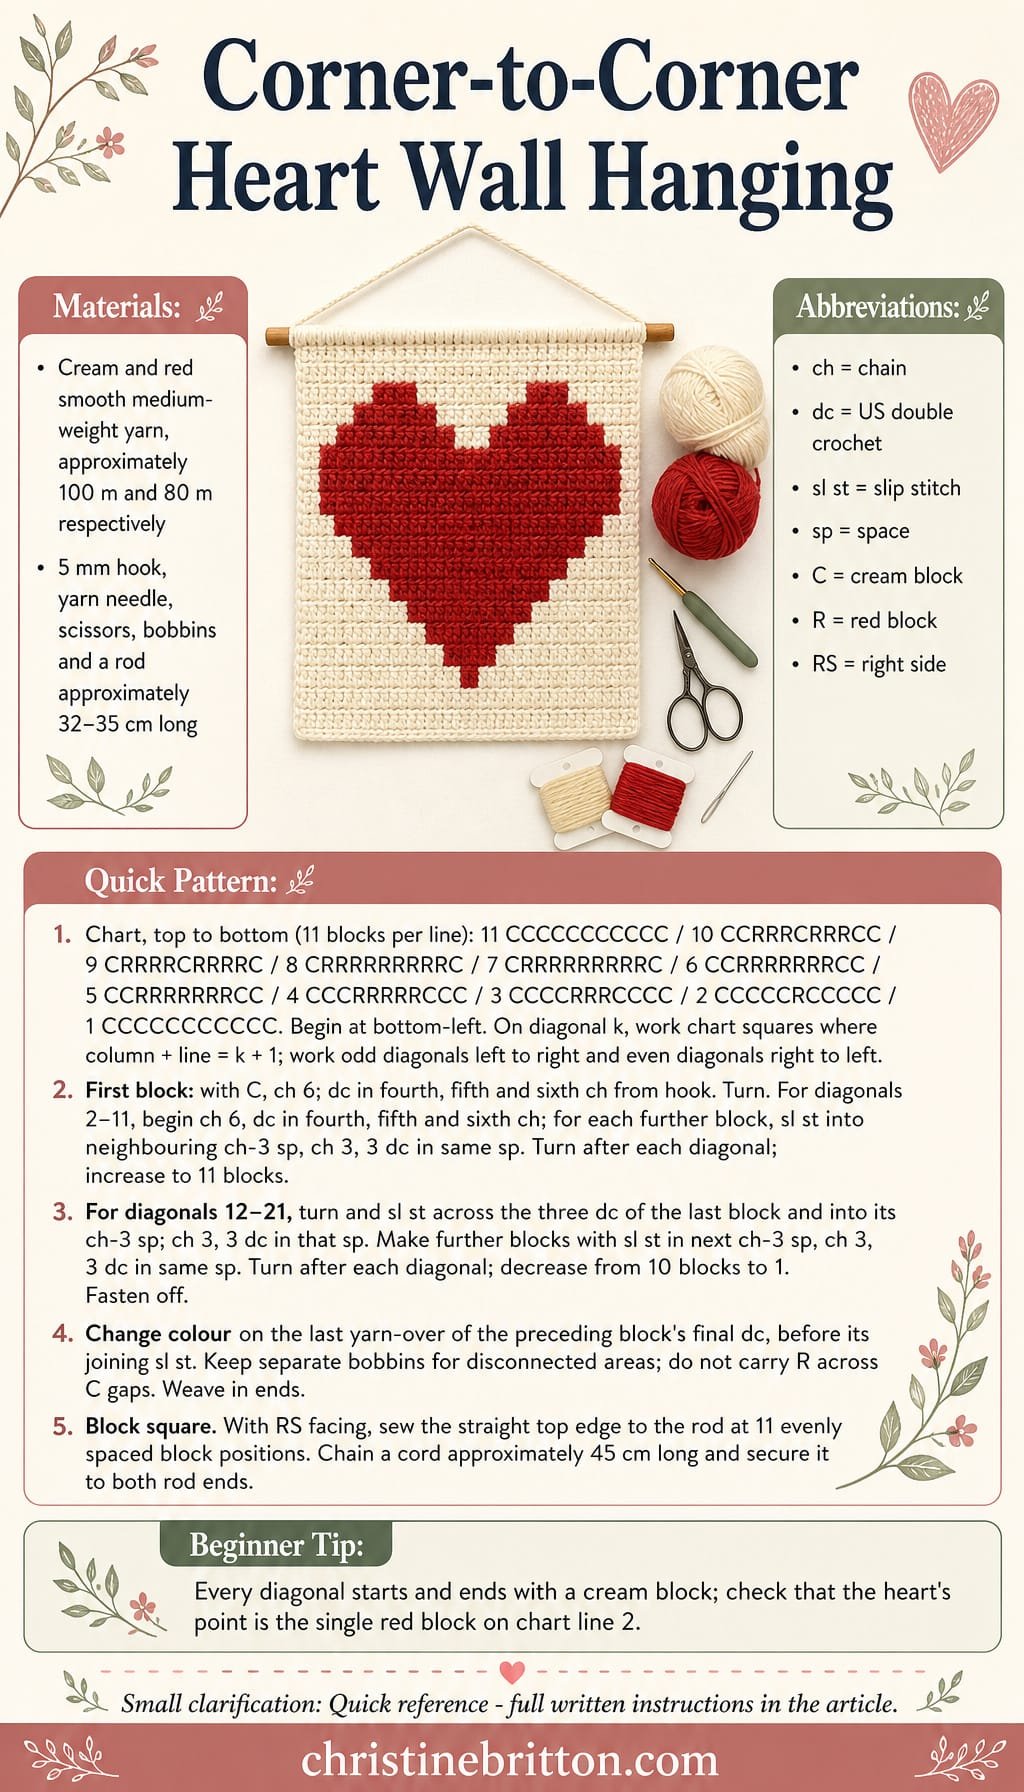
Quick-reference card. Follow the complete written instructions below.
Materials
- Cream medium-weight yarn: Smooth, solid-colour yarn; approximately 100 m allows for the panel, sewing and hanging cord.
- Red medium-weight yarn: Smooth, solid-colour yarn of similar weight; approximately 80 m.
- Crochet hook: 5 mm, or a size that makes firm, even blocks.
- Wooden rod or dowel: Approximately 32â35 cm long for the suggested gauge.
- Notions: Yarn needle, scissors and small yarn bobbins or clips for managing the colours.
Size and Fit
The panel is 11 blocks wide by 11 blocks high. At the suggested planning gauge, it will be approximately 27.5 cm square, excluding the rod and cord. Measure your panel before cutting or choosing its rod; allow roughly 2â4 cm of rod to extend beyond each side.
Gauge
Suggested planning gauge: 4 corner-to-corner blocks across and 4 blocks high measure approximately 10 cm. An exact gauge is not essential, but use the same yarn weight and tension for both colours so the panel remains square.
Abbreviations
US crochet terms.
- ch = chain
- dc = double crochet
- sl st = slip stitch
- sp = space
- C = cream block
- R = red block
- RS = right side
Pattern
- Read the chart Each chart character represents one corner-to-corner block of ch 3 and 3 dc. The 11 chart lines below are printed from top to bottom; read characters within a line from left to right. Line 1 is the bottom of the upright heart. Work diagonals from the bottom-left corner towards the top-right corner. For diagonal k, work every chart square whose column number plus line number equals k + 1. On odd-numbered diagonals, work those squares from left to right; on even-numbered diagonals, work them from right to left. Use the C or R shown for each square.
- Heart chart Line 11: CCCCCCCCCCC; line 10: CCRRRCRRRCC; line 9: CRRRRCRRRRC; line 8: CRRRRRRRRRC; line 7: CRRRRRRRRRC; line 6: CCRRRRRRRCC; line 5: CCRRRRRRRCC; line 4: CCCRRRRRCCC; line 3: CCCCRRRCCCC; line 2: CCCCCRCCCCC; line 1: CCCCCCCCCCC. Each line has 11 blocks.
- First block and increase diagonals 2â11 With cream, ch 6. Dc in the fourth, fifth and sixth ch from the hook: one block. Turn. To start each increase diagonal, ch 6 and dc in the fourth, fifth and sixth ch from the hook to make a new block. Sl st into the ch-3 sp of the neighbouring block on the previous diagonal; ch 3 and work 3 dc into that same sp to make the next block. Repeat the sl st, ch 3, 3 dc sequence across the diagonal. Turn after its last block. Continue until diagonal 11 contains 11 blocks, following the chart colours.
- Decrease diagonals 12â21 To start each decrease diagonal, turn, sl st into each of the three dc of the block just completed, then sl st into its ch-3 sp. Ch 3 and work 3 dc into that sp for the first block of the new diagonal. For each remaining block, sl st into the next block’s ch-3 sp, ch 3 and work 3 dc into the same sp. Turn after the last block. Work one fewer block on each diagonal: 10 blocks on diagonal 12, down to one block on diagonal 21. Fasten off.
- Colour changes Before a block that changes colour, make the final yarn-over of the preceding block’s last dc with the new colour. Use that colour for the joining sl st, ch 3 and 3 dc of the new block. The first and last block of every diagonal are cream, so the turning chains and decrease slip stitches remain cream. Use separate short lengths or bobbins for separated colour areas, particularly the two red lobes; do not carry red yarn across a cream gap. Leave tails to weave in securely.
- Check the shape Lay the panel flat with the heart upright. Both sides should contain 11 blocks. If the panel pulls diagonally, ease it into a square during gentle blocking rather than stretching one side longer.
Finishing
- Weave in all colour-change ends on the wrong side, avoiding bulky knots. Gently block the panel square if needed and allow it to dry.
- With the RS facing and the heart upright, centre the straight top edge beneath the rod. Using cream yarn and a needle, take a small stitch through the top of each of its 11 blocks and wrap the yarn around the rod at each point. Keep the spacing and tension even so the rod supports the full width rather than only the corners. Secure and weave in the sewing ends.
- For a hanging cord, chain with cream until the relaxed chain measures approximately 45 cm. Fasten off with long tails and tie or sew one end to each exposed end of the rod. Adjust the cord so the panel hangs level; secure the ties.
Helpful Tips
- Mark the bottom of the chart before starting: the single red block near line 2 forms the heart’s point.
- A small bobbin for each separate area prevents long floats from showing through the cream background.
- Keep ch-3 spaces and dc clusters consistent. Unevenly tight turning chains can make an otherwise square panel lean.
Join-As-You-Go Heart Garland

This Christmas garland places alternating red and cream hearts along a green cord, making a cheerful decoration for a mantel or small tree. The hearts are worked into anchor rings as the cord grows, so there is no separate row of motifs to sew on afterwards.
Plan where the garland will hang before you begin. Measure the space between its tie points, then check that a finished heart leaves enough room for its neighbours. Measuring along the relaxed cord as you work keeps the spacing tied to the display space rather than to an estimated chain length.
The join-as-you-go construction calls for a little attention when switching between the cord and each heart, but it also lets you check the placement as you go. Hang the finished garland without pulling it taut so the hearts can keep their shape.
Join-As-You-Go Christmas Heart Garland
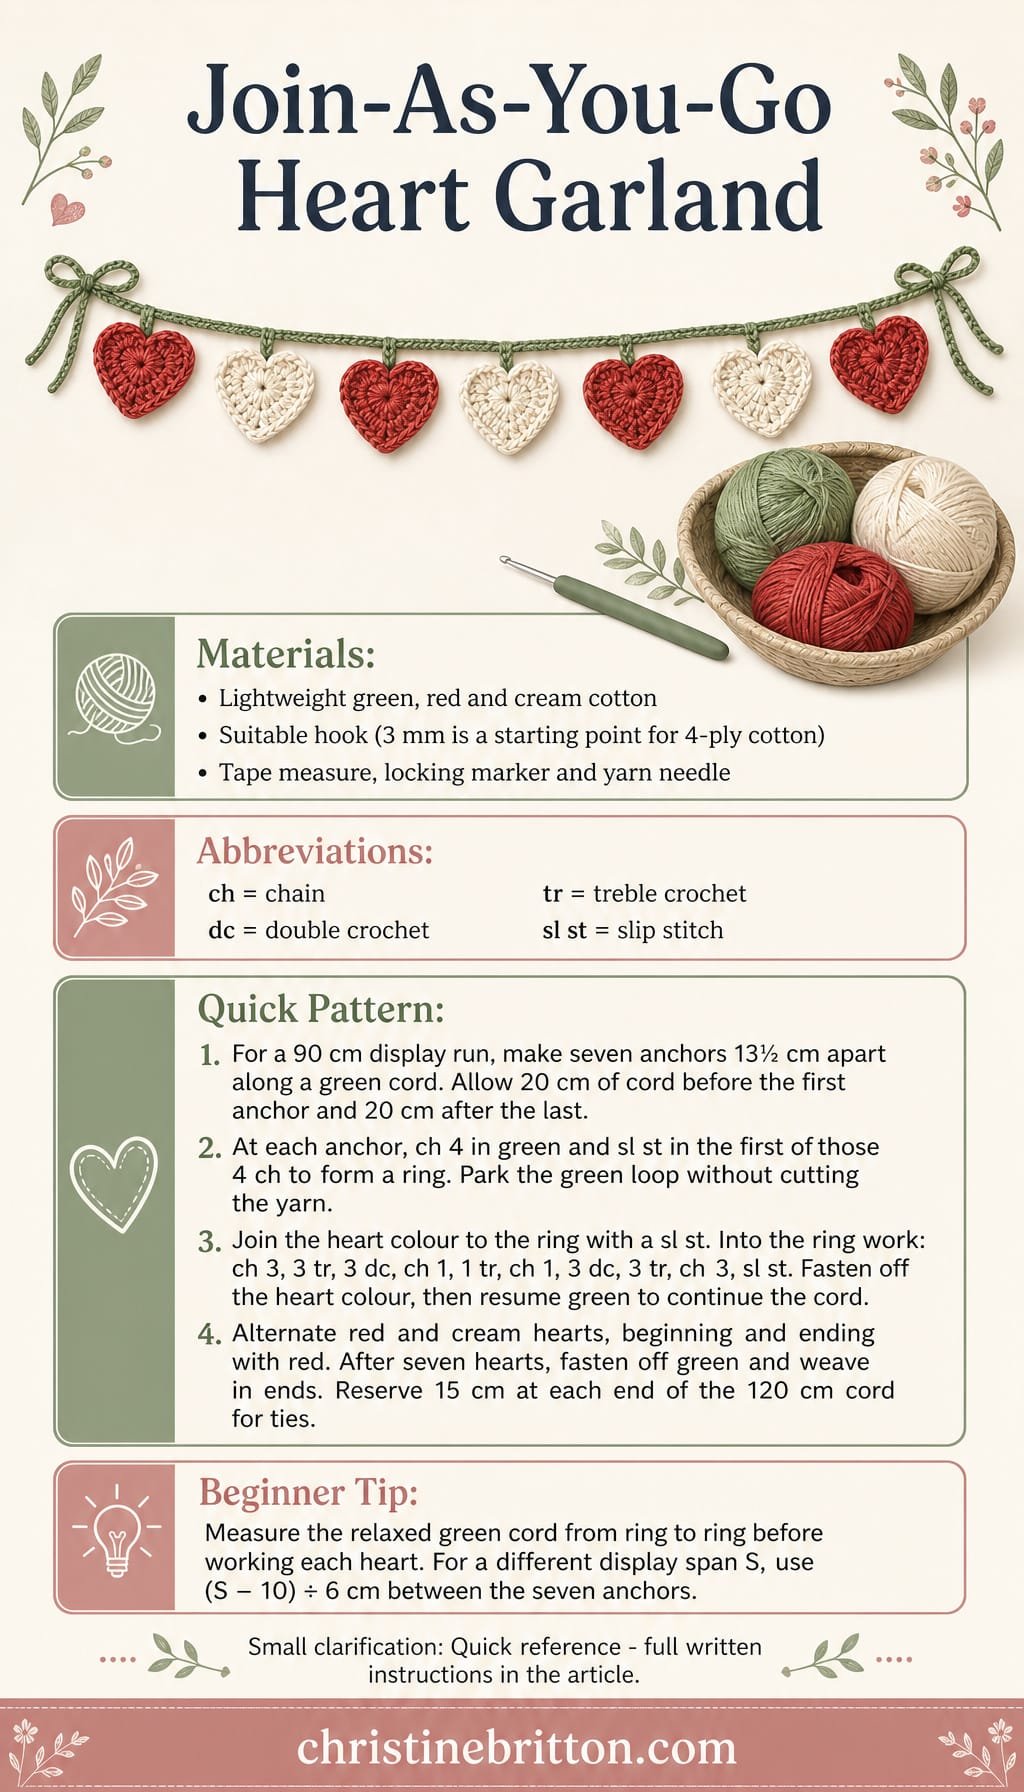
Quick-reference card. Follow the complete written instructions below.
Materials
- Yarn: Lightweight cotton in green, red and cream. Choose the same yarn weight for all three colours to help the garland hang evenly.
- Crochet hook: A size suited to your yarn; 3 mm is a starting point for 4-ply cotton.
- Other: Tape measure, locking stitch marker or safety pin, scissors and yarn needle.
Size and Fit
The sample has seven hearts on a cord measuring 120 cm along its relaxed length. Set aside 15 cm at each end for ties, leaving a 90 cm display run. The first and last hearts sit 5 cm inside the tie points. To change the display run while keeping seven hearts, choose a span S in centimetres. Make the cord S + 30 cm long, position the first and last anchor rings 20 cm from their respective cord ends, and space the seven anchors (S â 10) ÷ 6 cm apart, measured along the cord. Make one heart first to check its width; choose a span that leaves the desired gap between neighbouring hearts.
Gauge
An exact stitch gauge is not needed. Measure the green cord flat and relaxed as you work rather than relying on a set number of chains. Keep the hearts firm enough to hold their shape without pulling the anchor rings out of place.
Abbreviations
US crochet terms.
- ch = chain
- dc = double crochet
- tr = treble crochet
- sl st = slip stitch
Pattern
- Plan the spacing For the 90 cm sample display run, the distance between successive anchor rings is 13â cm. Measure along the green cord between the points where it meets each ring. Check the garland against its intended display space before committing to the final end tie.
- Start the cord and first anchor With green, ch until the cord measures 20 cm from its starting end. Ch 4 and sl st in the first of those 4 ch to make an anchor ring. Check the distance from the cordâs starting end to the point where it meets the ring; undo and adjust the preceding chains if needed. Leave the green working loop on a locking marker. Do not cut the green yarn.
- Work a heart into the ring Join red yarn to the green anchor ring with a sl st. Working into the centre of the ring, ch 3, 3 tr, 3 dc, ch 1, 1 tr, ch 1, 3 dc, 3 tr, ch 3, then sl st into the ring. The two groups of 3 tr form the upper lobes; the single tr forms the lower point. Fasten off the red yarn. Repeat this same heart sequence at later anchors, alternating cream and red.
- Continue and add hearts Put the green working loop back on the hook and continue chaining. When the distance along the cord from the first anchor to the planned position of the second is 13â cm, make the next ch-4 anchor ring as before. Check the ring-to-ring distance before working the heart. Park the green loop, join cream yarn and work a heart into the ring. Continue in this way until there are seven hearts, alternating red and cream; the seventh is red. Each of the six ring-to-ring distances measures 13â cm for the sample.
- Complete the cord After the seventh heart, resume green and chain until the cord measures 20 cm from the seventh anchor to its finishing end. Fasten off. Measured along the relaxed cord, the intended total is 120 cm: 20 cm to the first anchor, 80 cm across six intervals, and 20 cm after the last anchor.
Finishing
- Weave in the heart ends without drawing the green rings tight. Weave in the green ends securely.
- Set aside 15 cm at each cord end for tying. Place the intended tie points against the display space: the span between them should be 90 cm for the sample, with a heart 5 cm inside each tie point.
- Tie the garland in place without stretching the cord. Gently shape each heart by hand; if desired, lightly dampen and lay it flat to dry.
Helpful Tips
- Keep the green working loop on a locking marker while making each heart so that it cannot unravel.
- Measure to each new ring before adding its heart. If the spacing is wrong, it is easier to undo green chains and remake the ring at this stage.
- For a different span S, divide S â 10 cm by six to find the ring-to-ring spacing. Check a finished heartâs width before settling on a close spacing.
Tubular Heart Mini Wreath
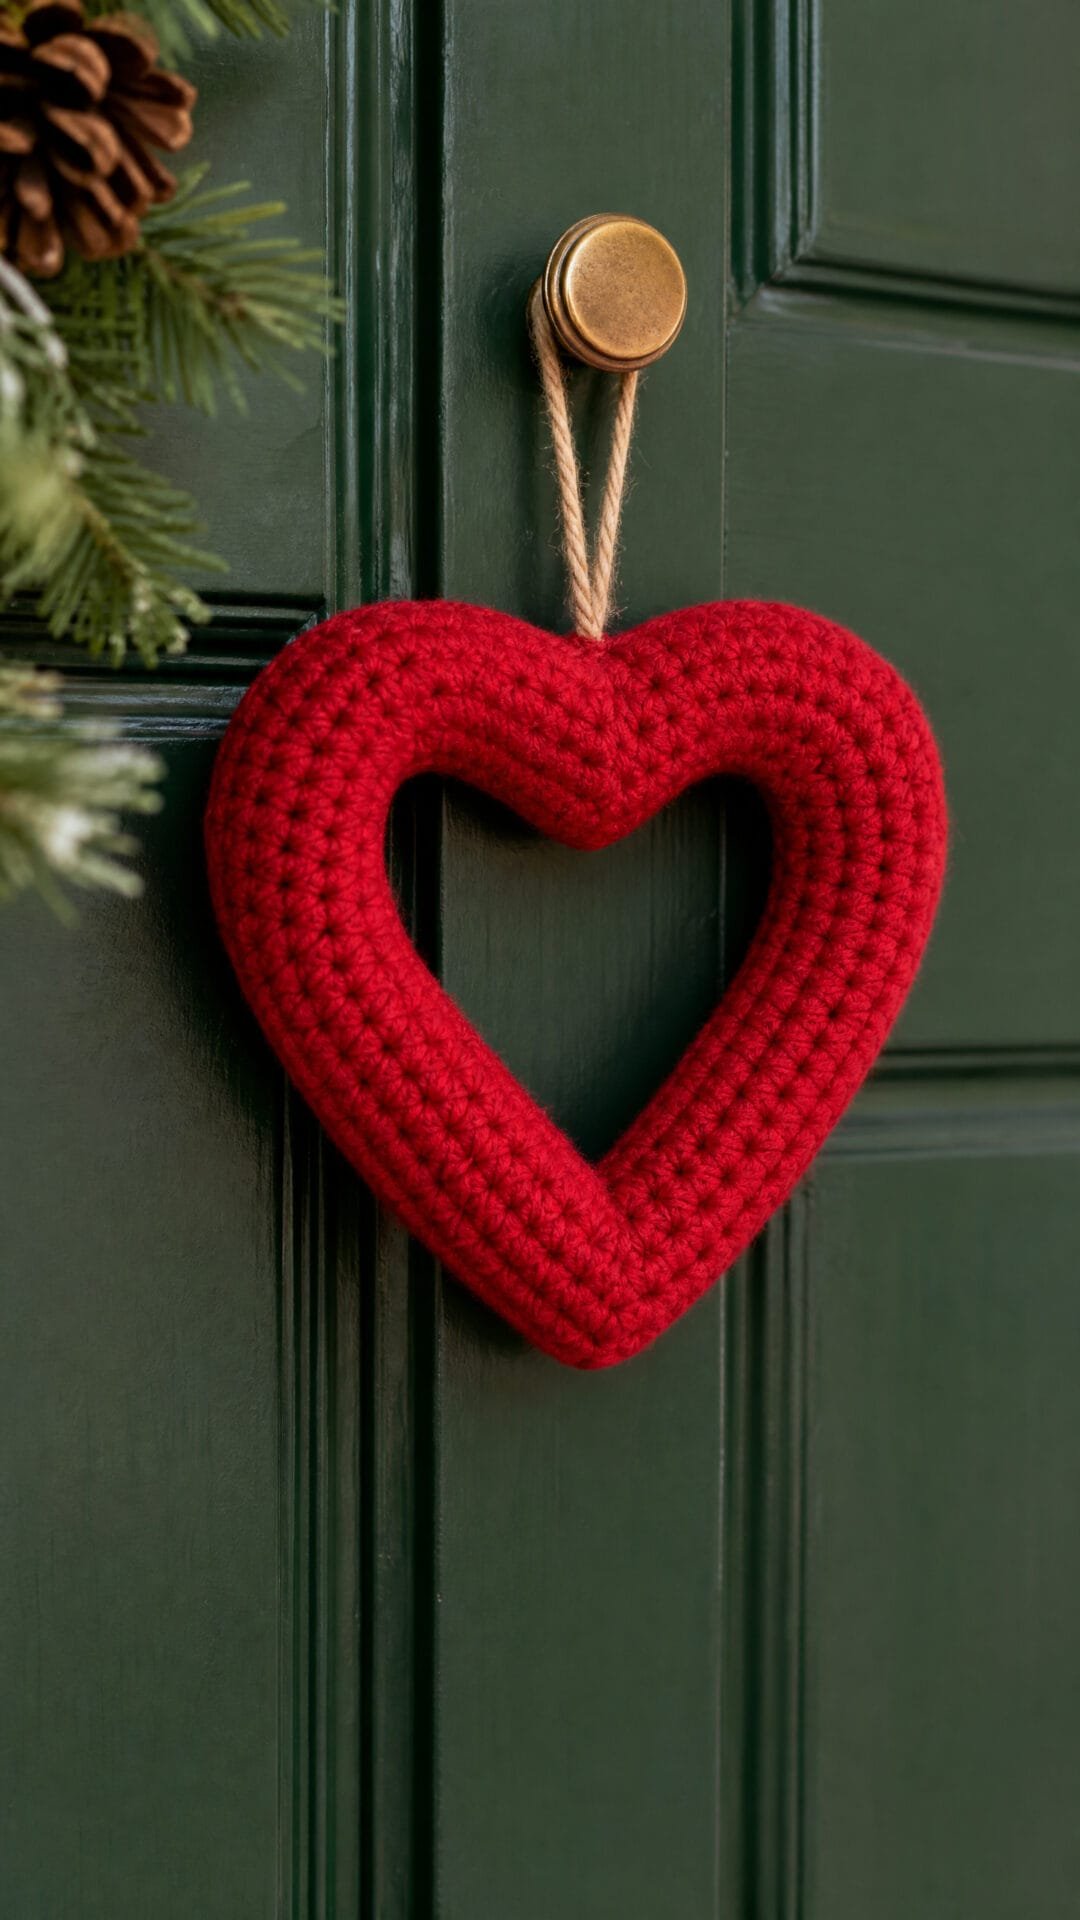
This Christmas heart has a softly rounded outline and an open centre, giving it the look of a tiny wreath rather than a flat motif. It makes a cheerful ornament for a tree or a small decoration for a door hook.
The shape is the interesting part of this intermediate project. Light padding allows the tube to curve into even lobes; overfilling can make it resist the bend and blur the heartâs silhouette.
Discreet anchoring helps the upper notch and pointed base hold their shape when the heart hangs. A separate hanging loop keeps the weight off the notch, so the open centre remains visible.
Tubular Heart Mini Wreath

Quick-reference card. Follow the complete written instructions below.
Materials
- Red 4-ply cotton yarn: Approximately 15â20 g, plus enough for the hanging loop
- 2.5 mm crochet hook: Or a size that makes a firm fabric with no visible stuffing
- Toy stuffing: A small amount; avoid overfilling the bends
- Yarn needle, stitch marker and scissors: Use the marker to track rounds worked in a continuous spiral
Size and Fit
One sample size. The tube is approximately 28 cm long at the stated round gauge. Once shaped, the heart is approximately 8â9 cm across, though its finished dimensions depend on how tightly you arrange the curves.
Gauge
Aim for approximately 24 sc and 30 rounds per 10 cm in firmly worked single crochet. Gauge is a guide; a dense fabric that conceals the stuffing matters most.
Abbreviations
US crochet terms.
- ch = chain
- sc = single crochet
- sc2tog = single crochet two stitches together
- sl st = slip stitch
- rnd = round
- st(s) = stitch(es)
Pattern
- Start the tube Leave a 30 cm starting tail for assembly. Make a magic ring. Rnd 1: Work 8 sc into the ring; pull it closed. Do not join. Place a marker in the first stitch and move it up at the start of each rnd. (8 sts)
- Work and stuff Rnds 2â84: Sc in each st around. (8 sts each rnd) Add small amounts of stuffing as the tube grows, pushing it towards the closed starting end. Stuff lightly so the tube stays rounded but bends readily. Count the rounds carefully: rnd 42 will become the upper notch.
- Close the second end Check the stuffing before closing. Rnd 85: Sc2tog 4 times. (4 sts) Fasten off, leaving a 30 cm tail. Thread it through the front loops of the remaining 4 sts and draw the opening closed.
- Form the heart Lay the tube in a heart outline with its two closed ends meeting at the lower point and rnd 42 at the upper centre. Curve the lobes around approximately rnds 27 and 57. Bend rnd 42 down towards the open centre to make a distinct notch. Adjust both sides until the opening is visible and the lobes look even.
- Secure the pointed base With the closing tail, sew the two closed ends together end-to-end. Take several small stitches through the end caps and the adjacent round of each side. Pinch the joined area into a V rather than a rounded bend, then secure the tail inside the tube. Use the starting tail for a few more hidden stitches at the join if needed.
- Secure the notch Thread a separate length of red yarn onto the needle. At the back of the heart, take two or three small stitches between the facing parts of the tube at approximately rnds 40 and 44. Draw them together gently just above the downward bend at rnd 42. Keep the stitches hidden and do not pull so tightly that the tube flattens. Secure and bury the yarn ends.
- Add a separate hanging loop Leave a 20 cm tail, ch 30, then fasten off leaving another 20 cm tail. Using one tail at each end, sew the chain ends to the back of the heart at approximately rnds 36 and 48. Let the chain arch freely above the notch. Secure and bury both tails.
Finishing
- Ease the stuffed tube into smooth, matching lobes without closing the centre opening.
- Check that the lower join remains pointed and the notch remains visible when the heart hangs.
- Trim yarn ends only after they have been securely woven into the tube.
Helpful Tips
- A smaller hook can help make the fabric dense enough to hide the stuffing.
- Use little pieces of stuffing rather than one large clump; a tightly filled tube is difficult to bend.
- Before sewing, use temporary yarn ties at the point and notch to check the shape.
Frequently Asked Questions
Which crochet Christmas heart should I start with?
The single-round ornament has the simplest construction. The point-up gift tag and granny-square decoration offer a next step if you are comfortable shaping a flat piece.
What yarn works well for a crochet heart gift tag?
Cotton is a useful choice for the flat tag because it gives the point and lobes definition. Leave an upper stitch gap free if you plan to tie it to a present.
How do I stop a crochet heart coaster curling?
Check that it lies flat as you work. If the edge pulls in or ripples, review your stitch counts and tension before finishing; gentle blocking may help even out a finished cotton coaster.
Can I use every heart in this collection as a tree ornament?
No. The collection also includes a coaster, napkin ring, gift pocket, basket and wall hanging. Choose one of the hanging designs for a branch, and size its loop to fit.
Final Thoughts
These 14 free crochet Christmas heart patterns offer different ways to use the same festive shape, from a small tree ornament to a reusable gift tag or table accent.
Pick the construction that suits your plans, then take a moment over the finishing: a balanced shape, tidy ends and a well-placed loop make a difference.