9 Free Crochet Christmas Hat Patterns to Make This Season
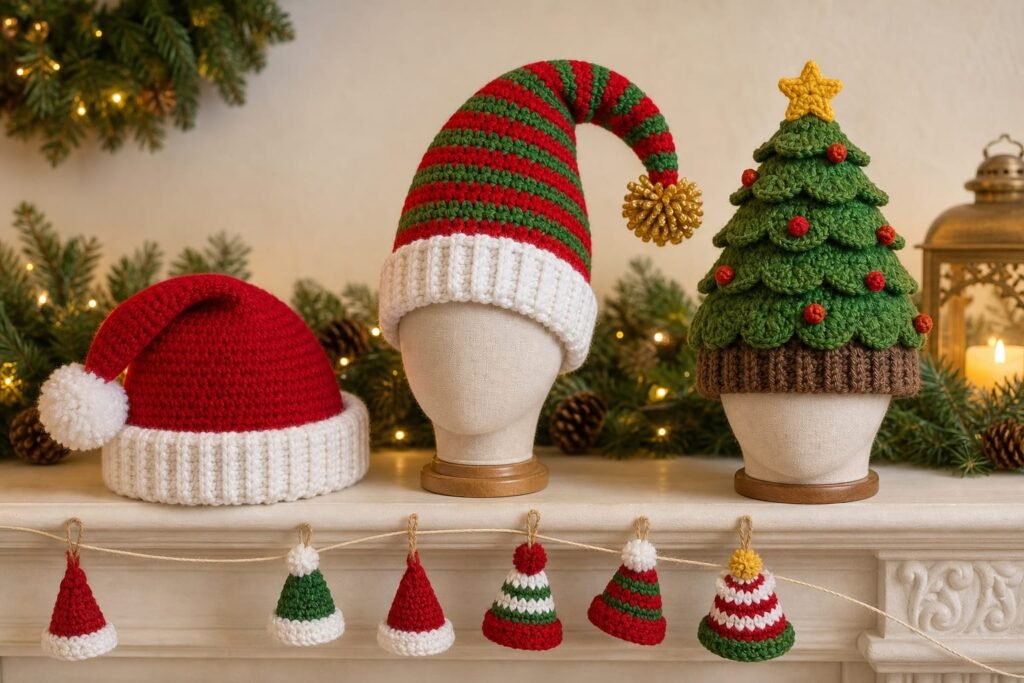
These crochet Christmas hats free patterns include festive choices for wearing, decorating and adding to handmade gifts. Choose from familiar Santa and elf styles, a textured tree hat, character designs and small seasonal accessories.
The collection covers beginner, confident beginner and intermediate projects, so it helps to check the construction before choosing. Some patterns focus on a fitted or slouchy hat, while the mini Santa hat and snowman top hat are decorative makes.
For more ideas that build on this collection, explore crochet hat patterns for every season.
Before You Start
Read the full pattern notes before selecting yarn. Wearable hats need a yarn with enough softness and recovery for the brim, while ornaments and structured features may benefit from a firmer fabric that holds its shape.
Check the stated size, gauge and any head-measurement guidance for each wearable design. A small change in tension can noticeably alter the circumference of a fitted beanie, especially where ribbing is used for stretch.
Gather contrast colours before beginning designs with stripes, holly, baubles or facial details. Leaving long enough yarn tails when changing colours makes it easier to sew on small pieces securely and weave in ends neatly.
For hats with ears, antlers, branch tiers or a pointed gnome top, make the separate parts first and lay them in position before sewing. This helps keep paired details balanced and prevents the design from leaning to one side.
Crochet terminology: This article uses US crochet terms. Check the abbreviations for each project.
Classic Santa Beanie
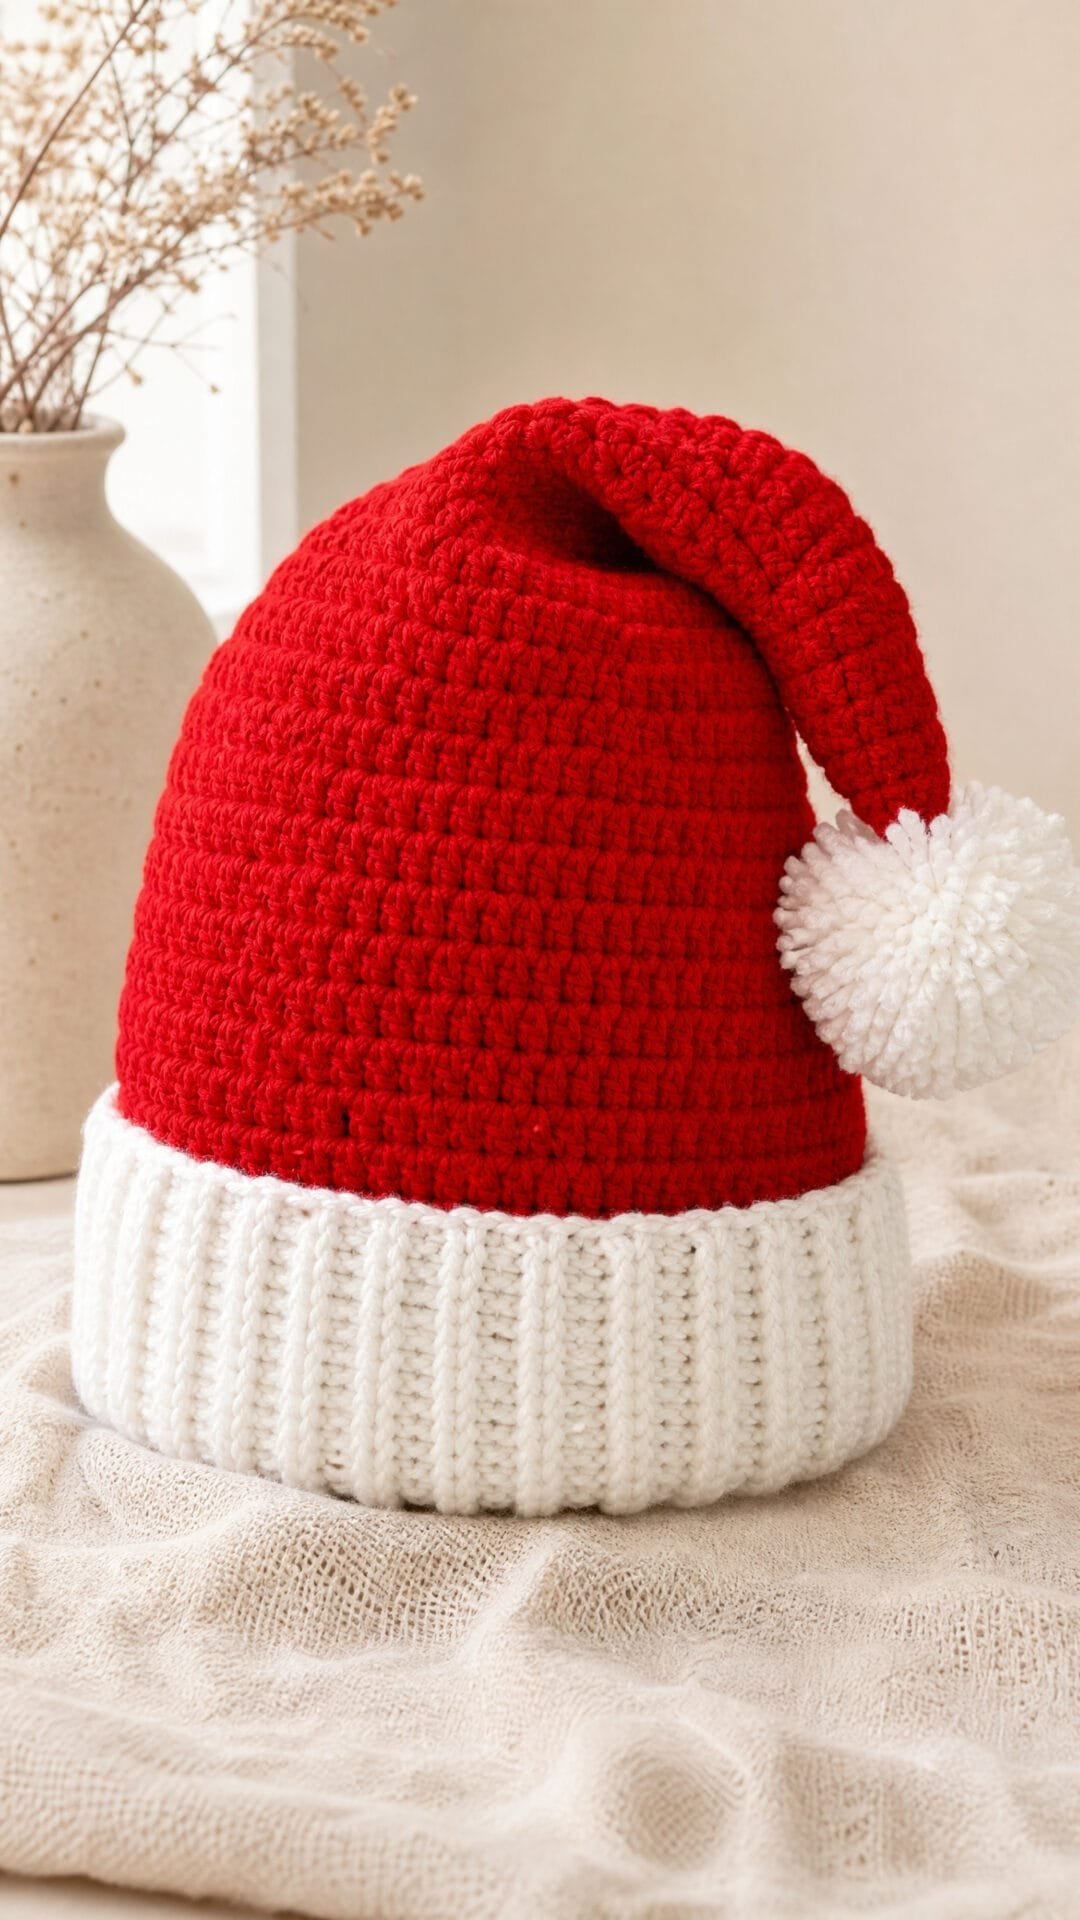
This classic Santa beanie crochet pattern brings together the unmistakable festive combination of a bright red hat, deep white ribbed cuff and rounded pom-pom. Its clean, traditional styling makes it a cheerful choice for Christmas parties, seasonal photos and handmade gifts.
The cuff is designed to sit snugly while retaining comfortable stretch, while the red upper section narrows gradually into a long, softly shaped point. Once worn, the narrow tip can be encouraged to fall to one side for the familiar Santa-hat silhouette rather than standing rigidly upright.
Although the shaping is straightforward, an even tension through the cuff and body will give the hat its best fit and finish. The fit can be tailored through the ribbed band, so you can use a head measurement to create a comfortable personalised Christmas hat before beginning the main shaping.
Classic Santa Beanie Crochet Pattern
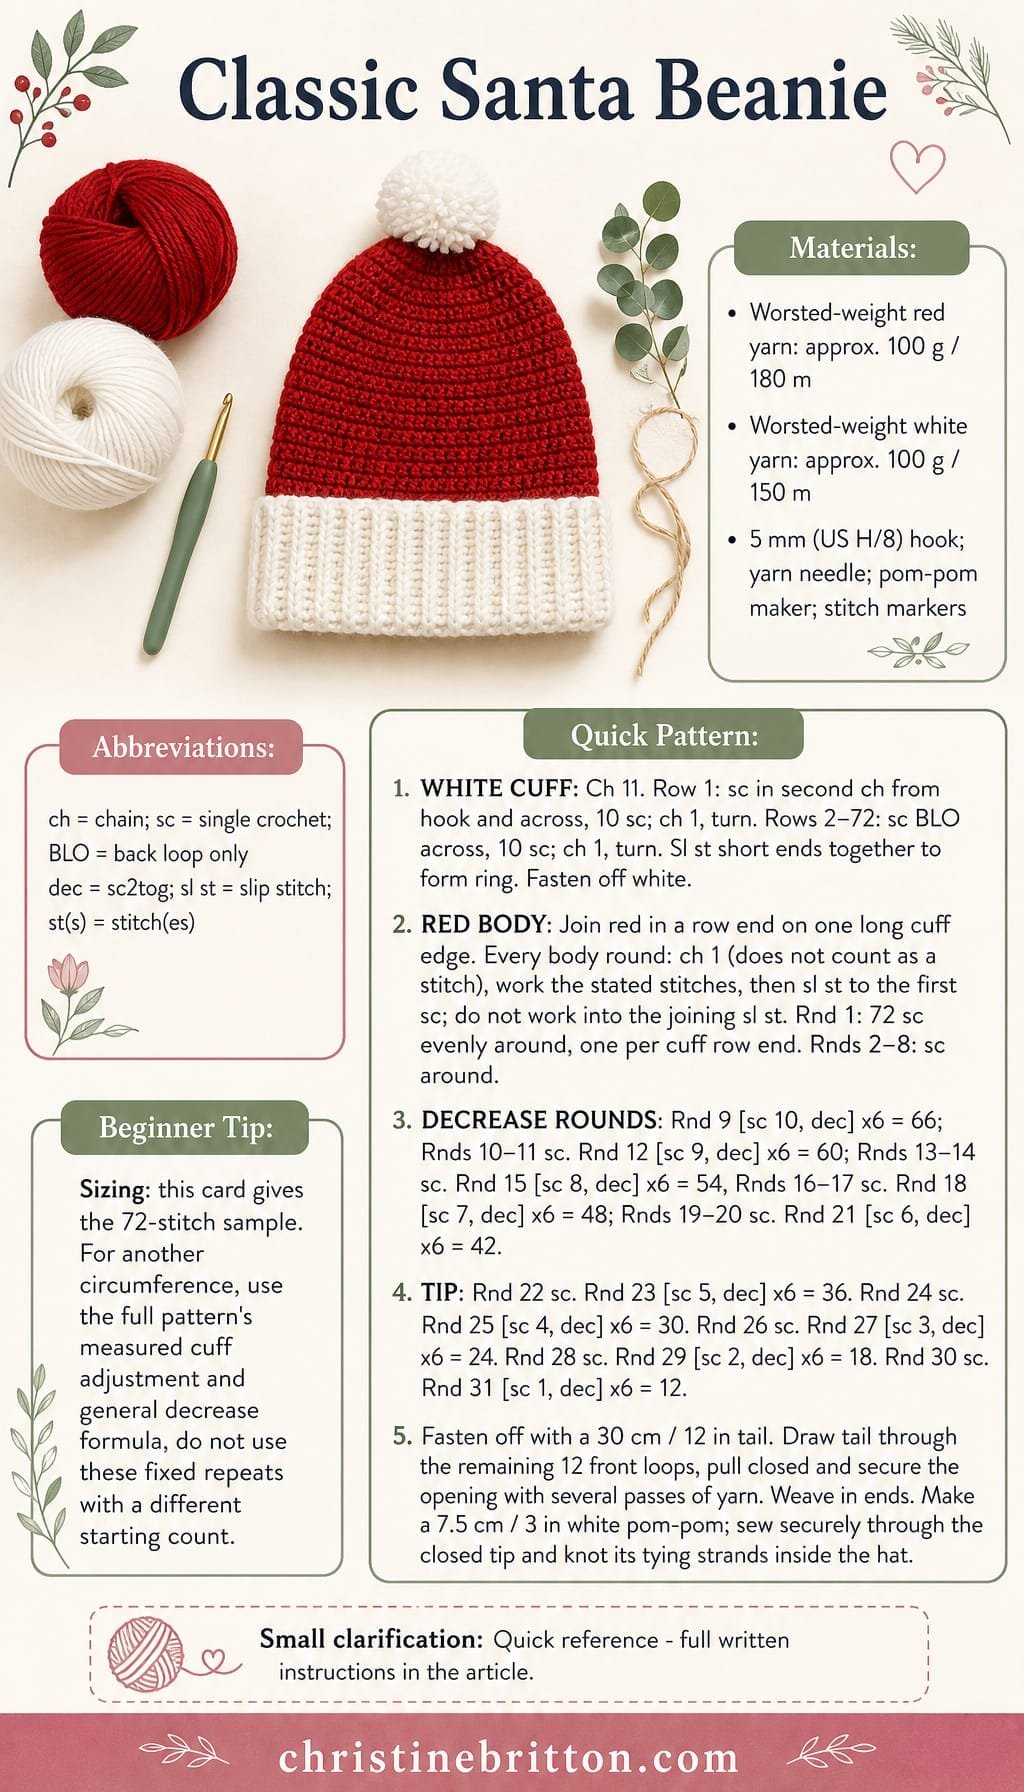
Quick-reference card. Follow the complete written instructions below.
Materials
- Worsted-weight yarn: Smooth acrylic or washable wool-blend: approximately 100 g / 180 m red and 100 g / 150 m white. Amounts include a generously sized pom-pom.
- Crochet hook: 5 mm (US H/8), or size needed to obtain gauge.
- Notions: Yarn needle, stitch markers, scissors and a pom-pom maker or two circles of card.
Size and Fit
Adult sample: intended for an approximately 56 cm / 22 in head. At the target gauges, the 72-row cuff and 72-stitch lower body each have a calculated relaxed circumference of approximately 51.5 cm / 20 ¼ in; the 10-stitch cuff is approximately 6.3 cm / 2 ½ in deep. These are calculated targets, not measured test results. To adjust circumference, alter the number of ribbing rows, not the starting chain: the starting chain sets cuff depth. Measure the head and choose a starting target circumference approximately 4–5 cm / 1 ½–2 in smaller. Multiply this target in centimetres by your relaxed ribbing rows per centimetre (1.4 at the stated gauge), then round to the nearest multiple of six, with a minimum of 18 rows. Call this chosen row count N. Work N cuff rows, then check the actual strip comfortably around the head before joining; add or remove rows in multiples of six if needed. Negative ease is a starting target, not a guaranteed result after rounding. Pick up N body stitches, one per cuff row end. All numbered rounds and stitch checks describe the 72-stitch sample. For another count, work eight plain body rounds, then use the general decrease formula and spacing given in Taper, first section rather than the sample’s fixed repeats. Different starting counts change the number of shaping rounds and therefore the taper length.
Gauge
Target ribbing gauge: 16 sc and 14 rows = 10 cm / 4 in in sc through back loop only, measured flat and relaxed without stretching. Target body gauge: 14 sc and 16 rounds = 10 cm / 4 in in joined rounds. Swatch both fabrics; use a different hook size for the body if necessary to obtain its gauge. Both circumferential gauges govern fit. The stated finished dimensions are calculated targets at these gauges, not measured test results.
Abbreviations
US crochet terms.
- BLO = back loop only
- ch = chain
- dec = decrease; work 2 single crochet together (sc2tog)
- rnd(s) = round(s)
- sc = single crochet
- sl st = slip stitch
- st(s) = stitch(es)
Pattern
- White ribbed cuff With white, ch 11. Row 1: Sc in second ch from hook and in each ch across; 10 sc. Ch 1, turn. Rows 2–72: Sc in BLO in each st across; 10 sc. Ch 1, turn. For an adjusted size, work N rows in total instead of 72, using the measured cuff adjustment in Size and fit. Check the strip comfortably around the head before joining. After the final row, do not fasten off. Fold the strip so the first and last rows meet, with the same side of the ribbing facing out. Sl st through corresponding stitches of the two short ends to join the cuff into a ring. Fasten off white and weave in this end.
- Red hat body, set-up All numbered rounds below describe the 72-stitch sample. With red, join yarn in any row-end stitch along one long edge of the white cuff. Rnd 1: Ch 1, work 72 sc evenly around, working 1 sc in each row end; join with a sl st to first sc. For an adjusted size, pick up N sc, one per cuff row end. The ch 1 does not count as a stitch. On every body round, ch 1, work the stated stitches and join with a sl st to the first sc; do not work into the joining sl st. Rnds 2–8: Ch 1, sc in each st around; join. Fasten off the white yarn if it has not already been woven in.
- Taper, first section 72-stitch sample: Rnd 9: Ch 1, [sc in next 10 sts, dec] 6 times; join. 66 sts. Rnds 10–11: Ch 1, sc in each st around; join. Rnd 12: Ch 1, [sc in next 9 sts, dec] 6 times; join. 60 sts. Rnds 13–14: Ch 1, sc in each st around; join. Rnd 15: Ch 1, [sc in next 8 sts, dec] 6 times; join. 54 sts. Rnds 16–17: Ch 1, sc in each st around; join. Rnd 18: Ch 1, [sc in next 7 sts, dec] 6 times; join. 48 sts. Rnds 19–20: Ch 1, sc in each st around; join. Rnd 21: Ch 1, [sc in next 6 sts, dec] 6 times; join. 42 sts. For other starting counts, replace this numbered taper and the numbered tip section with the following general shaping: after eight plain body rounds, work a decrease round using [sc in next (C/6 − 2) sts, dec] six times, where C is the current stitch count at the start of that round. Ch 1 and join as established. Work two plain rounds between the first five decrease rounds. After the fifth decrease round, work one plain round between subsequent decrease rounds. Recalculate the repeat using the new C on every decrease round. Stop immediately when 12 stitches remain, even if fewer than five decrease rounds have been worked; fasten off with a 30 cm / 12 in tail and follow Close the tip.
- Taper, tip section 72-stitch sample only; for other counts, continue the general shaping above. Rnd 22: Ch 1, sc in each st around; join. Rnd 23: Ch 1, [sc in next 5 sts, dec] 6 times; join. 36 sts. Rnd 24: Ch 1, sc in each st around; join. Rnd 25: Ch 1, [sc in next 4 sts, dec] 6 times; join. 30 sts. Rnd 26: Ch 1, sc in each st around; join. Rnd 27: Ch 1, [sc in next 3 sts, dec] 6 times; join. 24 sts. Rnd 28: Ch 1, sc in each st around; join. Rnd 29: Ch 1, [sc in next 2 sts, dec] 6 times; join. 18 sts. Rnd 30: Ch 1, sc in each st around; join. Rnd 31: Ch 1, [sc in next st, dec] 6 times; join. 12 sts. Fasten off, leaving a 30 cm / 12 in tail.
- Close the tip Thread the tail onto a yarn needle. Pass it through the front loops of all 12 remaining stitches, pull firmly to close the opening, then take the yarn through the tip several times to secure. Weave the tail down inside the hat.
- Make and attach pom-pom Using white, make a dense pom-pom approximately 7.5 cm / 3 in across. Leave its tying strands long. Sew the pom-pom securely through the closed tip and knot the strands on the inside of the hat. Trim the pom-pom into a neat round shape. Gently bend the narrow top section to one side when wearing to give the hat its classic soft Santa-hat lean.
Finishing
- Weave in all yarn ends securely, especially at the cuff join and the hat tip.
- Check that the pom-pom is firmly sewn on before wear; reinforce the attachment with several passes of yarn if needed.
- Lightly steam or mist the ribbed cuff only if needed. Avoid flattening the ribbing or compressing the pom-pom.
Helpful Tips
- Work the cuff firmly enough to recover after stretching, but not so tightly that it feels restrictive around the head.
- Use a removable marker in the first stitch of each round if the joined-round seam is difficult to identify.
- For an especially tidy decrease line, work each sc2tog through the front loops only. Use this method consistently throughout all decrease rounds.
- If using a yarn with less stretch than acrylic or wool, make the cuff closer to the full head measurement rather than subtracting the full 4–5 cm / 1 ½–2 in.
Striped Elf Hat
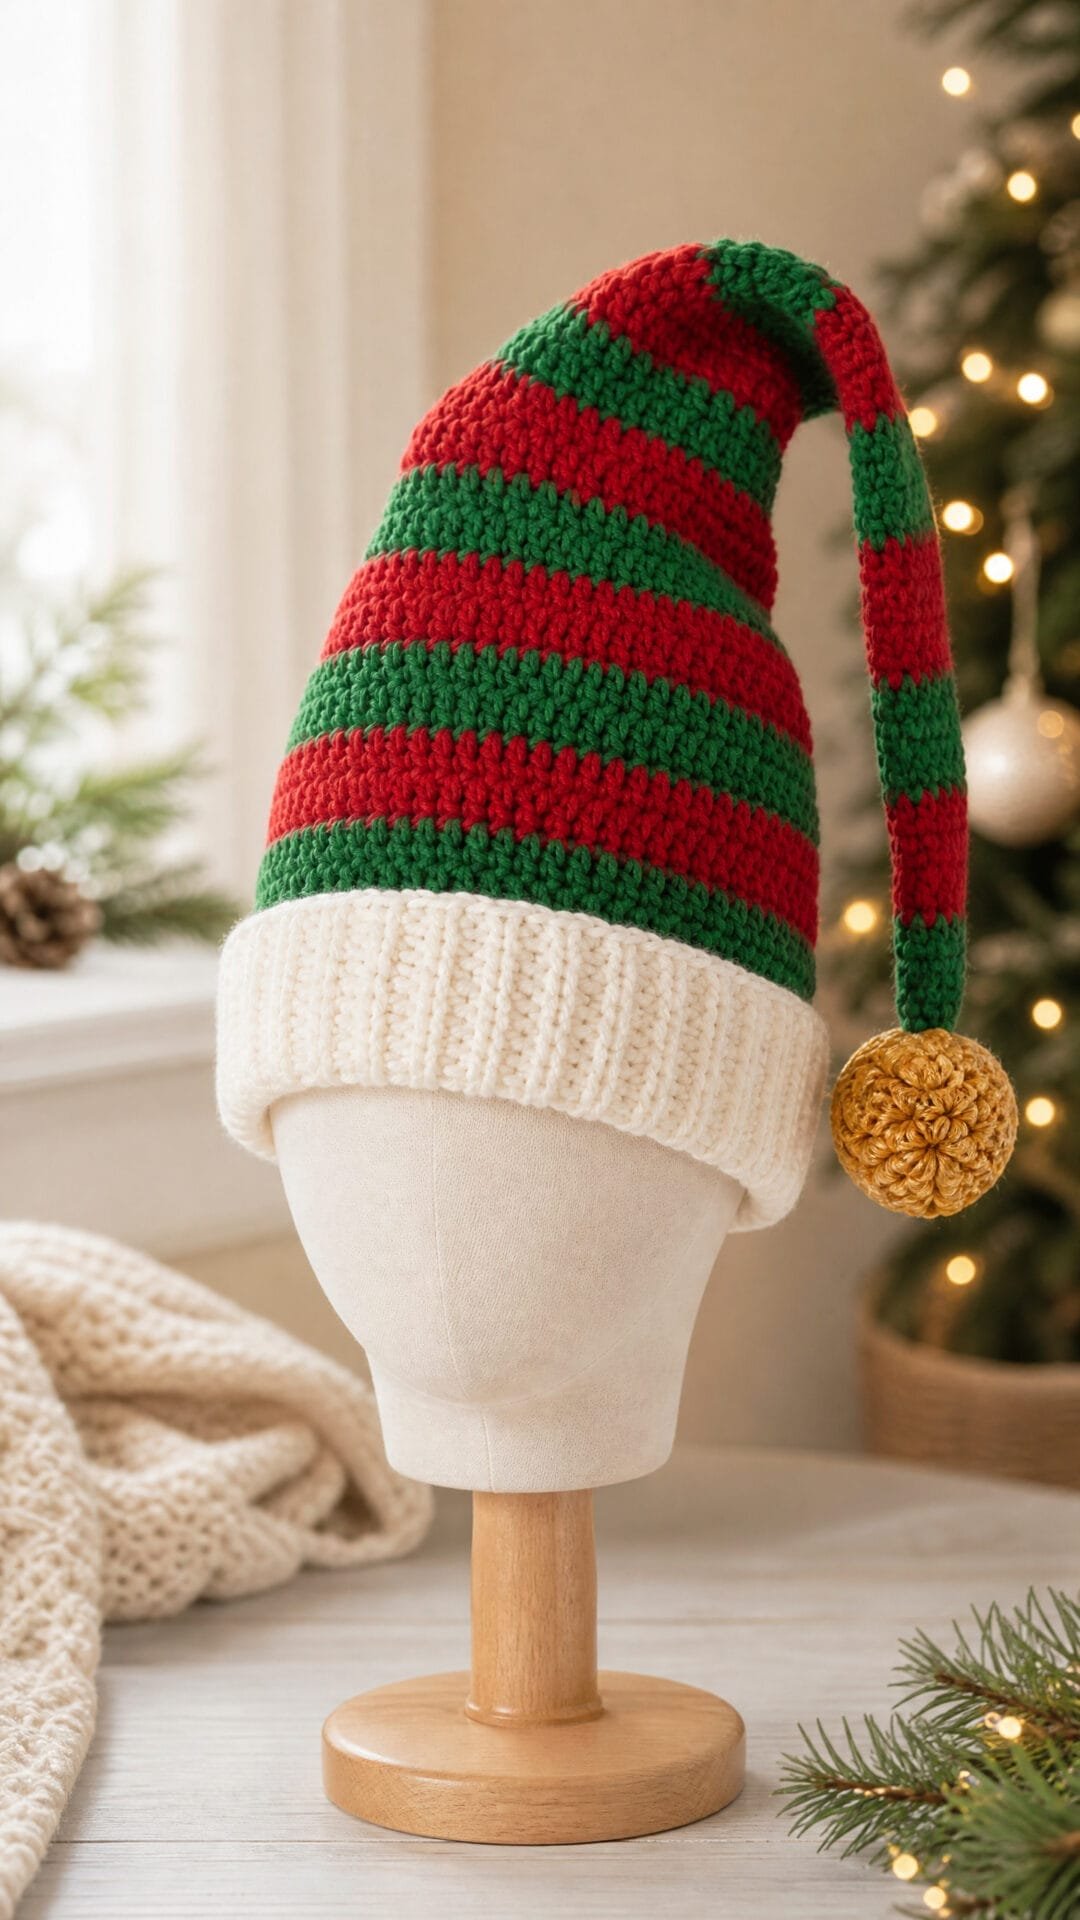
Bring a little storybook character to festive dressing with this striped elf hat. Bold red and green bands, a folded white cuff and a gold-coloured pom-pom give it a classic Christmas look, while the long, gently tapering crown keeps the silhouette playful rather than like a standard beanie.
This is a confident-beginner project for crocheters ready to move beyond a plain hat. The construction introduces tidy colour changes at the round seam and evenly placed shaping, so the stripes remain clear as the crown narrows towards the tip.
Choose shades with good contrast for the strongest striped effect, and bear in mind that the finished point is intended to sit softly and develop a light natural curve when worn. It makes a cheerful handmade accessory for seasonal parties, Christmas photographs or a festive costume.
Striped Elf Hat
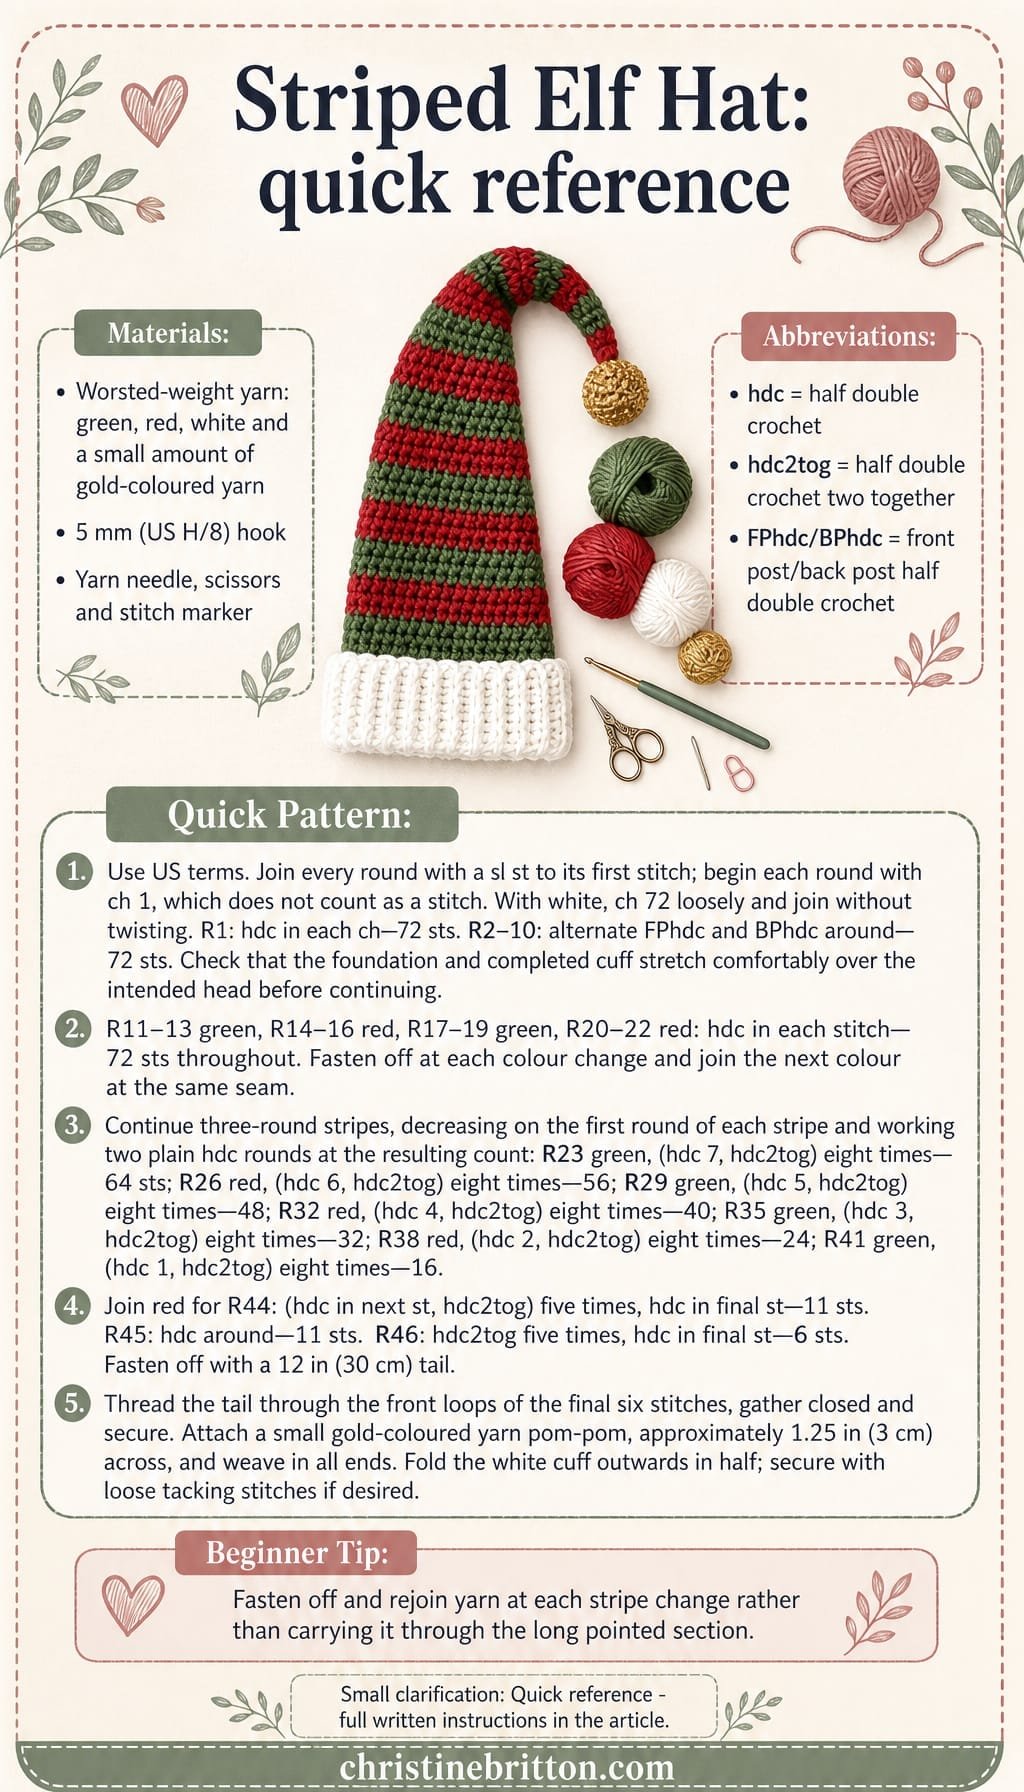
Quick-reference card. Follow the complete written instructions below.
Materials
- Worsted-weight yarn: Approximately 100 yd (92 m) green, 90 yd (82 m) red, 45 yd (42 m) white and 5 yd (5 m) gold-coloured yarn for the pom-pom.
- Crochet hook: 5 mm (US H/8).
- Notions: Stitch marker, yarn needle, scissors and a pom-pom maker or a small piece of card.
Size and Fit
One 72-stitch adult sample, intended for an approximate head circumference of 20–22 in (51–56 cm). Check that the foundation and completed cuff stretch comfortably over the intended head before continuing; the head range is a guide, not a guaranteed fit. The striped body circumference is approximately 20.5 in (52 cm) at stitch gauge. Measure the completed white cuff depth before folding; its folded depth is half that measurement. The striped section is approximately 14.4 in (36 cm) long at round gauge, so the finished length from folded brim edge to tip is that length plus half the measured cuff depth, excluding the pom-pom. For example, a 4 in (10 cm) cuff gives a folded length of approximately 16.4 in (41 cm).
Gauge
14 hdc and 10 rounds = 4 in (10 cm) in plain joined hdc rounds, using the 5 mm hook. This gauge does not apply to the post-stitch ribbing. Check gauge before starting; the striped body circumference depends on achieving the stated stitch gauge. Measure the completed ten-round cuff separately to determine its depth and check its stretch.
Abbreviations
US crochet terms.
- ch = chain
- st(s) = stitch(es)
- sl st = slip stitch
- hdc = half double crochet
- hdc2tog = half double crochet two stitches together; decrease
- FPhdc = front post half double crochet
- BPhdc = back post half double crochet
- rep = repeat
Pattern
- Notes The hat is worked bottom-up in joined rounds. Join every round with a sl st to the first stitch; the joining sl st and turning chain do not count as stitches. For the cuff, use white. For the body and point, work 3-round green and red bands. Fasten off the previous colour at a colour-change join, then join the next colour at that same seam before beginning the next round. This avoids long floats inside the hat.
- Foundation and cuff round 1 With white, ch 72 loosely. Take care not to twist the chain, then sl st to the first ch to form a ring. Ch 1, hdc in each ch around, sl st to first hdc. [72 sts]
- Cuff rounds 2–10 Ch 1, FPhdc around the first hdc or FPhdc from the preceding round, BPhdc around the next st, *FPhdc around the next st, BPhdc around the next st; rep from * around, sl st to first FPhdc. [72 sts] Repeat this round 8 more times. The post stitches form the ribbed white cuff. Measure the completed cuff depth before folding; its folded depth will be half this measurement. Before continuing, check that both the foundation and completed cuff stretch comfortably over the intended head.
- Body rounds 11–13 Join green. Ch 1, hdc in each st around, sl st to first hdc. [72 sts] Repeat for rounds 12 and 13.
- Body rounds 14–16 Join red. Ch 1, hdc in each st around, sl st to first hdc. [72 sts] Repeat for rounds 15 and 16.
- Body rounds 17–19 Join green. Ch 1, hdc in each st around, sl st to first hdc. [72 sts] Repeat for rounds 18 and 19.
- Body rounds 20–22 Join red. Ch 1, hdc in each st around, sl st to first hdc. [72 sts] Repeat for rounds 21 and 22.
- Shape point: rounds 23–25 Join green. Round 23: ch 1, *hdc in next 7 sts, hdc2tog; rep from * around, sl st to first hdc. [64 sts] Rounds 24–25: ch 1, hdc in each st around, sl st to first hdc. [64 sts each round]
- Shape point: rounds 26–28 Join red. Round 26: ch 1, *hdc in next 6 sts, hdc2tog; rep from * around, sl st to first hdc. [56 sts] Rounds 27–28: ch 1, hdc in each st around, sl st to first hdc. [56 sts each round]
- Shape point: rounds 29–31 Join green. Round 29: ch 1, *hdc in next 5 sts, hdc2tog; rep from * around, sl st to first hdc. [48 sts] Rounds 30–31: ch 1, hdc in each st around, sl st to first hdc. [48 sts each round]
- Shape point: rounds 32–34 Join red. Round 32: ch 1, *hdc in next 4 sts, hdc2tog; rep from * around, sl st to first hdc. [40 sts] Rounds 33–34: ch 1, hdc in each st around, sl st to first hdc. [40 sts each round]
- Shape point: rounds 35–37 Join green. Round 35: ch 1, *hdc in next 3 sts, hdc2tog; rep from * around, sl st to first hdc. [32 sts] Rounds 36–37: ch 1, hdc in each st around, sl st to first hdc. [32 sts each round]
- Shape point: rounds 38–40 Join red. Round 38: ch 1, *hdc in next 2 sts, hdc2tog; rep from * around, sl st to first hdc. [24 sts] Rounds 39–40: ch 1, hdc in each st around, sl st to first hdc. [24 sts each round]
- Shape point: rounds 41–43 Join green. Round 41: ch 1, *hdc in next st, hdc2tog; rep from * around, sl st to first hdc. [16 sts] Rounds 42–43: ch 1, hdc in each st around, sl st to first hdc. [16 sts each round]
- Finish point: rounds 44–46 Round 44: Join red. Ch 1, (hdc in next st, hdc2tog) five times, hdc in final st, sl st to first hdc. [11 sts] Round 45: ch 1, hdc in each st around, sl st to first hdc. [11 sts] Round 46: ch 1, hdc2tog 5 times, hdc in final st, sl st to first hdc. [6 sts] Fasten off, leaving a 12 in (30 cm) tail.
Finishing
- Thread the final tail onto a yarn needle. Pass it through the front loops of the remaining 6 stitches, pull firmly to close the point, then secure and weave in the tail.
- Make a small, firm gold-coloured yarn pom-pom, approximately 1.25 in (3 cm) across. Tie or stitch it securely to the closed point.
- Weave in all colour-change ends on the inside of the hat.
- Fold the white cuff upwards towards the outside of the hat. If preferred, place a few loose, invisible tacking stitches around the top fold to keep it in position without removing its stretch.
Helpful Tips
- Keep the colour-change seam in one vertical line at the back of the hat. Joining each new colour at the round seam produces neater stripes than carrying yarn across the inside.
- Work the starting chain loosely. A tight foundation chain can make the brim less stretchy than the ribbed cuff above it.
- Use a stitch marker in the first stitch of each decrease round. Check for eight decreases on each decrease round from R23 to R41, then five decreases on R44 and R46.
- The point will naturally curve and soften once the hat is worn. Avoid stuffing it; the lightweight shape is part of the elf-hat look.
If you’d like to keep building your crochet skills, take a look at crochet beanie patterns.
Christmas Tree Hat
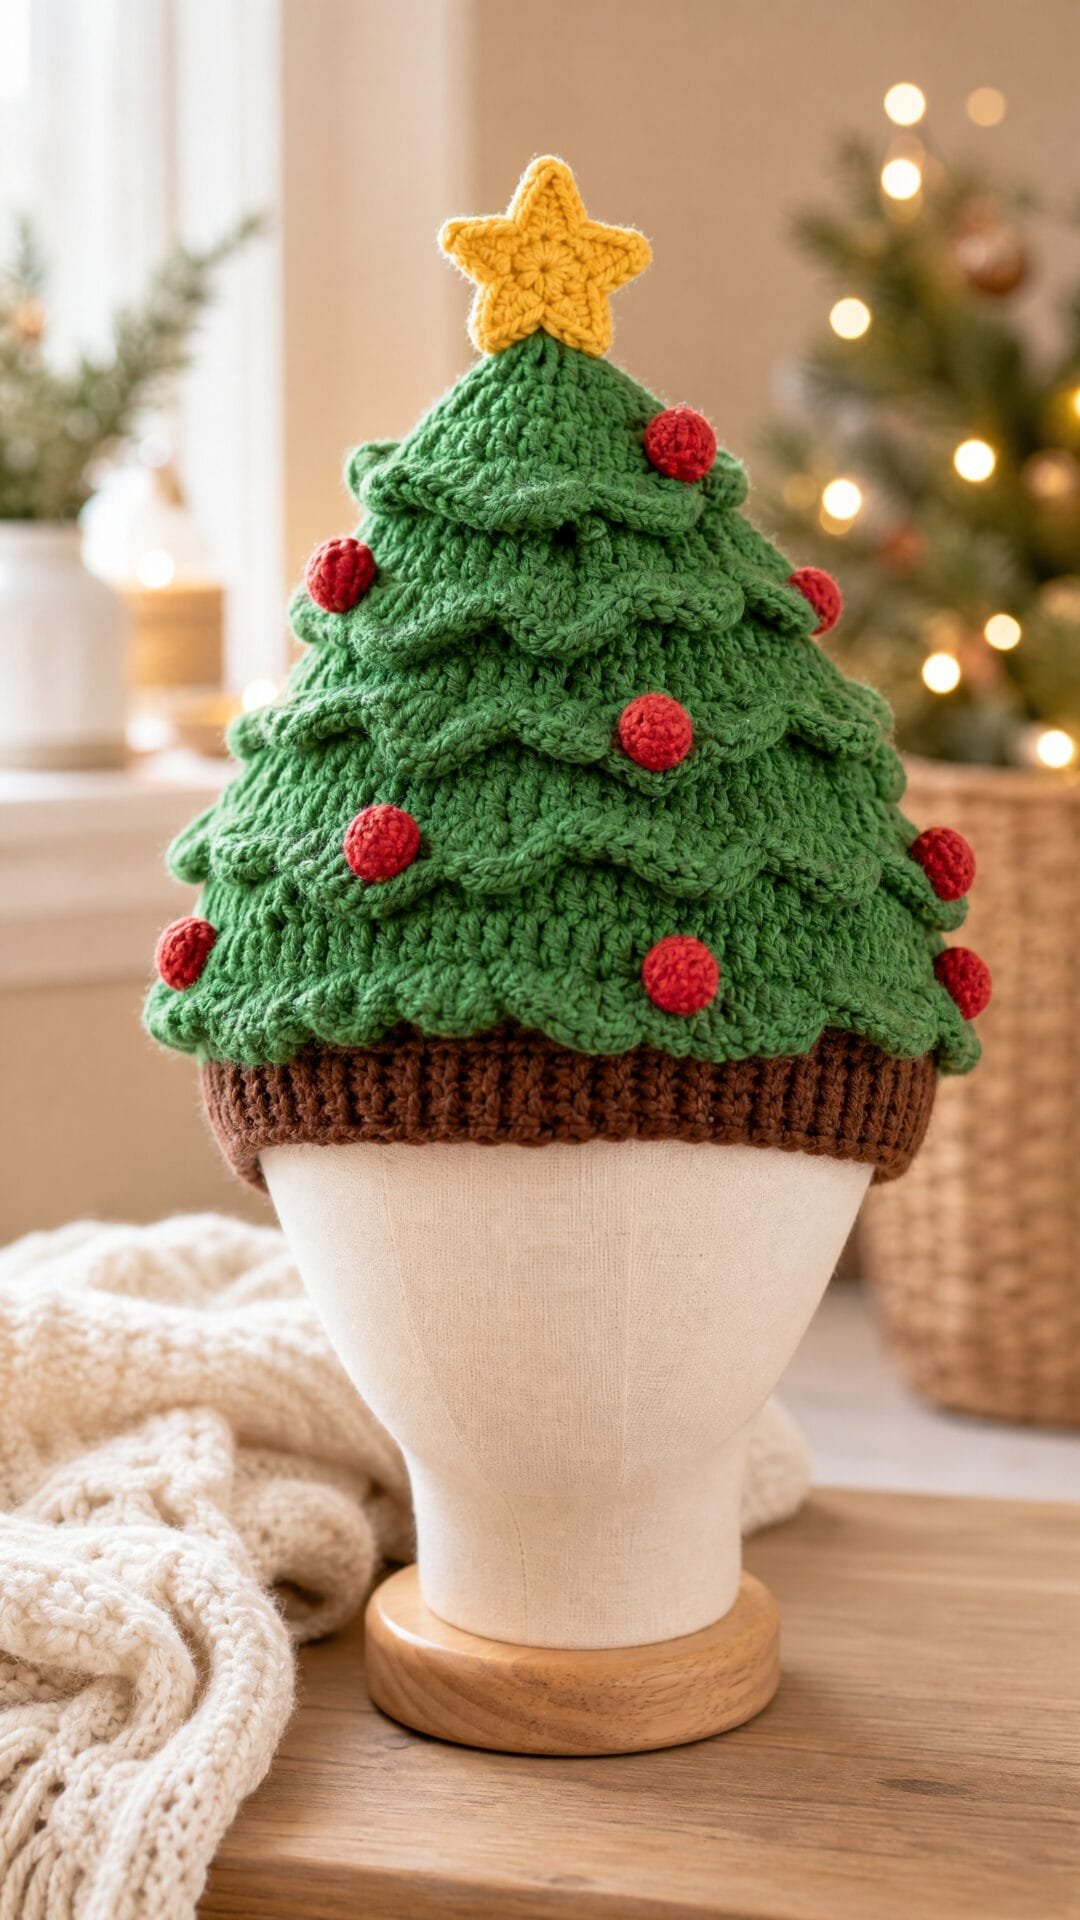
This Christmas Tree Hat turns a simple crown-down beanie into a cheerful festive make, with overlapping green scallops that create a recognisable layered tree silhouette. The brown rib-textured brim suggests a little trunk, while the red baubles and star topper give the finished hat its classic Christmas-tree character.
The decorative branch tiers are worked over the outside of the completed green hat rather than built into its shaping. That approach keeps the main fabric smooth and comfortable around the head, while allowing the raised scallops to sit visibly in layers from crown to brim.
The pattern provides one 66-stitch sample, with a calculated unstretched base circumference of approximately 41 cm (16¼ in) at the stated gauge. Check comfortable stretch and crown-to-ear coverage on the intended wearer; finished depth must be measured, and no additional sizes are provided. For a lighter, lower-profile finish, embroidered red details can stand in for the separate baubles; whichever decoration you choose, take care that every attached feature is secure before the hat is worn.
Although the tiered surface gives this project an intermediate feel, it avoids complex colourwork and relies on familiar stitches. It makes a playful seasonal accessory for Christmas parties, school events and festive photographs.
Christmas Tree Hat
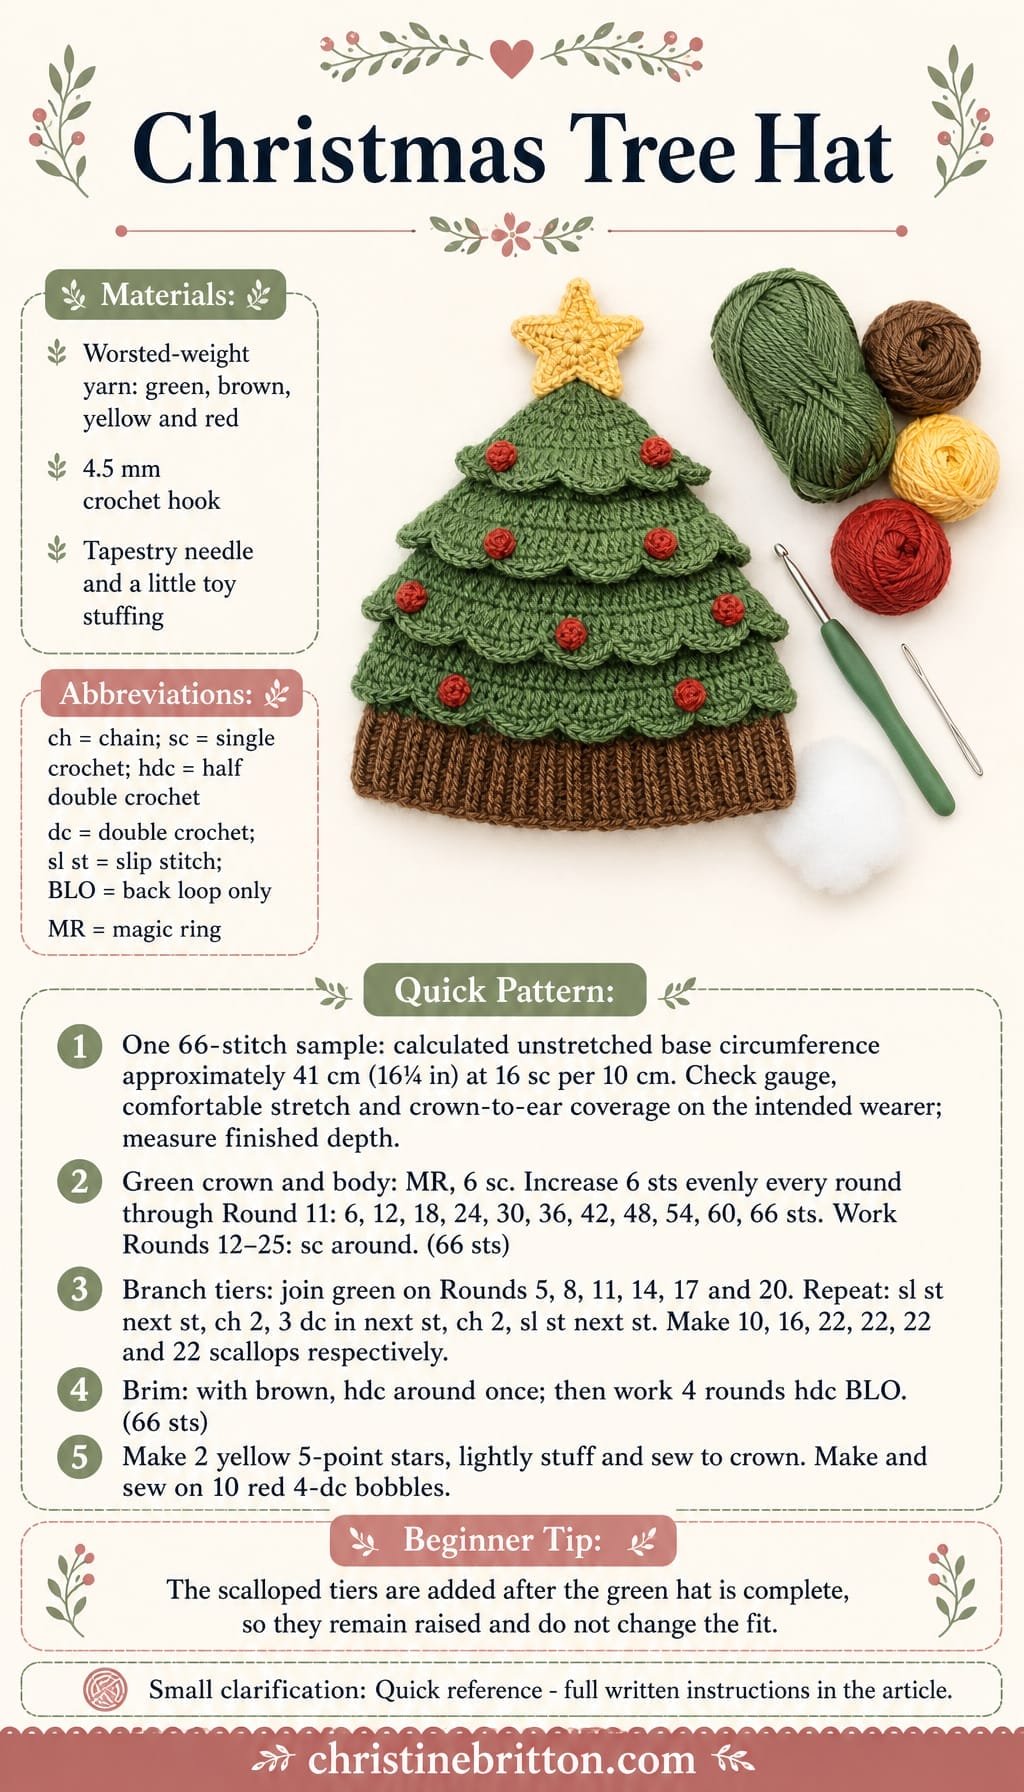
Quick-reference card. Follow the complete written instructions below.
Materials
- Worsted-weight yarn: Green, approximately 90 m (100 yd)
- Worsted-weight yarn: Brown, approximately 25 m (30 yd)
- Worsted-weight yarn: Yellow, small amount for star
- Worsted-weight yarn: Red, small amount for baubles
- Crochet hook: 4.5 mm
- Tapestry needle: For sewing and weaving in ends
- Toy stuffing: A very small amount for the star
Size and Fit
Sample size: 66 stitches around, giving a calculated unstretched base circumference of approximately 41 cm (16¼ in) at the stated gauge. The sample has 25 green rounds and five brown brim rounds. Finished depth must be measured; the supplied sc gauge does not establish the depth of the hdc brim. Check comfortable stretch and crown-to-ear coverage on the intended wearer rather than relying on an age or head-circumference range. No additional sizes are provided.
Gauge
16 sc and 18 rounds = 10 cm (4 in) in sc, using a 4.5 mm hook. Check gauge before beginning to reproduce the calculated unstretched base circumference. This sc gauge does not establish the depth of the hdc brim; measure finished depth and check fit on the intended wearer.
Abbreviations
US crochet terms.
- ch = chain
- sc = single crochet
- hdc = half double crochet
- dc = double crochet
- sl st = slip stitch
- st(s) = stitch(es)
- BLO = back loop only
- MR = magic ring
- bobble = work the stated number of incomplete double crochets in one stitch, then yarn over and pull through all loops on hook
Pattern
- Notes The hat is worked from the crown down in joined rounds. Join each round with a sl st in the first sc or hdc; the turning ch does not count as a stitch. Do not turn. Make the green hat first, then crochet the scalloped branch tiers over the outside of the fabric. This keeps the crown smooth enough to fit while giving the hat its layered tree appearance.
- Green hat: Round 1 With green, make an MR. Ch 1, work 6 sc in the ring; join. (6 sts)
- Green hat: Round 2 Ch 1, 2 sc in each st around; join. (12 sts)
- Green hat: Rounds 3–11 Ch 1, *sc in next st, 2 sc in next st; repeat from * around; join. Repeat this round, with one more sc between increases on each successive round: Round 3 has 1 sc between increases, Round 4 has 2, continuing until Round 11 has 9 sc between increases. Stitch counts are: Round 3: 18; Round 4: 24; Round 5: 30; Round 6: 36; Round 7: 42; Round 8: 48; Round 9: 54; Round 10: 60; Round 11: 66 sts.
- Green hat: Rounds 12–25 Ch 1, sc in each st around; join. (66 sts each round). Fasten off green after Round 25.
- Scalloped branch tiers With the outside of the hat facing you, join green yarn through the top of a stitch on the stated round. For one scallop, sl st in the next st of that round, ch 2, work 3 dc in the following st, ch 2, sl st in the next st. Repeat around the specified round, then fasten off. Work a tier on Round 5 (10 scallops), Round 8 (16 scallops), and Rounds 11, 14, 17 and 20 (22 scallops each). Keep the scallops on the outside of the hat and allow each lower tier to overlap the tier above it slightly.
- Brown trunk-style brim: Round 26 Join brown yarn at any stitch. Ch 1, hdc in each st around; join. (66 sts)
- Brown trunk-style brim: Rounds 27–30 Ch 1, hdc in BLO of each st around; join. (66 sts each round). Fasten off, leaving a tail to weave in.
- Yellow star: make 2 With yellow, make an MR. For one point, ch 4, sl st in the second ch from hook, sc in the next ch, hdc in the next ch, then sl st into the MR. Repeat four more times to make 5 points. Pull the ring closed, sl st to the base of the first point and fasten off, leaving a long sewing tail. Make a second matching star.
- Red baubles: make 10 With red, ch 2. Work a 4-dc bobble in the second ch from hook: yarn over, insert hook in the ch, yarn over and pull up a loop, yarn over and pull through 2 loops; repeat this incomplete dc three more times in the same ch, then yarn over and pull through all loops on hook. Ch 1 and fasten off, leaving tails for sewing. Make 10 baubles.
Finishing
- Place the two yellow stars wrong sides together. Add a pinch of stuffing, then whip stitch around the edges with one sewing tail, keeping the points aligned.
- Sew the star securely to the crown, stitching through the centre of the star and the hat several times. Knot and weave all ends through the inside of the hat.
- Sew the 10 red bobbles across the green area, spacing them between the scalloped tiers. Avoid placing baubles directly on the lower edge of a scallop, where they may pull the tier out of shape.
- Weave in all remaining ends securely. For a child’s hat, check that the star and every bauble are firmly attached before use.
Helpful Tips
- The branch scallops are decorative overlays rather than shaping rounds. This is what lets the hat retain a wearable beanie fit while still reading clearly as a Christmas tree.
- If the scallops curl tightly, work the ch-2 sections loosely. If they look too loose, reduce those chains to ch 1.
- For a less bulky decoration, replace the red bobbles with small red embroidered crosses or French knots.
- The brown BLO hdc rounds create horizontal rib texture. Use a smaller hook for the brim only if a firmer fit is needed.
Reindeer Earflap Hat
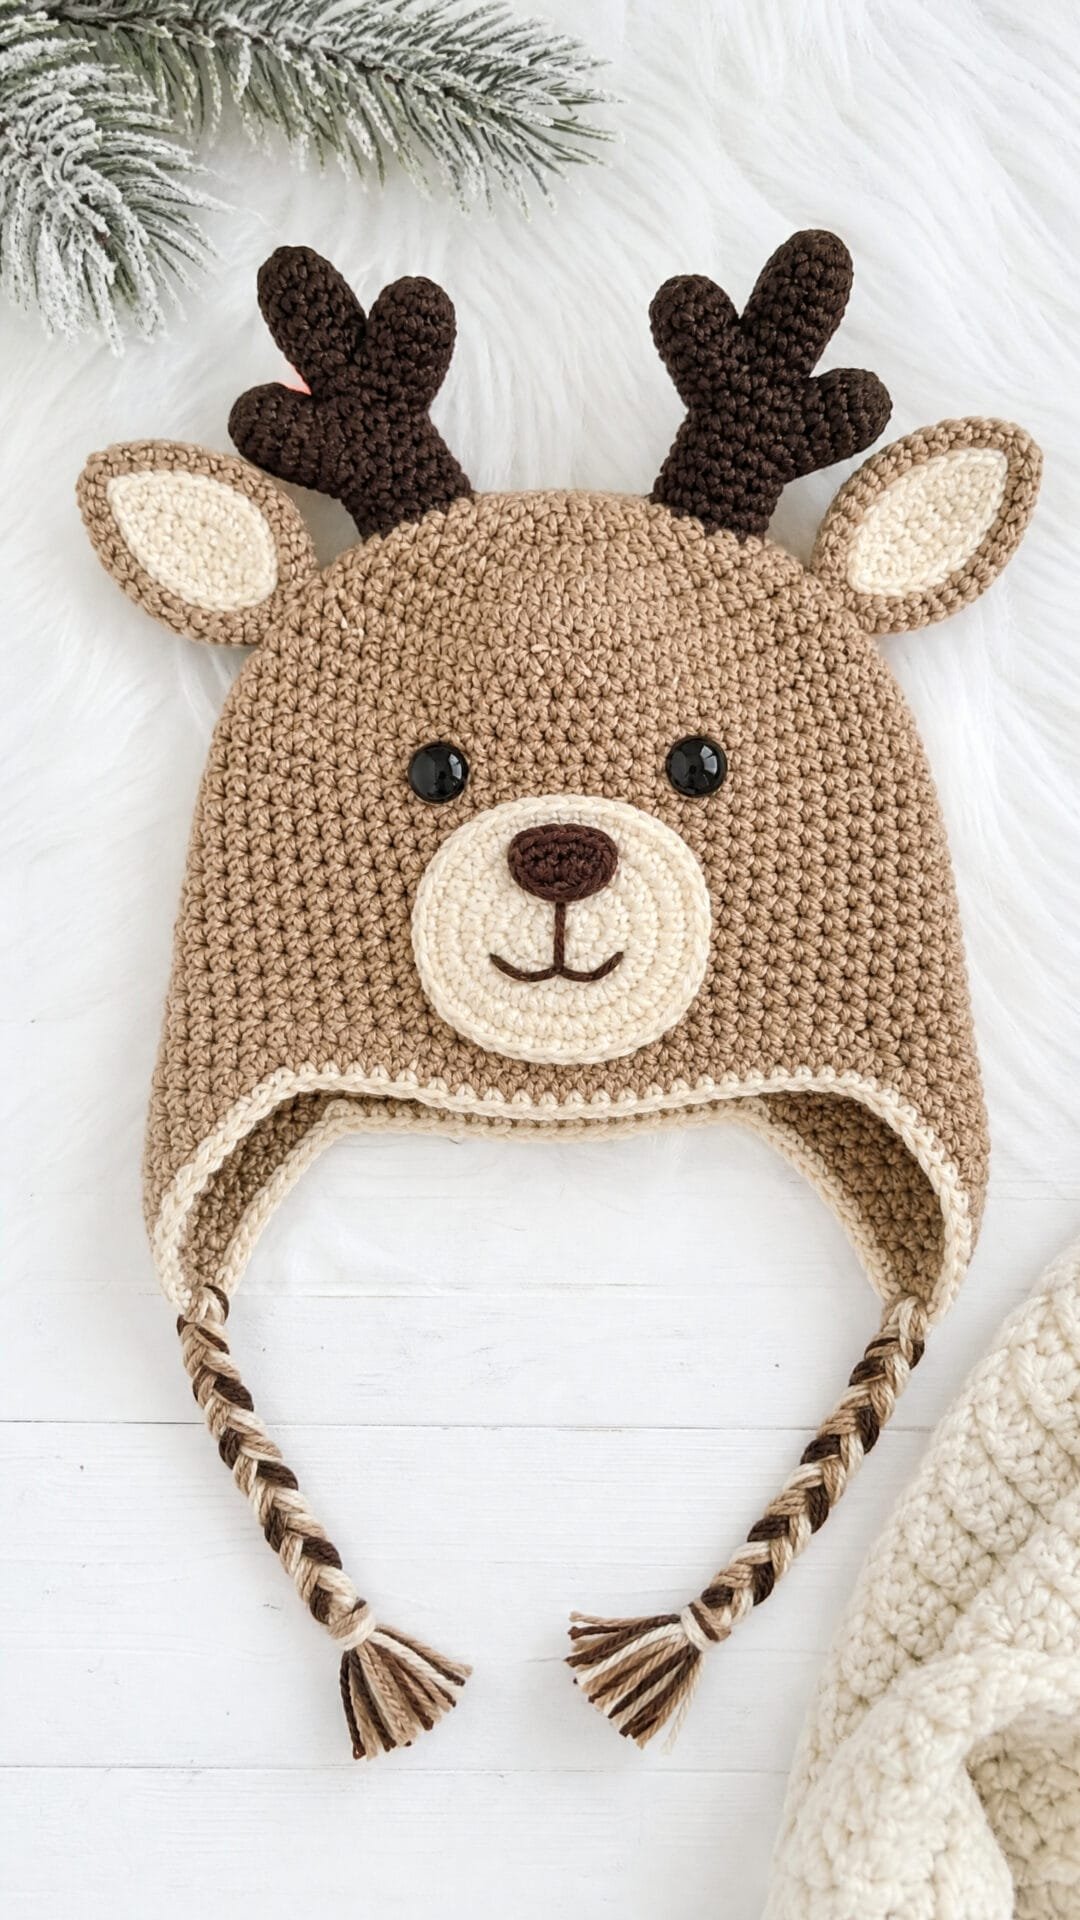
Bring a little woodland character to winter makes with this reindeer earflap hat. Its warm tan base is paired with a pale rounded muzzle, raised ears and soft antlers for a playful Christmas look that feels festive without relying on hard or detachable embellishments.
This is an intermediate crochet Christmas hat pattern, with the shaping concentrated in the crown, earflaps and separate character pieces. Working the decorative elements individually gives the finished reindeer a pleasing amount of dimension while keeping the hat itself comfortable to wear.
The embroidered facial detail is a practical choice for a children’s hat or a seasonal gift, as there are no loose buttons to contend with. Take a moment to arrange the muzzle, ears and antlers symmetrically before securing them, as their placement gives the reindeer its friendly expression.
Reindeer Earflap Hat
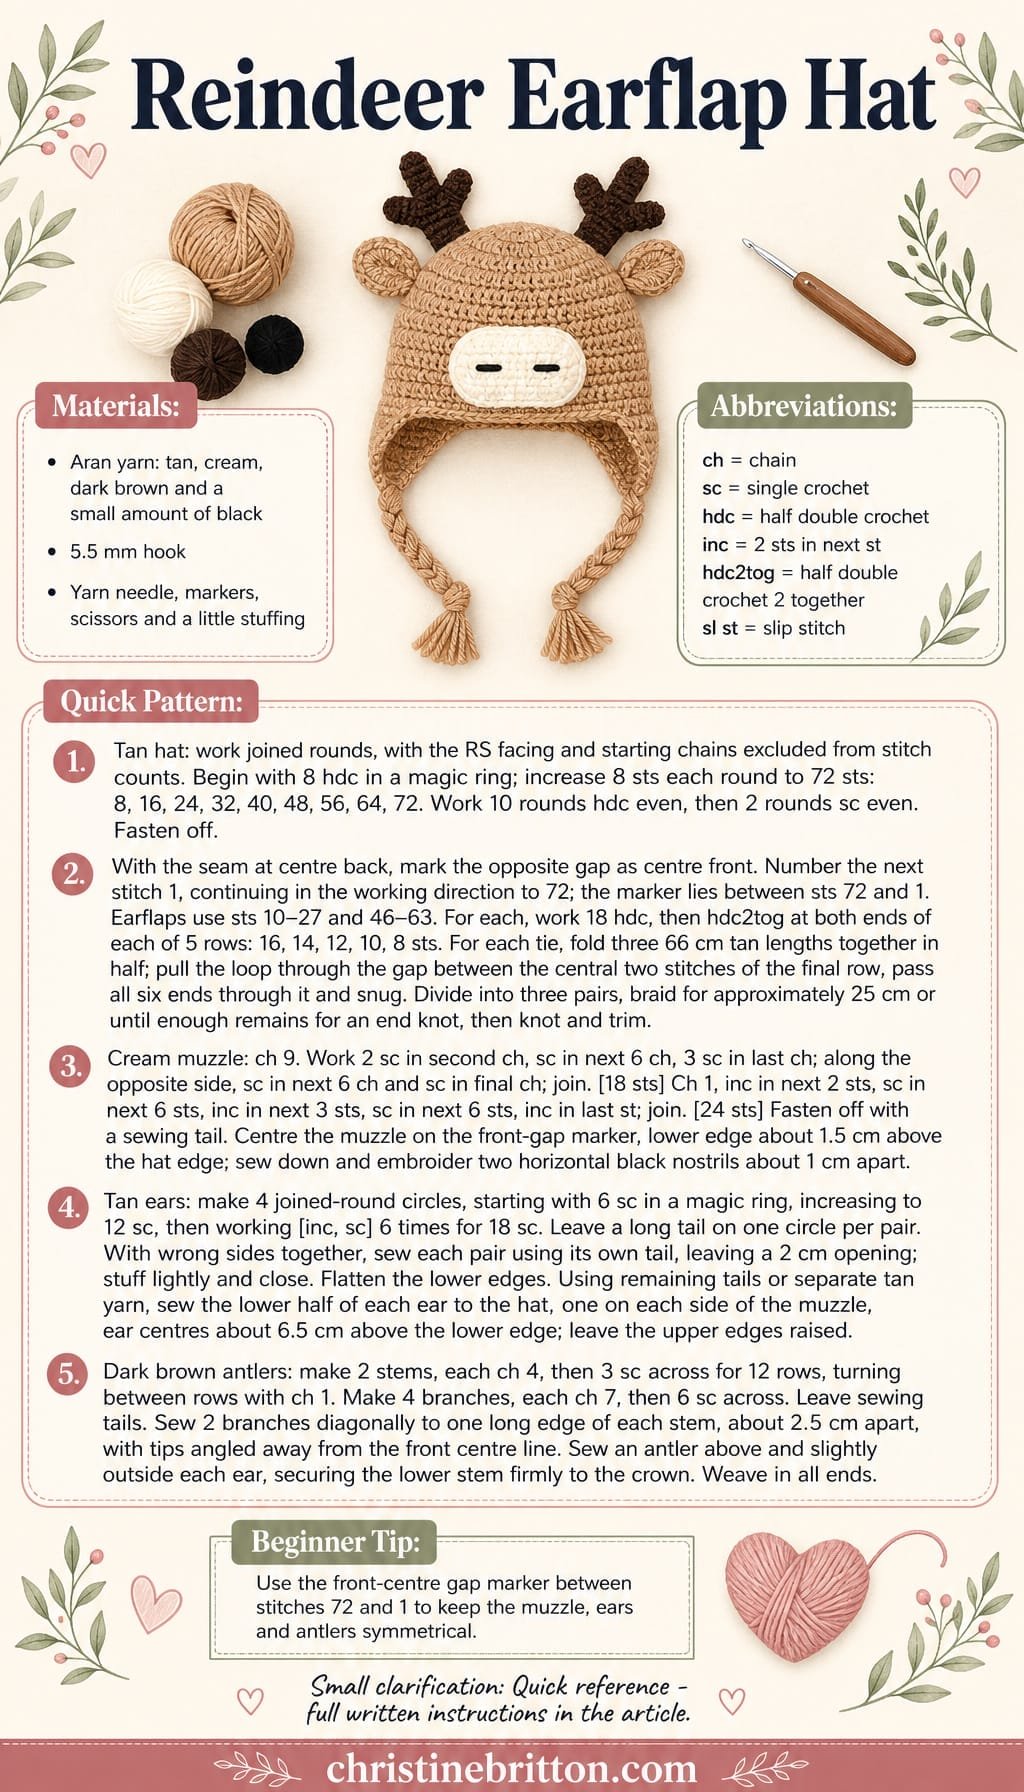
Quick-reference card. Follow the complete written instructions below.
Materials
- Aran-weight yarn: Tan, approximately 120 m for the hat and ears
- Aran-weight yarn: Cream, approximately 15 m for the muzzle
- Aran-weight yarn: Dark brown, approximately 25 m for the antlers
- Aran-weight yarn or embroidery thread: Black, a small amount for the nostrils
- Hook: 5.5 mm crochet hook, or size needed to obtain gauge
- Notions: Stitch markers, yarn needle, scissors and a small amount of polyester stuffing
Size and Fit
One sample size, intended for a head circumference of approximately 54 cm (21 ¼ in). At the stated gauge, the calculated hdc body circumference is approximately 51.5 cm (20 ¼ in), giving about 2.5 cm of negative ease. Intended crown-to-edge depth is approximately 19 cm (7 ½ in), excluding earflaps; the sc edging may affect the final measurement. Check the finished lower edge and fit before attaching the features. Other sizes are not graded.
Gauge
14 hdc and 11 rounds = 10 cm (4 in) in hdc, measured after blocking lightly if needed.
Abbreviations
US crochet terms.
- ch = chain
- sc = single crochet
- hdc = half double crochet
- sl st = slip stitch
- st(s) = stitch(es)
- inc = work 2 stitches in the next stitch
- hdc2tog = half double crochet 2 stitches together
- RS = right side
Pattern
- Notes The hat is worked in joined rounds with the RS facing. Join each round with a sl st to the first hdc or sc; the turning ch does not count as a stitch. Move the round marker up at the beginning of each round if helpful. Weave in yarn ends as the work progresses.
- Hat crown With tan yarn, make a magic ring. Round 1: Ch 1, work 8 hdc in ring; join. [8 sts] Round 2: Ch 1, inc in each st around; join. [16 sts] Round 3: Ch 1, [inc, hdc in next st] 8 times; join. [24 sts] Round 4: Ch 1, [inc, hdc in next 2 sts] 8 times; join. [32 sts] Round 5: Ch 1, [inc, hdc in next 3 sts] 8 times; join. [40 sts] Round 6: Ch 1, [inc, hdc in next 4 sts] 8 times; join. [48 sts] Round 7: Ch 1, [inc, hdc in next 5 sts] 8 times; join. [56 sts] Round 8: Ch 1, [inc, hdc in next 6 sts] 8 times; join. [64 sts] Round 9: Ch 1, [inc, hdc in next 7 sts] 8 times; join. [72 sts]
- Hat sides and lower edge Rounds 10–19: Ch 1, hdc in each st around; join. [72 sts per round] Round 20: Ch 1, sc in each st around; join. [72 sts] Round 21: Ch 1, sc in each st around; join. [72 sts] Fasten off.
- Earflap placement Lay the hat with the joining seam at centre back. Mark the opposite gap between lower-edge stitches as centre front. Number the next stitch 1 and continue around to 72 in the working direction, so the front marker lies between stitches 72 and 1. The first earflap uses stitches 10–27 and the second uses stitches 46–63. The front gap is stitches 64–72 plus 1–9, and the back gap is stitches 28–45: 18 stitches each.
- Earflaps With RS facing, join tan yarn in lower-edge stitch 10. Row 1: Ch 1, hdc in the same st and in each st through stitch 27; turn. [18 sts] Row 2: Ch 1, hdc2tog, hdc in next 14 sts, hdc2tog; turn. [16 sts] Row 3: Ch 1, hdc2tog, hdc in next 12 sts, hdc2tog; turn. [14 sts] Row 4: Ch 1, hdc2tog, hdc in next 10 sts, hdc2tog; turn. [12 sts] Row 5: Ch 1, hdc2tog, hdc in next 8 sts, hdc2tog; turn. [10 sts] Row 6: Ch 1, hdc2tog, hdc in next 6 sts, hdc2tog. [8 sts] Fasten off. Repeat on stitches 46–63 for the second earflap.
- Braided ties For each tie, cut three 66 cm (26 in) lengths of tan yarn and hold them together. Fold the bundle in half. Pull the folded loop through the gap between the two central stitches of the earflap’s final eight-stitch row, pass all six ends through the loop and snug it against the fabric. Divide the six ends into three pairs and braid the pairs together for approximately 25 cm (10 in), or until enough yarn remains for a secure end knot. Knot and trim evenly.
- Muzzle With cream yarn, ch 9. Round 1: Work 2 sc in second ch from hook, sc in next 6 ch, 3 sc in last ch; working along the opposite side of the foundation ch, sc in next 6 ch, sc in the final ch; join. [18 sts] Round 2: Ch 1, inc in next 2 sts, sc in next 6 sts, inc in next 3 sts, sc in next 6 sts, inc in last st; join. [24 sts] Fasten off, leaving a long sewing tail.
- Ears Make 4 with tan yarn. Round 1: Make a magic ring, ch 1, work 6 sc in ring; join. [6 sts] Round 2: Ch 1, inc in each st around; join. [12 sts] Round 3: Ch 1, [inc, sc in next st] 6 times; join. [18 sts] Fasten off, leaving a long sewing tail on one circle in each pair. Pair the circles to make 2 ears, placing wrong sides together. Using each pair’s own long tail, sew around its outer edge, leaving a 2 cm (¾ in) opening. Add a very small amount of stuffing, then close the opening. Reserve sufficient tail for attachment or use a separate length of tan yarn. Flatten the lower edge of each ear slightly.
- Antler stems Make 2 with dark brown yarn. Ch 4. Row 1: Sc in second ch from hook and in each remaining ch; turn. [3 sts] Rows 2–12: Ch 1, sc in each st across; turn. [3 sts] Fasten off, leaving a long sewing tail.
- Antler branches Make 4 with dark brown yarn. Ch 7. Row 1: Sc in second ch from hook and in each remaining ch. [6 sts] Fasten off, leaving a sewing tail. Each antler uses one stem and two branches.
- Assemble the face and antlers Use the marked front-centre gap between stitches 72 and 1 as the centre line. Position the cream muzzle horizontally on the front, with its lower edge about 1.5 cm (½ in) above the lower edge of the hat. Sew it securely through the hat fabric. With black yarn, embroider two short horizontal nostrils, spaced about 1 cm (⅜ in) apart, near the centre of the muzzle. Position one ear on each side of the muzzle, with each ear centre about 6.5 cm (2 ½ in) above the lower edge. Sew the lower half of each ear firmly to the hat so the upper edge remains raised. For each antler, sew two branches diagonally to one long edge of a stem, spacing them about 2.5 cm (1 in) apart and angling their tips away from the hat centre. Sew one finished antler directly above and slightly outside each ear, with the lower stem end secured firmly to the crown. Weave in all ends on the inside of the hat.
Finishing
- Check that the two earflaps sit at the same height and that the ties are the same length.
- Use small, close sewing stitches when attaching the muzzle, ears and antlers so the pieces are secured through the hat fabric rather than only to surface loops.
- Do not use buttons or other loose features; the nostrils are embroidered for a more secure finish.
- Lightly steam or shape the antler branches if needed, avoiding direct heat on synthetic yarn.
Helpful Tips
- Place a removable marker in the front-centre lower-edge gap between stitches 72 and 1 before making the earflaps; this makes the facial features easier to align.
- If the magic ring is difficult to tighten, ch 2 and work the first 8 hdc into the second ch from the hook instead.
- Try the hat on before sewing on the features. The muzzle should sit on the front rather than extend into either earflap.
- For a more pronounced ear shape, pinch the lower edge of each padded ear into a shallow fold before sewing it down.
For another related project collection, browse crochet Christmas ornament patterns.
Peppermint Swirl Beanie

This Peppermint Swirl Beanie brings a classic red-and-white sweet-shop colour palette to a close-fitting Christmas hat. Six gently curving colour wedges create a peppermint-inspired crown, while the solid red ribbed edge gives the finished piece a crisp, festive frame.
It is a satisfying intermediate crochet Christmas hat pattern for makers who would like to practise tapestry crochet in the round. The inactive colour is enclosed within the stitches, so keeping that strand relaxed helps the fabric remain flexible and the wedges sit smoothly.
Choose red and white yarns with a strong contrast and similar thickness and fibre content. Swatch with the inactive yarn enclosed, then check the hat’s depth as you work for a neat seasonal accessory or handmade gift.
Peppermint Swirl Beanie

Quick-reference card. Follow the complete written instructions below.
Materials
- Red worsted-weight yarn: Approximately 120 yd (110 m), plus extra for swatching. This is an approximate allowance, not verified consumption; use one working ball of red.
- White worsted-weight yarn: Approximately 120 yd (110 m), plus extra for swatching. This is an approximate allowance, not verified consumption; use one working ball of white. Choose yarn matching the red yarn in thickness and fibre content.
- 5 mm (H-8) crochet hook: Or size needed to obtain gauge.
- Stitch markers: Six removable markers, one for the first stitch of each colour wedge.
- Tapestry needle and scissors: For weaving in ends and trimming yarn.
Size and Fit
One adult sample size: approximately 20.5 in (52 cm) unstretched circumference, targeting 8.25 in (21 cm) total height, intended for a 21–22 in (53–56 cm) head circumference. The crown reaches 72 stitches, giving approximately 20.6 in at 14 dc per 4 in, consistent with the rounded finished circumference. Work the body and brim to the stated measurements rather than a fixed round count.
Gauge
14 dc and 8 rounds = 4 in (10 cm) in two-yarn tapestry crochet, worked in joined rounds with the inactive yarn enclosed. Check gauge before beginning and allow extra yarn for swatching. Measure the hat’s depth as instructed; post-stitch brim rounds need not have the same height as dc rounds.
Abbreviations
US crochet terms.
- MC = magic circle
- ch = chain
- sl st = slip stitch
- st(s) = stitch(es)
- dc = double crochet
- inc = 2 dc in the same stitch
- FPdc = front post double crochet
- BPdc = back post double crochet
- rep = repeat
Pattern
- Colour and round notes The hat is worked from crown to brim in joined rounds, with the right side facing throughout. Do not turn. Ch 2 at the start of each round does not count as a stitch. The six wedges repeat red, white, red, white, red, white. Use two-yarn tapestry crochet throughout the crown and body: carry the inactive colour along the tops of the stitches and crochet over it, keeping the enclosed strand relaxed. Change colour on the final yarn-over of the dc immediately before each new wedge. At the end of each crown and body round, complete the last white dc with red, then sl st in red to the first dc. Start the following round with ch 2 in red.
- Round 1 With red, make an MC and ch 2. Work (2 dc red, 2 dc white) three times, enclosing the inactive yarn from the outset and changing colour as described in the colour notes. Close the circle securely and join; 12 dc. Place a marker in the first dc of every wedge; six markers are in place.
- Rounds 2–6: swirl crown Ch 2 at the start of each round. Work each wedge entirely in its established colour, changing colour as described in the colour notes. Round 2: inc in both stitches of each wedge; 24 sts. Round 3: (inc, dc in next st) twice per wedge; 36 sts. Round 4: (inc, dc in next 2 sts) twice per wedge; 48 sts. Round 5: (inc, dc in next 3 sts) twice per wedge; 60 sts. Round 6: (inc, dc in next 4 sts) twice per wedge; 72 sts, with 12 sts in each wedge. Move each marker to its wedge’s first new stitch and join each round using the colour notes. Each round adds 12 stitches. The two consistently placed increases within each wedge create gently curving peppermint colour lines.
- Round 7 onwards: hat body Ch 2, dc in every st around, changing colour at each established wedge boundary and enclosing the inactive yarn. Keep the six 12-stitch wedges in their existing order, with colour boundaries aligned with the previous round. Join using the colour notes; 72 sts. Repeat even rounds until the hat measures approximately 7 in (18 cm) from crown centre to lower edge, laid flat without stretching.
- Red brim set-up After the final body round, fasten off white, leaving a tail to weave in, and continue with red. Ch 2, work FPdc around the first stitch’s post and BPdc around the next, then repeat this alternating sequence around all 72 posts. Join with a sl st to the first FPdc; 72 sts.
- Ribbed brim Ch 2, work FPdc around every FPdc and BPdc around every BPdc from the previous round. Join with a sl st to the first FPdc; 72 sts. Repeat until the total height is approximately 8.25 in (21 cm), measured from crown centre to lower edge with the hat laid flat without stretching, ending after a complete round. Do not assume post-stitch rounds have the same height as dc rounds.
Finishing
- Fasten off, leaving a 6 in (15 cm) tail.
- Secure the magic-circle tail and weave in all ends on the wrong side, following the paths of stitches in matching colours where possible.
- Gently shape the crown with clean hands if required. Do not stretch the post-stitch brim while weaving in its tail.
Helpful Tips
- Work from one ball of each colour. Carry the inactive yarn along the stitch tops and crochet over it throughout the crown and body; keep the enclosed strand relaxed so it does not draw the fabric in.
- Keep all six markers in place during the increase section. Each marker identifies a wedge’s first stitch and first increase; the second increase follows the written repeat for that round.
- For a clean colour boundary, use the next colour for the final yarn-over of the dc immediately before the new wedge. Ease the enclosed yarn along the stitches if the fabric begins to pucker.
- For a deeper hat, add even body rounds before beginning the red brim. Each extra dc round adds approximately 0.5 in (1.25 cm) at the stated gauge; increase the target total height by the same amount and measure as you work.
You may also find useful ideas in crochet Christmas tree patterns.
Snowman Top Hat
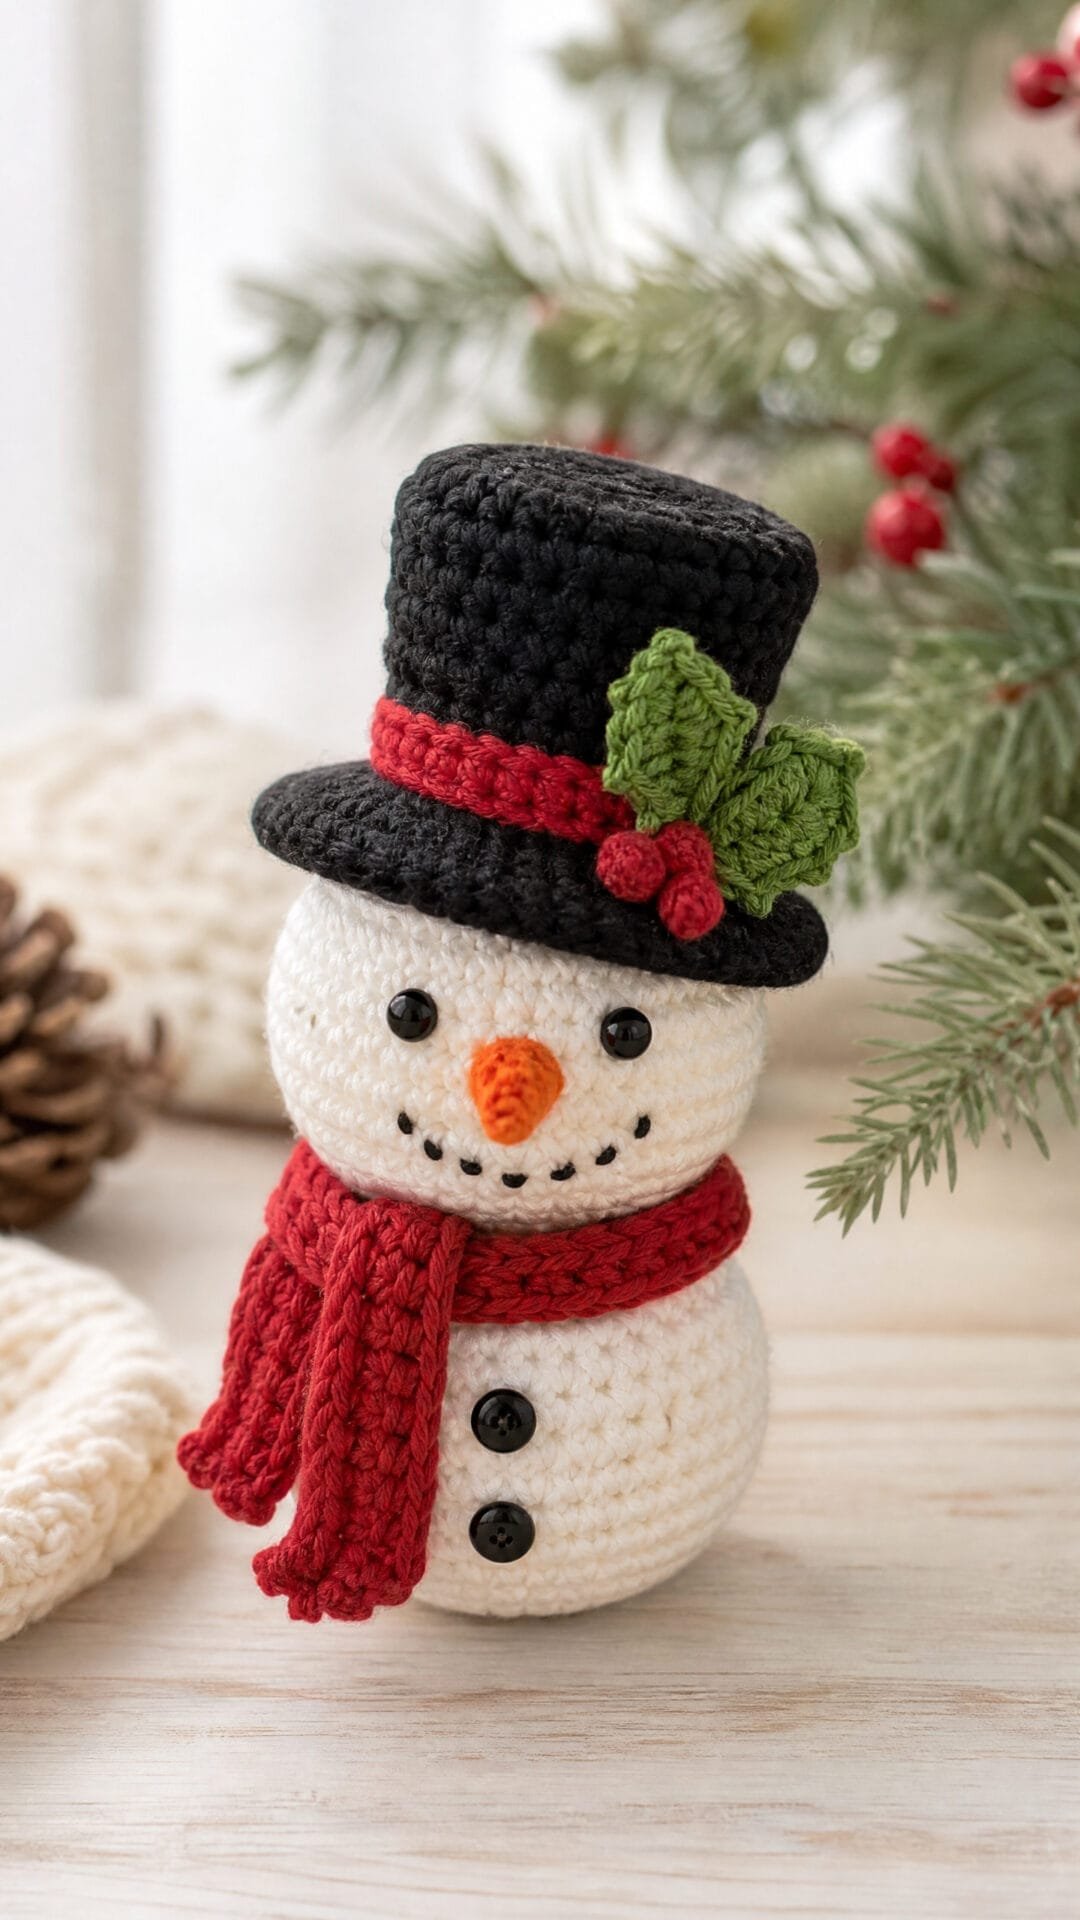
This miniature Snowman Top Hat brings an unmistakably festive finishing touch to a snowman decoration, tabletop scene or oversized ornament. Its classic black crown is set off by a bright red band and a pair of simple holly leaves, giving a familiar Christmas look without the need for a wearable fit.
The design is worked as separate brim and crown pieces before they are joined, which helps define the hat’s silhouette and keeps the colour change around the crown neat. A firmly spun yarn and even tension will give the small-scale shape the crispest appearance.
It is a useful confident-beginner project for practising joined rounds, straightforward increases and small decorative appliqué. The closed crown has an open underside, so the finished hat can sit over the top of an appropriate display figure or ornament.
Snowman Top Hat Crochet Pattern
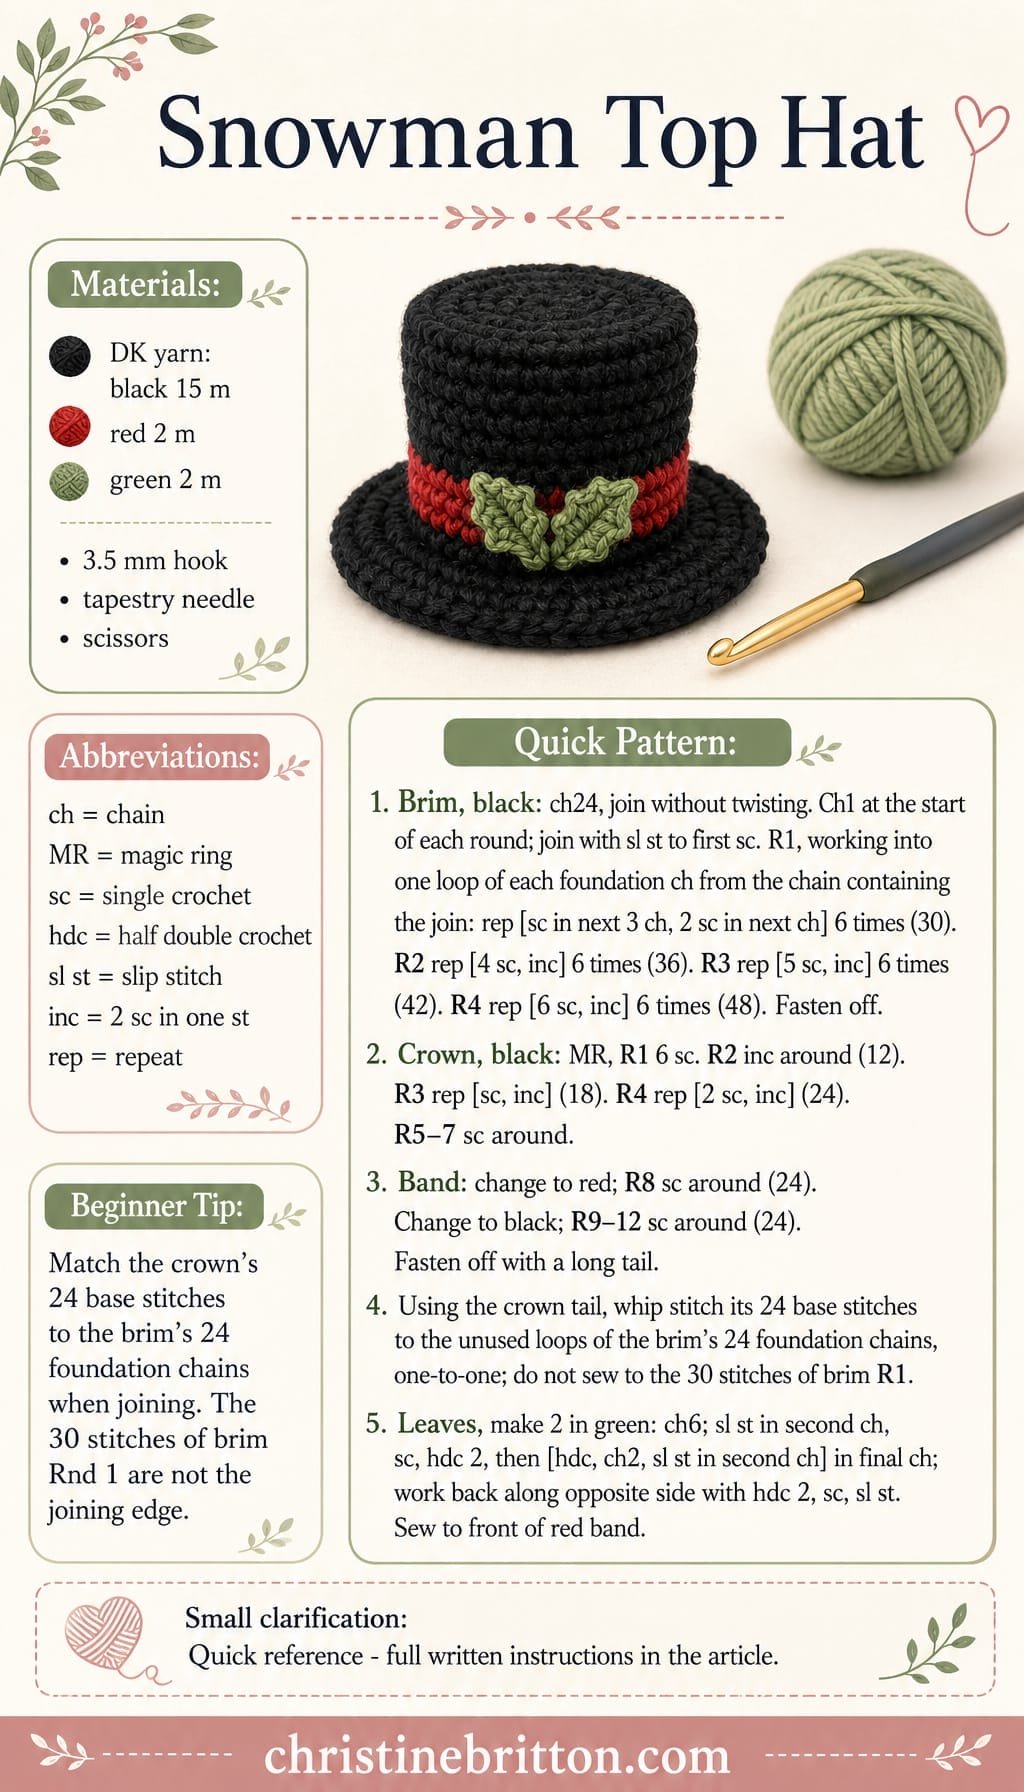
Quick-reference card. Follow the complete written instructions below.
Materials
- Black DK cotton or tightly spun acrylic yarn: Approx. 15 m; choose a firm yarn for a crisp shape.
- Red DK yarn: Approx. 2 m for the band.
- Green DK yarn: Approx. 2 m for two holly leaves.
- 3.5 mm crochet hook: Or the hook needed to obtain the stated gauge.
- Tapestry needle: For sewing the crown to the brim and attaching leaves.
- Stitch marker: Optional, for marking the first stitch of a round.
- Scissors: For cutting yarn ends.
Size and Fit
One decorative sample size: approximately 7.6 cm brim diameter, 3.8 cm crown diameter and 4 cm crown height. These dimensions are estimated from the target gauge, not measured testing. This is a decoration rather than a wearable hat; check that the approximately 3.8 cm crown opening suits your snowman head or ornament top before assembly.
Gauge
Target gauge: 20 single crochet stitches and 20 rounds = 10 cm in single crochet worked in rounds; measure stitch width and round height on a straight-sided section. Use a hook that produces firm fabric.
Abbreviations
US crochet terms.
- ch = chain
- MR = magic ring
- sc = single crochet
- hdc = half double crochet
- sl st = slip stitch
- st(s) = stitch(es)
- inc = 2 sc in the same stitch
- rep = repeat
- Rnd = round
Pattern
- Notes Work all hat and brim rounds with the right side facing. Join each round with a sl st to the first sc unless otherwise stated. The starting ch 1 does not count as a stitch. The red band is worked directly into the crown stitches, so it needs no foundation chain.
- Brim — Rnd 1 With black, ch 24. Join with a sl st in the first ch without twisting. Ch 1; working into one loop of each foundation chain and beginning in the chain containing the join, rep [sc in each of next 3 ch, 2 sc in next ch] 6 times; join. 30 sts.
- Brim — Rnd 2 Ch 1, rep [sc in each of next 4 sts, inc in next st] 6 times; join. 36 sts.
- Brim — Rnd 3 Ch 1, rep [sc in each of next 5 sts, inc in next st] 6 times; join. 42 sts.
- Brim — Rnd 4 Ch 1, rep [sc in each of next 6 sts, inc in next st] 6 times; join. 48 sts. Fasten off.
- Crown — Rnd 1 With black, make an MR. Ch 1, work 6 sc into the ring; join. 6 sts.
- Crown — Rnd 2 Ch 1, inc in each st around; join. 12 sts.
- Crown — Rnd 3 Ch 1, rep [sc in next st, inc in next st] around; join. 18 sts.
- Crown — Rnd 4 Ch 1, rep [sc in each of next 2 sts, inc in next st] around; join. 24 sts.
- Crown — Rnds 5–7 Ch 1, sc in each st around; join. 24 sts in each round.
- Crown — Rnd 8: red band Fasten off black and join red in any stitch. Ch 1, sc in each st around; join. 24 sts. This single contrast round forms the narrow, chain-free band.
- Crown — Rnds 9–12 Fasten off red and join black in any stitch. For each round, ch 1, sc in each st around; join. 24 sts in each round. Fasten off, leaving a 30 cm sewing tail.
- Join crown to brim Place the crown centrally over the opening in the brim, with the red band facing outwards. Align the crown’s 24 lower-edge stitches with the unused loops of the brim’s 24 foundation chains, not with the 30 stitches of Brim Rnd 1. Using the black crown sewing tail and a whip stitch, sew one crown stitch to each foundation chain all the way around. Keep the stitches even so the crown stands upright and the brim remains flat.
- Holly leaves Make 2 with green yarn. Ch 6. Sl st in the second ch from hook, sc in the next ch, hdc in each of the next 2 ch; in the final ch work hdc, ch 2, sl st in the second ch from hook. Working along the unused underside of the foundation chain, hdc in each of the next 2 ch, sc in the next ch, sl st in the final ch. Fasten off, leaving a sewing tail.
- Attach leaves Position the two leaves at an angle on the front of the red band. Sew their lower ends securely to the crown, then weave in all yarn tails on the inside of the hat.
Finishing
- Flatten the brim with your fingers and adjust the crown seam so the crown sits centrally.
- Weave in all ends securely, keeping bulky ends away from the outer edge of the brim.
- For a display piece, a small amount of steam held above, not touching, the cotton brim may help it lie flat. Do not steam acrylic yarn directly.
- If the hat will be used where small parts are unsuitable, omit the holly leaves or ensure every attachment is secure.
Helpful Tips
- Use firm cotton, rather than a soft or fuzzy yarn, if you want the brim and crown edges to look more structured.
- Keep the brim tension even. Tight stitches help it hold a flat circular shape; overly tight stitches may cause the outer edge to cup.
- If the brim ripples or cups, check the stitch counts and foundation-chain tension first: the chain ring should match the crown base without stretching or gathering. Once these checks are correct, gently block the brim flat according to the yarn care instructions.
- The crown is closed at the top and open underneath. Do not add stuffing: the firm crochet fabric and sewn join provide the shape.
- This pattern gives one decorative size. Check that the approximately 3.8 cm crown opening suits your display figure before assembly.
For more inspiration on this technique, see crochet Christmas stocking patterns.
Holly Berry Slouch Hat
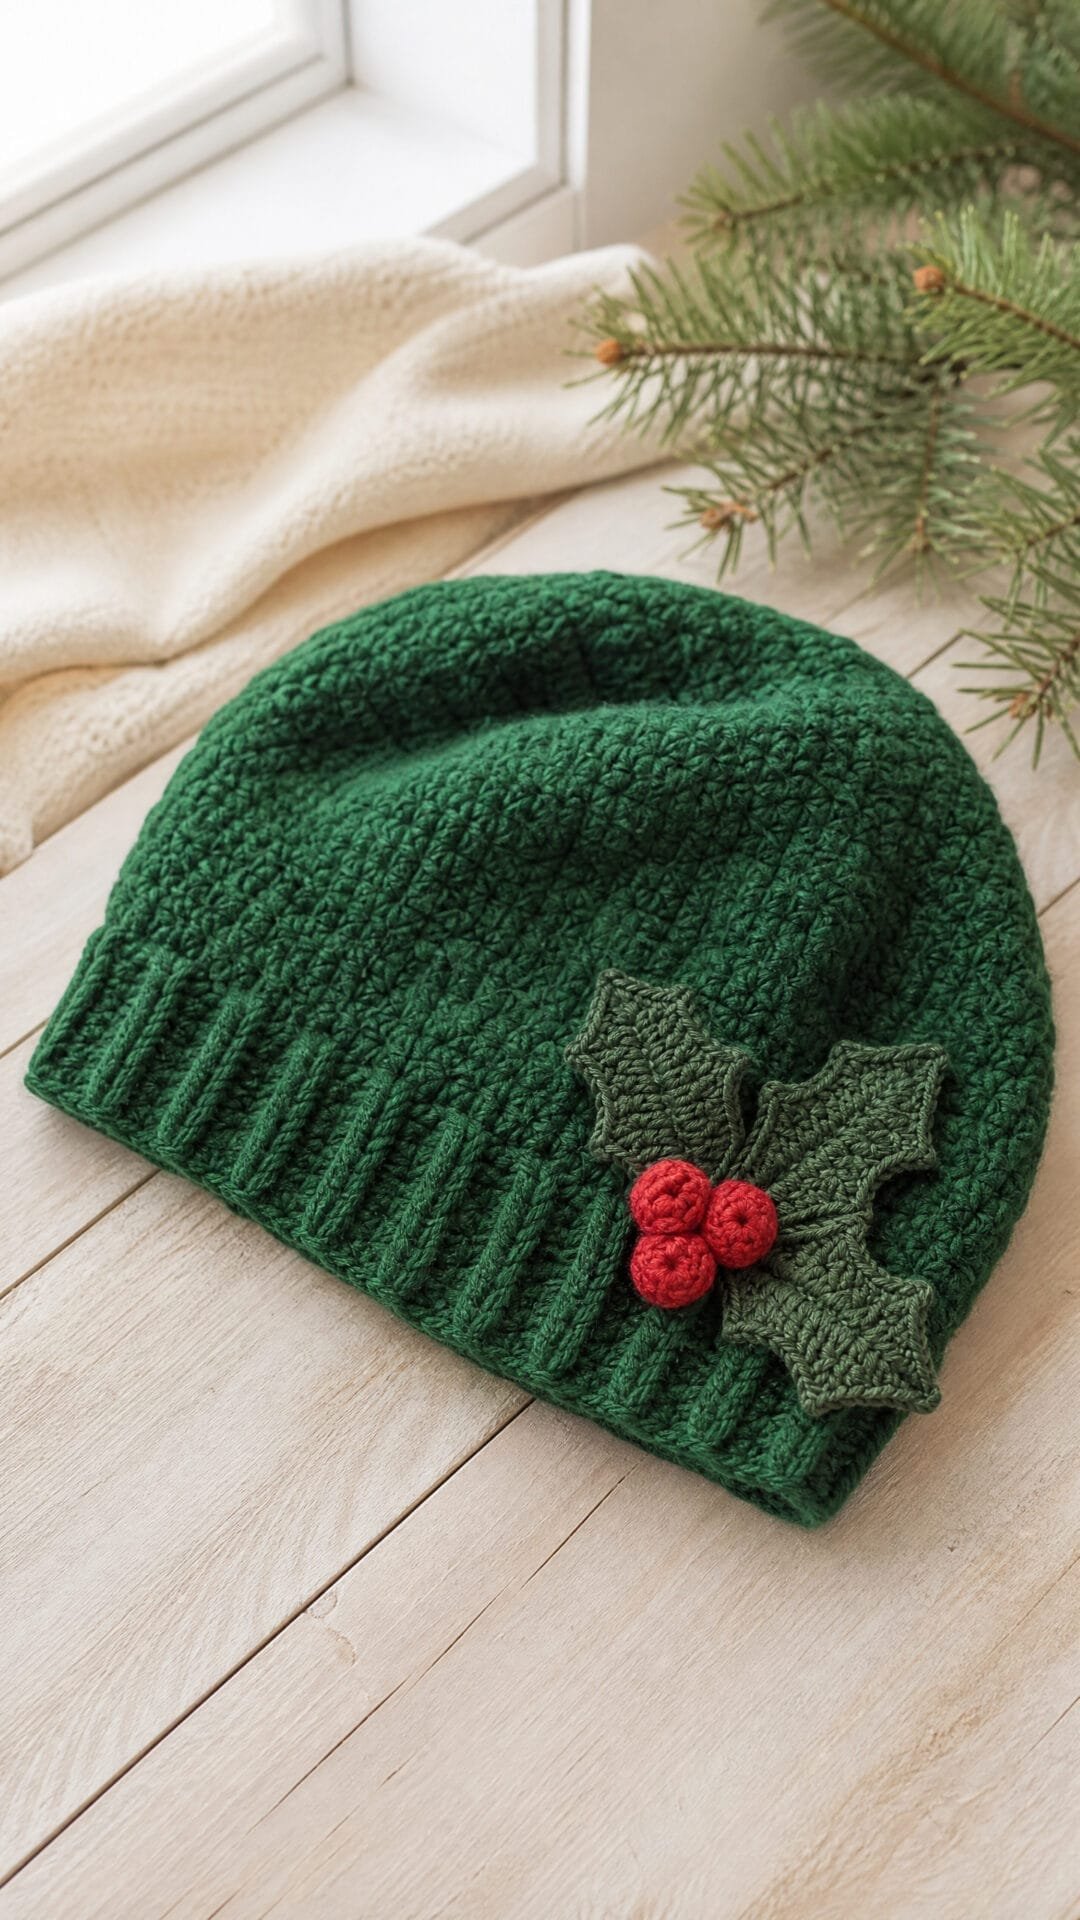
This Holly Berry Slouch Hat is a festive take on an everyday winter accessory. Its deep-green body, softly slouchy crown and folded ribbed brim create a wearable base, while a small holly cluster at one side brings in the Christmas detail without covering the whole hat.
The hat is crocheted from the brim upwards, moving from stretchy ribbing into a lightly textured fabric with small eyelets. The crown is shaped gradually for a tidy finish, and the contrast leaves and berries are made separately before being attached above the brim.
Keeping the holly motif clear of the folded edge helps the brim remain comfortable and elastic around the forehead. Arrange the leaves first, then position the berries over their bases for a balanced cluster; the decoration can sit on either side to suit the wearer.
Designed for confident beginners, this crochet Christmas hat pattern is a useful choice for seasonal gifting, festive outings or adding a handmade touch to a winter wardrobe. The simple colour palette also makes it easy to vary the look with brighter berries or a richer evergreen shade.
Holly Berry Slouch Hat Crochet Pattern
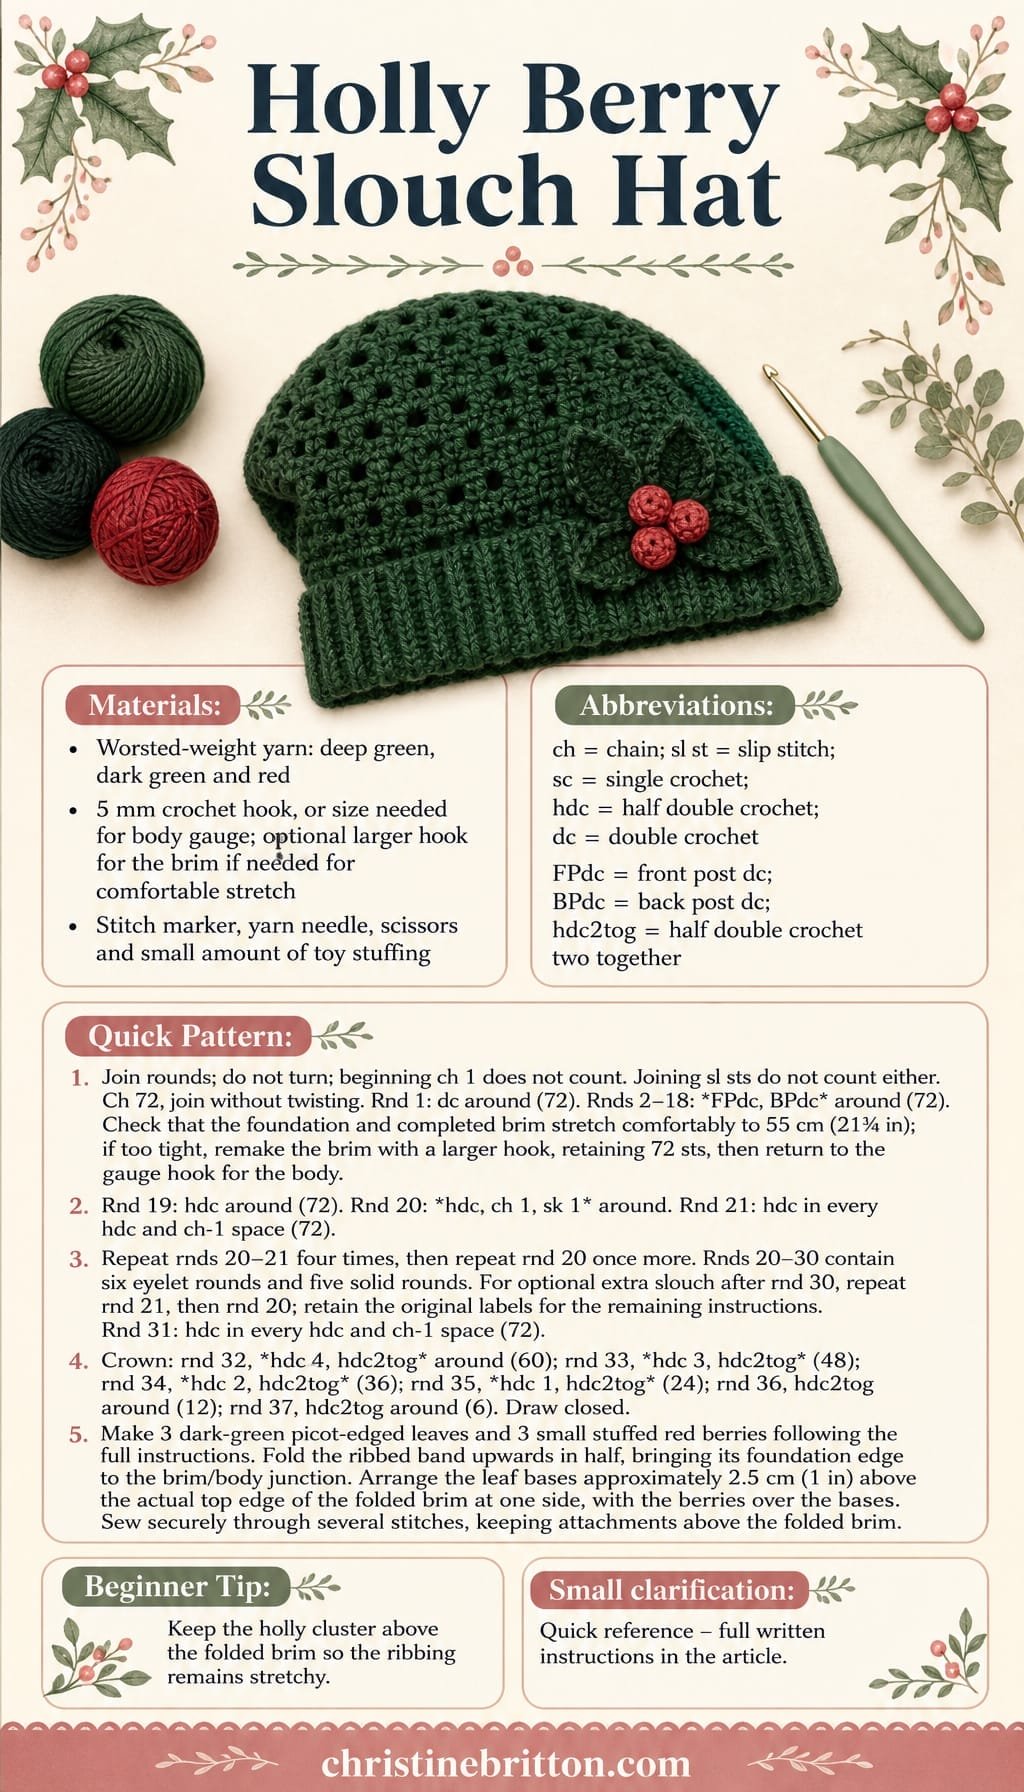
Quick-reference card. Follow the complete written instructions below.
Materials
- Worsted-weight yarn: Approx. 150 g (300 m) deep green for the hat.
- Worsted-weight yarn: Small amounts of dark green for the leaves and red for the berries.
- Crochet hook: 5 mm hook, or size needed to obtain body gauge. An optional larger hook may be needed for the brim if the foundation or completed band is too tight; return to the gauge hook for the body.
- Notions: Stitch marker, yarn needle, scissors and a small amount of polyester toy stuffing for the berries.
Size and Fit
Adult sample for a head circumference of approximately 55 cm (21¾ in); calculated body circumference approximately 51.5 cm (20¼ in) at the stated gauge. Retain 72 stitches throughout the brim and solid body rounds, or 72 positions on eyelet rounds, for the written crown shaping. Check that the foundation and completed brim stretch comfortably to the intended head circumference before continuing. If either is too tight, remake the brim with a larger hook, keeping the same stitch count, and return to the gauge hook for the body. Fold the completed 18-round ribbed band upwards in half, bringing its foundation edge to the brim/body junction. Finished depth varies with post-stitch round gauge and is measured from the lower fold to the closed crown.
Gauge
Target gauge: 14 stitch positions and 11 rounds = 10 cm in the alternating eyelet and solid-hdc body pattern, worked in joined, unturned rounds. Each hdc and each ch-1 space counts as one position; seven eyelet repeats span 14 positions.
Abbreviations
US crochet terms.
- beg = beginning
- BPdc = back post double crochet
- ch = chain
- dc = double crochet
- FPdc = front post double crochet
- hdc = half double crochet
- hdc2tog = half double crochet two stitches together
- rep = repeat
- rnd(s) = round(s)
- sc = single crochet
- sk = skip
- sl st = slip stitch
- st(s) = stitch(es)
Pattern
- Notes Work in joined rounds without turning, keeping the right side facing out. Join each round with a sl st into its first stitch; beginning ch 1 and joining sl sts do not count as stitches. Place a marker in the first stitch of each round and move it up as work progresses. The eyelet rounds contain 36 hdc and 36 ch-1 spaces; together they span the same 72 positions as the surrounding rounds. Count clarification for rnds 22–30: follow the written repeat sequence; rnds 20–30 contain six eyelet rounds and five solid hdc rounds, ending with eyelet rnd 30.
- Ribbed brim: foundation With deep green, ch 72. Take care not to twist the chain, join with a sl st in the first ch to form a ring. Ch 1.
- Ribbed brim: rnd 1 Work 1 dc in each ch around, join. (72 dc)
- Ribbed brim: rnds 2–18 Ch 1, *FPdc around next dc, BPdc around next dc; rep from * around, join. (72 sts) Fasten off only if changing yarn; otherwise continue with the main hat.
- Main hat: rnd 19 Ch 1, hdc in each st around, join. (72 hdc)
- Main hat: rnd 20 Ch 1, *hdc in next st, ch 1, sk next st; rep from * around, join. (36 hdc and 36 ch-1 spaces)
- Main hat: rnd 21 Ch 1, hdc in each hdc and in each ch-1 space around, join. (72 hdc)
- Main hat: rnds 22–30 Rep rnds 20–21 four more times, then rep rnd 20 once more. Across rnds 20–30 you will have worked six eyelet rounds and five solid hdc rounds. End after eyelet rnd 30. (36 hdc and 36 ch-1 spaces on rnd 30)
- Crown shaping: rnd 31 Ch 1, hdc in each hdc and ch-1 space around. (72 hdc)
- Crown shaping: rnd 32 Ch 1, *hdc in next 4 sts, hdc2tog; rep from * around, join. (60 sts)
- Crown shaping: rnd 33 Ch 1, *hdc in next 3 sts, hdc2tog; rep from * around, join. (48 sts)
- Crown shaping: rnd 34 Ch 1, *hdc in next 2 sts, hdc2tog; rep from * around, join. (36 sts)
- Crown shaping: rnd 35 Ch 1, *hdc in next st, hdc2tog; rep from * around, join. (24 sts)
- Crown shaping: rnd 36 Ch 1, hdc2tog around, join. (12 sts)
- Crown shaping: rnd 37 Ch 1, hdc2tog around, join. (6 sts) Fasten off, leaving a 20 cm (8 in) tail. Thread the tail through the front loops of the remaining 6 sts, pull firmly to close the crown, and weave in securely.
- Holly leaves: make 3 With dark green, ch 11. Working into the back bumps of the chain, sc in second ch from hook, hdc in next ch, dc in next ch, then [dc in next ch, ch 3, sl st in first ch of the ch-3 to make a picot] 4 times, hdc in next ch, sc in next ch. Work 3 sc in the final ch to turn around the tip. Working along the opposite side of the foundation chain, sc in next ch, hdc in next ch, dc in next ch, then [dc in next ch, ch 3, sl st in first ch of the ch-3 to make a picot] 4 times, hdc in next ch, sc in next ch. Sl st at the leaf base. Fasten off, leaving a long sewing tail. The picots form the holly points.
- Red berries: make 3 With red, make a magic ring. Rnd 1: Work 6 sc in ring. Rnd 2: Work 2 sc in each st around. (12 sts) Rnd 3: Sc in each st around. (12 sts) Rnd 4: Sc2tog around. (6 sts) Add a small pinch of stuffing, then fasten off leaving a tail. Thread the tail through the front loops of the final 6 sts and pull closed. Weave the tail through the berry to shape it into a small sphere.
- Arrange the decoration Fold the ribbed band upwards in half, bringing its foundation edge to the brim/body junction. Arrange the three leaves in a fan shape on one side of the hat, with their bases approximately 2.5 cm (1 in) above the actual top edge of the folded brim. Place the three berries over the leaf bases. Adjust the arrangement before sewing.
Finishing
- Use the dark-green leaf tails to sew each leaf firmly to the hat body, taking several small stitches through the central area of each leaf. Keep sewing stitches above the folded brim so the brim can stretch normally.
- Sew each red berry through its centre and into both the hat fabric and a leaf base where possible. Take several secure stitches, then weave in all ends on the inside of the hat.
- Tack the folded brim to the hat with one or two discreet stitches at the back seam area and beneath the holly cluster if desired. Do not stitch all the way around the brim, as this would reduce its stretch.
- Gently reshape the hat and berries by hand. Do not pull the eyelet rounds out of shape while attaching the embellishments.
Helpful Tips
- Work the first round of dc snugly but not tightly; an overly tight foundation chain can prevent the brim from stretching.
- The alternating FPdc and BPdc naturally creates vertical ribs. Check that the posts alternate before continuing, as correcting a twisted rib pattern is easier in the first few rounds.
- For a more pronounced slouch, after rnd 30 work two extra rounds: first repeat rnd 21, working hdc into every hdc and ch-1 space; then repeat rnd 20. Continue with the instructions labelled rnd 31 onwards, retaining the original labels for reference. These two extra rounds add approximately 2 cm (¾ in) at the stated body gauge without changing the circumference.
- If preferred, use flat red circles instead of stuffed berries: make 6 sc in a magic ring, then work 2 sc in each stitch around and sew the circles in place.
- Positioning the holly above, rather than on, the folded brim keeps the decoration visible when the hat is worn and avoids bulky stitches at the forehead.
Mini Santa Hat Ornament
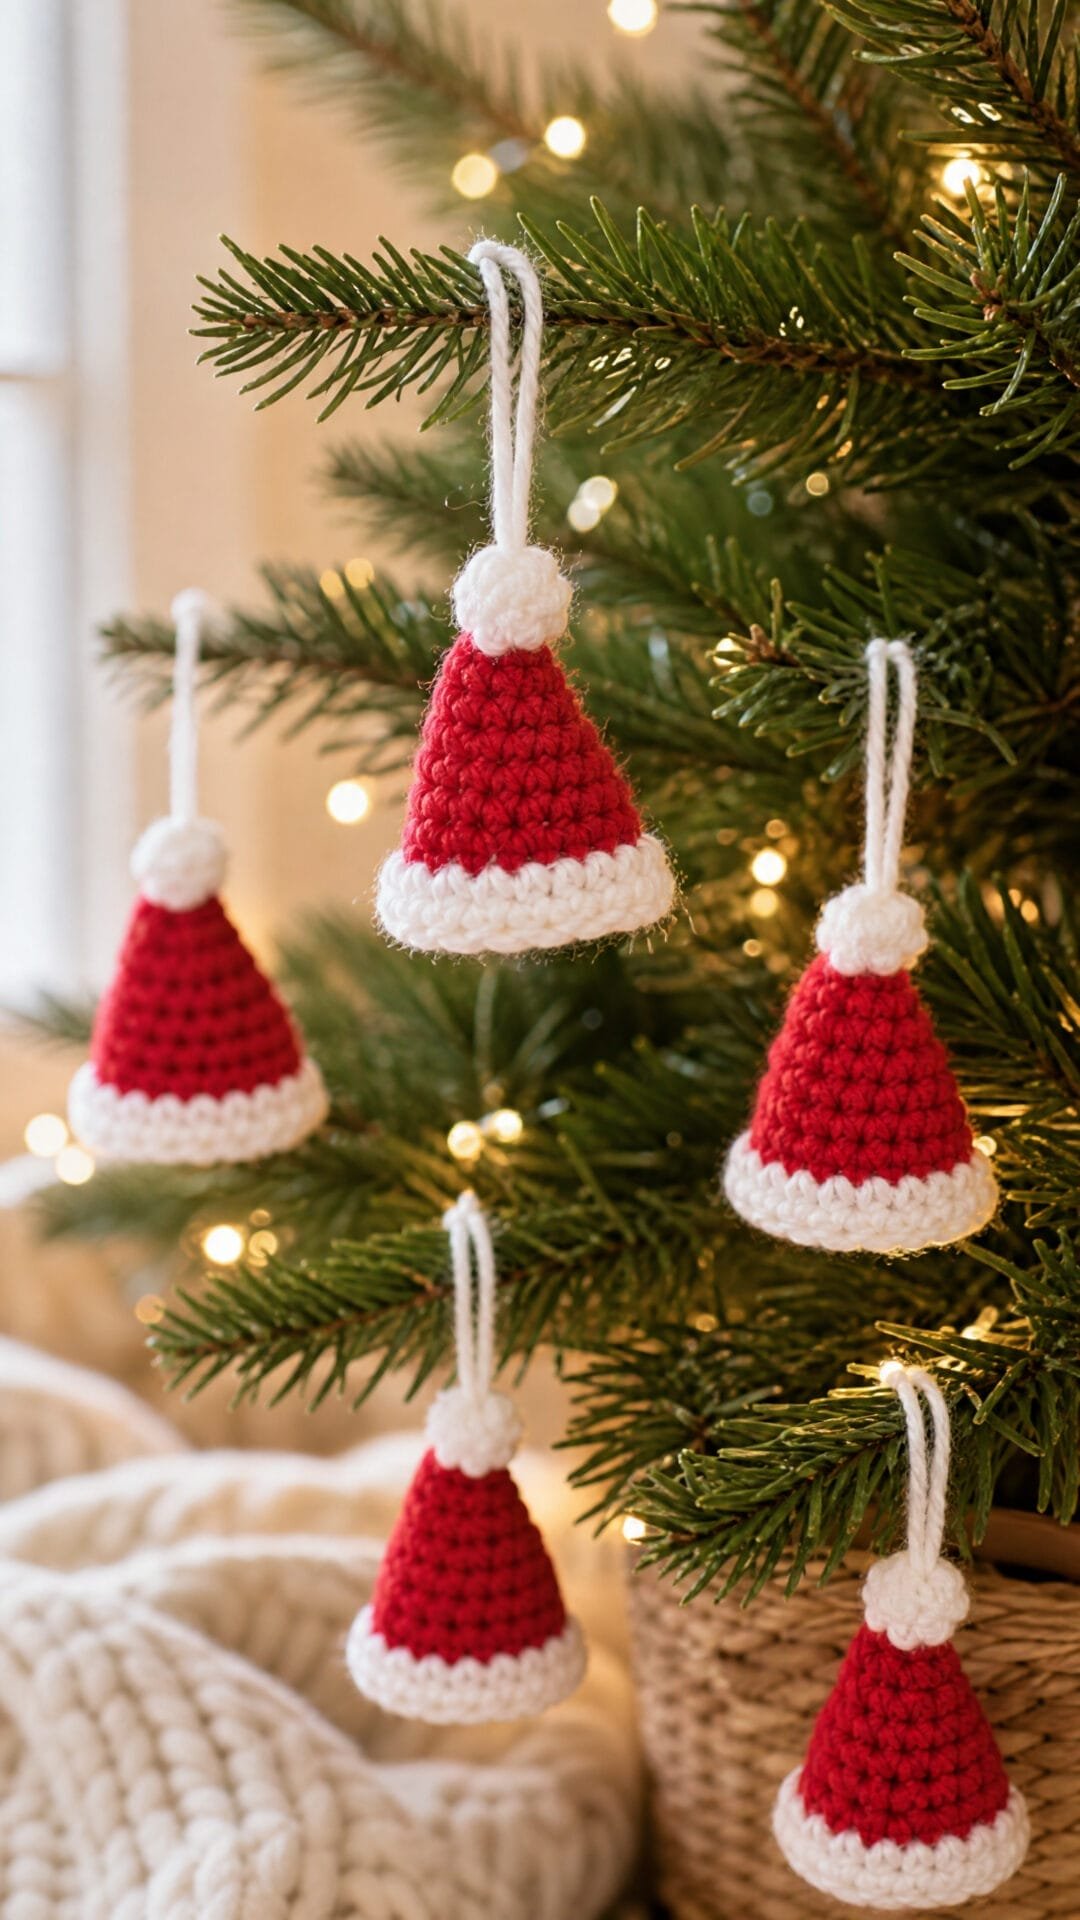
This mini Santa hat ornament is a cheerful way to use small lengths of red and white DK yarn. Its classic pointed cone, neat white cuff and pom-pom make it instantly recognisable on a Christmas tree, while its small scale also suits gift wrapping, place settings and festive garlands.
The hat is crocheted from the tip towards the opening in a continuous spiral, so a stitch marker is particularly helpful for keeping the shaping easy to follow. Working with an even tension will give the cone a tidy, firm finish and help the miniature shape hold well.
Choose a crocheted pom-pom for a rounded, soft finishing detail, or substitute a wrapped-yarn version if preferred. The hanging loop is attached near the tip, allowing the ornament to sit upright when displayed from a branch or ribbon.
As this is a small decorative make, it is a useful project for practising narrow rounds, colour changes and secure attachments before moving on to larger festive crochet projects.
Mini Santa Hat Ornament Crochet Pattern
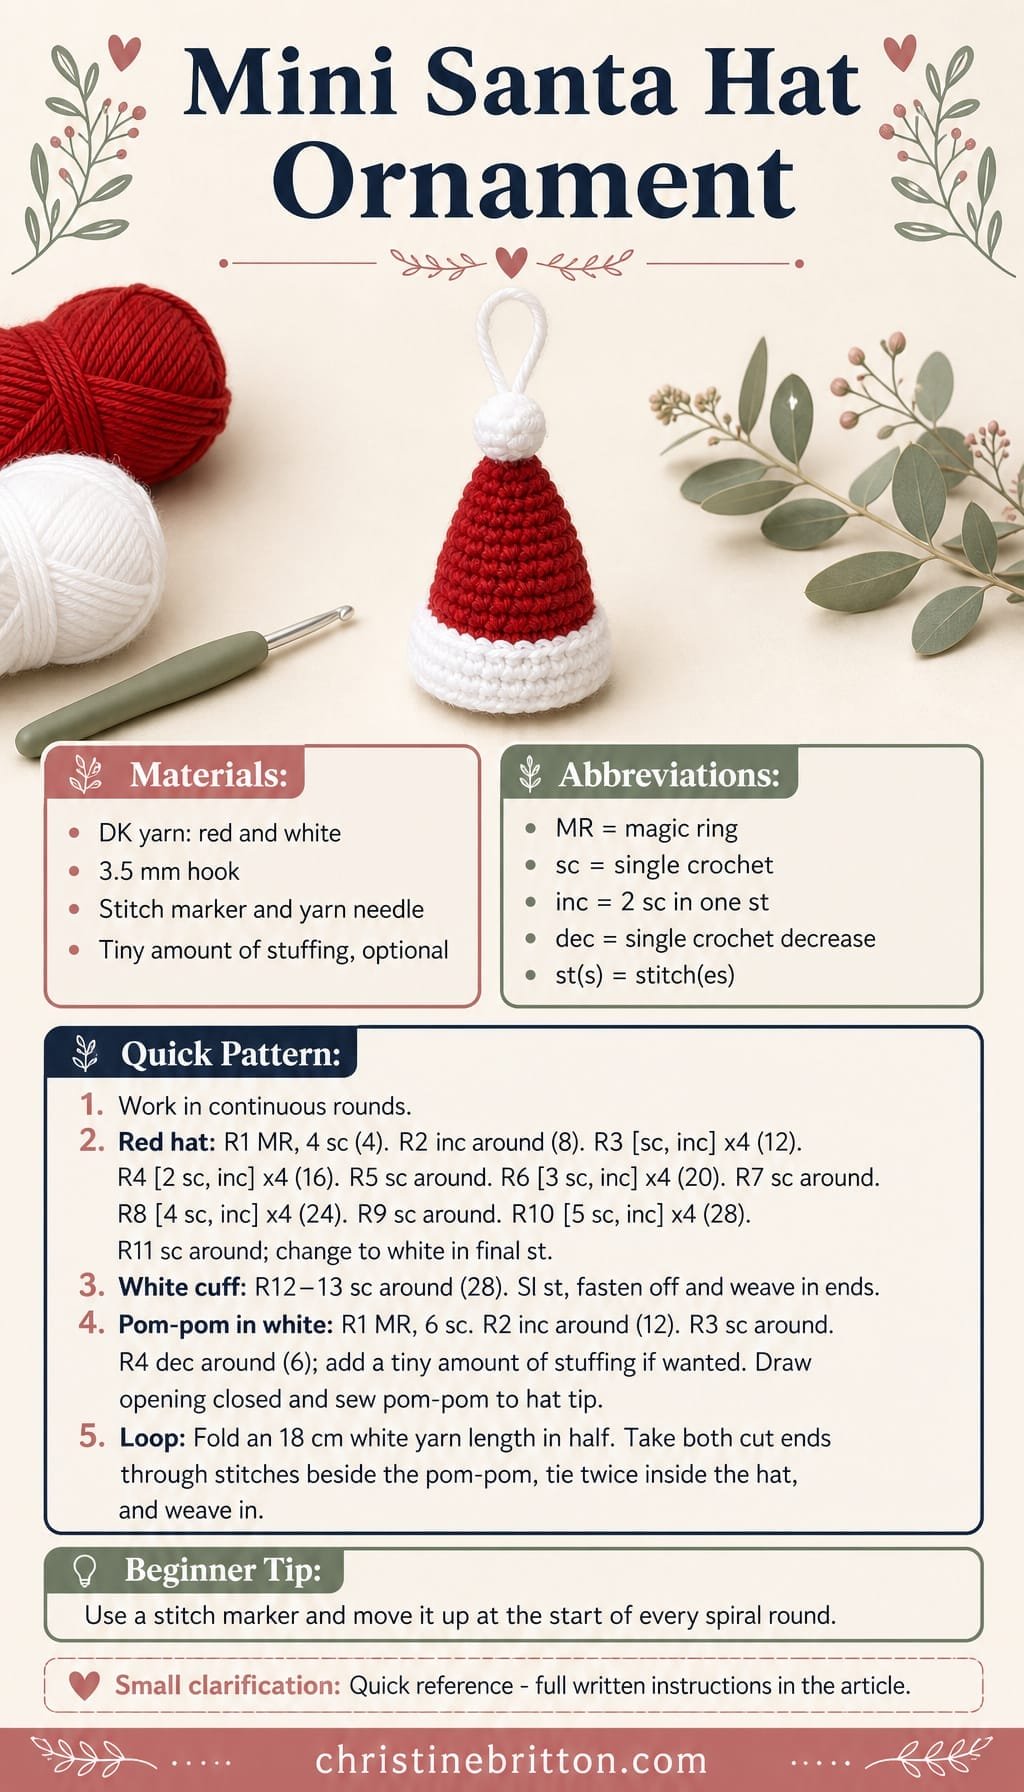
Quick-reference card. Follow the complete written instructions below.
Materials
- Yarn: Small amounts of DK-weight yarn: red for the hat and white for the cuff, pom-pom and hanging loop.
- Crochet hook: 3.5 mm hook, or a size that creates a firm fabric with no visible stuffing gaps.
- Stitch marker: To mark the first stitch of each continuous round.
- Yarn needle: For weaving in ends, attaching the pom-pom and securing the hanging loop.
- Toy stuffing: A very small amount, optional, for the crocheted pom-pom.
Size and Fit
One size: estimated from the guide gauge at approximately 5.5 cm from tip to cuff edge along the fabric and 6.4 cm across the opening when laid flat, excluding the pom-pom and hanging loop. These are calculated estimates, not tested measurements; finished dimensions depend on yarn, tension and shaping.
Gauge
Gauge is not essential, but work firmly. As a guide, 22 sc and 24 rounds measure approximately 10 cm using DK yarn and a 3.5 mm hook.
Abbreviations
US crochet terms.
- ch = chain
- dec = decrease: insert hook in next stitch and pull up a loop, insert hook in following stitch and pull up a loop, yarn over and pull through all 3 loops
- inc = increase: work 2 sc in the same stitch
- MR = magic ring
- sc = single crochet
- sl st = slip stitch
- st(s) = stitch(es)
Pattern
- Notes Work all hat and pom-pom rounds in a continuous spiral; do not join rounds. Place a stitch marker in the first stitch of each round and move it up as you work. Change colour by completing the final yarn over of the last red sc with white yarn.
- Red hat cone, Round 1 With red yarn, make an MR and work 4 sc in the ring. (4 sts)
- Round 2 Inc in each st around. (8 sts)
- Round 3 [Sc in next st, inc in next st] 4 times. (12 sts)
- Round 4 [Sc in next 2 sts, inc in next st] 4 times. (16 sts)
- Round 5 Sc in each st around. (16 sts)
- Round 6 [Sc in next 3 sts, inc in next st] 4 times. (20 sts)
- Round 7 Sc in each st around. (20 sts)
- Round 8 [Sc in next 4 sts, inc in next st] 4 times. (24 sts)
- Round 9 Sc in each st around. (24 sts)
- Round 10 [Sc in next 5 sts, inc in next st] 4 times. (28 sts)
- Round 11 Sc in each st around. Change to white in the final sc. (28 sts)
- White cuff, Round 12 With white yarn, sc in each st around. (28 sts)
- Round 13 Sc in each st around. Sl st in the next st to neaten the round. Fasten off and weave in the red and white ends on the inside of the hat. (28 sts)
- Crocheted pom-pom, Round 1 With white yarn, make an MR and work 6 sc in the ring. (6 sts)
- Pom-pom, Round 2 Inc in each st around. (12 sts)
- Pom-pom, Round 3 Sc in each st around. (12 sts)
- Pom-pom, Round 4 [Dec] 6 times. Add a tiny pinch of stuffing before the opening becomes too small, if desired. (6 sts)
- Close pom-pom Cut the yarn, leaving a 15 cm tail. Thread the tail through the front loops of the remaining 6 sts, pull tight to close, and secure. Use the tail to sew the pom-pom firmly over the red tip of the hat.
- Hanging loop Cut an 18 cm length of white yarn and fold it in half. With the yarn needle, take both cut ends through the red stitches beside the pom-pom from outside to inside. Tie the ends together twice on the inside of the hat, then weave them through several stitches before trimming. The folded end forms the hanging loop.
Finishing
- Check that the pom-pom and hanging loop are securely attached, especially if the ornament will be handled often.
- Shape the hat gently with your fingers, keeping the cone narrow at the top and the white cuff flat at the opening.
- For a gift-tag decoration, use a shorter hanging loop or omit it and thread ribbon through the cuff instead.
Helpful Tips
- If you prefer not to use a magic ring, ch 2 and work the Round 1 stitches into the second ch from the hook.
- Keep the first few rounds snug by holding the starting tail while crocheting; this helps the pointed tip stay neat.
- A wrapped-yarn pom-pom may be substituted for the crocheted pom-pom. Tie it firmly and sew it to the tip with its tying strands.
- Make a set in varied reds, or add an initial to the cuff with a small embroidery stitch.
Another helpful collection to bookmark is Christmas crochet projects.
Gnome Hat Headband
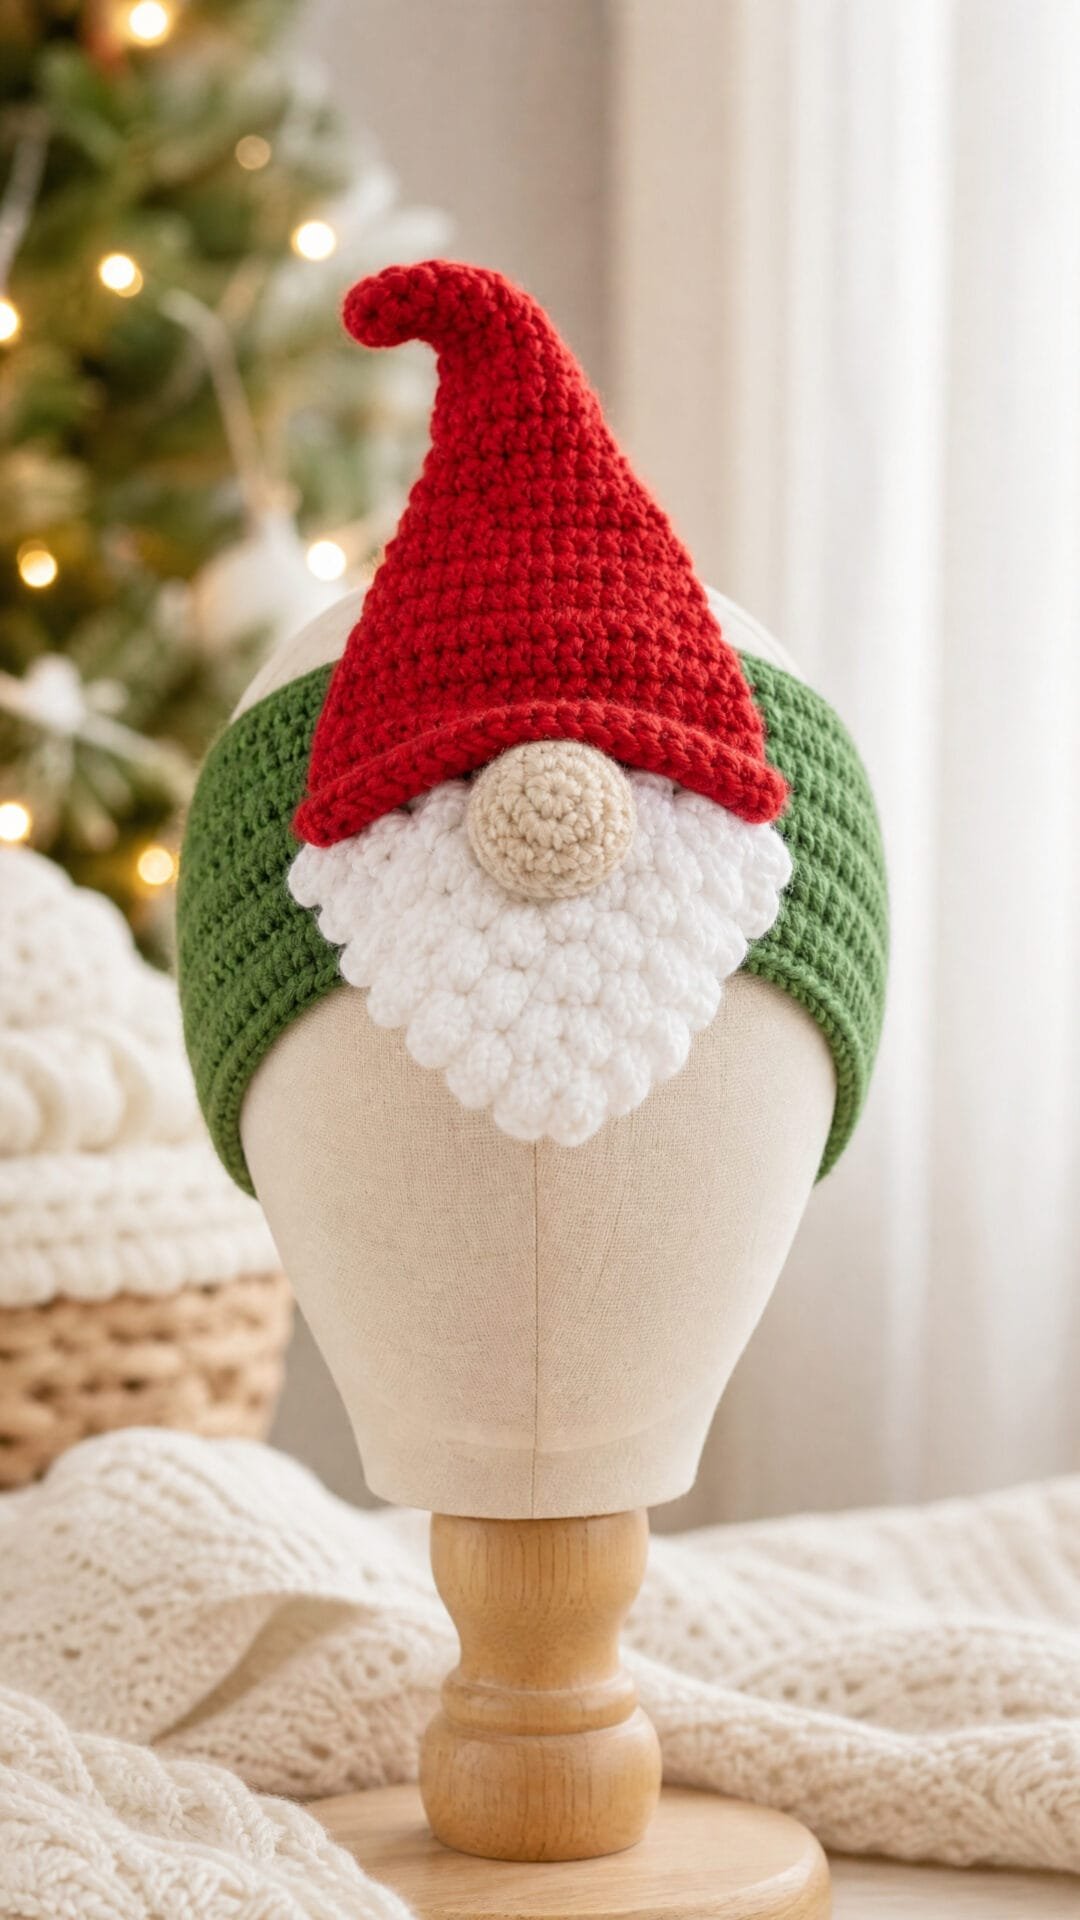
Bring a little gnome mischief to Christmas gatherings with this cheerful headband design. A classic red pointed hat, a rounded nose and a full white beard create an instantly recognisable festive character while keeping the look light and comfortable to wear.
This is an engaging intermediate make for crocheters who enjoy combining small shaped components with texture. The beard gives the piece its storybook finish, while the curved hat tip adds a playful bit of movement at the centre front.
A gnome headband is a practical alternative to a full novelty hat for school events, family photographs, Christmas markets and seasonal parties. Choose smooth, clearly defined colours for the hat and band, then let the softer beard texture provide the contrast that makes the face stand out.
Gnome Hat Headband
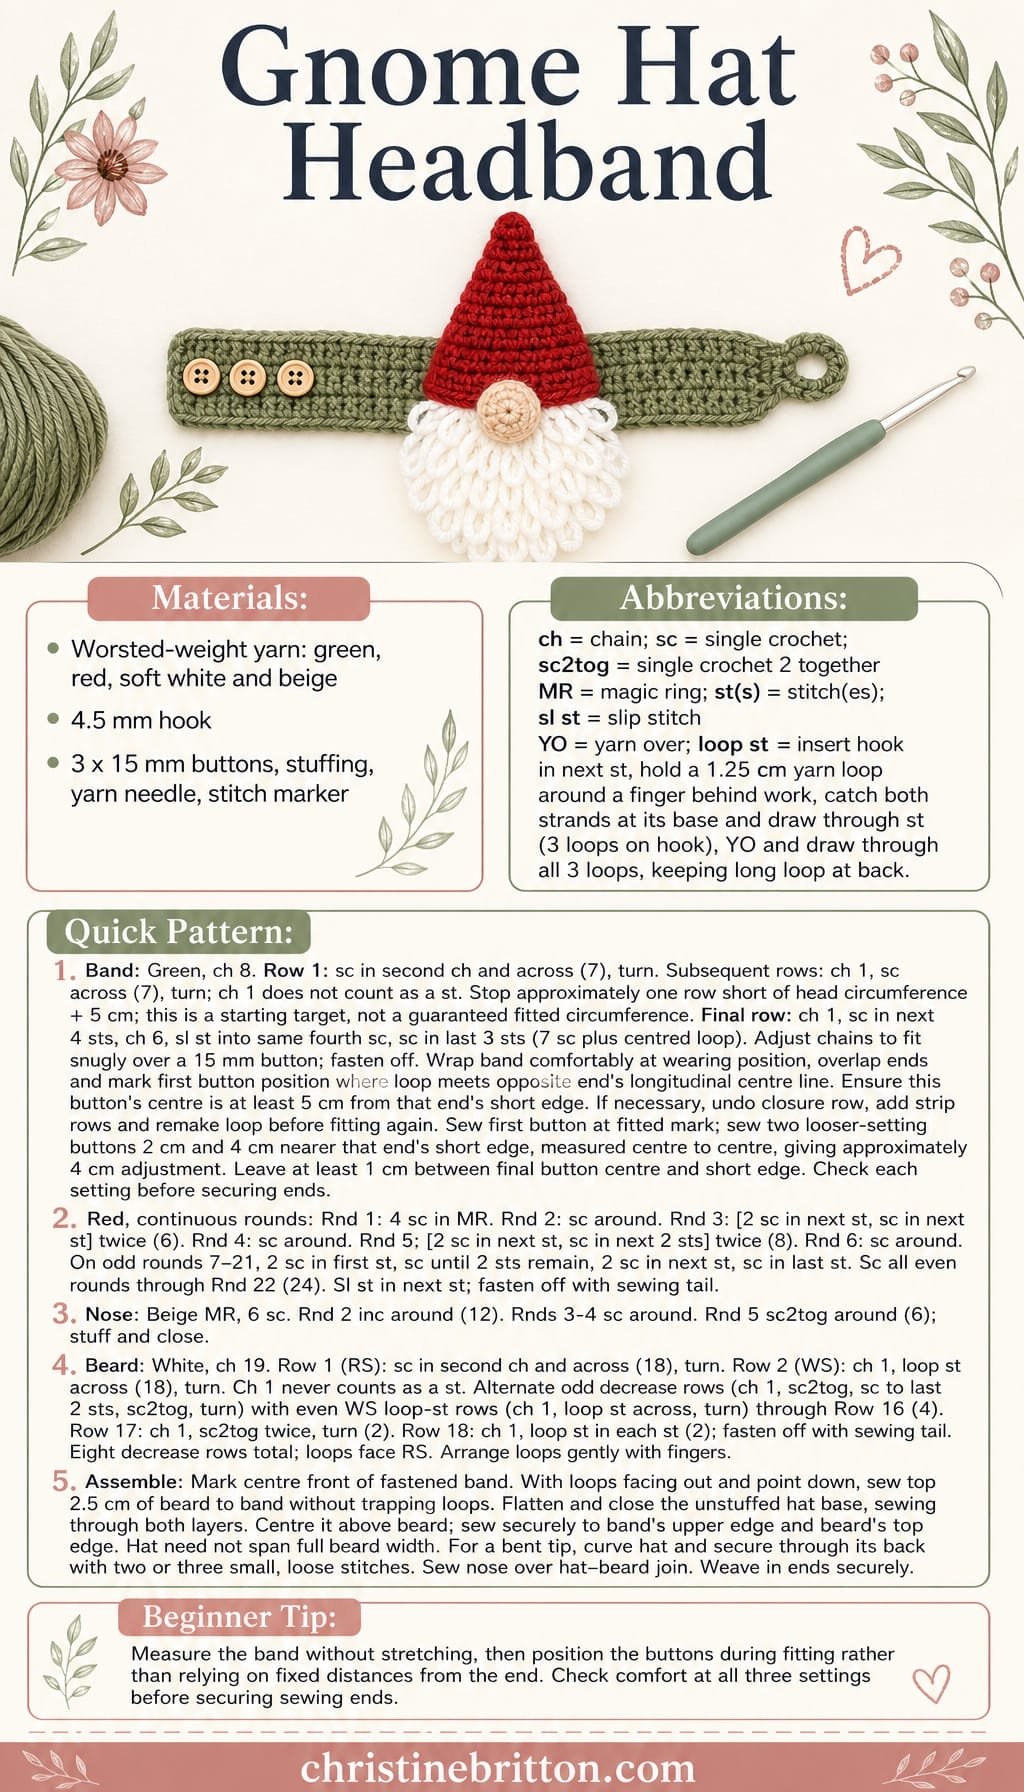
Quick-reference card. Follow the complete written instructions below.
Materials
- Worsted-weight yarn: Green for the headband (approximately 20 g), red for the hat (approximately 25 g), soft white for the beard (approximately 30 g), and a small amount of beige for the nose.
- Crochet hook: 4.5 mm, or size needed to obtain gauge.
- Notions: Three 15 mm buttons, polyester toy stuffing, yarn needle, stitch marker, scissors and tape measure.
Size and Fit
Measure around the head where the band will sit. Work the strip to approximately one row short of the head circumference plus 5 cm, then add the final closure row. This strip length is a starting target, not a guaranteed fitted circumference: wrap the band comfortably around the wearer and position the first button to suit the loop. Ensure the first button’s centre is at least 5 cm from the opposite end’s short edge. If necessary, undo the closure row, add strip rows and remake the loop before fitting again. Place two additional buttons 2 cm and 4 cm nearer that short edge, measured centre to centre, giving approximately 4 cm of looser adjustment. Leave at least 1 cm between the final button’s centre and the short edge. Check comfort at each setting. At the stated stitch gauge, the band is approximately 3.9 cm wide and the beard starts approximately 10 cm wide. Finished decoration length depends on the hat’s round gauge, loop-stitch row height, overlap and optional bent tip; measure after assembly.
Gauge
18 sc and 14 rows = 4 in/10 cm in single crochet, measured after lightly resting the swatch flat. Exact gauge is most important for the width of the band and the scale of the decoration.
Abbreviations
US crochet terms.
- ch = chain
- sc = single crochet
- sc2tog = single crochet 2 stitches together
- sl st = slip stitch
- st(s) = stitch(es)
- MR = magic ring
- RS = right side
- WS = wrong side
- rep = repeat
- YO = yarn over
- loop st = loop stitch: Insert hook in next st. Hold a 1.25 cm loop of yarn around a finger behind the work. Catch both strands at the base of this loop and draw them through the stitch—3 loops on hook. YO and draw through all 3 loops, keeping the long loop at the back of the work.
Pattern
- Headband: foundation With green, ch 8. Row 1: Sc in second ch from hook and in each ch across, turn—7 sts.
- Headband: strip Row 2: Ch 1 (does not count as a st), sc in each st across, turn—7 sts. Rep Row 2 until the strip measures approximately one row short of the wearer’s head circumference plus 5 cm. Do not stretch the strip while measuring. This length is a starting target; establish the comfortable fitted circumference when positioning the buttons.
- Headband: button loop Ch 1, sc in next 4 sts, ch 6, sl st into the same fourth sc, sc in last 3 sts—7 sc plus a centred loop. Adjust the chain count to pass snugly over a 15 mm button; fasten off.
- Headband: buttons Weave in the starting tail. Wrap the unbuttoned band comfortably around the intended wearing position, overlap the ends and mark where the loop holds a button on the opposite end’s longitudinal centre line. Ensure the first button’s centre is at least 5 cm from that end’s short edge. If necessary, undo the closure row, add strip rows and remake the loop before fitting again. Sew the first button at the fitted mark, then place two looser-setting buttons 2 cm and 4 cm nearer that end’s short edge, measured centre to centre. This gives approximately 4 cm of looser adjustment, with at least 1 cm between the final button’s centre and the short edge. Confirm comfortable fit at each setting before securing all sewing ends.
- Pointed hat With red, make an MR. Work in continuous rounds; use a marker in the first st of each round. Rnd 1: 4 sc in MR—4 sts. Rnd 2: Sc in each st around—4 sts. Rnd 3: [2 sc in next st, sc in next st] twice—6 sts. Rnd 4: Sc in each st around—6 sts. Rnd 5: [2 sc in next st, sc in next 2 sts] twice—8 sts. Rnd 6: Sc in each st around—8 sts. Continue this established shaping: on every odd-numbered round, work 2 sc in the first st, sc evenly until 2 sts remain, 2 sc in the next st, sc in the final st; on every even-numbered round, sc in each st around. Continue until 24 sts are reached at the end of Rnd 21. Rnd 22: Sc in each st around—24 sts. Sl st in next st and fasten off, leaving a long sewing tail. The hat will be a narrow cone that can curve naturally to one side.
- Nose With beige, make an MR. Rnd 1: 6 sc in MR—6 sts. Rnd 2: 2 sc in each st around—12 sts. Rnds 3-4: Sc in each st around—12 sts. Rnd 5: [Sc2tog] around—6 sts. Stuff firmly. Fasten off, leaving a long sewing tail. Close any remaining opening with the tail.
- Beard With soft white, ch 19. Turning ch 1 never counts as a stitch. Row 1 (RS): Sc in second ch from hook and in each ch across, turn—18 sts. Row 2 (WS): Ch 1, loop st in each st across, turn—18 sts. Row 3: Ch 1, sc2tog, sc in each st to last 2 sts, sc2tog, turn—16 sts. Row 4: Ch 1, loop st in each st across, turn—16 sts. Row 5: Ch 1, sc2tog, sc in each st to last 2 sts, sc2tog, turn—14 sts. Continue alternating a loop-st row and a decrease row, decreasing 2 sts on every decrease row, until Row 16 is complete and 4 sts remain. Row 16 is a loop-st row. Row 17: Ch 1, sc2tog twice, turn—2 sts. Row 18: Ch 1, loop st in each st—2 sts. Fasten off with a sewing tail. All even-numbered loop rows are worked with WS facing, leaving their loops on the RS. Arrange the loops gently with fingers without drawing yarn out of neighbouring stitches.
- Assembly Button the headband and place it on a flat surface with the button closure at the back. Mark the centre front. Position the straight top edge of the beard across the centre front, with its point facing down and its looped RS facing out. Stitch the top 1 in/2.5 cm of the beard securely to the band, keeping the looped texture free. Leave the hat unstuffed, flatten its open base and sew through both layers to close it. Centre this flattened base above the beard and sew it securely to the band’s upper edge and the beard’s top edge. The narrower hat need not span the beard’s full width. Curve the pointed end of the hat to one side and take two or three small, loose securing stitches through the back of the cone if a bent tip is wanted. Sew the nose at the centre, overlapping the lower edge of the hat and the upper edge of the beard. Pass all sewing tails through several stitches, weave them into the back and trim.
Finishing
- Check that the button loop sits flat and comfortably passes over each button before weaving in its tail.
- Secure the hat, nose and beard with several separate stitches rather than one long running stitch, especially if the headband will be worn by a child.
- Fluff the beard loops with fingers after assembly; avoid brushing hard enough to snag the yarn.
Helpful Tips
- Use a smooth, firm worsted-weight yarn for the green band so it does not curl or stretch out of shape.
- If none of the settings fits comfortably, refit and reposition the whole button group, maintaining 2 cm centre-to-centre spacing and at least 1 cm between the outermost button centre and the short edge.
- Keep stuffing inside the nose only; a lightly stuffed nose sits rounder and is easier to sew flat against the hat.
- For a less looped texture, substitute sc for every loop-st row. The beard will remain shaped but have a flatter finish.
Frequently Asked Questions
Which patterns are suitable for newer crocheters?
The mini Santa hat ornament is listed for beginners. The Santa beanie, elf hat, snowman top hat and holly berry slouch hat are listed for confident beginners.
Which Christmas hat patterns need intermediate skills?
The Christmas tree hat, reindeer earflap hat, peppermint swirl beanie and gnome hat headband are intermediate designs. Their shaping or decorative pieces require closer attention to placement and finishing.
Are all the projects wearable hats?
No. The snowman top hat is a small decoration, and the mini Santa hat is designed as an ornament. The gnome design is a headband rather than a full hat.
What yarn works well for a festive crochet hat?
Use the yarn weight specified by the individual pattern to protect the intended size and drape. For a wearable hat, choose a comfortable yarn with good stitch definition; for small decorations, a smooth yarn helps colour details show clearly.
How can I keep added features secure?
Sew ears, antlers, pom-poms, holly and other details through several stitches, then weave the yarn tail back through the fabric before trimming. Check that additions are firmly attached before gifting or wearing.
Final Thoughts
These crochet Christmas hats free patterns offer several ways to make seasonal accessories and decorations, with projects suited to different experience levels. Start with the construction that matches your current skills, then let the colour and finishing details create the festive character.
For more seasonal makes, pair a hat project with handmade decorations, stockings or tree details from the related Christmas crochet collections.