28 Crochet Christmas Hat Ornament Patterns to Save for Your Next Project

Looking for a crochet Christmas hat ornament to hang on the tree? These 28 patterns range from familiar Santa hats and ribbed beanies to shaped bonnets, caps and a layered Christmas tree hat.
The collection includes easy flat constructions as well as intermediate shaping and advanced colourwork. Choose by the shape you want to make, then check how the brim, crown and hanging loop are finished.
For more ideas that build on this collection, explore crochet Christmas ornament patterns.
Before You Start
These are miniature decorations, not hats sized to wear. Read your chosen patternâs yarn and hook details before starting: yarn thickness affects both the finished size and how well a brim or crown holds its shape.
The patterns use US crochet terminology. Check the stitch abbreviations in each one before you begin, especially if you usually follow UK patterns.
Construction varies across the collection. Some hats are worked in rounds, while the ribbed beanie begins as a flat strip and the panel designs need seaming. Leave enough yarn at joins for neat finishing, and position the hanging loop so the completed hat hangs upright.
Crochet terminology: This article uses US crochet terms. Check the abbreviations for each project.
Mini Santa Cone Hat Ornament

This Mini Santa Cone Hat Ornament gives the familiar red-and-white Christmas hat a neat, pointed silhouette. Its folded cuff and little pom-pom make it easy to recognise on a tree, while the hanging loop also makes it suitable for a gift tag or festive garland.
The cone is left unstuffed, so a firm fabric helps it keep its shape without adding weight. The small pom-pom adds the classic Santa-hat finish without making the tip droop.
This is an approachable project if youâre comfortable crocheting in continuous rounds. The colour change separates the cone from the cuff, and the pattern card below has the full instructions.
Mini Santa Cone Hat Ornament

Quick-reference card. Follow the complete written instructions below.
Materials
- Smooth DK yarn: Approximately 10 g red and 5 g white, including yarn for the pom-pom
- Crochet hook: 3.5 mm, or a size that makes a firm fabric
- Stitch marker: For marking the start of each round
- Tapestry needle and scissors: For securing the cuff, pom-pom and hanging loop
Size and Fit
One ornament size. At the suggested gauge, the red cone is approximately 5 cm tall and 12 cm around its base before adding the cuff, pom-pom and hanging loop. Your finished size will vary with yarn and tension.
Gauge
Approximately 20 sc and 22 rounds per 10 cm in single crochet. Exact gauge is not essential; work firmly enough for the unstuffed cone to hold its shape.
Abbreviations
US crochet terms.
- sc = single crochet
- inc = work 2 sc in the same stitch
- st(s) = stitch(es)
- R = round
Pattern
- Begin the red cone With red yarn, make a magic ring. R1: Work 4 sc into the ring. Pull the ring closed. Place a marker in the first stitch and move it up at the start of each round. Work in continuous rounds; do not join.
- R2 (Sc in next st, inc in next st) twice. (6 sts)
- R3âR11 In each round, work two evenly spaced increases: R3: (sc in next 2 sts, inc) twice. R4: (sc in next 3 sts, inc) twice. Continue in this way, working one more sc before each increase in every new round, through R11: (sc in next 10 sts, inc) twice. Stitch counts after R3âR11 are 8, 10, 12, 14, 16, 18, 20, 22 and 24 sts.
- White cuff Change to white on the final pull-through of the last sc of R11. R12âR14: Sc in each st around. (24 sts in each round) Fasten off, leaving a white tail long enough to secure the cuff.
- Fold the cuff Turn the white section upwards over the outside of the red cone. Use the white tail to tack its loose edge to the red fabric at four evenly spaced points. Keep the stitches small and do not pull the cuff tight.
- Pom-pom and hanging loop Make a small white yarn pom-pom and trim it to approximately 1 cm across. Sew it securely to the cone tip. Cut a 15 cm length of red yarn and fold it in half. Pass both cut ends through the tip beside the pom-pom, leaving a loop of approximately 3 cm above the hat. Knot the ends together inside the cone and weave them into the fabric.
Finishing
- Weave in any remaining ends, keeping knots and tails inside the hat.
- Straighten the folded cuff and gently shape the unstuffed cone before hanging.
Helpful Tips
- If the tip looks open after the first round, pull the magic ring closed again before weaving in its starting tail.
- Trim the pom-pom gradually so it stays small enough not to pull the cone tip down.
Gathered Ribbed Beanie Ornament

This crochet Christmas hat ornament has the look of a miniature winter beanie, with vertical ribs running from its open brim to a softly gathered crown. The plain lower edge keeps the shape simple and lets the texture stand out.
Working the ribbing as a flat strip avoids shaping a tiny crown in rounds, making this an approachable choice if you prefer working back and forth. It would look at home on a Christmas tree or tied to a wrapped gift; the full pattern below gives the construction and hanging-loop details.
Gathered Ribbed Beanie Ornament

Quick-reference card. Follow the complete written instructions below.
Materials
- DK yarn: Approximately 10â15 g in cranberry; choose a springy yarn that holds its ribbing.
- Crochet hook: 3.5 mm, or a size that produces a firm but flexible fabric.
- Yarn needle and scissors: For seaming, gathering and securing the hanging loop.
Size and Fit
One sample size. At the suggested gauge, the flat rectangle is approximately 6 cm from brim to crown and 10.4 cm around. Expect an ornament about 5.5â6 cm tall and 3.3 cm in diameter after gathering; dimensions will vary with yarn and tension.
Gauge
Approximate target: 20 sc across 10 cm along a row and 25 rows across 10 cm of relaxed back-loop ribbing. Gauge is not critical for an ornament.
Abbreviations
US crochet terms.
- ch = chain
- sc = single crochet
- BLO = back loop only
- sl st = slip stitch
Pattern
- Ribbed strip, Row 1 Ch 13. Sc in the second ch from the hook and in each remaining ch. You have 12 sc.
- Ribbed strip, Rows 2â26 Ch 1, turn. Sc BLO in each of the 12 sc across. Keep the turning ch loose and do not count it as a stitch. At the end of Row 26, fasten off with a long tail for seaming and gathering.
- Join the short edges Lay the rectangle flat with the ribs running from one long edge to the other. Bring the foundation-chain edge and Row 26 edge together, keeping the first and last stitches at the same end. With the long tail and a yarn needle, sew these short edges together, matching all 12 stitch positions. This forms a tube; the two edges made of row ends are the brim and crown.
- Gather the crown Choose one row-end edge as the crown. With the remaining tail, make a running stitch through each of its 26 row ends, including the ends beside the seam. Pull tight to close the opening. Sew across the centre a few times to secure it, then weave the tail inside. Leave the other row-end edge open as the plain brim.
- Hanging loop With a separate length of yarn, ch 20 and fasten off, leaving tails at both ends. Bring the chain ends together to form a loop. Sew both ends firmly to the gathered crown, then secure and weave the tails inside the hat.
Finishing
- Weave in any remaining ends without flattening the ribs.
- Ease the gathered crown into shape and straighten the open lower edge.
Helpful Tips
- The 12 stitches in each row set the brim-to-crown height; the 26 rows set the circumference.
- Do not catch the brim row ends when gathering, or the lower edge will close as well.
- If the crown will not close neatly, check that the running stitch has passed through every row end before pulling it tight.
Layered Christmas Tree Hat Ornament

This crochet Christmas hat ornament turns a miniature cone into a Christmas tree silhouette. Overlapping green scallops give it the look of branches, while a brown band and a soft yellow star complete the design. The brim stays open, so it reads as a tiny hat rather than a stuffed tree.
The scallops sit on the outside of the cone, attached to loops reserved as the cone is made. This gives the tiers a secure base without making the main fabric bulky. Pay particular attention where a reserved-loop round also widens the cone: the shaping and the loops for the tier both matter.
This is a good choice if you enjoy small projects with a little texture and shaping. Its soft, stitched-on details make it suited to a tree or a festive garland, without beads or other hard embellishments.
Layered Christmas Tree Hat Ornament
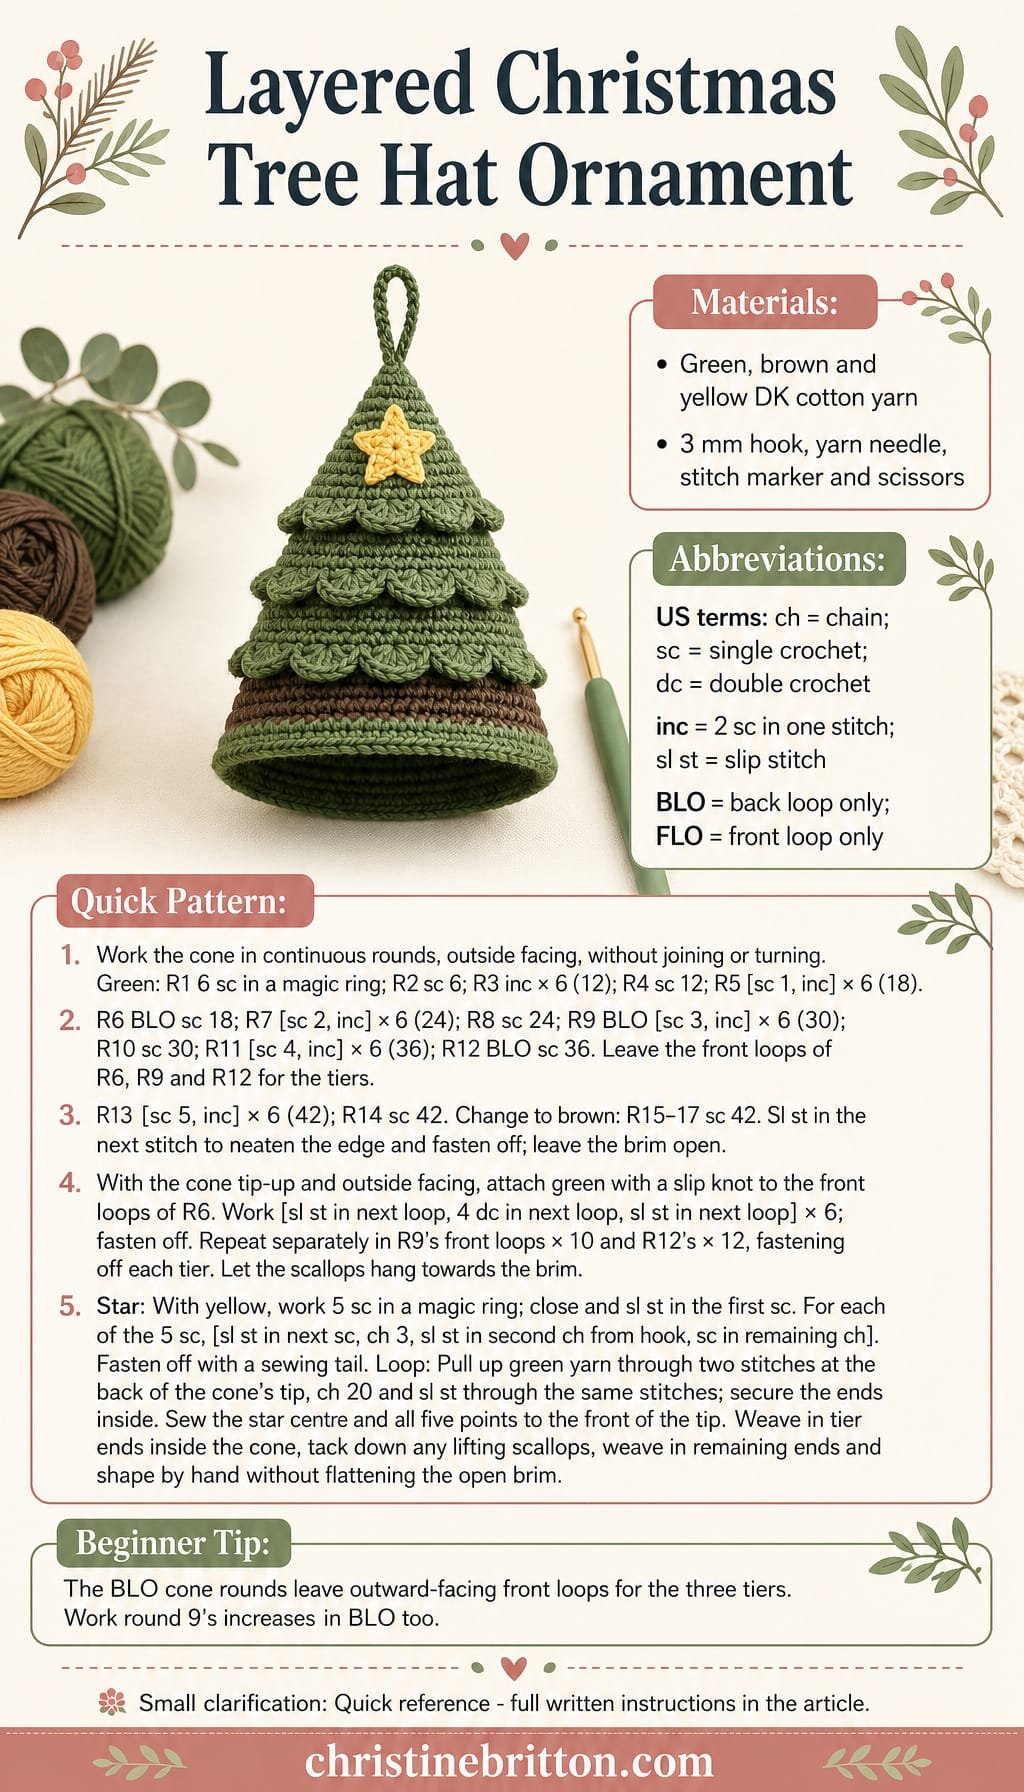
Quick-reference card. Follow the complete written instructions below.
Materials
- DK cotton yarn: Small amounts of green, brown and yellow
- Crochet hook: 3 mm, or a size that makes a firm fabric without obvious gaps
- Other: Yarn needle, stitch marker and scissors
Size and Fit
One ornament size. At the suggested gauge, approximately 6 cm across the open brim and 7 cm high including the star, excluding the hanging loop. These are approximate dimensions; the hook and yarn you use will affect the result.
Gauge
Aim for approximately 22 sc and 26 rounds per 10 cm in firm single crochet. Exact gauge is not essential for an ornament, but the fabric should hold its cone shape.
Abbreviations
US crochet terms.
- ch = chain
- dc = double crochet
- inc = work 2 sc in the same stitch
- sc = single crochet
- sl st = slip stitch
- BLO = back loop only
- FLO = front loop only
Pattern
- Before you begin Work the cone in continuous rounds with the outside facing you. Mark the first stitch of each round and move the marker up as you work. Unless a round specifies BLO, work through both loops. Do not turn or join the cone rounds.
- Cone, rounds 1â4 With green, make a magic ring. Round 1: Work 6 sc into the ring. Pull it closed. (6) Round 2: Sc in each stitch. (6) Round 3: Inc in each stitch. (12) Round 4: Sc in each stitch. (12)
- Cone, rounds 5â8 Round 5: [Sc in next stitch, inc in next stitch] 6 times. (18) Round 6: Working BLO, sc in each stitch; leave the front loops free for the first tier. (18) Round 7: [Sc in next 2 stitches, inc in next stitch] 6 times. (24) Round 8: Sc in each stitch. (24)
- Cone, rounds 9â12 Round 9: Working BLO, [sc in next 3 stitches, inc in next stitch] 6 times; leave the front loops free for the second tier. (30) Round 10: Sc in each stitch. (30) Round 11: [Sc in next 4 stitches, inc in next stitch] 6 times. (36) Round 12: Working BLO, sc in each stitch; leave the front loops free for the third tier. (36)
- Cone and band, rounds 13â17 Round 13: [Sc in next 5 stitches, inc in next stitch] 6 times. (42) Round 14: Sc in each stitch. (42) Change to brown. Rounds 15â17: Sc in each stitch. (42 per round) Sl st in the next stitch to neaten the edge, then fasten off. Leave the brim open.
- Three scalloped tiers Hold the cone tip-up with its outside facing you. Begin with the free front loops of round 6. Put a slip knot of green yarn on your hook; then work [sl st in next free front loop, 4 dc in next free front loop, sl st in next free front loop] 6 times. Fasten off. Repeat the same method in round 9’s 30 free front loops, working the bracket 10 times, and in round 12’s 36 free front loops, working it 12 times. Each bracket makes one scallop. Keep the tiers on the outside of the cone, hanging towards the brim.
- Yellow star With yellow, make a magic ring and work 5 sc into it. Pull the ring closed and sl st in the first sc. For each of the 5 sc, work [sl st in the next sc, ch 3, sl st in the second ch from the hook, sc in the remaining ch]. After the fifth point, fasten off, leaving a tail for sewing. This makes a small, flat five-point star.
- Hanging loop With green and the star held to the front of the tip, insert the hook through two stitches at the back of the cone’s tip and pull through a new loop of yarn. Ch 20, then sl st through the same two stitches to form a hanging loop. Fasten off and secure both ends inside the cone.
Finishing
- Sew the centre of the star to the front of the cone’s tip. Stitch down each point with yellow yarn so none can curl away.
- Weave tier ends into the inside of the cone. If a scallop lifts excessively, tack its lower edge to the cone with a small green stitch; keep all added decoration soft and securely attached.
- Weave in the remaining ends and gently shape the cone by hand. Do not flatten the open brim.
Helpful Tips
- Round 9 includes increases worked BLO: place both stitches of each increase into the back loop of the specified stitch. Its front loop remains available for the tier.
- Work each scalloped tier into the unused front loops of its named round, not into the stitches at the current brim.
- If your fabric is floppy, try a smaller hook before making the ornament again.
Long-Tipped Elf Hat Ornament

This crochet Christmas hat ornament has a playful elf silhouette: a red cuff beneath a green hat with a long point that curves to one side. The tiny tassel adds a bright accent without hiding the shape of the tip.
Unlike a shorter Santa-style cone, this hat narrows gradually, with plain rounds between the decreases. That spacing gives the point room to bend softly while the narrow cuff keeps the opening distinct. The unstuffed construction makes it a light decoration for a Christmas tree or a wrapped gift.
The pattern uses joined rounds, so it is worth keeping track of where each round begins. The hanging position also affects the silhouette: the hat looks most like an elf hat when the cuff hangs down and the tip falls to the side.
Long-Tipped Elf Hat Ornament

Quick-reference card. Follow the complete written instructions below.
Materials
- DK acrylic yarn: Small amounts of green for the hat and red for the cuff and tassel.
- 3.5 mm crochet hook: Or a size that makes a firm fabric.
- Tapestry needle and scissors: For closing the tip and weaving in ends.
- Stitch marker: Optional, for marking the first stitch of each round.
Size and Fit
One ornament size. The cuff has a 24-stitch opening, approximately 11 cm in circumference at the suggested gauge. The hat is approximately 9.5 cm tall before adding the tassel. Leave the cuff open; the hat is not stuffed.
Gauge
Aim for approximately 22 single crochet stitches and 24 rounds per 10 cm. Exact gauge is not essential, but a firm fabric will help the hat hold its shape.
Abbreviations
US crochet terms.
- ch = chain
- sc = single crochet
- sc2tog = single crochet two stitches together; one decrease
- sl st = slip stitch
- st(s) = stitch(es)
Pattern
- Working method Work in joined rounds. At the start of every round, ch 1 and make the first sc in the same stitch as the join. Join with a sl st to the first sc. The starting ch 1 and joining sl st do not count as stitches.
- Cuff, round 1 With red, ch 24. Join with a sl st to the first ch, taking care not to twist the chain. Ch 1, sc in each ch around; join. (24 sts)
- Cuff, round 2 Ch 1, sc in each st around; join. Fasten off red. (24 sts)
- Hat, rounds 3â4 Join green in any cuff stitch. Work 2 rounds of sc in each st around. (24 sts after each round)
- Hat, rounds 5â8 Round 5: (sc in next 10 sts, sc2tog) twice. (22 sts) Round 6: sc in each st. (22 sts) Round 7: (sc in next 9 sts, sc2tog) twice. (20 sts) Round 8: sc in each st. (20 sts)
- Hat, rounds 9â12 Round 9: (sc in next 8 sts, sc2tog) twice. (18 sts) Round 10: sc in each st. (18 sts) Round 11: (sc in next 7 sts, sc2tog) twice. (16 sts) Round 12: sc in each st. (16 sts)
- Hat, rounds 13â16 Round 13: (sc in next 6 sts, sc2tog) twice. (14 sts) Round 14: sc in each st. (14 sts) Round 15: (sc in next 5 sts, sc2tog) twice. (12 sts) Round 16: sc in each st. (12 sts)
- Hat, rounds 17â20 Round 17: (sc in next 4 sts, sc2tog) twice. (10 sts) Round 18: sc in each st. (10 sts) Round 19: (sc in next 3 sts, sc2tog) twice. (8 sts) Round 20: sc in each st. (8 sts)
- Hat, rounds 21â23 Round 21: (sc in next 2 sts, sc2tog) twice. (6 sts) Round 22: sc in each st. (6 sts) Round 23: (sc in next st, sc2tog) twice. (4 sts) Fasten off, leaving a tail for closing.
- Close the tip Thread the green tail onto a tapestry needle. Pass it through the front loop of each of the 4 remaining stitches, pull the opening closed and secure the tail inside the hat. Do not close the cuff.
Finishing
- For the tiny red tassel, cut 6 strands of red yarn, each approximately 7 cm long. Hold them together, fold them in half over the closed tip and tie them firmly to the tip with a separate strand of red yarn. Wrap and tie another short strand just below the fold to form the tassel head. Trim the loose ends to approximately 1.5 cm.
- For the hanging loop, thread a 15 cm length of yarn through a stitch on the side of the hat around rounds 17â19. Hold the ends together to form a loop and lift the hat before securing them: move the attachment point slightly if needed so the cuff hangs down and the tip falls to one side. Tie the ends securely inside and trim them.
- Weave in the remaining ends. Gently bend the unstuffed tip into a soft curve.
Helpful Tips
- Count the stitches after each decrease round. Every decrease round removes 2 stitches.
- Keep the decrease stitches moderately snug to avoid gaps in the taper.
- If the tip springs straight, lightly tack it to the side of the hat near round 18 with a few loose green stitches. Leave enough slack to retain the long, curved shape.
Granny Square Box Hat Ornament

This crochet Christmas hat ornament has a playful, boxy silhouette rather than the usual pointed shape. Its flat top and open bottom make it look like a miniature hat, while the granny-square motifs give each side a little character.
The visible joins are part of the design, outlining the edges and making the shape easy to recognise on a Christmas tree. Choose a few coordinated colours from your leftover yarn for a festive look, or keep the squares alike and let the contrasting joins stand out.
This is a satisfying project if you are comfortable making granny squares and ready to practise joining them into a three-dimensional shape. Keeping the motifs even helps the top sit neatly above the sides.
Granny Square Box Hat Ornament

Quick-reference card. Follow the complete written instructions below.
Materials
- DK cotton yarn: Small amounts of green, red and cream; use the same yarn weight for all five squares.
- Crochet hook: 4 mm, or a size that gives firm squares without making them stiff.
- Tapestry needle: For joining and weaving in ends.
- Scissors: For cutting yarn.
Size and Fit
Make five squares of the same size. If each square is approximately 4 cm (1½ in) across, the assembled ornament will be approximately 4 cm across and 4â4.5 cm tall, excluding the hanging loop. Exact size is not critical.
Gauge
After gently shaping, aim for a square approximately 4 cm (1½ in) across after two rounds. Matching square sizes matter more than an exact gauge.
Abbreviations
US crochet terms.
- ch = chain
- dc = double crochet
- sc = single crochet
- sl st = slip stitch
- sp = space
- rnd = round
Pattern
- Make five squares â rnd 1 With green, make a magic ring. Ch 3 (counts as the first dc), work 2 dc in the ring, ch 2. Work (3 dc in the ring, ch 2) three times. Join with a sl st to the top of the starting ch 3 and fasten off. You have four 3-dc groups and four corner ch-2 spaces.
- Each square â rnd 2 Join red with a sl st in any corner ch-2 sp. Ch 3 (counts as the first dc), then work 2 dc, ch 2 and 3 dc in the same corner sp; ch 1. In each of the next three corner ch-2 spaces, work (3 dc, ch 2, 3 dc); ch 1 after each corner, including the last. Join with a sl st to the top of the starting ch 3 and fasten off. Each square has four corners, with two 3-dc groups and one ch-1 space along each edge. Make four more identical squares.
- Join the side band Place four squares side by side, all with their right sides facing out and their edges aligned. With cream and a tapestry needle, whipstitch the vertical edge of each square to the next, including the fourth square to the first, to make an open-ended square tube. Sew through corresponding dc tops and chain spaces; keep the seams firm but not tight.
- Attach the flat top Place the fifth square over one end of the tube, right side facing out. Align its four edges and corners with the four upper edges and corners of the side band. Whipstitch all four edges in cream. Leave the other end open as the bottom of the hat.
- Edge the open bottom Join cream at any lower corner. Work 1 sc in each of the six dc and the ch-1 space along the lower edge of every side square. Also work 1 sc in each lower corner ch-2 space: there are two such spaces per square. Join with a sl st to the first sc and fasten off. The edging has 36 sc.
- Add the hanging loop Join cream with a sl st through the centre ring of the top square. Ch 20, then sl st through the centre ring again to close the loop. Fasten off, leaving a tail long enough to weave securely through stitches on the underside of the top.
Finishing
- Weave in all ends, taking care not to pull the corners out of shape.
- Gently square the four sides and flatten the top with your fingers. Leave the bottom open.
Helpful Tips
- Shape all five squares to the same dimensions before joining so the top corners meet the side seams neatly.
- Keep the cream joining stitches visible for a defined, boxy outline.
- If the fabric feels loose, use a smaller hook rather than pulling the seams tight.
Turned-Cuff Ski Hat Ornament

This crochet Christmas hat ornament has the cosy look of a little ski hat. Blue-and-cream stripes brighten the rounded crown, while the deep ribbed cuff gives the brim a substantial, turned-up look.
The contrast between the ribbed brim and smooth crown makes this a satisfying project for crocheters comfortable with joining pieces and shaping in the round. It would look at home among other handmade decorations or tied to a wrapped gift.
Turned-Cuff Ski Hat Ornament

Quick-reference card. Follow the complete written instructions below.
Materials
- Soft wool-blend DK yarn: Small amounts of blue and cream
- Crochet hook: 3.5 mm, or a size that gives a firm fabric
- Yarn needle: For joining the cuff and finishing
- Stitch marker: To mark the first stitch of each body round
Size and Fit
One ornament, approximately 12 cm around and 6 cm tall after the cuff is folded, excluding the hanging loop. These dimensions are estimates based on the stated gauge.
Gauge
Approximately 20 sc and 25 rows to 10 cm. Gauge is not critical, but use a firm fabric that holds the hat’s shape.
Abbreviations
US crochet terms.
- ch = chain
- sc = single crochet
- BLO = back loop only
- sc2tog = single crochet two stitches together; one decrease
- sl st = slip stitch
- rnd = round
Pattern
- Cuff strip With blue, ch 10. Row 1: Sc in the second ch from the hook and in each remaining ch; 9 sc. Rows 2â30: Ch 1, turn, sc BLO in each stitch; 9 sc. Fasten off, leaving a tail for joining.
- Join the cuff Bring the two short ends of the strip together without twisting it. Use the tail to sew the first and last rows together, matching all 9 stitches. Secure the tail. The 30 row ends along either long edge form the circumference of the cuff.
- Body set-up With the cuff seam at the back, join blue yarn at one long edge beside the seam. Work upwards from this edge. Work joined rounds: ch 1 at the start of each rnd, make the first sc in the first stitch or row end, and join with a sl st to the first sc. Neither the ch 1 nor the joining sl st counts as a stitch. When changing colour, fasten off the old colour after its last rnd and join the new colour before the next rnd.
- Body rnds 1â4 Rnd 1, blue: Work 1 sc into each of the 30 row ends along the chosen cuff edge; 30 sc. Rnd 2, blue: Sc in each stitch; 30 sc. Rnds 3â4, cream: Sc in each stitch; 30 sc per rnd.
- Shape the crown, rnds 5â7 Rnd 5, blue: [Sc in next 3 stitches, sc2tog] 6 times; 24 sc. Rnd 6, blue: Sc in each stitch; 24 sc. Rnd 7, cream: [Sc in next 2 stitches, sc2tog] 6 times; 18 sc.
- Close the crown, rnds 8â9 Rnd 8, blue: [Sc in next stitch, sc2tog] 6 times; 12 sc. Rnd 9, blue: Sc2tog 6 times; 6 sc. Fasten off with a tail. Thread it through the front loops of the remaining 6 stitches, draw the opening closed and secure the tail inside.
- Turn the cuff Fold the unworked lower edge of the cuff upwards over the outside of the hat by approximately 2 cm. Leave the fold loose rather than sewing it down, so the ribbing remains visible.
Finishing
- Weave in all remaining ends on the inside of the hat.
- For a hanging loop, cut a separate 15 cm length of blue yarn. Pass it through the centre of the closed crown, bring its ends together and knot them securely inside the hat. Adjust the loop to the length needed for hanging.
- Straighten the cuff fold and gently shape the rounded crown.
Helpful Tips
- Mark the first body stitch so the joining sl st is not mistaken for a stitch.
- Work the first body round into the end of every cuff row, including the rows on either side of the seam; there should be 30 stitches.
- Keep colour-change tails on the inside of the hat.
Earflap Winter Hat Ornament

This crochet Christmas hat ornament has a rounded crown and two tapered earflaps that give it the look of a miniature winter hat. The soft ties add movement below the brim, while a separate loop at the crown makes it easy to hang on a tree.
The earflaps are positioned opposite one another, so this is a satisfying choice if you enjoy a small project that calls for careful placement. Once it is hanging, let the ties fall freely below the hat rather than wrapping them around the loop.
Earflap Winter Hat Ornament

Quick-reference card. Follow the complete written instructions below.
Materials
- Smooth DK yarn: Approximately 10 g in teal, including the border, ties and hanging loop
- Crochet hook: 3.5 mm, or a size that makes a firm fabric
- Notions: Stitch marker, yarn needle and scissors
Size and Fit
One ornament size. At the suggested stitch gauge, the 24-stitch brim is approximately 12 cm around. Ties and hanging loop are not included in that measurement.
Gauge
Suggested target: approximately 20 sc across 10 cm. Exact gauge is not critical, but use a hook that leaves no obvious gaps in the fabric.
Abbreviations
US crochet terms.
- ch = Chain
- sc = Single crochet
- inc = Work 2 sc in the same stitch
- sc2tog = Single crochet 2 stitches together
- sl st = Slip stitch
- st = Stitch
- RS = Right side
Pattern
- Crown, round 1 Make a magic ring. Work 6 sc into the ring. Pull it closed. Work in a continuous spiral from here, marking the first stitch of each round. (6 sts)
- Crown, round 2 Inc in each stitch around. (12 sts)
- Crown, round 3 (Sc in next st, inc in next st) 6 times. (18 sts)
- Crown, round 4 (Sc in each of next 2 sts, inc in next st) 6 times. (24 sts)
- Hat sides, rounds 5â9 Sc in each stitch around for 5 rounds. Each round has 24 sts. Fasten off after round 9. Keep the round marker in place to identify brim stitch 1: the first stitch of round 9. Number the remaining brim stitches 2â24 in the direction you crocheted.
- First earflap With the RS facing, join yarn with a sl st in brim stitch 1. Row 1: Ch 1, sc in brim stitches 1â5, turn. (5 sts) Row 2: Ch 1, sc2tog, sc in next st, sc2tog, turn. (3 sts) Row 3: Ch 1, sc2tog, sc in next st, turn. (2 sts) Row 4: Ch 1, sc2tog. (1 st) Fasten off.
- Second earflap With the RS facing, join yarn with a sl st in brim stitch 13. Repeat earflap rows 1â4, working row 1 in brim stitches 13â17. Fasten off. Seven exposed brim stitches remain between the flaps on each side: stitches 6â12 and 18â24.
- Border With the RS facing, join yarn in exposed brim stitch 6. Sc in stitches 6â12; work 1 sc in each of the 3 row ends down the first side of the second earflap; sc in its row-4 tip stitch; work 1 sc in each of the 3 row ends up its other side. Sc in exposed brim stitches 18â24. Work down the first earflap in the same way: 3 sc along its side, 1 sc in its row-4 tip stitch and 3 sc up its other side. Sl st to the first border sc and fasten off. (28 border sc)
- Short ties For each tie, join yarn to the border sc at an earflap tip. Ch 9, then sl st in the second ch from the hook and in each remaining ch back towards the tip. Sl st into the same tip sc to anchor the tie; fasten off. Each tie has 8 sl sts.
- Hanging loop Join yarn securely at the centre of the crown. Ch 16 and sl st into the same centre point to form a loop. Fasten off.
Finishing
- Weave in all ends, securing the hanging-loop ends through the crown fabric.
- Smooth the earflaps into shape. Keep the two short ties hanging separately below the brim, away from the crown loop.
Helpful Tips
- Use a marker in the first stitch of round 9 until both earflaps are attached; their positions depend on that numbering.
- When bordering an earflap, work into the ends of rows 1â3 on each side. The row-4 stitch is the tip, not an additional row end.
- If the fabric looks loose, use a smaller hook rather than adding stitches.
Triangle Pixie Bonnet Ornament

This crochet Christmas hat ornament has a storybook pixie shape rather than the familiar round Santa-hat silhouette. Its pointed back gives the little bonnet character, while the visible face opening makes it clear that this is a hat, not a solid cone.
The cream body and red trim offer a gentle festive contrast, and the short chin ties add to the miniature bonnet look. It is intended as a hanging decoration for a Christmas tree or gift, rather than a wearable hat for a doll or baby.
Triangle Pixie Bonnet Ornament

Quick-reference card. Follow the complete written instructions below.
Materials
- DK yarn: Small amounts of cream and red; choose a soft yarn that drapes.
- Crochet hook: 3.5 mm, or a size that makes a flexible fabric.
- Tapestry needle and scissors: For seaming and weaving in ends.
Size and Fit
One ornament size. The flat triangle is approximately 11 cm across its base and 5.5 cm from point to base at the suggested gauge. Once folded, the face-opening edge measures approximately 5.5 cm on each side.
Gauge
Approximately 17 single crochet stitches and 18 rows per 10 cm. Gauge is a guide for size; a flexible fabric matters more than an exact match.
Abbreviations
US crochet terms.
- ch = chain
- sc = single crochet
- sl st = slip stitch
- st(s) = stitch(es)
Pattern
- Triangle, Row 1 With cream, ch 2. Work 1 sc in the second ch from the hook. Turn. (1 st)
- Triangle, Row 2 Ch 1, work 3 sc in the single st. Turn. (3 sts)
- Triangle, Rows 3â10 Ch 1. Work 2 sc in the first st, 1 sc in each st up to the last st, and 2 sc in the last st. Turn after Rows 3â9, but not after Row 10. Each row adds 2 sts; Row 10 has 19 sts. Fasten off.
- Fold and seam The first stitch is the back point; Row 10 is the face-opening edge. Fold the triangle from the first stitch to the centre of Row 10, with wrong sides together. The two sloping side edges now meet. Using cream and a tapestry needle, sew those edges together from the point through the ends of Row 10. Do not sew across Row 10: its two halves must remain separate to form the face opening.
- Red edging and ties With the bonnet folded, join red at one bottom corner of Row 10. Ch 13; sl st in the second ch from the hook and in each remaining ch to return to the corner. Work 1 sc in each of the 19 sts along Row 10, passing around the centre fold and keeping the two sides of the opening separate. At the opposite bottom corner, ch 13; sl st in the second ch from the hook and in each remaining ch to return to the corner. Fasten off.
- Hanging loop With cream, ch 16 and fasten off, leaving tails at both ends. Curve the chain into a loop and sew both ends securely to the back point at the upper end of the seam.
Finishing
- Weave in the ends without pulling the face opening closed.
- Gently shape the bonnet so the folded edge sits above the opening and the point projects at the back.
Helpful Tips
- On Row 10, the centre stitch sits at the fold. Work into it only once when adding the red edging.
- Keep the seam neat but not tight, so the small bonnet retains its shape.
Mini Bucket Hat Ornament

This mini bucket hat brings a playful change of shape to a collection of crochet Christmas decorations. Its flat circular crown and straight sides give it a recognisable bucket-hat profile, while the brim slopes gently outwards.
The simple silhouette looks especially charming hanging among more traditional festive ornaments. Firm fabric helps the sides stand upright and lets the brim keep its soft outward angle rather than folding flat.
Mini Bucket Hat Ornament

Quick-reference card. Follow the complete written instructions below.
Materials
- Cotton DK yarn: A small amount in forest green
- Crochet hook: 3 mm, or a size that makes a firm fabric
- Stitch marker: For marking the first stitch of each round
- Tapestry needle: For weaving in ends
Size and Fit
One ornament size. Approximately 5 cm across the crown, 7 cm across the brim and 3 cm tall, excluding the hanging loop, at the stated gauge. Dimensions may vary with yarn and tension.
Gauge
Approximately 24 sc and 26 rounds to 10 cm in firm, unblocked single crochet. Gauge is a guide to size; keep the fabric firm enough to support the brim.
Abbreviations
US crochet terms.
- ch = chain
- sc = single crochet
- sl st = slip stitch
- st(s) = stitch(es)
- rnd = round
- inc = work 2 sc in the same stitch
- BLO = work in the back loop only
- FLO = work in the front loop only
Pattern
- Before you begin Work the hat in continuous rounds without joining or turning. Place a marker in the first stitch of each round and move it up as you work. Unless a round specifies BLO or FLO, work through both loops.
- Flat crown, rnd 1 Make a magic ring and work 6 sc into it. Pull the ring closed. (6 sts)
- Flat crown, rnd 2 Inc in each st around. (12 sts)
- Flat crown, rnd 3 Repeat [1 sc, inc] 6 times. (18 sts)
- Flat crown, rnd 4 Repeat [2 sc, inc] 6 times. (24 sts)
- Flat crown, rnd 5 Repeat [3 sc, inc] 6 times. (30 sts)
- Flat crown, rnd 6 Repeat [4 sc, inc] 6 times. (36 sts)
- Straight sides, rnd 7 Work 1 sc BLO in each st around. This makes a defined turn below the flat crown. (36 sts)
- Straight sides, rnds 8â10 Work 1 sc in each st around for 3 rounds. (36 sts each round)
- Sloping brim, rnd 11 Working FLO throughout this round, repeat [5 sc, inc] 6 times. (42 sts)
- Sloping brim, rnd 12 Repeat [6 sc, inc] 6 times. (48 sts)
- Sloping brim, rnd 13 Repeat [7 sc, inc] 6 times. (54 sts)
- Firm edging, rnd 14 Work 1 sc in each st around with even, firm tension. Sl st in the first sc of this round and fasten off. (54 sc)
- Hanging loop With the top of the crown facing you, attach yarn beneath two stitches close to the centre of the crown. Ch 18, then sl st back into the same anchoring point to form a loop. Fasten off and weave both ends securely into the inside of the crown.
Finishing
- Weave in the starting and brim ends securely.
- Flatten the crown gently and smooth the brim outwards with your fingers. Keep the sides upright and the brim angled rather than folding it flat.
Helpful Tips
- If the brim flops, use a smaller hook or firmer tension; do not pull the final edging so tight that it cups.
- The BLO round marks the change from flat crown to straight sides. The FLO round marks the start of the outward-sloping brim.
Festive Top Hat Ornament

This crochet Christmas hat ornament brings a touch of old-fashioned festive style to the tree. Its tall, straight crown and broad, flat brim give it the unmistakable silhouette of a top hat, while the narrow red band adds a bright contrast.
The shape has a hollow underside, so it reads as a miniature hat rather than a stuffed decoration. The change in direction between crown and brim is the key detail to watch: a defined edge helps the sides look upright and the brim spread outwards.
It would also make a playful accent on a wrapped gift or a place setting. The full written pattern below takes you through the hat, band and hanging loop.
Festive Top Hat Ornament

Quick-reference card. Follow the complete written instructions below.
Materials
- Black cotton DK yarn: Approximately 20 m for the hat and hanging loop
- Red cotton DK yarn: Approximately 3 m for the hatband
- Crochet hook: 3 mm, or a size that produces firm stitches
- Other tools: Stitch marker, yarn needle and scissors
Size and Fit
One sample size. Approximately 5 cm tall from the top of the crown to the brim, excluding the hanging loop; approximately 10 cm across the brim. The hatband is made slightly longer than the crown circumference so its ends can overlap. Finished dimensions depend on your gauge.
Gauge
Approximately 20 sc and 20 rounds per 10 cm in firm, unblocked fabric. Exact gauge is less important than a crown that holds its shape and a brim that lies flat.
Abbreviations
US crochet terms.
- ch = chain
- sc = single crochet
- inc = work 2 sc in the next stitch
- BLO = back loop only
- FLO = front loop only
Pattern
- Before you begin Work the black hat in continuous rounds without joining or turning. Place a marker in the first stitch of each round and move it up as you work. Round 1 begins with an adjustable ring.
- Crown disc, Round 1 With black yarn, work 6 sc into an adjustable ring. Pull the ring closed. (6 sc)
- Crown disc, Round 2 Inc in each stitch around. (12 sc)
- Crown disc, Round 3 Repeat [sc in the next stitch, inc in the next stitch] 6 times. (18 sc)
- Crown disc, Round 4 Repeat [sc in each of the next 2 stitches, inc in the next stitch] 6 times. (24 sc)
- Crown disc, Round 5 Repeat [sc in each of the next 3 stitches, inc in the next stitch] 6 times. (30 sc)
- Crown disc, Round 6 Repeat [sc in each of the next 4 stitches, inc in the next stitch] 6 times. (36 sc)
- Straight crown, Round 7 Sc BLO in each stitch around. This marks the turn from the flat crown disc to the sides. (36 sc)
- Straight crown, Rounds 8â15 Sc through both loops in each stitch around. Work 8 rounds in total, keeping 36 sc in every round.
- Brim, Round 16 Sc FLO in each of the next 5 stitches, then inc FLO in the next stitch; repeat this sequence 6 times. Working into the front loops helps the brim turn outwards. (42 sc)
- Brim, Round 17 Working through both loops, repeat [sc in each of the next 6 stitches, inc in the next stitch] 6 times. (48 sc)
- Brim, Round 18 Repeat [sc in each of the next 7 stitches, inc in the next stitch] 6 times. (54 sc)
- Brim, Round 19 Repeat [sc in each of the next 8 stitches, inc in the next stitch] 6 times. Fasten off and weave in the end. (60 sc)
- Red hatband With red yarn, ch 39. Starting in the second ch from the hook, sc in each ch across. (38 sc) Fasten off, leaving a long tail for sewing. Wrap the strip around the bottom of the straight crown, just above the brim, with approximately 2 stitches of overlap.
- Attach the hatband Sew the overlapping ends together. Use the remaining tail to make small, discreet stitches around the band, securing it to the crown without pulling the sides inwards. Weave in the end.
- Hanging loop Cut a length of black yarn approximately 15 cm long. Bring both ends down through separate stitches near the centre of the crown top. Adjust the loop above the hat to approximately 4 cm, knot the ends securely inside the hollow crown and trim the excess.
Finishing
- Ease the crown into a straight-sided shape with your fingers.
- Lay the brim flat and gently shape its outer edge. If needed, lightly dampen and pin the brim flat until completely dry; avoid stretching its circumference.
Helpful Tips
- Keep the stitches firm so the crown stands without stuffing. A smaller hook can help if the sides feel floppy.
- The hat is intentionally hollow underneath; there is no separate base to make.
- If the red band feels tight, loosen the sewing overlap slightly rather than pulling the crown out of shape.
If youâd like to keep building your crochet skills, take a look at crochet Christmas tree hat patterns.
Mini Beret Ornament

This mini beret brings a playful change of silhouette to crochet Christmas decorations. Its broad, shallow crown sits over a noticeably narrower band, giving it the soft, slightly slouchy look of a beret rather than a pointed festive hat.
The contrast between the deep-red crown and dark-red band makes that shape easy to see, even when the ornament is hanging on a tree. A tiny central stem adds the familiar beret detail, while the hanging loop sits beside it so the crown remains the focus.
The band has an open underside, but this is a decorative ornament rather than a hat sized for a wearer. The shaping is the interesting part of the project: keeping the crown supple helps preserve its broad, shallow profile.
Mini Beret Ornament

Quick-reference card. Follow the complete written instructions below.
Materials
- DK wool-blend yarn: Small amounts of deep red for the crown and stem, and dark red for the band and hanging loop.
- Crochet hook: 3.5 mm, or a size that gives a firm but supple fabric.
- Notions: Stitch marker and yarn needle.
Size and Fit
One ornament size. At the suggested gauge, the crown is approximately 11â12 cm across and the circular band opening is approximately 7.5â8 cm in diameter. The band is narrower than the crown by design; it is not sized to fit a wearer.
Gauge
Target approximately 20 sc and 22 rounds per 10 cm in single crochet. Exact gauge is not essential for an ornament, but it affects the finished dimensions.
Abbreviations
US crochet terms.
- MR = magic ring
- ch = chain
- sc = single crochet
- inc = work 2 sc in the same stitch
- sc2tog = single crochet 2 stitches together; decreases by 1 stitch
- sl st = slip stitch
Pattern
- Working method Work the crown and band in continuous, unjoined rounds. Place a marker in the first stitch of each round and move it up as you work. Do not turn.
- Crown, round 1 With deep red, work 6 sc into an MR. Pull the ring closed. (6 sc)
- Crown, round 2 Inc in each stitch around. (12 sc)
- Crown, round 3 (Sc 1, inc) 6 times. (18 sc)
- Crown, round 4 (Sc 2, inc) 6 times. (24 sc)
- Crown, round 5 (Sc 3, inc) 6 times. (30 sc)
- Crown, round 6 (Sc 4, inc) 6 times. (36 sc)
- Crown, round 7 (Sc 5, inc) 6 times. (42 sc)
- Crown, round 8 (Sc 6, inc) 6 times. (48 sc)
- Crown, round 9 (Sc 7, inc) 6 times. (54 sc)
- Crown, round 10 (Sc 8, inc) 6 times. (60 sc)
- Crown, round 11 (Sc 9, inc) 6 times. (66 sc)
- Crown, round 12 (Sc 10, inc) 6 times. (72 sc)
- Crown, round 13 Sc in each stitch around. (72 sc)
- Shaping, round 14 (Sc 10, sc2tog) 6 times. (66 sc)
- Shaping, round 15 (Sc 9, sc2tog) 6 times. (60 sc)
- Shaping, round 16 (Sc 8, sc2tog) 6 times. (54 sc)
- Shaping, round 17 (Sc 7, sc2tog) 6 times. (48 sc) Change to dark red on the final yarn-over of the last sc2tog.
- Band, rounds 18â19 With dark red, sc in each stitch around for 2 rounds. (48 sc per round) Sl st into the next stitch to level the edge, then fasten off. Leave the band opening unclosed.
- Stem With deep red, ch 4. Starting in the second ch from the hook, sl st in each of the next 3 chains. Fasten off, leaving a sewing tail. Sew the base of the stem securely to the centre of the crown at the closed MR.
- Hanging loop With dark red, ch 24 and fasten off, leaving a sewing tail at each end. Bring the chain ends together to form a loop. Sew both ends securely to the crown beside the stem, without pulling the centre out of shape.
Finishing
- Weave all yarn ends into the inside of the beret, securing the stem and hanging loop especially well.
- Gently spread the crown so it sits wider than the band. Leave it unstuffed to retain the shallow beret shape.
Helpful Tips
- Count after each increase or decrease round: each shaping round changes the count by exactly 6 stitches.
- If the crown cups sharply during the increase rounds, relax your tension or try a slightly larger hook; the wide crown should remain supple.
Short-Visor Newsboy Cap Ornament
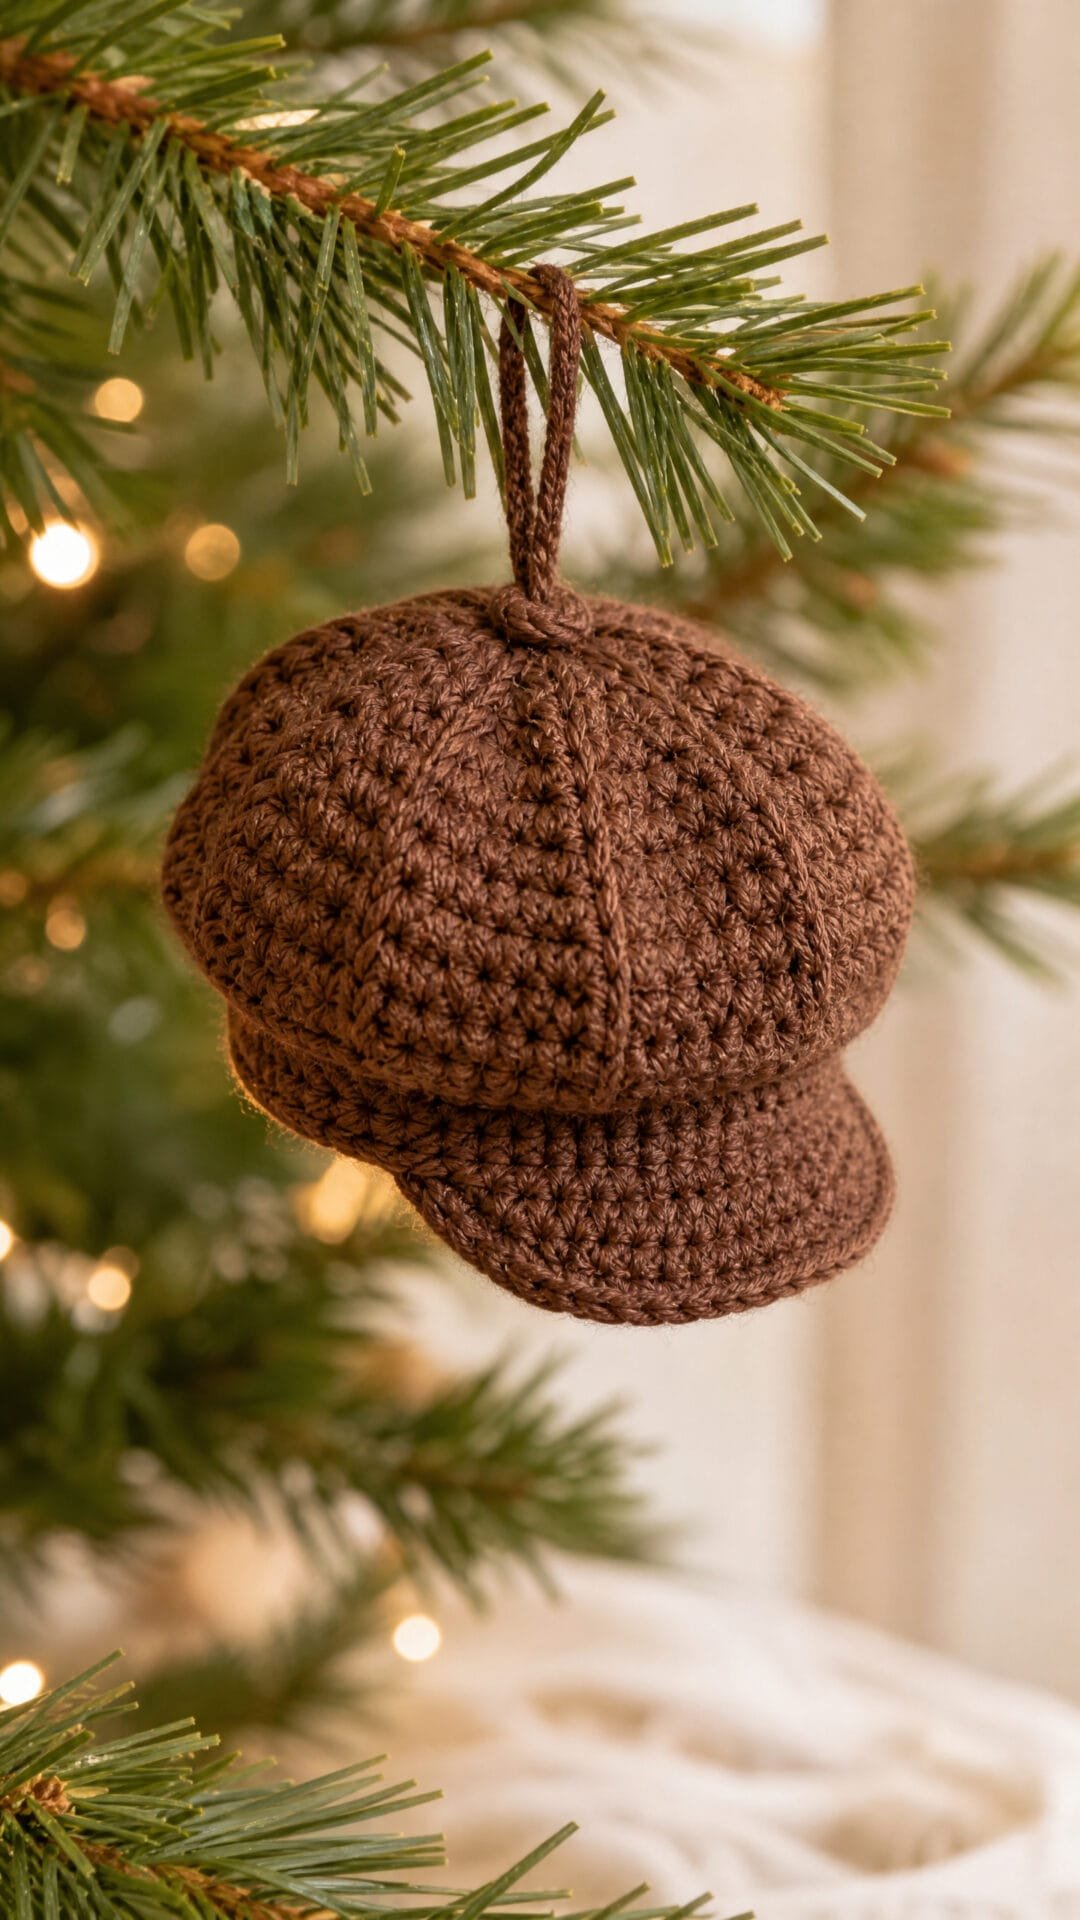
This crochet Christmas hat ornament takes its shape from a classic newsboy cap rather than a pointed festive hat. A full, rounded crown draws in towards an open band, while the short front visor gives it a distinctive silhouette.
The visor is the detail that makes this design feel balanced: its position at the centre front matters more than its size. In brown, the finished cap has a warm, vintage look that sits nicely alongside brighter Christmas crochet decorations.
Short-Visor Newsboy Cap Ornament

Quick-reference card. Follow the complete written instructions below.
Materials
- Firm wool-blend DK yarn: Approximately 10â15 g in brown.
- Crochet hook: 3 mm, or a size that produces a firm fabric.
- Notions: Two stitch markers, yarn needle and scissors.
Size and Fit
One ornament size. At the suggested gauge, the rounded crown is approximately 6â7 cm across, the band circumference is approximately 16 cm and the visor projects approximately 1â2 cm. Leave the band opening unclosed.
Gauge
Aim for approximately 22 sc and 24 rounds per 10 cm in firm fabric. Exact gauge is less important than a visor and crown that hold their shape.
Abbreviations
US crochet terms.
- ch = chain
- sc = single crochet
- sl st = slip stitch
- inc = work 2 sc in the same stitch
- invdec = invisible single-crochet decrease over the next 2 stitches
- sc2tog = single crochet the next 2 stitches together
Pattern
- Before you begin Work the crown and band in joined rounds. At the end of each round, sl st to the first sc and ch 1. Work the first sc of the next round into the same stitch as the join. Neither the joining sl st nor ch 1 counts as a stitch. Keep the round start at the centre back.
- Crown, rounds 1â4 Round 1: Work 6 sc in a magic ring; join. (6) Round 2: Inc in each stitch around. (12) Round 3: [Sc 1, inc] 6 times. (18) Round 4: [Sc 2, inc] 6 times. (24)
- Crown, rounds 5â8 Round 5: [Sc 3, inc] 6 times. (30) Round 6: [Sc 4, inc] 6 times. (36) Round 7: [Sc 5, inc] 6 times. (42) Round 8: [Sc 6, inc] 6 times. (48)
- Crown, rounds 9â10 Sc in each stitch around for 2 rounds. (48 stitches per round)
- Narrowing and band, rounds 11â14 Round 11: [Sc 6, invdec] 6 times. (42) Round 12: [Sc 5, invdec] 6 times. (36) Rounds 13â14: Sc in each stitch around. (36 stitches per round) Fasten off after joining round 14. Gently shape the crown into a rounded cap; do not close the band opening.
- Mark the front With the round-14 join at the centre back, count the 36 band stitches from the first sc of that round. Mark stitches 13 and 24. These mark the ends of the 12-stitch centre-front section for the visor.
- Visor, rows 1â4 With the outside of the cap facing you, join yarn in both loops of marked stitch 13 and ch 1. Row 1: Sc in stitches 13â24 inclusive; ch 1 and turn. (12) Row 2: Sc2tog, sc 8, sc2tog; ch 1 and turn. (10) Row 3: Sc2tog, sc 6, sc2tog; ch 1 and turn. (8) Row 4: Sc 8. Do not fasten off. (8)
- Visor edging Without turning, work slip stitches evenly along one side of the visor, across its 8-stitch outer edge and along the other side. Keep the slip stitches relaxed enough that the visor lies flat. Sl st into the band beside the visor, then fasten off. Gently curve the visor with your fingers.
- Hanging loop Join yarn at the centre of the magic ring on top of the crown. Ch 18 and sl st back into the same point to form a loop. Fasten off and secure both ends inside the crown.
Finishing
- Weave in the remaining ends without pulling the band out of shape.
- Shape the crown and visor by hand. If needed, lightly dampen the cap and let it dry with the visor held in a gentle curve.
Helpful Tips
- Mark the centre-front stitches before joining yarn for the visor; counting from the back keeps it centred.
- If the visor feels floppy, use a smaller hook for the visor and its edging while keeping the same stitch counts.
- The cap is an ornament, so leave the underside open rather than stuffing the crown.
Fold-Front Trapper Hat Ornament

This crochet Christmas hat ornament has the cosy look of a winter trapper hat in miniature. Its broad front flap gives it a different silhouette from a simple earflap cap, while the side flaps make it recognisable even when it is hanging on a tree.
The front flap is a separate piece, so the turned-up fold has a distinct edge rather than looking like a stripe on the cap. Contrasting colour on the flap edges and the undersides of the side flaps helps those details show at ornament scale.
This is a decorative hat rather than a wearable one. It would suit a tree, a wrapped gift or a festive garland, especially where its folded front can be seen.
Fold-Front Trapper Hat Ornament

Quick-reference card. Follow the complete written instructions below.
Materials
- Sturdy DK yarn: Small amounts of navy for the cap and outer flaps, and cream for the side-flap linings and edging.
- Crochet hook: 3.5 mm, or a size that gives a firm fabric without large gaps.
- Stitch marker: For marking the first stitch of each cap round.
- Tapestry needle and scissors: For securing the front flap, adding the hanging loop and weaving in ends.
Size and Fit
One decorative size, not intended to be worn. The cap has 36 stitches around its lower edge. At the planning gauge below, its circumference is about 16.5 cm and its width is about 5 cm. The side flaps extend approximately 2 cm below the cap. Your finished measurements will depend on your yarn and tension.
Gauge
Planning gauge: approximately 22 sc and 24 rounds per 10 cm. This is a sizing guide, not a measured test result. Exact gauge is unimportant for an ornament; aim for firm stitches.
Abbreviations
US crochet terms.
- ch = chain
- sc = single crochet
- sc2tog = single crochet two stitches together
- sl st = slip stitch
- RS = right side
- WS = wrong side
Pattern
- Before you begin Work the cap in continuous rounds; do not join or turn. Mark the first stitch of each round. For all flap rows, a turning ch 1 does not count as a stitch. The flaps are worked back and forth with the cap RS facing for their first rows.
- Navy cap, rounds 1â6 Round 1: Work 6 sc in a magic ring. (6) Round 2: Work 2 sc in each stitch. (12) Round 3: *Sc in next stitch, 2 sc in next stitch; repeat from * around. (18) Round 4: *Sc in next 2 stitches, 2 sc in next stitch; repeat from * around. (24) Round 5: *Sc in next 3 stitches, 2 sc in next stitch; repeat from * around. (30) Round 6: *Sc in next 4 stitches, 2 sc in next stitch; repeat from * around. (36)
- Navy cap, rounds 7â15 Sc in each stitch around for nine rounds. (36 stitches per round) Sl st in the next stitch after round 15, then fasten off. With the cap RS facing, number the stitches of round 15 from 1 to 36, starting at the stitch marked as the first stitch of that round. Stitches 1â12 are the front, 13â20 the first side, 21â28 the back and 29â36 the second side.
- Navy side flaps With the cap RS facing, join navy to stitch 13 of round 15. Row 1: Ch 1, sc in stitches 13â20; turn. (8) Rows 2â3: Ch 1, sc in each stitch; turn. (8) Row 4: Ch 1, sc2tog, sc in next 4 stitches, sc2tog; turn. (6) Row 5: Ch 1, sc2tog, sc in next 2 stitches, sc2tog. (4) Fasten off. Make the second flap in the same way, joining navy to stitch 29 and working row 1 across stitches 29â36.
- Cream side-flap linings Make two separate pieces. For each lining, ch 9. Row 1: Sc in the second ch from the hook and in each remaining ch; turn. (8) Rows 2â3: Ch 1, sc in each stitch; turn. (8) Row 4: Ch 1, sc2tog, sc in next 4 stitches, sc2tog; turn. (6) Row 5: Ch 1, sc2tog, sc in next 2 stitches, sc2tog. (4) Fasten off. Place one lining against the WS of each navy side flap, matching the wide bases and narrow tips. The cream should be visible on the underside of each flap.
- Cream side-flap edging For each paired side flap and lining, join cream at one base corner. Working through both layers, make 1 sc in each of the five row ends down the first side, 1 sc in each of the four stitches across the tip, then 1 sc in each of the five row ends up the other side. (14 edging stitches) Fasten off. Sew the two cream lining base corners neatly to the inside of the cap brim; do not stitch across the brim opening.
- Separate navy front flap Ch 13. Row 1: Sc in the second ch from the hook and in each remaining ch; turn. (12) Rows 2â4: Ch 1, sc in each stitch; turn after rows 2 and 3 only. (12) Fasten off. Sew the row-1 foundation edge to the outside of cap stitches 1â12 on round 15. Let the rest of the rectangle hang down for now.
- Cream front-flap edging Join cream at one lower corner of the hanging front flap. Work 1 sc in each of the four row ends up the first side, 1 sc in each of the 12 stitches across the free row-4 edge, and 1 sc in each of the four row ends down the other side. (20 edging stitches) Fasten off.
- Fold and secure the front Fold the front flap upwards over the outside of the cap so its cream-edged free edge sits near round 11. With navy yarn, stitch its two upper corners to the cap near the ends of the front section. Keep the middle of that edge free so the flap reads as a separate fold.
- Hanging loop Join cream or navy at the crown beside the closed magic ring. Ch 18, then sl st back into the same crown point to form a loop. Fasten off and secure both ends inside the cap.
Finishing
- Weave in all ends securely without pulling the brim out of shape.
- Ease the side flaps downwards and check that both cream linings face the same way.
- Shape the folded front flap with your fingers so its cream edging remains visible.
Helpful Tips
- Mark the first stitch of round 15 before attaching any flaps; the numbered brim sections keep the front, sides and back evenly placed.
- If the front flap feels bulky when folded, use a slightly smaller hook for that separate rectangle rather than changing its stitch count.
- Use small, secure stitches at the front corners so the flap stays folded while the ornament hangs.
Petal-Brim Cloche Ornament

This crochet Christmas hat ornament takes its shape from a close, rounded crown and a brim that opens into soft scallops. It has the familiar silhouette of a little cloche, with a more decorative edge than a straight-brimmed hat.
The shell petals sit close to their neighbours, giving the brim a layered appearance without needing to overlap or hold a rigid shape. A relaxed edge helps the scallops keep their gentle curve.
The open hat looks lovely hanging on a tree, where its curved crown and petal-like brim can be seen from different angles. It is an appealing choice if you enjoy small projects with a distinctive outline.
Petal-Brim Cloche Ornament

Quick-reference card. Follow the complete written instructions below.
Materials
- Smooth DK yarn: Approximately 15â20 m in burgundy, including the hanging loop.
- Crochet hook: 3.5 mm, or a size that produces a firm fabric.
- Other supplies: Stitch marker, yarn needle and scissors.
Size and Fit
One ornament size. The crown is approximately 5 cm across and the hat approximately 5â6 cm tall, excluding the hanging loop. These are estimates based on the suggested gauge, not measured sample dimensions. The open hat is not stuffed.
Gauge
Approximately 22 single crochet stitches and 24 rounds per 10 cm in a firm fabric. Exact gauge is not essential; use a smaller hook if the crown feels floppy.
Abbreviations
US crochet terms.
- ch = chain
- dc = double crochet
- rep = repeat
- sc = single crochet
- sl st = slip stitch
- st(s) = stitch(es)
Pattern
- Before you begin Work joined rounds with the outside of the hat facing you. At the start of each round, ch 1; this does not count as a stitch. Join each round with a sl st to its first stitch. Keep the joining sl st out of subsequent stitch counts.
- Round 1 Make a magic ring. Ch 1, work 6 sc into the ring and pull it closed. Join. (6 sc)
- Round 2 Ch 1, work 2 sc in each st around. Join. (12 sc)
- Round 3 Ch 1, rep [sc in next st, 2 sc in next st] 6 times. Join. (18 sc)
- Round 4 Ch 1, rep [sc in next 2 sts, 2 sc in next st] 6 times. Join. (24 sc)
- Round 5 Ch 1, rep [sc in next 3 sts, 2 sc in next st] 6 times. Join. (30 sc)
- Round 6 Ch 1, rep [sc in next 4 sts, 2 sc in next st] 6 times. Join. (36 sc)
- Rounds 7â10: straight sides Ch 1, sc in each st around and join. Work four rounds in total, each with 36 sc.
- Round 11: petal brim Ch 1, rep [skip next 2 sts, work 9 dc in next st, skip next 2 sts, sc in next st] 6 times. Join to the first dc of the round. You will have six shells, with one sc between neighbouring shells. (54 dc and 6 sc; 60 sts total)
- Round 12: light edging Ch 1, work 1 sc in each dc and each sc around. Join to the first sc. (60 sc) Fasten off without pulling the scallops tight.
- Hanging loop Join yarn securely at the centre of the crown, ch 22, then sl st into the same centre point to form a loop. Fasten off.
Finishing
- Weave in all ends on the inside of the hat.
- Ease the six shell petals outwards with your fingers. Let neighbouring scallops rest close together for a softly layered outline; do not stiffen the brim.
Helpful Tips
- Mark the first stitch of each round so the joining slip stitch is not mistaken for a stitch.
- In the brim round, each repeat uses six crown stitches and produces one nine-dc shell plus one separating sc.
- If the brim curls tightly, relax your tension on the shell stitches and edging rather than adding more stitches.
Two-Point Jester Hat Ornament

This crochet Christmas hat ornament swaps a traditional single crown for a playful jester shape. Its red and green points lean away from one another, while the cream brim gives the miniature hat a crisp contrast.
The distinctive shape comes from two separate tapered sections rising from the same hat body. That division is the part to pay closest attention to: keeping the sections distinct helps both points read clearly when the ornament hangs.
This is a good choice if you enjoy small festive projects with a little shaping. The full pattern below provides the round-by-round directions; the introduction is simply a guide to the design and its construction.
Two-Point Jester Hat Ornament

Quick-reference card. Follow the complete written instructions below.
Materials
- DK yarn: Small amounts of red, green and cream. Choose a flexible yarn so the points can be shaped gently outwards.
- Crochet hook: 3.5 mm, or a size that makes a reasonably firm fabric.
- Other supplies: Yarn needle, scissors and two stitch markers.
Size and Fit
One ornament size. At the stated gauge, the brim is approximately 12 cm around. Height from brim to closed tips is approximately 5 cm, excluding tassels and hanging loop. Finished dimensions are estimates, not measured results.
Gauge
Approximately 20 hdc stitches per 10 cm. Exact gauge is not essential for this ornament; use a firm enough fabric to hold its shape.
Abbreviations
US crochet terms.
- BLO = back loop only
- ch = chain
- hdc = half double crochet
- sc = single crochet
- sc2tog = single crochet two stitches together
- sl st = slip stitch
- st(s) = stitch(es)
Pattern
- Brim, round 1 With cream, ch 24. Without twisting the chain, join with a sl st in the first ch. Ch 1; hdc in the same ch as the join and in each remaining ch. Join with a sl st in the first hdc. Fasten off. (24 hdc)
- Body, round 2 Join red yarn in any stitch. Ch 1; sc BLO in the same stitch and each stitch around. Join with a sl st in the first sc. (24 sc)
- Body, rounds 3â4 For each round, ch 1; hdc in the same stitch as the join and in each stitch around. Join with a sl st in the first hdc. Fasten off after round 4. (24 hdc each round)
- Divide the crown Count the 24 stitches of round 4. Mark the first stitch and the 13th stitch: each point will use one group of 12 consecutive stitches. The two groups must remain separate.
- Red point, round 1 Join red yarn in the marked first stitch. Ch 1; sc in that stitch and the next 11 stitches only. Join with a sl st in the first sc, drawing the two ends of this 12-stitch group together to form its own tube. Leave the other 12 body stitches unworked. (12 sc)
- Red point, rounds 2â5 Work through both loops. Round 2: Ch 1, [sc2tog, sc in next 4 sts] twice; join in the first stitch. (10 sts) Round 3: Ch 1, [sc2tog, sc in next 3 sts] twice; join. (8 sts) Round 4: Ch 1, [sc2tog, sc in next 2 sts] twice; join. (6 sts) Round 5: Ch 1, [sc2tog, sc in next st] twice; join. (4 sts) Fasten off, leaving a 15 cm tail. Thread the tail through the front loops of the four remaining stitches, pull closed and secure inside the point.
- Green point, round 1 Join green yarn in the marked 13th body stitch. Ch 1; sc in that stitch and the next 11 previously unworked body stitches. Join with a sl st in the first sc to form a second, separate tube. (12 sc)
- Green point, rounds 2â5 Repeat rounds 2â5 of the red point in green, including closing the four-stitch tip.
Finishing
- Weave in loose ends. The brim remains open at the bottom; no stuffing is needed.
- For each cream tassel, cut six strands approximately 5 cm long. Pull their midpoints through a closed point tip so the ends hang below it. Tie a separate cream strand firmly around the bundle about 5 mm below the tip, then trim the hanging ends to approximately 1.5 cm.
- Cut a 15 cm length of cream yarn for the hanger. Fold it into a loop and stitch its two ends securely through the top centre where the point bases meet. Hide the ends inside the hat.
- Gently ease the two points away from each other before hanging. Avoid pulling on the tassels to shape them.
Helpful Tips
- The beginning ch 1 and joining sl st never count as stitches. On each joined round, work the first stitch into the same stitch as the join.
- On the point rounds, join into the first stitch made, not into the joining slip stitch from the previous round.
- Keep the two groups of 12 body stitches distinct when starting the points; do not crochet across the unworked group.
Pointed Crown Hat Ornament

This crochet Christmas hat ornament has the playful outline of a tiny festive crown. Its gold band keeps the shape simple, while upright red and green peaks make it stand out among softer, slouchier hat decorations.
The peaks grow directly from the band rather than being attached as separate embellishments. That construction leaves the top open and gives the ornament its distinctive pointed silhouette. Firm fabric and neatly shaped edges help the peaks hold their position when the hat is hanging.
It makes a cheerful addition to a Christmas tree, particularly alongside round baubles and other soft crochet decorations. The pattern below gives the full instructions for the band, peaks and hanging loop.
Pointed Crown Hat Ornament

Quick-reference card. Follow the complete written instructions below.
Materials
- DK cotton yarn: Small amounts of gold, red and green. Choose a firm yarn that holds its shape.
- Crochet hook: 3.5 mm, or a size that produces a firm, opaque fabric.
- Other supplies: Stitch marker, tapestry needle and scissors.
Size and Fit
One size. At the planning gauge, the band is approximately 15 cm around and the ornament is roughly 3â4 cm tall, excluding the hanging loop. The top remains open between the peaks.
Gauge
Planning gauge: approximately 20 sc and 22 rows or rounds per 10 cm. Gauge is not critical, but work firmly so the peaks stand upright. Dimensions will vary with your yarn and tension.
Abbreviations
US crochet terms.
- ch = chain
- sc = single crochet
- sc2tog = single crochet two stitches together; one decrease
- sl st = slip stitch
- st(s) = stitch(es)
Pattern
- Gold band With gold, ch 30. Without twisting the chain, join with a sl st in the first ch. Round 1: Ch 1, sc in each ch around; join with a sl st in the first sc. 30 sc. Rounds 2â3: Ch 1, sc in each sc around; join with a sl st in the first sc. 30 sc per round. Fasten off. Joining sl sts and beginning chains do not count as stitches.
- Mark the five sections Working along the upper edge of Round 3, mark stitches 1, 7, 13, 19 and 25. Each peak uses its marked stitch and the following five stitches. Work the peaks in this order: red, green, red, green, red. Because there are five peaks, the two red peaks meet across the round join.
- Make each triangular peak Join the peak colour with a sl st in the first stitch of its six-stitch section. Row 1: Ch 1, sc in that same stitch and in the next five band stitches; turn. 6 sc. Row 2: Ch 1, sc2tog, sc in the next 2 sc, sc2tog; turn. 4 sc. Row 3: Ch 1, sc2tog twice; turn. 2 sc. Row 4: Ch 1, sc2tog. 1 sc at the point. Fasten off. Repeat on each of the remaining four sections, leaving no band stitches unused.
- Edge the peaks For each peak, join its matching colour with a sl st in the first sc of Row 1, at the base of one side. Work 1 sc into each of the three row ends along that side (Rows 1â3). Work (sc, ch 1, sc) into the single stitch at the point. Work 1 sc into each of the three row ends down the other side. Sl st into the last sc of Row 1 and fasten off. This makes 8 edging sc and one point ch per peak; do not edge across the base.
- Hanging loop Cut a 24 cm length of gold yarn and fold it in half. Sew both cut ends securely to the back of the band, centred below the first peak. Tack the folded loop to the back of that peak near its point so it emerges above the point. Keep the stitches from showing on the front.
Finishing
- Weave in all ends on the inside of the band and the backs of the peaks.
- Gently shape the band into a circle and straighten the peaks. If needed, dampen and pin the peaks upright until dry.
Helpful Tips
- Place a marker in the first stitch of each six-stitch section before starting the peaks; this prevents a stitch being worked twice or missed.
- Keep the edging firm but not tight enough to pull a point sideways.
Cross-Front Turban Hat Ornament
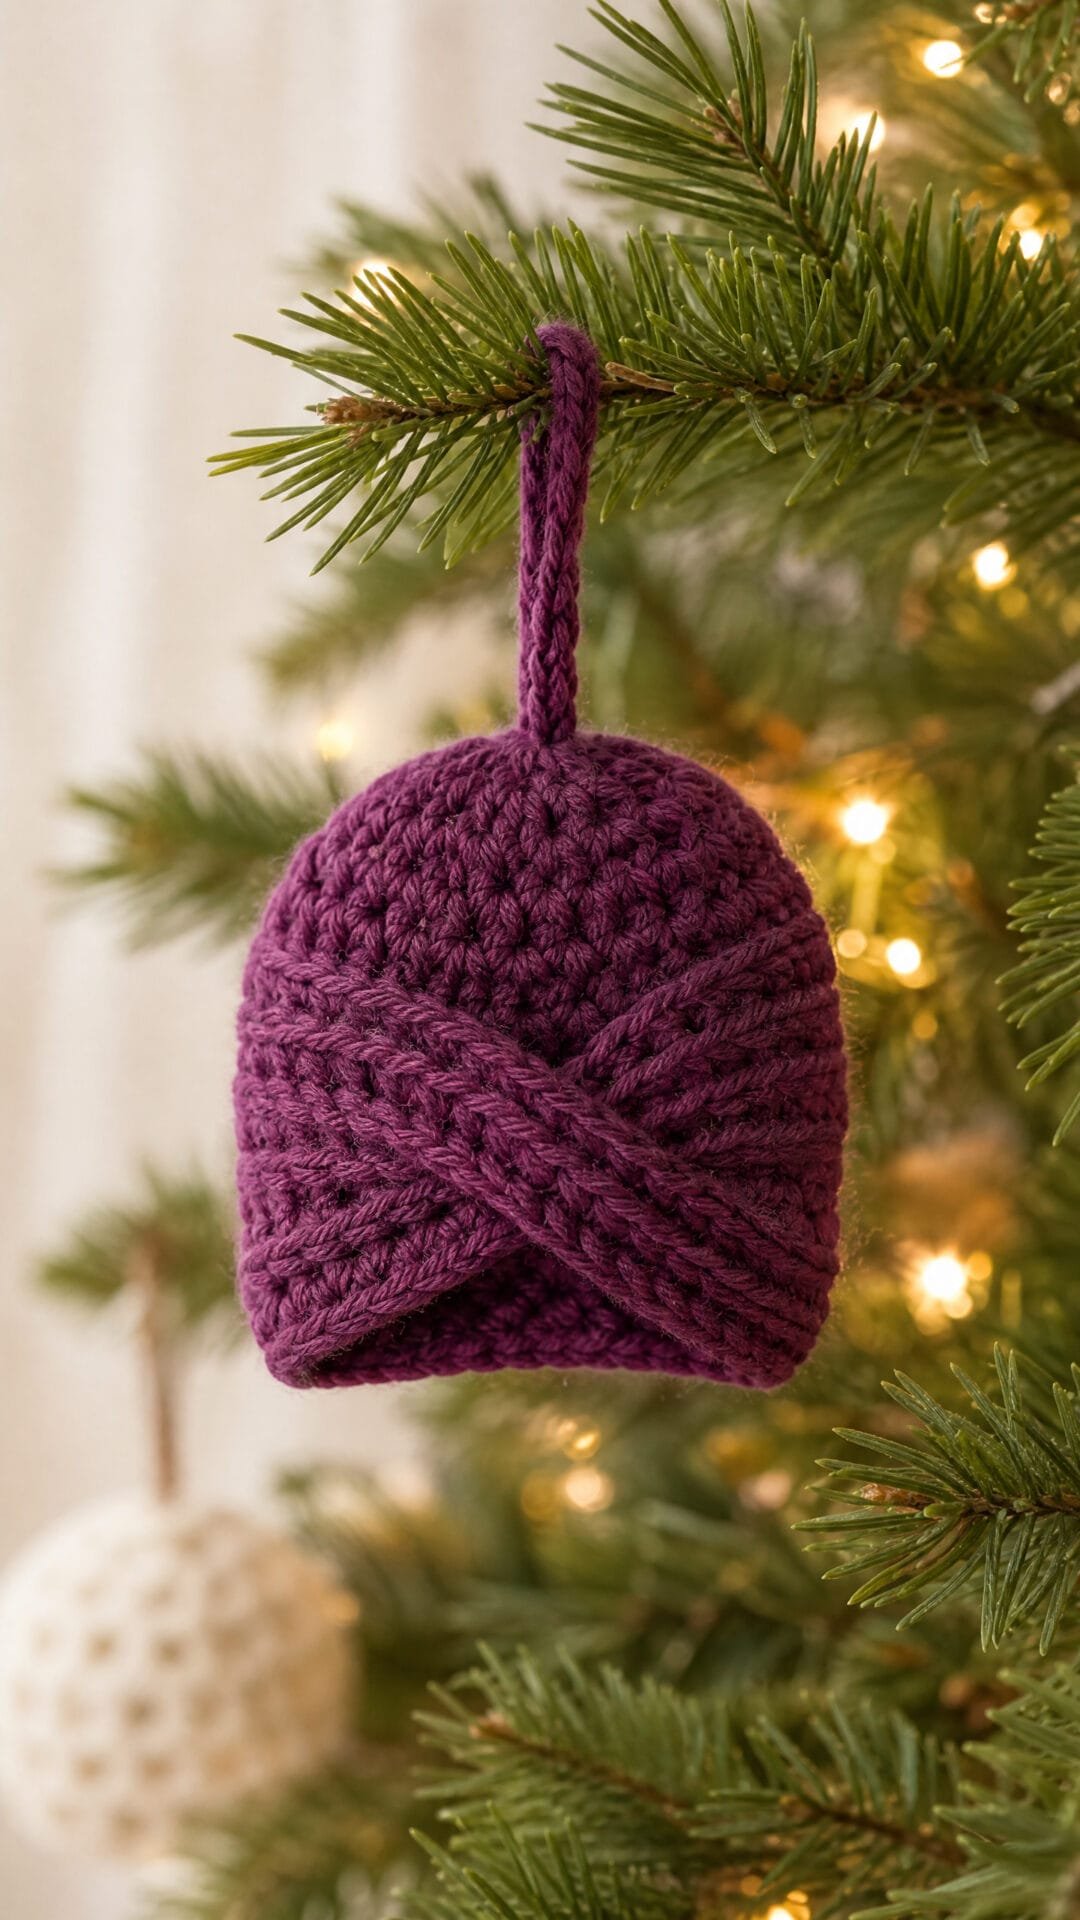
This Cross-Front Turban Hat Ornament gets its distinctive shape from two broad, flat bands sweeping across a shallow cap. The cap gives the little hat its rounded silhouette, while the crossing creates a soft, wrapped look at the front.
The arrangement matters more than a tight centre: the bands should sit smoothly against the cap so their overlap looks like fabric wrapped around a hat, rather than a knot. Itâs a satisfying project if you enjoy small crochet decorations with a little shaping and careful placement.
In plum, the ornament offers a change from traditional Christmas colours while still feeling festive on the tree. The written pattern below covers the cap, the matching bands and their placement.
Cross-Front Turban Hat Ornament

Quick-reference card. Follow the complete written instructions below.
Materials
- Soft DK yarn: A small amount in plum
- Crochet hook: 3.5 mm, or a size that gives a firm fabric
- Other tools: Stitch marker, yarn needle and scissors
Size and Fit
One ornament size. At the stated gauge, the 24-stitch cap measures approximately 12 cm around its lower edge. Each band is approximately 5.8 cm long before sewing. These are calculated dimensions, not tested finished measurements.
Gauge
Approximately 20 sc and 24 rows to 10 cm in firm single crochet. Exact gauge is not essential, but make both bands the same length.
Abbreviations
US crochet terms.
- ch = chain
- sc = single crochet
- sl st = slip stitch
- st(s) = stitch(es)
- rnd = round
Pattern
- Cap Work in a continuous spiral; mark the first stitch of each round. Rnd 1: Make 6 sc in a magic ring. (6) Rnd 2: Work 2 sc in each st. (12) Rnd 3: *Sc in next st, 2 sc in next st; repeat from * around. (18) Rnd 4: *Sc in next 2 sts, 2 sc in next st; repeat from * around. (24) Rnds 5â7: Sc in each st around. (24 each rnd) Sl st in the next st and fasten off. Leave the lower edge open.
- Make two bands For each band, ch 4. Row 1: Sc in the second ch from the hook and in each remaining ch. (3) Rows 2â14: Ch 1, turn, sc in each st. (3) Fasten off, leaving a long sewing tail at each end of each band. Lay the bands flat; do not fold them into cords.
- Mark the front With the cap upright and its lower edge facing down, choose the gap between two stitches of rnd 7 as the centre front. Count the stitch immediately to the right of that gap as stitch 1 and continue around the cap to stitch 24. The side attachment areas are stitches 6â8 on the right and 18â20 on the left. Use the same stitch columns when locating these areas on rnd 5.
- Cross and attach Arrange both bands across the front of the cap, not across the back. Pin one band from stitches 18â20 on rnd 5 at the left side to stitches 6â8 on rnd 7 at the right side. Pin the second from stitches 18â20 on rnd 7 at the left side to stitches 6â8 on rnd 5 at the right side. Pass the second band over the first at the centre front. Spread the bands so they lie flat, then sew each three-stitch-wide end securely to its marked side area. Keep the sewing stitches on the cap rather than gathering the bands. Add two or three small stitches through both layers at the crossing, without pulling them into a knot.
Finishing
- Weave in the sewing tails on the inside of the cap.
- Thread a separate length of yarn through the top of the cap, form a hanging loop approximately 4 cm tall, and secure both ends inside. Weave in the ends.
- Smooth the crossing and ease the bands against the front of the cap.
Helpful Tips
- Pin both bands before sewing. If your gauge differs, work the same number of rows on each band, adding or removing rows until each reaches comfortably from one marked side to the other across the front.
- Catch only small portions of the bands when securing the crossing to avoid a bulky centre.
Mushroom Cap Hat Ornament

This crochet Christmas hat ornament takes its shape from a woodland mushroom rather than a wearable winter hat. Its broad red dome curves over a cream underside, giving the cap a distinct silhouette even when it is hanging on the tree.
Small white yarn spots bring out the toadstool look without the weight of beads. The visible underside adds contrast and depth, while its central opening is a decorative feature rather than a fit for a head.
It makes a playful addition to woodland-themed Christmas decorations, especially among pinecones, greenery and other small crochet ornaments.
Mushroom Cap Hat Ornament

Quick-reference card. Follow the complete written instructions below.
Materials
- DK cotton yarn: Small amounts of red for the dome and hanging loop, cream for the underside, and white for the spots.
- Crochet hook: 3 mm, or a size that produces firm stitches at the stated gauge.
- Other supplies: Yarn needle, scissors and stitch markers.
Size and Fit
One ornament size. The finished outer rim is approximately 7.5â8 cm across, with a central underside opening approximately 3 cm across. These dimensions are estimates based on the stated gauge; check your own work if size matters. The opening is decorative, not sized to fit a person.
Gauge
Aim for approximately 20 sc and 22 rounds per 10 cm in firm crochet worked in rounds. Exact gauge is less important than a fabric firm enough to hold the cap’s shape.
Abbreviations
US crochet terms.
- ch = chain
- sc = single crochet
- sl st = slip stitch
- st(s) = stitch(es)
- inc = work 2 sc in the same stitch
- MR = magic ring
Pattern
- Working method Work the dome and underside separately in joined rounds. At the end of each round, sl st into its first sc to join, then ch 1 before the next round. Neither the joining sl st nor the ch 1 counts as a stitch. Mark the first sc if needed.
- Red dome, rounds 1â2 With red, make an MR. Round 1: Work 6 sc in the ring. Pull closed. (6 sts) Round 2: Inc in each st around. (12 sts)
- Red dome, rounds 3â8 Round 3: (Sc in next st, inc) 6 times. (18 sts) Round 4: (Sc in next 2 sts, inc) 6 times. (24 sts) Round 5: (Sc in next 3 sts, inc) 6 times. (30 sts) Round 6: (Sc in next 4 sts, inc) 6 times. (36 sts) Round 7: (Sc in next 5 sts, inc) 6 times. (42 sts) Round 8: (Sc in next 6 sts, inc) 6 times. (48 sts)
- Red dome, rounds 9â11 Sc in each st around for 3 rounds, keeping 48 sts in each round. Fasten off.
- Cream underside, round 1 With cream, ch 18 and sl st into the first ch to form a ring, taking care not to twist it. Ch 1. Work 1 sc in each ch around and join. This ring forms the central opening. (18 sts)
- Cream underside, rounds 2â6 Round 2: (Sc in next 2 sts, inc) 6 times. (24 sts) Round 3: (Sc in next 3 sts, inc) 6 times. (30 sts) Round 4: (Sc in next 4 sts, inc) 6 times. (36 sts) Round 5: (Sc in next 5 sts, inc) 6 times. (42 sts) Round 6: (Sc in next 6 sts, inc) 6 times. (48 sts) Fasten off.
- Embroider the spots Before joining the pieces, use white yarn to embroider nine small spots on the right side of the red dome: three spaced around rounds 4â6 and six staggered around rounds 7â9. Make each spot with two short straight stitches side by side, about 4 mm long. Secure the yarn on the wrong side without pulling the fabric tight.
- Add the hanging loop Attach red yarn at the centre of the dome’s MR. Ch 20, then sl st back into the same central attachment point to form a loop. Fasten off and secure both ends on the wrong side.
- Join the rim Place the pieces with their wrong sides facing each other: the red dome curves upwards and the cream underside faces downwards. Align their 48-stitch outer edges. Join red yarn at the rim and, working through both loops of one edge stitch on each piece, sl st the two layers together all the way around. Make 48 joining sl sts, one per matched pair. Join to the first joining sl st and fasten off. Leave the central cream opening uncovered.
Finishing
- Weave in any remaining ends; the central opening provides access to the inside after assembly.
- Ease the rim into an even circle by hand. Keep the embroidered spots and hanging loop clear of the rim seam.
Helpful Tips
- If the central opening closes up, check that the foundation chain was not twisted and that you worked into all 18 chains.
- Match all 48 stitch pairs before seaming; markers placed at quarter points can help prevent one layer from shifting.
- Use yarn rather than beads for the spots to keep the ornament lightweight.
Tasselled Fez Hat Ornament

A fez adds a distinctive silhouette to a collection of crochet Christmas hat ornaments. Its flat top and gently widening sides set it apart from a top hat, while the dark-red colour and small gold tassel give it a festive feel without obscuring its shape.
This intermediate project will appeal to crocheters who enjoy shaping a small piece. The open underside keeps the ornament light, and a separate hanging loop allows its profile to show clearly on a Christmas tree or gift.
Tasselled Fez Hat Ornament

Quick-reference card. Follow the complete written instructions below.
Materials
- Firm cotton DK yarn: Small amounts of dark red for the hat and gold for the tassel and hanging loop.
- Crochet hook: 2.5 mm, or a size that produces a firm fabric.
- Other tools: Stitch marker, yarn needle and scissors.
Size and Fit
One ornament, approximately 3.2 cm across the top, 4.8 cm across the open base and 3 cm tall, excluding tassel and hanging loop. Keep the base open; no stuffing is needed.
Gauge
Approximately 24 sc and 28 rounds per 10 cm in firm sc fabric. The suggested dimensions are estimates from this gauge, not measured results; exact gauge is not essential.
Abbreviations
US crochet terms.
- BLO = back loop only
- inc = work 2 sc in the same stitch
- MR = magic ring
- sc = single crochet
- sl st = slip stitch
- st(s) = stitch(es)
Pattern
- Before you begin Use dark red for the hat. Work in a continuous spiral without joining rounds; move a stitch marker into the first stitch of each new round. The top is worked first, followed by the sides towards the open base.
- Round 1 â top Make an MR and work 6 sc into it. Pull the ring closed. (6 sts)
- Round 2 Inc in each st around. (12 sts)
- Round 3 (Sc in next st, inc in next st) 6 times. (18 sts)
- Round 4 (Sc in next 2 sts, inc in next st) 6 times. (24 sts) This completes the flat top disc.
- Round 5 â turn to sides Working in BLO, sc in each st around. (24 sts)
- Round 6 Sc in each st around. (24 sts)
- Round 7 (Sc in next 3 sts, inc in next st) 6 times. (30 sts)
- Round 8 Sc in each st around. (30 sts)
- Round 9 (Sc in next 4 sts, inc in next st) 6 times. (36 sts)
- Rounds 10â11 Sc in each st around for 2 rounds. (36 sts per round)
- Round 12 â base edge Sc in each st around. (36 sts) Sl st into the first sc of this round, then fasten off. Leave the base open.
- Gold tassel Cut six 6 cm lengths of gold yarn and fold them together at their midpoints. Tie a separate 20 cm gold strand firmly around the fold. Use a yarn needle to take both ends of this tie through the closed centre of the top to the inside of the hat; knot them securely inside. Wrap and knot another short gold strand around the bundle about 5 mm below the fold. Trim the tassel ends to approximately 2.5 cm below the wrap.
- Hanging loop Cut an 18 cm length of gold yarn. Near the back edge of the top, take its ends from outside to inside through two adjacent stitches of Round 5. Leave a loop approximately 5 cm high above the hat, knot the ends securely inside and trim the excess.
Finishing
- Weave the dark-red yarn end into the inside of the side fabric without pulling the base out of shape.
- Tuck or trim the secured gold ends inside the hat. Gently flatten the top and even out the open base by hand.
Helpful Tips
- A firm cotton fabric helps the fez retain its shape without stuffing.
- The BLO round defines the edge of the flat top; keep subsequent rounds relaxed enough to let the sides widen.
- Keep the tassel short so it does not obscure the fez shape.
For another related project collection, browse Christmas hat patterns to wear.
Rolled-Brim Bowler Hat Ornament

This crochet Christmas hat ornament takes its character from a smooth, domed crown and a slim, upturned brim. The charcoal colour gives it the look of a classic bowler, making it a playful alternative to a traditional Santa hat on the tree.
The shape depends on a firm fabric that holds its curve without looking bulky. Its narrow brim frames the crown rather than spreading into a wide, flat edge, so the bowler silhouette remains clear even at ornament scale.
Rolled-Brim Bowler Hat Ornament

Quick-reference card. Follow the complete written instructions below.
Materials
- DK yarn: A small amount in charcoal, plus a 25 cm strand for the hanging loop
- Crochet hook: 3.5 mm, or a size that produces firm stitches
- Other: Stitch marker, yarn needle and scissors
Size and Fit
One ornament size. At the stated gauge, the crown is approximately 6.5 cm across and 5.5 cm high before the brim is rolled. The brim increases to approximately 7.5 cm across before its edge is drawn in. Measurements are estimates based on gauge, not a tested finished sample.
Gauge
Approximately 18 sc and 20 rounds to 10 cm in firm single crochet. Exact gauge is not essential, but a firm fabric helps the hat hold its shape.
Abbreviations
US crochet terms.
- ch = chain
- FLO = front loop only
- inc = work 2 sc in the same stitch
- sc = single crochet
- sc2tog = single crochet 2 stitches together
- sl st = slip stitch
Pattern
- Before you begin Work in joined rounds. At the end of each round, sl st to the first sc, then ch 1. Neither the joining sl st nor the ch 1 counts as a stitch. Work the first sc of the next round into the first sc of the previous round. Mark it if needed.
- Round 1 Make a magic ring and work 6 sc into it. Pull the ring closed. Join and ch 1. (6 sc)
- Round 2 Inc in each stitch around. Join and ch 1. (12 sc)
- Round 3 (Sc in next stitch, inc in next stitch) 6 times. Join and ch 1. (18 sc)
- Round 4 (Sc in next 2 stitches, inc in next stitch) 6 times. Join and ch 1. (24 sc)
- Round 5 (Sc in next 3 stitches, inc in next stitch) 6 times. Join and ch 1. (30 sc)
- Round 6 Sc in each stitch around. Join and ch 1. (30 sc)
- Round 7 (Sc in next 4 stitches, inc in next stitch) 6 times. Join and ch 1. (36 sc)
- Round 8 Sc in each stitch around. Join and ch 1. (36 sc)
- Rounds 9â11 Sc in each stitch around. Join and ch 1 after each round. (36 sc per round)
- Round 12 â outward brim Working in FLO, (sc in next 5 stitches, inc in next stitch) 6 times. Join and ch 1. (42 sc)
- Round 13 â brim edge Working through both loops, (sc in next 5 stitches, sc2tog over next 2 stitches) 6 times. Join and fasten off, leaving a tail long enough to secure the roll. (36 sc)
Finishing
- Turn the brim edge upwards towards the crown. With the long tail and a yarn needle, tack a stitch on the edge of Round 13 to the outside of Round 10 at six evenly spaced points, about six edge stitches apart. Keep the tacks small and adjust their tension until the brim rolls evenly.
- Weave in the remaining tails on the inside of the hat.
- Fold the 25 cm yarn strand in half. From the outside, pass both cut ends through the centre of the crown to the inside and knot them securely together. Adjust the loop to approximately 6 cm long, then trim the ends inside the hat.
Helpful Tips
- The brim is only two rounds deep: the increase spreads it out, while the decreases draw its outer edge in for the roll.
- If the crown feels floppy, use a smaller hook rather than adding more rounds; extra rounds will change the bowlerâs proportions.
- The bottom stays open, giving access to the inside for securing the brim and hanging loop.
Spiral Peppermint Hat Ornament

The peppermint twist in this crochet Christmas hat ornament is part of the fabric itself, not an embellishment added afterwards. Red and white curve across the flat crown and continue down the short sides, while a plain red brim gives the little hat a clear outline.
This is a satisfying choice if you enjoy colourwork that asks for close attention. Both colours stay active as the spiral grows, so it helps to pause at each change and check which section comes next. The finished hat has an open bottom and looks especially charming hung where its patterned crown can be seen.
Spiral Peppermint Hat Ornament

Quick-reference card. Follow the complete written instructions below.
Materials
- Smooth DK cotton yarn: Small amounts of red and white, plus a short length of white for the hanging loop.
- Crochet hook: 3.5 mm, or a size that gives a firm fabric.
- Notions: Two locking stitch markers, a yarn needle and scissors.
Size and Fit
One size: approximately 6 cm across the open brim and 3 cm deep, excluding the hanging loop. The hat is not stuffed.
Gauge
Approximately 22 sc and 24 rounds per 10 cm in firm sc fabric. Exact gauge is not essential, but use a hook that prevents gaps.
Abbreviations
US crochet terms.
- sc = single crochet
- inc = work 2 sc in the same stitch
- st(s) = stitch(es)
Pattern
- How the two spirals work Do not join or turn while working the two-colour sections. Complete the stated red section, park its working loop on a locking marker, then complete the white section and park that loop while you return to red. Each new section is worked into the stitches of the opposite-colour section immediately ahead of it. Count each colour separately.
- Crown foundation With red, make a magic ring and work 3 sc into it. Park the red loop. Make a slip knot with white and work 3 sc into the same ring, immediately after the red stitches. Gently close the ring. There are 3 red and 3 white sc (6 sts total).
- Crown increase 1 With red, inc in each of the next 3 white sts (6 red sc). With white, inc in each of the next 3 red sts (6 white sc). Total: 12 sts.
- Crown increase 2 With red, work (sc in next st, inc in next st) 3 times across the next 6 white sts. Repeat with white across the next 6 red sts. Total: 18 sts.
- Crown increase 3 With each colour in turn, work (sc in next 2 sts, inc in next st) 3 times across the next opposite-colour section. Total: 24 sts.
- Crown increase 4 With each colour in turn, work (sc in next 3 sts, inc in next st) 3 times across the next opposite-colour section. Total: 30 sts.
- Crown increase 5 With each colour in turn, work (sc in next 4 sts, inc in next st) 3 times across the next opposite-colour section. Total: 36 sts.
- Crown increase 6 With each colour in turn, work (sc in next 5 sts, inc in next st) 3 times across the next opposite-colour section. Total: 42 sts, comprising 21 red and 21 white. The crown should form a roughly flat circle.
- Short sides Work 4 cycles without increasing. For each cycle, sc with red in each of the next 21 white sts, then sc with white in each of the next 21 red sts. Keep both strands active until the fourth white section is complete. Each cycle remains at 42 sts.
- Plain red band Fasten off white, leaving a tail to weave in. Pick up the parked red loop and sc in the next 21 white sts, then in the next 21 red sts. Continue with red only, working 2 more unjoined rounds of 42 sc. Fasten off red. The band comprises 3 red rounds.
- Hanging loop Cut a 20 cm length of white yarn. Thread it through the centre of the crown, form a loop approximately 6 cm long above the hat, and secure both ends on the inside with several small stitches. Weave the ends into the inside of the crown.
Finishing
- Weave the red and white starting tails securely into stitches of their own colours on the inside.
- Weave in the white side tail and red band tail. Gently shape the crown and brim by hand.
Helpful Tips
- Keep a marker in each parked working loop so it cannot unravel.
- Count 21 stitches in each colour section before beginning the plain red band; missing a stitch at a colour change can distort the spiral.
- The brim stays open. Stuffing would change the shape of this flat-crowned ornament.
Seamed Panel Cap Ornament

This crochet Christmas hat ornament has a neat, structured silhouette: sloping upper corners lead to a straight, squared top, while visible side seams give the little cap its shape. The cream body and green lower edging make it a simple decoration for a tree or a wrapped gift.
Itâs a good choice if you prefer working flat rather than shaping a crown in rounds. The open base keeps it looking like a miniature cap, and the hanging loop lets it sit neatly among other Christmas crochet decorations.
Seamed Panel Cap Ornament

Quick-reference card. Follow the complete written instructions below.
Materials
- Cream DK cotton yarn: A small amount for both panels and their seams.
- Green DK cotton yarn: A small amount for the lower edging and hanging loop.
- 3.5 mm crochet hook: Or a hook that gives a firm fabric at the stated gauge.
- Tapestry needle and scissors: For seaming and weaving in ends.
Size and Fit
One ornament size. Each unedged panel is approximately 6 cm wide at the base and 5 cm tall at the stated gauge. The completed cap is approximately 6 cm tall including the green edging, excluding the hanging loop. The base remains open.
Gauge
20 sc and 20 rows = 10 cm in firm, flat single crochet. Exact gauge is not critical, but both panels must match.
Abbreviations
US crochet terms.
- ch = chain
- sc = single crochet
- sc2tog = single crochet two stitches together; decreases one stitch
- sl st = slip stitch
- st(s) = stitch(es)
Pattern
- Make the first panel With cream, ch 13. Row 1: Sc in the second ch from the hook and in each remaining ch; 12 sc. Ch 1 and turn at the end of each row. The turning ch does not count as a stitch.
- Panel rows 2â5 Sc in each st across; 12 sc on each row.
- Shape the upper corners Row 6: Sc2tog, sc in the next 8 sts, sc2tog; 10 sc. Row 7: Sc in each st across; 10 sc. Row 8: Sc2tog, sc in the next 6 sts, sc2tog; 8 sc. Rows 9â10: Sc in each st across; 8 sc on each row. Fasten off. The 8-stitch edge is the straight top of the cap.
- Make the second panel Repeat the panel instructions exactly, from the foundation chain through row 10.
- Seam the cap Place the panels with wrong sides together, aligning their 12-stitch lower edges and 8-stitch top edges. With cream and a tapestry needle, whipstitch through both layers up one side, across the straight top and down the other side. Follow the shaped corners as you sew. Keep both lower edges unsewn and leave the base open.
- Add the green edging With the base facing you, join green yarn at a side seam. Round 1: Work 1 sc into each of the 12 foundation-chain stitches along the front lower edge and each of the 12 along the back lower edge; 24 sc. Join with a sl st to the first sc. Round 2: Ch 1, sc in each sc around; 24 sc. Join with a sl st to the first sc and fasten off. Neither the joining sl st nor the beginning ch counts as a stitch.
- Add the hanging loop Join green yarn at the centre of the top seam. Ch 20, then sl st into the same point on the seam to form a loop. Fasten off and secure the ends on the inside.
Finishing
- Weave in all remaining ends on the inside of the cap.
- Flatten the ornament gently so the side seams and squared top sit neatly; do not close the base.
Helpful Tips
- Count both panels before seaming: each should have 12 stitches at the base, 8 stitches across the top and 10 rows.
- When edging the base, insert the hook into each foundation-chain stitch rather than guessing where to place stitches along the seam.
- For firmer corners, make the seaming stitches snug without pulling the top edge into a curve.
Short-Row Wedge Beanie Ornament

This little mustard beanie brings the familiar shape of a winter hat to a Christmas tree. Its sideways construction creates subtle wedge lines that draw the eye towards the crown, while the brim gives the ornament a tidy outline.
The short-row turning points are the part to watch: they shape the hat without obvious decreases. Choose yarn with clear stitch definition so you can see where each section ends and pick up the next wedge with confidence. The result is a compact decoration that also looks charming tied to a wrapped gift.
Short-Row Wedge Beanie Ornament

Quick-reference card. Follow the complete written instructions below.
Materials
- Smooth DK yarn: Approximately 20 g in mustard, plus a small amount for a hanging loop if desired
- Crochet hook: 3.5 mm, or a size that produces a firm fabric
- Yarn needle: For seaming and closing the crown
- Stitch marker: Optional, for marking the first wedge
Size and Fit
One ornament size: approximately 5.5 cm high before brim edging, with a brim circumference of approximately 17 cm at the stated gauge. The brim edging adds a little height. Exact dimensions depend on your yarn and tension.
Gauge
Aim for approximately 22 sc and 28 turned rows over 10 cm in single crochet. Gauge is a sizing guide, not a tested measurement; a firm fabric matters more than an exact match.
Abbreviations
US crochet terms.
- ch = chain
- sc = single crochet
- sl st = slip stitch
- st(s) = stitch(es)
Pattern
- Before you begin Work back and forth without cutting the yarn between wedges. Every turning ch 1 is for height and does not count as a stitch. The first stitch worked after each turn goes into the first available stitch. Keep the same side of the work facing you whenever you start a new wedge from the brim.
- Wedge 1, rows 1â2 Ch 13. Row 1: Starting in the second ch from the hook, sc in each ch across (12 sc). This row runs from brim to crown. Ch 1, turn. Row 2: Sc in each st across (12 sc), returning to the brim. Ch 1, turn.
- Wedge 1, rows 3â4 Row 3: Sc in the next 9 sts, leaving 3 sts unworked towards the crown. Ch 1, turn. Row 4: Sc in each of the 9 sts just worked, returning to the brim. Ch 1, turn.
- Wedge 1, rows 5â6 Row 5: Sc in the next 6 sts, leaving the remaining stitches towards the crown unworked. Ch 1, turn. Row 6: Sc in each of the 6 sts just worked, returning to the brim. Ch 1, turn.
- Wedge 1, rows 7â8 Row 7: Sc in the next 3 sts. Ch 1, turn. Row 8: Sc in each of the 3 sts just worked, returning to the brim. Ch 1, turn.
- Wedges 2â6 Repeat the following eight-row wedge five times, without fastening off between wedges. Row 1: Working from brim to crown, sc in 12 available sts: 3 across the top of the preceding row 8, then 3 previously unworked sts on row 6, 3 on row 4 and 3 on row 2. Ch 1, turn. Row 2: Sc in all 12 sts. Ch 1, turn. Rows 3â8: Work exactly as rows 3â8 of wedge 1. After row 8 of wedge 6, do not make another turning chain. Fasten off, leaving a tail long enough to sew the seam and close the crown.
- Join the wedge edges Bring the first and last wedge edges together with the brim ends aligned. Using the long tail, sew the 12 foundation-chain loops along the first edge to the 12 exposed stitches along the last edge, matching them from brim to crown. The last edge consists of 3 stitches each on rows 8, 6, 4 and 2 of wedge 6. Keep the seam flat and take the tail to the crown.
- Close the crown Pass the seam tail through the 12 row ends around the crown edgeâ2 from each wedge. Pull snug to close the small opening, then secure and weave in the tail.
- Edge the brim Join yarn at the seam on the brim edge. Ch 1, work 1 sc into the end of each of the 48 rows around the brim, then sl st to the first sc (48 sc). Fasten off and weave in the ends.
- Optional hanging loop Join yarn securely at the closed crown, ch 18 and sl st into the same attachment point to form a loop. Fasten off and weave in both ends.
Finishing
- Gently shape the ornament with your fingers so the wedge lines run evenly towards the crown.
- If blocking is needed, dampen lightly and let the hat dry in shape; avoid stretching the brim.
Helpful Tips
- Smooth yarn makes it easier to find the three unworked stitches at each short-row turning point.
- If helpful, place a marker at the crown end of row 2 in each wedge. You will return to its unworked stitches when starting the next wedge.
- On the first row of a new wedge, follow the exposed stitch tops from the shortest row towards the crown rather than working into the sides of stitches.
Zigzag-Edge Hat Ornament

This crochet Christmas hat ornament gets its character from a red zigzag edge beneath a green body. The points give the open brim a playful outline, while the rounded crown keeps the silhouette recognisably hat-shaped.
The zigzag is part of the crochet fabric rather than a separate decoration stitched on afterwards. Graduated stitch heights create the peaks near the brim, and the upper body narrows towards the crown. Itâs a satisfying choice if youâre comfortable working in joined rounds and want a small project with more texture than a plain miniature hat.
Hang it on a Christmas tree or use it to dress up a wrapped gift. The contrast between the red points and green body makes the shape easy to spot among other decorations.
Zigzag-Edge Hat Ornament

Quick-reference card. Follow the complete written instructions below.
Materials
- Smooth DK yarn: Small amounts of green and red
- Crochet hook: 3.5 mm, or a size that gives a firm fabric
- Stitch marker: For marking the beginning of each round
- Tapestry needle: For closing the crown and weaving in ends
Size and Fit
One ornament size. The 48-stitch opening is approximately 22 cm around, or 7 cm across when held open, at the suggested stitch gauge. Height depends on your round gauge. The lower edge remains open.
Gauge
Aim for approximately 22 sc per 10 cm in the round. Exact gauge is not critical, but use a firm fabric that holds the hat shape.
Abbreviations
US crochet terms.
- ch = chain
- sl st = slip stitch
- sc = single crochet
- hdc = half double crochet
- dc = double crochet
- tr = treble crochet
- sc2tog = single crochet two stitches together; one decrease
Pattern
- Starting ring With red, ch 48 loosely. Join with a sl st in the first ch, taking care not to twist the chain. Work Round 1 into the back bumps of the chains so the unused loops remain available for the lower edging. Place a marker at the beginning of each round. Work all body rounds without turning; each joining sl st and beginning ch 1 are not stitches.
- Round 1 â red peaks Ch 1. Repeat [sc in next ch, hdc in next ch, dc in next ch, tr in each of next 2 ch, dc in next ch, hdc in next ch, sc in next ch] 6 times. Join with a sl st in the first sc. Fasten off red. 48 stitches.
- Rounds 2â3 â green peaks Join green in the first stitch of Round 1. For each round, ch 1 and repeat [sc in next stitch, hdc in next stitch, dc in next stitch, tr in each of next 2 stitches, dc in next stitch, hdc in next stitch, sc in next stitch] 6 times. Join with a sl st in the first sc. Do not fasten off. 48 stitches after each round.
- Rounds 4â5 â upper body Ch 1, sc in each stitch around and join with a sl st in the first sc. Repeat for Round 5. 48 stitches after each round.
- Round 6 Ch 1, repeat [sc in next 6 stitches, sc2tog] 6 times. Join with a sl st in the first sc. 42 stitches.
- Round 7 Ch 1, repeat [sc in next 5 stitches, sc2tog] 6 times. Join with a sl st in the first sc. 36 stitches.
- Round 8 Ch 1, repeat [sc in next 4 stitches, sc2tog] 6 times. Join with a sl st in the first sc. 30 stitches.
- Round 9 Ch 1, repeat [sc in next 3 stitches, sc2tog] 6 times. Join with a sl st in the first sc. 24 stitches.
- Round 10 Ch 1, repeat [sc in next 2 stitches, sc2tog] 6 times. Join with a sl st in the first sc. 18 stitches.
- Round 11 Ch 1, repeat [sc in next stitch, sc2tog] 6 times. Join with a sl st in the first sc. 12 stitches.
- Round 12 Ch 1, sc2tog 6 times. Join with a sl st in the first stitch. Fasten off, leaving a tail for closing. 6 stitches.
- Red zigzag lower edge With the outside of the hat facing you, join red in an unused loop of the first starting chain at the lower edge. Working into one unused loop of each starting chain, repeat [sl st in next loop, sc in next loop, hdc in next loop, dc in each of next 2 loops, hdc in next loop, sc in next loop, sl st in next loop] 6 times. Join with a sl st in the first edging sl st and fasten off. The taller stitches extend the six lower points without adding a separate piece.
Finishing
- Thread the green crown tail through the front loops of the six remaining stitches, pull the opening closed and secure the tail inside.
- For a hanging loop, join green at the closed crown, ch 18 and sl st back into the crown. Fasten off and secure both ends inside the hat.
- Weave in the remaining ends. Gently shape the hat, leaving the lower opening and red zigzag points visible.
Helpful Tips
- Check that each eight-stitch peak repeat begins and ends with a sc; the two tr stitches sit at its centre.
- Keep the starting chain loose enough to work into its unused loops when adding the red lower edge.
- If the crown opening does not close neatly, use the finishing tail to draw the final six stitches together rather than adding another decrease round.
Five-Petal Panel Hat Ornament

This little hat gets its flower-like outline from five shaped panels that meet at the crown and flare towards the open base. The red seams make each curve stand out against the cream fabric, giving the ornament a striking look from every angle.
The panel construction makes this an appealing project if you enjoy seeing how separate pieces come together. Keeping their edges aligned is the main point to watch: it helps the seams radiate evenly and lets the five-petal shape show clearly. Hang the finished hat on a tree or use it as an accent on a wrapped gift.
Five-Petal Panel Hat Ornament

Quick-reference card. Follow the complete written instructions below.
Materials
- Cream DK cotton yarn: A small amount for the panels and base edging.
- Red DK cotton yarn: A small amount for the visible seams, crown and hanging loop.
- 3.5 mm crochet hook: Or a size that gives you a firm fabric.
- Tapestry needle, stitch marker and scissors: For seaming, marking the edging round and finishing.
Size and Fit
One ornament size. At the suggested gauge, approximately 6.5â7 cm tall, with an open base about 18 cm around. The finished dimensions will vary with your yarn and tension.
Gauge
Suggested gauge: approximately 22 sc and 24 rows over 10 cm in flat single crochet. Exact gauge is not essential, but a firm fabric will help the hat hold its shape.
Abbreviations
US crochet terms.
- ch = chain
- sc = single crochet
- sc2 in next st = work 2 single crochet stitches in the next stitch
- sl st = slip stitch
- st(s) = stitch(es)
Pattern
- Make five panels Use cream yarn. Work the following rows five times to make five identical panels. Turn after every row. The ch 1 used for turning does not count as a stitch.
- Row 1 Ch 3. Sc in the second ch from the hook and in the next ch. Ch 1 and turn. (2 sc)
- Row 2 Sc in each st. Ch 1 and turn. (2 sc)
- Row 3 Work sc2 in each st. Ch 1 and turn. (4 sc)
- Rows 4â5 Sc in each st. Ch 1 and turn after each row. (4 sc)
- Row 6 Work sc2 in the first st, sc in each of the next 2 sts, then sc2 in the last st. Ch 1 and turn. (6 sc)
- Rows 7â8 Sc in each st. Ch 1 and turn after each row. (6 sc)
- Row 9 Work sc2 in the first st, sc in each of the next 4 sts, then sc2 in the last st. Ch 1 and turn. (8 sc)
- Rows 10â15 Sc in each st. Ch 1 and turn after each row. (8 sc)
- Row 16 Sc in each st. Fasten off. (8 sc) Row 1 is the narrow crown end; Row 16 is the open-base end.
- Join the panels Arrange the five panels with their right sides facing out, Row 1 ends together and Row 16 ends together. Using red yarn and a tapestry needle, whipstitch the long edge of panel 1 to panel 2 on the outside of the hat. Catch the edge at the end of each matching row, from Row 1 through Row 16, making approximately 16 visible stitches along the seam. Keep the stitches snug without pulling the edges underneath. Join panels 2 to 3, 3 to 4, 4 to 5, then 5 to 1 in the same way to form a tube. Leave the wide base open.
- Close the crown Thread red yarn through the two Row 1 stitches at the narrow end of each panel, catching 10 stitches in all. Pull gently to gather the crown closed. Secure the yarn on the inside and weave in the end.
- Edge the open base With cream yarn, join at the base beside a seam. Ch 1, then work 1 sc in each Row 16 stitch around the opening: 8 sc per panel, 40 sc in all. Mark the first sc if helpful. Sl st to the first sc; the joining sl st does not count as a stitch. Fasten off and weave in the end.
- Add a hanging loop With red yarn, ch 20 and fasten off, leaving a tail at each end. Bring the chain ends together and sew both securely to the closed crown. Weave the tails into the inside of the hat.
Finishing
- Weave in all remaining ends on the inside, taking care not to hide the red seams.
- Gently shape the five panels with your fingers so the base stays open and the seams radiate evenly from the crown.
Helpful Tips
- Keep the same side of every panel facing out before seaming; this makes the five sections look consistent.
- Align matching row ends as you sew. Evenly spaced whipstitches emphasise the petal outline without puckering it.
- If the crown leaves a small gap after gathering, pass the red yarn through the narrow ends once more before securing it.
Openwork Mesh Hat Ornament

The Openwork Mesh Hat Ornament brings a lighter look to Christmas decorations. Its six triangular sections create an airy crown, with the joins giving the hat a distinct shape rather than letting the openwork disappear into one continuous surface.
The solid lower band provides a neat contrast to the mesh and helps the opening keep its round shape. Hang the finished hat where light can show through the crown, or pair it with denser crochet ornaments for a mix of textures on the tree.
Openwork Mesh Hat Ornament

Quick-reference card. Follow the complete written instructions below.
Materials
- Firm cotton DK yarn: Approximately 25â35 g in ivory
- Crochet hook: 3.5 mm, or the size needed to obtain the band gauge
- Tapestry needle: For joining panels and securing ends
- Stitch marker: Optional, for marking the first stitch of the band
Size and Fit
One ornament size. At the stated band gauge, the 66-stitch opening measures approximately 27.5 cm around, or 8.8 cm across when held round. The crown is made from five mesh rows; its height will vary with row gauge.
Gauge
24 sc = 10 cm worked firmly in the round. Check gauge on the band or on a separate sc swatch; the mesh panels do not have a fixed row gauge.
Abbreviations
US crochet terms.
- ch = chain
- dc = double crochet
- sc = single crochet
- sl st = slip stitch
- sp = space
Pattern
- Make six mesh panels Make six identical panels. For each panel, ch 5. Row 1: Dc in the fifth ch from the hook. The remaining four chains count as the first dc and a ch-1 sp: 2 dc and 1 ch-1 sp.
- Rows 2â5 of each panel Ch 4 and turn; the ch-4 counts as the first dc and first ch-1 sp. Dc in the first dc, then *ch 1, dc in the next dc; repeat from * across. Work the final dc into the third chain of the previous rowâs turning ch-4, counting up from its base. Each row adds one dc and one ch-1 sp. Row 5 has 6 dc and 5 ch-1 spaces. Fasten off, leaving a sewing tail on each panel.
- Join the crown Lay the six panels with their tips together and their Row 5 edges facing outwards. With right sides facing out, whipstitch the side edge of each panel to the next, matching corresponding row ends. Sew from the tip towards Row 5, taking small stitches through the outermost dc or turning chains rather than across the mesh openings. Join the sixth panel to the first in the same way. Weave a strand through the six tips and draw it up to close any central gap; secure the strand inside.
- Solid band, round 1 With the right side facing, join yarn at any seam on a Row 5 edge. Ch 1, then work 1 sc in each dc and 1 sc in each ch-1 sp around all six panels, including each panelâs edge dc at the seams. Do not work an extra stitch into a seam. Sl st to the first sc to join: 66 sc.
- Solid band, rounds 2â4 Ch 1, sc in each of the 66 sc around, then sl st to the first sc to join. Repeat for three rounds in total. Fasten off after round 4.
- Hanging loop Join yarn securely at the closed crown tip. Ch 12 and sl st back into the tip to form a loop. Fasten off and secure both ends inside the hat.
Finishing
- Weave in all remaining ends without pulling the mesh spaces closed.
- Shape the band into a circle with your fingers. If desired, lightly dampen and let the ornament dry in shape.
Helpful Tips
- Keep the panel seams small and even so the six triangular sections remain visible.
- If the band flares, use a smaller hook for its four rounds while keeping the stitch count at 66.
Raised-Column Winter Hat Ornament

This little winter hat brings the texture of a classic ribbed beanie to a Christmas tree ornament. Its raised columns stand out against the smoother fabric between them, while the folded edge gives it the look of a cosy turn-up.
The crown is shaped between the columns, so the textured lines continue towards the top instead of stopping at a gathered tube. That makes the change in shape part of the design. If you are new to front-post stitches, it helps to recognise each raised column before moving into the space beside it.
The dark-green colour suits a traditional Christmas display, but the hat shape also works as a small accent on a wrapped gift. The full pattern below contains the construction details.
Raised-Column Winter Hat Ornament

Quick-reference card. Follow the complete written instructions below.
Materials
- Yarn: Small amount of smooth wool-blend DK yarn in dark green
- Hook: 4 mm crochet hook, or a size that produces a firm fabric
- Other: Yarn needle, scissors and a stitch marker
Size and Fit
One ornament size. The band has 32 rows, the body has 32 stitches around its widest point, and the crown finishes with 8 stitches. It is a decoration, not a wearable hat.
Gauge
Exact gauge is not critical. Use a firm tension so the hat keeps its shape without stuffing. Keep the 32-row band and the stated stitch counts to maintain eight evenly spaced columns.
Abbreviations
US crochet terms.
- ch = chain
- sc = single crochet
- dc = double crochet
- fpdc = front-post double crochet: work a double crochet around the post of the indicated stitch, inserting the hook from front to back to front
- dc2tog = double crochet two stitches together over the next two indicated stitches
- BLO = back loop only
- sl st = slip stitch
Pattern
- Ribbed band, Row 1 Ch 9. Sc in the second ch from the hook and in each remaining ch. (8 sc)
- Ribbed band, Rows 2â32 Ch 1, turn. Sc BLO in each stitch. (8 sc per row) Do not fasten off.
- Join the band Bring the short ends together without twisting the band. Sl st through corresponding stitches of the first and last rows to form a ring. Turn the seam to the inside. The ring has 32 row ends along its upper edge.
- Body, Round 1 Ch 2; this and every starting ch 2 does not count as a stitch. Work 1 dc into each of the 32 row ends along the upper edge of the band. Join with a sl st to the first dc. (32 dc) Keep the right side facing for all body rounds.
- Body, Rounds 2â4 Ch 2. Repeat [fpdc around the next dc or fpdc post, dc in each of the next 3 stitches] 8 times. Join with a sl st to the first fpdc. (32 stitches: 8 fpdc and 24 dc per round)
- Crown, Round 5 Ch 2. Repeat [fpdc around the next fpdc post, dc in the next dc, dc2tog over the next 2 dc] 8 times. Join with a sl st to the first fpdc. (24 stitches: 8 fpdc and 16 plain stitches)
- Crown, Round 6 Ch 2. Repeat [fpdc around the next fpdc post, dc2tog over the next 2 plain stitches] 8 times. Join with a sl st to the first fpdc. (16 stitches: 8 fpdc and 8 plain stitches)
- Crown, Round 7 Ch 2. Repeat [fpdc around the next fpdc post, skip the next plain stitch] 8 times. Join with a sl st to the first fpdc. (8 fpdc) Fasten off, leaving a tail long enough to close the crown.
Finishing
- Thread the crown tail through the top loops of the 8 remaining stitches and pull the opening closed. Secure the tail inside.
- Fold the lower edge of the ribbed band upwards on the outside until it meets the base of Body Round 1. Tack the folded edge discreetly in place at four evenly spaced points.
- Make a hanging loop from a separate length of yarn. Pass it through the closed crown, knot its ends securely inside the hat and weave them in.
Helpful Tips
- Mark the first raised column if it helps you keep each four-stitch repeat aligned.
- When making an fpdc, work around the post and leave its top loops unworked; the following plain stitch goes into the next stitch.
- Do not add stitches at the band seam: work exactly one dc into each of the 32 row ends.
Snowflake Colourwork Hat Ornament

The white snowflake gives this little navy hat a clear focal point without covering the whole ornament in colourwork. A plain lower band frames the motif, while the plain rounded crown keeps the silhouette recognisably hat-shaped.
This is a project for crocheters comfortable with joined rounds and changing colours within a small motif. The written chart is confined to the front of the hat, so it is easier to keep track of the snowflake as it develops. Pay particular attention to the tension of the enclosed strand: if it is pulled too tightly, the front may pucker.
Snowflake Colourwork Hat Ornament

Quick-reference card. Follow the complete written instructions below.
Materials
- Navy DK cotton yarn: For the band, body, crown and hanging loop.
- White DK cotton yarn: A small amount for the snowflake; use a separate length for each chart round.
- 3 mm crochet hook: Or a size that produces firm stitches without gaps.
- Tapestry needle and scissors: For closing the crown and securing ends.
- Stitch marker: To mark the first stitch of each round.
Size and Fit
One size. At the suggested gauge, the 36-stitch brim has a calculated circumference of approximately 15 cm, and the 18-round hat is approximately 7 cm tall, excluding the loop. The brim remains open; this is a hollow hat ornament.
Gauge
Aim for 24 sc and 26 joined rounds per 10 cm in firm fabric. Exact gauge is not essential, but a different gauge will change the ornamentâs size.
Abbreviations
US crochet terms.
- ch = chain
- sc = single crochet
- sc2tog = single crochet two stitches together; one decrease
- sl st = slip stitch
- st(s) = stitch(es)
- N = navy
- W = white
Pattern
- Construction and colour changes Work from the open brim upwards in joined rounds. Join each round with a sl st into its first sc, then ch 1 to begin the next round; neither the join nor the ch 1 counts as a stitch. Do not turn. In the chart, each character represents one sc, read from left to right. For a colour change, work the preceding sc up to its final yarn-over and draw through with the new colour. Within the nine-stitch chart area, crochet over the inactive strand between colour changes to enclose it. Use a fresh length of white for each chart round; after its last W, change back to navy, cut the white with a tail for weaving in, and do not carry it around the back of the hat. Enclose the navy strand beneath white stitches so it is ready for the next navy stitch.
- Foundation and plain band With navy, ch 36. Taking care not to twist the chain, join with a sl st to the first ch. Round 1: ch 1, sc in each ch around, join. (36 sc) Rounds 2â3: ch 1, sc in each st around, join. (36 sc each round)
- Snowflake body, rounds 4â12 Each round has 36 sc. Work sts 1â14 in navy, follow the corresponding nine-character chart row for sts 15â23, then work sts 24â36 in navy. Join and ch 1 as usual. Read chart rows from bottom to top: Round 4: ….W….; Round 5: W…W…W; Round 6: .W..W..W.; Round 7: ..W.W.W..; Round 8: WWWWWWWWW; Round 9: ..W.W.W..; Round 10: .W..W..W.; Round 11: W…W…W; Round 12: ….W…. . A dot means navy and W means white. The nine-stitch area is centred opposite the round join.
- Plain round Round 13: With navy, ch 1, sc in each st around, join. (36 sc) Cut no navy yarn; continue into the crown.
- Rounded crown Keep working in navy, joining and making a non-counting ch 1 after each round except the last. Round 14: (sc in next 4 sts, sc2tog) 6 times. (30 sts) Round 15: (sc in next 3 sts, sc2tog) 6 times. (24 sts) Round 16: (sc in next 2 sts, sc2tog) 6 times. (18 sts) Round 17: (sc in next st, sc2tog) 6 times. (12 sts) Round 18: sc2tog 6 times. (6 sts) Join, fasten off and leave a long navy tail.
- Close crown and add loop Thread the navy tail through the front loops of the six remaining stitches and draw the crown closed. Secure the tail on the inside. With a separate navy strand, ch 18 and fasten off, leaving tails at both ends. Fold the chain into a loop and sew both ends firmly to the closed crown.
Finishing
- Weave in the white tails on the inside of the motif, taking care that they do not show through the navy stitches.
- Secure and trim all remaining ends inside the hat. Leave the brim open.
Helpful Tips
- Mark the first sc of each round: the ch 1 and joining sl st are easy to mistake for stitches.
- Check that each chart row contains exactly nine symbols before working it; there are 14 navy stitches on either side.
- Keep enclosed strands relaxed so the snowflake lies flat rather than puckering.
Frequently Asked Questions
Are all 28 crochet Christmas hat ornaments suitable for beginners?
No. The collection includes easy, intermediate and advanced patterns. The flat-strip ribbed beanie and seamed panel cap are useful starting points if you want to avoid more complex shaping.
Do these patterns make wearable Christmas hats?
No. They make miniature hat ornaments with hanging loops. For hats intended to wear, you will need a pattern written for the wearerâs size.
Which ornament should I choose if I want a Christmas tree shape?
Choose the Layered Christmas Tree Hat Ornament. Its overlapping scalloped tiers create the tree outline, and it is marked intermediate.
How can I help a miniature hat keep its shape?
Use the yarn and hook suggested by the chosen pattern, keep your tension even and finish any seams or tacked brims securely. Heavier decorations may pull a small crown or point out of line.
Final Thoughts
Pick a shape that matches the construction you would like to try, whether that is a simple seamed cap or a hat with layered tiers or colourwork. A neat brim and well-placed hanging loop make a noticeable difference once the ornament is on the tree.