Coral Sunset Tiered Ruffle Crochet Dress Free Pattern
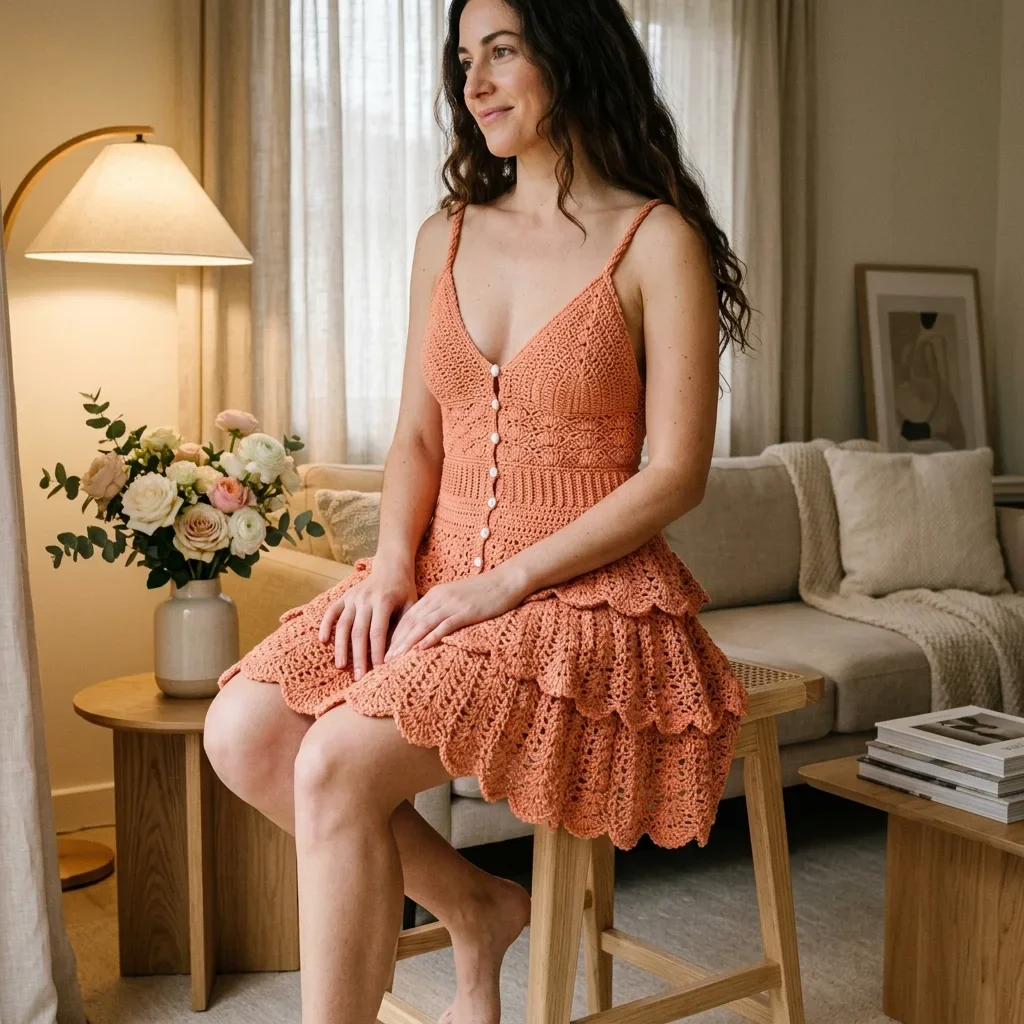
This is a fitted crochet mini dress with a V-neckline bodice, ribbed waistband, braided spaghetti straps, decorative button front, and a three-tiered scallop ruffle skirt. You will use single crochet, half double crochet, double crochet, and chains. The construction is top-down, worked mostly in the round with some flat sections.
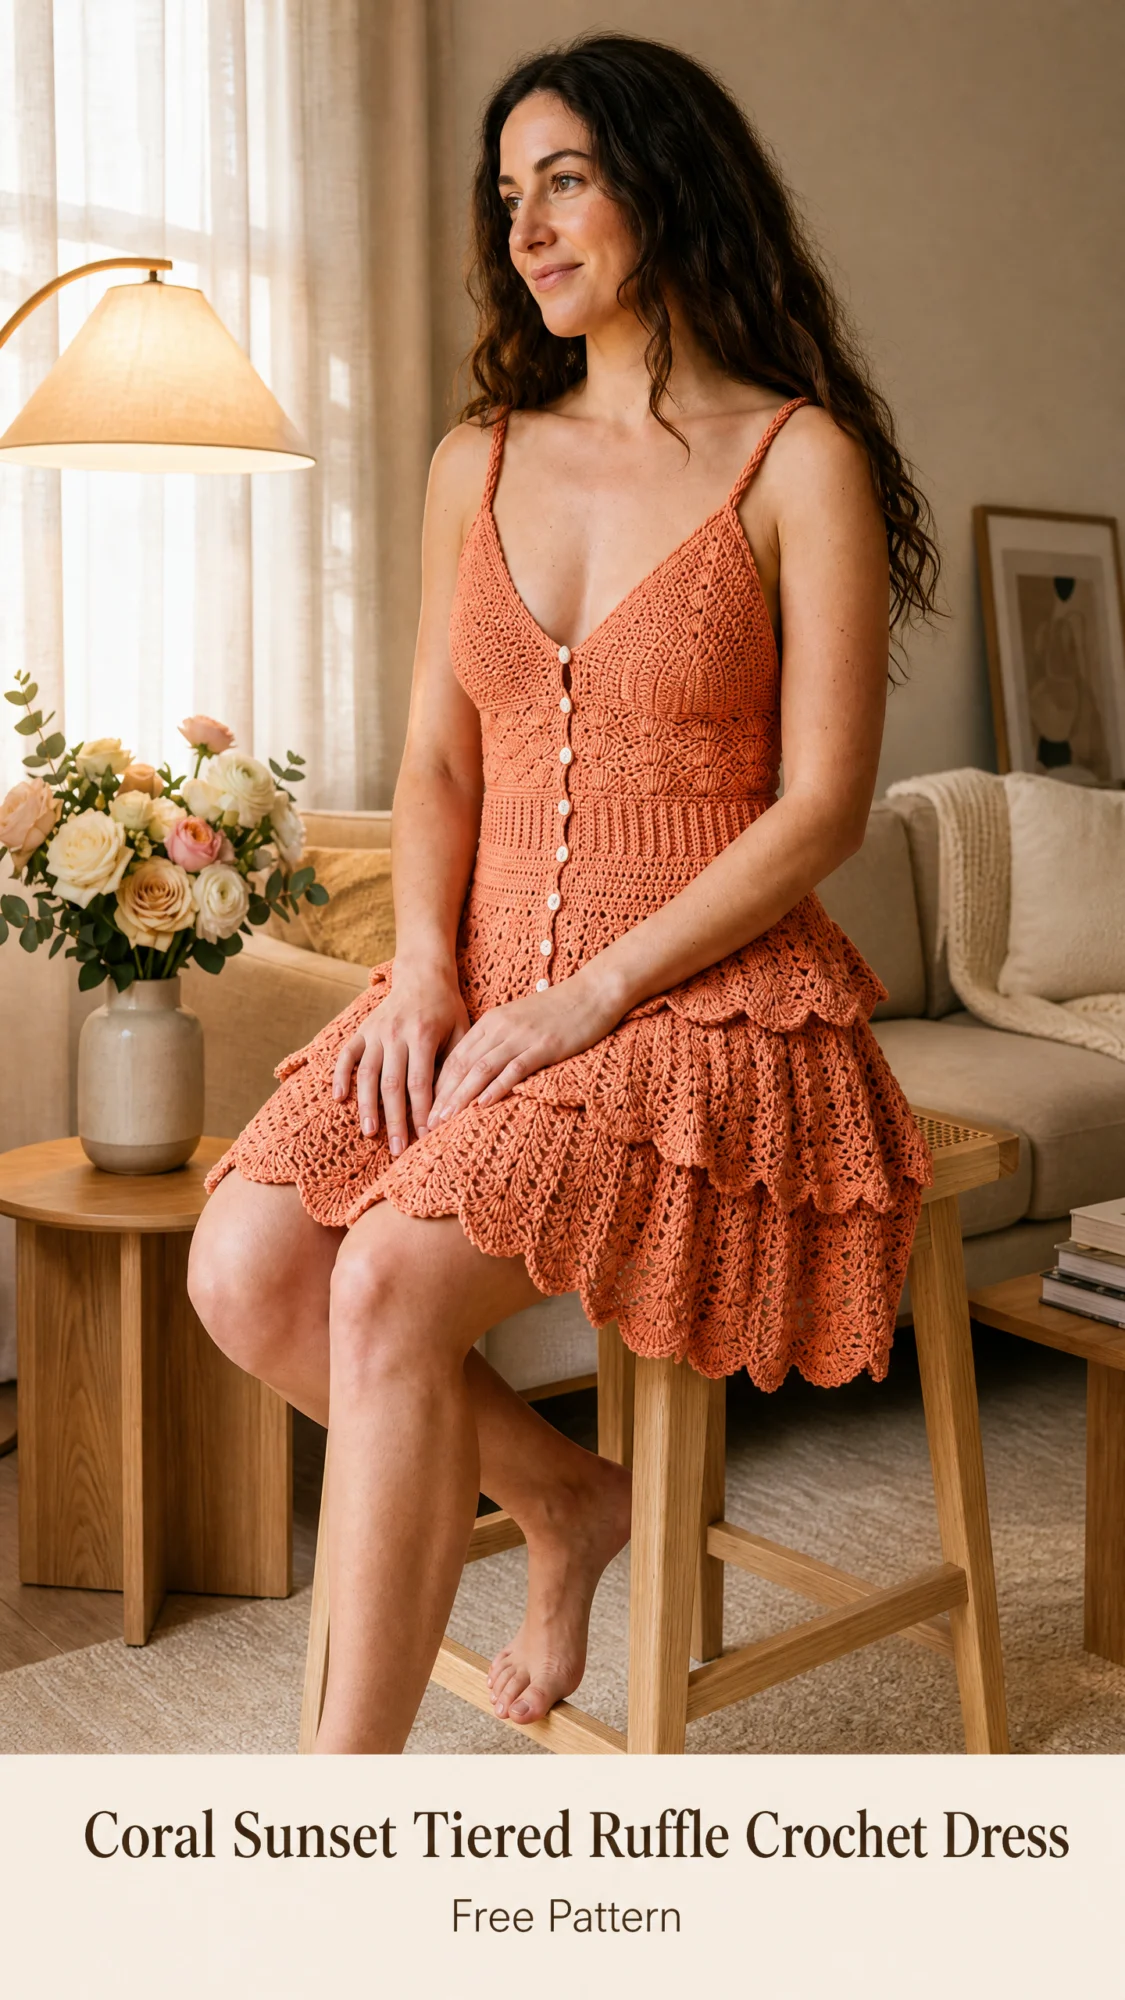
The skill level sits at advanced beginner to intermediate. If you can work in the round, follow stitch pattern repeats, and handle basic shaping, you have everything you need. The diamond lace bodice and fan stitch ruffles look intricate but break down into simple steps once you understand the rhythm.
Plan for 40 to 60 hours of work depending on your pace. This is a statement piece, so take your time and enjoy the process. The finished dress fits a size Small with a 32 to 34 inch bust and 26 to 28 inch waist, though I have included sizing guidance at the end.
Why This Crochet Dress Pattern Works So Well
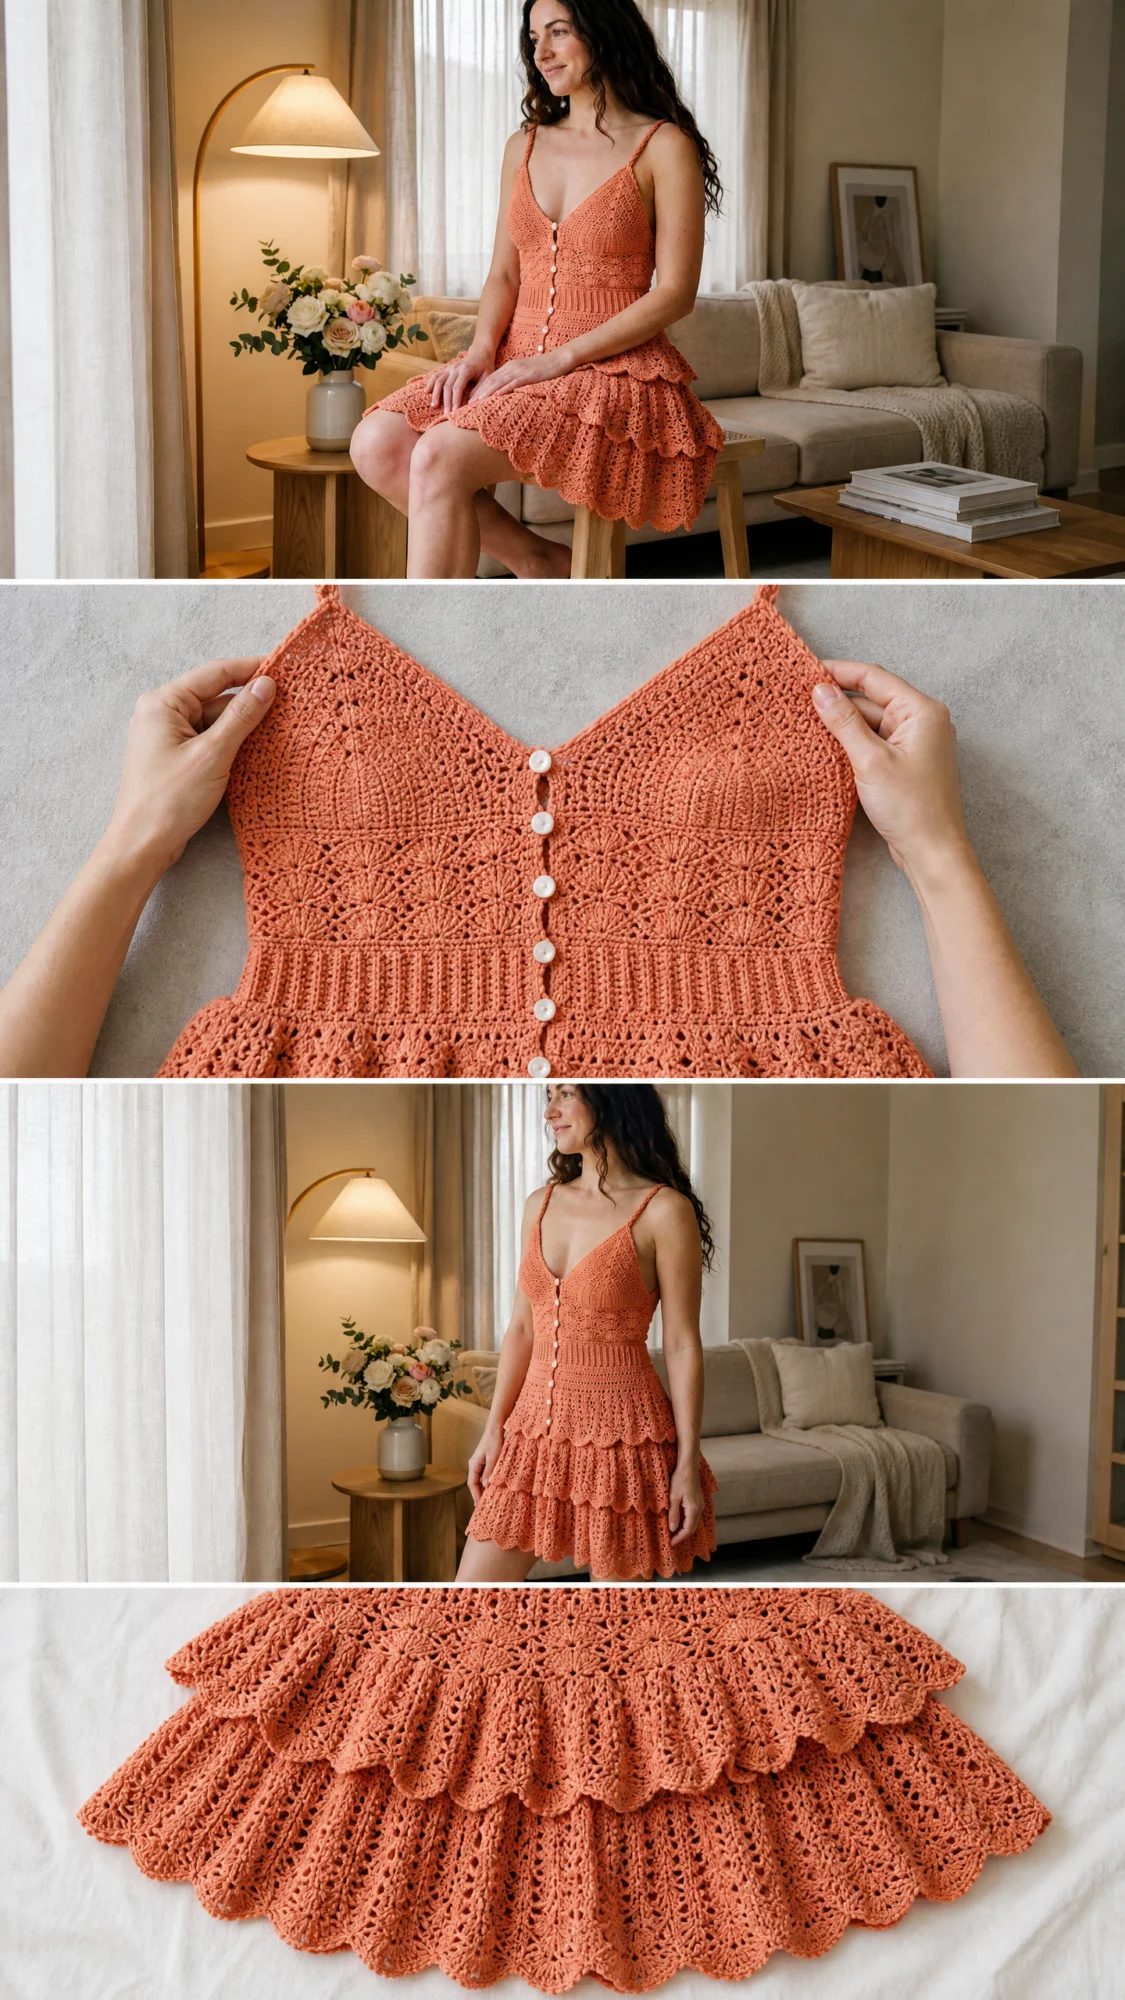
The tiered ruffle skirt creates that effortless, flowy silhouette without complicated construction. Each tier attaches to the waistband at a different drop point, which means the scalloped edges peek out below each other naturally. You do not need to worry about perfect alignment because the staggered layers hide any minor inconsistencies.
The bodice features a diamond lace stitch that adds texture and visual interest to the fitted upper section. The center front button band breaks up the lace pattern and gives your eye a place to rest. Those buttons are purely decorative, so you slip this dress on over your head. No fiddly buttonholes required unless you want them.
The ribbed waistband provides gentle shaping at the natural waist. Working in back loop only single crochet creates horizontal ridges that look like ribbing and offer some stretch. This section tapers in and then eases back out toward the hips, which gives the dress that flattering hourglass shape.
Materials You Will Need
Yarn: Approximately 1,400 to 1,600 yards of DK weight yarn (light weight, CYCA 3) in a coral or terracotta tone. Choose a smooth, plied cotton or cotton-blend for the best stitch definition and drape.
Recommended Yarn Options:
1. Lion Brand 24/7 Cotton in Terracotta: 100% mercerized cotton, 186 yards per 100g skein. You will need approximately 8 to 9 skeins. This yarn gives excellent stitch definition and washes beautifully.
2. Paintbox Yarns Simply DK in Lipstick Red or Vintage Pink: 100% acrylic with cotton-like drape, 137 yards per 50g skein. You will need approximately 12 skeins. Budget-friendly with consistent dye lots.
3. Drops Safran in color 22 (Coral): 70% cotton, 30% viscose, 175 yards per 50g skein. You will need approximately 9 to 10 skeins. The viscose adds subtle sheen perfect for the ruffle tiers.
Hooks:
Notions:
Gauge for This Crochet Dress Tutorial
Getting gauge right is essential for a fitted garment like this dress. Take the time to swatch before diving in.
Using E-4 / 3.5 mm hook in single crochet:
20 stitches x 24 rows = 4 inches x 4 inches
Using E-4 / 3.5 mm hook in diamond lace pattern:
One 8-stitch repeat = approximately 1.6 inches wide
Lace panel = approximately 5 rows per 1.5 inches tall
Using F-5 / 3.75 mm hook in fan stitch pattern:
One 12-stitch repeat = approximately 2.5 inches wide
If your swatch runs large, go down a hook size. If it runs small, go up. Adjusting your hook is much easier than adjusting the entire pattern.
Finished Measurements
Abbreviations and Stitch Definitions
Let me walk you through every stitch abbreviation you will encounter. If you are newer to crochet patterns, bookmark this section.
Special Stitches for This Crochet Pattern
Diamond Lace Stitch
This creates the angled diamond texture on the bodice. It works over a multiple of 8 stitches plus 2.
Row 1 (RS): Ch 1, sc in first st, (ch 2, sk 2 sts, dc in next st, ch 2, sk 2 sts, sc in next st) across to last st, sc in last st. Turn.
Row 2 (WS): Ch 3 (counts as dc), (2 dc in ch-2 sp, ch 1, 2 dc in next ch-2 sp) across, dc in last sc. Turn.
Row 3 (RS): Ch 1, sc in first st, (ch 2, sk 2 sts, dc in ch-1 sp, ch 2, sk 2 sts, sc in next sp) across, sc in top of t-ch. Turn.
Row 4 (WS): Repeat Row 2.
Rows 1 through 4 form the pattern repeat.
Fan Stitch
This creates the scallop ruffle effect on the skirt tiers. It works over a multiple of 12 stitches plus 1, worked in the round.
Step 1: Sl st to join, ch 3 (counts as first dc).
Step 2: Work 1 dc in same st as ch-3.
Step 3: Ch 1, sk 2 sts, sc in next st, ch 1, sk 2 sts.
Step 4: Work 5 dc in next st (fan made).
Step 5: Ch 1, sk 2 sts, sc in next st, ch 1, sk 2 sts.
Step 6: Work 5 dc in next st.
Repeat Steps 3 through 6 around, ending with 3 dc in same st as beginning ch-3. Join with sl st to top of beginning ch-3.
Scallop Edging
Sl st in first st, (ch 3, 2 dc in same st, sk 2 sts, sl st in next st) around. Join.
Braided Strap
Cut 6 strands of yarn, each 3 yards long. Divide into 3 groups of 2 strands. Knot at one end and braid tightly to desired length. Knot the other end. Trim ends and secure. Each strap should measure approximately 14 to 16 inches before attachment.
Step by Step Instructions
Section 1: Bodice Front
The bodice front is worked flat from the upper bust downward. You will create two side panels with V-neck shaping, plus a center button band, then join them together.
Right Front Panel
Foundation: Ch 22.
Row 1 (RS): Sc in 2nd ch from hook and in each ch across. Turn. (21 sc)
Row 2 (WS): Ch 1, sc in first st, sc in each st to last 2 sts, sc2tog. Turn. (20 sc)
The sc2tog at the neck edge shapes your V-neckline.
Row 3: Ch 1, sc in first st, sc in each st across. Turn. (20 sc)
Row 4: Ch 1, sc in first st, sc in each st to last 2 sts, sc2tog. Turn. (19 sc)
Row 5: Ch 1, work across in diamond lace pattern Row 1. Turn. (19 sts)
Row 6: Ch 1, work diamond lace pattern Row 2, sc2tog at neck edge. Turn. (18 sts)
Row 7: Work diamond lace Row 3. Turn. (18 sts)
Row 8: Work diamond lace Row 4, sc2tog at neck edge. Turn. (17 sts)
Row 9: Work diamond lace Row 1. Turn. (17 sts)
Row 10: Work diamond lace Row 2, sc2tog at neck edge. Turn. (16 sts)
Row 11: Work diamond lace Row 3. Turn. (16 sts)
Row 12: Work diamond lace Row 4, sc2tog at neck edge. Turn. (15 sts)
Row 13: Work diamond lace Row 1. Turn. (15 sts)
Row 14: Work diamond lace Row 2, sc2tog at neck edge. Turn. (14 sts)
Row 15: Work diamond lace Row 3. Turn. (14 sts)
Rows 16 through 24: Continue in diamond lace pattern, working even without decreases. (14 sts)
Fasten off, leaving a 12-inch tail for seaming.
Center Front Button Band
Foundation: Ch 8.
Row 1: Sc in 2nd ch from hook and in each ch across. Turn. (7 sc)
Repeat Row 1, working sc in BLO, until the band measures 10 inches. Fasten off, leaving a tail for seaming. You will attach buttons after assembly.
Left Front Panel
Foundation: Ch 22.
Row 1 (RS): Sc in 2nd ch from hook and in each ch across. Turn. (21 sc)
Row 2 (WS): Ch 1, sc2tog, sc in each st to end. Turn. (20 sc)
Note that the sc2tog is at the beginning of WS rows for this side.
Row 3: Ch 1, sc in each st across. Turn. (20 sc)
Row 4: Ch 1, sc2tog, sc in each st to end. Turn. (19 sc)
Row 5: Work diamond lace Row 1. Turn. (19 sts)
Row 6: Ch 1, sc2tog, work diamond lace Row 2 to end. Turn. (18 sts)
Continue in this manner, decreasing at the neck edge on WS rows through Row 14. (14 sts)
Rows 15 through 24: Work even in diamond lace pattern. (14 sts)
Fasten off, leaving a 12-inch tail.
Joining Front Panels
With RS facing, align the right front panel, center button band, and left front panel. Using mattress stitch or whip stitch with your yarn tails, sew the button band between the two front panels along their inner vertical edges.
Pick up 80 stitches evenly across the entire lower edge of the assembled front bodice. Place a stitch marker at the beginning and set aside.
Section 2: Bodice Back
The back is worked flat with no neckline shaping.
Foundation: Ch 43.
Row 1 (RS): Sc in 2nd ch from hook and in each ch across. Turn. (42 sc)
Rows 2 through 6: Ch 1, sc in each st across. Turn. (42 sc)
Row 7: Ch 1, sc in first st, work diamond lace Row 1 across to last st, sc in last st. Turn. (42 sts)
Row 8: Ch 1, sc in first st, work diamond lace Row 2 across to last st, sc in last st. Turn. (42 sts)
Rows 9 through 24: Continue in diamond lace pattern, working even throughout. (42 sts)
Fasten off, leaving a tail.
Checkpoint: Both bodice pieces should measure approximately 6 inches tall.
Section 3: Joining Bodice and Working Side Seams
With WS together, align the left side edges of front and back bodice. Using whip stitch, seam 1 inch down from the top edge at each armhole side. This creates the strap attachment zone. Leave the rest open for now.
Pick up along the full lower edges: 80 stitches from the front and 80 stitches from the back. You now have 160 stitches total in the round. Join to work in the round and place a marker at the join.
Section 4: Ribbed Waistband
Switch to E-4 / 3.5 mm hook. Work in the round in BLO single crochet.
Rnd 1: Ch 1, sc in BLO of each st around. Join with sl st to first sc. (160 sc)
Rnd 2: Ch 1, sc in BLO of each st around. Join. (160 sc)
Rnd 3: Ch 1, (sc in BLO of next 18 sts, sc2tog in BLO) 8 times around. Join. (152 sc)
Rnd 4: Ch 1, sc in BLO of each st around. Join. (152 sc)
Rnd 5: Ch 1, (sc in BLO of next 17 sts, sc2tog in BLO) 8 times around. Join. (144 sc)
Rnd 6: Ch 1, sc in BLO of each st around. Join. (144 sc)
Rnd 7: Ch 1, (sc in BLO of next 16 sts, sc2tog in BLO) 8 times around. Join. (136 sc)
Rnd 8: Ch 1, sc in BLO of each st around. Join. (136 sc)
Rnd 9: Ch 1, (sc in BLO of next 15 sts, sc2tog in BLO) 8 times around. Join. (128 sc)
Rnds 10 through 12: Ch 1, sc in BLO of each st around. Join. (128 sc)
Rnd 13: Ch 1, (sc in BLO of next 15 sts, 2 sc in BLO of next st) 8 times around. Join. (136 sc)
Rnd 14: Ch 1, sc in BLO of each st around. Join. (136 sc)
Rnd 15: Ch 1, (sc in BLO of next 16 sts, 2 sc in BLO of next st) 8 times around. Join. (144 sc)
Rnd 16: Ch 1, sc in BLO of each st around. Join. (144 sc)
Checkpoint: The waistband should measure approximately 2.5 inches tall with a minimum circumference of about 25.6 inches at the narrowest point.
Section 5: Skirt Tier 1 (Top Tier)
Switch to F-5 / 3.75 mm hook.
Tier 1 Increase Round:
Rnd 1: Ch 3 (counts as dc), dc in same st, 2 dc in each st around. Join with sl st to top of beginning ch-3. (288 dc)
Rnd 2: Sl st in each of next 2 sts to position. Ch 3. Work 2 dc in same st as ch-3, ch 1, sk 2 sts, sc in next st, ch 1, sk 2 sts, (5 dc in next st, ch 1, sk 2 sts, sc in next st, ch 1, sk 2 sts) 23 times, 2 dc in same st as beginning ch-3. Join with sl st to top of beginning ch-3. (24 fans)
Rnd 3: Ch 1, sc in join, ch 2, sk first 2 dc of fan edge, (5 dc in sc from previous rnd, ch 2, sk 2 dc, sc in center dc of fan, ch 2, sk 2 dc) 24 times, ending last rep with 5 dc in sc, ch 2, join with sl st. (24 fans)
Rnds 4 through 9: Continue alternating Rnd 2 and Rnd 3 pattern. (288 sts)
Tier 1 Hem Scallop Edging:
Rnd 10: Ch 1, sl st in first st. (Ch 3, 2 dc in same st, sk 2 sts, sl st in next st) 96 times around. Join. Fasten off.
Checkpoint: Tier 1 should measure approximately 4.5 to 5 inches from attachment to scalloped hem.
Section 6: Skirt Tier 2 (Middle Tier)
With RS facing, join yarn at the waistband lower edge, offset by 2 stitches from the Tier 1 join.
Rnds 1 through 3: Ch 1, sc in each st around. Join. (144 sc each round)
These rounds create the drop that positions Tier 2 below Tier 1.
Rnd 4 (Increase Round): Ch 3, dc in same st, 2 dc in each st around. Join. (288 dc)
Rnds 5 through 14: Work fan stitch pattern as written for Tier 1 Rnds 2 through 9. (288 sts)
Rnd 15 (Hem Scallop Edging): Work scallop edging as written for Tier 1. Fasten off.
Section 7: Skirt Tier 3 (Bottom Tier)
With RS facing, join yarn at the waistband lower edge, offset by 4 stitches from Tier 1 join.
Rnds 1 through 7: Ch 1, sc in each st around. Join. (144 sc each round)
These rounds create a longer drop to position Tier 3 below Tier 2.
Rnd 8 (Increase Round): Ch 3, dc in same st, 2 dc in each st around. Join. (288 dc)
Rnds 9 through 18: Work fan stitch pattern for 10 rounds total to create extra length on this bottom tier. (288 sts)
Rnd 19 (Hem Scallop Edging): Work scallop edging as written for Tier 1. Fasten off.
Checkpoint: Total dress length from shoulder to Tier 3 hem should measure approximately 28 to 30 inches.
Section 8: Straps
Make 2 braided straps following the Special Stitches instructions. Each strap measures approximately 14 inches finished.
Using a tapestry needle and doubled yarn, sew the first strap to the RS of the right front bodice at the peak of the V-neckline, approximately 0.5 inch from the top edge. Bring the strap over the shoulder and sew the other end to the WS of the back bodice upper edge, approximately 3 inches in from the side seam.
Repeat for the left strap. Try the dress on before securing permanently to confirm strap length.
Section 9: Button Band Finishing
Sew 6 to 8 evenly spaced pearl or white shank buttons down the center of the button band. Space them approximately 1.25 inches apart. Begin the first button approximately 0.5 inch below the V-neckline join and end the last button approximately 0.5 inch above the waistband.
Section 10: Neckline and Armhole Edging
With RS facing and E-4 / 3.5 mm hook, join yarn at right shoulder strap attachment point.
Front V-Neckline Edging: Work sc evenly along the right front neckline edge, approximately 1 sc per row end, from shoulder to center V-point (about 24 sc). Work 3 sc at the V-point corner. Work 24 sc up the left neckline to the left shoulder attachment point. (approximately 51 sc)
Fasten off and weave in ends.
Back Neckline Edging: Join yarn at right back shoulder point. Work sc evenly across the back upper edge, approximately 1 sc per stitch. Fasten off and weave in ends.
Finishing Your Coral Sunset Dress
Block all pieces before final wear. Wet blocking works best for cotton yarns. Soak the completed dress in lukewarm water for 15 to 20 minutes, gently squeeze out excess water (do not wring), and lay flat on blocking mats. Pin the ruffle tiers to open up the scallop edges. Allow to dry completely.
Weave in all remaining ends securely. For extra durability, weave ends in multiple directions and trim close.
Size Customization Tips
To adjust for larger sizes, add stitches to your foundation chains in multiples of 8 for the diamond lace sections. Increase the waistband starting stitch count proportionally. The ruffle tiers will automatically become fuller when you double the stitches in the increase rounds.
For smaller sizes, reduce foundation chains in multiples of 8 and decrease the waistband starting count.
Always swatch and measure as you go for fitted garments.
Care Instructions
Hand wash in cool water with mild detergent. Lay flat to dry. If machine washing, use a mesh laundry bag on a gentle cycle. Avoid hanging to dry, as the weight of the wet yarn can stretch the bodice. Store folded rather than hung to maintain shape.
Thank you so much for choosing this coral sunset tiered ruffle dress pattern. I hope you love making it as much as I loved designing it. The moment you slip it on and those ruffles swish around you, it will all be worth it.
If you found this crochet tutorial helpful, please save it to your Pinterest boards so you can find it again later. And I would absolutely love to see your finished dress. Leave a comment below or tag me on Instagram or Facebook with your photos. Happy crocheting!
You Might Also Like
- Sunshine Daisy Book Cover Free Crochet Pattern
- Lavender Peony Bloom Crochet Dress Free Crochet Pattern
- Coral Sunset Ruffled Baby Romper Free Crochet Pattern
- Dusty Rose Floral Lace Bucket Bag Free Crochet Pattern