Coral Reef Fish Crochet Beach Tote Free Pattern
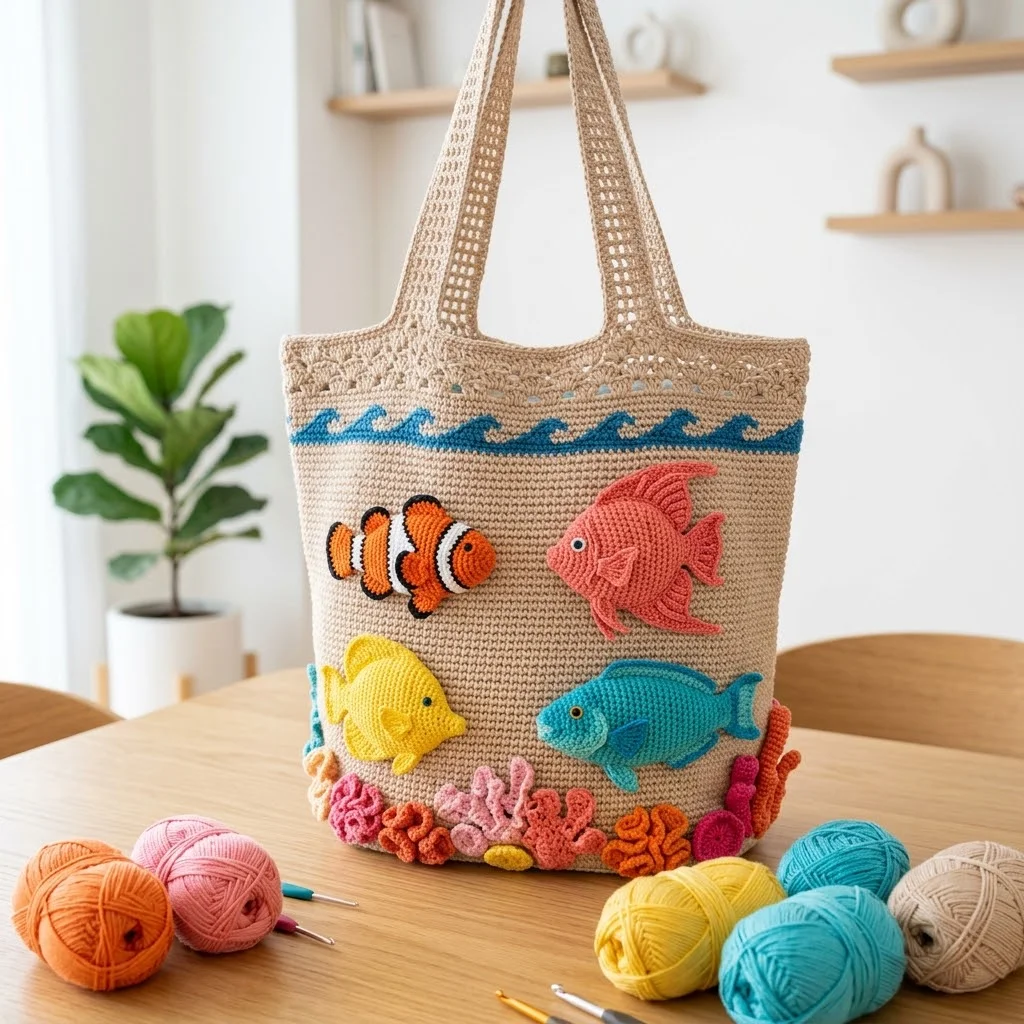
I don’t know about you, but I have a weakness for anything that brings beach vibes into my everyday life. This coral reef fish crochet beach tote is exactly the kind of project that makes me want to grab my hook and some colorful yarn right now. All the tropical charm with a practical bag you will actually use all summer long.
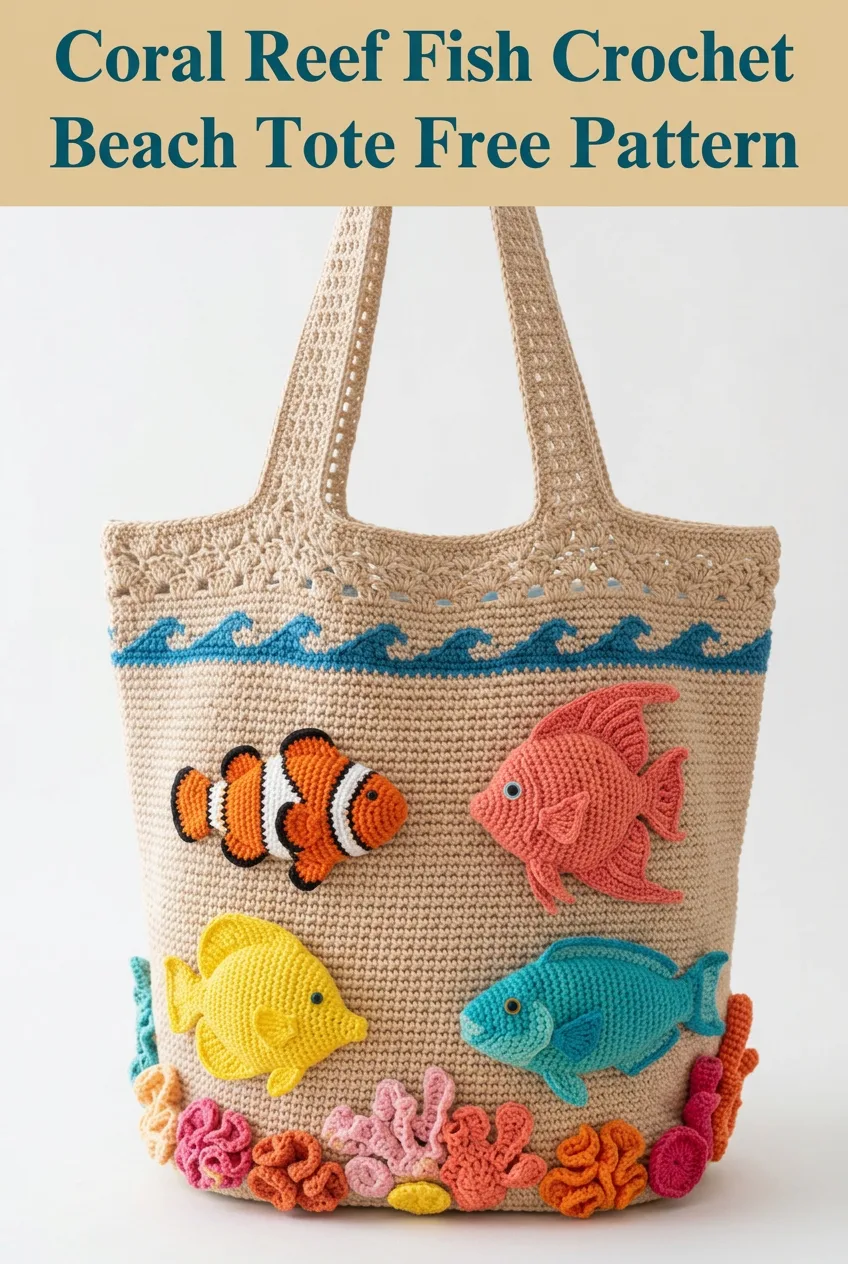
When I designed this tote, I wanted something that felt like a little underwater scene you could carry with you. The colorful fish, the waves along the top, the coral reef along the bottom. It is cheerful and fun and honestly just makes me happy every time I look at it. If you have been searching for a crochet beach bag pattern that stands out from the usual market totes, this is the one.
Why You Will Love This Crochet Beach Tote Pattern
This coral reef fish tote combines a sturdy, practical bag construction with playful appliqué details. The base of the bag uses single crochet (sc) throughout, which creates a dense fabric perfect for holding your sunscreen, book, towel, and snacks. The appliqué fish and coral pieces are worked separately and then sewn on, so you can customize the placement however you like.
The skill level here is intermediate. If you can work in rows, work in the round, and are comfortable sewing pieces together, you can absolutely make this bag. The individual fish and coral pieces use basic stitches with some shaping, and I will walk you through every step.
Materials Needed
Yarn:
Hook:
Notions:
Gauge
16 stitches and 18 rows = 4 inches in single crochet with 5.0mm hook and worsted weight cotton.
Gauge matters here because you want your bag to be sturdy and hold its shape. If your stitches are too loose, the bag will stretch out. Take a few minutes to make a gauge swatch. Trust me on this one.
Finished Dimensions
Abbreviations and Stitch Definitions
Let me break down every stitch abbreviation you will see in this pattern. Even if you know these, a quick refresher never hurts.
ch = chain: Yarn over, pull through loop on hook. This creates the foundation for most crochet work.
sl st = slip stitch: Insert hook, yarn over, pull through both the stitch and the loop on your hook in one motion. Used for joining and moving across stitches without adding height.
sc = single crochet: Insert hook into stitch, yarn over and pull up a loop (2 loops on hook), yarn over and pull through both loops. The shortest and most basic crochet stitch.
hdc = half double crochet: Yarn over, insert hook into stitch, yarn over and pull up a loop (3 loops on hook), yarn over and pull through all 3 loops. Slightly taller than single crochet.
dc = double crochet: Yarn over, insert hook into stitch, yarn over and pull up a loop (3 loops on hook), yarn over and pull through 2 loops, yarn over and pull through remaining 2 loops. Creates a taller, more open fabric.
inc = increase: Work 2 stitches into the same stitch. This adds one stitch to your count.
dec = decrease (invisible decrease for sc): Insert hook through front loops only of next 2 stitches, yarn over and pull through both, yarn over and pull through both loops on hook. This removes one stitch from your count.
magic ring = An adjustable starting loop that can be pulled tight. If you prefer, you can substitute ch 2 and work your stitches into the second chain from hook.
Coral Reef Fish Crochet Beach Tote Pattern Instructions
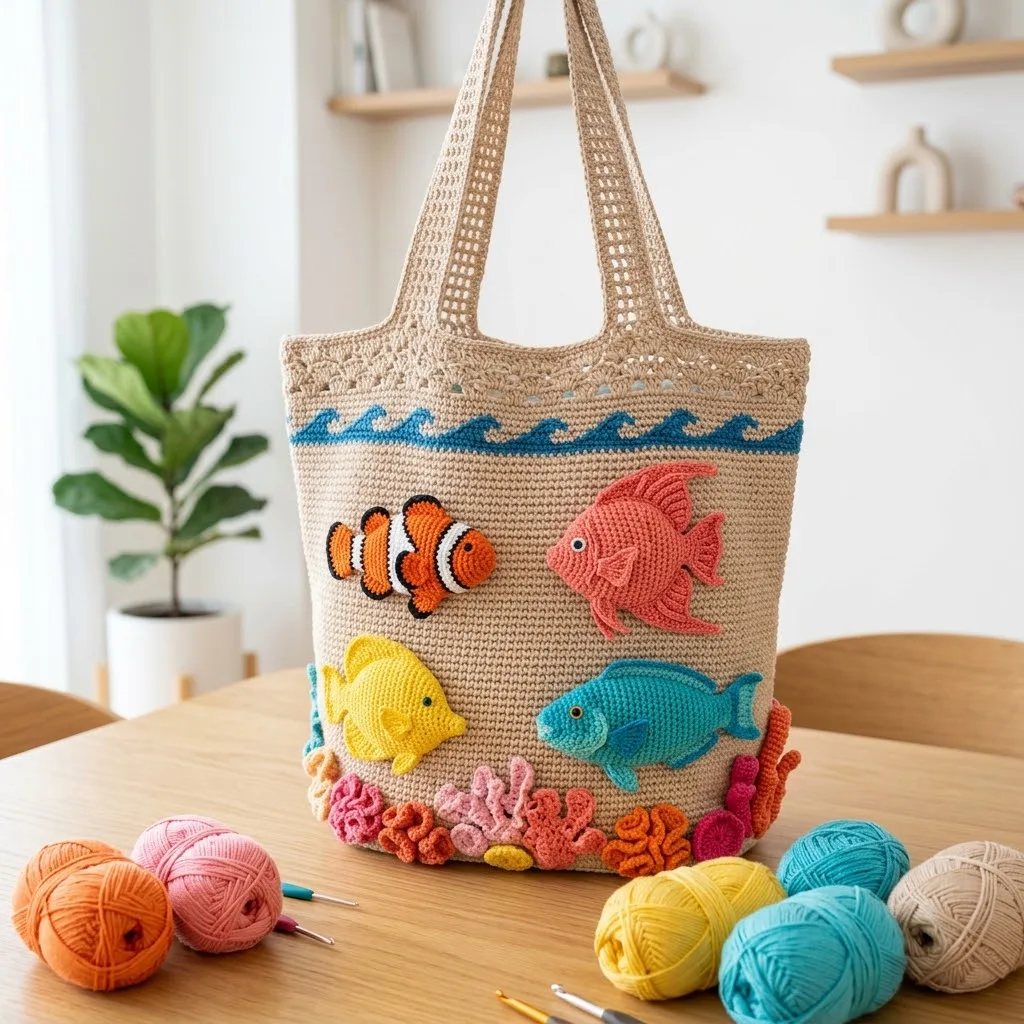
Bag Body (Make 2 Panels)
The bag is worked flat in two panels, then seamed together. This makes it easier to attach appliqués before assembly.
Foundation: With tan/sand yarn and 5.0mm hook, ch 57.
Row 1: Sc in 2nd ch from hook and in each ch across, turn. (56 sc)
Rows 2 through 60: Ch 1, sc in each st across, turn. (56 sc)
At the end of Row 60, fasten off and weave in ends.
Repeat for the second panel.
A note for beginners: If you lose count of your stitches, just count them at the end of each row for the first few rows until you get into a rhythm. You should always have 56 stitches.
Bag Bottom
Foundation: With tan/sand yarn and 5.0mm hook, ch 57.
Row 1: Sc in 2nd ch from hook and in each ch across, turn. (56 sc)
Rows 2 through 8: Ch 1, sc in each st across, turn. (56 sc)
Fasten off, leaving a long tail for seaming.
Handles (Make 2)
Foundation: With tan/sand yarn and 5.0mm hook, ch 9.
Row 1: Sc in 2nd ch from hook and in each ch across, turn. (8 sc)
Rows 2 through 100: Ch 1, sc in each st across, turn. (8 sc)
Fasten off, leaving long tails for attaching to bag.
The handles may feel long, but they need to comfortably sit on your shoulder. Feel free to adjust the length by adding or subtracting rows.
Wave Border
This decorative wave section is worked separately and sewn onto the bag.
Foundation: With blue yarn and 5.0mm hook, ch 113.
Row 1: Sc in 2nd ch from hook and in each ch across, turn. (112 sc)
Row 2: Ch 1, sc in first 4 sts, *hdc in next st, dc in next 2 sts, hdc in next st, sc in next 4 sts*, repeat from * across, turn. (112 sts)
Row 3: Ch 1, sc in each st across. (112 sts)
Fasten off, leaving a long tail for sewing.
Clownfish Appliqué
This little guy has the classic orange, white, and black stripes.
Body: With orange yarn and 4.0mm hook, make a magic ring.
Round 1: 6 sc into ring, pull tight, do not join. Place marker to track rounds. (6 sc)
Round 2: Inc in each st around. (12 sc)
Round 3: *Sc in next st, inc in next st*, repeat around. (18 sc)
Round 4: *Sc in next 2 sts, inc in next st*, repeat around. (24 sc)
Rounds 5 through 8: Sc in each st around. (24 sc)
Round 9: *Sc in next 2 sts, dec*, repeat around. (18 sc)
Round 10: *Sc in next st, dec*, repeat around. (12 sc)
Stuff lightly if desired for dimension, or leave flat.
Round 11: Dec around. (6 sc)
Fasten off and close hole.
White Stripes (Make 3): Ch 8, sc in 2nd ch from hook and across. (7 sc) Fasten off. Sew vertically across body.
Tail Fin: With orange yarn, ch 6. Row 1: Sc in 2nd ch from hook, hdc, dc, hdc, sc. Fasten off. Attach to back of body.
Dorsal Fin: With orange yarn, ch 4. Sl st in 2nd ch from hook, sc, hdc. Fasten off. Attach to top of body.
Eye: With black yarn, embroider a small eye or attach a small bead.
Coral Pink Fish Appliqué
Body: With coral pink yarn and 4.0mm hook, make a magic ring.
Round 1: 6 sc into ring. (6 sc)
Round 2: Inc in each st around. (12 sc)
Round 3: *Sc, inc*, repeat around. (18 sc)
Round 4: *Sc in 2 sts, inc*, repeat around. (24 sc)
Rounds 5 through 9: Sc in each st around. (24 sc)
Round 10: *Sc in 2 sts, dec*, repeat around. (18 sc)
Round 11: *Sc, dec*, repeat around. (12 sc)
Round 12: Dec around. (6 sc)
Fasten off and close.
Top Fin: With coral pink, ch 10. Row 1: Sl st in 2nd ch, sc, hdc, dc, dc, dc, hdc, sc, sl st. Fasten off. This creates a pointed fin. Attach along top of body.
Tail Fin: Ch 8. Row 1: Sl st in 2nd ch, sc, hdc, dc, dc, hdc, sc. Fasten off. Attach to back.
Eye: Embroider with black yarn.
Yellow Fish Appliqué
Body: With yellow yarn, make a magic ring.
Follow the same body pattern as the coral pink fish through Round 12.
Fins and Tail: Work the same fin patterns in yellow.
Eye: Embroider with black yarn.
Turquoise Fish Appliqué
Body: With turquoise yarn, make a magic ring.
Follow the same body pattern as the coral pink fish through Round 12.
This fish has a slightly rounder body, so you can add an extra round of 24 sc before decreasing if you want more size variation.
Fins and Tail: Work in turquoise.
Eye: Embroider with black yarn.
Coral Pieces
The coral along the bottom adds so much life to this bag. Make a variety of shapes and colors.
Branch Coral (Make 3 to 4 in assorted colors):
Ch 12. *Sl st in 2nd ch from hook, ch 5, sl st in 2nd ch from hook, sc, hdc, dc, skip 2 ch on main chain, sl st in next ch*, repeat pattern once more, then sl st in remaining chains. Fasten off.
This creates a branching coral shape. Do not worry if yours looks slightly different. Coral is irregular by nature.
Round Coral (Make 2 to 3):
Make a magic ring. Round 1: 8 hdc into ring, join. Round 2: Ch 2, *2 dc in next st, dc in next st*, repeat around, join. Fasten off.
Tube Coral (Make 2):
Ch 8, join to form ring. Rounds 1 through 4: Sc in each st around. (8 sc) Fasten off.
Feel free to get creative here. The coral section is very forgiving. Mix pinks, corals, oranges, and even some green for seaweed shapes.
Assembly Instructions
Step 1: Attach Appliqués
Before sewing the bag together, lay out your fish and coral pieces on one panel. Play with the arrangement until you are happy. Use pins to hold them in place.
With your tapestry needle and matching yarn colors, whip stitch each appliqué securely to the front panel. Take your time here. Secure stitching means your appliqués will survive beach trips.
Step 2: Attach Wave Border
Position the wave border horizontally across the upper portion of the front panel, about 3 inches below the top edge. Pin in place and whip stitch along both edges.
Step 3: Seam the Panels
Place the front and back panels with wrong sides together. Using tan yarn and your tapestry needle, whip stitch or mattress stitch along both side seams and the bottom.
Alternatively, you can single crochet the panels together for a decorative seam. Insert your hook through both layers and sc evenly along the edges.
Step 4: Attach the Bottom
Pin the bottom panel to the base of your bag. Whip stitch all the way around.
Step 5: Attach Handles
Position each handle approximately 4 inches from the side seams on both front and back panels. The handles should mirror each other. Sew securely, going over the attachment point several times for strength.
Step 6: Add Decorative Top Border (Optional)
For the lacy border visible at the top of the bag:
Join tan yarn at side seam. Round 1: Sc evenly around top opening. Round 2: *Sc, ch 2, skip 1 st*, repeat around, join. Fasten off.
This creates a simple eyelet border that adds a finished look.
Tips for Success
Yarn choice matters. Cotton holds up best for beach bags because it does not stretch like acrylic and dries quickly if it gets wet. Lily Sugar’n Cream, Peaches & Creme, or similar brands work beautifully.
Block your panels. Before assembly, wet block or steam block your crocheted panels. This evens out your stitches and makes seaming much easier.
Reinforce the handles. Beach bags carry weight. Sew those handles on securely, and consider adding a few extra stitches at the stress points.
Make it your own. Add more fish, fewer fish, different colors, a starfish, a little crab. This pattern is a starting point. Let your creativity swim.
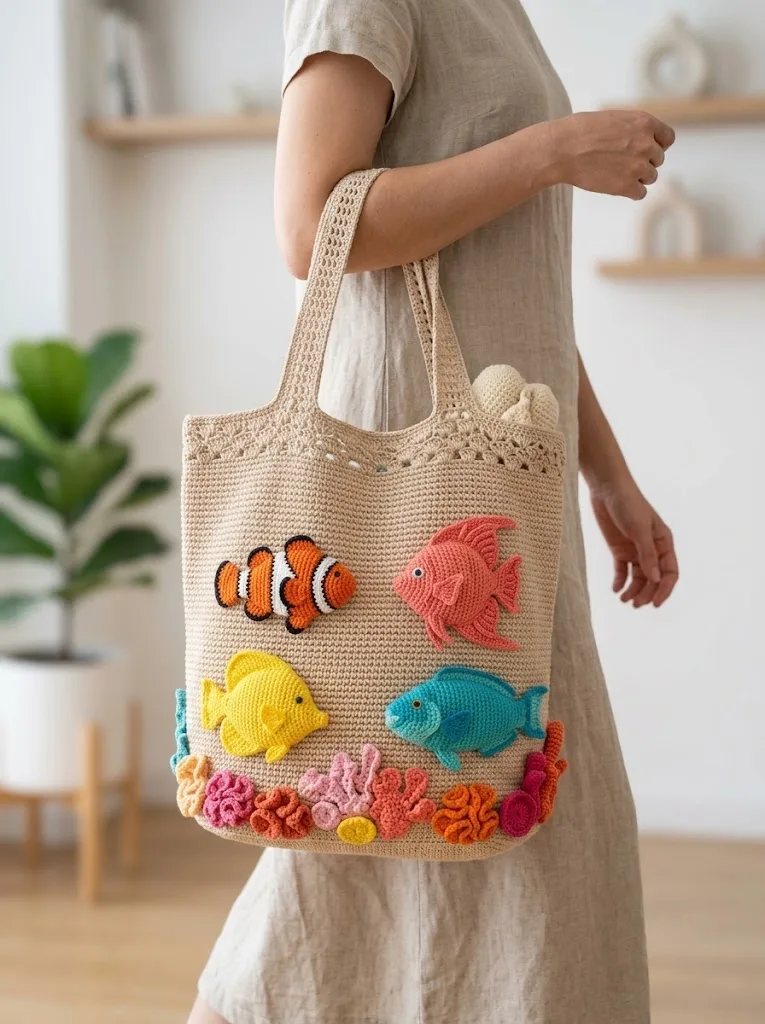
Who Is This Crochet Beach Bag Pattern For?
This coral reef fish crochet beach tote makes a wonderful project for anyone who loves the ocean, bright colors, or unique handmade accessories. It is perfect for:
The cheerful design sparks joy, and the practical construction means it will last season after season.
I really hope you enjoy making this coral reef fish crochet beach tote as much as I enjoyed designing it. If you create one, I would absolutely love to see it. Tag me on Instagram or share it in my Facebook group. Seeing your versions truly makes my day.
If this pattern has you dreaming of sandy beaches and sunny days, go ahead and save it to your Pinterest boards so you can find it when you are ready to cast on. And please drop a comment below if you make this bag. I love hearing from you, and your feedback helps other crocheters decide to dive in too.
You Might Also Like
- Midnight Silver Lace Bucket Bag Free Crochet Pattern
- Pastel Rainbow Kitty Tote Bag Free Crochet Pattern
- Pink Valentine Highland Cow Amigurumi Free Crochet Pattern
- Coral Reef Snake Plant Amigurumi Free Crochet Pattern