Coral Reef Charm Bracelet Free Crochet Pattern
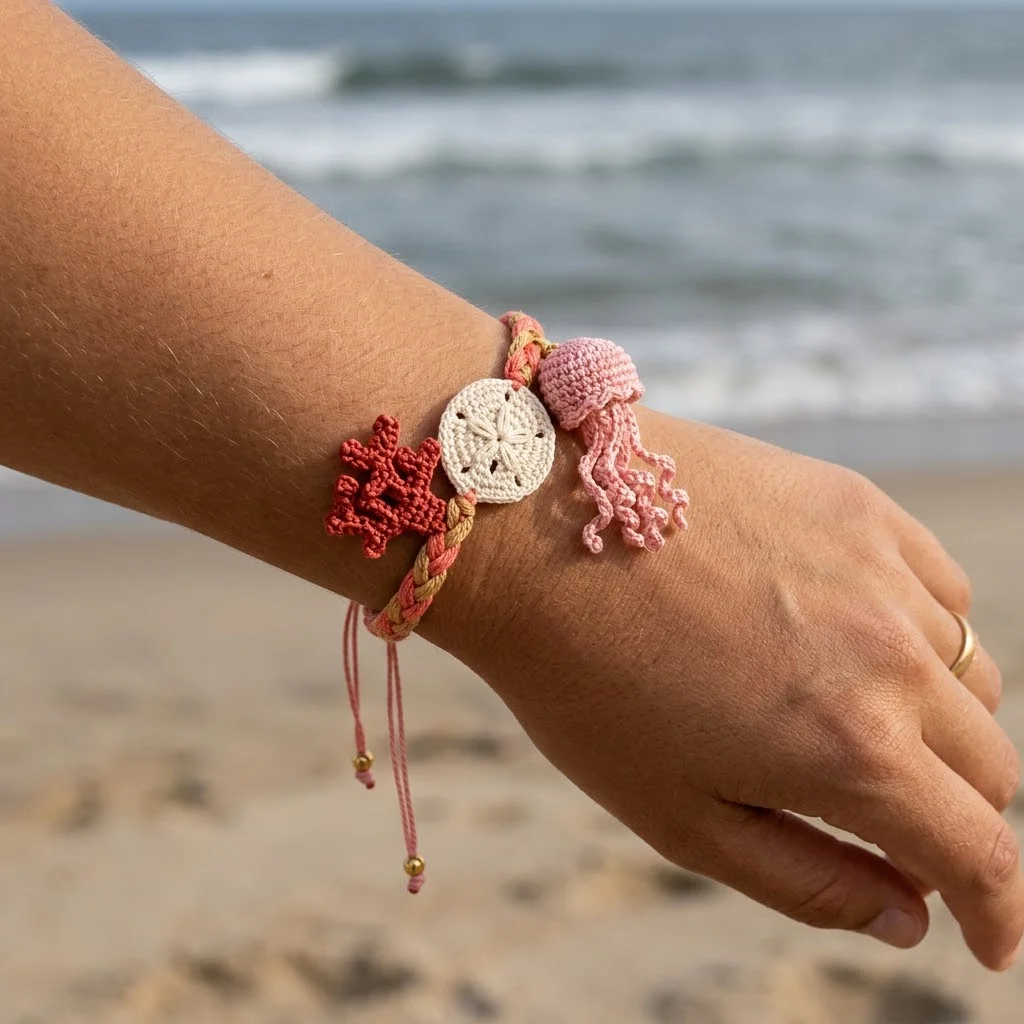
I don’t know about you, but I’m absolutely obsessed with those dainty little friendship bracelets that remind me of beach vacations and summer afternoons. All the coastal charm with none of the actual sand in my shoes. This crochet charm bracelet brings together three of my favorite ocean treasures: a tiny starfish, a delicate sand dollar, and the most adorable miniature jellyfish you’ve ever seen. It’s the kind of project that makes people stop and say “wait, you *made* that?”
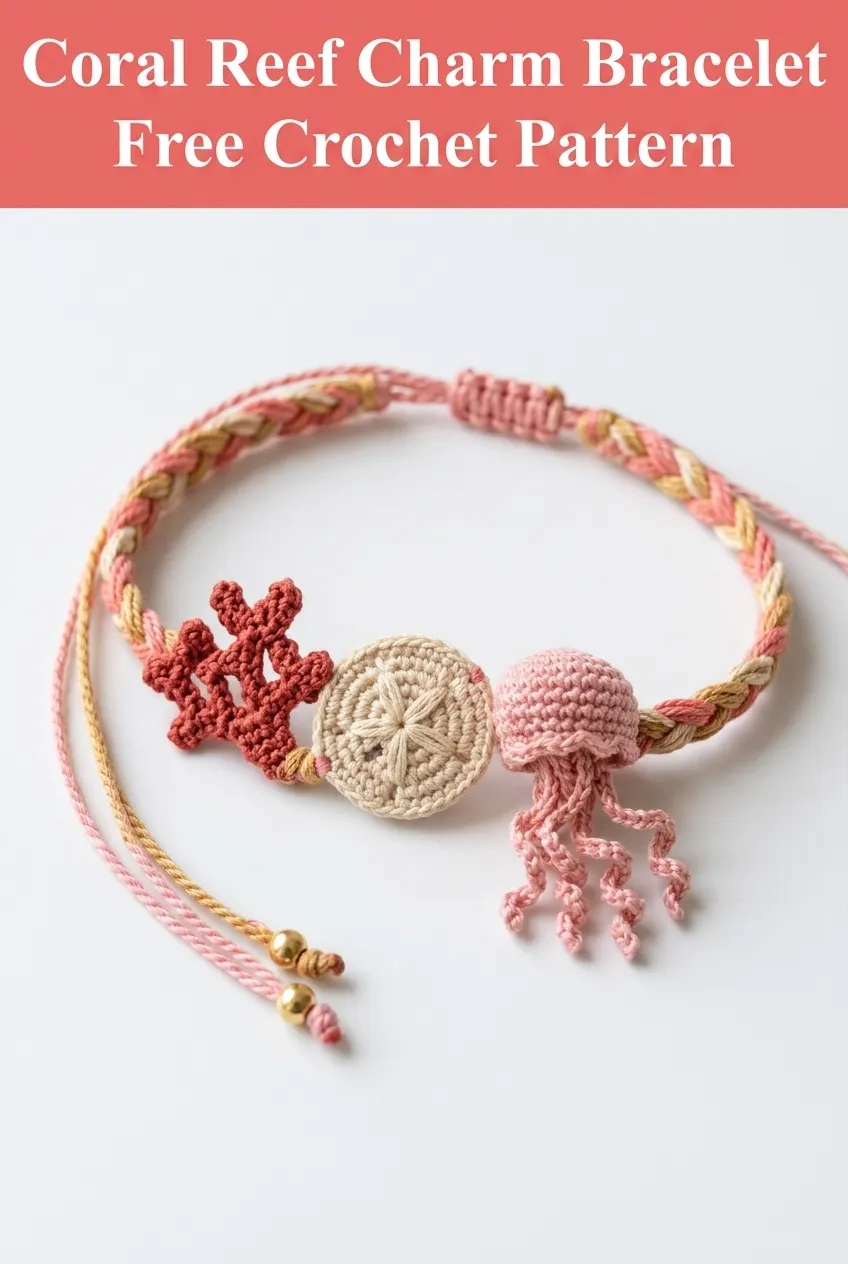
This crochet bracelet pattern works up quickly using small amounts of thread or fingering weight yarn, making it perfect for using up those beautiful scraps you’ve been saving. The braided band gives it that boho friendship bracelet vibe, while the detailed charms show off your crochet skills without requiring hours of work. Whether you’re making this for yourself or as a thoughtful handmade gift, this coral reef charm bracelet is sure to become a summer staple.
Why You’ll Love This Crochet Bracelet Pattern
This beginner friendly crochet pattern combines simple stitches with impressive results. Each charm uses basic techniques that most crocheters already know, just worked on a smaller scale. The finished bracelet has that artisan jewelry look that would easily sell for thirty dollars or more at a craft fair.
The adjustable sliding knot closure means one size truly fits all, and the braided band technique creates a secure, comfortable fit for everyday wear. Plus, working with thread or fine yarn is incredibly satisfying once you get the hang of it. The stitches are so crisp and the details really pop.
Materials Needed for Your Coral Reef Charm Bracelet
Yarn:
– Coral or rust orange for the starfish
– Cream or natural white for the sand dollar
– Light pink for the jellyfish
– Coordinating colors for the braided band (I used coral, pink, and golden tan)
Hook:
Notions:
Gauge: Gauge is not critical for this project, but your stitches should be tight enough that the charms hold their shape without being stiff.
Finished Size: Each charm measures approximately 1 to 1.5 inches. The bracelet band adjusts from about 6 to 9 inches.
Skill Level
This crochet tutorial is suitable for adventurous beginners and intermediate crocheters. If you’ve never worked with thread before, don’t panic. The stitches are exactly the same as regular crochet, just smaller. I recommend practicing a few chain stitches with your thread and hook before diving in. Once your hands adjust to the smaller scale, you’ll be surprised how quickly it feels natural.
Abbreviations and Stitch Definitions
Let me walk you through every stitch you’ll need for this step by step crochet pattern:
ch = chain: Yarn over, pull through loop on hook. This is your foundation stitch.
sl st = slip stitch: Insert hook, yarn over, pull through both the stitch and the loop on your hook in one motion. Used for joining and creating flat connections.
sc = single crochet: Insert hook into stitch, yarn over and pull up a loop (2 loops on hook), yarn over and pull through both loops. This is your workhorse stitch for the charms.
hdc = half double crochet: Yarn over, insert hook into stitch, yarn over and pull up a loop (3 loops on hook), yarn over and pull through all 3 loops at once.
dc = double crochet: Yarn over, insert hook into stitch, yarn over and pull up a loop (3 loops on hook), yarn over and pull through 2 loops, yarn over and pull through remaining 2 loops.
inc = increase: Work 2 stitches into the same stitch. This adds one stitch to your count.
magic ring = An adjustable starting loop that can be pulled tight to close any gap. If you’re not comfortable with magic rings, you can chain 2 and work your first round into the second chain from hook instead.
How to Crochet the Starfish Charm
The starfish is worked flat in one piece, starting from the center and creating each arm as you go.
Using coral colored thread:
Center:
Make a magic ring.
Round 1: Ch 1, work 5 sc into the ring. Pull the ring closed tightly. Do not join. (5 sts)
Creating the Arms:
You’ll now work each arm separately, then rejoin to the center.
Arm 1:
Row 1: Ch 4, sc in 2nd ch from hook, hdc in next ch, dc in last ch. Sl st into the next sc of the center ring. (1 arm complete)
Arm 2:
Row 1: Ch 4, sc in 2nd ch from hook, hdc in next ch, dc in last ch. Sl st into the next sc of the center ring. (2 arms complete)
Arms 3, 4, and 5:
Repeat Arm 2 instructions three more times, slip stitching into each remaining center sc. (5 arms complete)
Finishing:
Fasten off and weave in your end, tucking it into the center back of the starfish. The arms will naturally curl slightly, giving it dimension.
How to Crochet the Sand Dollar Charm
The sand dollar is worked in the round from the center out, with surface crochet details added at the end.
Using cream colored thread:
Round 1: Make a magic ring. Ch 1, work 6 sc into the ring. Pull closed. Sl st to first sc to join. (6 sts)
Round 2: Ch 1, work 2 sc in each st around. Sl st to first sc to join. (12 sts)
Round 3: Ch 1, *sc in next st, 2 sc in next st* repeat around. Sl st to join. (18 sts)
Round 4: Ch 1, *sc in next 2 sts, 2 sc in next st* repeat around. Sl st to join. (24 sts)
Round 5 (optional, for a slightly larger charm): Ch 1, *sc in next 3 sts, 2 sc in next st* repeat around. Sl st to join. (30 sts)
Fasten off, leaving a 6 inch tail.
Adding the Sand Dollar Pattern:
Thread your tapestry needle with matching thread. Using surface slip stitches or simple embroidery, create 5 lines radiating from the center to the edge, evenly spaced like the petals of a flower. This mimics the natural pattern found on real sand dollars. Don’t stress about perfection here. Nature isn’t symmetrical either.
How to Crochet the Jellyfish Charm
This is the most detailed charm, and honestly my favorite. The bell is worked in the round with light stuffing optional, and the tentacles are simple chains.
Using light pink thread:
Bell (worked in continuous rounds):
Round 1: Make a magic ring. Work 6 sc into the ring. Do not join, work in a continuous spiral. Place a stitch marker in the first stitch if needed. (6 sts)
Round 2: Work 2 sc in each st around. (12 sts)
Round 3: *Sc in next st, 2 sc in next st* repeat around. (18 sts)
Rounds 4 and 5: Sc in each st around. (18 sts)
Round 6: *Sc in next st, sc2tog* repeat around. (12 sts)
At this point, you can add a tiny bit of stuffing if desired. I left mine unstuffed and it holds its dome shape nicely.
Round 7: *Sc2tog* repeat around. Sl st to close. Do not fasten off. (6 sts)
Tentacles:
From the last stitch, *ch 12, sl st in 2nd ch from hook and in each ch back to the bell, sl st into the next st of Round 7* repeat 5 more times until you have 6 wavy tentacles.
Fasten off and weave in your end into the top of the bell.
Note: The tentacles will naturally spiral and curl, which is exactly what we want. Real jellyfish tentacles are messy and beautiful. Embrace the chaos.
How to Make the Braided Bracelet Band
The braided band is simple but looks intricate. You’ll create three strands of chain, then braid them together.
Strand 1 (coral): Ch 65. Fasten off, leaving a 4 inch tail.
Strand 2 (pink): Ch 65. Fasten off, leaving a 4 inch tail.
Strand 3 (golden tan): Ch 65. Fasten off, leaving a 4 inch tail.
Braiding:
Hold all three strands together. Tie an overhand knot about 2 inches from one end, securing all three chains. Braid the chains together in a standard three strand braid until you reach 2 inches from the other end. Tie another overhand knot to secure.
You should now have a braided section with loose tails on each end.
Assembly and Finishing Your Crochet Bracelet
Now comes the fun part. Putting it all together.
Attaching the Charms:
Using your tapestry needle and matching thread, stitch each charm securely to the braided band. Space them evenly, with the starfish on one side, the sand dollar in the center, and the jellyfish on the other side. Make sure the stitches go through the braid securely so the charms don’t flip or spin.
Creating the Adjustable Closure:
Overlap the two tail ends of your bracelet, pointing in opposite directions. Using one of the tail strands, tie a series of square knots around both overlapping sections. This creates a sliding closure. When you pull the knotted tails, the bracelet tightens. When you push the knots together, it loosens.
If desired, thread a small gold bead onto each tail end and tie a knot below it to keep it in place. This adds a polished finish and makes the bracelet easier to adjust.
Trim any excess tails and secure all knots with a tiny dab of clear fabric glue if you’re worried about them coming undone.
Pattern Notes and Tips for Success
Working with crochet thread can feel awkward at first. Here are my best tips for this crochet pattern:
Lighting matters. Work near a bright window or use a daylight lamp. Those tiny stitches are much easier to see in good light.
Take breaks. Your hands will fatigue faster than with regular yarn. Stretch your fingers every 15 minutes or so.
Block your charms. A light steam or wet blocking helps the flat charms lie smooth and shows off the stitch definition beautifully.
Customize your colors. These charms would look stunning in blues and teals for a different ocean vibe, or even in rainbow colors for a playful look.
Make It Your Own
Once you’ve mastered these three charms, consider adding more ocean friends to your collection. A tiny seashell, a little crab, or even a miniature seahorse would all work beautifully with this bracelet design. You could also attach these charms to earring hooks, necklace chains, or zipper pulls for coordinating accessories.
This coral reef charm bracelet makes an incredibly thoughtful gift for the beach lover in your life. It’s the kind of handmade jewelry that feels personal and special, something store bought pieces just can’t replicate.
I really hope you love making this coral reef charm bracelet as much as I loved designing it. If you found this crochet pattern helpful, I’d be so grateful if you saved it to your Pinterest boards so you can find it again later and share it with your crafty friends. And please, if you make this bracelet, drop a comment below or tag me on social media. Seeing your creations honestly makes my whole day.
You Might Also Like
- Dusty Rose Chunky Cropped Turtleneck Free Crochet Pattern
- Warm Autumn Terracotta Shoulder Bag Free Crochet Pattern
- Sunshine Lemon Tiered Baby Dress Free Crochet Pattern
- Coastal Blue Granny Square Patchwork Cardigan Free Pattern