Coastal Blue Granny Square Patchwork Cardigan Free Pattern
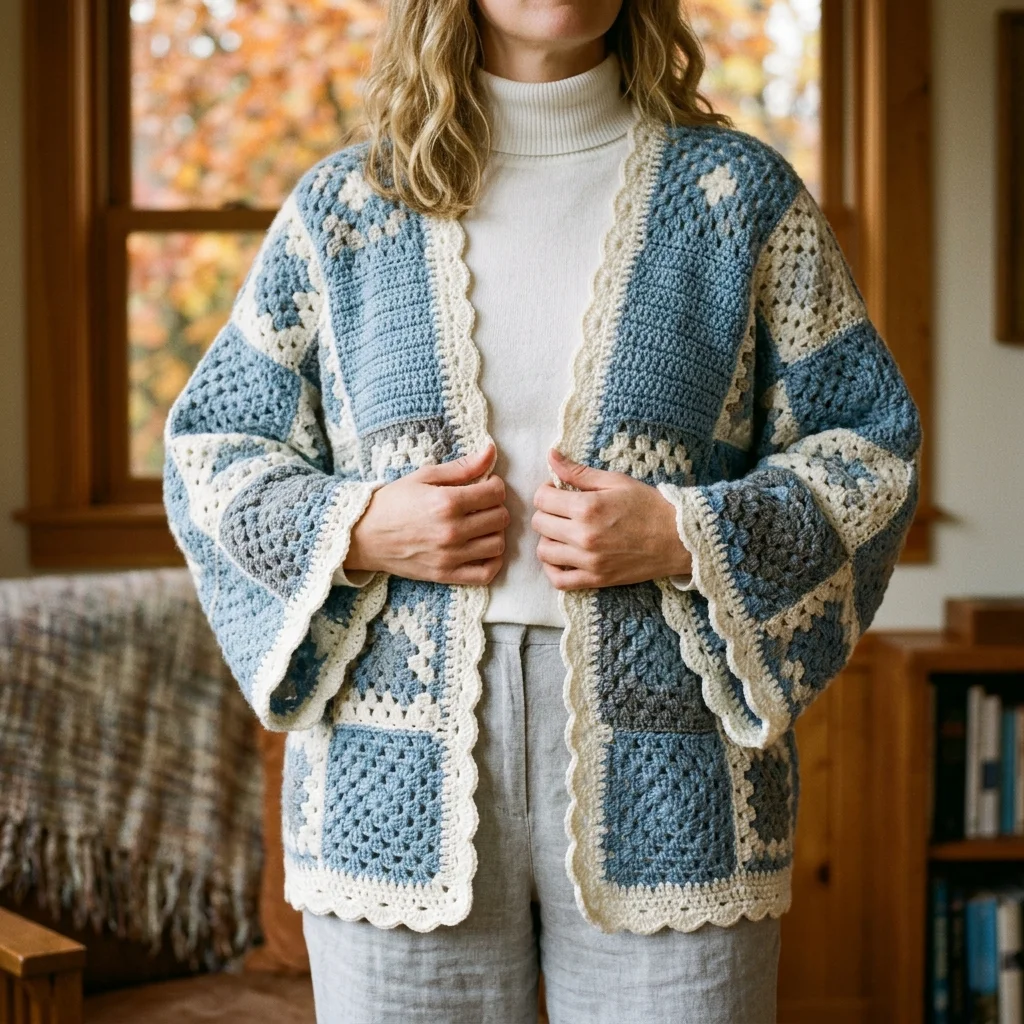
If you have been searching for a cozy, layered cardigan to keep the chill off during transitional seasons, this granny square patchwork cardigan delivers exactly that. It uses classic granny squares joined together in a patchwork layout, making it perfect for crocheters who love modular projects they can work on anywhere. The stitches are simple and repetitive, which means this is great for confident beginners ready to tackle their first wearable. It also makes a stunning handmade gift for someone who appreciates vintage-inspired style with a modern coastal color palette.
Why You Will Love This Crochet Pattern
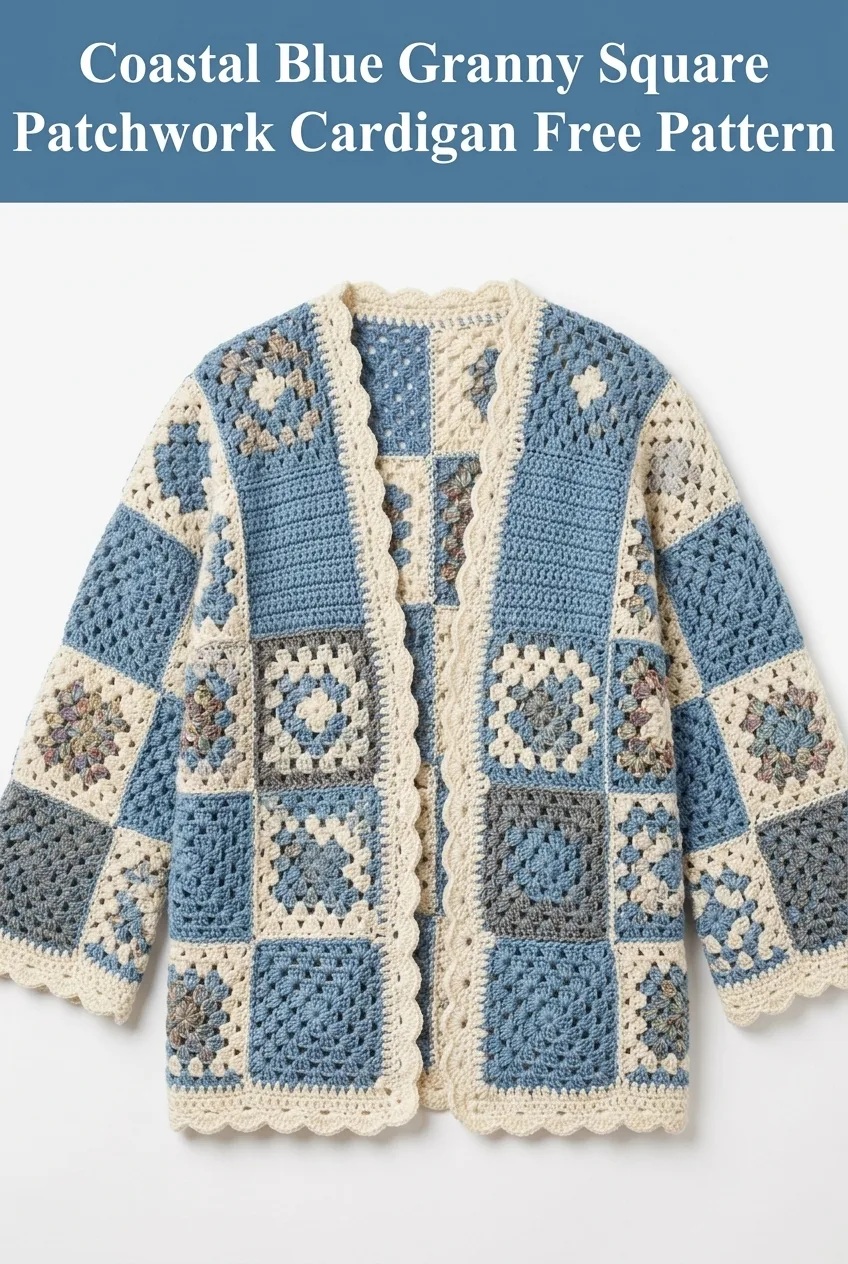
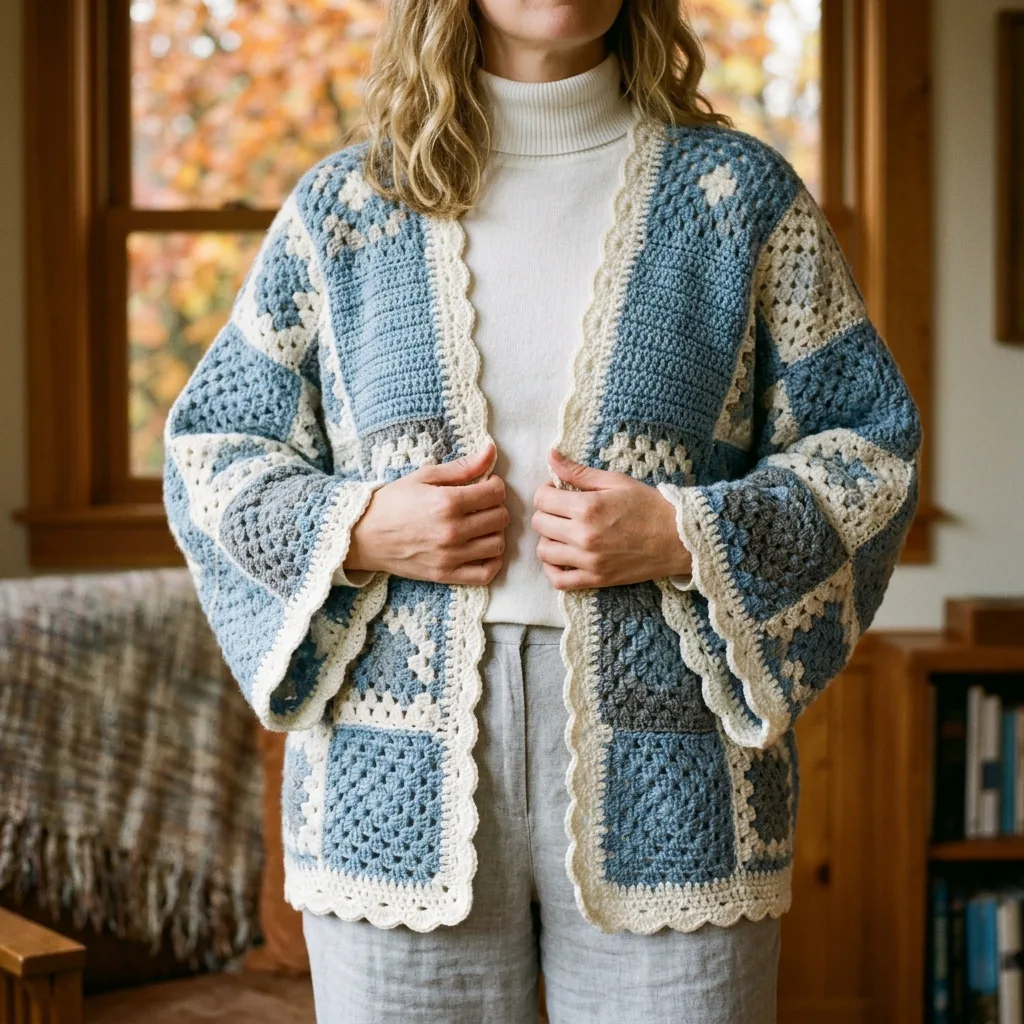
This Coastal Blue Granny Square Patchwork Cardigan combines the nostalgic charm of traditional granny squares with a relaxed, oversized silhouette. The open front design means no buttonholes, no zippers, and no fiddly closures. Just slip it on over a turtleneck or a simple tee and you are ready to go.
The color palette uses soft dusty blue tones paired with cream and warm taupe accents. These muted coastal shades work beautifully together without overwhelming the classic stitch texture. If you have been hoarding special skeins of worsted weight yarn in your stash, this is the project to finally use them.
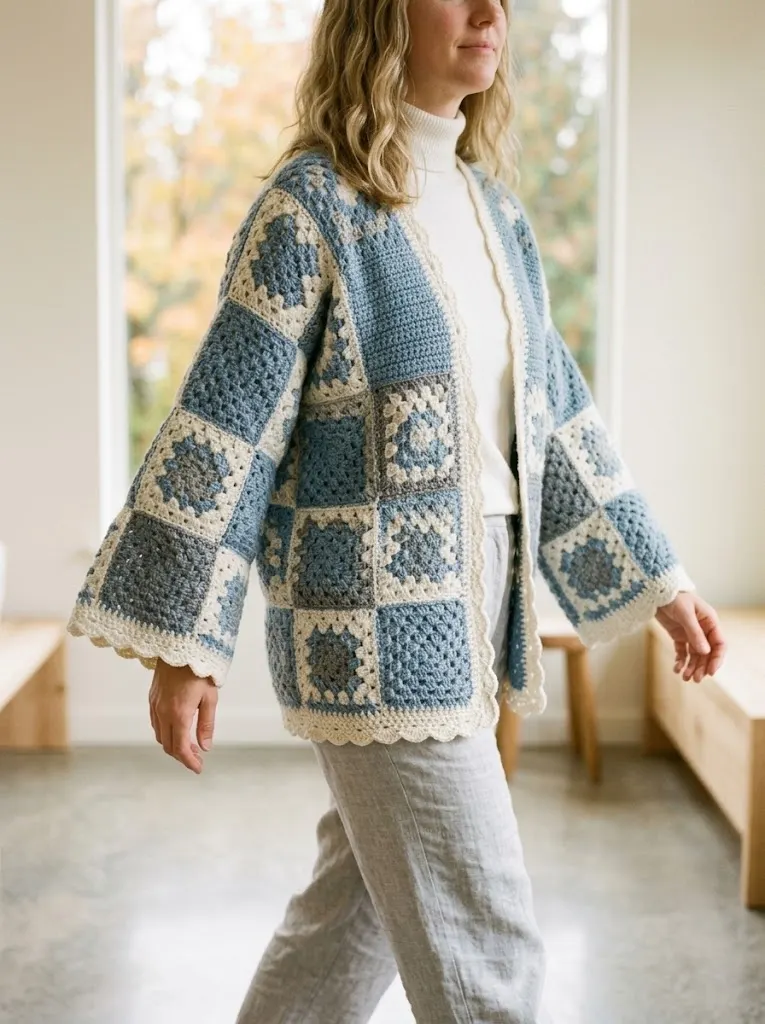
The wide bell sleeves give this cardigan a bohemian feel, while the scalloped edging along the front and hemline adds a polished finishing touch. It looks far more complicated than it actually is. If you can make a granny square and sew pieces together, you can absolutely make this cardigan.
Skill Level
Intermediate Beginner to Intermediate
You should be comfortable with:
If you have never made a granny square before, I recommend practicing a few small ones first. Once you have the rhythm down, the rest of this cardigan is smooth sailing.
Finished Measurements
This pattern is written for a relaxed, oversized fit.
| Size | Bust Circumference | Length (shoulder to hem) | Sleeve Length |
|---|---|---|---|
| S/M | 44 inches | 26 inches | 18 inches |
| L/XL | 50 inches | 28 inches | 19 inches |
| 2X/3X | 56 inches | 30 inches | 20 inches |
Each granny square measures approximately 5.5 inches by 5.5 inches after blocking.
Materials Needed
Yarn:
I recommend a soft acrylic blend or a machine-washable wool for easy care. Yarns with good stitch definition will show off the granny stitch clusters beautifully.
Hook:
Notions:
Gauge
One classic granny square using the pattern below should measure 5.5 inches by 5.5 inches after blocking.
Always check your gauge before starting. If your square is too small, go up a hook size. If it is too large, go down a hook size. Gauge matters for wearables because it affects the final fit.
Abbreviations and Stitch Definitions
Let me walk you through every abbreviation you will see in this pattern:
Pattern Notes
1. All granny squares are worked in the round from the center outward.
2. Join each round with a slip stitch to the top of the beginning chain-3 (which counts as your first double crochet).
3. Color changes happen at the end of rounds. Fasten off and join the new color with a slip stitch in any corner space.
4. Block all squares before assembly. Trust me on this. It makes seaming so much easier and gives a professional finish.
5. The front panels, back panel, and sleeves are assembled separately, then joined at the shoulders and sides.
Step-by-Step Crochet Pattern
Classic Granny Square (Make Multiple)
You will need the following number of squares based on your size:
| Size | Total Squares Needed |
|---|---|
| S/M | 36 squares |
| L/XL | 42 squares |
| 2X/3X | 48 squares |
This includes squares for the body and sleeves. I will break down placement in the assembly section.
Round 1 (Color A or C, varies by placement):
Ch 4, sl st to first ch to form a ring.
Ch 3 (counts as first dc here and throughout), 2 dc into ring, ch 2, *3 dc into ring, ch 2* three times, sl st to top of ch-3 to join. (4 clusters, 4 ch-2 corner spaces)
Round 2 (Color B):
Fasten off previous color. Join Color B with a sl st in any ch-2 corner space.
Ch 3, 2 dc in same corner space, ch 1, *3 dc in same corner space (corner made), ch 1, 3 dc in next ch-2 corner space, ch 1* around, ending with 3 dc in starting corner, ch 1, sl st to top of ch-3. (8 clusters total: 4 corners with 2 clusters each, 4 ch-1 spaces on sides)
Wait, let me clarify that. Round 2 actually looks like this:
Round 2 (Color B):
Join Color B in any corner ch-2 space. Ch 3, 2 dc, ch 2, 3 dc all in same corner space (first corner made). *Ch 1, skip to next corner ch-2 space, work (3 dc, ch 2, 3 dc) in corner space (corner made)* three more times, ch 1, sl st to top of ch-3 to join. (8 clusters, 4 ch-2 corners, 4 ch-1 side spaces)
Round 3 (Color A):
Fasten off Color B. Join Color A in any corner ch-2 space.
Ch 3, 2 dc, ch 2, 3 dc in same corner space. *Ch 1, 3 dc in next ch-1 space, ch 1, (3 dc, ch 2, 3 dc) in corner ch-2 space* around. End with ch 1, 3 dc in last ch-1 space, ch 1, sl st to top of ch-3 to join. (12 clusters total, 4 corners, 8 side clusters)
Round 4 (Color B):
Fasten off Color A. Join Color B in any corner ch-2 space.
Ch 3, 2 dc, ch 2, 3 dc in same corner. *Ch 1, 3 dc in each ch-1 space along side, ch 1, (3 dc, ch 2, 3 dc) in corner* around. Sl st to top of ch-3 to join. Fasten off. (16 clusters total, 4 corners, 3 side clusters per edge)
Weave in ends. Block square to 5.5 inches.
Color Variations
Looking at the finished cardigan, I can see some squares are worked primarily in dusty blue with cream accents, while others feature more taupe. Here is how to create visual variety:
Variation 1 (Blue Dominant): Rounds 1 and 3 in Color A (Dusty Blue), Rounds 2 and 4 in Color B (Cream)
Variation 2 (Taupe Accent): Round 1 in Color C (Taupe), Rounds 2 and 4 in Color B (Cream), Round 3 in Color A (Dusty Blue)
Variation 3 (All Blue): All rounds in Color A with Color B only on Round 4
Mix and match these variations across your squares to create the patchwork effect shown. There is no exact formula. Trust your eye and lay them out before seaming to make sure you like the arrangement.
Assembly
This is where your cardigan comes together. Take a deep breath. It is easier than it looks.
Back Panel
Arrange squares in a grid:
Joining Method:
Hold two squares with right sides facing. Using Color B and your yarn needle, whip stitch through back loops only along one edge. This creates a nearly invisible seam on the right side.
Alternatively, you can use a single crochet join: Hold squares with wrong sides together. Working through both layers, sc evenly along the edge. This creates a visible ridge on the right side, which adds a nice design element.
Join all squares into horizontal strips first. Then join strips vertically to complete the back panel.
Front Panels (Make 2)
Each front panel is narrower than the back:
Assemble the same way as the back.
Sleeves (Make 2)
The sleeves are constructed as flat rectangles, then seamed into tubes:
Joining Body Pieces
1. Shoulder Seams: Place front panels against back panel, right sides together. Seam along the top edge for one square width on each side. Leave the center back squares open for the neck.
2. Attach Sleeves: Find the center of the sleeve top edge. Match it to the shoulder seam. Pin in place. Seam the sleeve to the body along the armhole opening, attaching to both front and back panels.
3. Side and Underarm Seams: Starting at the bottom hem, seam up the side of the body. Continue along the underarm of the sleeve to the cuff.
Repeat for the second side.
Border and Edging
The scalloped border gives this cardigan its polished look. You will work this edging along the entire front opening, around the neckline, and along the bottom hem.
Setup Round:
Join Color B at the bottom right front corner (when wearing). Ch 1, sc evenly around the entire front opening, around the neck, and down the other front side. Work 3 sc in each outer corner to turn smoothly. Sl st to first sc to join. Do not turn.
Aim for approximately 3 sc per row edge and 1 sc per stitch along horizontal edges. The exact count does not need to be precise, just keep it even.
Scallop Round:
Ch 1, sc in first st. *Skip 2 sts, 5 dc in next st (shell made), skip 2 sts, sc in next st* around entire edge. Adjust skipped stitches slightly at corners to keep the scallops laying flat. Sl st to first sc. Fasten off.
Sleeve Cuffs:
Join Color B at the underarm seam. Ch 1, sc evenly around cuff opening. Sl st to join. Work one scallop round as above. Fasten off.
Bottom Hem (optional):
If you want a matching scalloped hem, work the same edging along the bottom of the back and front panels.
Finishing
Weave in all remaining ends. Block the entire cardigan gently, pinning out the scallops so they lay flat and pretty. Allow to dry completely before wearing.
Tips for Success
Blocking is not optional for this crochet tutorial. Granny squares tend to curl and pucker before blocking. A good wet block or steam block transforms the fabric.
Count your corners. If your squares start looking wonky, double check that you are working (3 dc, ch 2, 3 dc) in each corner on every round.
Lay out your squares before seaming. Take a photo of your arrangement so you remember the placement. This helps you distribute colors evenly and catch any issues before you commit.
Try on as you go. After joining the shoulder seams, drape the cardigan over your shoulders to check the fit. It is much easier to adjust before you have finished all the seaming.
Customization Ideas
Want to make this pattern your own? Here are some ideas:
Common Questions
Can a beginner make this cardigan?
Yes, if you are comfortable with basic stitches and willing to practice granny squares first. The construction is straightforward, just time-consuming.
How long does this take?
Each square takes about 20 to 30 minutes once you get into a rhythm. Assembly and edging add several hours. Plan for a total project time of 25 to 40 hours depending on your pace.
Can I use a different yarn weight?
Absolutely. Just know that your square size will change, which affects the final garment dimensions. Swatch first and calculate how many squares you need based on your new measurements.
Wear It With Pride
This Coastal Blue Granny Square Patchwork Cardigan crochet pattern creates a wearable piece of art. The combination of classic technique with modern styling makes it a standout in any handmade wardrobe. Whether you are curled up with coffee on a cool morning or layering up for an autumn walk, this cardigan has you covered.
Thank you so much for choosing this pattern for your next project. I truly hope you enjoy every stitch. If you make this cardigan, I would absolutely love to see it. Tag me on Instagram or share a photo in our Facebook group. Seeing your creations makes my whole day.
If this pattern caught your eye, save it to your Pinterest boards so you can find it when you are ready to cast on. And please drop a comment below if you give it a try. I love hearing about your color choices, modifications, and finished projects. Happy crocheting, friend.
You Might Also Like
- Arctic Ice Mermaid Plush Doll Free Crochet Pattern
- Tinkerbell Green Fairy Baby Dress Free Crochet Pattern
- Watermelon Slice Couple Amigurumi Free Crochet Pattern
- Coral Sunset Crochet Summer Boots Free Pattern