Coastal Blue Granny Square Patchwork Cardigan Free Pattern
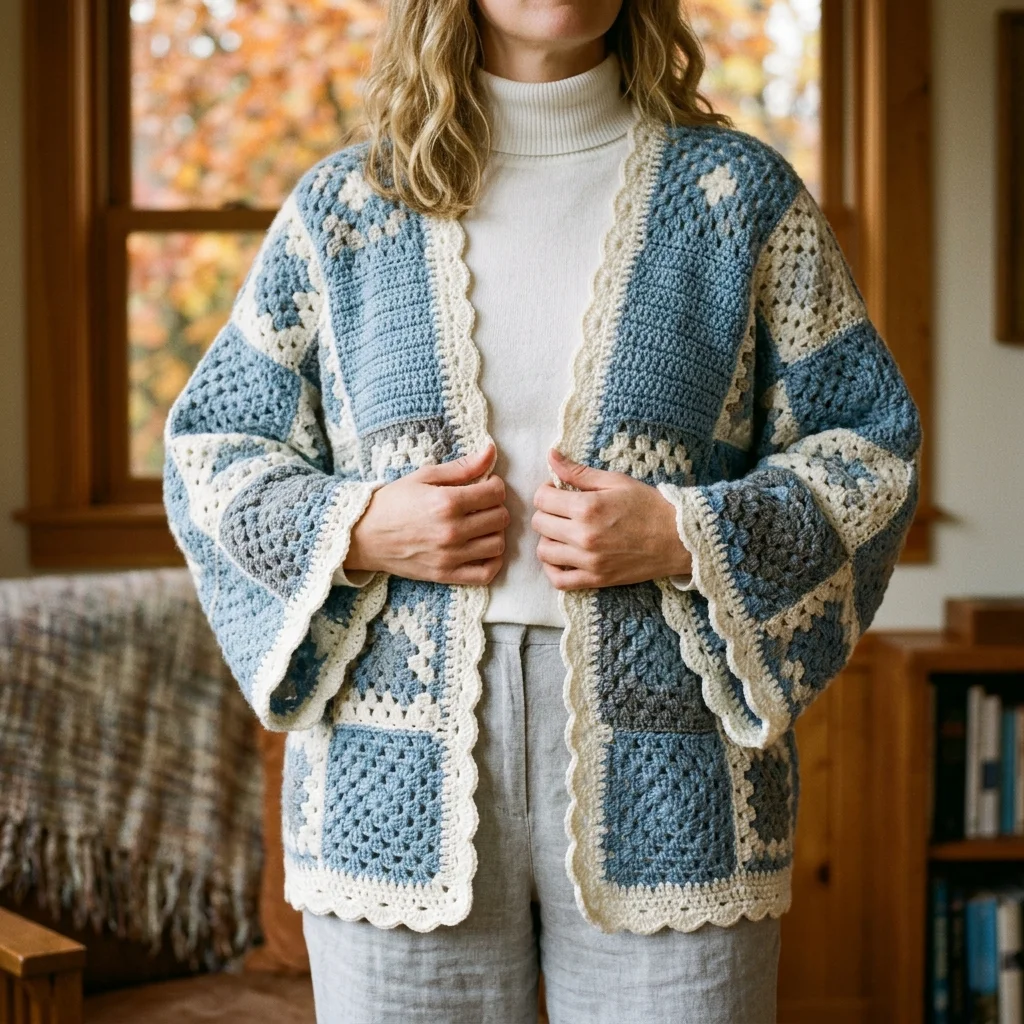
If you have been searching for a cozy layering piece that works up beautifully and keeps you warm through crisp autumn mornings, this patchwork cardigan is exactly what you need. The construction uses classic granny squares joined together, making it perfect for crocheters who know the basics and want to try their first wearable garment. The stitch pattern is simple and repetitive, so you can work on it while watching your favorite shows. This cardigan makes an incredible handmade gift for someone special, or treat yourself to a stunning piece you will reach for season after season.
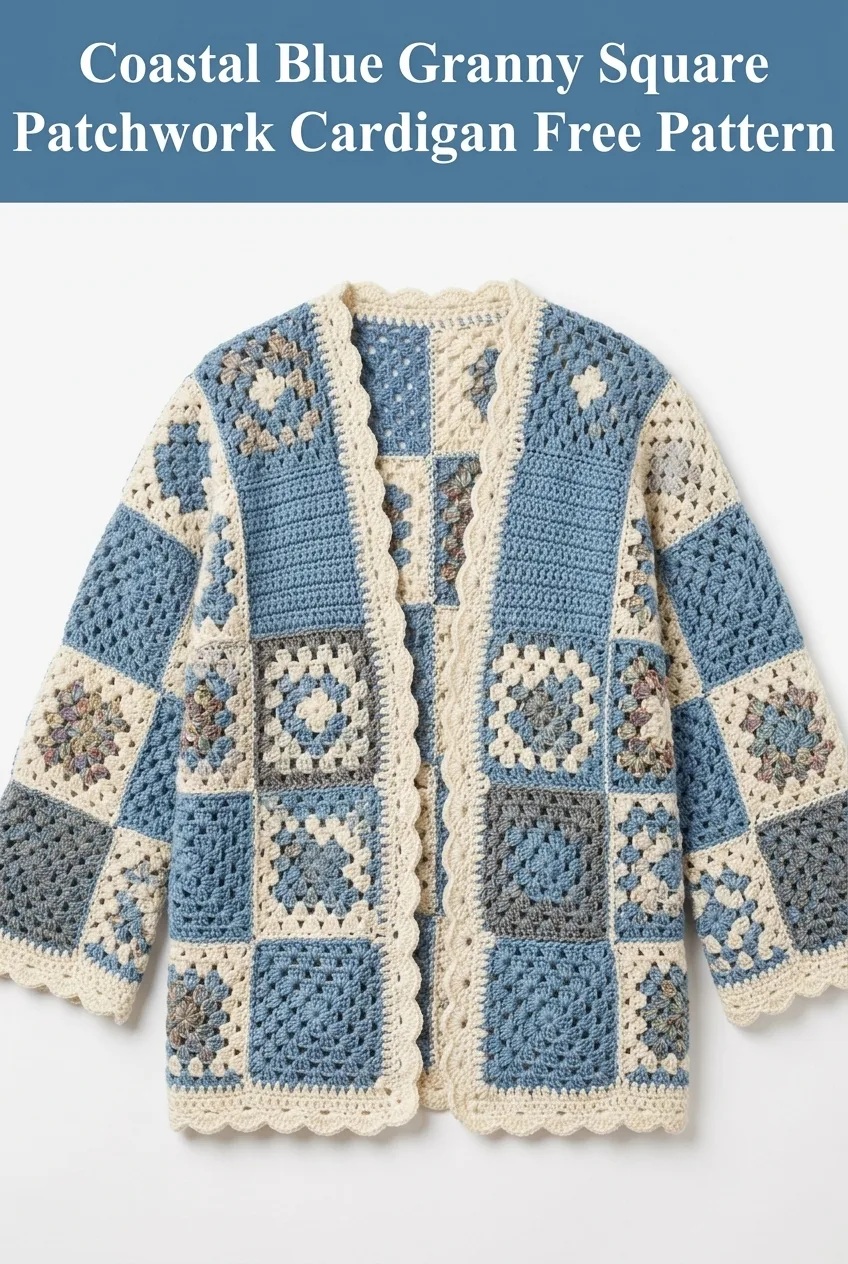
Why You Will Love This Granny Square Cardigan Pattern
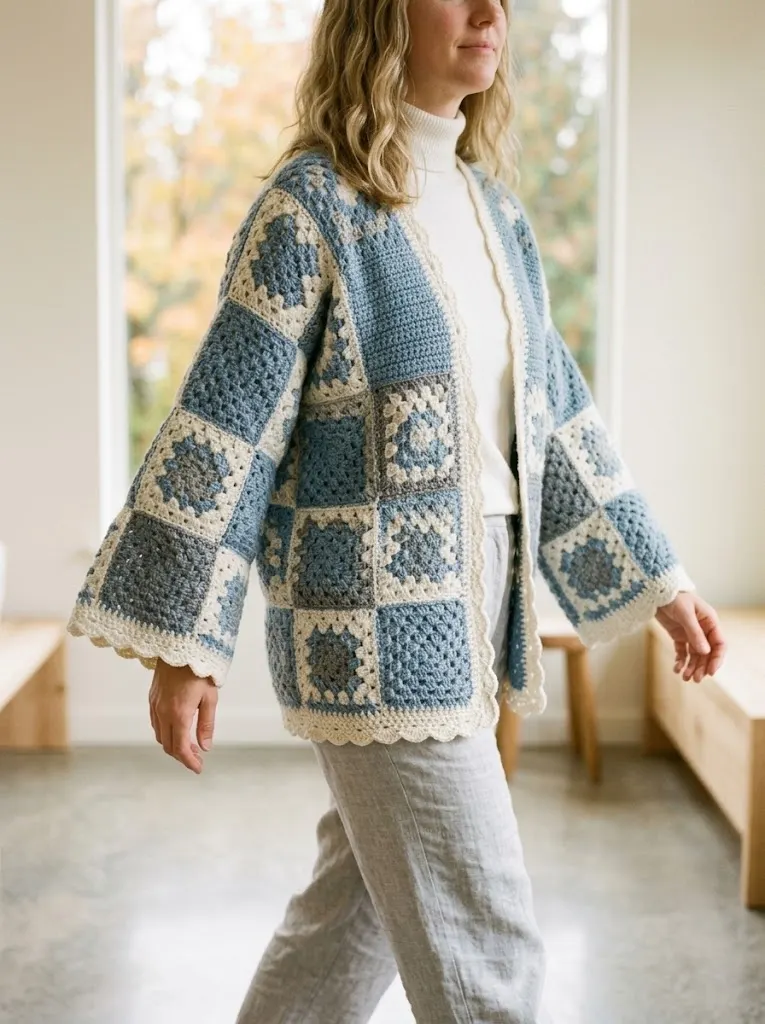
I designed this coastal blue patchwork cardigan to combine the nostalgic charm of traditional granny squares with a modern, wearable silhouette. The color palette features soft dusty blues, warm taupes, and creamy whites that blend together like sea glass on a quiet beach.
The beauty of this crochet pattern lies in its portability. Each square works up quickly, so you can tuck a few in your bag and crochet anywhere. Then the magic happens when you join them all together and watch your cardigan take shape.
What makes this pattern special:
Skill Level
Intermediate beginner. If you can make a granny square and join pieces together, you can absolutely make this cardigan. The construction is straightforward, and I will walk you through every step.
Finished Measurements
This pattern creates an oversized cardigan with the following approximate dimensions:
The relaxed fit works for sizes small through large. For a larger size, simply add an extra column of squares to the body panels and additional squares to each sleeve.
Materials Needed
Yarn:
I recommend a soft acrylic blend or wool blend for this project. Look for yarn with good stitch definition so your granny squares really pop.
Hook:
Notions:
Gauge
One completed granny square should measure 5 inches by 5 inches (13 cm by 13 cm) after blocking.
Gauge tip: Make one test square before starting. If your square is too small, go up a hook size. If it is too large, go down a hook size. Getting gauge right ensures your cardigan fits properly.
Abbreviations and Stitch Definitions
Let me break down every stitch you will use in this crochet tutorial:
Pattern Notes Before You Begin
Read through these notes before starting. They will save you confusion later.
1. Color placement varies. Looking at the finished cardigan, some squares start with blue centers, others with cream, and others with taupe. This creates the beautiful patchwork effect. I will give you color combinations to follow.
2. All squares use the same basic pattern. Only the colors change.
3. Join as you go or seam later. You can either join squares as you complete them, or make all squares first and seam them together at the end. I prefer making all squares first so I can arrange them exactly how I want.
4. The scalloped border is added last. It ties everything together beautifully.
How to Crochet the Basic Granny Square
This is your foundation for the entire cardigan. Once you master this, you are golden.
Round 1: With your starting color, make a magic ring. Ch 3 (counts as first dc), work 2 dc into the ring, ch 2, *work 3 dc into ring, ch 2* three more times. Sl st to top of beginning ch-3 to join. (4 clusters of 3 dc, 4 corner ch-2 spaces)
Round 2: Sl st into next 2 dc and into the corner ch-2 space. Ch 3 (counts as dc), 2 dc in same space, ch 1, *3 dc in same corner space, ch 2, 3 dc in next corner ch-2 space, ch 1* three times, 3 dc in first corner space, ch 2. Sl st to top of beginning ch-3. (8 clusters total, 4 corner ch-2 spaces, 4 side ch-1 spaces)
Round 3: Change color if desired. Sl st to corner ch-2 space. Ch 3, 2 dc in same space, ch 1, 3 dc in same corner, ch 2, *3 dc in next ch-1 space, ch 1, (3 dc, ch 2, 3 dc) in corner ch-2 space, ch 1* around. Sl st to join. (12 clusters total)
Round 4: Continue the established pattern, working (3 dc, ch 2, 3 dc) in each corner and (3 dc, ch 1) in each side space. Change color if following a color sequence. (16 clusters total)
Round 5: Final round. Complete one more round in the established pattern. Fasten off and weave in ends. (20 clusters total)
Your finished square should measure approximately 5 inches.
Square Color Combinations
Here are the color combinations I used. You will need to make 44 squares total.
Combination 1 (make 16 squares):
Combination 2 (make 14 squares):
Combination 3 (make 14 squares):
Feel free to adjust these combinations based on your yarn stash. The key is varying your placement so the finished piece looks intentionally mismatched.
Cardigan Construction Layout
Now for the fun part. Here is how to arrange your squares.
Back Panel: 4 squares wide by 5 squares tall (20 squares total)
Left Front Panel: 2 squares wide by 5 squares tall (10 squares total)
Right Front Panel: 2 squares wide by 5 squares tall (10 squares total)
Sleeves: Each sleeve uses approximately 12 squares arranged in a rectangular shape, 3 squares by 4 squares
Wait, you might be thinking, that math does not add up. You are right. The sleeves share squares with the body at the armhole join. Let me explain the assembly.
Step by Step Assembly Instructions
Step 1: Block all your squares.
Wet blocking gives the best results. Soak your squares in lukewarm water, gently squeeze out excess moisture, and pin each square to your blocking mat at exactly 5 inches. Let them dry completely. This step makes joining so much easier.
Step 2: Arrange your squares.
Lay out your back panel first. Play with the arrangement until you love it. Take a photo so you remember the layout.
Step 3: Join the back panel.
Using Color B (Cream) and a whip stitch or slip stitch join, connect your squares in rows first, then join the rows together. Keep your tension even.
To whip stitch: Hold two squares with wrong sides together. Insert your tapestry needle under both back loops of corresponding stitches. Pull yarn through. Repeat across.
Step 4: Join the front panels.
Create your left and right front panels the same way.
Step 5: Connect shoulders.
Place front panels against back panel, right sides together. Join the top corners, leaving the center open for the neckline. Each shoulder seam should span approximately 1.5 to 2 squares.
Step 6: Create the sleeves.
This is where it gets clever. Your sleeves are rectangles that attach at the armhole opening. Join your sleeve squares into a 3 by 4 rectangle. Fold in half lengthwise and seam the underarm. Attach the open end to the armhole, easing to fit.
Step 7: Seam the sides.
Join the front panels to the back panel along the sides, from the bottom edge up to the sleeve attachment point.
Adding the Scalloped Border
The border transforms your cardigan from handmade to polished and professional looking.
Using Color B (Cream), join yarn at the bottom corner of the right front panel.
Row 1: Sc evenly around the entire front opening and neckline. Work approximately 3 sc per row along the sides of each square and 1 sc in each stitch along the top and bottom edges. Sl st to join if working in the round, or turn if working flat.
Row 2 (Scallop Row): Ch 1, sc in first st, *skip 2 sts, 5 dc in next st (this creates the scallop shell), skip 2 sts, sc in next st* around. Adjust your stitch skipping as needed to make the scallops lay flat.
Fasten off. Weave in all ends.
Repeat the scalloped border around the bottom hem and the cuff of each sleeve.
Finishing Touches
Weave in every single end. I know, I know. This is the tedious part. Put on a good podcast and power through. Your future self will thank you.
Give it a final light steam block to help the border lay flat and the seams settle.
Try it on! Do a little spin. You made a wearable garment with your own two hands. That is incredible.
Tips for Customizing Your Cardigan
Want to make this crochet pattern your own? Here are some ideas.
Change the length. Add another row of squares to the bottom for a longer cardigan, or remove a row for a cropped look.
Switch up the colors. Imagine this in warm autumn tones, soft pastels, or bold jewel colors.
Add pockets. Make two extra squares and seam them onto the front panels. Instant cozy pockets.
Try different square patterns. Solid granny squares, sunburst squares, or even solid double crochet squares would all work beautifully.
Common Questions
How long does this cardigan take to make?
Most crocheters complete this project in 20 to 30 hours, depending on your speed. The repetitive nature makes it perfect for working on during TV time.
Can beginners make this?
If you have made granny squares before and feel comfortable seaming, yes. If you are brand new to crochet, I would suggest practicing a few granny squares first.
What if my squares are different sizes?
Blocking helps even out minor size differences. If some squares are significantly off, check your tension and adjust your hook size.
I really hope you love making this coastal blue granny square patchwork cardigan as much as I loved designing it. Thank you for trusting me with your crafting time. If you make one, I would absolutely love to see it. Tag me on Instagram or share in my Facebook group.
If this pattern sparked some inspiration, go ahead and save it to your Pinterest boards so you can find it whenever you are ready to start. And please drop a comment below if you give it a try. I read every single one, and hearing about your projects genuinely makes my day.
You Might Also Like
- Coral Peach Tie Front Crochet Cardigan Free Pattern
- Pink Strawberry Couple Amigurumi Free Crochet Pattern
- Ocean Teal Woven Purse on Linen Free Pattern
- Dusty Rose Mesh Crochet Sneaker Boots Free Pattern