29 Free Crochet Christmas Star Patterns to Save for Your Next Project

Looking for free crochet Christmas star patterns? These 29 designs range from hanging ornaments and gift toppers to table decorations, cushions and a tree topper. Choose a small flat star or a larger project with shaping and assembly.
The patterns use US crochet terminology. Check the difficulty and construction before choosing: a coaster calls for a different yarn and finish from a lace window star or a stuffed decoration.
For more ideas that build on this collection, explore crochet Christmas ornament patterns.
Before You Start
All stitch terms in this collection are US crochet terms. Read the chosen patternâs yarn, hook and size notes before starting, especially if you usually follow UK instructions. UK and US stitch names can describe different stitches.
Match the yarn to the job. Cotton gives lace stars, gift toppers and table pieces a defined edge, while a softer yarn may suit a stuffed star or blanket. If you substitute yarn, check your measurements before making fitted items such as the cushion cover or tree topper sleeve.
Plan the finish as well as the stitching. Weave in ends securely on pieces that will be handled, and let blocked openwork stars dry fully before hanging them. Keep detachable parts and long hanging loops away from babies and young children.
Crochet terminology: This article uses US crochet terms. Check the abbreviations for each project.
Five-Point Hanging Star Ornament

This flat five-point star is a tree ornament with a solid centre and tapered points. Its simple outline is easy to see among the branches, while the cream star and narrow red loop give it a classic Christmas look.
It also makes a reusable gift topper or a small accent for a festive garland. The design suits a confident beginner looking to practise an even, firm fabric: a centre that holds its shape helps the points keep their outline when the star is hanging.
Five-Point Hanging Star Ornament

Quick-reference card. Follow the complete written instructions below.
Materials
- Cream DK cotton yarn: A small amount for the star
- Red DK cotton yarn: A short length for the hanging loop
- 3 mm crochet hook: Use a smaller hook if needed to make a firm fabric
- Yarn needle and scissors: For fastening off and weaving in ends
- Blocking mat and rustproof pins: For shaping the five points
Size and Fit
One small ornament. Aim for approximately 7 cm from tip to tip; the finished size will vary with yarn and tension.
Gauge
Gauge is not critical. Work tightly enough that the centre lies flat and the points feel firm.
Abbreviations
US crochet terms.
- ch = chain
- inc = work 2 sc in one stitch
- sc = single crochet
- sc2tog = single crochet 2 stitches together
- sl st = slip stitch
- st = stitch
Pattern
- Centre, Round 1 With cream yarn, make a magic ring. Work 10 sc into the ring, pull it closed and sl st to the first sc to join. (10 sc)
- Centre, Round 2 Ch 1 (does not count as a st). Inc in each sc around; sl st to the first sc to join. (20 sc)
- Centre, Round 3 Ch 1 (does not count as a st). Repeat [sc in next sc, inc in next sc] 10 times; sl st to the first sc to join. Fasten off. (30 sc)
- Mark the point bases Number the 30 sc of Round 3 in working order, ignoring the starting chains and joining slip stitches. The five point bases are stitches 1â6, 7â12, 13â18, 19â24 and 25â30.
- Points, Row 1 With cream yarn, join in the first stitch of a point base. Sc in that stitch and in each of the next 5 stitches of the same base; ch 1 and turn. (6 sc)
- Points, Row 2 Sc2tog, sc in each of the next 2 sc, sc2tog; ch 1 and turn. (4 sc)
- Points, Row 3 Sc2tog twice; ch 1 and turn. (2 sc)
- Points, Row 4 Sc2tog. Fasten off. (1 sc)
- Complete the star Repeat Point Rows 1â4 on each of the other four marked bases. Every stitch of Round 3 is used once as a point-base stitch.
- Red hanging loop Join red yarn with a sl st in the final sc at the tip of one point. Ch 30, then sl st into the same tip stitch to form a loop. Fasten off securely.
Finishing
- Weave in all ends, taking care not to pull the centre out of shape.
- Lightly dampen the cream star. Pin the centre flat and gently pin out all five tips; leave it to dry fully before hanging.
Helpful Tips
- Count only the sc of Round 3 when dividing the point bases; joining slip stitches are not part of the 30-stitch perimeter.
- If a point curls, ease its stitches into shape while damp rather than stretching its tip sharply.
Granny Star Coaster

This Granny Star Coaster brings the familiar texture of a granny motif to a clearly defined five-point star. The clustered centre gives it a cosy, traditional look, while the pointed outline makes it a cheerful addition to a Christmas table.
Set one beside a favourite mug for a small festive touch, or make a few for a coordinated table setting. The open spaces between the clusters help the star shape stand out without making the design feel heavy.
Granny Star Coaster

Quick-reference card. Follow the complete written instructions below.
Materials
- DK cotton yarn: Small amounts of red and cream; use cotton for absorbency.
- Crochet hook: 4 mm, or a size that gives a flat fabric.
- Other: Yarn needle and scissors.
Size and Fit
One coaster, worked in four motif rounds plus an edging round. Finished dimensions depend on your yarn and tension; check that the centre supports the base of your intended mug.
Gauge
Exact gauge is not critical. The coaster should lie flat without its points curling or the centre cupping.
Abbreviations
US crochet terms.
- ch = chain
- dc = double crochet
- sc = single crochet
- sl st = slip stitch
- sp = space
Pattern
- Before you begin Work Rounds 1â3 in red and Rounds 4â5 in cream. Join each of Rounds 1â4 with a sl st to the top of its beginning ch 3; that ch 3 counts as the first dc. A corner is the ch-2, ch-3 or ch-4 sp between two 3-dc groups.
- Round 1 Make a magic ring. Ch 3, work 2 dc in the ring, ch 2. Work (3 dc in the ring, ch 2) four times. Pull the ring closed and join. You have five 3-dc groups and five ch-2 corner sps.
- Round 2 Sl st in each of the next 2 dc, then sl st into the next ch-2 corner sp. Ch 3, work 2 dc, ch 3 and 3 dc in that same sp; ch 1. In each of the remaining four corner sps, work (3 dc, ch 3, 3 dc), ch 1. Join. You have 30 dc, five ch-3 corner sps and five ch-1 sps.
- Round 3 Sl st in each of the next 2 dc, then sl st into the next ch-3 corner sp. Ch 3, work 2 dc, ch 3 and 3 dc in that same sp. Ch 1, work 3 dc in the next ch-1 sp, ch 1. Repeat the following sequence for each of the remaining four corners: (3 dc, ch 3, 3 dc) in the corner sp; ch 1, 3 dc in the next ch-1 sp, ch 1. Join. You have 45 dc, five ch-3 corner sps and ten ch-1 sps. Fasten off red.
- Round 4 Join cream with a sl st in any ch-3 corner sp. Ch 3, work 2 dc, ch 4 and 3 dc in that same sp. Ch 1, work 3 dc in the next ch-1 sp, ch 1; work 3 dc in the following ch-1 sp, ch 1. Repeat the following sequence for each of the remaining four corners: (3 dc, ch 4, 3 dc) in the corner sp; ch 1, 3 dc in the next ch-1 sp, ch 1; 3 dc in the following ch-1 sp, ch 1. Join. You have 60 dc, five ch-4 corner sps and fifteen ch-1 sps.
- Round 5: pointed edging Sl st in each of the next 2 dc, then sl st into the next ch-4 corner sp. Work (sc, ch 3, sc) in that sp. Moving towards the next corner, work 1 sc in each dc and 1 sc in each ch-1 sp. Work (sc, ch 3, sc) in the next ch-4 corner sp. Continue in this way around the coaster, working 1 sc in every dc and ch-1 sp between corners and (sc, ch 3, sc) in each remaining ch-4 corner sp. Join with a sl st to the first sc and fasten off. You have 85 sc and five ch-3 points.
Finishing
- Weave in the red and cream ends securely.
- Shape the five points by hand, then wash and dry the coaster flat according to the yarn label.
Helpful Tips
- Keep the ch-1 spaces between granny groups open: they are the spaces used to build the next round.
- If the star cups, try a larger hook; if the edge ripples, try a smaller hook.
Six-Point Lace Star Decoration

This six-point lace star brings a delicate, openwork look to Christmas decorations. Its open centre and airy points let light through, making it especially pretty against a window or the dark green of a tree.
Smooth cotton helps the lace details show clearly, while blocking gives the points a crisp, balanced outline. The finished star is lightweight enough to hang from a branch without weighing it down.
It also works well as a small accent on a wrapped gift. Choose a colour that contrasts with its backdrop so the openwork shape remains easy to see.
Six-Point Lace Star Decoration

Quick-reference card. Follow the complete written instructions below.
Materials
- Yarn: Small amount of smooth DK cotton in white or your chosen colour
- Hook: 3 mm crochet hook, or a size that gives firm, even stitches
- Other: Yarn needle, scissors, rustproof pins and a blocking mat
Size and Fit
One size with six points. Finished width varies with yarn, tension and blocking; pin the star to an even shape without stretching the stitches out of place.
Gauge
Gauge is not critical. Keep the chain arches loose enough to lie flat and the stitches firm enough to hold their shape after blocking.
Abbreviations
US crochet terms.
- ch = chain
- sc = single crochet
- dc = double crochet
- tr = treble crochet
- sl st = slip stitch
- sp = space
Pattern
- Centre ring Ch 12 and join with a sl st in the first ch to form a ring. Take care not to twist the chain.
- Round 1: six spokes Ch 1. Work (sc in ring, ch 7) six times. Join with a sl st in the first sc. You have six sc and six ch-7 arches. The ch-1 at the start does not count as a stitch.
- Round 2: open point foundations Sl st into the first ch-7 arch. For each of the six arches, work (sc, ch 4, dc, ch 5, dc, ch 4, sc) into the arch, then sl st in the Round 1 sc immediately after it. After the sixth arch, that sl st goes into the first Round 1 sc. Fasten off. You have six groups, each with two ch-4 spaces and one ch-5 space.
- Round 3: pointed mesh tips Join yarn with a sl st in the first ch-4 space of any Round 2 group. For each of the six groups, work sc in its first ch-4 space, ch 3, (dc, tr, ch 3, tr, dc) in its ch-5 space, ch 3, sc in its second ch-4 space, then sl st into the Round 2 slip stitch between this group and the next. On the first group, work the first sc into the same space where you joined the yarn. Fasten off after the sixth group. The ch-3 space between the two tr stitches is the tip of each point.
- Hanging loop After blocking, join yarn with a sl st in the ch-3 tip space of one point. Ch 20, then sl st into the same tip space to form a loop. Fasten off securely.
Finishing
- Weave in the ends from the star, leaving the hanging-loop ends until the loop has been added.
- Dampen the star and pin it to a blocking mat. Pin the six ch-3 tip spaces at even intervals, arranging the sides symmetrically. Allow it to dry completely.
- Add the hanging loop as instructed, then weave in its ends.
Helpful Tips
- Work into the chain spaces, not into individual chains, when shaping the points.
- If the star cups, try a slightly larger hook or relax the chain stitches. Do not force it flat by overstretching during blocking.
- Use rustproof pins when wet-blocking cotton.
Eight-Point Compass Star Gift Topper

This compass-inspired Christmas star gives a wrapped gift a crisp, graphic focal point. Alternating longer and shorter rays make its shape easy to recognise, even against the texture of plain brown wrapping paper.
Itâs a lovely choice when you want a parcel decoration that feels considered without competing with the gift wrap. The star belongs with the removable ribbon, so it can be kept after the present is opened.
The pattern suits crocheters who are comfortable working small pieces and want to try a star with more definition than a simple flat motif. Its pointed outline also makes it a useful idea for coordinated Christmas parcels.
Eight-Point Compass Star Gift Topper

Quick-reference card. Follow the complete written instructions below.
Materials
- Gold DK-weight cotton yarn: A small amount for one star.
- 3 mm crochet hook: Or a hook that gives a firm fabric with clearly defined stitches.
- Gift ribbon: Long enough to wrap around the parcel, with an additional 50 cm for tying a bow.
- Tapestry needle and scissors: For weaving in ends and attaching the star.
Size and Fit
One size. The finished dimensions depend on your yarn and tension. Measure the ribbon around your parcel along its intended path, then add approximately 50 cm for a bow.
Gauge
No fixed gauge is required. Work firmly so the points hold their shape.
Abbreviations
US crochet terms.
- ch = chain
- sc = single crochet
- sl st = slip stitch
- sc2tog = Single crochet two stitches together: draw up a loop in each of the next two stitches, then yarn over and pull through all three loops.
- sc3tog = Single crochet three stitches together: draw up a loop in each of the next three stitches, then yarn over and pull through all four loops.
Pattern
- Centre, round 1 Make a magic ring. Work 8 sc into the ring, pull it closed and join with a sl st to the first sc. (8 sc)
- Centre, round 2 Ch 1; work 2 sc in each sc around. Join with a sl st to the first sc. (16 sc)
- Centre, round 3 Ch 1; repeat [sc in each of the next 2 sc, ch 4] eight times. Join with a sl st to the first sc and fasten off. You have 16 sc and eight ch-4 spaces. The beginning ch-1 and joining sl st do not count as stitches.
- Mark the spaces Starting at any ch-4 space, mark every other space for a long ray. The four unmarked spaces are for short rays.
- Long ray, row 1 Join yarn with a sl st in a marked ch-4 space. Ch 1, work 7 sc into the same space. Turn. (7 sc)
- Long ray, row 2 Ch 1, sc in each of the 7 sc. Turn. (7 sc)
- Long ray, row 3 Ch 1, sc2tog, sc in each of the next 3 sc, sc2tog. Turn. (5 sc)
- Long ray, row 4 Ch 1, sc2tog, sc in the next sc, sc2tog. Turn. (3 sc)
- Long ray, row 5 Ch 1, sc3tog. Fasten off. (1 sc)
- Remaining long rays Work long-ray rows 1â5 in each of the other three marked ch-4 spaces, joining a new strand of yarn for each ray.
- Short ray, row 1 Join yarn with a sl st in an unmarked ch-4 space. Ch 1, work 5 sc into the same space. Turn. (5 sc)
- Short ray, row 2 Ch 1, sc2tog, sc in the next sc, sc2tog. Turn. (3 sc)
- Short ray, row 3 Ch 1, sc3tog. Fasten off. (1 sc)
- Remaining short rays Work short-ray rows 1â3 in each of the other three unmarked ch-4 spaces, joining a new strand of yarn for each ray.
Finishing
- Weave in the yarn ends on the back without pulling the points out of shape.
- Lay the star flat and gently shape its alternating long and short rays. If desired, lightly dampen and leave it flat until dry.
- Wrap the ribbon around the parcel. With matching yarn and a tapestry needle, make several small stitches through the starâs centre and the ribbon, keeping the stitches clear of the bow. Secure the yarn on the back of the ribbon, then tie the bow. The star will stay with the ribbon when it is removed.
Helpful Tips
- Work each ray into its ch-4 space rather than into the individual chains.
- A firm cotton fabric helps the points stay defined. Avoid stretching the centre while weaving in ends.
- Keep the star attached to the removable ribbon, not to the wrapping paper.
Stuffed Amigurumi Christmas Star

This softly padded Christmas star brings a little dimension to a low tree branch, gift basket or shelf. Its five-point outline looks cheerful without needing extra embellishment, and the tidy edge gives it a neat, rounded appearance.
The key is balance: firm fabric helps keep the surface smooth, while modest padding lets the points hold their shape. If the star feels too full, its outline can lose definition; a gentle puff is all it needs.
Stuffed Amigurumi Christmas Star

Quick-reference card. Follow the complete written instructions below.
Materials
- Yarn: Small amount of yellow DK cotton or acrylic yarn
- Crochet hook: 3 mm hook, or a size that produces firm stitches with no visible gaps
- Stuffing: Washable toy stuffing
- Other: Stitch markers, yarn needle and scissors
Size and Fit
One size, approximately 11 cm from tip to tip at the stated gauge. The five points are worked from consecutive groups of nine stitches, so no resizing is needed.
Gauge
Approximately 24 single crochet stitches and 26 rows to 10 cm, worked firmly. Gauge is not critical, but the fabric must be dense enough to contain the stuffing.
Abbreviations
US crochet terms.
- ch = chain
- sc = single crochet
- sl st = slip stitch
- sc2tog = single crochet two stitches together; decreases one stitch
- sc3tog = single crochet three stitches together; decreases two stitches
- st(s) = stitch(es)
Pattern
- Before you begin Make two identical faces. Work the centre of each face in continuous rounds; do not join or turn. Mark the first stitch of each round and move the marker up as you work. Chains used to turn the points do not count as stitches.
- Centre, Round 1 Make a magic ring and work 5 sc into it. Pull the ring closed. (5 sts)
- Centre, Round 2 Work 3 sc in each stitch around. (15 sts)
- Centre, Round 3 Repeat [sc in next st, 3 sc in next st, sc in next st] five times. (25 sts)
- Centre, Round 4 Repeat [sc in next 2 sts, 3 sc in next st, sc in next 2 sts] five times. (35 sts)
- Centre, Round 5 Repeat [sc in next 3 sts, 3 sc in next st, sc in next 3 sts] five times. (45 sts) Fasten off. Divide the round into five consecutive groups of nine stitches; each group becomes one point.
- Points, Row 1 Join yarn with a sl st in the first stitch of one nine-stitch group. Ch 1, sc in the same stitch and in the next 8 sts of that group. Turn. (9 sts)
- Points, Row 2 Ch 1, sc2tog, sc in next 5 sts, sc2tog. Turn. (7 sts)
- Points, Row 3 Ch 1, sc in each of the 7 sts. Turn. (7 sts)
- Points, Row 4 Ch 1, sc2tog, sc in next 3 sts, sc2tog. Turn. (5 sts)
- Points, Row 5 Ch 1, sc in each of the 5 sts. Turn. (5 sts)
- Points, Row 6 Ch 1, sc2tog, sc in next st, sc2tog. Turn. (3 sts)
- Points, Row 7 Ch 1, sc3tog. Fasten off. (1 st) Repeat Rows 1â7 on each of the other four nine-stitch groups. Make the second face in the same way.
- Join and stuff Weave in the face-making ends. Place the faces together with right sides facing out and their points aligned. Starting at a valley, join the yarn and work through both layers: make 1 sc in each of the 7 row ends up the side of a point, 1 sc through both apex stitches, and 1 sc in each of the 7 row ends down its other side. Repeat around the remaining points, aiming for 15 joining sc per point. Leave the last point open while you add a little stuffing to the centre and each point. Finish joining its edges, adjusting the stuffing as you close. Sl st to the first joining sc and fasten off.
- Optional hanging loop At an apex while working the joining seam, ch 20 after making the apex sc, then sl st into that same joining sc. Continue the seam as written.
Finishing
- Weave in the joining end securely.
- Gently shape the points with your fingers. The star should feel softly padded rather than tightly packed.
Helpful Tips
- If stuffing shows through the faces, use a smaller hook before making both panels.
- Keep the joining stitches even at the valleys; adding extra stitches there can blur the five-point outline.
- Use only a small pinch of stuffing in each point so the tips retain their shape.
Crochet Star Tree Topper

A tree topper needs to look crisp from across the room and stay upright once the branches are dressed. This five-point crochet star has a firm, flat silhouette, with a removable insert tucked between its two faces to help the points keep their shape.
A tapered sleeve sits behind the star and slips over the tree tip, so the fitting does not interrupt the front. Ties at the lower edge offer extra support around a suitable branch or stem. As tree tips vary, check the sleeve against the tree you plan to decorate before attaching it.
The insert can be taken out when the crochet needs washing or when the topper is packed away. It is a useful Christmas crochet project if you want a traditional gold star with a fitting designed for display rather than a hanging decoration.
Crochet Star Tree Topper

Quick-reference card. Follow the complete written instructions below.
Materials
- Gold DK cotton yarn: Approximately 50 g for the star, sleeve and ties.
- 2.5 mm crochet hook: Or a hook that produces a firm fabric at the stated gauge.
- Flexible polypropylene sheet: A thin plastic stationery folder works well; cut one insert after crocheting the star. Avoid sharp or brittle plastic.
- Other supplies: Stitch marker, tapestry needle, scissors and a ruler.
Size and Fit
The star is approximately 10â12 cm across at the stated gauge. The sleeve has an approximate 3 cm circumference at its closed top and 9 cm circumference at its open bottom. Check it against the intended tree tip before attaching it: the tip should enter the lower opening, with the sleeve narrowing enough to stop the topper slipping down. If necessary, add or omit a plain round between increase rounds to change the sleeve length, or work additional evenly spaced increases for a wider lower opening.
Gauge
Approximately 26 sc and 28 rounds or rows per 10 cm in firm cotton fabric. Exact gauge is less important than a star that holds its shape and a sleeve that fits the tree.
Abbreviations
US crochet terms.
- ch = chain
- sc = single crochet
- sc2tog = single crochet two stitches together; one decrease
- sl st = slip stitch
- st(s) = stitch(es)
Pattern
- Before you begin Make two identical star faces. Work their centres in continuous rounds, marking the first stitch of each round. For the points, turn after every row; a turning ch 1 never counts as a stitch.
- Star face centre â rounds 1â3 Round 1: Work 10 sc in a magic ring. (10 sts) Round 2: Work 2 sc in each st. (20 sts) Round 3: Repeat (1 sc, 2 sc in next st) around. (30 sts)
- Star face centre â rounds 4â5 Round 4: Repeat (5 sc, 2 sc in next st) five times. (35 sts) Round 5: Repeat (6 sc, 2 sc in next st) five times. (40 sts) Do not join. Divide the 40 stitches into five consecutive groups of eight, using markers if helpful.
- First point Row 1: Sc in the next 8 sts of round 5; turn. (8 sts) Row 2: Ch 1, sc across; turn. (8 sts) Row 3: Ch 1, sc2tog, sc in next 4 sts, sc2tog; turn. (6 sts) Row 4: Ch 1, sc across; turn. (6 sts) Row 5: Ch 1, sc2tog, sc in next 2 sts, sc2tog; turn. (4 sts) Row 6: Ch 1, sc across; turn. (4 sts) Row 7: Ch 1, sc2tog twice; turn. (2 sts) Row 8: Ch 1, sc2tog. (1 st) Fasten off.
- Remaining points and second face Join yarn to the first unworked stitch of the next group of eight on round 5 and repeat point rows 1â8. Continue until all five groups have become points. Make a second identical face. Weave in the point ends without pulling the edges out of shape.
- Sleeve Ch 8 and sl st into the first ch to form a ring, taking care not to twist it. Work in continuous rounds and mark the first stitch. Round 1: 1 sc in each ch. (8 sts) Round 2: Sc around. (8 sts) Round 3: Repeat (1 sc, 2 sc in next st) four times. (12 sts) Round 4: Sc around. (12 sts) Round 5: Repeat (2 sc, 2 sc in next st) four times. (16 sts) Round 6: Sc around. (16 sts) Round 7: Repeat (3 sc, 2 sc in next st) four times. (20 sts) Round 8: Sc around. (20 sts) Round 9: Repeat (4 sc, 2 sc in next st) four times. (24 sts) Rounds 10â12: Sc around. (24 sts each round) Sl st in the next st and fasten off, leaving a tail to neaten the lower edge if needed.
- Fit and attach the sleeve Test the sleeve on the tree tip before assembly. With one star face wrong side up and a point at the top, centre the sleeve over its back, with the narrow starting ring against the face and the wide opening directed down between the two lower points. Sew the eight stitches of the narrow rim securely to the back face around its centre, catching only that face. The star face covers this end of the sleeve, forming a cup; keep the wide bottom opening clear.
- Join the star faces Place the faces wrong sides together, matching all five points and keeping the sleeve outside the star. Leave one sloping side of a lower point open as the insert opening. Starting at that pointâs tip, work sc through both faces along the other side of that point and around the remaining outline, stopping at the notch at the far end of the unjoined side. Work approximately one joining sc through both layers at each row-end along a point side, one at each tip stitch and one in each notch. Adjust stitch placement where needed to keep the edge flat. Fasten off; do not sew the opening shut.
- Insert and closures Trace the joined star onto paper and draw a second outline approximately 3â5 mm inside its stitched edge. Cut the flexible plastic to the inner outline, rounding every tip and corner. Gently flex and feed the insert through the open side, then flatten it inside the star. Make a closure cord with ch 30; fasten off and weave it back and forth through the opposing edge stitches of the opening. Tie it in a bow so the insert remains removable. Make two more ch-30 cords and secure one to each side of the sleeveâs wide lower rim. Tie these around a suitable branch or stem below the tree tip when displaying the topper.
Finishing
- Check that the insert sits within the seam without pushing the crochet points out of shape. Trim and round it further if necessary.
- Weave in remaining yarn ends. To remove the insert, undo the bow at the star edge and slide the plastic out before washing the crochet.
- Place the sleeve over the tree tip and tie the lower cords securely but removably. Adjust the star so its upper point stands upright.
Helpful Tips
- Firm cotton and a close stitch gauge help the points retain their outline.
- Test the sleeve on the actual tree before sewing it to the star; artificial tree tips vary considerably.
- Keep the plastic insert away from heat and use an appropriate, flame-safe light source near the topper.
Star-in-a-Square Blanket Block

A star motif can be awkward to join directly into a blanket: its points leave an uneven edge. This block keeps the star visible at the centre while the background forms a square that can sit neatly alongside other blocks.
The interesting part is the transition from the starâs pointed outline to straight sides. Take time to identify the edge of each point before adding the background; consistent placement helps the square lie flat and keeps the motif clear. Itâs a satisfying choice if youâre comfortable working into row ends and want a Christmas block that can become part of a larger blanket.
Star-in-a-Square Blanket Block

Quick-reference card. Follow the complete written instructions below.
Materials
- Smooth aran-weight blanket yarn: Cream for the star and blue for the background; use the same yarn weight for both colours.
- Crochet hook: 5 mm, or a size that produces a fabric you like.
- Notions: Stitch marker, yarn needle and scissors.
Size and Fit
Makes one square blanket block. Finished dimensions depend on your yarn, hook and tension; make all blocks with the same materials and check that their edges match before joining. The final round has 25 stitches between each pair of corner spaces.
Gauge
An exact gauge is not required. Check that the square lies flat; change hook size if the fabric cups or ripples.
Abbreviations
US crochet terms.
- ch = chain
- sc = single crochet
- hdc = half double crochet
- dc = double crochet
- sc2tog = single crochet two stitches together
- st(s) = stitch(es)
- sl st = slip stitch
Pattern
- Star centre, round 1 With cream, make a magic ring. Work 6 sc into the ring. Join with a sl st to the first sc and pull the ring closed. Do not turn. (6 sts)
- Star centre, round 2 Ch 1, work 2 sc in each st, and join to the first sc. The starting ch does not count as a st. (12 sts)
- Star centre, round 3 Ch 1, work 2 sc in each st, and join to the first sc. (24 sts)
- Star centre, round 4 Ch 1, repeat [sc in each of the next 3 sts, 2 sc in the next st] six times. Join to the first sc. (30 sts)
- Star points, row 1 Divide round 4 into five consecutive groups of 6 sts; a marker in the first st of each group may help. For the first point, ch 1 and sc in each of the first 6 sts. Turn. (6 sts)
- Star points, rows 2â6 Row 2: Ch 1, sc2tog, sc in each remaining st; turn. Repeat this row four more times, making rows of 5, 4, 3, 2 and finally 1 st. Fasten off, leaving the last st as the tip.
- Remaining star points Join cream in the first unworked st of the next group of 6 round-4 sts. Work point rows 1â6 as above, beginning row 1 with ch 1. Repeat for all five groups, using every round-4 st once. Fasten off and weave in the cream ends.
- Number the star-edge anchors Lay the star flat. Each point has 11 edge anchors: the five row ends going up one side, its single tip st, and the five row ends coming down the other side. Starting at a row-1 end beside a gap, number these anchors 1â55 clockwise around the star. Each run of 11 belongs to one point; anchors 6, 17, 28, 39 and 50 are the tips. Work into one edge loop or row-end space at each anchor, without adding stitches between anchors.
- Blue squaring round Join blue at anchor 1. At each of anchors 1, 15, 29 and 43 work (2 dc, ch 2, 2 dc) for a corner, regardless of the stitch otherwise specified for that anchor. At every other anchor, work according to its position within its point’s run of 11: dc at positions 1â3 and 9â11; hdc at positions 4â5 and 7â8; sc at position 6, the tip. At anchor 52 only, work 2 hdc instead of 1 hdc. Continue through anchor 55 and join with a sl st to the first dc. Do not turn. (68 sts and four ch-2 corner spaces; 17 sts between corner spaces on each side)
- Straight border, round 1 Sl st across the next dc and into the first ch-2 corner space. Ch 2 (does not count as a st). Work (2 dc, ch 2, 2 dc) in that corner space. Dc in every st to the next corner space. Repeat the corner group and side stitches around; after the fourth corner group, dc in the remaining sts to the beginning. Join to the first dc. (84 sts and four ch-2 corner spaces; 21 sts between corner spaces on each side)
- Straight border, round 2 Sl st across the next dc and into the first ch-2 corner space. Ch 2 (does not count as a st). Work (2 dc, ch 2, 2 dc) in that corner space. Dc in every st to the next corner space. Repeat around as for the previous round and join to the first dc. Fasten off. (100 sts and four ch-2 corner spaces; 25 sts between corner spaces on each side)
Finishing
- Weave in the blue ends without drawing the corners tight.
- Gently shape or block the piece into a square, keeping the cream star visible and the four blue sides straight.
- For a blanket, make additional blocks with the same yarn and hook, then join corresponding 25-stitch sides and corner spaces.
Helpful Tips
- Mark the four corner anchors before starting blue. They are spaced around the star rather than placed at four star tips.
- The shorter stitches near most star tips and taller double crochets towards the gaps help the blue round fill the spaces between points.
- If a row-end anchor is hard to see, lay the point flat and count its five side row ends from the base towards the tip.
Filet Star Christmas Pennant

This filet star pennant uses the contrast between open mesh and filled areas to make a five-point star appear in a single colour. The narrowing sides give it a triangular silhouette that works well as a Christmas wall or window decoration.
The design is a good choice if you enjoy charted crochet and want to explore how a picture can emerge from stitch placement rather than colour changes. As the pennant narrows, it helps to keep an eye on both the developing star and the open space around it.
Hang it on its own for a simple seasonal accent, or pair it with other handmade Christmas decorations. A plain background will let the mesh and star show clearly.
Filet Star Christmas Pennant

Quick-reference card. Follow the complete written instructions below.
Materials
- Size 10 cotton crochet thread: White; approximately 100 m
- 1.75 mm crochet hook: Adjust if needed to achieve the target gauge
- Tapestry needle: For sewing the channel and weaving in ends
- Hanging rod: A smooth dowel approximately 5 mm in diameter and at least 25 cm long
Size and Fit
One size. At the target gauge, the filet panel is approximately 23 cm wide across the top and 19 cm deep; the folded channel adds height above the panel. Keep the hanging rod slightly longer than the finished top edge.
Gauge
Target gauge after blocking: 10 filet cells measure approximately 11 cm across, and 10 filet rows measure approximately 9 cm vertically. Exact gauge is less important than keeping the mesh square and the top wide enough for the rod.
Abbreviations
US crochet terms.
- ch = chain
- dc = double crochet
- sc = single crochet
- sl st = slip stitch
- F = filled filet cell
- O = open filet cell
Pattern
- Read the chart Each F is one filled cell and each O is one open cell. A number after a letter tells you how many consecutive cells to work: O8 means eight open cells. Read every row from the edge where you begin working towards the opposite edge. The chart is symmetrical, so it also reads correctly after turning. Each row begins with a dc at its edge; ch 3 counts as that dc. For each F, work dc in each of the next 3 stitch positions. For each O, ch 2, skip the next 2 stitch positions, then dc in the next stitch position. A chain counts as one stitch position: when filling an open cell on the following row, work into the individual chains, not around the chain space.
- Foundation and Row 1 Ch 66. Dc in the fourth ch from the hook and in each remaining ch. The initial 3 skipped chains count as the first dc, giving 64 stitch positions: 21 filled cells plus the starting dc. Row 1 chart: F21.
- Straight-edge rows For a row that does not decrease, turn and ch 3. This counts as the edge dc above the last dc of the previous row. Work its chart cells in order.
- Decrease rows For every odd-numbered row from Row 3 to Row 21, turn and sl st into each of the next 3 stitch positions. Ch 3; this counts as the new edge dc. Work the chart cells in order, leaving the final 3 stitch positions of the previous row unworked. Each decrease row removes one cell at each side. Work slip stitches into individual chains when crossing an open cell.
- Filet chart, Rows 2â7 Row 2: F1 O19 F1. Row 3: F1 O17 F1. Row 4: F1 O8 F1 O8 F1. Row 5: F1 O7 F1 O7 F1. Row 6: F1 O7 F1 O7 F1. Row 7: F1 O6 F1 O6 F1.
- Filet chart, Rows 8â14 Row 8: F1 O2 F9 O2 F1. Row 9: F1 O2 F7 O2 F1. Row 10: F1 O3 F5 O3 F1. Row 11: F1 O2 F5 O2 F1. Row 12: F1 O2 F2 O1 F2 O2 F1. Row 13: F1 O1 F2 O1 F2 O1 F1. Row 14: F1 O1 F1 O3 F1 O1 F1.
- Filet chart, Rows 15â21 Row 15: F1 O5 F1. Row 16: F1 O5 F1. Row 17: F1 O3 F1. Row 18: F1 O3 F1. Row 19: F1 O1 F1. Row 20: F1 O1 F1. Row 21: F1. Fasten off.
- Hanging channel Make a separate strip: ch 65. Row 1: sc in the second ch from the hook and in each ch across (64 sc). Rows 2â12: ch 1, turn, sc in each sc across (64 sc). Fasten off, leaving a long sewing tail. Fold the strip in half lengthwise, with Rows 1 and 12 together and the fold forming the top of the channel. Sew one long edge to the front of the pennantâs 64-position foundation edge and the other long edge to the back of that same edge. Keep both short ends open and avoid sewing through the channel.
Finishing
- Weave in ends without drawing the open cells out of shape.
- Dampen and pin the pennant into a symmetrical triangle, opening the mesh and aligning the star. Let it dry completely.
- Slide the rod through the channel. Add hanging cord to the rod ends if desired.
Helpful Tips
- Place a marker at each new edge dc on decrease rows; it helps distinguish the working edge from the three slip stitches beneath it.
- Count cells at the end of every row. The filled star is made entirely by stitch placementâno colour changes are needed.
Tapestry Star Mini Stocking

This miniature stocking makes a cheerful Christmas tree decoration or a small way to present a sweet or folded note. The cream star is worked into the red fabric, giving the front a crisp motif without a separate appliqué.
The toe-to-cuff construction and shaped heel give it a recognisable stocking silhouette while leaving the top open. The colourwork needs a little attention to keep the star on the front and the fabric smooth, making this a satisfying project for crocheters ready to try a small chart.
Tapestry Star Mini Stocking

Quick-reference card. Follow the complete written instructions below.
Materials
- Smooth DK yarn: Approximately 15 g red (A) and 5 g cream (B)
- Crochet hook: 3.5 mm, or a size that gives a firm fabric
- Other: Stitch marker, yarn needle and scissors
Size and Fit
One mini-stocking size. At the suggested gauge, the 24-stitch opening measures approximately 12 cm around; the foot is approximately 6 cm from toe to heel opening. It holds a small sweet or folded note. Finished measurements depend on your yarn and tension.
Gauge
Aim for approximately 20 sc and 22 rounds per 10 cm in single crochet. A firm fabric matters more than an exact gauge for this decoration.
Abbreviations
US crochet terms.
- A, B = Red main colour, cream star colour
- BLO = Back loop only
- ch = Chain
- inc = Work 2 sc in the same stitch
- sc = Single crochet
- sc2tog = Single-crochet 2 stitches together
- sl st = Slip stitch
Pattern
- Before you begin Work joined rounds. Unless stated otherwise, ch 1 at the start of a round, work the first sc in the first stitch, and join with a sl st to that sc. Neither the starting ch nor the joining sl st counts as a stitch. Keep the start of each round at one side of the stocking: stitches 1â12 form the front and stitches 13â24 form the back. Change colour during the final pull-through of the stitch before the new colour is needed.
- Toe, rounds 1â4 With A, make a magic ring. Round 1: ch 1, work 6 sc in the ring; join. (6) Round 2: inc in each stitch. (12) Round 3: [sc in next stitch, inc in next stitch] 6 times. (18) Round 4: [sc in next 2 stitches, inc in next stitch] 6 times. (24)
- Foot, rounds 5â12 With A, work 1 sc in each of the 24 stitches for 8 rounds. Keep the round beginning at the same side of the foot.
- Heel opening, round 13 With A, ch 1, sc in the next 12 stitches across the front, ch 12, skip the remaining 12 stitches at the back and join to the first sc. Leave the skipped stitches unworked for the heel. The 12 sc and 12 chains form a 24-position round.
- Leg base, rounds 14â16 Round 14: ch 1, sc in each of the 12 front stitches, then sc in each of the 12 chains; join. (24) Rounds 15â16: with A, sc in each stitch. (24 per round)
- Star chart, rounds 17â24 Work the following chart from bottom to top, one line per round. Each line gives colours for stitches 1â11, followed by 13 stitches in A to complete the round. X = B; . = A. Round 17: X………X. Round 18: .XX…..XX. Round 19: ..XXX.XXX.. Round 20: ..XXXXXXX.. Round 21: .XXXXXXXXX. Round 22: XXXXXXXXXXX. Round 23: ….XXX…. Round 24: …..X…… Work 1 sc in each stitch throughout, changing colour as indicated. Keep B carried loosely on the inside when it is not in use, securing longer floats every few stitches without pulling the fabric in. (24 stitches each round)
- Cuff, rounds 25â29 Rounds 25â26: with A, sc in each stitch. (24 per round) Cut B after its final use and secure its end inside. Rounds 27â29: with A, sc BLO in each stitch. (24 per round) Fasten off A after round 29.
- Heel With the opening facing you, join A at the first of the 12 unworked back stitches from round 12. Heel round 1: ch 1, sc in each of those 12 stitches, then sc in each of the 12 exposed underside loops of the round-13 chains; join. (24) Heel round 2: [sc in next 2 stitches, sc2tog] 6 times. (18) Heel round 3: sc in each stitch. (18) Heel round 4: [sc in next stitch, sc2tog] 6 times. (12) Heel round 5: sc2tog 6 times. (6) Fasten off, thread the tail through the front loops of the remaining 6 stitches and pull closed.
- Hanging loop Join A at a stitch on the back edge of the cuff. Ch 16 and sl st into the same cuff stitch to form a loop. Fasten off securely.
Finishing
- Weave in all ends on the inside, keeping the starâs cream strands hidden behind the fabric.
- Gently shape the heel and foot with your fingers. Keep the cuff opening clear for a small gift.
Helpful Tips
- Mark the first front stitch so the star remains centred on the front half of the stocking.
- When carrying cream between chart stitches, leave enough slack for the stocking to lie flat.
Corner-to-Corner Star Wall Hanging

This corner-to-corner star wall hanging makes a bold Christmas decoration without relying on lots of small details. The white star is set against a blue square, so its shape is easy to see from across the room.
The design is made from colour blocks rather than a separate star appliqué. Corner-to-corner crochet travels diagonally across the panel, so it helps to keep the chart close by and check your place whenever the working direction changes.
Itâs a good choice if youâre comfortable with basic corner-to-corner crochet and ready to try a larger colourwork picture. The finished panel hangs from a dowel, making it suitable for a wall or a spot beside the Christmas tree.
Corner-to-Corner Star Wall Hanging

Quick-reference card. Follow the complete written instructions below.
Materials
- Worsted-weight yarn: Approximately 150 m blue (B) and 100 m white (W); choose smooth yarns of similar weight.
- Crochet hook: 5 mm, or a size that gives a firm fabric.
- Wooden dowel: Approximately 40 cm long and 8â10 mm in diameter.
- Notions: Yarn needle, scissors, measuring tape and yarn for a hanging cord.
Size and Fit
One size: 13 Ã 13 C2C blocks. At the suggested gauge, the panel is approximately 32.5 cm square before the border; allow roughly 34â35 cm square after bordering. The 40 cm dowel extends beyond both sides.
Gauge
Aim for 4 C2C blocks across and 4 diagonals high to measure approximately 10 Ã 10 cm after blocking. Exact gauge is not essential, but check that the finished panel fits your dowel.
Abbreviations
US crochet terms.
- ch = chain
- dc = double crochet
- sc = single crochet
- sl st = slip stitch
- sp = space
- C2C block = one group of three dc with its ch-3 space
- B / W = blue / white
Pattern
- Read the chart Each chart position represents one C2C block. Rows are listed from top to bottom; each row has 13 positions. For example, B6 W1 B6 means six blue blocks, one white block and six blue blocks. Work diagonally, beginning at the bottom-left position. Number columns 1â13 from left to right and chart rows 1â13 from bottom to top. On diagonal d, a block is at column x and chart row d + 1 â x. Work the available positions in ascending column order on odd-numbered diagonals and descending column order on even-numbered diagonals. Diagonals 1â13 contain 1â13 blocks; diagonals 14â25 contain 12â1 blocks.
- Star chart Chart row 13: B13; row 12: B6 W1 B6; row 11: B5 W3 B5; row 10: B5 W3 B5; row 9: B1 W11 B1; row 8: B2 W9 B2; row 7: B3 W7 B3; row 6: B4 W5 B4; row 5: B4 W5 B4; row 4: B3 W3 B1 W3 B3; row 3: B2 W3 B3 W3 B2; row 2: B1 W3 B5 W3 B1; row 1: B13.
- First block and increasing diagonals With B, ch 6. Dc in the fourth ch from the hook and in each of the next two ch: one block for diagonal 1. For each of diagonals 2â13, turn and ch 6; dc in the fourth ch from the hook and in the next two ch to make the new first block. For each further block on that diagonal, sl st in the next blockâs ch-3 sp, ch 3, and work 3 dc in that same sp. Follow the chart position for each blockâs colour.
- Decreasing diagonals For each of diagonals 14â25, turn without making a ch-6 block. Sl st across the three dc of the edge block, then sl st into its ch-3 sp. Ch 3 and work 3 dc in that sp for the first block of the new diagonal. Continue across the available blocks by sl st in the next ch-3 sp, ch 3 and 3 dc in that sp. Follow the chart colours. Diagonal 25 has one B block. Fasten off.
- Colour changes A new chart position means a new block, not a new dc. At a colour change, fasten off the old colour after completing its block. Join the new colour in the ch-3 sp where the next block begins, then work that block as directed. For a new ch-6 block, join the required colour at the edge before making the chain. Weave ends into blocks of the matching colour rather than carrying yarn across contrasting areas.
- Border With B, join at a corner. Round 1: work 2 sc evenly along the outer edge of each of the 13 blocks on every side, plus 3 sc at each corner; sl st to the first sc. There are 26 sc per side, excluding corners, and 116 sc total. Round 2: sc in each sc, working 3 sc in the centre sc of each corner group; sl st to join. There are 124 sc. Fasten off and weave in ends.
- Dowel channel and hanging cord Place the panel with its star pointing upwards. Fold the bordered top edge approximately 2.5â3 cm towards the back. Using B and a yarn needle, sew the folded edge to the back of the panel, catching back loops where practical and leaving both channel ends open. Check that the dowel slides through before securing the seam. Insert the dowel. Make a chain approximately 55 cm long for the hanging cord; fasten off with tails long enough to tie securely around the exposed dowel ends.
Finishing
- Weave in all remaining ends, keeping white ends behind white blocks and blue ends behind blue blocks.
- Lightly block the panel square without stretching the channel.
- Tie the cord securely to both ends of the dowel and check that the hanging sits level.
Helpful Tips
- Mark off each completed diagonal on the chart; the working direction reverses on every diagonal.
- Keep the first block of each diagonal identifiable so you can count blocks before turning.
- Sew the channel on the back so the star remains fully visible from the front.
If youâd like to keep building your crochet skills, take a look at filet crochet Christmas patterns.
Mosaic Star Cushion Cover

This Mosaic Star Cushion Cover brings a bold Christmas motif to a familiar square shape. The cream star stands out against the green background, while the straight edges make it easy to style alongside other cushions after the festive season.
The front uses overlay mosaic crochet to create the geometric design. Its dropped stitches give the star definition, with small green ridges that are part of the technique rather than a flaw in the fabric. This is a good choice if you enjoy a charted project that rewards close attention to colour placement.
The plain envelope back keeps the focus on the star and makes the cover easy to remove. Because the front is sized around your chosen insert, it is worth checking how your fabric lies before planning the back.
Mosaic Star Cushion Cover

Quick-reference card. Follow the complete written instructions below.
Materials
- Yarn: Smooth, durable yarn in green (A) and cream (B), both the same weight. Choose a yarn suitable for a firm cushion fabric; the amount needed depends on the finished size.
- Crochet hook: A size that gives a firm fabric with your chosen yarn.
- Cushion insert: A square insert chosen to suit the finished front, or an existing insert that can be accommodated using the sizing directions.
- Other: Tape measure, stitch markers, scissors and yarn needle.
Size and Fit
Made to measure. The charted centre is 25 stitches wide and 27 rows high; green edging brings the front to the required square size. Aim for a finished front approximately 0â2 cm smaller than your square insert in each direction. If the charted centre is already larger than your insert, choose a larger insert rather than trying to shrink the crochet.
Gauge
No fixed stitch gauge is required. Use a firm fabric, then measure the charted centre and finished front without stretching them. Follow the squaring and edging directions before making the back panels.
Abbreviations
US crochet terms.
- ch = chain
- sc = single crochet
- dc = double crochet
- BLO = back loop only
- FL = front loop
- RS = right side
- st(s) = stitch(es)
- X = a dropped dc in the indicated chart position
Pattern
- How to read the star chart The chart positions run from 1 to 25, left to right as you look at the RS. Each listed range is part of the star; all other positions are background. For every row, work across the RS from the right-hand edge, reading positions 25 down to 1. Odd-numbered rows use green A; even-numbered rows use cream B. From Row 3 onwards, work an X in background positions on green rows and in star positions on cream rows. Work sc BLO in all other positions. Thus the cream X stitches build the star while green X stitches cover cream in the background.
- Dropped dc technique For an X, yarn over and insert the hook under the unused FL of the stitch in the same position two rows below. Complete a dc. Do not also work into the stitch directly beneath the X: one dropped dc counts as one stitch in the current row. Keep the dropped dc relaxed so the fabric lies flat.
- Star chart Rows 1â4: no star positions. Row 5: 13. Row 6: 12â14. Row 7: 11â15. Row 8: 10â16. Row 9: 9â17. Row 10: 8â18. Row 11: 7â19. Row 12: 3â23. Row 13: 4â22. Row 14: 5â21. Row 15: 6â20. Row 16: 7â19. Row 17: 8â18. Row 18: 8â18. Row 19: 7â11 and 15â19. Row 20: 6â10 and 16â20. Row 21: 5â9 and 17â21. Row 22: 4â8 and 18â22. Row 23: 3â7 and 19â23. Rows 24â27: no star positions.
- Front, Rows 1â2 With A, ch 26. Row 1 (RS): sc in the second ch from the hook and in each remaining ch; 25 sts. Fasten off. Do not turn. Row 2: return to the right-hand edge with the RS facing. Join B with a standing sc in the BLO of the first st; sc BLO across; 25 sts. Fasten off. Do not turn.
- Front, Rows 3â27 For each row, return to the right-hand edge with the RS facing. Join the row colour with a standing stitch in the first chart position, following the sc BLO or X instruction for that position. Continue across all 25 positions using the star chart and colour rules. Fasten off after every row; never turn. Row 3 uses A and Rows 3â4 have no star positions, so Row 3 is 25 green X stitches and Row 4 is 25 cream sc BLO stitches. Continue through Row 27, which is 25 green X stitches. Every row ends with 25 sts.
- Square and size the front Lay the charted front flat and measure its width and height. If they differ noticeably, add plain green sc strips to the shorter dimension before edging: for more height, work equal numbers of rows across the top and bottom edges; for more width, work equal numbers of rows along the left and right edges. Start each strip row at its edge with the RS facing, fasten off at the end and do not turn. Measure again and stop when the centre is approximately square. With A, work sc evenly around all four edges, placing 3 sc at each corner. On subsequent edging rounds, work sc in each st and 3 sc in the centre st of each corner group. Keep the edging flat; adjust the spacing of stitches worked into row ends if necessary. Stop when the square front is approximately 0â2 cm smaller than the insert. Fasten off.
- Plain envelope back Make two green sc panels. For each, ch enough to match the finished front’s width when worked in sc, then work sc rows until the panel is about 60% of the finished front’s height. Check the width against the front after several rows and adjust the starting chain on a new panel if needed. Turning ch 1 does not count as a st. Make both panels the same width and height, with straight edges. Their combined height is about 120% of the front’s height, providing an overlap of about 20%.
- Assemble Place the front RS down. Lay one back panel against its top edge and the other against its bottom edge, aligning the outer edges and overlapping the free horizontal edges at the centre. Check that the overlap remains at least 3 cm. Pin or mark the corners, then sew or sc through the front and back layers around the outer perimeter. At the sides of the overlap, catch both back panels; leave their overlapping horizontal edges open. Insert the cushion through the opening.
Finishing
- Secure and weave in the row-end tails, including any concealed by the edging.
- Gently shape the front and back panels to matching widths before assembly; do not stretch the mosaic stitches out of shape.
- Check the envelope opening after assembly and reinforce the two side points where the back panels overlap if needed.
Helpful Tips
- Mark positions 1 and 25 on the front so every mosaic row begins at the same side.
- A dropped dc goes into the unused FL two rows below, not around the whole stitch.
- Measure the completed front before starting the back; its finished dimensions, rather than the original chart count, determine the back-panel size.
Pieced Five-Point Star Cushion

This red star cushion turns a familiar Christmas motif into a cheerful accent for a sofa or reading chair. Its pieced construction gives each arm a defined shape while keeping the centre comfortably soft.
The project suits crocheters who enjoy assembly as much as making the individual pieces. Accurate edge alignment helps the five points look balanced and keeps the notches between them distinct.
Pieced Five-Point Star Cushion

Quick-reference card. Follow the complete written instructions below.
Materials
- Yarn: Approximately 550â700 m of sturdy worsted-weight yarn in red; the amount needed depends on your gauge and yarn.
- Crochet hook: A size that gives a firm fabric; 4.5 mm is a suggested starting point.
- Notions: Five stitch markers, yarn needle, scissors and cushion stuffing.
- Optional inner lining: Closely woven cotton fabric, matching sewing thread and a sewing needle or machine.
Size and Fit
One size. At the stated gauge, expect a cushion approximately 40â45 cm across at its widest points before stuffing. The exact dimensions depend on yarn, gauge and how firmly the cushion is filled.
Gauge
Approximately 14 sc and 16 rows measure 10 cm in firm, unblocked single crochet. Exact gauge is not essential, but use a fabric dense enough to contain the stuffing.
Abbreviations
US crochet terms.
- ch = chain
- sc = single crochet
- sc2tog = single crochet two stitches together
- sc3tog = single crochet three stitches together
- sl st = slip stitch
- st(s) = stitch(es)
- inc = work 2 sc in the same stitch
Pattern
- Construction Make two identical faces. Each face uses one pentagonal centre and five points, so make two centres and ten points altogether. The ch 1 used to begin a round or row does not count as a stitch.
- Pentagonal centre â make 2 Round 1: Make a magic ring, ch 1, work 5 sc into the ring, tighten and sl st to the first sc. (5 sc) Round 2: Ch 1, work 3 sc in each stitch around; mark the middle sc of each group of 3, then sl st to the first sc. (15 sc) Rounds 3â11: Ch 1. Work 1 sc in each unmarked stitch and 3 sc in each marked corner stitch. Move each marker to the middle sc of its new group of 3. Sl st to the first sc to close each round. Each round adds 10 stitches; round 11 has 105 sc. Fasten off, leaving a tail for seaming.
- Tapered point â make 10 Ch 22. Row 1: Sc in the second ch from the hook and in each ch across; turn. (21 sc) Row 2: Ch 1, inc in the first stitch, sc in the next 19 stitches, inc in the last stitch; turn. (23 sc) Row 3: Ch 1, inc in the first stitch, sc in the next 21 stitches, inc in the last stitch; turn. (25 sc) Rows 4â7: Ch 1, sc in each stitch across; turn. (25 sc) Rows 8â18: Ch 1, sc2tog, sc in each stitch until 2 stitches remain, sc2tog; turn. The counts decrease by 2 each row, from 23 stitches on row 8 to 3 stitches on row 18. Row 19: Ch 1, sc3tog. (1 sc) Fasten off. Leave a long tail at the foundation edge for attaching the point.
- Assemble each face On each centre, treat one marked corner stitch and the following 20 unmarked stitches as one side. This gives five separate sides of 21 stitches each; do not count a corner stitch on two sides. Match the 21 stitches of a pointâs foundation edge to one centre side and sew them together, stitch for stitch. Attach all five points in this way. At each corner, sew the neighbouring side edges of the two points together from their foundation ends through row 3. Repeat around the face. Leave the remaining point edges free: they form the five outer arms and the notches between them. Make the second face the same way.
- Join and stuff Place the faces with wrong sides together, aligning all five tips and notches. Sew around the outer edges with a firm, even seam, leaving approximately 10 cm open along one point edge. If using a lining, trace a completed face onto paper, add a 1 cm seam allowance and cut two fabric shapes. Sew the lining pieces together 1 cm from the cut edges, leaving an opening; place the lining inside the crocheted cover. Fill evenly, working small amounts of stuffing into each tip. Close the lining opening if used, then sew the remaining crochet edge closed.
Finishing
- Weave in ends securely, keeping them inside the cushion.
- Adjust the stuffing by hand so the centre lies comfortably flat and all five points are similarly filled.
Helpful Tips
- Keep the five corner markers in place until every point has been attached; they define the non-overlapping 21-stitch sides.
- Match and pin corresponding tips and notches before joining the faces.
- If your crochet fabric has visible gaps, use the optional lining to prevent stuffing from showing through.
Five-Flap Star Gift Pouch

This little pouch makes the wrapping part of the present. Its five triangular flaps meet over the opening, with gold edges creating a star motif across the top.
The drawcord closes the pouch beneath the flaps, so the points are decorative rather than load-bearing. A small, lightweight gift will let them meet comfortably; if they have to be pulled into place, the contents are too bulky.
It is a lovely way to present a tiny keepsake or treat at Christmas, and the recipient can use the pouch again afterwards.
Five-Flap Star Gift Pouch

Quick-reference card. Follow the complete written instructions below.
Materials
- Firm cotton yarn: DK weight: approximately 35 g green for the pouch and cord, plus a small amount of gold for the edging.
- Crochet hook: 3.5 mm, or a size that makes a firm fabric.
- Other supplies: Stitch marker, yarn needle and scissors.
Size and Fit
One size. At the stated gauge, the pentagonal base is approximately 8 cm across its flats; the sides are approximately 4 cm deep before the flaps. Suitable for a small, lightweight gift. The flap points should meet without needing to be pulled tight.
Gauge
Approximately 20 sc and 22 rows or rounds per 10 cm in firm fabric. Gauge is a guide to size; use a smaller hook if the fabric has gaps large enough for the gift to show through.
Abbreviations
US crochet terms.
- ch = chain
- sc = single crochet
- sl st = slip stitch
- BLO = back loop only
- sc2tog = single crochet two stitches together
- sc3tog = single crochet three stitches together
- st(s) = stitch(es)
Pattern
- Base: rounds 1â2 With green, make a magic ring. Work in continuous rounds, marking the first stitch of each round. Round 1: 5 sc in the ring; place a removable marker in each sc to identify the five corners. Round 2: 3 sc in each marked corner stitch. Move each corner marker to the middle sc of its group of three. (15 sc)
- Base: rounds 3â6 On each of rounds 3â6, work 1 sc in every stitch except the five marked corner stitches; work 3 sc in each corner stitch and move its marker to the middle sc of the new group. Stitch totals at the end of rounds 3, 4, 5 and 6 are 25, 35, 45 and 55 sc respectively. Each edge now has 11 stitches when counted from one marked corner up to, but not including, the next.
- Pouch sides: rounds 7â12 Remove the corner markers. Round 7: sc BLO in each of the 55 stitches to turn the work upwards. Rounds 8â12: sc in each stitch around. (55 sc on every round)
- Tie path: rounds 13â15 Round 13: Repeat [sc in next 4 sts, ch 2, skip next 2 sts, sc in next 5 sts] five times. This makes one ch-2 eyelet per side and leaves 55 stitches around when the chains are counted as stitches. Round 14: sc in each sc and in each chain around. Round 15: sc in each stitch around. (55 sc on each round) Sl st in the next stitch and fasten off.
- Five flaps Divide the 55 stitches of round 15 into five consecutive groups of 11. Make one flap on each group, leaving no top stitches unused. With green, join yarn to the first unworked stitch of a group. Row 1: sc in all 11 stitches of that group; turn. Row 2: sc2tog, sc in next 7 sts, sc2tog; turn. (9 sts) Row 3: sc across; turn. Row 4: sc2tog, sc in next 5 sts, sc2tog; turn. (7 sts) Row 5: sc across; turn. Row 6: sc2tog, sc in next 3 sts, sc2tog; turn. (5 sts) Row 7: sc across; turn. Row 8: sc2tog, sc in next st, sc2tog; turn. (3 sts) Row 9: sc across; turn. Row 10: sc3tog. (1 st) Fasten off. Repeat on the other four groups, joining at the next unused top stitch each time.
- Gold edging Edge each flap separately. Join gold at one base corner of the flap. Work 1 sc in each row end along rows 1â9 up to the point, 1 sc in the row-10 tip stitch, then 1 sc in each row end along rows 9â1 down the opposite edge. (19 gold sc per flap) Fasten off. Keep the edging relaxed so the points lie flat.
- Drawcord and closure With green, chain until the chain measures approximately 60 cm without stretching. Sl st in the second chain from the hook and in each remaining chain; fasten off. Starting outside the pouch, thread the cord in through the first eyelet, out through the second, in through the third, out through the fourth, in through the fifth and back out through the first. Both ends now emerge at the first eyelet. Place the gift inside, draw the opening in gently and tie the cord. Bring the five flap points towards the centre so they form a star. Do not use the points to pull the opening closed.
Finishing
- Weave in yarn ends securely, taking care not to sew an eyelet shut.
- If the flaps curl, lightly dampen and shape them flat; let them dry before filling the pouch.
Helpful Tips
- Use a marker to keep track of the start of each continuous round; a sl st is not added between rounds.
- Check that each flap uses exactly 11 stitches from round 15 before starting the next.
- The drawcord closes the pouch; the flaps sit over that closure. If a bulky gift prevents the points from meeting comfortably, choose a smaller gift rather than tightening the flaps.
Star-Topped Crochet Bookmark

This Christmas star bookmark is designed to sit neatly in a book, with the slim strip between the pages and the star visible above the top edge. It adds a festive touch without putting a raised decoration against the paper.
The star grows directly from the strip, so there is no separate motif to attach. Its flat shape makes this a practical choice for a book you are currently reading, as well as a small handmade gift.
Choose colours to suit the recipient or the cover of a favourite book. Keeping the fabric even and flexible will help the bookmark lie comfortably between the pages.
Star-Topped Crochet Bookmark

Quick-reference card. Follow the complete written instructions below.
Materials
- Fine, smooth cotton yarn: Small amounts of blue for the strip and yellow for the star; 4-ply cotton is suitable.
- Crochet hook: 2.5 mm, or a size that gives a firm, flexible fabric.
- Tapestry needle: For weaving in ends.
- Pins and a blocking surface: For shaping the star flat.
Size and Fit
The strip is 5 sc wide and 42 rows long. At the suggested gauge, it is approximately 2 cm wide and 15 cm long, excluding the star. For a longer or shorter bookmark, change the number of strip rows; keep the final row at 5 sc.
Gauge
A planning gauge of 24 sc and 28 rows per 10 cm gives the approximate strip dimensions above. Exact gauge is not critical; use a firm fabric that sits comfortably between pages.
Abbreviations
US crochet terms.
- ch = chain
- sc = single crochet
- hdc = half double crochet
- sl st = slip stitch
- st = stitch
Pattern
- Strip, Row 1 With blue, ch 6. Sc in the second ch from the hook and in each remaining ch. Turn. (5 sc)
- Strip, Rows 2â41 Ch 1, sc in each of the 5 sc. Turn after each row. (5 sc per row)
- Strip, Row 42 Ch 1, sc in each of the 5 sc. On the final sc, make its last yarn-over with yellow and draw through to complete the stitch. Do not turn. Cut the blue yarn, leaving a tail to weave in. (5 sc)
- Star centre With yellow, sl st into each of the two preceding stitches along the top edge of Row 42. You are now in the third, or centre, stitch. Ch 4, then sl st into that same centre stitch to form a small loop attached to the strip. Work 10 sc into the ch-4 loop. Sl st into the first of those 10 sc to join. (10 sc)
- Five star points Repeat the following sequence 5 times: sl st in the next sc of the star centre, ch 4, sl st in the second ch from the hook, sc in the next ch, hdc in the last ch, then sl st in the next sc of the star centre. Each repeat uses 2 centre stitches and makes 1 point. After the fifth point, fasten off yellow.
Finishing
- Weave the blue tail along the strip and the yellow tails through stitches on the back of the star. Avoid knots or thick bundles that could press into a book.
- Lightly dampen the bookmark and pin the strip straight and all five star points flat. Leave it pinned until completely dry.
Helpful Tips
- Keep the strip stitches even rather than tight, so the bookmark lies flat between pages.
- The first and last star points meet near the join in the centre round; this is expected.
Tiny Picot Star Earrings

These tiny picot stars turn a familiar Christmas motif into a subtle festive accessory. Their open, pointed outline reads clearly even at a small scale, while a matching pair looks lovely with a winter outfit or tucked into a handmade gift.
The detail here is in the shape: evenly formed picots make the points look balanced, and a flat centre helps each star keep its outline. Working at this scale calls for a little patience, which makes this a satisfying choice if you already feel comfortable with basic crochet stitches.
Tiny Picot Star Earrings

Quick-reference card. Follow the complete written instructions below.
Materials
- Size 10 cotton crochet thread: A small amount in white, or your chosen colour.
- 1.5 mm crochet hook: Adjust only if needed to make firm, distinct stitches.
- Stitch marker: For marking the first stitch of the ring.
- Earring findings and two small jump rings: Choose findings suitable for the wearer.
- Tapestry needle, scissors and jewellery pliers: For weaving in ends and attaching the findings.
- Blocking supplies: Pins and a suitable surface; fabric stiffener is optional.
Size and Fit
One size. Make two motifs with the same thread and hook, then block them to matching outlines. Finished size depends on thread and tension.
Gauge
No fixed gauge. The central ring should lie flat, with enough space for all five stitch groups to remain distinct.
Abbreviations
US crochet terms.
- ch = chain
- sc = single crochet
- hdc = half double crochet
- dc = double crochet
- sl st = slip stitch
- st = stitch
Pattern
- First star â centre Make an adjustable ring. Work 10 sc into the ring and pull it closed. Do not join. Mark the first sc. (10 sc)
- First star â points Starting in the marked sc, *sl st in the next sc; work (sc, hdc, dc, ch 3, sl st in the first of those 3 chains to form a picot, dc, hdc, sc) in the next sc. Repeat from * four more times, working once into each of the 10 centre sc. Fasten off. You have five picots, five valley sl sts and 30 other stitches.
- Second star Repeat the centre and points exactly as for the first star.
Finishing
- Weave in the ends securely on the back without pulling the points out of shape.
- Lightly dampen both stars. Pin out all five points and let the motifs dry completely. If you use fabric stiffener, apply it lightly according to its instructions, then allow it to dry completely.
- Using jewellery pliers, pass a jump ring through the stitches at the base of one picot on each star. Add an earring finding to each jump ring and close both rings securely. Check that the stars hang with a point at the top.
Helpful Tips
- Keep the picot chains similar in size so the five points match.
- If the centre cups, try a slightly larger hook or work the ring stitches more loosely.
- Attach the jump ring through the stitches at the picot base rather than relying on a single chain loop.
Crochet Star Napkin Ring

Give each place setting a small festive detail with this crochet star napkin ring. The cream star sits against a dark green band, so its shape stands out while the overall look stays simple enough for a traditional Christmas table.
The star and band are separate pieces, making it easy to choose a band length that suits the way you fold your cloth napkins. Lay out one folded napkin before you begin: a loose roll and a compact fold can need quite different fits.
Crochet Star Napkin Ring

Quick-reference card. Follow the complete written instructions below.
Materials
- DK cotton yarn: Small amounts of cream for the star and dark green for the band; choose washable yarn.
- Crochet hook: 3.5 mm, or a size that gives a firm fabric.
- Tapestry needle and scissors: For seaming, attaching the star and weaving in ends.
Size and Fit
Sample band: approximately 3 cm wide and 10 cm around at the stated gauge, made with 24 rows. It is intended for a folded napkin measuring approximately 10 cm around. To adjust, work more or fewer band rows until the strip wraps around your intended folded napkin without stretching and its short ends just meet. The star is approximately 6 cm across at the stated gauge; sizes are estimates, not measured results.
Gauge
Approximately 20 sc and 24 turned rows per 10 cm in firm single crochet. Gauge is useful for estimating size, but check the band against the folded napkin before seaming.
Abbreviations
US crochet terms.
- ch = chain
- sc = single crochet
- sc2tog = single crochet two stitches together
- sl st = slip stitch
- st(s) = stitch(es)
Pattern
- Star centre, round 1 With cream, make a magic ring. Ch 1, work 10 sc into the ring, pull it closed and join with a sl st to the first sc. Do not count the ch 1 or joining sl st as stitches. (10 sc)
- Star centre, round 2 Ch 1, work 2 sc in each sc around and join with a sl st to the first sc. Fasten off. There are 20 sc; divide them into five consecutive groups of four for the points. (20 sc)
- Star points, row 1 For the first point, join cream with a sl st in the first sc of the first group. Ch 1, sc in the same st and in each of the next three sc of that group. Do not work into the joining sl st. (4 sc)
- Star points, rows 2â3 Row 2: Ch 1, turn, sc2tog twice. (2 sc) Row 3: Ch 1, turn, sc2tog. (1 sc) Fasten off. Repeat all three point rows on each of the remaining four groups of centre stitches, joining fresh yarn at the first stitch of each group. Leave the points unjoined.
- Band, row 1 With dark green, ch 7. Sc in the second ch from the hook and in each remaining ch. (6 sc)
- Band, rows 2â24 Ch 1, turn, sc in each of the 6 sc. Repeat until you have worked 24 rows in total for the sample band, or stop at the row that lets the strip wrap around your folded napkin without stretching, with its short ends just meeting. Do not count turning chains as stitches. Fasten off, leaving a long tail for seaming. (6 sc per row)
- Assemble Bring the band’s short ends together without overlapping or twisting the strip. Use the dark green tail to whipstitch the six stitches of one short end to the corresponding six stitches of the other, forming a ring. Place the seam at the back. Centre the star over the front of the band and sew its round centre securely to the band with cream yarn, catching the band fabric but leaving the five points free.
Finishing
- Weave in all ends securely, particularly those on the separate star points.
- Gently flatten the star with your fingers, then slip the finished ring over the folded napkin.
Helpful Tips
- Mark the 20 centre stitches in five groups of four before starting the points so each point has its own base.
- Check the band around the actual folded napkin: different folding styles change its circumference.
- Wash according to the cotton yarn’s care instructions and reshape the star while damp.
Star-Shaped Gift Bag
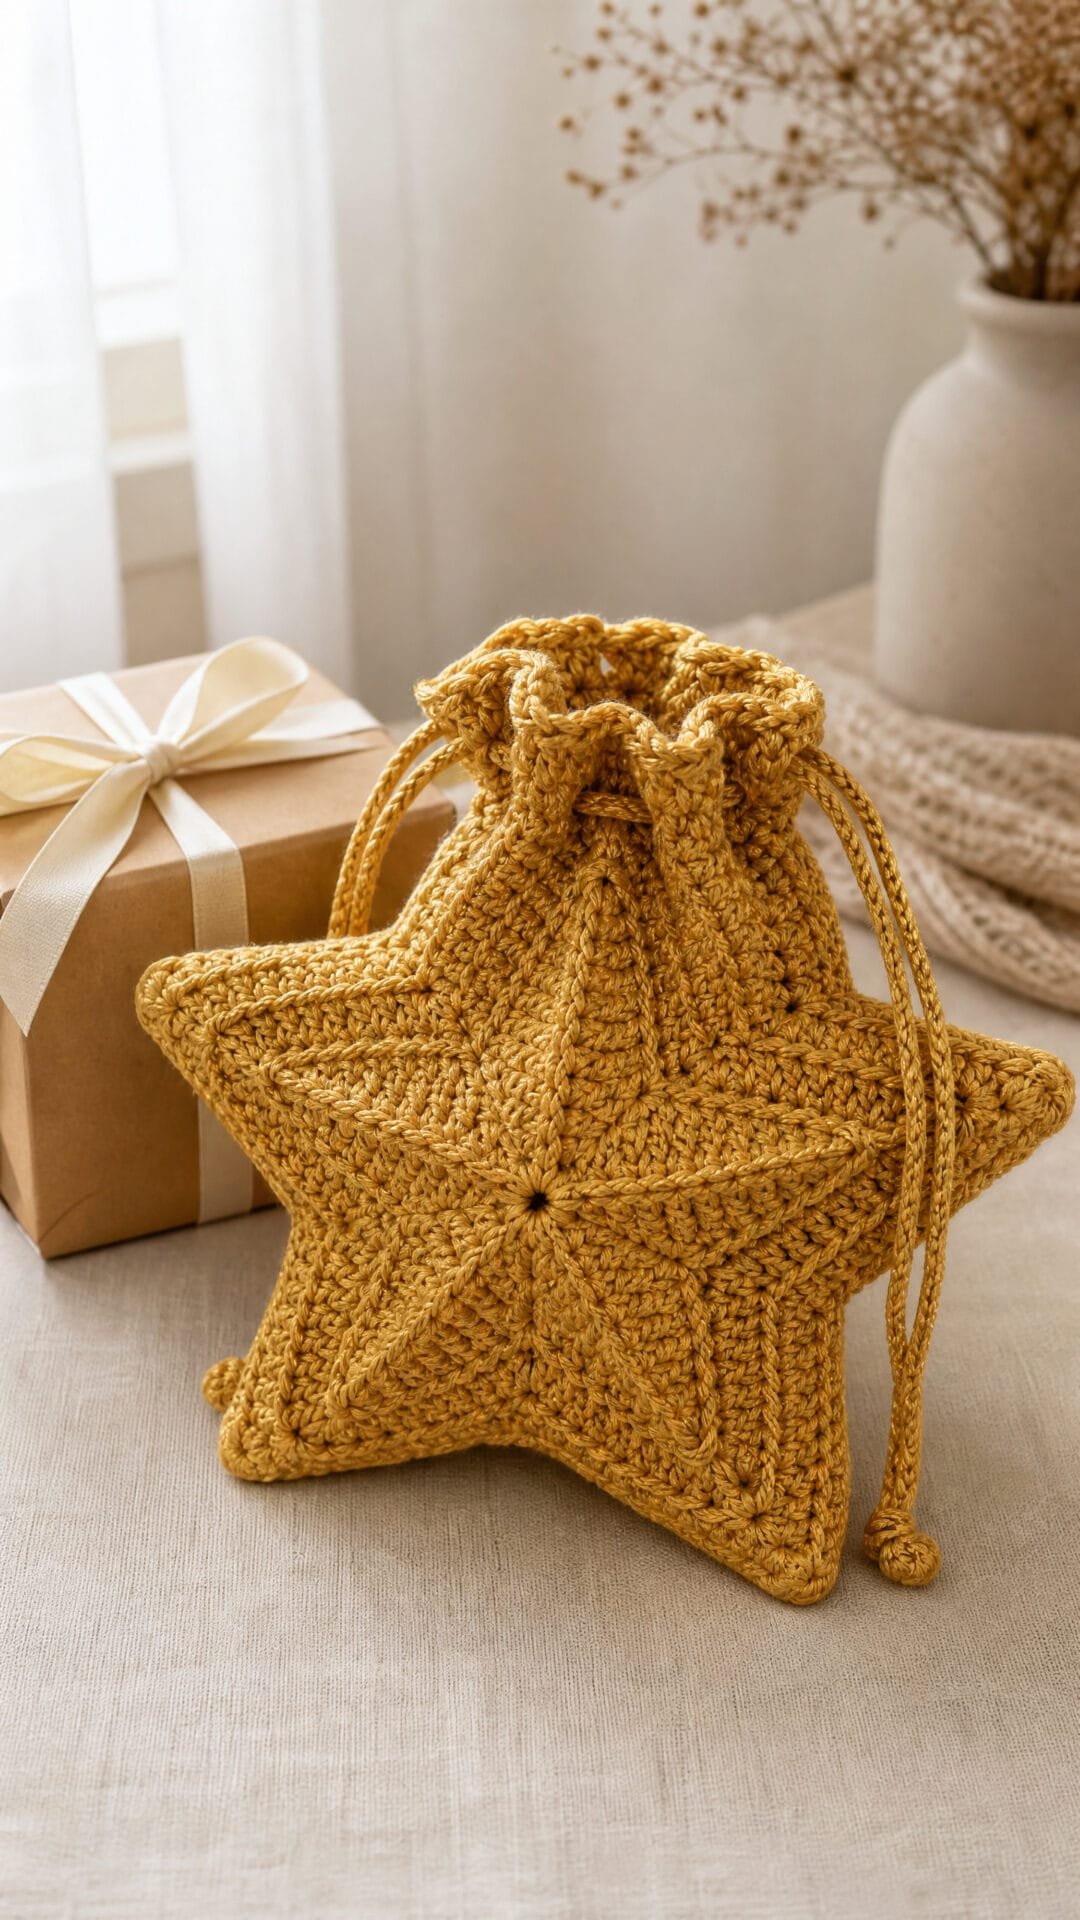
This Christmas star is a gift bag rather than a flat decoration. Its narrow gusset gives a small present room to sit inside while keeping the star outline easy to recognise.
The opening sits in the dip between the upper points, so it feels like part of the shape rather than an added flap. The drawcord draws it together, but does not seal it; wrap tiny or loose contents before putting them inside.
Matching the two star faces matters more here than it would for a decorative motif. When their edges line up, the bag keeps its shape and the opening sits evenly at the top. It is best suited to a light, compact gift rather than something bulky or heavy.
Star-Shaped Gift Bag

Quick-reference card. Follow the complete written instructions below.
Materials
- DK cotton yarn: Gold for both panels, the gusset and the drawcord; have enough for two matching panels.
- 3.5 mm crochet hook: Or a hook that gives a firm fabric without gaps.
- Stitch markers: To mark the centre corners and the ends of the opening.
- Yarn needle and scissors: For seaming and finishing.
Size and Fit
One sample construction: each panel has five points worked from 8-stitch bases; the gusset is 4 stitches wide. Finished measurements depend on your yarn and tension. The opening spans the inward-facing edges of two adjacent points.
Gauge
An exact gauge is not essential. Use the same hook and tension for both panels, aiming for fabric firm enough to hold a small gift.
Abbreviations
US crochet terms.
- ch = chain
- sc = single crochet
- sc2tog = single crochet two stitches together; decreases by one stitch
- inc = work 2 sc in one stitch
- st(s) = stitch(es)
Pattern
- Make two centre pentagons For each panel, ch 2. Round 1: work 5 sc in the second ch from the hook; join with a slip stitch to the first sc. Round 2: inc in each st; join (10 sc). Round 3: [sc in next st, inc in next st] 5 times; join (15 sc). Rounds 4â8: continue in the same way, working 2, 3, 4, 5 and then 6 sc between increases respectively. Join each round. Round 8 has 40 sc. Mark the second sc of each Round 8 increase; these five marked stitches are the corners.
- Add five points to each panel Each point uses one corner stitch and the next 7 stitches around Round 8, stopping before the following corner. Join yarn at a corner. Row 1: ch 1, sc in that corner and the next 7 sts; turn (8 sc). Row 2: ch 1, sc2tog, sc in next 4 sts, sc2tog; turn (6 sc). Row 3: ch 1, sc2tog, sc in next 2 sts, sc2tog; turn (4 sc). Row 4: ch 1, sc2tog twice; turn (2 sc). Row 5: ch 1, sc2tog (1 sc). Fasten off. Repeat at the other four corners. Turning chains do not count as stitches.
- Edge and mark the panels On each panel, choose two adjacent points as the upper-left and upper-right points; their inward-facing slopes form the opening. Join yarn at the tip stitch of the upper-left point. Work one continuous round of sc around the star, travelling the long way around to the upper-right tip before crossing the short top V. At every point, work 1 sc into each end of Rows 1â4 on each sloping side and 1 sc into the Row 5 tip stitch: 9 edging sc per point, 45 sc in all. Do not add a stitch at a valley. Join and fasten off. Starting with the edging sc at the upper-left tip and following that long route, mark stitches 1 and 37. Stitches 1â37 are for the gusset; the remaining 8 edging stitches lie on the two inward-facing slopes and stay open. Mark both panels in the same way.
- Make the gusset Ch 5. Row 1: sc in the second ch from the hook and each remaining ch; turn (4 sc). Rows 2â37: ch 1, sc in each of the 4 sts; turn, except after Row 37. Fasten off, leaving yarn for sewing. The gusset has 37 rows, one for each edging stitch along the long route on a panel.
- Assemble the bag Place the panels with their marked openings aligned. Sew one long edge of the gusset to edging stitches 1â37 of one panel, matching one gusset row to each edging stitch. Sew its other long edge to stitches 1â37 of the second panel in the same way. Keep the 8 unmarked edging stitches on each panel free. Secure the gusset’s short ends at the two upper tips without sewing across the opening.
- Make two drawcord channels Make one channel on each panel. With the opening facing you, join yarn to the first of its 8 free edging stitches. Channel Row 1: ch 1, sc in each of the 8 free edging stitches; turn (8 sc). Rows 2â4: ch 1, sc in each st; turn after Rows 2 and 3 only (8 sc). Fasten off. Fold this strip towards the inside of the bag and sew the edge of Row 4 down near the base of Row 1. Leave both short ends unsewn so the cord can pass through the tunnel.
- Add the drawcord Chain until the cord is about 35 cm long, or long enough to pass through both channels and tie securely; fasten off. Thread it through one panel’s channel and back through the other, bringing both ends out at the same side. Tie the ends together or make a bow.
Finishing
- Weave in all ends, keeping the channel entrances clear.
- Gently shape the points with your fingers. Do not stretch the opening when smoothing the bag.
Helpful Tips
- Make the second panel with the same hook and tension as the first so their edging stitches line up.
- Pin the gusset at both upper tips and around the lower points before sewing the full seams.
- Choose a gift that fits easily below the drawcord channels; pulling the cord closes the opening but does not seal it.
Openwork Star Table Centrepiece

This openwork star brings a little festive detail to the centre of a table without beads, bells or other loose embellishments. Its airy circular centre and tapered rays create a lace-like shape that looks lovely beneath a bowl of baubles.
The separate rays make this an engaging project if you enjoy working beyond a simple motif. For a tabletop display, choose a bowl that rests on the centre rather than the points, so the star can lie flat and its outline remains visible.
Openwork Star Table Centrepiece

Quick-reference card. Follow the complete written instructions below.
Materials
- Cotton yarn: Approximately 100 m of 4-ply cotton in white
- Crochet hook: 3.5 mm, or a size that gives a lace fabric you can block flat
- Other: Yarn needle, scissors, rustproof pins and a blocking mat
Size and Fit
One table centrepiece with twelve rays. Size depends on yarn, tension and blocking; allow roughly 24â28 cm across as a planning estimate, not a tested finished measurement.
Gauge
Exact gauge is not critical. Keep the mesh relaxed enough to open during wet-blocking.
Abbreviations
US crochet terms.
- ch = chain
- dc = double crochet
- sc = single crochet
- sl st = slip stitch
- sp = space
- st = stitch
Pattern
- Before you begin Work the mesh centre in joined rounds, then work one ray into each of its twelve outer ch-5 spaces. A beginning ch-3 counts as one dc. At the start of centre rounds 2â6, the beginning chain counts as one dc plus the stated chain space. Do not turn the centre. For each ray, the central chain space is the ch-2 space inside its shell.
- Centre round 1 Make a magic ring. Ch 3, work 11 dc into the ring and join with a sl st to the top of the beginning ch-3. Pull the ring closed. (12 dc.)
- Centre round 2 Ch 4 (counts as dc, ch 1). *Dc in the next dc, ch 1; repeat from * around. Join with a sl st to the third chain of the beginning ch-4. (12 dc and 12 ch-1 spaces.)
- Centre round 3 Ch 5 (counts as dc, ch 2). *Dc in the next dc, ch 2; repeat from * around, passing over the spaces between dc. Join to the third chain of the beginning ch-5. (12 dc and 12 ch-2 spaces.)
- Centre round 4 Ch 6 (counts as dc, ch 3). *Dc in the next dc, ch 3; repeat from * around. Join to the third chain of the beginning ch-6. (12 dc and 12 ch-3 spaces.)
- Centre round 5 Ch 7 (counts as dc, ch 4). *Dc in the next dc, ch 4; repeat from * around. Join to the third chain of the beginning ch-7. (12 dc and 12 ch-4 spaces.)
- Centre round 6 Ch 8 (counts as dc, ch 5). *Dc in the next dc, ch 5; repeat from * around. Join to the third chain of the beginning ch-8. Fasten off. (12 dc and 12 ch-5 spaces.)
- Ray row 1 Join yarn with a sl st in any ch-5 space of centre round 6. Ch 3, work 6 dc in the same space. Turn. (7 dc.)
- Ray row 2 Ch 3, dc in the next dc, ch 2, skip the next dc, work (2 dc, ch 2, 2 dc) in the next dc, ch 2, skip the next dc, dc in each of the final 2 dc. Turn. (8 dc and three ch-2 spaces.)
- Ray row 3 Ch 3, ch 2, work (2 dc, ch 2, 2 dc) in the central ch-2 space of row 2, ch 2, dc in the last dc, which is the top of row 2âs beginning ch-3. Turn. (6 dc and three ch-2 spaces.)
- Ray row 4 Ch 3, ch 2, work (2 dc, ch 2, 2 dc) in the central ch-2 space of row 3, ch 2, dc in the last dc. Turn. (6 dc and three ch-2 spaces.)
- Ray row 5 Ch 3, ch 2, work (dc, ch 2, dc) in the central ch-2 space of row 4, ch 2, dc in the last dc. Turn. (4 dc and three ch-2 spaces.)
- Ray row 6 Ch 3, ch 2, sc in the central ch-2 space of row 5, ch 2, dc in the last dc. Turn. (2 dc, 1 sc and two ch-2 spaces.)
- Ray row 7 and remaining rays Ch 1, sl st in the sc of row 6, passing over the intervening ch-2 space. Ch 3, then sl st in the first of those three chains to make a small picot at the tip. Fasten off. Join yarn in the next unused ch-5 space of centre round 6 and repeat ray rows 1â7. Continue until all twelve spaces hold one ray.
Finishing
- Weave in every end securely on the back of the work.
- Soak the star in water, gently squeeze out excess moisture and lay it flat on a blocking mat.
- Pin the mesh centre into an even circle and pin each picot tip outward, spacing the twelve rays evenly. Let the cotton dry completely before removing the pins.
Helpful Tips
- Mark the first outer ch-5 space if you need help keeping track of all twelve rays.
- In ray rows 3â6, work into the central ch-2 space; the side spaces are left open to form the lace outline.
- Keep a bowl centred over the mesh rather than pulling against the starâs points.
Spiral Five-Ray Star Placemat

This free crochet Christmas star pattern makes a five-point placemat rather than a small hanging decoration. A solid centre worked in a continuous spiral grows into five broad, tapered points, while raised post stitches give the rust-coloured cotton gentle swirling lines.
The pattern uses US crochet terms and is suited to crocheters comfortable with post stitches and keeping track of marked sections. Work one 24-stitch section for each point, then wash and block the placemat flat so the centre provides a steady surface for a plate.
Spiral Five-Ray Star Placemat

Quick-reference card. Follow the complete written instructions below.
Materials
- Washable cotton yarn: Approximately 200â250 m of medium-weight yarn in rust; allow extra if adjusting the size.
- Crochet hook: 4 mm, or a size that gives a firm but flexible fabric.
- Other: Five removable stitch markers, yarn needle and blocking mat or towels.
Size and Fit
One sample size, approximately 40 cm between non-adjacent tips at the suggested gauge. Each of the five points begins over 24 centre stitches. For a smaller placemat, stop the centre after an earlier round and work each point over that roundâs stitch count divided by five; decrease at both edges until two stitches remain, then work the final decrease. Stopping after an even-numbered round keeps an even starting count for each point.
Gauge
Suggested gauge: approximately 18 hdc and 11 hdc rows or rounds per 10 cm. Gauge affects the finished size. Aim for a firm fabric that lies flat rather than a loose fabric that stretches under a plate.
Abbreviations
US crochet terms.
- ch = chain
- hdc = half double crochet
- hdc2tog = half double crochet two stitches together
- FPdc = front-post double crochet, worked around the post of the indicated stitch
- BPdc = back-post double crochet, worked around the post of the indicated stitch
- RS = right side
- WS = wrong side
- st(s) = stitch(es)
Pattern
- Before you begin Work the centre in a continuous spiral without joining or turning. Mark its first stitch and move that marker up each round. The five equal sections also begin at the same positions throughout: treat the first stitch of each section as its boundary and use removable markers to keep track. An FPdc or BPdc counts as one stitch. When instructed to work an hdc in the same stitch as a post stitch, work into the top loops of that stitch as well as around its post.
- Centre, Round 1 Make a magic ring. Work 10 hdc into the ring; pull it closed. Mark the first hdc. Divide the round into five sections of 2 stitches each. (10 sts)
- Centre, Round 2 Work 2 hdc in every stitch. Mark the first new stitch of each section. Each section now has 4 stitches. (20 sts)
- Centre, Round 3 In each 4-stitch section, work 2 hdc in its first stitch, hdc in its second stitch, FPdc around its third stitch and hdc in that same third stitch, then hdc in its fourth stitch. Mark the first new stitch of each section. The five FPdc form the beginnings of the raised lines. (30 sts; 6 per section)
- Centre, Rounds 4â12 In each section, work 2 hdc in its first stitch. Work hdc in each stitch up to, but not including, the previous roundâs FPdc. Work FPdc around that FPdc and hdc in the top loops of the same stitch. Work hdc in every remaining stitch of the section. Move the section marker to its first new stitch. Repeat for all five sections in every round. Each round adds 2 stitches per section, or 10 stitches overall. After Round 12 there are 120 stitches: five sections of 24. Cut the yarn and pull the end through; do not add a joining stitch.
- Points, Row 1 With the RS facing, join yarn to the first stitch of any 24-stitch section. Ch 1. Work hdc2tog over its first 2 stitches, then work hdc across until 2 stitches remain, replacing the hdc at the sectionâs FPdc with an FPdc around that post. Work hdc2tog over the final 2 stitches. Turn. (22 sts)
- Points, Rows 2â10 Ch 1, then work hdc2tog over the first 2 stitches. Work hdc across until 2 stitches remain, replacing the ordinary hdc at the previous rowâs raised post stitch with BPdc on WS rows and FPdc on RS rows. Work hdc2tog over the final 2 stitches; turn. The counts after Rows 2â10 are 20, 18, 16, 14, 12, 10, 8, 6 and 4 stitches.
- Points, Rows 11â12 Row 11: Ch 1, hdc2tog twice across the 4 stitches; turn. (2 sts) Row 12: Ch 1, hdc2tog. (1 st) Cut yarn and fasten off. Work the same 12 point rows over each of the other four 24-stitch sections, always beginning Row 1 with the RS facing.
Finishing
- Weave in ends securely on the WS without pulling the centre or points out of shape.
- Wash according to the yarn label. Lay flat and gently pin the five tips so the centre remains level; let the placemat dry completely.
- Check that a plate sits steadily on the solid centre. If the fabric ripples, reblock without stretching the outer edges.
Helpful Tips
- Keep the five section markers in place until all points are started; they prevent a point from borrowing a stitch from its neighbour.
- The raised post stitch advances across each growing section, creating a gentle spiral rather than a straight spoke.
- If the centre begins to ruffle noticeably, try a smaller hook before continuing. Do not force it flat by stretching the points.
Raised-Star Table Runner

This Christmas table runner pairs a quiet cream background with raised red stars. The motifs are spaced along its length, giving each one room to stand out without making the design feel busy.
The stars are worked into the rectangular fabric rather than attached afterwards. Their front-post texture adds definition, while the straight sides and flat border make the runner easy to place on a dining table or sideboard.
This is an intermediate project for anyone who enjoys a little more detail than a plain runner. Careful motif placement and relaxed colour carrying help the fabric stay even, with the textured stars visible on the right side.
Raised-Star Table Runner

Quick-reference card. Follow the complete written instructions below.
Materials
- Washable cotton yarn: Worsted weight: approximately 450â600 m cream and 50â80 m red. Check the yarn label for laundering instructions.
- Crochet hook: 4 mm, or a size that gives you a firm fabric at the stated gauge.
- Other: Stitch markers, tapestry needle and scissors.
Size and Fit
One sample size: 49 stitches wide by 114 rows long before the border. At the suggested gauge, the ground is approximately 27 Ã 95 cm; the border adds approximately 1 cm to each overall dimension. The runner is intended to lie flat, not drape over the ends of a table.
Gauge
Aim for 18 hdc stitches and 12 hdc rows per 10 cm in the ground fabric. Gauge is a planning guide, not a claim of measured testing; your finished dimensions will depend on your yarn and tension.
Abbreviations
US crochet terms.
- ch = chain
- sc = single crochet
- hdc = half double crochet
- st(s) = stitch(es)
- RS / WS = right side / wrong side
- FP-cluster = Raised cluster counted as one stitch: yarn over, insert hook from front to back to front around the post of the corresponding hdc in the preceding row, and draw up a loop; yarn over and draw through two loops. Repeat this partial front-post double crochet twice more around the same post, then yarn over and draw through all four loops on the hook.
Pattern
- Ground and row numbering With cream, ch 51. Row 1 (RS): hdc in the third ch from the hook and in each remaining ch; turn. You have 49 hdc. The turning ch does not count as a stitch. For every subsequent row, ch 2, then work 49 stitches as directed and turn. Continue through Row 114, keeping Row 1 as the RS. Odd-numbered rows are worked with the RS facing; even-numbered rows are WS rows.
- Plain rows Work cream hdc in every stitch on Rows 2â12, 26â50, 64â88 and 102â114. Also work every even-numbered row within each star section entirely in cream hdc, including into the tops of the clusters. Each row ends with 49 stitches.
- Star placement Make one centred star on each of Rows 13â25, 51â63 and 89â101. In each section, the seven odd-numbered rows are star rows 1â7; the six even-numbered rows between them are plain cream rows. On every star row, count stitch positions 1â49 from the edge where you start that RS row. Work cream hdc except at the listed red positions, where you work one red FP-cluster around the post of the corresponding cream hdc in the immediately preceding WS row. Do not also work into the top of that hdc: each cluster replaces one ground stitch.
- Five-ray star chart Star row 1: red at positions 22 and 28. Star row 2: 23, 24, 26 and 27. Star row 3: 23â27. Star row 4: 22â28. Star rows 5 and 6: 24â26. Star row 7: 25. Read the chart from bottom to top as you progress along the runner. The two lower points, two side points and single upper point make the five rays.
- Colour changes on star rows Join red for the first listed position by making the final yarn over of the preceding cream hdc with red. Where red positions are consecutive, work the clusters in red. Between separated red groups, make the final yarn over of the preceding cluster with cream; carry red loosely along the WS while working the intervening cream hdc, then change back to red on the final yarn over before the next listed position. Keep the cream strand on the WS behind red stitches. Make the final yarn over of the last red cluster with cream, cut red with a tail to weave in, and finish the row in cream. Do not pull carried strands tight. Repeat this process independently on each star row.
- Flat border After Row 114, do not turn. With cream, ch 1 and work one round of sc. Beginning at the corner stitch of Row 114, work 3 sc in that corner stitch, 1 sc in each of the 47 interior stitches across Row 114, and 3 sc in its opposite corner stitch. Work 1 sc into the end of each of Rows 113 down to 2. Work 3 sc at the foundation corner beside Row 1, 1 sc into each of the 47 interior foundation-chain bases, and 3 sc at the opposite foundation corner. Work 1 sc into the end of each of Rows 2â113 along the remaining side. Slip stitch to the first sc. The border has 330 sc, counting all corner stitches; do not add a second round.
Finishing
- Weave in the red tails on the WS without drawing the star rows together.
- Weave in the cream ends. Launder according to the yarn label, then lay flat and gently straighten the border while drying.
Helpful Tips
- Mark positions 22 and 28 on the first star row to locate the seven-stitch-wide motif.
- Keep front-post clusters around the post of the preceding WS-row hdc, not around an earlier raised stitch.
- If the border waves, try a smaller hook for the border; if it pulls in, work the side stitches more loosely.
For another related project collection, browse crochet Christmas snowflake patterns.
Radiating Star Wreath

This open-centred wreath takes its shape from a covered ring and five long, tapered rays. The points give it a crisp star silhouette, while the open centre keeps it light and airy rather than solid.
It makes a striking Christmas decoration for an interior door or wall, especially where its outline can stand out against a plain background. The separate rays create a more sculptural look than a flat star motif, so keeping them evenly arranged is key to the finished effect.
This is an intermediate project for crocheters comfortable with shaping and joining pieces. The pattern below covers the construction and options for helping the rays hold their shape.
Radiating Star Wreath

Quick-reference card. Follow the complete written instructions below.
Materials
- Yarn: Approximately 100 g of gold DK-weight cotton; this allows extra yarn for joining and a hanging loop.
- Hook: 3.5 mm crochet hook, or a size that gives a firm fabric.
- Ring: One lightweight rigid ring, approximately 10 cm in outer diameter, with a narrow edge that can be covered with crochet.
- Other: Yarn needle, five stitch markers, scissors and pins. Optional: fabric stiffener or narrow felt strips for supporting the rays.
Size and Fit
One size. The 10 cm ring remains open in the centre. At the stated gauge, each ray is approximately 6 cm wide at its base and 9.5 cm long; the circle traced by the five tips is approximately 29 cm in diameter. Actual dimensions depend on your ring, yarn and blocking.
Gauge
Approximately 20 sc and 20 rows per 10 cm in flat sc fabric. A firm, even fabric matters more than an exact gauge; check that the 12-stitch ray bases fit their allocated sections of the covered ring.
Abbreviations
US crochet terms.
- ch = chain
- sc = single crochet
- sc2tog = single crochet two stitches together; decreases one stitch
- sl st = slip stitch
- st(s) = stitch(es)
Pattern
- Cover the ring Make a slip knot on the hook. Insert the hook through the centre of the ring and work 60 sc around its edge, moving the stitches together until the ring is evenly covered. Join with a sl st in the first sc; do not count the sl st as a stitch. Fasten off. Mark five consecutive sections of 12 sc, starting at stitches 1, 13, 25, 37 and 49. Position the first section at the top of the wreath.
- Ray: foundation and Rows 1â4 Make five identical rays separately. For each ray, ch 13. Row 1: sc in the second ch from the hook and in each remaining ch; 12 sc. Ch 1 and turn. Rows 2â4: sc in each st across; 12 sc. Ch 1 and turn after each row. The turning ch never counts as a stitch.
- Ray: Rows 5â10 Row 5: sc2tog, sc in the next 8 sts, sc2tog; 10 sts. Rows 6â7: sc in each st across; 10 sts. Row 8: sc2tog, sc in the next 6 sts, sc2tog; 8 sts. Rows 9â10: sc in each st across; 8 sts. Ch 1 and turn after every row.
- Ray: Rows 11â16 Row 11: sc2tog, sc in the next 4 sts, sc2tog; 6 sts. Rows 12â13: sc in each st across; 6 sts. Row 14: sc2tog, sc in the next 2 sts, sc2tog; 4 sts. Rows 15â16: sc in each st across; 4 sts. Ch 1 and turn after every row.
- Ray: Rows 17â19 Row 17: sc2tog twice; 2 sts. Ch 1 and turn. Row 18: sc in each st; 2 sts. Ch 1 and turn. Row 19: sc2tog; 1 st. Fasten off and weave in the tip end. Leave the starting tail long enough to help sew on the ray.
- Attach the rays Lay the ring flat with the marked top section uppermost. Place one ray at each marked section, with its 12-stitch foundation edge following the outer edge of those 12 ring stitches and its point facing directly away from the centre. Using the starting tail or a separate length of yarn, sew each foundation stitch securely to its corresponding covered-ring stitch. Keep the sewing on the back where possible. Adjust the five points to radiate evenly, then weave in the joining ends.
- Hanging loop At the back of the ring, behind the base of the upper ray, attach yarn securely. Ch 25, bring the chain back to the same attachment point and join with a sl st. Fasten off and weave in the ends securely.
Finishing
- Pin the wreath flat with all five rays pointing away from the open centre. Smooth the bases into gentle curves where they meet the ring.
- If the rays droop, apply fabric stiffener according to its instructions and let the wreath dry completely while pinned flat. Alternatively, sew narrow felt strips to the backs of the rays, securing their inner ends to the ring and keeping the felt behind the crochet.
- Check that the hanging loop and all five ray bases are secure before displaying the wreath on a door or wall.
Helpful Tips
- Keep the covering stitches evenly spaced: five groups of 12 make the ray placement straightforward.
- Work the rays firmly so their points hold their shape. If a foundation edge is longer than its marked ring section, try a smaller hook for the rays rather than skipping attachment stitches.
- For an outdoor-facing door, protect the cotton from rain and remove the wreath in wet weather.
Mesh Star Window Hanger

This airy star makes the most of a bright window: daylight passes through the open mesh, so its outline stands out without obscuring the view. Itâs a lovely choice when you want a Christmas decoration that feels light rather than solid.
The design grows from a pentagonal centre into five narrowing points. The openwork gives the star its delicate look, while the joined outer edge defines its shape. Blocking is especially important here, as it helps the points and the spaces between them form an even, symmetrical outline.
This is an intermediate project suited to crocheters comfortable working into chain spaces and keeping track of where each point begins. The pattern card and full instructions below provide the working details.
Mesh Star Window Hanger

Quick-reference card. Follow the complete written instructions below.
Materials
- Size 10 cotton crochet thread: Choose a firm thread in pale blue or your preferred colour.
- 1.5 mm crochet hook: Adjust the hook size if needed to make firm stitches and open chain spaces.
- Tapestry needle and scissors: For weaving in ends.
- Rustproof pins and blocking mat: For shaping the finished star.
Size and Fit
One size, with five points. The finished diameter depends on your thread, tension and blocking; pin the points at equal distances from the centre rather than stretching to a prescribed measurement.
Gauge
Gauge is not critical. Keep the single crochets firm and the ch-5 spaces open.
Abbreviations
US crochet terms.
- ch = chain
- sc = single crochet
- sl st = slip stitch
- sp = space
Pattern
- Centre, round 1 Ch 4 and join with a sl st to form a ring. Ch 1. Work (sc in ring, ch 5) five times. Join with a sl st to the first sc. You have 5 sc and 5 ch-5 spaces.
- Centre, round 2 Sl st into the first ch-5 sp. Work (sc in that sp, ch 5) four times. In each of the remaining four ch-5 spaces, work (sc in sp, ch 5) four times. Join with a sl st to the first sc; fasten off. You have 20 sc and 20 ch-5 spaces. Mark the first sc worked into each round-1 space: these five marked stitches are the corners. There are four ch-5 spaces between each marked corner and the next.
- First point, row 1 Join thread with a sl st in any marked corner. Ch 1 and sc in the same stitch. Moving towards the next marked corner, work (ch 5, sc in the next ch-5 sp) three times. Ch 5, sc in the next marked corner. Turn. This row has 5 sc and 4 ch-5 spaces.
- First point, row 2 Sc in the ch-5 sp nearest the hook. Working back across row 1, work (ch 5, sc in the next ch-5 sp) three times. Turn. This row has 4 sc and 3 ch-5 spaces.
- First point, row 3 Sc in the ch-5 sp nearest the hook. Work (ch 5, sc in the next ch-5 sp) twice. Turn. This row has 3 sc and 2 ch-5 spaces.
- First point, row 4 Sc in the ch-5 sp nearest the hook, ch 5, sc in the remaining ch-5 sp. Turn. This row has 2 sc and 1 ch-5 space.
- First point, row 5 Sc in the only ch-5 sp to form the tip. Fasten off.
- Remaining four points Repeat point rows 1â5 across each remaining group of four centre ch-5 spaces, starting at one marked corner and ending row 1 at the next. Each marked corner receives a row-1 sc from both adjoining points.
- Joined outer edging Join thread at a valley between two points. Sl st into each row-end sc along the outside of the next point, up to its tip and down its other side. Ch 1 at the tip before continuing. At each valley, sl st into both adjoining row-1 corner sc, then continue up the next point. Repeat around all five points and join to the first edging sl st. Fasten off. Keep the slip stitches loose enough that the outline can lie flat.
- Hanging thread With a separate length of cotton, make a loop through the edging ch-1 at one tip. Knot the ends securely on the back.
Finishing
- Weave in all ends without pulling the mesh out of shape.
- Dampen the star, pin the five tips evenly around the centre, and pin the valleys to define a symmetrical outline. Leave it to dry completely before unpinning.
Helpful Tips
- Mark all five corners before beginning the points; each point uses exactly four centre ch-5 spaces.
- If the edging pulls the points inward, remake it with looser slip stitches.
- Hang the star where its open mesh can catch the daylight.
Five-Point Star Baby Blanket

This five-point star baby blanket grows outwards from its centre, creating broad rays and distinct valleys. Its shaped outline makes it a striking alternative to a rectangular blanket while keeping the fabric soft and comfortable.
The changing shape calls for a little more attention than a straight-sided blanket. As it grows, the points should remain easy to identify and the valleys should look balanced; laying the work flat occasionally makes it easier to spot a change in shape.
The star looks lovely spread across a nursery chair or laid flat as a backdrop for a seasonal photograph. For use around a baby, its simple, undecorated edge avoids trailing or detachable details; follow your usual safe-sleep guidance when deciding where to use any blanket.
Five-Point Star Baby Blanket

Quick-reference card. Follow the complete written instructions below.
Materials
- DK yarn: Approximately 1,200â1,600 m of soft, washable yarn for an approximately 85 cm blanket; the amount needed will vary with gauge and yarn choice.
- Crochet hooks: 4 mm for the blanket and 4.5 mm for the flexible edging, or sizes suited to your yarn.
- Stitch markers: Five removable markers to identify the points.
- Other: Yarn needle, scissors and tape measure.
Size and Fit
Make one blanket approximately 85 cm at its widest tip-to-tip measurement. Lay it flat to measure and stop after any increase round once it is close to that width; the edging adds a little more. There is no fixed round count.
Gauge
Gauge is not critical. Make the fabric soft and flexible rather than firm, and use the tip-to-tip measurement to determine when to stop. Measure the blanket laid flat without stretching it.
Abbreviations
US crochet terms.
- ch = chain
- dc = double crochet
- sc = single crochet
- sl st = slip stitch
- sp = space
- dc3tog = Double crochet three stitches together: work an unfinished dc in each of the next three stitches, then yarn over and pull through all four loops on the hook.
Pattern
- Before you begin Work joined rounds with the right side facing. A beginning ch 2 counts as the first dc. Join each dc round with a sl st to the top of its beginning ch 2. Each increase round begins in the centre stitch of a point; the joining instructions move you there without counting the slip stitches as stitches.
- Round 1: centre Make a magic ring. Ch 2, dc in ring, ch 1; [2 dc in ring, ch 1] four times. Join to the top of the beginning ch 2 and close the ring. You have five pairs of dc separated by five ch-1 spaces.
- Round 2: establish the points Sl st into the next dc and then into the first ch-1 sp. Ch 2, 2 dc in the same sp, dc in each of the next 2 dc; [3 dc in the next ch-1 sp, dc in each of the next 2 dc] four times. Join. You have 25 dc. The middle dc of each 3-dc group is a point; mark all five.
- Round 3 Sl st into the next dc, which is the first marked point. Ch 2 and work 4 more dc in that same stitch, dc in the next stitch, then dc3tog across the next 3 stitches. Repeat [5 dc in the next marked point, dc in the next stitch, dc3tog across the next 3 stitches] four times. Join. You have 35 stitches. Move each point marker to the middle (third) dc of its new 5-dc group.
- Round 4 Sl st into each of the next 2 dc to reach the first marked point. Ch 2 and work 4 more dc in that same stitch, dc in each of the next 2 stitches, dc3tog across the next 3 stitches, then dc in the next stitch. Repeat [5 dc in the next marked point, dc in each of the next 2 stitches, dc3tog across the next 3 stitches, dc in the next stitch] four times. Join. You have 45 stitches. Move the point markers to the middle dc of each new 5-dc group.
- Round 5 and subsequent increase rounds At the start of each round, sl st into each of the next 2 dc to reach the first marked point. For Round 5, work the following sequence five times: 5 dc in the marked point, dc in each of the next 3 stitches, dc3tog across the next 3 stitches, and dc in each of the next 2 stitches. As on previous rounds, replace the first dc of the round with ch 2 and work 4 more dc in that first point. Join and move the markers to the middle dc of each new 5-dc group. For every later round, add one ordinary dc before and one after each dc3tog: Round 6 uses 4 dc before and 3 dc after; Round 7 uses 5 before and 4 after. Continue in this manner, working five repeats per round, until the blanket is close to the desired width. Each increase round adds 10 stitches.
- Flexible edging After the final increase round, switch to the larger hook. Ch 1 (does not count as a stitch). Work 3 sc in each marked point and 1 sc in every other stitch around, including each dc3tog at a valley. Join with a sl st to the first sc. Do not pull the edging tight.
Finishing
- Fasten off and weave in all ends securely, with no long tails left loose.
- Wash according to the yarn label, then lay flat and gently shape the five points and valleys. Let the blanket dry completely.
Helpful Tips
- Keep the point markers in the middle dc of each 5-dc group; the next round begins at the first marked point.
- If the edge cups, try a larger hook or relax your tension. If it waves, check that each round has exactly five point increases and five dc3tog valleys.
- For a baby blanket, avoid buttons, tassels, ties and other detachable or trailing details.
Christmas Star-Point Crown

A Christmas crown brings a little dress-up magic to festive gatherings, school celebrations and family photographs. This design has five evenly spaced peaks rising from a simple band, giving it a starry outline without looking like a flat star appliqué.
The fit is based on the wearer’s head measurement rather than an age label, so it can be made for the person who will wear it. Its defined peaks make it an appealing choice for a Christmas costume or a special place at the festive table. As the crown has a small detachable fastening, it is not suitable for children under three.
Christmas Star-Point Crown
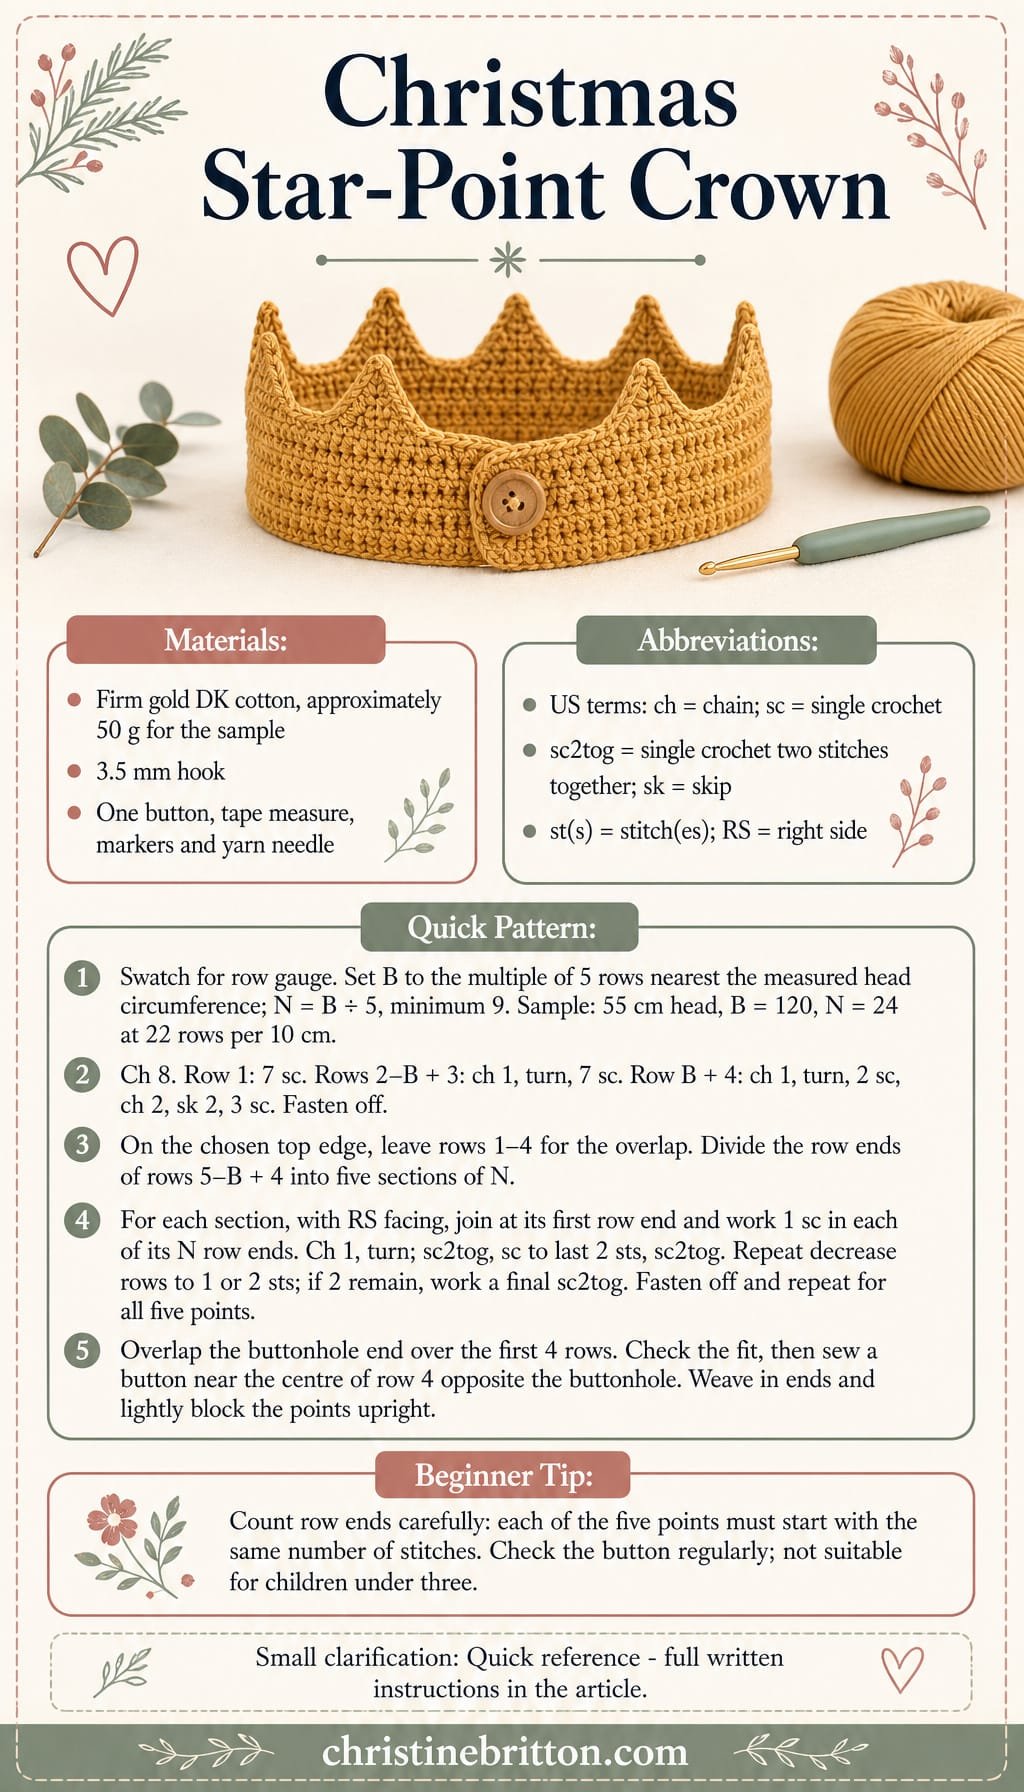
Quick-reference card. Follow the complete written instructions below.
Materials
- Firm cotton yarn: DK weight in gold; approximately 50 g for the sample size
- Crochet hook: 3.5 mm, or a size that produces a firm fabric
- Button: One button that fits securely through a ch-2 buttonhole
- Other tools: Tape measure, stitch markers and yarn needle
Size and Fit
Made to the wearer’s measured head circumference. The sample calculation is for a 55 cm head: 120 working rows give an approximately 54.5 cm fastening circumference at the stated row gauge. A further 4 rows form the overlap. Choose the nearest multiple of 5 working rows to the measured circumference; each five-row adjustment changes it by approximately 2.3 cm. Make a gauge swatch before choosing the row count.
Gauge
20 sc and 22 band rows = 10 cm in firm sc fabric. Measure the row gauge along the length of the band, without stretching.
Abbreviations
US crochet terms.
- ch = chain
- sc = single crochet
- sc2tog = single crochet two stitches together
- sk = skip
- st(s) = stitch(es)
- RS = right side
Pattern
- Calculate the band Measure the wearer’s head where the crown will sit. Using your swatched row gauge, calculate the number of rows needed for that circumference and round to the nearest multiple of 5. Call this number B, and divide B by 5 to get N, the number of row ends in each point. N must be at least 9. For the 55 cm sample, B = 120 and N = 24.
- Band Ch 8. Row 1: Sc in the second ch from the hook and in each remaining ch; 7 sc. Rows 2 through B + 3: Ch 1, turn, sc in each st; 7 sc per row. Row B + 4, the buttonhole row: Ch 1, turn, sc in the first 2 sts, ch 2, sk 2 sts, sc in the last 3 sts. Fasten off. For the sample, work 124 rows altogether. The first 4 rows form the overlap; rows 5 through B + 4 provide the top edge for the five points.
- Mark the point sections Lay the band flat with the side you want to show facing up and designate one long edge as the top. Mark the row ends at the top edge after rows 4, 4 + N, 4 + 2N, 4 + 3N, 4 + 4N and 4 + 5N. This divides the row ends of rows 5 through B + 4 into five sections of N row ends each. For the sample, each section contains 24 row ends.
- First point With the chosen RS facing, join yarn at the top of row 5. Point row 1: Work 1 sc into each row end in the first marked section; N sc. Ch 1, turn. Point row 2: Sc2tog, sc in each st until 2 sts remain, sc2tog; N â 2 sts. Ch 1 and turn. Repeat point row 2, decreasing by 2 sts on each row, until 1 or 2 sts remain. If 2 sts remain, ch 1, turn and sc2tog to leave 1 st. Fasten off. For the sample, point row 1 has 24 sts, row 12 has 2 sts and row 13 has 1 st.
- Remaining four points With the same side of the band facing you, join yarn at the first unworked row end of the next marked section. Work a point exactly as for the first, beginning with 1 sc in each of that section’s N row ends. Repeat for all four remaining sections. Do not work a point into the first 4 overlap rows.
- Fastening Wrap the band around the head with the buttonhole end over the first 4 rows. Sew the button securely to the outside of that overlap, near the top-to-bottom centre of row 4, opposite the buttonhole. Check the fit and button placement before fastening off the sewing thread.
Finishing
- Weave in all yarn ends securely.
- Lightly damp-block the five points upright and allow them to dry completely. Avoid stretching the band while it dries.
- Check that the button is firmly attached each time the crown is worn. Because it has a small detachable part, this crown is not suitable for children under three.
Helpful Tips
- Keep the point stitches firm so the peaks hold their shape; changing hook size may alter both the row gauge and the fit.
- Count band row ends rather than the visible ridges when marking the five sections.
- If the calculated band length falls between two multiples of 5, choose the closer one and check the fit before sewing on the button.
Star-Centre Crochet Bracelet

Not every Christmas star needs to hang on a tree. This bracelet turns the familiar motif into a small festive accessory, with the star as the focal point rather than part of an all-over design.
The narrow straps keep the star prominent and make the bracelet easier to fit to its wearer. The button closure is positioned separately from the motif, so the star can sit comfortably on top of the wrist.
It makes a thoughtful little gift or a cheerful addition to a Christmas outfit. If it will be worn beneath a close-fitting sleeve, check that the raised points feel comfortable before settling on the fit.
Star-Centre Crochet Bracelet

Quick-reference card. Follow the complete written instructions below.
Materials
- Smooth DK cotton yarn: Small amounts in cream for the star and red for the straps
- Crochet hook: 3 mm, or a size that produces firm stitches
- Button: Approximately 10 mm diameter
- Other notions: Stitch marker or safety pin, yarn needle and scissors
Size and Fit
Adjust to the intended wrist. Aim for a comfortable fit with about 0.5â1 cm of ease. Make both straps initially, then add rows and position the button while checking the bracelet around the wrist; do not rely on a fixed starting-chain length.
Gauge
Exact gauge is not essential. Keep the two-stitch-wide straps firm and check the fit as you work.
Abbreviations
US crochet terms.
- ch = chain
- sc = single crochet
- hdc = half double crochet
- dc = double crochet
- sl st = slip stitch
- st = stitch
Pattern
- Star centre With cream, make a magic ring. Work 10 sc into the ring, pull it closed and sl st to the first sc. For the point round, repeat the following five times: sl st in the next sc; work (sc, hdc, dc, ch 3, sl st into the first of those 3 ch, dc, hdc, sc) all in the next sc. Each ch-3 picot forms a tip. Fasten off and weave in the cream ends.
- First strap Identify the five sl sts between the star points. With red, join in the first of these sl sts. Ch 1 and work 2 sc into the same sl st. This is strap row 1. Turn; ch 1, sc in each of the 2 sc for row 2. Repeat row 2 until the strap has 12 rows in total. Leave the red yarn attached if you may need more rows.
- Second strap Join red in the third sl st between the star points, counting around from the first strap attachment. Work 2 sc into that sl st for row 1. Turn; ch 1, sc in each of the 2 sc for row 2. Repeat row 2 until this strap also has 12 rows. The selected attachments place the straps on roughly opposing sides of the five-point star.
- Adjust the length Hold the bracelet around the intended wrist with the straps extending away from the star. Add two-sc rows to the straps, checking frequently, until their ends can overlap by about 1 cm with 0.5â1 cm of ease around the wrist. Keep the straps approximately equal in length. Pin a button position on one strap about 1 cm in from its end; check that the other strap end reaches this position comfortably. Add or undo rows if needed.
- Buttonhole and button On the strap without the button, finish the final two-sc row with the yarn at its outer edge. Ch 5, then sl st into the other sc of that same final row to form a loop. Before fastening off, check that the loop passes over the button without slipping off too easily; change the number of chains if necessary. Fasten off. Sew the button securely at the marked position on the other strap, then check the closed fit.
Finishing
- Weave in all ends securely without pulling the star points out of shape.
- Gently smooth the star flat by hand. Keep the buttonhole loop clear of any woven-in ends.
Helpful Tips
- The 12-row strap lengths are a starting point for fitting, not a finished-size measurement.
- Count only the 2 sc across each strap row; turning chains do not count as stitches.
- If the picots curl, ease them into shape with your fingers rather than stretching the centre.
Five-Pocket Star Decoration

This Christmas star is both a wall decoration and a place to tuck away small surprises. Each of its five points has a shallow triangular pocket with an opening facing the centre, so the pockets remain visible when the star is hung.
The design combines a flat centre and pointed backing with separate pocket fronts. It is a good choice if you enjoy careful assembly: neat joins help the star lie flat, while a little ease in each pocket front leaves room for its contents.
Try filling the pockets with tiny folded messages or small, individually wrapped sweets for an Advent surprise or a festive gift. Keep the contents lightweight, and treat the star as a decoration rather than a toy.
Five-Pocket Christmas Star Decoration

Quick-reference card. Follow the complete written instructions below.
Materials
- DK cotton yarn: Red for the star; one small ball should be ample. Use the same yarn for the backing and pocket fronts.
- 3.5 mm crochet hook: Or a size that produces a firm fabric.
- Yarn needle and scissors: For assembly and finishing.
- Stitch markers: Five, to divide the centre into sides.
Size and Fit
One size. The centre has five 10-stitch sides, and each point has a 10-stitch base. Finished dimensions depend on your yarn and tension. For a larger or smaller star, change yarn and hook size together; use the same combination for every piece.
Gauge
Gauge is not critical. Crochet firmly enough that the pockets hold a folded note, and check that a 10-stitch point base fits one marked side of the centre.
Abbreviations
US crochet terms.
- ch = chain
- sc = single crochet
- sc2tog = single crochet two stitches together; decreases by one stitch
- sl st = slip stitch
- st(s) = stitch(es)
Pattern
- Centre Make a magic ring. Round 1: Work 5 sc into the ring; join with a sl st to the first sc. Do not turn. For every subsequent round, ch 1 (does not count as a stitch), work the round, then join with a sl st to its first sc. Round 2: 2 sc in each st (10). Round 3: (sc in next st, 2 sc in next st) five times (15). Continue increasing once in each of the five sections: round 4, (sc in next 2 sts, 2 sc in next st) five times (20); round 5, use 3 plain sc before each increase (25); round 6, use 4 (30); round 7, use 5 (35); round 8, use 6 (40); round 9, use 7 (45); round 10, use 8 (50). Fasten off. Mark the gaps after stitches 10, 20, 30, 40 and 50 of round 10. Each group of 10 stitches between gaps is one side of the centre.
- Backing points â make five Row 1: Ch 11; sc in the second ch from the hook and in each remaining ch (10). Row 2: Ch 1, turn; sc2tog, sc in next 6 sts, sc2tog (8). Row 3: Ch 1, turn; sc2tog, sc in next 4 sts, sc2tog (6). Row 4: Ch 1, turn; sc2tog, sc in next 2 sts, sc2tog (4). Row 5: Ch 1, turn; sc2tog twice (2). Row 6: Ch 1, turn; sc2tog (1). Fasten off, leaving a tail for assembly.
- Pocket fronts â make five Row 1: Ch 11; sc in the second ch from the hook and in each remaining ch (10). Row 2: Ch 1, turn; sc in each st (10). Row 3: Ch 1, turn; sc2tog, sc in next 6 sts, sc2tog (8). Row 4: Ch 1, turn; sc2tog, sc in next 4 sts, sc2tog (6). Row 5: Ch 1, turn; sc2tog, sc in next 2 sts, sc2tog (4). Row 6: Ch 1, turn; sc2tog twice (2). Row 7: Ch 1, turn; sc2tog (1). Fasten off, leaving a long sewing tail. The extra straight row gives each pocket a little fullness.
- Join the star backing Place the 10-stitch foundation edge of one backing point against each marked 10-stitch side of the centre, with all five tips pointing outwards. Using a yarn needle, sew each foundation edge to its centre side, matching one point stitch to one centre stitch. Keep the five joins flat; weave in the assembly tails.
- Add the pockets Lay one pocket front over each backing point, with its foundation edge towards the centre and its tip aligned with the backing tip. Sew the two sloping sides of each front to the corresponding sides of its backing point, easing the frontâs extra row evenly into the seams. Catch both layers securely at the tip. Do not sew the foundation edge: it is the opening, facing the centre of the star. Keep the opening clear of the seams where the points join the centre.
- Hanging loop Choose one point as the top. At the tip, centred above its pocket, pass a doubled length of yarn through the backing and pocket-tip stitches several times to reinforce the hanging point. Chain 18 with the doubled yarn, or knot a short folded strand into a loop, and secure both ends through those reinforced stitches. Weave in the ends without closing the pocket.
Finishing
- Weave in all remaining ends and gently flatten the star by hand.
- Check that all five pocket bases remain open and that the hanging loop is firmly attached.
- Hang from a hook or peg. Fill only with lightweight items, such as tiny folded notes or small, individually wrapped sweets.
Helpful Tips
- Keep the point-base seams neat so the pentagon and rays lie flat.
- The pocket fronts have one more row than the backing points; ease that small amount of fabric into the side seams rather than stretching the backing.
- Do not put unwrapped food directly into the crochet pockets. This is a decoration, not a toy.
Thick Crocheted Star Floor Mat

This five-point Christmas star brings a festive shape to the floor without the height of a plush decoration. Its dense centre and broad, tapered points give it a low profile that suits a spot beside the tree or a quiet corner.
The centre and points are made separately, so the joins can sit edge-to-edge rather than forming raised ridges underfoot. A firm fabric matters here: if it becomes loose or the seams pucker, the points are more likely to lift.
Think carefully about placement before using any crocheted floor mat. A point that catches a door or projects into a busy walkway can become a trip hazard, and the mat needs to stay put on the floor beneath it.
Thick Crocheted Star Floor Mat
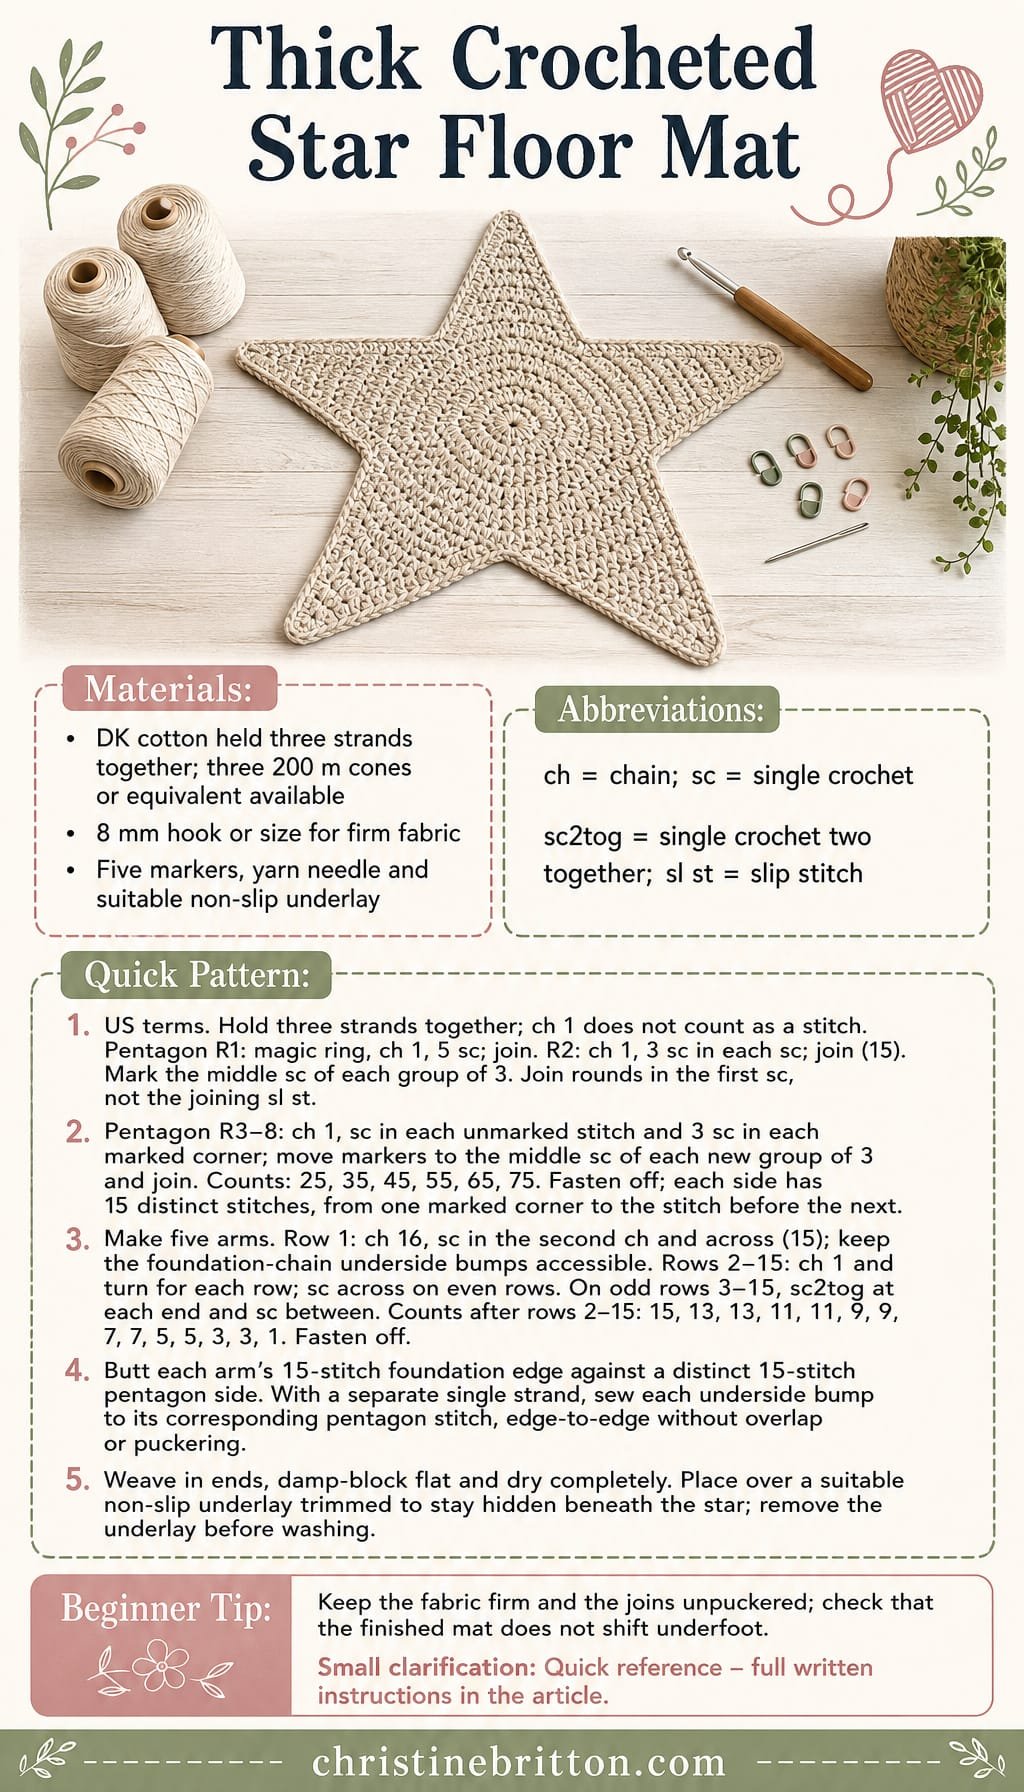
Quick-reference card. Follow the complete written instructions below.
Materials
- DK cotton yarn: Washable, sturdy cotton; three strands held together throughout the crochet. Have three 200 m cones or equivalent quantities available.
- Crochet hook: 8 mm, or a size that gives a firm fabric without making it buckle.
- Notions: Five removable stitch markers, yarn needle, scissors and a suitable non-slip rug underlay.
Size and Fit
One sample size, approximately 55â60 cm across the widest pair of points. Finished size depends on gauge and blocking. Check that the mat will lie clear of doors and walkways where an edge could catch.
Gauge
Aim for approximately 9 sc and 10 rows per 10 cm with three strands held together. Gauge is a guide, not a tested measurement: the fabric should feel dense, and the pentagon and arms should lie flat.
Abbreviations
US crochet terms.
- ch = chain
- sc = single crochet
- sc2tog = single crochet two stitches together; decreases one stitch
- sl st = slip stitch
- st(s) = stitch(es)
Pattern
- Before you begin Hold three strands of cotton together for the pentagon and all five arms. Beginning chains and turning chains do not count as stitches. Join each pentagon round with a sl st in its first sc; do not work into the joining sl st.
- Centre pentagon, round 1 Make a magic ring. Ch 1, work 5 sc into the ring, pull it closed and join. (5 sc)
- Centre pentagon, round 2 Ch 1, work 3 sc in each sc around and join. Mark the middle sc of each group of 3; these five marked stitches are the corners. (15 sc)
- Centre pentagon, rounds 3â8 For each round, ch 1 and work 1 sc in every unmarked stitch and 3 sc in each marked corner stitch. Move each marker to the middle sc of its new group of 3, then join. Stitch counts after rounds 3, 4, 5, 6, 7 and 8 are 25, 35, 45, 55, 65 and 75 sc respectively. Fasten off. On round 8, the 15 stitches from one marked corner, inclusive, to the stitch immediately before the next marked corner form one side. The five sides do not share stitches.
- Tapered arms, make five: row 1 With three strands held together, ch 16. Sc in the second ch from the hook and in each remaining ch; turn. Leave the underside bumps of the 15 foundation chains accessible for sewing. (15 sc)
- Tapered arms: rows 2â15 Ch 1 and turn at the start of each row. On every even-numbered row, sc in each stitch across. On every odd-numbered row from row 3 onwards, sc2tog over the first 2 stitches, sc in each stitch until 2 stitches remain, then sc2tog over the last 2 stitches. Rows 2â15 end with 15, 13, 13, 11, 11, 9, 9, 7, 7, 5, 5, 3, 3 and 1 stitch respectively. Fasten off after row 15.
- Join the star Lay the pentagon and arms flat, with one arm pointing out from each side. Butt each armâs 15-stitch foundation edge against one 15-stitch pentagon side. Using a separate single strand of cotton and a yarn needle, sew each foundation-chain underside bump to its corresponding pentagon stitch with small, even stitches. Do not overlap the pieces or pull the seam tight enough to pucker. Secure the ends firmly and repeat for all five arms.
Finishing
- Weave in all ends securely. Dampen and block the star flat, shaping the five points and allowing it to dry completely.
- Place the dry mat over a non-slip underlay suitable for the floor finish. Trim the underlay so it stays hidden beneath the star, including at the notches between points.
- Follow the yarn and underlay care instructions when cleaning; remove the underlay before washing the crocheted mat.
Helpful Tips
- If the pentagon cups, check that every marked corner receives 3 sc and that no joining sl st has been counted as a stitch.
- Keep the arm seams flat rather than stacking one piece over another; a raised join is uncomfortable underfoot.
- Check the mat and underlay for movement before use. Keep the points away from door swings and other trip-prone spots.
Star-Net Bauble Cover

This openwork cover turns a plain bauble into a star-themed decoration without hiding its colour. The crocheted net frames the surface, while small points around its widest part give it a festive outline.
The cover is worked from the hanging cap down towards the base, so it helps to check the fit against the bauble as the net takes shape. The open arches should sit comfortably around the curve rather than pulling the cap to one side.
A separate tie closes the cover underneath and can be undone when you want to change the bauble. Try a contrasting colour beneath the white net to make the star outline stand out on the tree.
Star-Net Bauble Cover

Quick-reference card. Follow the complete written instructions below.
Materials
- Fine cotton crochet thread: Approximately 20â30 m of white size 10 thread, plus a 30 cm length for the closing tie.
- Crochet hook: 2.5 mm, or the size needed for the stated gauge.
- Bauble: One unbreakable, approximately 6 cm diameter, with a hanging cap small enough for the starting ring to pass over.
- Tapestry needle: For weaving in the ends.
Size and Fit
One cover for a 6 cm diameter bauble, approximately 18.8 cm around its widest point. The starting ring must pass over the baubleâs hanging cap. Try the cover on as you work: the five arches should reach around the widest part without pulling the cap off-centre. If the net is markedly loose or tight, change hook size and restart.
Gauge
A relaxed chain of 12 measures approximately 3.7 cm. Gauge matters here because five 12-chain arches must reach around the baubleâs widest point.
Abbreviations
US crochet terms.
- ch = chain
- sc = single crochet
- sl st = slip stitch
- sp = space
- picot = Ch 3, then sl st into the first of those 3 chains.
Pattern
- Starting ring Ch 16 and join with a sl st to form a ring, taking care not to twist it. Check that the ring will pass over the baubleâs hanging cap, then slide it into place around the top of the bauble.
- Round 1 Work 5 sc into the ring. Join with a sl st to the first sc. Do not count the joining sl st as a stitch. (5 sc)
- Round 2 [Sc in next sc, ch 4] five times. Join with a sl st to the first sc. (5 sc; five ch-4 arches)
- Rounds 3â6: widen the net At the start of each round, sl st into the first arch of the previous round. Work [sc in next arch, ch N] five times, then join with a sl st to the first sc. Use ch 7 for Round 3, ch 10 for Round 4, and ch 12 for each of Rounds 5 and 6. Each round has 5 sc and five arches.
- Round 7: five star points Sl st into the first ch-12 arch. [Sc in next arch, ch 6, make a picot, ch 6] five times. Join with a sl st to the first sc. (5 sc; five picoted arches)
- Round 8 Sl st into the first ch-6 space. At the base of its picot, insert the hook beneath both ch-6 halves of that picoted arch and work 1 sc around them; ch 12. Repeat at each of the remaining four picots, working 1 sc around both ch-6 halves at its base, then ch 12. Join with a sl st to the first sc. (5 sc; five ch-12 arches)
- Rounds 9â11: narrow the net At the start of each round, sl st into the first arch of the previous round. Work [sc in next arch, ch N] five times, then join with a sl st to the first sc. Use ch 10 for Round 9, ch 7 for Round 10, and ch 4 for Round 11. Each round has 5 sc and five arches. Fasten off after Round 11.
- Removable closing tie With the cover on the bauble, thread the separate 30 cm length of cotton through all five ch-4 arches of Round 11. Draw the opening together gently beneath the bauble and tie a bow. Untie it to remove the cover.
Finishing
- Weave the starting and ending yarn tails into the crochet, keeping the picots visible.
- Arrange the five points evenly around the bauble and check that the closing tie is secure without pulling hard on the hanging cap.
Helpful Tips
- Work into each whole arch rather than individual chain stitches, except where Round 8 specifies working beneath both halves of a picoted arch.
- Keep the closing tie separate from the working yarn so the cover remains removable.
- Use an unbreakable bauble: fitting and removing a close net can put pressure on the ornament.
Joined-Star Christmas Scarf

This Joined-Star Christmas Scarf turns a festive motif into something wearable. Linked stars form a narrow, open strip rather than a solid panel, so the scarf works best as a decorative layer over a coat or jumper, not as a wind-blocking winter scarf.
The open spaces give each star room to stand out. Keeping the motifs oriented consistently helps the points form an even line; if the strip begins to twist or bunch, check how the newest star sits beside its neighbour before continuing.
The design is easy to adapt to the length you want by extending or shortening the line of stars. Its repeated construction is especially satisfying once the first joins are familiar, while the exposed points reward a little care in handling and storage.
Joined-Star Christmas Scarf

Quick-reference card. Follow the complete written instructions below.
Materials
- Yarn: Soft cream DK yarn with clear stitch definition; have enough for your chosen number of motifs.
- Hook: 4 mm crochet hook, or a size that makes firm but flexible points.
- Notions: Tapestry needle, scissors and stitch markers for identifying joining tips.
Size and Fit
The sample uses 20 motifs in one row. Width is one star; finished length depends on your yarn, hook and the space taken up by the joins. Add or omit whole motifs until the scarf reaches your preferred length. Make at least two motifs to use the joining method.
Gauge
No fixed gauge is required. Make one complete star and measure across opposite tips to judge the scarfâs width. Keep the points firm enough to hold their shape, and measure the growing strip laid flat to decide its length.
Abbreviations
US crochet terms.
- ch = chain
- sc = single crochet
- hdc = half double crochet
- dc = double crochet
- tr = treble crochet
- sl st = slip stitch
- st = stitch
Pattern
- Understand the star Each star has six arms. Number them 1â6 in the order worked. When laying out the scarf, position arm 1 at the top and arm 4 at the bottom; arms 2 and 3 face towards the next star, while arms 5 and 6 face towards the previous one. Keep the same side of every star facing up.
- First motif: centre Ch 2. Work 6 sc in the second ch from the hook. Sl st in the first sc to join. Do not turn.
- First motif: six arms Repeat the following once in each of the 6 centre sc, beginning with the next sc after the joining sl st: sl st in the centre sc, ch 5, sc in the second ch of this ch-5 from the hook, hdc in the next ch, dc in the next ch, tr in the last ch, then sl st in the same centre sc. Fasten off. Each arm has a five-chain spine and four stitches worked back towards the centre.
- Subsequent motifs: centre and placement Make the centre as for the first motif. Place the new centre beside the right-hand end of the strip, with its arms 5 and 6 facing the previous starâs arms 3 and 2 respectively. Check this placement before working the arms; keep both motifs face up.
- Subsequent motifs: arms and joins Work arms 1â4 as for the first motif. On arm 5, after making its ch 5, sl st into a free loop of the outermost chain of arm 3 on the previous star. Then work back along the new armâs ch-5: sc in its second chain from the hook as counted immediately after making that ch-5, hdc in the next ch, dc in the next ch, tr in the last ch, and sl st in the armâs centre sc. Work arm 6 in the same way, joining its tip to the outermost chain of arm 2 on the previous star. Fasten off. The joining sl sts are additional to the sl sts that anchor each arm at its centre.
- Continue the strip Repeat the subsequent motif instructions until you have 20 stars, or stop at your preferred length. Every neighbouring pair is joined at two tips; do not add chains between motifs.
- Optional plain edges For a light stabilising edge, join yarn with a sc in the outermost chain at the top tip (arm 1) of the first star. Ch just enough to reach the top tip of the next star without pulling either point out of shape; sc in that tip. Repeat the chain span and sc across all top tips, then fasten off. Make a matching edge across the bottom tips (arm 4). The chain count may vary with your gauge; keep both edges relaxed and equal in length.
Finishing
- Weave in ends on the wrong side, taking care not to pull the open centres closed.
- Lay the scarf flat and gently shape the points. If your yarn permits blocking, follow its care instructions and allow the scarf to dry fully.
Helpful Tips
- Mark arms 2 and 3 on the first star to make the first join easier to identify.
- Before fastening off a new star, check that both joins connect to the same previous motif and that the strip lies flat.
- Do not tighten the joining slip stitches so much that the paired points bunch together.
Frequently Asked Questions
Which star should I choose for a first project from this collection?
Try the five-point hanging ornament or granny star coaster if you are comfortable with basic stitches and working into shaped points. Both are marked confident beginner; the lace and colourwork designs are intermediate.
What yarn works best for a crochet Christmas star?
Cotton is a useful choice for a crisp ornament, coaster or lace star. For a stuffed star, choose a yarn that makes a firm fabric at the hook size given in the pattern so the filling is less likely to show.
How can I help an openwork star hold its shape?
Block it to the intended measurements, pinning each point evenly, and leave it flat until completely dry. A star hung in a window may also need a secure loop and enough support to prevent stretching.
Can the crochet star tree topper fit any tree?
Check the tree tip against the patternâs sleeve measurements. The tie-on sleeve is designed to be adjustable, but a very thin or heavy tree tip may need extra support.
Final Thoughts
Start with the starâs intended use, then choose the yarn and finish that will help it work there. A flat cotton ornament needs tidy points; a cushion or tree topper needs careful sizing and structure.
Whether you make one decoration or plan a set, check the patternâs US stitch terms and measurements as you go. Those small checks make the final shaping and assembly easier.