26 Crochet Christmas Mouse Patterns for Festive Amigurumi

Looking for a free Christmas mouse crochet pattern? These 26 festive mice include tree ornaments, shelf decorations and characters tucked into stockings, presents and other seasonal settings.
The designs range from a simple hanging bauble to more detailed pieces with shaped accessories. Browse by how you want to display your mouse, then check the difficulty and construction before choosing one.
For more ideas that build on this collection, explore free crochet Christmas bauble patterns.
Before You Start
These patterns use US crochet terminology. Check the difficulty note for your chosen mouse before gathering materials: a round bauble has fewer shaped parts than a train, sleigh or gift box.
For stuffed mice, a firm fabric helps keep the filling from showing through. Use a hook that gives you close stitches with your chosen yarn, and keep a stitch marker handy for rounds. Add stuffing in small amounts as you work, especially around tapered faces and flat bases.
Plan the finishing before you sew pieces together. Check where a mouse needs to sit, lean or hang, and position its ears and accessories accordingly. If the finished item may be handled by a young child, avoid detachable decorations and choose securely stitched features.
Crochet terminology: This article uses US crochet terms. Check the abbreviations for each project.
1. Standing Santa Mouse

This standing Santa mouse brings a cheerful bit of Christmas character to a mantelpiece or shelf. Its round ears and embroidered face give it a gentle expression, while the coat-shaped body, white trim and pointed hat make the festive theme clear.
The broad, flat-bottomed coat is part of the body, so the mouse does not need a separate stand. Keeping that base level is important to its balance; the tail sits low at the back and can rest on the shelf without lifting the figure.
The body provides a sturdy centre for the separately made head and smaller details. This is a satisfying choice if you enjoy amigurumi with a recognisable silhouette and a few decorative touches, rather than a figure that depends on accessories to look complete.
Standing Santa Mouse

Quick-reference card. Follow the complete written instructions below.
Materials
- Smooth DK yarn: Red for the body, arms and hat; grey for the head, ears, hands and tail; white for the coat trim and hat; a small amount of pink for the nose.
- 3 mm crochet hook: Or a hook size that makes a firm fabric with no visible stuffing.
- Toy stuffing: Enough to fill the body, head and hat pompom.
- Black embroidery thread: For the eyes and mouth.
- Notions: Yarn needle, stitch marker and scissors.
Size and Fit
One size. At the suggested gauge, the base is approximately 5.5â6 cm across and the mouse is approximately 18â20 cm tall, depending on how the hat sits. These are estimates, not measured test results. The base and body are made as one piece.
Gauge
Aim for approximately 24 sc and 26 rounds per 10 cm in firm, continuous rounds. Exact gauge is less important than a flat base and a fabric that conceals the stuffing.
Abbreviations
US crochet terms.
- ch = chain
- sc = single crochet
- sl st = slip stitch
- inc = work 2 sc in one stitch
- dec = single-crochet 2 stitches together; an invisible decrease is suitable
- BLO = back loop only
- MR = magic ring
Pattern
- Before you begin Work in continuous rounds unless instructed otherwise. Mark the first stitch of each round and move the marker up as you work. Numbers in brackets are stitch counts at the end of the round. Keep the same point on the body facing forward throughout assembly.
- Body and flat coat base â red R1: 6 sc in MR (6). R2: inc in each stitch (12). R3: (sc, inc) 6 times (18). R4: (2 sc, inc) 6 times (24). R5: (3 sc, inc) 6 times (30). R6: (4 sc, inc) 6 times (36). R7: (5 sc, inc) 6 times (42). R8: sc BLO around (42); this turns the edge upwards. R9â12: sc around (42). R13: (5 sc, dec) 6 times (36). R14â16: sc around (36). R17: (4 sc, dec) 6 times (30). R18â19: sc around (30). R20: (3 sc, dec) 6 times (24). R21â22: sc around (24). R23: (2 sc, dec) 6 times (18). R24â25: sc around (18). Fasten off, leaving a long tail for joining. Stuff the lower body firmly while keeping R1â7 level; add enough stuffing to support the neck without making the base bulge.
- Head â grey R1: 6 sc in MR (6). R2: inc around (12). R3: (sc, inc) 6 times (18). R4: (2 sc, inc) 6 times (24). R5: (3 sc, inc) 6 times (30). R6â11: sc around (30). R12: (3 sc, dec) 6 times (24). R13: (2 sc, dec) 6 times (18). Fasten off. The MR is the crown and the open 18-stitch edge is the neck. Embroider two small black eyes on R9, approximately five stitches apart, with a pink nose centred between and slightly below them on R10. Add a short black mouth below the nose. Stuff the head firmly, keeping its neck opening accessible.
- Ears â make two in grey For each ear, R1: 6 sc in MR (6). R2: inc around (12). R3: (sc, inc) 6 times (18). R4: (2 sc, inc) 6 times (24). Sl st into the next stitch and fasten off with a sewing tail. Leave each ear as a flat, unstuffed disc.
- Arms â make two For each arm, use red: R1: 8 sc in MR (8). R2â7: sc around (8). Change to grey: R8â9: sc around (8). Fasten off with a sewing tail. Add a little stuffing to the red portion only. Flatten the open end; it will be sewn to the body.
- Tail â grey Ch 17. Starting in the second ch from the hook, work 16 sc along the chain (16). Fasten off with a long sewing tail. This makes a flexible, unstuffed tail.
- Pointed Santa hat â red, then white With red, R1: 4 sc in MR (4). R2: sc around (4). R3: inc around (8). R4: sc around (8). R5: (sc, inc) 4 times (12). R6: sc around (12). R7: (2 sc, inc) 4 times (16). R8: sc around (16). R9: (3 sc, inc) 4 times (20). R10: sc around (20). R11: (4 sc, inc) 4 times (24). R12: sc around (24). R13: (5 sc, inc) 4 times (28). R14: sc around (28). R15: (6 sc, inc) 4 times (32). R16â17: sc around (32). Change to white. R18â19: sc around (32). Fasten off with a long tail for securing the brim. Leave the hat unstuffed so its tip can bend gently.
- Hat pompom â white R1: 6 sc in MR (6). R2: inc around (12). R3: sc around (12). R4: dec 6 times (6). Add a little stuffing, close the opening and sew the pompom to the hat tip.
- White coat trim With white yarn and the body held upright, work surface sl st through the fabric around body R9, keeping this hem line level. Fasten off. Work a second line of white surface sl st up the centre front from R9 to R23, placing approximately one slip stitch at each round. Fasten off and weave in the ends without pulling the body out of shape.
- Assembly Sew the head’s 18-stitch neck edge to the body’s 18-stitch opening, matching the front of the face to the coat trim. Sew the ears to opposite sides of the head around R7â9, attaching approximately five adjacent edge stitches of each disc so the ears project outwards. Sew the flattened red ends of the arms to opposite sides of body R20â22, with grey hands pointing down. Sew one end of the tail centrally to the back of body R9â10; curve its free length behind the mouse so it rests on the shelf rather than lifting the base. Set the hat brim around head R5â6, above the ears and eyes, and secure it with small stitches around the brim.
Finishing
- Weave in all remaining ends. Set the mouse on a level surface and gently flatten the base with your fingers.
- Adjust the stuffing or the angle of the head and hat before making any final securing stitches if the mouse leans.
- For a decoration intended for a young child, embroider all facial features securely and follow appropriate toy-safety guidance.
Helpful Tips
- Do not overstuff the base: a rounded underside will make the mouse less stable.
- If the hat point flops forwards, bend it gently towards the back to keep its weight over the base.
- When changing colours, make the first stitch of the new round with the new colour; small colour-change steps are normal in continuous rounds.
2. Hanging Mouse Bauble

This little mouse has the rounded silhouette of a Christmas bauble, with a tapered muzzle, folded ears and a curled tail that give it character from every angle. It makes a cheerful tree decoration without losing its distinctly mouse-like shape.
The hanging loop is anchored through the body rather than an ear, so the ears remain decorative. Embroidered features give the mouse a gentle expression without protruding fittings. Itâs an approachable festive amigurumi project for anyone comfortable working in continuous rounds and attaching small pieces.
Hanging Mouse Bauble

Quick-reference card. Follow the complete written instructions below.
Materials
- Smooth cotton-blend DK yarn: Small amounts in a mouse colour and a contrasting colour for the muzzle and inner-ear detail, if desired.
- Black embroidery thread or yarn: For the eyes and nose.
- 3 mm crochet hook: Or a hook that makes a firm fabric with no visible stuffing.
- Toy stuffing: A small amount.
- Stitch marker, yarn needle and scissors: The marker identifies the first stitch of each continuous round.
Size and Fit
One ornament, approximately 5 cm wide and 6 cm tall before adding the hanging loop. Size will vary with yarn and tension.
Gauge
Gauge is not essential. Work firmly enough that the stuffing does not show through the stitches.
Abbreviations
US crochet terms.
- ch = chain
- sc = single crochet
- inc = work 2 sc in one stitch
- dec = single crochet 2 stitches together; an invisible decrease may be used
- MR = magic ring
- rnd = round
- st = stitch
Pattern
- Before you begin Work the body, muzzle and ears in continuous rounds without joining. Mark the first stitch of each round and move the marker up as you work.
- Body, rnds 1â6 Using the mouse colour, rnd 1: work 6 sc in an MR (6). Rnd 2: inc in each st (12). Rnd 3: (sc, inc) 6 times (18). Rnd 4: (2 sc, inc) 6 times (24). Rnd 5: (3 sc, inc) 6 times (30). Rnd 6: (4 sc, inc) 6 times (36).
- Body, rnds 7â12 Sc in each st of each round (36). Keep the opening at the bottom of the body.
- Embroidered eyes Before stuffing or attaching the other pieces, embroider a small eye over approximately st 14 and st 22 of body rnd 9. Count from the marked first stitch of that round. Secure the thread ends inside the body.
- Hanging loop Cut a 30 cm length of mouse-coloured yarn and fold it in half. Feed its two cut ends from the outside through separate gaps beside the centre of body rnd 1, leaving an approximately 5 cm doubled loop above the body. From inside, sew each end back and forth through several top stitches, then knot the ends together inside. Trim the excess. The loop must be anchored to the body, not to an ear.
- Body, rnds 13â17 Rnd 13: (4 sc, dec) 6 times (30). Rnd 14: (3 sc, dec) 6 times (24). Rnd 15: (2 sc, dec) 6 times (18). Add stuffing, distributing it evenly without distorting the sphere. Rnd 16: (sc, dec) 6 times (12). Add a little more stuffing if needed. Rnd 17: dec 6 times (6). Fasten off, draw the yarn through the front loops of the remaining 6 stitches and pull closed. Secure and hide the end.
- Muzzle Using the contrasting colour, rnd 1: work 4 sc in an MR (4). Rnd 2: inc in each st (8). Rnd 3: (sc, inc) 4 times (12). Rnd 4: sc in each st (12). Fasten off, leaving a long sewing tail. Embroider a small black nose on the narrow tip at rnd 1, hiding the thread ends inside the muzzle.
- Ears, make two Using the mouse colour, rnd 1: work 6 sc in an MR (6). Rnd 2: inc in each st (12). Rnd 3: sc in each st (12). Fasten off each ear with a long sewing tail. If desired, embroider a few contrasting stitches on one face. Fold each ear in half to make a small semicircle; do not stuff.
- Curled tail Using the mouse colour, ch 13. Starting in the second ch from the hook, work 2 sc in each of the 12 chains (24 sc). The strip will curl naturally. Fasten off, leaving a sewing tail.
Finishing
- Lightly stuff the muzzle. Sew its 12-stitch open edge to the front of the body, centred below the eyes around body rnds 10â12, with the pointed nose facing outwards.
- Sew the folded edge of one ear to each side of the top of the body around rnds 4â5. Keep both ears clear of the hanging loop.
- Sew one end of the curled tail firmly to the back of the body around rnd 13, opposite the muzzle. Weave in all ends and check that the hanging loop remains secure.
Helpful Tips
- If gaps appear between body stitches, use a smaller hook rather than packing in more stuffing.
- For a child-safe ornament, embroider the features as directed rather than adding small detachable parts.
3. Mouse Peeking from a Christmas Stocking

This miniature Christmas stocking has a proper shaped heel, giving it the familiar silhouette of a full-sized stocking. A mouse peeks above the white cuff, with its head and little paws visible while the top of the stocking remains open.
Itâs an appealing project if you enjoy small crochet decorations with a bit of character. The heel gives the stocking its shape, while the lightly stuffed head keeps the mouseâs face rounded without crowding the opening.
The finished piece would look at home among festive shelf decorations or hanging on a Christmas tree. Its open cuff is part of the design: the mouse should look as though it has just popped up to see whatâs happening.
Mouse Peeking from a Christmas Stocking

Quick-reference card. Follow the complete written instructions below.
Materials
- Red DK cotton yarn: For the stocking; a small amount is sufficient.
- White DK cotton yarn: For the cuff.
- Soft DK yarn: Mouse colour, for the head, ears and paws.
- Dark embroidery thread or yarn: For the eyes and nose.
- 3 mm crochet hook: Or a size that produces a firm fabric.
- Other supplies: A little toy stuffing, a stitch marker and a yarn needle.
Size and Fit
One miniature size. The stocking has a 24-stitch leg and opening. Finished dimensions will depend on yarn and tension; keep both DK yarns similar in thickness.
Gauge
Exact gauge is not essential. Work firmly enough that the stocking holds its shape and stuffing does not show through the mouse head.
Abbreviations
US crochet terms.
- ch = chain
- sc = single crochet
- inc = work 2 sc in the same stitch
- dec = single crochet 2 stitches together
- st(s) = stitch(es)
- rnd = round
Pattern
- Before you begin Work continuous rounds unless a row is specified. Mark the first stitch of each round. A turning chain does not count as a stitch. Leave a sewing tail on each mouse piece.
- Stocking toe and foot With red DK cotton, make a magic ring. Rnd 1: 6 sc in ring (6). Rnd 2: inc in each st (12). Rnd 3: (sc, inc) 6 times (18). Rnd 4: (2 sc, inc) 6 times (24). Rnds 5â10: sc in each st (24). Do not fasten off.
- Shaped heel Work the heel in turned rows over the next 12 sts; leave the other 12 foot sts unworked. Row 1: sc in next 12 sts, ch 1, turn (12). Rows 2â5: sc in each st, ch 1, turn (12). Row 6: dec, 8 sc, dec, ch 1, turn (10). Row 7: dec, 6 sc, dec, ch 1, turn (8). Row 8: dec, 4 sc, dec (6). Do not turn or fasten off. The narrowed end of the flap forms the back of the heel.
- Join heel to leg Working from the end of Row 8, sc into each of the 7 row ends along the adjacent heel-flap side, sc in the 12 unworked foot sts, sc into each of the 7 row ends along the other heel-flap side, then sc in the 6 sts of Row 8 (32). Place the marker for the start of the next round. Rnd 2: (6 sc, dec) 4 times (28). Rnd 3: (5 sc, dec) 4 times (24). These decrease rounds bring the leg back to the foot’s 24-stitch circumference.
- Leg and cuff Rnds 4â9: sc in each st with red (24). Change to white. Rnds 10â13: sc in each st (24). Fasten off and weave in the ends. Leave the white cuff upright so its top edge remains an open rim.
- Mouse head With soft DK yarn, make a magic ring. Rnd 1: 6 sc (6). Rnd 2: inc in each st (12). Rnd 3: (sc, inc) 6 times (18). Rnds 4â6: sc in each st (18). Embroider two small eyes and a nose on the front. Rnd 7: (sc, dec) 6 times (12). Add a little stuffing. Rnd 8: dec 6 times (6). Fasten off, leaving a long tail; draw it through the remaining 6 front loops to close the base.
- Ears Make two with soft DK yarn. For each ear, make a magic ring. Rnd 1: 6 sc (6). Rnd 2: (sc, inc) 3 times (9). Fasten off, leaving a sewing tail. Do not stuff; flatten each ear.
- Paws Make two with soft DK yarn. For each paw, make a magic ring, work 5 sc into it and pull the ring closed. Fasten off, leaving a sewing tail. Do not stuff.
- Assembly Sew the lower edges of the ears to opposite sides of the head around Rnd 3, leaving their tops free. Choose a back and front for the stocking. Using the head’s long tail, sew its closed base securely to the inside back wall of the cuff, about two white rounds below the top edge. Catch several cuff stitches without sewing across the opening; the face should sit above the rim. Sew one paw to each side of the inside front edge, with the paws just visible above the rim. Keep a gap between them and check that the opening remains visible.
Finishing
- Weave in all remaining ends securely, taking care not to pull the cuff opening closed.
- Gently shape the toe, heel and ears by hand.
Helpful Tips
- Pick up one stitch in each heel-flap row end, including the stepped ends created by the decreases. Count all 32 stitches before starting the leg decreases.
- Use only enough stuffing to round the head gently; a tightly stuffed head can crowd the stocking opening.
- For a hanging decoration, attach a separate yarn loop firmly to the back of the stocking below the cuff, rather than to the mouse.
4. Four-Legged Reindeer Mouse

This Christmas mouse borrows just enough from a reindeer to look ready for the festivities: a long, tapered nose, rounded ears, little branched antlers and a bright collar. Its horizontal body and four short legs give it a different silhouette from the usual sitting amigurumi mouse.
The body and head are separate stuffed shapes joined at the neck, while the legs are attached underneath. Keeping the stuffing even and the fabric firm helps the mouse hold its shape; its ability to stand neatly will also depend on balanced leg placement.
The antlers are small but distinctive, so this is a good choice if you enjoy adding character through crochet details. The separate collar sits over the neck join and can be adjusted to fit without drawing the head down.
Four-Legged Reindeer Mouse

Quick-reference card. Follow the complete written instructions below.
Materials
- Brown worsted-weight yarn: For the body, head, legs, ears and tail; choose a firm yarn that holds its shape.
- Tan worsted-weight yarn: A small amount for the antlers.
- Red worsted-weight yarn: A small amount for the collar.
- Black embroidery thread or yarn: For the eyes and nose.
- Crochet hook: 3.5 mm, or a size that makes a dense fabric without gaps.
- Other supplies: Toy stuffing, stitch marker, yarn needle and scissors.
Size and Fit
One sample size: approximately 12 cm long from nose to rump, excluding the tail, when worked at the stated gauge. The collar is adjusted to fit the finished neck seam.
Gauge
Approximately 24 single crochet stitches and 27 rounds to 10 cm in dense amigurumi fabric. Exact gauge is less important than a fabric that keeps the stuffing inside; a different gauge will change the finished size.
Abbreviations
US crochet terms.
- ch = chain
- sc = single crochet
- inc = work 2 sc in the same stitch
- sl st = slip stitch
- st(s) = stitch(es)
- MR = magic ring
Pattern
- Before you begin Work the body, head, legs and antlers in continuous rounds; do not join or turn. Mark the first stitch of each round. The marked stitch on the body and head will also serve as a top centreline when positioning the features. Unless stated otherwise, work one sc in each stitch.
- Body With brown yarn, work from rump towards neck. Round 1: 6 sc in MR (6). Round 2: inc in each st (12). Round 3: (sc 1, inc) six times (18). Round 4: (sc 2, inc) six times (24). Round 5: (sc 3, inc) six times (30). Round 6: (sc 4, inc) six times (36). Rounds 7â20: sc around (36). Fasten off, leaving a long joining tail. Stuff firmly while keeping the open neck round accessible.
- Tapered head With brown yarn, work from nose towards neck. Round 1: 4 sc in MR (4). Round 2: (sc 1, inc) twice (6). Round 3: (sc 2, inc) twice (8). Round 4: (sc 3, inc) twice (10). Round 5: (sc 4, inc) twice (12). Round 6: (sc 2, inc) four times (16). Round 7: (sc 3, inc) four times (20). Round 8: (sc 4, inc) four times (24). Round 9: (sc 3, inc) six times (30). Round 10: (sc 4, inc) six times (36). Rounds 11â13: sc around (36). Fasten off, leaving a long joining tail. Stuff firmly, giving the nose a tapered shape.
- Join body and head Align the two open 36-stitch edges, with both marked first stitches at the top. Using a yarn needle and one joining tail, sew each head stitch to its corresponding body stitch all the way around. Add stuffing before closing the last few stitches if needed. Secure the yarn ends inside.
- Four legs Make four in brown. Round 1: 6 sc in MR (6). Round 2: inc in each st (12). Rounds 3â7: sc around (12). Fasten off with a long sewing tail. Stuff each leg, leaving its top edge open. Stand the mouse with its marked centreline at the top. Sew two leg openings to the underside near body rounds 8â10 and the other two near rounds 15â17. At each position along the body, place one leg to either side of the underside centreline, about five stitches away from it. Stitch around each opening securely, checking that all four leg bottoms reach the same surface.
- Ears Make two flat circles in brown. Round 1: 6 sc in MR (6). Round 2: inc in each st (12). Fasten off with a sewing tail; do not stuff. Sew the lower edge of each ear to head rounds 11â12, placing them on opposite sides of the top centreline about eight stitches away from it. Leave the upper edges free and rounded.
- Branched antlers Make two in tan. For each antler, work Round 1: 4 sc in MR (4). Rounds 2â4: sc around (4). Round 5: ch 4, sl st in the second ch from the hook and in each of the next two ch to make a side branch; then sc in each of the four main-round sts (4 main sts). Rounds 6â7: sc around the four main sts (4); do not work into the branch. Cut the yarn, pass it through the four top stitches and pull them together. Leave a long tail at the base. No stuffing is needed. Sew the bases securely to head rounds 12â13, between the ears and about three stitches to either side of the top centreline. Point the branches outwards.
- Tail With brown yarn, ch 16. Sl st in the second ch from the hook and in each remaining ch (15 sl sts). Fasten off, leaving a sewing tail. Sew the tail to the centre of the rump at body rounds 1â2.
- Separate red collar With red yarn, ch 39. Row 1: sc in the second ch from the hook and across (38). Row 2: ch 1, turn, sc across (38). Fasten off with a sewing tail. Wrap the band around the head-to-body seam and sew its short ends together without pulling it tight. If the band does not sit comfortably at your gauge, remake it with more or fewer starting chains before working both rows.
- Face Embroider one small eye on each side of head rounds 8â9, approximately five stitches from the top centreline. Embroider a small black nose over the tip at head round 1. Bury all thread ends securely.
Finishing
- Set the mouse on a level surface and adjust the leg positions before securing the last sewing stitches.
- Check that the collar covers the neck join without bending the head.
- Weave in or bury every yarn end, and check that the ears, antlers and legs are firmly attached.
Helpful Tips
- Keep the body stitches tight: a firm fabric and evenly stuffed legs help the mouse stand on four feet.
- The antler branch is made from a chain during Round 5; continue that round in the four main stitches so the stem retains its shape.
- Use embroidered facial details rather than small detachable parts if the mouse may be handled by a child.
5. Mouse in a Gift Box

This Christmas mouse looks as though it has popped out of its own present. Its face and paws appear above the open box, while the separate lid sits behind it for a playful, just-unwrapped look.
The box is made from a square base and four side panels, so neat seams and firm fabric matter as much as the crochet itself. The ribbon detail gives the present its festive character without adding bulk to the sides.
This is a display-friendly project for anyone who enjoys combining simple shapes with amigurumi. The lid is a loose prop rather than a fastening, so choose a stable spot where the finished scene can stay in place.
Mouse in a Gift Box
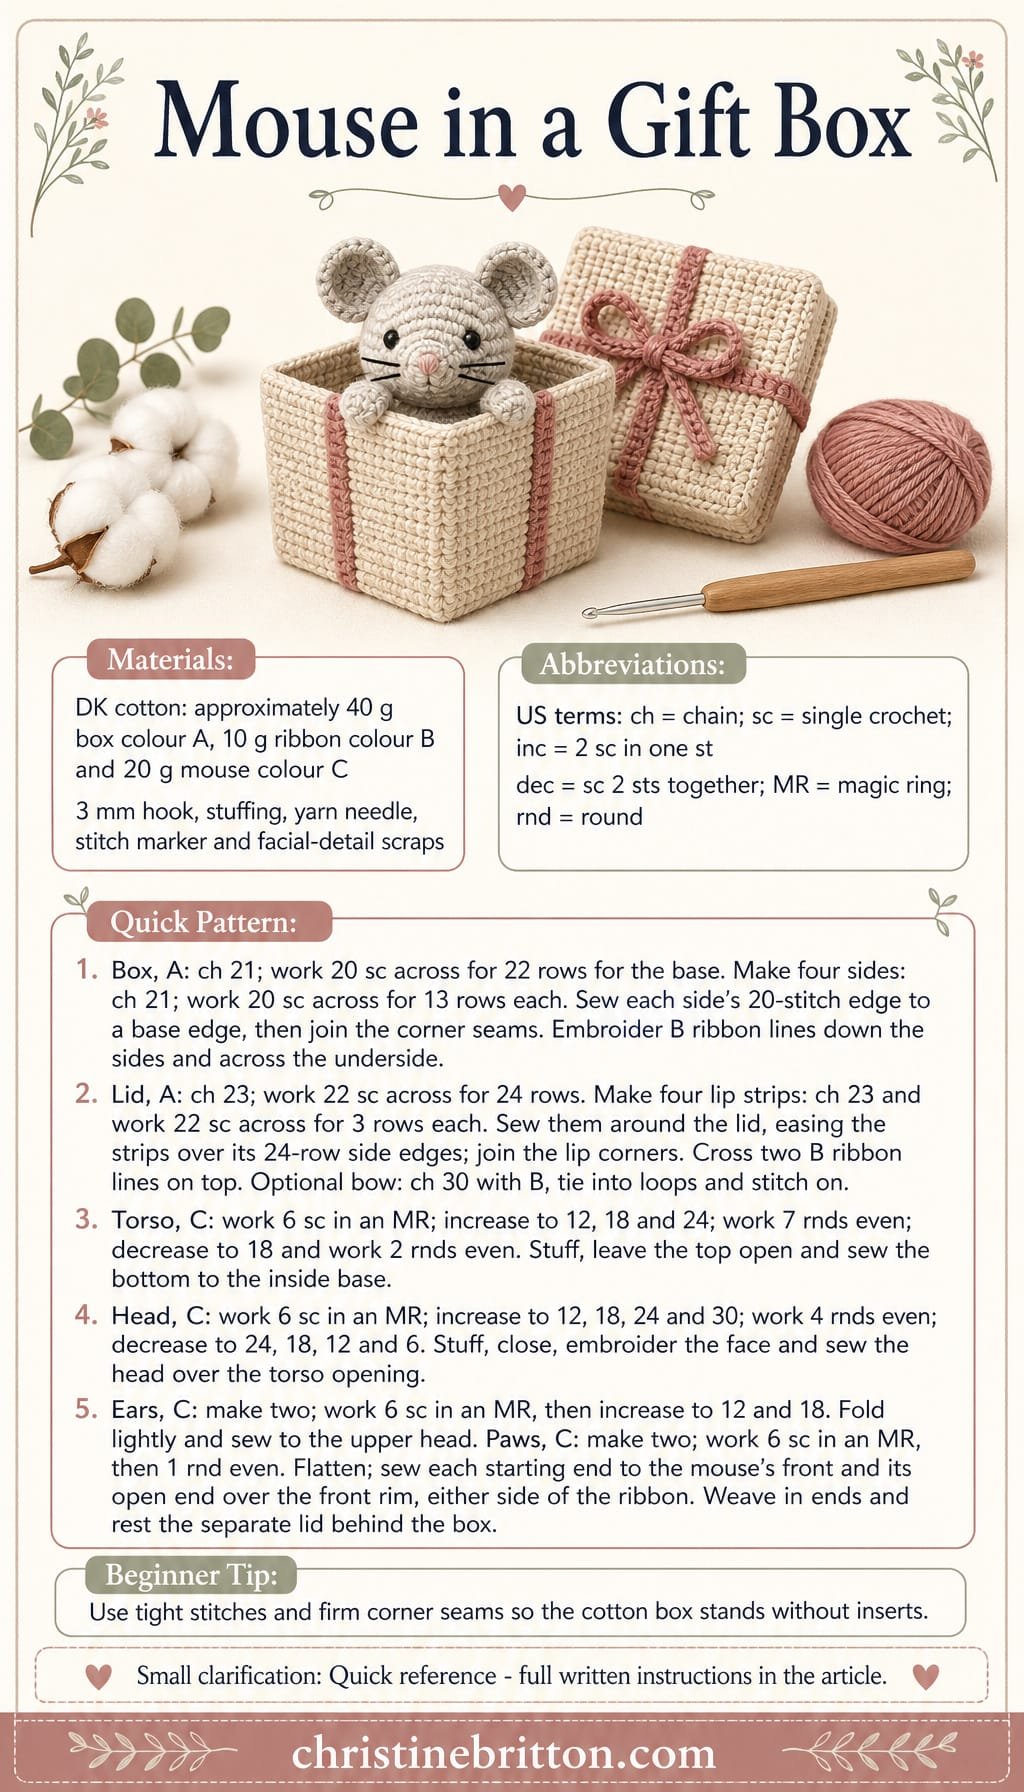
Quick-reference card. Follow the complete written instructions below.
Materials
- DK cotton yarn: Approximately 40 g in a box colour (A), 10 g in a contrasting ribbon colour (B) and 20 g in a mouse colour (C), plus scraps for the nose, eyes and whiskers.
- Crochet hook: 3 mm, or a size that produces firm stitches.
- Other supplies: Small amount of toy stuffing, yarn needle, stitch marker and scissors.
Size and Fit
One size. At the target gauge, the box base is approximately 10 cm square, its sides are approximately 6 cm high, and the lid is approximately 11 cm square. The mouse head rises above the rim. Exact dimensions depend on your yarn and gauge.
Gauge
Target gauge: 20 sc and 22 rows to 10 cm in flat fabric. Use a firm fabric so the box panels hold their shape; exact gauge is less important than matching the base and panel edges.
Abbreviations
US crochet terms.
- ch = chain
- sc = single crochet
- inc = 2 sc in one stitch
- dec = single crochet 2 stitches together
- MR = magic ring
- st(s) = stitch(es)
- rnd = round
Pattern
- Before you begin Work the flat pieces in turned rows and the mouse pieces in continuous rounds. Mark the first stitch of each round. A turning ch 1 does not count as a stitch. Leave long tails on pieces that will be sewn together.
- Box base With A, ch 21. Row 1: sc in the second ch from the hook and in each remaining ch; turn (20 sc). Rows 2â22: ch 1, sc in each st; turn (20 sc). Fasten off.
- Box sides Make four alike with A. Ch 21. Row 1: sc in the second ch from the hook and in each remaining ch; turn (20 sc). Rows 2â13: ch 1, sc in each st; turn (20 sc). Fasten off. Each panelâs 20-stitch edge will meet one 20-stitch edge of the base.
- Assemble the open box Place one panel along each base edge, with right sides facing out. Sew each panelâs 20-stitch edge to a base edge, matching the end stitches to the corners. Lift the panels and sew their short side edges together at all four corners. Keep the upper edges open. If the box looks uneven, ease the seams rather than pulling them tight.
- Box ribbon With B and a yarn needle, make a centred vertical line of running stitches on the outside of each side panel, from the base to the rim. Continue matching lines across the underside of the base so they cross in the centre. Keep the stitches loose enough that the panels remain flat.
- Lid top With A, ch 23. Row 1: sc in the second ch from the hook and in each remaining ch; turn (22 sc). Rows 2â24: ch 1, sc in each st; turn (22 sc). Fasten off.
- Lid lip and assembly Make four lip strips with A. For each, ch 23. Row 1: sc in the second ch from the hook and in each remaining ch; turn (22 sc). Rows 2â3: ch 1, sc in each st; turn (22 sc). Fasten off. Sew one long edge of each strip to an edge of the lid top. On the two edges formed by row ends, distribute the stripâs 22 stitches evenly over the lidâs 24 row ends. Sew the short ends of neighbouring strips together to form a shallow lip. The lid is separate from the box.
- Lid ribbon With B, embroider two centred lines across the outside of the lid top at right angles, forming a cross. For a bow, ch 30 with B, fasten off, tie the chain into two loops and stitch it over the crossing point.
- Mouse torso With C, work in continuous rounds. Rnd 1: 6 sc in an MR (6). Rnd 2: inc in each st (12). Rnd 3: (sc, inc) 6 times (18). Rnd 4: (2 sc, inc) 6 times (24). Rnds 5â11: sc in each st (24). Rnd 12: (2 sc, dec) 6 times (18). Rnds 13â14: sc in each st (18). Stuff firmly but do not stretch the stitches. Fasten off, leaving the top open. Sew the flat bottom securely to the centre of the inside base, positioning the torso so it stands upright.
- Mouse head With C, work in continuous rounds. Rnd 1: 6 sc in an MR (6). Rnd 2: inc in each st (12). Rnd 3: (sc, inc) 6 times (18). Rnd 4: (2 sc, inc) 6 times (24). Rnd 5: (3 sc, inc) 6 times (30). Rnds 6â9: sc in each st (30). Rnd 10: (3 sc, dec) 6 times (24). Rnd 11: (2 sc, dec) 6 times (18). Stuff. Rnd 12: (sc, dec) 6 times (12). Rnd 13: dec 6 times (6). Fasten off and close the remaining opening. Embroider two eyes on the front around rnds 7â8, approximately five stitches apart. Add a small nose below them and a few short whiskers on each side. Sew the lower part of the head securely to the torsoâs open top; the head covers that opening.
- Ears Make two with C. For each ear, work 6 sc in an MR (6). Rnd 2: inc in each st (12). Rnd 3: (sc, inc) 6 times (18). Fasten off. Do not stuff. Fold each circle lightly at its lower edge and sew the ears to opposite sides of the upper head, around rnds 3â5.
- Paws Make two with C. For each paw, work 6 sc in an MR (6). Rnd 2: sc in each st (6). Fasten off. Flatten without stuffing. Sew the closed starting end of each paw to the mouseâs front, then secure its open end over the front box rim. Place the paws on either side of the ribbon line so they appear to grip the edge.
Finishing
- Check that the torso is firmly attached to the inside base and the paws hold their position at the rim.
- Weave in all ends. Gently square the box corners with your fingers; avoid flattening the mouse.
- Set the separate lid behind the open box at an angle for display. It is not attached and may need support if the decoration is moved.
Helpful Tips
- Crochet tightly and seam through both edge loops for sturdier corners.
- For a display decoration intended for a young child, embroider all facial details and supervise use; the separate lid is not a toy fastening.
- Check the lid against the assembled box before sewing its lip. It should sit slightly wider than the box opening.
6. Carol Singer Mouse

This carol singer brings a little storytelling to a Christmas display: a scarf-wearing mouse holds an open songbook between its paws, ready to join the festive chorus. The embroidered face and page markings give it character without distracting from its simple shape.
Unlike a round amigurumi toy, the body is lightly flattened, giving the songbook a clear place at the front. The finished mouse is intended to rest against a firm display support rather than balance on its own.
This is an intermediate project for crocheters who enjoy assembling small pieces. The songbook is the focal point, so its open shape and the mouseâs forward-facing pose matter as much to the finished look as the cheerful scarf.
Carol Singer Mouse
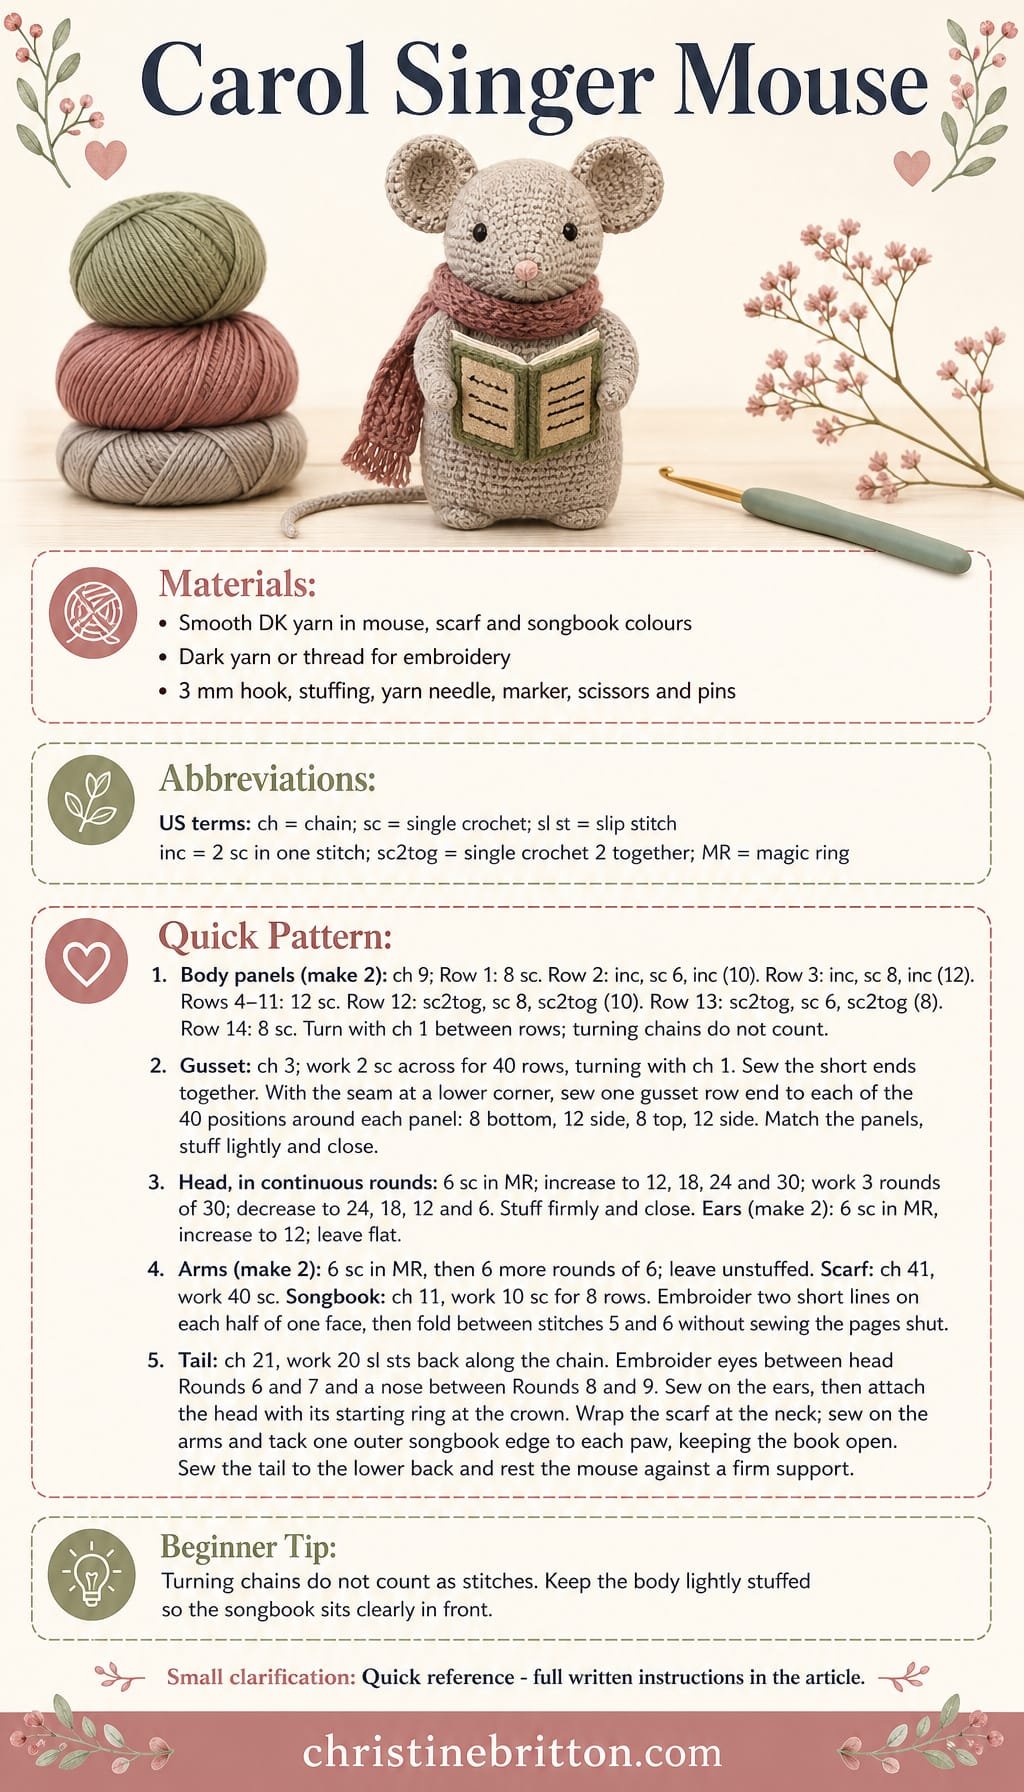
Quick-reference card. Follow the complete written instructions below.
Materials
- Smooth DK yarn: Small amounts in mouse colour, scarf colour and songbook colour, plus dark yarn or embroidery thread for the face and page markings.
- Crochet hook: 3 mm, or a size that produces firm stitches that hold the stuffing.
- Other supplies: Small amount of toy stuffing, yarn needle, stitch marker, scissors and pins.
Size and Fit
One sample size. At the suggested gauge, the body is approximately 6 cm wide and 6.5 cm tall, with a gusset about 1 cm deep. Finished height is approximately 11â12 cm, depending on head placement. The mouse is designed to rest against a display, not balance unsupported.
Gauge
Aim for approximately 20 sc and 22 rows per 10 cm in firm, flat single crochet. Exact gauge is not essential, but use a hook small enough that stuffing does not show through.
Abbreviations
US crochet terms.
- ch = chain
- sc = single crochet
- sl st = slip stitch
- inc = work 2 sc in the same stitch
- sc2tog = single crochet 2 stitches together
- MR = magic ring
Pattern
- Before you begin Make the body panels, gusset, head, ears and arms in mouse colour. Work turning chains without counting them as stitches. Work the head, ears and arms in continuous rounds; mark the first stitch of each round. Leave sewing tails where directed.
- Body panels â make 2 Ch 9. Row 1: sc in second ch from hook and each remaining ch; turn â 8 sc. Row 2: ch 1, inc in first st, sc 6, inc in last st; turn â 10 sc. Row 3: ch 1, inc in first st, sc 8, inc in last st; turn â 12 sc. Rows 4â11: ch 1, sc in each st; turn â 12 sc. Row 12: ch 1, sc2tog, sc 8, sc2tog; turn â 10 sc. Row 13: ch 1, sc2tog, sc 6, sc2tog; turn â 8 sc. Row 14: ch 1, sc in each st â 8 sc. Fasten off. Each panel has 40 joining positions around its edge: 8 stitches along Row 1, one row end for each of Rows 2â13 on each side, and 8 stitches along Row 14.
- Body gusset Ch 3. Row 1: sc in second ch from hook and next ch; turn â 2 sc. Rows 2â40: ch 1, sc in each st; turn â 2 sc. Fasten off with a long sewing tail. Sew the short ends together to form a narrow ring, keeping the seam at a lower corner of the body.
- Join and stuff the body Pin one long edge of the gusset ring around a body panel, placing the gusset seam at a Row 1 corner. Sew one gusset row end to each of the panelâs 40 joining positions: 8 across Row 1, 12 up one side, 8 across Row 14 and 12 down the other side. Attach the second panel to the other long edge in the same way, matching its top and bottom to the first panel. Leave a short opening, add a little stuffing without rounding out the panels, then close the opening. The Row 1 edge is the flat base.
- Head Round 1: 6 sc in MR â 6. Round 2: inc around â 12. Round 3: (sc 1, inc) 6 times â 18. Round 4: (sc 2, inc) 6 times â 24. Round 5: (sc 3, inc) 6 times â 30. Rounds 6â8: sc around â 30. Round 9: (sc 3, sc2tog) 6 times â 24. Round 10: (sc 2, sc2tog) 6 times â 18. Stuff firmly. Round 11: (sc 1, sc2tog) 6 times â 12. Round 12: sc2tog 6 times â 6. Fasten off, draw the final opening closed and leave a long tail for sewing.
- Ears â make 2 Round 1: 6 sc in MR â 6. Round 2: inc around â 12. Fasten off with a sewing tail. Leave the discs flat; do not stuff.
- Arms â make 2 Round 1: 6 sc in MR â 6. Rounds 2â7: sc around â 6. Fasten off with a sewing tail. Leave the arms unstuffed so they can curve towards the songbook.
- Scarf In scarf colour, ch 41. Sc in second ch from hook and each remaining ch â 40 sc. Fasten off and weave in the ends.
- Songbook In songbook colour, ch 11. Row 1: sc in second ch from hook and each remaining ch; turn â 10 sc. Rows 2â8: ch 1, sc in each st; turn â 10 sc. Fasten off and weave in the ends. With dark thread, embroider two short horizontal lines on each half of one face, keeping the centre clear. Fold the rectangle between stitches 5 and 6 so the marked halves form two open pages, each 5 stitches wide and 8 rows tall. Finger-press the fold; do not sew the pages shut.
- Tail In mouse colour, ch 21. Sl st in second ch from hook and each remaining ch â 20 sl sts. Fasten off with a sewing tail.
- Assembly With the headâs starting ring at the crown and its closed end at the neck, embroider two eyes between head Rounds 6 and 7, about 6 stitches apart. Place a small nose centrally between Rounds 8 and 9 and add short whiskers if desired. Sew the flat ears to opposite sides of the upper head. Sew the head securely to the centre of the bodyâs Row 14 edge, facing forward. Wrap the scarf once at the neck and tie its ends loosely at the front or side. Sew an arm to each upper side of the body, bringing the free ends forward. Hold the songbook open against the front of the body and tack one outer page edge to each paw; add a discreet stitch at the lower centre fold if needed to steady it. Sew the tail to the lower back.
Finishing
- Weave in all remaining ends and check that the songbook opens visibly between the paws.
- Adjust the stuffing and flatten the base gently. Position the mouse against a firm display support.
Helpful Tips
- Keep the gusset seam at a lower corner so it is less noticeable.
- Use only light stuffing in the body; overstuffing makes the panels bulge and obscures the book.
- Embroider the page lines before folding the songbook.
7. Mouse on a Christmas Wreath

This Christmas mouse ornament pairs a seated amigurumi mouse with a softly padded wreath. The mouse sits against the lower curve, while a red bow adds colour without hiding its face.
The wreathâs narrow crocheted tube needs an even fill to hold a rounded shape without looking lumpy. A firm fabric also helps keep the stuffing out of sight, particularly where the tube curves.
The mouse is anchored to the wreath at two spaced points rather than left to dangle from one seam. That makes this a more involved little Christmas crochet project, but gives the ornament a steadier shape when hung. Embroidered facial details keep the expression simple and avoid small detachable eyes.
Mouse on a Christmas Wreath

Quick-reference card. Follow the complete written instructions below.
Materials
- DK acrylic yarn: Approximately 20 g green for the wreath, 15 g grey for the mouse, and small amounts of red and pink. Choose a resilient acrylic for the padded ring.
- Crochet hook: 3.5 mm, or a size that makes a firm fabric with no visible gaps when stuffed.
- Other supplies: Toy stuffing, stitch marker, yarn needle and scissors.
Size and Fit
One ornament size. At the suggested gauge, the wreath is approximately 9 cm across before the mouse and bow are attached. The hanging loop adds approximately 4â5 cm in height. These are estimates, not measured results.
Gauge
Aim for approximately 20 sc and 22 rounds per 10 cm in firm single crochet. Exact gauge is less important than keeping the stuffing enclosed. At this gauge, 48 rounds of the wreath tube give approximately 22 cm of length before joining its ends.
Abbreviations
US crochet terms.
- ch = chain
- sc = single crochet
- sl st = slip stitch
- inc = work 2 sc in one stitch
- dec = single crochet decrease over the next 2 stitches
- MR = magic ring
- rnd = round
Pattern
- Wreath tube With green, ch 12 and sl st into the first chain to form a ring, taking care not to twist the chain. Rnd 1: Work 1 sc into each chain around (12). Place a marker for the start of the round and continue in a spiral. Rnds 2â48: Sc in each stitch around (12 per round). Stuff the tube firmly but evenly as it grows, leaving the final few centimetres accessible for joining. Fasten off with a long sewing tail.
- Join the wreath Curve the tube into a circle without twisting it. Add stuffing to the final section, then use the green tail to whipstitch each of the 12 stitches at the open end to a corresponding foundation chain at the starting end. Adjust the stuffing before closing the seam completely. Secure the tail and weave it through the tube.
- Mouse body With grey, work 6 sc in an MR. Work in a spiral. Rnd 2: Inc in each stitch (12). Rnd 3: (1 sc, inc) 6 times (18). Rnd 4: (2 sc, inc) 6 times (24). Rnds 5â8: Sc around (24). Rnd 9: (2 sc, dec) 6 times (18). Rnd 10: (1 sc, dec) 6 times (12). Rnd 11: Sc around (12). Stuff, leaving the top opening accessible. Fasten off with a long tail for attaching the head.
- Mouse head With grey, work 6 sc in an MR. Work in a spiral. Rnd 2: Inc in each stitch (12). Rnd 3: (1 sc, inc) 6 times (18). Rnd 4: (2 sc, inc) 6 times (24). Rnds 5â7: Sc around (24). Choose one side as the face. Embroider two small eyes on rnd 6, about six stitches apart, and a pink nose centred between them on rnd 7. Secure the embroidery ends inside the head. Rnd 8: (2 sc, dec) 6 times (18). Rnd 9: (1 sc, dec) 6 times (12). Stuff firmly. Rnd 10: Dec 6 times (6). Fasten off, draw the tail through the remaining six front loops and pull closed. Weave in the tail.
- Ears Make two in grey. Work 6 sc in an MR. Rnd 2: Inc in each stitch (12). Fasten off, leaving a sewing tail. Do not stuff. Sew the flat discs to opposite sides of the top of the head, across approximately rnds 2â4, leaving the front of the face visible.
- Arms and tail For each of two arms, with grey ch 7; sl st in the second chain from the hook and in each remaining chain (6 sl sts). Fasten off with a sewing tail. Sew one arm to each side of the upper body near rnd 9. For the tail, ch 10 with grey; sl st in the second chain from the hook and in each remaining chain (9 sl sts). Sew one end to the side of the body near rnd 4.
- Assemble and anchor the mouse Sew the closed underside of the head firmly over the body’s 12-stitch top opening, with the face pointing forwards. Place the mouse against the front of the wreath’s lower curve, with its broad lower body covering part of the ring. Using grey yarn, stitch the body to the wreath at two separate points: one through the left side of body rnds 4â6 and the ring near the 7 o’clock position, and one through the right side of those rounds and the ring near 5 o’clock. At each point, pass through stitches in both fabrics several times, avoiding long exposed strands. Secure and weave in the yarn. The two spaced attachments should prevent the mouse from swinging.
- Red bow With red, ch 12. Row 1: Sc in the second chain from the hook and across (11). Rows 2â3: Ch 1, turn, sc across (11). Fasten off and weave in the ends. Pinch the strip at its centre and wrap a separate length of red yarn around the pinch several times; knot securely at the back. Sew the bow to the wreath’s upper-right curve, clear of the top centre.
- Hanging loop With green, ch 20 and fasten off, leaving a long tail at each end. Bring the chain ends together to form a loop and sew both ends to the top centre of the wreath, through the tube’s crocheted fabric. Make several passes at each end, pull firmly to check the attachment, then weave the tails well into the ring.
Finishing
- Shape the wreath into an even circle and redistribute any lumpy stuffing through the fabric.
- Check that the head, both mouse-to-wreath attachment points, bow and hanging loop are secure; weave in all remaining ends.
- Hang the ornament from its loop rather than from the bow.
Helpful Tips
- Mark the beginning of each spiral round; the wreath tube is long enough for the start of a round to become easy to lose.
- If stuffing shows through the stitches, use a smaller hook rather than packing the tube more tightly.
- Embroidered eyes avoid small detachable parts.
8. Mouse Climbing a Candy Cane

This Christmas mouse looks as though it has been caught halfway up a candy cane. The striped, softly stuffed cane gives the ornament its festive shape, while the little grey climber adds a playful detail for a tree or seasonal display.
The hook is shaped with short rows rather than wire, so this project is a good choice if you prefer a soft ornament. The bend is the part that asks for the most attention: keeping its shaping on the same side helps the cane curve smoothly.
Although the tail curls around the cane, the mouseâs grip comes from its attached paws and body. That makes the pose more secure and gives the finished ornament the look of a determined little climber.
Mouse Climbing a Candy Cane

Quick-reference card. Follow the complete written instructions below.
Materials
- DK yarn: Approximately 20 g each of red, white and grey, plus small amounts of pink and black
- Crochet hook: 2.5 mm, or a size that makes firm stitches with no gaps around the stuffing
- Other supplies: Toy stuffing, stitch marker, yarn needle and scissors
Size and Fit
One ornament size. At the suggested gauge, the cane has a circumference of approximately 5.5 cm and the mouse is approximately 8 cm long from body base to head top. The finished ornament is approximately 16â18 cm tall; stuffing and the angle of the hook affect its height.
Gauge
Indicative gauge: 22 sc and 24 rounds per 10 cm in tightly worked amigurumi fabric. Exact gauge is not essential, but the fabric must contain the stuffing.
Abbreviations
US crochet terms.
- ch = chain
- sc = single crochet
- sl st = slip stitch
- inc = work 2 sc in one stitch
- dec = single-crochet decrease over 2 stitches
- MR = magic ring
- R = round
Pattern
- Before you begin Work the cane and mouse in continuous rounds unless a short row is specified. Mark the first stitch of each round. Turning chains do not count as stitches. Stuff as you work, keeping the cane firm but not stretched.
- Candy cane: straight section With red, R1: 6 sc in MR (6). R2: inc in each stitch (12). R3: sc around (12). Change to white for R4â6, sc around each round (12). Continue with 3 rounds red, then 3 rounds white, through R36. Thus R7â9, 13â15, 19â21, 25â27 and 31â33 are red; R10â12, 16â18, 22â24, 28â30 and 34â36 are white. Each round has 12 sc.
- Candy cane: short-row hook Work R37â39 in red and R40â42 in white. For EACH of these six rounds, first work a short-row pair: sc in the next 6 stitches, ch 1 and turn; sc back across those 6 stitches, ch 1 and turn. Now complete the numbered round with 12 sc: work into the 6 stitches of the most recent short row, then into the 6 previously unworked stitches of the preceding full round. Move the round marker to the first stitch of this 12-sc round. The short rows add length to one side of the tube and bend it towards the other side; each completed round still has 12 live stitches.
- Candy cane: downward tip R43â45: with red, sc around (12 each round). R46â48: with white, sc around (12 each round). Adjust the stuffing so the hook curves smoothly. R49: with red, dec 6 times (6). Fasten off and draw the yarn through the remaining front loops to close. If the bend needs defining, take two or three small, discreet securing stitches along its inside curve; do not pull them so tightly that the tube puckers.
- Mouse: body and head With grey, R1: 6 sc in MR (6). R2: inc in each stitch (12). R3â10: sc around (12 each round). R11: dec 6 times to form the neck (6). R12: inc in each stitch (12). R13: (sc, inc) 6 times (18). R14â17: sc around (18 each round). Before closing, embroider two black eyes on the front of the head at approximately R15, three stitches apart, and a small pink nose at approximately R17â18. Stuff the body and head. R18: (sc, dec) 6 times (12). R19: dec 6 times (6). Fasten off and close through the remaining front loops.
- Ears Make two in grey. For each ear, R1: 6 sc in MR (6). R2: inc in each stitch (12). Fasten off with a sewing tail. Do not stuff. Flatten each disc slightly and sew its lower edge to one side of the head at approximately R14â15.
- Front gripping paws Make two in grey. For each paw, R1: 4 sc in MR (4). R2â5: sc around (4 each round). Fasten off with a sewing tail. Leave unstuffed.
- Hind paws Make two in grey. For each paw, ch 4; starting in the second chain from the hook, sc in each of the next 3 chains (3). Fasten off with a sewing tail.
- Tail With grey, ch 25. Starting in the second chain from the hook, sl st in each of the next 24 chains. Fasten off, leaving a long tail for sewing.
- Assembly Place the mouse lengthwise against the straight part of the cane, with its body base near cane R9 and its head pointing towards the hook. Sew the back of the torso to the cane at several points. Sew one end of each front paw to the body around mouse R8â10, bring the paws around the sides of the cane, and stitch their tips securely to the cane. Attach the hind paws near mouse R3â4 and sew their free ends to the cane. Sew the tail to the back of the mouse near R3, curve it loosely around the cane, and tack its tip in place. The sewn paws and torso, not the tail, support the mouse.
Finishing
- Weave in all ends, checking that every paw attachment is secure.
- For a hanging loop, ch 25 in red or white. Fasten off with a long tail at each end and sew both ends securely to the outer top of the caneâs bend, around R39â41. Check how the ornament hangs before fastening off the sewing tails.
Helpful Tips
- Keep the first six stitches of each hook round facing the same side of the cane; changing sides between rounds will disrupt the curve.
- Embroidered facial features avoid hard parts on a hanging ornament.
- If the cane fabric shows stuffing, use a smaller hook rather than adding extra stitches.
9. Christmas Pudding Mouse

This Christmas pudding mouse combines a low, rounded pudding body with a little face that peeks out from the front. Its flat underside helps it sit upright as a festive decoration, while the separate head keeps the pudding shape easy to recognise.
The cream icing has an uneven scalloped edge that suggests drips without hiding the brown pudding beneath. Rounded ears, small paws and holly above the face give the mouse its character; embroidered features and crocheted berries keep the details soft.
It is a manageable project for a confident beginner who is comfortable shaping small amigurumi pieces. The main visual choice is the balance between the face and the icing: both should remain distinct so the finished piece reads as a mouse and a Christmas pudding at a glance.
Christmas Pudding Mouse
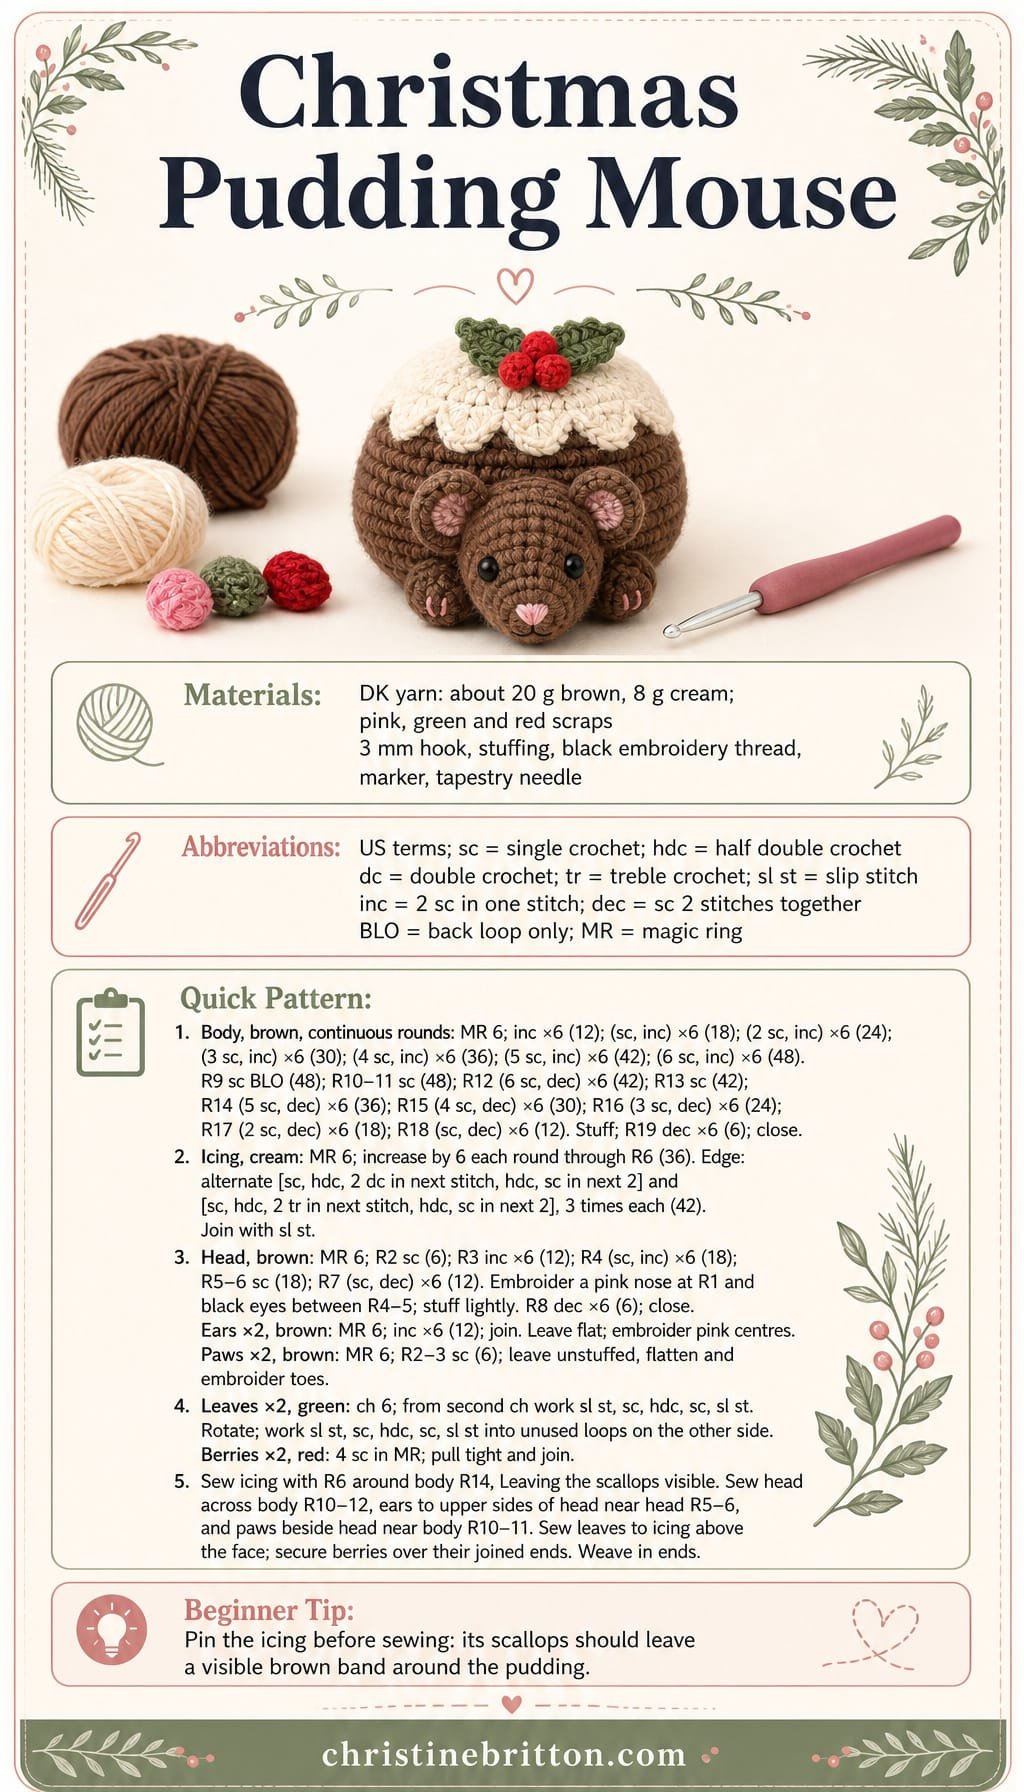
Quick-reference card. Follow the complete written instructions below.
Materials
- DK yarn: Approximately 20 g brown and 8 g cream, plus small amounts of pink, green and red.
- Crochet hook: 3 mm, or a size that makes a firm fabric without gaps.
- Other: Toy stuffing, black embroidery thread, stitch marker and tapestry needle.
Size and Fit
One size. At the suggested gauge, expect a body approximately 7 cm across and 5 cm high, excluding the head, ears and holly. Finished dimensions are approximate and will vary with yarn and tension.
Gauge
Aim for approximately 22 sc and 26 rounds per 10 cm in firm, unstuffed single crochet. A gap-free fabric matters more than an exact gauge.
Abbreviations
US crochet terms.
- ch = chain
- sc = single crochet
- hdc = half double crochet
- dc = double crochet
- tr = treble crochet
- sl st = slip stitch
- inc = 2 sc in the same stitch
- dec = single crochet 2 stitches together
- BLO = back loop only
- MR = magic ring
Pattern
- Before you begin Work the body, head and small pieces in continuous rounds unless instructed otherwise. Mark the first stitch of each round. Numbers in brackets are stitch counts. For every MR, an adjustable ring is recommended so it can be pulled closed.
- Pudding body â brown Round 1: 6 sc in MR (6). Round 2: inc in each stitch (12). Round 3: (sc, inc) 6 times (18). Round 4: (2 sc, inc) 6 times (24). Round 5: (3 sc, inc) 6 times (30). Round 6: (4 sc, inc) 6 times (36). Round 7: (5 sc, inc) 6 times (42). Round 8: (6 sc, inc) 6 times (48). Round 9: sc BLO around (48); this forms the edge of the flat underside. Rounds 10â11: sc around (48 each round). Round 12: (6 sc, dec) 6 times (42). Round 13: sc around (42). Round 14: (5 sc, dec) 6 times (36). Round 15: (4 sc, dec) 6 times (30). Round 16: (3 sc, dec) 6 times (24). Round 17: (2 sc, dec) 6 times (18). Round 18: (sc, dec) 6 times (12). Stuff firmly enough to support the dome while keeping the underside flat. Round 19: dec 6 times (6). Fasten off, thread the tail through the front loops of the remaining 6 stitches and pull closed.
- Icing cap â cream Round 1: 6 sc in MR (6). Round 2: inc in each stitch (12). Round 3: (sc, inc) 6 times (18). Round 4: (2 sc, inc) 6 times (24). Round 5: (3 sc, inc) 6 times (30). Round 6: (4 sc, inc) 6 times (36). Scalloped edge: work the following two sequences alternately, 3 times each. Short scallop: sc in next stitch, hdc in next, 2 dc in next, hdc in next, sc in next 2. Long scallop: sc in next stitch, hdc in next, 2 tr in next, hdc in next, sc in next 2. Each scallop uses 6 stitches and produces 7; the edge has 42 stitches. Sl st to the first sc of the edge and fasten off, leaving a sewing tail.
- Mouse head â brown The first round will be the projecting tip of the muzzle. Round 1: 6 sc in MR (6). Round 2: sc around (6). Round 3: inc in each stitch (12). Round 4: (sc, inc) 6 times (18). Rounds 5â6: sc around (18 each round). Round 7: (sc, dec) 6 times (12). Embroider a small pink nose over the closed centre of Round 1. On the upper side of the head, embroider two black eyes between Rounds 4 and 5, one on either side of the muzzle. Stuff lightly. Round 8: dec 6 times (6). Fasten off and close the opening through the front loops; leave a long tail for attaching the head.
- Ears â make 2 in brown Round 1: 6 sc in MR (6). Round 2: inc in each stitch (12). Sl st to the next stitch and fasten off with a sewing tail. Do not stuff. Add a few pink embroidery stitches at the centre of each flat ear.
- Paws â make 2 in brown Round 1: 6 sc in MR (6). Rounds 2â3: sc around (6 each round). Fasten off with a sewing tail. Do not stuff; flatten each little tube and add two short pink embroidered toe lines near its closed tip.
- Holly leaves â make 2 in green Ch 6. Starting in the second ch from the hook, work sl st, sc, hdc, sc, sl st along the chain. Rotate the work and, in the unused loops on the other side of the chain, work sl st, sc, hdc, sc, sl st back towards the starting end. Fasten off with a sewing tail. Each leaf has 5 stitches on each side of its centre chain.
- Holly berries â make 2 in red Work 4 sc in an MR. Pull the ring tight, sl st to the first sc and fasten off with a sewing tail. Each berry has 4 sc.
- Assembly Place the icing over the closed top of the body. Its Round 6 should sit around body Round 14; let the scallops fall towards Round 13. Sew beneath the scallops so their uneven edge remains visible. Choose a front. Sew the closed back of the head securely to the body across approximately Rounds 10â12, with its muzzle pointing outwards; keep the underside unobstructed. Sew an ear by a short section of its outer edge to each upper side of the head, near head Rounds 5â6, leaving most of each disc free. Sew one flattened paw to the body on either side of the head, near body Rounds 10â11, with the embroidered toes facing forwards. Finally, sew the two leaves to the icing just above the face, angled apart, and stitch the berries firmly over their joined ends.
Finishing
- Weave in all ends securely without pulling the flat underside out of shape.
- Check that the ears, paws, leaves and berries are firmly attached. This is a decorative amigurumi piece, not a toy for a young child.
Helpful Tips
- If stuffing shows through the brown stitches, use a smaller hook rather than packing in less stuffing.
- Pin the icing and face in place before sewing so the scallops frame the head and the pudding’s brown lower edge stays visible.
- Keep the ear discs flat; stuffing them would hide their rounded outline.
If youâd like to keep building your crochet skills, take a look at crochet Christmas reindeer projects.
10. Gingerbread Mouse

This Gingerbread Mouse has the look of a decorated Christmas biscuit: a tan mouse silhouette with wide ears, white icing-style stitches and a little red bow. Its lightly stuffed, flattened shape makes it a festive decoration rather than a rounded amigurumi toy.
The outline is formed from matching front and back panels, with the ears shaped as part of each panel. That gives the mouse its distinctive silhouette without separate ear pieces. The stitched details sit on the front, while a contrasting border frames the finished shape.
This is an appealing project if you enjoy shaping flat crochet and adding small embroidered details. The main thing to watch is the balance between a little softness and a crisp outline: too much stuffing would lose the gingerbread-biscuit effect.
Gingerbread Mouse

Quick-reference card. Follow the complete written instructions below.
Materials
- Tan DK cotton yarn: Approximately 25â35 g for the two panels.
- White DK cotton yarn: A small amount for the joined edge and stitched icing.
- Red and dark embroidery yarn: Small lengths for the bow and facial features.
- 3 mm crochet hook: Or a size that makes a firm fabric with no obvious stuffing gaps.
- Polyester stuffing: A small amount.
- Tapestry needle, stitch marker and scissors: For embroidery, assembly and finishing.
Size and Fit
One size. Approximately 11â12 cm tall and 7â8 cm wide at the suggested gauge, including the edging. This is a decorative item, not a toy.
Gauge
Approximately 22 sc and 24 rows to 10 cm in flat single crochet. Exact gauge is not essential, but use firm stitches so the stuffing stays inside.
Abbreviations
US crochet terms.
- ch = chain
- sc = single crochet
- sc2tog = single crochet two stitches together; a one-stitch decrease
- st(s) = stitch(es)
- RS = right side, which will face outwards
Pattern
- Before you begin Make two identical tan panels, working in rows from the bottom of the body upwards. Turn after every row unless instructed otherwise. A turning ch 1 never counts as a stitch. Work each increase as 2 sc in one stitch. Choose the RS of each panel before making the ears; row 21 begins at the left edge when the RS faces you.
- Body, rows 1â5 Ch 10. Row 1: Sc in the second ch from the hook and in each remaining ch (9 sc). Ch 1, turn. Row 2: 2 sc in the first st, sc in the next 7 sts, 2 sc in the last st (11 sc). Ch 1, turn. Row 3: Sc across (11 sc). Ch 1, turn. Row 4: 2 sc in the first st, sc in the next 9 sts, 2 sc in the last st (13 sc). Ch 1, turn. Row 5: 2 sc in the first st, sc in the next 11 sts, 2 sc in the last st (15 sc). Ch 1, turn.
- Body and neck, rows 6â14 Rows 6â8: Sc across (15 sc per row). Ch 1 and turn after each row. Row 9: Sc2tog, sc in the next 11 sts, sc2tog (13 sc). Ch 1, turn. Row 10: Sc across (13 sc). Ch 1, turn. Row 11: Sc2tog, sc in the next 9 sts, sc2tog (11 sc). Ch 1, turn. Row 12: Sc across (11 sc). Ch 1, turn. Row 13: Sc2tog, sc in the next 7 sts, sc2tog (9 sc). Ch 1, turn. Row 14: Sc across (9 sc). Ch 1, turn.
- Head, rows 15â20 Row 15: 2 sc in the first st, sc in the next 7 sts, 2 sc in the last st (11 sc). Ch 1, turn. Row 16: 2 sc in the first st, sc in the next 9 sts, 2 sc in the last st (13 sc). Ch 1, turn. Row 17: 2 sc in the first st, sc in the next 11 sts, 2 sc in the last st (15 sc). Ch 1, turn. Rows 18â20: Sc across (15 sc per row). Ch 1 and turn after rows 18 and 19 only.
- First ear, rows 21â25 With the RS facing you and row 20âs left edge ready to work, row 21: Sc in the first 4 sts; leave the remaining 11 sts unworked (4 sc). Ch 1, turn. Rows 22â23: Sc across (4 sc per row). Ch 1, turn after each row. Row 24: Sc2tog twice (2 sc). Ch 1, turn. Row 25: Sc2tog (1 sc). Fasten off.
- Second ear, rows 21â25 With the RS facing you, count row 20âs stitches from the left edge and join tan yarn to the 12th stitch. Row 21: Sc in stitches 12â15, working towards the right edge (4 sc). The 7 centre stitches of row 20 remain exposed between the ears. Ch 1, turn. Work rows 22â25 exactly as for the first ear. Fasten off. Repeat the complete panel instructions to make a second silhouette.
- Stitched decoration Decorate one panel before assembly. With white yarn and a tapestry needle, sew a short curved icing line across the neck, broken icing dashes near the lower body and a few short dashes inside each ear. Use dark embroidery yarn for two small eyes and a nose; add short whiskers if desired. Sew a small red bow at the neck using two stitched loops and a few securing stitches at their centre. Keep all yarn ends on the back of the decorated panel.
- Join and stuff Place the panels together with their RS facing out, matching the ears, neck and bottom edge. Join white yarn at one side of the body. Sc through both layers around the entire outline, including up and down each ear and across the 7-stitch dip between them. Work approximately one sc per row end and one sc per exposed stitch along horizontal edges; add a stitch at a tight corner if needed to keep the edge flat. Stop with a 3 cm opening on the body side. Add a little stuffing, spreading it thinly into the head and ears without rounding the biscuit-like shape. Sc through both layers across the opening, join to the first edging sc and fasten off.
Finishing
- Weave in all ends securely on the inside or into the joined edge.
- Gently shape the ears and flatten the stuffed panels by hand. Do not press the stuffing with a hot iron.
Helpful Tips
- Mark the first and last four stitches of row 20 before working the ears; this leaves exactly seven centre stitches for the dip.
- If the contrasting edge pulls the silhouette inward, work a few extra sc around the ear points and lower corners.
- Embroider the features rather than attaching beads or glued decorations.
11. Christmas Tree Mouse

This Christmas Tree Mouse brings a little character to a classic festive shape. A mouse peeks out near the top of the tree, with its ears visible beneath a flat star.
The stuffed cone supports separate scalloped branches, giving the tree a layered outline without hiding the mouseâs face. It makes a cheerful small decoration for a mantelpiece or seasonal display.
This is an intermediate project because the shaped cone, separate branches and small character details all need careful placement. The result combines the appeal of Christmas amigurumi with the silhouette of a miniature tree.
Christmas Tree Mouse

Quick-reference card. Follow the complete written instructions below.
Materials
- DK yarn: Green for the tree, mouse-coloured yarn for the head and ears, yellow for the star, and a little pink for the nose.
- 3 mm crochet hook: Or a size that makes a firm fabric through which stuffing will not show.
- Toy stuffing: For the cone and mouse head.
- Black embroidery thread: For the eyes.
- Other tools: Stitch marker, tapestry needle and scissors.
Size and Fit
One size. At the suggested gauge, expect a tree approximately 12 cm tall including the star, with a base about 7 cm across. The scalloped bottom tier extends beyond the base. Dimensions will vary with yarn and tension.
Gauge
Aim for approximately 20 sc and 22 rounds per 10 cm in firm fabric. Exact gauge is not essential; use a smaller hook if stuffing shows.
Abbreviations
US crochet terms.
- ch = chain
- st(s) = stitch(es)
- sl st = slip stitch
- sc = single crochet
- hdc = half double crochet
- dc = double crochet
- inc = work 2 sc in one stitch
- dec = single-crochet two stitches together
- MR = magic ring
- rnd = round
- rep = repeat
Pattern
- Before you begin Work in continuous rounds unless instructed otherwise. Mark the first stitch of each round. Do not count a joining sl st or starting ch as a stitch.
- Tree cone With green, ch 42 and sl st into the first ch to form a ring, taking care not to twist it. Rnd 1: Ch 1, sc in each ch around (42). Rnds 2â3: Sc around (42). Rnd 4: [Sc in next 5 sts, dec] 6 times (36). Rnds 5â6: Sc around (36). Rnd 7: [Sc in next 4 sts, dec] 6 times (30). Rnds 8â9: Sc around (30). Rnd 10: [Sc in next 3 sts, dec] 6 times (24). Rnds 11â12: Sc around (24). Rnd 13: [Sc in next 2 sts, dec] 6 times (18). Rnds 14â15: Sc around (18). Rnd 16: [Sc in next st, dec] 6 times (12). Rnds 17â18: Sc around (12). Rnd 19: Dec 6 times (6). Rnds 20â21: Sc around (6). Fasten off, draw the yarn tail through the six remaining stitches and pull the tip closed.
- Flat base With green, make 6 sc in an MR (rnd 1). Rnd 2: Inc in each st (12). Rnd 3: [Sc in next st, inc] 6 times (18). Rnd 4: [Sc in next 2 sts, inc] 6 times (24). Rnd 5: [Sc in next 3 sts, inc] 6 times (30). Rnd 6: [Sc in next 4 sts, inc] 6 times (36). Rnd 7: [Sc in next 5 sts, inc] 6 times (42). Fasten off, leaving a long sewing tail.
- Three separate branch tiers Make one tier with a 42-ch starting ring, one with a 30-ch ring and one with an 18-ch ring. For each tier, sl st into the first ch without twisting the ring. Rnd 1: Ch 1, sc in each ch around (42, 30 or 18 sc). Rnd 2: Rep [sc in next 2 sts, inc] around (56, 40 or 24 sc). Rnd 3: Rep [sl st in next st, sc in next st, hdc in next st, 3 dc in next st, hdc in next st, sc in next st, sl st in each of next 2 sts] around. This makes 7, 5 or 3 scallops respectively. Fasten off each tier, leaving a long tail at its unscalloped starting edge for sewing.
- Mouse head With mouse-coloured yarn, make 6 sc in an MR (rnd 1). Rnd 2: Inc in each st (12). Rnd 3: [Sc in next st, inc] 6 times (18). Rnds 4â5: Sc around (18). Rnd 6: [Sc in next st, dec] 6 times (12). Embroider two eyes on the front of rnd 4, about four stitches apart, and a small pink nose between them on rnd 3. Stuff the head lightly. Rnd 7: Dec 6 times (6). Fasten off and draw the tail through the remaining stitches to close.
- Mouse ears Make two. With mouse-coloured yarn, make 6 sc in an MR (rnd 1). Rnd 2: Inc in each st (12). Fasten off with a sewing tail. Leave both discs flat and unstuffed; pinch one edge of each disc to form its base.
- Flat star With yellow, make 10 sc in an MR and pull the ring closed. For each of five points: sl st in the next sc, ch 4, sl st in the second ch from the hook, sc in the next ch, hdc in the last ch, then sl st in the next sc of the ring. Each point uses two ring stitches. Fasten off with a sewing tail. Do not stuff the star.
- Assembly Stuff the cone firmly but evenly. Sew the 42-stitch edge of the base to the coneâs 42-stitch starting edge, matching one stitch of each edge all the way around; add stuffing before closing the seam. Sew the tiers on from bottom upwards: attach the unscalloped 42-stitch edge around cone rnd 2, the 30-stitch edge around rnd 8, and the 18-stitch edge around rnd 14. Distribute stitches evenly around each matching round and leave the scalloped edges free to fall downwards. Sew the mouse head to the front of the narrow section above the top tier, centred over cone rnds 16â19. Secure its lower edge close to the top tier so it appears to emerge from the branches. Sew the pinched ear bases to opposite upper sides of the head, with the ears standing above it. Sew the star flat against the cone tip above and between the ears.
Finishing
- Check that the stuffed base sits flat; redistribute stuffing if needed.
- Weave in all remaining ends without pulling the scallops tight.
- Gently arrange the free branch edges, ears and star by hand.
Helpful Tips
- Count each cone decrease round before continuing; the tier sizes depend on those stitch counts.
- Sew only the starting edge of each tier to the cone so the scallops remain distinct.
- For an item intended for a young child, embroider every facial detail and secure all pieces firmly.
12. Mouse in a Christmas Mitten

This Christmas mouse peeks out of a striped mitten rather than wearing one. The mitten is a flat-backed pocket with a recognisable thumb, giving the decoration a playful silhouette that works well on a tree or as part of a festive display.
The mitten takes its shape from two flat panels, while the little mouse has a separate stuffed body. That combination makes this an engaging intermediate project: the stripes keep the panels visually lively, and the pocket gives the mouse a place to nestle without hiding its face.
This is intended as a decoration, not a toy. Its embroidered features suit the small scale, but the hanging loop should still be kept out of young childrenâs reach.
Mouse in a Christmas Mitten

Quick-reference card. Follow the complete written instructions below.
Materials
- DK cotton yarn: Small amounts of red and cream for the mitten, grey for the mouse, and pink for the nose and ear details.
- 3 mm crochet hook: Or a hook that produces a firm fabric with your chosen yarn.
- Toy stuffing: A small amount for the mouse.
- Black embroidery thread: For the eyes.
- Tapestry needle and stitch marker: For sewing, embroidery and marking the start of rounds.
Size and Fit
One decorative size. At the suggested gauge, the mitten is approximately 5.5 cm wide across the palm and 7 cm from cuff to fingertip, excluding the thumb and hanging loop. The mouseâs head extends above the cuff; its exact position is set during assembly.
Gauge
Approximately 22 sc and 22 rows per 10 cm in flat sc. Exact gauge is not critical, but use a firm fabric that holds the pocketâs shape and contains the stuffing.
Abbreviations
US crochet terms.
- ch = chain
- sc = single crochet
- sc2tog = single crochet two stitches together
- sl st = slip stitch
- MR = magic ring
- rnd = round
Pattern
- Before you begin Make two identical mitten panels, one for the front and one for the back. Work the panels in turned rows; the turning ch does not count as a stitch. Change colour in the last yarn-over of the preceding row. Make the mouse in continuous rounds, marking the first stitch of each rnd.
- Mitten panels: rows 1â3 With red, ch 13. Row 1: Sc in the second ch from the hook and in each remaining ch; 12 sc. Rows 2â3: Ch 1, turn, sc in each stitch; 12 sc. Change to cream for row 4.
- Mitten panels: thumb and stripes, rows 4â12 Row 4: Ch 1, turn, sc in all 12 stitches, then ch 5 to extend the thumb side; the 5 chains are not counted as row 4 stitches. Row 5: Turn, sc in the second ch from the hook and in the next 3 chains, then sc in all 12 stitches of row 4; 16 sc. Change to red. Rows 6â7: Ch 1, turn, sc in all 16 stitches. Change to cream. Row 8: Ch 1, turn, sc in the first 12 stitches; leave the remaining 4 thumb stitches unworked. Row 9: Ch 1, turn, sc in all 12 stitches. Change to red. Rows 10â11: Ch 1, turn, sc in all 12 stitches. Change to cream. Row 12: Ch 1, turn, sc in all 12 stitches.
- Mitten panels: rounded fingertip, rows 13â15 Row 13: Ch 1, turn, sc2tog, sc in the next 8 stitches, sc2tog; 10 stitches. Change to red. Row 14: Ch 1, turn, sc2tog, sc in the next 6 stitches, sc2tog; 8 stitches. Row 15: Ch 1, turn, sc2tog, sc in the next 4 stitches, sc2tog; 6 stitches. Fasten off, leaving a sewing tail on one panel. Make the second panel in the same way.
- Mouse head With grey, work in continuous rnds. Rnd 1: 6 sc in an MR; 6. Rnd 2: 2 sc in each stitch; 12. Rnd 3: (Sc in the next stitch, 2 sc in the next stitch) 6 times; 18. Rnds 4â6: Sc in each stitch; 18. Rnd 7: (Sc in the next stitch, sc2tog) 6 times; 12. Embroider two black eyes on rnd 4, about 3 stitches apart, and a small pink nose centred beneath them on rnd 5. Stuff lightly. Rnd 8: Sc2tog 6 times; 6. Fasten off, leaving the six-stitch opening unclosed and a tail for sewing.
- Mouse torso With grey, work in continuous rnds. Rnd 1: 6 sc in an MR; 6. Rnd 2: 2 sc in each stitch; 12. Rnds 3â6: Sc in each stitch; 12. Rnd 7: Sc2tog 6 times; 6. Stuff lightly and fasten off, leaving the six-stitch opening unclosed. Using the headâs tail, sew the head and torso openings together, matching their six stitches.
- Ears and tail Make two ears with grey: work 6 sc in an MR, close the ring and fasten off with a sewing tail. Stitch a little pink yarn through the centre of each ear. Sew the ears to opposite sides of the top of the head, around rnds 2â3. For the tail, join grey yarn near the torsoâs starting ring, ch 15, sl st in the second ch from the hook and in each remaining ch; 14 sl sts. Fasten off and secure the end.
- Join the mitten Lay the panels together with their stripes aligned and both thumbs projecting on the same side. Either face of a panel may face out. With a tapestry needle, sew through the edge loops of both layers, starting at one cuff corner. Follow the side edge, around the projecting thumb and its inset, around the fingertip and down the other side. Stop at the opposite cuff corner. Do not sew across the row-1 edges: these form the pocket opening. Turn or ease the joined mitten so the seam sits neatly at the edge, with the cuff uppermost and the fingertip pointing down.
- Secure the mouse and add a loop Slip the mouse into the open cuff with its face towards the mitten front. Position its torso against the inside of the back panel so that the head rises about 2 cm above the cuff. Sew several stitches through the torso and back panel, roughly 2â3 cm below the cuff; avoid catching the front panel so the pocket remains open. To make a hanging loop, join red yarn through the back panel near the centre of the fingertip seam, ch 20, then sl st into the same attachment point. Fasten off and secure both ends through the back panel.
Finishing
- Weave in all yarn ends, taking care not to close the cuff.
- Gently shape the thumb, fingertip and ears with your fingers. Check that the mouse is secure and the hanging loop is anchored through the back panel.
Helpful Tips
- On row 8, the four unworked stitches form the outer edge of the thumb; do not crochet across them on row 9.
- Arrange the two panels by their outlines rather than insisting that the same fabric face points outward on both.
- Embroidered eyes avoid small detachable parts on this decoration. Keep the hanging loop and decoration away from young children.
13. Christmas Angel Mouse

This Christmas angel mouse brings a gentle character to a festive display. Its rounded ears and embroidered face peek above a flared gown, while the wings and halo make the angel theme clear from the back as well as the front.
The gown widens towards a separate flat base, giving the mouse a steady shape for a shelf or mantelpiece. The wings are flat, shaped pieces with free outer edges, so they stand out from the gown rather than wrapping around it. A crocheted halo sits behind the ears without wire.
This is an intermediate project because several small components need to sit together neatly. It is worth considering the mouse from all sides before attaching them: the face establishes the front, while the wings and little tail belong at the back.
Christmas Angel Mouse

Quick-reference card. Follow the complete written instructions below.
Materials
- Smooth DK yarn: Cream for the head, ears, gown, base and tail; a small amount of white for the wings and halo.
- Embroidery yarn: Brown or black for the eyes and mouth, and pink for the nose and optional inner-ear details.
- Crochet hook: 3 mm, or a size that produces a firm fabric without visible gaps.
- Other supplies: Toy stuffing, stitch marker, yarn needle and scissors.
Size and Fit
One size, made to the round and row counts below. Finished dimensions will vary with yarn and tension.
Gauge
Exact gauge is not essential. Work firmly enough that stuffing does not show through the stitches.
Abbreviations
US crochet terms.
- ch = chain
- sc = single crochet
- sc2tog = single crochet two stitches together
- sl st = slip stitch
- st(s) = stitch(es)
- R / Row = round / row
Pattern
- Before you begin Work the gown, base, head and ears in continuous rounds; mark the first stitch of each round. Work wings in turned rows. Beginning chains on the wings do not count as stitches.
- Gown and torso With cream, R1: 6 sc in a magic ring (6). R2: 2 sc in each st (12). R3: [sc, 2 sc in next st] 6 times (18). R4: [sc in next 2 sts, 2 sc in next st] 6 times (24). R5â8: sc around (24). R9: [sc in next 3 sts, 2 sc in next st] 6 times (30). R10: sc around (30). R11: [sc in next 4 sts, 2 sc in next st] 6 times (36). R12: sc around (36). R13: [sc in next 5 sts, 2 sc in next st] 6 times (42). R14: sc around (42). R15: [sc in next 6 sts, 2 sc in next st] 6 times (48). R16â18: sc around (48). Fasten off, leaving a long tail for attaching the base.
- Flat base With cream, R1â7: work as for gown R1â4, then continue the same six evenly spaced increases each round: R5 (30), R6 (36), R7 (42). R8: [sc in next 6 sts, 2 sc in next st] 6 times (48). Fasten off. Lightly stuff the gown, keeping its lower edge level. Match the base’s 48 stitches to the gown’s 48 stitches and sew them together around the edge. Add stuffing before closing the final gap; the base should remain flat.
- Head With cream, R1: 6 sc in a magic ring (6). R2: 2 sc in each st (12). R3: [sc, 2 sc in next st] 6 times (18). R4: [sc in next 2 sts, 2 sc in next st] 6 times (24). R5: [sc in next 3 sts, 2 sc in next st] 6 times (30). R6: [sc in next 4 sts, 2 sc in next st] 6 times (36). R7â12: sc around (36). R13: [sc in next 4 sts, sc2tog] 6 times (30). R14: [sc in next 3 sts, sc2tog] 6 times (24). R15: [sc in next 2 sts, sc2tog] 6 times (18). Embroider two small eyes between R9 and R10, about six stitches apart, with the nose centred below them around R11. Add a short mouth if desired. Stuff firmly. R16: [sc, sc2tog] 6 times (12). R17: sc2tog 6 times (6). Fasten off and draw the tail through the remaining front loops to close. Sew the closed underside of the head securely to the centre of the gown’s R1â4, with the face pointing forwards.
- Ears â make two With cream, R1: 6 sc in a magic ring (6). R2: 2 sc in each st (12). R3: [sc, 2 sc in next st] 6 times (18). Fasten off with a sewing tail. Leave the circles flat and unstuffed. If desired, embroider a few pink stitches near each centre. Sew a short section of each ear’s lower edge to one side of the head across approximately R5â7, leaving most of each circle visible.
- Wings â make two With white, ch 6. Row 1: sc in second ch from hook and in each remaining ch, ch 1, turn (5). Row 2: 2 sc in first st, sc in next 3 sts, 2 sc in last st, ch 1, turn (7). Row 3: 2 sc in first st, sc in next 5 sts, 2 sc in last st, ch 1, turn (9). Row 4: sc across, ch 1, turn (9). Row 5: sc2tog, sc in next 5 sts, sc2tog, ch 1, turn (7). Row 6: sc2tog, sc in next 3 sts, sc2tog (5). Fasten off with a long sewing tail. Place the wings side by side on the upper back of the gown, with their shaped edges flaring outwards. Sew each wing along its inner edge to the gown, roughly across gown R4â9; leave the outer edges free.
- Halo With white, ch 24 and sl st into the first ch to form a ring, taking care not to twist it. Work 1 sc into each ch around (24); sl st to the first sc and fasten off with a long tail. Lay the ring flat behind the upper part of the head so that its top rises above the crown. Stitch its lower arc directly to the back of the head behind the ears, then secure it at another point near the crown to help it stay upright. Do not use wire.
- Tail With cream, ch 17. Sl st in the second ch from hook and in each remaining ch (16 sl sts). Fasten off with a sewing tail and attach the tail at the centre back of the gown around R13, below the wings.
Finishing
- Weave in ends securely, checking that the head, wings and halo are firmly attached.
- Shape the gown over its flat base and smooth the wings so their free edges extend from the back.
Helpful Tips
- Before sewing on the head, mark the gown’s front and back so the face, wings and tail line up.
- Keep stuffing light at the gown’s hem; overstuffing can round out the flat base.
- For a toy intended for a young child, embroider all facial details and secure every attachment especially carefully.
14. Mouse Riding a Christmas Sleigh

This Christmas mouse sits on top of a little red sleigh, with its scarf adding a bright detail beside the curled runner ends. It makes a cheerful addition to a festive display, particularly among other small crochet decorations.
The sleigh gets its shape from doubled crochet fabric rather than wire. Its low seat and short upright back frame the mouse without hiding it, while the runner ends remain visible beyond the seat.
This is an intermediate project because the separate pieces need careful alignment as well as firm stitching. Once assembled, the mouse is anchored at its seated base, feet and paws so it stays in place on the sleigh.
Mouse Riding a Christmas Sleigh

Quick-reference card. Follow the complete written instructions below.
Materials
- DK cotton or cotton-blend yarn: Red for the sleigh and scarf; brown for the mouse; a small amount of pale pink or cream for the muzzle.
- Black embroidery thread: For the eyes and nose.
- 3 mm crochet hook: Or a size that produces firm stitches without gaps in the stuffed pieces.
- Polyester toy stuffing: A small amount for the mouse.
- Tapestry needle, stitch marker and pins: For assembly and keeping the runner positions even.
Size and Fit
One size. At the stated gauge, the seat is approximately 7.5 Ã 4.5 cm and the runners are approximately 9.5 cm long before their ends turn upwards. The mouse sits on the seat rather than fitting inside the back panel.
Gauge
Approximately 20 sc and 22 rows to 10 cm in firm, flat single crochet. Matching the stitch counts and keeping the fabric dense matter more than matching the finished dimensions exactly.
Abbreviations
US crochet terms.
- ch = chain
- sc = single crochet
- sl st = slip stitch
- inc = work 2 sc in one stitch
- dec = single-crochet decrease over the next 2 stitches
- st(s) = stitch(es)
- rnd = round
Pattern
- Working notes Work flat pieces in rows, turning with ch 1; the turning chain never counts as a stitch. Work mouse pieces in continuous rounds unless directed otherwise, marking the first stitch of each round. Numbers in parentheses give the stitch count at the end of the row or round.
- Seat With red, make two identical rectangles. Ch 16. Row 1: sc in the second ch from the hook and in each remaining ch (15). Rows 2â10: ch 1, turn, sc in each st (15). Fasten off each piece. Place the rectangles together and sew around all four edges to make one firm seat. Row 1 is the front edge; Row 10 is the back edge.
- Short back With red, make two identical panels. Ch 16. Row 1: sc in the second ch from the hook and in each remaining ch (15). Rows 2â5: ch 1, turn, sc in each st (15). Fasten off. Hold the panels together and sew their side and top edges. Sew their joined Row 1 edges upright along the seat’s back edge (Row 10), taking stitches securely through both seat layers.
- Runner strips Make four identical red strips: two layers for each of two runners. For each strip, ch 20. Row 1: sc in the second ch from the hook and in each remaining ch (19). Rows 2â3: ch 1, turn, sc in each st (19). Do not fasten off until its first tip is complete.
- First upturned tip on each runner strip After Row 3, ch 1 and turn. Tip Row 1: sc in the first 4 sts only (4). Tip Row 2: ch 1, turn, sc in each st (4). Tip Row 3: ch 1, turn, sc in the first 2 sts, dec (3). Tip Row 4: ch 1, turn, sc in the first st, dec (2). Tip Row 5: ch 1, turn, dec (1). Fasten off. This tip occupies one end of the strip’s Row 3 edge.
- Second upturned tip on each runner strip Join red yarn to the outermost unused stitch at the opposite end of the same Row 3 edge. Tip Row 1: ch 1, sc across the 4 end stitches towards the centre (4). Tip Row 2: ch 1, turn, sc in each st (4). Tip Row 3: ch 1, turn, dec, sc in the next 2 sts (3). Tip Row 4: ch 1, turn, dec, sc in the last st (2). Tip Row 5: ch 1, turn, dec (1). Fasten off. Repeat both tips on all four strips.
- Double and shape the runners Pair the strips with their upturned tips aligned and their right sides facing out. Sew around each pair to make two doubled, unstuffed runners. On each end, use a small stitch to draw the one-stitch tip slightly inwards towards the middle of its runner, creating a hooked curl. Keep both runners shaped alike. Pin the runners parallel beneath the seat, one near Row 2 and one near Row 9. Centre their 19-stitch lengths beneath the seat’s 15-stitch width so approximately 2 runner stitches extend beyond the seat at each end. Sew the straight upper edge of each runner firmly to the underside of the seat across the central 15 stitches. Leave the upturned ends visible.
- Mouse body With brown, make a magic ring. Rnd 1: 6 sc in ring (6). Rnd 2: inc in each st (12). Rnd 3: (sc, inc) 6 times (18). Rnd 4: (sc in next 2 sts, inc) 6 times (24). Rnds 5â8: sc in each st (24). Rnd 9: (sc in next 2 sts, dec) 6 times (18). Rnds 10â11: sc in each st (18). Stuff firmly. Rnd 12: (sc, dec) 6 times (12). Rnd 13: dec 6 times (6). Fasten off and draw the opening closed. The starting rounds form the seated base.
- Mouse head With brown, make a magic ring. Rnd 1: 6 sc in ring (6). Rnd 2: inc in each st (12). Rnd 3: (sc, inc) 6 times (18). Rnd 4: (sc in next 2 sts, inc) 6 times (24). Rnds 5â8: sc in each st (24). Rnd 9: (sc in next 2 sts, dec) 6 times (18). Stuff firmly. Rnd 10: (sc, dec) 6 times (12). Rnd 11: dec 6 times (6). Fasten off, draw closed and sew this closed end securely to the top of the body.
- Muzzle and face With pale pink or cream, make a magic ring. Rnd 1: 6 sc in ring (6). Rnd 2: (sc, inc) 3 times (9). Rnd 3: sc in each st (9). Fasten off, leaving an edge open for sewing. Lightly stuff and sew to the lower front of the head. Embroider a small black nose at its outer end and two black eyes above it.
- Ears Make two in brown. Rnd 1: 6 sc in a magic ring (6). Rnd 2: inc in each st (12). Rnd 3: sc in each st (12). Do not stuff. Flatten each ear and work 6 sc through both layers across its opening. Fasten off and sew the flattened edges to opposite sides of the upper head.
- Arms and feet Make two arms in brown. Rnd 1: 6 sc in a magic ring (6). Rnds 2â5: sc in each st (6). Do not stuff; flatten and work 3 sc through both layers across the opening. Sew an arm to each side of the upper body, directing the paws forwards. Make two feet in brown. Rnd 1: 6 sc in a magic ring (6). Rnd 2: inc in each st (12). Rnds 3â4: sc in each st (12). Rnd 5: (sc, dec) 4 times (8). Stuff lightly, flatten the opening and sew the feet to the lower front of the body.
- Tail and scarf For the tail, join brown yarn at the lower back of the body, ch 17, then sc in the second ch from the hook and in each remaining ch (16). Fasten off and secure the end; curve the tail to one side. For the scarf, with red ch 31, then sc in the second ch from the hook and in each remaining ch (30). Fasten off, leaving ends to weave in. Wrap the strip around the mouse’s neck and tie a small knot at the front or side.
- Fix the mouse to the sleigh Place the mouse centrally on the seat with its face towards the front edge. Sew the seated base through both seat layers. Sew the feet and the ends of both paws to the seat as separate anchor points. Keep the tail clear of the runners.
Finishing
- Check that the two runners stand parallel and that all four hooked ends curve inwards. Add a few concealed securing stitches beneath the seat if either runner wobbles.
- Weave in all ends. Straighten the back panel and arrange the scarf without covering the embroidered face.
Helpful Tips
- Use firm tension for the sleigh parts; loose stitches make the doubled panels less supportive.
- Pin both runners before sewing either one fully in place so their curled ends extend evenly beyond the seat.
- Embroidered features avoid separate eye fittings on this small decoration. If making it for a child, check every attachment carefully and follow appropriate toy-safety guidance.
15. Mouse on a Christmas Star

This Christmas mouse ornament pairs a softly padded five-point star with a small mouse perched at its centre. The defined points frame the mouse without making the decoration bulky, so it works as a cheerful addition to a Christmas tree or festive display.
The star has a little depth, while the mouse sits upright rather than lying flat against it. Its body and paws share the attachment across the front, helping the figure look comfortably seated. This is an appealing intermediate project if you enjoy combining shaped crochet pieces with small embroidered details.
Mouse on a Christmas Star

Quick-reference card. Follow the complete written instructions below.
Materials
- DK cotton yarn: Gold for the star and hanging loop; grey for the mouse. Small lengths of pink and black yarn or embroidery thread for the face.
- Crochet hook: Use a size that gives firm stitches with your yarn; 3 mm is a starting point.
- Toy stuffing: A small amount for the star, body and head.
- Other tools: Yarn needle, stitch marker and scissors.
Size and Fit
One ornament size. At the suggested gauge, the star is approximately 10 cm from its top point to its lowest edge, excluding the hanging loop. Exact dimensions will vary with yarn and tension.
Gauge
Approximately 22 sc and 24 rows or rounds per 10 cm in firm fabric. Exact gauge is not essential, but use stitches tight enough to contain the stuffing.
Abbreviations
US crochet terms.
- ch = chain
- sc = single crochet
- sl st = slip stitch
- inc = 2 sc in the same stitch
- dec = single-crochet 2 stitches together
- MR = magic ring
- rnd = round
- st = stitch
Pattern
- Star centres: make two With gold, work in continuous rounds. Rnd 1: 5 sc in an MR. Rnd 2: inc in each st (10). Rnd 3: inc in each st (20). Rnd 4: (sc, inc) 10 times (30). Rnd 5: (2 sc, inc) 10 times (40). Mark the first st of rnd 5. Do not fasten off until you have made the first point.
- Five points on each star centre Each point uses a separate group of 8 consecutive stitches from rnd 5. For the first point, continue with the working yarn: row 1: sc in the next 8 stitches of rnd 5, ch 1, turn (8). Row 2: dec, 4 sc, dec, ch 1, turn (6). Row 3: dec, 2 sc, dec, ch 1, turn (4). Row 4: dec twice, ch 1, turn (2). Row 5: dec (1); fasten off. For each of the remaining four points, join gold yarn to the next unused stitch of rnd 5 and work rows 1â5 as above. Each stitch of rnd 5 is used by exactly one point. Make five points on each of the two centres, then weave in the point ends.
- Mouse body With grey, work in continuous rounds from the bottom upwards. Rnd 1: 6 sc in an MR. Rnd 2: inc in each st (12). Rnd 3: (sc, inc) 6 times (18). Rnds 4â6: sc in each st (18). Rnd 7: (sc, dec) 6 times (12). Add a little stuffing. Rnd 8: dec 6 times (6). Fasten off, draw the yarn through the remaining stitches to close and leave a long tail for sewing.
- Mouse head With grey, work from the crown downwards. Rnd 1: 6 sc in an MR. Rnd 2: inc in each st (12). Rnd 3: (sc, inc) 6 times (18). Rnds 4â5: sc in each st (18). Rnd 6: (sc, dec) 6 times (12). Stuff lightly. Rnd 7: dec 6 times (6). Fasten off, close the opening and leave a long tail. Sew this closed end to the top of the body, keeping the head upright.
- Ears and face Make two ears in grey: work 6 sc in an MR, sl st to the first sc and fasten off with a sewing tail. Sew the ears to opposite sides of the head near rnd 3. With black, embroider two small eyes on the front of rnd 4. With pink, embroider a small nose below and between the eyes. Secure all embroidery ends inside the head.
- Paws and tail Make two paws in grey: ch 5, sc in the second ch from the hook and in each remaining ch (4 sc). Fasten off, leaving a sewing tail at each end. Sew one end of each paw to the front sides of the body, leaving the other ends free for attaching to the star. For the tail, ch 11 in grey and sl st in the second ch from the hook and each remaining ch (10 sl st). Fasten off and sew one end to the lower back of the body.
- Join and stuff the star Place the two star motifs together with right sides facing out and their points aligned. Using gold yarn, whipstitch around the outer edges through both layers. Leave a 2â3 cm gap along one side of a lower point. Add a small amount of stuffing to the centre and gently ease a little into each point; keep the star fairly flat. Close the gap and secure the yarn.
- Seat the mouse Set the mouse upright across the centre of one star face, with the tail behind it. Sew the bottom and lower back of the body firmly to the front star layer. Spread the two paws to either side and sew their free ends to the star face. Keep these attachment stitches in the front layer so they do not show on the back.
- Hanging loop With gold, ch 30 and sl st into the first ch to form a loop. Fasten off, leaving a long tail. Thread the tail through both star layers at the tip of the top point, pass it through both layers twice more, then secure it inside the star. The loop must be anchored to both layers, not just the front motif.
Finishing
- Check that the mouse sits securely and that the star points remain defined rather than tightly stuffed.
- Weave in any remaining ends. Gently shape the points by hand.
Helpful Tips
- Mark the five groups of eight stitches on each star centre before starting the points; this makes it easier to keep the motifs identical.
- Embroidered facial features avoid small detachable parts on an ornament.
16. Mouse in Santaâs Present Sack

This little Christmas mouse looks as though it has found the best hiding place among the presents. Its face peeks above a soft red sack, while its paws at the rim and a tiny gift tag give the decoration a playful, present-ready look.
The sackâs oval base helps it sit upright, and its loosely gathered opening creates folds without concealing the mouse. It is a charming choice for a festive shelf display or as part of a group of crochet Christmas decorations.
Mouse in Santaâs Present Sack
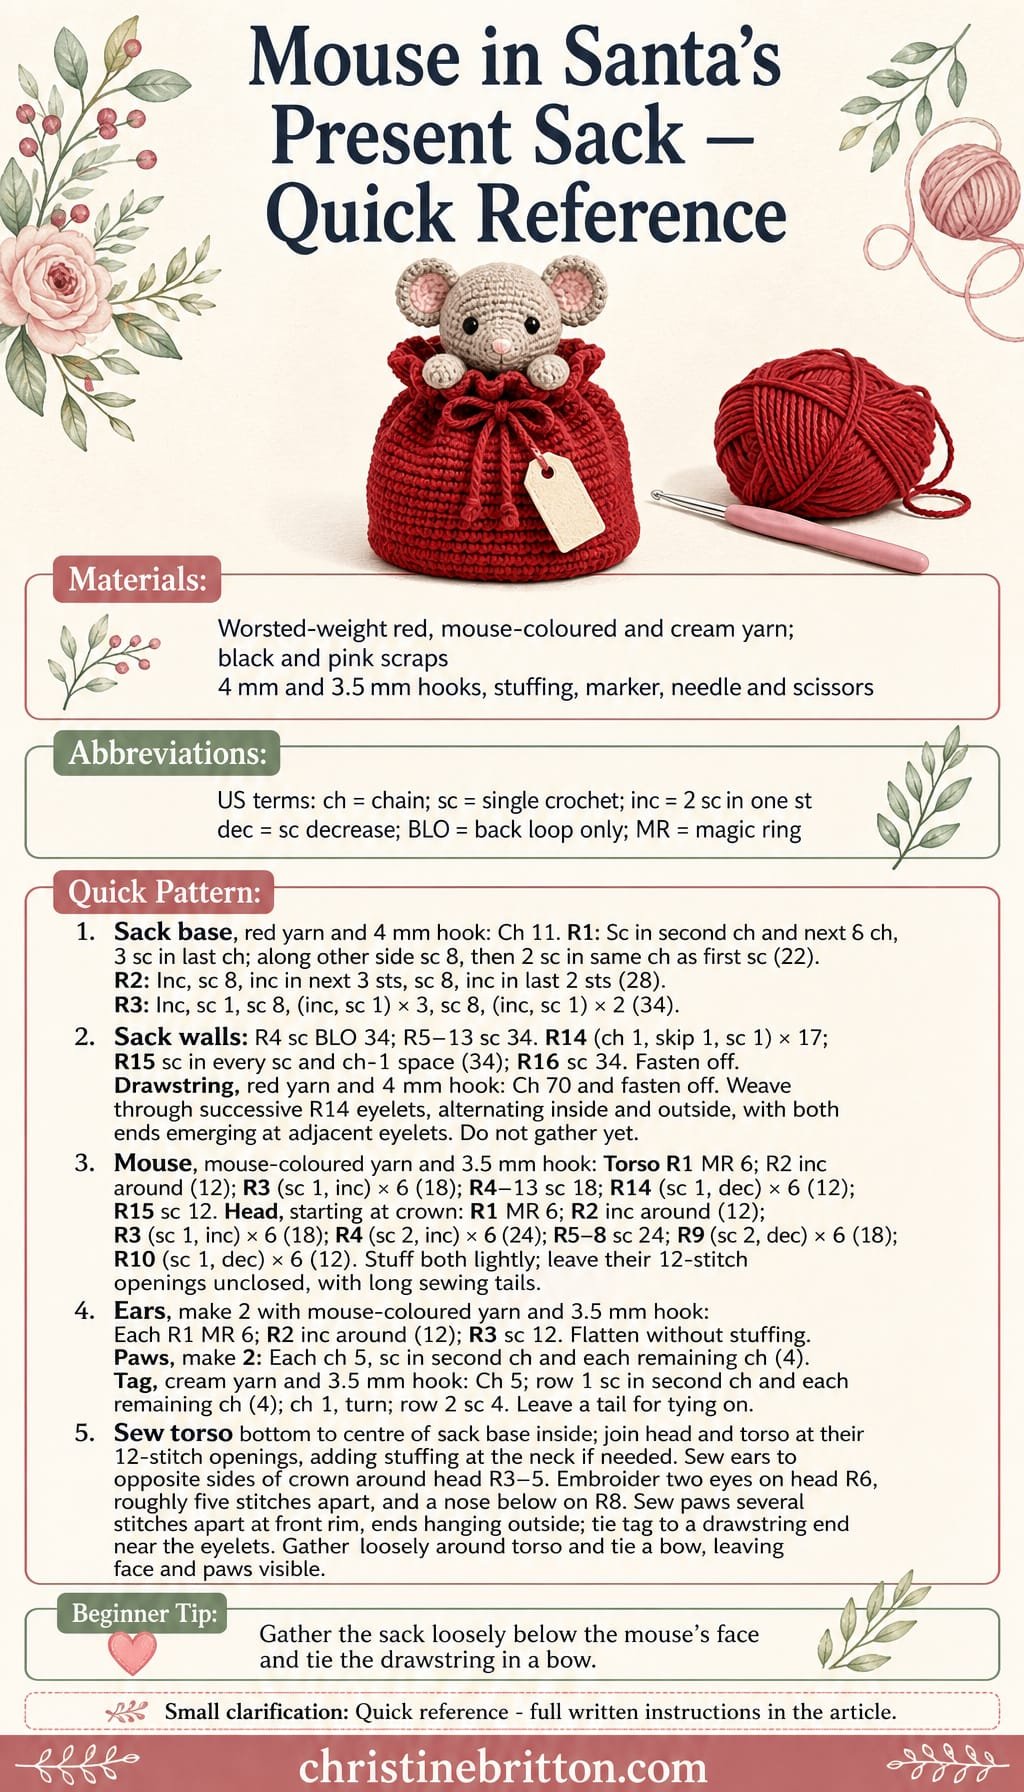
Quick-reference card. Follow the complete written instructions below.
Materials
- Worsted-weight yarn: Red for the sack, cream or grey for the mouse, a small amount of cream for the tag, and scraps of black and pink for the face
- Crochet hooks: 4 mm for the sack and drawstring; 3.5 mm for the mouse and tag, or sizes that give suitable fabric
- Other supplies: A small amount of toy stuffing, stitch marker, yarn needle and scissors
Size and Fit
One size. The sack opening has 34 stitches; at the suggested sack gauge, its ungathered circumference is about 23 cm. The finished height depends on your yarn, gauge and stuffing. The mouse is sewn inside the sack and projects above its loosely gathered rim.
Gauge
Aim for about 15 sc and 17 rounds per 10 cm in sack fabric. Exact gauge is not essential. Work the mouse firmly enough that stuffing does not show through.
Abbreviations
US crochet terms.
- ch = chain
- sc = single crochet
- inc = work 2 sc in the same stitch
- dec = single-crochet decrease over 2 stitches
- BLO = back loop only
- MR = magic ring
- st(s) = stitch(es)
- rnd = round
Pattern
- Before you begin Work all rounds continuously without joining, marking the first stitch of each round. Stuff the mouse lightly so its torso will sit inside the sack.
- Sack base â rnd 1 With red yarn and the 4 mm hook, ch 11. Sc in the second ch from the hook and in the next 8 ch, 3 sc in the last ch. Working along the other side of the foundation chain, sc in the next 8 ch and work 2 sc in the same chain as the first sc. 22 sts.
- Sack base â rnd 2 Inc in the first st, sc in the next 8 sts, inc in each of the next 3 sts, sc in the next 8 sts, inc in each of the last 2 sts. 28 sts.
- Sack base â rnd 3 Inc in the first st, sc in the next st, sc in the next 8 sts, (inc, sc in the next st) 3 times, sc in the next 8 sts, (inc, sc in the next st) 2 times. 34 sts.
- Sack walls â rnds 4â13 Rnd 4: Sc BLO in each st to turn the wall upwards. Rnds 5â13: Sc in each st. 34 sts in every round.
- Eyelet round and rim â rnds 14â16 Rnd 14: (Ch 1, skip the next st, sc in the next st) 17 times. There are 17 chain spaces and 17 sc, making 34 positions. Rnd 15: Sc in every sc and in every ch-1 space. 34 sts. Rnd 16: Sc in each st. 34 sts. Fasten off and weave in the end.
- Drawstring With red yarn and the 4 mm hook, ch 70 and fasten off. Starting at the front, pass one end through successive rnd-14 eyelets, alternating inside and outside the sack, until it emerges through the eyelet beside the starting point. Leave both ends outside. Do not gather the sack yet.
- Mouse torso â rnds 1â15 With mouse-coloured yarn and the 3.5 mm hook, work 6 sc in an MR. Rnd 2: Inc in each st. 12 sts. Rnd 3: (Sc in the next st, inc) 6 times. 18 sts. Rnds 4â13: Sc in each st. 18 sts. Rnd 14: (Sc in the next st, dec) 6 times. 12 sts. Rnd 15: Sc in each st. 12 sts. Stuff lightly, leave the top open and fasten off with a long sewing tail.
- Mouse head â rnds 1â10 Starting at the crown with mouse-coloured yarn and the 3.5 mm hook, work 6 sc in an MR. Rnd 2: Inc in each st. 12 sts. Rnd 3: (Sc in the next st, inc) 6 times. 18 sts. Rnd 4: (Sc in each of the next 2 sts, inc) 6 times. 24 sts. Rnds 5â8: Sc in each st. 24 sts. Rnd 9: (Sc in each of the next 2 sts, dec) 6 times. 18 sts. Rnd 10: (Sc in the next st, dec) 6 times. 12 sts. Stuff lightly, leave the bottom open and fasten off with a long sewing tail.
- Ears â make 2 With mouse-coloured yarn and the 3.5 mm hook, work 6 sc in an MR. Rnd 2: Inc in each st. 12 sts. Rnd 3: Sc in each st. 12 sts. Fasten off with a sewing tail. Do not stuff; flatten each ear.
- Paws â make 2 With mouse-coloured yarn and the 3.5 mm hook, ch 5. Sc in the second ch from the hook and in each remaining ch. 4 sc. Fasten off with a sewing tail.
- Gift tag With cream yarn and the 3.5 mm hook, ch 5. Row 1: Sc in the second ch from the hook and in each remaining ch. 4 sc. Ch 1, turn. Row 2: Sc in each st. 4 sc. Fasten off, leaving a tail for tying the tag to the drawstring.
Finishing
- Using the starting end of the torso, sew its rounded bottom securely to the centre of the sack base on the inside. Keep the torso upright.
- Sew the headâs 12-stitch opening to the torsoâs 12-stitch opening. Add a little stuffing at the neck if needed before closing the seam.
- Flatten the ears and sew their lower edges to opposite sides of the crown, around head rnds 3â5. Embroider two black eyes on the front of head rnd 6, roughly five stitches apart, and a small pink nose centred below them on rnd 8.
- Sew the paws to the front of the sack rim, several stitches apart, with their free ends hanging over the outside. Tie the gift tag to one drawstring end near the eyelets.
- Pull the drawstring just enough to form soft folds around the torso while leaving the mouseâs face and paws visible. Tie the ends in a bow; do not pull the opening shut.
Helpful Tips
- Keep the drawstring loose enough that the sack supports the mouse rather than covering its head.
- If the mouse fabric has gaps, use a smaller hook for the mouse pieces instead of adding more stuffing.
- For a decoration that may be handled by a young child, embroider the features and secure the tag and drawstring ends carefully.
17. Ice-Skating Mouse

This Christmas mouse looks ready to glide into a festive display, with a scarf, one lifted paw and two oversized dark skates. Pale strips beneath the boots suggest blades without making the little character look too realistic.
The skating pose gives this amigurumi project its intermediate-level challenge. Its legs and boots are separate pieces, so their placement matters as much as the shaping: feet set apart and toes facing forwards help the mouse look poised rather than perched.
The blades are decorative rather than a guarantee that the mouse will stand unaided. It makes a charming shelf decoration, and a fabric display base is worth considering if it will be placed somewhere it could be knocked.
Ice-Skating Christmas Mouse
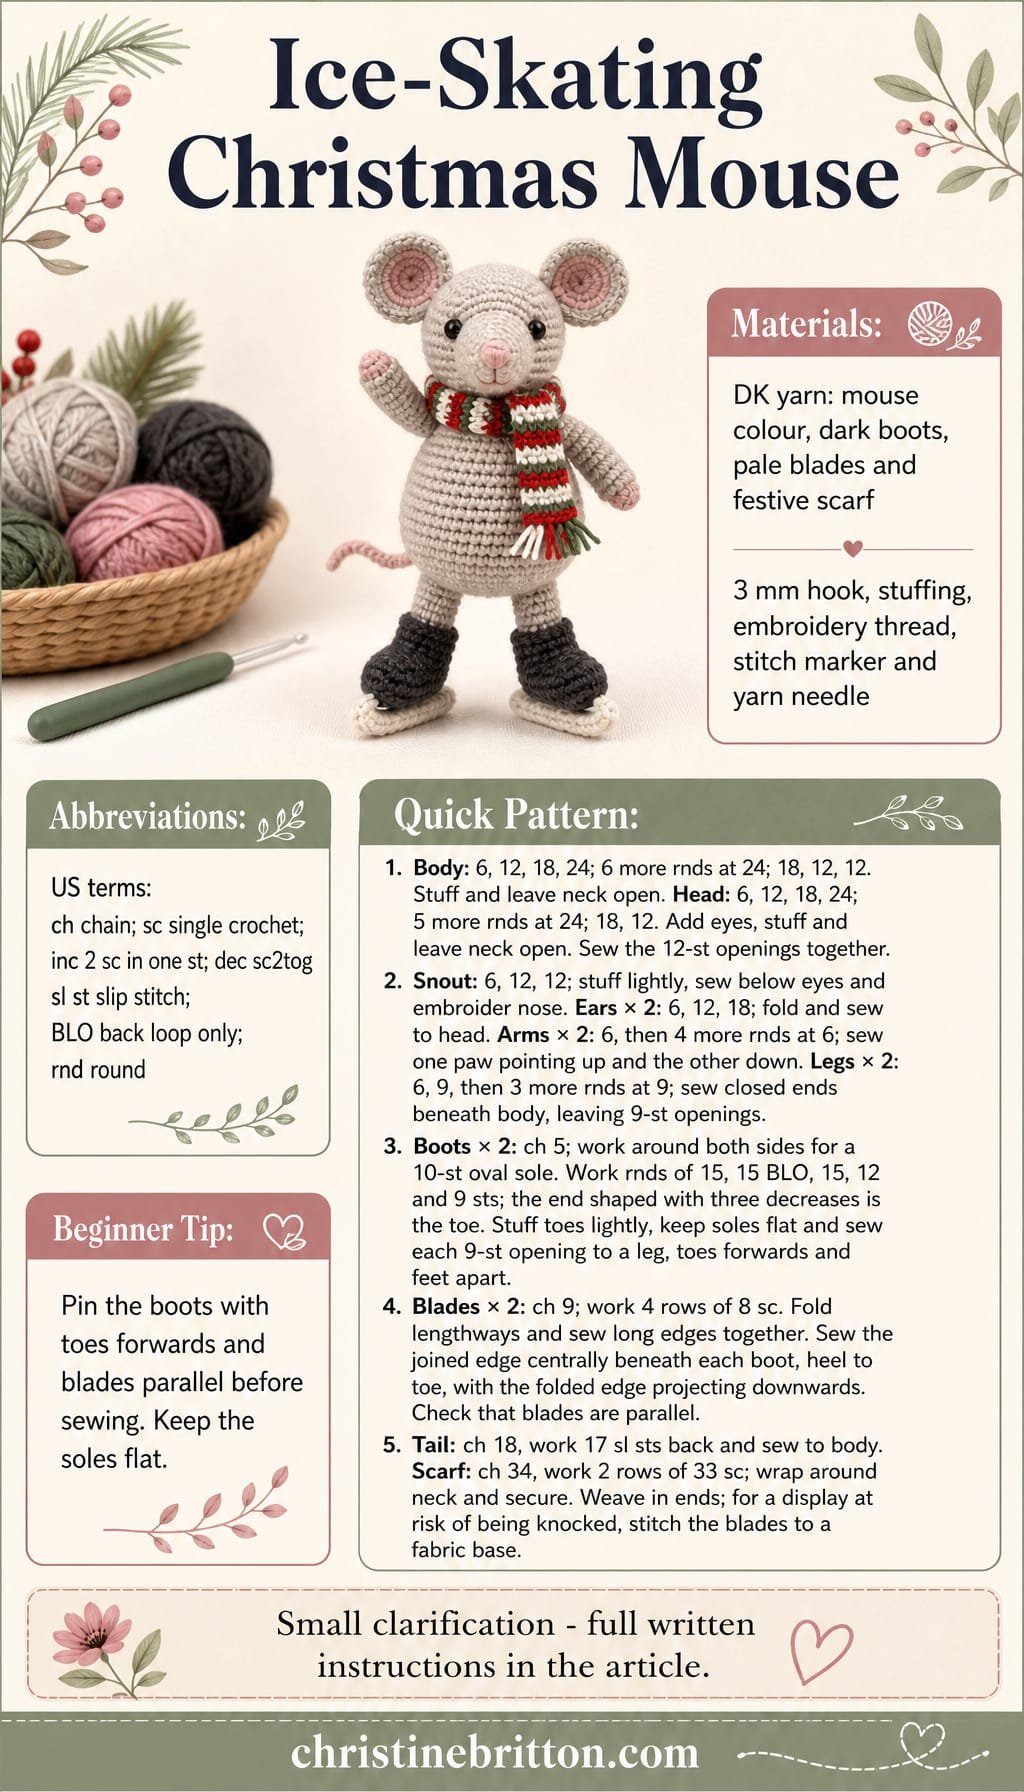
Quick-reference card. Follow the complete written instructions below.
Materials
- DK yarn: Mouse colour for the body, head, ears, arms, legs and tail; dark yarn for the boots; pale yarn for the blades; and a festive colour for the scarf.
- Crochet hook: 3 mm, or a size that makes firm fabric with no visible stuffing.
- Stuffing: Small amounts for the mouse and boots.
- Face details: Black embroidery thread for the eyes and nose, or two safety eyes for a decoration that will not be given to a child under three.
- Notions: Stitch marker, yarn needle, scissors and pins.
Size and Fit
One size, approximately 13â15 cm tall from blades to ear tips, depending on yarn, tension and assembly. Make both boots and both blades to the same stitch counts so the mouse stands as evenly as possible.
Gauge
Exact gauge is not essential. Use a firm DK fabric; as a guide, 20 single crochet stitches and 22 rounds measure approximately 10 cm. These are planning figures, not a measured sample.
Abbreviations
US crochet terms.
- ch = chain
- sc = single crochet
- inc = work 2 sc in the same stitch
- dec = single crochet 2 stitches together
- sl st = slip stitch
- BLO = work in the back loop only
- rnd = round
- st(s) = stitch(es)
Pattern
- Before you begin Work the stuffed pieces in continuous rounds without joining. Place a marker in the first stitch of each round. A magic ring may be replaced with ch 2 and 6 sc in the second chain from the hook. Numbers in brackets are stitch counts.
- Body With mouse-coloured yarn, rnd 1: 6 sc in a magic ring (6). Rnd 2: inc in each st (12). Rnd 3: (sc, inc) 6 times (18). Rnd 4: (2 sc, inc) 6 times (24). Rnds 5â10: sc in each st (24). Rnd 11: (2 sc, dec) 6 times (18). Rnd 12: (sc, dec) 6 times (12). Rnd 13: sc in each st (12). Stuff firmly, leaving the neck opening accessible. Fasten off with a long sewing tail.
- Head With mouse-coloured yarn, rnd 1: 6 sc in a magic ring (6). Rnd 2: inc in each st (12). Rnd 3: (sc, inc) 6 times (18). Rnd 4: (2 sc, inc) 6 times (24). Rnds 5â9: sc in each st (24). Rnd 10: (2 sc, dec) 6 times (18). Rnd 11: (sc, dec) 6 times (12). Embroider eyes between rnds 7 and 8, about six stitches apart across the front, or insert safety eyes there before stuffing. Stuff firmly. Leave the 12-stitch neck open and fasten off.
- Snout With mouse-coloured yarn, rnd 1: 6 sc in a magic ring (6). Rnd 2: inc in each st (12). Rnd 3: sc in each st (12). Fasten off with a sewing tail. Add a little stuffing and sew the open edge to the front of the head across approximately rnds 8â10, centred below the eyes. Embroider a small nose on its tip.
- Ears: make two With mouse-coloured yarn, rnd 1: 6 sc in a magic ring (6). Rnd 2: inc in each st (12). Rnd 3: (sc, inc) 6 times (18). Fasten off with a sewing tail. Do not stuff. Fold each circle in half and stitch its two bottom edges together; sew the folded bases to opposite sides of the head around rnds 4â6.
- Arms: make two With mouse-coloured yarn, rnd 1: 6 sc in a magic ring (6). Rnds 2â5: sc in each st (6). Stuff lightly at the paw end, leaving the final round easy to flatten. Fasten off with a sewing tail. Sew one arm to the upper side of the body around rnds 11â12, with its closed paw end pointing upwards. Sew the other around rnds 9â11 with its paw angled downwards.
- Legs: make two With mouse-coloured yarn, rnd 1: 6 sc in a magic ring (6). Rnd 2: (sc, inc) 3 times (9). Rnds 3â5: sc in each st (9). Stuff lightly and fasten off with a sewing tail. Sew the closed rnd-1 ends beneath the body, around body rnds 1â3. Space the legs apart; leave each 9-stitch lower opening unclosed for its boot.
- Boots: make two With dark yarn, ch 5. Rnd 1: sc in each of the next 3 chains, 3 sc in the last chain; working along the underside of the foundation chain, sc in the next 2 chains and 2 sc in the underside of the first chain (10). Mark the first stitch of the next round. Rnd 2: sc in the next 3 sts, inc in each of the next 3 sts, sc in the next 2 sts, inc in each of the next 2 sts (15). Rnd 3: working BLO, sc in each st (15). Rnd 4: sc in each st (15). Rnd 5: sc in the next 3 sts, dec 3 times, sc in the next 6 sts (12). Rnd 6: (2 sc, dec) 3 times (9). Stuff the toe lightly, keeping the sole flat. Fasten off with a sewing tail. The end shaped with three decreases is the toe.
- Skate blades: make two With pale yarn, ch 9. Row 1: sc in the second chain from the hook and each remaining chain (8). Ch 1, turn. Rows 2â4: sc in each st (8); ch 1 and turn after rows 2 and 3 only. Fasten off with a long sewing tail. Fold the strip lengthways so the two long edges meet. Stitch those edges together, forming a doubled strip with a folded long edge. Sew the joined edge centrally beneath a boot sole, running from heel to toe; leave the folded edge projecting downwards as the visible blade. Repeat for the second boot.
- Attach the boots Position each boot with its toe pointing forwards and its blade running from heel to toe. Sew its 9-stitch opening to the 9-stitch opening of a leg, matching stitches one for one. Check that the boots are spaced apart and their blades point in the same direction before securing all sewing ends.
- Tail With mouse-coloured yarn, ch 18. Sl st in the second chain from the hook and each remaining chain (17 sl sts). Fasten off with a sewing tail and attach the foundation-chain end to the back of the body around rnd 5. Curve the tail gently without pulling it tight.
- Scarf With festive-coloured yarn, ch 34. Row 1: sc in the second chain from the hook and each remaining chain (33). Ch 1, turn. Row 2: sc in each st (33). Fasten off and weave in the ends. Wrap once around the neck and secure the crossing ends with a few stitches so the scarf stays in place.
Finishing
- Sew the head’s 12-stitch opening to the body’s 12-stitch neck opening, matching stitches one for one and keeping the snout above the front of the body.
- Check the raised paw, forward-facing toes and parallel blades. Weave in all remaining ends.
- Set the mouse on a level surface. If it is to be displayed where it may be knocked, stitch the undersides of the blades discreetly to a fabric display base.
Helpful Tips
- Keep the boot soles and blades firm rather than overstuffed: a rounded sole makes the skating pose less steady.
- Pin the legs and boots in place before sewing to check the spacing and direction of the toes.
- Embroider the eyes instead of using safety eyes if the mouse may be handled by a child under three.
18. Christmas Bell Mouse

This Christmas Bell Mouse pairs a little mouse with a hollow, bell-shaped body. The open, flared rim and crocheted clapper make it recognisable as a bell, while the ears and embroidered face give it a gentle character.
The contrast between the firmly shaped bell and the softly stuffed mouse makes this an engaging intermediate crochet project. The clapper is decorative rather than a working jingle, so it suits a festive display where its shape can be seen.
With its hanging loop, the finished mouse makes a cheerful addition to a Christmas tree or seasonal garland. It is intended as a decoration, not a toy.
Christmas Bell Mouse

Quick-reference card. Follow the complete written instructions below.
Materials
- Cotton DK yarn: Red for the bell; grey or cream for the mouse; a small amount of gold or yellow for the clapper.
- Embroidery yarn: Black for the eyes and pink for the nose.
- Crochet hook: Approximately 3 mm, or a size that produces firm stitches.
- Toy stuffing: A small amount for the head, paws and clapper; do not stuff the bell.
- Notions: Stitch marker, yarn needle and scissors.
Size and Fit
One decorative size: approximately 13 cm high excluding the hanging loop, with an opening approximately 8 cm across at the suggested gauge. Finished dimensions will vary with tension.
Gauge
Aim for approximately 22 sc and 24 rounds over 10 cm in firm single crochet. Exact gauge is less important than a head fabric that conceals the stuffing and a bell fabric that holds its shape.
Abbreviations
US crochet terms.
- ch = chain
- sc = single crochet
- inc = 2 sc in the same stitch
- dec = single crochet 2 stitches together
- sl st = slip stitch
- st(s) = stitch(es)
- R = round
Pattern
- Before you begin Work in continuous rounds unless directed otherwise. Mark the first stitch of each round. Numbers in parentheses are stitch counts at the end of the round. Leave sewing tails where indicated.
- Bell: narrow top With red, R1: 6 sc in a magic ring (6). R2: inc in each st (12). R3â4: sc in each st (12). Keep the top closed and the bell unstuffed.
- Bell: widening body R5: (sc, inc) 6 times (18). R6â7: sc in each st (18). R8: (2 sc, inc) 6 times (24). R9â10: sc in each st (24). R11: (3 sc, inc) 6 times (30). R12â13: sc in each st (30). R14: (4 sc, inc) 6 times (36). R15â16: sc in each st (36).
- Bell: flared rim R17: (5 sc, inc) 6 times (42). R18: (6 sc, inc) 6 times (48). R19: (7 sc, inc) 6 times (54). R20â21: sc in each st (54). R22: sl st loosely in each st around (54). Fasten off and weave in the end. The final round reinforces the open rim; do not draw it closed.
- Mouse head With grey or cream, R1: 6 sc in a magic ring (6). R2: inc in each st (12). R3: (sc, inc) 6 times (18). R4: (2 sc, inc) 6 times (24). R5: (3 sc, inc) 6 times (30). R6â9: sc in each st (30). Embroider two small eyes on the front between R6 and R7, spaced about 5 sts apart, and a pink nose between R8 and R9. R10: (3 sc, dec) 6 times (24). R11: (2 sc, dec) 6 times (18). Stuff firmly. R12: (sc, dec) 6 times (12). R13: dec 6 times (6). Fasten off, pass the yarn through the remaining front loops and draw the base closed.
- Ears: make 2 With the head colour, R1: 6 sc in a magic ring (6). R2: inc in each st (12). R3: (sc, inc) 6 times (18). Sl st in the next st and fasten off, leaving a long sewing tail. Do not stuff. Pinch a few stitches at the base of each ear together before sewing.
- Paws: make 2 With the head colour, R1: 6 sc in a magic ring (6). R2: (sc, inc) 3 times (9). R3: sc in each st (9). Add a small pinch of stuffing. R4: (sc, dec) 3 times (6). Fasten off, leaving a sewing tail. Flatten the opening; it will be closed as the paw is sewn on.
- Clapper With gold or yellow, R1: 6 sc in a magic ring (6). R2: inc in each st (12). R3: sc in each st (12). Add a small pinch of stuffing. R4: dec 6 times (6). Fasten off with a long tail and draw the opening closed. Keep the remaining tail for suspending the clapper.
- Hanging loop With the head colour, ch 24, then sl st in the second ch from the hook and each remaining ch (23 sl sts). Fasten off, leaving a long tail at each end of the cord.
- Assembly Sew the pinched ear bases to opposite sides of the upper head across R3â5. Pass the sewing yarn through each ear base and the head stitches twice to reinforce the joins. Bring the two ends of the hanging cord through separate head stitches beside R1â2 to form a loop. Thread both ends down through the stuffed head and bring them out at its base. Knot the ends securely. Sew the head base over the bellâs narrow top, stitching through the head and bell R1â3; catch the loop ends in these stitches and weave them in. Sew the paws at either side of the head base, resting against the upper bell. From inside the bell, secure the clapper tail through several stitches at the centre of the bell top. Adjust the strand so the clapper hangs centrally, with its top about 1â2 cm above the lower rim, then knot and weave in the tail inside the bell.
Finishing
- Check that the bell opening remains round and the rim lies evenly; gently reshape it by hand without stuffing it.
- Tug the hanging loop, ears and clapper gently to check their joins, then weave in any remaining ends.
- Use this as a hanging decoration, not a toy: the suspended clapper and small sewn-on parts require secure assembly.
Helpful Tips
- Firm cotton DK and a snug hook help the unstuffed bell retain its flared silhouette.
- Keep the rim slip stitches loose enough that they do not pull the opening inward.
- Embroider the face before closing the head so the embroidery ends can be secured inside.
For another related project collection, browse free Christmas amigurumi patterns.
19. Mouse in a Christmas Cocoa Mug

This Christmas mouse peeks from a red crocheted mug, with a cocoa-coloured surface surrounding it. The result is a playful little scene for a festive shelf or mantelpiece rather than a usable cup.
An inset floor supports the mouse inside the mug, while the flat topping covers the space around it. The handle has a folded construction for a more substantial shape. Because the mug walls stand on their own, a firm, dense fabric matters more here than it would for a soft toy.
This is an intermediate project with several pieces to position neatly. It is best treated as a display decoration: the mug is not intended to hold a drink.
Mouse in a Christmas Cocoa Mug

Quick-reference card. Follow the complete written instructions below.
Materials
- Red DK cotton yarn: For the mug and handle; approximately 35 g.
- Mouse-coloured DK cotton yarn: For the torso, head and ears; approximately 20 g.
- Cream and cocoa-coloured DK cotton yarn: Approximately 10 g of each, for the topping and muzzle.
- Black embroidery thread: For the eyes and nose.
- 3 mm crochet hook: Or a size that produces firm stitches without gaps.
- Toy stuffing: A small amount for the mouse and beneath the mugâs inner floor.
- Notions: Stitch marker, yarn needle and scissors.
Size and Fit
One size. At the target gauge, the mug is approximately 7 cm across and 5.5 cm tall; the mouse adds approximately 3â4 cm above the rim. These are estimates, not measured dimensions. The mug is decorative and is not intended to hold liquid.
Gauge
Target gauge: approximately 22 sc and 24 rounds per 10 cm in firm single crochet. Exact gauge is less important than dense stitches and a mug wall that stands upright. Changing gauge changes every finished dimension.
Abbreviations
US crochet terms.
- ch = chain
- sc = single crochet
- inc = 2 sc in the same stitch
- dec = single-crochet decrease over the next 2 stitches
- BLO = back loop only
- st(s) = stitch(es)
- rnd = round
Pattern
- Before you begin Work in continuous rounds unless a step says otherwise. Mark the first stitch of each round and move the marker up as you work. Counts in parentheses are the stitch counts at the end of the stated round.
- Mug base With red, make a magic ring. Rnd 1: 6 sc in ring (6). Rnd 2: inc in each st (12). Rnd 3: (sc in next st, inc) 6 times (18). Rnd 4: (sc in next 2 sts, inc) 6 times (24). Rnd 5: (sc in next 3 sts, inc) 6 times (30). Rnd 6: (sc in next 4 sts, inc) 6 times (36). Rnd 7: (sc in next 5 sts, inc) 6 times (42). Rnd 8: (sc in next 6 sts, inc) 6 times (48). Do not fasten off.
- Mug sides Side rnd 1: Working BLO, sc in each st (48). Side rnds 2â13: Sc in each st (48). Fasten off after side rnd 13 and weave in the end. Keep the top edge open. The back-loop round forms the turn from base to wall.
- Inset inner floor With red, make a second flat circle exactly as for mug-base rnds 1â8 (48). Fasten off, leaving a long sewing tail. Place it inside the mug, level with the boundary between side rnds 8 and 9. If desired, put a little stuffing in the space below it first, without bulging the base. Sew all 48 outer stitches of the floor to the inside of the mug wall at that level. Keep the floor flat and leave the five side rounds above it open.
- Mouse torso With mouse-coloured yarn, make a magic ring. Rnd 1: 6 sc in ring (6). Rnd 2: Inc in each st (12). Rnd 3: (Sc in next st, inc) 6 times (18). Rnds 4â7: Sc in each st (18). Fasten off, leaving a long tail at the open top. Lightly stuff the torso. With a separate length of mouse-coloured yarn, sew its round-3 base firmly to the centre of the inset floor, keeping the open top facing upwards.
- Cocoa topping With cocoa-coloured yarn, ch 18 and join with a slip stitch to the first chain, taking care not to twist. Rnd 1: Sc in each chain (18); do not count the joining slip stitch as a stitch. Continue in continuous rounds. Rnd 2: (Sc in next 2 sts, inc) 6 times (24). Rnd 3: (Sc in next 3 sts, inc) 6 times (30). Rnd 4: (Sc in next 4 sts, inc) 6 times (36). Rnd 5: (Sc in next 5 sts, inc) 6 times (42). Rnd 6: (Sc in next 6 sts, inc) 6 times (48). Fasten off with a long tail. Slip the topping over the still-open torso. Sew its inner edge around torso rnd 5, then sew its 48-st outer edge to the inside of the mug at side rnd 12. Spread it flat so it covers the visible gap between mouse and wall. The mugâs final side round remains visible as a red rim.
- Mouse head With mouse-coloured yarn, make a magic ring. Rnd 1: 6 sc in ring (6). Rnd 2: Inc in each st (12). Rnd 3: (Sc in next st, inc) 6 times (18). Rnd 4: (Sc in next 2 sts, inc) 6 times (24). Rnd 5: (Sc in next 3 sts, inc) 6 times (30). Rnds 6â7: Sc in each st (30). Rnd 8: (Sc in next 3 sts, dec) 6 times (24). Rnd 9: (Sc in next 2 sts, dec) 6 times (18). Rnd 10: (Sc in next st, dec) 6 times (12). Stuff firmly but do not distort the shape. Rnd 11: Dec 6 times (6). Fasten off and draw the end through the final 6 stitches to close. The magic-ring end is the crown; the closed six-stitch end points down into the torso.
- Muzzle and face With cream, make a magic ring. Rnd 1: 6 sc in ring (6). Rnd 2: Inc in each st (12). Rnd 3: Sc in each st (12). Fasten off with a sewing tail. Lightly stuff and sew the open edge across the front of head rnds 7â9, with the magic-ring end projecting forwards. Embroider a black nose on that projecting tip and two small black eyes on head rnd 6, one on each side of the muzzle. Secure embroidery ends inside the head or beneath the muzzle.
- Ears Make two with mouse-coloured yarn. For each ear, make a magic ring. Rnd 1: 6 sc in ring (6). Rnd 2: Inc in each st (12). Rnd 3: (Sc in next st, inc) 6 times (18). Fasten off with a sewing tail. Do not stuff. Slightly pinch the lower edge of each flat ear and sew one to either side of head rnds 2â5, leaving most of each ear visible.
- Attach the head Set the head over the torsoâs open top, with the face pointing towards the front of the mug. The closed lower end of the head sits inside the torso opening. Using the tail left on the torso, sew its 18-st top edge evenly around head rnd 9, which also has 18 stitches. Check that the head stands securely above the topping.
- Mug handle With red, ch 7. Row 1: Sc in the second chain from the hook and in each remaining chain (6). Rows 2â22: Ch 1, turn, sc in each st (6). Fasten off with a long sewing tail. Fold the strap lengthwise so it is three stitches wide and sew its long edges together through both layers. Curve it into a handle and sew one short end firmly to the outside of the mug near side rnd 11 and the other near side rnd 3, aligned on the same side. Stitch across each full short end and reinforce both attachments.
Finishing
- Weave in remaining ends on the inside, taking care not to pull the mug wall out of shape.
- Set the mug on a flat surface and adjust the topping, head and handle before use as a decoration.
- For an optional cream accent, embroider a few short cream stitches on the cocoa topping; keep them flat rather than adding loose loops.
Helpful Tips
- Use firm, close-fitting stitches: loose stitches can make the unsupported upper mug wall floppy.
- Sew the topping in place before attaching the head; its central opening will not pass over the finished head.
- This is a decoration, not a drinking vessel. Embroidered facial features avoid small detachable eye parts.
20. Christmas Cracker Mouse

This Christmas Cracker Mouse combines a soft, rounded mouse with the silhouette of a festive cracker. Its face sits on the central body, while flattened, fan-shaped ends give it a distinctive look among crochet Christmas decorations.
This is a decorative piece, not a cracker to pull apart: the ends are securely sewn closed, with no snap or hidden filling. The intermediate-level project brings together a stuffed body, shaped ends and small facial details. Keeping the two ends aligned helps the finished mouse look balanced when displayed.
Christmas Cracker Mouse

Quick-reference card. Follow the complete written instructions below.
Materials
- Cotton-blend DK yarn: Approximately 50 g in a main colour, plus small amounts of a contrasting colour for the ends and ears and a little yarn for the muzzle.
- 3.5 mm crochet hook: Use a smaller hook if needed to make a firm fabric that does not show the stuffing.
- Polyester toy stuffing: For the central body only.
- Embroidery thread or fine yarn: Black for the eyes and whiskers; pink or brown for the nose and mouth.
- Other tools: Stitch marker, yarn needle, scissors and pins.
Size and Fit
One decorative size. At the stated gauge, the finished mouse is approximately 21 cm long from end to end. The stuffed body is approximately 15 cm long and 6 cm across; each flattened cracker end is approximately 12 cm across its outer edge.
Gauge
Approximately 20 sc and 24 rounds = 10 cm in firm, continuous-round crochet. Gauge is not critical, but tight stitches help contain the stuffing; changing gauge will change the finished size.
Abbreviations
US crochet terms.
- ch = chain
- sc = single crochet
- sl st = slip stitch
- inc = work 2 sc in the same stitch
- invdec = invisible single-crochet decrease over the next 2 stitches
- rnd = round
- st(s) = stitch(es)
Pattern
- Before you begin Work the body, ears and muzzle in continuous rounds without joining; mark the first stitch of each round. Numbers in brackets are stitch counts at the end of a round. Make the cracker ends in a contrasting colour. Leave long sewing tails where indicated.
- Stuffed body: rnds 1â6 In the main colour, work 6 sc into a magic ring for rnd 1 (6). Rnd 2: inc in each st (12). Rnd 3: (sc, inc) 6 times (18). Rnd 4: (2 sc, inc) 6 times (24). Rnd 5: (3 sc, inc) 6 times (30). Rnd 6: (4 sc, inc) 6 times (36). Keep rnd 3 identifiable: its 18 stitches will receive one cracker end.
- Stuffed body: rnds 7â35 Rnds 7â30: sc in each st (36 per rnd). Rnd 31: (4 sc, invdec) 6 times (30). Rnd 32: (3 sc, invdec) 6 times (24). Stuff firmly, then add stuffing as the opening narrows. Rnd 33: (2 sc, invdec) 6 times (18); this round will receive the second cracker end. Rnd 34: (sc, invdec) 6 times (12). Rnd 35: invdec 6 times (6). Fasten off and pass the tail through the front loops of the remaining 6 sts; pull closed and secure.
- Cracker ends: make 2 Ch 18 in the contrasting colour and join with a sl st to the first chain, taking care not to twist the ring. Work in continuous rounds. Rnd 1: sc in each chain (18). Rnds 2â3: sc in each st (18). Rnd 4: (2 sc, inc) 6 times (24). Rnd 5: (3 sc, inc) 6 times (30). Rnd 6: (4 sc, inc) 6 times (36). Rnd 7: (5 sc, inc) 6 times (42). Rnd 8: sc in each st (42). Rnd 9: (6 sc, inc) 6 times (48). Rnd 10: sc in each st (48). Fasten off, leaving a long tail. Keep the narrow neck and wide edge open for assembly.
- Attach and shape the cracker ends Slip one 18-st neck over each closed tip of the body. Match the 18 stitches of neck rnd 1 to the 18 stitches of body rnd 3 at one end and body rnd 33 at the other. Sew through each matching pair of stitches, working all the way around. The rounded body tips remain hidden inside the flares. Do not stuff the flares. Flatten each 48-st outer edge so that its front and back lie together, with 24 stitches along each side. Whipstitch the two sides together across the full width. Orient both flattened seams the same way to form fan-shaped ends.
- Ears: make 2 In the ear colour, work 6 sc into a magic ring for rnd 1 (6). Rnd 2: inc in each st (12). Rnd 3: (sc, inc) 6 times (18). Fasten off with a sewing tail. Leave the circles unstuffed and pinch a short section of each edge together at its base when attaching.
- Muzzle In the muzzle colour, work 6 sc into a magic ring for rnd 1 (6). Rnd 2: inc in each st (12). Rnd 3: sc in each st (12). Fasten off with a sewing tail. Leave unstuffed; the final round forms the edge to be sewn down.
- Paws: make 2 In the main colour, ch 5. Starting in the second chain from the hook, sc in each of the 4 remaining chains (4). Fasten off, leaving a sewing tail. These short strips are the front paws.
- Tail In the main colour, ch 18. Starting in the second chain from the hook, sl st in each of the 17 remaining chains (17 sl sts). Fasten off with a sewing tail.
Finishing
- Choose one side of the central cylinder as the front. Sew the muzzle to its middle, approximately over body rnds 18â21. Stitch all the way around its edge.
- Sew the ears to the upper part of the body on opposite sides of the muzzle, approximately at body rnds 16 and 23. Secure each pinched base with several stitches.
- Embroider two eyes on the body above either side of the muzzle. Embroider a small nose and mouth on the muzzle and short whiskers on the body beside it. Knot and bury all thread ends inside the body.
- Sew a paw to each lower side of the face, approximately at body rnds 15 and 24. Attach the tail underneath the body towards one end, around body rnd 27. Curve it along the body and tack it down at two additional points so it cannot dangle loose.
- Check the seams around both cracker necks and both flattened edges. Weave in all remaining ends. This is a decorative cracker mouse: do not add a snap, filling or any mechanism intended to pull it apart.
Helpful Tips
- Mark body rnds 3 and 33 with short lengths of waste yarn as you work; both have 18 stitches, making them straightforward attachment lines.
- Pin each flare in place before sewing so its flattened edge sits in the same plane as the other end.
- Keep the embroidered features small and secure, without beads or other loose decorations.
21. Sleeping Mouse in a Holly Hammock

This sleeping mouse brings a quiet moment to a collection of Christmas crochet decorations. Its closed eyes and tucked-in tail give it a cosy, curled-up look, while the holly leaves frame it like a little bed.
The hammock is a shallow cradle rather than a pouch: the leaves meet beneath the mouse, with their pointed edges left open and visible. This makes the holly shape part of the display instead of hiding it behind the figure.
This intermediate project combines shaped leaf fabric with small amigurumi pieces. The contrast between crisp leaf points and the mouseâs softer outline gives the finished decoration its character, with a cluster of red berries adding a festive accent.
Sleeping Mouse in a Holly Hammock
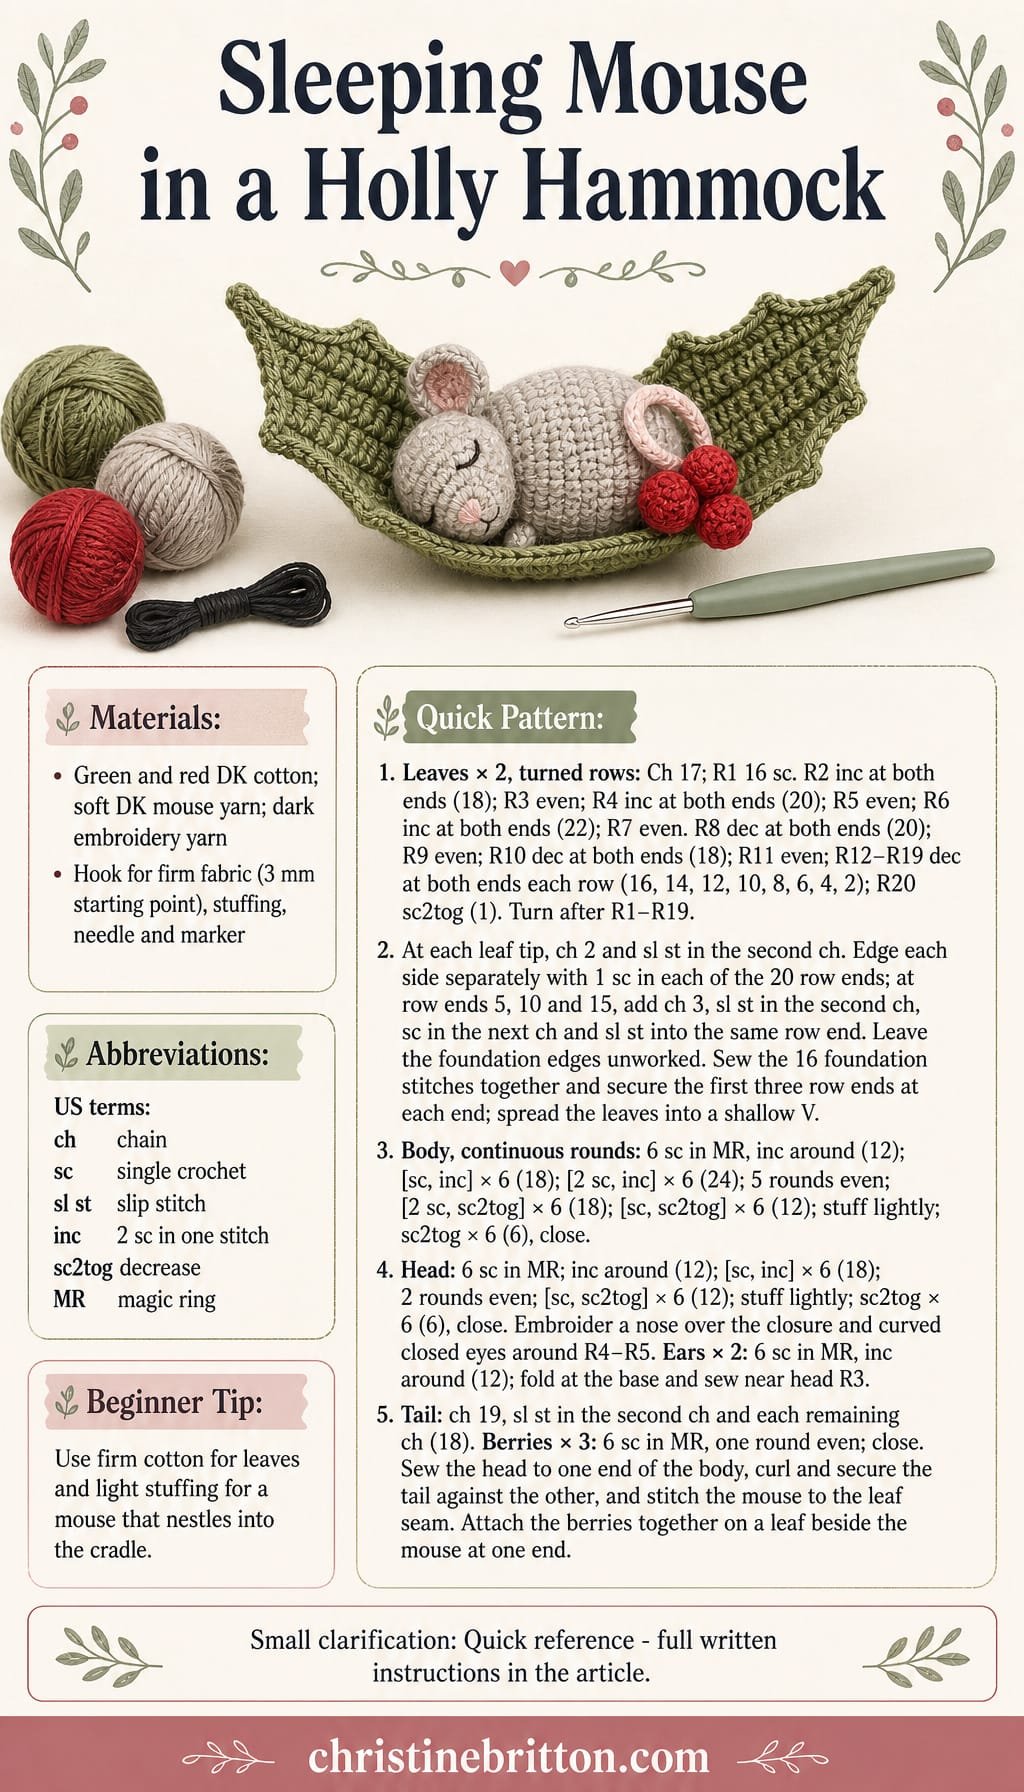
Quick-reference card. Follow the complete written instructions below.
Materials
- Firm DK cotton: Green for two leaves; a small amount of red for three berries.
- Soft DK yarn: Mouse colour for the body, head, ears and tail; a scrap of dark yarn for the face.
- Crochet hook: Use a size that makes firm stitches without gaps; 3 mm is a starting point for DK yarn.
- Notions: Toy stuffing, yarn needle, stitch marker and scissors.
Size and Fit
One size. Each leaf has a 16-stitch lower edge and extends 21 rows to its tip. Finished dimensions depend on your yarn and tension; the mouse should sit within the joined lower edges with its head near one end.
Gauge
Exact gauge is not essential. Make firm fabric that holds the leaf points and keeps stuffing inside the mouse.
Abbreviations
US crochet terms.
- ch = chain
- sc = single crochet
- sl st = slip stitch
- sc2tog = single crochet two stitches together; one decrease
- inc = work 2 sc in one stitch
- MR = magic ring
- R = row or round, as specified
Pattern
- Leaf shaping â make two Work in turned rows. Ch 17. R1: Sc in the second ch from the hook and each remaining ch; turn (16). R2: Inc in the first stitch, sc to the last stitch, inc in the last stitch; turn (18). R3: Sc across; turn (18). R4: Inc at each end as in R2; turn (20). R5: Sc across; turn (20). R6: Inc at each end; turn (22). R7: Sc across; turn (22). R8: Sc2tog, sc to the last 2 stitches, sc2tog; turn (20). R9: Sc across; turn (20). R10: Decrease at each end as in R8; turn (18). R11: Sc across; turn (18). R12âR19: Decrease at each end on every row, turning after each row (16, 14, 12, 10, 8, 6, 4, 2). R20: Sc2tog (1). Do not fasten off.
- Pointed leaf edging With the working yarn at the tip, ch 2 and sl st in the second ch from the hook to make a small tip. Work down one side, placing 1 sc in each of the 20 row ends. At the ends of rows 15, 10 and 5, after the sc in that row end, ch 3, sl st in the second ch from the hook, sc in the next ch and sl st back into the same row end. Fasten off at the lower corner. Join yarn at the other lower corner and work up the second side in the same way, making points at rows 5, 10 and 15. Fasten off at the tip. Leave the 16-stitch foundation edge unworked. Repeat for the second leaf.
- Join the hammock Lay the leaves together with their foundation edges aligned and their tips pointing away from the seam. Whipstitch the 16 foundation stitches of one leaf to the corresponding stitches of the other. Secure the first three row ends together at each end of the seam, leaving the rest of the side edges open. Spread the leaves into a shallow V with their pointed edges facing upwards.
- Mouse body Work in continuous rounds; mark the first stitch of each round. R1: 6 sc in an MR (6). R2: Inc in each stitch (12). R3: [Sc, inc] 6 times (18). R4: [Sc in next 2 stitches, inc] 6 times (24). R5âR9: Sc around (24 each round). R10: [Sc in next 2 stitches, sc2tog] 6 times (18). R11: [Sc, sc2tog] 6 times (12). Stuff lightly, keeping the body pliable. R12: Sc2tog 6 times (6). Fasten off and draw the tail through the front loops of the remaining stitches to close.
- Mouse head Work in continuous rounds. R1: 6 sc in an MR (6). R2: Inc in each stitch (12). R3: [Sc, inc] 6 times (18). R4âR5: Sc around (18 each round). R6: [Sc, sc2tog] 6 times (12). Stuff lightly. R7: Sc2tog 6 times (6). Fasten off and draw the tail through the front loops to close. The R7 closure is the muzzle; embroider a small nose over it and two short curved, closed eyes on opposite sides of the face around R4âR5.
- Ears â make two Work in continuous rounds. R1: 6 sc in an MR (6). R2: Inc in each stitch (12). Fasten off with a sewing tail. Fold each circle slightly at its base and stitch the ears to opposite sides of the head near R3, behind the eyes.
- Tail Ch 19 in the mouse yarn. Sl st in the second ch from the hook and each remaining ch (18 sl st). Fasten off, leaving a sewing tail.
- Berries â make three Using red cotton, work 6 sc in an MR. Work 1 sc in each stitch for one more round (6). Fasten off, draw the yarn through the front loops of all 6 stitches and pull closed. A wisp of stuffing is optional.
Finishing
- Sew the back of the head, around its first two rounds, to one end of the body. Angle the muzzle towards the body so the mouse appears curled up.
- Sew the tail to the opposite end of the body. Curve it alongside the body and secure it at two or three points so it stays tucked in.
- Set the mouse along the joined leaf edges and stitch its underside to the seam at several points. Keep the pointed leaf edges free to frame it.
- Stitch the three berries together near one end of the hammock, anchoring them to a leaf beside the mouse rather than across the open cradle. Weave in ends securely.
Helpful Tips
- If the leaves feel limp, use a smaller hook for the cotton rather than adding stuffing to the hammock.
- Shape the leaf points gently with your fingers after fastening off; do not pull them so tightly that the side edges pucker.
- Embroidered eyes and firmly attached berries are preferable to loose embellishments on a decoration that may be handled.
22. Mouse Driving a Christmas Toy Train

This Christmas mouse has a seat at the controls of a little toy engine, with its face and paws visible above the low front of the cab. The block-shaped train, round wheels and short chimney give it a cheerful, storybook look among festive decorations.
Unlike a train made entirely from rounded amigurumi shapes, this design gets its outline from flat panels joined into a box. The open cab has taller walls behind the mouse, so the driver remains the focus while the engine keeps its crisp toy-train silhouette.
This is an intermediate project suited to crocheters comfortable joining shaped pieces and positioning small details. The finished train is intended as a decoration rather than a toy for a young child.
Mouse Driving a Christmas Toy Train

Quick-reference card. Follow the complete written instructions below.
Materials
- DK cotton yarn: Red for the engine and cab, dark grey for the wheels, mouse grey for the mouse, and a small amount of pink for the ears.
- Black embroidery thread: For the eyes and nose.
- Crochet hook: Use a size that makes a firm fabric without gaps; 3 mm is a starting point for DK cotton.
- Other supplies: Toy stuffing, yarn needle, stitch marker and scissors.
Size and Fit
One decorative size. At the stated gauge, the engine body is approximately 6 cm long, 4 cm wide and 4 cm high. The wheels extend slightly beyond its ends; the open cab and mouse add height. Keep all small parts securely sewn on. This is a decoration, not a toy for a young child.
Gauge
Aim for approximately 20 sc and 20 rows per 10 cm in firm, flat sc fabric. Exact gauge is less important than dense stuffing-proof stitches, but use the same hook and tension for every panel.
Abbreviations
US crochet terms.
- ch = chain
- sc = single crochet
- sl st = slip stitch
- st(s) = stitch(es)
- inc = work 2 sc in one stitch
- dec = single crochet 2 stitches together
- MR = magic ring
Pattern
- Before you begin Work flat panels in rows: ch 1 and turn at the end of each row; the turning chain does not count as a stitch. Work circular pieces in continuous rounds and mark the first stitch of each round. Panel dimensions below give stitches across by rows high.
- Engine panels With red, make four 12-stitch à 8-row panels for the top, bottom and two long sides. For each, ch 13; sc in the second ch from the hook and in each remaining ch (12 sc). Work 7 more rows of 12 sc. Make two 8-stitch à 8-row panels for the front and rear: ch 9, work 8 sc across, then work 7 more rows of 8 sc. Fasten off, leaving sewing tails.
- Assemble the engine Treat the 12-stitch direction as the engineâs length. Sew the long edges of the top and bottom to the matching edges of the long sides, then sew on the front and rear panels, matching each 8-stitch edge to an 8-row edge. Use small, firm whipstitches through the edge loops and ease the edges together without pulling them into a curve. Before closing the final seam, stuff the box firmly enough to support its corners; then close it.
- Cab panels With red, make two layers for each cab wall so the walls can be lightly stuffed. For the rear wall, make two 8-stitch à 8-row panels: ch 9, work 8 sc across, then work 7 more rows. For each side wall, make two 6-stitch à 8-row panels: ch 7, work 6 sc across, then work 7 more rows. For the low front wall, make two 8-stitch à 4-row panels: ch 9, work 8 sc across, then work 3 more rows. Place each matching pair together, sew around its edges, add a thin layer of stuffing and close. Do not stuff these walls as firmly as the engine.
- Attach the open cab The cab occupies the rear six stitch positions of the engine top, leaving the front six positions exposed for the chimney. Sew the 8-stitch bottom edge of the rear wall across the rear edge of the top panel. Sew the 6-stitch bottom edge of each side wall along a long edge of that rear section. Sew the 8-stitch bottom edge of the low front wall across the top panel at the front of the cab. Sew neighbouring wall edges together at the four corners. Leave the top open; the 8-row side and rear walls stand higher than the 4-row front wall.
- Wheels Make four in dark grey. Round 1: 6 sc in an MR (6). Round 2: inc in each st (12). Round 3: (sc, inc) six times (18). Sl st in the next st, fasten off and leave a long sewing tail. Keep the wheels flat.
- Attach the wheels Place two wheels on each long engine side. Position their centres approximately level with the third row up from the bottom, opposite the second and tenth stitches along the sideâs 12-stitch length. For each wheel, first make a few small reinforcing stitches around its centre position on the engine side. Sew through the wheelâs centre stitches and those reinforced side stitches several times, then secure the tail. Keep the four wheels at matching heights; their lower edges may sit just below the engine.
- Chimney With dark grey, work 6 sc in an MR. Work 3 further rounds of 6 sc. Fasten off with a sewing tail, lightly stuff and sew the open end to the exposed front section of the engine top, centred across its width.
- Mouse head With mouse grey, work in continuous rounds. Round 1: 6 sc in an MR (6). Round 2: inc around (12). Round 3: (sc, inc) six times (18). Round 4: (2 sc, inc) six times (24). Rounds 5â7: sc around (24). Round 8: (2 sc, dec) six times (18). Round 9: (sc, dec) six times (12). Stuff firmly. Round 10: dec six times (6). Fasten off, draw the tail through the remaining stitches and close the hole. The closed round-10 end is the bottom of the head.
- Mouse ears and face Make two ears in pink. For each, work 6 sc in an MR, then inc around (12). Sl st in the next st and fasten off with a sewing tail. Flatten each circle and sew its lower edge to one side of the upper head, leaving the rest free. Embroider two small eyes and a nose on the front of the head before attaching it to the torso.
- Mouse upper torso With mouse grey, work 6 sc in an MR. Round 2: inc around (12). Rounds 3â6: sc around (12). Lightly stuff and leave the top open. Fasten off with a long tail. Sew the closed bottom of the head firmly to the 12-stitch top rim of the torso, taking several passes through the head and rim.
- Mouse paws and tail For each of two paws, work 6 sc in an MR with mouse grey. Sl st in the next st and fasten off with a sewing tail. For the tail, ch 9 with mouse grey; starting in the second ch from the hook, sl st in each of the 8 chains. Fasten off with a sewing tail.
- Seat the driver Sew the torsoâs bottom securely to the engine top inside the cab, directly behind the low front wall. Face the mouse towards the chimney. Sew one edge of each paw to the front of the torso and secure its free edge over the top of the low cab wall, one paw on either side of centre. Sew one end of the tail near the back of the torso and let the cord curl out beside it.
Finishing
- Check that the cab walls stand upright and that the chimney, wheels, head and paws are securely attached.
- Weave in and trim all ends. Gently shape the engine corners by hand; do not overstuff the cab walls.
Helpful Tips
- Keep the four engine panels with 12-stitch edges oriented the same way during assembly: those stitches run from front to rear.
- If the yarn shows stuffing between stitches, use a smaller hook rather than adding more stuffing.
- Mark the front of the engine before attaching the cab so the short front wall faces the chimney.
23. Mouse in a Snowman Costume

This Christmas mouse looks as though it has dressed up as a snowman, with its face and ears peeking out above a cosy scarf. The rounded white costume gives it a cheerful, stacked silhouette, while the stitched buttons make the disguise easy to recognise.
The costume is shaped as one piece, with a narrower area between its two rounded sections; the mouse head is made separately and sits at the top. That change in shape makes this an engaging intermediate amigurumi project. A winter hat and small arms add character without hiding the mouseâs expression.
It makes a playful addition to a shelf or festive display, especially alongside other Christmas crochet characters. The pattern below gives the full construction and placement details.
Mouse in a Snowman Costume

Quick-reference card. Follow the complete written instructions below.
Materials
- Worsted-weight yarn: Approximately 70 g soft, non-fuzzy white for the costume and arms; 20 g light brown or grey for the mouse; small amounts of red for the hat and scarf, and white for the pompom.
- 3.5 mm crochet hook: Or a size that makes a firm fabric with no visible gaps around the stuffing.
- Toy stuffing: For the body, head and pompom.
- Black embroidery thread: For the eyes, nose and snowman buttons.
- Other tools: Stitch marker, yarn needle and scissors.
Size and Fit
One decorative toy, approximately 21â23 cm tall including the hat if worked near the suggested gauge. Keep the stuffing firm but not stretched, particularly at the narrow join between the two snowballs.
Gauge
Approximately 16 single crochet stitches and 18 rounds per 10 cm in continuous rounds. Exact gauge is less important than a close fabric that contains the stuffing; changing gauge will change the finished size.
Abbreviations
US crochet terms.
- ch = chain
- sc = single crochet
- inc = work 2 sc in the same stitch
- dec = single crochet 2 stitches together; an invisible decrease is suitable
- st(s) = stitch(es)
- rnd = round
- FO = fasten off
Pattern
- Before you begin Work the body, head, arms, ears, hat and pompom in continuous rounds unless stated otherwise. Place a marker in the first stitch of each round and move it up as you work. Numbers in brackets are stitch counts at the end of the round. The scarf is worked in a row.
- Snowman body: lower snowball With white, make a magic ring. Rnd 1: 6 sc in ring (6). Rnd 2: inc in each st (12). Rnd 3: (1 sc, inc) 6 times (18). Rnd 4: (2 sc, inc) 6 times (24). Rnd 5: (3 sc, inc) 6 times (30). Rnd 6: (4 sc, inc) 6 times (36). Rnd 7: (5 sc, inc) 6 times (42). Rnds 8â13: sc in each st (42). Rnd 14: (5 sc, dec) 6 times (36). Rnd 15: (4 sc, dec) 6 times (30). Rnd 16: (3 sc, dec) 6 times (24). Stuff the lower snowball. Rnd 17: (2 sc, dec) 6 times (18). This narrow round forms the join between the snowballs; do not fasten off.
- Snowman body: upper section Continue in white. Rnd 18: (2 sc, inc) 6 times (24). Rnd 19: (3 sc, inc) 6 times (30). Rnd 20: (4 sc, inc) 6 times (36). Rnds 21â24: sc in each st (36). Rnd 25: (4 sc, dec) 6 times (30). Rnd 26: (3 sc, dec) 6 times (24). Rnd 27: (2 sc, dec) 6 times (18). Stuff the upper section, adding a little stuffing around the narrow join to support it without pulling it wide. Rnd 28: (1 sc, dec) 6 times (12). FO, leaving a long tail. Leave this 12-stitch top opening unclosed for the head.
- Mouse head With light brown or grey, make a magic ring. Rnd 1: 6 sc in ring (6). Rnd 2: inc in each st (12). Rnd 3: (1 sc, inc) 6 times (18). Rnd 4: (2 sc, inc) 6 times (24). Rnds 5â7: sc in each st (24). Rnd 8: (2 sc, dec) 6 times (18). Rnd 9: (1 sc, dec) 6 times (12). Stuff the head. FO, leaving its 12-stitch base open. With the head upright, embroider two small eyes on rnd 6, approximately 5 stitches apart. Embroider a small nose centred below them on rnd 7.
- Join head and body Centre the mouseâs face over the front of the costume. Hold the headâs 12-stitch base against the bodyâs 12-stitch top opening. Using the white tail, sew the openings together stitch by stitch, catching the edge loops of both pieces. Make a complete second pass around the join for strength, then secure the tail inside. The scarf will sit immediately below the head.
- Ears: make two With mouse-coloured yarn, make a magic ring. Rnd 1: 6 sc in ring (6). Rnd 2: inc in each st (12). FO, leaving a sewing tail. Flatten each small circle slightly and sew its lower edge to one side of the head across approximately rnds 4â5. Keep both ears clear of the embroidered eyes.
- Snowman arms: make two With white, make a magic ring. Rnd 1: 6 sc in ring (6). Rnd 2: (1 sc, inc) 3 times (9). Rnds 3â7: sc in each st (9). Rnd 8: (1 sc, dec) 3 times (6). FO, leaving a sewing tail. Lightly stuff each arm, then sew its 6-stitch end to a side of the upper snowball around rnds 21â23.
- Winter hat With red, make a magic ring. Rnd 1: 6 sc in ring (6). Rnd 2: inc in each st (12). Rnd 3: (1 sc, inc) 6 times (18). Rnd 4: (2 sc, inc) 6 times (24). Rnds 5â6: sc in each st (24). Rnd 7: (4 sc, inc) 6 times (30). Rnd 8: sc in each st (30). FO, leaving a sewing tail. Place the hat over the crown and slightly behind the ears, with its front edge above the eyes. Sew the brim to the head at several points so it stays in position.
- Pompom With white, make a magic ring. Rnd 1: 6 sc in ring (6). Rnd 2: inc in each st (12). Rnd 3: sc in each st (12). Rnd 4: dec 6 times (6). Add a small amount of stuffing. FO, draw the tail through the remaining front loops and pull closed. Sew the pompom to the top of the hat.
- Scarf With red, ch 51. Starting in the second ch from the hook, sc in each ch (50). FO. Wrap the strip once around the join beneath the head, cross its ends at the front and secure the crossing with a few discreet stitches. Arrange the ends to hang over the upper snowball.
- Buttons With black embroidery thread, stitch two small, distinct buttons down the front of the lower snowball. Position the upper button below the narrow join and leave several rounds between the buttons.
Finishing
- Check that the head, ears, arms, hat and pompom are firmly attached; reinforce any loose joins.
- Weave in all remaining ends securely and smooth the stuffing into an even stacked shape.
- For an item intended for a young child, use firmly embroidered facial details as directed and omit any detachable embellishments.
Helpful Tips
- Mark the front of the body before attaching the head so the face, scarf and buttons line up.
- If stuffing shows through the white stitches, use a smaller hook rather than packing in more stuffing.
- Keep the hatâs front brim above the eyes; a few small anchoring stitches are more useful than pulling the hat down tightly.
24. Nutcracker Soldier Mouse

This nutcracker soldier mouse brings a little storybook character to Christmas crochet decorations. Its straight red coat and tall black hat give it a formal silhouette, while the round ears rising above the hat keep it unmistakably mouse-like.
The flat circular base helps the stuffed figure stand, and the separate head and narrow arms give it a clear soldier shape. The hat has a flat top and straight sides rather than a tapered point, with a brim that projects slightly around its lower edge.
Gold-coloured embroidery suggests uniform trim without raised buttons. For the neatest appearance, keep the stuffing firm enough to support the shape but light enough that the base stays flat, and check the face remains visible beneath the brim.
Nutcracker Soldier Mouse

Quick-reference card. Follow the complete written instructions below.
Materials
- Smooth DK cotton yarn: Red for the body and sleeves; cream or light grey for the head, hands and ears; black for the hat; small amounts of pink and gold-coloured yarn for embroidery.
- Crochet hook: 3 mm, or a size that makes a firm fabric with no visible gaps around the stuffing.
- Polyester stuffing: Enough to support the body, head and hat without rounding the flat base.
- Other tools: Stitch marker, yarn needle, scissors and pins. Use black yarn to embroider the eyes.
Size and Fit
One size. At the suggested gauge, the bodyâs 36-stitch base is approximately 5.5â6 cm across. Finished height will vary with yarn, stuffing and how far the hat overlaps the head; this is a small standing decoration, not a fitted item.
Gauge
Approximately 20 single crochet stitches and 22 rounds per 10 cm. Gauge is a guide; a dense fabric and a base that remains flat matter more than an exact measurement.
Abbreviations
US crochet terms.
- BLO = Back loop only
- ch = Chain
- dec = Single crochet decrease: work the next 2 stitches together
- inc = Work 2 single crochet stitches in the same stitch
- MR = Magic ring
- rnd = Round
- sc = Single crochet
- sl st = Slip stitch
Pattern
- Before you begin Work in continuous rounds unless told otherwise. Mark the first stitch of each round and move the marker as you work. Numbers in brackets are stitch counts. The body begins at its flat bottom; the head begins at its crown.
- Red uniform body: flat base Rnd 1: Work 6 sc in an MR (6). Rnd 2: Inc in each stitch (12). Rnd 3: (1 sc, inc) 6 times (18). Rnd 4: (2 sc, inc) 6 times (24). Rnd 5: (3 sc, inc) 6 times (30). Rnd 6: (4 sc, inc) 6 times (36). Keep this circle flat.
- Red uniform body: straight sides and top Rnd 7: Sc BLO around (36); this turn forms the edge of the base. Rnds 8â18: Sc around (36 each rnd). Rnd 19: (4 sc, dec) 6 times (30). Rnd 20: (3 sc, dec) 6 times (24). Rnd 21: (2 sc, dec) 6 times (18). Stuff the body, pressing the bottom flat. Rnd 22: (1 sc, dec) 6 times (12). Rnd 23: Dec 6 times (6). Fasten off and draw the tail through the remaining front loops to close. Do not overstuff the bottom into a dome.
- Mouse head With cream or light grey, rnd 1: Work 6 sc in an MR (6). Rnd 2: Inc around (12). Rnd 3: (1 sc, inc) 6 times (18). Rnd 4: (2 sc, inc) 6 times (24). Rnd 5: (3 sc, inc) 6 times (30). Rnd 6: (4 sc, inc) 6 times (36). Rnds 7â12: Sc around (36 each rnd). Rnd 13: (4 sc, dec) 6 times (30). Rnd 14: (3 sc, dec) 6 times (24). Embroider two small black eyes on rnd 9, about 6 stitches apart, and a pink nose centred between them on rnd 11. Add short whiskers if desired. Stuff the head. Rnd 15: (2 sc, dec) 6 times (18). Rnd 16: (1 sc, dec) 6 times (12). Rnd 17: Dec 6 times (6). Fasten off and draw the tail through the remaining front loops to close.
- Tall black hat Work from the flat top down. Rnd 1: Work 6 sc in an MR (6). Rnd 2: Inc around (12). Rnd 3: (1 sc, inc) 6 times (18). Rnd 4: (2 sc, inc) 6 times (24). Rnd 5: (3 sc, inc) 6 times (30). Rnd 6: Sc BLO around (30). Rnds 7â15: Sc around (30 each rnd). Fasten off, leaving a long tail. The BLO round turns the top circle into a straight-sided cylinder.
- Separate black brim Ch 30 and join with a sl st in the first chain, taking care not to twist the chain. Rnd 1: Work 1 sc in each chain (30); thereafter work continuously. Rnd 2: (4 sc, inc) 6 times (36). Fasten off, leaving a sewing tail. Sew the 30-stitch inner edge of the brim evenly around the open lower edge of the hat. Leave the wider outer edge free to project slightly.
- Ears: make two With the head colour, rnd 1: Work 6 sc in an MR (6). Rnd 2: Inc around (12). Rnd 3: (1 sc, inc) 6 times (18). Rnd 4: Sc around (18). Fasten off, leaving a sewing tail. Keep each ear as a flat, unstuffed disc. Add a few pink stitches at its centre, keeping the reverse side tidy.
- Narrow arms: make two Begin with the head colour for each hand. Rnd 1: Work 6 sc in an MR (6). Rnd 2: Sc around (6). Change to red. Rnd 3: (1 sc, inc) 3 times (9). Rnds 4â8: Sc around (9 each rnd). Rnd 9: (1 sc, dec) 3 times (6). Fasten off, leaving a sewing tail. Add a little stuffing to the sleeve only if needed; flatten the six-stitch opening for sewing.
- Assembly and uniform embroidery Sew the closed underside of the head securely to the centre of the bodyâs closed top. Lightly stuff the hat to support its sides while keeping its top flat. Centre it over head rnds 1â5, with the brim above the embroidered eyes, and sew the hatâs lower edge to the head without stitching down the projecting outer brim. Sew the lower four stitches of each ear behind an upper side of the hat, near hat rnds 6â8, so the round tops rise above the crown; secure the ears through the hat fabric. Sew the flattened tops of the arms to opposite sides of body rnds 15â16, with the hands pointing down. On the front of the straight body, embroider two vertical gold-coloured lines from approximately rnd 9 to rnd 17. Add three short horizontal bars between them and a short line around the upper front for a collar. Keep these details stitched flat rather than attaching buttons.
Finishing
- Check that the base sits flat. Redistribute stuffing through the body with your fingers if it rocks.
- Weave in all ends securely, taking care not to pull the embroidered uniform lines out of alignment.
- Shape the hatâs top, brim and ears by hand. Keep the embroidered eyes and nose visible below the brim.
Helpful Tips
- If stuffing shows between stitches, use a smaller hook rather than adding more stuffing.
- The hat is a cylinder, not a cone: keep every side round at 30 stitches after the BLO turn.
- Pin the head, arms and hat in place before sewing so the mouse remains balanced over its circular base.
- For an item intended for a young child, embroider all facial features securely and check every seam; do not add loose decorations.
25. Mouse on a Christmas Drum

This little Christmas mouse sits on a festive drum, with its paws resting over the front rim. The crossed lacing gives the drum its toy-soldier character, while the mouseâs rounded shape keeps the scene playful rather than formal.
The drum is built as a low, stuffed cylinder rather than a single crocheted sphere. Its flat top gives the seated mouse a stable place to sit, and the defined rim makes the paws look as though they are holding on.
This is an intermediate amigurumi project with several small pieces and visible details. The drumâs shape and the mouseâs position do much of the storytelling, making it a charming addition to a Christmas display.
Mouse on a Christmas Drum

Quick-reference card. Follow the complete written instructions below.
Materials
- DK cotton yarn: Approximately 30 g red for the drum, 25 g grey for the mouse, 15 g cream for the drumheads and lacing, and a small amount of pink for ear details. Quantities are estimates.
- Black embroidery thread: For the eyes and nose.
- Crochet hook: 3 mm, or a size that produces firm stitches without gaps.
- Toy stuffing: For the drum, body, head and muzzle.
- Other tools: Tapestry needle, stitch marker, scissors and pins.
Size and Fit
One size. At the suggested gauge, the drum is approximately 6 cm across and 4 cm deep; the assembled ornament is approximately 11â12 cm tall. These are calculated guides, not tested measurements.
Gauge
Approximately 22 sc and 24 rows to 10 cm in firm fabric. Exact gauge is less important than matching the 42-stitch edge of each drumhead to the 42-stitch long edge of the side strip.
Abbreviations
US crochet terms.
- ch = chain
- sc = single crochet
- sl st = slip stitch
- inc = work 2 sc in the next stitch
- dec = single crochet 2 stitches together
- MR = magic ring
- st(s) = stitch(es)
- rnd = round
Pattern
- Before you begin Work all rounds in a continuous spiral unless stated otherwise. Mark the first stitch of each round and move the marker up as you work. Numbers in parentheses give the stitch count at the end of a round or row. Use firm tension so the stuffing does not show.
- Drumheads: make two in cream Rnd 1: 6 sc in MR (6). Rnd 2: inc in each st (12). Rnd 3: (sc, inc) 6 times (18). Rnd 4: (2 sc, inc) 6 times (24). Rnd 5: (3 sc, inc) 6 times (30). Rnd 6: (4 sc, inc) 6 times (36). Rnd 7: (5 sc, inc) 6 times (42). Fasten off each circle, leaving a long sewing tail.
- Drum side: make one in red Ch 43. Row 1: sc in the second ch from the hook and in each remaining ch (42). Rows 2â10: ch 1, turn, sc in each st (42). Fasten off, leaving a sewing tail. Bring the two short, 10-row ends together and sew them to form a tube. Each long edge has 42 stitches.
- Assemble the drum With the red tube right side out, sew one cream drumhead to one long edge, matching its 42 stitches to the 42 stitches of the strip. Sew the second drumhead to the other long edge, stuffing the cylinder firmly and evenly before closing the final gap. Keep both drumheads flat.
- Diagonal drum lacing Thread a needle with cream yarn. Around the red side, make 12 evenly spaced diagonal stitches, each travelling from just below the upper seam to just above the lower seam about two side-strip stitches clockwise. Repeat from the same upper points, this time landing about two stitches anticlockwise, to make crossed lacing. Pass the needle through the drum between stitches and secure the yarn discreetly.
- Mouse body: make one in grey Rnd 1: 6 sc in MR (6). Rnd 2: inc in each st (12). Rnd 3: (sc, inc) 6 times (18). Rnd 4: (2 sc, inc) 6 times (24). Rnd 5: (3 sc, inc) 6 times (30). Rnds 6â9: sc in each st (30). Rnd 10: (3 sc, dec) 6 times (24). Rnd 11: (2 sc, dec) 6 times (18). Begin stuffing, keeping the broad starting end flat. Rnd 12: (sc, dec) 6 times (12). Rnd 13: dec 6 times (6). Add stuffing as needed. Fasten off and draw the tail through the remaining stitches to close.
- Mouse head: make one in grey Rnd 1: 6 sc in MR (6). Rnd 2: inc in each st (12). Rnd 3: (sc, inc) 6 times (18). Rnd 4: (2 sc, inc) 6 times (24). Rnds 5â7: sc in each st (24). Rnd 8: (2 sc, dec) 6 times (18). Rnd 9: (sc, dec) 6 times (12). Stuff firmly. Rnd 10: dec 6 times (6). Fasten off, close the opening and leave a long tail for attachment.
- Muzzle: make one in grey Rnd 1: 6 sc in MR (6). Rnd 2: inc in each st (12). Rnd 3: sc in each st (12). Rnd 4: dec 6 times (6). Add a small amount of stuffing, close the opening and leave a sewing tail.
- Ears: make two in grey For each ear, work 6 sc in MR (6), then inc in each st (12). Fasten off, leaving a sewing tail. Do not stuff. Embroider a small pink patch inside each ear, keeping the outer edge free for sewing.
- Arms and paws: make two in grey For each arm, work 6 sc in MR (6), then sc in each st for rnds 2â5 (6 stitches per round). Do not stuff. Flatten the open end and stitch its three pairs of stitches together. Fasten off, leaving a long tail for attachment; the rounded starting end is the paw.
- Tail: make one in grey Ch 19, then sl st in the second ch from the hook and in each remaining ch (18 sl sts). Fasten off, leaving a tail for sewing.
- Assemble the mouse Sew the muzzle to the front of the head, centred across approximately rnds 5â7. Embroider a black nose on its tip and two small black eyes above it. Sew the ears to the upper sides of the head, attaching their lower edges around head rnds 3â5. Sew the closed end of the head to the narrow, closed end of the body, with the face pointing forwards. Sew the flattened ends of the arms to opposite sides of the upper body around rnds 7â9, so the rounded paws point forwards and slightly down. Sew the tail to the back of the broad body base.
- Secure the mouse to the drum Place the mouse on the top drumhead with its broad body base towards the back, close enough to the rear rim that both paws reach the front-side rim. Pin the base and paws in place. Sew the body base securely to the drumhead, then stitch each paw over the upper seam and to the red side approximately one row below it. Check that the drum stands level and the mouse cannot tip before securing all ends.
Finishing
- Weave in loose ends without pulling the drumheads out of shape.
- Straighten the crossed lacing and gently reshape the drum and mouse by hand.
- If the ornament is for a young child, check every sewn attachment carefully and omit any detachable embellishments.
Helpful Tips
- Keep the red strip’s turning chains out of the stitch count: every row must have 42 sc.
- Pin both drumheads at four evenly spaced points before sewing to distribute the 42 stitches around each edge.
- Embroider the face before attaching the head to the body; it is easier to keep the features symmetrical.
- The paws are anchored to the drum side, not merely laid on the top drumhead.
26. Mouse in a Pinecone Sleeping Bag

This little Christmas mouse looks as though it has settled down for a nap inside a pinecone. Its face peeks out from the open end, while raised, overlapping scales give the cover its woodland character.
The contrast between the smooth mouse and the textured cover makes this a charming addition to a festive display. It is an intermediate project: the main shapes are straightforward, but the scales need careful placement to keep their staggered appearance.
Choose a smooth yarn if you want the pinecone texture and the mouseâs sleepy expression to remain easy to see. The finished piece is intended as a decoration rather than a toy for a young child.
Mouse in a Pinecone Sleeping Bag

Quick-reference card. Follow the complete written instructions below.
Materials
- Smooth worsted-weight yarn: Brown for the cover, mouse colour for the head and body, and a small amount of pink for the nose and ears. Allow approximately 40 m of brown and 25 m of mouse colour.
- Black embroidery thread or yarn: A short length for the closed eyes.
- Crochet hook: Use a 3.5 mm hook, or a size that produces firm stitches without gaps.
- Other supplies: A small amount of toy stuffing, stitch marker, yarn needle and scissors.
Size and Fit
One sample size. At the stated gauge, the cover is approximately 10.5 cm from tip to opening, with a 20 cm circumference at the opening. The assembled mouse is approximately 10 cm long; its head sits just inside the opening. Exact finished dimensions depend on your yarn and tension.
Gauge
Aim for approximately 18 single crochet stitches and 20 rounds per 10 cm in firmly worked amigurumi fabric. Gauge is a sizing guide, not a claim of measured testing.
Abbreviations
US crochet terms.
- BLO = back loop only
- dc = double crochet
- dec = single crochet decrease, worked over two stitches
- FLO = front loop only
- inc = work 2 sc in one stitch
- MR = magic ring
- sc = single crochet
- sl st = slip stitch
- st = stitch
Pattern
- Before you begin Work the cover, head and body in continuous rounds unless told otherwise. Mark the first stitch of each round and move the marker up as you work. Round numbers start at the narrow tip of the cover and the front of the mouse’s head.
- Cover, rounds 1â4 With brown, work 6 sc in an MR for round 1 (6). Round 2: inc in each st (12). Rounds 3â4: sc in each st (12 each round).
- Cover, rounds 5â10 Round 5: (3 sc, inc) 3 times (15). Round 6: sc around (15). Round 7: (4 sc, inc) 3 times (18). Round 8: sc around (18). Round 9: (5 sc, inc) 3 times (21). Round 10: sc around (21).
- Cover, rounds 11â16 Work each odd-numbered round in BLO to leave its front loops free for scales. Round 11, BLO: (6 sc, inc) 3 times (24). Round 12: sc through both loops around (24). Round 13, BLO: (7 sc, inc) 3 times (27). Round 14: sc through both loops around (27). Round 15, BLO: (8 sc, inc) 3 times (30). Round 16: sc through both loops around (30).
- Cover, rounds 17â21 Round 17, BLO: (9 sc, inc) 3 times (33). Round 18: sc through both loops around (33). Round 19, BLO: (10 sc, inc) 3 times (36). Rounds 20â21: sc through both loops around (36 each round). Sl st in the next st, fasten off and weave in the end. Leave this wide end open.
- Scales Hold the cover with its tip pointing down and its marked first stitch facing you. On each specified round, count that round’s first stitch as stitch 1. Work a separate scale row into each listed nine-loop band: round 11, stitches 2â10 and 14â22; round 13, stitches 4â12 and 17â25; round 15, stitches 3â11 and 19â27; round 17, stitches 5â13 and 22â30; round 19, stitches 6â14 and 24â32. For each band, join brown yarn with a sl st in its first free FLO. Skip the next FLO, work 4 dc in the next FLO, skip the next FLO, sl st in the next FLO, skip the next FLO, work 4 dc in the next FLO, skip the next FLO, and sl st in the ninth FLO. Fasten off after each band and weave in the ends on the inside. Each band makes two scales; the shifted bands stagger them down the sides.
- Mouse head With mouse-colour yarn, work 6 sc in an MR for round 1 (6). Round 2: inc around (12). Round 3: (sc, inc) 6 times (18). Round 4: (2 sc, inc) 6 times (24). Rounds 5â9: sc around (24 each round). Round 10: (2 sc, dec) 6 times (18). Round 11: (sc, dec) 6 times (12). Stuff firmly but keep the front gently rounded. Round 12: dec 6 times (6). Fasten off with a long sewing tail and draw the remaining opening closed. The MR is the front of the face.
- Mouse body With mouse-colour yarn, work 6 sc in an MR for round 1 (6). Round 2: (sc, inc) 3 times (9). Round 3: (2 sc, inc) 3 times (12). Rounds 4â6: sc around (12 each round). Round 7: (2 sc, dec) 3 times (9). Add a little stuffing. Round 8: (sc, dec) 3 times (6). Fasten off, close the opening and leave a sewing tail. The round-1 end is the mouse’s rump.
- Ears and face Make two ears. For each, work 6 sc in an MR with mouse-colour yarn, pull the ring closed, sl st in the first sc and fasten off with a sewing tail. Do not stuff. Fold each small disc slightly and sew it to an opposite side of head round 4. With pink yarn, embroider a small nose over the centre of head round 1. With black thread or yarn, embroider two short curved closed eyes on opposite sides of head rounds 3â4. Secure all embroidery ends inside the head.
- Assembly Sew the closed end of the head to the closed round-8 end of the body. Keep the body aligned behind the face. Insert the mouse rump-first into the cover’s narrow end, easing the head into the wider section until its face rests at the opening. Adjust the stuffing if needed so the cover keeps its tapered shape. With matching yarn, make several small securing stitches through the body and cover near cover rounds 7â9. Add two discreet stitches between the sides of the head and the inside of the cover near round 20, leaving the face visible. Do not sew the opening shut.
Finishing
- Weave in any remaining ends without pulling the scale rows flat.
- Gently lift the dc shells so their lower edges overlap the scale rows beneath them.
- Check that the mouse is firmly attached inside the cover before using it as a decoration.
Helpful Tips
- Use smooth yarn and a firm tension: fuzzy yarn can obscure the individual scales and embroidered face.
- The bands are worked into the free front loops of earlier rounds, not into the 36 live stitches at the opening.
- This stuffed decoration is not suitable as a toy for a child under three.
Frequently Asked Questions
Which Christmas mouse pattern is simplest to start with?
The hanging mouse bauble is marked beginner. Its round shape makes it a more straightforward choice than the designs with several shaped accessories.
Are all 26 mice designed to hang on a tree?
No. Some are hanging ornaments, while others are made to stand, sit or rest against a display support. Check the description before adding a hanging loop.
How do I keep a stuffed mouse from looking lumpy?
Use small pieces of stuffing and spread them evenly as the shape grows. Take particular care at narrow faces and around bases that need to sit flat.
Can I use a different yarn weight?
You can, but it will change the finished size. Use a suitable hook for a firm fabric, and make connected parts in compatible yarn weights so they fit together.
Final Thoughts
Choose a mouse for the place it will go: a bauble for the tree, a flat-bottomed character for a shelf or a seated design for a festive display. Checking that detail first will help you focus on the right construction and finishing steps.