24 Crochet Christmas Napkin Rings for a Handmade Holiday
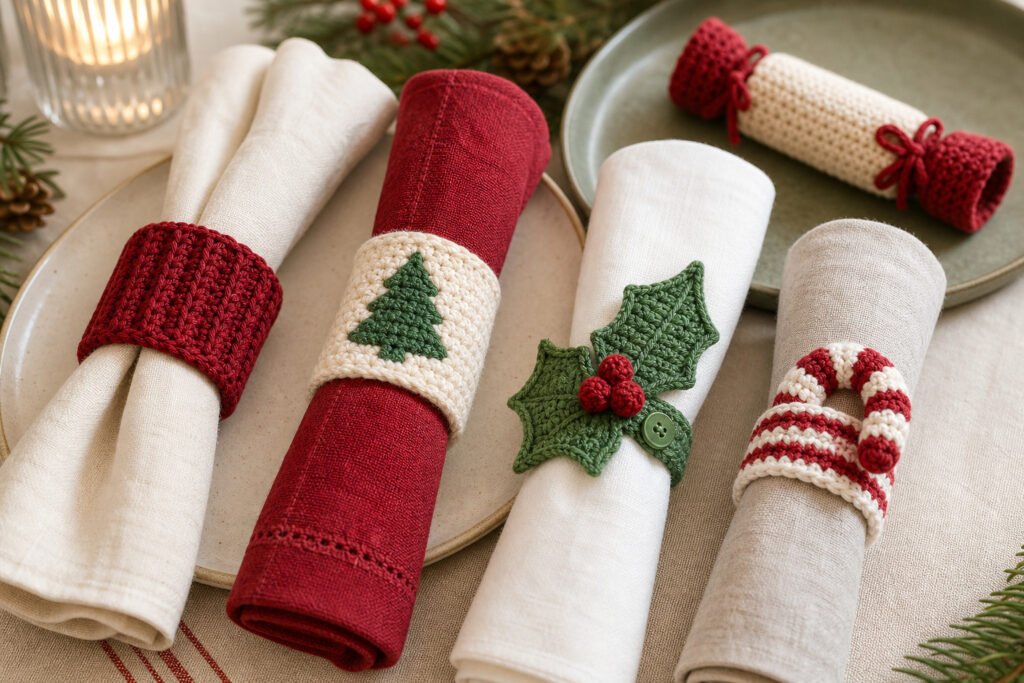
Looking for Christmas crochet napkin rings to dress a festive table? These 24 designs range from a simple ribbed cuff to trees, holly, robins and Christmas lights.
Some slide over a rolled napkin, while others tie or fasten around a fold. Choose the shape to suit your napkins, then consider how flat the decoration needs to sit beside plates and cutlery.
For more ideas that build on this collection, explore crochet Christmas coasters.
Before You Start
Decide how you will fold or roll your napkins before choosing a design. A snug cuff can hold a roll neatly, but a tie or wrap gives you more room to adjust around a thicker fold. Check the fit with the actual napkin rather than judging it by the finished ring alone.
For a table setting, choose yarn that feels comfortable to handle and suits the care your napkins will need. A smooth yarn can make small details, such as the tapestry tree or woven plaid, easier to see. Avoid leaving long ends or loose decorations where they could catch on cutlery.
Read each patternâs materials and finishing notes before starting, particularly for layered motifs and closures. The crochet stitch terminology in this article is US terminology; check abbreviations before working if you normally use UK terms.
Crochet terminology: This article uses US crochet terms. Check the abbreviations for each project.
Ribbed Christmas Cuff Napkin Ring

A deep-red ribbed cuff brings a quiet Christmas detail to the table without competing with patterned plates or festive linens. Its simple texture suits a cream linen napkin, while the discreet seam can sit out of view at the back.
The cuff is shaped to suit the napkin rather than a fixed circumference. Before joining it, check the unsewn piece around the napkin folded as it will be displayed, paying attention to the thickest part of the fold. It should sit comfortably and slide off without pulling: firm cotton has limited stretch, so a snug fit on the unsewn piece is unlikely to loosen much in use.
Using the same fold for each place setting helps a matching set look consistent. If the fold changes, check the fit again before joining.
Ribbed Christmas Cuff Napkin Ring

Quick-reference card. Follow the complete written instructions below.
Materials
- Yarn: A small amount of firm DK-weight cotton yarn in deep red
- Crochet hook: 3.5 mm, or a size that produces a firm but flexible fabric
- Other: Yarn needle, scissors and the folded napkin for checking fit
Size and Fit
The cuff is 6 single crochet stitches wide; its circumference is adjustable. Fold the napkin as you plan to place it on the table, then work enough rows for the rectangle to wrap around its thickest part with approximately 0.5â1 cm of ease. Cotton has limited stretch, so the ring should slide on and off without pulling.
Gauge
No fixed gauge is required. Keep the stitches firm and even, and use the folded napkin to determine the number of rows.
Abbreviations
US crochet terms.
- ch = chain
- sc = single crochet
- BLO = back loop only
- st(s) = stitch(es)
Pattern
- Foundation Ch 7. This chain sets the width of the cuff, from one open rim to the other.
- Row 1 Sc in the second ch from the hook and in each remaining ch. Turn. (6 sc)
- Row 2 Ch 1 (does not count as a st). Sc BLO in each st across. Turn. (6 sc)
- Following rows Repeat Row 2, keeping 6 sc in every row. The growing length of the rectangle will become the circumference of the ring.
- Check the fit Wrap the rectangle around the thickest part of the folded napkin, bringing its foundation edge and final-row edge towards each other. Continue until the edges meet with approximately 0.5â1 cm of ease around the napkin. Check that the cuff can slide off without forcing it; add rows if needed. Complete the final row, then fasten off with a long tail for sewing.
- Join the cuff Bring the short ends together without overlapping them. With the yarn needle, sew the six foundation-chain positions to the six stitches of the final row, matching them one for one. Keep the seam flexible rather than pulling it tight. The seam will sit at the back of the napkin.
Finishing
- Weave in the ends without tightening the cuff.
- Slide the ring onto the folded napkin and position the seam at the back. If it is too snug, undo the seam, add a row or two and rejoin.
Helpful Tips
- Keep the same napkin fold when checking fit and setting the table; a thicker fold needs a larger ring.
- Make all the rings for a matching set using the same napkin fold and row count, checking each one before sewing.
Christmas Tree Tapestry Napkin Ring

This Christmas tree napkin ring works the green motif into the cream fabric, giving it a neat, flat look rather than the raised outline of an appliqué. The small design stays easy to recognise when the band curves around a rolled napkin, especially against a dark red one.
This is an intermediate project for crocheters who enjoy colourwork on a small scale. The tree chart is written in crochet working order, which is useful to remember as you turn the fabric. A relaxed carried strand helps the band lie flat without distorting the motif.
Rolled napkins vary in bulk, so judge the fit against the ones you plan to put on the table. The finished ring should hold its shape while sliding over the fabric comfortably.
Christmas Tree Tapestry Napkin Ring

Quick-reference card. Follow the complete written instructions below.
Materials
- 4-ply cotton yarn: Small amounts of cream (C) and green (G), in a similar weight and thickness.
- 3 mm crochet hook: Adjust the hook size if needed to obtain a firm fabric.
- Tapestry needle and scissors: For seaming and weaving in ends.
Size and Fit
The sample band is approximately 4.6 cm tall and 11.5 cm around after seaming, intended for a rolled napkin measuring about 10â11 cm around. To change the circumference, add or remove the same number of plain cream rows at each end of the band. Keep at least two plain rows at each end and check the fit around your rolled napkin before seaming.
Gauge
Approximately 24 sc and 26 rows = 10 cm in firm, flat single crochet. Gauge affects the finished fit; measure the band against the napkin before seaming.
Abbreviations
US crochet terms.
- ch = chain
- sc = single crochet
- st = stitch
- C = cream yarn
- G = green yarn
Pattern
- Before you begin The 11 stitches across each row form the height of the ring. Rows build its circumference. The tree tip will face the edge where the last stitch of Row 1 sits. Ch 1 at the start of a row does not count as a stitch. Turn after every row.
- Plain first end â Rows 1â11 With C, ch 12. Row 1: Sc in the second ch from the hook and in each ch across; ch 1, turn. Rows 2â11: Sc in each of the 11 sts across; ch 1, turn. There are 11 sc in every row.
- Tree chart â Rows 12â20 Each chart line below gives the 11 stitches in WORKING ORDER for that row; follow the line from left to right as you crochet. C means work an sc in cream; G means work an sc in green. To change colour, make the final yarn-over of the preceding sc with the colour needed for the next stitch. Join G at the start of Row 13. On Rows 13â19, lay the unused yarn along the tops of the previous rowâs stitches and crochet over it, carrying both colours across the full row. Keep the carried strand relaxed. Ch 1 and turn after each row, carrying both yarns up the edge between chart rows. Row 12: CCCCCCCCCCC. Row 13: CCCGGCCCCCC. Row 14: CCCCGGGGCCC. Row 15: CGGGGGGGGCC. Row 16: CGGGGGGGGGC. Row 17: CGGGGGGGGCC. Row 18: CCCCGGGGCCC. Row 19: CCCGGCCCCCC. Row 20: CCCCCCCCCCC. Cut G after Row 19; work Row 20 with C only.
- Plain second end â Rows 21â31 With C, sc in each of the 11 sts across every row. Ch 1 and turn after Rows 21â30; do not ch 1 after Row 31. Fasten off, leaving a cream tail long enough to seam the ends.
- Check fit and seam Wrap the band around the rolled napkin with the tree facing out. It should slide on without squeezing the fabric. If needed, adjust the plain rows equally at both ends so the tree stays opposite the seam. Bring Row 1 and the final row together, keeping the band untwisted. With the cream tail, whipstitch the ends together through corresponding stitches. The seam sits behind the tree.
Finishing
- Weave in the cream and green ends without pulling the colourwork out of shape.
- Gently smooth the band by hand and slide it over the rolled napkin.
Helpful Tips
- The chart is written in working order, so its lines are not all read from the same physical edge of the band.
- If green shows prominently through the cream stitches, ease the carried strand behind the stitches and avoid pulling it tight.
- For several matching rings, roll the napkins the same way before checking each bandâs fit.
Holly Leaf Button-Wrap Napkin Ring

This Christmas crochet napkin ring uses the holly leaf itself as the wrap, rather than attaching a decoration to a separate band. Its pointed ends and shallow notches give it a recognisable shape without making the edges too fussy for a place setting.
The button closure lets you check the fit against the napkin as it will sit on the table before fixing the button in place. That matters if you plan to alternate between neatly folded napkins and fuller rolls: the leaf should overlap comfortably, not pull tight.
Three soft crocheted berries add a spot of red near the button end. Keep the decoration clear of the closure so the overlapping tip can lie flat and the napkin ring remains easy to fasten.
Holly Leaf Button-Wrap Napkin Ring
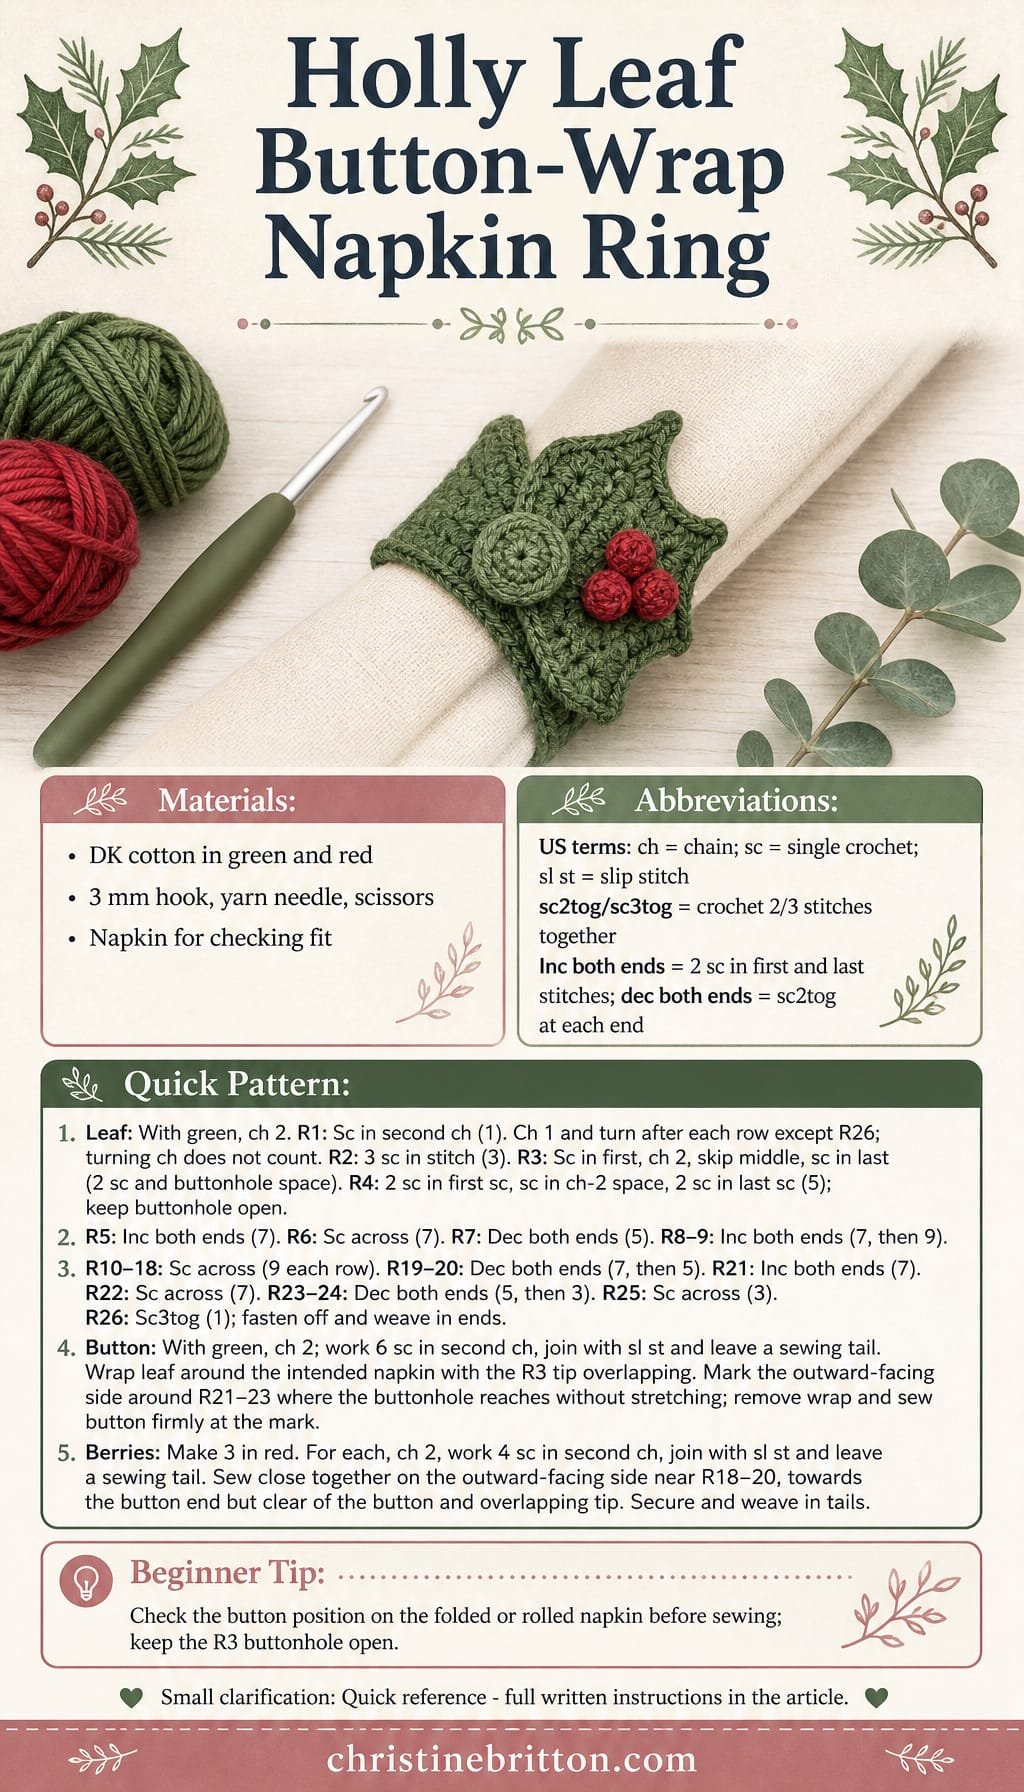
Quick-reference card. Follow the complete written instructions below.
Materials
- Green cotton yarn: DK weight; a small amount for one leaf and button
- Red cotton yarn: DK weight; a small amount for three berries
- Crochet hook: 3 mm, or a size that makes a firm fabric
- Other tools: Yarn needle, scissors and the napkin you intend to use
Size and Fit
The 26-row leaf is approximately 13 cm long and 3.5â4 cm wide at the suggested gauge. With the button centred around Row 22, the distance between button and buttonhole is approximately 9.5 cm. Before sewing on the button, wrap the leaf around your folded or rolled napkin and move the button within Rows 21â23 to suit its circumference. The ends must overlap enough for the buttonhole to sit over the button without pulling.
Gauge
Approximately 2.5 sc and 2 rows per cm in firm, unblocked fabric. Exact gauge is less important than checking the closure on the intended napkin.
Abbreviations
US crochet terms.
- ch = chain
- sc = single crochet
- sl st = slip stitch
- sc2tog = single crochet the next 2 stitches together; decreases by 1 stitch
- sc3tog = single crochet the next 3 stitches together; decreases by 2 stitches
- inc at both ends = Work 2 sc in the first stitch, 1 sc in each stitch between, and 2 sc in the last stitch; increases by 2 stitches
- dec at both ends = Work sc2tog over the first 2 stitches, 1 sc in each stitch between, and sc2tog over the last 2 stitches; decreases by 2 stitches
Pattern
- Before you begin Work the leaf in rows from the buttonhole tip to the opposite tip. Ch 1 and turn after every row except Row 26; turning chains do not count as stitches. The brief decreases and increases at Rows 7â8 and 20â21 form the shallow edge notches.
- Leaf, Rows 1â4 With green, ch 2. Row 1: Sc in the second ch from the hook. (1 sc) Row 2: Work 3 sc in the sc. (3 sc) Row 3: Sc in the first sc, ch 2, skip the middle sc, sc in the last sc. (2 sc and one ch-2 buttonhole space) Row 4: Work 2 sc in the first sc, 1 sc in the ch-2 space, and 2 sc in the last sc. (5 sc) Keep the Row 3 space open; do not sew through it later.
- Leaf, Rows 5â9 Row 5: Inc at both ends. (7 sc) Row 6: Sc across. (7 sc) Row 7: Dec at both ends. (5 sc) Row 8: Inc at both ends. (7 sc) Row 9: Inc at both ends. (9 sc)
- Leaf, Rows 10â18 Sc across each row. (9 sc per row)
- Leaf, Rows 19â26 Row 19: Dec at both ends. (7 sc) Row 20: Dec at both ends. (5 sc) Row 21: Inc at both ends. (7 sc) Row 22: Sc across. (7 sc) Row 23: Dec at both ends. (5 sc) Row 24: Dec at both ends. (3 sc) Row 25: Sc across. (3 sc) Row 26: Sc3tog over all 3 stitches. (1 sc) Fasten off and weave in the leaf ends.
- Crocheted button With green, ch 2 and work 6 sc into the second ch from the hook. Join to the first sc with a sl st, without counting the sl st as a stitch. Fasten off, leaving a long tail for sewing. The button is a small, soft disc; if it slips easily through the buttonhole, use a slightly larger hook for the button only.
- Fit the closure Wrap the leaf around the intended napkin with the Row 3 tip overlapping the other end. With the buttonhole over the overlap, mark a spot on the outward-facing side of the leaf around Row 22; Rows 21â23 offer a little adjustment. Check that the buttonhole reaches this spot without stretching the leaf. Remove the wrap and sew the button firmly at the mark, stitching through the button and leaf several times without closing the buttonhole.
- Berries, make 3 With red, ch 2 and work 4 sc into the second ch from the hook. Join to the first sc with a sl st. Fasten off, leaving a tail for sewing. Each small cluster of stitches forms a soft berry.
- Attach the berries Sew the three berries close together on the outward-facing side near Rows 18â20, towards the button end. Keep them clear of the button and the path of the overlapping tip. Secure the tails on the back and weave them in.
Finishing
- Button the leaf around the napkin and check that it sits comfortably without compressing the fabric.
- Gently shape the pointed ends and notched edges by hand. If desired, lightly dampen the leaf and let it dry flat before use.
Helpful Tips
- A firm fabric helps the long leaf hold its shape; avoid a loose hook size.
- Fit the closure to a folded or rolled napkin as it will appear on the table, since different folds change its circumference.
- Use stitched-on yarn berries rather than loose beads, and secure every sewing tail.
Christmas Wreath Napkin Ring

This Christmas wreath napkin ring brings a little greenery to each place setting without taking up much room on the table. Pointed leaves give it a full wreath shape, while small red berries add a festive accent.
The open centre holds a rolled napkin, and the firm band helps the wreath keep its shape. Because there is no cardboard or wire insert, the ring remains flexible for storage and can be washed according to the yarn label.
This is an intermediate project suited to crocheters who are comfortable working in joined rounds and making decorative stitches. Check the fit against the napkin you plan to use so it sits comfortably without drawing the leaves inward.
Christmas Wreath Napkin Ring

Quick-reference card. Follow the complete written instructions below.
Materials
- Green DK cotton yarn: A small amount for the band and leaves
- Red DK cotton yarn: A small amount for five berries
- 3.5 mm crochet hook: Or a size that gives a firm fabric
- Yarn needle, scissors and a rolled napkin: Use the napkin to check the chain length before joining
Size and Fit
The sample has a 36-stitch band, giving an approximate 18 cm inner circumference at the stated gauge. It is intended for a rolled napkin measuring about 17 cm around. For another napkin, make an even-numbered foundation chain that fits around it with about 1 cm of ease, without stretching the chain. Use that stitch count for every band round; the number of leaves will be half the stitch count.
Gauge
Aim for 20 sc across 10 cm in firm, un-stretched rounds. The fit check against your rolled napkin is more important than matching this gauge exactly.
Abbreviations
US crochet terms.
- ch = chain
- sl st = slip stitch
- sc = single crochet
- hdc = half double crochet
- dc = double crochet
- yo = yarn over
- st = stitch
Pattern
- Foundation With green, ch 36, or the even number chosen by the fit method above. Check the chain around the rolled napkin, then join with a sl st in the first chain, taking care not to twist it.
- Band, round 1 Ch 1. Work 1 sc in each foundation chain around. Join with a sl st in the first sc. (36 sc for the sample.)
- Band, rounds 2â3 Ch 1, work 1 sc in each sc around and join with a sl st in the first sc. Repeat once more. (36 sc in each round for the sample.) Keep the lower edge of the band clear; the leaves will be worked into the top stitches of round 3.
- Leaf edging Continuing in green, work the following sequence around the top of round 3: *sl st in the next sc, ch 5, sl st in the second ch from the hook, sc in the next ch, hdc in the next ch, dc in the last ch, sl st in the next sc; repeat from * until every sc of round 3 has been used. Each leaf uses two band stitches. Fasten off. (18 leaves for the sample.)
- Berries Make five separately with red. For each berry, ch 2. In the second ch from the hook, work an unfinished dc four times: yo, insert the hook in that chain, pull up a loop, yo and pull through two loops. You will have five loops on the hook. Yo and pull through all five loops, ch 1, then fasten off, leaving tails for sewing.
- Attach berries Sew the five bobbles among the leaves, near the bases of leaves 1, 4, 7, 11 and 15 on the sample. If you adjusted the stitch count, space them as evenly as possible. Keep the inner opening unobstructed.
Finishing
- Weave in all ends securely on the back of the band and berries.
- Slip the rolled napkin through the open centre. The band should sit comfortably around it without pulling the leaves inward.
- Wash and dry according to the yarn label; reshape the leaves while damp if needed, and store the ring flat.
Helpful Tips
- Count the foundation chains before joining: an even number ensures that every leaf has two band stitches.
- Use a firm but not tight tension so the band holds its shape while still flexing around the napkin.
- Sew berries to the outer edge rather than across the opening.
Poinsettia Tie Napkin Ring

This poinsettia sits on top of the napkin rather than wrapping around it. The green ties fasten out of sight underneath, leaving the red flower as the focus of each place setting.
Its layered, pointed petals give the flower depth while keeping it flat against the fabric. The contrasting centre adds a small highlight without making the decoration bulky.
A tie fastening is useful when your napkins are folded to different thicknesses: you can adjust the bow to suit each place setting. It also makes the flower easy to remove when it is time to use the napkin.
Poinsettia Tie Napkin Ring

Quick-reference card. Follow the complete written instructions below.
Materials
- DK cotton yarn: Small amounts of red for the petals, green for the ties and gold for the centre.
- Crochet hook: 3 mm, or a size that makes firm stitches.
- Other supplies: Yarn needle and scissors.
Size and Fit
Makes one napkin ring with two layers of five petals and two ties. Each sample tie begins with 42 chains and has 41 single crochet stitches. Before fastening off, check that the ties reach beneath your folded napkin with enough length left for a bow. For longer ties, add chains to each starting chain and work one single crochet into each additional chain.
Gauge
Exact gauge is not critical. Keep the petals firm enough to lie flat, and check tie length against the napkin you intend to use.
Abbreviations
US crochet terms.
- ch = chain
- sc = single crochet
- hdc = half double crochet
- dc = double crochet
- sl st = slip stitch
- st = stitch
Pattern
- Back petal layer With red, make a magic ring. Work 10 sc into the ring and pull it closed; join with a sl st to the first sc. Repeat the following sequence five times, working into the 10 sc in order: sl st in next sc, ch 8, sl st in second ch from hook, sc in next ch, hdc in next ch, dc in each of the remaining 4 ch, then sl st in next sc. Each sequence forms one pointed petal and uses two stitches of the centre ring. Fasten off, leaving a tail for sewing.
- Front petal layer With red, make another magic ring. Work 10 sc into the ring, pull it closed and join with a sl st to the first sc. Repeat the following sequence five times: sl st in next sc, ch 6, sl st in second ch from hook, sc in next ch, hdc in next ch, dc in each of the remaining 2 ch, then sl st in next sc. Fasten off, leaving a tail for sewing.
- Centre With gold, make a magic ring. Work 6 sc into the ring, pull it closed and join with a sl st to the first sc. Fasten off, leaving a tail for sewing.
- Layer the flower Place the smaller petal layer on the larger one, right sides facing up. Rotate it so its petals sit between the back petals. Sew the two layers together through their centre rings, then sew the gold centre over the stitches. Keep the petals unpadded and free to lie flat.
- Green ties Make two alike. With green, ch 42. Sc in the second ch from the hook and in each remaining ch: 41 sc. Fasten off, leaving a long tail at one end of each tie for attaching it.
- Attach and fasten Turn the flower over. Sew the first three sc at the tailed end of one tie securely to the back centre ring. Sew the second tie to the opposite side of that ring, so the ties extend in opposite directions. Weave in loose ends. Place the flower on top of a folded napkin, bring both ties beneath it and fasten them in a bow underneath.
Finishing
- Straighten the petals by hand and weave in any remaining ends without pulling the flower out of shape.
- If desired, lightly dampen and pin the flower flat until dry; do not pad the petals.
Helpful Tips
- Use cotton yarn and firm stitches to help the pointed petals hold their shape.
- Try the ties around your chosen napkin before fastening off. Add the same number of starting chains to both ties if you need more length.
Snowflake Loop Napkin Ring

This open snowflake gives a folded napkin a crisp winter detail without covering much of the fabric. Its points remain visible against the napkin, while the fastening stays behind the motif.
A narrow tab holds the ring around the napkin by passing through a loop and resting with its small end knob beyond it. The attachments sit at the bases of opposite snowflake points, away from the delicate tips, so the fastening can hold without pulling the snowflake out of shape. Fit it to the fold you plan to use: the tab should feel secure without drawing the points backwards.
Snowflake Loop Napkin Ring

Quick-reference card. Follow the complete written instructions below.
Materials
- Smooth DK cotton yarn: A small amount in white for each ring
- Crochet hook: 3.5 mm, or a size that makes firm stitches
- Tapestry needle and scissors: For assembly and weaving in ends
- Intended napkin: For checking the tab length and fastening
Size and Fit
Make one ring for each folded napkin. The tab length is adjustable: work its straight section until it reaches from the back of the snowflake, around the folded napkin and through the opposite loop with enough length left for the end knob to sit just beyond the loop. Check this before making the knob. If making a set, use the same fold and tab row count for matching napkins.
Gauge
An exact gauge is not required. Use firm, even stitches so the snowflake points and fastening hold their shape; fit the tab to the intended folded napkin rather than relying on a fixed row count.
Abbreviations
US crochet terms.
- ch = chain
- sc = single crochet
- hdc = half double crochet
- dc = double crochet
- sl st = slip stitch
- sc2tog = single crochet two stitches together
- WS = wrong side
Pattern
- Snowflake, round 1 Make a magic ring. Work 12 sc into the ring, pull it closed and sl st in the first sc. (12 sc)
- Snowflake, round 2 Ch 1. *Sc in the next sc, ch 5, skip the next sc; repeat from * six times. Sl st in the first sc. (6 sc and 6 ch-5 spaces)
- Snowflake, round 3 Ch 1. In each ch-5 space work (sc, hdc, dc, ch 3, sl st in the third ch from the hook to make a picot, dc, hdc, sc), then sl st in the next round-2 sc. Repeat around all six spaces. Fasten off. There are six points; each has a picot tip.
- Reinforced loop Ch 12. Sc in the second ch from the hook and in each ch across. (11 sc) Ch 1, turn, sc in each sc. (11 sc) Fasten off, leaving long tails for sewing. Fold this two-row strip into a loop. Sew both ends securely to the WS at the base of one snowflake point, spacing the ends about 5 mm apart. Catch the centre of the round-2 ch-5 arch and the bases of the two dc stitches in several small sewing stitches; do not sew through or pull on the picot.
- Tab Ch 4. Sc in the second ch from the hook and in each remaining ch. (3 sc) Ch 1, turn, sc in each sc. (3 sc) Repeat this straight row as needed, checking the fit around the folded napkin and through the loop. Stop with enough tab beyond the loop to make the knob. Fasten off at the starting end only if needed for sewing; leave the working yarn attached at the far end.
- End knob At the far end of the tab, ch 1, turn and work 2 sc in each of the 3 sc. (6 sc) Ch 1, turn, sc in each sc. (6 sc) Ch 1, turn, sc2tog three times. (3 sc) Fasten off with a sewing tail. Fold these three short rows into a small raised nub and stitch their side edges together securely. Weave in the tail.
- Attach and fasten Sew the tabâs starting end to the WS at the base of the point directly opposite the loop, using the round-2 arch and dc bases for support rather than the picot. Centre the snowflake on the napkin. Wrap the tab behind it, ease the knob through the loop and draw the tab snug. Let the knob rest just beyond the loop on the back so it resists slipping. The tab should hold without bending either snowflake point.
Finishing
- Weave in all remaining ends on the WS without drawing the open spaces closed.
- If the knob will not pass through the loop with a gentle squeeze, remake the loop with a slightly longer starting chain. If it slips back too easily, shorten the loop. Keep the two sewn ends securely anchored.
- Shape the six points gently by hand; avoid tugging on the attached points.
Helpful Tips
- Check the fit with the napkin folded exactly as it will be used.
- Sew through the bases of stitches behind the points, not through their picot tips.
- For a matching table setting, count the tab rows after fitting the first ring and use that count for napkins folded to the same size.
Christmas Star Pocket Napkin Ring
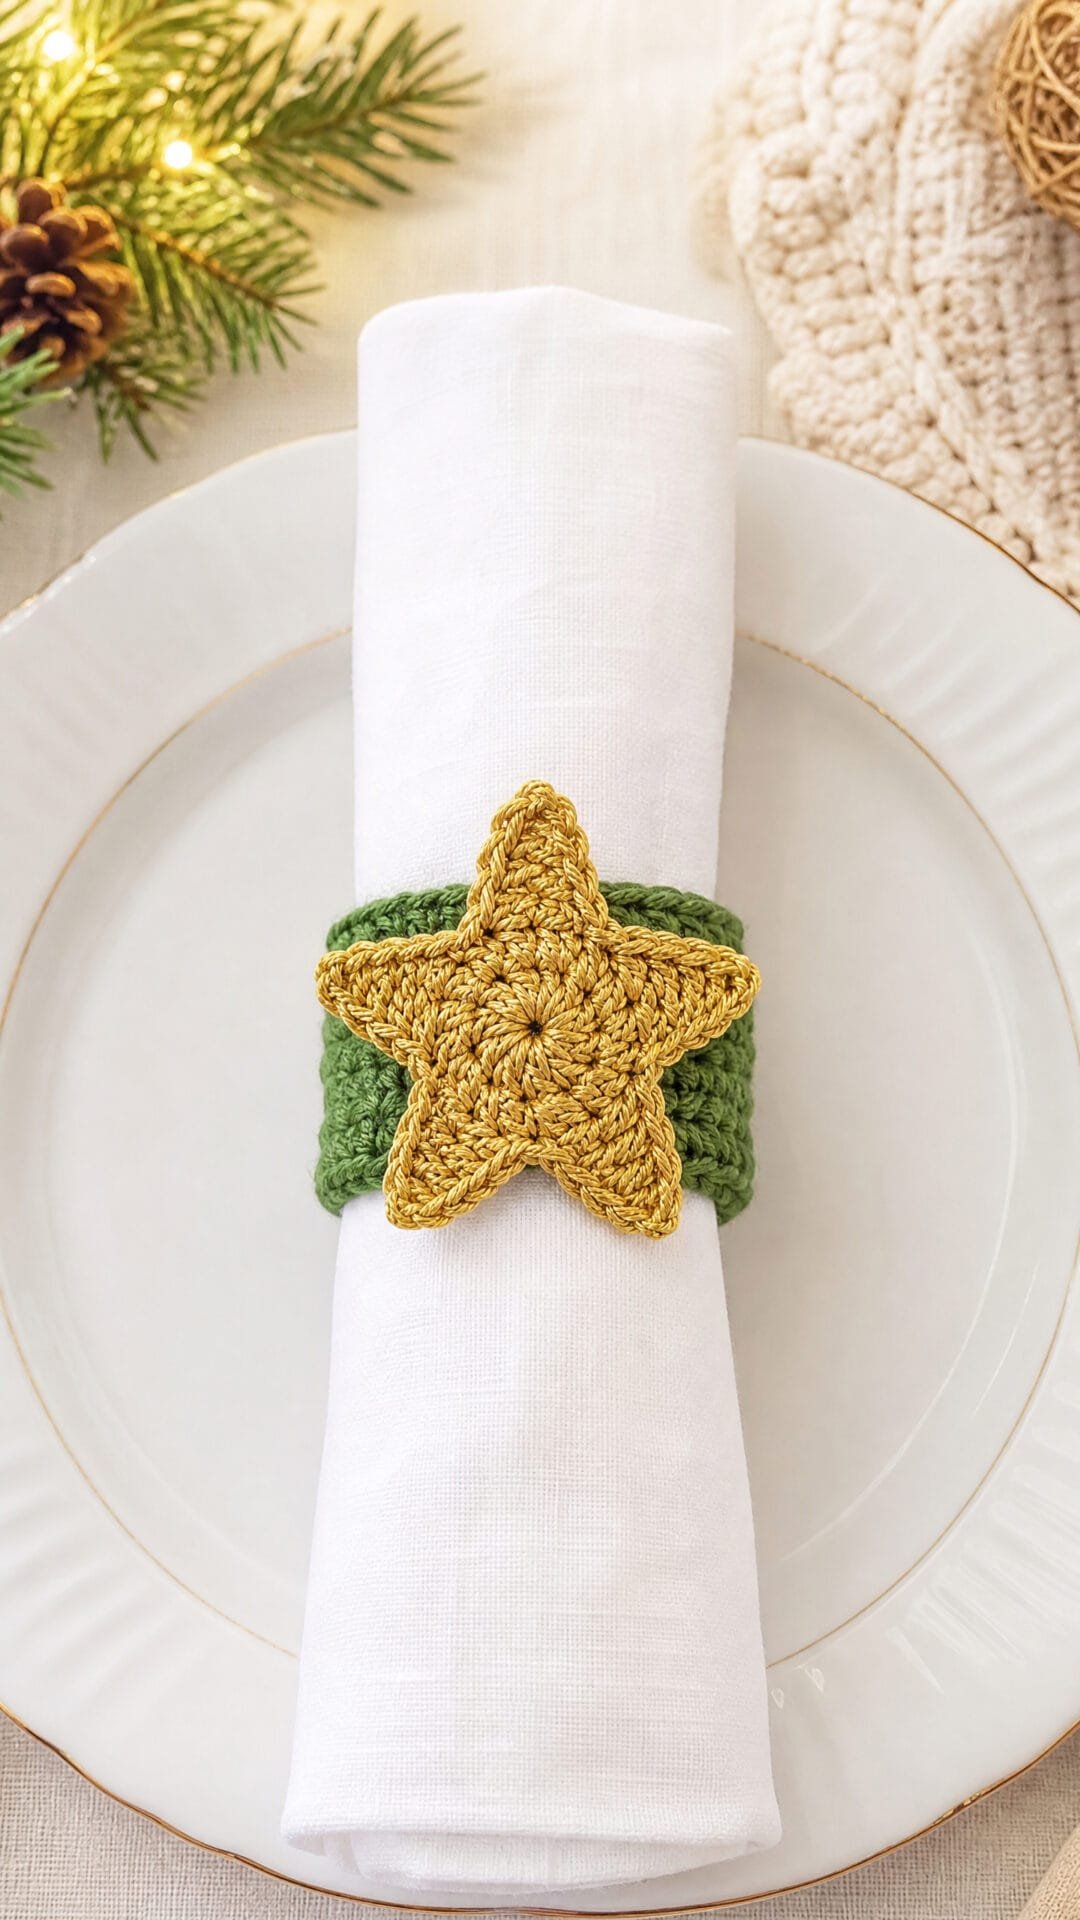
A gold five-point star gives this plain green napkin ring a festive focal point. Against a white rolled napkin, the simple colour contrast lets the star stand out without making the place setting feel crowded.
The star is made from two flat layers with a passage between them, so the band sits behind its front face rather than being stitched permanently to the decoration. The side openings need to stay clear for the band to lie flat and the star to sit neatly.
This is a useful design if youâd like to change the decoration later. The star is removable, but it does not simply pop off: the band seam must be undone before the band can be withdrawn.
Christmas Star Pocket Napkin Ring
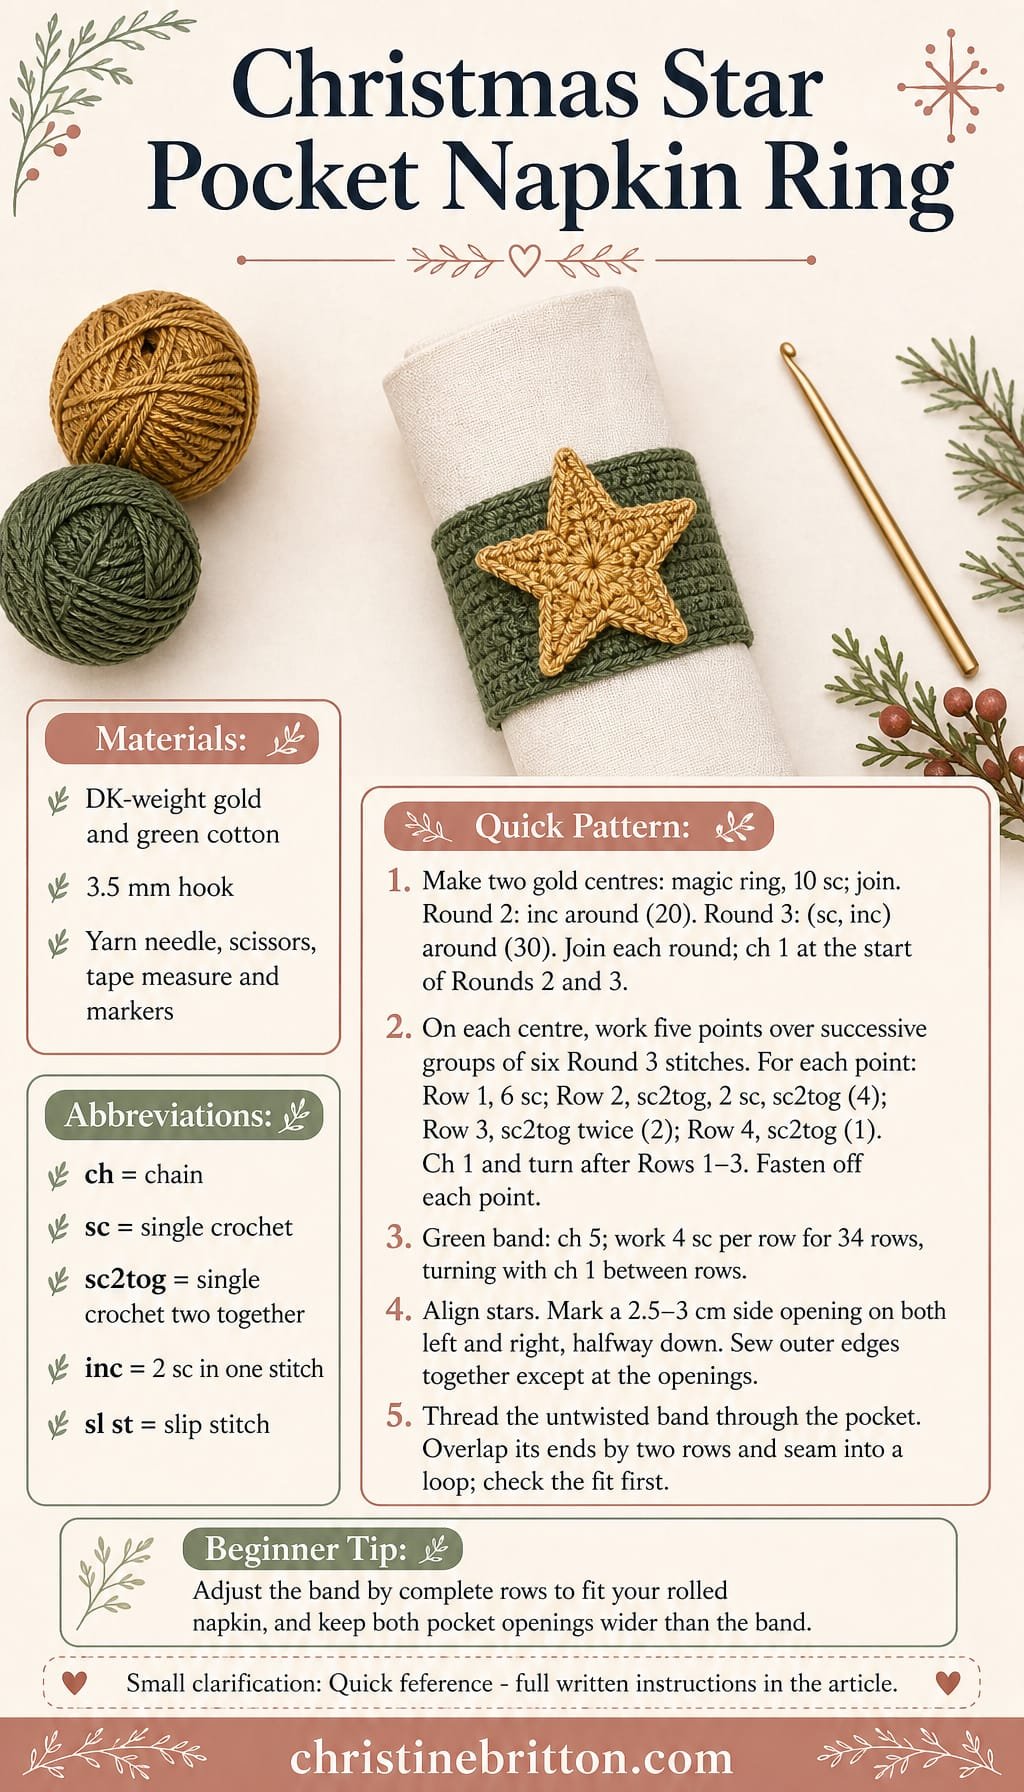
Quick-reference card. Follow the complete written instructions below.
Materials
- Gold cotton yarn: Small amount of DK-weight cotton for two stars.
- Green cotton yarn: Small amount of DK-weight cotton for the band.
- Crochet hook: 3.5 mm, or a size that gives a firm fabric.
- Notions: Yarn needle, scissors, tape measure and stitch markers.
Size and Fit
Sample band: approximately 2 cm wide and 13.3 cm around after seaming, for a rolled napkin approximately 13 cm around. To adjust, measure the rolled napkin and work the band until it measures the napkin circumference plus approximately 1 cm for the seam. Check that it slips over the napkin before sewing.
Gauge
Aim for approximately 20 sc and 24 rows to 10 cm in firm, flat sc fabric. Exact gauge is less important than a band that fits and slides through the starâs openings.
Abbreviations
US crochet terms.
- ch = chain
- sc = single crochet
- sc2tog = single crochet two stitches together
- inc = work 2 sc in one stitch
- sl st = slip stitch
Pattern
- Star centres: make two With gold, make a magic ring. Round 1: Work 10 sc into the ring; join with a sl st to the first sc. Round 2: Ch 1, inc in each stitch around; join (20 sc). Round 3: Ch 1, *sc in next stitch, inc in next stitch; repeat from * around; join (30 sc). Fasten off. The joining sl st and beginning ch 1 do not count as stitches.
- Five points on each centre Divide the 30 stitches of Round 3 into five consecutive groups of six. For each point, join gold yarn to the first stitch of an unused group. Row 1: Sc in all six stitches of that group, ch 1, turn (6 sc). Row 2: Sc2tog, sc in next two stitches, sc2tog; ch 1, turn (4 sc). Row 3: Sc2tog twice; ch 1, turn (2 sc). Row 4: Sc2tog (1 sc). Fasten off. Repeat on the other four groups, then make the five points on the second centre. Weave in the ends. The turning chains do not count as stitches.
- Band With green, ch 5. Row 1: Sc in the second ch from the hook and in each remaining ch (4 sc); ch 1, turn. Rows 2â34: Sc in each stitch across (4 sc); ch 1 and turn after Rows 2â33 only. Fasten off, leaving a tail for seaming. At the suggested gauge, 34 rows measure approximately 14.2 cm before seaming.
- Join the star pocket Place the stars together with their points aligned and one point at the top. Choose the better-looking side as the front. On each side edge, mark an opening approximately 2.5â3 cm long, centred halfway down the star. These openings are the bandâs entrance and exit on the back of the finished star. With gold yarn and a yarn needle, sew the two stars together along the outer edges everywhere except between the marked pairs. Sew around the top between the openings, fasten off, then sew around the bottom between the openings. Keep the openings clear and check that the band can pass through them.
- Thread and seam Feed the flat green band into one side opening, through the space between the stars and out of the other opening. Keep the band untwisted. Overlap its first and last two rows, then sew the overlap securely with the green tail to make a loop. The sample overlap is approximately 0.8 cm, giving a loop approximately 13.3 cm around. Try the loop on the rolled napkin before securing the seam fully; change the overlap or band length if needed.
Finishing
- Weave in the remaining ends without sewing across either pocket opening.
- Gently shape the five points and lay the star flat to dry if dampened.
- Slide the ring over a rolled napkin with the star facing out. To change the decoration, undo the band seam and withdraw the band from the pocket.
Helpful Tips
- The two openings must each be slightly wider than the finished band; enlarge them before seaming if the band catches.
- For a different napkin circumference, add or remove complete band rows while keeping four sc in every row.
- Keep joins and woven-in ends on the starâs inside faces for a neat front.
Candy Cane Knot Napkin Ring

This candy-cane-inspired napkin ring is a soft striped tie rather than a rigid decoration. It knots around a folded or loosely rolled napkin, bringing a familiar Christmas touch to the table without needing a wire insert.
The narrow tube gives the stripes a rounded look, while a gently curved tip suggests the hook of a candy cane. Because the curve stays flexible, it will sit differently depending on how you arrange the knot.
This is a useful choice when your napkins vary in thickness: check the tie against the napkin you plan to use before completing the curved end. A loose knot keeps the decoration easy to remove when it is time to eat.
Candy Cane Knot Napkin Ring

Quick-reference card. Follow the complete written instructions below.
Materials
- Cotton yarn: Small amounts of red and white DK-weight cotton
- Crochet hook: 3.5 mm, or a size that makes a firm tube without gaps
- Notions: Stitch marker, yarn needle, scissors and a napkin for checking the fit
Size and Fit
The sample cord is approximately 34 cm long and suits a folded or loosely rolled napkin about 14 cm around. Before shaping the hooked end, wrap the straight cord around your intended napkin and allow for a knot and two short visible ends. Add or omit complete two-round stripes if needed.
Gauge
Approximately 10 rounds measure 3 cm in length, with 6 sc forming a firm tube about 1 cm across. Exact gauge is less important than checking the length against your napkin.
Abbreviations
US crochet terms.
- sc = single crochet
- ch = chain
- rnd = round
- st = stitch
Pattern
- Start the tube With white, make a magic ring and work 6 sc into it. Pull the ring closed. Place a marker in the first sc and work in a continuous spiral; do not join rounds. Keep the opening accessible so you can conceal the starting tail inside the tube.
- Work the stripes Work 2 rounds of 6 sc in white. Introduce red and work 2 rounds of 6 sc. Continue alternating 2 white rounds and 2 red rounds, always working 6 sc per round. At each colour change, use the new colour for the final pull-through of the preceding round’s last sc. Leave the unused strand inside the hollow tube rather than carrying it under every stitch. Secure the new red tail inside the first few rounds before the tube becomes long.
- Check the length Continue the two-round stripes until the tube measures approximately 32 cm, finishing a complete two-round stripe. Check it around your napkin now: the remaining rounds and curved tip will add approximately 2 cm. Adjust the striped section in complete two-round repeats if you need a longer or shorter tie.
- Prepare the curved end Change to red if necessary and work 3 full rounds of 6 sc. Cut the white strand, leaving a tail to conceal inside the tube. Keep the marker at the start of the next round.
- Shape the hook With red, sc in the first 3 sts of the next round. Ch 1 and turn; sc in those 3 sts. Repeat the instruction âch 1, turn; sc in 3 stsâ three more times. These four extra short rows build length on one side of the tube. Without turning again, sc in the 3 unworked sts of the round. The round still has 6 sts; reposition the marker at its start if needed.
- Close the tip Work 2 full rounds of 6 sc in red. Cut red, leaving a 15 cm tail. Thread the tail through the front loop of each of the final 6 sts and pull gently to close the tip. Do not stuff the tube.
Finishing
- With a yarn needle, take the closing tail down through the hollow tube for several centimetres, bring it out between stitches and trim it close.
- Secure and conceal the starting and colour-change tails inside the tube. Ease the short-row end into a gentle crook with your fingers; it should remain soft, not rigid.
- Wrap the cord once around the napkin and tie a loose overhand knot, arranging the curved end where it can be seen. Untie it to remove the napkin.
Helpful Tips
- Keep the six stitches firm enough that the unused colour is not obvious through gaps, but loose enough to work into comfortably.
- If a single knot slips on your chosen yarn, allow extra cord length for a second knot when checking the fit.
- The short rows curve only the tip. They do not make a stiff, upright candy-cane crook.
Santa Belt Napkin Ring

This Santa Belt Napkin Ring brings a playful Christmas detail to each place setting. The red strap, black detail and open yellow buckle make the design recognisable as a belt, even when viewed from across the table.
The buckle is the focal point at the front, while an adjustable fastening sits behind the napkin. That makes it useful for folded napkins with a little more or less bulk: the belt can sit snugly without flattening the fabric beneath it.
For the clearest effect, pair it with a white napkin and let the fold stay full inside the ring. It works particularly well on a table where you want a small handmade accent without adding another ornament beside every plate.
Santa Belt Napkin Ring

Quick-reference card. Follow the complete written instructions below.
Materials
- Cotton yarn: Small amounts of red, black and yellow in the same DK weight
- Crochet hook: 3 mm, or a size that gives a firm fabric
- Tapestry needle: For reinforcing the slots, attaching the button and buckle, and weaving in ends
Size and Fit
One size. At the stated gauge, the strap is approximately 21 cm long and 2 cm wide. The three fastening positions give approximate closed circumferences of 13, 15.5 and 18 cm. Measure around the folded napkin and choose a slot that holds it without crushing it.
Gauge
Approximately 24 sc and 25 rows = 10 cm in firm, flat sc fabric. Gauge is a sizing guide; check the strap against your folded napkin before finishing.
Abbreviations
US crochet terms.
- ch = chain
- sc = single crochet
- sl st = slip stitch
- st(s) = stitch(es)
- RS = right side
Pattern
- Red strap, Row 1 With red, ch 52. Sc in the second ch from the hook and in each remaining ch; turn. 51 sc.
- Red strap, Row 2: fastening slots Ch 1, sc in the first 3 sts, ch 2 and skip the next 2 sts, sc in the next 4 sts, ch 2 and skip the next 2 sts, sc in the next 4 sts, ch 2 and skip the next 2 sts, sc in the remaining 34 sts; turn. You have 45 sc and three 2-ch spaces.
- Red strap, Row 3 Ch 1, sc in each sc and work 1 sc into each individual ch of the three 2-ch spaces; turn. 51 sc. Working into the chains, rather than around each space, leaves the openings below them.
- Red strap, Rows 4â5 Ch 1, sc in each st across; turn after Row 4 only. 51 sc per row. Fasten off.
- Reinforce the slots Thread a tapestry needle with red yarn and whipstitch around the edges of each of the three openings. Keep the stitches close to the edges so a button can still pass through. Secure the yarn on the wrong side.
- Black central strip Lay the strap RS up with the slotted end on the left. With black, surface sl st along Row 3 from strap stitch 22 through stitch 39, counting stitches from the slotted end. Work a second adjacent line along Row 4 over the same 18-stitch span. Keep both lines relaxed so the strap lies flat; fasten off on the wrong side.
- Yellow square buckle With yellow, ch 12 and join with a sl st to form a ring, taking care not to twist it. Work [3 sc into the ring, ch 2] four times, spacing the groups around the ring. Join with a sl st to the first sc. Fasten off, leaving a sewing tail. Shape the four 2-ch spaces into corners and sew those corners to the front of the strap, centred over the black strip. Leave the buckle’s middle open so the black strip shows through.
- Crocheted button With red, ch 2 and work 5 sc into the second ch from the hook. Join with a sl st to the first sc and fasten off, leaving a long sewing tail. Sew the button securely to the RS of the strap, centred across its width at strap stitch 48, counting from the slotted end. Do not sew through the button’s outer edge: it must remain raised enough to pass through a slot.
- Fasten around the napkin Place the buckle at the front of the folded white napkin. Wrap the strap around it, lay the slotted end over the button end at the back, and push the button up through the slot that fits comfortably. The slot nearest the strap tip makes the largest ring.
Finishing
- Weave in all ends without pulling the black strip or buckle out of shape.
- Check that the button passes through each reinforced slot. If an opening is too tight, ease its reinforcing stitches rather than stretching the strap.
- Gently shape the buckle into a square.
Helpful Tips
- Count the strap stitches from the slotted end when positioning both the black strip and the button.
- Surface slip stitches should sit on top of the red fabric, not draw its edges in.
- For a table setting, fasten the ring around an already-folded napkin so the fabric stays full beneath the belt.
If youâd like to keep building your crochet skills, take a look at crochet Christmas table runners.
Gingerbread House Tunnel Napkin Ring
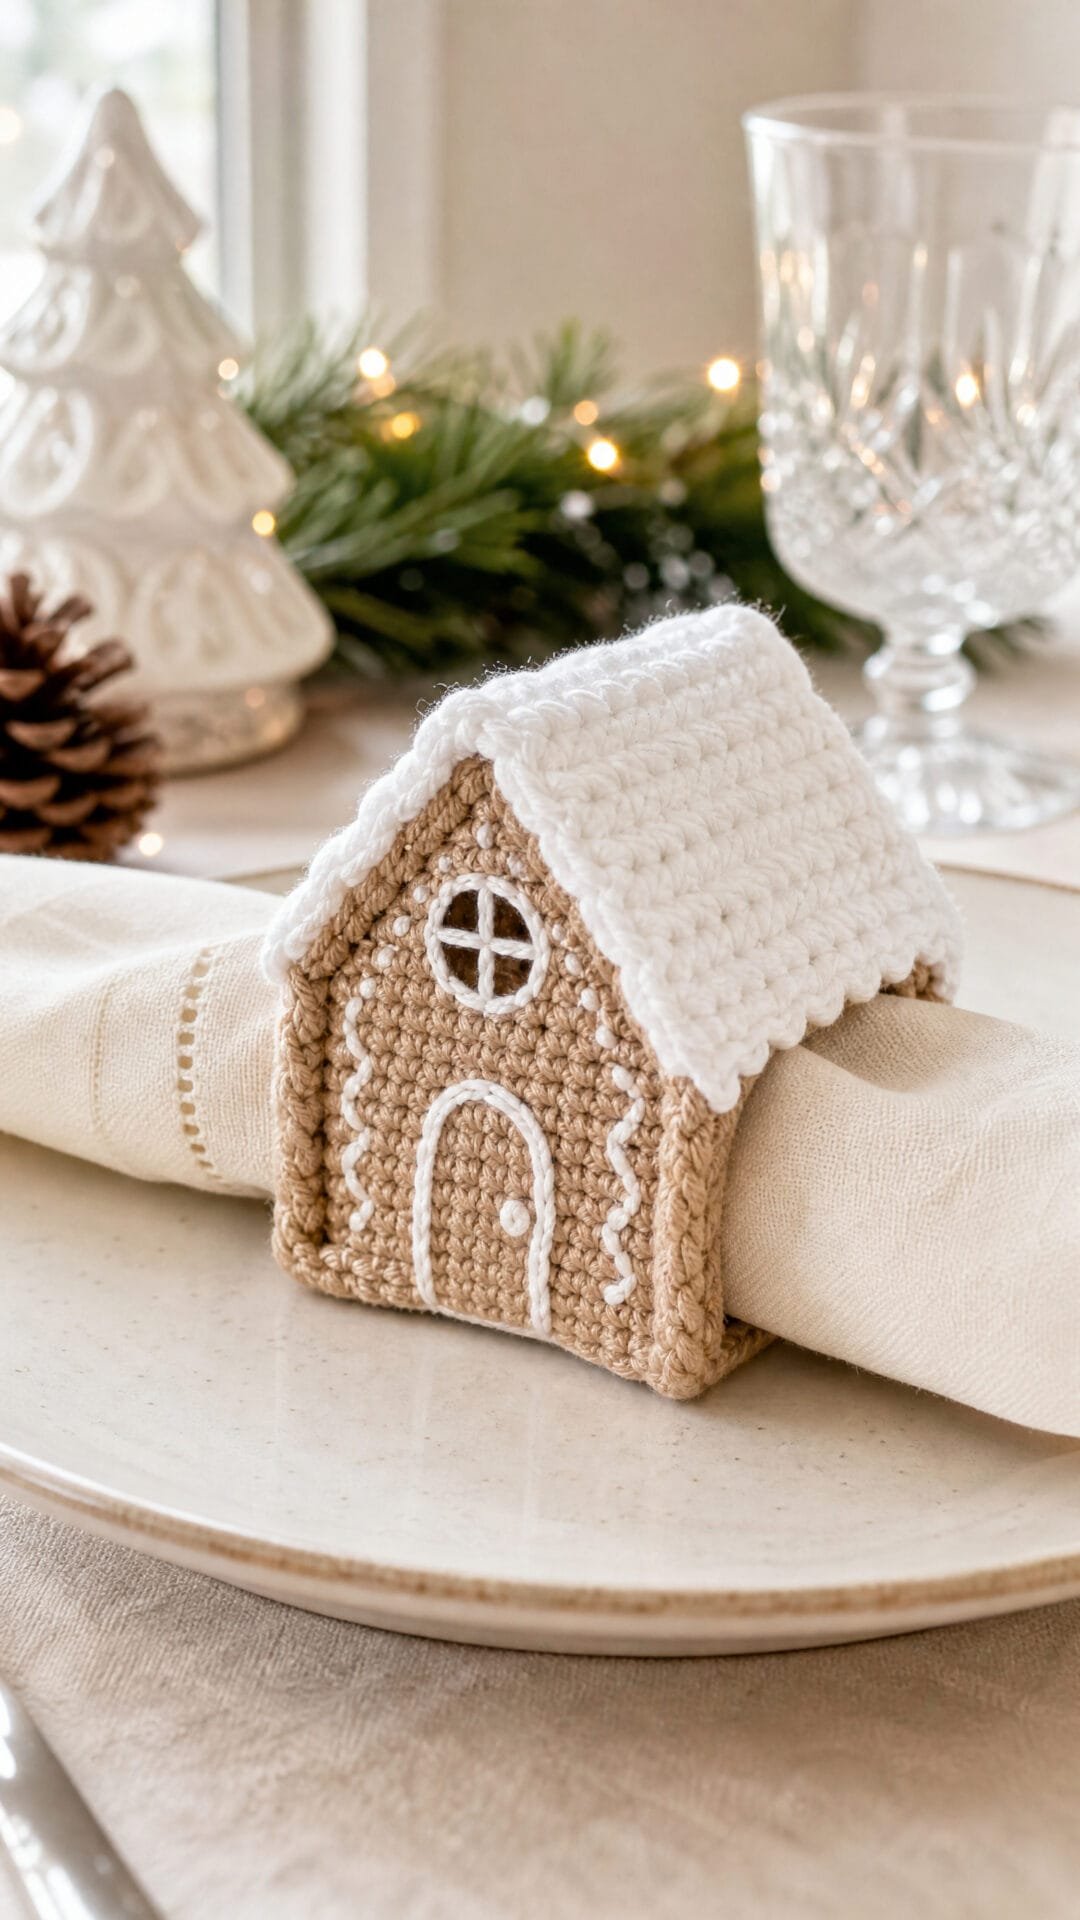
This gingerbread house is a little tunnel rather than a flat decoration. A napkin passes through its open sides, while the tan gable front, white peaked roof and stitched door give each place setting the look of a miniature Christmas cottage.
The three-dimensional shape makes this an appealing project if you enjoy turning simple crochet pieces into something decorative. The roof and walls need careful alignment to keep the house upright and the passage clear, so it is worth having the napkin you plan to use nearby as you work.
For a coordinated table, use the same door and window details on every house, or vary the embroidery so each guest has a different cottage. The decoration sits around the napkin rather than being attached to it, making the rings easy to lift off when it is time to eat.
Gingerbread House Tunnel Napkin Ring

Quick-reference card. Follow the complete written instructions below.
Materials
- Firm cotton yarn: Small amounts of tan and white in the same weight, plus scraps for embroidered details; DK cotton is suitable.
- Crochet hook: 3 mm, or a size that produces a firm fabric at the stated gauge.
- Notions: Yarn needle, scissors, stitch markers and the folded napkin you intend to use.
Size and Fit
One sample size: approximately 8 cm long between the side openings, 4 cm deep and 9 cm high to the ridge, before allowing for seams. The passage is best suited to a folded or loosely rolled napkin no more than approximately 3 cm thick. Test it with your actual napkin before completing the seams. For a deeper passage, add the same number of rows to both the floor and roof; their front and back edges must remain aligned.
Gauge
Approximately 16 sc and 16 rows = 10 cm in firm, unblocked fabric. Gauge affects the opening: measure against your folded napkin rather than relying on the finished dimensions alone.
Abbreviations
US crochet terms.
- ch = chain
- sc = single crochet
- sc2tog = single crochet two stitches together: insert hook in each of the next two stitches and pull up a loop in each, then yarn over and pull through all three loops
- sc3tog = single crochet three stitches together: pull up a loop in each of the next three stitches, then yarn over and pull through all four loops
- st = stitch
Pattern
- Before you begin Turning chains do not count as stitches. Make two identical tan gable walls. Their bottom edges and the floor run from one side opening to the other; the roof ridge runs from the front wall to the back wall. Leave both side openings unsewn.
- Gable walls â make 2 in tan Ch 14. Row 1: Sc in the second ch from the hook and in each ch across (13 sc). Rows 2â8: Ch 1, turn, sc in each st across (13 sc). Row 9: Ch 1, turn, sc2tog, sc in next 9 sts, sc2tog (11 sc). Row 10: Ch 1, turn, sc2tog, sc in next 7 sts, sc2tog (9 sc). Row 11: Ch 1, turn, sc2tog, sc in next 5 sts, sc2tog (7 sc). Row 12: Ch 1, turn, sc2tog, sc in next 3 sts, sc2tog (5 sc). Row 13: Ch 1, turn, sc2tog, sc in next st, sc2tog (3 sc). Row 14: Ch 1, turn, sc3tog (1 sc). Fasten off. The sloping edges are the row ends of Rows 9â14.
- Floor â make 1 in tan Ch 14. Row 1: Sc in the second ch from the hook and in each ch across (13 sc). Rows 2â7: Ch 1, turn, sc in each st across (13 sc). Fasten off. The foundation and final-row edges attach to the 13-stitch bottoms of the two walls.
- Roof â make 1 in white Ch 19. Row 1: Sc in the second ch from the hook and in each ch across (18 sc). Rows 2â7: Ch 1, turn, sc in each st across (18 sc). Fasten off. Fold lengthways between stitches 9 and 10, making two nine-stitch slopes. The foundation and final-row edges will attach to the sloping edges of the gable walls.
- Embroider the front Choose one wall as the front. With a contrasting scrap of yarn, stitch a simple door outline roughly three stitches wide and five rows high, centred on the rectangular part of the wall. Add small window outlines to either side if desired. Keep the embroidery on the outer face.
- Assemble the tunnel Stand the walls parallel, embroidered face outward, with their gable points aligned. Sew one 13-stitch edge of the floor to each wall bottom. Fold the roof over the gable points and sew each 18-stitch roof edge to the two slopes of its corresponding wall, easing the roof stitches evenly along the six row ends on each slope. Keep the roof fold centred at each point. Pause before securing the second roof edge fully and slide your folded napkin through the left and right side openings. If it is too tight front to back, undo the temporary roof seam and add equal numbers of rows to the roof and floor, then resew. Secure the seams without stitching across either side opening.
Finishing
- Weave in all ends on the inside, keeping the side openings clear.
- Gently shape the roof peak and check that the napkin slides through without pulling the walls inward.
Helpful Tips
- Use a firm, non-stretchy cotton fabric so the little house holds its shape.
- Pin or loosely baste the roof before sewing: each nine-stitch slope is eased onto six gable row ends.
- For a thicker napkin, increase the tunnel depth by adding matching rows to the roof and floor before assembly.
Reindeer Antler Napkin Ring

This reindeer napkin ring keeps the brown band light and open, so the little face and branched antlers take centre stage. The mesh also lets the colour of the napkin show through, making it an easy addition to a festive place setting.
The antlers are made from firm cotton stitches rather than wire. Their short shape and secure attachment help them stand upright, while the small surface-crochet features give the face its expression without beads or buttons.
For a coordinated table, use the same colours across a set, or vary the nose colour for one subtle Rudolph among the reindeer.
Reindeer Antler Napkin Ring
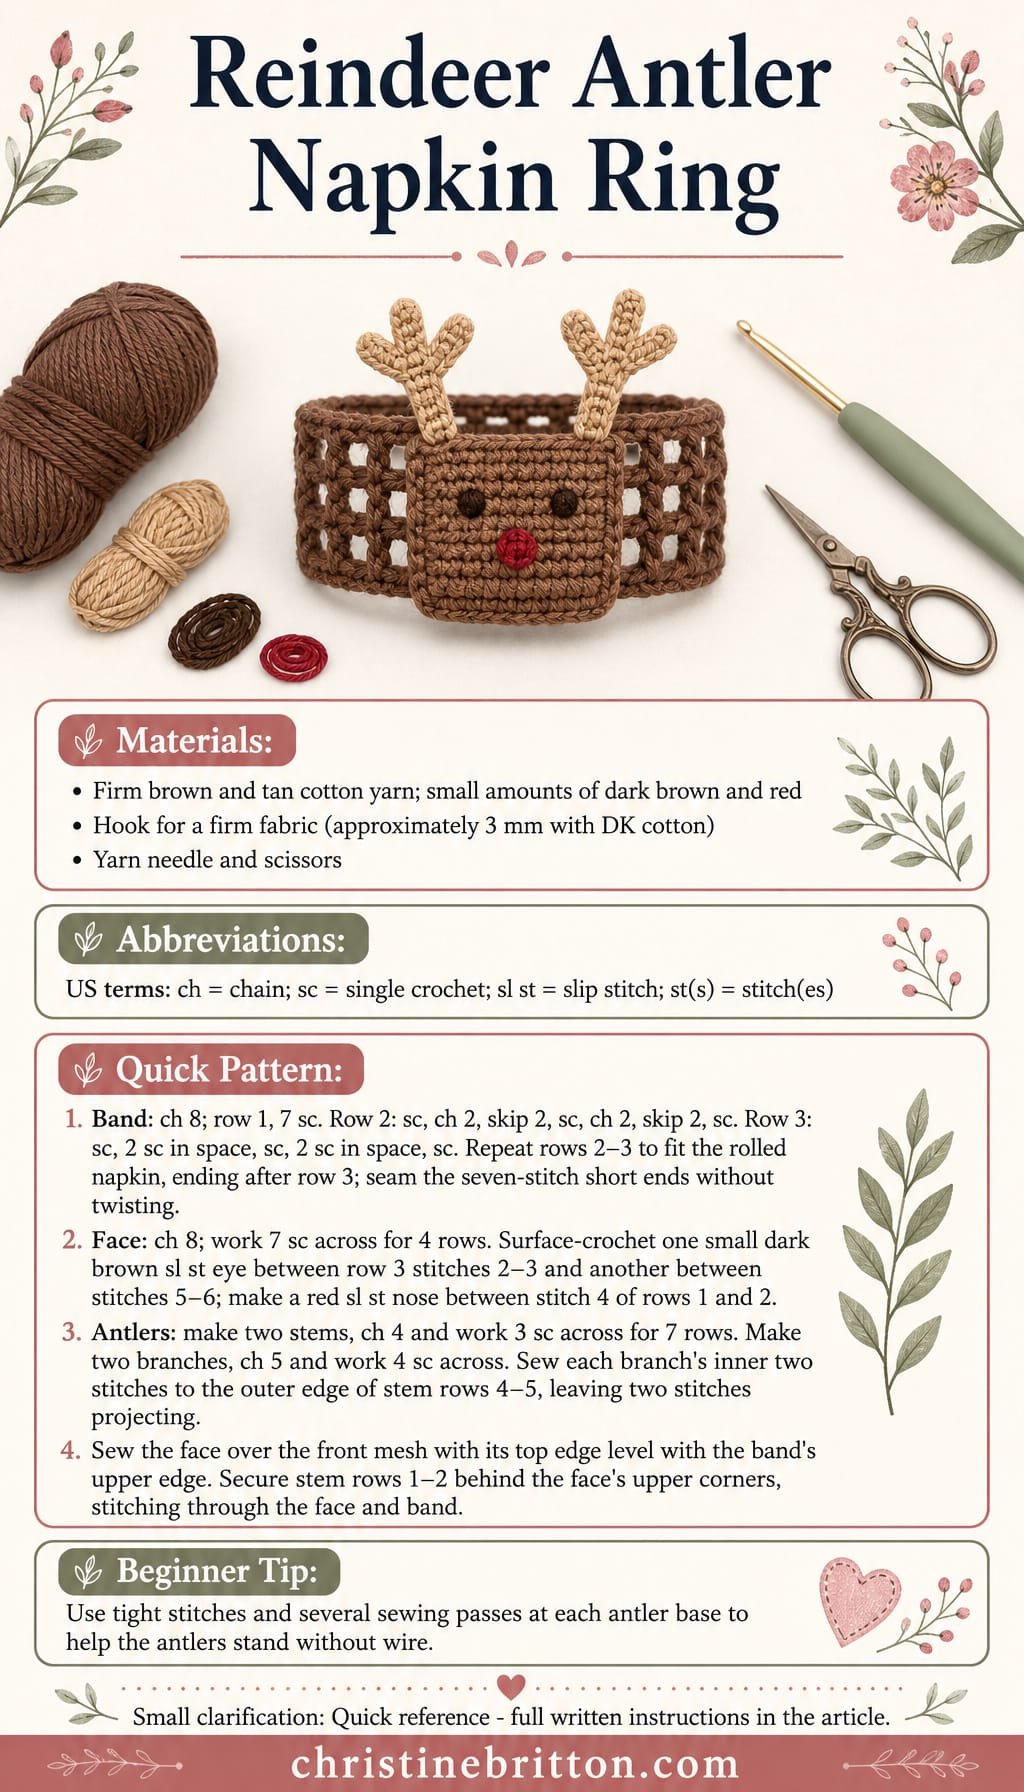
Quick-reference card. Follow the complete written instructions below.
Materials
- Firm cotton yarn: Small amounts of brown for the band and face, tan for the antlers, dark brown for the eyes and red for the nose.
- Crochet hook: Choose a hook that produces a firm fabric with your yarn; approximately 3 mm for DK cotton.
- Yarn needle and scissors: For joining the band and sewing on the face and antlers.
Size and Fit
Make the band to fit your rolled napkin rather than relying on a fixed row count. Wrap the strip around it without stretching, and work until the ends meet with up to 5 mm of ease. The seven-stitch band width stays the same; repeat more or fewer row pairs to change its circumference.
Gauge
Exact gauge is not essential because the band is fitted by measurement. Work the face and antlers tightly, using a smaller hook if needed so their stitches are firm.
Abbreviations
US crochet terms.
- ch = chain
- sc = single crochet
- sl st = slip stitch
- st(s) = stitch(es)
Pattern
- Brown mesh band, row 1 Ch 8. Sc in the second ch from the hook and in each remaining ch; 7 sc. Turn.
- Band, row 2 Ch 1, sc in the first st, ch 2, skip 2 sts, sc in the next st, ch 2, skip 2 sts, sc in the last st; 3 sc and two ch-2 spaces. Turn.
- Band, row 3 Ch 1, sc in the first sc, work 2 sc in the first ch-2 space, sc in the next sc, work 2 sc in the second ch-2 space, sc in the last sc; 7 sc. Turn.
- Fit and join the band Repeat rows 2 and 3 as a pair until the strip fits around the rolled napkin as described above. Finish after a row 3. Fasten off, leaving a long tail. Bring the foundation edge and final row together without twisting the strip. Whipstitch their seven stitches together to form a ring; secure the tail.
- Solid brown face Ch 8. Row 1: sc in the second ch from the hook and in each remaining ch; 7 sc. Rows 2â4: ch 1, turn, sc in each st; 7 sc. Fasten off, leaving a sewing tail. Row 4 is the top of the face.
- Surface-crochet features Work the features on the right side of the face before attaching it. For each eye, hold dark brown yarn behind the face, draw a loop to the front through row 3, then draw a second loop through the adjacent stitch and through the loop on the hook to make one small surface sl st. Place the eyes between stitches 2â3 and 5â6. Make a red nose in the same way between stitch 4 of rows 1 and 2. Secure all yarn ends on the back.
- Two tan antler stems Make two. Ch 4. Row 1: sc in the second ch from the hook and in each remaining ch; 3 sc. Rows 2â7: ch 1, turn, sc in each st; 3 sc. Fasten off, leaving a long sewing tail at the base, or attach a separate sewing length there.
- Two tan branches Make two. Ch 5. Sc in the second ch from the hook and in each remaining ch; 4 sc. Fasten off, leaving a sewing tail. Sew the inner two stitches of one branch along the outer edge of rows 4â5 of each stem. Point the branches away from the centre of the face, leaving their outer two stitches projecting. Secure the sewing tails.
- Assemble the reindeer Centre the face over a mesh section opposite the band seam, with its row 4 edge level with the upper long edge of the band. Sew around the face edges, catching the mesh posts and upper band edge. Position the antler bases behind the upper corners of the face, one spanning face stitches 1â3 and the other stitches 5â7. Stitch rows 1â2 of each stem firmly to the face and upper band edge, making several passes across each three-stitch base. The remaining stem rows rise above the ring.
Finishing
- Weave in all ends securely on the inside of the ring, keeping the mesh spaces open.
- Slip the ring over a rolled napkin and straighten the antlers by hand.
Helpful Tips
- Keep the stem and branch stitches tight; a loosely worked antler is more likely to flop.
- Sew through both the face and the band when securing each antler base. Wire or glue is not needed.
- For a different napkin, change the number of band row pairs, not the seven-stitch band width.
Christmas Mitten Cuff Napkin Ring

A white ribbed cuff circles the rolled napkin, while a flat red mitten rises from one side. Its projecting thumb makes the silhouette easy to recognise, and the cuff opening stays clear for the napkin.
This Christmas crochet napkin ring works well at a place setting where you want a festive detail without covering the plate. Check the fit against the napkin as you plan to roll it, then display the mitten facing your guests so its shape remains visible.
Christmas Mitten Cuff Napkin Ring

Quick-reference card. Follow the complete written instructions below.
Materials
- Firm cotton yarn: Small amounts of white and red DK-weight cotton.
- Crochet hook: 4 mm, or a size that gives a firm fabric at the stated gauge.
- Other tools: Yarn needle, scissors and a tape measure.
Size and Fit
One sample size. The cuff measures approximately 10 cm around and 3 cm high before the mitten is added. It is intended for a rolled napkin measuring about 9â9.5 cm around. Measure the napkin roll before starting; it should slide through the finished cuff without being squeezed.
Gauge
Approximately 20 sc and 24 rows = 10 cm in white back-loop-only sc, measured flat. Check the row gauge: the 24 rows become the cuffâs circumference.
Abbreviations
US crochet terms.
- ch = chain
- sc = single crochet
- BLO = back loop only
- sl st = slip stitch
- sc2tog = single crochet two stitches together
Pattern
- White cuff, Row 1 With white, ch 7. Sc in the second ch from the hook and in each remaining ch. You have 6 sc.
- White cuff, Rows 2â24 Ch 1, turn. Sc BLO in each of the 6 stitches. Repeat this row until you have worked 24 rows in total. Fasten off, leaving a tail for seaming.
- Seam the cuff Bring the foundation edge and the edge of Row 24 together without twisting the strip. Whipstitch these short edges together without overlapping them to form a ring. Keep the seam on the inside. The 24 row ends now run around each long edge of the cuff.
- Red mitten, Row 1 Choose one long edge as the cuffâs upper edge. Counting from the seam, join red in the end of the ninth white row. Work 1 sc in each of 9 consecutive row ends, finishing in the end of Row 17. These stitches form the base of the flat mitten. Do not work around the rest of the cuff.
- Red mitten, Row 2 Ch 1, turn. Sc in each of the 9 stitches, then ch 4 to begin the thumb.
- Red mitten, Row 3 Sc in the second ch from the hook and in each of the next 2 ch; sc in each of the 9 stitches of Row 2. You have 12 sc: 3 thumb stitches and 9 hand stitches.
- Red mitten, Row 4 Ch 1, turn. Sc in all 12 stitches, ending at the outer edge of the thumb.
- Red mitten, Row 5 Ch 1, turn. Sl st loosely in the first 3 stitches to pass over the thumb. Sc in each of the remaining 9 stitches. Only the 9 hand stitches remain active; leave the thumb projecting at the side.
- Red mitten, Rows 6â7 For each row, ch 1, turn and sc in each of the 9 hand stitches.
- Red mitten, Row 8 Ch 1, turn. Sc2tog, sc in the next 5 stitches, sc2tog. You have 7 sc.
- Red mitten, Row 9 Ch 1, turn. Sc2tog, sc in the next 3 stitches, sc2tog. You have 5 sc.
- Red mitten, Row 10 Ch 1, turn. Sc2tog, sc in the next stitch, sc2tog. You have 3 sc. Fasten off. The tapered sides and short final row form the rounded mitten top.
Finishing
- Weave in the ends on the back of the mitten and inside the cuff, without drawing the cuff opening closed.
- Set the cuff around the rolled napkin with the red mitten above its upper edge. Ease the thumb and top into shape with your fingers.
Helpful Tips
- The white strip is worked across the cuffâs height; its 24 rows determine the distance around the napkin.
- Use a firm cotton fabric so the mitten stands above the cuff rather than hanging over the place setting.
- If the cuff does not fit your napkin, adjust the number of white rows to match its measured circumference plus about 0.5â1 cm. Work the red base into 9 consecutive row ends opposite the seam.
Christmas Stocking Cuff Napkin Ring

This Christmas stocking napkin ring makes the stockingâs white, turned-over top the holder for a rolled napkin. A small red stocking hangs from its edge, with a shaped heel and projecting toe that distinguish it from a mitten.
The stocking is a flat, unstuffed decoration, while the cuff remains open for the napkin. It suits a festive place setting where the little stocking can sit visibly to one side rather than getting tucked underneath.
Christmas Stocking Cuff Napkin Ring

Quick-reference card. Follow the complete written instructions below.
Materials
- White and red DK yarn: Small amounts of each colour.
- 4 mm crochet hook: Or a hook size that gives a firm fabric and a cuff that fits your rolled napkin.
- Tapestry needle and scissors: For securing the folded cuff and weaving in ends.
Size and Fit
One sample size: 24 stitches around, approximately 15 cm in circumference at the suggested gauge. Before adding the stocking, slip the cuff over the rolled napkin; it should slide on without falling off. If necessary, change hook size or how tightly you roll the napkin. The cuff opening must remain clear.
Gauge
Target gauge: approximately 16 sc and 18 rows per 10 cm in single crochet. Fit on the napkin matters more than an exact gauge.
Abbreviations
US crochet terms.
- ch = chain
- sc = single crochet
- sc2tog = single crochet two stitches together
- sl st = slip stitch
- st = stitch
- rnd = round
Pattern
- Cuff foundation With white, ch 24. Join with a sl st in the first ch, taking care not to twist the chain.
- Cuff rnd 1 Ch 1, sc in each ch around, join with a sl st in the first sc. Do not count the joining sl st or beginning ch 1 as a stitch. (24 sc)
- Cuff rnds 2â4 Ch 1, sc in each sc around, join with a sl st in the first sc. Fasten off after rnd 4. (24 sc each rnd)
- Position the stocking Lay the cuff flat with its joining seam at the back. On the front, choose eight consecutive stitches along the edge of rnd 4, beginning at the viewerâs right of the group. Leave the remaining cuff stitches unworked. Work the stocking back and forth from these eight stitches; do not join its rows into a tube.
- Red leg, row 1 Join red with a sc in the first selected cuff stitch, then sc in the next seven selected stitches. Ch 1, turn. (8 sc)
- Red leg, rows 2â5 Sc in each stitch across. Ch 1 and turn after each row. (8 sc each row)
- Heel, row 6 Work 2 sc in the first stitch, then sc in each of the remaining seven stitches. Ch 1, turn. This begins the heel on the left edge as viewed from the front. (9 sc)
- Heel, row 7 Sc in the first eight stitches, then work 2 sc in the last stitch. Ch 1, turn. (10 sc)
- Heel and toe extension, row 8 Sc2tog over the first two stitches, then sc in each of the remaining eight stitches. Ch 5 at the end of the row; this chain projects to the right for the toe. Turn without adding a separate turning chain. (9 sc plus 5 ch)
- Foot, row 9 Sc in the second ch from the hook and in each of the next three ch, then sc in each of the nine stitches of row 8. Ch 1, turn. (13 sc)
- Foot, row 10 Sc in each stitch across. Ch 1, turn. (13 sc)
- Round the toe, row 11 Sc2tog over the first two stitches, then sc in each of the remaining 11 stitches. Ch 1, turn. (12 sc)
- Round the toe, row 12 Sc in the first 10 stitches, then sc2tog over the last two stitches. Ch 1, turn. (11 sc)
- Round the toe, row 13 Sc2tog over the first two stitches, then sc in each of the remaining nine stitches. Fasten off. (10 sc)
Finishing
- Fold the first two white cuff rounds down over the outside of the remaining two rounds to suggest a turned stocking top. With white yarn, tack the fold in place at two points on the back of the cuff, stitching through cuff fabric only.
- Weave in all ends on the wrong side. Do not stitch across the cuff opening or sew the red stocking closed; it hangs flat and unstuffed.
- Slide the cuff over the rolled napkin and arrange the stocking so its heel and toe hang visibly to one side.
Helpful Tips
- Keep the turning ch 1 loose enough to make the edge stitches easy to find; it never counts as a stitch.
- Row 8 has nine red stitches. Its five-chain extension becomes four additional stitches when worked in row 9.
- For a tidy toe, make the decreases at the beginning of rows 11 and 13 and at the end of row 12 as written.
Gift Parcel Wrap Napkin Ring
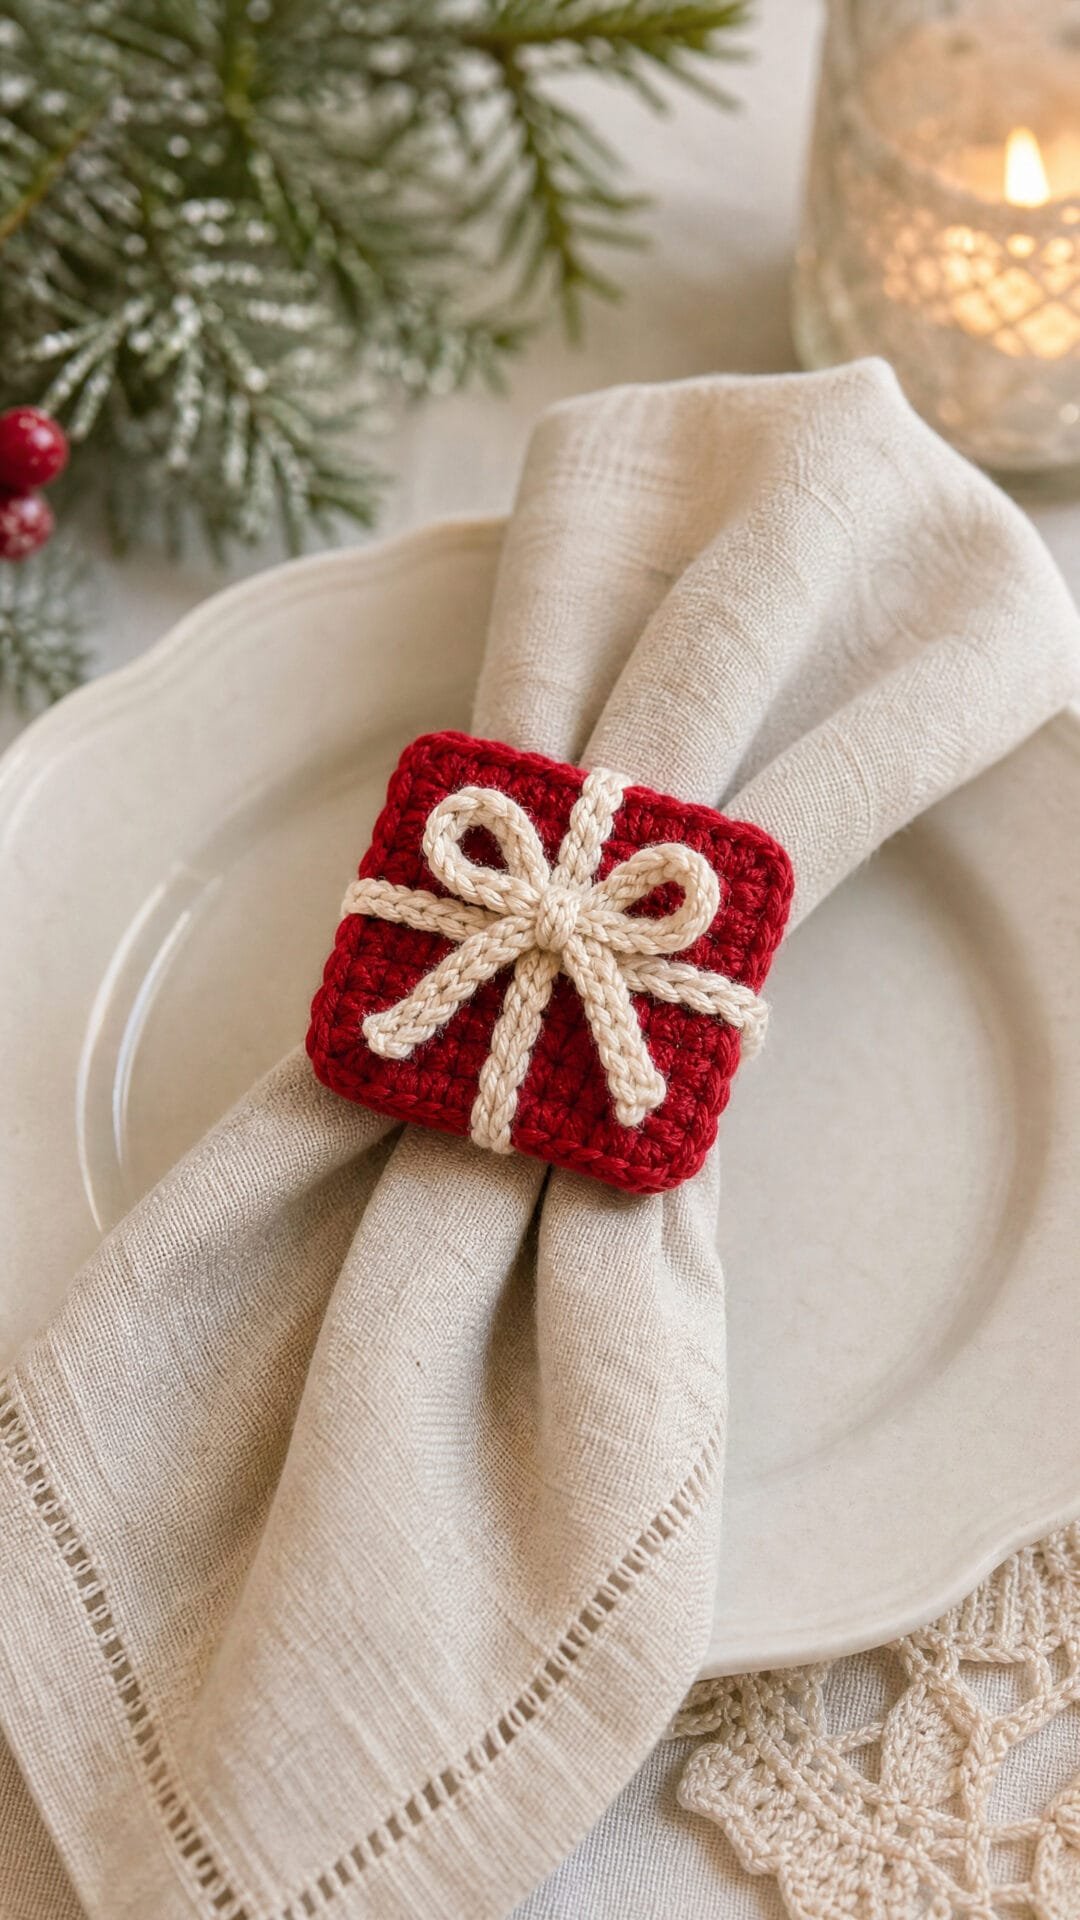
This napkin ring makes a folded napkin look like a little wrapped present. A square parcel face and crossed ribbons give it a festive look, while the fastening stays out of sight behind the napkin.
The firm front panel helps the parcel motif hold its shape, and the free sides of the wrap let the napkin sit comfortably without bunching the fabric. A flat bow adds a finishing touch without making the place setting bulky.
Gift Parcel Wrap Napkin Ring

Quick-reference card. Follow the complete written instructions below.
Materials
- Cotton yarn: Small amounts of red and cream DK-weight yarn
- Crochet hook: 4 mm, or a size that gives a firm fabric
- Other tools: Yarn needle, scissors, stitch markers and a tape measure
Size and Fit
The sample parcel face is approximately 5 cm square at the stated gauge. Its horizontal strip is approximately 25 cm long, with a 5 cm section on the face and a 10 cm arm on each side. It suits a folded napkin measuring about 14 cm around where the ring will sit. For another napkin, measure around the fold without compressing it. Make each arm at least half that measurement plus 2 cm; adjust the horizontal stripâs foundation chain evenly at both ends, keeping its central 10 stitches unchanged. The chain ties provide further adjustment.
Gauge
Target gauge: 20 sc and 20 rows per 10 cm in firm single crochet. Check your gauge if the finished square or strip length matters; no measured testing is claimed.
Abbreviations
US crochet terms.
- ch = chain
- sc = single crochet
- st(s) = stitch(es)
Pattern
- Parcel face With red, ch 11. Row 1: Sc in the second ch from the hook and in each remaining ch; 10 sc. Rows 2â10: Ch 1, turn, sc in each st; 10 sc per row. Fasten off and weave in the ends. The panel should be a firm square.
- Vertical ribbon With cream, ch 11. Row 1: Sc in the second ch from the hook and in each remaining ch; 10 sc. Fasten off, leaving a sewing tail. Place the strip vertically down the centre of the red square, with its ends level with the top and bottom edges. Sew its ends and centre to the panel without pulling the square out of shape.
- Horizontal wrap With cream, ch 51. Row 1: Sc in the second ch from the hook and in each remaining ch; 50 sc. Fasten off. Count 20 sts in from either end and mark the central 10 sts (sts 21â30). Lay those 10 sts horizontally across the middle of the parcel face, over the vertical ribbon. Sew only this central section to the panel, leaving the 20-st arm on each side free to wrap around the napkin.
- Adjusting the wrap If adjusting for another napkin, use the stated gauge of approximately 2 sc per cm to calculate each arm. Round up to a whole stitch, then ch twice that arm count plus 11 for the horizontal strip. Work one sc in the second ch from the hook and each remaining ch. Mark the central 10 sc; the stitch counts on either side should match.
- Back ties Join cream yarn to the free end of one horizontal arm, ch 25 and fasten off. Repeat at the other arm. Secure the yarn ends at the joins, but leave the chain ties free. With the panel facing out, take the arms around the folded napkin and knot the chain ties together behind it. Keep the wrap snug rather than tight.
- Flat bow With cream, ch 15. Row 1: Sc in the second ch from the hook and in each remaining ch; 14 sc. Row 2: Ch 1, turn, sc in each st; 14 sc. Fasten off with a long tail. Bring both short ends to the middle on the back and stitch them in place to form two flat loops. Wrap the tail twice around the centre, secure it on the back, then sew the bow over the ribbon crossing.
Finishing
- Weave in all loose ends except the free ends of the chain ties, securing those ends so the chains cannot unravel.
- Lay the parcel face flat and check that both wrap arms move freely from its sides.
- Remove the ring before washing the napkin; follow the yarn labelâs care instructions.
Helpful Tips
- A firm tension helps the square stay flat without a stiff insert.
- Pin or hold the central 10 stitches of the horizontal strip in place before sewing, so the two arms remain equal.
- If the panel puckers, loosen the sewing stitches rather than stretching the strips.
Christmas Cracker Sleeve Napkin Ring

Give each place setting a little Christmas-cracker charm with a crocheted sleeve that sits around a rolled napkin. Its fuller centre and softly gathered ends create the familiar shape without closing either opening.
The open mesh keeps the sleeve light, while the contrasting colours make its shape stand out on the table. The shaping makes this an intermediate project, but the finished ring is practical as well as decorative: guests can slide out their napkins without tugging at the crochet.
Set one at each place for a coordinated Christmas table, or pair them with different napkins to change the look. Keep the gathers relaxed so the sleeve holds its shape while remaining easy to use.
Christmas Cracker Sleeve Napkin Ring
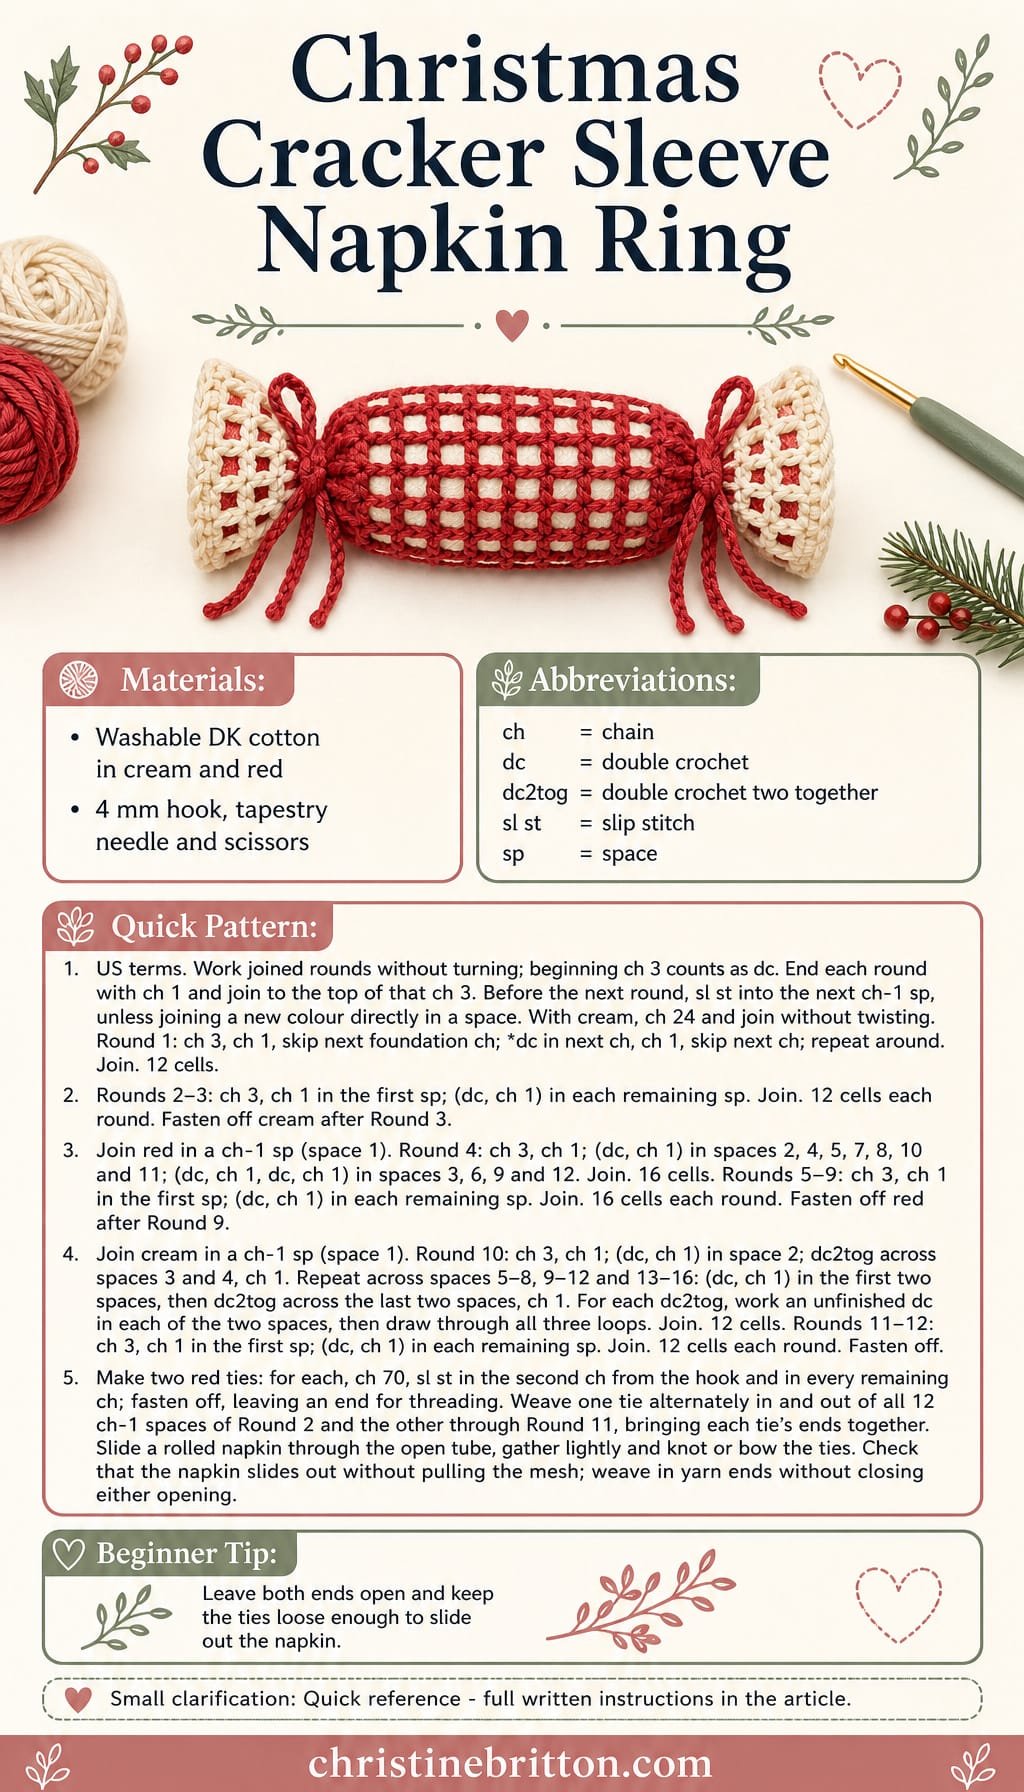
Quick-reference card. Follow the complete written instructions below.
Materials
- Washable DK cotton yarn: Small amounts of cream and red; use cream for the ends and red for the centre.
- Crochet hook: 4 mm, or a size that gives the stated gauge.
- Tapestry needle and scissors: For threading the ties and weaving in ends.
Size and Fit
One size. At the stated gauge, the sleeve measures approximately 9.5 cm long before gathering, with a 12 cm circumference at each end and a 16 cm circumference at the centre. It suits a rolled napkin approximately 3 cm in diameter. Tie the ends loosely enough for the napkin to slide out without pulling the mesh.
Gauge
Approximately 8 mesh cells across 8 cm and 5 rounds across 4 cm, measured on the centre section before gathering. Gauge is a target for the stated dimensions, not a tested measurement.
Abbreviations
US crochet terms.
- ch = chain
- dc = double crochet
- dc2tog = double crochet two together
- sl st = slip stitch
- sp = space
- mesh cell = one dc followed by one ch-1 space; a dc2tog followed by ch 1 also counts as one cell
Pattern
- Construction notes Work joined rounds without turning. The beginning ch 3 counts as a dc. Join each round with a sl st in the top of that ch 3. For each round after Round 1, sl st into the next ch-1 sp before beginning; that space is space 1. Each round ends with a ch 1 before the join.
- Foundation With cream, ch 24. Join with a sl st in the first ch, taking care not to twist the chain.
- Round 1 Ch 3, ch 1, skip the next foundation ch. *Dc in the next ch, ch 1, skip the next ch; repeat from * around. Join. 12 mesh cells.
- Rounds 2â3 Sl st into the next ch-1 sp. Ch 3, ch 1. Work (dc, ch 1) in each remaining ch-1 sp around. Join. 12 mesh cells each round. Fasten off cream after Round 3.
- Round 4: widen the centre Join red in any ch-1 sp; this is space 1. Ch 3, ch 1. Work (dc, ch 1) in spaces 2, 4, 5, 7, 8, 10 and 11. Work (dc, ch 1, dc, ch 1) in each of spaces 3, 6, 9 and 12. Join. 16 mesh cells.
- Rounds 5â9 Sl st into the next ch-1 sp. Ch 3, ch 1. Work (dc, ch 1) in each remaining ch-1 sp around. Join. 16 mesh cells each round. Fasten off red after Round 9.
- Round 10: narrow the second end Join cream in any ch-1 sp; this is space 1. Ch 3, ch 1. Work (dc, ch 1) in space 2. Work a dc2tog across spaces 3 and 4, then ch 1. Repeat that sequence across spaces 5â8, 9â12 and 13â16: work (dc, ch 1) in the first two spaces of each group, then dc2tog across its last two spaces and ch 1. To make a dc2tog across two spaces, work the first unfinished dc in one space and the second unfinished dc in the next, then draw through all three loops. Join. 12 mesh cells.
- Rounds 11â12 Sl st into the next ch-1 sp. Ch 3, ch 1. Work (dc, ch 1) in each remaining ch-1 sp around. Join. 12 mesh cells each round. Fasten off.
- Make two ties With red, ch 70 for each tie. Sl st in the second ch from the hook and in every remaining ch. Fasten off, leaving an end long enough to thread through the sleeve.
- Gather the ends Using a tapestry needle, weave one tie alternately in and out of all 12 ch-1 spaces of Round 2, bringing both tie ends together near the same space. Weave the second tie through Round 11 in the same way. Slide a rolled napkin through the open tube, draw up each tie lightly and knot or bow it. Check that the napkin can still slide out.
Finishing
- Weave in yarn ends without closing either opening.
- If needed, smooth the sleeve by hand; avoid flattening the gathered ends.
Helpful Tips
- Count ch-1 spaces rather than individual stitches when checking the mesh.
- A thicker napkin needs looser ties. Do not pull the ends tight against the fabric.
Christmas Bell Cuff Napkin Ring
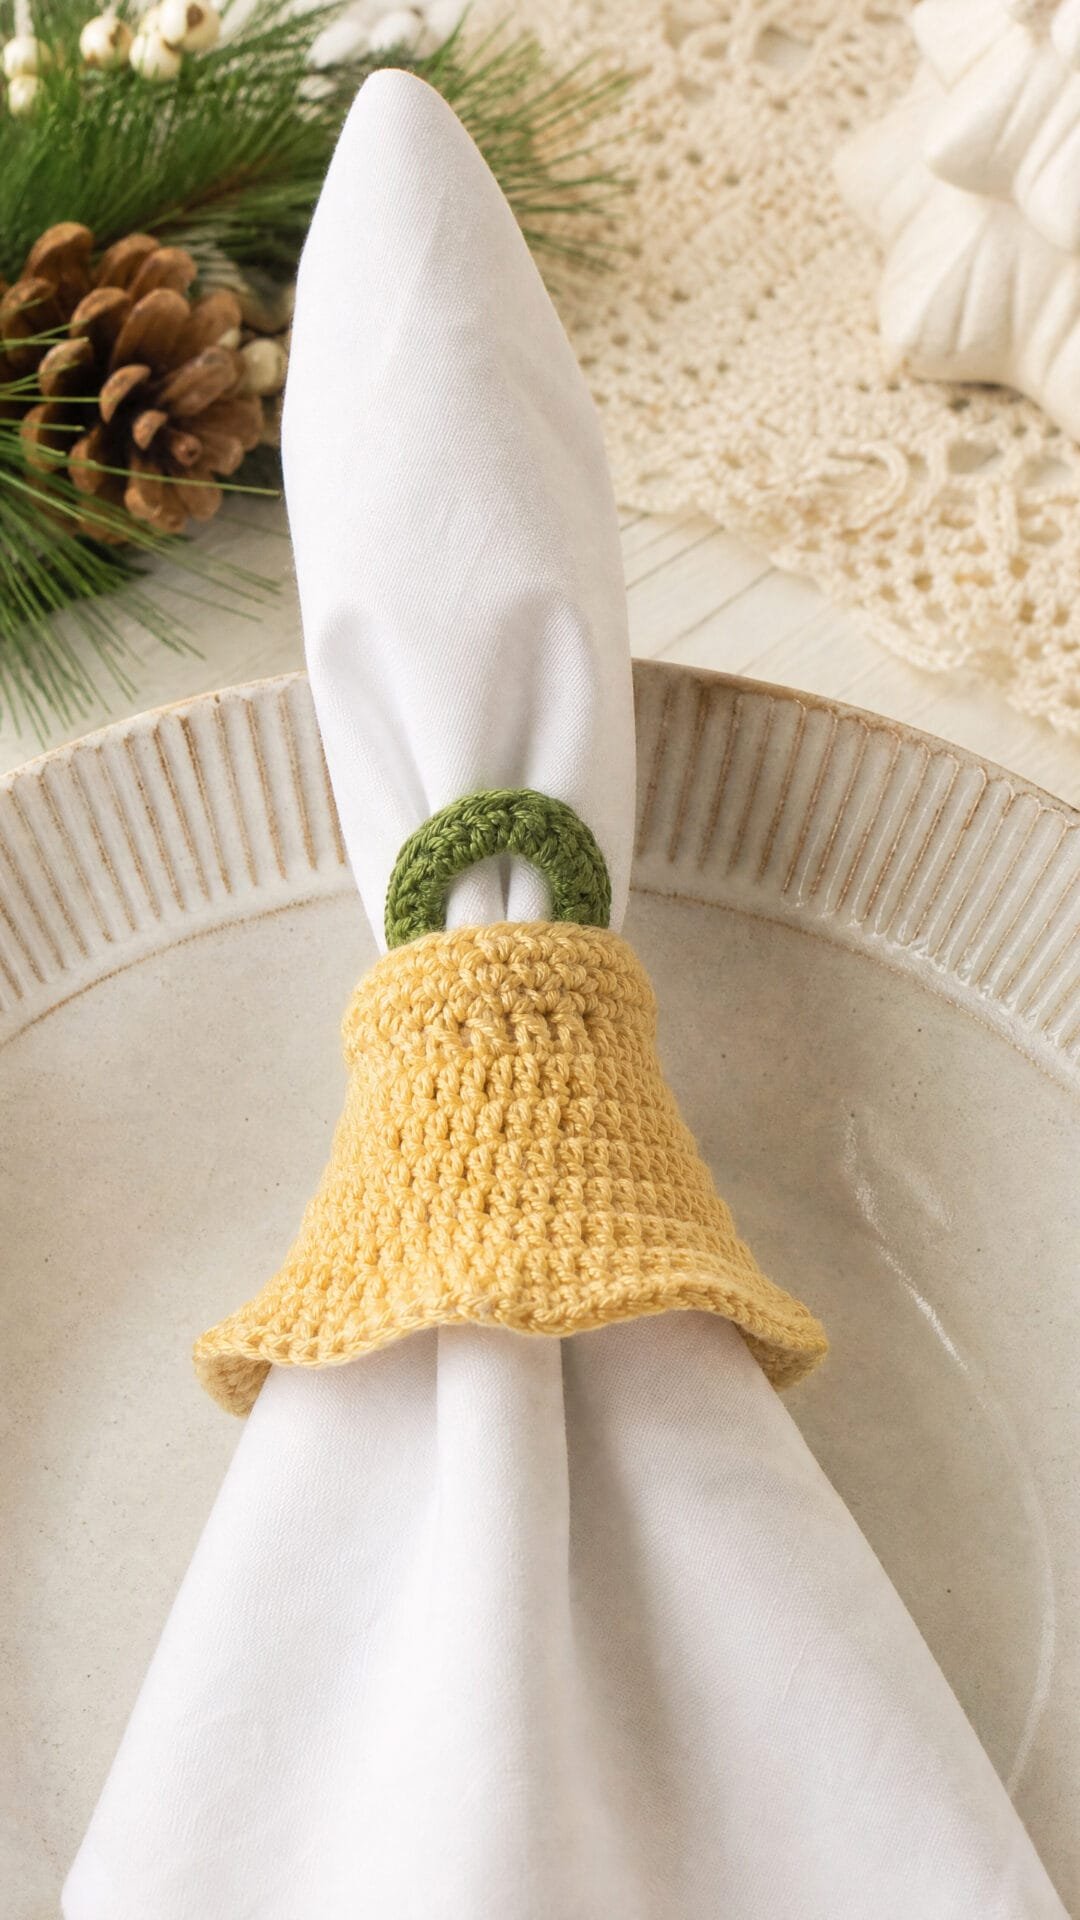
This Christmas bell cuff gets its shape from the crochet itself: a narrow opening widens into a shallow flare around the napkin. It gives a place setting the look of a little golden bell without adding a separate ornament.
The green arch at the top is a decorative detail; the rolled cloth napkin passes through the cuff beneath it. There is no loose bead or hard clapper to catch on the fabric or rattle against the tableware.
The shaped rounds make this an intermediate project, but the finished cuff is easy to use. Roll the napkin so it slides through the upper opening and sits securely without distorting the bell shape.
Christmas Bell Cuff Napkin Ring
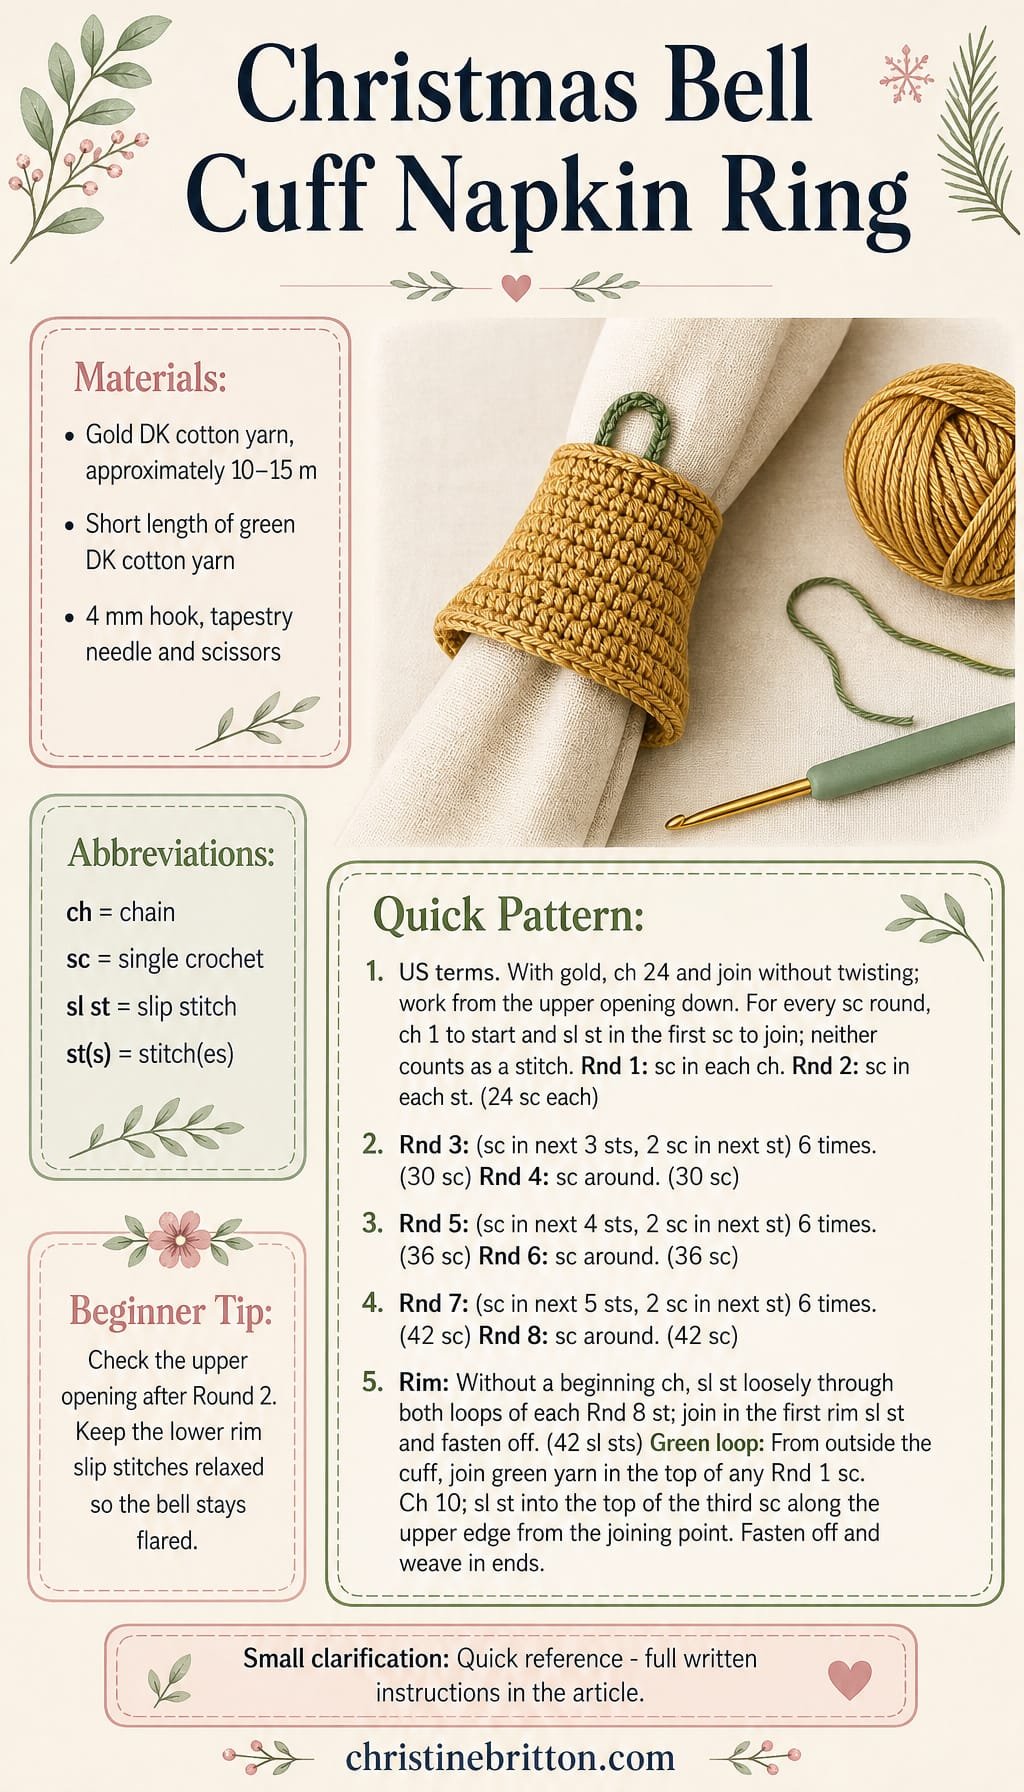
Quick-reference card. Follow the complete written instructions below.
Materials
- Gold DK cotton yarn: Approximately 10â15 m per ring
- Green DK cotton yarn: A short length for the decorative loop
- 4 mm crochet hook: Adjust hook size if needed to obtain the stated gauge
- Tapestry needle and scissors: For fastening off and weaving in ends
Size and Fit
One size. At the stated gauge, the upper opening measures approximately 12 cm around, the flared lower rim approximately 21 cm around, and the cuff approximately 4 cm tall. It is intended for a rolled cloth napkin about 11â12 cm around; adjust the roll so it slides through the upper opening without falling out.
Gauge
5 sc and 5 rounds = 2.5 cm in single crochet. Check the upper opening after Round 2, as its fit matters more than the exact height.
Abbreviations
US crochet terms.
- ch = chain
- sc = single crochet
- sl st = slip stitch
- st(s) = stitch(es)
- rnd = round
Pattern
- Set-up With gold yarn, ch 24. Without twisting the chain, join with a sl st in the first ch to form a ring. Work from the upper opening downwards. In every sc round, ch 1 to begin and join with a sl st in the first sc to finish; the beginning ch 1 and joining sl st do not count as stitches.
- Rnd 1 Ch 1, sc in each ch around; join. (24 sc)
- Rnd 2 Ch 1, sc in each st around; join. (24 sc)
- Rnd 3 Ch 1, (sc in next 3 sts, 2 sc in next st) 6 times; join. (30 sc)
- Rnd 4 Ch 1, sc in each st around; join. (30 sc)
- Rnd 5 Ch 1, (sc in next 4 sts, 2 sc in next st) 6 times; join. (36 sc)
- Rnd 6 Ch 1, sc in each st around; join. (36 sc)
- Rnd 7 Ch 1, (sc in next 5 sts, 2 sc in next st) 6 times; join. (42 sc)
- Rnd 8 Ch 1, sc in each st around; join. (42 sc)
- Lower rim Without making a beginning ch, sl st loosely through both loops of each of the 42 sts of Round 8. Join in the first rim sl st, fasten off and weave in the end. Keep this edge firm but loose enough that it does not pull the bell inward.
- Green upper loop With the cuff upright, join green yarn with a sl st in the top of any sc of Round 1, working from the outside of the cuff. Ch 10, then sl st into the top of the third sc along the upper edge from the joining point. Fasten off and weave the ends into the upper edge. The chain forms a small decorative arch; the napkin goes through the cuff, not through this loop.
Finishing
- Weave in all ends securely on the inside, keeping them clear of the upper opening.
- Gently shape the cuff so the lower rim flares evenly. Slide it over a rolled cloth napkin from the narrow end.
Helpful Tips
- Count the stitches before each increase round: the repeat needs exactly six sections.
- If the upper opening is too tight or loose, change hook size and start again rather than adding stitches; changing the starting count would also change the increase repeats.
- Keep the rim slip stitches relaxed. Tight slip stitches can undo the flare.
For another related project collection, browse Christmas crochet appliques.
Bauble Toggle Napkin Ring
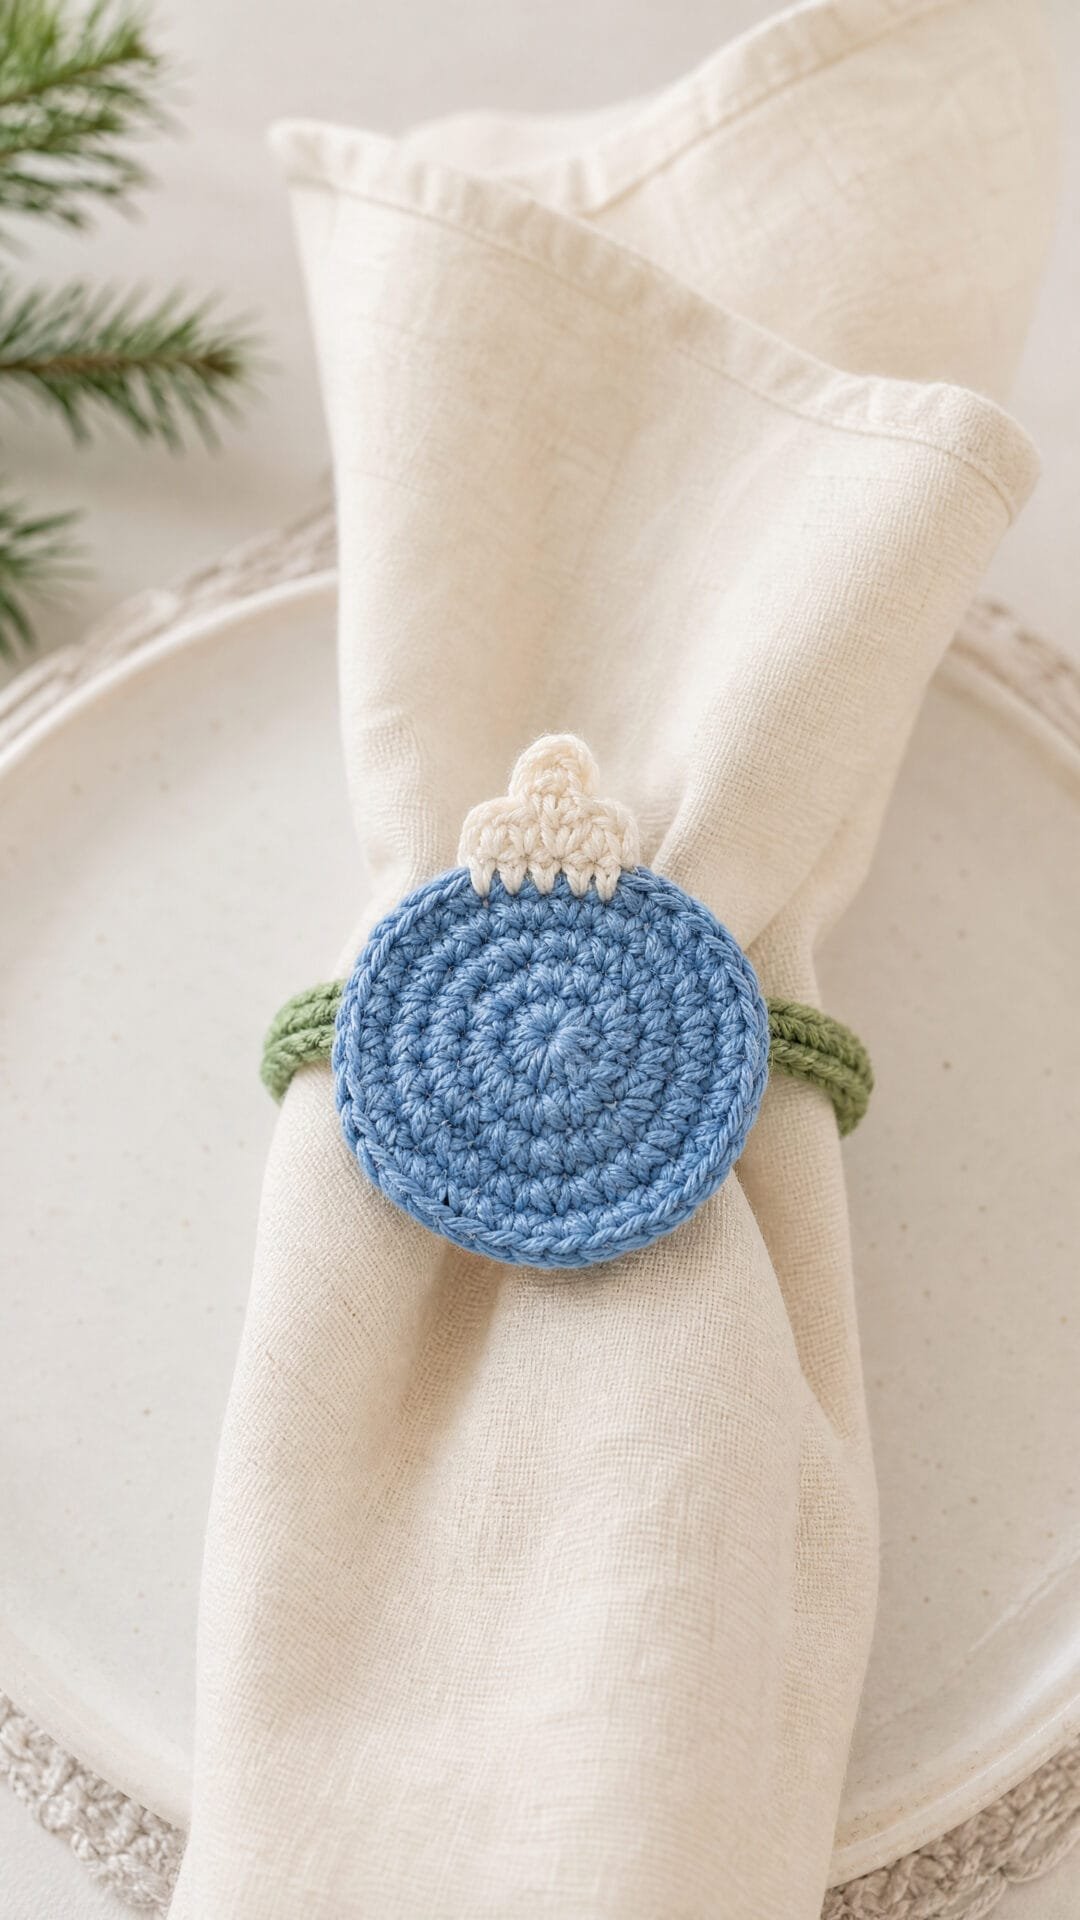
This Christmas crochet napkin ring uses its flat bauble as the fastening, not just a decoration. A slim wrap sits behind the napkin, leaving the blue ornament and its small cap visible at the front.
The flexible wrap suits a folded or rolled napkin, while the loop needs to pass over the bauble without stretching and stay in place when the napkin is moved. Firm fabric helps the bauble keep its shape and makes the fastening more secure.
It is a lovely choice if you want a festive table detail that feels playful without adding much bulk around each place setting.
Bauble Toggle Napkin Ring
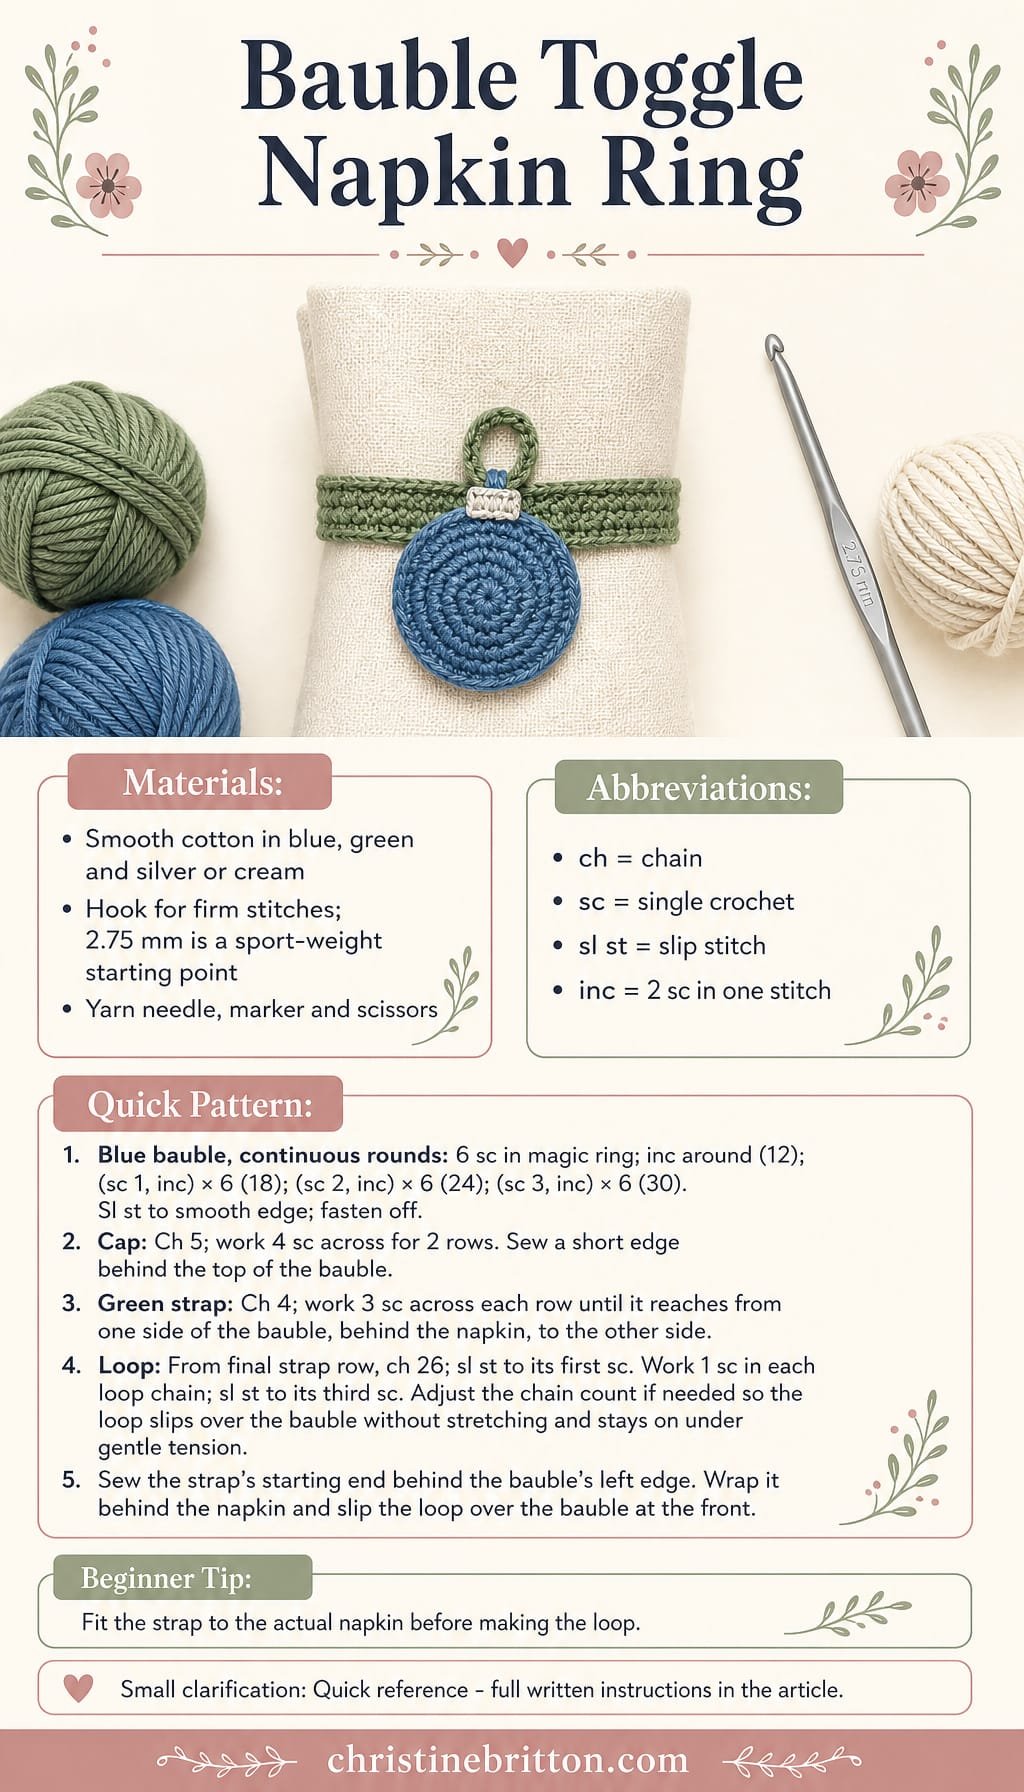
Quick-reference card. Follow the complete written instructions below.
Materials
- Smooth cotton yarn: Small amounts of blue for the bauble, green for the strap and silver or cream for the cap; use the same yarn weight throughout.
- Crochet hook: A size that produces firm stitches with your yarn; 2.75 mm is a starting point for sport-weight cotton.
- Other tools: Yarn needle, stitch marker and scissors.
Size and Fit
One adjustable size. The five-round bauble is intended to be roughly 3.5â4 cm across, depending on yarn and tension. Make the strap long enough to travel from one side of the bauble, around the back of the folded or rolled napkin, to the opposite side. An 8 cm strap is a starting length, not a fixed requirement. Check the fit on the napkin you intend to use.
Gauge
No fixed gauge is required. Use a hook small enough to make a firm bauble, then measure the strap and test the finished loop against it before fastening off.
Abbreviations
US crochet terms.
- ch = chain
- sc = single crochet
- sl st = slip stitch
- st(s) = stitch(es)
- inc = work 2 sc in the same stitch
Pattern
- Bauble, round 1 With blue, work 6 sc in a magic ring. Pull the ring closed. Work in a continuous spiral, placing a marker in the first stitch of each round. (6 sts)
- Bauble, round 2 Inc in each stitch around. (12 sts)
- Bauble, round 3 *Sc in next st, inc in next st; repeat from * around. (18 sts)
- Bauble, round 4 *Sc in next 2 sts, inc in next st; repeat from * around. (24 sts)
- Bauble, round 5 *Sc in next 3 sts, inc in next st; repeat from * around. (30 sts) Sl st in the next stitch to smooth the edge, then fasten off.
- Cap With silver or cream, ch 5. Row 1: Sc in the second ch from the hook and in each remaining ch. (4 sts) Row 2: Ch 1, turn, sc in each st. (4 sts) Fasten off, leaving a sewing tail. Sew one short edge to the back of four adjacent outer-round stitches at the top of the bauble, leaving the rest of the rectangle visible above the circle.
- Strap With green, ch 4. Row 1: Sc in the second ch from the hook and in each remaining ch. (3 sts) Each following row: Ch 1, turn, sc in each of the 3 sts. Continue until the strap reaches from the left edge of the bauble, around the back of your napkin, to the right edge of the bauble. An 8 cm strap is a starting point. Do not fasten off.
- Toggle loop From the end of the final strap row, ch 26. Sl st into the first sc of that same row to form a loop. Work 1 sc into each of the 26 chains, travelling back around the loop; sl st into the third sc of the final strap row. Fasten off. Lay the loop flat and try it over the bauble, feeding one edge of the flat circle through first. It must pass without stretching the loop but stay on the bauble when the strap is pulled gently. If it is too tight or too loose, undo the loop and change the chain count; work one reinforcing sc into every chain again.
- Assembly Sew the starting end of the strap securely to the back of the bauble at its left edge, keeping the cap at the top and the strap level. Wrap the strap behind the napkin, bring the loop to the front at the baubleâs right edge, and slip it over the bauble to fasten.
Finishing
- Weave in all ends without pulling the bauble out of shape.
- Check the ring on the intended napkin: the strap should hold it without crushing it, and the loop should remain over the bauble when the napkin is moved gently.
Helpful Tips
- A firm cotton fabric helps the flat bauble act as a toggle; if the circle curls or feels floppy, try a smaller hook.
- Adjust the strap for a folded or rolled napkin before making the loop. Napkin thickness can change the required length substantially.
- Keep the loop stitches even. Its fit matters more than the suggested 26-chain starting count.
Pinecone Scale Napkin Ring
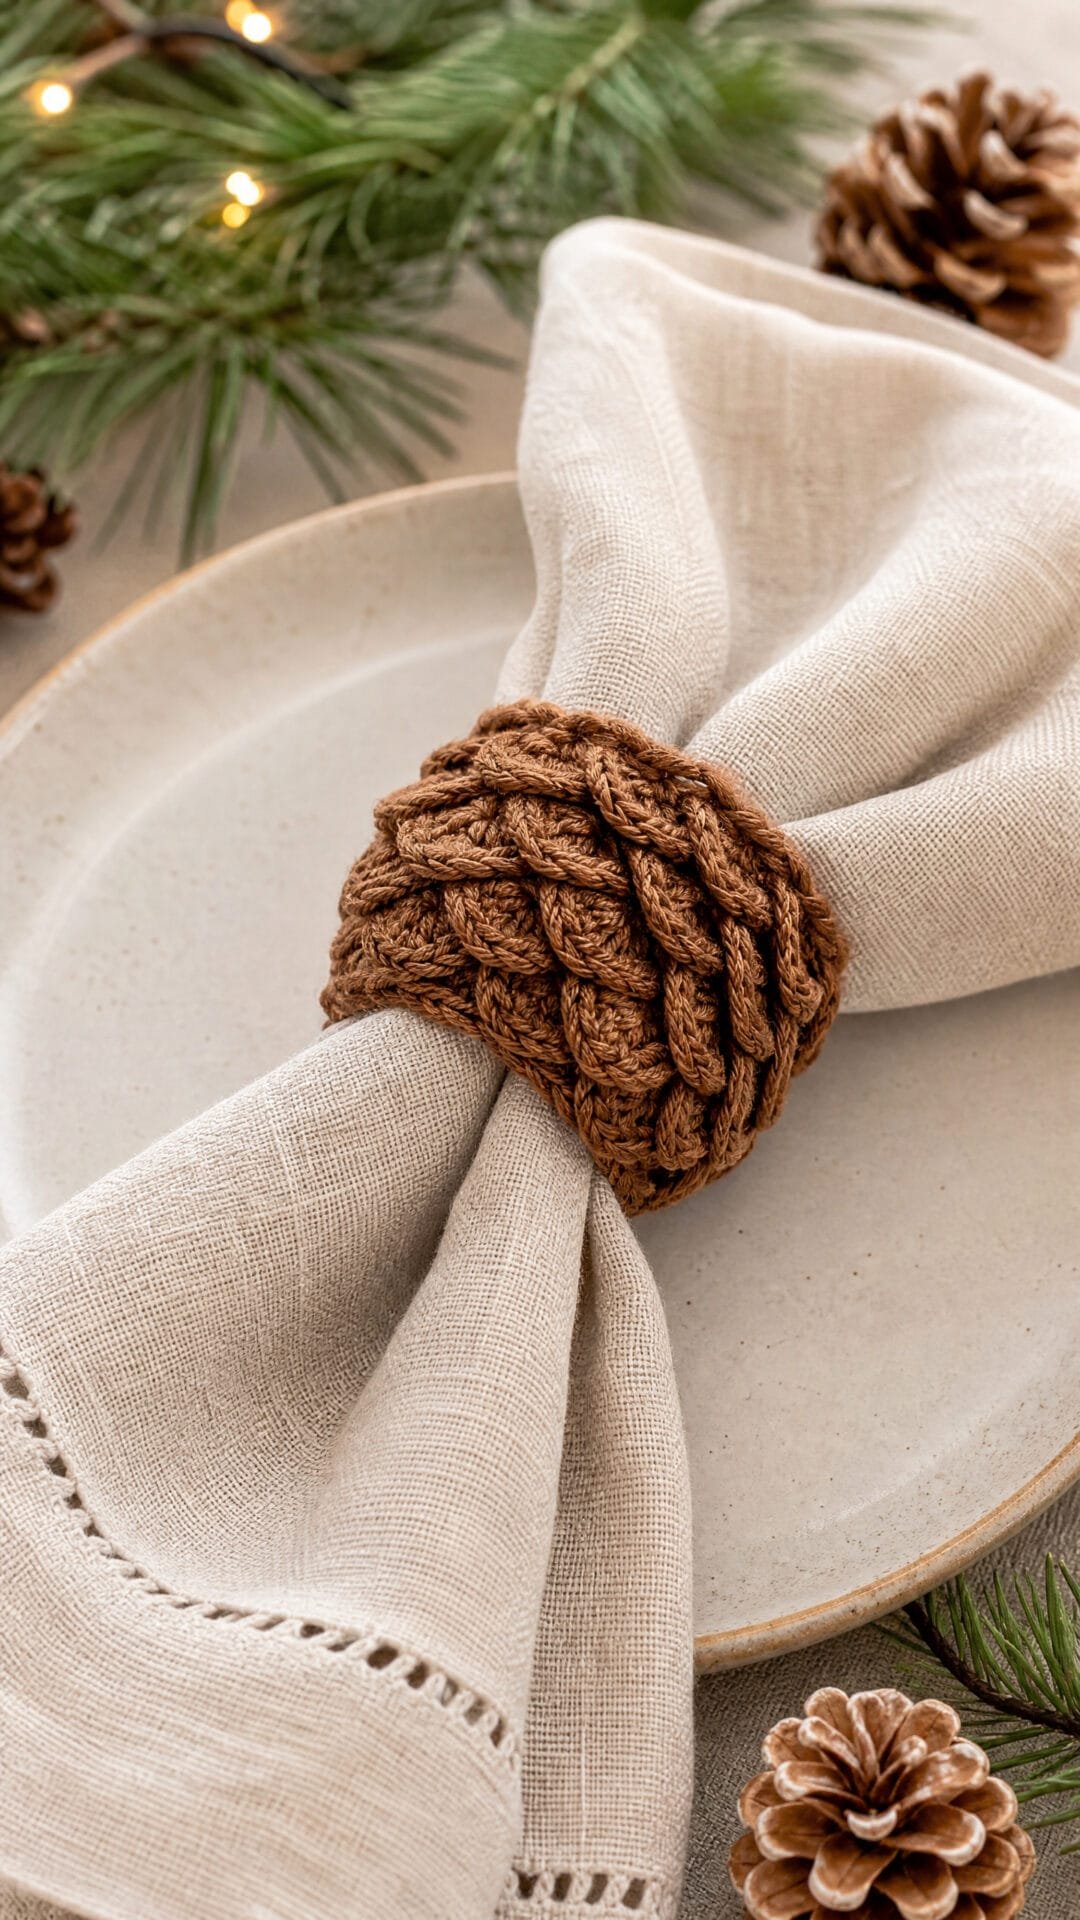
Bring a woodland detail to the Christmas table with a napkin ring inspired by the layered shape of a pinecone. Its short, staggered scales add texture without creating a bulky decoration beside the place setting.
The textured surface faces outwards, while the cuff remains smooth against the napkin. This intermediate project is a good choice if you enjoy working into selected loops, and the compact scales are less likely to catch on cutlery or neighbouring napkins.
Pinecone Scale Napkin Ring
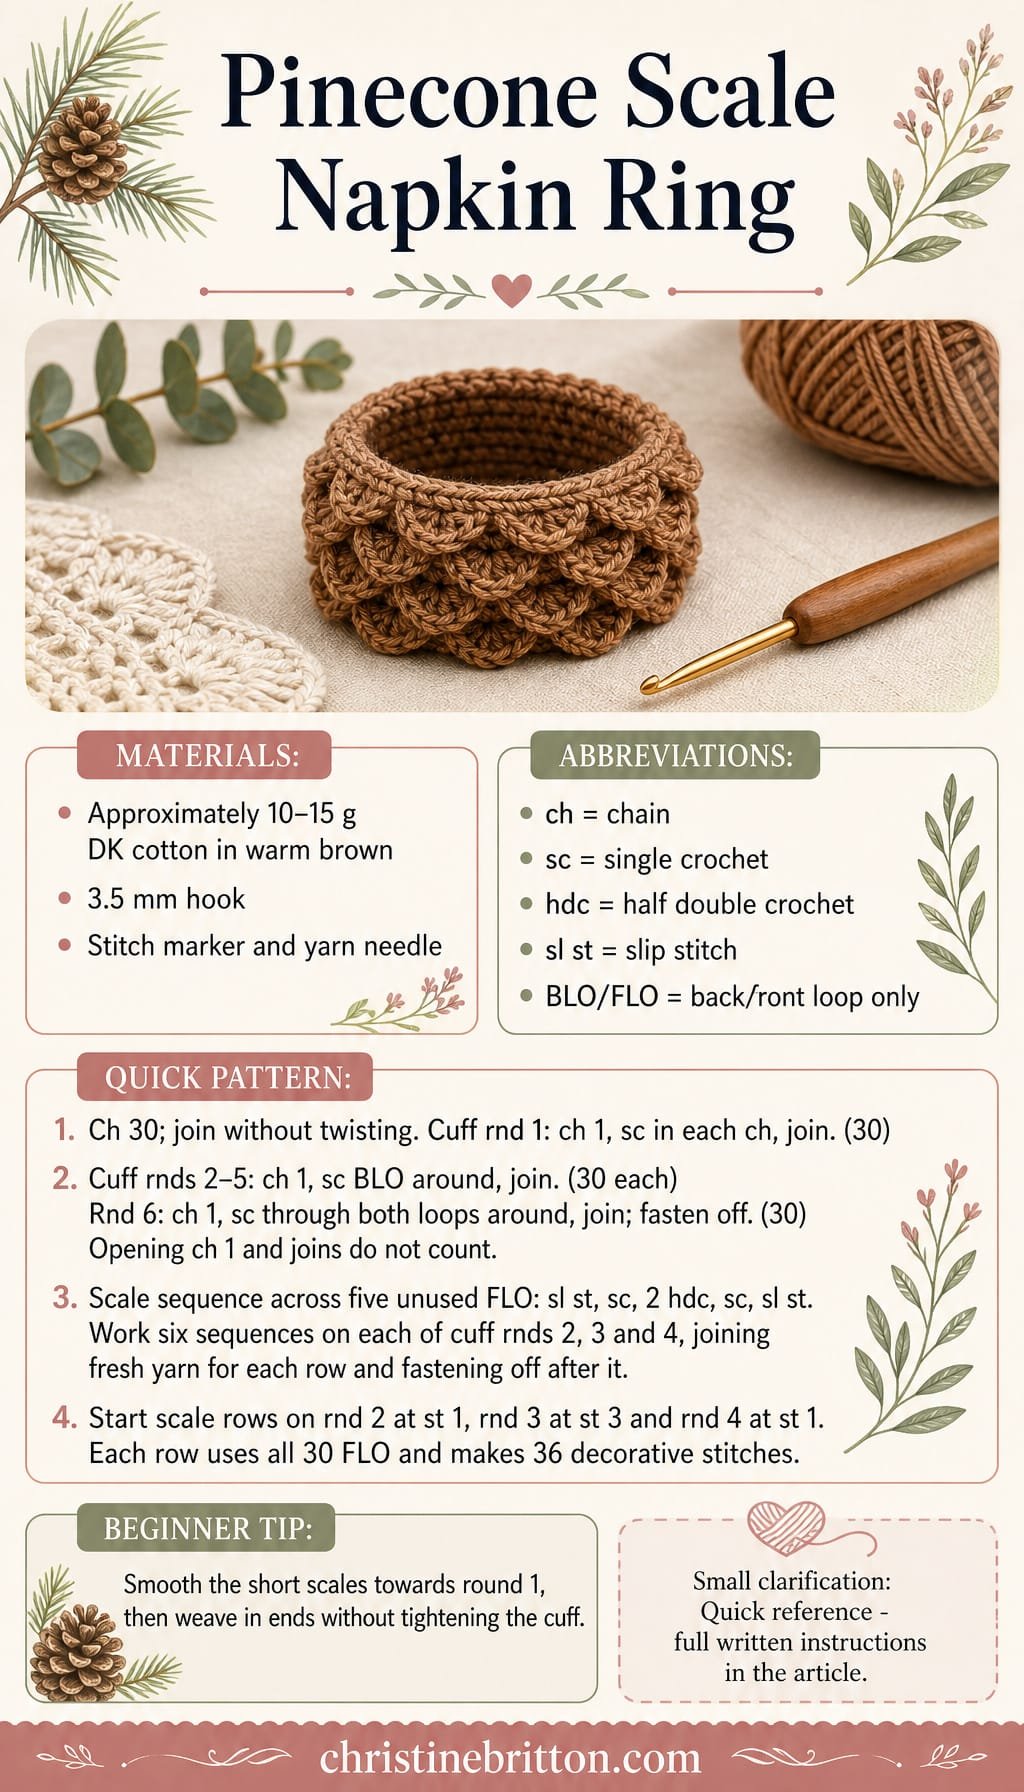
Quick-reference card. Follow the complete written instructions below.
Materials
- DK cotton yarn: Approximately 10â15 g in warm brown for one ring; allow extra if making a set.
- 3.5 mm crochet hook: Or a size that gives a firm fabric at the stated gauge.
- Stitch marker and yarn needle: For marking the round and weaving in ends.
Size and Fit
One size: approximately 13.5 cm in circumference and 2.5 cm tall at the stated gauge. Slip it over a folded or rolled napkin that measures approximately 13 cm around. The cotton cuff should hold its shape without squeezing the napkin.
Gauge
22 sc stitches and 24 sc rounds = 10 cm in firm fabric. Gauge affects the finished circumference; check it if the ring needs to fit a particular napkin.
Abbreviations
US crochet terms.
- ch = chain
- sc = single crochet
- hdc = half double crochet
- sl st = slip stitch
- BLO = back loop only
- FLO = front loop only
- st(s) = stitch(es)
Pattern
- Cuff set-up Ch 30. Without twisting the chain, join with a sl st in the first ch. Work with the outside of the ring facing you. In every cuff round, the opening ch 1 does not count as a stitch; join with a sl st in the first sc, not in the ch 1.
- Cuff round 1 Ch 1, sc in each ch around, join. (30 sc)
- Cuff rounds 2â5 Ch 1, sc in the BLO of each sc around, join. (30 sc in each round) Leave the unused front loops of rounds 2, 3 and 4 accessible on the outside for the scales.
- Cuff round 6 Ch 1, sc through both loops of each sc around, join. (30 sc) Fasten off and weave in the cuff ends.
- Scale row on round 2 With the outside facing you, locate the unused FLO of stitch 1 of cuff round 2. Join yarn by making a sl st in that loop; this is the first stitch of the first scale. Work *sc in the next FLO, 2 hdc in the next FLO, sc in the next FLO, sl st in the next FLO; sl st in the next FLO to begin the following scale. Repeat from * until six scales are complete, omitting the final instruction to begin another scale. Each scale uses five consecutive front loops: sl st, sc, 2 hdc, sc, sl st. Fasten off.
- Scale row on round 3 Starting in the unused FLO of stitch 3 of cuff round 3, work six scales exactly as for round 2. Continue past the round join as needed: the last scale ends in the FLO of stitch 2. Fasten off. This two-stitch shift staggers the scales.
- Scale row on round 4 Starting in the unused FLO of stitch 1 of cuff round 4, work six scales exactly as for round 2. Fasten off.
Finishing
- Weave the scale-row ends into the cuff without drawing the fabric tight.
- Gently smooth the scales downward towards round 1 so their edges overlap. Slip the finished ring over the napkin.
Helpful Tips
- Make each scale in the unused front loops of its specified cuff round; do not work into the napkin-facing side.
- Keep the hdc stitches relaxed but compact. Short scales are less likely to catch on cutlery or neighbouring napkins.
Christmas Candle Napkin Ring

This Christmas Candle Napkin Ring brings a little candlelight imagery to the table without an actual flame. A dark green band frames a folded napkin, while a flat cream candle and yellow crocheted flame create the festive detail at the front.
The candle is a decorative panel rather than a holder for a real candle. Its compact fabric and secure attachment help it sit neatly above the band, making this an appealing choice if you enjoy small crochet projects with a distinct shape.
Pair it with a red napkin for a traditional Christmas colour scheme, or let it stand out against plain linen. Keep the ring away from lit candles and other sources of heat.
Christmas Candle Napkin Ring
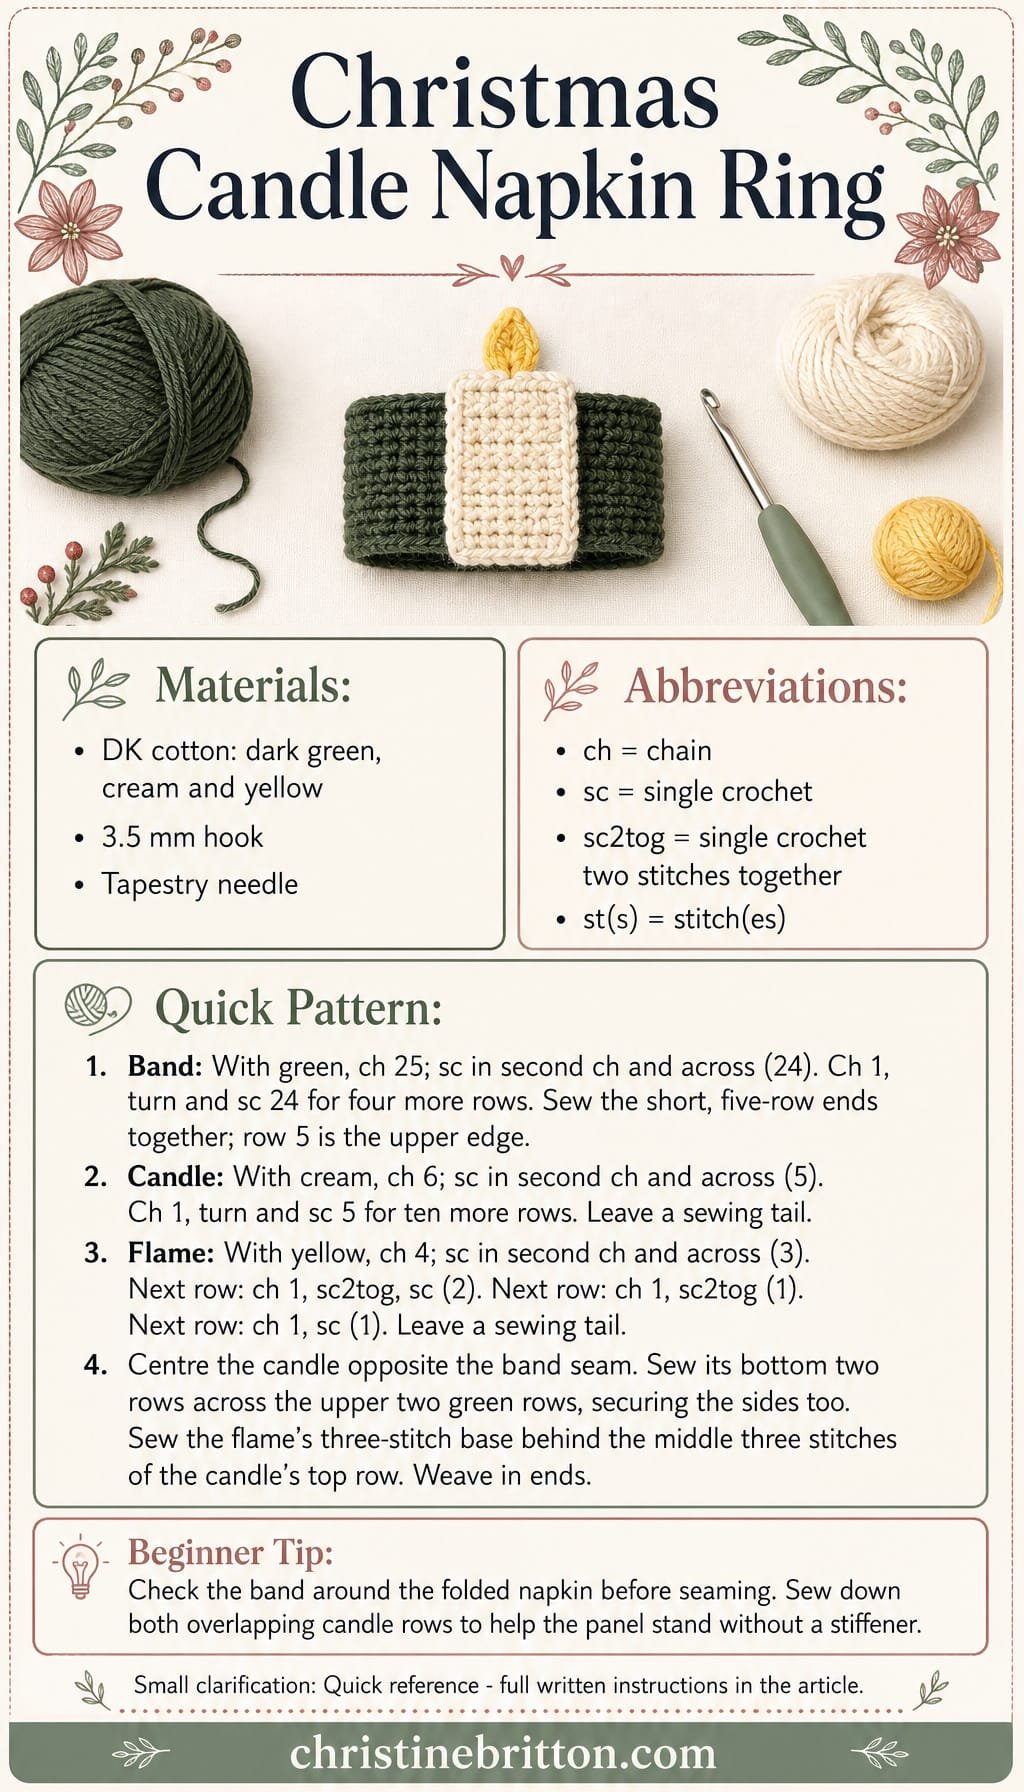
Quick-reference card. Follow the complete written instructions below.
Materials
- Cotton yarn: Small amounts of DK-weight yarn in dark green, cream and yellow
- Crochet hook: 3.5 mm, or a size that makes a firm fabric
- Tapestry needle: For joining and sewing on the candle and flame
- Stitch marker: Optional, for marking the front of the band
Size and Fit
The sample band is approximately 4.5â4.6 in (11.5 cm) around after seaming and approximately 0.8 in (2 cm) high. It is intended for a folded fabric napkin that fits comfortably through that opening. For a different napkin, adjust the green foundation chain by whole stitches: make the band long enough to wrap around the folded napkin without stretching, allowing approximately one stitch width for the seam. Keep the band at five rows and work the candle as written.
Gauge
Approximately 5 single crochet stitches and 6 rows per inch (2.5 cm) in firm, flat fabric. Check fit around the folded napkin before seaming; exact gauge is less important than a band that slides on without slipping off.
Abbreviations
US crochet terms.
- ch = chain
- sc = single crochet
- sc2tog = single crochet two stitches together
- st(s) = stitch(es)
Pattern
- Green band, row 1 With dark green, ch 25. Sc in the second ch from the hook and in each remaining ch. Turn. (24 sc)
- Green band, rows 2â5 Ch 1, sc in each st across, turn. (24 sc per row) Fasten off after row 5. Wrap the strip around the folded napkin to check the fit. Sew the two short, five-row ends together to make a ring, leaving the seam at the back. Row 5 forms the upper edge.
- Cream candle, row 1 With cream, ch 6. Sc in the second ch from the hook and in each remaining ch. Turn. (5 sc)
- Cream candle, rows 2â11 Ch 1, sc in each st across, turn. (5 sc per row) Fasten off, leaving a long tail for sewing. The piece is a flat rectangle; row 1 is its base and row 11 is its top.
- Yellow flame, row 1 With yellow, ch 4. Sc in the second ch from the hook and in each remaining ch. Turn. (3 sc)
- Yellow flame, row 2 Ch 1, sc2tog over the first 2 sts, sc in the last st. Turn. (2 sc)
- Yellow flame, row 3 Ch 1, sc2tog. Turn. (1 sc)
- Yellow flame, row 4 Ch 1, sc in the single st. Fasten off, leaving a long tail for sewing. (1 sc)
- Assembly Place the cream candle upright on the front of the band, opposite the seam. Lay its bottom two rows over the upper two green rows, so the remaining nine cream rows rise above the band. Using the cream tail, sew across both overlapping cream rows and their side edges, catching the green fabric securely without pulling the band tight. Centre the three-stitch base of the yellow flame behind the top row of the candle and sew it to the middle three cream stitches. Leave the tapered portion visible above the candle.
Finishing
- Weave in all ends securely on the inside or back of the work.
- Slide the ring onto the folded napkin and straighten the candle and flame. Keep the decoration away from lit candles.
Helpful Tips
- Use a smaller hook if the candle fabric feels loose; compact stitches help the flat panel hold its shape without a stiffener.
- Sewing down two full cream rows, rather than only the foundation edge, gives the upright candle a more stable base.
- If adjusting the band length, retain 24 stitches only when making the sample size; work the same stitch count on every green row after changing the foundation chain.
Peppermint Spiral Button Napkin Ring

The peppermint spiral is the fastening as well as the festive detail. Its flat, two-colour face gives this slim napkin ring the look of a wrapped sweet without adding bulk beneath the place setting.
Fit the wrap to the napkin as it will be folded on the table. It should sit comfortably against the fabric rather than squeeze it; a tight band can crease the fold and make the fastening difficult to use.
The button loop has a different job: it needs to slip over the spiral without forcing it, then sit snugly behind it. A secure loop will keep a comfortable wrap closed, but it cannot make a wrap that is too short fit properly.
Peppermint Spiral Button Napkin Ring

Quick-reference card. Follow the complete written instructions below.
Materials
- DK cotton yarn: Small amounts of red and white; use firm, smooth yarn for a button that holds its shape.
- Crochet hook: 3.5 mm, or a size that produces firm stitches.
- Tapestry needle: For assembling the spiral and securing the button.
- Stitch marker or removable pin: For marking the strap length and checking the loop before fastening it.
Size and Fit
Make one ring to fit your intended folded napkin. At the stated gauge, the strap is approximately 2 cm wide and each 36-stitch spiral strip is approximately 18 cm long; the finished disc diameter will depend on how closely it is coiled. Work the strap to fit the napkin rather than relying on a fixed strap length.
Gauge
Approximately 20 sc and 25 rows to 10 cm in firm, flat fabric. Exact gauge is not essential; keep the spiral strips and strap firm, then size the strap on the napkin.
Abbreviations
US crochet terms.
- ch = chain
- sc = single crochet
- sl st = slip stitch
- st = stitch
Pattern
- Red spiral strip With red, ch 37. Sc in the second ch from the hook and in each remaining ch: 36 sc. Fasten off, leaving a long tail for assembly.
- White spiral strip With white, repeat the red strip: ch 37 and work 36 sc. Fasten off, leaving a long tail.
- Coil the button Place one short end of each strip together at the centre. Wind the strips side by side in the same direction to form a flat, two-colour spiral, keeping their long edges adjacent rather than stacking them. Use the yarn tails and a needle to catch neighbouring edges together every few stitches as you coil. Secure both outer ends on the back. Sew several short stitches across the back, catching multiple turns without pulling the disc out of shape. The disc must remain flat and firmly joined.
- Start the red strap With red, ch 5. Row 1: sc in the second ch from the hook and in each remaining ch: 4 sc. Row 2: ch 1, turn, sc in each st: 4 sc. Repeat Row 2 to grow the strap; do not fasten off.
- Size the strap Centre the spiral disc on the starting end of the strap and pin it temporarily. Wrap the strap around the intended folded napkin so it lies flat without squeezing the fabric. Continue Row 2 until the working end reaches the near edge of the disc, where the loop will begin. Check this with the napkin folded as it will be used. The strap should be comfortable before the loop is added: a snug loop keeps the button fastened, but it cannot correct a band that is too tight.
- Make and reinforce the loop At the end of the final strap row, ch enough to pass around the disc when the disc is offered edge-first through the loop. As a starting point, make the chain approximately twice the disc diameter plus a little allowance for its thickness. Sl st to the opposite corner of that final strap row to close the loop. Test it over the disc while the strap is around the napkin; undo and change the chain count if needed. The loop should pass over the disc without forcing it, then sit snugly behind it. When the fit is right, turn and work 1 sc into each ch of the loop, working back towards its starting corner. Sl st at that corner and fasten off. Test the reinforced loop again; adjust it if the added stitches have made it too tight.
- Attach the button Remove the temporary pin. Centre the disc on the starting end of the strap and sew through the strap and several turns on the back of the disc. Keep the spiral face clear, and make several secure passes so the disc cannot pull away when the loop is opened.
Finishing
- Weave in all ends on the back of the disc and strap, taking care not to close the button loop.
- Fasten the ring around the folded napkin and check that the strap lies flat, the loop stays behind the disc and the napkin is not compressed.
Helpful Tips
- If the disc cups, ease the strips apart slightly as you coil; if it feels loose, add more joining stitches between neighbouring turns.
- Try the loop over the finished disc before reinforcing it, then test it again afterwards. The reinforced loop, not the initial chain alone, determines the final fit.
- For a different napkin fold, recheck the strap length before making the loop.
Woven Plaid Napkin Ring

Plaid brings a familiar festive look to the table, but tiny colour changes can be difficult to read in crochet. This napkin ring uses a cream mesh as a backdrop for red and green lines, so the check remains clear even on a small accessory.
The open grid gives the ring a light, textured appearance, while the woven lines add colour without hiding the crochet beneath. It works particularly well against a plain napkin, where the plaid can take centre stage.
This is a lovely option for a coordinated holiday table: make matching rings for a traditional look, or pair them with different napkin folds for a more relaxed setting. The pattern below includes a fit check so the ring suits the napkin you plan to use.
Woven Plaid Napkin Ring

Quick-reference card. Follow the complete written instructions below.
Materials
- Cotton yarn: Small amounts of cream, red and green in the same weight; DK cotton is a practical choice.
- Crochet hook: A size suited to your yarn that produces a firm, open mesh.
- Blunt yarn needle: For weaving the cords and seaming the ring.
- Scissors and tape measure: For checking the fit and cord lengths.
Size and Fit
The sample layout has 30 mesh openings around the napkin and 10 rows in height. At 18 openings per 10 cm, the flat rectangle is approximately 16.7 cm long before seaming; this is a planning figure, not a guaranteed finished measurement. Fold or roll the napkin as it will be displayed. Before making the rectangle, adjust the foundation chain by two chains for each opening added or removed. Before seaming, wrap the finished rectangle around the napkin and check that its short edges meet comfortably without stretching.
Gauge
Gauge is not critical, but a firm mesh helps the ring hold its shape. For the approximate length stated, aim for 18 ch-1 openings across 10 cm. Check the actual rectangle against your napkin; yarn, hook and tension will affect its size.
Abbreviations
US crochet terms.
- ch = chain
- sc = single crochet
- sl st = slip stitch
- sp = space
- RS = right side
- WS = wrong side
Pattern
- Cream mesh: foundation Ch 62. To change the circumference, add or subtract chains in multiples of two; the instructions below then produce one more or one fewer mesh opening for every two chains changed.
- Cream mesh: row 1 Sc in the second ch from the hook. (Ch 1, skip the next ch, sc in the next ch) 30 times. You have 31 sc and 30 ch-1 spaces. If you changed the foundation, repeat the bracketed sequence until you reach its end.
- Cream mesh: rows 2â10 Ch 1 and turn. Sc in the first sc. (Ch 1, skip the next ch-1 sp, sc in the next sc) across. Each row has 31 sc and 30 ch-1 spaces in the sample layout. Fasten off after row 10, leaving a long cream tail for the seam.
- Check the fit Wrap the rectangle around the prepared napkin, with its two short edges meeting. If it is too tight or loose, remake it with two more or two fewer foundation chains per opening needed. Lay it flat again for weaving.
- Make the crocheted cords Make four red cords and four green cords. For each cord, chain to the required length, then sl st in the second ch from the hook and in every remaining ch; fasten off with a tail of about 12 cm at each end. Four cords must be at least the rectangleâs length plus 6 cm; the other four must be at least its height plus 6 cm. Measure after slip stitching, as this can shorten a chain. Use two red and two green cords in each direction.
- Weave the horizontal lines With the RS facing, weave a red cord through the ch-1 openings of row 2, a green cord through row 4, a red cord through row 7 and a green cord through row 9. Travel from one short edge to the other, taking the cord alternately in front of and behind the sc posts between openings. Leave roughly equal cord ends at both short edges; do not pull the mesh narrower.
- Weave the vertical lines Count mesh-opening columns from the same short edge on every row. Weave a red cord through column 5, a green cord through column 11, a red cord through column 20 and a green cord through column 26, travelling from the bottom edge to the top edge. Pass alternately in front of and behind the fabric between successive row openings. At crossings, pass the vertical cord over one horizontal cord and under the next. Keep all lines relaxed and straight.
- Join the ring Turn to the WS. Using the long cream tail, butt the two short edges together and whip stitch their edge sc stitches from bottom to top, matching rows without overlapping the mesh. Fasten off. The woven lines run around and up the finished ring.
Finishing
- On the WS, secure each cord end with a small stitch around a nearby mesh post, then weave its yarn tail through several stitches. Trim any excess cord only after it is secure.
- Weave in the cream ends. Ease the ring back over the prepared napkin and straighten the plaid lines by hand.
Helpful Tips
- Use a blunt needle that passes easily through the mesh openings without splitting the cotton.
- Keep the woven cords loose enough that the cream grid remains visible; tight cords can distort the ring.
- If you change the number of openings, reposition the vertical lines at roughly even intervals rather than using the sample column numbers.
Christmas Pudding Napkin Ring

This Christmas pudding napkin ring adds a cheerful, recognisable detail to a festive place setting without taking over the table. Its gently domed front gives the pudding shape, while the unstuffed construction keeps it low enough to sit comfortably against a rolled napkin.
The white scalloped icing softens the brown pudding shape, and the small green leaves bring a touch of colour to the top. A narrow band holds the motif in place, with the ties kept behind the napkin for a tidy view from the front.
It works particularly well against a dark red napkin, but a plain linen or cotton napkin will also let the pudding stand out. The result is a small handmade detail that feels festive without adding bulk beside the cutlery.
Christmas Pudding Napkin Ring

Quick-reference card. Follow the complete written instructions below.
Materials
- Cotton yarn: Small amounts of brown, white and green DK-weight cotton.
- Crochet hook: 3 mm, or a size that gives a firm fabric.
- Tapestry needle and scissors: For assembly and weaving in ends.
- Optional red embroidery thread: For tiny berry stitches.
Size and Fit
Sample pudding: approximately 4 cm across. Sample band: approximately 12.5 cm long and 2 cm wide, with a 12 cm tie at each end; it suits a rolled napkin approximately 4 cm in diameter. For another napkin, work the band until it reaches approximately the napkin’s circumference, then add the ties. Check the fit around the actual rolled napkin before fastening off.
Gauge
Approximately 6 sc and 7 sc rows per 2.5 cm in firm cotton fabric. Gauge is not critical; measure the band against your napkin.
Abbreviations
US crochet terms.
- ch = chain
- sc = single crochet
- hdc = half double crochet
- dc = double crochet
- sl st = slip stitch
- st(s) = stitch(es)
- BLO = back loop only
Pattern
- Brown pudding, rounds 1â2 Work in continuous rounds; mark the first stitch of each round. With brown, make a magic ring. Round 1: Work 6 sc into the ring. (6 sts) Round 2: Work 2 sc in each st. (12 sts)
- Brown pudding, rounds 3â4 Round 3: (Sc in next st, 2 sc in next st) 6 times. (18 sts) Round 4: (Sc in next 2 sts, 2 sc in next st) 6 times. (24 sts)
- Brown pudding, rounds 5â6 Round 5: (Sc in next 3 sts, 2 sc in next st) 6 times. (30 sts) Round 6: Sc BLO in each st. (30 sts) Sl st in the next st and fasten off, leaving a sewing tail. Gently cup the disc so the final round forms a shallow rim; do not stuff it.
- White icing, rows 1â3 With white, ch 2. Row 1: Work 3 sc in the second ch from the hook. (3 sts) Ch 1 and turn. Row 2: Work 2 sc in each st. (6 sts) Ch 1 and turn. Row 3: (Sc in next st, 2 sc in next st) 3 times. (9 sts) Do not turn.
- White icing, scalloped edge Working across the 9 stitches of row 3, (sl st in next st, 3 dc in next st, sl st in next st) 3 times. Fasten off, leaving a sewing tail. Place the icing over the upper part of the brown disc, with the scallops pointing towards its centre. Sew its top and sides to the disc with small stitches, then tack the scallops lightly in place.
- Green leaves Make two. With green, ch 4. Working back along the chain, sl st in the second ch from the hook, sc in the next ch, and sl st in the last ch. Fasten off, leaving a sewing tail. Sew the leaves flat at the top of the icing. If desired, add one or two tiny red berry stitches between them.
- Brown band With brown, ch 6. Row 1: Sc in the second ch from the hook and in each remaining ch. (5 sts) Rows 2â35: Ch 1, turn, and sc in each st. (5 sts per row) Fasten off. The sample band is approximately 12.5 cm long. Adjust the number of rows if needed to match the circumference of your rolled napkin.
- Ties and assembly Join brown yarn with a sl st at the centre of one short end of the band. Ch until the chain measures approximately 12 cm without stretching, then fasten off securely. Make the same tie at the other short end. Centre the pudding over the middle of the band and sew its rim to the band where they overlap, keeping the front gently domed. Wrap the band around the napkin and tie the chains behind it.
Finishing
- Weave in all ends securely, taking care not to pull the pudding flat.
- Smooth the icing and leaves into place. Keep the pudding unstuffed so it lies comfortably at a place setting.
Helpful Tips
- Try the band around the napkin before adding the ties; a loosely rolled napkin can need extra rows.
- Use small attachment stitches through the pudding rim rather than stitching across its centre.
Christmas Robin Wing-Wrap Napkin Ring

This little robin does more than decorate a napkin: its wings form the wrap that holds it in place. The brown body and separate red breast sit above the fold, while the wings curve underneath and meet at a button fastening. There is no separate band to hide behind the bird.
The shape of a folded napkin matters more than its size when checking the fit. A loosely rolled napkin and a crisp, layered fold can take up different amounts of room, so use the fold you plan to put on the table when judging how comfortably the wings meet. They should hold the robin in place without bending its body.
The small face gives this Christmas crochet napkin ring its character without making the bird bulky. It is a cheerful detail for a place setting, particularly if you want a handmade decoration that feels part of the table rather than something simply laid on top.
Christmas Robin Wing-Wrap Napkin Ring

Quick-reference card. Follow the complete written instructions below.
Materials
- Smooth cotton yarn: Small amounts of brown and red DK-weight yarn, plus scraps of black and yellow for the face.
- Crochet hook: 3 mm, or a size that makes a firm fabric.
- Other: Yarn needle, scissors and a removable stitch marker.
Size and Fit
One adjustable size. At the suggested gauge, the body is approximately 4.5 cm wide and 5 cm tall, with each wing approximately 5 cm long. Start with a folded napkin measuring about 14 cm around where the ring will sit. Before making the fastenings, wrap the wings beneath your intended napkin and adjust the straight section of each wing until their tips overlap by roughly 0.5â1 cm without pulling the body out of shape.
Gauge
Suggested gauge: 20 sc and 24 rows over 10 cm in firm, flat sc fabric. Gauge is a guide; fit the wings to your folded napkin.
Abbreviations
US crochet terms.
- ch = chain
- sc = single crochet
- sl st = slip stitch
- sc2tog = single crochet two stitches together; decreases one stitch
- inc = work 2 sc in one stitch
Pattern
- Before you begin Make all flat pieces in turned rows. A turning ch 1 does not count as a stitch. The body is worked from the top of the head down.
- Brown body, rows 1â4 Ch 4. Row 1: Sc in the second ch from the hook and in each remaining ch; turn. (3 sc) Row 2: Ch 1, inc in the first sc, sc in the next sc, inc in the last sc; turn. (5 sc) Row 3: Ch 1, inc, sc in the next 3 sc, inc; turn. (7 sc) Row 4: Ch 1, inc, sc in the next 5 sc, inc; turn. (9 sc)
- Brown body, rows 5â12 Rows 5â9: Ch 1, sc in each of the 9 sc; turn. Row 10: Ch 1, sc2tog, sc in the next 5 sc, sc2tog; turn. (7 sc) Row 11: Ch 1, sc2tog, sc in the next 3 sc, sc2tog; turn. (5 sc) Row 12: Ch 1, sc2tog, sc in the next sc, sc2tog. (3 sc) Fasten off.
- Red breast Ch 4. Row 1: Sc in the second ch from the hook and in each remaining ch; turn. (3 sc) Row 2: Ch 1, inc, sc in the next sc, inc; turn. (5 sc) Rows 3â4: Ch 1, sc in each sc; turn. (5 sc) Row 5: Ch 1, sc2tog, sc in the next sc, sc2tog. (3 sc) Fasten off with a sewing tail. Centre the patch on the front of the body over approximately body rows 7â11, with its narrower row 1 edge nearest the head. Sew around its edge without pulling the body inward.
- First wing With the body front facing and its row 1 at the top, join brown yarn at the side edge of body row 5. Wing row 1: Work 1 sc into each of the four side edges of body rows 5â8; turn. (4 sc) Row 2: Ch 1, inc, sc in the next 2 sc, inc; turn. (6 sc) Rows 3â5: Ch 1, sc in each sc; turn. (6 sc) Row 6: Ch 1, sc2tog, sc in the next 2 sc, sc2tog; turn. (4 sc) Rows 7â12: Ch 1, sc in each sc; turn after rows 7â11 only. (4 sc) Fasten off.
- Second wing and fit Repeat the first wing on the opposite side of the body, joining at the side edge of body row 5 and working into the side edges of rows 5â8. Work away from the body. Before fastening off the second wing, wrap both wings beneath the intended folded napkin. For a different circumference, add or omit the same number of 4-sc rows in the straight section of each wing. Keep at least two straight rows after row 6 on each wing, and aim for the wing tips to overlap by 0.5â1 cm at the back.
- Crocheted button With brown yarn, make a magic ring. Round 1: Work 6 sc into the ring; pull it closed. Round 2: Sc2tog three times around. (3 sc) Fasten off with a long tail and draw the tail through the remaining stitches to close the top. Use the tail to sew the button securely to the outward-facing side of one wing, about one row in from its tip.
- Button loop Join brown yarn to either middle stitch at the tip of the other wing. Ch 5, then sl st back into the same stitch to form a loop. Fasten off and secure the ends. Try the fastening around the napkin; if the loop slips off or cannot pass over the button, undo it and change the chain length by one stitch.
- Face Embroider two small black eyes near body rows 4â5, above the breast. Make a small yellow V-shaped beak between them. Keep knots and yarn ends on the back of the body.
Finishing
- Weave in all ends, taking care not to stitch the wings to the body beyond their four-row attachments.
- Lightly shape the body and wings by hand. Fasten the wings beneath the napkin so the robin remains on top.
Helpful Tips
- Mark body rows 5 and 8 on both sides before attaching the wings; matching attachment points help the fastening sit centrally.
- Adjust wing length against the napkin folded as it will be used, rather than against the napkin laid flat.
- Keep the button compact and sew through it several times so it withstands repeated fastening.
Christmas Lights Chain Napkin Ring

This Christmas Lights Chain Napkin Ring brings the look of a miniature string of lights to a festive table. Bright, flat bulbs stand out against the dark green cord, while their charcoal bases give each one the familiar outline of a Christmas light.
The bulbs are worked directly onto the cord rather than made as separate appliqués. It is an appealing intermediate project if you enjoy small colour changes and want a decoration that stays tidy around a napkin. The loop-and-button fastening also makes it easy to set the ring in place without pulling it over the rolled fabric.
Christmas Lights Chain Napkin Ring

Quick-reference card. Follow the complete written instructions below.
Materials
- 4-ply cotton yarn: Small amounts of dark green, charcoal, red, yellow and blue
- 3 mm crochet hook: Or a size that gives a firm fabric
- Tapestry needle and scissors: For attaching the button and securing every yarn end
Size and Fit
The sample has a 39-stitch cord and six bulbs. Fit it to the rolled napkin you intend to use: the cord should circle it comfortably, with its ends meeting before the loop is fastened over the button. If needed, change the foundation-chain length and check the worked cord again before adding the bulbs. For a longer cord, add bulb bases in pairs of adjacent stitches, leaving at least four unworked cord stitches between bases and a few stitches clear at each end.
Gauge
Exact gauge is not essential. Work firmly so the cord holds its shape and the bulb stitches do not gape.
Abbreviations
US crochet terms.
- ch = chain
- sc = single crochet
- sl st = slip stitch
- sc2tog = single crochet two stitches together
- sc3tog = single crochet three stitches together
- st(s) = stitch(es)
Pattern
- Green cord With dark green, ch 40. Sl st in the second ch from the hook and in each remaining ch: 39 sl sts. Hold the cord around the rolled napkin without stretching it. If its ends do not meet comfortably, remake it with more or fewer foundation chains; the number of cord sl sts will always be one fewer than the number of foundation chains.
- Fastening loop At the end just worked, ch 9 and sl st into the top of the last cord sl st to form a loop. Fasten off. The loop must slip over the finished button without falling off easily; remake it with fewer or more chains if necessary.
- Crocheted button With dark green, make a magic ring. Round 1: Work 6 sc into the ring; pull it closed. Round 2: Work 2 sc in each sc around: 12 sc. Sl st in the first sc and fasten off, leaving a sewing tail. Sew the centre of this small disc firmly to the opposite, button-end of the cord. Pass the sewing tail through the cord and button several times, then secure it. Check the fastening around the napkin before adding bulbs.
- Mark bulb positions Lay the cord flat with the side on which you want the bulbs facing you. Count its sl sts from the button end. On the 39-stitch sample, the six bases use cord stitches 4â5, 10â11, 16â17, 22â23, 28â29 and 34â35. Make the bulbs red, yellow, blue, red, yellow and blue in that order.
- Charcoal base, repeat for each bulb Join charcoal yarn to the top loops of the first marked green cord st. Ch 1, sc in that same cord st, then sc in the next marked cord st: 2 sc. Fasten off. Work each base separately; do not carry yarn between them.
- Coloured bulb, repeat on each base Join the chosen bulb colour in the first charcoal sc. Row 1: Ch 1, sc in the same charcoal sc, then work 2 sc in the second charcoal sc: 3 sc. Row 2: Ch 1, turn; 2 sc in the first sc, sc in the next sc, 2 sc in the last sc: 5 sc. Row 3: Ch 1, turn; sc in each sc: 5 sc. Row 4: Ch 1, turn; sc2tog, sc in the next sc, sc2tog: 3 sc. Row 5: Ch 1, turn; sc3tog: 1 sc. Fasten off. Repeat for all six bulbs.
Finishing
- Weave each coloured yarn end securely through stitches on the back of its bulb. Weave each charcoal end into its base and the adjoining cord; do not leave loose edges or long strands between bulbs.
- Weave in the remaining green ends. Gently shape the flat bulbs with your fingers, then fasten the ring around the napkin and check that the button stays inside the loop.
Helpful Tips
- A firm tension helps the bulbs remain small and keeps their bases snug against the cord.
- For a different napkin, check the completed cord around it before making the button and bulbs. Space any revised bulb positions evenly without placing a base in the fastening area.
Frequently Asked Questions
Which napkin ring should I choose for a beginner?
The Ribbed Christmas Cuff Napkin Ring is the only design marked Easy. The remaining 23 are marked Intermediate, so check their shaping, colourwork or fastening details before choosing one.
Will these fit cloth and paper napkins?
Fit depends on the napkin and how you fold it. Check a fixed cuff against your intended roll; a tie, wrap or adjustable fastening may suit a different fold more readily.
How do I stop a motif from getting in the way at dinner?
Position raised details at the front or side of the napkin, away from plates and food. A flatter design, such as the pudding or tapestry tree, may be easier to arrange on a crowded table.
Do the patterns use UK or US crochet terms?
They use US crochet terminology. Read the stitch abbreviations before starting, as familiar stitch names can mean different things in UK patterns.
Final Thoughts
A small change in construction can make a napkin ring work better for your table. Match the cuff, tie or fastening to your napkin fold, then choose a motif that leaves enough space for the rest of the place setting.
Once finished, check the fit and weave in any remaining ends so the rings are ready to use again.