Champagne Gold Bell Sleeve Crochet Top Free Pattern
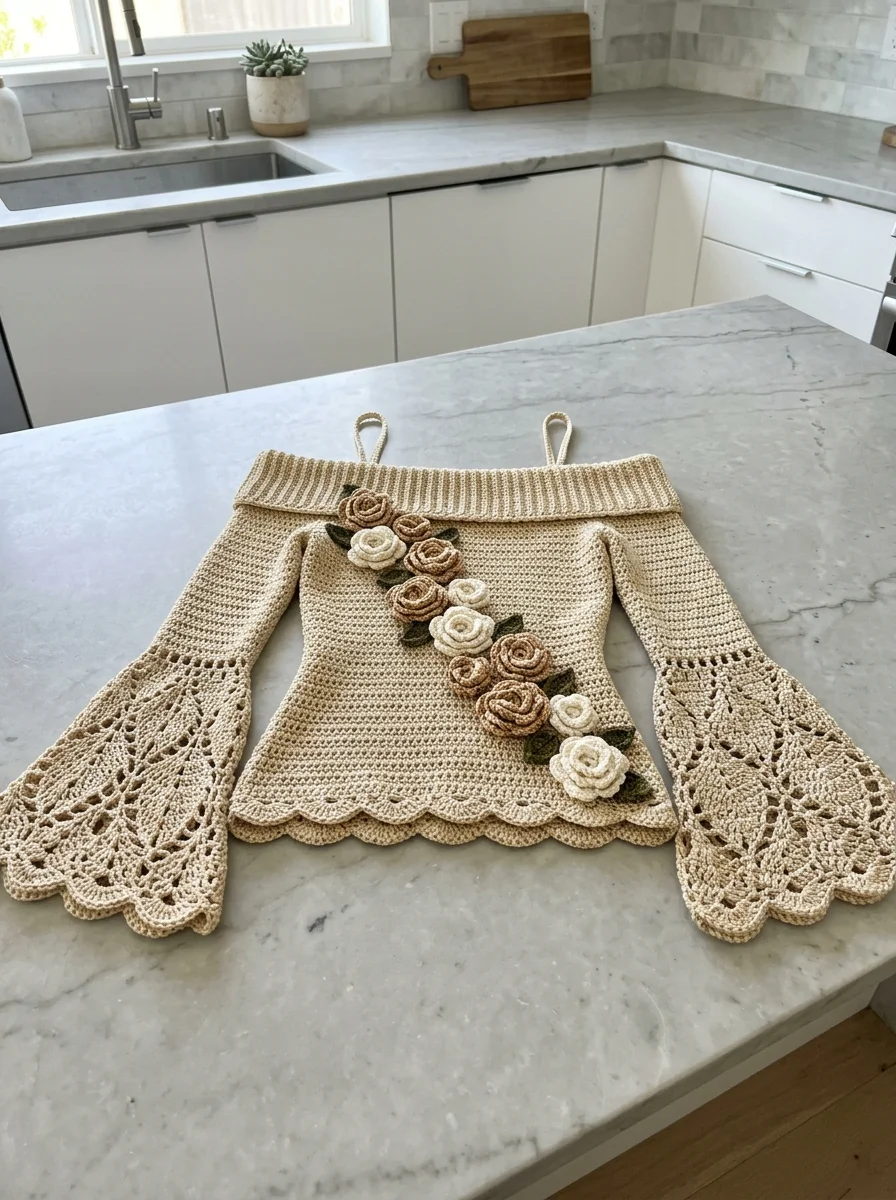
This gorgeous off-shoulder crochet top with dramatic bell sleeves and romantic rose appliqués is exactly the kind of project that makes you fall in love with crochet all over again. I designed this piece to capture that dreamy, bohemian aesthetic while still being totally wearable. And yes, you can absolutely make this even if you have never tackled a garment before.
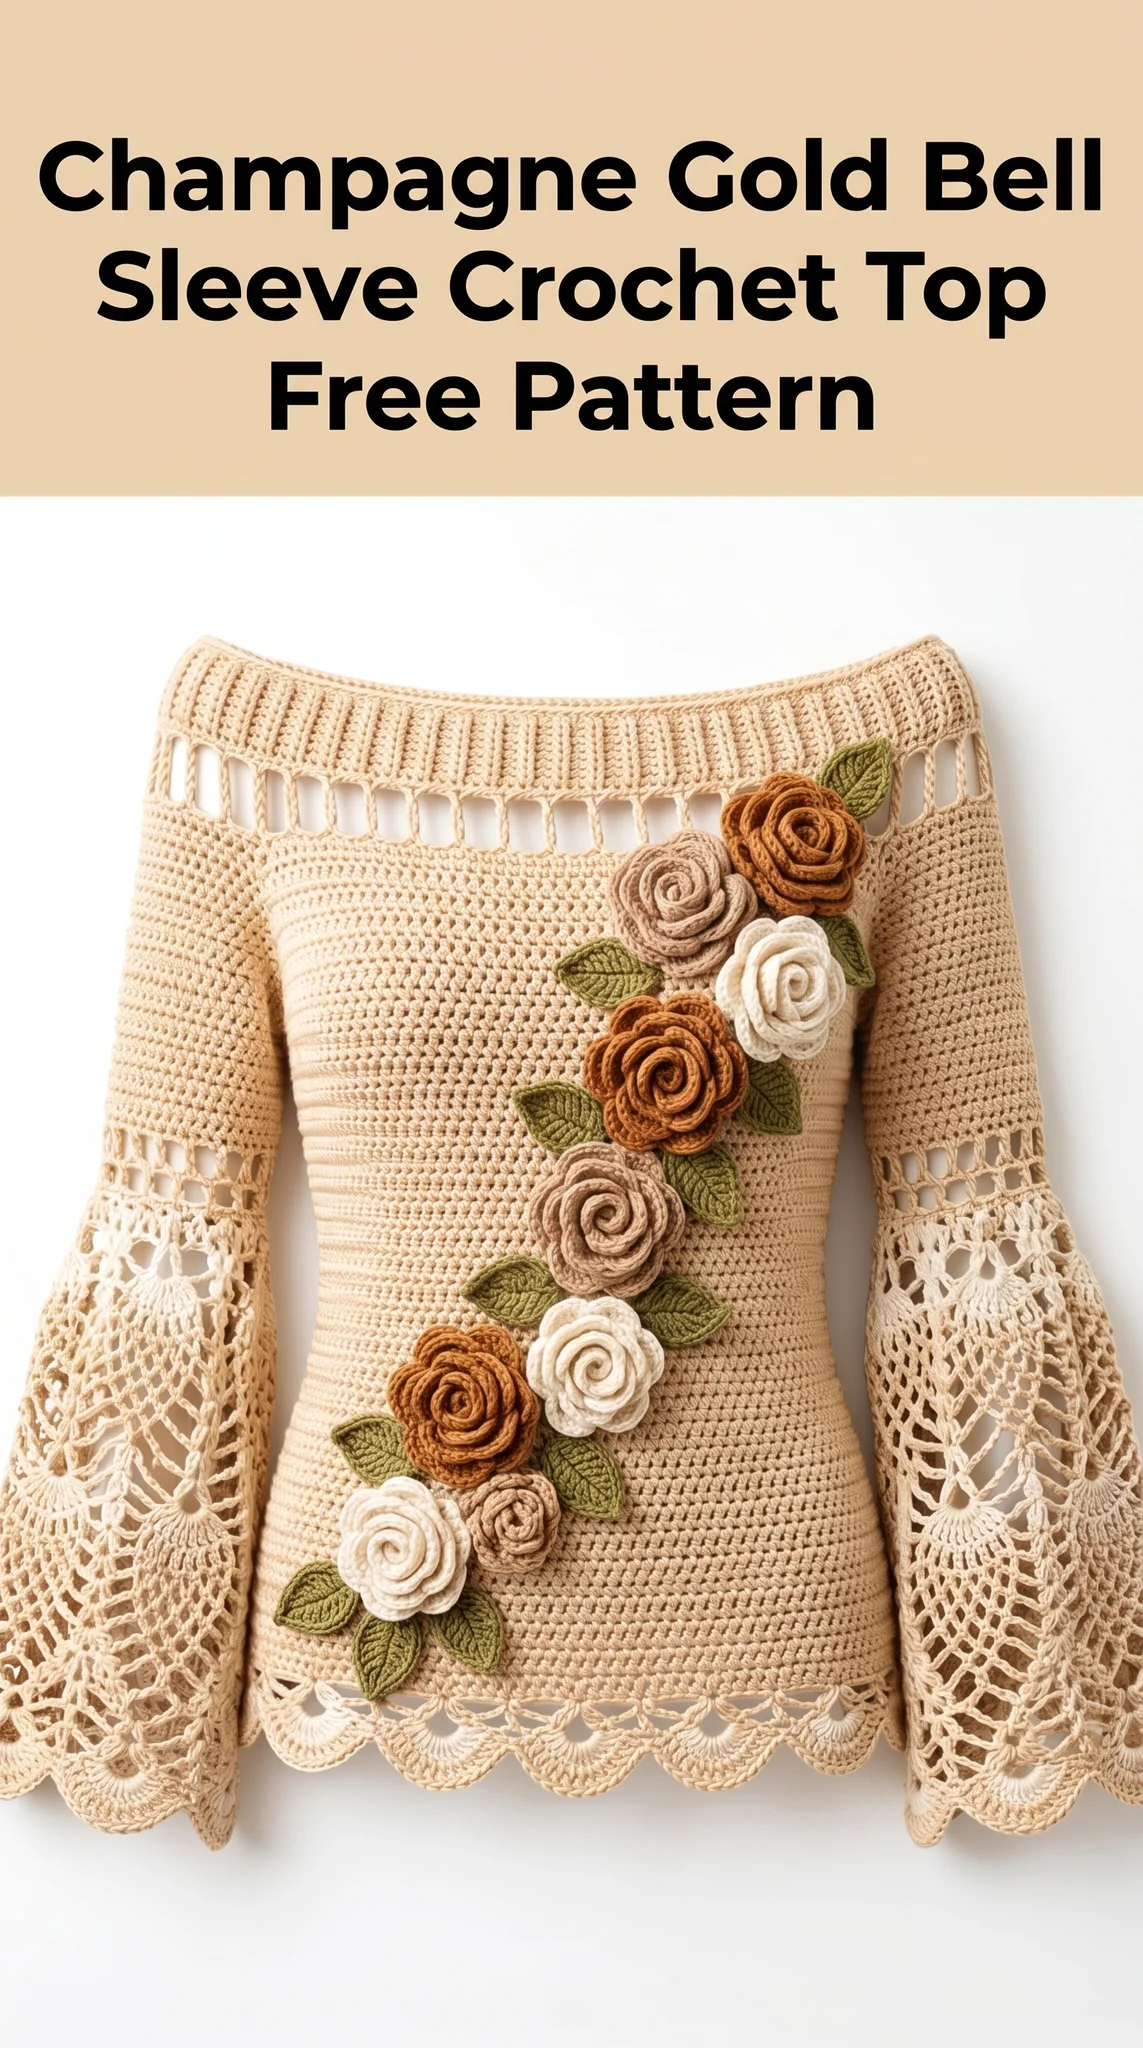
The Champagne Gold Bell Sleeve Crochet Top combines simple stitches with stunning details. The body uses basic single and double crochet throughout. The magic happens in those show-stopping pineapple lace bell sleeves and the cascade of dimensional roses down the front. Trust me, it looks way harder than it actually is.
Let me walk you through every single step of this crochet pattern so you can recreate this beauty from scratch.
Why This Crochet Top Pattern Works
Before we dive into the crochet tutorial, let me tell you what makes this design special.
The off-shoulder neckline features a ribbed band that stretches comfortably and stays put. Those bell sleeves use a classic pineapple lace motif that flares dramatically at the wrist. The body itself is straightforward with a subtle A-line shape and a sweet scalloped hem.
The roses are made separately and sewn on. This means you control the placement and can customize however you like. Want fewer flowers? Go for it. Want them in different colors? Absolutely.
This step by step crochet pattern is perfect for intermediate crocheters ready to level up. If you can work in rows and rounds and follow a stitch pattern, you have got this.
Materials You Will Need
Gathering everything beforehand makes this project so much smoother. Here is your complete supply list.
Yarn
Main Color (MC): Approximately 800 to 1000 yards of DK weight cotton or cotton blend yarn in champagne gold or light beige. I recommend a smooth, tightly spun yarn for stitch definition. Look for something with a slight sheen.
Rose Colors: Small amounts (25 to 50 yards each) of:
Leaf Color: Approximately 50 yards of olive green or sage
Cotton yarn works beautifully here because it drapes well and holds the lace pattern crisply. Acrylic blends work too but may not have the same elegant drape.
Hook
3.5mm (E/4) crochet hook for the main body and sleeves
3.0mm (D/3) crochet hook for the roses and leaves (optional, for tighter appliqués)
Always check your gauge. Adjust hook size up or down as needed.
Notions
Gauge
Getting gauge matters for garments. Please do not skip this part.
Body gauge: 18 stitches and 20 rows = 4 inches in single crochet with 3.5mm hook
Sleeve gauge: One complete pineapple motif measures approximately 4 inches wide at the widest point
If your gauge is off, your top will not fit properly. Too many stitches per inch means go up a hook size. Too few means go down.
Finished Measurements
This pattern is written for size Small with notes for adjusting.
For larger sizes, add multiples of 4 stitches to the body and work additional rows on the sleeve panels.
Abbreviations and Stitch Definitions
Let me define every stitch abbreviation before we begin. If you are newer to reading patterns, bookmark this section.
ch = chain: Yarn over, pull through loop on hook. Creates foundation or adds height.
sl st = slip stitch: Insert hook, yarn over, pull through stitch AND loop on hook in one motion. Used for joining.
sc = single crochet: Insert hook, yarn over, pull up a loop (2 loops on hook), yarn over, pull through both loops.
hdc = half double crochet: Yarn over, insert hook, yarn over, pull up a loop (3 loops on hook), yarn over, pull through all 3 loops.
dc = double crochet: Yarn over, insert hook, yarn over, pull up a loop (3 loops on hook), yarn over, pull through 2 loops, yarn over, pull through remaining 2 loops.
tr = treble crochet: Yarn over twice, insert hook, yarn over, pull up a loop, (yarn over, pull through 2 loops) three times.
sk = skip: Miss the indicated stitch or space.
sp = space: The gap created by chains, where you work into rather than into a stitch.
BLO = back loop only: Insert hook under only the back loop of the stitch instead of both loops.
FLO = front loop only: Insert hook under only the front loop.
dec = decrease: Work two stitches together as one to reduce stitch count.
inc = increase: Work two stitches into the same stitch to add stitches.
Pattern Instructions
Now for the good part. Take a deep breath. We will tackle this one piece at a time.
Back Panel
The back is worked flat from the bottom up.
Foundation: Ch 78.
Row 1: Sc in 2nd ch from hook and in each ch across. Turn. (77 sts)
Rows 2 to 4: Ch 1, sc in each st across. Turn. (77 sts)
Row 5 (decrease row): Ch 1, sc in first 10 sts, sc2tog, sc to last 12 sts, sc2tog, sc in last 10 sts. Turn. (75 sts)
Rows 6 to 10: Ch 1, sc in each st across. Turn. (75 sts)
Row 11: Repeat Row 5 decrease pattern. (73 sts)
Continue working in single crochet, decreasing 2 stitches every 6th row until you have 69 stitches. This creates the subtle A-line shape.
Continue even (no decreases) until piece measures 10 inches from beginning.
Armhole Shaping:
Next Row: Sl st in first 5 sts, ch 1, sc in same st, sc across to last 5 sts, leave remaining unworked. Turn. (59 sts)
Following Rows: Ch 1, sc2tog, sc to last 2 sts, sc2tog. Turn.
Repeat decrease row 3 more times. (51 sts)
Continue even until armhole measures 5 inches. Fasten off.
Front Panel
Work exactly as Back Panel through armhole shaping.
The roses will cover any slight variations. The front and back are identical in this design.
Side Seams
Place front and back panels together with right sides facing. Using yarn needle and matching yarn, whip stitch or mattress stitch side seams from bottom hem to underarm. Leave armholes open.
Ribbed Neckband
This creates that stretchy off-shoulder band. It is worked sideways in rows, then joined into a ring.
Foundation: Ch 13.
Row 1: Sc in 2nd ch from hook and each ch across. Turn. (12 sts)
Row 2: Ch 1, sc in BLO of each st across. Turn. (12 sts)
Repeat Row 2 until ribbing measures approximately 32 inches unstretched, or long enough to fit comfortably around the top of the bodice when slightly stretched.
Join short ends with sl st to form a ring. Do not fasten off.
Attaching the Band:
With right side of bodice facing, pin neckband evenly around top edge. The ribbing should stretch slightly to fit.
Working through both layers, sl st around to join. Adjust ease as needed so the band sits comfortably off the shoulders.
Hanging Loops (optional):
At each shoulder seam, ch 20, sl st to same spot to create small loops for hanging. These keep your top on a hanger nicely.
Bell Sleeves
These stunning sleeves are the star of this crochet top pattern. Each sleeve is worked from the shoulder down.
Upper Sleeve
Join yarn at center of underarm.
Round 1: Ch 1, work 60 sc evenly around armhole opening, sl st to first sc to join. (60 sts)
Rounds 2 to 15: Ch 1, sc in each st around, sl st to join. (60 sts)
Round 16 (increase round): Ch 1, *sc in next 9 sts, 2 sc in next st*, repeat around, sl st to join. (66 sts)
Rounds 17 to 20: Ch 1, sc in each st around, sl st to join. (66 sts)
Round 21: Ch 1, *sc in next 10 sts, 2 sc in next st*, repeat around, sl st to join. (72 sts)
Continue increasing 6 stitches every 5th round until you have 84 stitches.
Pineapple Lace Section
This is where the bell shape happens. Deep breath. You have got this.
Setup Round: Ch 4 (counts as dc + ch 1), sk 1 st, *dc in next st, ch 1, sk 1 st*, repeat around, sl st to 3rd ch of beginning ch-4. (42 dc, 42 ch-1 spaces)
Round 1: Sl st into ch-1 sp, ch 3 (counts as dc), 6 dc in same sp, sk 2 ch-1 sps, sc in next ch-1 sp, sk 2 ch-1 sps, *7 dc in next ch-1 sp (shell made), sk 2 ch-1 sps, sc in next ch-1 sp, sk 2 ch-1 sps*, repeat around, sl st to top of ch-3. (7 shells)
Round 2: Ch 3, dc in same st, *dc in next 5 dc, 2 dc in next dc, ch 3, sc in next sc, ch 3*, repeat around, ending with sl st to top of ch-3.
Round 3: Ch 3, dc in same st, *dc in next 7 dc, 2 dc in next dc, ch 3, sc in ch-3 sp, ch 1, sc in next ch-3 sp, ch 3*, repeat around, sl st to join.
Rounds 4 to 8: Continue the pineapple pattern, increasing one dc on each side of every shell each round, while working chain spaces and sc in the gaps between shells. The chains get longer (ch 4, then ch 5) as the pineapple opens.
Final Edging Round: Ch 1, *sc in each dc of shell, 3 sc in turning point, sc down other side, sc in each ch sp*, repeat around, sl st to join.
Fasten off. Weave in ends.
Repeat entire sleeve for second arm.
Scalloped Hem Border
This finishes the bottom edge beautifully.
Join yarn at one side seam with right side facing.
Round 1: Ch 1, sc evenly around entire bottom edge, sl st to join.
Round 2: Ch 1, *sc in next st, sk 2 sts, 5 dc in next st (shell), sk 2 sts*, repeat around, adjusting as needed to end evenly, sl st to join.
Round 3: Ch 1, *sc in center dc of shell, ch 3, sc in sc between shells, ch 3*, repeat around, sl st to join.
Fasten off.
Rose Appliqués
Make 8 roses total: 3 in cream, 3 in tan/camel, 2 in brown/rust. Mix and match as you like.
Foundation: Ch 48.
Row 1: Dc in 4th ch from hook, dc in next ch, *ch 2, sk 2 ch, dc in next 3 ch*, repeat across.
Row 2: Ch 3, turn, *work 5 dc in ch-2 sp, dc in next 3 dc*, repeat across.
Starting from one end, roll the strip tightly into a spiral. The double crochet clusters naturally form petals. Stitch through the bottom layers with yarn needle to secure the rose shape.
Fasten off, leaving a long tail for sewing.
Leaf Appliqués
Make 10 to 12 leaves in olive green.
Foundation: Ch 10.
Row 1: Sl st in 2nd ch from hook, sc in next ch, hdc in next ch, dc in next 3 ch, hdc in next ch, sc in next ch, sl st in last ch.
Row 2: Ch 1, do not turn, working down the other side of the foundation chain: sl st, sc, hdc, dc, dc, dc, hdc, sc, sl st.
Fasten off, leaving tail for sewing.
Assembly and Finishing
Block all pieces before final assembly. Wet blocking works best for cotton. Pin to measurements and let dry completely.
Arranging the Roses:
Lay your top flat. Arrange roses in a diagonal cascade from upper left to lower right (or your preferred placement). Tuck leaves behind and around roses.
Pin everything in place. Step back and look. Adjust until you love it.
Using yarn tails or matching thread, stitch each appliqué securely to the front of the bodice. Catch just the back of the roses so stitches stay invisible from the front.
Weave in all remaining ends. Give your finished piece one final light steam or blocking.
Care Instructions
This handmade treasure deserves gentle care.
Hand wash in cool water with mild detergent. Gently squeeze out water without wringing. Lay flat on a towel to dry, reshaping as needed. Store folded, never on a hanger for long periods, as the weight of the sleeves may stretch the shoulders.
You Did It
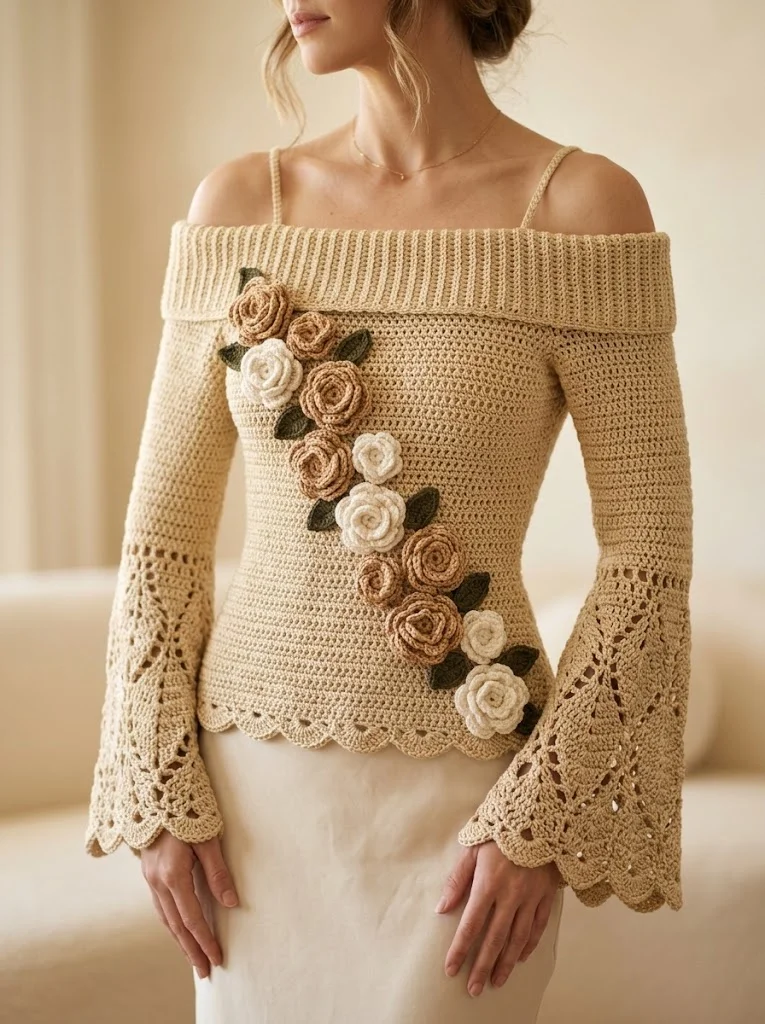
This Champagne Gold Bell Sleeve Crochet Top is a labor of love, and completing it is a real accomplishment. The combination of simple stitches, romantic lace sleeves, and those gorgeous roses creates something truly special.
I hope this crochet pattern brought you joy to make. This beginner friendly approach to garment construction opens doors to so many future projects.
Thank you so much for choosing this pattern and trusting me to guide you through it. Your finished piece is going to be absolutely stunning.
I would love to see what you create. Tag me on Instagram or share in our Facebook group. Seeing your makes genuinely makes my day.
Happy crocheting, friend. You have got serious skills.