Blush Pink Shearling Crochet Cardigan Free Crochet Pattern
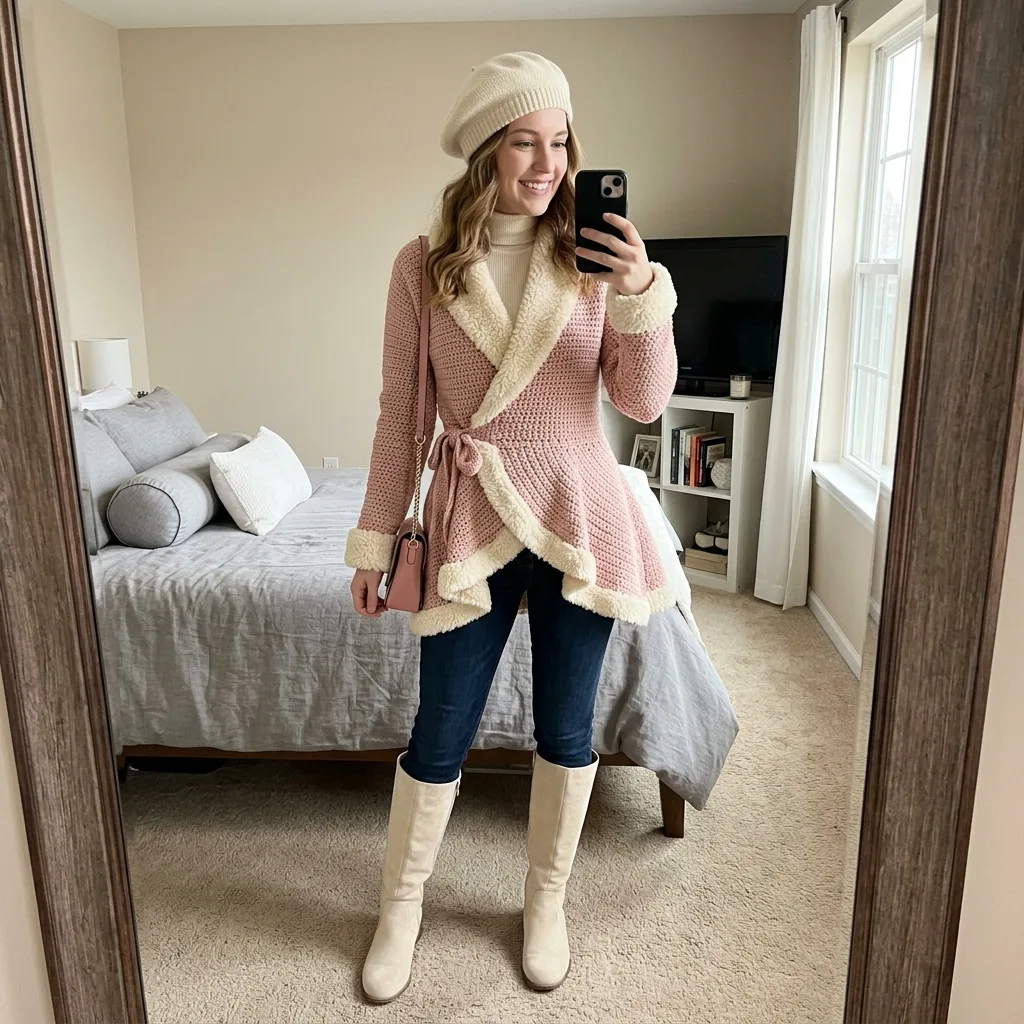
I don’t know about you, but I have been searching for the perfect cozy cardigan pattern for ages. You know the type. Something that looks like it belongs in a boutique window but actually keeps you warm when the temperature drops.
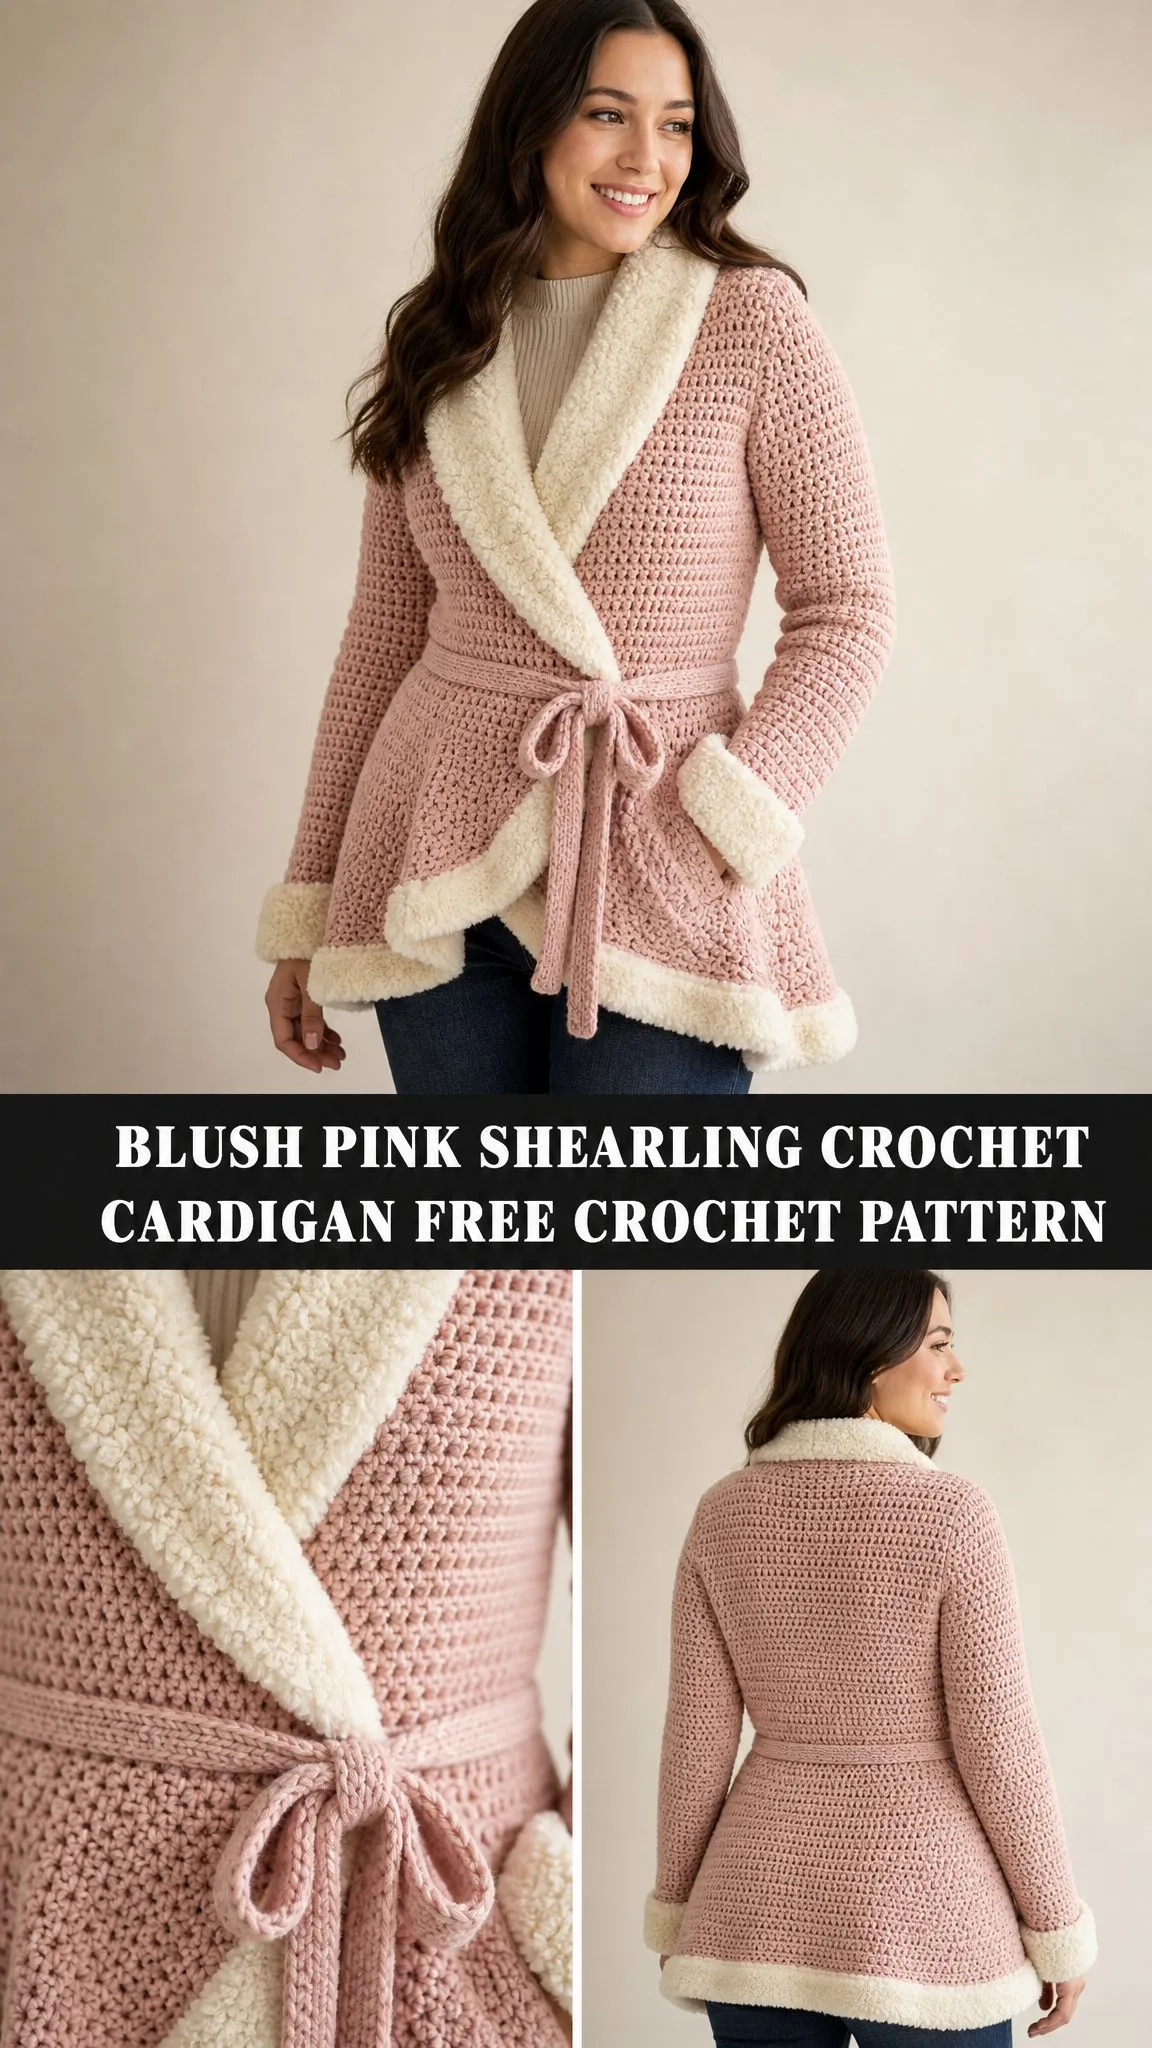
This blush pink shearling crochet cardigan is exactly that dream piece brought to life. The wrap-style silhouette flatters every figure, the sherpa-style trim adds that trendy shearling look everyone loves, and the whole thing works up in a dense, squishy fabric that feels like a warm hug.
The best part? Once you break down the construction, this cardigan is completely achievable. No magic required, just patience and a good podcast queue.
Why This Crochet Cardigan Pattern Stands Out
This is not your average boxy cardigan. The design features an A-line silhouette with a deep V-wrap front, a fitted waist cinched with a crocheted belt, and a gorgeous flared peplum hem. The cream boucle trim along the lapels, cuffs, and hem creates that covetable shearling effect you see in high-end winter wear.
The body uses an Offset Moss Stitch that creates a dense, woven-looking fabric with excellent drape. It looks complex but follows a simple two-row repeat once you get going. The main color is a beautiful blush pink worked in worsted weight yarn, while the fluffy trim uses a bulky boucle yarn in cream.
This crochet tutorial walks you through every panel, every decrease, and every finishing detail. By the end, you will have a stunning handmade cardigan that looks like it cost a fortune.
Skill Level and Time Commitment
Let me be honest with you. This is an intermediate level project. You should be comfortable with flat construction, garment shaping (that means increases and decreases), reading stitch counts across multiple panels, and seaming pieces together.
If you have made a basic sweater or structured garment before, you can absolutely handle this. If this is your first garment, I would recommend starting with something simpler to build your confidence first.
Time estimate: Plan for approximately 30 to 45 hours for a size Medium. The body panels take about 20 hours, sleeves around 8 hours, trim about 5 hours, and finishing another 2 to 3 hours. This is a project to savor over several weeks, not rush through in a weekend.
Finished Sizes
This pattern is written for sizes Small, Medium, Large, and Extra Large. Changes for each size appear in parentheses throughout in this order: (S, M, L, XL).
Bust: 36 (40, 44, 48) inches / 91.5 (101.5, 112, 122) cm
Waist: 28 (32, 36, 40) inches / 71 (81.5, 91.5, 101.5) cm
Hip/Hem Circumference: 44 (48, 52, 56) inches / 112 (122, 132, 142) cm
Cardigan Length (back neck to hem): 28 (29, 30, 31) inches / 71 (73.5, 76, 78.5) cm
Sleeve Length (underarm to cuff): 18 (18.5, 19, 19) inches / 45.5 (47, 48, 48) cm
Upper Arm Circumference: 13 (14, 15, 16) inches / 33 (35.5, 38, 40.5) cm
Materials You Will Need
Yarn
Main Color (MC): Worsted weight yarn in blush pink. You will need approximately 1,600 (1,750, 1,900, 2,050) yards / 1,463 (1,600, 1,737, 1,875) meters. Look for a smooth, matte-finish wool-blend or acrylic-wool that holds stitch definition well.
Contrast Color (CC): Bulky weight boucle or sherpa-style bouclette yarn in cream or off-white. You will need approximately 350 (380, 410, 440) yards / 320 (347, 375, 402) meters.
Yarn Suggestions
Option 1: Lion Brand Wool-Ease in Rose Heather for MC paired with Lion Brand Go For Faux Thick and Quick in Ivory for CC. This combo is machine-washable and budget-friendly.
Option 2: Paintbox Yarns Simply DK held double in Blush Pink for MC paired with Paintbox Yarns Simply Super Chunky in Cream for CC.
Option 3: Cascade 220 in a dusty rose colorway for MC paired with Bernat Blanket yarn in Vintage White for CC. This gives the most polished blocked finish.
Hooks
For Main Color: US Size I-9 / 5.5 mm
For Contrast Trim: US Size J-10 / 6.0 mm
Notions
Gauge
Getting gauge right is mandatory for this garment. Each stitch represents approximately 0.25 inches of width, so being off even slightly will dramatically affect your finished size.
With MC and I-9 / 5.5 mm hook in Offset Moss Stitch:
16 half double crochet = 4 inches / 10 cm
12 rows = 4 inches / 10 cm
To make a gauge swatch: Chain 22. Work Offset Moss Stitch for 16 rows. Fasten off, wet block, and measure the center 4 inches only. Do not measure the edges. Adjust your hook size up or down as needed until you match gauge.
Abbreviations
Here are all the abbreviations used in this crochet pattern. I will define each one so you know exactly what to do.
Special Stitches Explained
Offset Moss Stitch
This creates the dense, textured fabric for the entire cardigan body. It looks like a woven material and has wonderful drape. Here is how it works:
Foundation Row (RS): Chain a multiple of 2 plus 1. Single crochet (sc) in second chain from hook, chain 1 (ch 1), skip 1 chain (sk 1 ch). Repeat the sequence of sc in next chain, ch 1, skip 1 chain across the row. End with sc in the last chain.
Row 1 (WS): Ch 1, turn. Sc in first sc, ch 1. Work sc in next ch-1 space, ch 1. Repeat across. End with sc in last sc.
Row 2 (RS): Ch 1, turn. Sc in first sc, ch 1. Work sc in next ch-1 space, ch 1. Repeat across. End with sc in last sc.
Repeat Rows 1 and 2 for the pattern. You are always working your single crochets into the chain spaces of the previous row and chaining over the single crochets of the previous row. The offset creates that beautiful moss texture.
Important counting note: Throughout this pattern, stitch counts refer to the number of sc units only. The ch-1 spaces do not count as stitches for shaping purposes.
Hdc2tog (Half Double Crochet Two Together)
This is a decrease stitch. Yarn over, insert hook in next stitch, yarn over, pull up a loop. You have 3 loops on your hook. Yarn over, insert hook in the following stitch, yarn over, pull up a loop. You now have 5 loops on your hook. Yarn over and draw through all 5 loops. You just decreased by one stitch.
Sc2tog (Single Crochet Two Together)
Another decrease. Insert hook in next stitch, yarn over, pull up a loop. Insert hook in the following stitch, yarn over, pull up a loop. Yarn over and draw through all 3 loops on your hook.
Shearling Single Crochet Trim
This is simply regular single crochet worked with the CC boucle yarn and the larger J-10 hook. The loopy texture of the boucle yarn creates the shearling effect automatically. No special technique needed.
Crocheted Belt
With MC and I-9 hook, ch 200 (210, 220, 230). Slip stitch in second chain from hook and in each chain across. Fasten off and weave in ends. Set aside for finishing.
Pattern Notes Before You Begin
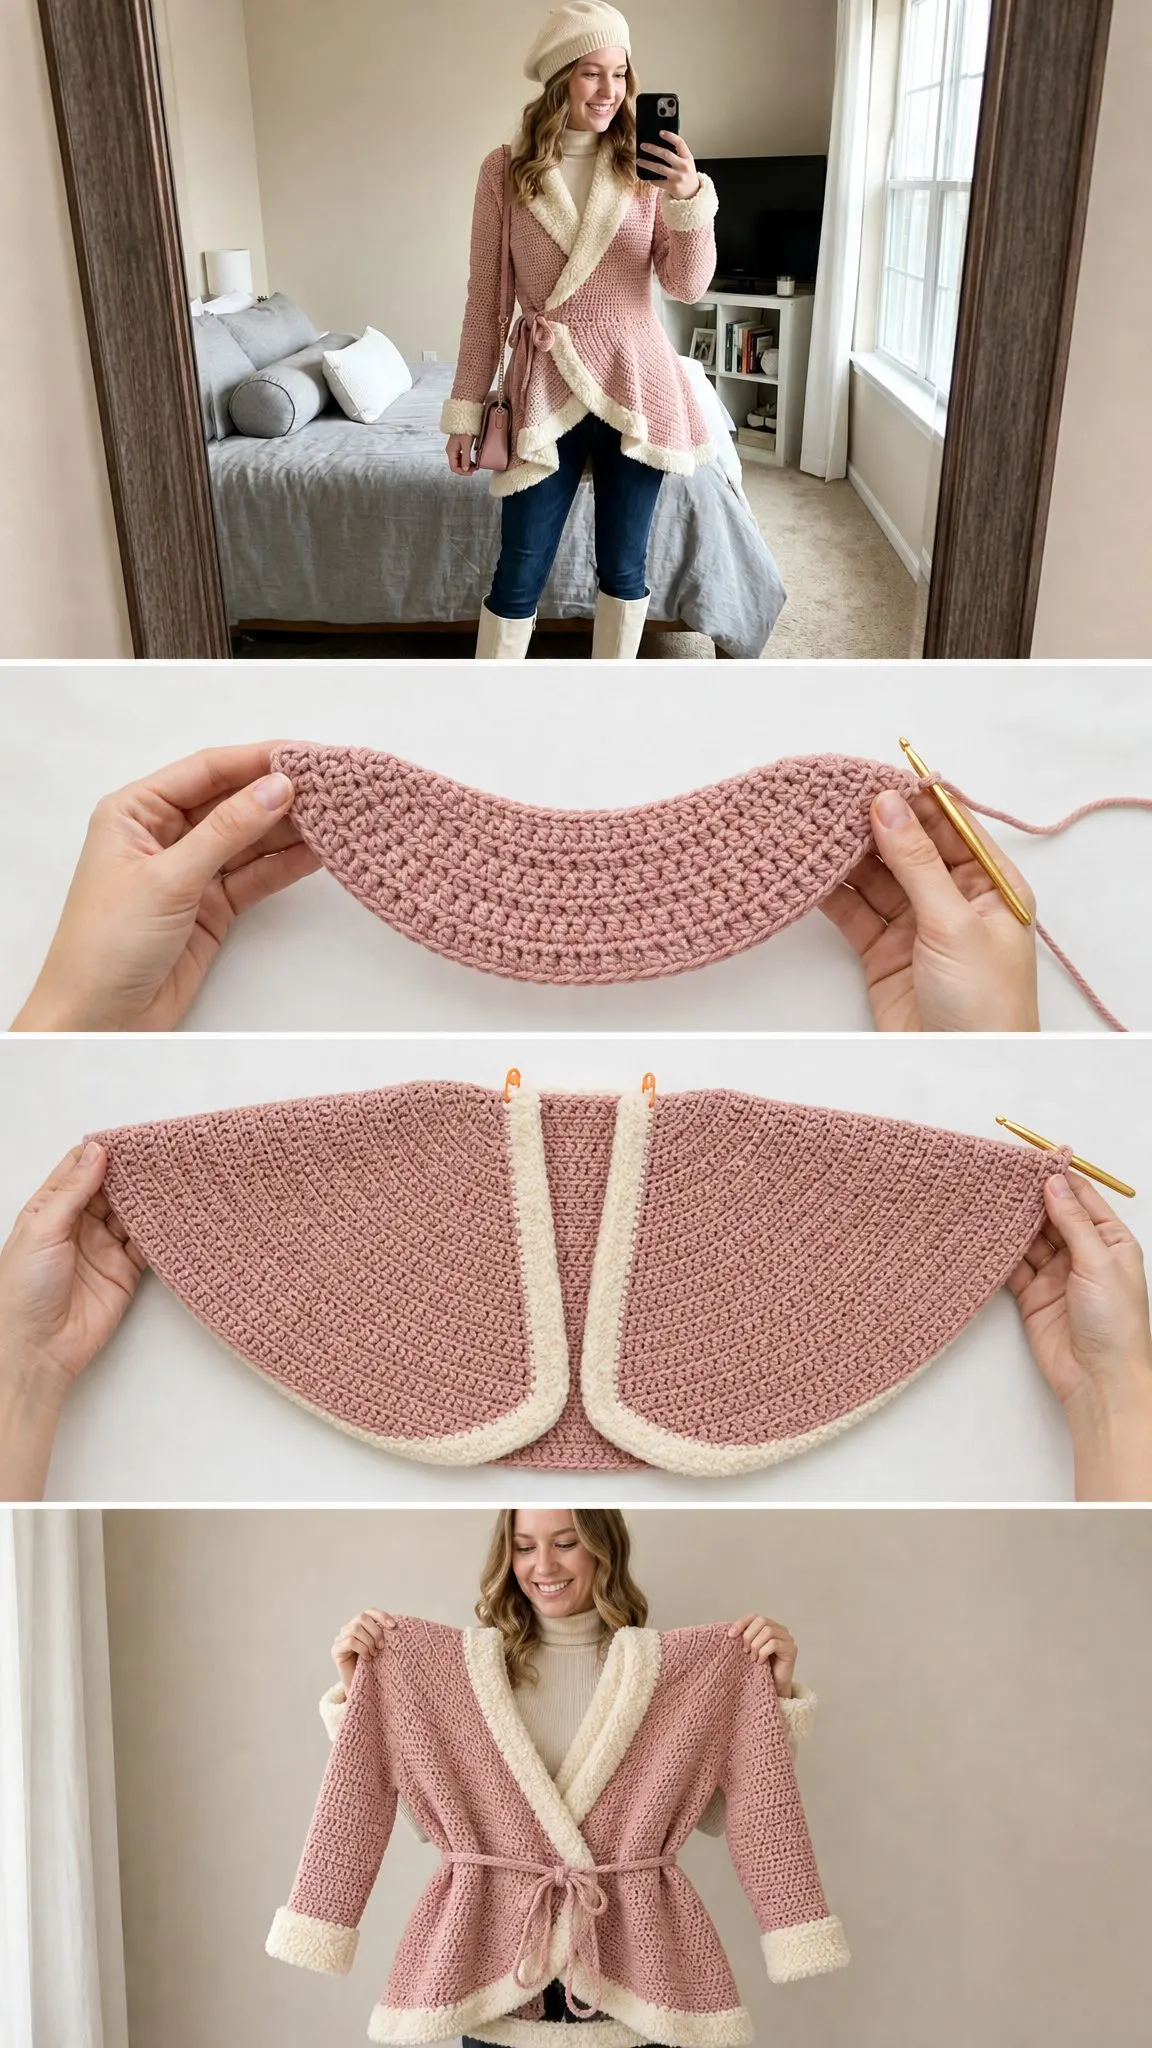
1. The cardigan is constructed in three flat panels: Back, Left Front, and Right Front. Sleeves are worked flat as two separate panels and seamed. Everything gets seamed together, then the trim is applied last.
2. The wrap front creates the deep V neckline. The left and right front panels are mirror images of each other.
3. The peplum hem flare is created through increases in the lower section of each panel. The flare begins about 10 rows above your starting chain and widens toward the hem.
4. Waist shaping uses decreases then increases in the bodice section.
5. All turning chains (ch 1) do NOT count as a stitch.
6. The contrast trim yarn is never used during main panel construction. Save it for finishing.
7. Block all panels before seaming for the best results and most accurate dimensions.
Step by Step Instructions: Back Panel
The back panel is worked from the lower hem edge upward.
Starting stitch count: 89 (97, 105, 113) sc units
Foundation and Hem Section
Foundation Row (RS): With MC and I-9 hook, ch 90 (98, 106, 114). Sc in second ch from hook, ch 1, [sk 1 ch, sc in next ch, ch 1] across, end sc in last ch. 89 (97, 105, 113) sc units
Row 1 (WS): Ch 1, turn. Sc in first sc, ch 1, [sc in next ch-1 sp, ch 1] across, end sc in last sc. 89 (97, 105, 113) sc units
Row 2 (RS): Ch 1, turn. Work in pattern across. 89 (97, 105, 113) sc units
Rows 3 through 12: Repeat Rows 1 and 2 five more times. 89 (97, 105, 113) sc units
Checkpoint: After Row 12, your back panel should measure approximately 22.25 (24.25, 26.25, 28.25) inches wide and 4 inches tall.
Waist Decrease Section (Rows 13 through 24)
You will decrease 1 sc unit at each end every other row, 6 times total.
Row 13 (WS): Ch 1, turn. Sc in first sc, ch 1, sc in next ch-1 sp, ch 1, sc2tog over next sc and ch-1 sp. Work in pattern to last 4 units, sc2tog over last two units before final sc, ch 1, sc in last sc. 87 (95, 103, 111) sc units
Row 14 (RS): Ch 1, turn. Work in pattern across. 87 (95, 103, 111) sc units
Row 15 (WS): Decrease 1 at each end as on Row 13. 85 (93, 101, 109) sc units
Row 16 (RS): Work in pattern. 85 (93, 101, 109) sc units
Row 17 (WS): Decrease 1 at each end. 83 (91, 99, 107) sc units
Row 18 (RS): Work in pattern. 83 (91, 99, 107) sc units
Row 19 (WS): Decrease 1 at each end. 81 (89, 97, 105) sc units
Row 20 (RS): Work in pattern. 81 (89, 97, 105) sc units
Row 21 (WS): Decrease 1 at each end. 79 (87, 95, 103) sc units
Row 22 (RS): Work in pattern. 79 (87, 95, 103) sc units
Row 23 (WS): Decrease 1 at each end. 77 (85, 93, 101) sc units
Row 24 (RS): Work in pattern. 77 (85, 93, 101) sc units
Checkpoint: After Row 24, your back panel waist should measure approximately 19.25 (21.25, 23.25, 25.25) inches wide and 8 inches tall.
Rows 25 through 28: Work even in pattern with no shaping. 77 (85, 93, 101) sc units each row
Waist Increase Section (Rows 29 through 38)
Increase 1 sc unit at each end every other row, 5 times total. To increase at the edge, work 2 sc into the first or last sc of the row, then ch 1 to maintain the pattern.
Row 29 (WS): Increase 1 at each end. 79 (87, 95, 103) sc units
Row 30 (RS): Work in pattern. 79 (87, 95, 103) sc units
Row 31 (WS): Increase 1 at each end. 81 (89, 97, 105) sc units
Row 32 (RS): Work in pattern. 81 (89, 97, 105) sc units
Row 33 (WS): Increase 1 at each end. 83 (91, 99, 107) sc units
Row 34 (RS): Work in pattern. 83 (91, 99, 107) sc units
Row 35 (WS): Increase 1 at each end. 85 (93, 101, 109) sc units
Row 36 (RS): Work in pattern. 85 (93, 101, 109) sc units
Row 37 (WS): Increase 1 at each end. 87 (95, 103, 111) sc units
Row 38 (RS): Work in pattern. 87 (95, 103, 111) sc units
Checkpoint: After Row 38, your back panel bust should measure approximately 21.75 (23.75, 25.75, 27.75) inches wide and 12.67 inches tall.
Rows 39 through 44: Work even in pattern. 87 (95, 103, 111) sc units each row
Armhole Shaping (Rows 45 through 56)
Row 45 (WS): Slip stitch across the first 5 (5, 6, 6) sc units, ch 1, work in pattern to the last 5 (5, 6, 6) units, leave remaining stitches unworked. Turn. 77 (85, 91, 99) sc units
Row 46 (RS): Ch 1, turn. Sc2tog at beginning of row, work in pattern to last 2 units, sc2tog. 75 (83, 89, 97) sc units
Row 47 (WS): Ch 1, turn. Sc2tog at beginning, work in pattern to last 2 units, sc2tog. 73 (81, 87, 95) sc units
Row 48 (RS): Ch 1, turn. Sc2tog at beginning, work in pattern to last 2 units, sc2tog. 71 (79, 85, 93) sc units
Rows 49 through 60: Work even in pattern. 71 (79, 85, 93) sc units each row
Checkpoint: After Row 60, the back panel should measure approximately 20 inches tall.
Shoulder and Neck Shaping (Rows 61 through 66)
Mark the center 23 (25, 27, 29) sc units for the back neck.
Left Shoulder:
Row 61 (WS): Ch 1, turn. Work in pattern across 24 (27, 29, 32) sc units. Turn, leaving remaining stitches unworked. 24 (27, 29, 32) sc units
Row 62 (RS): Ch 1, turn. Sc2tog at neck edge, work in pattern to end. 23 (26, 28, 31) sc units
Row 63 (WS): Ch 1, turn. Work even to last 2 units at neck edge, sc2tog. 22 (25, 27, 30) sc units
Row 64 (RS): Ch 1, turn. Sc2tog at neck edge, work in pattern to end. 21 (24, 26, 29) sc units
Rows 65 through 66: Work even. 21 (24, 26, 29) sc units
Fasten off.
Right Shoulder:
Return to Row 60. Skip the center 23 (25, 27, 29) neck stitches. Join MC with sl st and work Rows 61 through 66 as a mirror of the left shoulder, working neck decreases at opposite edges. 21 (24, 26, 29) sc units
Fasten off. Your back panel is complete.
Step by Step Instructions: Right Front Panel
The right front is worked from hem upward. The side edge will seam to the back, and the neckline edge creates the wrap front.
Starting stitch count: 55 (61, 67, 73) sc units
Foundation Row (RS): With MC and I-9 hook, ch 56 (62, 68, 74). Sc in second ch from hook, ch 1, [sk 1 ch, sc in next ch, ch 1] across, end sc in last ch. 55 (61, 67, 73) sc units
Rows 1 through 12: Work in Offset Moss Stitch, even. 55 (61, 67, 73) sc units each row
Waist Decrease Section (Rows 13 through 24)
Decrease at the side edge only. The neckline edge stays straight for now.
Row 13 (WS): Ch 1, turn. Work in pattern to last 2 units, sc2tog. 54 (60, 66, 72) sc units
Row 14 (RS): Work even. 54 (60, 66, 72) sc units
Continue this pattern, decreasing at the side edge every WS row through Row 23.
Row 23 (WS): 49 (55, 61, 67) sc units
Row 24 (RS): Work even. 49 (55, 61, 67) sc units
Rows 25 through 28: Work even. 49 (55, 61, 67) sc units each row
Waist Increase Section (Rows 29 through 38)
Increase at side edge only, every other row, 5 times.
Row 37 (WS): 54 (60, 66, 72) sc units
Row 38 (RS): Work even. 54 (60, 66, 72) sc units
Rows 39 through 44: Work even. 54 (60, 66, 72) sc units each row
Neckline and Armhole Shaping (Rows 45 through 70)
Now you will shape both the armhole and the angled neckline simultaneously.
Row 45 (WS): Sl st across first 5 (5, 6, 6) sc units at armhole edge, ch 1, work in pattern to last 2 units at neckline edge, sc2tog. 47 (53, 58, 64) sc units
Row 46 (RS): Sc2tog at armhole edge, work in pattern to last 2 units at neckline, sc2tog. 45 (51, 56, 62) sc units
Continue following the shaping instructions, decreasing at the neckline edge on most rows while working the armhole shaping in the first few rows.
After Row 66: 25 (31, 36, 42) sc units
Rows 67 through 70: Continue neckline decreases.
Row 70 (RS): Work even. 22 (28, 33, 39) sc units
Fasten off. Right front panel is complete.
Step by Step Instructions: Left Front Panel
Work as a mirror image of the right front panel. All shaping occurs at opposite edges:
All stitch counts remain identical to the right front panel.
Sleeves, Assembly, and Finishing
Sleeves
The sleeves are worked flat and seamed. Work increases gradually from cuff to upper arm to achieve the correct circumference. Apply the CC sherpa trim to the cuffs after blocking.
Assembly
1. Block all pieces to measurements before seaming
2. Seam shoulders using mattress stitch or your preferred method
3. Seam side seams from hem to underarm
4. Set in sleeves and seam
Applying the Shearling Trim
With CC yarn and J-10 hook, work single crochet evenly along:
The boucle yarn creates the fluffy shearling effect automatically. Work approximately 1 sc per row end or per stitch.
Belt
Thread your crocheted belt cord through the waist seam area or create small belt loops during finishing. Tie at the front for the fitted silhouette.
Tips for Success
Take your time with gauge. Seriously. This is a fitted garment and gauge matters enormously.
Block before seaming. Your pieces will relax and even out, making seaming much easier and your finished cardigan much more professional.
Use stitch markers liberally. Mark your shaping rows, your center back neck, and any other points that help you keep track.
Try it on as you go. Once your back panel is blocked, hold it up to yourself. Check that the length and width are working for your body.
This blush pink shearling crochet cardigan is a labor of love, but the result is absolutely worth every hour you put into it. You will have a handmade garment that rivals anything you could buy in a store, perfectly sized for your body, in colors you chose yourself.
I really hope you enjoy making this cozy cardigan as much as I enjoyed designing it. If you make one, I would absolutely love to see it. Save this pattern to your Pinterest boards so you can find it when you are ready to start, and please drop a comment below to let me know how yours turns out. Happy crocheting!
You Might Also Like
- Sage Green Botanical Leaf Table Runner Free Crochet Pattern
- Lavender Mint Shell Stitch Baby Dress Free Crochet Pattern
- Coral Sunset Gradient Chain Purse Free Crochet Pattern
- Lavender Sunflower Granny Square Tote Free Crochet Pattern