Blush Pink Ruffle Baby Dress Set Free Crochet Pattern
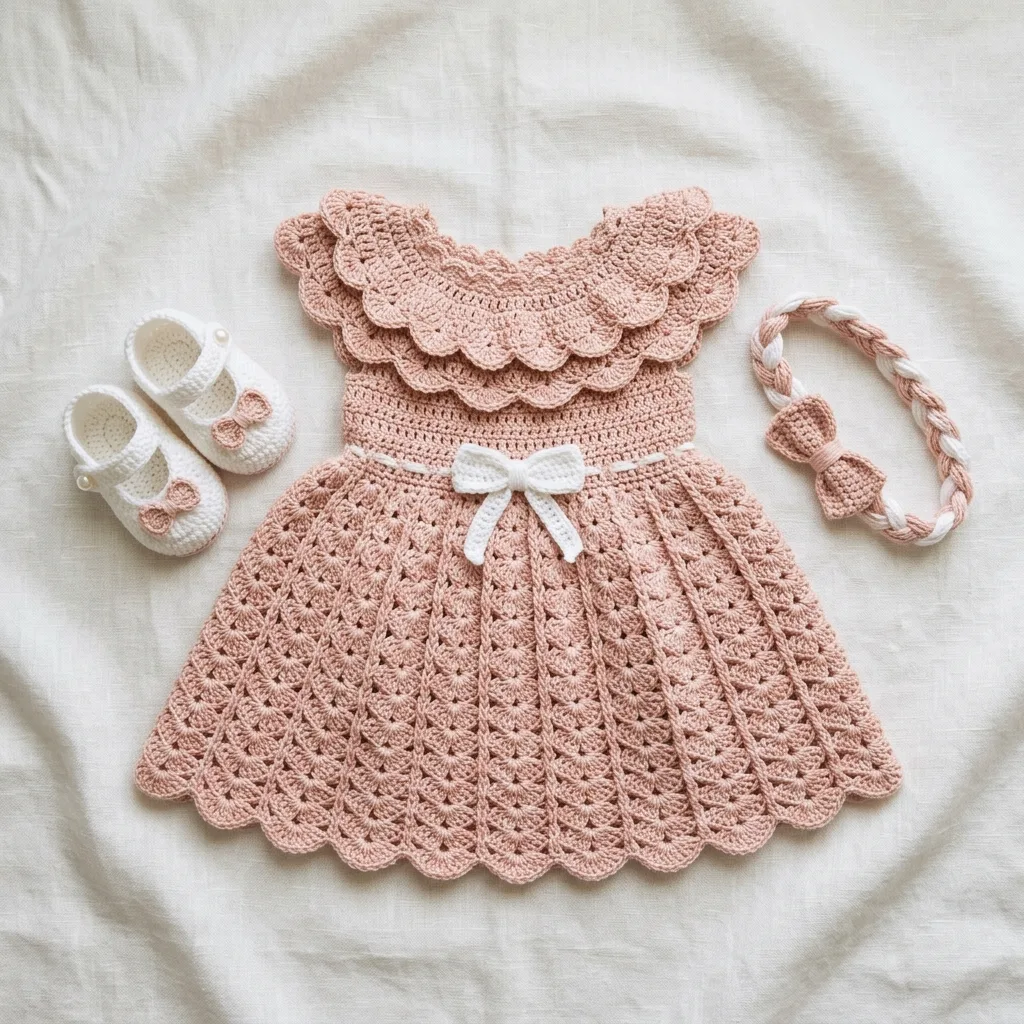
Baby dresses look complicated. All those ruffles, that flared skirt, the tiny matching accessories. I get it. You see a photo like this and think you need years of experience to pull it off. But here’s the truth: if you can single crochet and double crochet, you can absolutely make this dress.
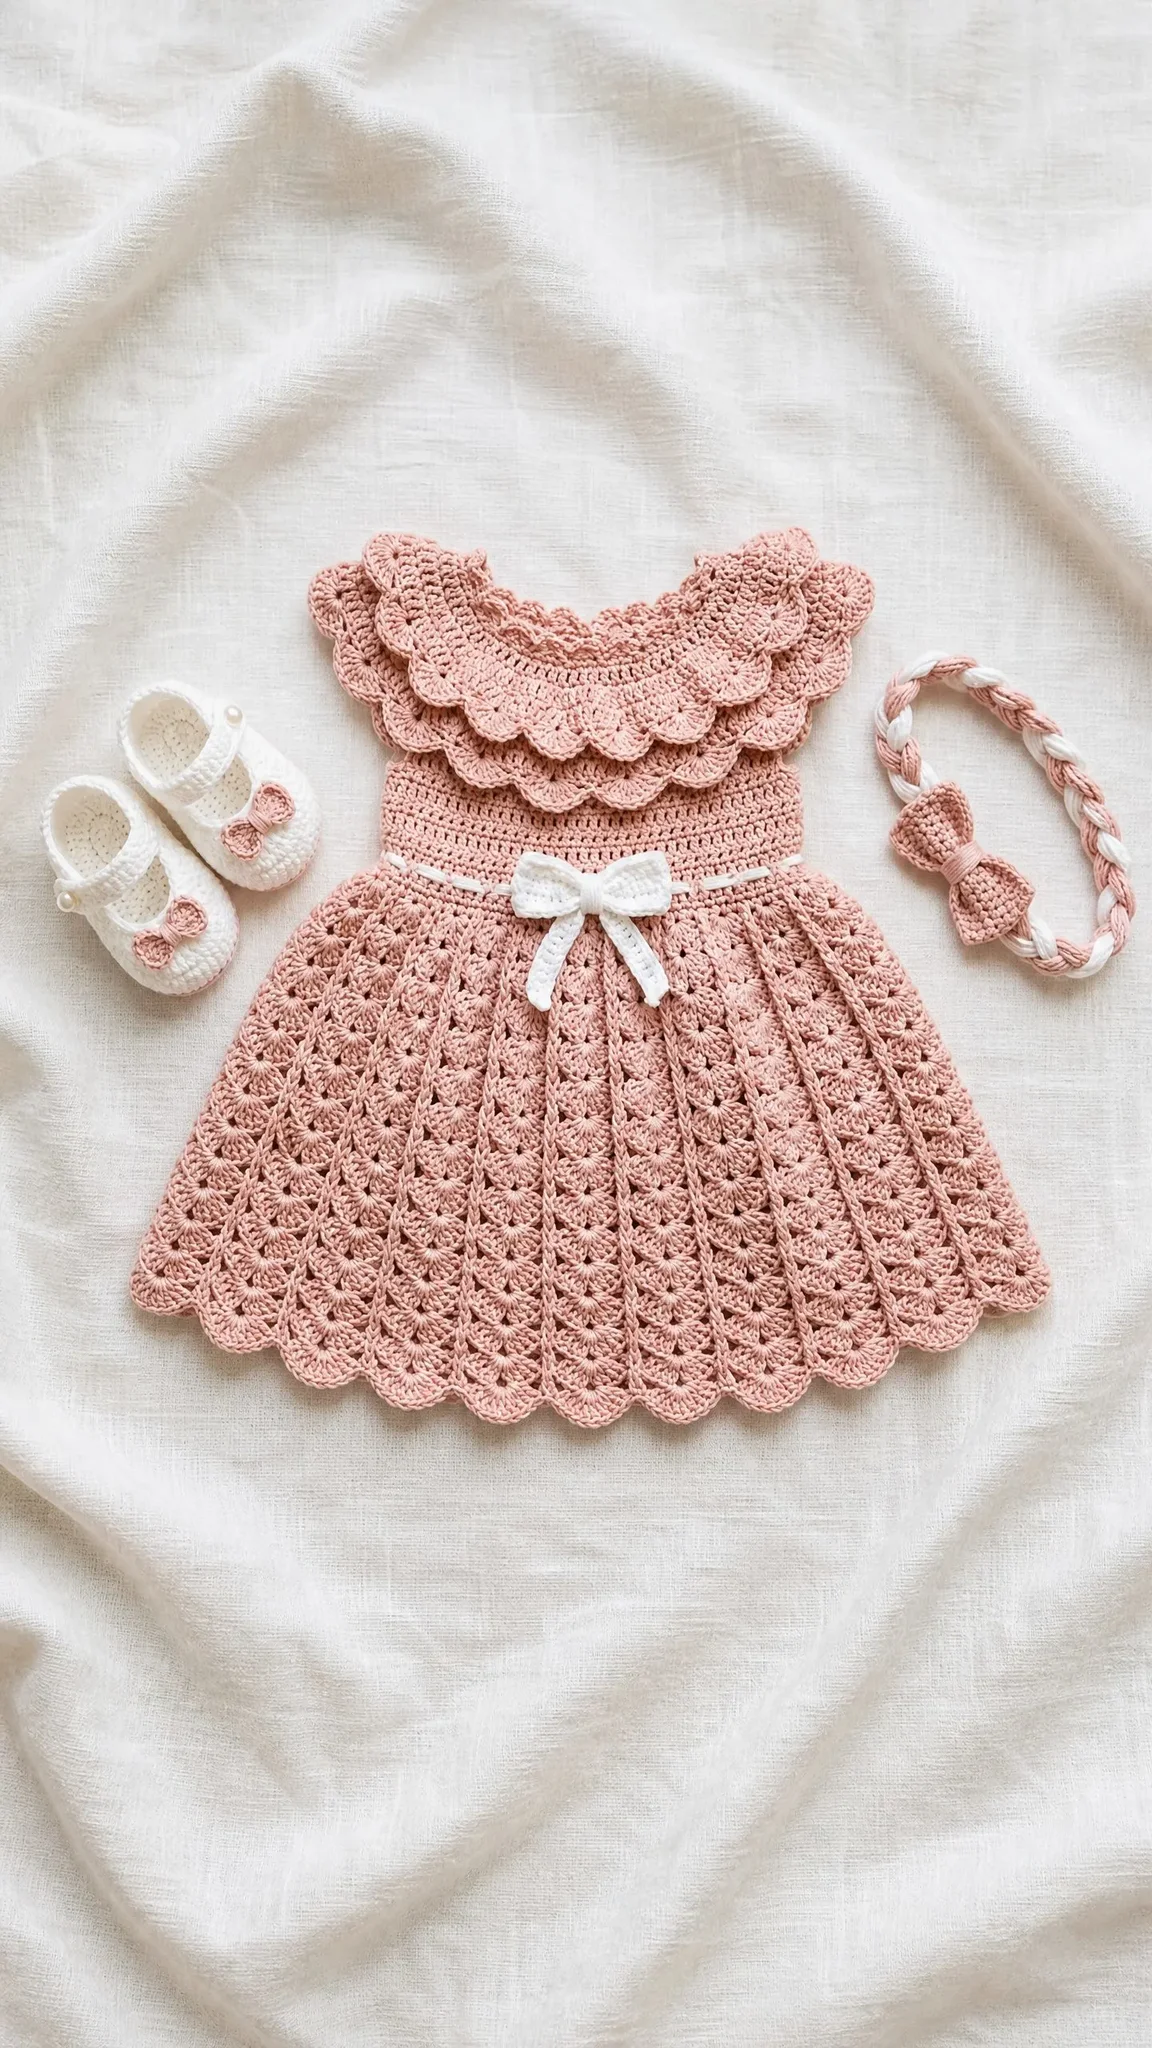
The construction is more straightforward than it appears. You work from the top down in joined rounds, which means no seaming the body. The fan stitch that creates that beautiful flared skirt? It’s just five double crochets in one spot, repeated around. Once you get the rhythm, it practically works itself.
Whether you’re an intermediate crocheter ready for your first garment or a confident beginner looking for a stretch project, this blush pink ruffle baby dress set will meet you where you are. I’ve broken everything down step by step, defined every stitch, and flagged the tricky spots before you reach them.
What You’ll Be Making
This complete baby dress set includes four coordinating pieces: a fitted dress with a stunning double-layered scallop ruffle collar, a fan stitch A-line skirt with scallop hem, a pair of Mary Jane booties with bow detail, and a braided headband with a crochet bow. The colorway pairs a soft blush rose with crisp white accents at the waistband, booties, and headband braid.
The dress fits newborn to 3 months, with a chest measurement of approximately 14 to 15 inches and a total length from shoulder to hem of about 13 inches. The bodice measures roughly 5.5 inches, and the skirt adds another 7.5 inches of that gorgeous flared silhouette.
Total project time: 13 to 19 hours spread across all pieces. The dress body takes the longest at 8 to 12 hours, the collar adds 2 to 3 hours, booties take another 2 to 3 hours, and the headband with bow finishes up in about an hour.
Materials You’ll Need
Yarn:
Hook:
Additional supplies:
Recommended Yarn Options
Paintbox Yarns Cotton DK works beautifully for this project. It’s 100 percent cotton with 273 yards per 100g skein. Look for Ballet Pink (shade 450) for the main color and Pure White (shade 403) for accents. Cotton gives the dress that slight structure you see in the photos without excessive stretch.
Drops Safran DK is another excellent choice. Also 100 percent combed cotton with 175 yards per 50g skein. Old Rose for main and Off White for accents. This yarn has exceptional stitch definition that really shows off the fan pattern.
Lion Brand 24/7 Cotton DK offers wide availability and machine washability. It’s 100 percent mercerized cotton with 186 yards per 100g skein. Blush for main, White for accents.
When substituting yarn, choose something smooth and non-splitty with good stitch definition. Cotton or cotton blends work best for infant garments since they breathe well and launder easily. Avoid highly elastic yarns because they’ll distort the fan stitch and throw off your gauge.
Gauge (Don’t Skip This)
With your E-4 hook and DK weight yarn: 18 stitches and 20 rows should equal 4 inches in single crochet, blocked.
For the fan stitch section: one complete fan repeat measures approximately 1.25 inches wide and 0.75 inches tall.
I know gauge swatches feel tedious, but they’re essential for fitted garments. Even one stitch per inch off can change the chest measurement by over an inch on a small baby, affecting both fit and safety around the neck and chest.
To make your swatch: Chain 22. Work single crochet across for 22 rows. Fasten off. Block the swatch by wetting it and letting it dry flat. Measure the center 4 inches and count your stitches and rows. If your gauge is too tight, go up a hook size. Too loose? Go down.
Abbreviations and Stitch Definitions
Let me walk you through every stitch and abbreviation you’ll encounter.
ch = chain. Yarn over and pull through the loop on your hook.
sl st = slip stitch. Insert hook, yarn over, pull through both the stitch and the loop on your hook in one motion.
sc = single crochet. Insert hook into stitch, yarn over and pull up a loop (2 loops on hook), yarn over and pull through both loops.
dc = double crochet. Yarn over, insert hook into stitch, yarn over and pull up a loop (3 loops), yarn over and pull through 2 loops (2 loops remain), yarn over and pull through remaining 2 loops.
hdc = half double crochet. Yarn over, insert hook, yarn over and pull up a loop (3 loops), yarn over and pull through all 3 loops at once.
inc = increase. Work 2 stitches into the same stitch.
inv-dec = invisible decrease. Insert hook through the front loop only of the next stitch, then through the front loop only of the following stitch, yarn over and pull up a loop, yarn over and pull through both loops. This creates a neater decrease than a standard sc2tog.
sk = skip. Pass over the indicated stitch without working into it.
ch-sp = chain space. The gap created by a chain in the previous row or round.
MC = main color (blush rose)
CC = contrast color (white)
Special Stitches
Fan Stitch (also called shell stitch): Work 5 dc all into the same stitch or space. This creates a fan shape with 5 double crochets sharing one base point. When used in the skirt, these fans are flanked by single crochets and chain spaces to create that radiating scallop effect you see in the photos.
Fan Stitch Repeat: The complete unit is: sc in sc, ch 1, skip 1 st, 5 dc in next st (fan), ch 1, skip 1 st, sc in next st. This 7-stitch-consuming unit appears throughout the skirt.
Scallop Edging: Sl st into first st, (ch 2, 4 dc in same st, sl st into next st) repeat around. Each scallop uses 2 stitches.
Shell Collar Unit: (3 dc, ch 1, 3 dc) all in same stitch or space. Creates a V-shaped shell for the collar.
Pattern Notes Before You Begin
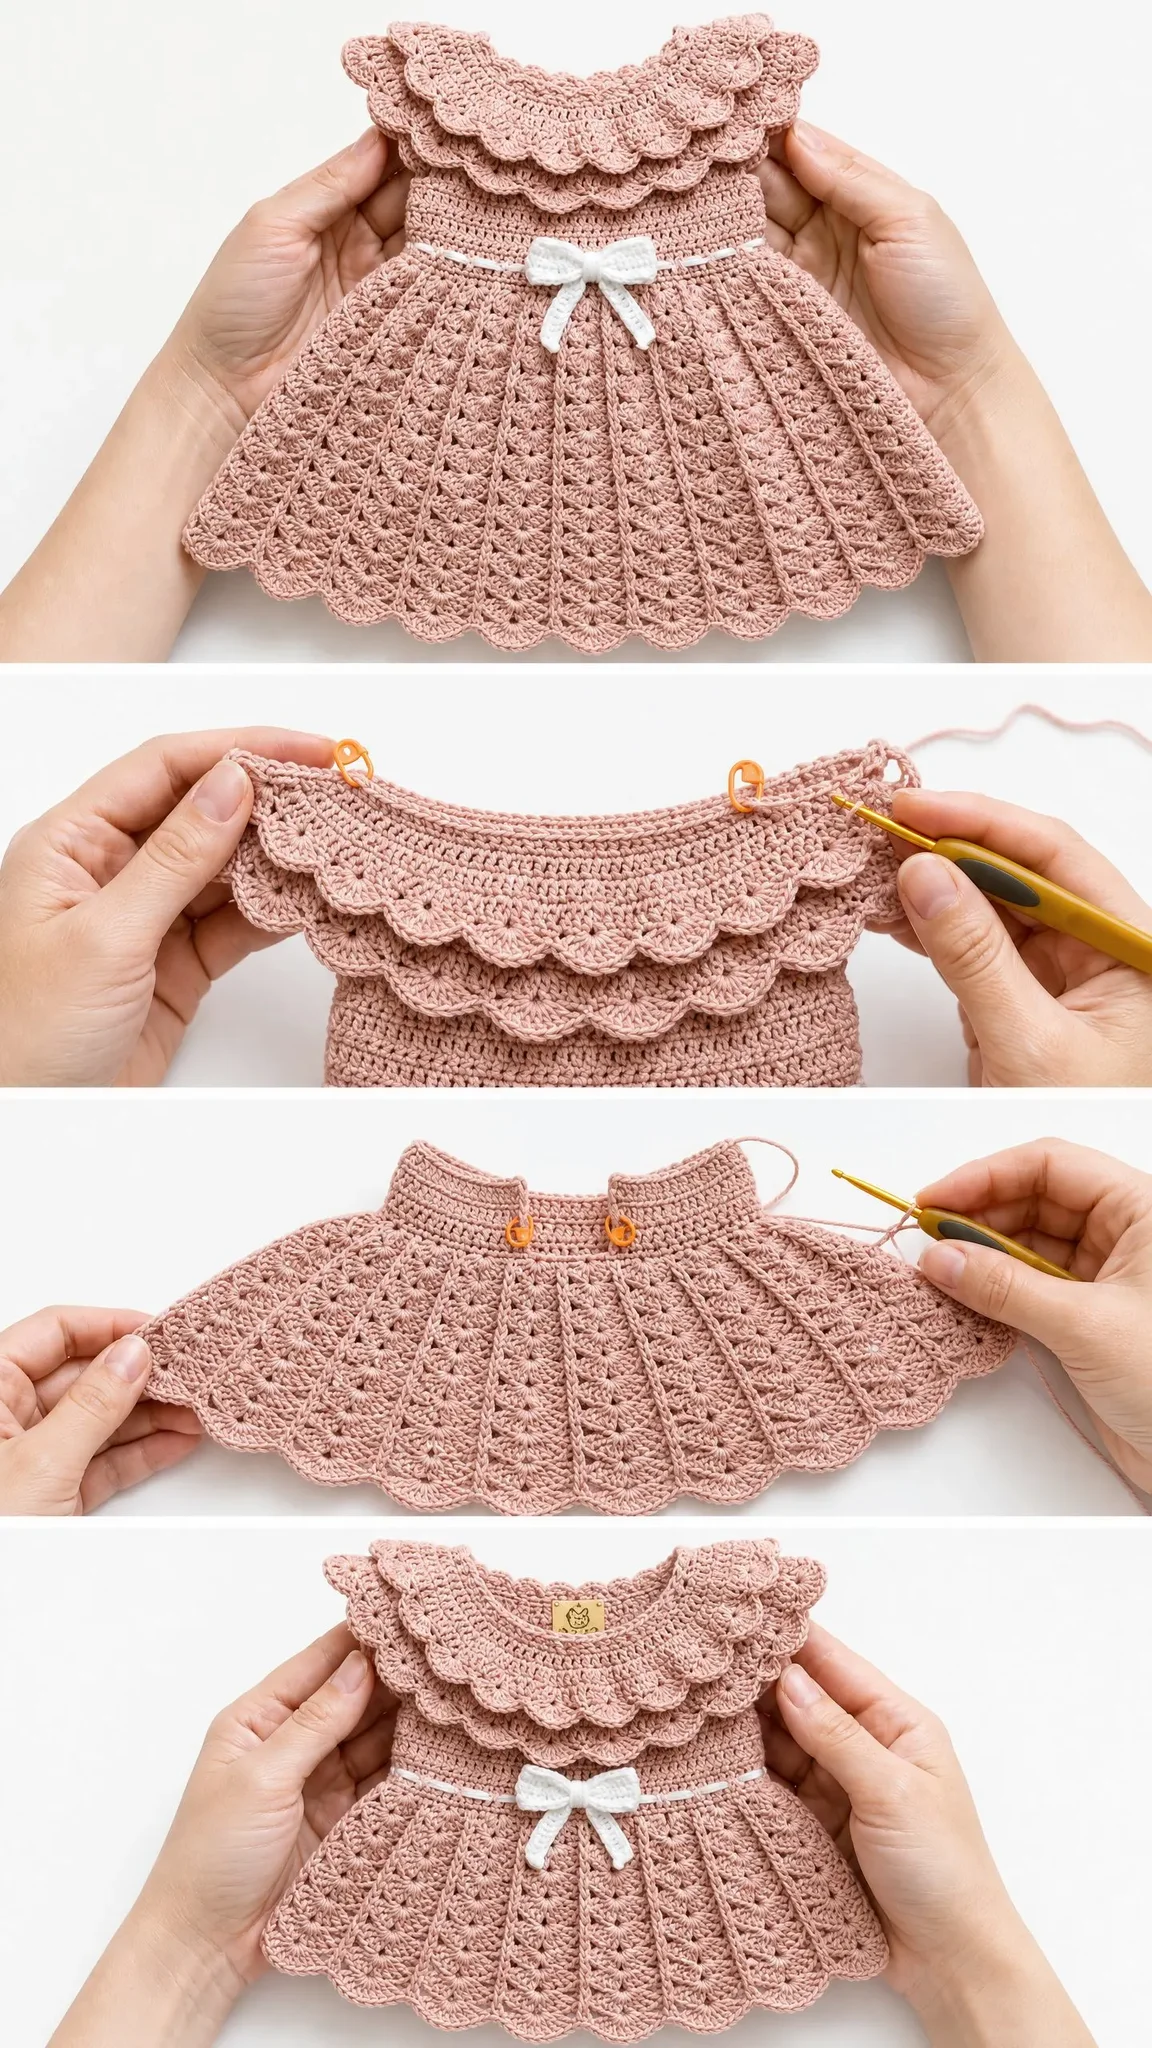
The dress is worked from the neck down in joined rounds. No flipping your work, no seaming the body. The yoke uses single crochet with increases to shape the rounded neckline and create armhole openings. The skirt attaches directly to the bodice and fans outward naturally thanks to the shell stitch geometry.
Join each round with a slip stitch to the first stitch unless I tell you otherwise.
Chain 1 at the beginning of a single crochet round does NOT count as a stitch. Don’t work into it when you come back around.
Chain 3 at the beginning of a double crochet round DOES count as the first double crochet. Work into the top of it when you complete the round.
Always work with the right side facing you unless a section says otherwise. Place a stitch marker in the first stitch of each round and move it up as you go. This simple habit prevents so much confusion.
Dress Instructions
Section 1: Neckline Foundation
With MC and E-4 hook, ch 60. Being careful not to twist, sl st to first ch to form a ring.
Rnd 1: Ch 1, sc in each ch around, sl st to first sc to join. (60 sc)
Rnd 2: Ch 1, sc in each st around, sl st to join. (60 sc)
Rnd 3: Ch 1, (sc in next 9 sts, inc in next st) 6 times, sl st to join. (66 sc)
Rnd 4: Ch 1, sc in each st around, sl st to join. (66 sc)
Rnd 5: Ch 1, (sc in next 10 sts, inc in next st) 6 times, sl st to join. (72 sc)
Rnd 6: Ch 1, sc in each st around, sl st to join. (72 sc)
Checkpoint: Your neckline tube should measure approximately 1.25 inches in height and about 16 inches in circumference when gently stretched.
Section 2: Yoke Shaping
Rnd 7: Ch 1, (sc in next 11 sts, inc in next st) 6 times, sl st to join. (78 sc)
Rnd 8: Ch 1, sc in each st around, sl st to join. (78 sc)
Rnd 9: Ch 1, (sc in next 12 sts, inc in next st) 6 times, sl st to join. (84 sc)
Rnd 10: Ch 1, sc in each st around, sl st to join. (84 sc)
Rnd 11: Ch 1, (sc in next 13 sts, inc in next st) 6 times, sl st to join. (90 sc)
Rnd 12: Ch 1, sc in each st around, sl st to join. (90 sc)
Rnd 13: Ch 1, (sc in next 14 sts, inc in next st) 6 times, sl st to join. (96 sc)
Rnd 14: Ch 1, sc in each st around, sl st to join. (96 sc)
Section 3: Armhole Separation
This is where we divide for the armholes. Mark your stitches as follows:
Rnd 15 (armhole round): Ch 1, sc in next 24 sts (front), ch 4, skip next 12 sts (right armhole), sc in next 24 sts (back), ch 4, skip next 12 sts (left armhole), sl st to first sc to join.
Those chain-4 bridges replace the skipped stitches at each underarm.
Rnd 16: Ch 1, sc in next 24 sc (front), sc in each of 4 ch (right underarm), sc in next 24 sc (back), sc in each of 4 ch (left underarm), sl st to join. (56 sc)
Rnd 17: Ch 1, sc in each st around, sl st to join. (56 sc)
Rnd 18: Ch 1, (sc in next 13 sts, inc in next st) 4 times, sl st to join. (60 sc)
Rnd 19: Ch 1, sc in each st around, sl st to join. (60 sc)
Rnd 20: Ch 1, (sc in next 11 sts, inc in next st) 5 times, sl st to join. (65 sc)
Rnd 21: Ch 1, (sc in next 12 sts, inc in next st) 5 times, sl st to join. (70 sc)
Checkpoint: The body below the armhole should measure approximately 2 inches. Total bodice from neckline: about 3.25 inches. Circumference at Rnd 21: approximately 15.5 inches.
Section 4: Waistband
Rnd 22: Join CC, ch 1, sc in each st around, sl st to join. Cut CC, leaving a 6-inch tail. (70 sc)
Optional eyelet round for ribbon threading: Instead of plain sc, work: Ch 3 (counts as first dc), skip 1 st, (dc in next st, ch 1, skip 1 st) 34 times, dc in last st, sl st to top of ch-3 to join. This creates 35 eyelet holes for threading your ribbon.
Rnd 23: Join MC, ch 1, sc in each st around, sl st to join. (70 sc)
Rnd 24: Ch 1, sc in each st around, sl st to join. (70 sc)
Checkpoint: Total dress height from neckline should be approximately 5.5 inches. This completes your bodice.
Section 5: Skirt
Now for the fun part. With 70 stitches, you have exactly 10 fan repeat units (7 stitches each).
Rnd 25 (first fan round): Ch 1, (sc in next st, ch 1, sk 1 st, 5 dc in next st, ch 1, sk 1 st) 10 times, sl st to first sc. (10 fan units)
Rnd 26: Ch 1, sc in first sc, ch 1, skip ch-1 sp, dc in first dc of fan, dc in second dc, dc in third dc (center), dc in fourth dc, dc in fifth dc, ch 1, skip ch-1 sp, (sc in sc, ch 1, skip ch-1 sp, 5 dc in center dc of fan, ch 1, skip ch-1 sp) 9 times, sl st to first sc. (10 fan repeats)
The pattern is established now. In every following round, your sc lands in the sc of the previous round, and your fans land in the center (third) dc of the previous fan.
Work Rnds 27 through 42 in established fan pattern: (sc in sc, ch 1, 5 dc in center dc of fan, ch 1) repeat around. (10 fan repeats each round)
Checkpoint: After Rnd 42, the skirt should measure approximately 7.5 inches. Full dress from shoulder to hem: about 13 inches.
Section 6: Scallop Hem Edging
Rnd 43 (hem setup): Ch 1, sc evenly around the hem edge, placing 1 sc in each sc and 2 sc in each fan group center. Total: 70 sc. Sl st to join. (70 sc)
Rnd 44 (scallop round): Sl st into first st, (ch 2, 4 dc in same st, sl st into next st) 35 times. (35 scallops)
Fasten off. Weave in ends.
Section 7: Collar
The collar has two ruffle layers. Work the outer (larger) ruffle first, then the inner (smaller) ruffle.
Outer Ruffle:
Join MC to any stitch of Rnd 1 (the foundation round).
Collar Rnd C1: Ch 3 (counts as dc), 2 dc in same st, (sk 1 st, 3 dc in next st) 29 times, sk last st, sl st to top of ch-3. (90 dc in 30 groups)
Collar Rnd C2: Ch 3, 2 dc in same st, dc in next dc, 3 dc in next dc, (3 dc in first dc of next group, dc in center dc, 3 dc in last dc of group) 29 times, sl st to top of ch-3. (210 dc)
Collar Rnd C3: Ch 1, sc in each dc around, sl st to join. (210 sc)
Collar Rnd C4 (scallop edge): Sl st into first st, (ch 2, 4 dc in same st, sl st into next st) 105 times. (105 scallops)
Fasten off. Weave in ends.
Inner Ruffle:
Join MC to Rnd 2 of the neckline, offset by 1 stitch from the outer ruffle attachment.
Collar Rnd IC1: Ch 3, 2 dc in same st, (sk 1 st, 3 dc in next st) 29 times, sl st to top of ch-3. (90 dc)
Collar Rnd IC2 (scallop edge): Sl st into first st, (ch 2, 4 dc in same st, sl st into next st) 45 times. (45 scallops)
Fasten off. Weave in ends.
Checkpoint: The finished collar should span approximately 5 inches from neckline to the bottom edge of the outer ruffle when laid flat.
Section 8: Back Opening
Mark a 2-inch section at the center back (about 9 stitches). Reinforce the edges with whipstitch or work a row of sc along each edge. Add 3 button loops (ch 3, skip 2, sc) on the left back edge, and sew 3 buttons on the right edge. Safety note: Buttons must be at least 1 inch in diameter to prevent choking hazard, or use snaps instead.
Booties Instructions
Size: Newborn to 3 months, sole length approximately 3.5 inches
Sole:
With MC, ch 12.
Row 1: Sc in second ch from hook and in each ch to end, turn. (11 sc)
Rows 2 to 6: Ch 1, sc in each sc to end, turn. (11 sc)
Without fastening off, work around the perimeter: sc evenly around all four sides (11 along top, 5 along short side, 11 along bottom, 5 along other short side), sl st to join. (32 sc around perimeter)
Sides:
Rnds 1 to 3: Ch 1, sc in each sc around, sl st to join. (32 sc each round)
Toe Shaping:
Rnd 4: Ch 1, sc in next 10 sc, (inv-dec) 6 times, sc in next 10 sc, sl st to join. (26 sc)
Rnd 5: Ch 1, sc in next 8 sc, (inv-dec) 5 times, sc in next 8 sc, sl st to join. (21 sc)
Cuff:
Rnd 6: Ch 1, sc in each sc around, sl st to join. (21 sc)
Rnd 7: Ch 3 (counts as dc), dc in same st, (sk 1 st, 2 dc in next st) 10 times, sl st to top of ch-3. (21 dc)
Rnd 8: Ch 1, sc in each dc around, sl st to join. (21 sc)
Strap: Join CC at center back of cuff. Ch 20. Fasten off leaving a tail. Sew the other end to the opposite side of the center back cuff for an ankle strap.
Booty Bow: With CC, ch 12. Row 1: Sc in second ch from hook and in each ch across, turn. (11 sc) Rows 2 to 4: Ch 1, sc in each sc to end, turn. Fasten off. Pinch at center, wrap CC yarn around 4 times, knot securely. Sew to front center of strap.
Make 2 booties.
Headband and Bow Instructions
Headband Braid:
Cut 6 strands of yarn: 2 MC and 2 CC, each 36 inches long. Knot at one end. Divide into 3 groups of 2 strands each (alternate MC and CC for visual interest). Braid tightly for the entire length. Tie off and trim ends to 0.5 inches. The finished braid should measure about 15 inches unstretched. Tie ends together to form a loop sized for an infant head (about 14 inches in circumference).
Headband Bow:
With MC, ch 16.
Row 1: Sc in second ch from hook and in each ch across, turn. (15 sc)
Rows 2 to 6: Ch 1, sc in each sc to end, turn. (15 sc)
Fasten off. Pinch at center. Wrap an 8-inch strand of MC tightly around the center 6 times. Knot and trim. Sew or tie the bow to the front center of the headband.
Finishing and Blocking
Weave in all ends securely using your yarn needle, working them into the wrong side in multiple directions.
Wet block the dress by soaking in cool water for 10 to 15 minutes. Gently press excess water out with a towel, then pin flat to a blocking mat. Pin each scallop point outward so they’re clearly defined. Let dry completely (12 to 24 hours).
The booties can be hand washed and air dried flat. The headband can be lightly steamed if desired.
Thread your ribbon through the eyelet row, bring ends to front, and tie a bow. Trim ribbon ends at a 45-degree angle and apply fray stop solution to prevent unraveling.
Care Instructions
Hand wash in cool water with mild baby-safe detergent. Don’t wring or twist. Press gently in a clean towel and lay flat to dry away from direct sunlight. If your yarn label permits, you can machine wash on delicate cold in a mesh bag. Never tumble dry or iron directly.
Important: Check all buttons and attachments before each use. Small objects are a choking hazard for infants.
Size Customization Tips
For 3 to 6 months: Start with ch 66 instead of ch 60. Continue increases to maintain 6-section symmetry. Your skirt will accommodate 12 fan repeats (84 stitches at the skirt join).
For 6 to 9 months: Start with ch 72. Aim for 84 stitches (12 repeats) or 91 stitches (13 repeats) at the skirt join. Add 3 to 4 additional skirt rounds for length.
To lengthen the skirt: Each additional pair of fan rounds adds approximately 0.75 to 1 inch.
To make a top instead: Work only through Rnd 24 (bodice) and add the scallop edging at the waist.
I hope you love making this blush pink ruffle baby dress set as much as I loved designing it. The finished set makes an absolutely stunning gift for baby showers, christenings, or newborn photos. Tag me on Instagram or share in our Facebook group when you finish yours. I genuinely love seeing your creations come to life.
If this pattern made your project list, go ahead and save it to your Pinterest boards so you can find it easily when you’re ready to start. And if you make it, drop a comment below. I’d love to hear how it turned out for you!
You Might Also Like
- Coral Sunset Floral Halter Dress Free Crochet Pattern
- Charcoal Gray Modern Lace Maxi Skirt Free Crochet Pattern
- Pastel Rainbow Unicorn Granny Square Blanket Free Pattern
- Sunflower Granny Square Mustard Tote Free Crochet Pattern