Peach Blossom Flutter Dress Free Crochet Pattern
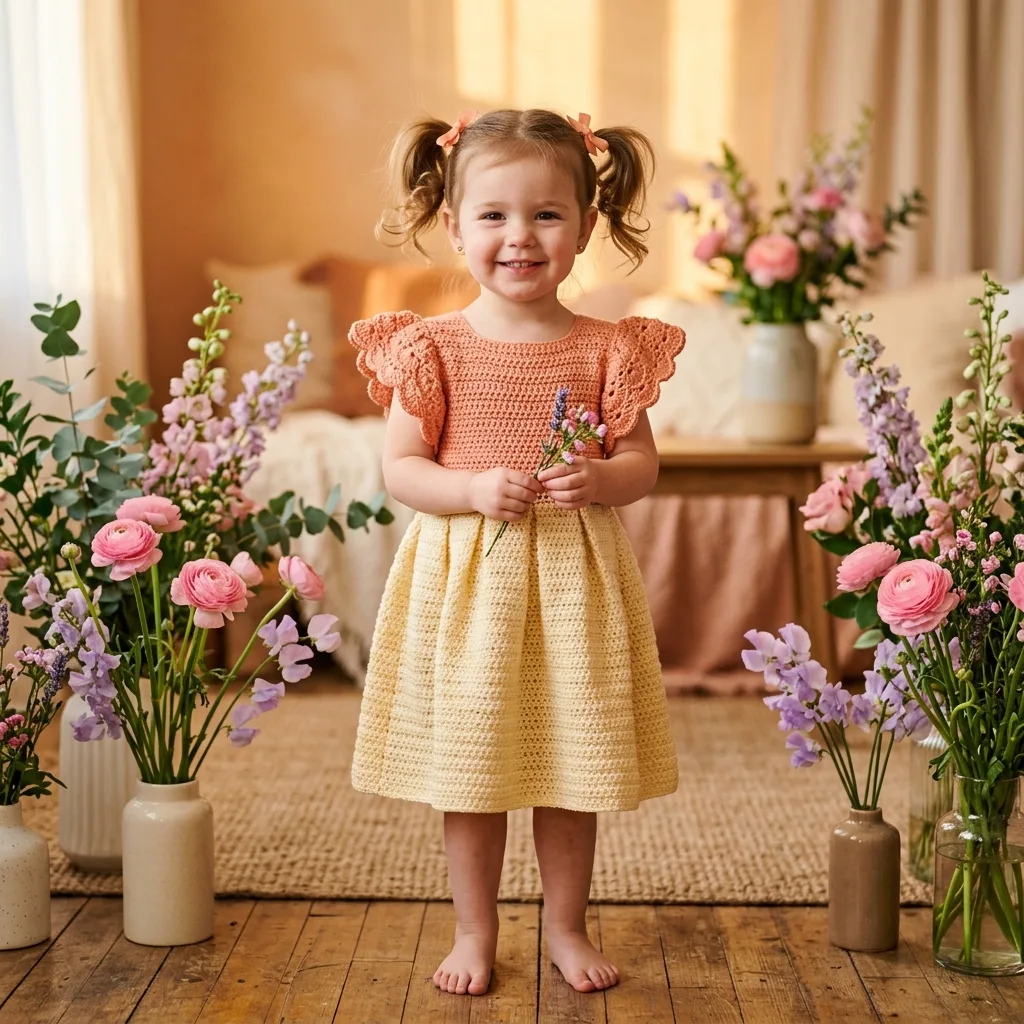
This little dress has been living in my head for years. I first sketched it in a spiral notebook during a long car ride, watching the sunset turn the sky that exact coral-peach color you see in the bodice. I wanted to make something for my niece that felt like springtime wrapped up in yarn.
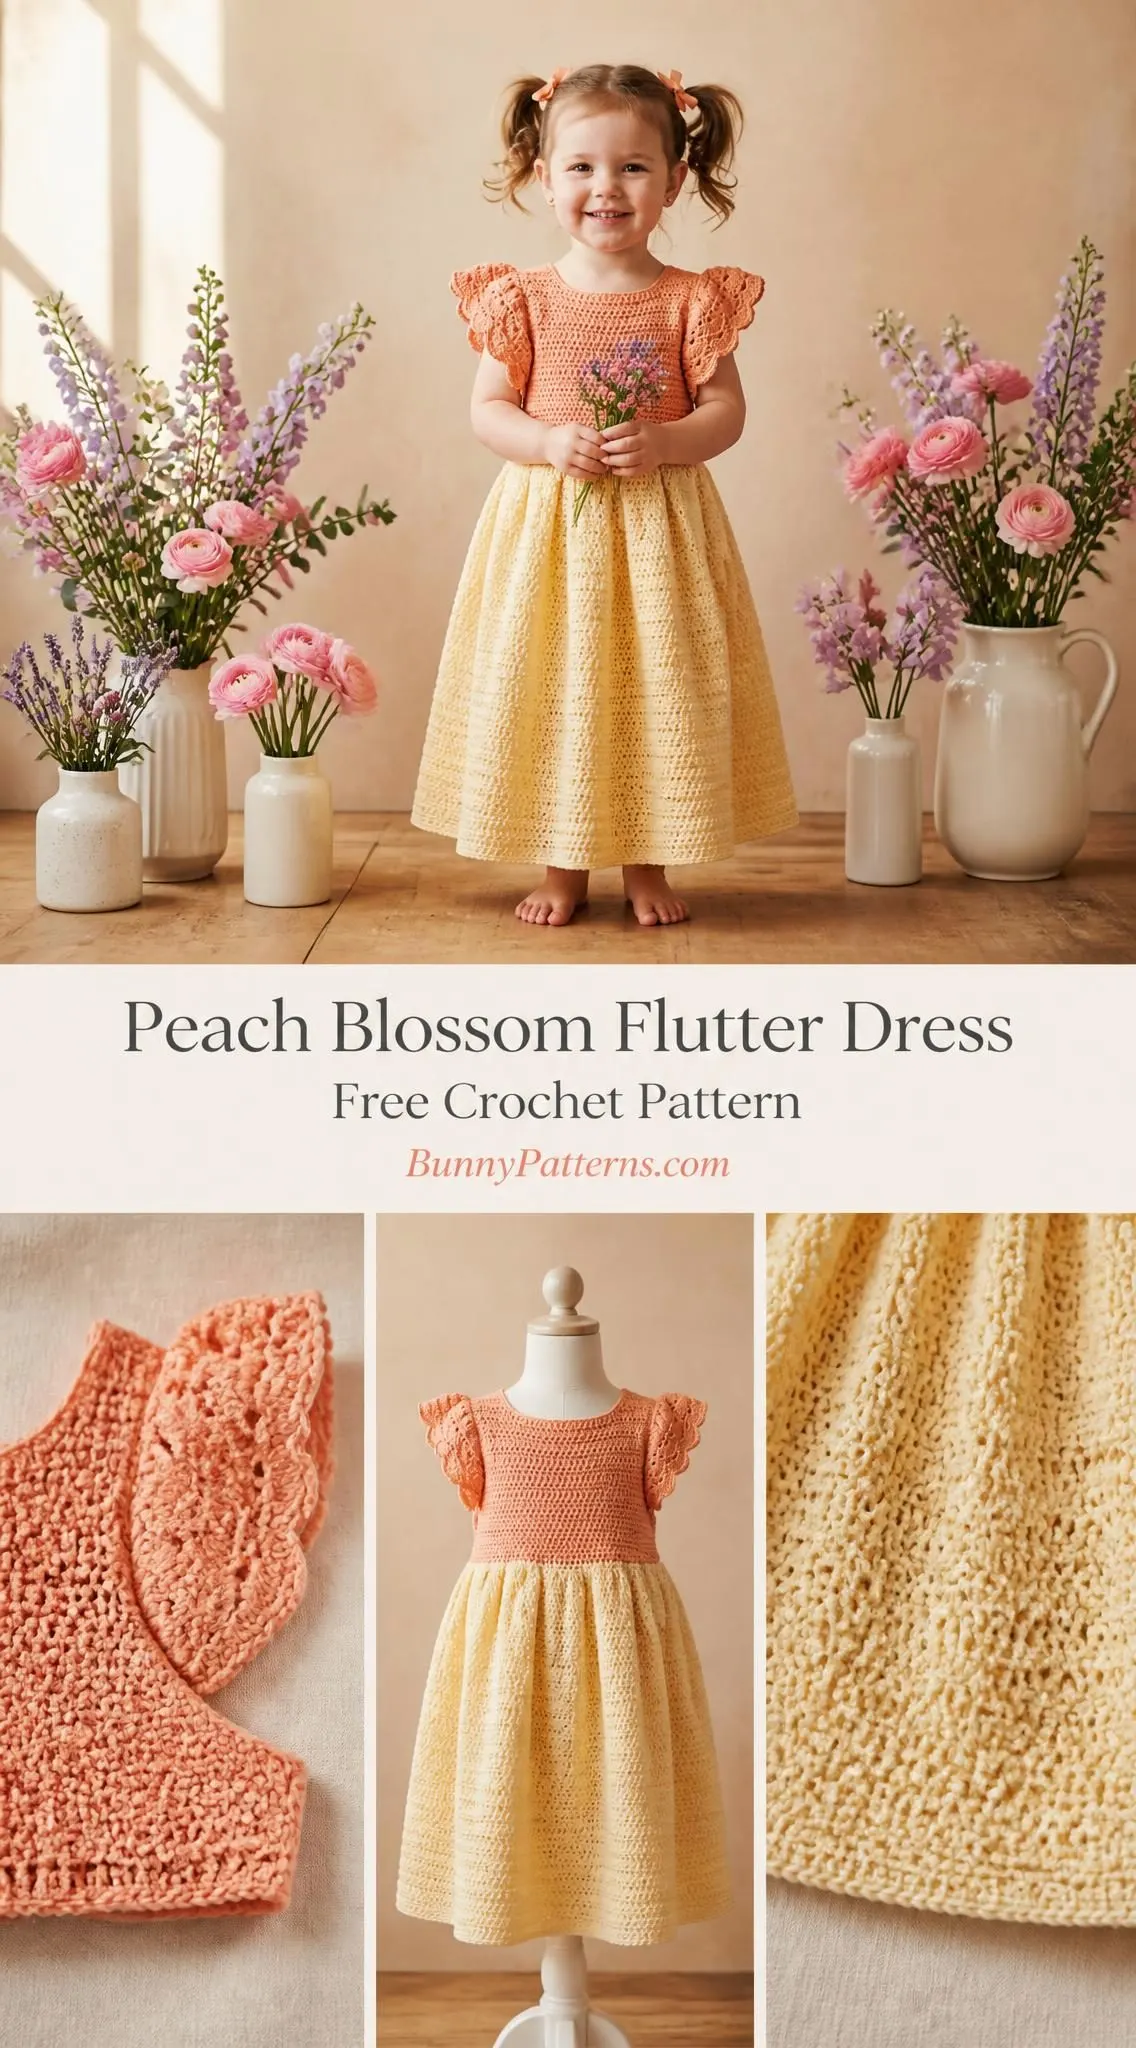
I called it the Peach Blossom Flutter Dress because of those delicate lace sleeves that reminded me of flower petals catching a breeze. The original version sat unfinished in my project bag for two whole years before I finally figured out how to get the skirt to drape just right.
Now it is ready for you. Four sizes from 12 months through 4T, a gorgeous moss stitch skirt in butter yellow, and those dreamy flutter sleeves that look so much harder than they actually are. Let me walk you through every single step.
What Makes This Crochet Dress Pattern Special
The Peach Blossom Flutter Dress combines two techniques that create stunning visual contrast. The bodice uses tight, structured single crochet in a warm coral-peach shade. The skirt flows in a textured moss stitch using soft butter yellow yarn. Where they meet at the waist, you get this beautiful gathered effect that gives the dress its classic silhouette.
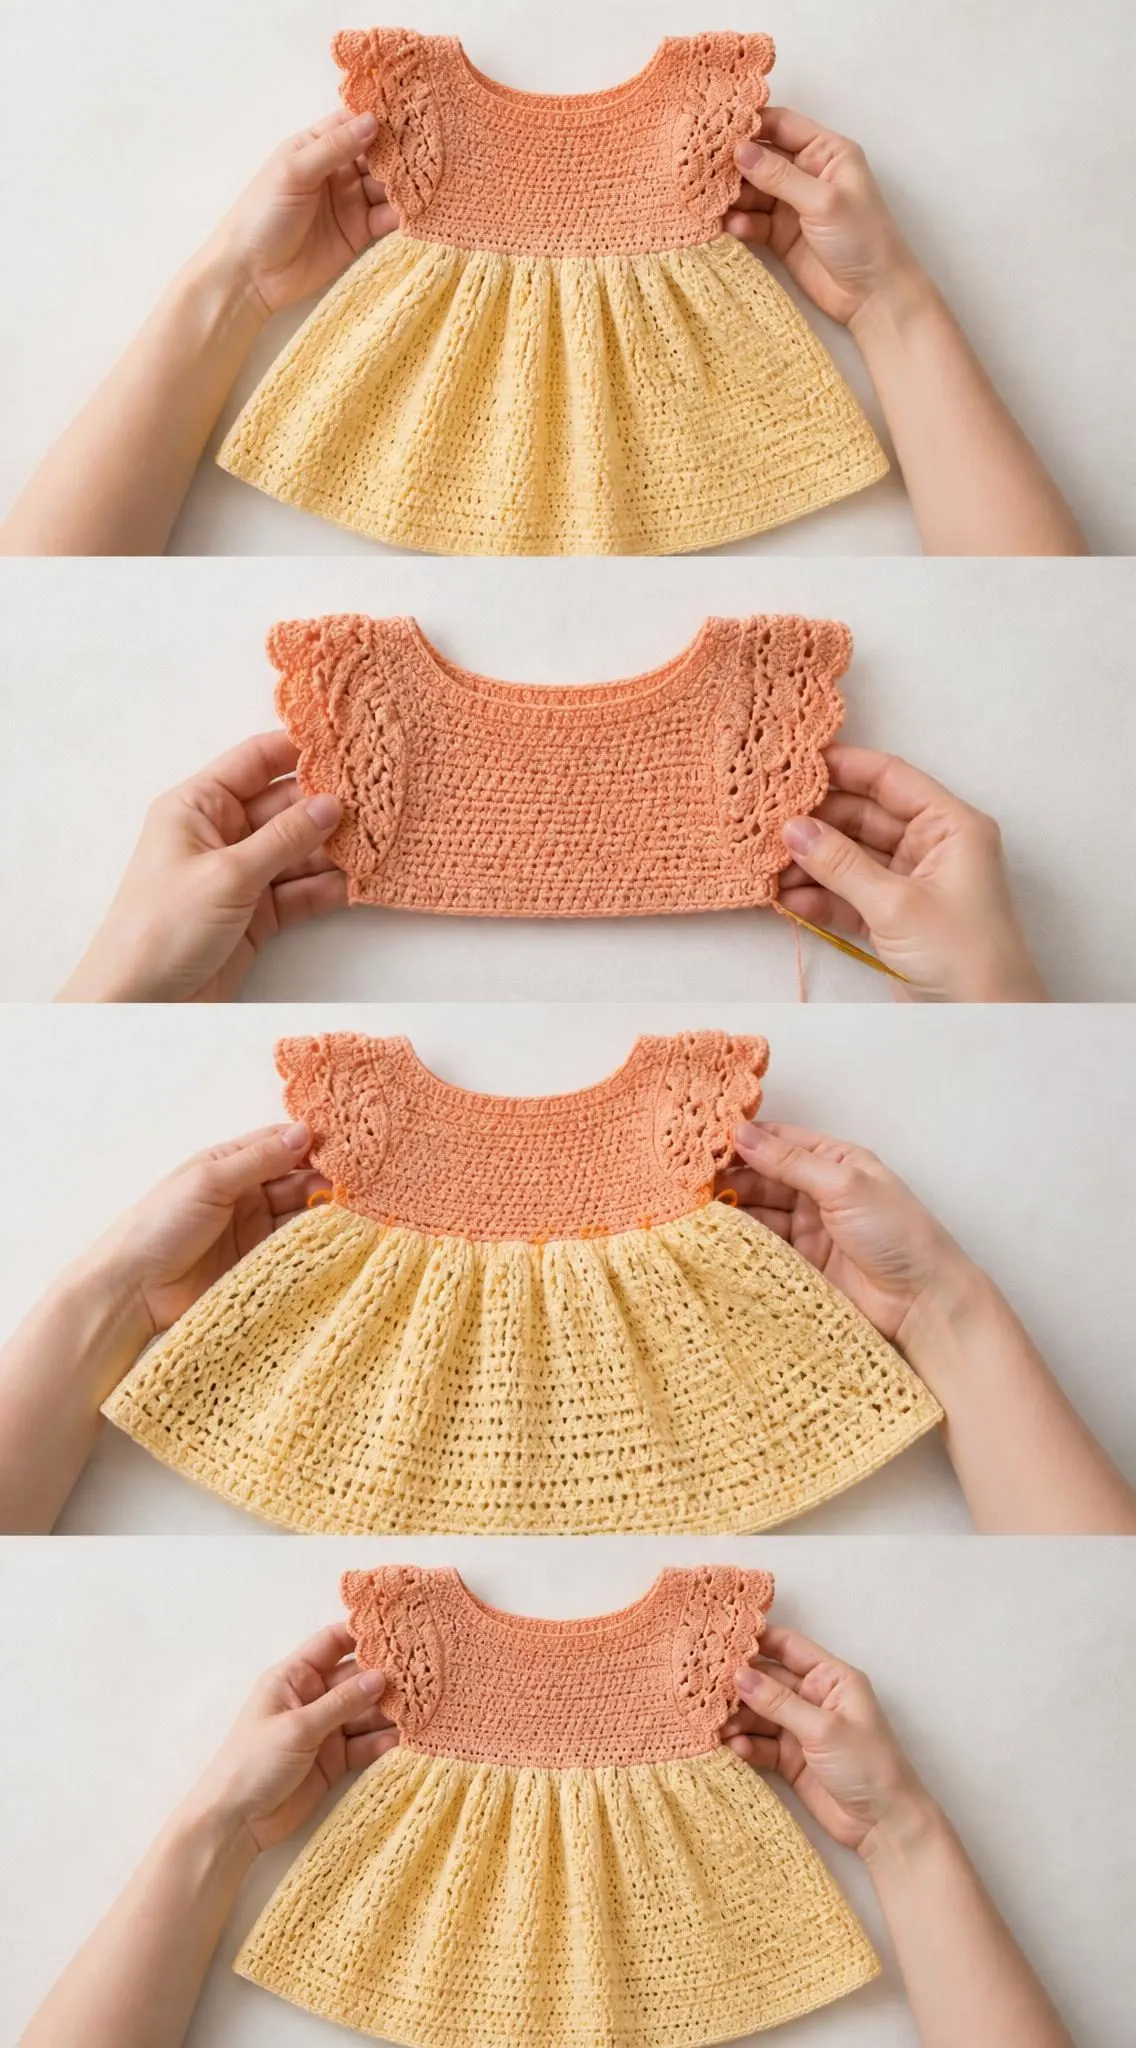
The flutter sleeves deserve their own paragraph. They look like intricate lacework, but they are actually flat panels worked separately using a simple shell stitch repeat. You crochet them flat, then attach them to the armhole openings. No complicated in-the-round sleeve shaping required.
This dress features a practical button closure along the center back of the bodice. Three small buttons make dressing a wiggly toddler so much easier than pulling something over their head.
Skill Level and Time Estimate
I am calling this an intermediate pattern. You should be comfortable working flat pieces in single crochet, understand basic increases and decreases for shaping, and feel confident seaming garment pieces together.
If you have completed a few small garment projects before, you can absolutely handle this dress. The techniques are not complicated. They just require patience and attention to stitch counts.
Time estimate: Plan for 12 to 18 hours of work depending on the size you choose. The bodice works up relatively quickly. The skirt takes longer because of the moss stitch texture. Allow extra time for blocking and assembly at the end.
Finished Measurements
This pattern includes four sizes. All measurements are given in order as 12 months, 2T, 3T, 4T.
Size 12 months: chest 18 inches, total length 15 inches, waist 17 inches
Size 2T: chest 20 inches, total length 17 inches, waist 19 inches
Size 3T: chest 22 inches, total length 19 inches, waist 21 inches
Size 4T: chest 24 inches, total length 21 inches, waist 23 inches
The dress is designed with approximately 1 inch of positive ease at the chest for comfortable movement.
Materials Needed
Yarn A (coral peach): DK weight cotton or cotton-acrylic blend. You will need approximately 200 yards for size 12M, 230 yards for 2T, 270 yards for 3T, or 310 yards for 4T.
Yarn B (butter yellow): DK weight cotton or cotton-acrylic blend. You will need approximately 300 yards for size 12M, 360 yards for 2T, 420 yards for 3T, or 490 yards for 4T.
Crochet hook: US size G-6 (4.0 mm). Adjust as needed to meet gauge.
Notions: Yarn needle, 6 stitch markers, scissors, three small buttons approximately 3/8 inch diameter, sewing needle and coordinating thread for buttons, rust-proof pins for blocking.
Yarn Suggestions
Paintbox Yarns Simply DK works beautifully for this project. It produces a smooth, even fabric that is machine washable. Perfect for baby garments.
Lion Brand 24/7 Cotton DK gives excellent stitch definition for the lace flutter sleeves and drapes wonderfully in the skirt.
Drops Safran adds a slight sheen and extra durability thanks to its polyamide content.
Any DK weight yarn that achieves gauge will work. Prioritize cotton or cotton-blend yarns for breathability and drape.
Gauge
Getting gauge right is critical for a fitted garment like this dress. Please take time to swatch.
Single crochet gauge: 20 stitches and 24 rows equals 4 inches square, blocked.
Moss stitch gauge: 18 stitch pattern units and 20 rows equals 4 inches square, blocked.
Work a swatch at least 5 inches square in each stitch pattern. Block it, let it dry completely, then measure the center 4 inches. Go down a hook size if your stitches are too loose. Go up a hook size if they are too tight.
Abbreviations and Stitch Definitions
Let me explain every stitch and abbreviation you will encounter in this pattern.
ch (chain): Yarn over, pull through loop on hook. This is your foundation.
sl st (slip stitch): Insert hook, yarn over, pull through stitch and loop on hook in one motion.
sc (single crochet): Insert hook into stitch, yarn over and pull up a loop (2 loops on hook), yarn over and pull through both loops.
sc2tog (single crochet 2 together): This is a decrease stitch. Insert hook into next stitch and draw up a loop. Insert hook into following stitch and draw up another loop. Yarn over and draw through all 3 loops on hook. You have turned 2 stitches into 1.
dc (double crochet): Yarn over, insert hook into stitch, yarn over and pull up a loop (3 loops on hook), yarn over and pull through 2 loops (2 loops remain), yarn over and pull through remaining 2 loops.
hdc (half double crochet): Yarn over, insert hook, yarn over and pull up a loop (3 loops on hook), yarn over and pull through all 3 loops at once.
ch-sp (chain space): The gap created by a chain in the previous row. You work into this space, not into the chain itself.
sk (skip): Pass over the indicated stitch without working into it.
RS (right side): The front of your work, the side that will show.
WS (wrong side): The back of your work, the side that faces inward.
pm (place marker): Insert a stitch marker to hold your place.
rep (repeat): Work the instructions again as indicated.
Special Stitches
Moss Stitch
Also called linen stitch or granite stitch. This creates that gorgeous textured fabric for the skirt.
The pattern works over an even number of stitches. Each row or round follows this rhythm: single crochet in next stitch, chain 1, skip 1 stitch. Repeat across or around.
On following rows, you work your single crochets into the chain-1 spaces from the previous row, and chain 1 over each single crochet.
Think of each sc plus ch-1 as one unit. The stitch counts in the skirt section refer to these units.
Lace Shell
This creates the beautiful flutter sleeve texture. Work double crochet, chain 1, double crochet, chain 1, double crochet all into the same stitch or space. You end up with a 3-dc fan with chain spaces between.
Picot
Chain 3, then slip stitch into the first chain you made. This creates a tiny decorative bump. You will use picots along the flutter sleeve edges and the skirt hem.
V-Stitch
Work double crochet, chain 2, double crochet all into the same stitch or space.
Important Pattern Notes
Read these before you begin. They will save you confusion later.
The bodice is worked flat in single crochet. The back bodice is worked in two separate halves to create the center back button opening.
Turning chains: Chain 1 at the beginning of single crochet rows does NOT count as a stitch. Always turn and work your first single crochet into the first stitch directly below.
The skirt joins to the bodice and works in the round from the waist down. A gathering effect is achieved by working more stitches into the bodice waist edge than exist in the bodice stitch count.
Flutter sleeves are worked flat as separate panels. You attach them along the armhole edges after all main pieces are seamed.
Use stitch markers at side seams and center front and back when working the skirt in the round.
Stitch counts appear in parentheses at the end of every row or round.
Sizes appear as 12M (2T, 3T, 4T) throughout. The first number is always size 12 months.
Yarn A is coral peach. Yarn B is butter yellow. Do not carry yarn between sections. Fasten off and rejoin as needed.
Front Bodice Instructions
With Yarn A and G-6 hook, chain 47 (53, 59, 65).
Row 1 (RS): Single crochet in 2nd chain from hook and in each chain across. Turn. (46, 52, 58, 64 sc)
Row 2 (WS): Chain 1, single crochet in each stitch across. Turn. (46, 52, 58, 64 sc)
Rows 3 through 14 (12, 14, 14): Repeat Row 2. At end of last row, do not turn. (46, 52, 58, 64 sc)
Checkpoint: Front bodice body should measure approximately 2.5 inches (2.5, 3, 3 inches) tall at this point.
Armhole Shaping for Front Bodice
Row 15 (13, 15, 15) (RS): Slip stitch across first 4 stitches, chain 1, single crochet in same stitch as last slip stitch, single crochet across to last 4 stitches, leave last 4 stitches unworked. Turn. (38, 44, 50, 56 sc)
Row 16 (14, 16, 16) (WS): Chain 1, sc2tog, single crochet across to last 2 stitches, sc2tog. Turn. (36, 42, 48, 54 sc)
Row 17 (15, 17, 17) (RS): Chain 1, sc2tog, single crochet across to last 2 stitches, sc2tog. Turn. (34, 40, 46, 52 sc)
Row 18 (16, 18, 18) (WS): Chain 1, sc2tog, single crochet across to last 2 stitches, sc2tog. Turn. (32, 38, 44, 50 sc)
Row 19 (17, 19, 19) (RS): Chain 1, single crochet in each stitch across. Turn. (32, 38, 44, 50 sc)
Rows 20 through 26 (18 through 24, 20 through 28, 20 through 30): Chain 1, single crochet in each stitch across. Turn. (32, 38, 44, 50 sc)
Checkpoint: Front bodice should now measure approximately 5.5 inches (5.5, 6, 6.5 inches) total height.
Front Neckline Shaping
On the next right side row, you will work across the first 10 (12, 14, 16) stitches only for the right shoulder. Leave the center 12 (14, 16, 18) stitches unworked. Then complete the left shoulder separately.
Right Shoulder
Row 27 (25, 29, 31) (RS): Chain 1, single crochet across first 10 (12, 14, 16) stitches. Turn. Leave remaining stitches on hold. (10, 12, 14, 16 sc)
Row 28 (26, 30, 32) (WS): Chain 1, sc2tog, single crochet across. Turn. (9, 11, 13, 15 sc)
Row 29 (27, 31, 33) (RS): Chain 1, single crochet across to last 2 stitches, sc2tog. Turn. (8, 10, 12, 14 sc)
Row 30 (28, 32, 34) (WS): Chain 1, single crochet in each stitch across. Turn. (8, 10, 12, 14 sc)
Row 31 (29, 33, 35) (RS): Chain 1, single crochet in each stitch across. Turn. (8, 10, 12, 14 sc)
Fasten off. This is the right shoulder strap.
Left Shoulder
With RS facing, skip center 12 (14, 16, 18) stitches, rejoin Yarn A in next stitch.
Row 27 (25, 29, 31) (RS): Chain 1, single crochet across remaining 10 (12, 14, 16) stitches. Turn. (10, 12, 14, 16 sc)
Row 28 (26, 30, 32) (WS): Chain 1, single crochet across to last 2 stitches, sc2tog. Turn. (9, 11, 13, 15 sc)
Row 29 (27, 31, 33) (RS): Chain 1, sc2tog, single crochet across. Turn. (8, 10, 12, 14 sc)
Row 30 (28, 32, 34) (WS): Chain 1, single crochet in each stitch across. Turn. (8, 10, 12, 14 sc)
Row 31 (29, 33, 35) (RS): Chain 1, single crochet in each stitch across. Turn. (8, 10, 12, 14 sc)
Fasten off.
Back Bodice Right Half
This half holds the buttons.
With Yarn A and G-6 hook, chain 25 (28, 31, 34).
Row 1 (RS): Single crochet in 2nd chain from hook and in each chain across. Turn. (24, 27, 30, 33 sc)
Row 2 (WS): Chain 1, single crochet in each stitch across. Turn. (24, 27, 30, 33 sc)
Rows 3 through 14 (12, 14, 14): Repeat Row 2. (24, 27, 30, 33 sc)
Armhole Shaping for Back Right Half
Row 15 (13, 15, 15) (RS): Slip stitch across first 4 stitches, chain 1, single crochet in same stitch as last slip stitch, single crochet across. Turn. (20, 23, 26, 29 sc)
Row 16 (14, 16, 16) (WS): Chain 1, single crochet across to last 2 stitches, sc2tog. Turn. (19, 22, 25, 28 sc)
Row 17 (15, 17, 17) (RS): Chain 1, sc2tog, single crochet across. Turn. (18, 21, 24, 27 sc)
Row 18 (16, 18, 18) (WS): Chain 1, single crochet across to last 2 stitches, sc2tog. Turn. (17, 20, 23, 26 sc)
Row 19 (17, 19, 19) (RS): Chain 1, single crochet in each stitch across. Turn. (17, 20, 23, 26 sc)
Rows 20 through 26 (18 through 24, 20 through 28, 20 through 30): Chain 1, single crochet in each stitch across. Turn. (17, 20, 23, 26 sc)
Back Right Shoulder Shaping
Row 27 (25, 29, 31) (RS): Chain 1, single crochet across first 8 (10, 12, 14) stitches for shoulder. Turn. Leave remaining 9 (10, 11, 12) stitches for neck edge unworked. (8, 10, 12, 14 sc)
Row 28 (26, 30, 32) (WS): Chain 1, single crochet in each stitch across. Turn. (8, 10, 12, 14 sc)
Row 29 (27, 31, 33) (RS): Chain 1, single crochet in each stitch across. Turn. (8, 10, 12, 14 sc)
Fasten off.
Back Bodice Left Half
This half will have the button loops.
Work exactly as Back Bodice Right Half, but mirror all shaping. The armhole decrease begins at the end of RS rows on the opposite edge from the center back opening.
With Yarn A and G-6 hook, chain 25 (28, 31, 34).
Row 1 (RS): Single crochet in 2nd chain from hook and in each chain across. Turn. (24, 27, 30, 33 sc)
Row 2 (WS): Chain 1, single crochet in each stitch across. Turn. (24, 27, 30, 33 sc)
Rows 3 through 14 (12, 14, 14): Repeat Row 2. (24, 27, 30, 33 sc)
Armhole Shaping for Back Left Half
Row 15 (13, 15, 15) (RS): Chain 1, single crochet across to last 4 stitches, leave last 4 stitches unworked. Turn. (20, 23, 26, 29 sc)
Row 16 (14, 16, 16) (WS): Chain 1, sc2tog, single crochet across. Turn. (19, 22, 25, 28 sc)
Row 17 (15, 17, 17) (RS): Chain 1, single crochet across to last 2 stitches, sc2tog. Turn. (18, 21, 24, 27 sc)
Row 18 (16, 18, 18) (WS): Chain 1, sc2tog, single crochet across. Turn. (17, 20, 23, 26 sc)
Row 19 (17, 19, 19) (RS): Chain 1, single crochet in each stitch across. Turn. (17, 20, 23, 26 sc)
Rows 20 through 26 (18 through 24, 20 through 28, 20 through 30): Chain 1, single crochet in each stitch across. Turn. (17, 20, 23, 26 sc)
Back Left Shoulder Shaping
Row 27 (25, 29, 31) (RS): Skip first 9 (10, 11, 12) stitches (neck edge), rejoin yarn, chain 1, single crochet across remaining 8 (10, 12, 14) stitches. Turn. (8, 10, 12, 14 sc)
Row 28 (26, 30, 32) (WS): Chain 1, single crochet in each stitch across. Turn. (8, 10, 12, 14 sc)
Row 29 (27, 31, 33) (RS): Chain 1, single crochet in each stitch across. Turn. (8, 10, 12, 14 sc)
Fasten off.
Checkpoint: Each back bodice half should measure approximately 6.5 inches (6.5, 7, 7.5 inches) total height. Shoulder straps should be 8 (10, 12, 14) stitches wide, matching front shoulder strap width exactly.
Flutter Sleeves (Make 2)
The flutter sleeve is a flat lace panel shaped in a slight arc. It has a scalloped and picot-edged outer edge and a straight inner edge for attachment to the armhole.
With Yarn A and G-6 hook, chain 31 (33, 35, 37).
Row 1 (RS): Single crochet in 2nd chain from hook, chain 1, skip 1 chain, single crochet in next chain, repeat from to across. Turn. (16, 17, 18, 19 sc and 15, 16, 17, 18 ch-1 spaces)
Row 2 (WS): Chain 3 (counts as dc), double crochet in same stitch, skip ch-1 space, lace shell in next single crochet, repeat from to across, ending double crochet in last single crochet. Turn.
This row produces 7 (8, 8, 9) lace shells plus a double crochet at each end.
Row 3 (RS): Chain 1, single crochet in first double crochet, chain 2, single crochet in center double crochet of lace shell, repeat from to across, single crochet in top of chain-3. Turn. (9, 10, 10, 11 sc and 7, 8, 8, 9 ch-2 spaces)
Row 4 (WS): Chain 1, single crochet in first single crochet, lace shell in ch-2 space, single crochet in next single crochet, repeat from to across. Turn. (7, 8, 8, 9 lace shells with single crochet between)
Row 5 (RS): Chain 1, single crochet in first single crochet, chain 3, single crochet in center double crochet of next lace shell, repeat from to across, single crochet in last single crochet. Turn.
Row 6 Outer Edge Picot Row (WS): Chain 1, slip stitch in first single crochet, chain 3, slip stitch in first chain of ch-3 to make picot, slip stitch in ch-3 space, chain 3, slip stitch in first chain to make picot, slip stitch in next single crochet, repeat from to across. Fasten off.
Inner Edge: The straight edge formed by the foundation chain is your attachment edge. Rejoin Yarn A at foundation chain end, slip stitch evenly across all single crochets of Row 1 to stabilize. Fasten off.
Make the second flutter sleeve the same way.
Assembly Instructions
Take your time with assembly. This is where your dress comes together beautifully.
Step 1: Seam Shoulders
Align front and back shoulder straps at each shoulder. Using yarn needle and Yarn A, whipstitch through both loops of corresponding stitches. Seam both right and left shoulders. You are seaming 8 (10, 12, 14) stitches per shoulder.
Step 2: Seam Sides
With right sides together, align front and back bodice side edges from waist up to armhole. Match your rows carefully. Whipstitch side seams closed. Leave armhole edges open.
Step 3: Attach Flutter Sleeves
Pin each flutter sleeve with its inner straight edge along the armhole opening. The flutter sleeve should span from approximately 1 inch in front of the shoulder seam to 1 inch behind it, sitting centered on the shoulder. Slip stitch the inner edge of the flutter sleeve to the armhole edge using Yarn A. Fasten off and weave in ends.
Step 4: Back Button Loops
With Yarn A and right side facing, join yarn at top right corner of Back Left Half (the half with the open edge at center back). Work a row of single crochet evenly down the center back edge. Place 3 button loops at approximately 0.5 inch from the top, 1.5 inches from the top, and 2.5 inches from the top.
For each button loop: single crochet to position, chain 3, skip 1 single crochet on edge, single crochet in next stitch to form loop. Fasten off.
Step 5: Buttons
Sew three buttons onto the Right Half center back edge, aligned with the button loops. Use sewing needle and coordinating thread.
Checkpoint: Assembled bodice should measure 9 inches (9, 10, 10.5 inches) chest circumference laid flat. Total bodice height from waist to highest shoulder point should be approximately 7.5 inches (7.5, 8, 8.5 inches).
Skirt Instructions
The skirt is worked in the round using moss stitch in Yarn B. It joins to the bodice at the waist with a gathering increase round, then works downward.
Waist Joining Round
Hold assembled bodice with wrong side facing you. With Yarn B, join at right side seam of waist edge.
The bodice waist edge has 46 (52, 58, 64) single crochets total. To create gentle gather, work into each bodice waist stitch as follows. In every 5th stitch, work 2 single crochets.
Size 12M: Work single crochet in 4 stitches, 2 single crochet in next stitch, repeat 9 times, 2 single crochet in last stitch. Join with slip stitch. (56 sc)
Size 2T: Single crochet in 4 stitches, 2 single crochet in next stitch, repeat 10 times, single crochet in last 2 stitches. Join with slip stitch. (62 sc)
Size 3T: Single crochet in 4 stitches, 2 single crochet in next stitch, repeat 11 times, single crochet in last 2 stitches, 2 single crochet in last stitch. Join with slip stitch. (70 sc)
Size 4T: Single crochet in 4 stitches, 2 single crochet in next stitch, repeat 12 times, single crochet in last 4 stitches. Join with slip stitch. (76 sc)
Skirt Round 1 (Set Up Moss Stitch)
Single crochet in first stitch, chain 1, skip 1 stitch, repeat from to around. Join with slip stitch to first single crochet.
Units per size: 28 (31, 35, 38) moss stitch units.
Skirt Round 2
Single crochet in ch-1 space, chain 1, skip single crochet, repeat from to around. Join with slip stitch to first single crochet. (28, 31, 35, 38 units)
Repeat Skirt Round 2 throughout the skirt, working increase rounds as follows.
Skirt Increase Rounds
Every 8 rounds, work an increase round to widen the skirt for an A-line silhouette.
Place stitch markers at positions 14 and 28 (2T: 15 and 31, 3T: 17 and 35, 4T: 19 and 38) for increase placement.
Increase Round (all sizes): Work moss stitch to marked position. Work (single crochet, chain 1, single crochet, chain 1) into same ch-space to create 2 units from 1. Remove marker. Continue in moss stitch to next marker, repeat increase, remove marker. Replace markers in new positions. Join with slip stitch. (adds 4 stitches or 2 units per increase round)
Stitch counts after each increase round:
Size 12M: Start with 56 stitches (28 units). After Round 8: 60 stitches (30 units). After Round 16: 64 stitches (32 units). After Round 24: 68 stitches (34 units).
Size 2T: Start with 62 stitches (31 units). After Round 8: 66 stitches (33 units). After Round 16: 70 stitches (35 units). After Round 24: 74 stitches (37 units).
Size 3T: Start with 70 stitches (35 units). After Round 8: 74 stitches (37 units). After Round 16: 78 stitches (39 units). After Round 24: 82 stitches (41 units).
Size 4T: Start with 76 stitches (38 units). After Round 8: 80 stitches (40 units). After Round 16: 84 stitches (42 units). After Round 24: 88 stitches (44 units).
Skirt Length
Continue working moss stitch rounds without further increases until skirt measures the following from joining round:
Size 12M: 8 inches
Size 2T: 9.5 inches
Size 3T: 11 inches
Size 4T: 12.5 inches
Approximate total rounds worked including increase rounds: Size 12M approximately 40 rounds, Size 2T approximately 47 rounds, Size 3T approximately 55 rounds, Size 4T approximately 62 rounds.
Skirt Hem Round
When skirt has reached desired length, work 1 round of single crochet. Work 1 single crochet into each single crochet and 1 single crochet into each ch-1 space around to close the moss stitch and create a clean hemline. Join with slip stitch. Do not fasten off.
Hem Edging
With Yarn B:
Round 1: Chain 1, single crochet in each stitch around. Join with slip stitch. (68, 74, 82, 88 sc)
Round 2: Chain 3, slip stitch in same stitch to create picot, slip stitch in next 2 stitches, repeat from to around. Join. Fasten off.
Finishing Your Peach Blossom Flutter Dress
Weave in all remaining ends using your yarn needle. Take your time with this step. A garment this pretty deserves tidy finishing.
Blocking: Wet block your finished dress by soaking it in lukewarm water for 15 minutes. Gently squeeze out excess water without wringing. Lay flat on a blocking mat or clean towel. Shape the bodice, smooth out the skirt, and gently arrange the flutter sleeves. Pin if needed. Allow to dry completely before moving.
Blocking makes such a difference in how professional your finished dress looks. The moss stitch opens up beautifully, and the lace on the flutter sleeves becomes crisp and defined.
Care Instructions
Machine wash cold on gentle cycle or hand wash. Lay flat to dry. If using 100% cotton yarn, expect minimal shrinkage after first wash. Steam blocking between washes will keep the dress looking fresh.
You Did It!
This Peach Blossom Flutter Dress crochet pattern takes patience, but the result is absolutely worth every stitch. Watching a little one twirl in a dress you made by hand is one of the best feelings in the world.
Thank you so much for choosing this pattern. I hope it brings you hours of happy crocheting and creates beautiful memories for someone you love. If you make this dress, I would absolutely love to see it. Tag me on Instagram or share a photo in our Facebook group.
If you loved this crochet pattern, go ahead and save it to your Pinterest boards so you can find it again later. And please drop a comment below if you make your own Peach Blossom Flutter Dress. I read every single one, and nothing makes my day like seeing your finished projects!
You Might Also Like
- Sage Green Ruffle Baby Romper Free Crochet Pattern
- Lavender Butterfly Baby Dress Free Crochet Pattern
- Ocean Wave Hexagon Throw Free Crochet Pattern
- Ocean Blue Ombre Drawstring Bucket Bag Free Crochet Pattern