Rainbow Butterfly Wings Cardigan Free Crochet Pattern
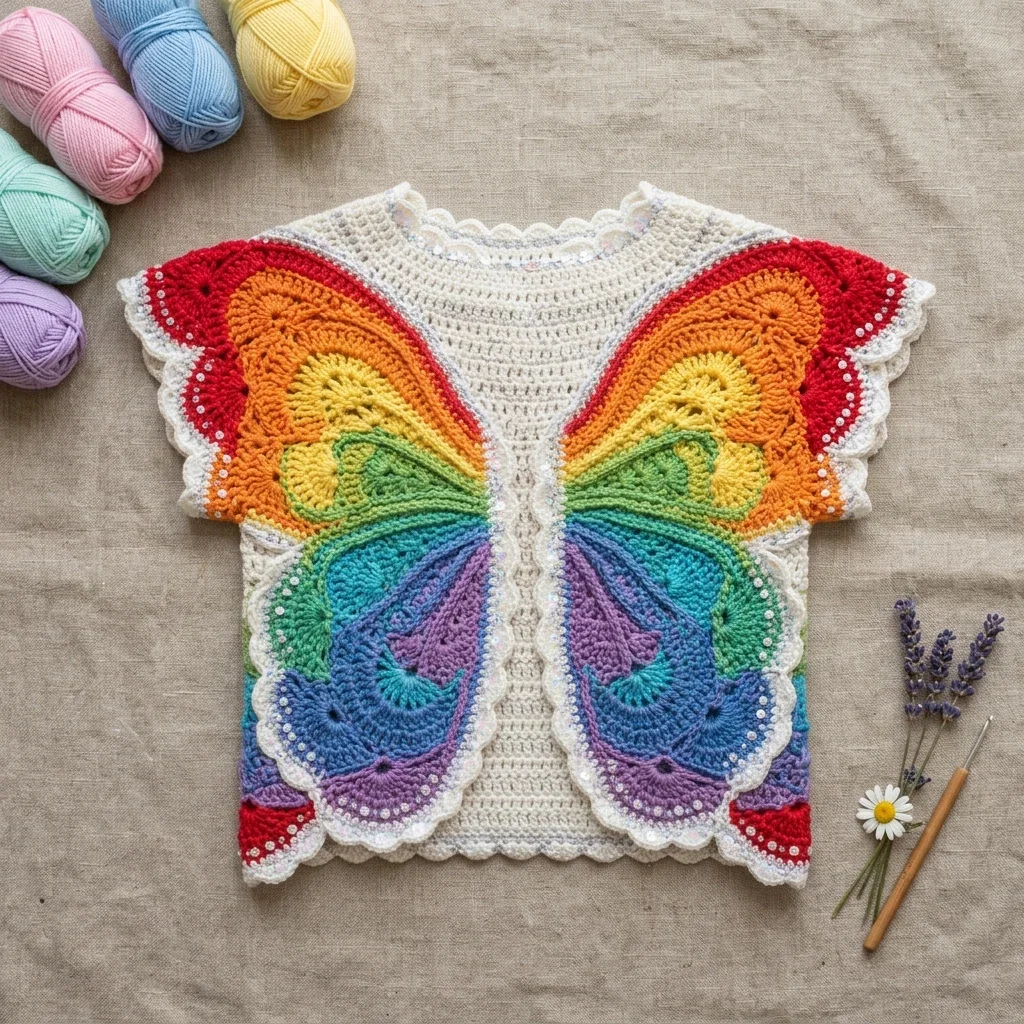
When I first sketched out this design, I had one goal in mind. I wanted to create a wearable piece of art that would make everyone who saw it stop and stare. I pictured bold rainbow wings spanning the entire front of a cardigan, worked in those gorgeous fan stitches that catch the light just right. I wanted the construction to challenge experienced crocheters while still being achievable with patience and clear instructions.
After countless hours of swatching, reworking color sequences, and perfecting the wing panel shaping, I am SO pleased with how this turned out. The way the rainbow colors flow from red at the top through lavender at the bottom creates this stunning gradient effect. And when you add those tiny pearl bead embellishments along the white outlines? Pure magic.
This is definitely a showstopper project. It takes time and skill, but the finished cardigan is unlike anything you will find in stores. Let me walk you through everything you need to bring these butterfly wings to life.
About This Rainbow Butterfly Wings Cardigan Crochet Pattern
This stunning garment combines a simple single crochet body with intricate butterfly wing appliques that wrap around from front to back. The wings are constructed using layered fan stitches, shell stitches, and puff stitches worked in a full rainbow progression. Think red, orange, yellow, green, teal, blue, purple, and lavender, all outlined with crisp white yarn throughout.
The cardigan itself is a cropped, open-front style with no buttons or closures. It hits at or just above your natural waist and features a rounded crew neckline with scallop edging. The cap sleeves form naturally through the shoulder-to-armhole shaping and get finished with matching scallop borders.
Construction order matters here. You will work the bodice back panel first, then both front panel halves, then all four butterfly wing applique panels separately. After that comes assembly, border work, and finishing with those beautiful bead embellishments.
Skill Level and Time Investment
I am going to be honest with you. This is an advanced level pattern. You need to feel comfortable with colorwork using multiple yarn colors within a single row, fine-gauge fan and shell stitch work, applique construction and joining, and understanding how large motifs need to be placed spatially.
The butterfly wing panels involve complex shaping curves that must mirror each other precisely. If you have never finished a garment before or worked with frequent color changes, I would recommend building up to this project with a few simpler colorwork pieces first.
Time estimate: Plan for 40 to 60 hours of work, depending on your experience. The wing panels alone will take approximately 25 to 30 hours. This is absolutely a labor of love, not a weekend project.
Finished Measurements
This pattern is written for a finished bust of 36 inches (91.5 cm) with a finished length of 15 inches (38 cm) from shoulder to hem. The garment has approximately 2 inches (5 cm) of positive ease, meaning it fits a 34 inch (86.5 cm) bust comfortably.
Here are all the key measurements:
Materials Needed for the Butterfly Wings Cardigan
Yarn Requirements
You will need DK weight yarn (Light 3) in nine colors:
Yarn Suggestions
Lion Brand Yarn Felt-Proof Wool works beautifully for this project. It blocks well and holds stitch definition, which is critical for making those fan stitch wing sections really pop.
Paintbox Yarns Simply DK is another excellent choice. They offer a wide spectrum of colors that closely match the rainbow progression needed, and the price point is friendly for a project requiring this many colors.
Cascade 220 Superwash Sport used doubled gives a DK weight effect with excellent stitch definition.
Important substitution note: Choose a smooth DK weight yarn with low halo. Avoid fuzzy or textured yarns for the wing panels because stitch definition is critical to the visual impact. Your white yarn should be bright white, not off-white or cream, to maintain that crisp contrast with the rainbow colors.
Hooks
Notions
Gauge
Getting gauge right is mandatory for this garment. Even small deviations will affect both the finished bust measurement and how the wing panels fit onto the body.
Body panels (Color A, E-4 / 3.5 mm hook):
20 single crochet (sc) x 24 rows = 4 inches / 10 cm in single crochet, blocked
Wing applique panels (E-4 / 3.5 mm hook, fan stitch pattern):
One full 7-stitch fan repeat plus 2 chain spaces = 1.75 inches / 4.5 cm wide
4 fan rows = 2 inches / 5 cm tall
How to Make a Gauge Swatch
Chain 24.
Row 1: Single crochet (sc) in second chain (ch) from hook and in each ch across. (23 sc)
Rows 2-26: Chain 1, turn, sc across. (23 sc)
Fasten off. Block your swatch. Measure the interior 20 stitches and 24 rows. Adjust your hook size if needed.
Abbreviations and Definitions
Let me explain every abbreviation you will encounter:
Special Stitches for the Butterfly Wing Panels
These decorative stitches create the beautiful texture in the wing sections.
Shell Stitch
Work 5 double crochet (dc) all into the same stitch or space. This creates a fan-shaped cluster. In the wing panels, shells are worked into chain spaces from the previous row.
Puff Stitch
This creates a puffy, textured bump:
1. Insert hook into stitch, yarn over, pull up a loop to the height of a dc. (2 loops on hook)
2. Insert hook into same stitch again, yarn over, pull up a loop to same height. (4 loops on hook)
3. Insert hook into same stitch again, yarn over, pull up a loop to same height. (6 loops on hook)
4. Yarn over and pull through all 6 loops on hook. Chain 1 to close.
Fan Stitch
Work (2 dc, ch 1, 2 dc, ch 1, 2 dc) all into the same stitch or space. This 7-part cluster with its 6 dc and 2 internal chain-1 spaces forms the primary motif of the butterfly wing sections.
Scallop Border Stitch
Skip 2 stitches, work 5 dc into next stitch, skip 2 stitches, slip stitch into next stitch. This 6-stitch unit forms each shell along the border edges.
Reverse Single Crochet
Working from left to right (opposite your normal direction), insert hook into the next stitch to the right, yarn over, pull up a loop, yarn over, pull through both loops on hook. This is optional for accenting wing panel outlines.
Important Pattern Notes Before You Begin
Read through these notes carefully. They will save you headaches later.
1. The body is worked flat in rows. The back panel is one piece. The front is worked as two separate mirror-image halves.
2. The butterfly wing applique panels are worked as four separate flat pieces: upper left wing, upper right wing, lower left wing, lower right wing. Each pair is a mirror image.
3. Wing panels are worked from the body-center edge outward to the tip. The curved wing shape comes from strategic increases and decreases.
4. For color changes within wing rows, work the last yarn-over of the final stitch in the old color with the new color, then continue with the new color. Do not cut yarn between small color sections within a single row. Carry yarn loosely along the back instead.
5. The rainbow color sequence from top to bottom of each wing is: Red (B), Orange (C), Yellow (D), Green (E), Teal (F), Blue (G), Purple (H), Lavender (I). White (A) is used throughout for chain spaces, outlines, and borders.
6. Block all pieces before assembly. The wing panels especially need blocking to open up the fan stitches and flatten the scalloped edges.
7. Bead embellishments are added after all crocheting is complete, using a beading needle and thread to tack beads at regular intervals along the white outlines.
Back Panel Instructions
Using Color A (White) and E-4 / 3.5 mm hook, chain 92.
Foundation Row (WS): Sc in 2nd ch from hook and in each ch across. Turn. (91 sc)
Rows 1-10 (and continuing): Ch 1, sc in each st across. Turn. (91 sc)
Continue working even in sc until piece measures 8 inches / 20.5 cm from foundation, ending with a WS row. You should have completed approximately 48 rows total including the foundation row.
Checkpoint: Your piece should measure 8 inches / 20.5 cm tall and 18.2 inches / 46 cm wide.
Armhole Shaping (Back Panel)
Next Row (RS): Sl st across first 6 sts, ch 1, sc in next st and each st across to last 6 sts. Leave last 6 sts unworked. Turn. (79 sc)
Row 1 of armhole: Ch 1, sc2tog, sc across to last 2 sts, sc2tog. Turn. (77 sc)
Row 2: Ch 1, sc2tog, sc across to last 2 sts, sc2tog. Turn. (75 sc)
Row 3: Ch 1, sc2tog, sc across to last 2 sts, sc2tog. Turn. (73 sc)
Row 4: Ch 1, sc in each st across. Turn. (73 sc)
Row 5: Ch 1, sc2tog, sc across to last 2 sts, sc2tog. Turn. (71 sc)
Row 6: Ch 1, sc in each st across. Turn. (71 sc)
Continue working even in sc until armhole measures 7 inches / 18 cm from the first armhole row, ending with a WS row. That is approximately 42 rows total for the armhole section.
Shoulder and Neck Shaping (Back Panel)
Work across first 15 sts only for right shoulder. Turn. (15 sc)
Row 1: Ch 1, sc2tog, sc to end. Turn. (14 sc)
Row 2: Ch 1, sc to last 2 sts, sc2tog. Turn. (13 sc)
Row 3: Ch 1, sc to end. Fasten off. (13 sc)
Rejoin yarn to left shoulder with RS facing (the last 15 sts of the row, leaving center 41 sts unworked for back neck).
Row 1: Ch 1, sc across to last 2 sts, sc2tog. Turn. (14 sc)
Row 2: Ch 1, sc2tog, sc to end. Turn. (13 sc)
Row 3: Ch 1, sc to end. Fasten off. (13 sc)
Checkpoint: Your completed back panel should measure 15 inches / 38 cm from foundation to shoulder. Each shoulder section is 13 sts wide (approximately 2.6 inches / 6.6 cm). The back neck opening is 41 sts (8.2 inches / 20.8 cm).
Right Front Panel Instructions
Using Color A (White) and E-4 / 3.5 mm hook, chain 47.
Foundation Row (WS): Sc in 2nd ch from hook and in each ch across. Turn. (46 sc)
Work even in sc for the same number of rows as the back panel body section (approximately 48 rows total), ending with a WS row, until piece measures 8 inches / 20.5 cm from foundation. Maintain 46 sc per row throughout.
Armhole Shaping (Right Front Panel)
Next Row (RS): Sl st across first 6 sts, ch 1, sc in next st and each st across. Turn. (40 sc)
Row 1 of armhole: Ch 1, sc across to last 2 sts, sc2tog. Turn. (39 sc)
Row 2: Ch 1, sc2tog, sc across. Turn. (38 sc)
Row 3: Ch 1, sc across to last 2 sts, sc2tog. Turn. (37 sc)
Row 4: Ch 1, sc across. Turn. (37 sc)
Row 5: Ch 1, sc across to last 2 sts, sc2tog. Turn. (36 sc)
Row 6: Ch 1, sc across. Turn. (36 sc)
Continue working even until armhole measures 4 inches / 10 cm from first armhole row, ending with a WS row.
Neck Shaping (Right Front Panel)
Next Row (RS): Ch 1, sc across first 13 sts only (right shoulder sts). Leave remaining 23 sts unworked for neck edge. Turn. (13 sc)
Row 1: Ch 1, sc2tog, sc to end. Turn. (12 sc)
Row 2: Ch 1, sc to last 2 sts, sc2tog. Turn. (11 sc)
Row 3: Ch 1, sc2tog, sc to end. Turn. (10 sc)
Row 4: Ch 1, sc to end. Fasten off. (10 sc)
Left Front Panel Instructions
Work as Right Front Panel with all shaping mirrored.
Foundation Row (WS): Chain 47, sc in 2nd ch from hook and each ch across. Turn. (46 sc)
Work body section even in sc for same number of rows as right front panel.
Armhole Shaping (Left Front Panel)
Next Row (RS): Ch 1, sc across to last 6 sts. Leave last 6 sts unworked. Turn. (40 sc)
Row 1 of armhole: Ch 1, sc2tog, sc across. Turn. (39 sc)
Row 2: Ch 1, sc across to last 2 sts, sc2tog. Turn. (38 sc)
Row 3: Ch 1, sc2tog, sc across. Turn. (37 sc)
Row 4: Ch 1, sc across. Turn. (37 sc)
Row 5: Ch 1, sc2tog, sc across. Turn. (36 sc)
Row 6: Ch 1, sc across. Turn. (36 sc)
Continue even until armhole measures 4 inches / 10 cm from first armhole row.
Neck Shaping (Left Front Panel)
Next Row (RS): Ch 1, sc across first 13 sts. Leave remaining 23 sts unworked. Turn. (13 sc)
Row 1: Ch 1, sc2tog, sc to end. Turn. (12 sc)
Row 2: Ch 1, sc to last 2 sts, sc2tog. Turn. (11 sc)
Row 3: Ch 1, sc2tog, sc to end. Turn. (10 sc)
Row 4: Ch 1, sc to end. Fasten off. (10 sc)
Upper Right Wing Panel Instructions
This panel forms the upper-right butterfly wing, covering from the right shoulder area diagonally down to the center front and across to the right armhole edge.
Using Color A and E-4 hook. Work begins at the inner top point of the wing (near neckline center).
Foundation ring: Ch 6, sl st to first ch to form ring. (Or use a magic ring.)
Row 1 (RS, Color A): Ch 3 (counts as dc here and throughout), (2 dc, ch 2, 3 dc) in ring. Turn. (6 dc, 1 ch-2 sp)
Row 2 (Color A): Ch 3, dc in same st, dc in next dc, ch 1, (3 dc, ch 2, 3 dc) in ch-2 sp, ch 1, dc in next dc, 2 dc in top of ch-3. Turn. (14 dc, 1 ch-2 sp, 2 ch-1 sps)
Row 3 (Color B, Red): Ch 3, dc in same st, dc in each dc to ch-1 sp, ch 1, 3 dc in ch-1 sp, ch 1, (3 dc, ch 2, 3 dc) in ch-2 sp, ch 1, 3 dc in next ch-1 sp, ch 1, dc in each dc to last st, 2 dc in top of ch-3. Turn. (24 dc, 1 ch-2 sp, 4 ch-1 sps)
Row 4 (Color A): Ch 3, dc in same st, dc in each dc to first ch-1 sp, [ch 1, 3 dc in ch-sp] rep across to ch-2 sp, ch 1, (3 dc, ch 2, 3 dc) in ch-2 sp, ch 1, [3 dc in ch-sp, ch 1] rep across to last 2 dc, dc in each dc to last st, 2 dc in top of ch-3. Turn. (34 dc, 1 ch-2 sp, 6 ch-1 sps)
Row 5 (Color C, Orange): Rep Row 4 pattern, adding one more 3-dc group to each side. (46 dc, 1 ch-2 sp, 8 ch-1 sps)
Row 6 (Color A): Rep expansion pattern. (58 dc, 1 ch-2 sp, 10 ch-1 sps)
Row 7 (Color D, Yellow): Rep expansion pattern. (70 dc, 1 ch-2 sp, 12 ch-1 sps)
Row 8 (Color A): Rep expansion pattern. (82 dc, 1 ch-2 sp, 14 ch-1 sps)
Row 9 (Color E, Green): Rep expansion pattern. (94 dc, 1 ch-2 sp, 16 ch-1 sps)
Row 10 (Color A): Rep expansion pattern. (106 dc, 1 ch-2 sp, 18 ch-1 sps)
Row 11 (Color F, Teal): Rep expansion pattern. (118 dc, 1 ch-2 sp, 20 ch-1 sps)
Row 12 (Color A): Rep expansion pattern. (130 dc, 1 ch-2 sp, 22 ch-1 sps)
Row 13 (Color G, Blue): Rep expansion even (no new additions to sides). (130 dc, 1 ch-2 sp, 22 ch-1 sps)
Row 14 (Color A): Rep even row. (130 dc, 1 ch-2 sp, 22 ch-1 sps)
Upper Wing Taper Phase
Row 15 (Color H, Purple): Ch 3, sk first 2 dc, dc in each dc to first ch-1 sp, [ch 1, 3 dc in ch-sp] rep across to ch-2 sp, ch 1, (3 dc, ch 2, 3 dc) in ch-2 sp, ch 1, [3 dc in ch-sp, ch 1] rep across to last ch-1 sp, dc in each dc leaving last 2 dc unworked. Turn. (118 dc, 1 ch-2 sp, 20 ch-1 sps)
Row 16 (Color A): Rep taper row. (106 dc, 1 ch-2 sp, 18 ch-1 sps)
Row 17 (Color I, Lavender): Rep taper row. (94 dc, 1 ch-2 sp, 16 ch-1 sps)
Row 18 (Color A): Rep taper row. (82 dc, 1 ch-2 sp, 14 ch-1 sps)
Row 19 (Color H, Purple): Rep taper row. (70 dc, 1 ch-2 sp, 12 ch-1 sps)
Row 20 (Color A): Rep taper row. (58 dc, 1 ch-2 sp, 10 ch-1 sps)
Row 21 (Color G, Blue): Rep taper row. (46 dc, 1 ch-2 sp, 8 ch-1 sps)
Row 22 (Color A): Rep taper row. (34 dc, 1 ch-2 sp, 6 ch-1 sps)
Row 23 (Color F, Teal): Rep taper row. (22 dc, 1 ch-2 sp, 4 ch-1 sps)
Row 24 (Color A): Rep taper row. (10 dc, 1 ch-2 sp, 2 ch-1 sps)
Row 25 (Color E, Green): Ch 3, sk first dc, dc in next dc, ch 1, (dc, ch 2, dc) in ch-2 sp, ch 1, dc in next dc, sk last dc, sl st in top of ch-3. Fasten off. (4 dc, 1 ch-2 sp, 2 ch-1 sps at tip)
Wing Panel Construction Framework
All four wing panels follow this structural logic:
Phase 1, Expansion: Begin at inner corner (near body center) or at the top point. Increase one fan or 3-dc cluster group per side every 2 rows. Work even rows in between.
Phase 2, Maximum width: The upper wing reaches its widest point at approximately Row 18. The lower wing reaches maximum width at approximately Row 12.
Phase 3, Taper to tip: Decrease by omitting one group per side every 2 rows until 1 fan remains. Close off the tip.
Phase 4, Outline: With Color A (White), work 1 round of sc around the entire perimeter of the completed wing panel, working 3 sc into each outer corner point and sc2tog at each inner concave point.
Create the Upper Left Wing Panel as a mirror image of the Upper Right Wing Panel. Create the Lower Right and Lower Left Wing Panels following the same framework but with fewer rows to create the narrower, more pointed lower wing shape.
Assembly Instructions
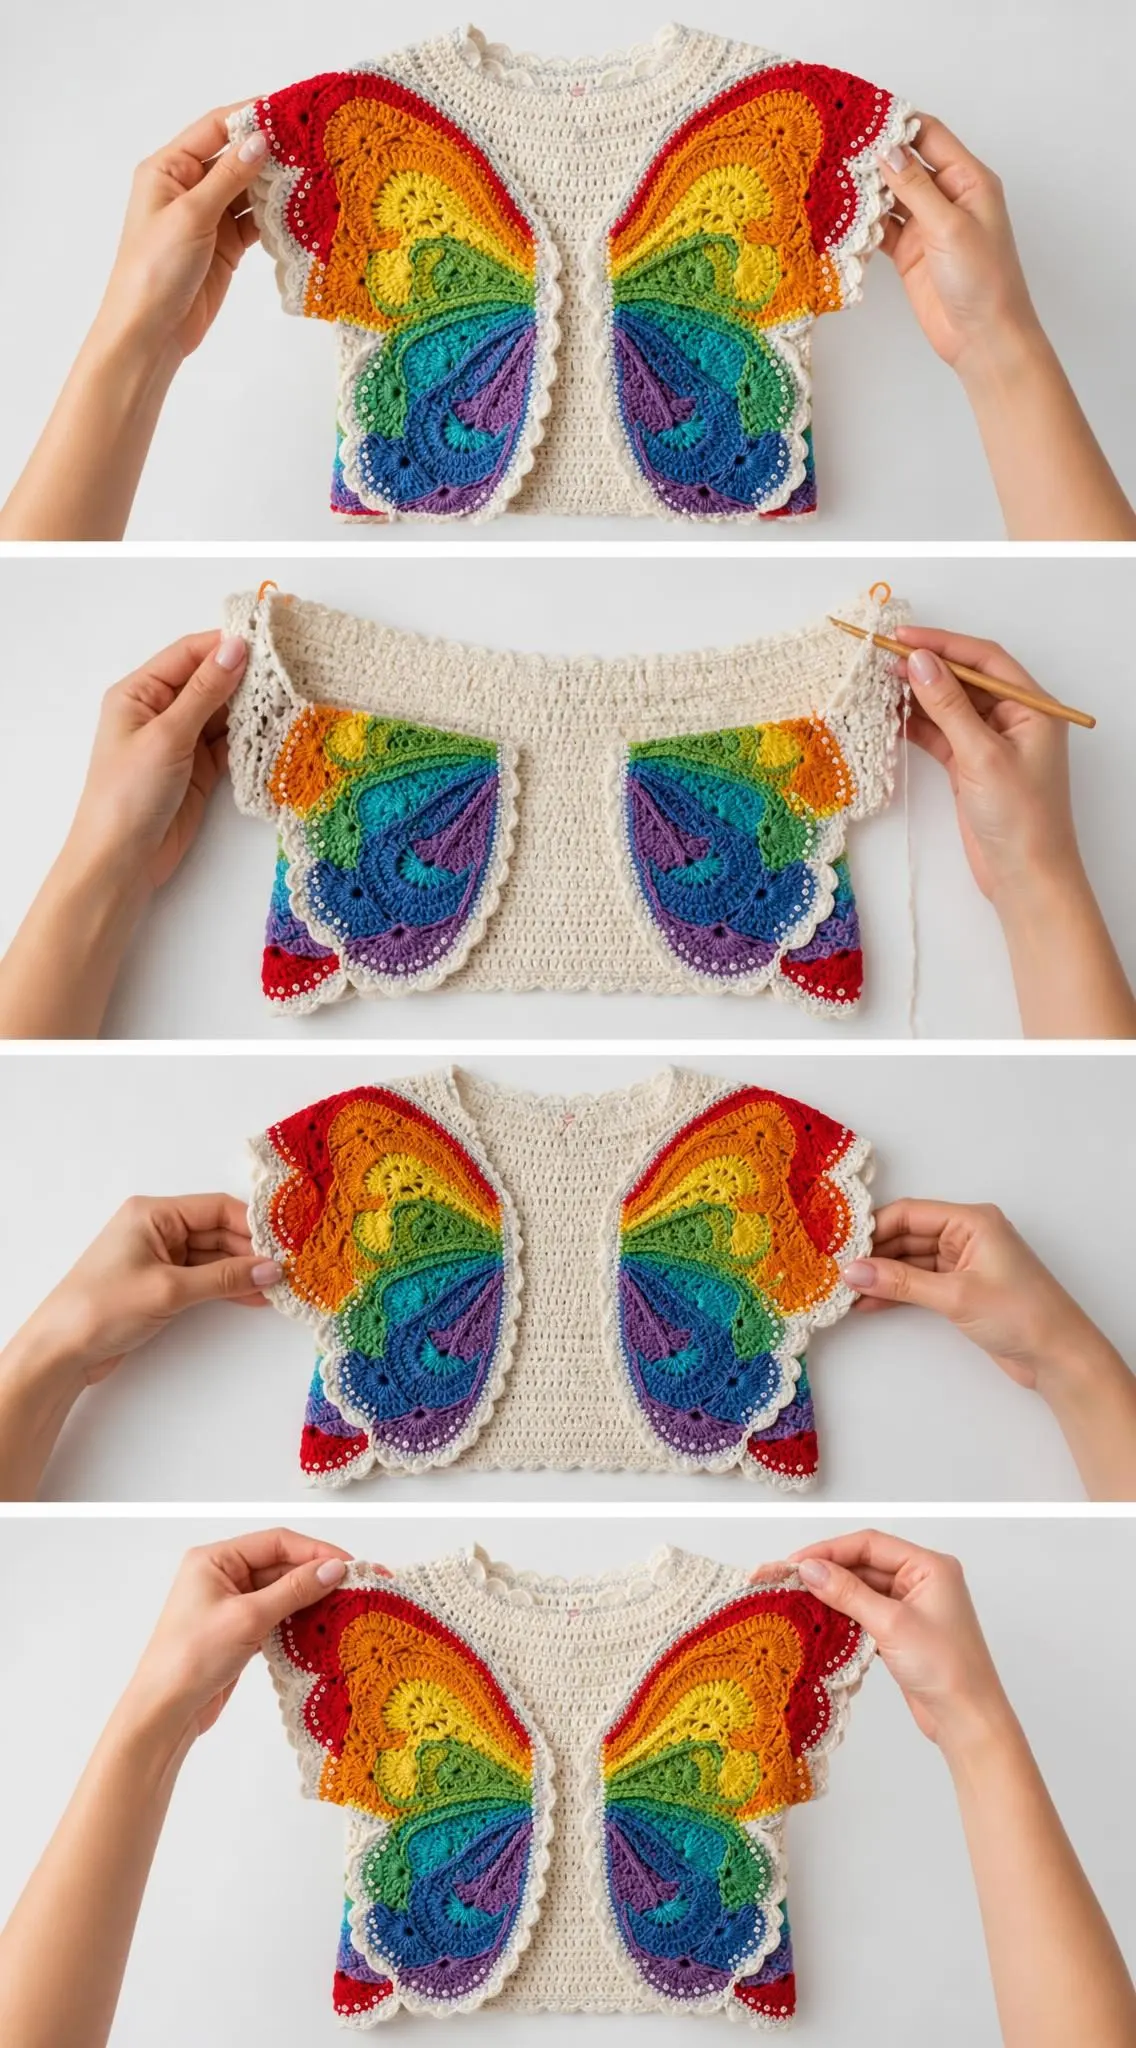
1. Block all pieces thoroughly before joining. Pin the wing panels flat and steam or wet block to open up the fan stitches.
2. Seam the shoulder seams by aligning the 13 stitches of each front shoulder to the corresponding back shoulder stitches. Use a mattress stitch or whip stitch.
3. Position the wing panels on the body. The upper wings should sit at shoulder level, spanning from near the center front opening to the armhole edge. The lower wings continue the butterfly shape below.
4. Use the joining slip stitch method to attach wing panels: Insert hook through both layers (applique and body held together), yarn over, pull up a loop and through the loop already on hook.
5. Leave armhole openings unattached for ease of movement.
Border and Finishing
Join White (A) to any corner of the garment and work the scallop border continuously around the entire perimeter: hem, front opening edges, neckline, and sleeve edges.
Scallop pattern: Skip 2 sts, work 5 dc into next st, skip 2 sts, sl st into next st. Repeat around.
Bead Embellishments
Using a beading needle and thread, tack 150 to 200 small pearl or crystal beads at regular intervals along the white outlines of all wing panels. Space them evenly for a cohesive sparkle effect. Add beads along the scallop border edges as well.
Weave in all remaining ends. Give the finished garment a final light blocking.
Final Thoughts on This Crochet Tutorial
This rainbow butterfly wings cardigan pattern is a true labor of love. The combination of simple single crochet body construction with those elaborate fan stitch wing appliques creates something truly special. Take your time with each wing panel, double check your color sequence, and trust the blocking process to make everything come together beautifully.
I hope this step by step crochet pattern brings you hours of creative joy. The finished cardigan is absolutely worth every stitch.
Thank you so much for choosing this pattern for your next project. I truly appreciate you being here. If you make this butterfly wings cardigan, I would absolutely love to see it! Tag me on Instagram or share in our Facebook group.
Save this pattern to your Pinterest boards so you can find it when you are ready to start. And please drop a comment below if you make one. I love seeing your finished creations and hearing how the pattern worked up for you. Happy crocheting!
You Might Also Like
- Pink Rose Butterfly Baby Dress Free Crochet Pattern
- Lavender Tiered Ruffle Doll Dress Free Crochet Pattern
- Lavender Purple Drawstring Bucket Bag Free Crochet Pattern
- Sunset Peach Woven Crochet Clutch Free Pattern